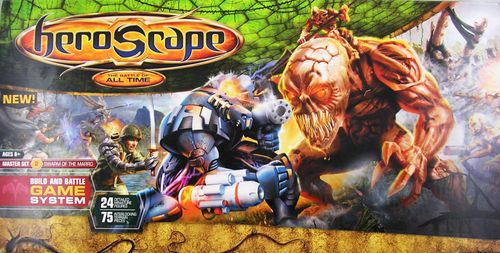
Heroscape Master Set: Swarm of the Marro
Heroscape Master Set: Swarm of the Marro Rulebook
Table of Contents
Table of Contents
- Object
- Get Ready to Play
- The Battle Begins!
- A Round of Play
- 1. Place Your Order Markers
- 2. Roll for Initiative
- 3. On Your Turn
- Action 1. Reveal Your Order Marker (Always)
- Action 2. Move Figure(s) on Your Army Card (Optional)
- Example 4: Basic Movement
- Example 5: Moving Up
- Example 6: Height Limit for Moving Up
- Example 7: Moving Down
- Example 8: Falling
- Example 9: Moving onto Water
- Example 10: Moving out of Water
- Example 11: Moving Double-space Figures
- Example 12: Flipping a Double-space Figure
- Example 13: Moving Under an Overhang
- Example 14: Moving Up Onto a Low Overhang
- Example 15: Tor-Kul-Na Moves into Tight Quarters
- Engagement Rules
- Action 3. Attack with Figure(s) on the Army Card (Optional)
- Attacking
- Ending a Round
- Ending the Battle
- Scoring
- Marro Hive Rules
- A Round of Play
- Glyphs
- Special Powers
- Using Multiple Master Sets and/or Expansion Sets
- Battlefields & Game Scenarios
Object
Create a battlefield and choose your Army, then fight the battle of all time! To win, be first to achieve your victory condition.
Get Ready to Play
1. Set Up Your Battlefield
To do this, choose a battlefield and a Master Game Scenario from the Battlefields & Game Scenarios section starting on page 15. After you've played several games, you may want to create your own battlefields and game scenarios.
Team seating and play: If you're playing a team game, teammates should sit next to each other on one side of the table, facing their opponents.
Teammates play the game separately, but they can discuss strategy, offer suggestions, and so on. Victory conditions for teams vary with the game scenario, but in most games they work together toward a common goal.
Playing with Multiple Master Sets and/or Expansion Sets: There are a few special rules for doing this. They're explained on page 14.
About the Army Cards
In this game, you'll use the Master Game side of the Army Cards.
As in the Basic Game, each Army Card features either a Hero or a Squad, with Move, Range, Attack and Defense numbers. But you'll notice that the Master Game side of each card has much more information about the figure(s). As you play, you'll become more familiar with how all of this information figures into the gameplay. Example 1 explains the Army Card information.
Example 1: Your Army Cards (Master Game Side)
Unique/Common: Unique Army Cards — When selecting cards to put in your Army, you cannot select two of the same Unique Army Card. Common Army Cards — When selecting cards to put in your Army, you can include two or more of the same Common Army Card.
Hero/Squad: Hero Cards feature a single (usually powerful) figure. Squad Cards feature two or more (usually less powerful) figures. Your Army can include all Heroes, all Squads, or any combination.
Valkyrie: The Valkyrie General who leads the Army (Jandar, Utgar, Ullar, Vydar, Aquilla or Einar).
Species: Biological Classification of the figure(s).
Class: The type of figure(s).
Personality: Dominant characteristic.
Size/Height: The size of the Hero or Squad, and the number of levels high.
Special Power(s): Most figures have special powers that allow them to "break the rules" when moving, attacking and defending.
Points: The value of an Army Card, based on the power of its figure(s).
Target Point: The green dot shows the area from where you determine Line of Sight.
Hit Zone: The red area shows what part of the figure(s) can be attacked. Used when checking Line of Sight.
Life: The number of wounds it takes to destroy the figure(s).
Move: The maximum number of spaces the figure(s) may move.
Range: The number of spaces away that the figure(s) can attack.
Attack: The number of dice you roll for a normal attack.
Defense: The number of dice you roll to defend.
The example card shown is Shiori (Einar) — Human, Unique Hero, Ninja, Tricky, Medium 4, 3 Life, Move 6, Range 1, Attack 3, Defense 3, 60 Points — with these special powers:
Concentrated Will: If Shiori has only one unrevealed order marker on her Army Card, add 1 to her attack and defense.
Phantom Walk: Shiori can move through all figures and is never attacked when leaving an engagement.
Shuriken Special Attack: Range 5. Attack Special. If Shiori is attacking a small or medium figure, roll 3 attack dice for Shuriken Special Attack. If Shiori is attacking a figure of a different size or a destructible object, roll 2 attack dice for Shuriken Special Attack.
2. Gather and Place Your Army
For the Master Game Scenarios, you can use a pre-made Army or a pre-set Army, or you can draft an Army. These three ways of gathering an Army are explained below.
As you gather your Army, make sure that the total point value doesn't exceed the one listed in your chosen game scenario (it can be lower, but not higher). Players don't need to have the same number of Army Cards; for example, you may have three Army Cards, while an opponent may have four or five Army Cards.
Army Card colors: In the Master Game, the loyalties of good and evil warriors may become neutral, or even shift to the other side; therefore, your Army can include Army Cards of mixed colors.
Using a Pre-Made Army
Experienced players may know exactly which Armies they want, based on the game scenario, the point values, their favorite figures, or other factors. If you've already chosen (or brought along) your Army, place your cards in front of you. Then players roll to see who places his Army on the battlefield first. Re-roll ties. The highest roller will place his entire Army first; placement then passes to the left. You must place your entire Army in the same starting zone. You cannot place any figures in an enemy-occupied starting zone. Unless stated otherwise in the game scenario, teammates start in the same starting zone. If there are more Army figures than spaces in the starting zone, you can't use the extra figures.
Using a Pre-Set Army
Some scenarios have the Armies chosen for you. As in the Basic Game, you choose the Pre-Set Army that you want to control. After choosing your Army, place your Army Cards in front of you, then place your figures on the battlefield.
Drafting an Army
Drafting is a fair and fun way for players to choose their Army Cards for a well-balanced game. When you select an Army Card, take the figure or figures shown on the card and place them in a starting zone immediately, before the next player selects an Army Card. You must place your entire Army in the same starting zone. You cannot place any figures in an enemy-occupied starting zone. Unless stated otherwise in the game scenario, teammates start in the same starting zone. If there are more Army figures than spaces in the starting zone, you can't use the extra figures.
For a 2-player game, players draft as follows:
- Both players roll the 20-sided die. Re-roll any ties. The higher roller drafts first, by choosing one Army Card.
- The other player then chooses two Army Cards.
- Each player, in turn, then chooses one Army Card, until both players' Armies have been completely chosen and placed.
Let's say you're playing the 2-player Deadly Wall of Water game scenario on the Montiqua Ledge battlefield. This game calls for each player to gather a 500-point Army. Example 2 shows the Armies that you and your opponent chose, and where you placed them.
For a 3- or more- player game, players draft as follows:
- All players roll the 20-sided die. Re-roll any ties. The highest roller drafts first, by choosing one Army Card.
- The player to the left then chooses one Army Card, and so on. The last player to draft chooses two Army Cards.
- Drafting goes back around the table (it reverses direction). The last player (the player who drafted first) chooses two Army Cards. The draft reverses direction again.
- If at any time a player cannot pick another Army Card because choosing it would exceed the total Army point limit, that player must pass. If you pass, you have completed your Army.
- Continue going back and forth around the table with the last player in each direction choosing two Army Cards and reversing the draft direction until all players have completed their Armies.
Example 2: You Gather and Place Your Armies
Your Army: You chose this Army for a 500-point total, and placed them where shown.
Your Opponent's Army: He chose this Army for a 500-point total, and placed them where shown.
Order Markers
Each player takes four Order Markers: 1, 2, 3, and X. On each round, you'll place these on your Army Card(s) to mark the order in which your figures will move and attack.
Wound Markers and Dice
Place all of the Wound Markers and the 12 combat dice near the battlefield. The combat dice are used as attack dice (rolling for skulls) and also as defense dice (rolling for shields).
Glyphs
These "magical" enchantments are placed on certain spaces in several of the Game Scenarios (as directed in the Battlefields & Game Scenarios section). Most of them grant special powers when a figure lands on them. See Glyphs, on page 13.
The Battle Begins!
The game is played in several rounds. A round consists of three turns for each player.
A Round of Play
The Round Marker Track: In the Battlefields & Game Scenarios section, each game scenario features a numbered line where players keep track of the rounds they've played. Before starting the first round, place the black Round Marker on the "1." At the end of each round, move the Round Marker ahead to the next number.
Each round of play consists of the following four steps:
- Place Your Order Markers
- Roll for Initiative
- Players take their turns one at a time, until each player has taken three turns.
- Move the Round Marker ahead to the next number.
All of these steps are explained in detail below.
1. Place Your Order Markers
On a turn, you'll move and attack with the figure(s) on one Army Card. Decide now which Army Card you'll use on which turn, then place an Order Marker on those cards (1 for the first turn, 2 for the second turn, 3 for the third turn). You may place two or more Order Markers on the same card, if you want to use that card for two (or even all three) of your turns.
Players place their markers at the same time. Place your markers with the numbers facing you, so your opponents can't see them. (Teammates can look at each other's Markers.)
The "X" Order Marker: This extra marker is not used on any of your turns; it is only a decoy to prevent your opponents from knowing which three Order Markers you actually intend to use.
If your Army includes two or more of the same common Army Card, you don't need to keep these figures separate (that is, keep track of which figures belong to which card). For example, if you're using two cards worth of Marro Stinger figures, each Order Marker placed on either Army Card activates any three of them.
Note: More competitive players can take turns placing all of their markers. To do this, roll the 20-sided die. The high roller places all of his Order Markers first; then the player to the left places all of his Order Markers; and so on, until all Order Markers have been placed.
Examples 3 shows where you decided to place your Order Markers.
Example 3: You Place Your Order Markers
On this round, you decide to mobilize Sonlen (first turn), your Marro Stingers (second turn), then a squad of your Nagrubs (third turn). You place the X Order Marker on the Tor-Kul-Na, to "fake out" your opponent.
2. Roll for Initiative
At the beginning of a round, each player rolls the 20-sided die for initiative. The player with the highest roll will get to take each of his turns first. Play then passes to the left. If there's a tie for highest roll, the tying players re-roll.
For example, Dan, Ben and Mike are playing. Dan rolls a 2, Mike rolls a 15, and Ben rolls a 17. For the first turn (using Order Marker 1), Ben will go first; then play will pass to the left until all three players have played their first turns. Then Ben (because he won initiative) will take his second turn (using Order Marker 2) before Dan and Mike. When the round ends (after each player has taken three turns), the players will replace their Order Markers and roll for initiative for the next round.
3. On Your Turn
During a round, each player will take three turns. Usually, you'll do three actions on your turn, in this order:
Action 1. Reveal Your Order Marker (Always)
Action 2. Move Figure(s) on the Army Card (Optional)
Action 3. Attack with Figure(s) on the Army Card (Optional)
All three of these actions are explained in detail in the following sections.
Action 1. Reveal Your Order Marker (Always)
Start your turn by revealing your Order Marker for that turn, then laying it number-side up on the Army Card. Note: Later in the game, it's possible that the figure(s) on that Army Card will have been destroyed earlier in the round. In such a case, you lose your turn.
Action 2. Move Figure(s) on Your Army Card (Optional)
Now you may move any or all figures on your chosen Army Card, if you want to. Follow these rules for moving each figure:
- Check the Move number: You can move a figure in any direction up to the Move number on its Army Card. For example, with a Move number of 5 a figure can move 0, 1, 2, 3, 4, or 5 spaces. (Uneven terrain and water may limit movement, as you'll soon see.) Example 4 shows basic movement.
- Order of movement: Move Squad figures in any order, one at a time.
- Passing and landing on other figures: You can move through a space with a friendly figure on it (one of your own or a teammate's), unless the figure is engaged (see Engagement Rules on page 11). You can't move through a space with an opponent's figure on it, or end your move on a space with any other figure.
Example 4: Basic Movement
Shiori has a Move number of 6. You advance her the full 6 spaces toward the opposing figures. Note: Shiori may move through Sonlen because he is a friendly figure.
- Moving up: When you move to a higher level, count the side of each higher level as one space, as well as the space you land on. Example 5 shows how to do this. If your figure can't move enough spaces to reach the top of a ledge, then it can't move there.
Note: Glyphs, water tiles and swamp water tiles do not add height to any spaces on which they're placed.
Example 5: Moving Up
Count the side of each level as you move a Marro Stinger to the top of the first ledge. Note: The Marro Stinger cannot move to the top ledge because it would take a move of 6, and his Move number is only 5.
Height limit: A figure cannot move up a number of levels equal to or higher than its Height number all at once. See Example 6.
Example 6: Height Limit for Moving Up
Shiori cannot move up to the space marked with an "X" because it would take 5 moves to reach the top, and Shiori's Height number is 4.
- Moving down: When you move to a lower level, you don't need to count sides on the way down (but there may be a penalty for moving to a much lower level; see Falling). Example 7 shows a figure moving down.
Example 7: Moving Down
To move Shiori down from this ledge, you don't need to count the sides of the levels.
Falling: When a figure moves down to a much lower level, it may get wounded. (Falling rules do not apply if a figure falls onto a water space. A figure can fall onto a water space from any level. However, all Falling rules apply if a figure falls onto a swamp water space.) Falling does not stop a figure's movement, but it may wound or destroy it. A fall is defined as follows:
If a figure moves down onto a level that is equal to or higher than the figure's height, you must roll one combat die immediately to see if it was wounded. Major fall: If the drop is 10 levels more than the figure's height, you must roll two additional dice (for a total of three dice).
For each skull you roll, add one Wound Marker to the figure's Army Card. (See Life, on page 12.)
Extreme Fall: If the move is 20 levels more than the figure's height, you must roll the 20-sided die. If you roll 19 or 20, the figure survives without taking any falling damage. If you roll 1-18, the figure is destroyed.
Example 8 shows a figure falling.
Example 8: Falling
When you move Shiori down from this 4-level cliff, you roll one attack die for the fall, because the cliff is equal to or higher than her height of 4. You don't roll a skull, so Shiori is safe.
- Moving onto water: When you move onto a water space from any other space (even from another water space), you must end your move there. See Example 9. Note: Double-space figures can move past one water space that's between two non-water spaces without stopping; they must stop only if they move onto two water spaces.
Example 9: Moving onto Water
When you move Shiori onto a water space, she must stop there.
- Moving onto swamp water: Unlike moving through water, when you move onto a swamp water space from any other space, you may continue moving if you have moves left.
- Moving from water or swamp water to land: For water spaces or swamp water spaces that are lower than their adjacent land spaces, the "moving up" rule applies. When moving from water or swamp water to land, count the side of each land space as you move. See Example 10.
Example 10: Moving out of Water
When moving Shiori from the starting water space up onto the adjacent land space, you count two spaces because the water is considered a level lower than the land space. Shiori then moves 4 additional spaces for a total move of 6.
- Moving double-space figures: Some figures, like Major Q10 and Tor-Kul-Na, take up two spaces. When moving a double-space figure, decide which side to lead with (for example, the left side or the right side). Then move the figure so that the other side follows the same spaces that the leading side just occupied. Always end a double-space figure's move on two same-level spaces. Example 11 shows how to move a double-space figure.
Example 11: Moving Double-space Figures
From his starting spaces (top picture), Major Q10 moves 5 spaces right side first, with his left side trailing along the same spaces as his right side (middle picture). Counting the sides of the ledges, Major Q10 ends his move at the top, on two same-level spaces (bottom picture).
- Flipping a double-space figure: Anytime during a double-space figure's move, you can flip it. See Example 12. To flip a double-space figure, turn the figure around while keeping it on the same two spaces. The flip is free: It does not count as part of your move. The double-space figure does not take any leaving engagement attacks when flipping since the figure is staying on the same two spaces. Leaving engagement attacks are explained later on page 12.
Example 12: Flipping a Double-space Figure
Major Q10 flips to face the other direction.
- Overhangs: An overhang exists when one or more tiles are above another tile with space in between. Figures that are small enough to do so may move under overhangs (Example 13 shows an overhang).
Example 13: Moving Under an Overhang
On this battlefield, notice that the two Marro Stingers on the left can move under this overhang, but the Marro Stinger on the right cannot.
Figures can also move up onto low overhangs: when you move a figure up a low overhang, count the nearby support tiles. See Example 14.
Example 14: Moving Up Onto a Low Overhang
The Marro Stinger counts the nearby support tile as he moves onto this overhang.
- Keep the base on the space: When you end a figure's move, make sure its base lies flat and is on that space only (or spaces, in the case of double-space figures). No part of its base may overlap on another space or area between spaces.
- Tight quarters: Some battlefields have narrow passageways, ruins and overhangs that may limit the movement of some figures. A figure can't move through or onto a space that it can't fit completely onto. Example 15 shows a figure in tight quarters.
Example 15: Tor-Kul-Na Moves into Tight Quarters
Left picture: Tor-Kul-Na can't move onto this space, because his right arm keeps him from standing completely flat on the spaces. Right picture: However, he can move onto this space by leading with his left foot.
Engagement Rules
A figure becomes engaged when it moves adjacent to an opponent's figure. Adjacency Exceptions: Most of the time, if a figure is next to another figure, they are adjacent. Here are the exceptions to the rule:
- If one figure's base is on a level equal to or higher than the height of the other figure, they are not adjacent and therefore not engaged. See Example 16, below.
Example 16: Not Adjacent
Shiori is not adjacent to the Marro Stinger because the Marro Stinger is on a ledge which is 4 levels high, and is equal to Shiori's height of 4.
- If an obstacle such as a ruin, stone wall or battlement is between two figures, both figures' heights must be higher than the obstacle to be engaged. If both figures' heights are lower than the obstacle, or only one figure's height is lower, they are not engaged.
Leaving an engagement: Your figure may move around an opponent's figure that it is engaged with; but as soon as your figure moves away (onto a space that's not adjacent), the opponent's figure may take a "leaving engagement attack" at your figure. To do this, the player who controls the opponent's figure rolls one die to attack. (You do not roll any dice to defend your figure.) If a skull is rolled, your figure takes one wound. Place one Wound Marker on its Army Card (see Life, on page 12).
Multiple engagements: Your figure may become engaged with more than one figure at the same time. As you leave each engagement, your opponent's figure may roll one attack die. For each skull rolled, your figure takes one wound. Example 17 shows a multiple engagement.
Example 17: Multiple Engagement
When you move Sgt. Drake Alexander away from two opposing Marro Drudge, your opponent may roll one die for each Marro Drudge. Two skulls are rolled, inflicting two wounds. You place two Wound Markers on Sgt. Drake Alexander's Army Card.
Action 3. Attack with Figure(s) on the Army Card (Optional)
Now it's time for you to attack with your Hero or Squad.
Who can attack? Any figure(s) on your chosen Army Card within Range, and with a clear Line of Sight (if necessary — see below), can attack. If no figure on your Army Card meets these two conditions, then no attack is possible.
Looking for hidden figures: At any time, feel free to walk around the battlefield to find out which figures are hiding where: behind raised terrain areas or the Marro Hive, for example. (As you do this, other players may want to shield their Order Markers so you can't see them.)
Before attacking with a figure, check the Range and Line of Sight as follows:
- Range: A targeted figure must be within the Attacking figure's Range: for example, with a Range of 5, your Marro Stinger can attack any figure within 5 spaces from it.
A figure with a Range of 1 can attack a figure only from an adjacent space.
A double-space figure can attack from either space it occupies.
When checking the Range, don't count extra spaces for any difference in levels. If the distance between your figure and the targeted figure includes an area with no spaces (for example, near the edge of the battlefield), you may still attack it, but you must count the spaces along the battlefield to check the Range.
Engaged figures: If one of your figures is engaged with one or more other figures, your figure may attack only those figures. Note: A figure does not need Line of Sight to attack a figure that it is engaged with or adjacent to.
Attacking around other figures: You may attack figures even if other figures are between your figure and the targeted figure, but you must have a clear Line of Sight to attack.
- Line of Sight: To attack a targeted figure, your figure must be able to "see" it from its location. Unlike Range, the Line of Sight is an imaginary straight line between your attacking figure's Target Point and the targeted figure's Hit Zone; it has nothing to do with the spaces on the battlefield. If the targeted figure is (for example) behind the Marro Hive or a cliff, so that your figure can't "see" it, then no attack is possible. The only exception to this rule is if a figure is engaged with or adjacent to another figure. A figure does not need Line of Sight to attack a figure that it is engaged with or adjacent to.
To determine if there is a clear Line of Sight, check the Target Point (the green dot on your figure's Army Card) and the Hit Zone (the red area on the targeted figure's Army Card). Then get behind your figure and look to see if its Target Point can "see" any part of the targeted figure's Hit Zone. If so, there is a clear Line of Sight.
If players disagree about whether or not there is a clear Line of Sight, just roll the 20-sided die; the high roller wins the dispute.
Adjusting Figures: Players may touch or move only their figures, and may do so only on their turns. For example, a player cannot move his figure out of the Line of Sight on an opponent's turn.
Example 18 shows how to determine if a targeted figure is within an Attacker's Range and Line of Sight.
Example 18: Range and Line of Sight
You want your Marro Stinger to attack Shiori.
- First, you count the spaces from your Marro Stinger to Shiori: Shiori is 5 spaces away, so she is just within the Marro Stinger's Range.
- Then, you check for a clear Line of Sight from your Marro Stinger's Target Point to Shiori's Hit Zone. Sonlen is in the way, but your Marro Stinger can still see part of Shiori's Hit Zone, so it can attack.
Before attacking, consider height advantage, special powers, and Glyphs (if any), as explained below. (The you-snooze-you-lose rule: If you forget to do this, tough luck. Maybe next time, you'll remember!)
- Height Advantage: If the base of one figure is higher than the base of the other figure (no matter what their actual size or height), the higher figure has height advantage, and rolls one extra die for either attack or defense. If the base of the higher figure is 10 or more levels higher then the height of the lower figure, the higher figure would instead roll two extra dice for either attack or defense.
When figuring height advantage, remember that Glyphs, water tiles and swamp water tiles do not add height to the spaces they're on.
- Special powers and special attacks: Many figures have special powers or abilities that help them move, attack, defend, and more. Check your figure's Army Card to see what special powers or abilities (if any) your figure can use. If your Army Card includes a special attack (a special power with the words "special attack" in the name), you may use this attack instead of a normal attack. Page 14 explains special powers and special attacks.
- Glyphs: Some Glyphs give the Attacker or the Defender an advantage. Glyph powers are explained on page 13.
To carry out the attack, follow these steps:
- Announce which figure is the Attacker, and which figure is the Defender.
- Check the Attack number on your Attacker's Army Card, adding any extra dice for height advantage, special powers or Glyphs. Then roll that number of attack dice. After you roll, the Defender rolls the number of defense dice on his Defender's Army Card, adding any extra dice for height advantage, special powers or Glyphs.
- Every skull the Attacker rolls counts as one hit. For every skull (hit) the Attacker rolls, the Defender must roll at least one shield, to block it. Important: for attack rolls, the Attacker only counts skulls. For defense rolls, the Defender only counts shields.
- If the Attacker rolls the same number of skulls (hits) or less than the Defender rolls shields, the attack is unsuccessful. The Attacking and Defending figures stay where they are, and that attack is over.
- If the Attacker rolls more skulls (hits) than the Defender rolls shields, the attack is successful. For each unblocked skull (hit) the Attacker rolled, one Wound Marker must be placed on the Defender's Army Card.
Life: When a figure has as many Wound Markers as the Life number on its Army Card, it is destroyed. (A figure with only one Life is destroyed by only one wound.) The player who controls the destroyed figure places it on the Army Card. When all figures on an Army Card have been destroyed, the Army Card is out of play. Do not reveal any unrevealed Order Markers that are on that card for that round of play. On future rounds, you can't take any turns for that card. At the beginning of the next round, any Order Markers still on that Army Card come back into play, and can be placed in future rounds.
Destroying a Common Figure when your Army includes two or more of the same Army Card: If your Army includes two or more of the same common Army Card, follow this rule when a common figure is destroyed: When any figure on your Common Army Card is destroyed, you may place it on any matching Army Card, if you do not have any of these figures destroyed. If a common Army Card already has a destroyed figure on it, you must fill up that card first, before placing the destroyed figure on an empty card.
After you've finished attacking, your turn is over. The player to your left then takes a turn.
Example 19 shows an attack and its outcome.
Attacking
The figures on your chosen Army Card attack one at a time, in any order. Each figure can attack only once, but each figure can attack the same figure or a different figure. Note: Some figures have special powers that allow them to attack more than once.
Example 19: An Attack
One of your Marro Stingers attacks Shiori. You roll three attack dice.
Shiori has a minor height advantage, so she adds one die to her defense number. Your opponent rolls four defense dice.
You roll two skulls. Your opponent rolls no shields.
Shiori takes two wounds. Place two Wound Markers on Shiori's Army Card.
Shiori has one Wound Marker from a previous attack. She now has three Wound Markers, and is destroyed. Your opponent places Shiori on the Army Card, and leaves the Order Marker there (he must skip his turn for Shiori on this round).
Ending a Round
After the last player takes his third turn, the round is over. Move the Round Marker ahead one space on the track (if no one has won yet). Players then begin a new round by placing their Order Markers, then rolling for initiative.
Ending the Battle
The game scenario sets the victory conditions for each game. However, if the game hasn't ended by the time you've played a certain number of rounds, you may decide that the player (or team) with the most points wins. See Scoring, below.
Scoring
In cases where scoring is necessary, each player or team scores points for each Army Card with figures still on the battlefield. Score the full points listed on the Army Card, even if there is only one surviving Squad figure.
Marro Hive Rules
There are a few rules that apply only to the Marro Hive. The Marro Hive may never be moved from its starting location by any special power on any Army Card or Glyph. Figures can never move through a space occupied by the Marro Hive. For example, Shiori cannot use her Phantom Walk special power to walk through the Hive. If the Marro Hive is destroyed, it becomes a terrain obstacle and is not removed from the battlefield. When placing the Marro Hive, it is always placed on its 6-hex swamp water tile base. When placing the 6-hex swamp water tile base, you cannot create an overhang (no empty space can be under the base). The 6-hex base can only be placed on land tiles. When calculating height advantage against or for the Marro Hive, consider the Hive to be sitting in the swamp water.
Glyphs
Depending on the scenario, Glyphs are placed on top of battlefield spaces either power-side up or symbol-side up. Glyphs are stationary unless otherwise stated in a scenario. When one of your figures moves onto a Glyph that is symbol-side up, stop there and turn the Glyph power-side up; the powers on the Glyph take effect immediately. When your figure lands on a power-side up Glyph, it must stop. Note: A double-space figure must stop when its leading side moves onto it.
Some Glyphs grant temporary powers, while others grant longer-lasting ones. For each Glyph your figure finds, follow the rules below.
Permanent Glyphs
The power of each permanent Glyph is in effect for as long as a figure is standing on it. Exception: The Glyph of Brandar is an artifact. It usually represents an object as directed by the specific game scenario.
Glyph of Ulaniva (Unique Attack +1): All unique figures in your Army may add one extra attack die when attacking normally.
Glyph of Crevcor (Common Attack +1): All common figures in your Army may add one extra attack die when attacking normally.
Glyph of Wannok (Wound): At the end of every round, roll the 20-sided die. If you roll a 1, the figure on the Glyph receives one wound. If you roll a 2 or higher, you may choose an opponent who must give one wound to any figure he or she controls on the battlefield.
Glyph of Thorian (Thorian): All opponents' figures must be adjacent to your figures to attack your figures with a normal attack.
Glyphs of Proftaka (Pit Trap): Your figure is trapped. The trapped figure cannot move from this space. The figure can move off the Glyph of Proftaka only if a friendly figure occupies an adjacent space.
Glyph of Brandar (Artifact): The rules for this Glyph vary, depending on the game scenario.
Temporary Glyphs
The power of each temporary Glyph takes effect only once. When one of your figures moves onto any of these Glyphs, follow its rules, then remove it from the game.
Glyph of Nilrend (Negation): When one of your figures stops here, you may choose any opponent's unique figure. Roll the 20-sided die. If you roll a 1-4, nothing happens. If you roll a 5-20, place the Gold Negation Marker on the chosen figure's Army Card. All of that figure's special powers are negated for the rest of the game.
Glyph of Oreld (Intercept Order): When one of your figures stops here, roll the 20-sided die. If you roll a 1-9, nothing happens. If you roll a 10-20, you may remove one random Order Marker from an opponent's Army Card.
Special Powers
The special powers of the figures keep each game exciting, challenging, and unpredictable. Always be aware of the special powers your figures possess; they can make a big difference in your game.
Special Attacks: Special attacks can never be modified by Glyphs, other special powers or height advantages. A special attack is used instead of a normal attack.
Attack Dice and Defense Dice: Any time an Army Card refers to attack dice or defense dice, use combat dice. For example: on Raelin's card it states that all figures you control within 6 clear sight spaces of Raelin add 1 to their defense dice. These figures would roll 1 additional combat die when rolling for defense.
Clear Sight Spaces: Raelin's Extended Defensive Aura mentions "clear sight." To determine clear sight, use Raelin's Target Point. If she can see any part of your figures (not just the Hit Zone) within the 6 spaces, they are affected by the Extended Defensive Aura. To determine clear sight from a double-space figure or a 6-space figure like the Marro Hive, you may count from any of the spaces the figure occupies.
Swamp water is a type of water: A swamp water space is a type of water space. Any special power that applies to a figure on a water space will also work on a swamp water space. For example, a Microcorp Agent's Water Suit special power would work in swamp water. (Microcorp Agents are in Collection 3.)
Multiple Targets: When a special attack targets more than one figure at the same time, the Attacker decides the order in which the Defender will roll combat dice for each figure affected.
Flying and Overhangs: See Example 20.
Example 20: Flying and Overhangs
Raelin flies out from under the overhang and onto the top, ignoring extra spaces for elevation. M1 will roll a leaving engagement attack since Raelin was engaged before starting her move.
Special Power References on Army Cards: Some special powers make reference to the Species, Personality, Valkyrie, Unique/Common, Hero/Squad and or Class of other figures. For example, the Marro Hive references any small or medium Common Squad; the Marro Stingers and the Marro Drudge fall into this category. The Marro Drones (from Collection 2) would also fit this category.
Simultaneous Special Powers: If you and an opponent are using the same Army Cards with powers that happen at the same time, you must roll the 20-sided die to see who gets to use them first.
Using Multiple Master Sets and/or Expansion Sets
Combining two or more Master Sets, or collecting expansion sets, gives you lots of new options. You can create a super-sized battlefield and play with any number of players. You can even boost the point value of your Armies, to match the bigger battlefield. But along with that extra excitement comes a few special rules . . .
Unique Army Cards: If you're combining two sets of Army Cards, make sure that no player has more than one of the same Unique Army Card in their Army. (For example, your Army can't include two Shioris.) However, you and an opponent can both have the same Unique Army Card(s). For example, you and your opponent can each have one Shiori in your Armies.
Unique Heroes with the same name: If you're combining this Swarm of the Marro Master Set and the Rise of the Valkyrie Master Set, you will notice that each set has a Raelin and a Sgt. Drake Alexander. A player cannot have two Unique Heroes with the same name. For example, a player cannot have a Swarm of the Marro Raelin and a Rise of the Valkyrie Raelin in the same Army.
Marking Your Figures: If you are playing with multiple sets or expansion sets, you may want to use a permanent marker to initial the underside of your figures' bases to remember who owns which figure.
Battlefields & Game Scenarios
Battlefield Key
The graph below shows the type and color of each tile. As you build your battlefield, notice the center colors and border colors, so you'll know which ones to use.
Battlefield Key (notice center and border colors): SWAMP has dark green centers, SAND has golden centers, ROCK has gray centers, GRASS has green centers, WATER has blue centers, SWAMP WATER has yellow-green centers.
| Tile | Border color | Available in |
|---|---|---|
| 24 space | tan borders | Swamp |
| 7 space | purple borders | Swamp, Sand, Rock |
| triple space | black borders | Swamp, Sand, Rock |
| double space | yellow borders | Swamp, Sand, Rock, Grass |
| single space | red or blue borders | Swamp, Sand, Rock, Grass, Water, Swamp Water |
| marro hive | blue borders | Swamp Water |
The Tiles
The hex-shaped tiles come in various sizes and colors. You'll link them and stack them as shown on the following pages, to build your battlefields.
Linking: Slide the notches into the grooves, as shown. Don't try to snap them together.
Stacking: Fit one tile on top of another as shown.
The Glyphs
In the battlefield diagrams, Glyphs are represented by their key letters. When you build a battlefield that includes Glyphs, follow the Glyph Key below to see which ones to use.
Glyphs Key
- Placed Symbol-Side Up: ?
- Placed Power-Side Up:
- Glyph of Ulaniva: U
- Glyph of Crevcor: C
- Glyph of Wannok: W
- Glyph of Thorian: T
- Glyph of Proftaka: P
- Glyph of Brandar: B
- Glyph of Nilrend: N
- Glyph of Oreld: O
The Narrows Battlefield
Leaving the desolate Valley of Skulls and crossing the obvious borders of the Volcarren Wastelands and this new land, you emerge and see to your relief an immense swamp area that is fed by the many snow-capped mountain springs that surround the narrow pass. The contrast of the two areas is remarkable to you, as you feel the moisture seep into your skin after weeks of travel across the parched earth of the volcanic rocks of the wastelands.
The booklet shows this battlefield built level by level (Level 01 through Level 05) in pictorial diagrams.
The Narrows Game Scenarios
Basic Game – A Long Wait (2 players)
Holding The Narrows is essential to maintaining control of the central valleys of the Quilato Mountain Range. As the only pass to the west, this is the most strategic location to move Jandar's troops into the vast mountain range. Rumors of a wellspring are connected to these mysterious valleys that the insular kyrie of the Moon Tribe will only hint at.
Goal: Destroy all of your opponent's figures.
Setup: Place figures where shown.
Player 1: 1 Sgt. Drake Alexander; 2 Raelin; 3 Sonlen; 4 Shiori.
Player 2: 1, 2, 3 Marro Stingers; 4, 5, 6 Marro Drudge; 10 Tor-Kul-Na.
Victory: Destroy all of your opponent's figures to win.
Basic Game – Spring Surprise (2 players)
The spring storms have come to an end. The rains have soaked the lands, causing large patches of erosion, uncovering ancient architecture and artifacts that were once buried. An old enchantment of the Green Leaf Tribe, that makes a protective field, has been revealed from beneath the ground. With the Marro swarming the area, it is a perfect time to activate it and take a well-deserved breather. You just need a safe place to do it.
Player 1's Goal: Player 1 must clear a zone to release the protective field.
Player 2's Goal: Player 2 must destroy all of Player 1's figures.
Setup: Place figures where shown. The battlefield is divided into four zones: the Ridge Zone, the Sand Zone, the Wet Zone, and the Highland Zone.
Player 1: 1 Shiori; 2 Sgt. Drake Alexander; 3 Raelin the Kyrie Warrior; 4 Major Q10.
Player 2: 1, 2, 3 Marro Stingers; 4, 5, 6 Marrden Nagrubs; 7, 8, 9 Marro Drudge; 10 Tor-Kul-Na.
Victory: Player 2 wins immediately when all of Player 1's figures are destroyed. Player 1 wins immediately when he has control over 1 of the 4 zones, or has destroyed all of Player 2's figures. Player 1 has control of a zone when he has the only figure(s) occupying the zone.
Campaign Master Game — Exploration Part 1: Ominous Beginnings (2 players)
"A vision of wellsprings has brought us here, far from the cold north of Nastraland, to the bug-infested bogs and jungles of the sweltering south. Raelin, Sonlen and I must make our way through this canyon and link up with Major Q10 and Shiori at the end of the pass. Q10 and Shiori have been scouting ahead. It has been a while since we have heard from them. Raelin looks concerned. I look up in the sky as we walk and I shiver at the sight of the large alien birds circling above us, an ominous warning of what we are approaching between the tall dark mountains." — Sergeant Drake Alexander
Player 1's Goal: Player 1 must reach the other end of the pass.
Player 2's Goal: Player 2 must prevent all three figures from exiting the pass.
Setup: Place figures where shown.
Player 1: 1 Sgt. Drake Alexander; 2 Raelin the Kyrie Warrior; 3 Sonlen.
Player 2: 1, 2, 3 Marro Stingers; 4, 5, 6 Marro Drudge; 7, 8, 9 Marrden Nagrubs.
Special Rules: Once a Hero has reached the Exit Zone spaces, it is taken out of play and is removed from the battlefield. Exit Zone spaces are marked E.
Victory: Player 1 wins when the three Heroes have exited the battlefield, or all of Player 2's figures have been destroyed. Player 2 wins immediately when any one of Player 1's Heroes is destroyed or if Player 1 fails to reach the exit spaces with all three Heroes by the end of Round 10.
Campaign Continues: If all three Heroes survived the battle, you may continue the story campaign by playing Unexpected Capture on the Montiqua Ledge battlefield, page 19.
Montiqua Ledge Battlefield
Just beyond the Narrows is the first valley, which is surrounded by massive cliffs of the Quilato Mountain Range. During the annual heavy rains, this deep valley floods with the waters of a thousand springs. The only safe area during the floods is a small ledge on the Northern half of the valley called Montiqua Ledge - named in honor of the only surviving kyrie warrior of the Green Leaf Tribe, who took shelter on the ledge during the destruction of his village more than a thousand years ago.
The booklet shows this battlefield built level by level (Level 01 through Level 05) in pictorial diagrams.
Montiqua Ledge Game Scenarios
Basic Game – Protect the Waters (2 players)
The Marro have come to contaminate the last of the clean waters surrounding the Montiqua Ledge. The Kyrie of the Moon Tribe have pleaded with you to protect these waters and give their warriors time to assemble and drive back the monsters.
Player 1's Goal: Player 1 must prevent Player 2 from contaminating the blue waters.
Player 2's Goal: Player 2 must contaminate the blue waters or destroy all of Player 1's figures.
Setup: Place figures where shown.
Player 1: 1 Sgt. Drake Alexander; 2 Raelin; 3 Sonlen.
Player 2: 1, 2, 3 Marro Stingers; 4, 5, 6 Marro Drudge; 7, 8, 9 Marrden Nagrubs.
Victory: Player 2 wins immediately if he occupies any four water spaces or destroys all of Player 1's figures. Player 1 wins immediately if he destroys six figures in Player 2's Army.
Master Game – Deadly Wall of Water (2 players, or 3 players as individuals)
The Moon Tribe has brought back an urgent report: Enemy forces have destroyed the ancient levy that prevents the valley from destructive flooding; and a deadly wall of water is headed towards Montiqua Ledge, the only terrain high enough to save your Army. Getting to Montiqua Ledge will be the easy part. Battling the other Armies headed for Montiqua Ledge will be the hard part.
Goal: Destroy all of your opponents' figures.
Setup: Turn all Glyphs symbol-side up, then shuffle them. Randomly place four of the shuffled Glyphs symbol-side up where shown. Place the other Glyphs out of play, keeping them secret.
Two players: Each player drafts or brings a pre-made 500-point Army. One player starts in the red starting zone; the other player starts in the blue starting zone.
Three players: Each player drafts or brings a pre-made 300-point Army. Each player can start in the red, green or blue starting zone.
Special Rules: At the end of Round 3, and at the end of every round afterwards until the Deadly Wall of Water floods the Montiqua Ledge, the last player to take a turn rolls the 20-sided die. The Deadly Wall of Water floods the Montiqua Ledge if:
- At the end of Round 3, a 1-4 is rolled.
- At the end of Round 4, a 1-8 is rolled.
- At the end of Round 5 and every round afterwards, a 1-10 is rolled.
If the Deadly Wall of Water floods the Montiqua Ledge, all figures that occupy a Level 1 space, including all water spaces and swamp water spaces, are destroyed. At the end of any following rounds, all figures that occupy these spaces will also be destroyed.
If a figure you control occupies a space with the Glyph of Brandar, all figures you control are not affected by the Deadly Wall of Water.
Victory: To win, be the last player on the battlefield with at least one figure. If the battle reaches the end of Round 10, roll for the Deadly Waters as normal. Then the battle is over and the player with the most points on the battlefield wins (see Scoring). If both players lose their last figure at the same time, then neither player wins.
Campaign Master Game — Exploration Part 2: The Unexpected Capture (2 players)
"We approach an ancient and beautiful valley after having met up with Major Q10 at the mouth of the Narrows. Unfortunately, the soulborg brings sad tidings of Shiori's capture at the hands of the inhuman monsters, the Marro. As I survey the terrain of the vale I see in the distance, along the riverbed, a large shelf of stone jutting up from the flat floor of the valley. This seems a perfect location to ambush the Marro troops escorting Shiori west."
"As we make our way to the ambush location, I once again see in the sky large birds circling above us and casting their carrion shadows upon our fateful path." — Sergeant Drake Alexander
Player 1's Goal: Player 1 must keep at least four of his Heroes alive and destroy all Player 2's figures.
Player 2's Goal: Player 2 must destroy at least two of Player 1's figures.
Setup: Place figures where shown.
Player 1: 1 Sgt. Drake Alexander; 2 Raelin; 3 Sonlen; 4 Shiori; 5 Major Q10.
Player 2: 1, 2, 3 Marro Stingers; 4, 5, 6, 7, 8, 9 Marro Drudge; 10, 11, 12, 13, 14, 15 Marrden Nagrubs.
Special Rules: For the first round only, Players do not roll for initiative. Player 1 goes first.
Victory: Player 1 wins if he destroys all of Player 2's figures and has at least four Heroes on the battlefield. Player 2 wins if he destroys two of Player 1's figures. If the battle reaches the end of Round 10, and Player 1 has not destroyed all Player 2's figures, Player 2 wins.
Campaign Continues: If at least four Heroes that Player 1 controlled survived the battle, you may continue the story campaign by playing Source of Corruption on the Xualtiaca Swamp battlefield, page 21.
Xualtiaca Battlefield
As you enter the valley beyond Montiqua Ledge, you can hear a song of pain coming from an overgrown area of thick vine. As you emerge from the thick vine, you enter a small swampy area and see a raw, skin-and-bone maw emerging from a brackish pool of algae-covered water. Between the two maws are large glowing sacs that are being forced out of the mouth by more larva-like sacs below the surface of the water. Gazing at this hideous alien abomination, you immediately sense that the painful song is emanating from the contaminated waters. This is the source of the Marro infestation.
The booklet shows this battlefield built level by level (Level 01 through Level 06) in pictorial diagrams.
Xualtiaca Game Scenarios
Master Game – Siren's Call (2 players, or 4 players on 2 teams)
An infestation of giant fire ants has caused the Marro Hive in the Xualtiaca Swamp to go crazy and bombard the area around it with a shrill "Siren's Call" that drives all living beings to be destroyed. As you flee the area in terror, you notice that the Marro are running away even faster.
Goal: Destroy all of your opponent's figures.
Setup: The Marro Hive starts on the battlefield. No player may draft or bring a pre-made Army that includes the Marro Hive. Place the Glyphs power-side up where shown (Glyph of Nilrend, Glyph of Crevcor, Glyph of Ulaniva, and Glyph of Thorian).
Two players: Each player drafts or brings a pre-made 500-point Army.
Four players: Each player drafts or brings a pre-made 285-point Army.
One player/team starts in the red starting zone; the other player/team starts in the blue starting zone.
Special Rules: At the end of any round any player that has figures within seven spaces of the infected Marro Hive is affected by the Marro Hive's Siren's Call. Players affected must allocate one automatic wound to any one figure in their Army within the seven spaces, in turn order.
If a figure ends its turn adjacent to the Marro Hive, that figure receives one automatic wound.
The infected Marro Hive is not affected by Siren's Call. For this scenario the infected Marro Hive is not considered a figure, and is not affected by anything that would affect a figure. For example, the infected Marro Hive cannot be attacked, and cannot roll any disengagement attacks.
The wet marshy ground makes travel slow and ponderous. Moving on any sand tile space counts as two spaces. Figures may fly, leap and grapple over sand tile spaces counting each hex as one space. Double-space figures may move on sand tile spaces using the lead side of the base to count spaces.
Victory: Be the last player/team with figure(s) on the battlefield to win. If the battle reaches the end of Round 10, then the battle is over and the player/team with the most points on the battlefield wins (see Scoring).
Campaign Master Game — Exploration Part 3: Source of Corruption (2 players)
"After the ferocious battle at Montiqua Ledge, we decide to stay together and avoid any major conflicts by staying off the cleared paths. A sense of dread almost overtakes me as we emerge into a clearing and see what could only be described as a Marro parasite: a humongous creature that is glowing and pulsating out of the choking natural spring."
"Out of the top this 'leech' drops a large larva sac that starts to tear itself open almost immediately. What emerges from within is a Marro Stinger, and the horror hits me. This is where the Marro have hidden, and we must destroy this grotesque monster before more can be made for the numberless hordes of Utgar." — Sergeant Drake Alexander
Goal: Destroy all of your opponent's figures.
Setup: Place figures and Glyphs power-side up where shown.
Player 1: 1 Sgt. Drake Alexander; 2 Raelin; 3 Sonlen; 4 Shiori; 5 Major Q10.
Player 2: 1, 2, 3, 4, 5, 6 Marro Stingers; 7, 8, 9, 10, 11, 12 Marro Drudge; 13, 14, 15, 16, 17, 18 Marrden Nagrubs; 19 Tor-Kul-Na; 20 Marro Hive.
Campaign Setup: If you just played The Exploration Part 2: Unexpected Capture, and you are continuing the Campaign, place only Player 1's Hero figures that were not destroyed in the Unexpected Capture. Surviving figures are placed where shown. Any wound markers on the surviving Heroes' Army Cards are removed. Glyphs are placed where shown.
Victory: Be the last player with at least one figure on the battlefield to win. If the battle reaches the end of Round 10, then the battle is over and the player with the most points on the battlefield wins (see Scoring).
Summary of Campaign: "I have no time for the feelings of satisfaction after the destruction of the Marro Hive and its Hivelord for, far above us, the large carrion birds that have followed us for so long through the mountains are finally descending. As I prepare myself for battle, Raelin points out (with her far-reaching eyes) that these are not birds. They are kyrie, Kyrie of the Moon Tribes." — Sergeant Drake Alexander
Waters of Life Battlefield
The booklet shows this battlefield built level by level (Level 01 through Level 04) in pictorial diagrams, culminating in the Marro Hive on its swamp water base.
Waters of Life Game Scenarios
Master Game – Waters of Life (2 players)
According to the emissaries of the Moon Tribe, you have discovered the ancient Waters of Life! Many tribal warriors came to drink these magical waters to cure their most severe injuries, spawning the myth that the Waters of Life can bring back warriors from the dead. Now a new power has taken root in the Waters of Life – a deadly Marro Hive that is slowly transforming the Waters of Life into a drink of doom.
Player 1's Goal: Destroy the Marro Hive.
Player 2's Goal: Protect the Marro Hive from being destroyed, or destroy all of your opponent's figures.
Setup: Player 2 starts with the Marro Hive and must place the Marro Hive as shown on the battlefield. Player 1 cannot draft or bring a pre-made Army that includes the Marro Hive.
Player 1 starts in the red starting zone; Player 2 starts in the blue starting zone.
Player 1 drafts or brings a pre-made 500-point Army. Player 1's Army must include all Heroes and no Squads.
Player 2 drafts or brings a pre-made 300-point Army. Player 2's Army must include all Squads and no Heroes.
Special Rules: Any Unique Hero (which includes the Marro Hive) who ends a turn that occupies a water tile space or a swamp water tile space that is adjacent to a water tile, may roll the 20-sided die to drink from the Waters of Life.
If a 1 is rolled, the Unique Hero receives one wound.
If a 2-17 is rolled, the Unique Hero removes one wound.
If an 18-20 is rolled, the Unique Hero removes two wounds.
Victory: Player 1 wins if the Marro Hive is destroyed before the end of Round 8. Player 2 wins if the Marro Hive survives to the end of Round 8, or if Player 2 destroys all of Player 1's figures.
Master Game – Rogue Hive (2 players, 3 players, or 4 players as individuals)
The Marro Hive has been changing and contaminating the Waters of Life, but so has the magical spring been fighting back and changing the grotesque Marro abomination. In its confused state, it can't distinguish friend from foe, randomly linking telepathically to any General in the area.
Goal: Destroy all of your opponent's figures.
Setup: No player may draft the Marro Hive or bring a pre-made Army that includes the Marro Hive. Place the Marro Hive Army Card near the battlefield.
Two players: Each player drafts or brings a pre-made 500-point Army. Player 1 starts in the red starting zone; Player 2 starts in the green starting zone.
Three players: Each player drafts or brings pre-made 380-point Armies. Player 1 starts in the red starting zone; Player 2 starts in the blue starting zone; Player 3 starts in the green starting zone.
Four players: Each player drafts or brings pre-made 285-point Armies. Player 1 starts in the red starting zone; Player 2 starts in the blue starting zone; Player 3 starts in the green starting zone; and Player 4 starts in the orange starting zone.
Special Rules: At the beginning of every round, before Order Markers are placed, all players roll the 20-sided die. The player with the highest roll takes control of the Marro Hive by placing the Army Card, along with any wounds on it, with the rest of his Army Card(s). This player may place Order Markers on the Marro Hive Army Card as if it is in his Army.
At the end of every round, the Hive is no longer considered in control by any player. Any player who loses control of the Hive and has no figures on the battlefield is out of the game.
Victory: Be the last player with at least one figure on the battlefield to win. If the battle reaches the end of Round 8, then the battle is over and the player with the most points on the battlefield wins (see Scoring).