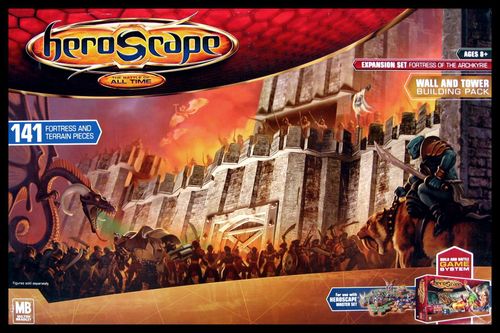
Heroscape Expansion Set: Fortress of the Archkyrie
Heroscape Expansion Set: Fortress of the Archkyrie Rulebook
Table of Contents
Table of Contents
Rules
Contents: 7 Straight Bases, 10 Corner Bases, 4 End Bases, 7 Straight Wall Sections, 10 Corner Wall Sections, 4 End Wall Sections, 21 Single-Space Wall Walks, 1 Nine-Space Wall Walk, 1 Seven-Space Wall Walk, 50 Battlements, 1 Fortress Doorway, 1 Fortress Door, 1 Flag, 1 Fortress Door Card, 1 Sliding Bar for Door, 22 Single-Rung Ladder Pieces.
First Time You Play: Remove your game parts from their wrappings. Discard the extra materials.
Fortress Walls
The following rules for the Fortress Walls apply to both the Basic Game and the Master Game. Exceptions: The Falling and Engagement rules are used only in the Master Game. In the Basic Game, the Door cannot be destroyed or attacked. The Door Card is not used in the Basic Game.
Fortress Wall Battlefield Key: Use this key when building battlefields with Fortress Wall pieces, Wall Walk Tiles and Battlements.
- Single corner wall: Height 9 Levels.
- Single straight wall: Height 9 Levels.
- Single end wall: Height 9 Levels.
- Fortress doorway, fortress door and sliding bar for door: Height 10 Levels.
- Single corner base: Height 1 Level.
- Single straight base: Height 1 Level.
- Single end base: Height 1 Level.
- Nine-space wall walk: Height 1 Level.
- Seven-space wall walk: Height 1 Level.
- Single-space wall walk: Height 1 Level.
- Battlement attached to wall walk: Height see page 3.
Fortress Walls, Wall Walks, and Battlements: Fortress Walls are made up of Wall Sections, Bases, and Wall Walks and may be built in a variety of ways. They may be built as single-wall height, double-wall height, or even higher. Bases are used to connect the Wall Sections to the battlefield. Wall Walks are spaces that sit on top of Wall Sections and allow figures to move on and occupy the top of the walls. Battlements may be placed on Wall Walks or terrain spaces for figures to hide behind during battle.
How to Build Fortress Walls: Fortress Walls may be built on any normal terrain such as grass, sand, rock, etc. Stack a Straight, Corner or End Base on the terrain space where you wish to build. Then stack the matching Wall Section on top of the base, snapping the pieces together for a tight fit. You may place another matching Wall Section on top to build it higher, or place a Wall Walk on top to end the build. You may link Battlements on the sides of the Wall Walks for added protection. See Examples 1, 2, 3 and 4.
When building Fortress Walls, follow the rules below:
- Each Wall Section must sit on a Base or another Wall Section.
- Each Wall Section must have a Wall Walk or another Wall Section on top of it.
- Fortress Walls may not sit on water tiles or other tiles considered to have no height.
Example 1: Placing Bases. Stack and link Bases on Terrain Spaces.
Example 2: Adding Walls. Attach Wall Sections to Bases.
Example 3: Building Higher Walls. Attach Wall Sections on top of other Wall Sections.
Example 4: Adding Wall Walks and Battlements. Place Wall Walks on top of Wall Sections with Battlements.
Counting Levels on Fortress Walls: The Fortress Walls are marked with heavy lines to help count levels. Each heavy line equals 1 full level. A wall base equals 1 full level.
Moving on Wall Walk Tiles
Wall Walk Tiles create spaces that may allow your figures to travel more quickly than normal. Figures may move on and occupy all Wall Walk spaces similar to other normal terrain spaces such as rock, grass, or sand. When moving your figures on Wall Walk spaces, count each space as a normal space. However, if your figure's entire move consists of Wall Walk spaces, including the starting space, your figure receives a bonus and you may add 3 spaces to your figure's move. The 3 additional spaces must also be on Wall Walk spaces. Figures cannot use Ladders with the bonus. Example 5 shows a figure walking on a Wall Walk.
Example 5: Moving on Wall Walk Spaces. The Tarn Viking Warrior's Movement is 4. His entire move is on Wall Walk Spaces, so he can move 7 (4+3) total spaces.
When a figure moves from one Wall Walk to a higher level, the figure must add the difference in height to the movement, similar to the "Moving Up" rule in the Master Game Guide. When moving down to a lower Wall Walk space, you do not need to count the difference unless the level is equal to or more than the height of the figure. See Falling in the Master Game Guide.
Using Wall Walk Tiles as Road Tiles: When Wall Walks are not supported by Fortress Walls, you can link and stack them the same way you link and stack other terrain tiles such as grass, sand, and rock tiles. The Wall Walks then become Road Tiles in your battlefield.
Moving on Road Tiles: Road Tiles create spaces that may allow your figures to travel more quickly than normal. When moving your figures on Road Spaces, count each space as a normal space. However, if your figure's entire move consists of Road Spaces, including the starting space, you may add an additional 3 spaces to your figure's move. The 3 additional spaces must also be on Road Spaces.
Battlements
Battlements are structures that may be added to Wall Walks or hex-shaped tiles such as grass, rock or sand. Battlements offer valuable protection during battles by providing figures with obstacles to hide behind.
Moving over Battlements: Figures may move over Battlements. Count the lowest part of a Battlement as spaces in addition to any difference in levels that may need to be counted during the figure's movement. The height from the inside of a Battlement (the side connected to a tile) is 2. The height from the outside of a Battlement (the side not connected to a tile) is 3. See Examples 6 and 7.
Example 6: Moving over a Battlement from inside. The Izumi Samurai has a move of 6. The inside wall costs 2 movement spaces to move over because it has a height of 2.
Example 7: Moving over a Battlement from outside. The Izumi Samurai has a move of 6. The outside wall costs 3 movement spaces to move over because it has a height of 3.
Engagement Rules: Figures adhere to the same Engagement Rules as described in the Master Game Guide. If two figures are on adjacent spaces separated by a Battlement, both figures' heights must be higher than the lowest part of the Battlement to be adjacent or engaged. See Example 8.
Example 8: Battlement engagement. The outside part of the Battlement has a height of 3, plus the extra level below it for a total height of 4 (3+1). Agent Carr has a height of 5, so he is adjacent to and engaged with the Tarn Viking Warrior. The Marro Warrior has a height of 4, so he is not adjacent to or engaged with the Tarn Viking Warrior.
Line of Sight: Battlement Points may be used as Target Points. Battlement Points, on the corners of the Battlements, are used only for range attacks. They are used for Line of Sight only when attacking from the inside of the Battlement. A figure next to a Battlement Point may use this point instead of his or her Target Point. It is the equivalent of leaning over the Battlement to target an opponent.
To use the Battlement Point, choose a Battlement Point that is next to the space your figure is on. Then target your opponent by lining up the Battlement Point at the outside edge of the Battlement to your target. If there is a clear Line of Sight, you may use a range attack. Figures with special powers that reference clear sight spaces, like Raelin, may also use the Line of Sight mark in addition to their Target Point, to determine whom their special powers affect.
Example 9: Battlement Points. Using his Target Point, Syvarris cannot see the Shaolin Monks. When Syvarris uses the Battlement Points, he can see the Shaolin Monks, and can therefore attack.
The Doorway
The Doorway allows figures to enter and exit a Fortress. Attached to the Doorway is a moveable Door that may be opened and closed. Figures cannot see or target other figures through the Doorway when the Door is closed. The Doorway may be placed anywhere on the battlefield as long as the Doorway and all of the Doorway Spaces (1-4) are all on the same level. When building battlefields, keep the 4 Doorway Spaces clear of any obstacles such as ruins or trees. Only figures are allowed to occupy the 4 Doorway spaces. See Example 10.
Example 10: The 4 Doorway Spaces. Outside Fortress: Spaces 1, 2, 3 and 4 are shown in the diagram, with Space 1 next to the Outside Fortress and Space 4 next to the Inside Fortress.
The Fortress Door: The Door is a destructible object that may be opened and closed. Unless specified differently at the beginning of a scenario, the Door starts every game in the closed position. The scenario will also specify who has control of the Door and the Door Card.
Control of the Door: Control of the Door is managed by the player who controls the Door Card. This player rolls defense dice when the Door is attacked. The controlling player loses control of the Door when a new player occupies Door Space #4. The Door Card, along with any wound markers, is immediately taken over by the new controlling player.
Rules for Opening or Closing the Door:
- As long as the controlling player's figure occupies Doorway Space #4, the controlling player may open or close the Door whenever needed. If the figure moves from this space or is destroyed, and the space remains unoccupied, the Door cannot be opened or closed.
- When the Door is closed, it must be completely closed to occupy the space in the Doorway (Space #1). When closed, it is considered barred from the inside and may not be opened from the outside by any enemy figures.
- When the Door is open, it must be opened completely to occupy Space #3 as shown in Example 11. Only those figures that can fit on and move through Space #1 are allowed to pass through the Doorway.
- The Door may be opened or closed by the controlling player for his/her own figures and for other figures that may want to pass through. The controlling player may open or close the Door even when it is not his/her turn. See Example 11.
- When opening or closing the Door, all spaces #1, 2, & 3 must be unoccupied. If there is a figure on one of these spaces, the Door may not be opened or closed.
Example 11: Opening the Door. A Tarn Viking is on Doorway Space #4 and therefore has control of the Fortress Door. He has opened it to allow the Knight to enter.
Targeting the Door: Instead of choosing a figure to attack, players may target the Door as a Destructible Object. Destructible Objects may be targeted and attacked much the same way a figure is targeted and attacked. The Door's defense against attacks is described below. To target the Door, use the hex-shaped tile space that is below the Door to determine adjacency, engagement, or range, as shown in Example 12.
Example 12: Targeting the Door. Deathwalker 8000 (Range of 7) has Line of Sight to the Fortress Door and may attack with a range attack using the space below the Fortress Door to determine range.
Attacking and Defending: The Door may be attacked by a normal attack, a special attack, or by special powers that only cause wounds. Add Height Advantage where appropriate. The Door may receive wounds the same way that a figure may receive wounds. The Door cannot be targeted or attacked by special powers that may "destroy" it in one attack. See Example 13.
Example 13: Attacking and defending the Door. The two Shaolin Monks are adjacent to Doorway Space #1, the space the Door currently occupies, so they may attack the Door. The Door is allowed 4 Defense Dice and any 'Reinforced Defense' as specified on the Door Card. Any skulls not blocked by shields count as wounds. Place the appropriate amount of wound markers on the Door Card.
Destroying the Door: The Door has 10 Life; if the Door receives 10 Wounds, the Door is destroyed. Remove the destroyed Door as shown in Example 14.
Example 14: Removing the destroyed Door. Remove the Door by gently pulling it up and off its hinges, then place it out of the game.
Ladders
Ladders may be used only by small or medium single-space figures, to allow them to move onto spaces on walls and terrain. Each Ladder may consist of 1 or more Single-Rung Ladder Pieces.
Ladder Battlefield Key: Use this key when building battlefields with Ladders.
- Single-Rung Ladder Piece, attached to this hex-tile.
- Six-Rung Ladder, attached to this hex-tile.
Building a Ladder: Build a Ladder by combining 1 or more Single-Rung Ladder Pieces, stacking them together one on top of another, and linking them to a Wall Walk, Fortress Wall or other hex-shaped tiles. Only one Ladder may be built on a hex-shaped tile space such as grass, rock, sand, etc. This space is called the Landing Space. The bottom Single-Rung Ladder Piece must always be placed directly on the Landing Space. Landing Spaces cannot be water spaces or other similar spaces considered to have no height. Ladders must always be linked into the side of a Wall Walk, Fortress Wall or other hex-shaped tiles. The Single-Rung Ladder Piece at the top of every Ladder must always be connected to a Wall Walk, Fortress Wall or other hex-shaped tile. See Examples 15 and 16.
Example 15: Building Ladders. Stack multiple Ladder Rungs together to allow access to higher levels.
- To attach Ladders to Wall Walks or hex-shaped tiles: Slide the notches into the grooves as shown below.
- To create longer Ladders: Place one Ladder piece on top of another to build longer Ladders as shown below.
Example 16: Correct and incorrect Ladder placement.
- Correct: The Single-Rung Ladder Piece at the top of this Ladder is connected to the Wall Walk tile, and the bottom rung is placed on the Landing Space.
- Incorrect: This Ladder is not correctly linked into the side of the Wall Walk.
- Incorrect: The bottom rung of this Ladder is not placed directly on its Landing Space.
Movement on Ladders: Figures may move onto a Ladder by moving onto a Rung Space, counting the move to this rung as if it were a hex-shaped tile space. To end a figure's move on a Ladder, slide its base into a rung.
Treat each figure on a rung as if it were on a hex-shaped tile space. All rules for normal movement on hex-shaped tile spaces apply to figures on Ladders except the following:
- When moving up or down, each rung counts as 1 space; do not count levels.
- Figures are not allowed to skip rungs unless they fall off a Ladder.
- Figures are not allowed to fall from any space onto a Ladder rung.
Figures must count levels (not rungs) when falling off a Ladder to determine falling damage.
Move on and off the Ladders as shown in Examples 17-22.
Example 17: Using the Landing Space. Moving onto a Ladder from a Landing Space. Moving off of a Ladder onto a Landing Space.
Example 18: Counting the Landing Space. Moving onto a Ladder and counting the Landing Space. Moving off of a Ladder and counting the Landing Space.
Example 19: Moving onto a Ladder from a hex tile space. Moving onto a Ladder Rung from a same-level hex tile space. Moving onto a Ladder Rung from a different-level hex tile space.
Example 20: Moving off of a Ladder and onto a hex tile space. Moving off a Ladder onto a same-level hex tile space. Moving off a Ladder onto a different-level hex tile space.
Example 21: Moving from one Ladder to another Ladder. Moving from one Ladder to a same-level Ladder. Moving from one Ladder to a different-level Ladder.
Example 22: Moving from one Ladder to another Ladder. Moving from one Ladder to a same-level Ladder. Moving from one Ladder to a different-level Ladder.
Special Movement on Ladders: Figures that fly, leap, jump, or have similar movement over spaces may move from Rung to Rung, Ladder to Ladder, or on and off of a Ladder, counting only the spaces on the battlefield as they would during their normal movement. See Examples 23 and 24.
Example 23: Flying onto a Ladder. Raelin flies 6 spaces from one Ladder to another Ladder.
Example 24: Leaping onto a Ladder. The Shaolin Monk uses his Stealth Leap of 3 to move from one Ladder to another Ladder.
Example 25: Moving around Ladders. This Izumi Samurai must move around the Ladder to use it or to occupy the Landing Space. Figures may not move through Ladders.
Engagement: Treat each figure on a Rung as if it were on a hex-shaped tile space. All rules for being adjacent or engaged on hex-shaped tile spaces apply to figures on Ladders. See Examples 26 and 27.
Example 26: Figures engaged. The Knight is adjacent and engaged with Agent Carr.
Example 27: Figures not engaged. The Knight is not adjacent to, and therefore not engaged with Agent Carr because the Knight is equal to or higher than the Height of Agent Carr.
If two figures are on the same Ladder, the two figures are engaged if neither figure can move closer on the Ladder to the other. See Example 28.
Example 28: Engagement on the same Ladder. Agent Carr and the Tarn Viking are adjacent and engaged on this Ladder. Agent Carr and the Tarn Viking are not adjacent or engaged on this Ladder.
If a figure on a Landing Space can move onto the first Rung and the figure above cannot move closer to the figure on the Landing Space, both figures are adjacent and engaged.
Example 29: Landing Space and Ladder engagement. The Shaolin Monk is adjacent to and engaged with this Knight because the Knight cannot move any closer to the Monk on the Landing Space. The Shaolin Monk is also adjacent to and engaged with this Knight of Weston as shown.
Example 30: Engagement between figures on different Ladders. The Tarn Viking is 4 levels below Agent Carr on the Ladder. Because the Tarn Viking has a height of 5, they are adjacent and engaged. The Tarn Viking is 6 levels below Agent Carr on the Ladder, and therefore they are not adjacent or engaged.
Hit Zones: The bases of all figures on Ladders are considered valid Hit Zones by all other figures. See Example 31.
Example 31: Using a figure's base as a Hit Zone. The Knight of Weston is on the Ladder; therefore, the Zetian Guard can target the Knight's base as a valid Hit Zone.
Target Points: Figures on Ladders may use the entire edge of their base as an alternate Target Point instead of their normal Target Point when using Line of Sight. See Example 32.
Example 32: Using the edge of a figure's base as a Target Point. Syvarris can target Agent Carr using the edge of his base.
Other Ladder Rules: The Ladder will affect engagement rules as follows:
- Ladders may block Line of Sight when targeting a figure.
- If 2 figures are completely separated by a Ladder, they are considered neither adjacent nor engaged. See Example 33.
Example 33: Figures separated by a Ladder. Agent Carr is only adjacent to and engaged with Shaolin Monk 3 because the Ladder separates Agent Carr from Shaolin Monks 1 and 2. Explosion Special Attack by Deathwalker 9000 on Shaolin Monk 2 does not affect Agent Carr because he is not adjacent.
Height Advantage: Figures on a Ladder may receive Height Advantage for attack and defense as explained in the Master Game Guide. See Examples 34 and 35.
Example 34: Height Advantage for an attack from a Ladder. Syvarris has a Height Advantage on Shaolin Monk 2 but not on Shaolin Monk 1, so he adds one extra attack die when attacking Shaolin Monk 2.
Example 35: Height Advantage for defense on a Ladder. The Shaolin Monk has a Height Advantage on Zetian Guard 2 but not Zetian Guard 1, so he adds one extra defense die only when defending against Zetian Guard 2.
The Flag
The Flag may be placed on the top of any Battlement as shown. It does not have any special powers unless specified in a scenario.
Flag Battlefield Key: Use this key when building battlefields with Flags.
Example 36: Flag placement. Attach the Flag by sliding it onto a Battlement from the top. Flag properly placed.
The West Barbican of Idona Castle Scenarios
Required Sets: Rise of the Valkyrie Master Set and Fortress of the Archkyrie.
Built primarily as an escape route from the castle if the main defense falls, the West Barbican of Idona Castle has never been attacked. Few enemies know of the existence of this part of the castle. The access to the West Barbican is known to be a long, dangerously narrow ledge that falls off steeply from both sides. Attacking armies have tried to cross this passageway only to turn back after losing half of their army. There is a safer pass through underground caves, but it is a well-guarded secret.
The scenario battlefield maps (Level 01, Level 02, Level 03, Level 12, Level 21, and Flag & Ruins) are diagrams in the printed insert and are not reproduced here.
Master Game: Ambush at the West Barbican (3 or 4 Players)
With the main castle under a long siege, the call for reinforcements has arrived, but the enemy has followed them back to the West Barbican. As the reinforcements rush to the safety of the fortress, the enemy outflanks and ambushes them only a short distance away from the outer door. For the enemy, destroying the reinforcements means crushing any hope that the castle guards have of surviving the siege. For the castle guards, rescuing the reinforcements and getting them behind the walls means everything.
Goal: Player 1 and Player 2 are on a team and must work together to rescue 3 Unique Heroes from the army of reinforcements. Player 3 must prevent 3 Unique Heroes from reaching the safety of the West Barbican walls. (In a 4 Player game, Players 3 and 4 team up for this goal.)
Setup: Player 1 controls the Door at the start of the game and places the Door Card with the other Army Cards that he/she controls. Player 1 must sit directly to the right of Player 2.
Three Players: Player 1 drafts or brings a pre-made 225-point army. Player 2 drafts or brings a pre-made 550-point army. Player 3 drafts or brings a pre-made 715-point army.
Player 1 starts in the orange starting zone, including any spaces under the 7-Hex and 9-Hex Wall Walks within the Barbican. Player 1 must also start with 1 figure on Door Space #4. Player 2 starts in the blue starting zone as the ambushed reinforcements. At least 3 Unique Heroes, 2 of which must be non-flying, must be placed on the blue starting zone. Player 3 starts in the purple starting zone.
Four Players: Player 1 drafts or brings a pre-made 225-point army. Player 2 drafts or brings a pre-made 635-point army. Player 3 and Player 4 each draft or bring pre-made 315-point armies.
Player 1 starts in the orange starting zone, including the spaces under the 7-Hex and 9-Hex Wall Walks within the Barbican. Player 1 must also start with 1 figure on Door Space #4.
Player 2 starts in the blue starting zone as the ambushed reinforcements. At least 3 Unique Heroes, 2 of which must be non-flying, must be placed in the blue starting zone.
Player 3 and Player 4 start on any space in the purple starting zones.
Special Rules: When using pre-made armies, Player 2 places his/her entire army on the blue starting zone first; placement then passes to the left.
At the beginning of the first round only, do not roll for Initiative. Player 2 automatically goes first, followed by the player on his/her left. At the beginning of Round 2, play continues as normal; all players roll for Initiative.
Strong unknown forces have always interfered with the use of any summoning powers. Figures that are successfully summoned must roll the 20-sided die. If a 19 or 20 is rolled, the figure is safe. If a 1-18 is rolled, the figure is destroyed.
Victory: Player 1 and Player 2 win if: A) Player 1 has control of the Door Card and has at least 1 figure that is within the Barbican Walls, and B) Player 2 has 3 Unique Heroes, that started in the blue starting zone, occupying any spaces in Player 1's starting zone.
If Player 1 and Player 2 fail to save 3 Unique Heroes by reaching the inside of the Barbican Wall by Round 12, it is assumed that darkness has set in and the reinforcements are overwhelmed. Player 3, or Players 3 and 4, win the game.
Master Game: The Siege of the West Barbican (2 or 3 Players)
A determined army carefully makes their way through the treacherously narrow ledge that leads to the West Barbican, losing only a few warriors. The guards of the Barbican are completely surprised and undermanned, but must prepare for a battle that will determine the fate of Idona Castle and its control over Western Nastraland and the Dark Lakes.
Goal: Player 1 must defend the West Barbican and prevent Player(s) 2 (and 3) from taking control of the Barbican. Player(s) 2 (and 3) must destroy all of Player 1's figures or take control of the Barbican by taking down the Flag.
Setup: Place the Glyph power-side up as shown. Player 1 controls the Door at the start of the game and places the Door Card with the other Army Cards that he/she controls.
Two Players: Player 1 drafts or brings a pre-made 500-point army and also starts with control of the Door Card. Player 2 drafts or brings a pre-made 750-point army.
Player 1 starts in the orange starting zone, including any spaces under the 7-Hex and 9-Hex Wall Walks within the Barbican. Player 1 must start with at least 1 figure on Door Space #4. Player 2 starts in the purple starting zone.
Three Players: Player 1 drafts or brings a pre-made 650-point army and also starts with control of the Door Card. Player 2 and Player 3 draft or bring pre-made 325-point armies.
Player 1 starts in the orange starting zone, including any spaces under the 7-Hex and 9-Hex Wall Walks within the Barbican. Player 1 must also start with 1 figure on Door Space #4. Player 2 and Player 3 are on a team and each start on any space in the purple starting zone.
Special Rules: Player(s) 2 (and 3) are allowed to take down the Flag to win the game. To take down the Flag, Player(s) 2 (and 3) must move a figure onto the orange start space with the X that is next to the Flag. This figure must be unengaged when taking down the Flag. After moving, instead of attacking with this figure, he/she may take down the Flag and remove it from the game.
Victory: Player(s) 2 (and 3) must either destroy all Player 1's figures or take down the Flag to win the game. Player 1 must prevent the Flag from being taken down or destroy all of his/her opponent's figures to win the game. If the game reaches the end of Round 12, Player 1 receives reinforcements from the castle and the opportunity for Player(s) 2 (and 3) to take control of the Barbican has been lost. Player 1 immediately wins the game.