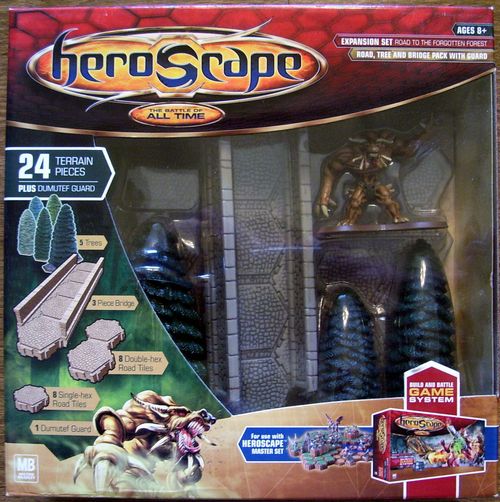
Heroscape Expansion Set: Road to the Forgotten Forest
Heroscape Expansion Set: Road to the Forgotten Forest Rulebook
Table of Contents
Table of Contents
First Time You Play
Remove your game parts from their wrappings. Discard the extra materials.
Road Tiles
The following rules for the road tiles apply to both the Basic Game and the Master Game.
Road Battlefield Key - Use this key when building battlefields with road tiles.
Key labels: single-space road tile, double-space road tile, five-space road tile.
Building with Road Tiles: Road Tiles come in single-hex, double-hex, and five-hex tiles. You can link them and stack them the same way as any other tile to create road spaces on your battlefield.
Road Tiles create spaces that may allow your figures to travel more quickly than normal.
Moving on Road Spaces: When moving your figures on road spaces, count each space as a normal space. However, if your figure's entire move consists of road spaces, including the starting space, you may add an additional 3 spaces to your figure's move. The 3 additional spaces must also be on road spaces. See Example 1.
EXAMPLE 1: Moving on Road Spaces Finn's move is 5. Finn's entire move is on road spaces, so he can move 8 total spaces.
Stone Walls
The following rules for the stone walls apply to both the Basic Game and the Master Game. Exceptions: The Falling and Engagement rules are only used in the Master Game.
Stone Wall Battlefield Key - Use this key when building battlefields with stone walls.
Building with Stone Walls: There are 2 stone walls that may be used in a variety of ways. You may build a bridge by combining them with the 5-space road tile, you may use the stone walls together to create a long wall, or you may use them alone on different parts of the battlefield as you see fit.
A stone wall must be placed on the battlefield with each of the 8 connecting faces attached to hex tiles. See Examples 2, 3 and 4.
EXAMPLE 2: Connecting Faces (Diagram labelled "connecting faces" along the base of the stone wall.)
EXAMPLE 3: Stone Wall placed correctly This stone wall is placed correctly because all 8 connecting faces are attached to hex tiles.
EXAMPLE 4: Stone Wall placed incorrectly This stone wall is placed incorrectly because a connecting face is not attached.
Moving over Stone Walls: Figures may move over stone walls. When moving over a stone wall, count the height of the stone wall as spaces. The height of the inside wall (the side connected to a tile) is 2. The height of the outside wall (the side not connected to a tile) is 3. See Examples 5, 6 and 7.
EXAMPLE 5: Moving over an inside wall Finn has a move of 5. The inside wall costs 2 movement spaces to move over because it has a height of 2.
EXAMPLE 6: Moving over an outside wall The outside wall costs 3 movement spaces to move over because it has a height of 3.
EXAMPLE 7: Moving over an elevated outside wall When a figure moves over an elevated outside wall, be sure to count the height of the wall and nearby support tiles.
A figure cannot move over a stone wall if it cannot move enough spaces to get to an empty space on the other side.
Falling: To determine if a figure is considered falling after moving over a stone wall, measure its fall from the top of the stone wall.
Engagement: When a stone wall is between two figures, both figures' heights must be higher than the stone wall as positioned on the battlefield to be engaged. If one or both of the figures are equal to, or are below the wall, they are not engaged. The stone wall has a height of 2 on the inside and a height of 3 from the outside. See Example 8.
EXAMPLE 8: Stone Wall Engagement Blade Grut 1 is engaged with Finn. Blade Grut 2 is not engaged with Finn because Blade Grut 2 has a height of 4 and the stone wall, as positioned on the battlefield, has a total height of 4.
Line of Sight Marks: Line of Sight Marks are the red markings on the tops of the stone walls used only for range attacks. They are used for Line of Sight only when attacking from the inside of the stone wall. A figure next to a Line of Sight Mark may use this mark, instead of his or her Target Point. It is the equivalent of leaning over the wall to target an opponent. To use a Line of Sight Mark, choose a Line of Sight Mark that is next to the space your figure is on. Then target your opponent by lining up the Line of Sight Mark at the outside edge of the wall to your target. If there is a clear line of sight, you may use a range attack. See Example 9.
EXAMPLE 9: Using a Line of Sight Mark Syvarris using his Target Point cannot see the Blade Grut. However, when Syvarris uses the Line of Sight Mark on the Stone Wall, he can see the Blade Grut and therefore can attack.
Figures with special powers that reference clear sight spaces, like Raelin, may also use the Line of Sight Mark in addition to their Target Point, to determine who their special power affects.
Evergreen Trees
The following rules for the evergreen trees apply to both the Basic Game and the Master Game.
Evergreen Tree Battlefield Key - Use this key when building battlefields with evergreen trees.
Key entries: 10 height evergreen tree; 11 height evergreen tree (two trees); 12 height evergreen tree; 15 height evergreen tree.
Evergreen trees may be placed onto any spaces where they fit. You may not place them on a space(s) that does not have a hex interlock. For example, you cannot place trees on water tiles because the water tile(s) does not have a hex interlock. Four of the evergreen trees in this set occupy one single hex space and one evergreen tree occupies 4 spaces.
Moving Around Evergreen Trees: Figures are not allowed to move through any spaces that are occupied by trees. Figures cannot move through any of the 4 spaces occupied by evergreen tree 15.
Line of Sight: All evergreen trees block Line of Sight. Long range attacks can only be used when a clear Line of Sight is available between evergreen trees. See Examples 10 and 11.
EXAMPLE 10: Looking between the trees Syvarris can easily see the Blade Grut between the trees.
EXAMPLE 11: Looking between the trees There is a small area but Syvarris can see the Blade Grut between the trees.
The Forgotten Forest Battlefield
Required Sets: Rise of the Valkyrie Master Set and Road to the Forgotten Forest.
The Dumutef Bridge spans a deep fast-running river that few dare cross even at the shallowest areas. Deep holes in the riverbed can swallow the largest warriors and deadly creatures in the river leave only the bones of the fool-hearty. The Dumutef Guards pride themselves for never having allowed anyone to cross the bridge into the neighboring woods. Because most travelers never bother to come this way, it is called the Forgotten Forest.
Battlefield level diagrams (Levels 01 through 05) are printed hex maps and are not reproduced as text here; see the page images.
The Forgotten Forest Game Scenarios
Battlefield Levels 06, 07 and 08 (with Ruins and Trees) are printed hex maps and are not reproduced as text here; see the page images. Each scenario gives its own setup layout as a diagram.
Master Game - The Bridge to the Forgotten Forest (2 Players)
The Bridge to the Forgotten Forest has long been the stronghold of the Dumutef Guards and their army. Despite their formidable reputation, an occasional army is foolish enough to battle them for the rewards that lead on down the road... more wellsprings!
Goal: Player 1 must take control of the bridge (five-space road tile). Player 2 must retain control of the bridge.
Setup: Place the Glyphs power-side up where shown. (Diagram with a "Place under Bridge" callout and lettered Glyph markers; see the page image.)
Player 1 drafts or brings a pre-made 425 point army. Player 1 starts in the purple zone. Player 2 drafts or brings a pre-made 525 point army. Player 2 must spend 25 of the 525 points on at least one Dumutef Guard. If the players are drafting, Player 2 will draft first and must pick and place a Dumutef Guard. Player 2 starts in the orange starting zone.
Special Rules: All figures except Soulborgs, must roll the 20-sided die for survival upon entering any water space. If you roll a 1, your figure is destroyed. If you roll 2-4, your figure takes 1 wound. Double-space figures roll only once to cross when using the same water space on the same turn.
Victory: At the end of any round, if Player 1 solely occupies the bridge, he/she wins. If by the end of the 10th round, Player 1 has not achieved victory, an army of reinforcements for the Dumutef Guards arrive and repel all attackers. Player 2 wins the battle, and once again the Dumutef Guards prove to be invincible.
Note: As Player 1, you are battling against overwhelming odds; but if you do win, your army will be forever written into Valhallan lore with other legendary warriors.
(The Round Marker Track, rounds 1 through 10, is printed alongside the scenario.)
Master Game - Fall of the Dumutef Bridge (3 Players)
The bridge is lightly defended as neither travelers nor armies have ventured this way in a year, and a hard winter is setting in. Many of the defenders have sought shelter in the nearby forest. It is the perfect time to plot an attack with an ally to overwhelm the Dumutef Guards. Or is it?
Goal: Players 1 or 2 must take control of the bridge (five-space road tile). Player 3 must retain control of the bridge while awaiting reinforcements that arrive throughout the battle.
Setup: Place the Glyphs power-side up where shown. (Diagram with lettered Glyph markers; see the page image.)
Players 1 and 2 each draft or bring a pre-made 350 point army. Player 3 drafts or brings a pre-made 350 point army. Player 3 must spend 25 of the 350 points on at least one Dumutef Guard. If the players are drafting, Player 3 will draft first and must pick and place a Dumutef Guard.
Player 1 starts in the purple starting zone. Player 2 starts in the red starting zone. Player 3 starts in the blue and orange starting zone.
Special Rules: All figures except Soulborgs, must roll the 20-sided die for survival upon entering any water space. If you roll a 1, your figure is destroyed. If you roll 2-4, your figure takes 1 wound. Double-space figures roll only once to cross when using the same water space on the same turn.
Players 1 and 2 are the attacking team and have an alliance that may not be broken.
At the end of rounds 2, 3, 4, and 5, Player 3 rolls for reinforcements on the 20-sided die and uses the following chart to determine reinforcements:
- 1 = No reinforcements this round
- 2-5 = 25 points of reinforcements
- 6-10 = 75 points of reinforcements
- 11-15 = 125 points of reinforcements
- 16-19 = 175 points of reinforcements
- 20 = 200 points of reinforcements
All reinforcements enter the battlefield on the Blue Starting Spaces.
Victory: At the end of any round:
If the attacking team solely occupies the bridge, the attacking team wins.
At the end of Round 10:
If Player 3 solely occupies the bridge or if the bridge is completely unoccupied, he/she wins.
If the attacking team and Player 3 both occupy bridge spaces: The attacking team wins if they occupy more spaces than Player 3. Player 3 wins if he/she occupies the same or more spaces than the attacking team.
Transcriber note: the printed title of this scenario is "Fall of the Dumutef Bridge" (3 Players), and the printed title of the 2-player scenario is "The Bridge to the Forgotten Forest". The Dumutef Guard army card is not in this document.