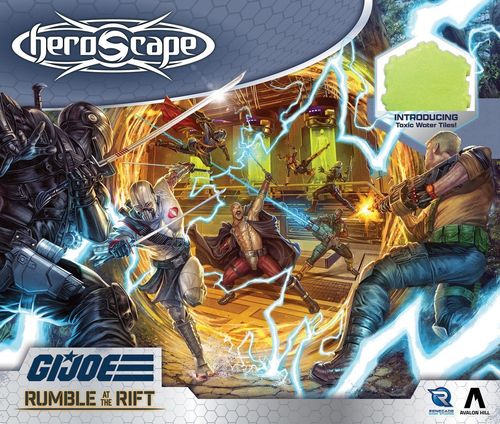
G.I. JOE Heroscape: Rumble at the Rift Battle Box
G.I. JOE Heroscape: Rumble at the Rift Battle Box Rulebook
Table of Contents
Table of Contents
Game Contents
Miniatures
- Duke
- Snake Eyes
- Scarlett
- Roadblock
- COBRA Commander
- Storm Shadow
- Destro
- Doctor Mindbender
Contents
- 2 24-hex Asphalt Tiles
- 5 7-hex Concrete Tiles
- 6 3-hex Concrete Tiles
- 6 1-hex Toxic Land Tiles
- 5 1-hex Toxic Water Tiles
- 5 1-hex Shadow Tiles
- 2 COBRA Fortifications
- 4 Glyphs
- 20 Wound Markers
- 1 Round Marker
- 8 Order Markers
- 8 Combat Dice
- 1 20-sided Die
- 8 Army Cards
- 3 Glyph Cards
- 1 Heroscape G.I. JOE Rulebook
Getting Ready to Play the Game
Pick a Scenario and Map
Each Heroscape game begins with choosing a scenario that determines the goal and victory condition for the players. In competitive Heroscape play, the most common scenario played has a simple victory condition: You win when none of your opponents' figures remain on the battlefield. Part of the scenario, often referred to as the "Format," dictates the point value of your Army, the number of figures or occupied spaces allowed for your Army, and any alternative victory conditions. Heroscape tournaments often use a dedicated pool of maps that were designed with competitive play in mind. A pool of suggested maps to play on for competitive events can be found here.
In casual play, scenarios can vary widely. Games might be asymmetrical battles with different objectives for each player and may even involve more than two Armies! The map can be of your own design and is only limited by your imagination. A variety of Heroscape scenarios can also be found in the various Scenario Books found in Battle Box and Master Set releases, the Tome of Annihilation, and a pool of monthly scenarios that tell the ever-evolving story of the war on Valhalla.
Choose Your Army
Once a map and a scenario have been selected, it's time to build your Army! The scenario dictates the maximum points value of your Army, the maximum number of figures your Army can include, and the maximum number of spaces your Army can occupy at the start of the game. You may also be limited by the number of spaces in your map's starting zone. If your Army occupies more than the maximum number of spaces or contains more than the maximum number of figures, you must choose and set aside figures before the game begins until your Army is at or under the maximum. Those figures will not participate in the battle.
Armies can be comprised of Unique, Uncommon, and Common Army Cards, according to the following rules:
- Unique: An Army is not allowed to have multiple Unique Army Cards with the same name.
- Uncommon: Each Army can have any number of an Uncommon Army Card with the same name or different names. If your army has two or more of the same Uncommon Army Card, you must keep those figures separate (that is, keep track of which figure belongs to which card). For example, if you are using 2 Feral Trolls, you must clearly mark each Feral Troll figure and a matching Feral Troll Army Card so you can tell which Feral Troll is being activated by which Order Markers and which Wound Markers belong to which Feral Troll. Uncommon figures are considered to be Unique figures in every other way.
- Common: When building an Army, you can choose any number of Common Army Cards with the same name or different names. When playing an Army, if it includes Common figures, a single Army Card represents all of that type of figure in your Army, no matter how many times that Army Card was chosen during Army building. Each Order Marker placed on a Common Army Card lets you activate any of your figures that belong to that Common card, up to the number of figures displayed on the card.
Special powers and other game effects refer to players' Armies and the figures therein, as follows:
- In Your Army: Army Cards that were chosen to be a part of your Army before the game or that you have taken control of during the game.
- You Control: Figures that you can activate that are still on the battlefield. This includes figures from your own Army that remain under your control and any other figures you have gained control of. This does not include figures your teammates control.
- Friendly: Figures you and any of your teammates control.
- Enemy: Figures your opponents control and figures that no player controls.
Gather Your Components
Each player must bring the Army Cards and figures for their Army, a set of combat dice, a twenty-sided die, and whatever markers they need for their Army (such as Wound Markers). Additionally, each player must bring a set of Order Markers numbered 1, 2, 3, and X, all in the same color. The combat dice are used as attack dice (rolling for skulls) and also as defense dice (rolling for shields). The 20-sided die is used when rolling for initiative at the beginning of each round, Special Powers on Army Cards, Glyphs, and terrain effects. Order Markers are used to determine which of your figures will activate during each round and in what order.
Army Cards (Master Game Side)
The Master Game side of an Army Card is labeled as follows:
- Affiliation: This symbol and name represent the organization or Valkyrie General the figures follow.
- Name: This is what the figures on this Army Card are called. This name may be shortened or abbreviated in the special powers shown on the card.
- Species: Biological classification of the figures. If a card has 2 species separated by an "&", treat it as having both for any game effects.
- Uniqueness: All Army Cards are either Common, Uncommon, or Unique. When selecting Army Cards for your Army, you cannot select more than 1 Unique Army Card with the same name. You may select any number of the same Common or Uncommon Army Cards with the same name.
- Hero / Squad: Hero cards feature a single figure, capable of acting on their own in the heat of battle. Squad cards feature 2 or more figures who act together.
- Class: The type of figure. If a card has 2 classes separated by an "&", treat it as having both for any game effects.
- Personality: The figure's dominant behavior in the world of Heroscape.
- Size: The overall weight category of the figure.
- Height: The number of levels tall the figure is.
- Special Power(s): Most figures have 1 or more special powers that allow them to go above and beyond the standard moving, attacking, and defending.
- Portrait: An image of the figure or figures whose Army Card this is.
Example Army Card (Gelryie Vanguards, as printed on page 4 of the Master Game Guide): Affiliation: Vydar. Name: Gelryie Vanguards. Species: Gelryie. Hero / Squad: Common Squad. Class: Vanguard. Personality: Fierce. Size: Medium. Height: 5. Special powers:
- Tidal Advance: At the start of each round, after placing Order Markers, you may move each Fierce and Unfathomable figure you control up to 1 space for each of your Order Markers on the Gelryie Vanguards.
- Defend the Deep: A Gelryie Vanguard adds 2 to its Defense Value when it is on a water space or when it defends against an attack from a figure that has height advantage.
- Swim: Gelryie Vanguards do not have to stop their movement when entering a water space.
Move 5. Range 1. Attack 3. Defense 2. Points 65.
The Battle Begins!
Each game of Heroscape is played over several rounds. A round consists of 3 Player Turns for each player. During each of your Player Turns, you will reveal an Order Marker on 1 of your Army Cards, then move and attack with the figure or figures represented by that Army Card.
Each round of play consists of the following steps:
- Place Order Markers
- Roll for Initiative
- Take Player Turns
- Move the Round Marker ahead to the next number
These 4 steps are explained in detail below.
1. Place Order Markers
During the Place Order Markers step, you must decide which Army Card you'll use on each of your 3 Player Turns. Place Order Markers on those cards: "1" for your first Player Turn, "2" for your second turn, and "3" for your third. You may place 2 or more Order Markers on the same card if you want to use that card for 2 (or even all 3) of your Player Turns that round. The "X" Order Marker does not have any intrinsic effect; it is a decoy to prevent your opponents from knowing which numbered Order Markers you actually intend to use. Place it carefully to misdirect your opponent, or to trigger the special powers of certain figures. You cannot place Order Markers on Army Cards that are not in your Army.
Players place their Order Markers at the same time. Place your Order Markers with the numbers facing you, so your opponent can't see them. Be careful how you place them! You usually cannot change them later, and must use those figures in that order during the round.
2. Roll For Initiative
After placing Order Markers, each player rolls a 20-sided die for Initiative to determine who goes first. The player who rolls the highest result has the Initiative and will take the first Player Turn this round. In case of a tie, both players reroll their 20-sided die.
3. Take Player Turns
During a round, players alternate taking Player Turns (unless the scenario specifies otherwise). To begin, the player with Initiative reveals their "1" Order Marker on 1 of their Army Cards and moves and attacks with the corresponding figures. Then, the opposing player reveals their "1" Order Marker and does the same. Play then passes back to the player with Initiative, who reveals their "2" Order Marker and takes another Player Turn. Play continues in this way until each player has revealed their 3 numbered Order Markers and taken 3 Player Turns. A Player Turn consists of the following steps, in this order:
Reveal Order Marker
Begin your Player Turn and reveal the next Order Marker in the sequence, laying it number side up on the Army Card it was placed on. Game effects that happen "before revealing an Order Marker" are also part of that Player Turn.
Take Army Card Turns
Within each of your Player Turns you will take turns with 1 or more Army Cards. Typically, a player will take a turn with the Army Card beneath the Order Marker they just revealed. However, some special powers such as the Frostclaw Paladin's Jandar Champion Bonding allow you to take turns with other Army Cards as well.
Move Figures
At the start of an Army Card's turn you may move a number of figures equal to those pictured on that Army Card. If it is a Common Army Card, you may move a number of figures equal to the number of silhouettes depicted on the card. Any figure that is chosen to move is considered activated (even if it moves 0 spaces). Moving figures follows these rules:
- Normal Movement: You can move a figure in any direction a number of hexagonal spaces up to the Move Value on its Army Card. Uneven terrain may limit their movement, as you'll soon see.
- Fitting Onto a Space: A figure does not need to check to see if it fits on each space as it moves; it just needs to fit into its final position with its base lying flat on the battlefield and occupying only the number of spaces equal to its base size (single or double-space), without overlapping any additional spaces. When attempting to fit a figure onto the battlefield, there are some exceptions to the normal state of play:
- Opposing miniatures can prevent a figure from being placed on a space if the miniature protrudes onto that space, even if that space is otherwise empty. For example, if Xenithrax the Vine Weaver's tail overlaps a space such that a figure cannot be placed fully and flatly on that space, the figure cannot be placed. However, players may not intentionally position a figure's sculpt to prevent other figures from occupying spaces adjacent to them. If a player wishes to move a figure to a space next to another figure and that space is blocked by a portion of that other figure, both players must turn, lift, or flip the involved figures until both figures can fit if possible.
- A double-space figure can end its movement with half of its base overlapping a Height 0 tile.
- Obstacles: Walls, trees, and other big barriers are known as "obstacles." A figure cannot move through or onto obstacles.
- Overhangs: A figure cannot move through an arch, overhang, door, or other similar terrain feature if the figure's height exceeds the "gap" (the height differential between the space's height and the terrain feature's level). If the overhanging feature spans multiple spaces, a figure's height cannot exceed the shortest gap it is moving through.
- Engaged: A figure that is adjacent to an enemy figure or that is using a special power to move through an enemy figure is engaged with that figure.
Moving Through Overhangs
Diagram captions:
- Bok-Bur-Na is Height 5, so he can walk under the overhang on the left because the gap is 5 high. He may not walk through the overhang on the right because the gap is only 4 high.
- You can move Scarlett a number of same-level spaces equal to her Move Value of 6. She cannot pass through the wall or the enemy figures.
- You must count 3 spaces for Scarlett to move up onto this ledge. Count 1 for each new level and 1 for moving onto a new space.
- To get down from this ledge, Scarlett counts only 1 space for this move.
Attack with Figures
Resolve any game effects that occur "after moving and before attacking," even if you have moved no figures. Then, figures represented by your chosen Army Card that are within Range of another figure and have line of sight can attack. If no figure on your Army Card meets these 2 conditions, you cannot attack.
If the chosen Army Card is a Common Army Card, you may attack with a number of figures equal to the number of silhouettes depicted on the card. Figures activated by moving this turn do not have to attack, but the total number of activated figures cannot exceed the number pictured on the Squad's Army Card (unless they have a Special Power that allows them to activate more).
For example: There are 3 Ranoc Vipers pictured on the Ranoc Vipers Army Card. A player who controls 6 Ranoc Viper figures moves 2 Vipers during the Move Figures step of their Player Turn. They are still able to attack with up to 3 Ranoc Vipers during Action 3: Attack with Figures on the Army Card (optional). 1 of these attacks can come from a Viper that has not moved, thus activating it; the other 2 must come from the 2 previously-activated Vipers.
In addition, attacking figures must obey the following rules:
- Engagement: A figure that is engaged with 1 or more enemy figures can target only figures it is engaged with for attacks, and does not require line of sight to attack an engaged target.
- Range: A targeted figure must be within the attacking figure's Range. When checking Range, do not count extra spaces for any difference in levels. If the distance between your figure and the target figure includes an area with no spaces (for example, near the edge of the battlefield), you can still attack it but you must also count the empty spaces to check the Range. A figure with a Range of 1 can attack only adjacent figures.
- Line of Sight: Figures in the Master Game have a green Target Point and a red Hit Zone illustrated on their Army Card. To determine if the attacking figure has line of sight, check its Target Point and the target figure's Hit Zone. Then get behind the attacking figure and look to see if its Target Point can "see" any part of the target figure's Hit Zone. If it can, the attacker has line of sight.
Height Advantage
If the base of 1 figure is on a higher level than the base of another figure (no matter the height of each figure), the higher figure has height advantage against the lower figure. While attacking with a normal attack or defending against an attack from a figure, the figure with height advantage rolls 1 additional die. Height advantage may also be referenced by certain special powers. Destructible objects are treated as figures during an attack and can therefore have height advantage, and figures can have height advantage against destructible objects. In rare cases, a figure may gain extreme height advantage against another figure. If a figure is more than 10 levels above the base of another figure, it rolls 2 additional dice for height advantage (instead of 1).
Resolving a Master Game Attack
For each attacking figure, follow these steps:
- Declare Attack: Announce which 1 of your figures is the attacker, whether it is using its normal attack or a special attack, and which figure it is targeting.
- Roll Attack Dice: If making a normal attack, the attacker rolls a number of combat dice equal to the Attack Value on its Army Card, adding any extra dice for height advantage, special powers, and Glyphs, hoping to roll skulls. If making a special attack, the attack cannot be modified by Glyphs, other special powers, or height advantage.
- Roll Defense Dice: The defender rolls a number of combat dice equal to the Defense Value on its Army Card, adding any extra dice for game effects like height advantage, special powers, and Glyphs, hoping to roll shields. The defender can roll these extra dice even against a special attack.
- Compare Results: If the attacker rolls more skulls than the defender rolls shields, the attack is successful! For each skull not blocked by a shield, the defender takes 1 wound.
Destroying Figures
Attacks and special powers can cause figures to take wounds. When a figure takes a wound, place 1 Wound Marker on its Army Card (or at its base if it is Common or a Squad figure). When a figure has Wound Markers equal to or greater than the Life Value on its Army Card, it is destroyed. The player who controls the destroyed figure places it on its Army Card and returns any Wound Markers that figure had to the supply.
Master Game Attack Examples
Agent SI-4X is declared as the attacker and targets Cainak, Private Eye. With a Range Value of 5, SI-4X has Cainak in range. SI-4X's Target Point is his head, and from that point he can see the Hit Zone on Cainak's figure, so he has line of sight to Cainak. SI-4X has an Attack Value of 2 and therefore rolls 2 combat dice when he attacks: 2 skulls for the attacker.
Cainak has a Defense Value of 3. The base of her figure is also on a higher level than the base of SI-4X's figure, giving her height advantage. Height advantage grants Cainak 1 additional combat die for her defense, so she rolls 4 total combat dice: 2 shields for the defender.
The defender rolled the same number of shields as the attacker, so they blocked the attack. No wounds are taken.
Cainak Returns Fire! On Cainak's turn, she wants to attack SI-4X. Cainak has a Range Value of 5, and has SI-4X in range and line of sight. She attacks from her elevated position! Cainak has an Attack Value of 4 and height advantage, so she rolls 5 total combat dice: 3 skulls for the attacker.
SI-4X defends! He has a Defense Value of 5. In addition, his Obfuscation Matrix Special Power means he counts as being on a shadow space, which provides an extra defense die while defending. Therefore, SI-4X rolls 6 dice against Cainak's attack: 2 shields for the defender.
SI-4X rolled fewer shields than Cainak rolled skulls, so Cainak's attack succeeds! 1 skull was not blocked by shields, so SI-4X takes 1 wound. He has a Life Value of 3, so he is not yet destroyed and remains on the battlefield.
Destroyed Figures
After a figure is destroyed, the text on its Army Card no longer applies to that figure unless:
- That text references destroyed figures. For example, the Revnan Acolytes Risen By Revna ability says "At the start of each round, before placing Order Markers, you may place one of your destroyed Revnan Acolytes onto an empty space adjacent to a Hero you control who follows Revna."
- The text is part of a single attack or effect that affects multiple figures. In these cases, the attack or effect will still affect the remaining figures. For example, if a COBRA Flight Pod uses its Air-To-Ground Missile Special Attack to target an adjacent figure and is destroyed by its own attack, other affected figures must still roll defense dice.
- The game effect has a specific duration. For example, Dorim the Bulkhead Brawler's Charge!!! ability is in effect after it's triggered and until the next time his controlling player reveals an Order Marker, even if Dorim is destroyed in the interim.
By contrast, Crimson Widow's Pirate Commander ability does not reference destroyed figures and does not have a specified duration, so it ceases to function if Crimson Widow is destroyed.
Special Attacks
Some figures have special attacks on their Army Cards. These attacks can be used instead of a figure's normal attack, and each figure in a Squad can choose whether to use its normal or its special attack. The attack dice of special attacks cannot be modified by any game effect except their own text.
Attacks Against Multiple Figures
Some special attacks can affect multiple figures simultaneously with a single roll of the attack dice. These attacks obey the following rules:
- If the attack targets a single figure but affects other figures, the attacker needs line of sight only to the targeted figure. For example, Killian Vane III targets an enemy figure in line of sight with his Blunderbuss Special Attack. If there is another enemy figure adjacent to the target behind a wall and not in line of sight, that figure is still affected by the attack. Some attacks, like Line X attacks and Moltenclaw's Burning Breath Special Attack, specify that line of sight is required for all affected figures.
- If an engaged figure uses a special attack that affects multiple figures, it must target a figure it is engaged with. Figures it is not engaged with may still be affected. For example, if Killian Vane III uses Blunderbuss Special Attack while engaged, he must target a figure he is engaged with. All figures adjacent to the target are also affected, (except for Killian, because his card says he cannot be affected) even if they are not engaged with Killian.
- When an attack affects multiple figures simultaneously, any figure that was targeted rolls defense dice first. Then, the attacking player chooses the order in which other affected figures roll defense dice.
Attacks That Draw a "Straight Line" Through Multiple Figures
- Some special attacks, such as the Twister Special Attack used by Ewashia, Master of Tides, require players to draw a straight line from the initial target a certain number of spaces, affecting each figure in those spaces. Affected figures roll defense dice separately, starting with the initially targeted figure and proceeding along the line in sequence until all figures have made their defense rolls.
- Other special attacks, such as Decker the Burrow Breaker's Drill-Drive Special Attack, trace a straight line through other figures as the attacking figure moves along that line. In these cases, affected figures roll defense dice separately in the order they were moved through.
Special Attack Keywords
Some special attacks contain keywords in their subheader. These keywords stand in for rules that are often too wordy to easily fit on a card. The rules for these keywords can be found below:
- Explosion X: A special attack with "Explosion X" in the subheader requires line of sight only to the initial target of the attack. For an Explosion 1 attack, all figures adjacent to the target are also affected. For an Explosion 2 or higher, all figures within X spaces of the initial target (friendly and enemy) are also affected. For example, an Explosion 1 Special Attack affects the initial target and all figures adjacent to that target. An Explosion 2 Special Attack is applied to the initial target and all figures within 2 spaces of that target. After a figure is chosen as the initial target, the attacker rolls dice equal to the value of the attack once for all figures affected by the attack. Affected figures roll defense dice separately, starting with the initial target of the attack and then proceeding in an order of the attacker's choice.
- Note: The attacking figure can be affected by its own attack. If the attacking figure is destroyed during an Explosion attack, all affected figures must still defend.
- Line X: A special attack with "Line X" in the subheader follows a unique resolution sequence. To resolve a Line X attack, choose a number of spaces equal to the X value in a straight line away from the attacking figure, beginning with a space within 1 space of the attacking figure. All figures on those spaces who are in line of sight are affected by the Line attack, regardless of elevation. Roll attack dice equal to the value of the attack once for all figures affected by the attack. Affected figures roll defense dice separately, starting with the figure closest to the attacker and proceeding along the line in sequence until all figures have made their defense rolls.
- Note: If a figure uses a Line attack into an overhang, it affects the figures on all levels in the line of attack, as long as that attacking figure has line of sight to those figures. In this case, the attacker chooses the order in which those attacks are resolved.
Check Victory Conditions
At the end of each Player Turn, players check the victory conditions for the scenario they are playing. If a single player has achieved the victory conditions, that player is the winner. If multiple players have satisfied the victory conditions, the game is a draw. Otherwise, the game continues to the next Player Turn. If there are no more Player Turns left to resolve, move to the End of the Round.
Scoring
In cases where scoring is necessary, each player or team scores points for each of their Army Cards with figures still on the battlefield. Divide the points value of an Army Card by how many total Life that Army Card represents to determine how many points each Life is worth. Score points for each remaining Life a figure has if that figure is on the battlefield.
- Hero Example - Dorim the Bulkhead Brawler: Dorim the Bulkhead Brawler's Points value is 100 and his Life Value is 5, so each Life is worth 20 points. If he ends the game with 3 Wound Markers on him, he has 2 Life remaining and scores 40 points.
- Squad Example - Elites of Ullar: Elites of Ullar have 2 Life each, have 3 members to a squad, and a squad is worth 105 Points. So, each Life is worth 17.5 Points. If a player ends the game with 5 Elites of Ullar on the battlefield, and 3 of those have Wound Markers, then they have 7 Life of Elites on the battlefield and score 122.5 Points.
4. End the Round
Resolve any end-of-round effects and check victory conditions. If no players have achieved the victory conditions, remove all of your Order Markers from your Army Cards and advance the Round Marker on its track. A new round then begins; repeat the steps above until the game concludes!
Special Powers
Many Army Cards feature powers that change the way its figures interact with the game. When a special power contradicts the core rules, the special power takes precedence. If 2 special powers contradict each other, "cannot" overrides "can" and "may."
Clear Sight
Many special powers require "clear sight" to the target figure, which is different from line of sight. To determine if a figure has clear sight to another figure, get behind the figure's Target Point and determine if it can "see" any part of the target figure (even if that part is outside of the figure's Hit Zone). If it can, it has clear sight to the target figure. Figures do not have clear sight to themselves.
Some special powers require clear sight to a target space. A figure has clear sight to a space if the space in question is its own space or it has clear sight to a figure that occupies the space in question. If there is no figure on a space, place a Wound Marker in the middle of that space. If the figure has clear sight to the Wound Marker, it has clear sight to the space. Remove the Wound Marker after determining clear sight.
Special Power Keywords
Some special powers are represented by keywords. These keywords stand in for rules that are often too wordy to easily fit on a card. The rules for these keywords can be found below.
Flying
A figure with the Flying Special Power never takes falling damage and may choose to fly at any point during a non-placement movement made by the figure's controller or their teammate. When the figure chooses to fly, each figure it is engaged with may make a leaving engagement attack against it. While the figure is flying it ignores all elevations and is not considered to occupy any space that it passes over. This means that:
- It is not adjacent to (or engaged with) any figures.
- It may pass over any figures, even figures that would normally disallow other figures from entering their space.
- It ignores all terrain effects, such as water and molten lava. It may pass over any space occupied by an obstacle, such as a tree or bush.
- It ignores effects of all Glyphs it passes over. That includes not having to stop in a space with a Power Glyph.
- It is not affected by any special powers that require adjacency or clear sight or line of sight. For example, a flying figure is not affected by Cyberclaw or Engagement Strike while it is flying (Cyberclaw still prevents a figure from beginning to fly). Figures that are flying can ascend overhangs, but not pass through the bottom of them.
When a flying figure ends its movement it must land on its current space. When doing so it enters that space and may trigger effects that occur when a figure enters a space, such as Girushia, Grove Keeper's Wicked Thorns. It is also affected by the terrain it lands on, if that terrain has an effect on figures that enter its space. The figure is then considered to be on that space until it next starts to fly, and it may continue its movement.
Stealth Flying
A figure with the Stealth Flying Special Power has all of the same benefits as a figure with flying, except that it does not take any leaving engagement attacks when it starts to fly.
Simultaneous Effects
Resolve 1 effect at a time. After 1 given effect is resolved, other effects can resolve only if their conditions are still met.
- If a player has multiple effects they control that can be applied at the same time, they may choose which to resolve first.
- Effects in a given time window that take effect "immediately" are resolved before any effects that do not say "immediately".
- Effects that require moving out of a timing window (e.g. powers whose effect involves taking a turn with a card, or an effect that causes you to repeat the move or attack actions) cannot be resolved until all other effects that could be applied in that timing window are resolved.
- For example, Queen Maladrix the Conqueror is adjacent to 2 Deathreavers. She attacks 1 Death Reaver and destroys it. Queen Maladrix has Double Attack, which allows her to make an additional normal attack after attacking. However, the above rule supersedes that additional attack, allowing the Deathreavers player to move up to 2 Deathreavers before Maladrix makes her second attack.
- If there are multiple effects that could resolve at the same time, resolve effects in this order (UTGAR):
- Unit Effects: Effects caused by Army Cards, including effects that have been added to a unit by Treasure Glyphs on their Army Card.
- Terrain Effects: Effects caused by map tiles, obstacles, or destructible objects.
- Glyph Effects: Effects caused by Power Glyphs.
- All Remaining Effects: Anything not covered by the previous timing steps.
- For example, at the end of a round a player has 1 Exile of the Sundered Sea on a lava field and 1 Exile on a Glyph of Wannok. Because the lava field is a terrain effect, that player must first roll for lava field damage, then roll for the Glyph of Wannok.
- If there are multiple effects within a single timing window (such as multiple Army Card effects within the Unit Effects window), the player currently taking a Player Turn resolves any effects that they control first.
Double-Space Figures
Double-space figures occupy 2 spaces on the battlefield, and are subject to a slightly different set of rules than single-space figures, as follows:
- When moving a double-space figure, decide which end to lead with (for example, the front end or the back end). Then move the figure so that the other end enters the same spaces that the leading end just left.
- You must always end a double-spaced figure's move on 2 spaces of the same level. At the end of its move, a double space figure can be placed onto 2 spaces even if its base does not lie entirely flat, provided those spaces are on the same level and the game element preventing it from lying flat is a Glyph or Height 0 terrain tile placed on top of 1 of those spaces. For example, a water tile placed by Ewashia, Master of the Tides' Create Water ability does not add height but can prevent a double-space figure from lying perfectly flat. In this case, the figure can still be placed.
- A double-space figure does not have to stop when it moves over 1 water space between 2 land spaces; but it does have to stop if it moves onto 2 adjacent water spaces.
- You can flip the facing of a double-space figure only at any point during its movement (including before and after moving it) and when adjusting a double-space figure so that figures can fit beside it.
Diagram caption: Halushia, Scion of the Wild moves 6 spaces, front end first, with the back end following along the same spaces. Notice that Halushia counts the side of the land space when moving up from the water space. His move ends across the water on 2 land spaces of the same level. He can move up to 7 spaces with his Move Value of 7. But he doesn't have to! You can stop a figure's movement strategically to stay out of range of enemy attacks, or get ready to for future turns.
Determining Range and Line of Sight to a Double-Space Figure
- When determining range to a double-space figure, use the closest part of its base. For example, a Greatbow Archer is targeting Queen Maladrix. The front half of her base is 6 spaces away, while the back half is 7 spaces away. Queen Maladrix is at range 6 of the Greatbow Archer.
- It is possible to have range to the front half of a double-space figure, but for line of sight to be obstructed to the front half of that figure because of a cliff or other obstacle. As long as line of sight can be drawn to another part of the figure's hit zone, it counts as being in range of the front half and within line of sight.
- Diagram caption: Bok-Bur-Na has a Range Value of 5. He is at Range 5 of the back half of Halushia, but does not have Line of Sight to it. However, he has Line of Sight to the front half of Halushia, so Bok-Bur-Na can attack.
- A double-space figure that has been flipped in order to fit another figure on an adjacent space may be flipped to its original orientation (temporarily displacing adjacent figures) before the attack step of its turn and then must be flipped back to fit at the end of its turn.
Terrain
Many tiles and obstacles have additional game effects, as follows:
Height 0 Tiles
Height 0 tiles are not considered land tiles for the purposes of game effects.
Height 1 Tiles
Height 1 tiles are considered land tiles for the purposes of game effects.
- Lava Field: At the end of the round, each figure on a lava field space must roll to see if it takes lava field damage. For each of their figures on one or more lava field tiles, a player must roll 1 combat die. If they roll a skull, that figure takes 1 wound.
- Road: If a figure's normal move consists of road spaces, including the starting space, it may add an additional 3 spaces to its move. The 3 additional spaces must also be on road spaces. A Flying figure must choose not to fly in order to receive this benefit.
Ice
- Normal Ice: There are no special rules for moving onto or through normal ice tiles.
- Slippery Ice: Some scenarios designate the ice tiles on the map as "slippery ice." Figures moving on slippery ice must count each space moved as 2 spaces. Flying figures that land on slippery ice spaces require 2 spaces of movement to do so (1 to enter the space, and an additional 1 to land).
- Thin Ice: Some scenarios designate the ice tiles on the map as "thin ice." When a figure ends movement on a thin ice tile, roll the 20-sided die. If the result is equal to or lower than that figure's height, it cracks the surface and takes 1 wound from the jagged edges and freezing waters. If the result is a 1, the figure takes 2 wounds.
Lava
- Molten Lava: When a figure moves onto a molten lava space from any other space (even from another molten lava space), it must end its move there. Then, you must roll the 20-sided die. If you roll a 20, the figure has miraculously survived. If you roll a 1–19, the figure is destroyed. When a double-space figure stops in 1 or 2 molten lava spaces, it must roll only once for molten lava damage.
- Cooling Lava: Some scenarios designate the molten lava tiles on the map as "cooling lava." When a figure moves onto a cooling lava space from any other space (even from another cooling lava space), it must end its move there. Each time a figure enters a cooling lava space, it takes 1 wound. If a figure starts its turn on a cooling lava space, roll 1 attack die. If the result is a skull, the figure takes 1 wound. The Lava Resistant Special Power protects against cooling lava.
Shadow
A Small, Medium, or Large figure on 1 or more shadow tiles adds 1 to its Defense Value.
Water
- Water: When a single-space figure moves onto a water space from any other space (even from another water space), it must end its move there. A double-space figure does not have to stop when it moves over 1 water space between 2 land spaces; but it does have to stop if it moves onto 2 adjacent water spaces.
- Wellspring Water: A Wellspring water tile counts as a water tile. When a figure moves onto a Wellspring water space from any other space (even from another water space), it must end its move there. At the beginning of each round, each Hero on a Wellspring water tile may roll the 20-sided die. If the result is a 12 or higher, that Hero may remove 1 Wound Marker from its Army Card. If the result is a 1 or 2, that Hero takes 2 wounds.
- Swamp Water: A swamp water tile counts as a water tile except figures do not have to stop their movement when they land on it and falling onto swamp water does not prevent falling damage.
- Toxic Water: A toxic water tile counts as a water tile except figures do not have to stop their movement when they land on it. A figure on a toxic water space subtracts 2 from its Defense Value. A double-space figure that is on both toxic land and toxic water tiles subtracts only 2 from its Defense Value, not 3.
Toxic Land
A figure on a toxic land space subtracts 1 from its Defense Value. A double-space figure that is on both Toxic Land and Toxic Water tiles subtracts only 2 from its Defense Value, not 3.
Wood
Each scenario will specify whether wood tiles are considered decking tiles or road tiles.
- Decking: There are no special rules for moving onto or through decking tiles.
- Road: Wood tiles that are designated as road tiles count as roads and have the same effect. Road tiles made of wood and stone are interchangeable and only differ cosmetically. A figure may benefit from the road effect as long as their entire movement consists of road spaces, even if those are a mix of wooden and stone roads.
Snow
- Normal Snow: There are no special rules for moving onto or through normal snow tiles.
- Heavy Snow: Some scenarios designate the snow tiles on the map as "heavy snow." Figures moving on heavy snow must count each space moved as 2 spaces. Flying figures that land on heavy snow spaces require 2 spaces of movement to do so (1 to enter the space, and an additional 1 to land).
Obstacles
Figures cannot move onto or through an obstacle. For obstacles that sit between spaces, if that obstacle is between 2 figures, both figures' heights must be higher than the obstacle to be engaged. If either figure's height is equal to or lower than the obstacle, they are not engaged. Figures can move over obstacles that sit between spaces by counting the height of the side of the obstacle it is moving over as spaces (as if moving to a higher level). A figure cannot move over an obstacle if it cannot move enough spaces to get to an empty space on the other side.
Cannons: Instead of attacking normally, a figure that is adjacent to a cannon and is not engaged may rotate the cannon on its space, then perform a Cannon Fire Special Attack. For this attack, measure line of sight from the barrel of the cannon and measure range from the cannon's space. Each cannon can only be used to make this special attack once per Player Turn.
Cannon Fire Special Attack: Range 8. Attack 3. Explosion 1. Destructible Objects never roll defense dice against Cannon Fire Special Attack.
Cannons are Height 2.
Evergreen Trees: Evergreen trees can be placed onto any spaces where they fit. Snow Fields of Valhalla and Forests of Valhalla evergreen trees are Height 10, 12, and 15, respectively.
Fortified Walls: Fortified Walls can be placed on any spaces where they fit. You cannot place them on spaces that do not have hex interlocks.
Fortified Walls are Height 7. Note: Fortified walls are referred to as "COBRA fortifications" in the Rumble at Rift Battle Box.
Laur Jungle Trees and Laur Underbrush: Laur jungle trees and Laur underbrush can be placed onto any spaces where they fit, and should be locked into at least two other hex edges for stability. A Small, Medium, or Large figure adjacent to a jungle tree or underbrush rolls 1 additional defense die against attacks from non-adjacent figures.
Laur jungle trees are Height 13, 14, and 15, respectively. Laur underbrush is Height 10.
Laur Walls: Laur walls consist of columns which sit on top of hexes and wall pieces that are suspended between those columns.
Laur walls are Height 9.
Ship Pieces: The attachment points on the lower level of ship pieces should be connected to enough terrain tiles to ensure stability. Terrain tiles may be attached to the upper level of a ship piece.
Ship pieces are Height 9 from the outside, Height 8 from the inside while on the lower level, and Height 2 from the inside while on the upper level.
Stone Walls: Stone walls can be used in a variety of ways. You may build a bridge by combining them with the 5-space road tile. You may use the stone walls together to create a long wall, or you may use them alone on different parts of the battlefield as you see fit.
Stone walls are Height 3 on the outside and Height 2 on the side that is connected to terrain.
Outcrops: Glaciers, rock outcrops, and lava rock outcrops are all considered outcrops. Outcrops must be placed on special Height 0 tiles with holes. Special Height 0 tiles with holes may be used without outcrops on top. If used in this way, they follow rules for their terrain type. The 3-hex outcrop must be placed on 3 special Height 0 tiles with holes arranged so that the holes are located on the outermost points. The 1-hex outcrop is Height 7. The peaks of the 3-hex outcrop are Height 5, 7, and 9, respectively.
Destructible Objects
Destructible objects can be destroyed by attacking them with figures or dealing wounds to them with special powers. Destructible objects obey the following rules:
- Destructible objects are not figures but can be targeted and attacked as if they were normal figures, with some exceptions. A destructible object can be targeted or attacked only by normal attacks, special attacks, or special powers that only inflict wounds. Special powers that do not inflict wounds cannot affect a destructible object unless specifically stated in the power. Special powers or special attacks that mention "destroy" as one of the effects cannot target or affect a destructible object unless specifically stated in the power. Special powers limited by size, species, class, or personality cannot affect destructible objects.
- A destructible object is considered a figure for the purposes of engagement only when a figure targets it for an attack or special power.
- A destructible object is considered a figure for the purposes of adjacency and engagement only when a figure targets it for an attack or special power. Powers that depend on adjacency or height advantage can modify an attack against a destructible object.
Shroudshrooms: A shroudshroom's Life Value can be tracked by using the holes on top as a receptacle for Wound Markers. A young shroudshroom is Height 7. A mature shroudshroom is Height 10. An ancient shroudshroom is Height 13.
Advanced Range and Clear Sight
Figures like Corvynn the Rotbeak and terrain like Shroudshrooms affect the standard rules for range and clear sight in complicated ways.
Diagram caption (Corvynn the Rotbeak): Sudema is within Range 5 of "Blink" Dawson for her Petrifying Glare special attack, but cannot determine clear sight to Blink because she is standing next to a Young Shroudshroom. However, she can use Corvynn the Rotbeak's Eyes in the Sky special power to determine clear sight from Corvynn's position. Sudema is not within Range 5 of Blink for her Petrifying Glare special power. However, Corvynn's Eyes in the Sky special power allows the Undead Sudema to measure Range from Corvynn when using Corvynn to determine clear sight. Blink is 3 spaces away from Corvynn, so Sudema can use Petrifying Glare on Blink.
Rope Ladders
A figure is at the top of a rope ladder if it is on a space the rope ladder is attached to (labeled 1). A figure is at the bottom of a rope ladder if it is on the space below the rope ladder (labeled 2) and the bottom of that rope ladder is no higher than the figure's height above that figure's base.
Diagram caption: Nishi Souta is a Medium single-space figure with Height 4. The bottom of the rope ladder is also Height 4, so Nishi can climb it. To climb the ladder, he counts 1 space of movement to get to the space at the bottom of the rope ladder, 1 space to move up the rope ladder to the top of the stack of tiles, and 1 space to move onto the space at the top of the ladder. Nishi Souta is at the top of this rope ladder. Agent SI-4X is at the bottom of the rope ladder. Sudema is not at the bottom of the rope ladder because she is not on the space below the rope ladder. Nishi Souta and SI-4X can consider each other adjacent while attacking.
Other Terrain
Rope Ladders: Rope ladders are affixed to the edge of a terrain tile, and allow adjacent figures to quickly climb up and down and attack figures at the other end.
A figure is at the top of a rope ladder if it is on a space the rope ladder is attached to. A figure is at the bottom of a rope ladder if it is on the space below the rope ladder and the bottom of that rope ladder is no higher than the figure's height above that figure's base.
While moving, a Small, Medium, or Large single-space figure at the bottom of a rope ladder may count the distance to the space at the top of that rope ladder as 1 level.
While moving, a Small, Medium, or Large single-space figure at the top of a rope ladder may count the rope ladder as 1 level of elevation. If the rope ladder ends 1 or more spaces above the space below it, the figure will fall the remaining distance.
While attacking, a figure that is at the top or bottom of a rope ladder may consider itself to be adjacent to the figure at the other end of that same rope ladder.
Glyphs
Depending on the Scenario you are playing, Glyphs are placed on top of battlefield spaces either power-side up or symbol-side up.
Power Glyphs
When a figure moves onto a Power Glyph that is symbol-side up, it must stop there and turn the Glyph power-side up; the powers of the Glyph take effect immediately. When a figure moves onto a power-side-up Glyph, it must stop and activate the Glyph's effect.
Permanent Power Glyphs
The power of each permanent Power Glyph is in effect for as long as a figure is standing on it.
- Glyph of Astrid (Attack +1): All figures in your Army add 1 to their Attack Value.
- Glyph of Brandar (Artifact): The rules for this Glyph vary, depending on the Scenario.
- Glyph of Crevcor (Common Attack +1): All Common figures in your Army add 1 to their Attack Value.
- Glyph of Dagmar (Initiative +8): When you roll for initiative, add 8 to your die roll.
- Glyph of Gerda (Defense +1): All figures in your Army add 1 to their Defense Value.
- Glyph of Ivor (Range +4): All figures in your Army with a Range Value of 4 or more add 4 to their Range Value.
- Glyph of Jalgard (Defense +2): All figures in your Army add 2 to their Defense Value.
- Glyph of Lodin (Lucky 20-Sider): Whenever you roll the 20-sided die, you may add 1 to your die roll.
- Glyph of Proftaka (Pit Trap): A figure cannot move off the Glyph of Proftaka unless a friendly figure occupies an adjacent space.
- Glyph of Rannveig (Wind): All figures with the Flying Special Power lose this power and cannot Fly while a figure is standing on the Glyph of Rannveig.
- Glyph of Thorian (Thorian): Opponents' figures must be adjacent to your figures to attack them with normal attacks.
Temporary Power Glyphs
The power of a temporary Power Glyph takes place only once. When 1 of your figures moves onto any of these Glyphs, follow its rules, then remove it from the game.
- Glyph of Erland (Summoning): When a figure you control lands on this Glyph, choose any 1 figure on the battlefield (yours, a teammate's, or an opponent's) and place it in an empty space within 1 space of the figure on this Glyph. Figures moved by the Glyph of Erland do not take leaving engagement attacks.
- Glyph of Felaron (Glyph Removal): Remove any other Glyph from the battlefield.
- Glyph of Haukeland (Healing): When one of your figures stops here, you may remove up to 3 Wound Markers from across any of your figures.
- Glyph of Kelda (Healing): Only figures with one or more Wound Markers can move onto this Glyph. When one of your figures ends its movement here, remove all Wound Markers from it. This Glyph cannot be placed symbol-side up in any scenario you may create.
- Glyph of Mitonsoul (Massive Curse): When a figure lands on this Glyph, all players must roll the 20-sided die for all their own figures. If a 1 is rolled, that figure is destroyed. On a 2 or higher, that figure is safe.
- Glyph of Nilrend (Negation): When a figure you control lands on this Glyph, you may choose any opponent's Unique Army Card and roll the 20-sided die. If you roll 1–4, nothing happens. If you roll 5–20, place the Gold Negation Marker on the chosen figure's Army Card. All of that figure's special powers are negated for the rest of the game.
- Glyph of Oreld (Intercept Order): When a figure you control lands on this Glyph, roll the 20-sided die. If you roll 1–9, nothing happens. If you roll 10–20, you may remove 1 random unrevealed Order Marker from an opponent's Army Card.
- Glyph of Quillivon (Sudden Movement): Choose up to 3 of your figures other than the one on this Glyph. You may move each of the chosen figures up to 5 spaces.
Treasure Glyphs
Treasure Glyphs obey the following rules:
- Treasure Glyphs do not force figures to stop when they move onto them.
- Only Unique Hero figures can attempt to pick up or activate a Treasure Glyph. Other figures can land on spaces with Treasure Glyphs, but they cannot attempt to pick them up or activate them unless otherwise stated.
- A Unique Hero figure that ends its movement on a space with a Treasure Glyph may attempt to pick it up or activate it, depending on the Treasure Glyph's individual rule.
- A Treasure Glyph that has been placed on a figure's Army Card affects only the figure that is carrying it unless otherwise stated.
- Treasure Glyphs cannot be traded between figures. Treasure Glyphs must first be dropped by 1 figure (either voluntarily while moving or by the figure being destroyed—see below), and then picked up by another figure at a later time.
- A Unique Hero can carry any number of Treasure Glyphs. At any point during your figure's movement, you may place a Treasure Glyph they possess power-side up in a space the figure occupies. That figure may then continue its movement. You cannot drop a Treasure Glyph onto a space that already has another Glyph on it.
If a figure carrying a Treasure Glyph is destroyed, the Glyph is placed power-side up in a space that figure last occupied. If that space already has a Glyph on it, the Treasure Glyph the figure was carrying is removed from the game. If a figure that is carrying more than 1 Treasure Glyph is destroyed, its controlling player chooses which Treasure Glyph to place in each space that figure occupied. Once every space the figure occupied has a Treasure Glyph in it, the remaining Treasure Glyphs (if any) are removed from the game.
Treasure Glyph Traps
If you are playing a Scenario that specifies traps, when a figure tries to pick up or activate a symbol-side up Treasure Glyph, before revealing it, it must roll a 20-sided die to see if a trap is activated.
- If you roll 1–5, you set off the trap! Leave the Treasure Glyph symbol-side up. The scenario-specific trap takes effect.
- If you roll 6 or higher, you don't set off the trap, and the figure reveals the Treasure Glyph and places it on its Army Card. That figure now controls the Glyph.
Figures never roll for a trap on a power-side up Treasure Glyph.
Permanent Treasure Glyphs
A permanent Treasure Glyph gives the figure certain abilities as long as they carry it.
- Bloodcursed Blade: When this Hero attacks an adjacent figure with a normal attack, add 1 skull to the roll. At the end of this Hero's turn, if no figure took a wound during that turn, this Hero takes 1 wound. A player cannot choose to drop the Bloodcursed Blade.
- Brandar's Chest (Artifact): The rules for this Treasure Glyph vary, depending on the Scenario.
- B.R.E.A.T.H.: This Hero gains the Heat Beam Special Attack.
- Heat Beam Special Attack: Line 6. Attack 4. After this Hero uses the Heat Beam Special Attack, if that figure is not a Scientist, destroy this Glyph. When this Glyph is removed from Gimbal's Army Card, remove the head from Gimbal's miniature.
- Brooch of Shielding (Disengage): This figure is never attacked when leaving an engagement.
- C.L.A.W.S.: This Hero gains the C.L.A.W.S special power.
- C.L.A.W.S.: When this Hero attacks an adjacent figure with a normal attack, before rolling attack dice, you may choose 1 figure that is also adjacent to this Hero. If the defending figure takes any wounds from this Hero's attack, the chosen figure takes 1 wound. After a Hero that is not a Scientist uses the C.L.A.W.S. special power, destroy this Glyph. When this Glyph is removed from Gimbal's Army Card, remove the arms from Gimbal's miniature.
- Giant Hunter Stone (+1 Die vs. Large or Huge): This figure adds 1 to its Attack and Defense Value when attacking or defending against Large or Huge figures.
- Gulløx Wing Render: While attacking an adjacent figure with a normal attack, you may re-roll 1 die that did not show a skull.
Tech Glyphs
Tech Glyphs are a subset of permanent Treasure Glyphs that typically provide once-per-round abilities to figures.
- Jump Pack: Before you start to move, you may flip this Glyph symbol-side up to gain the Flying Special Power for the rest of this movement. At the end of the round, flip this Glyph power-side up. Only Small or Medium figures may use this ability. When this Glyph is picked up, flip it symbol-side up.
- Nanite Shielding: Before rolling defense dice, you may flip this Glyph symbol-side up to add 1 automatic shield to your roll. At the end of the round, flip this Glyph power-side up. Only Small or Medium figures may use this ability. When this Glyph is picked up, flip it symbol-side up.
- Nanotoxin Coating: After you inflict 1 or more wounds with a normal attack against an adjacent figure, you may flip this Glyph symbol-side up to add 1 additional wound. At the end of the round, flip this Glyph power-side up. When this Glyph is picked up, flip it symbol-side up.
Temporary Treasure Glyphs
The power of each temporary Treasure Glyph takes effect at a time of your choosing, so choose wisely. A figure must be carrying the Treasure Glyph to activate its temporary effect. Once the effect completes, the Treasure Glyph is removed from the game.
- Belt of Giant Strength (Attack +2): This figure may use this belt before rolling attack dice for a normal attack against an adjacent figure. This figure adds 2 to its Attack Value this turn.
- Bracers of Teleportation (Teleport): This figure may use these bracers before moving. Instead of moving normally, you may place this figure on any same-level space(s) within 10 spaces of its current location. If this figure is engaged when it starts to teleport, it will not take any leaving engagement attacks.
- Cloak of Invisibility (Invisibility): This figure may use this cloak at any point during its turn. This figure has no visible Hit Zones and never takes leaving engagement attacks until the end of the current round or until it attacks with a normal or special attack, whichever comes first.
- Elixir of Speed (Move +4): This figure may use this elixir before moving to add 4 to its Move Value this turn.
- Potion of Healing (Heal 3 Wounds): This figure may drink this potion after revealing an Order Marker on its Army Card to remove up to 3 Wound Markers from this figure's Army Card.
- Ring of Protection (Defense +3): This figure may choose to use this ring after an attacking figure has rolled attack dice and before rolling defense dice to add 3 to its Defense Value for this attack.
- Scarab of Invulnerability (Ignore Wounds): This figure may use this Scarab whenever it receives 1 or more wounds. Roll the 20-sided die. If you roll 1–15, ignore 1 of the wounds just received. If you roll 16 or higher, ignore all wounds just received.
- Whetstone of Venom (Poison): This figure may use this Whetstone before rolling attack dice for a normal attack against an adjacent figure. If that figure takes at least 1 wound from that attack, it receives 2 additional wounds.
Ancient Artifact Treasure Glyphs
Ancient artifacts are powerful and rare Treasure Glyphs. Ancient Artifact Treasure Glyphs follow all rules for Treasure Glyphs with the following exception: an Army may control more than 1 ancient artifact Treasure Glyph, but an Army can never control more than 1 copy of the same Ancient Artifact Treasure Glyph. If at any point an Army would control more than 1 copy, all extra copies must be removed from the game.
- Bolt of the Witherwood (Enchanted Shot): After moving and before attacking with this figure, you may choose any opponent's figure within 5 clear sight spaces. Roll the 20-sided die. If you roll 1–15, remove this Glyph from the game and nothing happens. If you roll 16 or higher, remove this Glyph from the game and the chosen figure is destroyed.
- Revenant's Tome (Unnatural Revival): This figure may use this tome after revealing an Order Marker on its Army Card. Before taking that turn with this figure, place 1 previously destroyed Unique figure from your Army in any empty space(s) within 5 clear sight spaces of this figure. Immediately make a normal attack with the placed figure, then immediately destroy the placed figure. While the placed figure is on the board, all of its special powers are negated. The placed figure is considered to have a Life Value of 1 and is not affected by any special power on any Army Card while it is on the board.
Scenario Book
Introduction
Before beginning one of these scenarios, you and your opponent need to agree on a complexity level: Rookie, Seasoned, or Veteran. These levels allow you to play the same scenario but with varying amounts of special rules to either streamline or add depth to the experience. Rookie will always use Heroscape's Basic Game Rules. Seasoned will always use the Master Game Rules, with fewer scenario-specific Special Rules to look out for. Veteran is the most complex experience, offering more in-depth Special Rules to make each battle feel truly unique. There's no wrong choice: play from Rookie through to Veteran, or jump right in at whatever level feels best!
Note: the Basic Game Rules that the Rookie level calls for are printed in the Heroscape G.I. JOE Rulebook, which is not reproduced in this file.
Scenario Play
In this book you will find 3 battlefield maps and 3 Scenarios. Together, a battlefield and a matching Scenario will create a unique gameplay experience that sets the stage for your epic battles. Each Scenario in this book has optional complexity levels, allowing you to play with either the Basic or the Master Game rules. Both sets of rules can be found in the Heroscape G.I. JOE Rulebook.
The world of Valhalla is vast. Once you've played the Scenarios in this book, you are encouraged to create your own! Build unique battlefields, scribe epic special rules, and share them with your friends as you charge forth into Valhalla!
Battlefield Key
The graph below shows the type and color of each tile. As you build your battlefield, take note of the center and border colors, so you know which tile to use.
- Asphalt: black centers, 24 space tan borders.
- Concrete: light gray centers, with 7 space purple borders or 3 space black borders.
- Special Tiles:
- Toxic Land: red borders, black centers, with hazard. -1 defense.
- Toxic Water: blue borders, green centers, with hazard. -2 defense, counts as water for relevant special powers.
- COBRA Fortifications: pink.
- Shadow: dark blue borders, black centers. +1 defense for small, medium, & large.
The Tiles
The hex-shaped tiles come in various sizes and colors. You'll link them and stack them as shown on the following pages to build dramatic battlefields. The illustrations below show how to connect your tiles.
Some tiles have special rules that affect figures who move onto them. In this set, most tiles are simply ground to walk on. The following tiles have additional rules:
- Toxic Land: A figure on a Toxic Land space subtracts 1 from its Defense Value.
- Toxic Water: A figure on a Toxic Water space subtracts 2 from its Defense Value. A Toxic Water tile counts as a water tile, but figures do not have to stop their movement when they land on one.
- Shadow: A small, medium, or large figure on a Shadow tile adds 1 to its Defense Value.
The Glyphs
In the battlefield maps, Glyphs are represented by their key letters. When you build a battlefield that includes Glyphs, follow the Glyph Key below to see which ones to use.
Glyphs Key:
- Placed Power-Side Up: GLYPH OF BRANDAR: B
- Placed Symbol-Side Up: ?
Glyph Reference
The following Glyphs are featured in the Scenarios and figures from this Battle Box. Learn their abilities and use them to your advantage in battle!
- Brandar (Special): The rules of this Glyph vary, depending on the Scenario. Read carefully to discover what it does.
- Nanotoxin Coating (Tech): After you inflict 1 or more wounds with a normal attack against an adjacent figure, you may flip this Glyph symbol-side up to add 1 additional wound. At the end of the round, flip this Glyph power-side up. When this Glyph is picked up, flip it symbol-side up.
- Nanite Shielding (Tech): Before rolling defense dice, you may flip this Glyph symbol-side up to add 1 automatic shield to your roll. At the end of the round, flip this Glyph power-side up. Only Small or Medium figures may use this ability. When this Glyph is picked up, flip it symbol-side up.
- Jump Pack (Tech): Before you start to move, you may flip this Glyph symbol-side up to gain the Flying Special Power for the rest of this movement. At the end of the round, flip this Glyph power-side up. Only Small or Medium figures may use this ability. When this Glyph is picked up, flip it symbol-side up.
NOTE: TECH GLYPHS: Tech Glyphs are a special type of Treasure Glyph. Generally, they do not start on the battlefield, but instead in the possession of a figure. See the Heroscape G.I. JOE Rulebook for how to use Destro's Tech Glyphs. (Those rules are not reproduced in this file.)
Scenario 1: Rumble at the Rift
Map 1: COBRA Facility, Earth. The map's level diagram is not reproduced in this text; the Scenario refers to it for setup.
GOAL: Be the only player with figures remaining on the battlefield.
SETUP: Place all figures where shown on the map. If you are playing on Veteran difficulty, place the Glyph of Brandar where shown on the map.
VICTORY: When the other player has no figures left on the battlefield, you win! Or, at the end of Round 5, the remaining COBRA forces escape and the COBRA player wins.
SPECIAL RULES: Rookie: Play this game using the BASIC ruleset. Turn all Army Cards to their Basic sides.
SPECIAL RULES: Seasoned: Play this game using the MASTER ruleset. No additional Special Rules.
SPECIAL RULES: Veteran:
- Crumbling Architecture: The Rift's crackling energy has weakened the walls. Each COBRA Fortification can be destroyed by attacking it. Treat these Fortifications as Destructible Objects with 3 Life and 3 Defense for this scenario.
- The Rift: The Glyph of Brandar represents the nexus of the otherworldly portal. Over time, its pull grows stronger… After each player turn, the active player may choose 1 figure and move that figure directly toward the portal a number of spaces equal to the round number.
- To move toward the portal, count the minimum number of spaces between the figure and the portal (ignoring obstacles and height). While moving, the figure cannot enter a space where the minimum number of spaces between it and the portal is increased. Count elevation normally during this movement.
- If a figure moves onto the Glyph of Brandar, the figure is swept away to another world and removed from the battlefield.
Scenario 2: Mission Critical
Map 2: Toxic Pool, Valhalla. The map's level diagram is not reproduced in this text; the Scenario refers to it for setup.
GOAL: The G.I. JOE player needs to destroy COBRA's nanite vial before it can be activated. The COBRA player must activate their nanomachines and begin their conquest of Valhalla!
SETUP: Place the Glyph of Brandar where shown on the map. The G.I. JOE player places their 4 figures in the blue starting zone; the COBRA player places their 4 figures in the red starting zone. Both players place a Wound Marker on the "zero" space of their respective tracks.
VICTORY: Either player may win by advancing their Activation (COBRA) or Deactivation (G.I. JOE) tracker to its fourth and final space. Either player may also win by destroying all of their opponent's figures. If the game reaches the end of Round 6 without either player claiming victory, COBRA reinforcements arrive, preventing the G.I. JOE operation and winning the game for COBRA!
Tracker key (from the Scenario's tracker diagram): Activation (COBRA) and Deactivation (G.I. JOE) trackers, each with spaces 0, 1, 2, 3, and 4.
SPECIAL RULES: Rookie: Play this game using the BASIC ruleset.
- We Have It!: When a figure ends its movement on the Nanite Vial (Glyph of Brandar), that figure picks it up. Place it on that figure's Army Card.
- Download or Delete: When a figure ends its turn holding the Glyph of Brandar, that player advances their tracker 1 space.
SPECIAL RULES: Seasoned: Play this game using the MASTER ruleset.
- We Have It!: When a figure ends its movement on the Nanite Vial (Glyph of Brandar), that figure picks it up. Place it on that figure's Army Card.
- Download or Delete: Before revealing an Order Marker on a figure that is holding the Nanite Vial, the player revealing that Order Marker advances their tracker 1 space.
- Oops!: When a figure that is holding the Nanite Vial takes 1 or more wounds, the opposing player places the Nanite Vial on an empty space within 1 space of that figure.
SPECIAL RULES: Veteran: Play this game using the MASTER ruleset.
- We Have It!: When a figure ends its movement on the Nanite Vial (Glyph of Brandar), that figure picks it up. Place it on that figure's Army Card.
- Download or Delete: Before revealing an Order Marker on a figure that is holding the Nanite Vial, the player revealing that Order Marker advances their tracker 1 space.
- Oops!: When a figure that is holding the Nanite Vial takes 1 or more wounds, its controlling player must roll the 20-sided die. Subtract 5 from the result for each wound the figure has, to a maximum of minus 20. If the result is 5 or less, or if the figure holding the vial is destroyed, the figure drops the Nanite Vial! If the Nanite Vial is dropped, the opposing player places it on a space within 1 space of the figure who dropped it. If the Nanite Vial is placed on a space occupied by another figure, that figure immediately picks it up.
Scenario 3: Wherever There's Trouble
Map 3: Waypoint Waylay, Valhalla. The map's level diagram is not reproduced in this text; the Scenario refers to it for setup.
GOAL: G.I. JOE wants to rescue their mind-controlled comrades; COBRA wants to convince their renegades to return.
SETUP: Place the Glyph of Brandar power-side up where shown on the map. Player 1 places their 4 figures (Scarlett, Roadblock, Destro, and Storm Shadow) in the blue starting zone; Player 2 places their 4 figures (COBRA Commander, Doctor Mindbender, Duke, and Snake Eyes) in the red starting zone.
VICTORY: When the other player has no figures left on the battlefield, you win! Or, if the game reaches the end of Round 6 without either player claiming victory, the mind-controlled G.I. JOEs snap out of it and Player 1 claims victory!
SPECIAL RULES: Rookie: Play this game using the BASIC ruleset.
- Snap Out Of It!: When a figure standing on the Device (Glyph of Brandar) would destroy an enemy figure with an attack, the player controlling the attacking figure gains control of the figure that would be destroyed instead.
SPECIAL RULES: Seasoned: Play this game using the MASTER ruleset.
- Snap Out Of It!: At the end of any round, if a player controls a figure standing on the Device (Glyph of Brandar), it deactivates. Remove the Glyph from the battlefield. Deactivating the Device causes the loyalties of various characters to shift: Player 1 takes control of Duke and Snake Eyes; Player 2 takes control of Destro and Storm Shadow. Then, each player removes any Order Markers from the Army Cards of their affected figures and gives those Army Cards to their opponent.
SPECIAL RULES: Veteran: Play this game using the MASTER ruleset.
- Snap Out Of It!: At the end of each round, if a player controls a figure standing on the Device (Glyph of Brandar), they may choose to toggle it by flipping the Glyph to its other side. Toggling the Device causes the loyalties of various characters to shift. Remove any Order Markers from the Army Cards of any affected figures and give those Army Cards to your opponent.
- Power-Side Up: Player 1 takes control of Destro and Storm Shadow; Player 2 takes control of Duke and Snake Eyes.
- Symbol-Side Up: Player 1 takes control of Duke and Snake Eyes; Player 2 takes control of Destro and Storm Shadow.