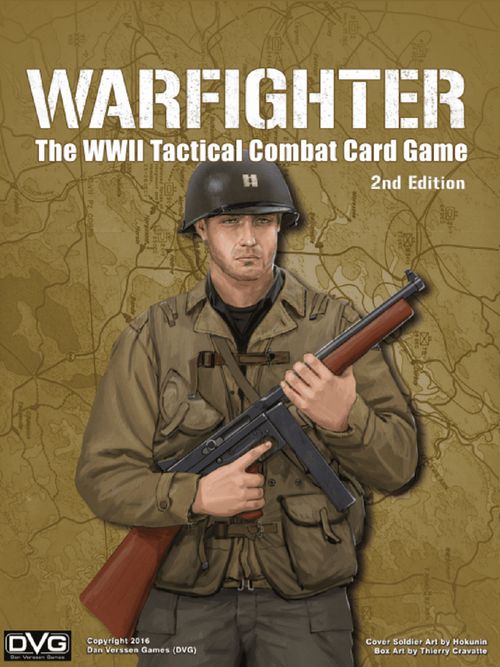
Warfighter: The WWII Tactical Combat Card Game
Warfighter: The WWII Tactical Combat Card Game Rulebook
Table of Contents
Table of Contents
- 1. Important Information
- 2. Preparing a Mission and Gearing Up
- 3. Playing the Mission
- 3.1 Game Concepts
- 3.2 Soldier Turn
- 3.2.1 Environment
- 3.2.2 Actions & Activities
- 3.2.2.1 Remove 1 Suppress (Action)
- 3.2.2.2 Discard and Draw (Action)
- 3.2.2.3 Play an Action Card (Activity)
- 3.2.2.4 Move (Action)
- 3.2.2.5 Attack (Action)
- 3.2.2.6 Reload (Action)
- 3.2.2.7 Play a Location Card (Activity)
- 3.2.2.8 Activate the Objective (Activity)
- 3.2.2.9 Pay Retain Costs (Activity)
- 3.2.2.10 Lighten the Load (Activity)
- 3.2.2.11 Trade Between Soldiers (Activity)
- 3.2.2.12 Deploy Bipod (Action)
- 3.2.2.13 Mid-Mission Healing (Action)
- 3.2.2.14 Move into Striking (Action)
- 3.3 Hostile Turn
1. Important Information
1.1 Contents of the Box
Your box should come with a fair few things:
- The Warfighter World War II Europe New Recruit Manual (you're reading it!)
- The Warfighter Keywords Reference
- 280 cards of varying types
- Several sheets of punch-out counters
- Three ten sided dice and one six sided die
- The Tactical Display game board
We'll explain each component in depth in the next few sections of the manual. You will also need an opaque bag or cup you can draw from without looking inside. A tray for sorting the counters is recommended for ease of play.
Note that this manual does not cover expansion content; it focuses entirely on the contents of the base box, with one or two exceptions.
1.1.1 Cards
Warfighter is driven by its cards; they determine the entirety of your Team and their capabilities, and the Mission and Objective you are sent to accomplish. Note that if a card and this manual have contradicting rules, the card always takes priority.
Soldier Cards represent your men sent on their dangerous mission.
- Player Soldiers are flexible and customisable. You choose their Weapons, Equipment and Skills. This makes Player Soldiers the most expensive kind of Soldier. They're also the only Soldier type that can draw Action Cards, which you use to find Locations. Action Cards can be thought of as battle tactics, which can be used to improve the situation of the game, or turn things around if the battle goes south.
- Non-Player Soldiers are Soldiers that come with their own set of Weapons, Equipment and Skills which can't be changed. As a result, they are cheaper to bring onto your team and are usually good at fulfilling a singular role, but are less flexible as a result.
- Squad Soldiers are akin to the background soldier in a war movie. They're usually very cheap and somewhat weak, but they are very simple to run in comparison to other Soldier types and have all of their relevant stats on the card. If you want a simpler game, or have just a few resources left and need some extra firepower, they are good to bring along.
Two Player Soldiers in your Team is suggested for the flexibility on the Action Cards, but half the fun of Warfighter is experimentation; try everything from one super-strong Player Soldier to a sprawling set of eight Soldiers.
Your Soldiers need to be equipped with Weapons, Equipment and Skills.
- Weapons are all the guns and explosives you need to survive Europe. The box comes with plenty of tools for the Missions ahead, from M1s and M1911s to flamethrowers, rocket launchers, knives and grenades.
- Equipment can be just as important; from medkits and smoke grenades to breaching charges and entrenching tools, these passive or expendable cards can be just what you need in certain situations.
Warfighter refers to Weapons and Equipment as "Gear."
- Skills can either be passive effects that improve your Soldiers' inherent capabilities, or active abilities that can be triggered at certain points.
Action Cards are drawn by Player Soldiers, and contain both a series of resources and tactics that can turn the tide, and Location Markers. The Team requires Locations to progress through the Mission, so having as many Action Cards as possible means faster progress through the Mission.
Locations are drawn over the course of the game by Player Soldiers and played between the Mission and the Objective for your Team to move through. Locations can be very varied, with different effects, difficulty to enter, amount of Hostiles that will be drawn, environmental dangers, and more. For example, "Crops" is easier to enter than "Cratered" and costs nothing to play, but becomes more difficult to enter due to enemy presence. You can draw multiple Locations and play them in whatever order you like, but only one can be played per turn.
Missions define the game; how many resources you have to spend on your Soldiers, the time you have to complete the Objective, how far away the Objective is and how loaded up your Soldiers can be. There can also be special conditions or Mission types that change the way the Mission plays.
Objectives determine what needs to be done. Holding the fort, clearing out the enemy, destroying a supply dump or destroying a tank. Once the Objective is completed, the game immediately ends in success.
A game of Warfighter plays out very differently with certain combinations of Mission and Objective cards; House to House and Supply Dump can play out a lot faster compared to Travel Light paired with Bridge Capture, which requires a lot of Soldiers and a lot of Time.
Hostiles are the enemy that actively seek out your Team of Soldiers and Attack them to prevent you from completing the Objective. They range in capabilities from simple riflemen to a tank. Their behavior is determined by the effect box at the bottom of the card, and the number in the reticle shows how many "people" are part of the Hostile card to be eliminated. The top right corner of a Hostile card is the Hostile Value, which shows how much Experience is earned if the Hostile is Eliminated.
Event cards are also drawn from the Event Deck when a Hostile is drawn that has the Event banner – they can shake up the state of the game.
1.1.2 Counters
The box comes with a lot of counters that are used throughout the game. A quick outline is provided here; more details will be given when these counters are more appropriate.
- Soldier Identification Counters come in pairs; one stays on a Soldier to identify their number, and the other goes on the board to show what Location they are in.
- Action Counters are used by Soldiers to perform Actions during the Soldier Turn.
- The Inactive counter keeps track of the Objective and whether it has been reached and activated yet.
- The Timer counter keeps track of how many Turns the Mission has left.
- Ammo Counters show whether or not your Weapons are Loaded and how much ammo you have left for them.
- Expendable Counters are placed on a card matching their visual, and removed when used.
- Wound Counters are used to track how much damage Soldiers have taken. The bandaged side represents a Wound that has been partially treated.
- Experience Counters are earned by Soldiers for eliminating Hostiles and can be used for many different effects.
- Hostile Targeting Counters are used to track what Soldier is being Targeted by Hostile Cards.
- Objective Hostile Counters keep track of what Hostiles are put into play by the Objective. These are mainly used for the Eliminate Hostiles Objective Type, as a reminder of which Hostiles need to be Eliminated to complete the Mission.
- EKIA (Enemy Killed in Action) and Suppress Counters keep track of how many Reticles on a Hostile have been killed or Suppressed.
- Striking Counters come in pairs and are used to keep track of which numbered Soldier is attacking which Hostile in Striking Combat.
- Bipods are used on certain Weapons, either as a requirement or to give you a benefit when used.
Once you've sorted out those counters, you'll notice you have a few left over. These are for content not included in the base box; keep them somewhere out of the way to keep the game as easy as possible to learn.
1.1.3 Tactical Display
The Tactical Display is the game board. The green area to the left is where all the shuffled decks will be placed.
The red area is the Time Track. The Timer counter will be used to track the amount of turns that remain in the Mission.
The white row contains slots for the Mission, Location and Objective cards. Each slot has a Location number (often referred to by the game as Location # or Loc #), with the number starting from 1 for the Mission card slot and incrementing by 1 for each space to the right. When Hostiles are drawn from the Hostile Deck, they'll be placed above these slots to indicate what Location they are in. The vertical board size does not limit the amount of Hostiles; they may stretch above the Tactical Display in columns.
The rest of the Tactical Display contains setup and gameplay references. This manual follows these references as closely as possible.
2. Preparing a Mission and Gearing Up
Setting up a game of Warfighter proceeds in two halves: picking a Mission and Objective to play, then preparing a Team of Soldiers to take on that Mission and Objective. The next few sections of this manual will show you how to do just that.
2.1 Preparing the Mission
The first thing you need to do is select what region you're playing. The region determines what Mission, Objective and Hostile decks you'll be using. In the core game, you'll only have the Europe region; expansions can add more. You cannot mix together cards from different regions. (The region of a card is determined by the top-right corner of the card in some circumstances.)
You can also choose the difficulty of the Hostiles; below the Hostile value on each Hostile card is an "F" for Frontline, or "E" for Elite. The Frontline Hostiles are easier than the Elite Hostiles; you may also shuffle the two decks together for a difficulty level between the two.
Take the Location, Hostile and Event Decks for your region, shuffle them face-down, and place them on their respective Tactical Display spaces.
Next will be to pick your Mission and Objective. You may pick any combination of the provided Missions and Objectives, but note that some Missions and Objectives must be played in-set. You may also shuffle the Mission and Objective decks to get a completely random mission, following the above rules. Once you've picked a Mission and Objective, place the Mission in the Mission Card slot on the Tactical Display, and the Objective in the specified Location # on the Tactical Display.
If the Objective has a "Present" card or an "Embedded Objective" card listed, place that card in the same column as the Objective. Any cards accompanying the Objective in this way are not considered to be played and do not have any effect on the Mission until the Objective is Activated.
Place the Timer counter on the listed numbered space on the Mission Timer, and place the Inactive Counter on the Objective. Keep all other counters nearby in a general supply. At this point, you're ready to start choosing your Team (2.2).
2.1.1 Mission Types
There are multiple types of Missions in Warfighter that can affect how the game plays out. Note that if a Mission has no specific Mission type as listed below, no rules are changed and simply play as this manual says.
Play a few Missions that don't have any Mission Types like Travel Light or Long Way first, then come back here. These rules assume you understand the basic Warfighter game.
Escape Mission: This mission involves working backwards from the Objective and reaching the Mission card. Note that this Mission type is on an Objective card, not a Mission card.
- During Setup, all Soldier Identification Counters start on the Objective, not the Mission. Do not place the Inactive counter on the Objective.
- During the Mission:
- When all Soldiers reach the Mission card, the Objective is complete.
- Cards that mention "Front-most" are placed ahead of the Soldiers (between the Mission card and the left-most Soldier) while cards that say "Rear-most" are placed behind the Soldiers (between the right-most Soldier and the Objective card).
Raid Mission: A Raid Mission combines a regular Mission with an Escape Mission.
- Setup is unchanged.
- When the Objective is completed, the Mission changes to an Escape Mission; all Soldiers need to be on the Mission card to finish the Mission.
2.1.2 Objective Types
The Objective needs to be completed, and the moment it is completed, you win the game. This section details all of the Objective Types included in the base box and how to run them.
Eliminate Hostiles:
- When the Objective is Activated, add an Objective Hostile counter to every Hostile card drawn for the Objective.
- If any Hostiles are drawn for the Objective during the Reinforcement step, give them an Objective Hostile counter as well.
- The Objective is completed when every Hostile that has an Objective Hostile counter has been removed from the Tactical Display and the Objective has no Hostiles at the end of a Soldier Turn (even regular, non-Objective Hostiles).
Keep Clear:
- Setup is unchanged.
- At the end of each Soldier Turn, if there are no Hostiles in the Objective, add a generic counter (any counter you aren't using and will not confuse for another counter) to the Objective.
- If a Hostile is in the Objective at the end of the Soldier Turn, remove any generic counters from the Objective if there are any.
- If the amount of generic counters on the Objective are equal to the Keep Clear value listed on the Objective card, the Objective is completed.
Destroy the XXX / Clear the XXX: These Objective cards can be Attacked directly following the normal Attacking rules, using the details on the card. If the Objective is given enough EKIAs equal to the number of "Hits," the Objective is completed. (The Objective is not treated as a Hostile in any way otherwise.)
Destroy the (Specified Hostile): Specifically on the Objective "Tank Hunting," the card says 'Present German Elite "PzKfw IVH Tank."' This means you place that listed Hostile card above the Objective as a Hostile, but it does not become active until the Objective is Activated. If the listed Hostile is defeated, the Mission is a Success.
2.2 Setting up a Team
With your Mission and Objective clear, you can start thinking about how to load out your Team.
Warfighter uses a points system called Resource Points, which you use to buy Soldiers and cards to be equipped to those Soldiers. The amount of Resource Points you have available to spend is equal to the Resources listed on the Mission card. You do not need to spend all the Resource Points given to you, but you cannot exceed the total available Points. When you have finished spending your Resource Points, make a note of the amount of Resource Points you have spent, it will be important later on.
A helpful layout is to place vertically-aligned face-down cards you're not using as "proxies."
The Resource Points cost of every card is shown in the top right corner of each Soldier, Weapon, Equipment and Skill. You may buy any Weapon, Equipment and Skill multiple times, even if you only have one copy of said card – you may use a proxy or some other way of maintaining who has a copy. A Soldier cannot have more than one copy of a Skill, but Weapons and Equipment are fine. You cannot use a Soldier or Vehicle with the same name more than once on the same Team.
Take as long as you like setting up your Team. The next few sections detail all the cards so you know what you're buying. When you're ready, move to Section 2.3 to finish setting up the Mission.
2.2.1 Soldiers
The Type of a Soldier is listed next to their name with an abbreviation; Player Soldiers do not have this abbreviation, while Non-Player Soldiers have (NPS) and Squad Soldiers have (SQS).
The top-right corner of the card lists the Soldier's Cost in Resource Points.
The Soldier's Nationality is at the top left. You can only buy cards for a Soldier if it matches their Nationality, or if the card being bought has no Nationality. The Nationality of a WW2 card is on the back of the card. A Gear/Skill card with no flag has no Nationality.
The Soldier's Movement Value is on the right side of the card, below the Cost, below the upwards-pointing arrow. This determines how easily they may move between Locations during Missions; higher is better.
The Soldier's Terrain Cover is in the bottom left corner of the card underneath the semicircle. The higher this value is, the more likely the Soldier will walk away from a Hostile Attack without being Wounded.
Soldiers receive every card listed in their effect box (their Printed Gear) for no Resource Point cost. Beige text determines a Gear card. Underlined text is a Skill; red underlined text signifies a Negative Skill. Any remaining black text is Abilities or effects with no associated card; check the Keywords Reference found in the box.
If a Soldier comes Printed with a Gear or Skill they normally wouldn't be allowed to use, they can use it as normal.
Player Soldiers have three values in the left of their effect box.
- Health is how many Wounds a Soldier can take before they are Downed and their default Handsize. Wounds taken by the Soldier reduce their Handsize.
- Loadout is how much the Soldier can carry; the amount of Loadout Cost in Gear can never go above this. Note that Loadout may be modified by the Loadout value on the chosen Mission Card across all Player Soldiers, and any Printed Gear on a Soldier's card still counts toward their total Loadout.
- This does mean a combination of a Soldier's Printed Gear and Loadout penalties on certain Mission cards can cause some Soldiers to not be usable as bought.
- HtH adds to Attack Rolls when this Soldier Attacks with a HtH-Type Weapon in Striking Range, such as the M3 Knife.
Non-Player Soldiers have a different effect box on their card. Instead of having a Health value, their Health is determined by the highest number in the table at the top of the box. Taking a Wound can cause a Non-Player Soldier to lose an Action once enough Wounds have been sustained. Non-Player Soldiers do not have a Loadout value, they can simply carry all the Gear they are provided with, and their HtH bonus is communicated through a Keyword.
A Squad Soldier effect box is similar to the Non-Player Soldier – Health and Actions are determined by the table. Their card also outlines their Attack capabilities here instead of using a Weapon like other Soldier types. Lower numbers are better; if a Squad Soldier takes a Wound, they're less likely to land a shot as a higher number is harder to roll during an Attack.
You cannot buy extra Gear or Skills for Non-Player or Squad Soldiers by default, but some cards have the ability to be bought for any kind of Soldier.
2.2.2 Weapons
Weapons are used by Soldiers to Attack Hostiles during the Mission.
The top of the card shows the name of the Weapon, with its Nationality, Year, and Type of Weapon (for example, Ranged). The Type can be referenced by other cards. The Year can be referenced by certain Missions.
Below the Type is the Cost of the Weapon in Resource Points. There is also a Loadout Cost. If a Weapon has no separate Loadout Cost, then the Loadout Cost is the same as the RP Cost, but some Weapons list the Loadout Cost separately.
In the bottom right corner of the card is the Ammo square, which determines how many Ammo counters the Weapon starts with. Stack all of the Ammo counters face-up on the Ammo box; the Weapon begins "Loaded" with Ammo this way.
You may buy extra Ammo for a Weapon by adding 1 to the Resource Point Cost and Loadout of the Weapon. If you do, you may take another set of Ammo. This may be repeated multiple times. If you wanted to, you could pay a total of 4 RP and 6 Loadout to have an M1 with 15 Ammo.
Some Weapons have the Expended Keyword, like the Mk2 Grenade. As you may expect from a Weapon like a Grenade, when you attack with a Grenade, the counter for the Weapon is returned to the supply. You must buy Expended Weapon cards for their listed Cost (and Loadout) one by one. Add a counter to the card for each Expended Weapon or Ammo bought this way.
The M1918A2 also has a Bipod, which uses the Bipod counter. As an Action, a Soldier may deploy it, gaining the benefit listed on the card. If the Soldier Moves, the Bipod is undeployed and it must be deployed again for the benefit.
Some Weapons have Keywords in their effect box on the right hand side, which affects the behavior of the Weapon. Expended is one of them, but there may be Self-Defense such as on the M1911 Pistol, which can cancel an incoming Attack, or "Start with 1 XP," which gives the Soldier a bonus. Be sure to read the Keywords Reference.
Note that the "Penetration" Keyword is very important; it improves your Defeat Cover Rolls during your Attacks, making otherwise out of reach Hostiles just that little bit more vulnerable.
To the left of each effect box is the Weapon's Attack Table and Fire Modes. The Attack Table lists the Range of the Weapon (which Locations the Weapon can Attack), the Reload value of the Weapon (if you roll this number or less on an Attack Die, you must Reload your Weapon), and the Kill value of the Weapon (whether the Weapon hits the enemy). You use the relevant column for the Range of the Hostile you are Attacking.
The Fire Modes determine how many dice you roll during an Attack with the Weapon. When you Attack with a Weapon that has multiple Fire Modes, you may pick which Fire Mode you want to use. You roll the number of Attack Dice specified under the Rolls column. Using a Fire Mode with more dice means you are more likely to Reload, but also more likely to reach the Kill number on one of those dice.
If the Fire Mode table on a Weapon lists modes with "X XP," you need to spend that much Experience from Soldiers in order to use those Fire Modes. These modes are usually more powerful than the standard Fire Mode as a result.
Weapons that have the Thrown Type but not the Expended Keyword are a special case. Weapons such as the M3 Knife can be used for its regular HtH attacks, or it can be used in a Range 0 Thrown Attack against a Hostile using the same Fire Modes on the card. If Thrown, regardless of whether or not the Attack causes an EKIA or a Suppress, place the card underneath the Hostile. When that Hostile is discarded, the Soldier who owned the Knife may retrieve it and use it again.
Weapon Attack Example: Using the M1918A2 Machine Gun without the bipod deployed to Attack a Hostile at Range 1, the Kill number is 8 and the Reload number is 2. Choosing the Auto Fire Mode means rolling 3 Attack Dice (d10). The results on the three dice are 9, 6 and 2. The 9 is above the Kill number, so it may cause an EKIA or Suppress. The 6 is the Kill number but above the Reload number, so it has no effect. (Without the bipod deployed there is no Spray – if it were deployed, the result of the Defeat Cover die may result in a Suppress.) The 2 equals the Reload number, so it causes the Ammo counter Loaded on the Weapon to flip to the Empty side after the Attack.
2.2.3 Equipment
Equipment cards are utilities which can be used throughout the Mission to benefit Soldiers.
Equipment works the same way as Weapons when it comes to Cost; the Cost is also the Loadout Cost unless otherwise specified.
Most Equipment in this box is Equipment that is Expended, much like Grenades from the previous section. When a Soldier buys this Equipment, place the appropriate counters from the supply on the Equipment. If the Equipment does not have a circle or square to place a counter, the card itself is returned to the box when used.
During the Soldier Turn, the Soldier with the Equipment can return a counter from the Equipment to the supply in order to take advantage of the Equipment's effect. For the Canteen, a Soldier may use it to draw 3 Action Cards or gain 2 Hardy (Hot) counters.
Expansions can add equipment with passive effects that provide a general bonus across the entire Mission, and applies immediately as soon as the Equipment is bought (so if an Equipment card increases a Soldier's Loadout you can take advantage of the extra Loadout capacity while setting up your Team).
2.2.4 Skills
Skills are inherent effects and abilities that can be bought for Soldiers. They have their Name at the top, with the Cost next to the name. Unlike Gear, Skills do not have any Loadout cost; a Soldier may have as many Skills as they want, but no Soldier can have more than one Skill with the exact same name.
Skills will often provide either a passive benefit to actions performed by your Soldier, or an active ability that needs to be used. In the case of Marksman you simply increase the results of your Attack Rolls with Ranged Weapons.
In the case of Spotter, this is an active ability that can be performed any time during the Soldier Turn by the Soldier with the Skill (by paying the listed requirement). Some Skills can have both passive and active effects. Some cards also have passive abilities that are triggered at certain times, like His Number Was Up.
There are also Negative Skills like Panic which provide nothing but a deficit. However, these Skills cannot be bought – they are included along with certain Soldiers in order to provide a downside to using them.
2.3 Completing Setup
Once you have your Mission set out and your Team equipped, follow the remainder of these steps, and then proceed to Section 3.
- Shuffle the Action Card deck. Place it on the Action Deck space.
- Give each Soldier on your Team a pair of Soldier Identification Counters; place one of the two on the Mission card and the other near the Soldier card.
- Escape Mission: All Soldiers start on the Objective, not the Mission.
- Give each Soldier on your Team their amount of Action counters, Action side face up. A Soldier has two Actions by default, unless any of their cards say otherwise.
- Find the matching Hostile Targeting Counters for each set of Soldier Identification Counters you've given to Soldiers, and place them inside an opaque cup or other method of random drawing. This is the Target Cup.
- Soldiers gain Experience and Hardy counters if noted on their cards.
- Each Player Soldier draws a hand of Action Cards equal to their Health.
- If a Player Soldier draws a Location Marker Action Card, they may follow the text on the card immediately, before the game begins.
- Make a note of your team's current Resource Point value if you haven't already.
3. Playing the Mission
Once the Mission is set up and you have a Team, you can start the Mission. Missions play out like this:
- Your Soldiers start out on the Mission card. Play starts from the Soldier Turn.
- Player Soldier(s) will draw Location cards to play in the empty slots between the Mission and Objective.
- Soldiers will Move between these Locations to get to the Objective.
- Once they reach the Objective, they must Activate the Objective to Move onto it and complete it by fulfilling the requirements on the Objective card.
- You win immediately when the Objective is completed.
And you lose if all your Soldiers are Downed, the Objective is failed, or you run out of Time.
3.1 Game Concepts
This section highlights a few concepts and rules that appear multiple times throughout the game, kept here so they are easy to refer back to later.
3.1.1 Dicey Matters
Ten-sided dice are used for all die rolls in the game, except for Defeat Cover Rolls during Attacks. If a ten-sided die roll has a result of 0, treat it as a 10.
3.1.2 Keywords
Many cards have Keywords, which determine some or all the behaviors of a card. When you see a word by itself that doesn't seem to have any definition, refer to the Keywords Reference that's included in the box. You will need to reference this practically all the time, so keep it close by.
Note that keywords are updated constantly, so if you're relatively new to the series or your copy is somewhat old, check BGG or the DVG website for an updated set of keywords.
3.1.3 Empty Decks
When any of the decks on the Tactical Display are empty and another card needs to be drawn, shuffle the discard pile of that deck and place it back on the Tactical Display face-down as per setup, then continue drawing.
3.1.4 Spending Experience
When Eliminating a Hostile card, that Soldier gains Experience Points (XP) equal to the Hostile Value of the Eliminated card.
When Experience must be paid, Experience from any Soldier, either earned before or during the game, can be used to pay for the cost.
When a Soldier is Downed, all of that Soldier's Experience is lost.
3.1.4.1 Upgunning
When a card has text surrounded by [square brackets], this means the card can be Upgunned. To Upgun a card, any Soldier may spend 1 Experience Point, even if the Soldier is not the one using the effect. Once a card is Upgunned, all text inside of [square brackets] on the card may be used instead of the regular text. This only applies across one usage of the card; for example, the Rifleman Skill card may be upgunned for one Attack.
3.1.5 Hostile Effectiveness
This section discusses certain Hostile behaviors you should know before starting the game.
Hostiles have a Reticle count in the bottom-right corner of their picture; this determines how many EKIA or Suppress counters a Hostile Card can hold. Hostiles become less effective as EKIA or Suppress counters are added to them. While just one Suppressed reticle is enough to keep an enemy from Moving during the Hostile Turn, they will still Attack if every Reticle isn't at least Suppressed.
An attack's effectiveness is determined by the table in the effect box – the numbers at the top of the table say how many uncovered reticles are needed to use this column of the table. For example, inflicting an EKIA or a Suppress can be enough to stop a Sniper Team Hostile getting a potential "Kill" when Attacking.
This can also apply to other text on the card; the "Entrance Cost" Keyword has two numbers, separated by a slash. These follow the same rules as the columns; if you have uncovered reticles equal to the numbers in the left-most column, use the left-most number, and so on. Suppressing or EKIAing one reticle can be enough to remove the Entrance Cost penalty completely.
Hostiles also have Keywords and other text at the bottom of their effect box; most Keywords and other text are active at all times until all reticles are Suppressed or have suffered an EKIA. Some Keywords remain in effect though; reference the Keyword Reference for which Keywords work this way.
3.1.6 Range
Most cards in the game refer to a "Range." In Warfighter, Range 0 is considered to be "this Location," i.e. where your Soldier or the Hostile is at that moment. Range 1, Range 2 and so on are that many locations away horizontally from said Location.
Example: Soldier #1 is Range 2 from the Lone Soldier Hostile, Soldier #2 is Range 1, and Soldier #3 is Range 0. Soldier #2 and #3 are in Range of Attacks from the Lone Soldier, #1 is not.
3.2 Soldier Turn
The Soldier Turn is where you perform Actions with your Soldiers in an attempt to complete the Mission. You may perform as many actions as you have the resources to perform, and you may end the Soldier Turn at any time, proceeding to the Hostile Turn.
At the beginning of the Soldier Turn, refresh all Soldier Actions by flipping them off the "Used" side, if they aren't off that side already.
3.2.1 Environment
While not relevant to the Europe base box, this step may become relevant in expansions, so it is mentioned here for the sake of keeping to the reference.
The Environment step occurs before any Soldiers take their Actions.
For each Soldier that is on a Location with an Environ: keyword, roll a ten-sided die. If the roll does not meet or exceed the number listed, you choose whether they suffer a Suppress or a Wound.
Some Equipment / Skills / Abilities give you Hardy: XXX counters, where XXX is the name of a keyword. If you fail your Environ roll and the Hardy counter matches the keyword, you may discard one Hardy in order to ignore the results of the roll.
Sometimes, you want to take the Wound so that a Soldier has a spare action available to them. This could mean the difference between failing and succeeding.
3.2.2 Actions & Activities
In this step, you may perform Actions with any Soldier available to you in any order. In most cases, these Actions will cause you to flip an Action counter to the Used side. It cannot be used for another action until the next Soldier Turn. Sections are marked with an (Action) or an (Activity) in the title. An (Activity) has no inherent cost, but may come with extra costs attached. You must finish performing one Action or Activity before you can start another.
3.2.2.1 Remove 1 Suppress (Action)
While a Soldier is Suppressed, they are incapable of performing any other Actions. Spend 1 Action to remove a Suppress from the Soldier and allow them to perform Actions.
3.2.2.2 Discard and Draw (Action)
A Player Soldier may discard as many Action Cards from their hand as they wish, then draw Action Cards to their hand up to their current Health (printed Health minus Wound counters).
If you draw any Location Marker cards, you may perform the text in the effect box immediately.
3.2.2.3 Play an Action Card (Activity)
To play an Action Card, simply place it in the Action Card discard pile and perform the effect written on the card.
Most Action Cards are free to use and are discarded after using them. Some may only be used at certain times. Most Action Cards can be used during the Soldier Turn, but not in the middle of another Action (you can't have a free Move in the middle of an Attack, for example). You may use multiple Action cards at a time. If an Action Card has a cost, it must be paid in full or the card cannot be used.
Some cards have a Type and a number, which shows an extra cost to use that Action Card. The number is the amount of other Action Cards you discard from the hand of the Player Soldier that wants to play the card. The Type can be referenced by other cards.
3.2.2.4 Move (Action)
Soldiers take this Action to move between adjacent placed Locations. If there are no placed adjacent Locations to move to, a Soldier cannot Move. Soldiers may only ever Move once per Soldier Turn.
To Move, a Soldier's Movement Value must meet the Entrance Cost of a Location. The Entrance cost of a Location is stated in the top right corner of the Location card. There may also be an extra penalty to the Entrance Cost, whether that be on the Location itself or on a Hostile occupying that Location. You must meet or exceed the total of ALL of these numbers.
To meet this cost, a Soldier has a basic Movement Value. Soldiers may also discard Action cards to add to their Movement Value for a single Move. Player Soldiers must discard Action cards from their own hand and nowhere else. Any Player Soldier may discard cards for Non-Player and Squad Soldiers. Every card discarded this way adds 1 to the Soldier's Movement Value for this Move.
Player Soldiers may also set Action Cards aside for specific Soldiers, including themselves. Place Action Cards set aside this way near the Soldier in question. When that Soldier Moves, they discard all Action Cards placed aside for them and add 1 to their Movement Value for each. Once an Action Card is set aside in this way, it cannot be used for any other purpose. It is not in that Player Soldier's hand anymore; they may Discard and Draw normally, not counting put aside cards as part of their hand. This can be used if a Player Soldier is heavily Wounded and can't spend all of the cards needed to Move a Soldier in one hand of Action Cards.
When a Soldier has met or exceeded the total Entrance Cost, they may move their Soldier Identification counter to the new Location. If the Soldier that Moved has a Weapon with a Deployed Bipod counter, flip the Bipod counter to the Undeployed side.
3.2.2.5 Attack (Action)
You Attack with a Soldier in order to remove Hostiles from your path to the Objective. Attacking takes place in multiple steps that should be followed in order. The Tactical Display has a reminder as to the order, if you need it.
Declare Attack. To Declare an Attack, pick a Hostile that is within range of one of your Weapon cards that has a non-Empty Ammo counter and no Jam, or a Weapon with the Expended keyword that has counters on it. This is your Targeted Hostile and chosen Weapon for the Attack. You can only Attack a Hostile card within Range of your chosen Weapon. HtH-Type Weapons are not in Range unless the Attacking Soldier is in Striking Range specifically with the Hostile being Attacked.
This is the time that you play Action Cards that modify your Attack in some way.
For Squad Soldiers, refer to the table on their card, use the column that equals the Health they have left, check the Range of the Hostile, and that will tell you your Kill number.
Declare Fire Mode. Pick a Fire Mode as listed on your chosen Weapon for the attack. This determines how many dice you roll. (Squad Soldiers and Weapons with one Fire Mode do not perform this step.)
More dice means more chances to land that killing blow, but you stand a higher chance of needing to Reload.
Roll Dice. Roll as many ten-sided dice as your Fire Mode states, and one six-sided die. The ten-sided dice are your Attack Rolls, and the six-sided die is the Defeat Cover roll. Only roll a single ten-sided and six-sided die for Squad Soldier Attacks.
Check for Reload. If any of the ten-sided dice are equal to or lower than the Reload number on your Weapon, and your Weapon uses Ammo, flip the currently loaded Ammo to the Empty side of the counter. This weapon cannot be used again until you perform a Reload action. Weapons that have the Expended keyword always return a counter to the supply.
Apply Modifiers. Any modifiers from Equipment, Skills, and played Action Cards are now added to the rolls. Modifiers do not count for checking Reloads.
Using three Steady Aim cards and rolling 1 on an Attack Die might reach the Kill number, but you'll still need to Reload.
Check to Defeat Cover. Note the number on the bottom left of the Targeted Hostile card; if your modified Defeat Cover roll equals or exceeds this number, you have defeated the Hostile's cover.
Resolve Attack. Look at your final Attack Rolls.
If all of your modified Attack Rolls have lower than the listed Kill number on the Weapon used for this Attack, and you did not defeat the Hostile's Cover, you have missed the shot; the Hostile suffers no effect.
If one or more of your modified Attack Rolls have equal to or higher than the listed Kill number, but you did not defeat the Hostile's Cover, or if you did defeat the Hostile's cover but none of your modified Attack Rolls were equal to or higher than the Kill number, the Attack leaves a Suppress on the Hostile. Place a Suppress on the Hostile card.
If both an Attack Roll was equal to or higher than the Kill number and the Hostile's cover was defeated, you have scored an EKIA. Place an EKIA counter on the Hostile card.
If this results in EKIA counters being equal to the reticle number on the Hostile, discard the Hostile, return its Hostile Targeting Counter to the Target Cup, and the Soldier that performed this Attack gains Experience equal to the Hostile Value of the discarded Hostile.
There are some things to note about Attacks:
- Each Reticle on a Hostile can only have one Suppress or EKIA on it at a time. If all reticles on a Hostile are already Suppressed and you add another Suppress, nothing happens. However, if you get an EKIA and all non-EKIA reticles are Suppressed, you flip one of those Suppress counters to EKIA.
- You only ever add 1 Kill to a Hostile during an Attack Roll, unless the Weapon used for the Attack has the Spray keyword or the Fire Mode of the Weapon is Explosion. In either case, you add EKIA counters to the Hostile equal to the amount of Attack Dice that equal or exceed the Kill number.
- If an Event or non-Attack effect causes a Hostile to gain the last EKIA required to Eliminate them, give the Experience to the Soldier who last caused an EKIA via an Attack on the Hostile.
Weapon Attack Example: Using the M1918A2 Machine Gun without the bipod deployed to Attack a Hostile at Range 1, the Kill number is 8 and the Reload number is 2, and the Auto Fire Mode rolls 3 Attack Dice (d10). The results on the three dice are 9, 6 and 2. The 9 is above the Kill number, so it may cause an EKIA or Suppress. The 6 is the Kill number but above the Reload number, so it has no effect. The 2 equals the Reload number, so it causes the Ammo counter Loaded on the Weapon to flip to the Empty side after the Attack.
3.2.2.6 Reload (Action)
If an Attack resulted in a Reload result, causing an Ammo counter to be flipped to the Empty side, you can Reload as an Action to discard said Empty counter to the box, replacing it with any of the other Ammo counters available to the Weapon as placed there before the mission, Empty-side face down.
3.2.2.7 Play a Location Card (Activity)
If a Location Card is in a Player Soldier's hand, it may be played in an Open Location slot. Any Soldier must be adjacent to an Open Location slot for a new Location to be played, not only the Soldier with the Location in their hand. If you have a Location adjacent to the Objective, leaving no Open slots between the Mission and Objective, you may not play a Location. You may only play one Location per Soldier Turn.
Location cards can have a cost to play, which is written on the card itself. "Free to play" costs nothing, it can simply be played. "1 Action" and "1XP" are all self-explanatory.
When playing a Location card, the number of Hostiles that show up depends on the current Resource Point value of your Team. Check the Hostiles table on the new Location card to see how many Hostiles arrive when the new location is placed. Draw Hostiles from the Hostile deck and place them in the same column as the newly placed Location.
Every time you draw a Hostile, refer to the Hostile Value of the Hostile Card, and add it to an ongoing total. When the total amount of Hostile Value drawn this way equals or exceeds the number on the Location, stop drawing Hostiles. If this number on the table is equal to 0 (either printed or due to card effect), draw exactly one Hostile card, and then stop. "None" means draw nothing.
If a Hostile card with an Event banner is drawn, immediately draw a card from the Event Deck and add it to the same Location the Hostile card was drawn to. Resolve any Events after drawing all cards.
Give each placed Hostile a random Hostile Targeting Counter from the Target Cup; this is now their Targeted Soldier.
Hostiles drawn and placed in a Location slot with no Location card act normally. Hostiles drawn and placed in the Objective while it is Inactive also act normally.
Special Instruction for Escape Missions: If a Hostile has the keyword "front-most" or "rear-most," reverse their usual Location positioning, so that "front-most" Hostiles are closer to the Mission card, and "rear-most" Hostiles are closer to the Objective card.
If you need to draw Hostiles but the Hostile Deck is empty, shuffle the discards and place them as a new Hostile draw deck, and continue drawing Hostiles as needed.
Drawing Hostiles Example: An 87 RP Team plays a Location card. The Hostiles table on the card requires drawing 8 Hostile Value worth of Hostile cards. Draw a 2 Value Hostile (2). Then draw a 1 Value Hostile (3) with an Event banner, so an Event is drawn before continuing. Draw a 3 Value Hostile (6), then a 4 Value Hostile (10). This exceeds the value on the table, so drawing stops. Resolve any Events that have been drawn and check for Keywords now.
When you place Hostiles, be sure to check for Keywords that may affect how the Hostile enters play. As a result of that, if a Hostile is to be placed to the left of the Mission, place them on the Mission. If a Hostile would be placed to the right of the Objective, place them on the Objective.
Locations may have Keywords on them; reference them now, just to be sure you do not need to place any more Hostiles or other side effects.
Note that Location Cards are considered Action Cards; if you do not wish to play a Location, you may still discard the card for Move, Discard and Draw, or costs for other Action Cards.
3.2.2.8 Activate the Objective (Activity)
The Objective, and any attached Embedded Objective cards, start out Inactive. When a card is Inactive, it is treated as if it doesn't exist – Soldiers cannot Move into an Inactive Objective, Present and Embedded Objective have no effect on the Mission, etc. When a Soldier is Adjacent to the Objective, they may Activate the Objective by removing the Inactive counter from it, and drawing Hostiles in the same way you would for a Location. The Objective and any Present or Embedded Objective cards may now be interacted with. Be sure to check for Keywords on the Objective and any cards there, as they go into effect now.
If you have time left in the mission, take the time to get all your Soldiers onto the previous Location, and attack it in one big swing...unless that's not your tactic. Be flexible.
3.2.2.9 Pay Retain Costs (Activity)
Certain Action Cards have a Retain cost. If you pay the listed Retain cost, you may keep the effects of those cards into the next Soldier Turn. If this cost is not paid, the card is discarded and the effect is lost at the end of the current Soldier turn.
3.2.2.10 Lighten the Load (Activity)
You may freely discard Gear from Player Soldiers (not NPS or Squad) in order to recalculate your total Resource Points. Use the new total Resource Points generated this way for the rest of the Mission when playing Location cards and activating the Objective. You must discard at least one point worth of Gear to do this unless a Soldier is Downed due to a Hostile Attack.
If things go really badly and you lose a couple of Soldiers, you should always Lighten the Load so that you can drop a tier of Hostile value and make the rest of the mission easier.
3.2.2.11 Trade Between Soldiers (Activity)
Player Soldiers in the same Location may freely hand Weapons, Equipment and Ammo back and forth between each other, assuming they do not exceed their Loadout value. Non-Player Soldiers may receive Ammo equivalent to their Weapon's caliber from a Soldier with the same caliber weapon (the caliber is listed in the Weapon's Ammo Box), but they must never exceed the amount of Ammo the Weapon has listed. Player Soldiers may also drop Weapons and Equipment on a space for another Player Soldier to acquire later.
Note that if a Weapon or Equipment has been used this Soldier Turn, it cannot be traded or dropped this Soldier Turn.
3.2.2.12 Deploy Bipod (Action)
Some Weapons have Bipod counters. A Soldier can spend an Action to deploy a Bipod (flip the counter) on one of their Weapons, gaining any listed benefits on the Weapon card. If the Soldier with a Deployed Bipod Moves or Enters Striking, the Bipod is Undeployed (flip the counter), and must be deployed again. Tripods in expansions behave the same way.
3.2.2.13 Mid-Mission Healing (Action)
If a Soldier has Healing Equipment or a Skill, they can use it to remove Wounds from a Soldier.
Declare the Wound to be healed, then follow any instructions listed on the card. If you Heal equal to, or more, points compared to the Wound counter, discard the Wound counter.
If you roll less, calculate how many points are left on the Wound by subtracting the Heal total from the Wound total, and replace the current Wound counter with a new Wound counter, equal to that total, then flip the new counter to the bandaged side; you cannot attempt to heal this Wound for the remainder of the Mission.
Healing Example: A Soldier tries to heal another Soldier in their Location of a 2 Wound counter using the First Aid Kit Equipment. They roll the die and get a 6. This heals 1 of the 2 Wounds. They discard the 2 Wound counter, take a 1 Wound counter, flip it to the bandaged side and give it to the Wounded Soldier. If the roll was 7 or higher, the Wound counter would be discarded entirely.
3.2.2.14 Move into Striking (Action)
This Action allows Soldiers to move into Striking Range (hand to hand combat) with any Hostile in the same Location as them.
The Soldier must pay the Striking Cost listed on the Location in Actions. For Locations with a cost of 2 or higher, the Soldier can set aside Actions on one Soldier Turn, then pay the rest of the total on the next Soldier Turn, but the Soldier cannot perform any other Actions until the Action cost is paid in full; otherwise, all saved Actions are lost. The Soldier may perform Activities that do not cost Actions.
When all Actions are paid, you may use the matching Soldier Identification Counter's numbered Striking Counter to mark the Hostile the Soldier is engaging in Striking with; that Soldier is now in that Hostile's Striking Area. If that Hostile is Targeting another Soldier, change the Target counter to the Soldier that just engaged in Striking. One Soldier can only be in Striking with one Hostile at a time, but multiple Soldiers can be in Striking with one Hostile.
Your Soldier is now in "Striking Range," a new kind of Range. Some Actions change for Soldiers in Striking Range (any unmentioned Actions still work as normal):
- They may specifically Attack their engaged Hostile using HtH-Type Weapons, or they may Attack any other Hostile following normal Attack rules.
- They may Move to another Location, however Moving will result in moving out of Striking Range and into Range 0 in the new Location; remove the Striking Counter from the Hostile.
- They may return to Range 0 by paying the Striking Cost on the Location, in which case, remove the Striking Counter from the Hostile.
A Soldier also returns to Range 0 for free if the Hostile they're in Striking Range with leaves the game (by being discarded or Eliminated).
Some Locations have the "Close Quarters Combat" Keyword. When you Enter Striking in these Locations, you are not in Striking with any particular Hostile, but with the Location itself, and may Attack any Hostile in the Location with HtH Weapons. Place the Striking Counter on the Location instead of any particular Hostile.
A Soldier cannot enter Striking Range with a Hostile that is being Screened. If a newly-drawn Hostile Screens the Hostile the Soldier is in Striking Range with (either via entering the Location or becoming unsuppressed), the Soldier can move back to Range 0 or into Striking Range with the Screening Hostile at no cost. Simultaneously, if a Screening Hostile engaged in Striking with a Soldier is no longer Screening any Hostiles, that Soldier may freely Target (move the Striking Counter to) any of the previously Screened Hostiles. They may also move back to Range 0.
Think of it as the Screening Hostile being a "bodyguard"; you need to take out the bodyguard before you can attack your target. If the bodyguard shows up and gets between you and the target, you can freely switch to attacking them, and if you take out the bodyguard, you can go back to attacking the Hostile the bodyguard was protecting.
3.3 Hostile Turn
The Hostile Turn is an entirely AI and dice-driven turn in which Hostiles will spawn, move, attack, and the rest of the game's systems are handled. Follow this turn to the letter as you play (the board has a good reminder for you in what order to do this in). Once this set of procedures is over, you'll go to your Soldier Turn, until the time on the mission runs out.
3.3.1 Reinforcement Draw
For each Location that has a Soldier on it, and each Location that has "Always draw for Rein." written on it, follow these steps. If the Location has "Rein: None," do not follow these steps.
Draw the top card of the Hostile deck and compare it to the Rein: value in the top left corner of the Location. If the Hostile Value matches any of the range, the Hostile is added to the Location and given a random Target from the Target cup, otherwise it is discarded.
If the Hostile Card is played and has an Event banner, draw an Event and play it to the same Location.
3.3.2 Attack
Hostiles will Attack Soldiers if the following conditions are met:
- They are in Range of the Soldier with the Soldier Identification Counter matching their Hostile Targeting Counter.
- They have at least one uncovered (no EKIA or Suppress counter) Reticle.
- No other effects such as Keywords prevent the Hostile from Attacking.
Hostile Attacks work in a relatively similar way to your Attack action, however, they reference a table on the card itself to determine what Attack they perform. Hostiles Attacking a Soldier in Striking Range with them use their Range 0 Attack.
Roll a ten-sided (Attack) die and six-sided (Defeat Cover) die. Check how many uncovered reticles the Hostile has, and reference the roll on the Attack Die to the column of the Hostile attack chart equal to the uncovered reticles. Compare the Cover value of the targeted Soldier and the Defeat Cover die.
If the ten-sided roll is a Miss on the Hostile attack chart and the Cover roll did not defeat the target Soldier's Cover, nothing happens and the Attack ends.
If the Attack roll is not a Miss but Cover was not defeated or vice-versa, the Soldier is Suppressed – place a Suppress counter on the Soldier.
If the Attack roll is not a Miss and Cover was defeated, reference the table for the effect to be applied – it may be a Keyword.
If a Soldier is Wounded as a result, give them a new Wound counter equal to the Wounds dealt. Every Hostile Attack that causes a Wound causes a new Wound counter, equal to the value listed.
Note: You do not need to discard Action Cards as a Player Soldier if you are wounded; you simply draw up to your Health during a Discard and Draw.
Hostile Attack Example: A Sturmtruppen, with one Suppressed counter, attacks a Soldier that has Cover 2, and rolls a 7 on the Attack Die and 3 on the Defeat Cover Die. The Attack Die references the middle column, as there are 3 uncovered reticles. The Attack would result in 1 Wound, given to the targeted Soldier. If the Sturmtruppen had one more Suppressed / EKIAd reticle, it would instead refer to the 2-1 column, and this attack would only cause a Suppress, as the Defeat Cover die was still successful. If the Sturmtruppen had no reticles covered, the Attack would result in 2 Wounds, as it would be referencing the 4 column.
3.3.2.1 Soldier Down
If a Soldier has 0 Health or less remaining after a Hostile Attack, they are Downed – removed from the game, basically. Remove their counter from the board, discard any Action Cards they were holding (if any), all of their Weapons, Equipment and Ammo are dropped in the Location they were downed (and can be picked up by any Player Soldier), return all of their Skills to the box, and you immediately perform a Lighten the Load calculation (3.2.2.10). Remove the downed Soldier's target counters from the Target cup and board; all Hostiles targeting this Soldier receive new Targets from the Target cup.
3.3.3 Close Range
A Hostile will only Move if it has no Suppress counters and is not within the listed Range of its Target. Move Hostiles one Location closer, or further away, from their Target. Unlike Soldiers, Hostiles can move into Open Location slots.
If a Hostile is within Range of a Soldier, but cannot Attack its Target, move the Hostile closer to the Target.
If a Hostile has a Soldier in its Striking Area, but its Hostile Targeting Counter does not refer to that Soldier, specifically pull one of that Soldier's Hostile Targeting Counters from the Targeting Cup, and place it on the Hostile. Return any other Hostile Targeting Counters to the Target Cup and shake to shuffle.
Keep Hostiles that are a real threat Suppressed! One Suppress is enough to leave most Hostiles in the dust, and bigger threats are less threatening the more Suppressed they are.
3.3.4 Remove Suppress Counters
Remove one Suppress counter from each Hostile card.
Gameplay tip: Have a huge Hostile that you're extremely worried about? Suppress the hell out of it. It'll take multiple turns to get back to full strength.
3.3.5 Advance Mission Timer
Move the Time counter on the Time Track one space downwards. If the Time counter would move lower than the 1 space at this point, the mission ends in failure.
Return to the beginning of the Soldier Turn.
You have a little bit of time to fool around in most cases, but more than two or three Soldier Turns spent fiddling in the same spot will leave you really strapped for time when it comes to finishing the objective.