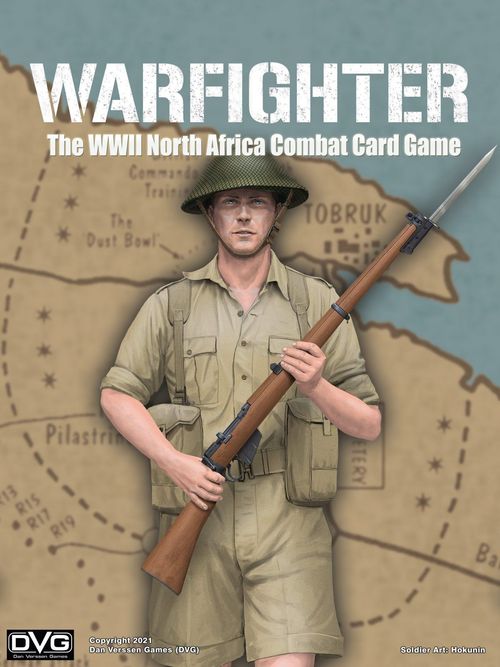
Warfighter: The WWII North African Combat Card Game
Warfighter: The WWII North African Combat Card Game Rulebook
Table of Contents
Table of Contents
- Settings and Eras
- Game Overview
- Victory
- Component Overview
- Mission Set-Up
- Purchasing Your Cards
- Playing Action Cards
- Initial Action Cards
- Sequence of Play
- Soldier Actions
- Soldier Activities
- Location Cards
- Soldier Attacks
- Hostile Cards
- Event Cards
- Hostile Turn
- Soldier Wounds
- Completing the Objective
- Shadow War
- Private Military Contractors (PMCs)
- Campaigns
- Medal Cards
- Vehicles
- Undead - Alternative WWII Setting
- Player Campaigns
- Optional Rules
- Warfighter Card Keywords (February 2023)
Settings and Eras
Warfighter now spans several Eras and Settings. Eras represent large blocks of time. Settings are specific situations within an Era.
- WWII Era (WWII to pre-Vietnam War): European Setting, Pacific Setting, Korean War Setting, WWII Undead Setting
- Cold War Era (Vietnam War to pre-Desert Storm): Vietnam War Setting, Resistance Setting
- Modern Era (Desert Storm to pre-Near Future): Daytime Setting, Shadow War Setting, Private Military Contractor (PMC) Setting
Your Warfighter Soldiers, PMCs, Heroes, etc. (Soldiers for short) can travel as seamlessly as possible between Settings and even Eras.
Travel Between Settings and Eras
For example, taking your WWII Pacific Soldiers to WWII Europe (a change in Setting), or taking your Modern Daytime Soldiers to WWII Pacific (a change in Era).
Your Soldiers can only have their inherent Era Skills and Gear cards. When playing the Mission, use the Action cards, Hostile cards, and Display Sheet of the Era and Setting they are traveling to.
Example: Your WWII Pacific Soldier can use any WWII Era Skills and Gear cards.
Example: If your Modern Shadow War Soldier, WWII European Soldier, and Fantasy Fighter wanted to explore a Fantasy Dungeon, they would each have the Skills and Gear of their own Eras, and you would use the Fantasy Action card deck, Display Sheet, and Hostile cards.
Game Overview
Warfighter is a fast-paced card game depicting a squad of Soldiers engaging hostile forces. To succeed, your Soldiers must complete a mission in enemy territory. They only have the weapons and equipment they bring with them to battle the enemy forces they encounter, so planning and preparing for the mission is vital to your success.
The Warfighter series features boxed core games that provide the basis for an Era or Setting, as well as expansion packs to add Soldiers, Hostiles, Locations, Weapons, and more.
You can play solitaire, or work co-operatively with your friends, while the game controls the hostile forces. You win or lose the game as a team.
The components and examples appearing in this rulebook are taken from several Warfighter Eras. Unless noted otherwise, all rules apply to all Eras.
Victory
The game immediately ends in success when you complete the Objective cards requirements.
The game ends in failure if you run out of Game Turns, or when the last member of your team has zero Health remaining.
Component Overview
Tactical Display Sheet
The Tactical Display Sheet is where you will place your card decks, cards, and counters during the game.
Keyword Sheet
The Keyword sheet defines the Keywords found on the Warfighter cards. If you see an unfamiliar word on a card, reference the Keyword sheet for its rules.
Mission Cards
You will select one of these cards at the start of each Mission. Mission cards give you the information needed to purchase your team and start your Mission.
Objective Cards
You will also select one of these cards at the start of each Mission. Objective cards detail the conditions that must be met to complete the Mission and win the game.
Location Cards
There are Location Marker cards in the Action card deck, indicating when to draw a Location card. Location cards detail the terrain you travel through on your way to your Objective.
Hostile Cards
The Hostile cards detail the threats to your team during the Mission.
Some eras, such as WWII, have Elite (more challenging) and Frontline (less challenging) Hostile cards. Separate the Hostile cards into a Frontline deck and an Elite deck. They are easy to tell apart by their card backs.
Other eras, such as Modern, have more than one type of Hostile. In the Modern era, the Drug Cartel Hostiles are among the least challenging, and the Eastern European Hostiles are among the most challenging.
You will select one of these Hostile decks at the start of each Mission. Only use one Hostile type during the Mission.
If you need to draw a Hostile card, and the Hostile Draw Deck is empty, shuffle the discards and re-form the Hostile Draw Deck. If there are no Hostiles in the Discard or Draw deck, do not place the Hostile.
Event Cards
The Event cards represent special situations on the battlefield.
Soldier Cards
There are 3 kinds of Soldier cards: Squad Soldiers, Non-Player Soldiers, and Player Soldiers. Each player can play more than one Soldier of any types.
- Squad Soldiers come as they are shown on their cards. These are good low-cost Soldiers to fill out your team. Some of them have Skill cards, Weapon cards, or Equipment cards.
- Non-Player Soldiers (NPS) come with the predesignated Weapons, Equipment, and Skills noted on their cards. These are mid-cost Soldiers, and are good at supporting your main Player Soldiers.
- Player Soldiers have a hand of Action cards and can be equipped with the Weapons, Skills, and Equipment of your choosing. These are your most costly and highly-skilled Soldiers.
Skill Cards
You can purchase Skill cards to improve your Player Soldiers abilities. Skills cannot be transferred to other Soldiers. Soldiers are still only allowed to have one instance of each Skill card.
Nation Skill cards are specific to each Nation in the game. These cards give the Soldiers of each Nation a unique feel. Purchase these Skill cards as normal. Some Nation cards have a Pre-Requisite (Pre-Req). The Soldier must meet this requirement to purchase the card.
Example: A Nation card has a Pre-Req of Marines only. In order to purchase the card, a Soldier must belong to the flagged Nation, and be a Marine.
Specialist Skill cards group several Skills together onto the same card. This allows the Soldier to gain the listed Skills while paying fewer Resource Points. Gather the listed Skill cards as normal for reference during the Mission. The Soldier gains all the listed Skills for the cost of the Specialist card, instead of paying the individual cost for each Skill card.
To purchase a Specialist card, the Soldier must meet the noted Pre-Reqs listed on the Specialist card. The Soldier must have the minimum RP cost or higher printed on the card, as well as any other noted requirements.
Example: A Specialist card has the Pre-Req of Veteran, Printed 21+ RP. In order to purchase the card, a Soldier must have the Veteran Skill, and have an RP cost of 21 or more on the Soldier card.
Weapon Cards
You can purchase Weapon cards for your Player Soldiers. Player Soldiers may freely transfer Weapons to other Player Soldiers in their same Location card.
Equipment Cards
You can purchase Equipment cards for your Player Soldiers. Player Soldiers may freely transfer Equipment to other Player Soldiers in their same Location card. Weapons and Equipment are collectively known as Gear.
Sitrep Cards
Not all eras have Sitrep cards. You may select one of these cards when you are selecting your Mission and Objective cards. These cards add a special situational modification to the Mission. Sitrep cards are an optional card type. You may add them to a Mission if you choose.
Each Sitrep card notes the number of RP you must pay (Pay) or receive (Gain) by taking the card. Some Sitrep cards have a Gain or Pay value based on the Objectives Location card. Gain or Pay the noted number of RP based on the Objectives Location at the start of the Mission.
Example: A Sitrep card has a Gain: 2/Loc notation. The Objective is in the 6th Location position. You gain 12 extra RP to spend on Mission Setup.
Service Record Cards
Not all eras have Service Record cards. You can purchase Service Record cards for your Soldiers. These cards show the past battles your Soldier fought in. Service Records cannot be transferred to other Soldiers.
Action Cards
Player Soldiers draw, hold, discard, and play Action cards during the game. Each Action card details its game effect. Action cards cannot be transferred to other Soldiers.
Dice
10-sided dice are used for all die rolls, except to Defeat Cover. You will roll a 6-sided die to Defeat Cover. If your 10-sided die has a 0 facet, treat it as a 10. A d20 is used if your Soldier has Armor Equipped.
Some Weapon, Skill, and Equipment cards modify your die rolls.
Timer Counter
The Timer counter tracks the number of Turns remaining in the Mission.
Inactive Counter
An Inactive counter is placed on the Objective card at the start of the Mission. Once you Activate the Objective card, discard this counter.
Soldier Identification Counters
Each Soldier Identification counter has a number. There are two of each of these numbered counters. You will place one on the Soldiers card, and the other on the Soldiers current Location card.
Hostile Targeting Counters
Each Hostile Targeting counter is numbered. There are 4 copies of each numbered counter. You will only use the Hostile Targeting counters that have the same number as a Soldier Identification counter. Place the Hostile Targeting counters into an opaque cup. You will draw these counters to determine which Soldier a Hostile is targeting.
Action Counters
Each Soldier has two Actions per Soldier Turn unless otherwise noted on the card. As your Soldier uses an Action, flip the Action counter to the USED side. At the start of the next Soldier Turn flip them back.
Ammunition Counters
Most Weapons come with several Ammunition counters. You will place these Ammo counters on your Weapon cards.
When the rules and cards refer to Ammo they are only referring to these counters. They are not referring to Grenades, Rockets, etc.
Gear and Grenade Counters
There are also several types of counters used to track the number of Grenades and Equipment your Soldiers carry.
Hand to Hand Counters
When a Soldier Engages a Hostile in Hand to Hand (HtH) Combat, place one of these counters on that Hostile card.
Service Record Counters
These counters will be placed on your Service Record cards to show how many times you can use each Service Record Skill.
Hardy Counters
These counters will be expended to overcome harsh Environmental conditions.
Experience Counters
Each Experience counter represents one or two Experience Points (XP). Some Soldiers start with Experience Points. You will gain Experience Points when you Kill the last Hostile on a Hostile card.
Suppress/EKIA Counters
Place these counters on a Hostile card each time you inflict an Enemy Killed In Action (EKIA) or Suppress result from your Soldiers Attack.
Wound Counters
Wound counters will be used to track the reduction in a Soldiers Health. The reverse of these counters are Treated Wound counters, used to track Wounds that cannot be Healed again.
Bandage Counters
Four Bandage counters come with each First Aid Kit Equipment card you purchase.
Mission Set-Up
Select Nation
Select the Nation of your Soldier cards. Any card which is specific to one or more Nations will show the Nation's flag in the upper left corner. These may include Weapon, Skill or Equipment cards, and can only be used by Soldiers from that Nation. If there is no flag in the corner, it can be used by any Nation.
Select the Region of the Mission, Location, and Objective cards. This can be Europe, Far East, Jungle, etc.
Select the Nation of the Hostiles you are facing, as well as their quality level. Choose between Frontline Hostiles (F) and the more difficult Elite Hostiles (E). All Hostiles in your Hostile deck must be of the same level.
Not all eras have Elite and Frontline Hostiles. Some eras separate the Hostiles by type/difficulty.
Example: The Modern era includes Middle East, Cartel, Eastern European, and more.
Create the Battlefield
Deploy the Tactical Display Sheet
Place the Tactical Display Sheet on the table. Your Soldiers will always be in a Location card. Mission and Objective cards are considered to be Location cards. The Mission card and Objective card are the first and last Location cards of a Mission.
Deploy the Decks
Shuffle the following decks: Hostiles, Locations, Events, and Action cards. Place each deck face down on the Tactical Display Sheets respective Deck Areas. Place the Keyword sheet nearby for easy reference.
Card Text and Decks
Where the text on a card conflicts with the Rulebook, the card takes precedence over the Rulebook.
When a deck is depleted, gather the cards from the discard pile, shuffle the cards, and form a new deck.
Mission Card Details
- Title: For flavor only.
- Region: Where your Mission takes place.
- Entrance Cost: The Action card discard cost to enter the Location. The higher the number, the harder it is to Enter the Location.
- Resources: The number of Resource Points you have to build your team and equip them for this Mission.
- Time: The number of Game Turns you have to complete the Mission.
- Objective: Specifies where to place the Objective card along the Tactical Display Sheets Mission Path.
- Loadout: Adjust each Player Soldiers Loadout rating by this modifier. Non-Player Soldiers and Squad Soldiers ignore this adjustment.
Example: A Player Soldier has a Loadout of 12. The Mission has a Loadout penalty of -5. The Soldiers Loadout is reduced to 7.
- Engage in Hand to Hand: The Action cost to engage a Hostile card in Hand to Hand combat.
- Special Notes: Special notes relating to the Mission.
Example: When you play the Still Waters Mission card, you know the Mission will take place in the Jungle, you will have 114 Resource Points to use toward creating your team, you will have 18 Game Turns to complete your Objective, which is found in Location #9 and there is -5 Loadout to how much your Soldiers can carry.
Select Your Mission Card
Choose a Mission card belonging to the Region you selected.
Mission Types
Warfighter features several types of Mission cards. Standard Mission cards are found in the Core Games. The other Mission types are found in the Expansion Packs.
Standard Mission
These Mission cards detail a Standard Mission. Your Soldiers begin in the Mission card, advance through a number of Location cards, and finally enter an Objective card and overcome the final obstacle to complete the Mission.
Escape Mission
Your Soldiers travel through these Missions backwards. Soldiers begin in the Objective card and travel backwards to the Mission card.
The Objective card begins the Mission Active. Draw Hostile cards for the Objective card after the Advance Mission Timer step of the first Mission turn.
All Soldiers must be in the Mission card to complete the Mission. Soldiers cannot be Removed from these Missions. All Downed Soldiers are KIA. Some card effects add Hostiles to Location cards. Do not add Hostiles to the Mission card.
In regard to the Keywords Front-most, Rear-most, Beyond, and Behind, treat the Objective card as being the Mission card, and the Mission card as being the Objective card.
Shadow War Missions
Place the Insertion card and Extraction card next to the Mission card. Resolve the Extraction as normal.
Holding Action Mission
Your Soldiers must keep Hostile cards out of the Objective card throughout the duration of the Mission. Holding Action Missions have special set-up rules and Mission rules.
Set-Up
At the start of a Holding Action Mission, place a "Holding Action Mission. The Front." Mission card in Location #1, and a "Holding Action Mission. Fallback Position." Objective card in the Objective's Location. Draw and place a random Location card for each of the other Location spaces, and then place all Soldiers in the Objective card.
During the Mission
Draw a Hostile card for each Location (other than the Mission and Objective cards) each Soldier Turn after the Environment step. Ignore any text on the Hostile cards relating to Place.
During the Hostiles Close Range step, instead of Hostiles automatically Moving closer to Soldiers, roll a die for each Hostile. Move the Hostile one Location closer to the Objective if the roll is 2 higher than the Entrance cost of the Location it is about to Enter. Do not roll for a Hostile if it has 1 or more Suppress counters.
Example: A Hostile is about to Enter a Location with an Entrance cost of 3. The Hostile must roll 5 or higher to Move into that Location.
Perform the Hostile Reinforcement Draw step as normal.
Ignore Hostile abilities and Keywords that adjust the Timer, Place, or Maintain.
If you have a card effect that can add Mission Time, you can use it to reduce Mission Time.
Do not perform the Hostile Turn on the last Turn of the Mission.
If there are Hostile cards in the Objective card at the end of a Soldier Turn, end the Mission. You have failed.
To complete the Mission, you must have no Hostile cards in the Objective card at the end of each Soldier Turn, until the end of the Mission.
Medals Expansion
If you are using the Medals Expansion, treat all Medal card backs that read "Draw when you play a Location." to read "Draw when you play a Location. Or, discard at any time."
Hold The Line Mission
Your Soldiers must keep the Location cards clear of Hostile cards to complete the Mission.
Set-Up
Begin the Mission with a "Hold the Line Mission. Left Flank." Mission card in Location #1, a "Hold the Line Mission. Right Flank." Mission card in the Objective's Location, and draw and place a random Location card for each of the remaining Locations. Redraw, and keep redrawing, for any Locations drawn that have a Rein of "None". Do not draw Hostiles when you place the Locations.
Place your Soldiers in any of the Location cards, including the Mission card and Objective card.
During the Mission
Treat all Locations as being Always Rein (checking Reinforcement values and Hostile values as normal), Mission (if it has a Reinforcement value), and Objective card each Game Turn.
Ignore text on Hostile cards relating to Place.
If you have a card effect that can add Mission Time, you can use it to reduce Mission Time.
Example: The Wrist GPS Equipment card adds 2 extra Turns to the Mission Time. If a Soldier equips this, immediately subtract 2 Turns from the Mission time.
If there are Hostile cards in play at the end of a Soldier Turn, end the Mission. You have failed.
To complete the Mission, you must have no Hostile cards in play at the end of each Soldier Turn, until the end of the Mission.
Medals Expansion
If you are using the Medals Expansion, treat all Medal card backs that read "Draw when you play a Location." to read "Draw when you play a Location. Or, discard at any time."
Shore Invasion Mission
A Shore Invasion Mission is a special kind of Mission first appearing in WWII Expansion #43 Shore Invasions.
Shore Invasion Missions begin with your Soldiers in a Landing Craft in the Mission card. You must fight your way out of the Mission card, through the Surf, across the Beach, and finally to the Objective.
Set-Up
To set up your Mission, select: a Shore Mission card for Location #1 and a Shore Objective for Location #4. Also, select a Landing Craft Equipment card, and place it next to the Mission card.
Purchase your Soldiers and Gear as normal, except you may not purchase or use Smoke Grenades during the Mission.
Once you have completed these steps, draw a random Surf Location card for Location #2 and a random Beach Location card for Location #3. Also, draw Shore Defenses Hostile cards for the Shore Defenses Objective card.
Fortifications
If you are using the Fortification expansion, draw a Fortification card for the first Hostile card for the Shore Defenses Objective. Do not use a Fortification Objective. Use the Shore Assault Objective.
During the Mission
You are now ready to begin. Any Soldiers in the Mission card suffer the limitations listed on the Landing Craft card.
Hostile cards do not start in, or Enter, Location cards #1, #2, or #3. Place, or keep, Hostile cards in the Shore Objective card.
Draw all Reinforcement Hostiles from the normal Hostile deck.
The Shore Defenses Objective card and Shore Defenses Hostile cards begin the Mission Active.
Airborne Mission
An Airborne Mission is a special kind of Mission first appearing in WWII Expansions #24, #25, and #40.
Airborne Missions begin with the Soldiers being delivered to the start of the Mission by either Parachutes, or in a Glider. Once the Mission is underway, Airborne forces must operate behind enemy lines, cut off from support forces, until their Mission is complete. The Landing Zone and Enemy Lines cards simulate the difficulties of Airborne Missions.
Set-Up
To perform an Airborne Mission, select an Airborne Mission card. Only Airborne Soldiers may participate in Airborne Missions. Select Airborne Player Soldiers, Non-Player Soldiers, and Squad Soldiers as normal. Select an Objective card as normal.
Your Soldiers must be delivered to the Mission card with a Glider, or with Parachutes. Decide if you will use a Glider or Parachutes when selecting your forces.
If you selected Parachutes, refer to the rules on the Parachute Equipment card. All Soldiers must be Equipped with a Parachute. If you selected a Glider, refer to the rules on the Glider Equipment card. All Soldiers must arrive in the Glider.
Shuffle the Landing Zone cards and place the deck next to the Tactical Display Sheet. If you have multiple Airborne expansions, you may combine the Landing Zone cards to form a single deck.
Shuffle the Enemy Lines cards and place the deck next to the Tactical Display Sheet. If you have multiple Airborne expansions, you may combine the Enemy Lines cards to form a single deck.
You are now ready to begin.
During the Mission
At the start of the 1st Turn, draw a Landing Zone card and apply its effect. Do not draw Landing Zone cards after the 1st Turn.
At the start of each Game Turn, starting with the 2nd Turn, draw and resolve an Enemy Lines card.
Fortification Mission
A Fortification Mission is a special kind of sub-Mission first appearing in WWII Expansion #45.
Set-Up
Select a normal Mission card and a Fortification Objective card. Find the Hostile card that is Present on the Fortification Objective card, and place it next to the Objective card. Shuffle the Fortification Hostile cards and draw one for each Location that will be placed during the Mission.
Example: The Objective is in Location #5, so there will be 3 Location cards. Draw 3 Fortification Hostile cards.
Turn the Fortification Hostile cards face-up and examine them. You are free to examine them at any time throughout the Mission.
During the Mission
When you draw Hostiles for a new Location, randomly select one of the Fortification Hostile cards you set aside. Then, draw the remaining Hostiles as normal from the Hostile deck.
Example: You place a Location with a Hostile value of 5. You draw and place a value 1 Fortification card. You then draw from the standard Hostile deck, and draw a value 3 Hostile, and finally a value 2 Hostile.
If the Fortification card has Overkill, and cannot be placed, draw a card at random from the unused Fortification Hostile cards. Continue redrawing until a Fortification Hostile card can be placed.
JTAC Mission
JTAC (Joint Terminal Attack Controller) Missions have your Soldiers using a laser designator to illuminate a target for an airborne weapon platform to destroy with bombs or missiles.
Some Objective cards have the JTAC Attacks only notation. These Objectives can only be Destroyed by JTAC Attacks.
- JTAC Target Designator Card: Required to perform a JTAC Attack on an Objective. You must purchase and assign this Gear to a Soldier as normal.
- JTAC Attack Platform Card: Required to perform a JTAC Attack on an Objective.
- JTAC Guidance Counter: Use these counters to record your accumulated JTAC Guidance Points.
During the Mission
To complete these Missions, you must purchase a JTAC Target Designator and a JTAC Attack Platform during Set-Up. You can only perform JTAC Attacks against designated Objective cards.
To perform a JTAC Attack, you must move the JTAC Designator Equipment card within Range of the Objective card. The Ranges are listed on the Designator card.
Once you have the Designator in Range, the equipping Soldier may begin paying Actions to generate Guidance Points for one designated JTAC Attack Platform. Each time the Soldier pays an Action, roll a die, reference the chart on the Designator cards, and apply the listed modifiers. The result is the number of Guidance Points generated. Use a JTAC Guidance counter to record the Guidance Points for future reference. You may spend Actions and accumulate Guidance Points for one or more Turns.
Only one Designator may generate Guidance Points for each JTAC Attack Platform.
You must Activate the Objective before you can start generating JTAC Guidance Points against it.
During the Soldier Turn, you may declare the JTAC Attack Platforms Attack on the Objective. Doing so is not an Action. Roll the number of Attacks noted on the JTAC Attack Platform card, reference the Attack chart, and apply the Guidance Points modifier to each roll. The result of each roll is the number of Damage Points inflicted on the Objective.
You Destroy the Objective if you inflict the number of JTAC Attack points of Damage listed on the Objective card.
For each point of Damage inflicted on the Objective, Eliminate 1 random Hostile in the Objective card. Gain XPs as normal.
Immediately move the Noise counter to the Alarm Sounded space on the Tactical Display Sheet.
Roll as noted on the JTAC Target Designator card for each Soldier that was at the listed Range from the Objective during the Attack to determine if that Soldier was also Downed by the Attack.
Example: You have selected an AN/PED-1 and MQ-9 Reaper for your Mission. Your Soldier moves the AN/PED-1 within 1 Location of the Objective. You spend 1 of the Soldiers Actions to make a Guidance roll. You roll a 6, and gain 1 Guidance. You then spend 2 XP to boost the roll to an 8. This gives you 2 points instead of 1. On the Soldiers next Turn, you spend another Action, roll an 8 and get more Guidance Points, for a total of 4. You continue to spend Actions Turn after Turn until you have accumulated 10 Guidance Points. You then declare the Reaper Attack. 10 Guidance Points gives you a +2 modifier on your 2 Reaper rolls. You roll a 5 and 8, which become a 7 and 10, and you inflict 3 Hits on the Objective.
You may only perform 1 JTAC Attack Platform Attack during the Mission.
Raid Mission
These are two-part Missions. First, complete the Mission as specified. You may not select an Escape Mission Objective. Once you complete the Mission, perform an Escape Mission from the Objective card back to the Mission card.
Meltdown Mission
These Missions have the Soldiers racing against an impending disaster while trying to complete the Objective.
Set-Up
The Mission card designates a Meltdown number (x). Place the Meltdown Progress counter on the noted number of the Mission Timer Track.
Example: The Mission card notes Meltdown (22), place the Meltdown Progress counter on Turn 22 of the Mission Timer Track.
During the Mission
Each time a Hostile Attacks and does not inflict a Wound or Kill, place 1 Meltdown Damage counter on the Mission card. Also, place 1 Meltdown Damage counter on the Mission card for each die rolled for an Explosion Attack (do not do this for Weapons used as a Distraction).
Each time you advance the Timer counter, advance the Meltdown Progress counter a number of spaces equal to the number of Meltdown Damage counters that are on the Mission card.
Example: There are 3 Meltdown Damage counters on the Mission card. At the end of the Turn, you advance the Timer counter 1 space. You also advance the Meltdown Progress counter 3 spaces.
Once you complete the Objective, stop moving the Meltdown Progress counter as you have completed the Mission.
If the Meltdown Progress counter reaches 0, the target is destroyed, Down all Soldiers, and you fail the Mission.
Sabotage Mission
These Missions have the Soldiers tasked with destroying the target through acts of sabotage. These Missions will commonly be paired with a second Mission type, such as Meltdown.
In order to complete these Missions, the target must be Destroyed by the means noted on the Mission card.
Damaging Locations
During Sabotage Missions, your Soldiers inflict Damage on the target, usually by using their Hack and Pick Abilities.
When you place one of these Locations into play, place an Unresolved counter on it. When you meet the noted condition, flip the counter to its Resolved side.
Example: Referencing the example card shown, if you make a successful Hack roll, you place 1 Meltdown counter, generate 3 Noise, and flip the counter to its Resolved side. During Hostile Turns, you will also roll to determine if a Hostile Technician Arrives in the Location on a roll of 1 to 5.
Many Sabotage Missions include Hostile cards that can Repair the damage you have inflicted on Locations. These Hostiles have the Repair ability noted in their card text.
Technicians enter play in response to a Locations Arrival Keyword. During the Hostile Reinforcement Draw step, roll a die for each Location with a Resolved counter and the Arrival Keyword. If the roll is in the noted range, look through the Hostile deck for the noted card. If there are none in the Hostile deck, look through the cards placed off to the side, and place the noted Hostile type in the Location. Shuffle the Hostile deck.
If the Location already has a noted Arriving Hostile present, do not roll.
Example: A Location card has Console Station (Hack, +1), Success: Place 1 Meltdown Damage counter, and Technicians Arrive (1-5). Your Soldier makes a successful Hack roll, triggering the Success text. During the next Hostile Reinforcement Draw step, there is no Technician in the Location. You roll a die and get a 3. You place a Technicians card in the Location.
During the Hostile Attack step, roll a die for each Technician. If they roll a Successful Repair, flip the counter from its Resolved side back to its Unresolved side, and undo the Success effect you inflicted.
Example: The Technicians card has a Repair 6+/8+ notation. The Location has a Resolved counter and due to the Success text, you placed a Meltdown Damage counter on the Mission card. You roll during the Hostile Attack step for the Technicians and get a 7. The Technicians succeed and flip the counter back to Unresolved, and discard 1 Meltdown Damage counter from the Mission card. If the Technicians had suffered a Suppress or EKIA, they would have needed an 8+ to succeed.
Treat Technicians as normal Hostiles when Attacking them.
A Repaired Location may be Damaged/Resolved by your Soldiers again, as before. If you do, roll for Arrival as normal. This repeats until the end of the Mission.
Sabotage (Meltdown) Mission
The Soldiers must perform the activities noted on the Location cards to set the Meltdown Progress counter in motion. To complete the Mission successfully, you must complete the conditions noted in the Objective card, the Meltdown Progress counter must reach 0, and your Soldiers must be Extracted before the Timer and Meltdown counters reach 0.
Example: The Mission card has the Sabotage (Meltdown) Mission type. The Soldiers must complete the Objective card, arrange for the target to be Destroyed by Meltdown Progress, and they must be successfully Extracted before the Meltdown and Timer counters reach 0.
Set-Up
Set up the Mission as normal.
During the Mission
Resolve the Mission as normal. You may Move your Soldiers to the Extraction card, and attempt to Extract them at any time.
If the target has not been Destroyed when the Timer counter reaches 0, continue resolving Turns for Technician Arrival, Repair attempts, and Meltdown Progress to determine if the Technicians can prevent the Meltdown Progress counter from reaching 0.
Fortification Mission (any Mission)
You may declare any type of Mission to be a Fortification Mission. Shuffle and place the Fortifications deck within easy reach. Fortifications first appeared in WWII Expansion #45. The first Hostile placed for each Location must come from the Fortifications deck.
K9 Mission
If a K9 Soldier is taken on a Mission, shuffle and place the K9 Encounter deck next to the Hostile deck.
Each pair of Handler and K9 cards have the same photo and note. You cannot take a K9 with a Soldier who is not their Handler. A Handler can participate in a Mission without their K9.
Do not Draw Hostile Targeting counters for K9 Soldiers.
A Handler and their K9 must always be in the same Location. When a Handler performs a Move, the K9 must also perform the Move at the same time. The Handler pays the Entrance costs for both Handler and K9. If the Handler cannot pay both costs, the pair cannot Move.
K9 Soldiers do not have Actions. K9 Soldiers do not pay Actions to Move. K9 Soldiers cannot perform Attacks against Hostiles.
K9 Encounters
Place the K9 Encounter cards next to the Hostile deck. Before you place a new Locations Hostile cards, draw 1 card from the K9 Encounter deck. The number in the top right corner shows the Hostile value of that K9 Encounter.
If a Handler and their K9 are the first Soldiers to Enter the card, roll on the K9 Encounter card. If all rolls are successful, gain the noted Reward. If any roll fails, suffer the Failure.
Do not gain XP for the Encounters Hostile value.
If a Soldier other than a Handler and their K9 is the first to Enter, the K9 Encounter card rolls are automatically failed.
When a Soldier Enters a Location with a K9 Encounter, the top-most note designates whether the K9 or the Handler must perform the first roll.
K9 Soldiers have 4 Ability Modifiers: Bomb, Friendly, Rescue, and Threat. When a K9 performs a roll, apply the number in the parentheses.
Example: This Encounters first roll has a (Bomb, -1) notation. Gizmo succeeds on a Bomb roll of 5 or higher. This Encounter has a -1 modifier. Therefore, Gizmo must roll a 6 or higher to succeed on the roll.
Some rolls have conditional modifiers.
Example: In the Buried Explosive Encounter, under the K9 roll, you may pay 1 Discipline to add 4 to your roll. Under the Handler roll, there are multiple modifiers. The first allows you to pay an XP to add 1 to your roll, and the second allows you to discard 2 cards to add 3 to your roll. If you can meet the modifier, you can pay it, and gain the bonus.
You do not have to use the modifiers if you can meet their requirements. You must pay the requirements before performing each roll.
Some Encounter cards give you a choice if you fail a roll. For these cards, you can either accept the minor harmful effect, or try a fresh Ability roll, at the risk of suffering a major harmful effect.
Example: Wong and Gizmo are in Location #2. Wong places a new Location with a total Hostile value of 5. You start by drawing a K9 Encounter. The K9 Encounter is Buried Explosive. Do not draw other Hostile cards until you resolve this card. The Location has an Entrance cost of 5. Wong must discard 2 cards to Enter for himself, and 1 card for Gizmo, totaling 3 discards. Wong can decide to Ignore the Encounter. On a roll of 3 or higher, the Encounter is discarded. On a roll of a 2 or less, Wong would suffer the Failure text on the Encounter.
Wong decides not to Ignore the Encounter. The first roll is made by the K9, and it is a Bomb type roll. Gizmo has a Bomb 5+, meaning he succeeds on a 5 or higher. This Encounter has a -1 modifier decreasing Gizmos chance of success to a 6+. Gizmo can pay 1 Discipline to add 4 to the roll. You decide to pay the Discipline and perform the roll. Gizmo rolls a 4, and adds 4 due to paying the Discipline, totaling 8. As this total is 6 or higher, Gizmo succeeds on the roll.
Next, is a Handler roll, so Wong must roll his Handler skill of a 7+. Wong discards 2 cards to add 3 to his roll, but decides not to pay the XP. Including the +3 modifier, Wong rolls a 9, and succeeds. He gains the Reward listed on the card.
If he had rolled a 2 + 3 = 5, he would have failed. At this point you can either accept the Failure result and have Wong and Gizmo each suffer 1 Wound, or you can have Gizmo make a new K9 attempt. To do so, Gizmo needs to roll a 5 or higher with a -1 modifier, a 6+ to succeed. You must pay another Discipline if you would like the +4 modifier on this roll. If the roll succeeds, you gain the Reward, if it fails, you suffer the Failure text and both Wong and Gizmo are Killed.
Discipline
K9 Soldiers have the Discipline Stat. Discipline gives the K9 bonuses on most K9 Encounters. At the start of the 1st Turn, place Discipline counters on the K9 card equal to the K9s Discipline Stat. When a note says to pay Discipline, expend the Discipline amount from your K9.
Handler Ability
All Handler Soldiers have a Handler Ability. In order to complete some K9 Encounters, the Handler must roll their Handler Ability or higher.
K9 Objectives
If a K9 is brought on a Mission, you must choose one of the K9 Objectives. Upon successfully resolving the Objective, the Mission is complete.
Placing the Mission Card
Place your selected Mission card on the Tactical Display Sheet on the Location #1 Mission card space on the Mission Path. Put the other Mission cards aside, as you will not use them during this Mission.
The number of Turns you have to complete your Mission is found on your Mission card. Place the Timer counter on the Mission Timer Track on the Tactical Display Sheet.
Example: If the Mission card specifies Time: 18, then place the Timer counter on the 18 on the Mission Timer Track.
Placing the Objective Card
Choose an Objective card from your selected Region. Place it on the Location number specified on the Mission card.
Example: The Still Waters Mission card specifies Objective: #9. Place the selected Objective card on the #9 space on the Tactical Display Sheet.
Place the other Objective cards aside, as you will not use them during this Mission.
Objective Card Details
-
Objective: The conditions that must be met to complete this Mission. Some Objectives have Keywords describing what you must do to complete the Mission. These are found in the Keyword sheet.
-
Reinforce: The exact point value of Hostile cards that can arrive in this Location.
Example: The Reinforce value is 0-1. You draw a Hostile card during the Draw Reinforcement step and check its Experience value. If the value is 0 or 1, add the Hostile card to the Location. If it is any other value, discard the Hostile.
-
Engage in Hand to Hand: The Action cost to engage in Hand to Hand combat.
-
Hostiles: The total value of Hostile cards that appear when you Activate this card is based on your Teams current Resource Point value.
Example: When you Activate the River Crossing Objective, your Team's current Resource Point value is 114. When drawing Hostiles, you check the Hostiles table and see that having 100-124 Resource Points causes you to draw 9 points of Hostiles.
Place the Inactive counter on the Objective card. Embedded Hostiles in an Inactive Location remain inactive, i.e. do not Move, Attack, apply Keywords or Search value, until the Objective is Activated.
Soldier Card Details
-
Nation: Indicates the Soldiers Nation.
-
Name of Soldier: Only one instance of each Soldier card can be purchased for a Mission.
Example: You have 2 copies of Player Soldier Duncan. Only 1 copy of Duncan can be used in a Mission.
-
Resource Cost: The cost in Resource Points to select this Soldier.
-
Movement: The Movement value reduces the number of Action cards that the Soldier has to pay toward a Location card's Entrance cost. Other Player Soldiers cannot discard Action cards for your Player Soldier.
Example: A Location has an Entrance cost of 4 and your Soldier has a Movement value of 2. You would only need to discard 2 Action cards to Enter the Location.
-
Terrain Cover: Hostiles must roll this number or higher on a 6-sided die to Defeat the Soldiers Terrain Cover during an Attack.
Example: A Hostile is attacking Player Soldier Duncan. The Hostile must roll a 2 or higher on a 6-sided die to overcome Duncans Terrain Cover.
-
Soldiers Health: A Soldier can hold a number of Action cards equal to the Health value. Each Wound a Soldier suffers reduces the Health (and Hand Size) by one card. If the Player Soldier ever reaches 0 Health, the Soldier is Down (incapacitated) and can no longer participate in the Mission.
-
Soldiers Loadout: A Soldier can only hold Weapons and Equipment up to the noted Loadout value. A cards Resource cost is also its Loadout weight unless otherwise noted.
Example: An M1 Carbine costs 2 Resource Points. It has a Loadout weight of 2.
Example: An M1 Rifle has a Resource cost of 2, but as noted on its card, it has a Loadout weight of 4.
Any Weapons or Gear with which the Soldier is pre-equipped counts against the Soldiers Loadout value.
-
Soldiers Hand to Hand (HtH) Skill: Modifies a Soldiers Hand to Hand Attack rolls.
Non-Player Soldier Card Details
Non-Player Soldiers (NPS) start the game with the Weapons, Skills, and Equipment cards noted on their cards. They do not have a hand of Action cards. You choose how they use their Actions each Soldier Turn.
-
Nation: Indicates the Soldiers Nation.
-
Name of Soldier: Only one instance of each Non-Player Soldier card can be purchased for a Mission.
Example: You have 2 copies of NPS Nurke. Only 1 copy of Nurke can be used in a Mission.
-
Resource Cost: The cost in Resource Points to select this Soldier. All their Weapons, Equipment, and Skills are included in the NPSs cost.
-
Movement: Since a Non-Player Soldier does not have a hand of Action cards, if the Movement value is less than a Locations Entrance cost, Player Soldiers on the team must discard their Action cards for the Soldier to enter the Location card.
Example: Non-Player Soldier Nurke is Entering the Light Jungle Location card. The Light Jungle has an Entrance cost of 4 and Nurke has a Movement value of 1. Player Soldiers must discard 3 Action cards so Nurke can enter the Light Jungle Location.
-
Terrain Cover: Hostiles must roll this number or higher on a 6-sided die to Defeat the Soldiers Terrain Cover during an Attack.
-
Soldiers Health and Actions: Each NPS receives Actions to use each Soldier Turn based on the current Health. The numbers in the top row show the Soldiers current Health. The numbers in the Actions row show how many Actions the Soldier can use.
Example: Nurke begins with 2 Health. Whilst he has 2 Health he gets 2 Actions each turn. When he is reduced to 1 Health, he only gets 1 Action each turn.
If the Non-Player Soldier ever reaches 0 Health, the Soldier is Down (incapacitated) and can no longer participate in the Mission.
-
Soldiers Weapons, and Equipment: A Non-Player Soldier has only the Skills, Weapons, and Equipment listed on the card.
Whomever is playing the Non-Player Soldier can choose which of the Soldiers Weapons to use for an Attack.
You cannot purchase extra Ammo for a Non-Player Soldier, but you can pass Ammo to the Non-Player Soldier during the Mission, and the Non-Player Soldier can pass Ammo to other Player Soldiers and Non-Player Soldiers.
Squad Soldier Card Details
Squad Soldier cards do not have Action cards, Weapon cards, Skill cards, or Equipment cards. They can only use the information on their cards which may include Weapon cards, Skill cards, and Equipment cards.
-
Nation: Indicates the Soldiers Nation.
-
Name of Soldier: Only one instance of each Squad Soldier card can be purchased for a Mission.
Example: You have 2 copies of Squad Westlake. Only 1 copy of Westlake can be used in a Mission.
-
Resource Cost: The cost in Resource Points to select this Soldier.
-
Movement: Since a Squad Soldier does not have a hand of Action cards, if the Movement value is less than a Locations Entrance cost, other Player Soldiers on the team must discard their Action cards for the Soldier to enter the Location card.
Example: Squad Soldier Westlake is Entering the Light Jungle Location card. The Light Jungle has an Entrance cost of 4 and Westlake has a Movement Skill of 2. Player Soldiers must discard 2 Action cards so Westlake can enter the Light Jungle Location.
-
Terrain Cover: Hostiles must roll this number or higher on a 6-sided die to Defeat the Soldiers Terrain Cover during an Attack.
-
Health, Actions, and Attacks: As a Squad Soldier suffers Wounds, the Soldier's Actions decrease, and the Soldier's chances to successfully Attack also decrease.
Example: Squad Soldier Westlake has 2 Health, and he has 3 Actions to use during the Soldier Turn. His Hit number is 6 at Range 0.
If the Squad Soldier ever reaches 0 Health, the Soldier is Down (incapacitated) and can no longer participate in the Mission.
Squad Soldiers never run out of Ammo. If a Squad Soldier does not have an HtH Attack row, use their Range 0 row to make Hand to Hand Attacks.
-
Soldiers Special Ability (if any): Any special ability information is noted here.
If a Squad Soldier is carrying Ammo or Expended counters for a Weapon they do not have, they can give these counters to another Soldier in their Location that is able to carry them.
A Squad Soldier may not be given Gear if it brings them in excess of what they started with.
Weapon Card Details
-
Name of Weapon: Shows the military designation and its Weapon type.
-
Nation: Choose Weapon cards matching your Soldiers flag.
-
Weapon Keyword: All Weapons have a Keyword, such as Ranged, Thrown, or Melee. These Keywords are referenced on Action cards, Equipment cards, and Skill cards. If an Action card modifies the Weapons title or Keywords, then the Weapon gains the noted benefits.
Example: You are using an M1903A4 Scoped Rifle with the Ranged Keyword. You can use the Steady Aim Action card to improve its Attack.
-
Resource Cost: The cost in Resource Points to equip your Soldier with this Weapon. Unless otherwise noted on the Weapon card, this value is also the Weapons Loadout weight.
If the Weapons Loadout weight is different from the Resource Cost, the Loadout weight will be displayed under the Resource cost.
When you purchase a Weapon card for a Player Soldier, pay its Resource cost and place it next to your Soldier card face up on the table. It remains with you throughout the Mission unless it is expended, passed, or dropped.
Example: The M1903A4 Scoped Rifle costs 2 Resource Points and has a Loadout of 4.
-
Weapon Range: The distance between your Soldier and the target.
A Weapon may be able to Engage a Hostile at:
- Range 0 - in the same Location card as your Soldier.
- Range 1 - one Location card away from your Soldier.
- Range 2 - two Location cards away from your Soldier.
When you declare an Attack, declare which of your Weapons you are using and which Hostile you are Attacking.
To use a Weapon, the Hostile must be within the Weapons Range.
-
Reload #s: If any of your Attack rolls are equal to or less than the Weapons Reload number, your Weapon has run out of Ammo during the Attack. You cannot use the Weapon again until you Reload it.
Melee Weapon Card Details
- Melee Keyword: Can only be used in Hand to Hand Combat.
- Special Rules (if any): Any special notes relating to the Weapon. Additional Keywords can also be found here.
- Mode: You can freely choose the Attack Mode you want to use for your Weapon with each Attack.
- Strong - Roll 1 10-sided die. A Strong Attack represents a focused, powerful Attack.
- Combo - Roll 2 10-sided dice. A Combo Attack represents a series of Attacks.
- Aimed - Roll 1 10-sided die. An Aimed Attack represents a well-aimed Attack.
- Attack Details: Details any additional special rules for the Weapon.
Equipment Card Details
When you purchase an Equipment card, pay its Resource Point cost and place it next to your Player Soldier card face up on the table. It remains with you throughout the Mission unless expended, passed, dropped, or discarded.
-
Card Title: A description of the Equipment.
-
Resource Cost and Loadout Weight: Any Equipment which comes pre-printed on a Soldier card has its RP cost included in the Soldier's RP cost. However, the Loadout weight of the items still have to be counted against the Soldier's Loadout rating.
-
Card Effect: Costs that must be paid to gain the Equipment cards effect. The cards effect can be used whenever it is applicable.
Example: Camouflage gives you a chance to stop Hostiles from targeting you during each Hostile Turn.
Armor Card Details
Update: This is a new rule section for Warfighter! Up until this rulebook, it was assumed that a Soldiers Cover value was a combination of their ability to use terrain for cover, as well as the protection offered by their body armor. Going forward, a Soldiers Cover rating strictly refers to their ability to use terrain cover. We are now providing Equipment Armor cards for Soldiers wishing to wear Armor. We have included Modern Armor Equipment cards in the Update card pack, as well as in the new Warfighter products.
-
Type of Armor: Shows the military designation for the Armor.
-
Resource Cost: The cost in Resource Points to equip your Soldier with this Armor. Unless otherwise noted on the card, this value is also the Armors Loadout weight.
If the Armors Loadout weight is different from the Resource Cost, the Loadout weight will be displayed under the Resource cost.
When you purchase an Armor card for a Player Soldier, pay its Resource cost and place it next to your Soldier card face up on the table. It remains with you throughout the Mission unless it is expended, passed, or dropped.
Example: The IBA Kevlar costs 2 Resource Points and has a Loadout of 4.
-
Equipping Limitations: If a Soldier card lists a specific type Armor card, you must Equip the Soldier with the Armor. Because the Armor is listed on the Soldier card, its RP cost has been included in the Soldiers purchase cost.
If a Soldier card does not list an Armor type, you may Equip the Soldier with any one Armor card.
-
Coverage and Protection: The Loc. column shows the Body Locations protected by the Armor. The number under the Cover Arc shows the Cover value provided for those Body Locations. For visual reference:
Area Body Location 1 Head 2 Face 3 Neck 4-6
Skill Card Details
Skill cards permanently enhance your Soldier.
When you purchase a Skill card, pay its Resource cost and place it next to your Soldier card face up on the table. It remains with the Soldier throughout the Mission. Skills have no weight, and therefore do not count toward your Loadout limit.
- Name of Skill: A description of the Skill.
- Resource Cost: The cost in Resource Points to equip your Player Soldier with this Skill.
- Card Effect: Pay any costs to gain the Skill cards effect. The cards effect can be used whenever it is applicable.
Soldiers are limited to one Skill card of each title. You cannot pass Skill cards between Soldiers. The number of Skill cards in the game does not limit what your team can purchase.
Some Non-Player Soldiers and Squad Soldiers come with listed Skills. These work exactly the same as for Player Soldiers. Skills which come pre-printed on a Soldier card are already calculated into the RP cost of the card, and do not need to be paid for separately.
Some Skill cards reference other Skill card titles.
Example: In order to purchase Sharpshooter, you must first purchase Marksman.
Service Record Card Details
-
Nation: Only Soldiers from this Nation can use this card.
-
Region: For flavor only. This is where the battle took place.
-
Resource Cost: The cost in Resource Points to equip your Soldier with this Skill. These do not have a Loadout cost.
-
Soldier Type: Each Service Record card designates which type of Soldier can be equipped with this card. Some Service Record cards cannot be equipped by Vehicles.
Example: This card can be purchased for a Player Soldier (PS), a Non-Player Soldier (NPS), and a Squad Soldier (SQ).
-
Battle: Each card shows the name of the battle, and the date the battle took place. You can only equip a Soldier with one Service Record that takes place during a specified time. Service Records dates cannot overlap.
Example: You purchase the Battle of Kokoda for your Player Soldier. The battle took place in July 1942. You cannot purchase other Service Record cards that happened in this time period.
-
Skills: Each Service Record shows the abilities gained by the Soldier.
Each card designates how many times during the Mission each ability can be used. Place the specified number of counters A, B, and C on each Service Record card. When an ability is used, discard the counter.
A Soldier can have any number of Service Records, as long as they do not overlap Battle dates.
Service Record cards are located in the Ammo Box decks and various Expansions.
Purchasing Your Cards
The decisions you make here will go a long way to determining your Missions success. It is important to spend some time on this.
You purchase Soldiers, Weapons, Equipment, Service Records, and Skill cards with the Resource Points noted on your Mission card.
You must purchase at least one Player Soldier for your Mission.
Distribute the Resource Points between players in any way agreeable to all the players. You do not have to spend all the Resource Points.
The Resources number on the Mission card shows the maximum number of Resource Points you can spend.
Example: The Still Waters Mission card specifies Resources: 114. You can spend no more than 114 Resource Points in total.
The Loadout modifier specified on the Mission card applies to each of your Player Soldiers. It modifies the amount of Weapons, Ammunition, and Equipment they can carry on their Mission.
Example: The Mission card specifies Loadout: -5. A Player Soldier with a Loadout value of 12 can only carry 7 Loadout points of Weapons, Equipment, and spare Ammunition on this Mission.
Weapons, Skills, and Equipment
What your Soldiers take with them into the Mission is usually all they will have to succeed or fail with. Some Locations, Action cards, and Equipment allow for mid-Mission resupply.
The number of actual Weapon, Equipment, Service Record, and Skill cards in the game does not limit what your team can purchase.
Example: 2 Soldiers both want the M1918A2 Machine Gun, but there is only 1 M1918A2 card in the game. Both Soldiers can purchase and use the Weapon. Both Soldiers can reference the card while keeping track of their own Ammo usage.
If you run out of Ammo during the Mission, your chances of survival are low. Equip accordingly.
Player Soldiers may freely drop Weapon or Equipment cards in a Location. The cards remain in the Location in case other Player Soldiers want to pick them up.
You can freely pass Weapon and Equipment cards between Player Soldiers in the same Location card as long as the Weapons and Equipment do not exceed the receiving Player Soldiers Loadout. Weapons and Equipment may not be passed if they have been used this Turn.
Example: A Player Soldier is equipped with the M1903A4 Scoped Rifle. He fires it once, so he cannot pass it to another Player Soldier this Turn.
You may not pass Weapon or Equipment cards to or from Non-Player Soldiers or Squad Soldiers, but you may pass the same type of Ammo between Player Soldiers and Non-Player Soldiers (see section below).
Weapon Ammo
Each Weapon uses a specific type of Ammo. When you purchase a Weapon, place the specified number of Ammo counters on the Weapon card.
Example: The M1 Rifle begins the Mission with 5 Ammo counters.
If you roll a Reload result, turn the Weapons top Ammo counter over to its Empty side. You must spend an Action to remove the Empty counter from your Weapon card and reveal the next Ammo counter. You cannot attack with that Weapon until you have Reloaded (removed the Empty Ammo counter).
You cannot Attack with a Weapon if it has no remaining Ammo counters.
You can only use Ammo that is specific to the Weapon you are using.
Example: Your Weapon uses .30 caliber Ammo. Your Weapon may only receive Ammo from another Weapon that is also .30 caliber.
Several Weapons use the same type of Ammo. As long as the Ammo type is the same, you can freely pass Ammo counters between Player and Non-Player Soldiers in the same Location card during the Soldier Turn.
Purchasing Extra Ammo
You can purchase extra Ammo for Player Soldier Weapons before a Mission. Each extra Ammo purchase costs 1 Resource Point and 1 Loadout point. Buying extra Ammo gives you a number of Ammo counters equal to the number noted on the Weapon card that you are purchasing extra Ammo for.
Example: When you purchase extra Ammo for the M1 Rifle, you gain an additional 5 Ammo counters for a cost of 1 Resource point and 1 Loadout point.
Counters
Once you have chosen and equipped your team, assign each Soldier a number.
Place one copy of each Soldiers Identification counter on your Soldier card. Place the matching Identification counter on the Mission card. All Soldiers begin each Mission in the Mission card. This is an easy way to remember which counter represents each Soldier.
Example: When I move the #1 counter on the Tactical Display Sheet, I know I am moving Player Soldier Duncan.
Place each Soldiers 4 Hostile Targeting counters in a cup.
Example: You have chosen Player Soldier Duncan, Non-Player Soldier Nurke, and Squad Soldier Westlake. You place the 4 copies of the Hostile Targeting counters #1, #2, and #3 into a cup.
Place 1 Action counter next to each Soldier card for each of the Soldiers Actions. During the game, as you spend each Action during a turn, flip the Action counter to its Used side. Flip all Action counters to their unused sides at the start of each Soldier Turn.
Team Selection Example
Example: I purchase Player Soldier Duncan who comes with 1 Hardy (Hot), Gung Ho, and Hip Shooter. I'm loading him with an M2 Carbine, a M1919 Tripod, and a Mk2 Grenade. I am also giving him the skills Veteran, Leadership, Rifleman, Close Combat, and Guts.
Next, I choose Non-Player Soldier Nurke, loaded with 2 XP, an M1919 Machine Gun, the Machine Gunner Skill, and a Mk2 Grenade.
Finally, I add Squad Soldier Westlake who comes with the Skill Gung Ho.
This team costs a total of 62 Resource Points.
Playing Action Cards
All Player Soldiers have a hand of Action cards. Keep each Player Soldiers hand of cards separate.
When you play an Action card, apply the effects of the card, and then place it in the discard pile. You can play as many Action cards from your hand as you like during the Soldier Turn.
You may play multiple Action cards for a single attack.
Example: You are about to Attack, so you play a Steady Aim to gain +2 on your Rifle Attack. You play a second Steady Aim to gain a total of +4.
You can always draw Action cards due to a card effect, even if the draw puts you in excess of your Hand Size. Your ability to draw a card is only limited during a Discard and Draw Cards Action. You never need to discard Action cards due to having too many cards in your hand.
You can play Action cards only during the Soldier Turn unless noted otherwise on the Action card.
Some Action cards can only be played when a specific condition occurs. These conditions might occur at any time. You can play more than one card in reaction to a condition.
Example: Play a Take Cover card when your Soldier is about to suffer Wounds from an Attack roll.
Some Action cards have an Experience Point cost to play. Any Soldier can contribute Experience Points to pay the cost.
Some Action cards refer to Stealth Attacks. You must have a Weapon with the Stealth Keyword to perform a Stealth Attack.
Upgunning
Whenever there is a bracket [ ] in an Action and Skill cards text, you can pay 1 Experience Point to Upgun the card. Upgunning a card lets you use the bonus effects in all of the cards brackets.
Example: A Steady Aim card allows you to add 2 to your Attack roll. If you choose to Upgun the card, you pay 1 XP to use the benefit in the brackets and add 4 to your Attack roll instead of 2.
Some Action cards say "You [any Soldier]". This means the card can be played to benefit the Soldier, or it can be Upgunned to benefit another Soldier.
Example: You can play a Reloading card during the Soldier Turn to Reload a Weapon for yourself or Upgun it to Reload a Weapon for another Soldier.
If the Action card does not say [any Soldier], the card can only benefit the Player Soldier that plays it.
Example: You can only play a Steady Aim card for yourself.
Any Soldier can contribute Experience Points to Upgun a card.
Paying 1 Experience Point Upguns all the Brackets on a card.
Example: You can play a Trail Blazing card for your Player Soldier and reduce a Locations Entrance cost by 2. Or you can Upgun it to reduce the Entrance cost by 4, and you can play it for either your Player Soldier, or another Soldier.
Keyword Matching
Some Action cards will only benefit a Weapon with a matching Keyword.
Example: You are using an M1 Rifle with the Ranged Keyword. You can use the Steady Aim Action card to improve your Attack.
Example: You could not use a Steady Aim to improve a Grenades Attack because the Grenade does not have the Ranged Keyword.
Support Action Cards
Some Action cards have the word Support next to their discard cost. Support Action cards require Action cards to be discarded by the Soldier playing the card. Discard the number of Action cards noted in the top right corner of the card and place the Support card next to your Soldier.
Other Player Soldiers cannot discard cards to meet this requirement.
Support cards do not benefit from Soldier Skills and Action cards.
Example: You play a Mortar Support Action card to Attack a Hostile card. Even though the Mortar Support inflicts Explosion Attacks, you cannot play Action cards that enhance Explosion Attacks.
These cards can be kept in play for more than one Turn. Once the Support card is in play, you gain its benefit. At the end of each Soldier Turn, you can choose to either discard the card, or pay its Retain cost in Experience Points. If you Retain the card, you can use the cards effect again during the next Turn.
Example: I play the Sniper Support Action card and discard 2 Action cards from my hand. At the end of the Soldier Turn, I pay 2 Experience Points to Retain the card.
Any Soldier can contribute to the XP Retain cost of a Support card.
Example: I discard 2 cards to put a Sniper Support card into play. I use it to Kill a Hostile on a Hostile card with a value of 0 or 1. At the end of the Soldier Turn, another Soldier and I each spend 1 Experience Point to Retain the Sniper Support card for another Turn. Since the Sniper Support card is already in play, I do not have to discard more cards to keep it in play.
Only cards with a Retain Keyword can be Retained.
Covert Action Cards
Some Action cards have the word Covert next to their discard cost. Covert Action cards focus on the stealthy and silent aspects of warfare. Covert Action cards require Action cards to be discarded by the Soldier playing the card.
Discard the number of Action cards noted in the top right corner to play the Covert card. No other Player Soldier can discard cards to meet this requirement.
Initial Action Cards
Each Player Soldier has a hand of Action Cards that they draw, hold, play, or discard during the game.
Each Player Soldiers Hand Size is equal to the Soldiers current Health. Draw Action Cards for each Player Soldier equal to the Soldiers Health.
Sequence of Play
Perform the following steps each Mission Turn until the Mission is successfully completed or fails:
Soldier Turn
- Roll for Environment
- By paying an Action, a Soldier can: Remove 1 Suppress; Move; Attack; Reload; Discard and Draw; Engage in Hand to Hand (may require more than 1 Action)
- Soldiers can also freely do the following Activities: Play an Action Card (may cost an Action if stated on the card); Play a Location Card (may cost an Action if stated on the card); Activate the Objective Card; Pass Gear to other Soldiers; Lighten the Load; Pay Retain Costs
Hostile Turn
- Reinforcement Draw
- Hostiles Attack
- Hostiles Close Range
- Hostiles Remove Suppress Counters
- Advance Mission Timer
Soldier Actions
All Player Soldiers have 2 Actions that can be spent each Soldier Turn, unless otherwise noted on their cards. Non-Player Soldiers and Squad Soldiers have their Actions listed on their cards.
Soldiers can play cards, use Equipment, declare Attacks, and perform Actions in any order. Soldiers cannot give their Actions to other Soldiers.
Remove 1 Suppress
Spend 1 Action to remove 1 Suppress counter from your Soldier.
If there are one or more Suppress counters on a Soldier's card, the Soldier may only use Actions to remove the Suppress counters until none remain on the card. The Soldier may also play Action cards that do not require an Action.
Move
Spend 1 Action to Move to an adjacent Location card. Your Soldier will always be in a Location card. Each Soldier can only Move once during each Soldier Turn.
Your Soldier can Move, even if there are Hostiles in the same Location card as the Soldier.
Attack
Spend 1 Action to Attack a Hostile. This Action is covered in detail in the Soldier Attacks section.
Reloading
Spend 1 Action to remove an Empty Ammo counter from a Weapon. If the Weapon has any remaining Ammo counters, the Weapon is Reloaded and can be used. Only Player Soldiers and Non-Player Soldiers may perform this Action.
Discard and Draw
Spend 1 Action to discard any number of cards from your Hand, and then Draw cards until you reach your Soldiers current Hand Size. Only Player Soldiers may perform this Action.
Engage in Hand to Hand
Spend the number of Actions indicated on the Location card to Engage a Hostile card at Range 0 in Hand to Hand Combat.
Soldier Activities
Soldiers can also perform the following Activities during the Soldier Turn. These Activities do not have an Action cost, unless noted on a card.
Example: You play a Location card. Playing a Location card does not cost an Action, but the specific Location card you played lists 1 Action to play as a cost. This is an example of an Activity resulting in an Action cost.
Play an Action Card
Soldiers can play any number of Action cards. Unless noted on the card, there is no cost to play an Action card. Only Player Soldiers may play Action cards.
Discard for Other Soldiers
Player Soldiers discard the Action cards needed for Non-Player Soldiers and Squad Soldiers to perform Actions requiring an Action card discard. This can include: Entering a Location, Using Equipment, etc.
Play a Location Card
Only 1 Location card can be played each Soldier Turn. Unless noted on the card, there is no cost to play a Location card.
Activate the Objective Card
Any Soldier in a Location card that is adjacent to the Objective may activate the Objective. There is no cost to Activate the Objective.
Remove the Inactive counter and draw Hostiles for the Objective card. Soldiers cannot Move or Attack into an Objective card until it is Activated.
Pass Gear to Other Soldiers
Freely Pass Weapons or Equipment to other Player Soldiers in your current Location.
You can drop Gear for another Player Soldier to Pick Up when they enter your Location. This does not cost an Action.
Non-Player Soldiers can Pick Up and receive Ammo counters, as long as they never have more Ammo than is listed on their Weapon card.
Each Equipment and Weapon card can only be used by one Soldier each Game Turn. Weapons and Equipment may not be passed if they have been used in the current Turn.
Lighten the Load
Recalculate your team's resource point value immediately when you discard Weapons or Equipment, as necessary. Any discarded item is removed from the game. This is useful when you are recalculating your Teams resource point value.
Example: Your Team is worth 85 Resource Points. A 10-point Soldier is Downed, reducing your Team to 75 points. If you can reduce your Team value by 1 point, you will drop into the 50-74 range on the Hostile charts. You discard 1 Mk2 Grenade to reduce your value to 74.
Pay Retain Costs
Any Soldier may pay the XP cost to Retain Support cards in play. If a Support card is not Retained, discard it.
Once all Soldiers have used their Actions, or at any time, continue with the Sequence of Play.
Example of a Soldier Turn
During a Mission with Player Soldier Duncan and Non-Player Soldier Nurke, both Soldiers have two Actions and are in the same Location.
Duncan uses one Action to Discard and Draw his hand to full. Nurke uses an Action to Attack a Hostile in his Location. Duncan freely passes Ammo to Nurke to replace some that he previously expended.
Duncan then plays the Stream Location card which is free to play. After drawing the new Hostiles, Nurke uses his second Action to Move into the Stream Location card, after paying the Entrance cost. Duncan then uses his second Action to enter the Stream Location card, also after paying the Entrance cost. Both Soldiers are now out of Actions.
Location Marker Cards
There are several Location Marker cards in the Action card deck. When you draw a Location Marker card, discard and immediately draw a Location card from the Location card deck. Add the Location card to your hand.
Location Cards
Location cards detail the terrain you travel through on your way to your Objective.
The text on a Location card only applies to that Location card.
Location cards have some of the same information as Mission cards and Objective cards.
-
Name of Location: For flavor only.
-
Reinforce: The exact point value of Hostile cards that can arrive in this Location during each Hostile Reinforcement Draw step.
-
Entrance Cost: Each Location card has an Entrance cost in its top right corner. Each Soldier must discard this number of Action cards before Entering the Location. Player Soldiers can discard for Non-Player Soldiers and Squad Soldiers. Player Soldiers cannot discard cards for other Player Soldiers.
Example: You must discard 2 Action cards from your hand before you can enter a Location card with an Entrance cost of 2.
-
Cost to Play: The cost to play a Location card is noted on its card:
- Free to play: This card does not cost any Actions or Experience Points to play.
- Action: The Soldier playing the Location card must spend the noted number of Actions to play the card.
- Pay Experience Points: You must spend the noted number of Experience Points to play the card. Any Soldier can contribute Experience Points to pay the cost.
- Other Keywords and special notes are also noted in this section.
-
Engage in Hand to Hand: The Action cost to engage in Hand to Hand combat.
-
Hostiles: When you place a Location card, draw cards from the Hostile deck. The total Experience value of Hostile cards that appear in a Location depends on your teams total resource value. This is the same as the Resource value on the Mission card.
Example: Your team begins the game with 120 Resource Points. When you place the Stream Location card, you draw Hostile cards until you have drawn 10 or more Experience Points in Hostile cards.
Each Hostile card has its Experience Point (XP) value printed in its top right corner. Draw Hostile cards one at a time and keep an ongoing total of the Experience Point value of the Hostile cards drawn. When you draw a Hostile card that brings the total Experience Point value equal to or greater than the Location cards Hostile value, stop drawing cards.
Environment
Location cards with the Environ (Environment) Keyword first appear in the WWII Russia Expansions #9 and #10. Soldiers in these Location cards must endure particularly harsh environmental conditions.
To overcome the Environment, each Soldier in the Location must roll the noted value or higher on a 10-sided die at the start of the Soldier Turn.
Example: The Stream card represents a Fever Environment. Each Soldier must roll a 4 or higher to resist Fever.
A Soldier who fails the Environment roll must either discard a Hardy counter, suffer a Wound or suffer a Suppress.
Due to Mission, Location, or Event text, it is possible for a Location to have more than one Environmental effect in effect at a time. When this happens, roll for all of them separately.
When you play a Mission in a Region with Environmental conditions on the Location cards, use the Hardy counters to record each Soldiers remaining Hardy. Soldiers begin with 0 Hardy, unless otherwise noted on their cards.
Example: Missions taking place in Russia have the Cold Environmental condition.
Additional Hardy counters can be gained through Service Record cards, Equipment cards, and Skill cards. Once allocated, you cannot move Hardy counters to a different Soldier.
Placing Locations
Regardless of how many Soldiers are in the game, only one new Location card can be placed during each Soldier Turn.
At the start of the game, if there are no Player Soldiers with a Location Marker card, you must spend Actions to Discard and Draw until someone draws a Location Marker card.
Play each Location card on the Tactical Display Sheet, adjacent to the front-most Location card played along the path.
You can play a Location card as long as there is a Soldier in the front-most Location card.
Placing Hostiles
When you play a Location card, immediately resolve the card text, and then draw Hostile cards based on the teams current Resource Point value and place the Hostiles in the new Location card. Some Hostiles have Keywords that will place them in other Location cards.
Example: A Hostile has the Front-most keyword. Place this Hostile in the Location with the Front-most Soldier.
Example: A Hostile has the Place in Targeted Keyword. Place the Hostile in the same Location as the Soldier it is Targeting.
Some Hostiles have Keywords that will place them in a Location space that does not have a Location card. Place them, and move them as normal.
Example: A Hostile has the Place 2 Beyond Front-most keyword. Place the Hostile 2 cards in front of the Front-most Soldier.
If a Hostile is to be placed Behind the Mission card, place it in the Mission card. If a Hostile is to be placed Beyond the Objective card, place it in the Objective card.
Assigning Hostiles
When you draw a Hostile card, draw a Hostile Targeting counter from the cup to see which Soldier the Hostile will be Attacking. The Hostile will target that Soldier each Turn until the Hostile (or the Soldier) is Killed.
If the Soldier being targeted by the Hostile card moves out of the Hostiles Range, the Hostile card will not Attack until it is back in Range.
A Soldier can be targeted by more than one Hostile card.
If a Soldier is Downed, remove all the Soldiers Hostile Targeting counters from the cup. Draw a new targeting counter for each Hostile that was targeting the Downed Soldier.
Example: You have 3 Soldiers in the Mission. You play a Location and draw a Machine Gun Team, Flankers, Ambushers, and an Officer. You draw 1 Hostile Targeting counter from the cup for each Hostile. Immediately place the Flankers in the Rear-most Soldiers Location. You draw a counter #1 for the Machine Gun Team, a #2 for the Officer, a #3 for the Flankers, and another #1 for the Ambushers. Now that we know whom the Ambushers are Targeting, place them in Soldier 1s Location.
During the Hostile Attack step, your Soldier #1 is Downed. Remove the #1 counters from each Hostile card and the cup. Redraw those counters. The Machine Gun Team is now Targeting Soldier #3, and the Ambushers is now Targeting Soldier #2. The Officer continues to Target Soldier #2. The Ambushers now move into Soldier 2s Location.
When you Kill a Hostile, return its Targeting counter to the cup.
Entering a Location
Your Soldier can only Move into a Location card that is adjacent to your Soldiers current Location. Spend 1 Action to Move into an adjacent Location card. Each Soldier can only Move once during each Soldier Turn.
You must discard the Location cards Entrance cost in Action cards to move into it. Pay the Locations Entrance cost before entering the Location. Your Soldiers Movement value, Equipment, and Action cards may reduce the number of cards that you need to discard.
Example: The Advance Action card adds 3 to your Movement value. If you have a Movement value of 2, and you play the Advance Action card, you now have a Movement value of 5.
The Action cards that a Player Soldier discards for movement can only come from the Soldier's own hand of Action cards. The Action cards to be discarded for a Non-Player Soldier or Squad Soldier can come from any Player Soldiers hand of Action cards.
Only draw Hostile cards when a new Location card is placed. Do not draw new Hostile cards when you move into a previously placed Location card.
Example: All the Soldiers are in the Stream Location card. You play the Light Jungle Location card, adjacent to the Stream card. You draw Hostiles.
Example: Duncan is in the Mission card, and NPS Nurke is in the adjacent Stream Location card. When Duncan moves into the Stream Location card, do not draw Hostile cards.
Hostile Penalties
Some Hostile cards add to a Locations Entrance discard cost.
Example: The Stream Location has an Entrance cost of 1. There is a Machine Gun Team in the Location. The Machine Gun Team adds 2 more to the Entrance cost. A Soldier must discard 3 cards to enter the Location.
As a Hostile card suffers Suppressions and Hits, its Entrance penalty is reduced. The numbers separated by slashes relate to the Hostile cards Attack chart columns.
Example: When the Machine Gun Team does not have any Suppresses or EKIAs, it uses the 4-3 column. It also adds +2 to the Entrance cost. When the Machine Gun Team suffers 2 Suppression or EKIA, it uses the 2-1 column. It now adds +1 to the Entrance cost.
This makes it vital to Suppress or Hit certain Hostiles before entering their Location, to reduce the Entrance cost.
Doors
Some Fortification cards have a Door to Interior note. Doors first appeared in WWII Expansion #45. You can Attack the Fortification card as normal, rolling against its Defeat Cover, or you can attempt to Breach its Door.
Treat a Door in a Structure card as having the Structure keyword.
Example: A Weapons gains +5 Penetration against Structures. The Weapon would gain +5 Penetration against a Door in a Structure card.
One way you can Breach a Door is by Attacking it. A Soldier must be in the Fortifications Location card to Attack its Door. The Doors Cover and Hits needed to Destroy it are listed on the Hostile card. Do not add the Hostiles Size when Attacking a Door.
Example: The Elite Observation Post has a Cover value of 12. You can Attack it as normal and attempt to overcome its Cover value, or you can move a Soldier into its Location and have the Soldier Attack the Observation Posts Door, which only has a Cover of 9. If you inflict 2 Hits on the Door, you Breach the Door. The Door allows you to perform Interior Attacks against the Observation Post. The Observation Posts Interior only has Cover value of 2.
Instead of inflicting Hits on the Door, some Doors can be Breached with a successful Pick roll. Such Doors have the Pick x+ notation in their text. To Pick, move a Soldier with the Pick ability into the Fortifications Location. Once in the Location, spend an Action to Pick the Doors lock. If successful, you Breach the Door. You can attempt to Pick the lock multiple times. Some locks have a modifier to your Pick roll.
Example: The Elite Barracks Door has a Pick notation, so it can be Picked. You move a Soldier with Pick 9+ into the Barracks Location. The Door has Pick +0. You roll to Pick the Doors lock. You will succeed on a roll of 9 or higher. You roll a 9, and succeed. You Throw a couple Grenades into the Barracks Interior, Defeating its Interior Cover of 1, and inflicting the 6 Hits needed to Eliminate the Barracks.
Breached
Once the Door is Breached, Soldiers in the Location may Attack the Fortification using the much lower Cover value noted in the Door information.
Once Breached, you may perform Range 0 Attacks, or pay Actions as normal to Engage in Hand to Hand combat.
Vehicle and Aircraft Attacks must always Defeat the Hostiles normal Cover value.
Beneficials (Success)
You can gain a beneficial effect from some Locations. They include the word Success and have a notation similar to: Controls (Hack +1), Success: Add 1 to....
The first word offers a general description of the type of activity being performed, but does not affect game play. Common descriptions include: Controls, Console, Repair, etc.
The Hack notation on Location cards usually refers to repairing or operating a complex device. To gain the noted effect, you must have a Soldier with the noted ability in the Location card, and the Soldier must spend an Action and perform a successful ability roll with the noted modifier. The first time any Soldier succeeds in the roll, you gain the noted effect.
Example: A Location card has: Repair (Hack +3), Success: Add 2 extra Turns to the Mission Time. Your Soldier must succeed with a Hack roll, and gets to add 3 to their roll. If the roll is successful, you get 2 extra Turns to complete your Mission.
If the Hack or Pick results in a Noise increase, advance the Noise counter as normal. If there are Hostiles in that Location, roll on the Noise Track to determine if any Hostile heard the Noise.
Obstacles (Fail)
Some Locations have a detrimental effect that is initiated when the first Soldier enters the Location card. They include the word Fail and have a notation similar to: Booby Trap (Pick, Detect +x, Disarm +x), Fail: Inflict....
The first word offers a general description of the type of obstacle encountered, but does not affect game play. Common descriptions include: Booby Trap, IED, Locked Hatch, etc.
The Pick notation on Location cards usually refers to a task to be performed that requires manual dexterity. When the first Soldier Enters the Location, that Soldier must immediately attempt to Detect the Obstacle with the noted ability roll, and noted Detect modifier, to Detect the threat. This does not require an Action. If the Soldier fails their roll (or does not have the noted ability), they set-off the threat and suffer the noted effect.
If the Detect roll succeeds, before you perform any other Actions or activities, you may immediately attempt to either Disarm the threat, or freely move the Soldier back to the previous Location and discard the Location.
Example: You place a Location with an Obstacle, and Move a Soldier into the Location. You immediately roll to Detect the Trap, and you succeed. Before you place Hostiles, Activate the Objective, or anything else, you must decide whether to Disarm the Trap and roll for success, or retreat the Soldier to the previous Location and discard the Location.
If you Detect the threat, you may immediately attempt to Disarm it. To do so, make a successful ability roll, with the noted Disarm modifier. This does not require an Action. If the Soldier fails their roll, the Soldier suffers the noted Fail effect. You may choose to keep the Location card, or discard the Location card and freely move the Soldier back to the previous Location. If the roll succeeds, the threat is Disarmed and eliminated, and the Location card remains in play.
Example: A Location card has: Booby Trap (Pick, Detect +3, Disarm +1), Fail: Inflict a Kill on 1 Soldier in this Location. Your Soldier gets to add 3 to their Pick roll to Detect, and 1 to their Pick roll to Disarm. The Soldier rolls to Disarm, and fails. You must inflict a Kill on the Soldier.
Example: A Location card has: Booby Trap (Pick, Detect +3, Disarm +1), Fail: Inflict a Kill on 1 Soldier in this Location. Your Soldier gets to add 3 to their Pick roll to Detect, and 1 to their Pick roll to Disarm. The Soldier rolls to Detect, and succeeds. You decide to retreat the Soldier and discard the Location card.
Example: A Location card has: Locked Hatch (Hack +1), Fail: Move the Objective 1 Location Beyond its current Location. Your Soldier gets to add 1 to their Hack roll to overcome the Locked Hatch. If the Soldier fails the Hack roll, move the Objective card 1 Location further along the Location path.
Once you resolve the Detect and Disarm rolls, you draw Hostile cards, Activate the Objective, and perform other Actions and activities as normal.
The Detect and Disarm rolls are two different rolls. If an effect only modifies one roll, it only modifies one of the rolls.
Example: A card adds 2 to a Pick roll. You can play the card to improve the Detect or Disarm roll. It does not modify both.
If the Hack or Pick results in a Noise increase, advance the Noise counter as normal. If there are Hostiles in that Location, roll on the Noise Track to determine if any Hostiles heard the Noise.
Soldier Attacks
A Soldier can spend 1 Action to Attack any Hostile card that is within Weapon Range.
You can use the same or a different Weapon with each Attack. You can target the same or a different Hostile card with each Attack as long as the Hostile card is within Range of the Weapon.
Each Attack can only inflict 1 EKIA or 1 Suppress result, no matter how many Attack dice are rolled.
Squad Soldiers use their Attack Chart to roll 1 Ranged Attack die and 1 Defeat Cover die. Unless noted otherwise on their card, all Squad Soldier Attacks are Ranged Attacks.
Attack Modifiers
If a modifier adjusts an Attack roll, it modifies all of the Attack die rolls.
Example: A Steady Aim card adds 2 to your Attack roll. If you fire in Auto Mode, it adds 2 to each of your 3 die rolls.
Attack and Defeat Cover
To Attack with a Weapon, roll the number of 10-sided dice based on your Attack Mode as well as one 6-sided die to Defeat the target's Cover. You roll only one 6-sided die for Defeat Cover, regardless of how many Attack dice you roll.
When attacked, the target has a chance of getting behind cover. To overcome a targets Cover, the attacker must roll equal to, or above, the targets Cover value on a 6-sided die.
There are 3 possible results when performing an Attack:
- Kill: If any of your adjusted Attack rolls is equal to or exceed the Weapons Hit number for the Range, and your Defeat Cover roll equals or exceeds the Hostiles Cover number, you Kill the Hostile. Place an EKIA (Enemy Killed in Action) counter on the Hostile card to record the Kill.
- Suppress: If any of your Attack rolls is equal to or exceed the Weapons Hit number for that Range, or your Defeat Cover roll equals or exceeds the Hostiles Cover value, but not both, you Suppress the Hostile. Place a Suppress counter on the Hostile card. Place only 1 Suppression counter, even if the Attack inflicts more than 1 Hit.
- No Effect: If all of your Attack rolls are less than the Weapons Hit number for that Range and your Defeat Cover roll is less than the Hostiles Cover number, the Hostile suffers No Effect.
To show the relation between the Attack die roll and the Defeat Cover die roll, here is the Attack chart from the Tactical Display Sheet (a chart of Attack die result against Defeat Cover die result: Hit with Cover defeated is a Kill; Hit or Cover defeated, but not both, is a Suppress; neither is No Effect).
Example: You have an M1918A2 Machine Gun and you are shooting at Hostile Lone Soldier at Range 0 (he is in your Location). You will need an Attack roll of 7 or higher and a Defeat Cover roll of a 1 or higher due to the Weapons Penetration 1 attack bonus.
Attack Example #1 - You select Auto Mode, roll 3 Attack dice, and get a 2, 8, and 9. You also roll a Defeat Cover roll of a 5 +1 Penetration, for a 6. You Hit with your Attack, and you have defeated the Hostiles Cover. You have also rolled this Weapons Reload result meaning to fire this weapon in the future you must spend an Action to Reload. You inflict 1 Kill on the Lone Soldier card. Place 1 EKIA counter on the card. You eliminated this Hostile. Remove the card. Due to the Hostiles 0 XP value, you do not earn any XP for Eliminating this Hostile.
Attack Example #2 - You select Semi Mode. You roll a 4, missing with your Attack, but you roll a Defeat Cover of 4 (+1), defeating the Hostiles cover. You Suppress the Lone Soldier. Place a Suppress counter on the Lone Soldier card.
Each Reticle number on a Hostile card represents one Hostile. If a Hostile card has multiple Hostiles, only one Hostile is Suppressed with each Suppress result or Killed with a Kill result.
When you Kill a Hostile, you can either place an EKIA counter on the card, or replace a previously placed Suppress counter with an EKIA counter, until all Hostiles on the card have an EKIA counter.
Example: A Machine Gun Team Hostile card currently has one EKIA counter and one Suppress counter. You inflict a Kill. You can either place an EKIA counter on the Machine Gun Team card, or replace the Suppress counter with an EKIA counter.
Each Hostile on a card can only have one EKIA or one Suppress counter. If you inflict a Suppress and all the Hostiles already have an EKIA or Suppress counter, your Attack has no effect.
Example: A Hostile card has the number 4 in its Reticle, indicating 4 Machine Gun Team Hostiles. The card already has 2 Suppress counters and 2 EKIA counter. Your Attack inflicts a Suppress. It has no effect.
If your Attack inflicts the final Kill on a Hostile card, discard the Hostile card and gain the number of Experience Points noted on the Hostile card. Place the Experience counters on the Soldier card that performed the final Kill. Each Star on an Experience Point counter is equal to 1 Experience Point.
Example: Duncan inflicts the 4th and final Kill on a Machine Gun Team card. Discard the Machine Gun Team card and add 4 Experience Points to Duncans Soldier card.
Reloading
If any of your Attack rolls are equal to or less than the Weapons Reload number, your Weapon has run out of Ammo during the Attack. You cannot use the Weapon again until you Reload it.
Example: The M1918A2 Machine Gun will Hit a Hostile at Range 0 on a roll of 7 or higher. If the Hostile is at Range 1, you must roll 8 or higher. If either roll is 2 or less on any Attack roll, the Weapon runs out of Ammo during the Attack.
Example: Your M1918A2 runs out of Ammo on a roll of 2 or less on any Attack die. You fire in Auto Mode at an Officer, and roll a 1, 4, and 9 for your Attacks, and you roll a Defeat Cover roll of 5. You Kill the Officer, and your M1918A2 runs out of Ammo.
Attack modifiers do not adjust your roll until after you check for Reload.
Example: Due to Skills, Equipment, and Action cards, you have accumulated a +6 on this Attack roll against the Lone Soldier with your M1918A2 at Range 0. You fire in Semi Mode and roll a 2, and a Defeat Cover roll of a 3. First you check for Reload. You rolled a 2 or lower, so you will run out of Ammo. Next, you apply the +6 modifier to bring your Attack roll to a 8. The result of your Attack is 1 EKIA, and you also run out of Ammo.
Explosion and Spray
Weapons that explode, like hand grenades, have the Explosion Keyword. Weapons that fire streams of bullets, like Machine Guns, have the Spray Keyword.
Roll the indicated number of Attack dice for an Explosion or Spray Weapon. Regardless of how many Attack dice you roll, only roll 1 Defeat Cover die.
Unlike other Attacks, each Explosion and Spray Attack die has a chance to inflict a Miss, Suppress, or Hit. Resolve each Attack roll separately against the Hostile card. Suppressions and Kills do not spill over to affect other Hostile cards.
Example: You throw a Grenade at a Mortar Team card with 4 Hostiles. You roll a 5 for your Defeat Cover (+1 for Penetration, increasing it to a 6), which is successful. Your Attack rolls are: 2, 7, 6, and 9. You inflict 2 Kills and 2 Suppressions.
Example: You throw a Grenade at a Sniper Team card with 2 Hostiles. Your Defeat Cover roll is a 1 (+1 for Penetration, increasing it to a 2), and fails. Your Attack rolls are: 2, 10, 7, and 9. You inflict 3 Suppressions, but the third Suppression has no effect because there are only 2 Hostiles.
Suppressed Weapons
Some Weapons have the Suppressed keyword. These Weapons make less noise when fired.
When you inflict an EKIA on a Hostile with a Suppressed Weapon Attack, in addition to placing an EKIA counter, also place a Suppressed counter on the Hostile card. This represents the confusion the enemy suffers from being attacked by an unseen attacker.
Thrown Attacks
All Thrown Attacks have an Attack Range of 0. If you Attack using a Weapons Thrown mode, you cannot use the Weapon again until that Hostile card is Eliminated, and you are still in its Location.
Example: You Throw your M3 Knife at a Hostile card at Range 0. Regardless of the outcome of your Attack, you cannot use that Knife again until that Hostile card is Eliminated and you are still in its Location.
Hand to Hand Combat
There are two types of Hand to Hand Combat: Unarmed and Melee.
Unarmed combat takes place when a Soldier does not have a Melee Weapon. Melee combat takes place when a Soldier is using a Melee Weapon to Attack, such as a Knife or Bayonet. The same rules apply to both types of Attacks.
In order to perform a Hand to Hand Attack, your Soldier must be in the same Location card as the Hostile (Range 0).
In addition to being in the same Location, you must select a Hostile card in your Location and pay the number of Actions indicated by the Locations Hand to Hand (HtH) combat value to Engage the Hostile in HtH combat (Unarmed or Melee). Place the Hand to Hand counter with your Soldiers number on the Hostile card you have Engaged. A Soldier can only Engage 1 Hostile in HtH at a time.
Example: You pay 1 Action and discard as normal to Enter a Location. The Location has a Hand to Hand cost of 1, so you pay 1 Action, select the Hostile, and place your Hand to Hand counter on the targeted Hostile card. This uses both your Actions. On your next Turn, you perform a Hand to Hand Attack and Kill the last Hostile on the card. If you wish to Engage another Hostile card in that Location, you must pay the Locations 1 Action HtH Engage cost again.
You may put aside Actions to accumulate and pay the Hand to Hand cost. These cannot be used for anything else. You lose the set aside Actions if you perform any other Actions while they are being saved. Once you pay a Hand to Hand cost, you lose any remaining set aside Actions.
Soldiers and Hostiles cannot perform Hand to Hand Attacks against Squad Soldiers, Structures, Aircraft, and Vehicles. If a Hostiles text has it Attacking in HtH against a Squad Soldier, Structure, Aircraft, or Vehicle, it instead conducts its Attacks at Range 0.
Example: You are using the Vehicle expansion, and a Hostile card with the text "Engages in HtH" Targets one of your Vehicles. Move the Hostile into your Vehicles Location and conduct a Range 0 Attack.
You must pay the Locations HtH Action cost to move from Engaging a Hostile card back to Range 0. You must, and freely, return to Range 0 when the Engaged Hostile card is Eliminated.
Attacking
The Unarmed Combat reference card is provided as an easy way to look up your Unarmed Combat options.
If you spend an Action to perform an HtH Attack, select your Mode of Attack: Strong, Combo, or Precise, and then roll 10-sided dice and a 6-sided die as normal.
- Rs - The Rs column indicates the number of Attack dice you roll.
- St - If any of the Attack rolls are equal to or less than the number in the St column before modifiers, you Stumble.
- H - If one of more of the Attack rolls are equal to or greater than the number in the H column you score a Hit.
- P - The number in the P column is your Attacks Penetration.
Add the Soldiers HtH modifier to your Attack rolls.
Hand to Hand Attacks use the same process as all the other Soldier Attacks. If the Attack and Defeat Cover rolls are successful, you inflict an EKIA. If one or the other is successful, you inflict a Suppress. If neither is successful, there is no effect from the Attack.
Stumble
If you roll the Weapons Stumble number or lower, before applying any Modifiers, or any of your Attack rolls, you have Stumbled during the Attack. You immediately suffer 1 Suppress when you Stumble. It is possible with a Combo Attack to successfully Hit with one roll, while Stumbling with the other roll. As with any other Suppress, you cannot perform any Actions until you pay an Action to remove the Suppress.
Example: A Player Soldier with HtH +1 is in the same Location with a Hostile. The Location has a Hand to Hand Action cost of 2. The Soldiers Rifle is out of Ammo. He saves his last Action during his Turn and declares that he is setting it aside to use toward paying a Hand to Hand cost. The Hostile Attacks another Soldier during the Hostile Turn, and Misses.
During the Soldiers next Turn, he spends 1 Action and his 1 saved Action to pay the Locations Hand to Hand Action cost of 2. He places his Hand to Hand counter on the Hostile card. He pays 1 Action to perform an Unarmed Attack, selects Strong Mode, and rolls his Attack, gets lucky and rolls a 7 (+1 due to his HtH to make it an 8) for his Attack and a 5 (-4 for a Strong HtH Attack) for his Defeat Cover. The Hostile has a Cover of 1. He places 1 EKIA counter on the Hostile.
Later in the Turn, another Soldier moves into our Soldiers Location. The new Soldier has a Bayonet. He gives the Bayonet to our Soldier, who attaches it to his Rifle.
During the next Soldier Turn, our Soldier Attacks the same Hostile card, but this time with a Bayonet. Since the Soldier is Attacking the same Hostile, he does not need to pay the Locations Hand to Hand Action cost again. He chooses Combo Mode, and rolls 2 Attack dice getting a 3 and 10, and rolls 1 Defeat Cover die getting a 4. He has an HtH modifier of +1. Due to the Combo Attack Mode, he needs to roll a 7 or higher to Hit with either Attack die. The 10 is successful. His Defeat Cover roll of a 4, -2 for performing a Combo Attack, is also successful. Because he has one or more successful Attack rolls, and a successful Defeat Cover roll, he inflicts 1 EKIA on the Hostile card.
The Aim Keyword is not used in WWII or Modern-era Warfighter, but is referenced in other eras of Warfighter. Where Aim appears, treat the number after Aim as adding to your Penetration.
Example: The Bayonets Aimed Attack has a Penetration 0 with an Aim 1. Treat the Aimed Attack as having Penetration 1 in WWII and Modern-era.
Shadows Ability (Hand to Hand)
Some Soldiers have the Shadows Keyword printed on their cards. Only Soldiers with the Shadows ability can attempt to perform Shadow Attacks or Shadows rolls.
Shadow Attacks
At any time during the Soldier Turn, the Soldier can roll a 10-sided die. If you roll the Soldiers Shadows value or higher, the Soldier has successfully moved out of sight of the enemy. If you roll less than the Soldiers Shadows ability, you Attack as normal. Some Hostiles modify your Shadows roll.
If you make a successful Shadows roll, add the Weapons Stealth modifier to your HtH Attack rolls for the remainder of the Soldier Turn.
Example: You make a successful Shadows roll and your Ka-Bar knife has Stealth +4. You decide to perform a Combo Attack. You get to add 4 to both of your Attack rolls.
If you make a successful Shadows roll, add 2 to your Stealth Weapons Penetration for the remainder of the Soldier Turn.
Example: You add 4 to your Ka-Bars Attack rolls, and 2 to its Defeat Cover rolls.
Shadows roll affects only apply in the Location where you made the successful Shadows roll.
Self-Defense Weapons
You can use Weapons with the Self-Defense keyword to perform Attacks in HtH combat. Use a Self-Defense Weapons Range 0 Attack values when Attacking in HtH combat.
Hostile Cards
As you draw Hostile cards, place them face up on the Tactical Display next to their Location card.
-
Title: The name of Hostile.
-
Reticle: The Number of Hostiles on a card.
Example: You must inflict 4 Kills to eliminate the Banzai card.
-
Hostile Value and Experience Points: The number in the upper right corner shows the Experience Point value of this Hostile card. Use this value when you are drawing Hostiles for a new Location card, or for Reinforcements. Also, a Soldier gains this number of Experience Points from Killing the last Hostile on the card.
You must Kill all the Hostiles on the card before you can claim the Experience Points for the card.
-
Hostile Level: At the start of a Mission, choose between Frontline Hostiles (F) and the more difficult Elite Hostiles (E). All Hostiles in your Hostile deck must be the same level.
-
Event: When you place a Hostile with the Event notation, immediately draw a card from the Event deck. Add the Event to the Hostiles Location.
-
Attack Range and Attack Chart: Hostiles use the chart on their card to Attack their targeted Soldier.
Example: The Banzai use the 4-3 column when Attacking, if no Hostiles are Suppressed or Killed. They use the 2-1 column if 2 or 3 Hostiles are Suppressed or Killed.
Some Hostile cards have an effect, but no die roll or Attack chart. This text is only active if there is at least one Hostile that is not Suppressed or Killed on the card and the Hostile is within the noted Range.
Example: If the Large Truck is within Range 2 of its Targeted Soldier, draw a Reinforcement card for the Large Truck during the Reinforcement Draw step. If the card drawn has a Reinforcement value of 0, 1, 2, or 3, place the Hostile in the Trucks Location. If the Hostiles value is 4 or more, discard it.
Some Hostile cards have a Reinforce effect in addition to an Attack chart. This text is always active if there is at least one Hostile that is not Suppressed or Killed on the card.
Example: The Officers Reinforce and Inspire is active unless he is Suppressed. The Screened by effect is always active.
Event Cards
- Name of Event: For flavor only.
- Game Effect: Some game effects are resolved when the card is drawn, whilst others continue to apply in that Location.
World War II Event Cards
Warfighter World War II Event cards are located in their own deck, separate from the Hostile card deck. Draw an Event card immediately after drawing a Hostile card with the Event notation. If the Event affects a Location, place the Event card next to the Location it was drawn for. Only draw an Event card if the Hostile enters play.
Modern Event Cards
Warfighter Modern Event cards are located within the Hostile deck. The Event cards Experience value counts toward the total Hostile value when drawing Hostile cards for the Location. Treat the card's Experience value as normal when calculating for the Location's Reinforcement card draw.
Modern Shadow War Event Cards
Warfighter Modern Shadow War Event cards are located within the Hostile deck, and act similarly to Modern Day Event cards. When placed, immediately Reveal and resolve the Event.
General Rules
Some Event cards note that you can pay Experience Points to cancel the Event. These XP must be paid immediately after all Hostile and Event cards are drawn.
Resolve all Events for a Location before conducting Soldier Actions.
You do not gain XP for resolving Event cards.
Hostile Turn
Soldiers may only interrupt the Hostile's Turn to play Action cards, use Weapons, or use Equipment which specifically state that the card can be used during the Hostile Turn.
Reinforcement Draw
Draw one Hostile card for each Location card with a Soldier, and for each Location with an Always Reinforce keyword.
Each Hostile card has a value in its upper right corner. When you draw a Hostile card, compare its value against the Reinforce value on the Location card. If they match, add the Hostile card to that Location. If the point value does not match, do not draw another Reinforcement card.
Example: Your Location cards Reinforce value is 0-1. When you draw a Hostile Reinforcement card, check its value. If it is a 0 or 1, add that Hostile card to your Location card and draw its Hostile Targeting counter. If it is not a 0 or 1, discard the Hostile card.
Example: The Stream Location has a Reinforce value of 0-1. You draw an Officer with a value of 3. Discard the Officer card.
Example: The Stream Location has a Reinforce value of 0-1. You draw Recruits with a value of 1. Add the Recruits card to the other Hostile cards in the Stream Location card, and draw a Hostile Targeting counter from the cup for the Recruits.
Do not draw a card for Locations that have a None Reinforce value.
Hostiles Attack
Resolve Attacks for all Hostile cards that are in Range of their targeted Soldiers.
Example: A Hostile has a Range of 0-2. The Hostile will Attack its targeted Soldier when the Soldier is at Range 0, 1, or 2.
Hostile cards roll dice to Attack. Consult their Attack chart to determine the effects of their Attack roll.
Hostile cards that have numbers greater than one on their Reticle have multiple columns on their Attack chart. The numbers at the top of each column represent the number of remaining Hostiles that have not been Killed or Suppressed.
Example: If you have Suppressed one Hostile on an Ambushers card, they will attack using the column for 2-1 remaining Ambushers. An Attack roll of 10+ inflicts 2 Wounds.
No more than one Suppress counter can be placed on a card for each Hostile. If all Hostiles on the card already have an EKIA or Suppress counter, ignore any additional Suppress results inflicted on the Hostile card.
Example: If 3 Ambushers are alive and Unsuppressed when they attack, the Ambushers inflict 2 Wounds on a roll of 8+.
Example: If 1 Ambusher is Killed and 1 is Suppressed, there is only 1 active Ambusher. The Ambushers inflict 2 Wounds on a roll of 10+.
Example: If 1 Ambusher is Killed and 2 more are Suppressed, there are no active Ambushers on the Hostile card. The Ambushers card does not attack during this Turn.
Weapon Range and Attack Chart
When a Hostile Attacks a Soldier, roll a 10-sided die for the Attack, and roll a 6-sided die to Defeat the Soldiers Cover.
Each Hostile card has a unique Attack chart. Use the Attack chart to determine the result of the Attack based on the success of the die rolls.
Resolving a Hostile Attack
Update: With the addition of Body Armor to the game, this rule section now has a Body Armor Roll step.
Attack Roll and Terrain Cover Roll
Roll a 10-sided die for the Hostiles Attack, and a 6-sided die for the Hostiles Defeat Terrain Cover roll. Compare the Attack roll to the Hostiles Attack chart to determine the number of Wounds inflicted on the Soldier.
Compare the Defeat Terrain Cover roll to the Soldiers Terrain Cover value. If the roll is equal to, or greater than, the Terrain Cover value, the Attack defeats the Terrain Cover. If the Defeat Cover roll is less than the Soldiers Terrain Cover value, the Attack does not defeat the Soldiers Terrain Cover, do not roll for the Soldiers Body Armor.
Terrain Cover does not apply to non-Hostile Attacks (i.e. Environ, Event cards, etc).
Body Armor Roll
If the Defeat Cover roll defeated the Soldiers Terrain Cover, roll a 20-sided die for Body Location and a 6-sided Defeat Body Armor die to determine the Attack defeats the Soldiers Body Armor. The Body Location roll is considered to be a Soldier die roll.
- If the Body Location roll results in a Body Location not protected by the Body Armor, the Body Armor is defeated.
- If the Body Location roll results in a Body Location protected by the Body Armor, and the Defeat Cover roll is equal to or greater than the Body Armors Cover for that Body Location, the Body Armor is defeated.
- If the Body Location roll results in a Body Location protected by the Body Armor, and the Defeat Cover roll is less than the Body Armors Cover for that Body Location, the Body Armor is successful.
- If the Soldier is not Equipped with Body Armor, do not roll to defeat the Body Armor. The Attack automatically defeats the Body Armor.
Body Armor Cover does not apply to non-Hostile Attacks (i.e. Environ, Event cards, etc).
Result of the Attack
Each Attack has 1 of 3 results:
Wounded - The Attack roll indicates 1 or more Wounds on the Hostile Attack chart, and the Defeat Terrain Cover roll defeated the Soldiers Terrain, and the Soldiers Body Armor was defeated. Place a Wound counter on the Soldiers card equal to the Wounds inflicted.
Example: The Hostiles Attack roll inflicts 3 Wounds, the Defeat Terrain Cover roll is equal to, or greater than, the Soldiers Terrain Cover, and the Defeat Body Armor roll defeats the Soldiers Body Armor. The Soldier suffers 3 Wounds.
Suppressed - Either the Attack roll inflicted 1 or more Wounds or both Defeat Cover rolls were successful, but not both. Place a Suppress counter on the Soldier card.
Example: The Hostiles Attack roll indicates 2 Wounds, but its Defeat Terrain Cover roll fails to Defeat the Soldiers Terrain Cover. Do not roll to Defeat Body Armor because the Defeat Terrain Cover roll failed. The Soldier suffers a Suppress.
Example: The Hostiles Attack roll indicates 1 Wound, its Defeat Terrain Cover roll defeats the Soldiers Terrain Cover, but the Defeat Body Armor roll fails to defeat the Soldiers Body Armor. The Soldier suffers a Suppress.
Example: The Hostiles Attack roll indicates a Miss, the Defeat Terrain Cover roll is equal to, or greater than, the Soldiers Terrain Cover, and the Defeat Body Armor roll defeats the Soldiers Body Armor. The Soldier suffers a Suppress.
No Effect - The Attack roll inflicted 0 Wounds, and at least one of the Defeat Cover rolls failed. The Attack has no effect on the Soldier.
Example: The Hostiles Attack roll indicates a Miss, and the Defeat Terrain Cover roll fails to defeat the Soldiers Terrain Cover. The Soldier suffers no effect.
Example: The Hostiles Attack roll indicates a Miss, the Defeat Terrain Cover roll defeats the Soldiers Terrain Cover, but the Defeat Body Armor roll fails to defeat the Soldiers Body Armor. The Soldier suffers no effect.
Summary
- If the Attack roll and both Defeat Cover rolls are successful, the Soldier suffers Wounds.
- If only 2 of the 3 Attack and Defeat Cover rolls are successful, the Soldier suffers a Suppress.
- If 0 or 1 of the 3 Attack and Defeat Covers rolls are successful, the Soldier suffers no effect.
Hostiles Close Range
If a Hostile card has 1 or more Suppress counters, it cannot Move.
All Hostile cards that are out of Range move one Location card closer to, or away from, their targeted Soldier to bring the Soldier within the Hostile cards Attack Range. If a Hostile card is in Range of its target, the Hostile card does not move.
Example: The Flankers have targeted Soldier #2, NPS Nurke, but Nurke is at Range 2 from the Flankers. Move the Flankers 1 Location closer to Nurke during the Close Range step.
Example: The Flankers, who have a Range of 1, have targeted Soldier #2 Nurke, but Nurke is at Range 2 from the Flankers. The Flankers have a Suppressed counter on their card. The Flankers cannot Attack because they are out of Range, and they cannot Move because they have a Suppress counter.
There are situations when a Hostile is in Range, but cannot Attack the Soldier, due to an Obstructed Location or other card text. In such situations, the Hostile Moves closer to the Soldier.
Some Hostiles do not Attack your Soldiers, but instead apply a detrimental effect. If the targeted Soldier is out of the Hostiles Range (and the Hostile does not have a Suppress), move the Hostile one Location card closer to its targeted Soldier.
Example: The Large Truck draws a Reinforcement each Turn during the Reinforcements Draw step. If it is more than 2 Location cards away from its targeted Soldier, it does not draw a Reinforcement card. Move the Large Truck one location closer to its targeted Soldier during the Close Range step.
No Location Card
There will be times when a Hostile is Placed in, or Moves into, a Location space that does not yet have a Location card. Place and Move the Hostile cards as normal as if there is a Location card present.
Remove Suppress Counters
Remove one Suppress counter from each Hostile card.
Advance Mission Timer
Move the Timer counter one space down the Mission Timer Track. If you move the counter past the 1 space, you have run out of Time, and your Mission ends in failure.
Soldier Wounds
Each Wound suffered by a Soldier reduces the Soldiers Health and Hand Size by 1.
Example: Your Soldier starts with a Health of 6. This means your Hand Size is 6, and you can hold at most 6 cards in your Hand after performing a Discard and Draw Action. Your Soldier then suffers a 2-point Wound. This reduces their Health and Hand Size to 4. You can hold at most 4 cards in your Hand after performing a Discard and Draw Action.
Place a Wound counter on your Wounded Soldier card equal to the number of Wounds inflicted by the Attack. Each time your Soldier suffers Wounds, place a separate Wound counter on the Soldiers card.
Example: Duncan suffers a 1-point Wound from a Sniper Teams Attack and a 2-point Wound from an Attack by Flankers. Place 2 separate Wound counters on Duncan, a counter with a 1 and a counter with a 2. Duncan must be Treated for each Wound separately.
Mid-Mission Healing
There are several cards that give you the ability to Heal Soldier Wounds in the middle of a Mission, such as a First Aid Kit. You can only attempt to Heal each Wound once during a Mission. Before rolling to Heal, declare which Wound you are attempting to Heal.
A Heal 1 effect reduces a Wound by 1 point. A Heal 2 reduces a Wound by 2 points.
If a Heal result completely Heals a Wound, discard the Wound counter.
If a Heal result does not completely Heal a Wound counter, replace the Wound counter with a Treated Wound counter. The Treated Wound counter shows that the Wound cannot be Treated, Reduced, or Removed again.
Disregard any unused Heal points left over.
Example: Nurke has suffered a 2-point Wound. Duncan uses his First Aid Kit and Heals 1 point of Nurkes Wound. Replace the 2 Wound counter with a 1 point Treated Wound counter. This shows he is still suffering from 1 Wound, and the Wound cannot be Treated, Reduced, or Removed again during the Mission.
Example: A Soldier suffers a 2-point Wound. Later in the game, you play a Walk It Off Action card to reduce it to a Treated 1-point Wound. The 1-point Wound cannot be Treated, Reduced, or Removed again.
Example: A Soldier has a 1-point Treated Wound. You cannot play a Walk It Off Action card to remove the Treated Wound.
Outside of Mission Healing
Soldiers participating in a Campaign, or a series of linked Missions, can receive Healing between Missions as specified in those rules.
Out of Mission Healing is not limited to once per Wound counter. Such Wounds can be Healed multiple times until fully Healed.
Example: A Soldier is injured in a Private Military Contractor (PMC) Campaign. At the end of each Week, you roll to see if your Infirmary is able to Heal the Wounds. Continue rolling each Week until all the Wounds are Healed.
Downed
If a Soldier is reduced to 0 Health or less, the Soldier is Down and any Wounds can no longer be Healed, Reduced, or Removed. A Downed Soldier can no longer participate in the Mission. Immediately remove the Soldier's counter from the Tactical Display Sheet, and discard any Action cards held by the Soldier.
A Downed Soldier leaves behind all of its Weapons, Equipment, and Ammo in the Location, which can be picked up by other Soldiers using the normal Equipping rules.
You may also voluntarily Remove a Soldier who has been reduced to 2 or 1 Health from the Mission. You may Remove Soldiers from the Mission at any time during the Soldier Turn.
Recalculate your teams Resource point value each time a Soldier is Downed or Removed from the Mission.
Example: If a 20-Resource point Non-Player Soldier is Downed, your team, which started with 52 Resource Points, would now be worth 32 Resource Points. When drawing Hostiles for the Stream Location card, you would only draw until there are 4 or more Hostile Experience Points of Hostile cards in the Location card.
Take into account the Resource Point value of all the Player Soldiers Weapons and Equipment during the recalculation.
Example: If you started the Mission with 4 Grenades, they would have been worth 4 Resource Points. If you have 2 Grenades when you recalculate, count them as being worth 2 points.
Removed Soldier Outcome
When the Mission is over, roll to determine the status of each Downed or Removed Soldier. If you are playing a one-time Mission, this is for player interest only. If you are playing in a series of Campaign Missions, this will determine the Soldiers future participation in the Campaign.
If a Soldier receives an Able to return to Duty result, he remains in the Campaign. Any other result removes him from the Campaign.
| d10 | Soldiers Status |
|---|---|
| 8+ | Able to return to Duty |
| 6-7 | Medical Discharge |
| 5- | KIA |
| Mod. | Soldiers Condition |
|---|---|
| +4 | Removed with 2 Health. |
| +2 | Removed with 1 Health. |
| +0 | Removed with 0 Health or less. |
| +2 | If the Objective was completed |
Completing the Objective
During the Soldier Turn, any Soldier in the Location card adjacent to the Objective card can Activate the Objective card by declaring it as the next Location. If the Objective has an Activate cost, pay the cost as if it is a Location card. Remove the Inactive counter from the Objective when you Activate it.
Example: During a River Crossing Mission, the Objective will be in the 6th space. If your Soldier is in the Location in the 5th space, you can Activate the Objective card.
Activating the Objective card is the same as playing a new Location card. Immediately draw the Objectives Hostile cards when you Activate the Objective card.
Each Objective card specifies what you need to do to win.
Your team does not have to be in the Objective card to win the game. Your team does not have to be together in the same Location card to win the game.
Objective Hostile Cards
Place an Objective Hostile counter on each Hostile card drawn toward the Objective cards Hostile value.
If the Objective has the Eliminate Hostiles Keyword, you must Eliminate all such Hostile cards, even if they were Placed outside the Objective, or Moved out of the Objective. Also, to fulfill the Eliminate Hostiles Keyword condition, there can be no Hostile cards in the Objective at the end of the Soldier Turn.
Hostile cards can leave the Objective card as normal during the Close Range step.
Examples:
- You draw a Hostile card as part of the Objectives Hostile cards when Activating the Objective. Place an Objective Hostile counter on the Hostile even if it is Placed outside the Objective.
- You draw a Hostile card for a Location, and it is to be Placed in the Objective. Do not place a Objective Hostile counter on the Hostile, but to complete the Eliminate Hostiles Keyword, you must Eliminate the Hostile.
- A Hostile card Moves into the Objective. Do not place a Objective Hostile counter on the Hostile, but to complete the Eliminate Hostiles Keyword, you must Eliminate the Hostile.
Objective Targets
Some Objectives have a single target that must be Destroyed to complete the Mission. For these targets, all Suppress and Hit results produced by an Explosion Attack inflict Suppresses and Hits on the target.
Example: You throw a Grenade at the Supply Dump and inflict 2 Hits and 2 Suppresses. Both Hits inflict damage on the Supply Dump. The Suppresses have no effect.
Other Objectives note a specific number of targets, each of which must be Destroyed with separate Attacks.
Example: The Supply Huts Objective notes there are 4 Huts that must be Destroyed. The card also notes that you must inflict 2 Hits on each Hut, with Explosion Attacks, to Destroy them, and that all Hostiles in the Objective must be Suppressed or EKIAd in order to target the Huts.
After Killing the Objectives Hostiles, you throw a Grenade at a Hut and inflict 4 Hits. You only Destroy 1 Hut. The last 2 Hits have no effect. You must target each of the 4 Huts with a different Attack to Destroy them.
Another Soldier then fires a Flamethrower at a Hut and inflicts 3 Hits. He Destroys the Hut. Your Team must Destroy 2 more Huts to complete your Mission.
Rule Change: Some Action cards can be used to target Hostile cards, including attacking the Hostiles as well as the Target in an Objective card. (Previous versions of this rule allowed Action cards to only attack Hostiles, but not the Target.)
Treat these Objective card Hostiles as being a Hostile card with reticles.
Example: Treat the Supply Huts as being a Hostile card with 4 reticles, one for each Hut.
Success
The game immediately ends in success when you complete the Objective cards requirements.
The game ends in failure if you run out of Game Turns, or when the last member of your team is Downed.
If your last Soldier is Downed in the same Action that you complete the Objective, the game ends in success.
Shadow War
Use all the standard Warfighter rules when conducting a Shadow War night Mission, with the following exceptions and additions. Shadow War replaces the night combat cards and rules appearing in the Warfighter Modern Footlocker storage box.
In Shadow War, attacking and movement generate Noise. The Hostiles can hear this Noise, become aware of your presence, and go into normal combat mode. You want to do your best to keep your Noise to a minimum, because if they are unaware of you, they wont attack you, or intentionally move toward you, and you get very beneficial targeting bonuses when you attack them.
Once they become aware of your presence, they will mobilize and deploy reaction forces to hunt you down, making your mission much more difficult.
Shadow War Set-Up
When you select your Mission and Objective cards, also select an Insertion and Extraction card. Place the cards on the indicated spaces on the Tactical Display Sheet.
Any RPs spent on Insertion and Extraction cards still count toward your overall RP value for the Mission.
Example: You have a maximum of 50 RPs to spend from the Mission card. You spend 40 RPs on Soldiers and Gear, and 8 RPs on Insertion and Extraction cards. Your team has an RP value of 48.
Equipment
Night Gear is highly recommended when conducting a Shadow War Mission. This Gear will help you to negate Night Entrance penalties, Reveal Hostiles, as well as accomplish other useful functions.
Vehicles
You may not include Soldier Vehicles or Light Vehicles in Shadow War Missions.
New Card Types
Insertion
Details the teams method of arriving at the target. Apply the Insertion cards text at the start of the Mission. Each card notes any costs and limitations to your Mission. Soldiers begin the Mission in the Mission card as normal.
On The Ground
Shows any unexpected circumstances at the target. At the start of the first Soldier Turn, draw a random On the Ground card, place it next to the Mission card, and apply its effects before commencing the first Soldier Turn. Most of these cards have a positive and a negative adjustment to the Mission.
These cards are not in the Shadow War core game box, but they can be found in the Shadow War expansion sets.
Mission Cards
Shadow War Mission cards have two new pieces of information: Activity and Confusion.
Activity
Activity is a measure of the targets general Noise and Activity level during the Mission. The higher the Activity value, the better it is for you. When adjusting the Noise counter at the end of each Turn, retreat the Noise counter a number of spaces on the Noise Track equal to the Activity value. Some Mission cards have a negative Activity value. Negative Activity values advance the Noise counter, instead of retreating it.
As you place Location cards, the Activity value decreases. When determining the Activity level, use the Location of the right-most Location card placed, or the Objective, if it has been Activated. The Activity value for each set of Location cards is shown on the Mission cards.
Example: Using the card shown above, if the right-most Location is the Mission card or Location #2, the Activity has a value of 3. If there is a Location card placed in Location #3 or #4, the Activity has a value of 2.
Confusion
Confusion is a measure of how much time it takes the enemy to react once the alarm is sounded. The higher this value, the better it is for you. Once the enemy goes On Alert, you will reduce the Noise counter by this number of spaces on the Track.
Location Cards
Every Night Location has an additional Entrance penalty printed under the normal Entrance cost. This is the Locations Night Entrance penalty. A Soldier must pay this penalty in discards if he has not negated the Night Entrance penalty. Movement skill and standard Action cards, such as Advance, cannot be used to pay Night Entrance penalties. Only card effects that specifically note Night Entrance penalty can be used to pay the Night Entrance cost.
Example: I Move a Player Soldier into the Location card shown above. He has a Move value of 4. This pays for the Entrance cost of 3, but does not carry over to the Night Entrance penalty. He then discards a card to use his Night Goggles to pay the 2 discards of the Night Entrance penalty.
Rein. Roll
During the Hostiles Turn, resolve a Rein. Roll for each Location with a Soldier.
Night Locations use Reinforce Roll rules instead of the normal Reinforce rules, and have Rein. Roll instead of Reinforce printed along their tops.
Roll a die during the Reinforcement Draw step, then draw the next Hostile card. Add the Hostile cards value to the die roll. If the Hostiles value plus the roll falls into the cards Rein. Roll range, draw the Hostile card and put it into play.
Example: The Locations Rein. Roll is 1-4. The next Hostiles value is 1. If you roll a 1, 2, or 3, draw the Hostile.
If the Hostiles value plus the roll does not fall into the cards Rein. Roll range, discard the Hostile.
Example: The Locations Rein. Roll is 1-3. The next Hostiles value is 3. You cannot roll a 0, so you automatically discard the Hostile card.
Distraction Location Cards
Some Locations have the Distraction (x) notation. When you have a Soldier in one of these Locations, the Soldier may deploy Triggered Weapons to create a future Distraction. You must have the minimum number of rolls of Triggered Weapons in the Location to create a Distraction. Placing the Weapons is not an Action. Placing more than the minimum number of Weapon dice has no additional effect. Place the Weapon counters on the Location card to note their placement.
Example: The Location has a Distraction (2) notation. To perform a Distraction, you must leave at least 2 Attack dice of Triggered Gear in the Location. You leave a Triggered Gear with 3 Attack dice.
You may Trigger the Weapons in a Location at any time. Each Locations Weapons are separately Triggered. Triggering a Weapon is not an Action, and is not considered to be an Attack. When you Trigger a Weapon, Eliminate a number of random Hostile cards in that Location equal to the Locations noted Distraction dice. Gain XP from these Hostiles as normal. Treat the Noise generated as normal.
Example: I play the Engine Room Location card in a Mission against the Golden Nori. The Location has the Distraction (2) Keyword. I have an M18 Claymore with me. After entering the Location, I place my M18 Claymore. My Claymore has 4 rolls of Explosions, which is more than the 2 rolls needed by this Locations Distraction value. The Claymores 2 extra rolls will have no effect.
Later, I decide to Trigger my Claymore as a Distraction. There are 3 Hostiles in the Location. 2 random Hostile cards in the Engine Room are Eliminated. I gain XP for the 2 Hostile cards. Placing my Claymore, Triggering my Claymore, and Eliminating Hostile cards cost no Actions.
I move the Noise counter by 20 spaces up the Noise Track, 5 noise for each Explosion die on the Claymore card. This moves the Noise counter into the Alarm Sounded circle.
Reaction Force Hostile Cards
Separate these special Hostile cards and place them off to the side for possible later use. Reaction Force Hostiles only enter play when the target goes On Alert. Reaction Forces Move and Attack as regular Hostiles.
Extraction Cards
Details the teams method of leaving the target. The Extraction card is treated as being adjacent to the Objective card. Each Extraction card notes costs and limitations to your Mission. Your Soldiers must meet the conditions on the Extraction card to end the Mission.
Standard Extraction
To perform a Standard Extraction you must first complete the Objective. Once the Objective is completed, Soldiers can enter the Extraction card from any Location cards, as well as Moving between the Extraction card and any Location cards. You may meet, or attempt to start meeting, the Extraction cards condition once all Soldiers are in the Extraction card.
Example: There are 4 Soldiers in the Mission. Near the end of the Mission, 1 Soldier is in the Objective card in Location #5, 2 Soldiers are in Location #4, and 1 Soldier is in Location #3. The Soldier in the Objective completes the Objective. All Soldiers can now Move directly to the Extraction card.
Abort Mission Extraction
You may only declare an Abort Mission Extraction if the Objective has not been completed. Once you declare an Abort Mission Extraction, the Objective cannot be completed. If you somehow complete the Objective after declaring an Abort Mission Extraction, ignore the completed result. Once you declare an Abort Mission Extraction, Soldiers can enter the Extraction card from any Location cards, as well as Moving between the Extraction card and any Location cards. You may meet, or attempt to start meeting, the Extraction cards condition once all Soldiers are in the Extraction card.
New Counter Types
- Noise: Used to track the current Noise level. Place the Noise counter on the lowest circle of the Noise Track.
- Unaware/Pauses: Used to show each Hostile cards awareness of your presence.
- Unaware Target: Drawn from a cup when you declare a Ranged Attack against an Unaware or Pauses Hostile. Do not draw these counters for Hand to Hand Attacks.
- Enemy Mobilization Status Counter: Used to show the alert status of the enemy forces.
- Mobilized: Used to indicate which Locations have been Mobilized.
- Going For Alarm: Used to indicate Hostiles that are aware of your presence, and are trying to sound the alarm.
New Ammo Types
Shadow War introduces two kinds of Ammo, in addition to the standard Ammo: Black and Subsonic. These Ammo types can be used in non-Shadow War Missions, although there is no practical reason to do so.
- Standard Ammo: The standard Ammo used in Warfighter. There are no adjustments.
- Black Ammo: This Ammo is optimized for night combat. These are heavy subsonic rounds. This Ammo makes less Noise when fired. Pay 1 RP for each Black Ammo counter you select. This Ammo may only be used for: Pistols, SMGs, Carbines, Rifles, and Machine Guns.
- Subsonic Ammo: This Ammo has a lower velocity, and thus lower Penetration. This Ammo also makes less Noise when fired, but it suffers from a -2 Penetration modifier. This Ammo may only be used for: Pistols, SMGs, Carbines, Rifles, and Machine Guns.
Ammo Selection
You may now select the individual Ammo counters assigned to each Weapon. Select whichever counter you want loaded into the Weapon at the start of the Mission.
When you perform a Reload, you may select from any of the Weapons remaining Ammo counters. You may also perform a Reload to exchange the current Ammo counter for a different Ammo counter. In this situation, do not discard the Weapons Ammo counter.
Example: Your Weapon has 6 Ammo counters. You decide to purchase 2 Black Ammo counters for 1 RP each, 2 Subsonic Ammo counters at no cost, and 2 standard Ammo counters at no cost. You then decide to start with a Black Ammo loaded.
Non-Player Soldiers
You may select and purchase any of the 3 Ammo types for your Non-Player Soldiers.
Example: Your NPSs Weapon has 4 Ammo counters. You decide to purchase 2 Black Ammo counters for 1 RP each, and 2 standard Ammo counters at no cost. You then decide to start with a Black Ammo loaded.
Starting with Special Ammo
Some Soldiers have a number of Black or Subsonic Ammo counters that they start the Mission with noted on their cards.
Shadow War Hostiles
Shadow War Hostiles do not know of your presence until you make enough Noise to attract their attention. Hostiles have several escalating levels of awareness of your presence. In the final stage of awareness, they Move and Attack like a regular Hostile card.
Until the Shadow War Hostiles are aware of you, they Move randomly and will not Attack.
Shadow War Soldiers are usually lighter armed than daylight Soldiers. Try to attract as little attention as possible, to keep the Hostiles unaware of your Soldiers for as long as possible. If you are forced into a stand-up fight, the Mission will go badly in a hurry.
Shuffle the Hostile cards as normal, and place the cards with their Unrevealed sides face up on the Tactical Display Sheet. The Unrevealed side of Hostile cards are more deadly than the Revealed sides. Unaware sides tend to have a higher Cover, more Reticles, deadlier Attack information, and so on. It is almost always a good tactic to Reveal Hostile cards as soon as possible.
Status
Hostiles have 4 status levels. These descriptions are for informational purposes only.
- Unaware - They have no clue that your Soldiers are in the area.
- Pauses - They stop because they think they heard or saw something.
- Going For Alarm - They know your Soldiers are nearby, and they are trying to alert the others.
- Mobilized - They are fully aware of your nearby Soldiers and act like regular Hostiles.
Unaware or Pauses Hostile Actions
Hostiles perform Actions based on their respective status.
- Unaware - The Hostile does not perform Close Range Movement or Attack. It performs Random Movement.
- Pauses or Going For Alarm - The Hostile does not perform Close Range Movement, Random Movement, or Attack.
- Aware - The Hostile performs Close Range Movement and Attacks as normal.
- Reaction Force - The Reaction Force Hostile performs Close Range Movement and Attacks as normal.
Whether a Hostile is Unrevealed or Revealed does not affect its Move and Attack Actions.
Random Hostile Movement (<- X-X ->)
Roll a die for each Unaware Hostile. If the roll is less than the number range shown on the Hostiles card, Move the Hostile 1 Location to the left. If the roll is in the number range, don't Move the Hostile card. If the roll is greater than the number range, Move the Hostile card 1 Location to the right.
Example: For the Hostile card above, you roll a 2. Move the Hostile card 1 Location to the left. If you had rolled a 6, the Hostile would not Move. If you had rolled a 9, the Hostile would Move 1 Location to the right.
If a Hostile Moves to the left of the Mission card, or to the right of the Extraction card, remove it from the Mission, and do not gain XP. If it has a Going For Alarm counter in play, the counter remains in play and advances as normal.
Do not Move Hostile cards with a Stationary Random Movement notation. Do not Move Hostile cards with an Objective Hostile counter out of the Objective card due to Random Hostile Movement.
Hostile Targeting Counters
Normally, you draw Hostile Targeting counters for Hostile cards when they enter play. In Shadow War, you do not draw a Hostile Targeting counter for a Hostile until it becomes Aware.
Shadow War Soldier Turn
You perform the same basic Actions as for a daytime Mission. In addition to your normal Actions, you will also Reveal Hostiles to get a clear picture of the threat they represent, and do your best to avoid making too much Noise.
Avoiding Hostiles is also handy. When they are close by, the Noise level increases due to their inherent search abilities. If too many Hostiles spend too long in close proximity, they will discover you sooner or later.
Placing and Revealing Hostiles
During the Mission, draw Hostile cards as normal. The Unrevealed sides are deadlier. They have more Reticles, higher Defeat Cover ratings, and better Attacks.
When placing a new Hostile card, place it with its Unrevealed side face up, and place an Unaware counter on it.
If a Hostile card is to be placed to the left of the Mission card, place it in the Mission card. If a Hostile is to be placed to the right of the Extraction card, place it in the Extraction card.
Revealing Hostiles
Revealing a Hostile is the act of flipping its card from its Unrevealed side to its Revealed side. The Hostile card keeps any counters already on it when it is Revealed. Unless otherwise stated, there is no Range or keyword limit to Revealing a Hostile.
You Reveal Hostile cards by using your Night Equipment. Each Equipment card specifies the roll or cost needed to Reveal a Hostile card. When you Reveal a Hostile card flip it from its Unrevealed side to its Revealed side. Unless noted as being an Action, Revealing a Hostile does not use an Action.
Movement Noise (Shadows Skill)
When a Soldier declares an Action to Move to a different Location, roll for the Soldiers Shadows Skill. If the Soldier makes a successful Shadows roll, the Action generates 0 Noise. If the roll fails, the Action generates 1 Noise.
Example: A Soldier has Shadows 8+. You Move her into an adjacent Location card and roll a 9 for her Shadows Skill. A success. She does not make any Noise.
Example: A Soldier has Shadows 8+. You Move him into an adjacent Location card and roll a 7 for his Shadows Skill. A failure. He makes 1 Noise.
Attacking Hostiles
To Kill a Hostile card, you need to do any 1 of 3 things, depending on its status:
- If Unrevealed, EKIA all its Unrevealed Reticles.
- If Revealed, EKIA all its Revealed Reticles, as normal.
- If you have placed EKIAs on an Unrevealed Hostile and you then Reveal it, it might be immediately Killed. This is because while the EKIAs are not enough to Kill all the Unrevealed cards Reticles, they are enough to Kill all the Revealed cards Reticles. In this situation the Soldier who Reveals the Hostile card gets the XP.
Example: You have been attacking an Unrevealed Hostile card with 4 Reticles. You have inflicted 3 EKIAs. You then use Night Goggles to Reveal the Hostile card. The Revealed side has only 2 Reticles. Immediately Kill the Hostile card, and the Revealing Soldier gains its XP.
Attacking an Unaware or Pauses Hostile
When a Soldier declares, and pays for, an Attack against a Hostile card with an Unaware or Pauses counter, draw an Unaware Target counter from the cup.
Do not draw an Unaware Target counter when targeting a Vehicle, Structure, Door, Inanimate, or Aircraft, unless the Hostile has the Vulnerable Keyword. Draw an Unaware Target counter as normal against Vulnerable Hostile cards.
Unaware Target counters have the following effects on your Attack:
- No Shot - The Soldier cannot perform this Attack. The Action is wasted. The Soldier can declare and pay for a new Attack.
- +X, +X - Add the top number to the Soldiers Attack rolls, and the bottom number to the Soldiers Defeat Cover roll.
- EKIA, No Roll - Place an EKIA on the Hostile card for each Attack die to be rolled. No rolls needed. Do not roll to check for Reloading.
- Pay 1 XP, EKIA, No Roll - The Soldier must pay 1 XP to perform this Attack. If you choose to, place an EKIA on the Hostile card for each Attack die to be rolled. No rolls needed. Do not roll to check for Reloading.
- EKIA, No Roll, GFA - Place an EKIA on the Hostile card for each Attack die to be rolled. No rolls needed. Do not roll to check for Reloading. If there is a Hostile in the Soldiers Location, or the Targets Location, change a random Hostiles status in those Locations to Going For Alarm (GFA). If there are no Hostiles in either Location, do not place a Going For Alarm counter.
After drawing the Unaware Target counter, you may choose to resolve the Attack as normal, or you may choose not to perform the Attack. If you choose not to Attack, the Action remains paid for, and it still counts as an Action, albeit a wasted one.
Example: You declare an Attack, and draw an Unaware Target counter. It is a +3 / +0. You may perform the Attack and add 3 to your Attack die rolls, or you may choose not to do the Attack, and waste the Action.
Use the Unaware Target Attack Chart on the Shadow War Tactical Display Sheet to determine the outcome of the Attack.
If the Attack results in an EKIA or Going For Alarm, but does not Eliminate the last Reticle on the Hostile card, place a Going For Alarm counter on the Hostile card and the Going For Alarm Track.
Example: The Hostile card has 3 Reticles. You Attack it and inflict 1 EKIA. Place 1 EKIA and 1 Going For Alarm counter on the Hostile card.
After resolving the Attack, or choosing to not perform the Attack, return the Unaware Target counter to the cup.
For extra EKIAs gained from Skills or Actions, e.g. Point Blank or Re-Acquire, these are not considered separate attacks, and do not incur an added Noise penalty. Pay the stipulated XP cost to gain the second EKIA.
Attacking an Aware Hostile
Hostiles that do not have an Unaware or Pauses counter are Aware Hostiles. Hostiles that do not have an Unaware or Pauses counter, do not draw an Unaware Target counter. Resolve the Attack as normal. Use the Normal Target Attack Chart on the Tactical Display Sheet to determine the outcome of the Attack.
Attack Noise
After resolving the Attack, advance the Noise counter along the Noise Track. See the Soldier Actions Chart on the Tactical Display Sheet for the Noise generated by each type of Attack.
Black Ammo and Subsonic Ammo generate 5 Noise for each Attack die declared. Normal Ammo generates 10 Noise for each Attack die declared. A Suppressed Weapon reduces the Noise generated by each Attack die declared.
Example: A standard M4 Carbine firing standard Ammo creates 10 Noise with each Attack die declared.
Example: Subsonic or Black Ammo creates 5 Noise per Attack die, and a Suppressed M4 Carbine reduces the Noise by 3 for each die. This results in each M4 Black Ammo Attack die generating 2 Noise.
Example: You fire a Black Ammo Burst (2 dice) from your Suppressed M4 Carbine against an Unaware Hostile. You draw the EKIA, No Roll counter. You inflict 2 EKIAs. Even though no Attack dice were actually rolled, you still generate 4 Noise.
Explosion Attacks generate 5 Noise for each Attack die rolled.
Example: You throw a 4-die Grenade at a Hostile card. It generates 20 Noise.
Example: You use a 2-die Trigger device as a Distraction. It generates 10 Noise.
A Hand to Hand Attack that inflicts an EKIA generates 0 Noise. Any other Hand to Hand Attack result generates 1 Noise.
Evading Hostiles
Soldiers can pay XP to Evade Hostiles using the normal Evasion rules.
Example: The Hostile card has an Evade (3 XP) notation. You can pay 3 XP during the Soldier Turn to discard the Hostile.
Soldiers can pay to Evade a Hostile that has a Going For Alarm counter. When you do so, discard the Hostile card. The Hostiles Going For Alarm counter remains on the track and advances as normal.
Noise Track
As you generate Noise with your Actions, and as the Hostiles search for you, the Noise counter advances up the track. The higher it gets, the better the chance of the Hostiles discovering you. Once a Hostile notices your presence and goes for the alarm, you have only a handful of Actions to Eliminate the Hostile card before it alerts all the enemy forces.
The Noise Track is divided into 6 sections. Each section lists the die roll ranges for Going For Alarm and Pauses.
- The lowest section has None for Going For Alarm and 1- for Pauses.
- The next section has None for Going For Alarm and 3- for Pauses.
- The next section has 2- for Going For Alarm and 3-5 for Pauses.
- And so on up the Track.
If the die roll does not fall into the Pauses or Going For Alarm die roll ranges, it has no effect.
If an Action generates 1 or more Noise, advance the Noise counter on the Noise Track the number of spaces equal to the Noise generated by the Action. Each time a Soldier performs an Action that generates 1 or more Noise, advance the Noise counter along the Noise Track.
If an Action ends up having a negative value because of modifiers, it generates 0 Noise.
Example: A Pistol Attack generates 0 Noise, and there is another card in effect that subtracts 1 from all Noise generated. The Pistol creates 0 Noise.
If there is a Hostile card in the Soldiers Location, or the Targeted Hostiles Location, roll on the Noise Track. If the result is Pauses, flip a random Hostiles Unaware counter in the Soldiers Location or the targets Location to its Pauses side. If the result is Going For Alarm, replace a random Hostiles Pauses or Unaware counter in the Soldiers Location or the targets Location with a Going For Alarm counter.
Example: Your Soldier Moves into a Location, fails his Shadows roll and generates 1 Noise. You advance the Noise counter by 1 space along the track. The Noise counter is now in the middle space of the third section (Going For Alarm 2- and Pauses 3-5) from the bottom. You roll a 1. This means a random Hostile in the Soldiers new Location is Going For Alarm. If you had rolled a 4, a random Hostile in the Location would Pause. If you had rolled a 7, there would have been no effect to advancing the Noise counter.
Example: A Soldier in Location #3 Attacks a Hostile card in Location #5. The Black Ammo generates 5 Noise, less 2 Noise for the Suppressed Weapons Noise reduction, for a total of 3 Noise. You advance the Noise counter 3 spaces. If there are any Hostiles in Location #3 or #5, roll to see if any of them Pause or Go For Alarm. If one is Pausing or Going For Alarm, randomly determine which Hostile in Location #3 or #5 is doing so.
If an Unaware Hostile receives a Pauses result, flip its Unaware counter to its Pauses side.
If a Hostile already has a Pauses counter, and it is about to gain a second Pauses counter, instead, replace its Pauses counter with a Going For Alarm counter.
If a Hostile already has a Going For Alarm counter, any additional Going For Alarm counters to be placed on the Hostile card are ignored.
Going For Alarm Track
Anytime you place a Going For Alarm counter on a Hostile, also place a Going For Alarm counter with the same number on the Going For Alarm Track. Each Hostile card notes which space on the track to place its Going For Alarm counter.
Example: A Hostile card is Going For Alarm. You place a Going For Alarm #1 counter on the Hostile card, and a second Going For Alarm #1 counter on the Going For Alarm Track. A second Hostile also starts Going For Alarm. Place #2 counters on the Hostile card and track.
When you Eliminate a Hostile card, discard its Unaware, Pauses, and both of its Going For Alarm counters.
Reaction Forces
Reaction Force Hostile cards do not have an Unrevealed side. Do not place an Unaware counter on them.
Shadow War resolves some activities Action by Action, such as Hostiles Going For Alarm. To clarify, an Action is still counted as an Action, even if the Soldier did not have to pay an Action to perform it.
Example: A Soldier plays a Snap Shot card to perform an Attack without paying an Action. You still advance the Going For Alarm counters after resolving the Action.
Example: Due to the Noise an Action generated, a Hostile received a Going For Alarm counter. A Hostile card has an Alarm 4 notation. You place a Going For Alarm 1 counter on the Hostile, and on the Going For Alarm Track on the 4 space. One of your Soldiers performs an Attack. After resolving the Attack, you advance the Hostiles Going For Alarm counter to the 3 space. A Soldier Moves. You advance the counter to the 2 space. A Soldier performs a Discard and Draw. You advance the counter to the 1 space. A Soldier attempts to Attack the Hostile, but draws a No Shot counter. You advance the counter to the Alarm Sounded space.
After resolving an Action, advance each counter on the Going For Alarm Track by 1 space. If any Reticles on a Hostile card are Suppressed, do not advance its counter.
Example: The Hostile card has 2 Reticles. You inflict 1 Suppress on the card. Since the Hostile card has 1 or more Suppress counters, do not advance its Going For Alarm counter on the track.
Hostile Movement and Attacks
If a Hostile does not have an Unaware, Pauses, or Going For Alarm counter, it Moves and Attacks as normal.
Hostile Attacks
Move the Enemy Mobilization Status counter to the On Alert space if a Hostile performs an Attack.
Shadow War Hostile Turn
As you go farther into the Location cards, the enemy activity decreases, and it becomes easier for them to detect you. Once the Noise counter or a Going For Alarm counter enters an Alarm Sounded space on the tracks, the enemy will quickly track you down.
Once the alarm sounds, the enemy forces go through a brief period of confusion. This makes it easier for you to perform Actions and not be noticed. However, once the alarm is sounded, if you do anything that would cause a Hostile to Pauses or Go For Alarm, the Hostile instead becomes aware of you and acts like a regular Hostile.
Also, once the alarm sounds, a wave of alert and mobilized Hostiles forces rises up from the first Location cards and begins sweeping through the Locations in search of you.
Night Activity
- Flip all Hostile Pauses counters back to their Unaware sides.
- Advance all Going For Alarm counters 1 space on the track.
Adjust Noise Counter
Each Hostile has 1 to 3 Search ratings printed on its card. From left to right, these numbers are the Hostiles Search value at Range 0, Range 1, and Range 2 from the Soldier. Advance the Noise counter the indicated number of spaces when at Range 0, Range 1, and Range 2.
If there are Soldiers at more than one Range from the Hostile, use the Range with the highest Search value.
Example: The Hostile shown above advances the Noise counter 2 spaces at Range 0, 6 spaces at Range 1, or 4 spaces at Range 2. There is a Soldier at Range 0, and a second Soldier at Range 1. Advance the Noise counter 6 spaces because that is the higher of the two Search numbers.
Example: There are 2 Hostiles at Range 0 to your Soldiers. They have Range 0 Search values of 2 and 3. There are also 3 Hostiles at Range 1 from the nearest Soldiers with Range 1, 2, and 3 Search values of 0, 2, and 1. You would advance the Noise counter 8 spaces (2 + 3 + 0 + 2 + 1).
If there are Soldiers at more than one Range from the Hostile with a negative Search value, use the Range with the lowest Search value.
The Mission cards Activity value indicates the number of spaces to retreat (move downward) the Noise counter on the Noise Track based on the position of the right-most Location card in play. After taking into account all Noise modifiers, adjust the Noise counter on the track.
Example: Due to Hostile card Search values, you advance the Noise counter by 8, but due to the Activity value of the right-most Location, you retreat the Noise counter by 3. Overall, you only advance the Noise counter by 5.
Alarm Sounded
If the Noise counter enters its Alarm Sounded circle, or a Going For Alarm counter enters its Alarm Sounded square, move the Enemy Mobilization Status counter to the On Alert space on the Tactical Display Sheet. Once the Enemy Mobilization Status counter enters the On Alert square, it remains there for the remainder of the Mission.
Once the Enemy Mobilization Status counter is in the On Alert space any time a Pauses or Going For Alarm counter is to be placed on a Hostile card, do not place the counter, and remove all Unaware, Pauses, and Going For Alarm counters from the Hostile card. The Hostile is now Aware. Also, any Hostiles Going For Alarm also become Aware.
Discard Suppress Counters
Discard the Suppress counters from all Hostile cards.
First Turn On Alert
If this is the first Night Activities step that the Enemy Mobilization counter is in the On Alert space, perform the following steps.
- Place Mobilized counters on the Mission card and Location #2.
- Remove all Unaware, Pauses, and Going For Alarm counters from all Hostiles in the Mission card and in Location #2.
- Place a Reaction Force Hostile card in Location #2. Do not place an Unaware counter on the Reaction Force.
Confusion
After the Alarm Sounds, retreat the Noise counter down the track a number of circles equal to the Mission cards Confusion value.
After First Turn On Alert
If the Turn started with the Enemy Mobilization Status counter in the On Alert space, perform the following steps.
- Place a Mobilized counter and Reaction Force Hostile card in the Location to the right of the right-most Location that already has a Mobilized counter. Do not place an Unaware counter on the Reaction Force. The number of Reaction Force Hostiles in the deck do limit the number of Reaction Forces that can be in play at the same time.
- Do not place a Mobilization counter or Reaction Force card in the Extraction card.
- Remove all Unaware, Pauses, and Going For Alarm counters from all Hostiles in all Mobilized Locations.
Shadow War Extended Example
The Objective card is in Location #5. You have Soldier Smith in Location #4, Soldier Murphy in Location #3, and Soldier Jones in Location #2.
Soldier Murphy makes a Melee Attack against a Hostile in his Location, and inflicts an EKIA on 1 of the Hostiles 3 Reticles. You place the EKIA counter, as well as a Going For Alarm #1 counter on the Hostile because you inflicted an EKIA or Suppress on the Hostile, but all the Reticles on the card are not suffering an EKIA or Suppress. The Hostile has an Alarm 3, so you also place a Going For Alarm #1 counter on the 3 space of the Going For Alarm Track.
Smith is out of Actions and Jones only has a Range 0 SMG and 1 Action remaining.
You Move Jones into Location #3. Since an Action has been resolved, you advance the Going For Alarm counter from the 3 to 2.
Smith, however, does have a Snap Shot Action card. You play the card, Smith performs an Attack on the Hostile, but Misses. You advance the Noise counter. You also advance the Going For Alarm counter to 1.
This ends the Soldier Turn, and you begin the Hostile Turn. During the Hostile Turn, the Hostile still retains its Unaware counter, which means the Hostile cannot Move or Attack.
You perform Random Movement for all Hostiles that are not Suppressed, Pausing, or Going For Alarm.
You advance the Going For Alarm counter to the Alarm Sounded space. You then move the Enemy Mobilization counter to the On Alert space.
You proceed to the Night Activities portion of the Hostile Turn. Since this is the first Night Activities step in which the Enemy Mobilization counter is in the On Alert space, you place Mobilized counters in the Mission card and Location #2. You place a Reaction Force in Location #2. You also remove the Unaware, Pauses, and Going For Alarm counters from all the Hostiles in the Mission card and Location #2.
You then retreat the Noise counter 10 spaces because the Mission card has a Confusion value of 10.
You then resolve the next Soldier Turn.
Smith takes another shot at the Hostile card, and inflicts an EKIA. It also inflicts a Suppress on the third Reticle since it was a Suppressed Attack. You would normally place a Going For Alarm counter on the Hostile due to the Attack. However, since the enemy is On Alert, you instead remove all of their Unaware, Pauses, and Going For Alarm counters. The Hostile is now Aware.
Smiths Attack generated 2 Noise, so you advance the Noise counter 2 spaces and roll to see if a Hostile in Location #3 noticed the Attack.
There are three Hostile cards in Location #3: the one you have been Attacking, plus two more. You roll a Pauses result. You then roll to see which of the three Hostiles in that Location Pauses. You roll, and one of the two Hostiles that have not been Attacked Pauses. However, since the enemy is On Alert, instead of Pausing, you remove their Unaware counter. That Hostile is now Aware.
You resolve the remainder of the Soldier Turn. Murphy and Smith Move from Location #3 to Location #4.
You resolve the Hostile Turn. The Reaction Force in Location #2 Closes Range to Location #3.
When you resolve the Night Activities steps, since the Enemy Mobilization counter was in the On Alert space at the start of the Turn, and the right-most Mobilized Location is Location #2, you place a Mobilized counter in Location #3. You place a Reaction Force in Location #3. You also remove the Unaware, Pauses, and Going For Alarm counters from all the Hostiles in Location #3.
The Mission continues.
Private Military Contractors (PMCs)
Warfighter Private Military Contractor (PMC) makes you the boss of a private security company heading off to make the world a better place in the Iraqi Gold Rush days of 2003 and onward. You hire operators, build up your Office and Iraqi Compound, bid on contracts, and use the Warfighter tactical system to resolve engagements with the local hostiles. Along with fighting hostiles, you also need to turn a profit! You have bills to pay, so get out there and start making some money!
PMC Victory
Your goal is to make as much money as possible during a 6-Month Campaign. The different Victory levels are shown on the Business Form for each type of Business.
If the Money in your Companys Bank Account ever goes below $0, you immediately lose the Campaign.
PMC New Rules
PMC uses all the standard Warfighter rules, except where noted below. PMC adds a strategic campaign level to your Warfighter missions. You run a company, and manage all the financial details of the company, and use the Warfighter tactical system to resolve engagements that occur at your contract sites.
PMC Nation
PMC is a Nation in Warfighter, and uses all the standard Nation rules.
PMC / Soldier
These terms are used interchangeably when referring to your personnel. The cards and rules refer to RP. This refers to the Printed cost on the Soldiers card, and does not include Skills and Gear.
Many Soldier cards note an -or- for their Weapon selection. When you purchase a Soldier, or they Promote to a higher Level, decide which Weapon they will Equip for that Level.
Example: When Smith Promotes to Level 3, he must decide whether to Equip the AR-15 Carbine or the M4 Carbine.
Example: Smith chose to Equip the AR-15 Carbine when he Promoted to Level 3. When Smith Promotes to Level 4, he decides to Equip the M4 Carbine. The AR-15 Carbine is removed from him, and placed back in the Weapon deck.
Example: Level 5 Smith was able to choose between the AR-15 Carbine and the M4 Carbine, and he chose to Equip the AR-15 Carbine. You also purchased for him an MP5 SMG and M9 Pistol. When he Promotes to Level 6, he decides to Equip the M4 Carbine. He removes the AR-15 Carbine, but keeps the MP5 SMG and M9 Pistol.
Duration
Each PMC Campaign has a 6-Month duration.
Reputation
Your company starts with 0 Reputation. You will gain and lose Reputation during a Campaign. As your Reputation increases, you will receive advantages. Place Reputation counters for your Companys current Reputation on the Reputation area of the Tactical Display. If you do badly, your Reputation can go below 0 and into the negatives.
Red/Green Text
Some cards have text printed in red or green. Red text denotes some kind of restriction or penalty.
Example: A Contract card has red text of "Must have Rep 5+." If you have Reputation 4 or less, you cannot Bid on this Contract.
Green text denotes a bonus or advantage of some kind.
Example: A Contract card has green text of "If Rep 9+, -1 Comp." If you have Reputation 9 or higher, randomly remove one Competitor from Bidding on this Contract.
Remove from Campaign
Remove the card or set of Soldier cards from the Campaign. They cannot be used again. If a PMC is Downed, remove their cards from the Campaign. If you hire a PMC, then later decide not to pay them at the start of a Month, remove their cards from the Campaign.
Vehicles
If a Vehicle is rendered Immobile, and you complete the Objective, you may retrieve and freely repair the Vehicle. If you do not complete the Objective, discard the Vehicle card. It may be repurchased.
Overwatch
At the start of a Mission, divide your Soldiers between the Tactical and Overwatch groups. You must have at least one Player Soldier in the Tactical group.
Place the Overwatch Soldiers off to the side of the Tactical Display. They do not travel through the Location cards. Treat the Tactical Soldiers as normal.
For each Overwatch Soldier, draw 1 random Overwatch counter for every 10 RP, or fraction of 10 RP, of the Soldiers Printed RP value. Do not add additional Skills, and Gear. Place each Soldiers Overwatch counters on the Soldiers card.
Example: You place a 12 RP Soldier, with an additional 4 RP of Skills, and 8 RP of Gear on Overwatch. Draw only 2 Overwatch counters for the Soldier (RP 12), as their additional Gear and Skills do not count toward Overwatch counters.
You may expend each Overwatch counter during the Mission to gain the noted effect. Discard any unused Overwatch counters at the end of the Mission.
Overwatch Counters
- Gain 3 XP - At any time, add a total of 3 XP to any Soldiers.
- Cancel val 0-2 Hostile Arrival - When you draw a Hostile Reinforcement card with a value of 0 to 2, Discard it.
- Adjust Mission Turns 1 - After adjusting the Timer counter during the Advance Mission Timer step, adjust the Timer counter by 1 space in either direction.
- Eliminate a val 0 Hostile - During the Soldier Turn, Eliminate 1 Hostile card with a value of 0.
- Draw 3 Cards - At any time, draw a total of 3 Action cards and add them to a Player Soldiers hand.
- Cancel Attack, Down - After rolling a Hostiles Attack and Defeat Cover dice, Down the Overwatch Soldier to cancel the Attack.
- Gain 1 Action - During the Soldier Turn, give 1 Action to any Soldier. This Action is temporary, and is removed at the beginning of the next Soldier Turn.
- Cancel val 0-4 of Hostile Moves - During the Hostile Close Range step, select a total value of 0 to 4 Hostile cards in one Location. Do not Move them.
Dollars and Resource Points
PMC measures costs and income in Dollars. When purchasing Warfighter cards, $1000 dollars = 1 Resource Point.
Example: The M4 Carbine has an RP cost of 3, it costs $3000 to purchase for a Player Soldier PMC.
You do not have to buy Ammo for Weapons. It is included as part of the purchase cost. You do need to repurchase Expended Gear that is used.
Example: I purchase 3 M67 Grenades. I use 2 of them in a Mission. I do not freely get those back, and may re-purchase them next Month.
Purchase vs. Overhead
All purchases are a one-time purchase unless noted as Overhead. You pay Overhead costs at the start of each Month during the Accounts Payable step.
Example: Smith at Level 6 has an RP value of 22, which is an Overhead of $22,000. I decide to purchase the MP5 SMG for $2000 and give it to Smith. Smiths Overhead is still $22,000.
PMC Stress Cards
PMC Stress cards are a new card type. These cards represent the stressful effects of combat on people who are not trained to military standards. Shuffle these cards into the Action card deck.
After drawing cards, immediately play any Stress cards drawn. Each card is divided into 3 sections:
- Top - Declares which PMC Soldiers can be affected by the card. Many cards also give you the option of paying XP instead of suffering the effects of the card.
- Middle - Details the ill affects on the PMC Soldier.
- Bottom - Details the benefit gained by the PMC Soldier.
All of these rules remain unchanged if you are playing a Mission with a mix of PMCs and standard military Soldiers. However, if you draw a PMC Stress card for a non-PMC Player Soldier, discard and redraw. Also, when determining which Soldier is affected by a Stress card, only select from PMC Soldiers - do not include non-PMC Soldiers in the selection.
You must use these cards if you are playing a Mission with one or more PMC Soldiers.
Hostile Cards
PMC includes three types of Hostile cards. All Hostile cards function as normal Warfighter Hostiles, however, Epic and Legendary Hostile cards are more powerful versions of the standard Hostile. Shuffle the Epic cards. Shuffle the Legendary cards. Place their decks off to the side for later use.
Business Set-Up
Forming Your Business
You begin a PMC Campaign by creating your business. To do so, fill out the Business Form provided. You can also download these forms from the DVG website.
Fill in the information for your Company Name, Owners Name, City and Country, Slogan, and Logo. These do not affect game play, and are for personal flavor.
Select the size of your Business. From smallest to largest, you can select from: Sole Proprietor, Partnership, LLC, or Corporation. LLCs and Corporations are found in the PMC Expansion decks. We recommend starting with a Sole Proprietor business.
Each Company card notes your Starting Money. Collect Starting Money counters and place them on the Bank Account area of the Display Sheet.
You must select an Office card and a Compound card. The Office card is where your company is located in your home country. Your Compound card is your companys facility in Iraqs Green Zone.
You may select Enhancement cards for your Office and Compound. Most of these card types have three levels: inferior, normal, and superior. Inferior cards actually save you money each Month, but you do suffer some kind of penalty. Normal cards have no adjustments, and no cost. They are assumed to be part of your Companys Overhead. Superior cards have a Monthly Overhead cost, and provide you with a benefit. The cost of an Enhancement is based on your Office or Compound cards Enhancement value.
Example: If you had an Office with the Lawyer Enhancement, you would pay: x1 $Enh which would be $8,000 due to the Offices Enhancement note.
Example: If you had the Compound with the Primitive Infirmary, you would pay: -x1 $Enh which means your Overhead is reduced by $6,000 due to the Compounds Enhancement note.
Record all of these choices on your Business Form. Now that you have created your Companys structure, you can start making purchases.
Purchases
You may purchase the following items in any order. All of this is part of the Business Set-Up step.
You always have the Federal Firearms License, and must follow the limitations that come with it. You may purchase other Licenses which will remove some of these limitations. These are one-time purchases. Once you purchase a License, you have it for the remainder of the Campaign.
Select the PMCs you wish to hire. PMCs come in levels from 1 to 6, with Levels 1 and 2 being Squad Soldiers, 3 and 4 being Non-Player Soldiers, and 5 and 6 being Player Soldiers. Each Soldier can only have one card in the Campaign at any time. You may hire a PMC at any of their 6 Levels. During the Campaign, your PMCs will earn Hero Points by going on Missions. The Hero Points needed for a PMC to Promote to the next Level is noted on each PMCs card for Levels 1 to 5. PMCs cannot Promote higher than Level 6.
PMCs come with the Gear and Skills listed on their cards at no cost. You cannot purchase a PMC if you do not have the proper Licenses for all of their Gear. If you have hired a PMC and they Promote to a card that has Gear you are not licensed for, you must Remove the PMC from the Campaign. You may purchase additional Gear for Player Soldiers. You may not allocate a PMCs Gear to other Soldiers. If the PMC has an -or- for a choice between multiple Weapons, you must Equip them with a Weapon you have Licenses for, or they leave your Campaign.
When a PMC Promotes to the next higher Level, they freely gain the Gear listed on their new card, and lose any Gear that was printed on their old card.
Each PMC has a Salary noted on their cards. As you allocate Hero Points to a PMC, and they Promote to higher Levels, their Salary remains the same as when you hired them. However, PMCs have a Reputation and Raise noted on their cards. If your Company does not meet the Reputation needed by the PMC, you must give the PMC a Raise from the Salary you hired them at, to the Salary listed on their current card. The Salaries of your PMCs are part of your Monthly Overhead.
Example: You hired a Level 2 PMC costing 5 RP ($5000) and requiring Reputation 3. Your company had Reputation 4. Later, the PMC Promoted to Level 3 with 8 RP and Reputation 5. Your company by then had Reputation 6, so you did not have to give them a Raise. Now, the PMC has Promoted to Level 4 with 11 RP and 7 Reputation. Your company still has a Reputation of 6. You must either give them a Raise to $11000, or they will leave your company.
Select and purchase any Weapons and Gear you are Licensed for. This Equipment belongs to your Company and you may allocate it Week by Week to any Player Soldiers. Record this Gear in the Company Inventory section of the Form.
Select and purchase Skills for Soldiers as normal.
Record all this information on your Business Form.
Place Money counters equal to your Overhead in the Overhead area of the Display Sheet. This is not your Money. It is just an easy reminder of your Monthly Overhead.
Whenever you earn Money, add the Money counters to the Bank Account space on the Display Sheet. Whenever you spend Money, Subtract the Money counters from your Bank Account.
Black Market Gear
Some Gear has the Black Market Keyword. See the Keywords sheet for details. You may purchase this Gear even if you do not have the proper License. Each time you purchase a Black Market item, roll a die. If you roll the Risk number or lower, you do not pay for the item, you do not receive the item, and you must pay the noted fine.
Example: For the M67 Grenade Black Market: Roll a die for each Grenade you purchase. On a roll of 1 or less, you do not pay for the Grenade, or get the Grenade, but you do need to pay a $25,000 fine. If you roll a 2+ you receive the item.
Competitors
Draw 2 Competitor cards. These Competitors remain in play throughout the Campaign.
Cards and Counters
Place the Month counter in the 1 square of the Months track. Place the Hostile cards and Contract cards in their spaces on the Display Sheet. Place your PMC, Skill, and Gear cards off to the side.
Sort the Location cards (Baghdad, Baghdad Embassy, etc.) into their individual Region and place them off to the side.
PMC Game Play
You are now ready to begin bidding on Contracts, running Missions, and making the world a better place! All while making a buck or two.
Monthly Sequence
Each Month, you perform the following Monthly Sequence of steps.
Acquisitions
Decide whether to keep the PMCs you have previously selected, or you may fire any of them, and Remove them from the Campaign. Select any new PMCs, Gear, and Licenses you would like to purchase and pay for them out of your Bank Account. Purchase and adjust any of your Office and Compound Enhancements. Adjust the Money counters in the Overhead area as needed to reflect your new Overhead.
Accounts Payable
Begin by paying your Overhead expenses. This includes your Office, Compound, PMC Salaries, and Enhancements. To do so, reference the Money counters in your Overhead area on the Display Sheet, and deduct that much Money from the Bank Account area on the Display Sheet.
You pay Overhead for the following cards:
- Soldier cards. Only pay for the Soldier cards Printed RP value. Do not pay Overhead for their Skills or Gear.
- Office card.
- Compound card.
- Office and Compound Enhancement cards.
- Any other cards that have an Overhead notation.
Bid on Contracts
Shuffle the Contract cards and draw the number noted on your Company card. Place them face-up. You may Bid on them in any order. If a Contract has a Term extending beyond the end of your Campaign, discard it and draw until you draw a Contract that does not extend beyond the end of your Campaign. If a Contract has Bidding requirements, and you don't meet the requirements, you cannot Bid on the Contract.
Select the Contract you want to Bid on. Roll a die for each of your Competitors. If their roll is equal to, or higher than, the Bid roll noted on each Competitor card, they are also in the Bidding. If all the Competitors fail their Bid rolls, you win the Contract.
If at least one Competitor made their Bid roll, then the Bidding goes to a new round. Reduce the amount of the Contract by the amount shown on the Contract card. You may now decide to continue Bidding, or drop out. If you drop out, discard the Contract.
If you decide to stay in the Bidding, roll a die for each of the Competitors that remained in the Bidding. Since this is the first follow-up round of Bidding, subtract 1 from their die rolls. Repeat the Bidding rounds until only you remain, or you drop out. Subtract 1 from their rolls for each round after the first round of Bidding, and continue to subtract the noted amount of the Contracts Bid Money for each round of Bidding.
Example: You have Darkwater and Pointy End as your 2 Competitors on a $40000 Contract with a $4000 Bidding Reduction. On the first round of bidding, Darkwater needs to roll a 6+ and Pointy End needs an 8+. Darkwater rolls an 8 and Pointy End rolls a 3. Pointy End drops out of Bidding and Darkwater stays in for a 2nd round. You decide to stay in as well, and now Darkwater has a -1 modifier. They roll a 6 which is not high enough, as they needed a 7+, so they also drop out of bidding, making the Contract yours for $36000.
If you win the Contract, place the Money counters on the Contract equal to the amount it was worth when you won the Bidding. Also, place a Contract counter on the Contract card, as well as the same numbered Contract counter on the Weeks of Contract track in the space equal to the Contracts Term in Weeks. You will receive this Money if you successfully complete the Contract.
Repeat for each Contract you wish to Bid on. Discard any Contracts you do not wish to Bid on.
Week to Week
Each Month, allocate your PMCs and Gear to each of your Contracts, and then roll for the Week to determine if there is an Engagement for each of your Contracts. You repeat this allocation and Engagement process for each of the 4 Weeks each Month.
Freely Allocate your PMCs and Gear to each Contract. You may rearrange your PMCs at the start of each Week. Each Team must have at least one Player Soldier, or you fail the Mission and fail to complete the Contract. If you fail to complete a Contract, discard the Contract card, its Money counters, and its Contract counters. Also, suffer any Failure notes on the Contract card.
Engagements
Roll a die for each Contracts Threat. If the roll is less than or equal to the Contracts Threat, an Engagement occurs. Draw a Mission card from that Contracts noted Mission deck. Find the Objective in that deck with the same title. The Region and Hostiles are listed on each Mission card.
When an Engagement occurs, immediately collect Money counters equal to the Contracts Engaged Money, and add them to your Bank Account on the Display Sheet. Do this for each Engagement, for each Contract, each Week.
Escalation
If you roll the Contracts Threat value or lower, resolve the Mission as normal.
If your roll is higher than the Threat value, no Mission occurs. Instead, draw an Escalation counter from the cup and place it on the Contract card. These counters modify future Threat rolls for the Contract as well as your rewards when a Mission does occur for the Contract.
Continue to accumulate Escalation counters on the Contract card until a Mission occurs or the Term of the Contract ends. Once a Mission occurs, discard all Escalation counters from the Contract. Before resolving the Mission, add the noted Engagement Money counters, Escalation Money, and Reputation counters to your business. You gain these regardless of the Missions success.
Bonus Reputation
If the total RP of Soldiers is equal to one-half or less of the Mission cards Hostile value, you gain 1 Reputation at the end of the successful Mission. Overwatch Soldiers do not count toward the Missions RP limit when calculating a Missions Reputation bonus.
Example: Your Mission card notes 40 RP. An Escalation counter increases RP by 20 RP to 60 RP. You allocate 27 RP of Soldier cards to the Mission. You successfully complete the Mission and earn 1 Reputation point.
Resolve the Mission
Use the total RP value of the Mission card plus Escalation counters when drawing Location Hostile cards, and for other cards that reference a Locations Hostile value. Do not use your Teams RP value.
Example: The Mission lists 20 RP, and the Mission has a +20 RP Escalation counter. You allocated 67 RP of Soldiers to the Contract. When drawing Hostile cards for Locations, use the 30-49 range on the Location cards.
Resolve the Mission as normal. Allocate the Mission cards Hero Points to the PMCs that are Level 1 to 5 that survived the Mission. You must allocate all the Hero Points if possible, and a PMC must Promote if they have the required number of Hero Points. You cannot allocate Hero Points to a Level 6 Soldier.
If you failed the Mission, then you failed to complete the Contract, immediately discard the Contract card and its Bid Money counters.
Repeat these steps for each Contract. Resolve each Mission as normal. Advance the Contract counters by one space on the Weeks track on the Tactical Display.
Accounts Receivable
A Contract successfully ends when you have successfully resolved all its Missions during its Term. At the end of the Month, collect the successfully completed Contracts Bid Money counters from the Contract card and add them to your Bank Account.
Successfully completing, or failing to complete, a Contract may have other effects noted on the Contract cards.
Once a Contract ends, discard the Contract card and its Contract counters.
Paperwork
As with any business, it is now time to do the paperwork. Adjust your Company Reputation and record the new value on your Business Form. You can also place Reputation counters on the Tactical Display totalling your new Reputation. Some cards adjust your Reputation as noted.
Add 2 Epic Hostile cards and 1 Legendary Hostile card to the Hostile deck, and re-shuffle the deck. The Hostiles become more challenging during each passing Month of the Campaign.
End of Month
This completes the Month. Advance the Month counter by one space. Each Month ends at the end of 4 Weeks. At the end of Months 1 to 5, start the cycle again with the Accounts Payable step. At the end of Month 6, end the Campaign. Some Contracts will not be complete at the end of a Month. Continue the Contracts next Month.
End of Campaign
End the Campaign after resolving 6 Months of activities. Compare the Money counters in your Bank Account to the Victory chart on the Business form to determine your level of success.
Linked Campaigns
You can link 2 or more 6-month Campaigns to form a longer company history. Start the Linked Campaign with a Sole Proprietor Campaign, and play the Campaign as normal.
Next Campaign
After the first Campaign, if you have enough money to meet the Starting Money of a Partnership, then start a new Campaign using the Partnership Business card. If you don't have enough money for a Partnership, play the next Campaign as a Sole Proprietorship. Repeat this process in the following Campaigns for upgrading to LLCs and Corporations.
Pay $100,000 for each Reputation point you would like to keep from your previous Campaign.
You may rehire PMCs that did not die from the previous Campaign. Perform Reputation checks to check for Raises at the start of the Campaign if your Reputation decreased.
Perform all the standard start of Campaign set-ups and purchases. Play the Campaign as normal.
Campaigns
A Campaign is a series of linked Missions that take place in a specific setting. Not all eras will have Campaigns. Select the Campaign sheet you wish to play and place it next to the Tactical Display Sheet.
- Title: The Campaigns title, whether you will be playing an Offensive or Defensive Campaign, and historical information.
- General Information: Designates your Nation, your starting Resource Points to create Squads, the enemy Nation, the Region type, the number of Weeks (Campaign Turns) the Campaign runs, and any Expansions needed to play the Campaign.
- Mission / Location Cards: Lists the Mission or Location cards you will need for the Campaign.
- Objective / Location Cards: Lists the Objective or Location cards you will need for the Campaign.
- Rules: The special rules used by the Campaign. Where Campaign rules conflict with the rulebook, Campaign rules take precedence.
- Map: The Campaign map. The arrow-headed lines show the direction of travel between Missions.
- Victory: The Victory Chart that shows how well you did during your Campaign.
Squad Creation
Purchase your Soldiers, Skills, and Gear as normal using the Campaign sheets starting RP limit. Divide your Soldiers into 1 or more Squads. Assign each Squad a Squad counter. Your Soldiers and the Gear they have will remain within these Squads throughout the Campaign.
Campaigns limit the RP you begin with and the maximum number of Squads you may start with. This is based on the number of START squares on a Campaign sheet.
Fill out the Campaign Log Sheet.
Each Squad performs 1 Mission each Week.
Example: You are playing an Offensive Campaign with 3 Squads. During a Week of the Campaign, Squad #1 runs a Mission to attack an Artillery Position. Squad #2 attacks an Airfield, and Squad #3 attacks Bunkers.
Offensive Campaigns
Set-Up
Place the Enemy Held counters in all the squares on the map.
Place your Squad counters in the noted Starting squares. Your Squads start in squares with Enemy Held counters. Limit of 1 Squad per Starting square.
Start of Each Week
Conduct a Mission for your current Objective's square. Use the Objective card noted in the square.
Draw a random Starting Location card and place it in Location space #1. This serves as the first Location of your Mission, instead of a Mission card. The Location card starts the Mission in play. You do not have to pay its Entrance and Action/XP costs to play it. Also, do not draw Hostiles when placing the Starting Location card.
You do not use a Mission card for Offensive Missions. Roll on the following chart to determine the Location space of the Objective, the number of Turns you have to complete the Objective, and other information and other Effects as stipulated.
| Roll | Location# | Turns | Effect |
|---|---|---|---|
| 2- | 4 | 7 | Add 3 to the Hostile value of the Objective |
| 3-4 | 5 | 9 | Add 1 to the Entrance cost of each Location |
| 5-6 | 6 | 10 | No adjustment |
| 7-8 | 7 | 12 | Gain 1 Squad Soldier (7 RP or less) for the remainder of the Campaign. |
| 9+ | 8 | 15 | Gain 12 RP of Soldiers and Gear for the remainder of the Campaign. |
Conduct Missions
Conduct a Mission for each Squad using the Starting Location card and Objective card pairing.
Recalculate each Squad's RP at the start of each Mission for purposes of the Hostile charts on Location and Objective cards.
Your Squad regains the number of Resource Points it lost or expended during the Mission. You may use these RP to purchase new Soldiers, Gear, and Skills.
Example: Your Squad began the Mission with 27 RP. After the Mission, due to Downed Soldiers and Expended Gear, the Squad is only worth 15 RP. The Squad regains 12 RP.
If You Complete the Objective
Your Squad gains the Resource Points listed on the Campaign sheet for completing the Objective. You may purchase Soldiers, Gear, and Skills.
Flip the Enemy Held counter to its Friendly Held side.
Move the Squad along a line leading out of its square to an adjacent square. Squads can freely move through Friendly Held squares without stopping.
If You Did Not Complete the Objective
Your Squad gains the Resource Points listed on the Campaign sheet for not completing the Objective. You may purchase Soldiers, Gear, and Skills.
Do not flip the Enemy Held counter.
Do not move the Squad counter out of its square.
Your Squad will attempt the same Mission next Week with a new Starting Location card and a new roll on the Mission chart above.
End of Each Week
Mark off the current Week Completed on the Campaign Log Sheet.
Determine if the Campaign is completed. If it is, go to the End of Campaign rules. Do not perform any other End of Each Week actions.
If the Campaign is not Completed
Remove all XPs from the Soldiers. They begin the next Mission with their normal starting number of Mission XPs.
Soldiers Heal all Wounds suffered during the Mission.
Weapons freely regain the Ammo printed on their cards. All Expendables, such as Grenades and Rockets, may be repurchased. Ammo beyond that printed on the Weapon cards may also be purchased.
Update the Campaign Log Sheet based on your purchases. Determine the new Resource Point totals for each Squad based on their current Soldiers, Weapons, and Gear.
End of Campaign
Compare the number of Objectives completed to the Campaigns Victory Chart to determine your level of success (or failure).
Defensive Campaigns
Set-Up
Place your Squad counters in the indicated Starting squares.
Draw a random Mission card and a random Starting Location card, for each battle from those listed on the Campaign sheet.
Defensive Campaign Missions are much like Escape Missions. Treat each Mission card as having the Escape Mission Keyword and using the Escape Mission rules.
Your Goal... Escape
These Missions do not use Objective cards. Your goal in every Defensive Campaign Mission is to Move backward through Location cards and Enter the Mission card.
Place the Mission card in its normal place on the Tactical Display Sheet. Place the Starting Location card in the Objective space printed on that Mission card. You do not have to pay its Entrance and Action/XP costs to play it. You must however draw the Hostiles for the Objective card after the Advance Mission Timer step (see the Escape Mission rules earlier in this Rulebook).
Example: The Mission card specifies the Objective card being in Location #6. Place the Starting Location card in the Location #6 space on the Tactical Display Sheet.
The Mission ends when any of the following occurs:
- All Soldiers are in the Mission card.
- When the Mission Time runs out.
- When the player decides to end the Mission.
Any Soldiers not in the Mission card when the Mission ends are captured by the enemy and are removed from the Campaign.
Conduct Missions
Conduct a normal Escape Mission for each Squad. Recalculate each Squad's RP at the start of each Mission for purposes of the Hostile charts on Location cards.
End of Each Week
Mark off the current Week Completed on the Campaign Log Sheet.
Determine if the Campaign is completed. If it is, go to the End of Campaign rules, and do not perform any other End of Each Week actions.
If the Campaign is not Completed
Remove all XPs from the Soldiers. They begin the next Mission with their normal start of Mission XPs.
Soldiers Heal all Wounds suffered during the Mission.
Weapons freely regain the Ammo printed on their cards. Any unused Expendables such as Grenades carry over to the next Mission.
Move each of the Squads along a line to the next square.
Roll on the following chart to determine the adjustment that affects the next Mission.
| Roll | Effect |
|---|---|
| 2- | Purchase 3 RP of Gear |
| 3-4 | Gain 1 Squad Soldier (6 RP or less) |
| 5-6 | Gain 4 RP of Grenades |
| 7-8 | -1 Location from next Objective |
| 9+ | Subtract 2 from the Hostile value of the Objective |
Update the Campaign Log Sheet based on your purchases. Determine the new Resource Point totals for each Squad based on their current Soldiers, Weapons, Skills, and Gear.
End of Campaign
Compare the RP value of your surviving Soldiers, Skills, and Gear (not Medals) to the Campaigns Victory Chart to determine your level of success (or failure).
Medals in Campaigns
If you are using the Medals expansion, your Soldiers earn Medals as normal during the Campaign Missions. The RP value of Medals is only used when drawing Hostile cards for Location and Objective cards.
Example: You are playing an Offensive Campaign. Your Squad started the Mission worth 30 RP, plus 5 RP of Medals. During the Mission, you treat the Squad as being worth 35 RP when drawing Hostile cards. At the end of the Mission, your Squad is only worth 20 RP due to losses, not counting Medal RP. Your Squad gains 10 RP to make purchases (30 RP of starting [the printed example ends here in the source])
Medal Cards
Nation Medal Cards
Set-Up
Separate the Medal cards by Nation. You will only need the Nation cards for the specific Nation you are commanding during a Mission. Place all the other Medal cards off to the side.
Shuffle your Nations Medal cards and place the deck face down next to the Tactical Display Sheet.
The Mission
Always use Elite Hostiles when you are using the Medals expansion.
Drawing a Medal Card
Draw the top card when the Mission meets the condition specified on the back of its card. Draw only one card even if the next card in the deck has the same condition.
Example: A Medal cards back has the condition "Draw when you play a Location." You play a Location card and draw the Medal card. If the next card also has the "Draw when you play a Location" condition, do not draw it until you play another Location card.
Potential Medal Recipient
Once you draw the Medal card, randomly determine which of your Soldiers is in a position to receive the Medal. All Soldier types (Player Soldiers, Non-Player Soldiers, and Squad Soldiers) may receive Medals.
Earning the Medal
If the Soldier completes the requirements listed on the Medal card, the Soldier gains the noted benefit. Immediately apply the benefit to the Soldier. It is possible for a Soldier to earn a benefit they would not normally be eligible for.
Example: A Squad Soldier earns a benefit that awards him 2 RP of Skills. Select 2 RP of Skills for that Soldier.
Example: An NPS earns a Medal that allows him to "Once per Mission, Find 1 Grenade." Even though he is an NPS and his Gear is normally pre-determined, he can Find, and use, the Grenade.
The Medal cards come with sheets of Medal stickers. Peel off the appropriate Medal sticker and apply it to the Soldier card.
Each Medal has an RP value. Take this into account during Soldier RP checks, such as when Lightening the Load. These stickers stay with the Soldier until he suffers a Downed or KIA result. Take into account the RP value of Medals when selecting Soldiers for future Missions.
Eliminate
Some Medals have the Eliminate condition. This means the Soldier must be the only Soldier to inflict all Suppression and EKIA results on the Hostile card. If any other Soldier, or card played by another Soldier, inflicts a Suppression or EKIA on the Hostile card, the Soldier is no longer eligible to receive the Medal for that Hostile card.
Example: To receive a Medal, the Soldier must Eliminate an enemy Sniper card. If any Soldier, other than the selected Soldier, inflicts a Suppress or EKIA on the Sniper, the Soldier is no longer eligible to receive the Medal.
If the Medal specifies a Turn limit, and the condition is not met within the noted limit, shuffle the Medal back into its Nations draw deck.
Example: The French's Military Medal specifies that 2 EKIA must be placed on a Rifle Team this turn. If the Soldier only places a single EKIA this turn, the Medal is discarded, with the Hostile remaining in play.
Draw and leave face down...
Draw the card, but leave it face down. Move it off to the side. Reveal it, when the condition is met.
Draw a Hostile...
If the Hostile does not have Place instructions, Place it in the Front-most Location card. The Hostile Targets Soldiers as normal.
PMC Medal Cards
PMC Medal cards work much the same as Nation Medal cards.
Differences
PMC Medal cards have a variety of card text formats on their front sides.
- Some cards will inflict a penalty on the Soldier until a condition is met or a cost is paid.
- Other cards will impose a penalty and benefit.
- And still other cards will simply give the Soldier a bonus of some kind.
Most PMC cards either have an instant effect, and are then discarded, or they only last for a set duration, such as until the Soldier exits their current Location. Very few PMC cards stay in effect past the end of the Mission.
PMC Medal cards do not add to a Soldiers RP value unless the card has an RP value in its top-right corner.
Stickers
Even though the effects of most PMC Medals do not last beyond the end of the Mission, place a Medal sticker on the Soldiers card each time the Medal card is placed on a Soldier.
Vehicles
Squad Vehicle cards, Anti-Vehicle Hostile cards, and Driving cards first appeared in WWII Expansions #36, #37, #38, and #39.
You can now purchase and operate Squad Vehicles as part of your team. This added capability is balanced by the presence of Anti-Vehicle Hostiles that appear during the Mission.
Every Nation has its own set of Squad Vehicle cards, Anti-Vehicle cards, and Driving cards, which can be identified by the Nations flag.
Treat Vehicle cards as being Squad Soldier cards for the purposes of card effects, unless specified otherwise on the card.
Example: If a Hostile card Targets the Soldier with the highest RP value, include Vehicle cards in the selection.
Example: A card inflicts 1 Wound on a random Vehicle. Do not include non-Vehicle Soldiers in the random selection.
Treat Vehicles as being the same as Soldiers when drawing Hostile Targeting counters for standard Hostile cards.
Light Vehicles
If the only Soldier Vehicles included in the Mission are Light Vehicles, ignore the Noise and Anti-Vehicle card rules. If any standard Vehicles are included in the Mission, treat Light Vehicles as normal Vehicles.
Example: The only Vehicle in your Mission is an SUV from the PMC game. The SUV is a Light Vehicle, so you would not use the Noise rules or the Anti-Vehicle cards.
Interior Missions
Some Mission cards have the Interior Keyword. You may not use Light Vehicles or Vehicles in these Missions. When drawing Hostile cards, ignore and redraw for any Vehicle Hostile drawn.
Squad Vehicle Cards
You purchase and use Squad Vehicle cards the same way as you purchase and use Squad Soldier cards. Each Vehicle card represents a specific Vehicle. Each Vehicles values vary slightly to take into account the skills of that specific crew as well as the quirks of that specific Vehicle. The new aspects of Squad Vehicle cards are detailed below.
-
Noise: The amount of Noise the Vehicle creates. The higher the number, the more Noise it creates. In general: 1 = Jeeps, 2 = Half-tracks, 3 = Light Tanks, and 4 = Medium and Heavy Tanks.
-
Cannon: Some Vehicles are equipped with a Cannon. Use the Attack Chart and Keywords as normal. The new Keyword Prox for Proximity appears for many Cannons, and is defined on the Keywords Sheet.
Example: A Cannon has the Keywords Single Shot, Pen 3., Ranged Attack. This means it can only use the Cannon once per Turn, it has a Penetration of 3, and it is a Ranged Attack.
-
MG: Many Vehicles are equipped with a Machine Gun. Use the Attack Chart and Keywords as normal.
Example: A Machine Gun has the Keywords Auto: 3 dice, Spray, Pen 2., Ranged Atk. This means that when it Attacks, it will perform a 3-die Auto Attack and you check each die roll to see if it inflicts a Hit. It has a Penetration of 2, and makes a Ranged Attack.
-
S. Arms: Some Vehicles are able to carry Soldiers which can perform Small Arms Attacks. Use the Attack Chart and Keywords as normal. The new Keyword Atks = Health appears for all Small Arms. This means the Vehicle can perform a number of Small Arms Attacks each Soldier Turn equal to its current Health, without spending Actions.
Example: A Half-track has a Health of 4 and has a Small Arms Attack Chart with the Atks = Health Keyword. Every Turn, the Half-track can perform 4 free Small Arms Attacks. If the Half-track suffers 2 Wounds, it can then only perform 2 Small Arms Attacks each Turn.
-
Keywords: Squad Vehicle cards introduce several new Keywords, which are defined on the Keywords sheet. Loadout - The Vehicle can carry the indicated number of Gear Loadout points. Purchase this Gear as normal. You may pass the Gear to other Soldiers as normal.
Anti-Vehicle Cards
Anti-Vehicle cards represent the enemys anti-vehicle capabilities. These cards are specially designed to engage your Squad Vehicles in combat.
During Set-Up, shuffle the enemy Nations Anti-Vehicle cards to form a deck, and place it next to the Tactical Display Sheet. All Anti-Vehicle cards are Elite difficulty.
Example: You set-up a Mission and select Japan to be the Hostile Nation. Shuffle the Japanese Anti-Vehicle cards and place them next to the Tactical Display Sheet.
-
Noise Range: During the Hostile Reinforcement Draw step of each Turn, draw an Anti-Vehicle card for each Squad Vehicle. If the Squad Vehicles Noise rating falls into the Anti-Vehicles Noise range, then place the Anti-Vehicle in its specified Location. The Anti-Vehicle card automatically Targets the Vehicle it was drawn for. If the Squad Vehicles Noise rating does not fall into the Anti-Vehicles Noise range, then discard the Anti-Vehicle card.
Example: You are drawing an Anti-Vehicle card for an M4 Tank Vehicle with a Noise rating of 4. You draw the Anti-Tank Rifle Team Anti-Vehicle card with a Noise range of 2-3. Since 4 is not in the range 2-3, you discard the Hostile.
If you had drawn the Anti-Tank Gun with a Noise range of 3-4, you would have placed the Anti-Tank Gun 2 Location cards beyond the Front-most Location.
-
XP: The XP gained from Destroying the Hostile.
-
Keywords: Anti-Vehicle cards introduce several new Keywords, which are defined on the Keywords Sheet.
Driving Cards
Driving cards are part of the Anti-Vehicle deck of cards. Instead of being an enemy group of Soldiers or a Vehicle, these represent random Vehicle-rated events.
- Nation: As with the other cards, these cards are also Nation specific.
- Noise Range: This works the same as the Noise Range on Anti-Vehicle cards.
- Card Text: Each card has text detailing the cards effect.
Undead - Alternative WWII Setting
This section details the rules for playing the game with a supernatural flavor, featuring undead enemies, as introduced in WWII Expansion #42. If this is of no interest to you, you may skip this section.
Background
Nazi experimentation into the occult has released horrors upon the world. Axis soldiers have risen from the dead, unleashing a new phase of WWII across the globe!
New Mechanics
Expansion #42 introduces new rule mechanics to the Warfighter world.
Double-Reticles
Some Undead Hostiles have a new type of Reticle with 2 numbers. These cards have 2 or more powerful Hostiles that require more than 1 Hit each to Destroy.
The large number shows the number of Hits you must inflict to Destroy each Hostile. The smaller number to the bottom-right shows the number of Hostiles on the card.
Example: You must inflict 3 Hits on each Hostile, and there are 2 Hostiles on the card.
Keep track of the Hits and Suppressions inflicted to each Hostile separately.
Targeting
Double-Reticle Hostiles have the Each notation on their Attack Charts. This means you draw a Hostile Targeting counter for each Hostile when you draw the Hostile card, and you roll an Attack for each Hostile.
At the start of the Hostile Attack step, if the Hostile is in Range of one or more of its Targeted Soldiers, redraw all Targeting counters for Soldiers that are out of the Hostiles Attack Range. Keep redrawing until all Targeted Soldiers are in the Hostiles Attack Range.
At the start of the Close Range step, if a Double-Reticle Hostile card is out of Range to all its Targeted Soldiers, Move the Hostile card towards its closest Targeted Soldier during the Close Range step.
Immediately draw a new Targeting counter if a Targeted Soldier is Downed. If there are Soldiers within the Hostiles Attack Range, redraw until you draw a Targeting counter for a Soldier within the Hostiles Attack Range.
Example: Each Imperial Warrior has a Health of 3, and there are 2 Imperial Warrior Hostiles on this card.
The 1st Warrior is Targeting Soldier #1 and has suffered 2 EKIAs, reducing its Health from 3 to 1. This Warrior will now Attack using the 1 column on its Attack Chart.
The 2nd Warrior is Targeting Soldier #4, and has suffered 1 EKIA. This Warrior Attacks using the 3-2 column on its Attack Chart.
Each Warrior rolls on its Attack Chart during the Hostile Attack step.
If you inflict more than 1 Hit with an Attack (for example, a Grenade), you may distribute the Hits as you like between the Hostiles on the card.
Suppressions
Treat each Suppression as an EKIA for purposes of their Attack column. If a Hostile has suffered a total number of EKIAs and Suppressions equal to its Health, it cannot act this Turn.
Example: An Imperial Warrior has suffered 1 Hit and 1 Suppression. It Attacks using the 1 column.
Example: An Imperial Warrior has suffered 2 Hits and 1 Suppression. It cannot Attack.
Hostiles cannot be Suppressed below 0 Health. When a Hostile has suffered EKIAs and Suppresses to bring them to 0 Health, do not inflict additional Suppresses. If a newly inflicted EKIA would bring a Hostile with Suppresses below 0 Health, discard Suppresses to bring it back to 0 Health.
Example: A Hostile has 5 Health. It has suffered 3 EKIAs and 2 Suppresses. You inflict 1 more EKIA on it. Place the new EKIA counter and discard 1 of its Suppress counters.
Remove 1 Suppression from each Hostile during the Remove Suppress Counters step.
For the purposes of these examples, we are placing Suppressions on the Imperial Warriors. The Undead have the Fearless Keyword, making them immune to Suppression.
Divinity
Some Soldiers, such as Clergy, have Divine Powers. Such Soldiers start each Mission with the noted number of Divinity Points.
Clergy can only Equip a limited selection of Weapons, as noted on their cards. They can use other Gear as normal.
Example: A Clergy has the text "Weapons: Only Blessed with LO 0-1." This means that the Clergy Soldier can only use Blessed Weapons that have a Loadout of 0 or 1. He can use non-Weapon Gear as normal.
Each Clergy also starts with a School of Theology. Select any one of the Theology cards for your Clergy Soldier. Theology cards list your Clergys Divine Power cards, and other adjustments to their Powers and abilities. Only Clergy Soldiers can select and use Theology cards.
Each Divine Power Skill card notes the number of Divinity points expended to use the Power. If a Soldier does not have enough remaining Divinity to use a Power, the Power cannot be used. Using a Divine Power costs 1 Action.
Some Divine Power cards are used in Reaction. Each card has the Reaction Keyword and notes the condition under which it can be used. Using a Reaction Power still costs Divinity points, but does not cost an Action.
The only way to gain more Divinity Points is to Eliminate Hostiles that have a Divinity value. When the group Eliminates a Hostile with a Divinity value, divide the Divinity between the groups Clergy Soldiers however you like. A Clergy Soldier may exceed their original Divinity Points value.
Example: The Soldiers gain 3 Divinity for Eliminating the Imperial Warriors. There are 2 Clergy Soldiers in the Mission. The players decide to give 2 Divinity Points to one Clergy Soldier, and 1 Divinity Point to the other.
Blessed
Some Weapons have the Blessed Keyword. These Weapons have superior values and a higher Resource Point cost. Blessed Gear can be used as normal by any Soldiers.
Player Campaigns
You can link several Missions together to form a Campaign. To do this, select a Region and Hostile type as normal, then select the Mission cards you want to use in your Campaign. Arrange the Mission cards in order from fewest Resource Points to most Resource Points. You will conduct the Missions in that order.
Selecting Soldiers
Purchase your Player Soldiers as normal, but there is one restriction: you cannot purchase Skill cards at this time. You will use these Player Soldiers throughout the Campaign. As long as a Player Soldier is fit for duty, he must participate in a Mission.
You are free to purchase Weapons, Ammo, and Equipment as you like for each Mission after purchasing your Player Soldiers. None of their Gear carries over to the next Mission. You may also purchase Non-Player Soldiers and Squad Soldiers on a Mission-by-Mission basis as normal.
The First Mission
Shuffle all the Objective cards for your Region and draw the first one. You now have the Mission and Objective of your first Mission. Play through the Mission as normal.
At the end of the Mission, your Player Soldiers earn Mission Points equal to the Objectives Location number.
Example: The Objective card is in Location #4, the Team earns 4 Mission Points.
You are free to divide these Mission Points however you like between the Player Soldiers. You may only purchase Skill cards with these points. Each Mission Point equals 1 Resource Point when purchasing Skills. Each Soldier may also save Mission Points, and accumulate them to purchase Skills at a later time between Missions.
If a Soldier suffers a KIA or Medical Discharge, that Soldier cannot be used again during the Campaign.
The Following Missions
As you complete each Mission, set aside that Mission and Objective card. You will not use them again.
If you fail to complete a Mission, your Campaign ends and you use the rules below to determine your level of success (or failure).
Remove all Wounds from your Player Soldiers between Missions. If a Player Soldier, Non-Player Soldier, or Squad Soldier suffers a KIA or Medical Discharge, remove him from the Campaign.
Use the next Mission card, and randomly draw an Objective card from those remaining.
When preparing for a Campaign, pay the base Resource cost of each Player Soldier, then purchase your Gear, Non-Player Soldiers, and Squad Soldiers as normal.
You may also purchase additional Player Soldiers. As with the original Player Soldiers, you cannot purchase Skill cards for them before their first Mission. After their first Mission, you can buy Skills for them using Mission Points as normal. These Soldiers remain in the Campaign unless they suffer a KIA or Medical Discharge.
Mission Adjustments
Do not count the point values of Skill cards towards your Mission Resource limit when you are preparing for a Mission.
Roll a die after each Mission. The result adjusts all the remaining Missions for the Campaign. There is no limit to the number of times an effect can be rolled each Campaign.
| Roll | Adjustment |
|---|---|
| 1-2 | Move the Objective card 1 Location further away from the Mission card. |
| 3-4 | Add 1 to the cost of all future Skill card purchases. |
| 5-6 | Subtract 1 from the Mission card Time. |
| 7-8 | Subtract 1 from the Loadout of all Player Soldiers. |
| 9-10 | Add 3 to the Objective cards Hostile value |
Level of Success
At the end of your last Campaign Mission, total your Victory Points to determine the effect your Campaign had on the world.
Scoring Points
Gain and lose Victory Points (VPs) at the end of each Mission as follows:
- Gain VPs equal to the Objective cards Location.
- Lose 1 VP for each Non-Player Soldier or Squad Soldier that is Medically Discharged.
- Lose 2 VPs for each Non-Player Soldier or Squad Soldier that is KIA.
- Lose 2 VPs for each Player Soldier that is Medically Discharged.
- Lose 3 VPs for each Player Soldier that is KIA.
| VPs | Reach of Campaigns Importance |
|---|---|
| 6- | No effect |
| 7-15 | Tactical |
| 16-26 | Operational |
| 27-34 | Theater |
| 35+ | Strategic |
Optional Rules
You can choose to use each of these rules at the start of the Mission.
Saving Action Cards to Enter
You may put aside Action cards from your hand to pay the discard cost of the next Location you enter. If you have any saved Action cards left over after paying the cost, discard them. These cards do not count toward your Health limit of Action cards, and they cannot be used for anything else.
Weapon Jams
When using Burst or Auto Fire Mode, if 2 or more of your Attack rolls are 1 above your Reload number, your Weapon suffers a Jam and cannot be used again until the Jam is cleared. You must spend 1 Action to clear a Jam.
Example: Your M1918A2 Machine Gun has a Reload number of 2. You fire in Auto mode and roll a 3, 6, and 3. It suffers a Jam.
As with Reloads, check for Jams before adding Attack modifiers. It is possible to have a Weapon Jam, yet still Suppress or Kill a Hostile with the Attack.
When firing in Auto Mode, it is possible for a Weapon to both Jam and need to be Reloaded.
If you use this rule, gain 1 extra Resource Point for each Soldier that purchases one or more Weapons with Burst or Auto Fire Modes.
Random Mission Generation
Instead of selecting a Mission card and Objective card, you can select a random Mission and Objective card from the same Region.
Combining Hostile Decks
You may shuffle together the Elite and Frontline decks for a Nations Hostile cards to generate a set of Hostile cards that are harder to defeat than a Frontline deck, but easier to defeat than an Elite deck.
Warfighter Card Keywords (February 2023)
This is a comprehensive list of the Keywords used in the Warfighter series.
Card Titles: Many Keywords refer to card titles. The referred to card title must exactly match the card text.
Example: A card's text notes that the Hostile card is "Screened by Gunmen". The card would not be Screened by "Gunman" or "Elite Gunmen" cards.
Reference words: Some Keywords have the "Reference" notation in their description. These Keywords do not have a game rule, but are referred to by other cards.
Example: The Keyword "Ranged" on Weapon cards does not have an associated rule. It is referenced by other cards, such as the Action card "Steady Aim".
-
1-Handed - The Melee Weapon requires only 1 hand. You may also use a Shield.
-
2-Handed - The Melee Weapon requires 2 hands. You may not use a Shield.
-
Active/Acted - Active refers to Hostiles and Hostile Attacks that have not yet acted this Turn. Acted refers to Hostiles and Hostile Attacks that have acted this Turn. If a Hostile performs more than one Attack each Turn, the Hostile and each of its Attacks is either Active or Acted.
Example: A Hostile card that only performs one Attack is Active until it performs that Attack each Turn.
-
Activity - A measure of the enemy's activity level during a Shadow War Mission. Subtract this number from the Noise.
-
Add x - This notation appears in some Attack modifier card text. Add "x" to the Attack roll.
-
Add +x/+y - Appears in some Attack modifier card text. Add "x" to the Attack roll (if you are rolling more than 1 Attack die, add "x" to each of them), and "y" to the Defeat Cover roll.
Example: Add +3/+1 means to add 3 to the Attack roll and 1 to the Defeat Cover roll.
-
Adjacent - When you discard a Location marker card, search the Location deck, and place the Location card noted by the Front-most Location in your hand, and then shuffle the Location deck. If the noted Location is already in play, draw the next Location card as normal.
Example: The Front-most Location card is "Street", and notes "Adjacent House". You then discard a Location marker card. Instead of drawing the next Location card, search the Location deck, and place the "House" card in your hand.