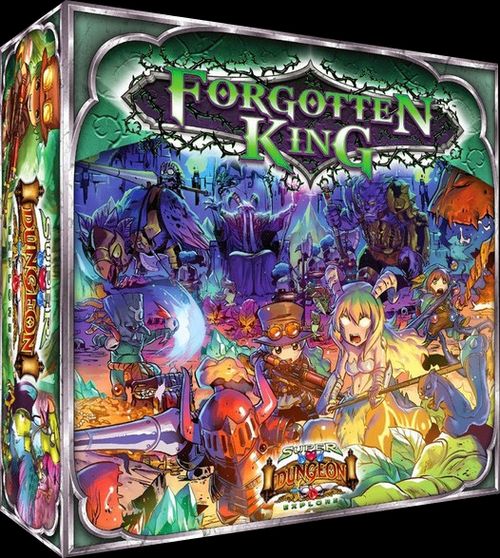
Super Dungeon Explore: Forgotten King
Super Dungeon Explore: Forgotten King Rulebook
Table of Contents
Table of Contents
- Game Overview
- What You Need to Play
- Game Setup
- The Dungeon
- Rolling Dice
- Playing the Game
- Power-Up
- The Cards
- Hero Activation
- Basic Actions
- Potions
- Wrath
- Explore Cards
- Backpack
- Monster Gangs
- Monster Activation
- Commands
- Example of Play
- You Have Died
- Advanced Rules
- Boo Booty
- Creeps
- Pets
- Rule Priority
- Shapeshift
- Status Effects
- Tile Effects
- Traps
- Select Difficulty
- Expand Your Game
- Reference
Game Overview
The Dark Consul has created spawning points throughout the dungeon that will create hordes of monsters to ravage Crystalia. The Heroes must journey through the dungeon and destroy all of the spawning points in order to summon and defeat the dreaded dungeon boss. The Consul, powered by the Command Deck, will attempt to destroy all of the Heroes before they succeed.
Over the course of a game the Heroes and Consul take turns activating models. As monsters are destroyed the Consul will spawn reinforcements from spawning points. Fortunately for the Heroes, each spawning point only has a finite amount of power and every spawn will drain its energy. The Heroes must attempt to hasten the spawning point's destruction with all their skill and strength.
When each spawning point is destroyed a powerful mini-boss will spawn. One by one the Heroes will seek to defeat them and earn loot, treasure, and valuable princess coins. Once the last spawning point is destroyed the dungeon boss will spawn and an epic battle for the fate of Crystalia will commence.
What You Need to Play
Models (with arcade game cards):
- 3-5 Heroes
- 1 Dungeon Boss
- 2-4 Mini-Bosses
- 3-5 Spawning Points — All monsters listed under "Spawning Pool."
- 3+ Boo Booty
- 6+ Creeps
Other components:
- Arcade Mode Rulebook
- 3-5 Dungeon Tiles with Tile Effect Cards
- Trap Templates
- Super Dungeon Explore Dice
- Start Marker
- Game Effect Tokens
- Dungeon Key Tokens
- 3-5 Treasure Chests
- Command Deck
- Explore Deck
- Loot Deck
- Treasure Deck
- Princess Coin Tokens
- Wound Tokens
- Wrath Tokens
- Skull Tokens
- Potion Tokens
- Status Effect Tokens
Game Setup
1. Select Game Size
Arcade Mode is designed for 1 - 5 players. Each player will assume control one or more Heroes.
| 3 Heroes | 4 Heroes | 5 Heroes | |
|---|---|---|---|
| Heroes | 3 | 4 | 5 |
| Dungeon Tiles | 3 | 4 | 5 |
| Treasure Chests | 3 | 4 | 5 |
| Spawning Points | 3 | 4 | 5 |
| Mini-Bosses* | 2 | 2-3 | 2-4 |
| Dungeon Boss | 1 | 1 | 1 |
| Wrath Tokens | 5 |
In larger games players may select more than two mini-bosses if they have the models available in their collection.
Shannon, Greg, and Evan are going to play a three Hero game. All of them will play as Heroes.
2. Select Heroes
The players select which Heroes they want to play. The selected Heroes are referred to as a party. A party consists of 3 - 5 Heroes and their game cards. Players can each control a single Hero or multiple Heroes. Each player controls every aspect of their own Hero: deciding attacks, movement, and who may drink their powerful potion.
If duplicate Heroes are chosen we recommend it is done in true arcade spirit and they are painted different colors.
When selecting your Heroes try to build a balanced party. A good mix of offense types, healing ability, and potion effects will help ensure success.
Shannon, Greg and Evan are playing the Heroes. Shannon chooses the Questing Knight, Greg chooses the Thundervale Huntress, and Evan chooses Princess Emerald.
3. Select Monsters
Monsters bash, burninate, and attempt to destroy the Heroes. The monsters chosen are called the spawning pool.
All the players should decide on which monsters they would like to play against together. Every combination of monsters provides their own unique challenge, and players are encouraged to try different combinations from game to game.
Select one dungeon boss. Each dungeon boss comes with a game card, six unique treasure cards, and twelve unique explore cards.
Select mini-bosses. A minimum of two mini-bosses must be chosen, but additionals may be selected (up to the maximum) if they are available in the players' collection. Each mini-boss comes with a game card. Many mini-bosses also include unique loot or treasure cards.
The unique cards that come with bosses can be used in any game that the boss is selected in.
Friendly & Enemy
Some abilities and effects refer to friendly or enemy models. When playing a Hero, any model controlled by the Consul is an enemy, while any model controlled by a fellow Hero is friendly. For the monsters, any model controlled by a Hero is an enemy, and any model controlled by the Consul is friendly.
Shannon, Greg, and Evan, choose The Forgotten King as the dungeon boss, then Bashful Boris and Trent as the two mini-bosses. Since three Heroes are in the party the players choose three spawning points.
First, they choose the Bramble Knight, adding one Grobbit Executioner, two Frog Knights, and four Billmen to the spawning pool.
For the last two spawning points they choose the Old-Growth Hollow. The Old-Growth Hollow is a paired spawning point and uses both of their remaining choices. One Sprout (including the King Sprout shapeshift), two Wisps, two Turnipheads, and six Mooks are added to the spawning pool.
Select spawning point models. Each spawning point model's game card lists the type and number of monsters that are added to the spawning pool. Players may choose one spawning point model for every Hero in the game.
Some spawning points only come in pairs of two. These are called paired spawning points. Paired spawning points count as two choices. When one is selected, the matching second spawning point listed on the card must be selected as well. The monsters added to the spawning pool listed on the paired spawning points' card is for both spawning points combined.
Select creeps. Creeps are minor monsters that are only spawned by drawing explore cards. Players must choose at least six creeps to add to their spawning pool. However, there is no upper limit to the number of creeps players can add to their spawning pool. Players may even include every creep in their collection if they want more variety!
An alternate way to choose your monsters is to take one of every spawning point card you own, shuffle them, and draw them randomly. Then do the same for your mini-bosses and dungeon boss. This can create combinations you would have never thought of!
4. Build Dungeon
The dungeon map is built using one dungeon tile for every Hero in the party. Players choose and place the first tile. When placing each tile beyond the first, at least one of its doorways must align with another tile's doorway. Place the tile then roll a single green dice. Rotate the tile 90° clockwise for each star rolled. If a blank is rolled, flip the tile to the opposite side.
Squares. Every dungeon tile has a grid of squares on it. Squares are used for movement, range, and determining area effects.
A model cannot ever move into or through a location on a dungeon tile that does not have a square. Likewise, no action or ability can affect a location that does not have a square.
Walls. Walls are represented by a black line between squares. Models cannot move or draw line of sight through walls.
Doorways. Doorways are the areas where tiles connect. Models cannot move through doorways that are not connected to another doorway.
Tile Effects. Some squares have unique effects, called tile effects. Squares with tile effects have a grey hatched border and an icon that represents the effects of the square. Each tile effect is detailed on a card. See Tile Effects, page 40.
Open Squares. Squares that do not have a tile effect are called open squares.
Dungeons laid out in a straight line are typically easier to defeat than ones in a square or cross pattern.
The players choose three tiles and place the first one. Next they place the second tile, and roll a green dice, resulting in one star. They rotate the tile 90° clockwise, and align the doorways. Then they place the third tile, and roll a green dice, resulting in three stars. They rotate the tile 90° three times (270°) and align the doorways.
5. Build Treasure Deck
The base treasure deck is made up of 24 treasure cards.
Some models are supplied with unique, model treasure cards. These cards are indicated by the model's portrait on the card. Only treasure cards supplied with models or wonders being used in the game may be chosen.
The players choose six model treasure cards, six boo booty treasure cards, and six wonder treasure cards. See Wonders below, and Boo Booty, page 36.
Add these cards to the 24 base treasure cards to build a 42 card treasure deck.
Wonders. Wonders are treasure cards that represent truly unique and rare artifacts that Heroes may gain during the game, such as becoming the master of a Pet. See Pets, page 38.
Seasoned players can customize the treasure deck to suit how they want to play by adjusting both the deck size and what treasure cards are used. If you feel extra dwarfy, add every treasure card you own to the deck!
There are eight unique treasure cards to choose from: six from The Forgotten King and one each from Trent and Boris. The players choose: Lost Love Pendant, Posh Pajamas, Bramble Bracers, Shadow Crown, Deeproot Acorn, and Boris's Bashful Bammer.
They then select six wonders, all of them pets: Mr. Chompers, Admiral Fuzzybottom, Lord Gruff, Madam Hilde, Mrs. G. Snorts, and The Colonel.
Finally, they select six boo booty cards: two Booty Grinder, two Booty Biter, and two Bouncing Booty.
6. Build Loot Deck
The base loot deck is made up of 48 loot cards.
If players possess unique loot cards from organized play events or special models, they may add these loot cards directly to the deck, or swap them out on a one by one basis to customize the deck.
The players have no unique loot cards for this game, so use the standard deck.
7. Build Explore Deck
The base explore deck is made up of 24 explore cards.
Each dungeon boss is supplied with twelve unique explore cards that are used only when that dungeon boss is being played.
Add these cards to the 24 base explore cards to build a 36 card explore deck.
The players add the twelve unique explore cards that came with The Forgotten King dungeon boss to the deck.
8. Build Command Deck
The base command deck is made up of 36 command cards.
If players possess unique command cards from organized play events or special models, they may add these cards directly to the deck, or swap them out on a one by one basis to customize the deck.
The players have no unique command cards for this game, so use the standard deck.
9. Heroes Enter Dungeon
The players place the start marker on any square that is within four squares of a doorway that is not connected to another dungeon tile. Place all Heroes in a square on or adjacent to the start marker.
The Heroes choose one of the doorways and place the start marker within four squares. Shannon, Evan, and Greg each place their Hero adjacent to the start marker.
10. Populate Dungeon
The players place one spawning point and one treasure chest on each dungeon tile. There may not be more than one spawning point and one treasure chest on a single dungeon tile.
Each tile has a square marked SPAWNING POINT where the spawning point is to be placed. Players then place a treasure chest anywhere within five squares of each spawning point.
Next, every spawning point on the dungeon map spawns. The players place each monster within two squares of the spawning point. Monsters may not be placed in a negative tile effect, or adjacent to another monster, unless it cannot be placed otherwise.
Monsters may only be spawned from a spawning point which lists them as part of its spawning pool.
If a spawning point is a paired spawning point players must divide the monsters, by gang, between both spawning points as equally as possible. Gangs must be placed together. See Monster Gangs, page 20-21.
The players are using the Bramble Knight spawning point. They place all of the monsters within two squares, making sure none of them are adjacent to another monster.
11. Time to Explore!
Place one potion token on each Hero's game card. Shuffle each deck, then organize the tokens. Place them in easy reach of all players. Time to begin the game!
The Dungeon
The dungeon map is built from dungeon tiles marked with walls and doorways.
Wall. Walls are represented by a black line between squares. Models cannot move or draw line of sight through walls.
Doorway. Doorways are the areas where tiles connect. Models cannot move through doorways that are not connected to another doorway.
Rolling Dice
Heroes roll dice for almost everything they do. There are three different colors of dice: blue, red, and green. In general, green dice are better than red dice and red dice are better than blue dice.
A Hero's game card shows the number and color of dice the Hero rolls for each attribute. In addition, Heroes may gain bonus dice from equipment, potions, or other effects.
Hearts
Blue and green dice can roll hearts.
If an offense roll wins and any hearts were rolled a heart has popped out of the target!
A Hero may immediately remove one wound token or one status effect token from any Hero's game card for each heart rolled.
Potions
Red and green dice can roll potions.
If an offense roll wins and any potions were rolled the target has dropped a potion!
A Hero may immediately place one potion token on any Hero's game card for each potion rolled.
I love hearts and potions, but be sure to share them with the Hero who needs them most. I'll even share my favorite Super Slurpy Grape Soda!
Stars
Whenever a dice roll is made count the total number of stars that were rolled. The more stars the better!
When a roll targets another model it is called an offense roll. When this happens the target gets to make a roll to stop the action, called a defense roll.
The offense roll wins if it has more stars than the defense roll. The defense roll wins if it has an equal number or more stars than the offense roll.
Any blank faces, hearts, or potions rolled do not count as stars.
Attribute Stars
In addition to dice, some models have stars listed in their attributes. If a model has stars in their attribute, add the number indicated to the final number of stars rolled on the dice.
Attributes that have only stars have a static value. No dice are rolled, the number of stars listed is considered the value of the "roll."
Monster Attributes
Monsters only have attribute stars and never have dice. When making an offense roll, monsters use their Strength STR attribute. When making a defense roll, monsters use their Armor ARM attribute, even if the Hero's action specifies that the target use an alternate attribute.
Bonus Dice & Stars
During the game, models will earn bonus dice or stars from equipment, potions, and other effects. Whenever a model earns bonus dice or stars they add these to their rolls exactly as if they were printed on the model's card.
Greg is making a roll for an action that uses his Thundervale Huntress's STR 2/1. The Huntress is equipped with a Dwarven Axe which gives her +1 STR.
Rerolls
Some abilities cause a model to reroll one or more dice. A dice may only be rerolled once. If a dice is subject to multiple rerolls from opposing enemy and friendly effects, the effects cancel and no reroll is made.
Greg makes an offense roll using two blue dice and one red dice, resulting in 3 stars, plus 1 star from his Dwarven Axe, for a total of 4 stars and 1 heart.
Playing the Game
Beginning with the Heroes, the Heroes and Consul alternate turns. During a turn models can be activated or monsters spawned. At the end of every turn is the Power-Up phase where both the Heroes and the Consul have a chance to increase the deadliness of the game. The Heroes and Consul continue alternating turns until one side wins the game.
Hero Turn
-
Choose two Heroes to activate during the Hero Turn. See Hero Activation, pages 14 - 19.
Choose first from any Heroes that did not activate in the previous Hero Turn, then choose from the remaining Heroes.
-
Activate first Hero.
-
Activate second Hero.
-
Resolve Power-Up, pages 12 - 13.
-
Play then moves to the Consul Turn.
Questing Knight & Princess Emerald Turn — Power-Up — Consul Turn — Power-Up — Princess Emerald & Thundervale Huntress Turn — Power-Up — Consul Turn — Power-Up — Questing Knight & Thundervale Huntress Turn — Power-Up
If you have difficulty remembering which models have activated, place a Game Effect token on each model's card after they have activated.
Consul Turn
The players perform all aspects of the Consul Turn in the order below. They may have one player perform the steps or, to speed things up, have every player participate.
- Monster Activation a. Determine Disturbed Monsters. b. Determine Order of Activation. c. Perform Upkeep d. Draw Command Card. e. Perform Commands.
- Resolve Power-Up, pages 12 - 13.
- Play then moves to the Hero Turn.
The rules for using monsters are described in detail in the following sections:
- Monster Gangs, pages 20 - 21.
- Monster Activation, pages 22 - 23.
- Monster Commands, pages 24 - 27.
Many rules for Monster Activation are shared with, and refer to, the Hero Activation section. If this is your first time reading the rules read Hero Activation before Monster Activation.
Victory
If the dungeon boss and his monsters destroy all of the Heroes, the Consul wins and darkness tightens its grip upon Crystalia.
If the Heroes destroy the dungeon boss, the Heroes win and light has banished the darkness from this corner of Crystalia.
Power-Up
Power-Up occurs after every turn, both Hero and Consul. There are four types of Power-Up: Equipment, Wonder, Mighty Monsters, and Boss Spawn. After a turn has concluded resolve each Power-Up that is applicable in the following order:
1. Equipment
Drawn loot and treasure cards are called equipment.
The party may draw one card from the Loot Deck for every elite or minion monster destroyed during the turn, up to a maximum of three cards.
The party may draw one card from the Treasure Deck for each mini-boss or boo booty destroyed. See Boo Booty, page 36.
The party may not draw loot cards for monsters that were destroyed during the Consul Turn (such as from Fire or Backlash) or that possess the Insignificant ability. Treasure for destroying mini-bosses may be drawn regardless of whose turn it was when they were destroyed.
Any Hero may be equipped during Power-up. Only one piece of equipment may be equipped per slot. A Hero may only have one treasure card equipped at a time.
Equipment that is not equipped during Power-up is discarded. For each treasure card that is discarded, even if it was previously equipped, one Hero may remove a single wound or status effect token.
Each Hero has four colored-crystal equipment slots along the edge of their card: Citrine, Ruby, Emerald, and Sapphire. Each equipment card has a corresponding crystal color indicating the slot to which they can be equipped.
Tuck the equipment card underneath the Hero card until the matching crystals touch and only the name and abilities of the equipment is showing. The Hero gains all the abilities and bonuses listed on the equipment exactly as though they were printed on the model's card.
All equipment is shared by the Heroes and goes into the backpack. It doesn't matter who drew the card or where they are on the dungeon map.
If a Hero replaces a piece of equipment the old card must be discarded and may not be equipped by another Hero.
If the Loot Deck or Treasure Deck are drawn through, reshuffle the discarded cards to refresh the deck.
2. Wonder
Heroes may equip or use any wonders they have acquired. Each wonder has its own unique rules for how it functions.
3. Mighty Monsters
At the end of any turn in which a mini-boss was destroyed, the players advance the Mighty Monster chart one step. The bonuses gained by the monsters are cumulative based on the number of mini-bosses destroyed. Once the top of the chart has been reached—stop! The monsters are now extra mighty and will advance no further.
Only elite and minion monsters gain the benefits of the Mighty Monster Chart shown below:
| Mini-Bosses Destroyed | Monster Bonus |
|---|---|
| 1 | +1 ARM |
| 2 | +1 STR |
| 3 | +1 ARM |
| 4 | +1 STR |
| 5 | Place one of each status effect token in a pile, and randomly choose one. All monsters gain the chosen effect as an ability. |
Want your dungeon to look extra awesome? Paint your monsters to be themed with your favorite status effect. Now those are some Mighty Monsters!
4. Boss Spawn
The players must place one mini-boss for each spawning point that was destroyed during the turn. Place each mini-boss so that it is occupying the square where the destroyed spawning point model was, on the tile's spawn icon. If there is no room to place the model, place it as close to the spawn icon as possible. The mini-boss will activate in subsequent Consul Turns.
If no mini-boss is available in the spawning pool, immediately advance the Mighty Monster chart one step instead.
If the spawning point destroyed was the last one on the dungeon map, a mini-boss is not spawned. Instead the dungeon boss is spawned. The dungeon boss will activate in subsequent Consul Turns.
The dungeon boss is a terrible and powerful foe. The boss's arrival can be the final decisive blow to end the game, or the surprising pendulum swing that turns the entire tide of the adventure in the opposite direction.
The Cards
Hero Card:
- Name
- Type
- Movement Points
- Action Points
- Strength Attribute
- Armor Attribute
- Willpower Attribute
- Dexterity Attribute
- Hearts
- Potion Quantity
- Crystal Affinity
- Abilities
- Unique Actions
- Potions
Hero Activation
A Hero's activation consists of multiple parts: upkeep, movement, actions, and potions. Upkeep is always resolved at the beginning of a Hero's activation. After its upkeep a Hero may spend movement points, action points, and drink potions in any order the player wishes.
A Hero may divide spending their points between movement and actions, so long as the total number of points spent of each type does not exceed the number they possess.
Most things a Hero does during their activation will earn the Hero wrath. Wrath determines which model the monsters are most likely to attack.
Upkeep
A Hero performs upkeep at the beginning of their activation. Resolve each upkeep step in the following order:
- End effects from the model's previous activation, such as potions or auras.
- Spend Princess Coins, page 32.
- Apply healing effects, such as Tough.
- Apply status effects, such as Poison or Fire. See Status Effects, page 39.
- Apply all other game effects the model is subject to in the order of its player's choice.
Movement Points
During a model's activation it may move a number of squares up to its total number of movement points. Each adjacent square the model moves into counts as one square and uses one movement point, including diagonals. Large based models also count this as one square even though the size of their base makes them occupy multiple new squares.
Models may freely move through tokens, templates, and friendly models, but may not move through enemy models or end their movement in a square occupied by another model.
Action Points
A model spends action points to perform actions. There are two types of action:
Red offensive actions inflict a single wound if successful.
Blue support actions do not inflict wounds. Instead, they cause special effects to occur, such as inflicting status effects on enemies or helping friendly models.
Each action has a cost listed on its icon indicating how many action points the model must spend to perform the action.
During its activation, a model may spend any number of action points, up to the total listed on its card, to perform any actions available to it. A model may perform the same action multiple times.
All models have access to a variety of basic actions, which are detailed on page 18. In addition, many models have unique actions only they can perform. Unique actions are listed on a model's card or are gained from equipment, potions, and other game effects.
Both basic actions and unique actions follow the same rules to perform, which are detailed below.
1. Determine Line of Sight. Models require line of sight to target another model. A model has line of sight when it can draw at least one straight line from any point of its square to any point on the intended target's square. The line cannot contact walls or structures, including where walls or structures meet squares on a corner.
Models (friendly or enemy), tokens, and templates do not block line of sight. Models always have line of sight to themselves.
Augment & Dangerous. Offensive and support actions may only target or affect enemy models unless the action has Augment or Dangerous.
Actions with Augment are actions that may only target or affect friendly models.
Actions with Dangerous are actions that may target and will affect both friendly and enemy models.
Range Icons. Range icons indicate the range of an action. If the action has an area effect it will not list a number range with the icon, the area effect is used instead. See Area Effects, page 34.
Support Range: Only support actions possess a support range icon. If the support action does not possess a range or an area effect it may only target the model using the action.
Example — Scope: Range 8, DEX vs DEX.
Melee Range: All actions that possess a melee range icon use the model's STR when making an offense roll.
Example — Lightning Charge: Range 2, +1 STR, Push 5.
Magic Range: All actions that possess a magic range icon use the model's WILL when making an offense roll.
Example — Stranglethorn: Range 6, Burst 1.
Missile Range: All actions that possess a missile range icon use the model's DEX when making an offense roll.
2. Check Range. All actions have a maximum range. Only models that are within range of an action may be targeted by the action.
To see if a target is within range count the number of squares between the model performing the action and the target model, including the square the target occupies. If the number is equal to or less than the action's range the model may be targeted by the action.
If the target is further than the action's range the model may not be targeted. A different target must be chosen.
3. Make Offense Roll. All offensive actions require an offense roll. Support actions never require an offense roll unless the action indicates otherwise. If no offense roll is indicated, skip directly to 5. Resolve Effects.
If the support action does require an offense and defense roll, the action will specify which attributes are used.
4. Compare Results. Since monsters only have attribute stars, no roll is made by the monsters. Instead, compare the number of stars rolled for the offense roll to the target monster's ARM attribute. A monster's ARM can be increased or decreased by status effects and other game effects. Include all of these effects when determining the result of the roll.
The offense roll wins if it rolled more stars than the monster's ARM attribute. If it was an offensive action, place a single wound token on the target model.
If the offense roll did not win, the action has failed. No wound or other effects of the action occur.
5. Resolve Effects. Some actions have special effects, such as inflicting status effects. If the offense roll wins the player then resolves the secondary effects of the action.
If the target model was not destroyed and has any secondary effects when targeted, those effects are then applied.
If the target model was destroyed the Hero earns wrath. See Wrath, page 19.
Evan spends one action point to use Emerald's "Scope" support action (Range 8, DEX vs DEX). He checks that Emerald has line of sight and counts to make sure the King Sprout is within the action's range 8. Scope requires an offense and defense roll of DEX vs DEX.
Evan makes the offense roll using Princess Emerald's DEX 2/1, resulting in a total of 4 stars. In Arcade monsters use the ARM attribute for all defense rolls. The players compare Evan's roll to the King Sprout's ARM 2. Evan's roll exceeded the King Sprout's defense and has won the roll. Since this is a support action it does not inflict a wound. The King Sprout suffers the Bane status effect.
Next, Evan uses Emerald's "Stinging Shot" offensive action against the King Sprout (Range 8, +1 DEX). Emerald has not moved since her last action, so Evan knows she has line of sight and is in range. Stinging Shot has the missile range icon, so the offense roll is made using Emerald's DEX 2/1. Stinging Shot grants a bonus +1 DEX, making the total roll 2/2.
Evan rolls a total of 3 stars. The King Sprout is currently suffering Bane, reducing its ARM 2 by 1, giving it a total ARM 1. Evan's roll exceeded the King Sprout's defense and has won the roll. The King Sprout suffers one wound and the status effect Ice. Finally, since Evan rolled a potion, he can give a single potion token to any Hero.
Basic Actions
Offensive
Magic Attack (1): A model may only use Magic Attack if it has the magic range icon on its WILL attribute. The model may make an offensive action using its Willpower (WILL) attribute against any enemy model within the range indicated.
Melee Attack (1): A model may only use Melee Attack if it has the melee range icon on its STR attribute. The model may make an offensive action using its Strength (STR) attribute against any enemy model within the range indicated.
Missile Attack (1): A model may only use Missile Attack if it has the missile range icon on its DEX attribute. The model may make an offensive action using its Dexterity (DEX) attribute against any enemy model within the range indicated.
Support
Heroes may use all basic support actions. Monsters may only use the Run and Vigor basic actions.
Bandage (support, 1): A model using Bandage makes a roll using its WILL attribute. If the model rolls more stars than the number of wound tokens on the target remove one wound token from the target.
Conjure Pet (support, 6): Place the model's pet in target empty square. A model may only use Conjure Pet if it is the pet's master.
Disarm Trap (support, 2): The model makes a roll using its DEX attribute. If the model rolls more stars than target trap's defense the trap is destroyed.
Explore (support, 2): Draw one explore card and apply its effects immediately. The party may only perform the Explore action one time in each tile per game.
Pick Lock (support, 1): The model makes a roll using its DEX attribute. If the model rolls three or more stars draw two cards from the Treasure Deck and add them to the backpack. Remove target treasure chest from the dungeon map. If fewer than three stars are rolled the players replace the chest with one randomly chosen boo booty.
Run (X): Before spending any action points, a model may choose to spend all of their action points to run. A model that runs may spend a total of twice its total number of movement points during its activation.
Scavenge (support, 0): A Hero can pick up an item that can be scavenged such as a skull token, princess coin, or dungeon key. Remove the token from the dungeon map and place the recovered item in the party's backpack.
Smash Chest (support, 1): Draw one card from the Treasure Deck and add it to the backpack. Remove target treasure chest from the dungeon map.
Unlock Treasure Chest (support, 1): Spend one dungeon key token. Draw two cards from the Treasure Deck and add them to the backpack. Remove target treasure chest from the dungeon map.
Vigor (support): A model using Vigor makes a roll using its ARM attribute. If the model rolls more stars than the number of status effect tokens on its card they may remove one status effect token.
Don't underestimate a basic action just because it's "basic." Clever use of basic actions can win the game!
Potions
The maximum number of potions a model can carry is indicated by the Potion Quantity on their card. When a model gains a potion through a dice roll or other effect, place a potion token on their card.
Potions grant the Hero a free, single-use action. Resolve the action exactly like a normal action that costs no action points.
All potions have a cost listed on its icon indicating how many potion tokens the Hero must spend to drink the potion.
To drink a potion, remove the indicated number of potion tokens from the Hero's card, then resolve the effects of the potion.
A Hero may drink one potion during its activation. That potion can be of any type.
A Hero may drink a single emergency potion during the Consul Turn.
A Hero may never drink a potion to interrupt a dice roll or affect a dice roll that has already been made, unless the potion indicates otherwise.
When a Hero drinks a potion they gain one wrath token. They may also gain additional wrath tokens depending on the effects of the potion. See Wrath, page 19.
There are three types of potion:
Support. A support potion grants the model that drank the potion a single-use support action.
Offensive. An offensive potion grants the model that drank the potion a single-use offensive action.
Emergency. An emergency potion grants the model that drank the potion a single-use support action that may be used during the Consul Turn.
Sharing Potions
A Hero is not restricted to drinking only the potion(s) listed on their card. A Hero may share their potion with another Hero.
To drink another Hero's potion remove the potion tokens from the sharing Hero's card. The Hero drinking the potion then resolves the effects of the potion.
A Hero may drink another Hero's potion no matter where they are on the dungeon map.
Princess Emerald is out of action points, but she can still drink a potion. Evan is worried that the monsters might try to take revenge during their turn, so he asks Shannon if Emerald can drink the Questing Knight's Magic Armor potion. Shannon agrees and removes the potion token from the Questing Knight's card. Now Princess Emerald gains the effects of the potion granting her +1 ARM until her next upkeep. Since drinking potions earns wrath, Princess Emerald places one wrath token on her card.
Don't be stingy with your potions! Always share your potion with the Hero who needs it most. Also, always ask permission and say "thank you." No one likes an impolite soda stealer.
Wrath
When a Hero activates they have a chance to incur the wrath of the dungeon's monsters. Wrath is represented by placing wrath tokens on the Hero's card. The amount of wrath a Hero gains increases the likelihood the Hero will be the target of the dungeon's monsters.
Each time a Hero performs one of the following actions or abilities, add the number of wrath tokens indicated on the chart below:
| Hero Action | Wrath |
|---|---|
| Destroying an elite or minion monster. | +1 |
| Using the Heal X ability. | +1 |
| Successfully using a support action. | +1 |
| Drinking a potion. | +1 |
| Opening a treasure chest. | +2 |
| Destroying a mini-boss or spawning point. | +2 |
The total number of wrath tokens used in a game of Arcade is equal to twice the number of Heroes, minus one. So a party of three would have five tokens, and a party of five would have nine tokens.
Once all available wrath tokens have been accumulated by the party, Heroes that earn more wrath must remove tokens from any other Hero of their choice to add to their card.
Equal Wrath
Occasionally two or more Heroes will have an equal amount of wrath. When this is the case, monsters will always treat the Hero who activated most recently as the Hero with the higher amount of wrath.
Explore Cards
Anytime a Hero moves into a dungeon tile that the party has never entered before the Hero immediately stops their movement and draws a card from the top of the Explore Deck.
After the explore card is drawn immediately resolve the effects of the card. The explore card only affects the tile for which it was drawn. The Hero may then resume their activation.
Some explore cards spawn creeps or trigger traps. These are described in more detail in the Advanced Rules. See Creeps, page 38 and Traps, page 40.
In addition, there are abilities and actions that allow more explore cards to be drawn beyond the first for each tile.
An explore card is not drawn for the tile the Heroes start the game in.
Backpack
The backpack is where the party stores items gained during the game that can be used by the entire party, including: princess coins, dungeon keys, wonders, and unequipped treasure or loot cards.
The party should keep all their backpack items on the backpack card, where all players have easy access.
Princess Coins
At the end of any action where a spawning point was destroyed the Heroes place a princess coin token in any square the destroyed spawning point occupied. The party may use the Scavenge basic action to add the princess coin to their backpack. See Basic Actions, page 17 and Princess Coins, page 32.
Dungeon Keys
At the end of any action where a mini-boss was destroyed the Heroes place a dungeon key token in any square the destroyed mini-boss occupied. The party may use the Scavenge basic action to add the dungeon key to their backpack. Dungeon keys may be spent to use the Unlock Treasure Chest basic action, See Basic Actions, page 17. Some modes of Super Dungeon use dungeon keys for other unique actions.
Wonders
Each time the party gains a wonder (such as a pet) it is placed in the backpack. Wonders may be used during Power-Up.
Equipment
Each time the party gains a treasure or loot card it is placed in the backpack. Treasure and loot cards can be equipped during Power-Up.
Monster Gangs
Monsters are divided into two categories: Solo Monsters and Gangs.
Solo Monster
Solo monsters are unique and powerful monsters that function alone. A solo monster has a single card that lists all of their abilities and unique actions.
Gangs
Gangs represent a group of monsters that rally together to increase their combat potential. All monsters on a gang card are bonded. This is represented by a combined profile on a single card.
Elite. The core of a gang is the elite. All actions or abilities used by the gang are performed by elites. The strength of the elite's combat profile, as well as the abilities available to it, are increased by the bonded monsters in their gang.
Minion. Minions are weaker monsters that are always bonded to an elite listed on their gang card. Minions cannot take actions. Instead they lend support to their elite, increasing its combat profile and granting it new abilities.
Forming a Gang
A gang is not a static group. Whenever an elite performs a command, is targeted by another model, or is otherwise affected by any game effect, players check to see if any bonded monsters from its gang are within two squares of it.
If there are bonded monsters within two squares of the elite it uses its gang attributes. In addition, the elite gains all of the bonded monster's abilities and unique actions just as though it possessed them itself.
Solo Card fields: 1. Name, 2. Type, 3. Movement Points, 4. Action Points, 5. Strength Attribute, 6. Armor Attribute, 7. Range Attribute, 8. Hearts, 9. Crystal Affinity, 10. Abilities, 11. Unique Actions, 12. Arcade Icon.
Gang Card fields: 1. Name, 2. Type, 3. Solo Attributes, 4. Gang Attributes, 5. Action Points, 6. Strength Attribute, 7. Range Attribute, 8. Crystal Affinity, 9. Elite Name & Type, 10. Elite Abilities, 11. Elite Unique Actions, 12. Elite Movement Points, 13. Elite Hearts, 14. Elite Armor Attribute, 15. Bonded Monster Name & Type, 16. Bonded Monster Abilities, 17. Bonded Monster Unique Actions, 18. Bonded Monster Movement Points, 19. Bonded Monster Hearts, 20. Bonded Monster Armor Attribute, 21. Arcade Icon.
If there are no bonded monsters within two squares of the elite it uses its solo attributes, and only benefits from its own abilities and unique actions.
When using multiple spawning points of the same type it is not required to keep track of which monsters came from each spawning point. They may form a gang with any elite listed on their gang card regardless of which spawning point it came from.
In addition, an elite may benefit from forming a gang with a bonded monster, even if the bonded monster is forming a gang with another elite as well.
Grobbit A has formed an Executioners gang with Billmen 1 and 2. Grobbit B has formed an Executioners gang with Billman 1. Billmen 3 and 4 are more than two squares from both Grobbit A and B so are not part of either gang. Frog Knight A and B are more than two squares apart and no House of Frog gang is formed.
Elite Gangs
In some gangs the same monster is both the elite and the bonded monster. These gangs work just like a normal gang, and every elite in the gang may perform actions.
Expendable
When an elite monster suffers a wound, place the wound token on the closest bonded minion from the elite's gang that is within two squares instead. The bonded minion suffers both the wound and all effects caused by the action or game effect.
Only when no bonded minions are within two squares will the elite suffer wounds itself.
Expendable is not used when an elite is affected by an area effect. Nor is it used when the elite suffers a game effect that does not cause a wound.
Note that Expendable is never used to transfer wounds to bonded elites.
Monster Activation
Most events that occur during Monster Activation are determined by drawing a card from the Command Deck. However, there may be game effects that monsters are subject to that are not controlled by the Command Deck, such as tile effects, auras, or Hero's abilities. When monsters are subject to these effects players resolve them according to the rules of the effect.
1. Determine Disturbed Monsters
Only monsters that are disturbed are activated during the Consul Turn. To determine which monsters are disturbed the players must first determine which tiles are active.
Active Tiles. Any tile with a Hero on it at the beginning of the Consul Turn is an active tile.
Disturbed. All spawning points and monsters on an active tile and any tiles that share a doorway with an active tile are disturbed.
Monsters are also disturbed if a Hero attacked any monster or spawning point on the tile during the Hero Turn. When this occurs, the spawning point and all of the monsters on the tile are considered disturbed.
The Heroes are on Tile A, so it is an active tile and its monsters are disturbed. The monsters on Tile B are disturbed, because they are on a tile that shares a doorway with an active tile. The monsters on Tile C are not disturbed.
Monsters do not remain disturbed. If you move far enough away from them they will stop coming after you!
2. Determine Order of Activation
Monsters activate every step of Consul Activation in a set order:
- Creep
- Dungeon Boss
- Mini-Boss
- Elite
- Minion
Begin with the monster of the given type that is closest to the Hero with the most wrath. Then activate the next closest monster and continue outwards until all disturbed monsters of the given type have performed the step. Players complete the step for all disturbed monsters of the given type before moving to the monsters of the next type.
If monsters are equal distance the players may choose which ones to activate first.
3. Perform Upkeep
The players perform upkeep. Resolve each upkeep step for all disturbed monsters according to the order of activation:
- End effects from the previous Consul Turn, such as uniques or auras.
- Apply healing effects, such as Tough.
- Apply status effects, such as Poison or Fire. See Status Effects, page 39.
- Apply all other game effects the monster is subject to in the order of the players' choice.
4. Draw Command Card
One player draws a single card from the Command Deck to determine what the disturbed monsters will do this turn. If no monsters remain on the dungeon, do not draw a command card. Instead, immediately resolve a Spawn command as explained below.
Some command cards possess special commands. In these cases follow the rules for the special command as written.
Only disturbed monsters and spawning points perform commands.
Monsters performing commands determine line of sight and range in the same manner as Heroes. See Hero Activation, page 14.
When the last card of the Command Deck is drawn, shuffle the discard pile to refresh the deck.
The most common commands are: Spawn, Move, Unique, and Fight.
5. Perform Commands
Monsters performing commands follow the rules as described in Hero Activation, except where the command specifies otherwise. Using the order of activation, monsters perform each command listed on the command card in the order they are listed. All disturbed monsters complete each command before moving to the next command.
If a command possesses a multiplier, such as Move x2, the monster performs the command the number of times indicated by the multiplier before moving to the next monster.
Commands
Spawn
One disturbed spawning point, closest to the Hero with the most wrath, immediately spawns all monsters listed on its spawning card and that are available in the spawning pool.
The players place each monster within two squares of the spawning point. Monsters may not be placed in a non-blessing tile effect, or adjacent to another monster, unless it cannot be placed otherwise. When this occurs, monsters are placed adjacent to other monsters before being placed in non-blessing tile effects. See Blessing, page 33 and Tile Effects, page 40.
Monsters may only be spawned from a spawning point which lists them as part of its spawning pool.
Any disturbed monsters listed on the spawning point that are already on the dungeon map may remove all wound and status effect tokens, regardless of the specific spawning point from which they were spawned.
After placing all of the models, the spawning point suffers one wound.
If you are using two of the same spawning points you don't need to keep track of which monsters came with each one. When spawning use any available monsters in the spawning pool that are on the spawning point's card, up to the maximum number listed!
No Eligible Spawning Points. If there are no disturbed spawning points capable of spawning, either because they have all been destroyed or because there are no models available in the spawning pool, perform any other commands that are listed on the card. If there are no other commands listed on the card, immediately draw a new card.
Move
All disturbed monsters in the dungeon move, according to the order of activation, up to their full number of movement points. Monsters use the rules described for Hero movement points on page 14, and the rules below:
1. Determine Monster's Target. Dungeon bosses, mini-bosses, and elite monsters always move towards the Hero with the most wrath.
Minions move towards the nearest elite that is part of their gang. If there is no such elite on the dungeon map, minions will move towards the nearest spawning point which can spawn their gang's elite.
2. Move Monster. Each monster will take the shortest path towards their target as possible, while avoiding non-blessing tile effects and Hero occupied squares. Monsters move through other monsters and spawning points.
A monster will enter a non-blessing tile effect only if it cannot reach its destination otherwise. See Tile Effects, page 40.
If a monster possesses an ability which allows them to treat negative tile effects as open squares, such as Surefoot, Fly, or Burrow, they will move through those squares to reach their target. See Abilities, page 33.
Monsters that are already adjacent to or within range of a Hero with lower wrath, will disengage from that Hero and move past other Heroes to reach their target.
Elites that are part of an elite gang take a path towards the Hero with the most wrath, that will also bring it within two squares of the nearest elite in its gang that has already moved. If such a path is not possible, the elite will move to be in range of the Hero.
There are lots of possible paths you can take when moving monsters, so don't get bogged down trying to determine the "correct" one. Just choose the quickest path that is logical to you to get the monster where it needs to go.
3. Stop Movement. Once a dungeon boss, mini-boss or elite is within solo range or adjacent to the Hero with the most wrath, and in line of sight, the monster stops moving. See Line of Sight, page 15.
Once a minion is adjacent to a bonded elite the minion stops moving.
The Questing Knight has the most wrath and is the monsters' target.
1. Frog Knight 1 and the Sprout are equal distance from the Questing Knight. The players choose to move Frog Knight 1 first, stopping when it reaches its solo range 2.
2. The Sprout is the next elite and moves, stopping when it reaches its solo range 2.
3. The last elite is Frog Knight 2. It moves so that it is both within range of the Questing Knight and within two squares of Frog Knight 1 to form a House of Frog gang.
4. Minions move next. Starting with Mook A, Mook A and B move toward the Sprout to form the Lil' Sprouts gang. Mook C also moves towards the Sprout, but does not have enough movement points to join the gang.
Unique
Following the order of activation, disturbed monsters activate all unique actions on their cards, in the order they are listed. Unique actions are free and do not cost the monster any action points.
Only dungeon bosses, mini-bosses, and elites perform unique actions.
Unique actions always target the Hero with the most wrath that is both in range and in line of sight of the monster. The monster's range attribute is always used unless the unique action lists a different range or an area effect. See Area Effects, page 34.
Just like Hero actions, monster unique actions can be either offensive or support.
Unique Offensive Actions. Unique offensive actions use the monster's STR attribute. Some unique actions or game effects may modify the monster's STR. These bonuses or penalties are added or subtracted to the total STR.
Any affected Heroes must make a defense roll using an attribute with a defense icon against the monster's total STR. If the defense roll is less than the total STR the Hero suffers one wound and the effects of the unique action.
Unique Support Actions. Unique support actions do not inflict wounds. Instead they cause special effects to occur such as inflicting status effects on enemies or helping friendly models. No defense roll is made, simply resolve the effect of the action.
If the target model within range is already under the effects caused by the monster's support action it will instead target the next eligible model.
Augment. If a unique support action is an Augment the monster will target the closest eligible friendly model that will benefit from the action, within range and line of sight. e.g. A monster that removes wound tokens using Mend will only target a monster that is wounded.
Overcharge. If a gang has a unique action that is an overcharge action it is used instead of, not in addition to, the solo version.
A Unique command has been issued and Trent is performing his unique offensive actions. Unique actions are resolved in the order they are listed on a model's card, so Decay will resolve first, followed by Overgrowth.
Decay will target the Hero with the most wrath within Trent's range of 3 squares. Which in this case is the Thundervale Huntress, with three. Greg makes a defense roll using the Thundervale Huntress's ARM 3, rolling 3 stars. The players compare the roll to Trent's STR 4.
The Thundervale Huntress rolled fewer stars, so takes 1 wound and must discard a piece of equipment.
Next, Overgrowth is resolved. It is a Wave 3 area effect, hitting all models within 3 squares of Trent's base, and causes Poison. Both the Thundervale Huntress and Princess Emerald are hit and must make defense rolls. Greg rolls 4 stars for the Thundervale Huntress. Evan rolls Princess Emerald's ARM 3, rolling 1 star. The players compare both rolls to Trent's STR 4.
The Thundervale Huntress tied Trent's STR, since ties always go to the defense roll, she does not take a wound. Princess Emerald's roll was less than Trent's STR. She suffers 1 wound and the status effect Poison.
The Will-O-Wisps gang then performs the Unique command. First, the players check if a gang has been formed. i.e. If the Wisps are within 2 squares of one another.
If a gang has not been formed, each Wisp uses the normal version of Pollen Dream using their solo range of 4 squares. Pollen Dream inflicts the status effect Slow, targeting the Hero with the most wrath in range and that is not already suffering Slow.
If a gang has been formed, each Wisp instead uses the overcharge version of Pollen Dream, which becomes a Wave 5 area effect, affecting every model within 5 squares of each Wisp's base.
Signature Actions
Signature actions are unique actions that a monster performs during the Fight command if a Unique command is not drawn. Signature actions cost no action points. If a Unique command and Fight command are drawn, the monster will perform the signature action only during the Unique command.
Fight
During the Fight command dungeon bosses, mini-bosses, and elites spend action points to perform Basic Attack offensive actions against the Heroes. In addition, some monsters may perform signature actions.
1. Order of Activation. Monsters perform the Fight command using the standard order of activation. Minions do not perform the Fight command.
2. Determine Monster's Target. Monsters target the Hero with the most wrath that is within its range.
3. Check for Gangs. Check and see if any bonded monsters are within two squares of the elite monster performing the Fight Command.
If any bonded monsters are within two squares a gang is formed and the elite uses its gang attributes. It will also gain any abilities the bonded monsters in its gang possess.
If there are no bonded monsters within two squares no gang is formed and the elite uses its solo attributes and abilities.
4. Perform Signature Action. If the monster possesses a signature action, and no Unique command was issued, the monster performs its signature action. Signature actions cost 0 action points.
5. Perform Basic Attack. The monster makes one Basic Attack offensive action per action point on its card.
Basic Attack: A Basic Attack targets the Hero with the most wrath within the monster's range and line of sight. Basic Attacks use the monster's STR attribute.
Some unique actions or game effects may modify the monster's STR when making a Basic Attack. These bonuses or penalties are added to the monster's total STR.
Defense Rolls. When a Hero is targeted by a Basic Attack or unique offensive action, it must make a defense roll using any attribute with a defense icon against the monster's total STR. If the defense roll is less than the total offense the Hero suffers one wound and any effects caused by the monster, such as status effects.
Example of Play
Hero Turn
The players have been playing for several turns and now it is the Hero Turn. Currently the maximum amount of wrath for a three Hero game is already on the Heroes. The Questing Knight has one wrath, Princess Emerald has one wrath, and the Thundervale Huntress has three wrath. They select the Questing Knight and Princess Emerald to activate.
Consul Turn
Determine Disturbed Monsters. All of the Heroes are on a single tile, so it is the only active tile. All of the monsters on the active tile are disturbed: Trent, 2 Turnipheads, 2 Wisps, 1 Sprout, and 4 Mooks. There are currently no monsters on any tile that share a doorway with the active tile.
Questing Knight Activation. Shannon activates the Questing Knight and makes three Melee Attack basic actions destroying two Mooks and inflicting one wound on a Wisp. Since the Questing Knight destroyed two models, Shannon removes two wrath tokens from the Thundervale Huntress and places them on the Questing Knight.
Princess Emerald Activation. Evan activates Princess Emerald. She uses the Scope support action on Trent. Unfortunately, she only rolls 2 stars, which fails to exceed Trent's ARM 3. Evan decides to try Scope again. This time Evan rolls 4 stars and Trent suffers the status effect, Bane. With her last action point Princess Emerald makes a Missile Attack basic action at Trent, rolling 3 stars. Fortunately Bane reduces his ARM by 1 to ARM 2 so she is successful and Trent suffers 1 wound.
Since Emerald successfully used a support action she gains one wrath. Greg removes one token from the Thundervale Huntress and places it on Emerald.
Power-Up. Shannon draws two loot cards for the Mooks he destroyed, drawing: Dwarven Axe and Potion Bandolier. The party equips the Thundervale Huntress with the Dwarven Axe and Princess Emerald with the Potion Bandolier.
No wonders were drawn, nor were any mini-bosses or spawning points destroyed. Play moves to the Consul Turn.
Determine Order of Activation. Trent is a mini-boss and will perform all commands first, followed by the elites, which will perform each command in order depending on which is closest to the Hero with the most wrath. Finally the minion Mooks will perform commands.
Perform Upkeep. There are currently no active game effects that need to be resolved for the monsters' upkeep.
Draw Command Card. The players draw a command card to see what the monsters in the dungeon will do, drawing: Combo. The players now perform each command on the card in the order it is listed.
The Questing Knight currently has the most wrath (3) so all monsters will attempt to target him.
Move Command
-
Mini-Boss Moves. Trent moves first, but does not have enough movement points to reach the Questing Knight, and ends near Princess Emerald (wrath 2) and the Thundervale Huntress (wrath 0).
-
Elites Move.
- The Sprout is the closest elite to the Questing Knight. The Sprout has a solo range 2 and stops within 2 squares of the Questing Knight.
- Wisp A moves towards the Questing Knight. The Wisp has a solo range 4 and stops within 4 squares of the Questing Knight.
- Turniphead A also has a solo range 4 and stops within 4 squares of the Questing Knight.
- Wisp B takes a path that will bring it within its solo range 4 of the Questing Knight and 2 squares of Wisp A. The Wisp makes it within 4 squares of the Questing Knight, but not within 2 squares of Wisp A so no gang is formed.
- Turniphead B attempts to move within its solo range 4 of the Questing Knight and 2 squares of Turniphead A. It cannot make it within 4 squares of the Knight, but does make it within 2 squares of Turniphead A forming the Herbalist gang.
-
Minions Move. The Mooks are bonded to the Sprout so they move towards it, stopping once they are adjacent. Three Mooks make it to within 2 squares of the Sprout to form a Lil' Sprouts gang.
Unique Command
- Mini-Boss Uses Unique Actions. Unique actions are resolved in the order they are listed on a model's card, so Decay will resolve first, followed by Overgrowth.
Decay is an offensive action. Trent has STR 4 and range 3 squares.
Decay: Models wounded by Decay must discard one piece of equipment of their choice.
Princess Emerald has the highest wrath within his range and must make a defense roll of 4 or higher. She fails and suffers one wound and must discard a piece of equipment. She only has the potion bandolier, so Shannon places it in the discard pile.
Overgrowth: Wave 3.
Overgrowth is an offensive action that is a Wave 3 area effect, so it does not use Trent's range. Princess Emerald and Thundervale Huntress are both in the area effect and must make a defense roll against Trent's STR 4. Princess Emerald and Thundervale Huntress both win their roll and suffer no wounds. If they had failed they would have suffered both a wound and the status effect Poison.
- Lil' Sprout Gang Uses Unique Actions. The Lil' Sprout Gang uses the support unique action Rampant Growth, granting it +1 STR.
Rampant Growth: Lil' Sprouts gain +1 STR.
- Elite Wisp A Uses Unique Actions. Wisp A uses the support unique action, Pollen Dream. Wisp B is not within two squares to form a gang so the solo version is used.
Pollen Dream.
The Questing Knight is within Wisp A's solo range of 4 squares. Pollen Dream is a support action and does not cause a wound, instead the Questing Knight suffers the status effect Slow.
- Elite Turniphead A Uses Unique Actions. The Turnipheads are within two squares of one another, forming the Herbalist gang, and use their gang attributes. In addition they use the overcharge version of the support action It's Medicinal:
It's Medicinal: Wave 6, Mend 1.
Overcharged It's Medicinal is a Wave 6 area effect that is also an augment, so all friendly models within 6 squares of the Turniphead are affected. Trent and Wisp B are within the area effect and each remove a wound token.
-
Elite Turniphead B Uses Unique Actions. Turniphead B also uses the overcharge version of It's Medicinal, but no wounded monsters are in the area.
-
Elite Wisp B Uses Unique Actions. Wisp B uses the solo version of Pollen Dream. However, the Questing Knight is already suffering Slow, so the Wisp targets the next closest Hero with the most wrath that is within range and line of sight: Princess Emerald.
Unfortunately, this means that for the last roll the Sprout gains the benefit of its Virulent ability granting it +1 STR against models suffering Poison.
Knowing that it will be harder to make defense rolls now, Shannon has the Questing Knight drink his Magic Armor emergency potion granting the Questing Knight +1 ARM.
Drinking the potion earns the Questing Knight one wrath token. Shannon removes one wrath token from Princess Emerald's card and places it on the Questing Knight's. Then he makes the final defense roll against the Lil' Sprouts' new STR 4. Shannon rolls 5 stars and wins the roll!
Fight Command
- Mini-Boss Fights. Trent possesses 2 action points, STR 4 and range 3. Princess Emerald and the Thundervale Huntress are both within range. Both of Trent's Basic Attack offensive actions will go against Princess Emerald since she has the most wrath.
Princess Emerald must make two defense rolls of 4 or higher to avoid being wounded. Shannon rolls 2 stars and 4 stars, losing one roll and winning the other. Shannon places one wound token on Princess Emerald's card.
- Wisps Fight. Both the Wisps and Turniphead A are four squares from the Questing Knight, so the players decide to activate Wisp A, Wisp B, and then Turniphead A.
The Wisps are not within two squares of one another so they use their solo attributes of 1 action point, STR 2 and range 4. The Questing Knight is suffering Poison so both Wisps gain +1 STR from their Virulent ability for a total STR 3. Both Wisps are elites so they both spend an action point to make one Basic Attack each.
The Questing Knight must make two defense rolls. He loses one and suffers one more wound. Ouch!
- Elite Turniphead A Fights. Turniphead A and Turniphead B are within two squares of one another and will use their gang attributes of 1 action point, STR 2 and range 6. The Questing Knight is suffering Poison so Turniphead A gains +1 STR from its Virulent ability for a total STR 3.
The Questing Knight must make one defense roll of 3 or higher—and succeeds!
- Lil' Sprouts Gang Fights. The Sprout is the closest elite to the Questing Knight and fights first.
Three Mooks are within two squares of the elite Sprout, forming a Lil' Sprouts gang. Therefore the elite Sprout will use its gang attributes, giving it 3 action points, STR 2 and range 3. Since the Unique command was given, the Sprout is benefiting from Rampant Growth granting it +1 STR, for a total STR 3. In addition, the Mooks grant the Sprout their ability Poison, and any wounds the Sprout inflicts will cause the status effect.
The Questing Knight must make three defense rolls of 3 or higher. The Questing Knight wins the first roll, but loses the second roll and suffers one wound and Poison.
- Elite Turniphead B Fights. Turniphead B did not make it within its solo range 4 of the Questing Knight. However, since it formed a gang with Turniphead A it uses its gang attributes and its improved range 6, putting the Questing Knight within range. Like Turniphead A, Turniphead B spends its action point to make a Basic Attack offensive action of STR 3.
The Questing Knight must make another defense roll of 3 or higher. Unfortunately, he rolls no stars and takes a wound!
Power-Up. No additional equipment or wonders were earned during the Consul Turn, nor were any mini-bosses or spawning points destroyed. Play moves to the Hero Turn.
Hero Turn
The players select two Heroes to activate, one of them must be the Thundervale Huntress since she did not activate last turn. They select Princess Emerald as the other Hero to activate.
Princess Emerald Activation. Princess Emerald activates first. She is currently suffering from Slow, so her movement points are halved. Evan decides to attack the Old-Growth Hollow spawning point. Princess Emerald makes two Missile Attack basic actions against it, wounding both times. Evan then decides to try to get some loot and makes a Missile Attack against a Turniphead, destroying it.
Since Princess Emerald destroyed a model she gained one wrath. Evan removes a token from the Questing Knight and places it on Princess Emerald's card.
Thundervale Huntress Activation. Next the Thundervale Huntress activates. Greg moves her two squares so that she is adjacent to the Sprout and three Mooks, then spends two action points to use the Trample unique offensive action, hitting every model within one square of the Thundervale Huntress's base. Greg rolls an impressive 5 stars which destroys all three Mooks and inflicts a wound on the Sprout. With the Thundervale Huntress's last action Greg makes a Melee Attack basic offensive action against the Sprout but rolls only 1 star.
The Thundervale Huntress destroyed three models and gains three wrath. Greg takes two tokens from the Questing Knight and one token from Princess Emerald and places them on the Thundervale Huntress's card.
Power-Up. During the turn Princess Emerald destroyed one Turniphead and the Thundervale Huntress destroyed three Mooks. The players draw 3 loot cards (since three is the maximum number that may be drawn per turn), drawing: Chainmail, Spikes, and Silk Gloves. The party equips the Questing Knight with the Chainmail, Princess Emerald with the Silk Gloves, and the Thundervale Huntress with the Spikes.
The Game Continues. It is the Consul Turn next. The party draws a command card and performs every command listed. During the following Hero Turn the Questing Knight must be selected to activate since he did not activate last Hero Turn.
The Heroes and Consul continue alternating turns until one side is victorious.
You Have Died
Over the course of a game, models will suffer wounds and be healed. Some may even be destroyed and then resurrected!
Every model has a number of Hearts indicated on their card. Whenever a model suffers a wound, place a wound token on their card. Whenever a model heals a wound, remove a wound token from their card.
For Heroes and boss monsters it is easiest to keep track of wounds and status effects on their game card. For smaller monsters it is often easier to place the wound tokens next to the model on the dungeon map.
Once a model has a number of wound tokens equal to its number of Hearts the model is destroyed. A destroyed model cannot be activated or otherwise be used in any way, including receiving new equipment or potion tokens.
If the destroyed model is a monster, remove all wounds and status effect tokens from its card or the dungeon map and return the model to the spawning pool.
If the destroyed model is a Hero, remove the model from the dungeon map and place a skull token in the square it last occupied.
Skull Tokens
Skull tokens represent a destroyed Hero's equipment. Any Hero may retrieve a skull token by using the Scavenge basic action, page 17. After scavenging a skull token, remove it from play and place the destroyed Hero's equipment in the backpack. It may be equipped by other Heroes as normal during Power-Up.
Princess Coins
During any Hero's upkeep they may choose to spend one or more princess coins.
For each princess coin spent, choose one Hero that is either on the dungeon map or that has been destroyed. Remove all wound and status effect tokens from the model's card.
If the princess coin was used on a destroyed model, return the model to the dungeon map adjacent to the start marker. If the Hero's skull token remains on the dungeon map, the Hero's equipment was not scavenged and they return to play with it still equipped. Remove the token from play.
Once the effects of the princess coin have been resolved return it to the token pile.
Advanced Rules
Abilities
Many models have a number of abilities listed on their card. These abilities are always active and require no action points to activate.
The most common abilities are listed below. If an ability is not listed here it will be on the model's game card.
Backlash: If a model targeted by an offensive action possesses Backlash and wins the defense roll, the model making the offense roll suffers one wound. A model may not draw a loot card for destroying a model due to Backlash.
Blessing: A tile effect with Blessing bestows a positive effect, specified on the tile effect's card, to models within the tile. Blessings only affect Hero, elite and minion models.
Burrow: A model with Burrow may move through walls, and treats difficult terrain and structure squares as open squares. All non-blessing tile effects in those squares are ignored.
Cursed: Equipment with Cursed must be equipped during Power-Up if any Hero has an available slot, and cannot be removed or discarded unless the model is destroyed.
Fly: A model with Fly treats difficult terrain, chasm, and structure squares as open squares. All non-blessing tile effects in those squares are ignored. Structure squares do not block line of sight to or from models with Fly.
Heal X: A model affected by Heal may remove a number of wound tokens or a number of status effect tokens equal to the value of X.
Hookshot: Actions with Hookshot do not require line of sight to target a model. Range must still be counted around walls and structures.
Immune: Status Effects: A model that is Immune: Status Effects can never suffer the negative effects of status effects. If a model that is suffering a status effect gains Immune: Status Effects remove all status effect tokens immediately.
Immune X: A model with Immune X is immune to the negative status effect shown by the icon. If a model that is suffering a status effect gains Immune X to that effect remove the status effect token immediately. e.g. A model with Immune Poison is immune to Poison.
Insignificant: A model may not draw a loot card for destroying a model with Insignificant.
One Use Only: An action with One Use Only may only be used a single time during the game, once it has been used it may not be used again.
Pet X: A model with Pet X is the master of the pet listed as X. A model with Pet X may never be a different pet's master. The listed pet begins the game within two squares of its master.
Shapeshift X: The model may Shapeshift into the model listed. See Shapeshift, page 39.
Small: An enemy model may only target a Small model if it is within 3 squares of the model.
Status Effects: If a model has a status effect listed as one of its abilities any successful offensive action it performs inflicts the status effect upon its target. See Status Effects, page 39.
Stealth: Actions targeting a model with Stealth reduce their Range by 3, to a minimum of 1.
Surefoot: A model with Surefoot treats difficult terrain squares as open squares. All non-blessing tile effects in those squares are ignored.
Tough: During its upkeep, a model with Tough may remove a single wound token.
Affinity
Every model has an affinity with one or more of the Goddess Crystals of Crystalia. A model may gain greater benefits from equipment or game effects if they share an affinity. Conversely, a model may suffer penalties if they do not share an affinity.
When a model's affinity impacts a game effect the effect will specify how the affinity is used. If a model has affinity with two colors they benefit or suffer the effects of the affinity if either of the colors match.
Equipment Affinity. If a piece of equipment has an affinity it will list both a standard bonus and an affinity bonus. Models whose own affinity matches the equipment's gain the affinity bonus instead of the standard bonus. All other models use the standard bonus.
Area Effects
Some actions can hit multiple models all at the same time. These actions are called area effects.
To use an area effect first determine which models are in squares that will be affected. Squares that the user cannot draw line of sight to are not affected. All models that are within the area are considered to be affected simultaneously.
With the exception of Burst X, area effects replace the range of an action.
If the area effect action requires an offense roll the model using the action makes a single roll. Every model within the area is allowed to make a defense roll.
Friendly models, including the user, are not affected by area effects unless they are Augment or Dangerous actions.
If a model is affected by two area effects simultaneously the effects are cumulative as long as the actions' names are different, even if their effects are the same.
When a monster uses an area effect, the effect is oriented so that it affects the most Heroes possible, while also including the Hero with the most wrath that can be affected.
Burst X. Determine a Burst effect's target as normal using the action's range. After the target has been selected, it and every model within X squares of the target are affected. Squares that the target cannot draw line of sight to are not affected.
If a large based model is targeted by a Burst area effect choose one square occupied by its base as the square targeted and determine the area effect as normal.
Cross X. A Cross effect is centered on the user's base and every square within X squares of the user, but does not affect any diagonal squares.
Lance X. A Lance effect draws a straight line in any direction directly away from the user's base along a distance of X. Every model along this line is hit. Lance effects may not be used along diagonals.
Sweep X. A sweep effect hits every model within X squares of any single side of the user's base along a straight line. Sweep effects may not be used along diagonals.
Wave X. A Wave effect is centered on the user's base and every square within X squares of the user.
Aura X. An Aura effect is centered on the user's base and every square within X squares of the user. Auras remain in play, centered on and moving with the user, until their next upkeep.
Boo Booty
Boo booty are a special type of monster and treasure card.
In addition to their game card, each boo booty has a treasure card that is shuffled into the Treasure Deck.
When Heroes draw a boo booty from the Treasure Deck replace the treasure chest model with the specified boo booty model and game card. Any additional treasure cards that were drawn are discarded.
During the Consul Turn a boo booty is considered a disturbed monster and follows commands as normal. When the boo booty is destroyed the Heroes may draw one card from the Treasure Deck during Power-Up.
A boo booty is only spawned when treasure chests are opened. If another action or effect causes a boo booty card to be drawn, such as destroying a mini-boss, or if there is no available boo booty model in the spawning pool, shuffle it back into the treasure deck and draw again.
Control Effects
Control Effects allow one model to move another model. A model that is moved as a result of a control effect does not count as having been activated and may still activate and move as normal during their own turn.
A model may never be moved in a manner that would not be legal for them to move on their own. Difficult terrain and other tile effects are treated as normal.
Use Control Effects to move pesky enemies into deadly tile effects or friendly models away from danger.
Compel X. A model targeted by Compel may be moved a number of squares up to the value of X in any direction.
Pull X. A model targeted by Pull may be moved a number of squares up to the value of X towards the model using Pull. Each square moved must decrease the distance between the two models. Once the two models are adjacent, the target model immediately stops.
Push X. A model targeted by Push may be moved a number of squares up to the value of X away from the model using Push. Each square moved must increase the distance between the two models. If the target model cannot be moved further away, such as from contact with a wall, the model immediately stops.
Creeps
Many explore cards spawn a special type of monster known as creeps. Creeps are spawned only by drawing explore cards. When an explore card is drawn it indicates the number of creeps that are spawned.
Creeps are spawned within two squares of the tile's spawning point as normal. There is no limit to the number of creeps that may be on the dungeon map—just the number of models players own!
All creeps have the Insignificant ability.
Pets
Pets are wonders. At the beginning of each game the Heroes may choose up to six wonder cards, any of which may be pets, to add to the Treasure Deck.
Pets must be bound to another model called a master. A pet is represented by a single model and game card that explains its abilities in the game.
Heroes may start the game with a pet thanks to the Pet X ability, or they may rescue pets by drawing them from the Treasure Deck.
A model may only ever be a single pet's master at one time. If a model gains a new pet, the old pet's model and card are placed in the backpack, and may be given to another model during Power-Up.
If a master is destroyed its pet is immediately placed in the backpack. During the master's activation it may use Conjure Pet, page 17, to return the pet to play.
Pets are considered part of the party and any game effect which affects the entire party affects any pets as well.
Rescue. When the Heroes draw a pet card from the Treasure Deck, place the pet's game card and model in the backpack.
During Power-Up the party may choose one Hero to be the pet's master. Place the pet model within two squares of the master, then place the pet's game card in front of the player for easy reference.
Pet Activation. A pet must activate during any turn its master activates. A pet may activate anytime during the turn, but may not interrupt another model's activation. When the pet is activated it must complete its entire activation.
All pets possess four attributes: movement points, action points, STR strength, and ARM armor.
Pets may spend movement points and action points in the same manner as other models. Pets may only use the Melee Attack and Run basic actions. The pet's STR is used for any offense roll the pet is required to make.
Pets are not required to remain within two squares of their master. The master gains any benefits granted by the pet as long as the pet is on the dungeon map.
Wrath. Whenever a Pet causes an effect that would generate wrath, place the wrath token on the pet's master.
Targeting Pets. Pets may be targeted and affected by actions as normal. The pet's ARM is used for any defense roll the pet is required to make. If a pet suffers a wound it is immediately destroyed.
During the master's activation they may use Conjure Pet, page 17, to return the pet to play.
Rule Priority
If a game card, game effect, or ability has a rule that is contrary to the rules in this rulebook, the card or ability always takes precedence.
Shapeshift
A model with the Shapeshift ability has two cards and two models, one representing their original form and one representing their shapeshift form. Models always begin the game or are spawned using their original form.
When a model shapeshifts, replace its card with the specified shapeshift card. Replace the model on the dungeon map with the new shapeshift model. The new model must occupy at least one square that the previous model occupied. If there is no room to place the new model, it will push any models, friendly or enemy, out of the occupied squares, by the shortest path possible to make room for its model.
The model retains all tokens and equipment it possesses regardless of its form. The shapeshift form retains the same model type as the original form.
Hero Shapeshift. When the Hero is activated it may choose to shapeshift into its alternate form during its upkeep.
Monster Shapeshift. If a monster has the ability to shapeshift, it will be included on two arcade cards, one for each form. Use the appropriate arcade card for the form the monster is currently in.
A monster will shapeshift into its alternate form whenever a Spawn command is issued. Monsters that shapeshift are considered in play, and may not spawn, as long as one of their forms are on the dungeon map.
The Sprout is currently suffering one wound and the status effect Fire. During the Consul Turn, the Spawn command is issued, so the Sprout must shapeshift into King Sprout. The players replace the Sprout's card with the King Sprout's. They move both the wound token and the Fire token to the new card.
Status Effects
Status effects are negative effects that cause a model to suffer a disadvantage in the adventure.
When a model suffers a status effect, place the appropriate status effect token on the model's card. The model suffers the effect until the token is removed.
Status effects are typically caused by actions that target a model. When this is the case, the model only suffers the status effect if the action was successful.
A model may suffer multiple status effects, but may only ever have one of the same type.
Remember, status effects last until removed by using a heart or other ability. Use those hearts wisely!
Bane: A model suffering Bane discards the highest result rolled anytime it makes a defense roll. (Arcade: A monster suffering Bane reduces its ARM by 1.)
Fire: A model suffering Fire suffers one wound during its upkeep.
Hex: A model suffering Hex discards the highest result rolled anytime it makes an offense roll. (Arcade: A monster suffering Hex reduces its STR by 1.)
Ice: A model suffering Ice may not use unique actions.
Knockdown: A model suffering Knockdown may not move or perform any other action until it spends 1 action point or all of its movement points to remove the Knockdown token. (Arcade: A monster suffering Knockdown may not perform commands until the next Move command. Instead of moving it must remove the Knockdown token.)
Poison: A model suffering Poison reduces its total number of action points by 1, to a minimum of 1.
Slow: A model suffering Slow halves its movement points, rounding up.
Tile Effects
Chasm. Models cannot move through chasms. Models can draw line of sight through chasms.
Difficult Terrain. Each square of difficult terrain a model enters costs two movement points. If a model does not have enough movement points to move into a square with difficult terrain, it may not do so.
If any part of a large based model enters a square of difficult terrain, the move costs two movement points. Do not count squares a large model already occupies.
Structure. Models cannot draw line of sight across or move through structures.
Traps
When a trap explore card is drawn the Heroes have sprung a trap!
Each trap uses a trap template. After a trap has been sprung the Consul places the trap's template in the tile according to the rules below.
Trap shapes: Area, Line, Scatter.
When a line or area trap is drawn, place the appropriate template adjacent to the Hero that sprung the trap. When a scatter trap is drawn place one single square template adjacent to the Hero who sprung the trap. Then place three more anywhere within the tile, no closer than within four squares of one another.
Trap templates may not be placed across walls, structures, or chasms. They may be placed in the same square as a friendly or enemy model.
Once the template has been placed the trap is immediately triggered.
Triggering Traps. Whenever a model from the party moves onto a trap template or a square adjacent to the template the trap is triggered. Immediately resolve the effects of the trap. All models, friendly or enemy, that are on or adjacent to the trap template are affected.
Many trap effects are shown as either a support action or an offensive action. When these traps are triggered immediately resolve the action.
If a trap requires an offense roll to resolve its effects it will have a STR attribute that affected models must make a defense roll against.
Traps may be triggered multiple times until they are disarmed. However, a model can only trigger a trap once during its activation.
Monsters never trigger traps. However, if a Hero triggers a trap, any monsters on, or adjacent to, the trap template are affected as well.
Disarming Traps. All traps have a Defense attribute. In order to disarm a trap a model must use the Disarm Trap basic action, page 17, and exceed the trap's defense.
It is Greg's turn and the Thundervale Huntress has just moved into a new tile. Greg draws an explore card, drawing: Wall of Fire! The players place the line trap template so it is adjacent to the Thundervale Huntress triggering the trap immediately.
I'm Burning!: STR 3.
Greg must make a defense roll of 3 or higher. Since I'm Burning is an offensive action the Thundervale Huntress suffers one wound and the status effect Fire if he fails the roll.
Select Difficulty
Super Dungeon Explore is designed so that the challenge monsters bring to the table is varied. Some monsters are brutal engines of destruction, while others deal little damage but provide unique game effects to confound the Heroes' plans. This is also reflected in the Heroes. Some Heroes excel at destroying monsters, while others support the party with healing or augments.
One of the most enjoyable aspects of Super Dungeon Explore is trying out new combinations of Heroes, monsters, and game rules to see how players overcome the challenge and create a fun play experience for everyone involved. Below are a few of Soda Pop Miniatures' favorite ways to customize our games. Pick and choose your favorite ones to use in your game or create your own!
Power-Up the Heroes:
- Start with a Princess Coin in the backpack.
- Reduce the number of spawning points.
- Don't use the Mighty Monster chart.
- Heroes may discard loot to earn hearts.
- Heroes may equip more than one item of treasure.
- Loot and Treasure are never discarded from the backpack.
Power-Up the Dark Consul:
- Heroes start with one Princess Coin and can never earn more.
- All monsters inflict a status effect. (We love Fire!)
- Only destroying Elite monsters allow Heroes to draw loot.
- Monsters always perform the Fight command.
- Heroes cannot share offensive (red) potions.
- Monsters attack every Hero in range.
Expand Your Game
Forgotten King has already introduced you to Classic Mode and Arcade Mode, but there are more ways to play! The PVP Arena game mode allows you to recruit a warband consisting of a single Hero and two spawning points of monsters, to face a single opponent in head-to-head competition. Visit the Soda Pop Miniatures website to download PVP Arena rules. Coming soon, the new Super Dungeon: Legends game mode will allow you to advance your Heroes in epic campaigns as they battle their way across Crystalia.
There are more brave Heroes to recruit and even more monsters waiting to be unleashed by the Dark Consul! Populate your dungeon with new Heroes, Dungeon Bosses, Mini-Bosses, and hordes of monsters with Super Dungeon Explore Level Boxes, Warband Boxes, Dungeon Tiles Expansions, Hero Single Boxes, and Mini-Boss Single Boxes.
Reference
Hero Turn
- Choose two Heroes to activate during the Hero Turn. See Hero Activation, pages 14-19. Choose first from any Heroes that did not activate in the previous Hero Turn, then choose from the remaining Heroes.
- Activate first Hero.
- Activate second Hero.
- Resolve Power-Up, pages 12-13.
- Play then moves to the Consul Turn.
Consul Turn
- Monster Activation a. Determine Disturbed Monsters. b. Determine Order of Activation. c. Perform Upkeep. d. Draw Command Card. e. Perform Commands.
- Resolve Power-Up, pages 12 - 13.
- Play then moves to the Hero Turn.
See Monster Gangs, pages 20 - 21; Monster Activation, pages 22 - 23; Monster Commands, pages 24 - 27.
Action Icons (pg. 14):
- Offensive Action: Inflict a single wound if successful.
- Support Action: Do not inflict wounds, only effects.
- Overcharge Action: Use instead of the original action.
- Signature Action: Unique action performed during Fight Command.
- Augment: May only target or affect friendly models.
- Dangerous: May target and will affect friendly and enemy models.
- Defense: May use attribute for defense roll.
Range Icons (pg. 16):
- Support Range: Only used with support actions.
- Melee Range: Only use STR attribute.
- Magic Range: Only use WILL attribute.
- Missile Range: Only use DEX attribute.
Potions (pg. 18)
A model may drink one potion during its activation of any type. A model may drink a single emergency potion during the Consul Turn.
- Support Potion: Grants the model a single-use support action.
- Offensive Potion: Grants the model a single-use offensive action.
- Emergency Potion: Grants the model a single-use support action that may be used during the Consul Turn.
Status Effects (pg. 31)
- Bane: A model suffering Bane discards the highest result rolled anytime it makes a defense roll. (Arcade: A monster suffering Bane reduces its ARM by 1.)
- Fire: A model suffering Fire suffers one wound during its upkeep.
- Hex: A model suffering Hex discards the highest result rolled anytime it makes an offense roll. (Arcade: A monster suffering Hex reduces its STR by 1.)
- Ice: A model suffering Ice may not use unique actions.
- Knockdown: A model suffering Knockdown may not move or perform any other action until it spends 1 action point or all of its movement points to remove the Knockdown token. (Arcade: A monster suffering Knockdown may not perform commands until the next Move command. Instead of moving it must remove the Knockdown token.)
- Poison: A model suffering Poison reduces its total number of action points by 1, to a minimum of 1.
- Slow: A model suffering Slow halves its movement points, rounding up.
- Immune: Status Effects: A model that is Immune: Status Effects can never suffer the negative effects of status effects. If a model that is suffering a status effect gains Immune: Status Effects remove all status effect tokens immediately.
- Immune X: A model with Immune X is immune to the negative status effect shown by the icon. If a model that is suffering a status effect gains Immune X to that effect remove the status effect token immediately. e.g. A model with Immune Poison is immune to Poison.