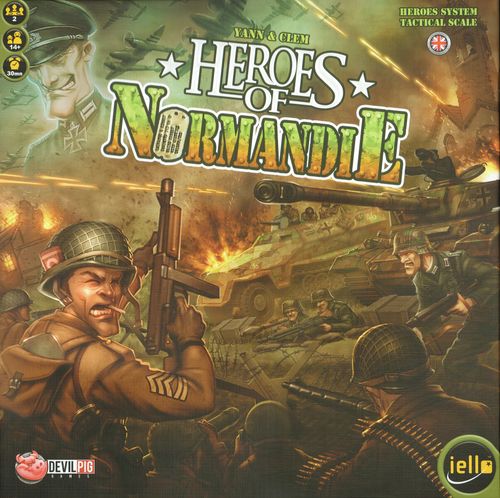
Heroes of Normandie
Heroes of Normandie Rulebook
Table of Contents
Table of Contents
Box Contents
German Army Box
- 6 Terrain boards
- 3 Buildings
- 4 One-space Defensive positions
- 1 Two-space Defensive position
- 6 Bonus tactics
- 9 Objective markers
- 1 German officer recruitment tile (Major Hans Gruber)
- 2 German recruitment tiles (Panzer Lehr)
- 11 Infantry unit counters (PZGR-Lehr-Regiment 901)
- 10 Infantry unit counters (PZGR-Lehr-Regiment 902)
- 2 Vehicle counters (PZGR-Lehr-Regiment 902)
- 23 German recruitment options (gear, supports, orders and character traits)
- 3 German hero recruitement options
- 3 German hero counters (2 units and 1 vehicle)
- 3 German common infantry unit counters
- 4 German common vehicles counters
- 14 German wood tokens
- 2 German dice
- 76 German Action cards
US Army Box
- 1 US officer recruitment tile (Cdt. John Marvin)
- 2 US recruitment tiles (4th Infantry Division)
- 11 Infantry unit counters (8th Infantry Regiment)
- 10 Infantry unit counters (22nd Infantry Regiment)
- 2 Vehicle counters (22nd Infantry Regiment)
- 23 US recruitment options (gear, supports, orders, and character traits)
- 3 US hero recruitment options
- 3 US hero counters (2 units and 1 vehicle)
- 2 US common infantry unit counters
- 4 US common vehicle counters
- 14 US wood tokens
- 2 US dice
- 76 US Action cards
- 1 Turn counter
- 1 Initiative marker
- 1 End marker
- 3 Event markers
- 92 Tokens (Equipment, Suppressed, Destruction, etc.)
Components
Infantry
These counters represent the soldiers and certain infantry units with special equipment such as machine guns, anti-tank weapons, artillery, etc. These counters have two sides that hold all the information you need to use them without having to consult the rules all the time.
The back of a counter often depicts the same unit as the front, with reduced traits (for when the unit has suffered a hit). Sometimes the defense value is higher to reflect the difficulty of hitting reduced numbers, but more often it's lower, due to reduced unit efficiency.
In some cases, such as machine guns, the two sides of a counter have the same number of men in different firing positions.
A counter shows: the division insignia and specific badge; an outline color (yellow for officers, red for heavy weapons, and any dark colour for heroes); its special abilities; the unit name (written in red if the unit has suffered damage); its cost in army points (used in scenarios that build armies by spending army points); its movement value; a hit icon (meaning the unit can take a hit before being eliminated); a combat bonus against infantry; a defense value (against infantry — a yellow defense; a result of 6 or more is needed to cause a hit to this token); a combat bonus against light vehicles (adds 1 to its dice result against units with purple defense); and a combat bonus against heavy vehicles (a unit cannot damage units with a gray defense if this bonus shows a cross).
Recruitment Tile and Recruitment Options
We tried to capture the organization of each army, but obviously, we made a few compromises to avoid bogging down the rules and the game.
The recruitment tile is the nucleus of your army. All your units revolve around it. Each recruitment tile represents the heart of a platoon, or even a single officer.
A recruitment tile can give an extra order star or a special ability, found at the upper-left corner of the tile.
Note: Recruitment tiles have a cost in army points, indicated on the tile.
To this recruitment tile, you add recruitment options. These options are infantry, vehicles and/or additional equipment.
Note: Recruitment options have a cost in army points, indicated on the option selected.
Breaking Point. When a unit is eliminated, place the token below its corresponding recruitment tile or recruitment option tile. When the recruitment tile reaches its breaking point, turn the tile or option over. Your opponent earns the points indicated immediately.
The breaking point of a tile or of a recruitment option is represented by red squares. When the number of units destroyed equals the number of red squares, you have reached the breaking point of the tile.
Note: If a destroyed unit belongs to both a tile and a recruitment option, you must assign the loss to the option.
If the option or tile provided a special bonus, it is lost. Units and recruitment options like equipment, character traits, and orders are not lost when you reach the breaking point of a recruitment tile.
Heroes. Heroes of Normandie would not be what it is without its heroes! Heroes are not recruitment options and therefore do not need to be associated with recruitment tiles. But some cannot be enlisted without the proper recruitment tile.
Light Vehicles
These counters are larger than infantry. They represent vehicles used for transport, reconnaissance, or support. They have two sides, one representing the vehicle in good order, the other representing the wreck of the destroyed vehicle.
Once destroyed, a light vehicle becomes an obstacle acting as a terrain overlay. Light vehicle wrecks can be removed from the terrain during the game, according to certain rules.
Heavy Vehicles
These counters are larger than infantry. They represent tanks and heavily equipped vehicles. They are centerpieces on the battlefield, but beware: They are vulnerable if not supported by infantry.
A heavy vehicle counter shows a primary weapon (red) and its special abilities, a secondary weapon (yellow) and its special abilities, and front/side/back defense values that differ depending on the angle of the shot.
Once destroyed, a heavy vehicle becomes an obstacle acting as a terrain overlay. Heavy vehicle wrecks can be removed from the field during the game, according to certain rules.
Terrain
Terrain represents the battlefield. It is composed of terrain boards which you can arrange to create a large number of different combinations.
Elements printed on them, like groves and forests, have a tactical impact on the game.
Terrain Overlays
These tiles can be arranged on the terrain boards to create different battlefields. These decorative tiles can be buildings, thickets, defensive positions, etc.
Cards
Action cards allow you to spice up the game and make it more dynamic.
Each player has a deck of cards, according to the faction he leads.
Markers
Markers are detailed and explained in their respective chapters.
Setup
Scenarios
Choose a scenario. We recommend you start with the first scenario, because the scenarios progress in complexity.
Select the units as explained in the scenario's "Composition of the Armies" chapter, and set up the terrain as shown in the battle plan.
You can also generate a scenario using the Player Generated Clashes (see Scenario booklet, p.14-15).
You must assemble your forces using a certain number of army points, as determined by you and your opponent.
Cards
Before you start playing, create your deck of cards. Choose at least 40 cards for your deck from the 76 available, or follow the instructions given by the scenario.
You can only use the cards of your faction.
You cannot choose command cards (Artillery or Aviation) if you do not have recruitment options that permit you to do so. These cards do not count against the 40 cards that you must select.
At the beginning of the game, each player draws the first 4 cards from his deck.
Deployment
First, determine initiative (defined by the scenario or any other technique you like). Then, deploy your troops in the zones defined by the scenario. The player with initiative deploys all his troops first.
Deploy infantry units so that the side with their name in white is face-up. If the name is printed in white on both sides, you can choose which side is face-up.
It is not advisable to deploy your vehicles wreck-side-up!
Now, the game can commence....
Victory Conditions
A game plays out over no more than 8 rounds, or to a number of rounds determined by the scenario.
If you reach the scenario's victory condition, or a player no longer has any order tokens to place on units, the game ends at the end of the current round.
(It goes without saying that if a player no longer has any units or orders, he has lost the game!)
To win, you must meet the requirements presented in the scenario.
To win a free scenario, you must earn a certain number of victory points (determined at the outset).
These victory points are earned by controlling objectives (primary or secondary, see Scenario booklet, p.2), and by inflicting damage to your opponent (see Breaking Point).
Army Creation
Once you define the number of army points, it's time to assemble your forces.
Buy Recruitment Tiles
You must first buy as many recruitment tiles as you want, within the limits of your available points.
Everything revolves around these recruitment tiles. You must have at least one recruitment tile to assemble your army on the battlefield.
Note: Do not spend all your points on these tiles. You will need some points left over to flesh out your recruitment options.
Buy Recruitment Options
To purchase a recruitment option, it must be the right size to fit into the opening in the recruitment tile, and the colored bands on each side must correspond to at least one of those surrounding the opening.
Several types of recruitment options are available: support, equipment, character traits, and orders. You can find a more detailed description at the end of this booklet.
Support. These are infantry, artillery, or vehicles.
Equipment. This is specific equipment that can be used by the units on the recruitment tile. Each unit from a recruitment tile has access to any equipment assigned to the same recruitment tile. It is not necessary to assign it to a particular unit.
If an equipment option is assigned to an Officer recruitment tile, then it will be available to all units in your army.
Heroes have access to all equipment present in the army to which they belong.
Take the number of corresponding tokens indicated on the tile and place them on the option tile.
Character Traits. Character traits represent the specialties of certain soldiers or elite troops.
Orders. Orders represent planning and strategy put in place by high command. These are bonuses that benefit your entire army and can only be obtained if you have purchased an Officer tile for your army.
Heroes. Hero options do not require space on a recruitment tile. They can be purchased in addition to all the recruitment options.
Some heroes wear a generic insignia, and can therefore support any recruitment tile of the corresponding army.
Others wear a specific insignia and can be incorporated in your army only if one of your recruitment tiles has the same insignia.
Note: Once you spend all your army points, take the corresponding units, and place the tokens for recruitment options on those options.
Action!
A game round is divided into 3 phases:
- Orders Phase
- Activation Phase
- Supply Phase
Order Phase
During this phase, players alternate placing an Order token of their choice on a owned unit of their choice, until all Order tokens have been placed.
The player with the initiative starts.
One Order token per unit, no more!
Units having thus "received" an order may then act during the Activation Phase.
Note: The loss of an Order, Special Order, and Bluff token is resolved without having to reveal it to the opponent.
Order Tokens. To determine the number of Order tokens (numbered 1 to 10) you are entitled to, count the number of stars on your recruitment tiles (regardless of color), on certain units (generally officers or heroes), and on certain options.
For example, if you have 5 stars on your recruitment tiles, option, and heroes, you take the Order tokens numbered from 1 to 5. Five units will be able to act during the Activation phase.
You can never have more than 10 Order tokens!
When you lose a unit that was providing one or more Order tokens, you must accordingly reduce the number of tokens that you collect at the end of the Supply Phase.
Bluff Tokens. In addition to your Order tokens, you also have a Bluff token you can use to misdirect your opponent. This token, whose back looks just like an Order token, is placed at the same time as your real Orders. A Bluff token does not activate a unit. Its sole purpose is to confuse your opponent by suggesting that the unit could be activated!
Note: This token is considered an Order token, but doesn't prevent a unit's move during the Supply Phase.
Special Order Tokens. Special Orders can be obtained using the High Command action card or the Battle Plan recruitment option.
Note: Remember that because this recruitment option is an order, you must have recruited an Officer to be able to buy it. You can never have more than two special orders.
Special Orders can be played before any other order placed on your units. They can be played as an "Order 0" and thus act before your "Order 1".
They cannot, however, interrupt an activation in progress. If both players want to use a special order at the same time, the player who has initiative goes first.
Activation Phase
The player with initiative starts. First, the player reveals his Order number 1 and activates that unit. The unit can take one of two actions:
- Move/Assault
- Fire
Once the unit has acted, the second player reveals his Order 1 and activates his unit. Continue, following ascending numerical order. Once one player has no more orders to reveal, his opponent activates all remaining units in ascending order.
Leave the Order tokens beside the units, to differentiate those that have been activated during this phase from the others.
Activated Marker. Certain cards, such as Opportunity Fire, activate units who have no Order or who have not yet acted. In this situation, place an Activated marker on the unit in question, when indicated by the card.
An unit that receives such a marker loses any order token that was assigned to it without revealing it. It can no longer perform an action that round (except defending itself during an assault). It also will not be able to move during the Supply Phase.
Movement
Certain terrains and terrain overlays affect movement. They are described in detail in Terrain and Terrain Overlays (see below).
Movement of Infantry Units. When a unit performs a move action, it can travel a number of spaces equal to or less than its Movement value (even 0).
- Diagonal moves are allowed.
- An infantry unit cannot pass through vehicles and enemy infantry.
- Infantry units can pass through friendly infantry units. However, they cannot share the same space at the end of the move.
Zone of Control.
- Each infantry unit exerts a zone of control (ZoC) over the 8 spaces adjacent to it. If one of the spaces is separated from the unit by a No Passage symbol, then it is not part of the unit's ZoC.
- An infantry unit may not move from one square in an enemy unit's ZoC to another square in that enemy unit's ZoC.
The Zone of Control of a unit in a building does not extend outside the building.
Note: ZoC can prevent entering/leaving a building. For more details, see Buildings, below.
Rule changed with the community: It is possible for a vehicle to pass or end its move diagonally even if either of the two spaces on either side are inaccessible.
Movement of Vehicles. Each vehicle is represented by a counter large enough to occupy a little more than one or two spaces.
To move a vehicle occupying two spaces, count the number of spaces from the front of the vehicle. If you want to move backward, count the number of spaces from the back of the vehicle.
During its move, a vehicle can rotate 45°. Vehicles can also rotate while stationary. It costs 1 movement point for each 45°.
If a vehicle ends its move diagonally, it is considered to occupy ONLY two spaces. This might result in some pieces overlapping.
A vehicle is allowed to pass through a space containing an infantry unit (friendly or enemy). If the vehicle ends its move in a space occupied by an infantry unit, displace that unit into an adjacent free space, chosen by its owner. If the infantry unit has no free space to which it can move (buildings, other units, ZoC, forbidden space, leaving the board, etc), or it has 0 movement value, it is immediately eliminated and removed from the game.
Vehicles and Zones of Control. Neither light nor heavy vehicles exert ZoC. Therefore, enemy units can move freely through spaces adjacent to a vehicle. Unlike infantry, vehicles are not affected by ZoC exerted by infantry units.
Assault
Only units with the Assault special ability can engage in melee against an enemy infantry unit or vehicle.
Note: An assault can only be launched from a free space or a space belonging to a friendly vehicle with the Transport special ability (see Special Abilities, below). It must be adjacent to the defender.
The attacker must follow the movement rules explained in the previous chapter, and must have enough movement points to move INTO its target space.
Rule changed with the community: Assault must be announced before the assaulting unit begins moving and must be resolved, whatever happens.
Rule changed with the community: Enemy ZoC doesn't prevent a unit from moving into a space occupied by an enemy to assault it.
To symbolize the assault in progress, place the attacking counter overlapping its target.
In one example given in the rulebook: a German unit A prohibits movement in its ZoC. An American unit enters the ZoC of German units B and C with movement #1. The American unit can lead an assault on German unit C, even if it's moving into the ZoC of German unit B, because this movement is an assault.
Resolution of an Assault. The attacker rolls 2 dice, keeps the higher roll, and adds the combat bonus corresponding to the type of enemy unit (against infantry, light vehicles, or heavy vehicles). He also adds any bonuses available (special ability cards, recruitment options, etc.) and subtracts any penalties.
A cross indicates that assault is not possible against a target of this type without special equipment.
The defender rolls 1 die (or 2 if the unit has the Assault special ability, keeping the higher roll), and adds its corresponding combat bonus, the defense bonus provided by the terrain element it's in (except if the attacker and the defender are in the same defensive position or building), as well as any other bonuses available (special ability, cards, recruitment options, etc.). Then subtract any penalties.
If the defending unit is a heavy vehicle, you must use the secondary weapon (yellow outline) combat bonus.
The player with the higher result wins the assault.
Attacker Wins.
- If the defending unit has the elimination symbol, it is eliminated and the unit is removed from the game.
- If the hit symbol is present on a defending infantry unit, it takes a hit. Turn the counter over.
Note: Besides taking this hit, the infantry unit must immediately retreat into one of the three spaces away from the attacker. This retreat is a movement. If the unit cannot perform it, the unit is eliminated. The unit cannot retreat if it has to move through an enemy ZoC.
If none of these three spaces are accessible, then the defending infantry unit is eliminated and the unit is removed from the game. Once the defender's retreat is complete, the attacking unit must move into the defender's former space, if it's accessible.
- If the defending unit is a light vehicle, it is destroyed. Turn it over to its wreck side. It becomes a terrain overlay.
- If the defending unit is a heavy vehicle, you must determine the damage location (see Damage on Heavy Vehicles, below).
A vehicle never retreats due to losing an assault.
Defender Wins. The attacker takes a hit.
- If the attacking unit has the elimination symbol, it is eliminated. Remove the unit from the game.
- If the hit symbol is present on the attacking unit, it takes a hit. Turn the counter over.
Moreover, the attacking unit is pushed back to the last space it held before the assault. The defender does not move and remains in its space.
Tie. The attacker and the defender remain on their respective spaces from before the assault. No damage is applied.
Rule changed with the community: Assault and Units with Firing Arc (see Firing Arc, below). If a unit is assaulted from a space outside its firing arc, immediately assign it a Suppressed token and resolve the assault.
Firing
During the Activation Phase, a unit that does not move can fire.
In order to fire, make sure the attacking unit has an appropriate combat bonus against the target. If there is an X in the location of the appropriate combat bonus, the unit in question cannot fire on this target. Most infantry units without special equipment cannot target a heavy vehicle.
Vehicles with several weapons can use all of their weapons during the same firing action and can choose a different target for each weapon. The shots are not made simultaneously. Heavy vehicles such as tanks often have at least a cannon and a machine gun.
Note: If the vehicle is moving, verify that the weapons have the Fire on the Move special ability (see Special Abilities, below), which is often the case with machine guns, but not with cannons!
Line of Sight. To fire on an enemy target, there must be a line of sight (LoS), which is to say that there can be no Obstacle blocking the LoS (see Terrain and Terrain Overlays, below).
To verify that the shot is possible, trace a line between the center of the attacking unit space and the center of the target space.
Note: Some terrain and terrain overlays block line of sight, such as buildings. A symbol indicates which ones block LoS.
Note: All infantry units block LoS unless the target or the unit firing is a vehicle. Vehicles block LoS.
Whenever a two-space vehicle targets a unit, it can choose the center of either of its spaces as the starting point of its LoS.
Whenever a two-space vehicle is the target, the attacker may aim at the center of either of the two spaces.
Range. Most weapons in Heroes of Normandie have unlimited range. However, beyond 7 spaces, shots suffer a −2 penalty to their final result.
Note: When counting the number of spaces to your target, use diagonals, and ALWAYS take the shortest path. Count the target unit's space, but do not count the firing unit's space.
Firing Arc. Unless specified, units have a firing arc of 360°. Weapons with a limited firing arc have a graphical representation of it. Units with a limited firing arc must be positioned to have the front of the counter aligned with the edge of the space it occupies.
Shot Resolution. To resolve shots, roll a die. To that result, add the combat bonus corresponding to the type of enemy unit (against infantry, light vehicles, or heavy vehicles). Add any bonuses available (special ability cards, recruitment options, etc.). Subtract any penalties. When the result is greater than or equal to the defense value of the unit in question, the latter takes a hit, as shown below.
- If the target has the elimination symbol, it is eliminated. Remove the unit from the game.
- If the hit symbol is present on a targeted infantry unit, it takes a hit. Turn the counter over.
- If the target unit is a light vehicle, it is destroyed. Turn it over to its wrecked side. It becomes a terrain overlay.
- If the target unit is a heavy vehicle, you must determine the damage location.
Note: If the result is at least double the value of the targeted unit's defense value (plus any bonuses), the targeted unit is immediately eliminated from the game. This rule also applies to heavy vehicles. This is called a kill shot!
Damage on Heavy Vehicles. When a heavy vehicle is hit by a shot, or by losing an assault, the attacker rolls a die to determine where it was hit. Place the Damage marker in the corresponding location on the vehicle.
- 1 — Crew: You can fire with only one weapon each round.
- 2 — Track: The vehicle can no longer move. If it was in motion, it stops immediately.
- 3–4 — Hull: Place two Suppressed markers on the vehicle in addition to the Damage marker. If the vehicle was in motion, it stops immediately.
- 5 — Primary Weapon: The main weapon (red) of the vehicle is destroyed.
- 6+ — Destruction: The vehicle is destroyed. Turn it over to its wrecked side.
If a vehicle receives two Damage markers of the same type, it is destroyed. Turn the vehicle over to its wrecked side.
Heavy vehicles have different defenses, depending on the angle of the shot. Attackers may choose either space to take advantage of a lower defense.
Supply Phase
During this phase, units that have not received an order and have no Activated marker can move (see Movement, above).
Note: A unit that has received a Bluff token can move during this phase, because these tokens are not considered Orders.
A unit moving in the Supply Phase may use certain special abilities (like Ambush and Tripod — see Special Abilities, below).
The Immutable Rule of the Supply Phase: No firing or assault can happen during this phase! The Supply Phase only allows units that have not yet acted to move.
Execution of the Supply Phase
- Resolve all effects linked to the beginning of the Supply Phase in this order: special abilities, action cards, recruitment options, scenario.
- Discard the Bluff tokens placed on each player's units.
- Move any of your units that received neither Order nor Activated markers this round. The player with initiative plays first, and can move some or all of these units. Then his opponent does the same.
- Discard one and only one Suppressed marker per unit.
- Resolve all effects linked to the end of the Supply Phase in this order: special abilities, action cards, recruitment options, scenario.
- Discard as many cards as you wish. Then draw up to four cards in your hand (or more if some bonus permits).
- Check the victory conditions.
- Take the number of Order tokens to which you are entitled. Make sure it equals the number of stars you currently have (especially if you suffered losses). If you no longer have any units or orders, you lose the game!
- Move the initiative marker one notch on the turn counter, and turn it over to determine the new initiative.
Then start a new round!
Action Cards
Action cards must be used during the phases indicated in their description:
- Order Phase
- Activation Phase
- Supply Phase
- Playable Anytime
You can play as many cards as you want during a round, and even during a single action.
Everything you need to know is printed on the card.
Each card has a certain number of copies. You can not incorporate more than this number in your deck.
If the card contradicts a rule, the card overrides the rule (except for the Immutable Rule of the Supply Phase).
Note: If two players want to play cards simultaneously, the player with initiative prevails. Then the second player can decide whether to play his card or play another one.
Don't hesitate to play cards. You will draw new ones at the end of the Supply Phase.
Note: If more than one card is played on the same action, resolve them starting with the last card played. Then go up the order of playing cards until the first card played. If a card has no valid target, its effect does not apply.
Cards bearing a High Command symbol may only be included in your deck if you take the corresponding recruitment options. These cards do not count toward the minimum of 40 cards required to build your deck.
AAA and Aviation Cards. When an Aviation card is played, make an anti-aircraft defense check before applying card effects: your opponent rolls a die. If the result is equal to or higher than the number in the anti-aircraft defense icon, discard the card and do not apply its effects.
For every unit on the board with the Anti-Aircraft Artillery special ability (AAA), add 1 to the result of the die roll.
Cards may also carry a German event, Common event, US event, or Scenario end marker — check the scenario for their effects.
Terrain and Terrain Overlays
The symbols on terrain boards and terrain overlays indicate the effects of different terrain and terrain overlays. These effects are applied to all spaces indicated by the colored contour of the terrain or the entire terrain overlay tile.
Structure. This overlay is a structure. To destroy it, you must inflict the number of demolition points printed in the symbol (see Destruction special ability, below). Once you reach this number, turn the terrain overlay over to its ruin side or remove it from the game.
Units within a structure are suppressed upon the structure's destruction. Each unit in the building receives a Suppressed marker. The player with initiative must redeploy all of his units that were in the structure on the structure's ruins. Once he has finished, his opponent does the same.
When a heavy vehicle drives over a wreck, it inflicts 1 demolition point.
Defense. This element provides a bonus to the defense value of every infantry unit on one of its spaces. The value of this bonus is printed in the symbol.
Obstacles. This element totally blocks LoS or obscures LoS that crosses it. For each space crossed by the Obscured LoS, subtract the value in the symbol from the final dice result. These penalties are cumulative if the Obscured LoS passes through multiple spaces (of one or several elements). The target space does not count.
Note: If the element is situated between two spaces, this penalty does not apply to units in adjacent spaces on either side of the element.
Clear Line of Sight. LoS that crosses no spaces with obstacle symbols.
Obscured Line of Sight. LoS that crosses spaces with obstacle symbols.
Blocked Line of Sight. LoS that crosses a space with the No Passage symbol.
Difficult Passage. When a unit enters this element, it must stop moving immediately. A unit within a Difficult Passage zone can move only one square when it moves. Its movement ends immediately after.
Impassable. No unit can enter this element. (Elements may also be marked as impassable specifically to infantry, light vehicles, and/or heavy vehicles, according to the icon color.)
Impassable to Heavy and Light Vehicles. This element is impassable to heavy and light vehicles.
No Passage. It is impossible to pass between two spaces connected by this symbol. This also blocks LoS.
Opportunity Fire. Only during the Activation Phase, an infantry unit that has not already been activated (by an Order token or by an Activated marker) and is on a terrain element or terrain overlay that has this symbol can fire at any time during the movement of a targeted enemy unit that crosses its Clear or Obscured LoS (after any use of the Fire on the Move Special Ability by the opponent). The firing rules are applied as explained under Firing, above.
If the unit fires, it loses any Order token it had and receives an Activated marker. The targeted unit does not end its movement, even if hit or Suppressed.
Water. This element is forbidden to units with no Amphibious special ability (see Special Abilities, below). Units with this special ability can move normally.
Examples
Thicket. A small group of trees of various sizes.
- Does not hinder movement.
- The entire overlay slightly (not only the visual) obscures LoS.
- Provides a defense bonus to infantry units.
Hedgerow. The Norman hedgerows were a nightmare for the Allies. Each embankment could hide a machine gun nest, artillery, or a squad of soldiers. Vehicles could not traverse them without preparation, and crossing them could be an ordeal even for an infantryman.
- Hedgerow spaces are impassable to light and heavy vehicles.
- Infantry must stop as soon as they enter. If they move within the grove, they must stop moving immediately after one space.
- Groves completely block LoS.
- Infantry units get a defensive bonus if they are positioned in a grove space.
Forests. From the heart to its edge, a forest is always a great place to hide.
- When firing on a unit in a forest, each forest space obscures LoS. The deeper the target is in the woods, the harder it is to hit.
- An infantry unit in a forest space gets a bonus to its defense value.
- Spaces in the heart of a forest are generally impassable to vehicles.
Defensive Positions. Sandbags, foxholes, and more, defensive positions take many forms and styles.
- Some obscure LoS. In this case, the entire layout obscures LoS.
- A unit inside a defensive position benefits from extra protection unless the firing or assaulting unit is also in the position.
- They allow infantry units to perform Opportunity fire during the Activation phase.
- You can throw a grenade inside a defensive position from a space adjacent to it. The blast is contained by the position and all units within the defensive position are hit. Units outside are not affected by the blast. Units inside don't benefit from the position defense bonus.
Buildings
House, farm, barn, or shed, buildings can be of any type. A unit can only enter from a space pointing in with a blue arrow. Ignore half-spaces for movement.
Note: A unit's ZoC on one of these outside spaces prevents another unit from entering or leaving a building.
To fire out of a building, a unit must be in a space bearing marks that indicate an opening. These marks block LoS. To fire on a unit inside a building, that unit must be on a space directly adjacent to an opening.
Rule changed with the community: If two buildings are adjacent, only infantry units can pass between them.
Note: If two buildings are diagonally adjacent, vehicles can pass or stop between them.
A unit inside a building benefits from extra protection unless the firing or assaulting unit is also in the building, or if a grenade is launched into it.
A unit launching a grenade into a building must be in a square adjacent to an opening indicated by red bands and pointed to by arrows.
All units inside a room are affected. They do not benefit from the defense bonus normally provided by the building. The explosion is contained by the walls of the building, and therefore does not affect units in other rooms or outside. You don't need to use the blast template.
A unit with a blast pattern weapon cannot directly target an intersection inside a building. A blast pattern that explodes outside a building can affect the building, but not the units inside directly (see Structure, above).
Note: When throwing a grenade out of a building, the first intersection is situated on the half-space in front of the opening.
Note: Some buildings completely block LoS. In this case, you have to take the visual of the building into account, not the entire overlay.
Recruitment Options
This section contains recruitment options that are not units.
General Rules
- Only units related to the same recruitment tile as the option can use a piece of equipment or benefit from the effects of a character trait.
- A recruitment option put on an Officer Recruitment Tile allows the entire army to benefit from the option.
- Equipment recruitment options must be discarded after use.
- Heroes can access all equipment present in the army they belong to.
- Unless otherwise stated on the counter, equipment that allows a shot (grenades, anti-tank weapons, etc.) is used instead of the unit's shot (see Firing rules, above) and can be combined with Special Abilities such as Fire on the Move. The same unit cannot take both a shot and use equipment that allows a shot.
- Equipment that provides a bonus, such as Ammo, is used as part of the action, but must be announced before rolling the dice. This bonus is added to the unit combat bonus.
Equipment
Additional Shielding. This option gives you 3 extra Additional Shielding. They can be used only by heavy vehicles. Each token gives a +1 bonus to defense.
Note: You must announce its use BEFORE the attacker's die roll. You can use as many as you want in a single attack. Discard each token after use, regardless of success!
Ammo. This option gives you 3 Ammo tokens. Each token gives a +1 bonus on shots against infantry. You cannot use Ammo with explosive weapons. You must announce its use BEFORE your die roll. You can use as many as you want in a single attack. Discard each token after use.
Ammo Belt. This option gives you 3 Ammo Belt tokens. Only units with the Burst special ability can benefit from this equipment. Each token gives a +2 bonus on shots against infantry, or +1 against light vehicles. You can use as many tokens as you want in a single attack, but you must announce their use BEFORE rolling the die. Discard each token after use.
APC Shells. This option gives you 3 APC shell tokens. Armor-piercing shells can be used only by heavy vehicles. Each token gives a +1 bonus against vehicles. You can use only one APC shell per attack, and you must announce its use BEFORE rolling the die. Discard each token after use.
Culling Hedgerow Cutter. This option gives you 2 Passage tokens. During movement of a heavy vehicle, you can traverse a hedgerow. Place a Passage token on the space traversed by the vehicle. Once you no longer have any Passage tokens, the Culling Hedgerow Cutter is destroyed.
Demolition Charge. This option gives you 3 demolition charge tokens. This equipment allows damage to or destruction of structures (see Destruction, below). You must be adjacent to your target at the end of your movement to use it. This movement can be done during the Activation or Supply Phases.
Rule changed with the community: The explosion occurs at the beginning of the Supply Phase and has no area effect. Discard each token after use.
Fuel. This option gives you 3 Fuel tokens. Each token spent increases the speed of a light or heavy vehicle by 1 space for this turn. You cannot use more than one at a time. Discard each token after use.
Gear. This option gives you 3 or 5 tokens of your choice. You must select them from among those provided with the Equipment option (colored stripes must correspond to those surrounding the Gear recruitment option).
Goliath. This option gives you 1 Goliath. Goliaths are units. Deploy your Goliath at the same time as your army. All characteristics of the Goliath are printed on the counter.
The Goliath can be targeted. During its movement, it can enter a space occupied by any enemy unit (infantry or vehicle). You can detonate it at any moment during its movement. Any unit in the same space as the Goliath when it explodes can be damaged. If the target is a heavy vehicle, use its lateral defense value. If the Goliath explodes in a structure, the structure can take damage (see Destruction special ability, below).
If the Goliath explodes, it is destroyed. Remove it from the board.
Grenade. This option gives you 3 Grenade tokens. The combat bonuses for grenades are printed on their respective tokens. You can use a grenade at a maximum distance of 2 intersections. You can launch them over terrain elements, as the distance allows. Place the corresponding blast pattern on the targeted intersection. There is never dispersion. All units and structures present in the blast pattern, even partially, are affected by the shot. Resolve each individually.
You can launch a grenade into a building if you're on the space adjacent to an opening (see Buildings, above).
HE Shells. This option gives you 3 HE shell tokens. HE shells can only be used by a heavy vehicle's primary weapon. Instead of your normal shot, you can place a red blast pattern on an intersection. You must have a Clear LoS. Discard each token after use.
Horn of Plenty. Deploy the Horn of Plenty as a unit with the Scout 3 spaces special ability (see below). It transforms blue blast patterns (see Indirect Fire special ability, below) into green blast patterns for all mortars that are up to 2 spaces from the Horn of Plenty.
Panzerfaust. This option gives you 3 Panzerfaust tokens. The maximum range of a Panzerfaust is 4 spaces. There must be a line of sight between the shooter and the target. Discard each token after use.
Position. This option gives you 1 Position. One unit that has not been activated may, instead of moving during the Supply Phase, place an advanced position on its space. An advanced position cannot be placed in a building, a ruin, a bunker, a water space, or any space inaccessible to an infantry unit.
Rifle Grenade. This option gives you 3 rifle grenade tokens. The combat bonuses for rifle grenades are printed on their respective tokens. A rifle grenade permits you to use a grenade at a maximum distance of 7 intersections. The rifle grenade has the Indirect Fire special ability (see below). All units present (even partially) on one of the 4 spaces under the blast template are affected by the attack. Resolve each individually.
You can launch a grenade into a building if you're on the space adjacent to an opening (see Buildings, above).
Sticky Bomb/Magnetic Mine. This option gives you 3 Magnetic Bomb tokens or 3 Sticky Bomb tokens. If one of your infantry units is adjacent to an enemy vehicle at the end of the infantry's movement, the unit can place a bomb/mine on the vehicle. This movement can be done during the Activation or Supply Phases. If the vehicle moves, it takes the token with it. The bomb/mine explodes at the end of the Supply Phase. This explosion has no area effect. For a heavy vehicle, use the side defense value. You can place several tokens simultaneously. Resolve each individually. Discard each token after use.
The Character Traits
Ace Driver. This character trait permits you to reduce the penalty related to the Fire on the Move special ability by 1 point. Only vehicles can benefit from this option.
Bloodthirsty. A bloodthirsty unit inflicts 2 hits instead of one when it attacks during an assault.
Courageous. Courageous units can remove 2 Suppressed markers instead of one during the Supply Phase.
Ferocious. During an assault, ferocious units drive the defenders back, regardless of who wins combat. Obviously, the attacking unit must not have been destroyed during the attack.
Note: This Character trait cannot be used when assaulting vehicles.
Hardboiled. This character trait gives you 3 Hardboiled tokens. Discard a Hardboiled token to remove a Suppressed marker from one of your units. You can play several Hardboiled tokens at the same time.
Hardened. This character trait gives you an additional Order token. Each turn, you must assign it to one of the recruitment tile units. You cannot possess more than 10 orders.
Heroic. This character trait gives you 3 Heroic tokens. Each token permits you to reactivate a unit you just activated. For the second action, the unit does not need an additional Order. You cannot activate the unit a third time. Special Orders cannot be played between these two activations. Discard each token after use.
Intrepid. Intrepid units always have initiative. If two intrepid units have the same Order number, the player with initiative acts first.
Nazi Basterds. This character trait grants you an additional 30 points to build your army. To compensate, your opponent has a bonus of +1 against your units during assaults.
Sharpshooters. Units with this trait get the −2 penalty for long-range shots beyond 9 squares instead of 7. Sharpshooter units that have the Limited Range special ability (see below) increase this range by 2 spaces.
Tankbuster. This character trait gives infantry a +2 bonus on assault against heavy vehicles (even if the unit has an X against gray defense).
Tricky. This character trait gives you 2 Ruse tokens. These tokens have a concealed face on one side, and an empty face on the other. They are used to deceive the enemy. As long as they have not been identified (see Ambush special ability, below), you can play them like any other unit in your army. You can even assign Order markers to them. Other than moving, they do nothing.
Triggerhappy. This character trait gives you 3 Suppressed tokens. As soon as you fire, you can put one of these Suppressed markers on the target unit. Obviously, the attacking unit must be able to fire on the target.
Veteran. This character trait gives you 3 Veteran tokens. Each token permits you to reroll any dice (one or more) whose results you are not happy with. You must keep the new result. You can use a Veteran token on a roll you just rerolled. Discard each token after use.
Orders
Airstrike. You can add as many Aviation cards to your deck as the number indicated on the option.
Artillery. You can add as many Artillery cards to your deck as the number indicated on the option.
Battle Plan. This option allows you to obtain a Special Order token (see Orders Phase/Special Orders, above) for the entire game. You cannot have more than 2 Special order tokens.
Bluff. This order grants you 1 extra Bluff token.
Concealed. This order grants you two Concealed tokens. These tokens function like the Ambush special ability (see below). During the Supply Phase, you can assign a Concealed token to any infantry unit that meets the activation conditions for ambush (see Ambush special ability). Replace the unit with the Concealed token, and place the unit next to the recruitment tile. Place marker A or B on it, corresponding to the Concealed token. Once the unit is discovered, you can take the marker and use it again in the next Supply Phase.
Directive. This order grants you 1 or 3 Directive tokens of your choice from the 4 available. At the end of the Orders Phase, place the selected token on one of your officers (who has the Special Order ability). All units up to 3 spaces from this officer receive the bonus. You can only place 1 directive per turn.
- Fire at Will! — gives a +1 bonus to firing against infantry units.
- Charge! — gives a +1 bonus to melee attack.
- Double Time! — gives a +2 bonus to movement.
- Hold Your Ground! — gives a +1 bonus to defense for infantry units.
Discard the directive at the end of the Supply Phase.
Guardian. The defense bonus granted by terrain element is increased by 1 point.
Improvisation. You can draw 1 card more than the maximum number allowed, but you must then discard 1.
Infiltration. This order gives the Scout 6 spaces special ability (see below) to all units of the tile in addition to the benefits of the Concealed directive.
Note: The American option can only be assigned to the Miller's Rangers Recruitment tile (Kickstarter exclusive).
Initiative. You can use this order to maintain initiative. When it's time to turn over the initiative marker, during the Supply Phase, announce this order instead, and turn the order to its "used" side to keep initiative. On the following turn, your opponent takes initiative as usual.
MG Nest. At the end of the Supply Phase, you can put the MG nest anywhere on the board except for the enemy's deployment zone.
Planning. This order grants you 1 additional Order token. You cannot have more than 10 Order tokens.
Smoke. This order gives you 3 smoke bomb patterns. To use a smoke bomb, place an Order on it. You can use several smoke bombs by placing an order on each one. When its activation turn comes, you can put the smoke bomb pattern on any intersection on the terrain.
Roll a die to determine dispersal (see Indirect Fire, below). The dispersal of smoke is only 1 space. Once dispersal is determined, place the pattern on its −4 side.
At the end of the Supply Phase, remove any smoke bomb patterns that were already on their −2 side. Then flip any others to the −2 side.
All shots crossing, entering, or leaving a smoke bomb are affected by the penalty mentioned above.
Special Abilities
The Immutable Rule of Special Abilities: You can't turn over a unit more than once per movement through use of special abilities (or of action cards like speed setup).
AAA (Anti-Aircraft Artillery). When an Aviation card is played, add 1 to the AAA roll for each unit of the opposing camp with this special ability.
Ambush. To activate this special ability, you must turn over your unit during a movement, at the beginning or end of the movement. This movement can be null (zero spaces). A unit with this ability can be deployed with whichever side up that you like.
Once concealed, your unit cannot be targeted by shots, and ignores blast pattern.
To spot an ambushed unit, you need a Clear LoS. If the unit is inside a terrain element or a terrain overlay, you also have to be at 2 spaces or fewer from it. Then turn over the counter. This counts as 0 movement that can not be modified by any bonus. Conditions to flip over an ambushed unit counter are checked each space covered by this ambushed unit or by an enemy infantry or light vehicle unit.
A unit can be turned over or spotted only once per movement.
Note: Heavy vehicles cannot identify concealed units. Two concealed units can identify each other simultaneously. Concealed units don't block LoS. Concealed units can be assaulted. Concealed units spotted while moving keep the movement value of the concealed side. Only the owner of an ambushed unit can consult it.
A concealed unit that fires loses the benefits of this special ability, and you must turn the counter over.
Amphibious. This unit can cross areas that have the water icon.
Artillery Spotter. If your artillery spotter has a Clear LoS on the indirect fire blast pattern, you can reduce the dispersal distance by 1 intersection.
Assault. This unit specializes in hand-to-hand combat. It can initiate melee combat and roll 2 dice when attacking or defending. If a value is printed in the symbol, add it to the result of your roll.
Autonomous. This unit does not require an Order marker to act. You can choose to activate it at any time during the Activation Phase. However, it may not interrupt a current activation.
Barrage Order. To order a barrage, you must assign an Order marker to a unit that has this special ability. Moreover, the unit must take no action (neither movement nor firing). All heavy weapons units (red border) with the same name (e.g., .30 cal, mortar), not yet activated, and located within 3 spaces of that unit can all fire at the same time when that Order's turn comes up. Resolve each shot separately. Place an Activated marker on the units that have fired. Remove any Order markers they might have had. The unit with the special ability keeps its Order token, and thus cannot move during the Supply Phase.
Destruction. Units with this special ability can destroy structures. Every time they fire at a structure directly or at a unit within the structure, they roll a number of dice equal to the value indicated in the symbol. For each result equal to or greater than 4, place a Destruction marker on the structure. If the number of markers reaches the value of the structure, it is destroyed. Remove the wreckage from the game or flip over the terrain overlay.
Dual Weapon. When shooting, roll two dice and keep the higher result.
Firing on the Move. This unit can fire while moving. Firing on the Move is made before the exiting of the unit on a space.
Note: The penalty specified in the symbol is subtracted from the unit combat bonus, not from the final result.
Frightening Shot. After missing a shot with no result (no hits, suppression, or localized damage), you can place a Suppressed marker on your target.
Hawkeye. This unit's shots are not subject to long-range fire penalty.
Howitzer. Instead of taking a normal shot, the unit can use the Howitzer special ability. These units must target an intersection. They have no range limit and no range penalty. You must use the blast pattern whose color corresponds to the symbol. You must have a Clear LoS to fire. You cannot fire into a building. Units and structures present in the blast pattern, even partially, are affected by the shot. Resolve each shot individually.
- Units within a building are not affected by an explosion on the outside.
- Concealed units are never affected by blast patterns.
- Blast patterns are not subject to the penalty for long-range fire.
- If a heavy vehicle is hit by a blast pattern, use its side defense value.
Indirect Fire. Instead of taking a normal shot, the unit can use the Indirect Fire special ability. All weapons with this special ability can make Howitzer or Indirect Fire special abilities. These weapons must target an intersection. They have no range limit and no range penalty. You must use the blast pattern whose color corresponds to the icon present on the firing unit.
Indirect Fire is made when the explosive weapon does not have a Clear LoS on the target intersection. Due to not having a Clear LoS, Indirect Fire may scatter from the desired intersection! Refer to dispersal diagrams indicated on the blast pattern, roll a die. On a roll of 1 to 4, the shot scatters a number of intersections determined by the number printed in the symbol, in the direction the number indicates on the template. On a roll of 5 or 6, the shot is successful and does not scatter from the target intersection.
Note: Dispersal rolls are not affected by Suppressed markers.
If you have a Clear LoS, do not roll the die to determine dispersal. Instead, place the blast pattern directly on the targeted intersection.
Note: You cannot fire into a building. You cannot fire from inside a building.
Units and structures present in the blast pattern, even partially, are affected by the shot. Resolve each shot individually.
- Units within a building are not affected by an explosion on the outside.
- Concealed units are never affected by blast patterns.
- Blast patterns are not subject to the penalty for long-range fire.
- If a heavy vehicle is hit by a blast pattern, use its side defense value.
Limited Range. This unit cannot shoot a target located beyond the number of spaces/intersections indicated. If the special ability is printed without the "intersections" variant, it affects its normal shots. If printed with the "intersections" variant, it affects shots that use intersections. In addition, the shot may be indirect.
Machine Gunner. This unit can divide its attack bonus among multiple targets, as long as it allocates at least a +1 bonus to each target (it therefore must perform a roll for each target). The player must announce this before taking his first shot, and can only apply it to units within 2 spaces of each other and of the same type (either infantry, light vehicle, or heavy vehicle). The firing unit must have a Clear or Obscured LoS to each target.
Opportunity Fire. To activate this special ability, you must turn over your unit while moving, at the beginning or end of the movement. This movement can be 0 spaces. Only during the Activation Phase, a unit that has not already been activated (by an Order token or by an Activated marker) and has Opportunity Fire activated can fire at any time during the movement of an enemy unit that crosses its Clear or Obstructed LoS (see Firing rules, above).
If the unit fires, it loses any Order token it had and receives an Activated marker. Do not flip the counter. The targeted unit does not stop its movement, even if it is hit or Suppressed.
A unit with this ability can be deployed whichever side up you like.
Order(s). This special ability provides one or more additional Order tokens. The quantity depends on the number of stars on the symbol. If the unit is hit or eliminated, adjust your number of Order tokens at the end of the next Supply Phase.
Perforating. Add 1 to the die roll when you determine the type of damage inflicted on a heavy vehicle.
Personal Order. The unit provides one additional Order token. However, you must assign an order to each unit that has this special ability each turn.
Positive Waves. When your unit is affected, your opponent must roll 2 dice for the location of the damage and you choose the result.
Scout. A unit that has this special ability can deploy outside the deployment zone a maximum number of spaces equal to the number printed on the icon. It must not be in a space adjacent to an objective (main, secondary, or bonus) or in the area of the objective itself (e.g., if it's a building). A unit with this ability can be deployed on whichever side up you like.
A vehicle with the Transport special ability and wanting to use its Scout special ability can only be loaded with troops that also have the Scout special ability.
Sniper. Instead of taking a normal shot, this unit can use the Sniper special ability. The player rolls a die on the table below. The roll is affected by Suppression and Obstacles. The Sniper special ability can only target infantry units.
- 1: No effect.
- 2–3: Place a Suppressed marker on the target unit.
- 4–5: Inflict a hit on the target unit.
- 6+: Inflict a hit on the target unit, and place a Suppressed marker on it if it has not been eliminated.
Substitute. If a heavy weapons unit (red border) suffers one or more hits, you can assign the hits to a unit that has the Substitute special ability, if it is 2 spaces or closer to the affected unit. This special ability doesn't work if the heavy weapon is killed during an assault.
Suppressive Fire. Instead of taking a normal shot, this unit can perform suppressive fire (apply normal Firing rules, above). Double all bonuses (All of them!) and then roll the die. Calculate the defender's defense value as usual. If the result is equal to or greater than the defense value, the target takes no damage, but instead receives a Suppressed marker. If the result is twice the defense value (or greater), the target receives two Suppressed markers. There is no maximum number of Suppressed markers a unit can receive.
Note: Defending units are not easy to dislodge, but remember that if they receive a Suppressed marker from being fired upon before the assault, they suffer a −2 penalty! You can also use the Machine Gun special ability combined with Suppressive Fire to suppress several targets. Double the combat bonus before splitting it.
Suppressed Marker Penalties. Each marker imposes a −2 penalty ANY TIME the unit rolls a dice. This penalty is not subtracted from the unit combat bonus but from the final result! Each marker also imposes a −2 penalty to the movement value. If this value drops to zero, the unit is immobilized.
Note: A unit that is suppressed while moving (with an Opportunity Fire for example) can finish its movement before applying the Suppression movement penalty.
Rule changed with the community: Suppressed units don't exert ZoC. Enemy units can move freely through spaces adjacent to suppressed units.
Terrifying. When this unit wins an assault, in addition to damage, it places two Suppressed markers on the victim, assuming it was not eliminated during the assault. If it loses the fight, it still puts one Suppressed marker on his opponent.
Transport. The vehicle can carry infantry units. Use the following rule to determine how many units may be transported. Units on a side with the Officer symbol, Heroes, and Officers count as 1. All other units count as 2.
Rule changed with the community: Vehicles cannot carry more than one Gun (an infantry counter large enough to occupy a little more than one space).
During the Activation or Supply Phases, an infantry unit may enter or exit a vehicle at the beginning or the end of the infantry's movement, from or to any adjacent space.
Note: The vehicle is considered a free space when it comes to conducting an assault. It is possible to lead an assault from a vehicle with the Transport special ability, as well as retreat in a vehicle if the Assault is lost, whether the unit is the attacker or defender.
A unit on a vehicle can receive an Order marker. They can therefore exit the vehicle or shoot from the vehicle.
Rule changed with the community: Heavy weapon units (red border) cannot shoot from a vehicle, unless they have the Firing on the Move special ability. The Firing on the Move penalty is not applied.
A unit inside a vehicle cannot be targeted and is not hit by blast patterns.
If the vehicle is destroyed, the troops inside take no damage, but must be redeployed on empty spaces adjacent to the wreck.
Note: Units cannot be redeployed on spaces occupied by other units. They can not be redeployed in a space within an enemy ZoC. The units' owner chooses where to redeploy them.
Note: Units with a Special ability marked with the "unslashed" symbol must be redeployed on their non-activated Special Ability side (unslashed). This counts as 0 movement that can not be modified by any bonus.
Place a Suppressed marker on each unit. Any unit for which there is no available space died in the explosion.
Tripod. To activate this special ability, you must turn over your unit at the beginning or end of the movement. This movement can be 0 spaces. Once turned over, the characteristics of your unit change. A unit with this ability can be deployed whichever side up you wish.
Multiplayers Rules (3–4 Players)
For multiplayer games with 3 players, you need an army box (sold separately). Two army boxes are required for 4 players.
Alliance. When playing multiplayer games, two or more players on the same side form an Alliance. Alliances can be formed between different armies (for example, British and American troops). Alliances share the regular pool of Order Tokens and Action Cards.
Victory Conditions. Use the normal victory conditions for a scenario. The defeat of one player from an Alliance does not end the game, or mean game loss for the Alliance in question.
Army Creation. After defining the number of army points per Alliance, each player must purchase at least one recruitment tile providing one or more units. The number of army points available per player is the number of Army points of the Alliance divided by the number of players in that Alliance. For example, in a 2-vs-1 game with 500 army points per side, the Alliance players purchase armies worth 250 points each while the single player builds an army with 500 points.
Recruitment of a High Command Tile. An Alliance has the option of buying a single High Command recruitment tile (recruitment tiles having only location for orders and no unit).
All players in an Alliance share the total costs of the high command tile and selected options. The shared cost does not need to be equally distributed.
Options on a purchased high command tile can be used by all players of that Alliance.
For recruitment options involving markers or tokens (e.g., Battle Plan or Hidden), use markers corresponding to the armies of the Alliance above. This does not increase the number of markers. The token or marker is not permanently assigned to the option and may be used by either Alliance player if necessary, or following an external effect such as an Action card.
For example, an Alliance of British and Americans acquired the Planning recruitment option. One Order token is awarded to the Alliance, not to each player. Each player places one of their Order tokens on the recruitment option. Each round, the Order token is assigned to one player in the Alliance. The chosen player takes his Order token from the recruitment option and returns it to the recruitment option at the end of the Supply Phase.
Recruitment options related to High Command recruitment tiles must follow the colored bands present on the sides of the opening of the option. For example, there can't be any US recruitment option on a Commonwealth high command recruitment tile, even if a player of the alliance has US units.
Action Cards. Each Alliance prepares a single deck of 50 cards instead of 40. Players belonging to an Alliance must choose which nation's deck to use. One player of the Alliance must belong to this army. If a High Command is recruited, then the deck must be from the same army as the High Command.
Initiative and Order of Play. Place the Initiative marker on the face corresponding to the Alliance which goes first. During game setup and at the beginning of each Orders Phase, players of each Alliance must decide the order in which they will play within the turn.
Deployment. Each player deploys his army based on initiative and order of play within the Alliance. The first player of the Alliance with initiative must deploy troops. Next, the first player from the opposite Alliance deploys. Then the second player of the Alliance with initiative deploys, and so on.
Activation Phase. Players activate their units in the order defined and alternate with the opponent(s). A unit can't assault or fire on an allied unit's spaces.
Movement. Units of a player can pass through squares occupied by infantry units belonging to an allied player, respecting the rules of Movement.
Supply Phase. Players can move all their non-activated units within the defined order.
Action Cards. The number of Action Cards drawn during the Supply Phase is based on the number of players in the Alliance:
- 1 player: 6 cards
- 2 players: 3 cards each
- 3 players: 2 cards each
Allied players can show their Action cards to each other. They can exchange Action cards only during the Supply Phase. Action cards are drawn and assigned for the next round. Allied players can play cards against an opponent (Mine Action card, etc.). They cannot play cards granting a bonus in any form to units belonging to their teammate(s) (Battle Rage, Burst into Action, Panzerfaust, etc.).
Precision Special Ability. A special ability that affects other units (e.g., Barrage Order) can also be applied to Allied units if the Allied player who owns those units agrees. Similarly, any Special Ability that requires the presence or LoS of other units (Substitute, Artillery Spotter, etc.) may be used on an allied unit, with the agreement of the unit's owner.
2-vs-1 and 3-vs-1 games. The number of Order tokens, Special Order tokens, and Bluff tokens is limited respectively to 10, 2, and 2 per Alliance. This means that each Alliance has only one Bluff token (without a suitable recruitment option). The single player follows the same limits as during a normal game.
As appropriate, the single player activates two units alternatively with his opponents. For example, if he has initiative, he activates his Order 1. The first opponent activates his own Order 1. Then the single player activates his Order 2, his second opponent activates his Order 1, and so on.
Glossary
- Unit: infantry, light vehicle, or heavy vehicle counter
- ZoC: Zone of Control
- LoS: Line of Sight
- Blocked LoS: Line of Sight that crosses a space with the No Passage symbol
- Clear LoS: Line of Sight that crosses no spaces with obstacle symbols
- Obscured LoS: Line of Sight that crosses spaces with obstacle symbols
Game Aid — Game Phases
Orders Phase. One star = 1 Order token.
Activation Phase. Movement/Assault or Firing.
Supply Phase. Neither firing nor any assault can happen during this phase!
Suppressed Marker
Each marker imposes a −2 penalty to ALL of a unit's die rolls. Each marker also imposes a −2 penalty to a unit's movement value. If this value drops to 0, the unit is immobilized (not if suppressed during a movement). Suppressed units don't exert a zone of control.
Terrain Quick Reference
- Structures: To destroy a structure, you must inflict the number of demolition points printed within the symbol.
- Defenses: This element provides a bonus to the defense value of each infantry unit on one of its spaces.
- Obstacles: This element totally blocks LoS or interferes with LoS that cross it (Obscured LoS).
- Difficult Passage: Once a unit enters this element, it must stop its movement immediately.
- Water: This element is impassable to units with no Amphibious special ability.
- Impassable: No unit can enter this element.
- Impassable to...: This element is impassable to Infantry, Heavy, or Light vehicles.
- Impassable to... and to...: This element is impassable to unit types corresponding to the icon color.
- No Passage: It is impossible to pass between two spaces connected by this symbol. It also blocks LoS.
- Opportunity Fire: This element gives the Opportunity Fire special ability.
Special Abilities Quick Reference
- AAA: add 1 to the AAA roll for each unit.
- Ambush: Once concealed, your unit cannot be targeted.
- Amphibious: You can cross areas that have the water icon.
- Artillery Spotter: Reduce dispersal distance by 1 interspace.
- Assault: Unit can engage in melee and roll 2 dice when attacking or defending.
- Autonomous: This unit does not require an Order marker to act.
- Barrage Order: You may shoot multiple units of the same type with the same order.
- Destruction: Roll a number of dice equal to the value. On 4+, place a marker.
- Dual Weapon: Fire: Roll two dice and keep the higher result.
- Firing on the Move: The unit can fire while moving.
- Frightening Shot: After missing a shot, place a Suppressed marker on your target.
- Hawkeye: This unit's shots are not subject to the penalty for long-range fire.
- Howitzer: Use a blast pattern.
- Indirect Fire: Use a blast pattern.
- Limited Range: Shots cannot be made beyond the number of spaces/interspaces.
- Machine Gunner: Unit can divide its attack bonus across multiple targets.
- Opportunity Fire: Unit can fire at any time during the movement of an enemy unit.
- Order(s): This special ability provides one or more additional Order tokens.
- Perforating: Add 1 to the die roll when you need to determine damage location.
- Personal Order: The unit provides one additional Order token, but must be assigned one.
- Positive Waves: Your opponent rolls 2 dice for the damage location. You choose which to use.
- Scout: Unit can deploy outside the deployment zone.
- Sniper: 1: No effect. 2–3: Suppressed. 4–5: One hit. 6: One hit + Suppressed.
- Substitute: Assign damage on heavy weapon to this unit (max: 2 spaces).
- Suppressive Fire: Double your combat bonus to suppress your target.
- Terrifying: Assault: 2 Suppressed tokens when victorious, 1 when defeated.
- Transport: The vehicle has the ability to carry infantry units.
Move Sequence
Announce movement → Fire on the Move → Move 0 or 1 spaces → Ambush verification → Opportunity Fire → repeat move sequence.
Shot Resolution
Announce shot type (regular or Suppressive) → Initial attack bonus → Fire on the Move penalty → Equipment bonus → Split attack bonus (if Machine Gunner) → Double attack bonus (if Suppressive Fire) → Roll die (2 dice if Dual Weapon) → Roll result = die roll + modified attack bonus − penalties (Suppressed marker, Range, Obstacle).
- Clear Line of Sight: Line of Sight that crosses no spaces with obstacle symbols.
- Obscured Line of Sight: Line of Sight that crosses spaces with obstacle symbols.
- Blocked Line of Sight: Line of Sight that crosses a space with the No Passage symbol.