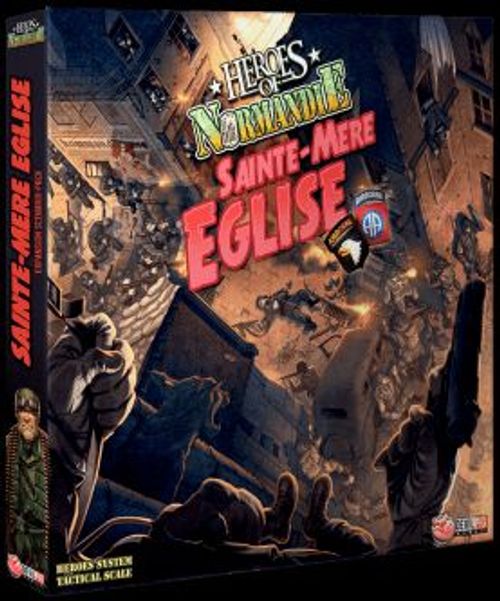
Heroes of Normandie: Sainte-Mere Eglise
Heroes of Normandie: Sainte-Mere Eglise Rulebook
Table of Contents
Table of Contents
- New Rules
- Sainte-Mere-Eglise
- Scenario 1 - Pathfinders
- Scenario 2 - Regroup!
- Scenario 3 - Pigeon Shooting
- Scenario 4 - When You've Gotta Go...
- Scenario 5 - La Fiere, Part One
- Scenario 6 - La Fiere, Part Two
- Campaign Map
New Rules
Night Combat
In the scenarios set at night, the maximum range, the penalty for shooting at long range, the dispersions, and the range for revealing concealed units are modified according to the conditions of the night (Dark Night or Clear Night).
Dark Night
- The maximum range for shots is 7 spaces. Beyond this distance, it is impossible to fire.
- The penalty for long range starts at 5 spaces.
- The maximum range of 7 spaces also applies to the Limited Range special ability if it is greater than 7 spaces.
- In order to discover a unit hidden in a terrain overlay, you must be adjacent to it.
- A unit can hide in open terrain (outside of a terrain overlay) if no enemy is within 2 spaces with a clear LoS on the hidden unit.
- Dispersion from indirect fire is increased by 2 spaces.
- No direct fire with the indirect fire special ability. The range of indirect fire is not affected.
- It is impossible to play Aviation cards.
Clear Night
- The maximum range for shots is 9 spaces. Beyond this distance, it is impossible to fire.
- The penalty for long range starts at 7 spaces.
- The maximum range of 9 spaces also applies to the Limited Range special ability if it is greater than 9.
- In order to discover a unit hidden in a terrain overlay, you must be adjacent to it.
- A unit can hide in open terrain (outside of a terrain overlay) if no enemy is within 4 spaces with a clear LoS on the hidden unit.
- Dispersion from indirect fire is augmented by 1 space.
- It is impossible to play Aviation cards.
The Sun Rises...
In certain scenarios, the darkness of the night can change, and the sun can rise. Special markers permit you to indicate these changes on the turn counter.
Flames and Light Sources
Light sources and flames illuminate all adjacent spaces. Whenever you shoot at units in one of these illuminated spaces, apply the firing rules from the rulebook in the base game. This even applies to discovering hidden units that are situated in the illuminated spaces.
Streetlamps
- Streetlamps are positioned on the interspaces, and illuminate the 4 adjacent spaces.
- A unit with an Order can try to destroy one if it has a line of sight on the interspace with the streetlamp token.
- If a blast pattern covers a streetlamp, it may also be destroyed.
- In either of these two cases, roll a die. Do not add the combat value of the unit. You can add other bonuses though (equipment, Action cards, or others).
- The penalties for long range and obstacles still apply.
- The streetlamp is destroyed on a result of 3 or more.
- In the setup illustrations, streetlamps are indicated by this symbol.
Sleeping Units
Some units start the scenario sleeping. These are indicated by the Sleeping marker.
- Deploy them on the gameboard by placing the Sleeping marker on them.
- Deploy them with their "inactive" side showing, if they have one.
- They can neither receive Order tokens nor Activated markers, nor can they be moved during the Supply Phase.
- Sleeping units cannot benefit from the effects of an Action card.
- A sleeping unit cannot be targeted by a shot unless the enemy unit is within 2 spaces of the sleeping unit.
- If the sleeping unit is in a building, it cannot be targeted by a shot unless the enemy unit is adjacent to the sleeping unit. In any case, a sleeping unit is obviously still affected by blast patterns.
- A sleeping unit that is attacked as part of an Assault is automatically eliminated.
- When shot, sleeping units suffer damage normally.
- A unit sleeping outside (not in a building) wakes up as soon as a shot or explosion rings anywhere on the terrain.
- A unit sleeping in a building wakes up whenever:
- A shot is taken either from a space inside the same building or from a space adjacent to the building.
- The Destruction ability is used in or a blast pattern overlaps either the same building, or a space within 5 spaces of the building.
- An Assault takes place in the same building.
- A unit with an Order can wake a sleeping unit if they are adjacent at the end of its movement.
- Once awake, the unit loses its Sleeping marker, but immediately receives a Suppressed marker. It loses the Suppressed marker at the end of the Supply Phase of the current turn, or if an Action card or a special ability removes it.
Holey, Holey, Holey
When a unit with the Destruction special ability fires at a building or a unit inside a building, it will make a hole in the building.
- If the shot is aimed at a unit, the hole will be made in the wall in front of it (A).
- If the shot is aimed at the building itself, the hole will be made in the targeted space (B or C).
- If the point of impact is a corner, the player must choose one of the two walls that meet at the point of impact (C or D).
Roll the number of dice indicated in the Destruction symbol, and apply the destruction rule as explained in the rulebook.
- If you roll one 6 on the D6s you may place a Hole marker, showing its 1 destruction point side, instead of the usual Destruction marker.
- Infantry units can enter and leave the building by passing through the hole in the wall; however, they must end their movement as soon as they are past the hole.
- If a Hole marker is already present, you may turn it to its 2 demolition points side.
- If you roll two or more 6s on the D6s you may spend two of the 6s to place a Hole marker, showing its 2 destruction point side, instead of the usual Destruction marker.
- If a Hole marker is already present, you may turn it to its 2 demolition points side.
- Infantry units can enter and leave the building by passing through the hole in the wall. They do not have to end their movement once through the hole, and can therefore continue their movement.
- If the point of impact is a corner, you can either choose one of the two walls, and place a 2-point Hole marker there; or place one 1-point Hole marker on each of the two walls affected by the blast pattern.
- Hole markers count toward the number of demolition points necessary to destroy the building.
Holes and Blast Patterns
- If the shot uses a blast pattern, and the blast pattern covers only one wall, the point of impact is the wall under the blast pattern (A).
- If the blast pattern covers two walls of the same building (B), roll the number of dice indicated in the Destruction symbol on the blast pattern.
- If you roll only one 6, choose one of the two walls (B), and place the Hole marker on it showing its 1 demolition point side.
- If you roll at least two 6s, you can either choose one of the two walls (B), and place the Hole marker on it showing its 2 demolition point side; or place one Hole marker (showing its 1 demolition point side) on each of the two walls affected by the blast pattern (B).
- If the blast pattern covers two buildings (or more), roll the dice for each building, and apply the rules above (C and B).
3 Rooms, Kitchen, Bath...
An explosion (grenade or other) that occurs in a room of a multi-room building is contained by the walls bounding the room. The walls are indicated by red markings.
Large Buildings
These buildings cannot be destroyed, but you can make holes in the walls in order to create openings.
- When you use a grenade in a large building, it does not affect all the spaces of the building. You must target an interspace and place the blast pattern.
- When the grenade is launched into the building from outside (from one of the spaces indicated by the arrows), the maximum distance is 1 interspace.
- When the grenade is launched into the building from within the building, the maximum distance is 2 interspaces.
- A blast pattern, or a grenade placed inside a building cannot make holes in the walls.
- In order to shoot through a hole, the shooter or the target have to be adjacent to the Hole marker.
New Special Abilities
- Charge: When this unit launches an assault, it is allowed one free attack before the assault. Move the unit into contact with its target, then resolve the attack as for a Fire Action. The target benefits from any defense bonus granted by the terrain. If the target survives, resolve the assault. If the target is eliminated, the unit must finish its movement in the space that the target occupied. The unit can take an additional Fire Action by using an action card, as well.
- Urban Combatant: The unit can enter or leave a building by any opening (door or window) indicated by a blue or white arrow. It cannot enter bunkers in this fashion.
- Demolition: This special ability permits you to make holes in the walls of buildings on a 5 or 6 (instead of only 6).
- Inspiration: If this unit has not been activated (with an Order or an Activated marker), it can remove a Suppressed marker at any time from another infantry unit within 3 spaces of it. The unit with the Inspiration special ability then receives an Activated marker.
- Munitions Carrier: This unit gives a +1 bonus to all shots (except shots using blast patterns) of friendly infantry units in adjacent spaces. The unit itself does not get the bonus.
New Equipment
Camo
This option gives you 3 Camo tokens. Discard one Camo token to gain a +1 bonus to an infantry unit's defense value. You can use as many Camo tokens as you want in a single attack, but you must announce how many BEFORE your opponent rolls the die. This option will not protect a unit from a blast pattern.
Cricket Lore
This option gives you 3 Cricket Lore tokens. If a unit fires on an enemy unit, you can discard a Cricket Lore token to add the combat value (corresponding to the target's defense type) of a friendly unit within 3 spaces of the firing unit, to the die roll. This friendly unit must have a line of sight on the target and cannot have acted already this turn (with an Order or an Activated marker). Place an Activated marker on it.
- You can spend several Cricket Lore markers in a single shot to add the combat values of several units. Each one must comply with the rules above.
- Place an Activated marker on each one.
More New Equipment
Glider (Planeur)
This option gives you 1 or 2 Glider tokens. Each glider has the ability to transport (see Transport Special Ability in the rulebook from the base game).
- A vehicle that occupies a single space uses all of the transport points of a glider.
- Vehicles that occupy two spaces cannot be transported by gliders (with the exception of the English Tank Tetrarch Mk VII, which uses all of the transport points of a glider).
- During the Deployment Phase, you can place your Glider tokens anywhere around the gameboard. Place each one facing a space accessible to the units it is transporting. Place the units it's carrying on top of it (without exceeding its transport value).
- If this is Equipment (attributed to a recruitment tile), the units must also be part of the recruitment tile to which the Glider option is attributed.
- These units can be selected from among all of your units if the Glider option is attributed to a command tile.
- These units will be able to enter the battlefield at the space at which the arrow points, with an Order token or during a Supply Phase.
- The units in the glider cannot fire until they have entered the game.
- The Order(s) special ability of officers still apply even if they are inside the Glider.
- If the space where the units are supposed to exit the Glider is occupied by an enemy unit, and no units in play can free up the space, you can either:
- Give an Order token to a unit in the Glider and carry out an assault. If the assault is a failure, the attacking unit withdraws back into the Glider (if it survived).
- or Drop a vehicle from the Glider to park in the occupied space in order to drive out the enemy unit.
- If no unit in the Glider can mount an assault, and there is no vehicle in the Glider, the units in the Glider are stuck as long as that space is occupied.
Hawkins Mines
This option gives you 3 Hawkins Mines markers. If one of your infantry units is adjacent to an enemy vehicle or a building at the end of its movement, it can place 1 marker on the vehicle/building. This movement must be during the Activation Phase. If the vehicle moves, it takes the marker with it.
- This explosion does not have an area effect.
- With several units, it is possible to place more than 1 marker on the same vehicle or building.
- At the start of the Supply Phase, the mines explode. If there are several, add their combat values or their destruction values, then make a single die roll. Remove it and discard it.
- If it is a heavy vehicle, use its lateral defense value.
Knife
This option gives you 3 Knife markers. Discard a Knife marker to add a +2 bonus on your result during an assault. You can use as many Knife markers as you want during a single attack, but you must announce how many BEFORE rolling the die. Discard the marker after use.
New Character Traits
Dropped (Parachuted)
With this option, either at the moment of deployment or when the reinforcements arrive (depending on the scenario), you can parachute the infantry units from the recruitment tile to which this option is attached. You must parachute ALL the units from this recruitment tile. You cannot attribute light or heavy vehicles or cannons to this recruitment tile.
- For each unit, choose an interspace anywhere on the battlefield. Place a blast pattern on the interspace so it points at the diagonals, then roll the die for dispersion.
- In the event of dispersion (any result other than 5 or 6), the unit lands in the space indicated by the die roll. This dispersion is unaffected by Night modifiers.
- On a roll of 5 or 6, choose in which of the four spaces the unit lands.
- If the unit is deployed with an Order token during the Order Phase, it receives a Suppressed marker and can act.
- If the unit is deployed during the Supply Phase, it does not receive a Suppressed marker, but cannot act before the following turn.
- A unit with the Ambush special ability can be placed with its "hidden" side face-up.
- A unit with a special ability requiring activation (Tripod, Medic, Opportunity Fire...) must be placed with its "inactive" side face-up.
- The unit is eliminated if it leaves the gameboard, or lands on a Structure (building, bunker...), a terrain overlay that is normally forbidden (e.g. a Water space without having the Amphibious special ability), or an enemy unit.
- If the unit lands on a space containing any other terrain element than those listed above, it receives a second Suppressed marker.
- If the unit lands on a friendly unit, put it an adjacent space of your choice. Both units receive a Suppressed marker.
Carbine M1
The page carries a Carbine M1 illustration headed "Carbine M1" with no rules text of its own; no rules are transcribed for it.
Sprinter
This option gives you 3 Sprint markers. At the start of its movement, a unit can spend one or more Sprint markers. For each marker spent, it adds 1 to its movement value. Moreover, it ignores blocking terrain.
Walking Fire
This option gives you 3 Walking Fire markers. A unit can spend a Walking Fire marker to use the Firing on the Move special ability with a -1 penalty. A unit that already has this special ability with a -2 penalty can also use a Walking Fire marker to improve its special ability. Discard the marker after use.
Sainte-Mere-Eglise
Each scenario can be played independently or one after the other in order to compose a mini-campaign. If you go with the campaign, apply the effects of the different victory conditions; otherwise, ignore them.
Scenario 1 - Pathfinders
You need to mark the drop zones in order to assure that the Grand Operation plays out optimally. Just a handful of cream-of-the-crop airborne troops will be sent before the air wave. The more markers that are placed precisely, the more efficient the drops will be.
1- Battlefield Setup and Deployment
The battlefield is built from six tiles, as shown in the printed diagram: C2-A (with the US deployment zone), SM5-A, C3-A, C1-B, SM6-B and SM4-A (with the German deployment zone). The diagram also shows the printed objective markers on the tiles.
2- Recruitment of the Armies
US (the printed star marker with X4 sits above the tile):
- Pathfinders Squad (80)
- Engineers Squad (90)
- Signalers (20)
- Camo (10, X3)
- Grenade (5, X3)
- Hawkins Mines (15, X3)
German (Panzergrenadiere, I. Battalion, PzGr Lehr Rgt 901; tile with officer star):
- Assault Group, with Fire Group and MG 42 (55)
- Puma (40)
- Ob Hauser card, with Fire Group and Recon Group (officer star)
- Grenade (5, X3)
- Panzergrenadiere, with Recon Group and Fire Group (45)
- Tile total: 65
3- Preparation
Without looking at them, place 2 Bonus tactic markers.
Remove the following cards from both decks: Weak Point, Precision, Ram, Surprise!, Repairs, all the Artillery and Aviation cards. Also remove the German card Booby Trap. Also remove the American cards Don't Stop!, Hit and Run, It Bounced Right Off It.
The American player has initiative. Place the corresponding marker on space 1 of the turn counter.
The players deploy in their respective deployment zones. The German player deploys first. The American player distributes the Halifane Lights however he likes among his troops. The Signalers unit carries the Eureka Ground Radar.
Each player draws 4 cards.
4- Playing the Game
This game lasts 6 turns. The combat takes place on a dark night.
The American player must place and activate at least two of the three Halifane Lights on the secondary objectives, then send a coded message with the Eureka Ground Radar.
- In order to place a Halifane Light, simply stop on a secondary objective space.
- In order to activate a Halifane Light, you must have a unit with the Engineer special ability on the same space as the Halifane Light. The unit must activate the light either by using an order or during the Supply Phase, and cannot fire or move. Flip the Halifane Light to its activated side.
- A hidden unit that activates a Halifane Light does not reveal itself.
- If a unit carrying a Halifane Light or the Eureka Ground Radar is eliminated, it leaves the token on its space. In order to pick it up, simply stop on it.
The game ends if, at the end of a Supply Phase, the Signalers unit that carries the Eureka Ground Radar is in the primary objective space when at least two Halifane Lights have been activated.
5- End of the Game and Victory
American victory: The American player wins the game if he activates the Eureka Ground Radar before the end of turn 6.
Sainte-Mere-Eglise: In Scenario 2, the American player will be able to place the Drop Zones on the blue locations (and not on the red).
German victory: The German player wins the game if the American player has not managed to activate the Eureka Ground Radar before the end of turn 6.
Sainte-Mere-Eglise: In Scenario 2, the American player must place the Drop Zones on the red locations (and not on the blue).
Scenario 2 - Regroup!
The parachuting has begun and it has not gone so great. The troops are scattered across the Norman countryside. The units now have to regroup in order to march on their objectives.
1- Battlefield Setup and Deployment
The battlefield is built from six tiles, as shown in the printed diagram: C5-B, SM5-A, C3-A, C1-B, SM6-A and C2-A (with the German deployment zone). The diagram shows Drop Zones 1 to 6 in blue and Drop Zones 1 to 6 in red; the red zone numbered 5-6 sits on SM5-A.
2- Recruitment of the Armies
US Paratroopers (101st Inf Div, 502nd Inf Reg):
- Pathfinders Squad (60)
- Grenade (5, X3)
- Lieutenant Fred O. Brennan (star marker), with Recon Team, Fire Team, BAR Team and 30 cal (105)
- Sprinter (5, X3)
- Paratroopers (60)
German Panzergrenadiere (I. Battalion, PzGr Lehr Rgt 901):
- Panzerschreck Group, with Fire Group, MG 42 and Panzerschreck (60)
- A shield-with-"L" emblem (Lehr), as printed
- Ob Hauser (star marker), with Fire Group and Recon Group, MG 42 (65 total)
- Grenade (5, X3)
- Panzergrenadiere, with Recon Group and Fire Group, MG 42 (45)
3- Preparation
Without looking at them, place 2 Bonus tactic markers.
Remove the following cards from both decks: Weak Point, Precision, Panzerfaust, Bogged Down, It Bounced Right Off It, Hit and Run, Ram, Don't Stop!, Repairs, Surprise!, all the Artillery and Aviation cards. Also remove the German cards Booby Trap and Return to Sender.
The German player deploys first in his deployment zone.
The American player has initiative. Place the corresponding marker on space 1 of the turn counter.
Each player draws 4 cards.
4- Playing the Game
This game lasts 6 turns. The combat takes place on a dark night.
The American player must get as many troops as possible off the board through the spaces marked with a green arrow.
Sainte-Mere-Eglise: Depending on the outcome of Scenario 1, you will use either the blue Drop Zones or the red ones. Outside the campaign, use the red Drop Zones.
Before the Order Phase of the first turn, the American player chooses 6 units. He rolls one die for each of them; the result indicates at which Drop Zone the unit lands. For each one, apply the rules of the Dropped option; however, they do not get the Suppressed marker.
If a unit must land in the pond, it is not eliminated, but will instead be deployed in the following Supply Phase.
The American player will be able to bring the rest of his units into play in the Supply Phase of the first turn.
If Lieutenant Fred Brennan is not yet or is no longer on the battlefield, the American player does not get the two extra Orders he provides.
5- End of the Game and Victory
American victory: The American player wins the game if he gets 6 units off the board before the end of turn 6.
Sainte-Mere-Eglise: In Scenario 5, the American player will be able to bring his reinforcements into play.
German victory: The German player wins the game if the American player has gotten fewer than 6 units off the board at the end of turn 6.
Sainte-Mere-Eglise: In Scenario 5, the American player will not be able to bring his reinforcements into play.
Scenario 3 - Pigeon Shooting
While the scattered American paratroopers attempt to regroup, some less lucky ones were dropped directly into Saint-Mere-Eglise. A burning house lights up the civilians trying to put out the flames under the German soldiers' watch. Quick! The Americans must gather in the church in order to escape a massacre.
1- Battlefield Setup and Deployment
The battlefield is built from six tiles, as shown in the printed diagram: SM1-A (the church, with Drop Zone 1), SM3-A (with a German deployment zone and Drop Zone 5), SM6-B (Drop Zone 2), SM2-A (with a second German deployment zone and Drop Zone 3), SM4-A (Drop Zone 6, with a tile labelled "HoN") and C4-B (Drop Zone 4, with the La Fiere grange building).
2- Recruitment of the Armies
US Paratroopers (82nd Inf Div, 508th Inf Reg):
- Command tile (airborne insignia, star marker)
- Intel. Norman McVicar (star), with Recon Team, Fire Team, Bazooka Team and BAR Team (110)
- Grenade (5, X3)
- Paratroopers, with Recon Team and Fire Team (60)
US Paratroopers (101st Inf Div, 502nd Inf Reg):
- Pathfinders Squad (60)
- Walking Fire (10, X3)
- 1st Lt. Fred O. Brennan (star), with Recon Team, Fire Team, BAR Team and .30 cal (105)
- Knife (15, X3)
- Paratroopers, with Recon Team and Fire Team (60)
Hero: Arthur "Dutch" Schultz (30)
German Panzergrenadiere (I. Battalion, PzGr Lehr Rgt 901):
- Command tile (shield with "L")
- Ammo (10, X3)
- Ob. Hauser (star), with Recon Group, Fire Group, MG 42 and Fire Group (65)
- Grenade (5, X3)
- Assault Group, with Fire Group and MG 42 (55)
German Panzergrenadiere (I. Battalion, PzGr Lehr Rgt 902):
- Panzergrenadiere, with Recon Group, Fire Group and MG 42 (45)
- Zündapp (25)
- Oblt. Helfer (star), with Recon Group and Fire Group (70)
- Grenade (5, X3)
- Mechanisierte Sd.Kfz. 251/1 (60, X2)
Feldkommando (Major Hans Gruber):
- Bluff (5, +1)
- Veteran (15, X3)
- Command tile (shield with "L"), printed with a "200+" label and a total of 30
Hero: Reino Hamer, "The Wall" (40)
3- Preparation
Without looking at it, place 1 Bonus tactic marker.
Place the house in flames.
Remove the following cards from both decks: Weak Point, Precision, Ram, Repairs, all the Artillery and Aviation cards. Also remove the American cards Don't Stop, Hit and Run, It Bounced Right Off It.
The German player deploys first in his deployment zone. He cannot deploy units on the church tile, not even by using the Scout special ability.
The American player has initiative. Place the corresponding marker on space 1 of the turn counter.
Each player draws 4 cards.
4- Playing the Game
This game lasts 6 turns. The combat takes place on a dark night.
The German player must eliminate as many American units as possible. The American player must finish the game with at least 3 units in the church.
Before the Order Phase of the first turn, the American player chooses 6 units. He rolls one die for each of them; the result indicates at which Drop Zone the unit lands. For each one, apply the rules of the Dropped option; however, they do not get the Suppressed marker.
Then, at the end of each Supply Phase, the American player must try to bring 6 units into play in the same manner, until he has no more. Units that parachute during a Supply Phase do not receive a Suppressed marker, and cannot act until the following turn.
On the first turn, the American player has 4 Order tokens. He adds one at the start of the second turn, then another at the start of the third turn. So, by the end, he has 6 Order tokens.
Obviously, if you lose an officer, you lose the corresponding Order tokens.
The Spire
In order to enter the spire, you must go through the church space with the stairs symbol. Take the unit and place it on the stairs space of the spire terrain overlay. It must stop its movement in this space whether it is ascending or descending the stairs.
- A unit on the stairs space can fire on a unit in the space of the church with a stairs symbol, and vice versa.
- A unit on the stairs space can launch a grenade onto an interspace adjacent to the church space with a stairs symbol; however, the opposite is impossible.
- A unit on the stairs space cannot fire or launch grenades at a unit in the spire.
- A unit in the spire can launch a grenade or fire at a unit in the stairs space, but cannot see units in the church.
- The LoS of a unit in the spire is measured from the interspace in the church that is indicated with a red mark.
The spire space is a dominant position.
- A unit in a dominant position can fire on units outside the dominant position, respecting the shooting rules from the rulebook in the base game.
- A unit in a dominant position is less hampered by obstacles that block or obstruct line of sight. Whenever the LoS of a unit in a dominant position crosses a terrain element with one of the following symbols (printed on the page as an X, a 2 and a -1 icon), or a vehicle, only LoS to the space immediately behind the obstacle is affected. The spaces beyond that are not.
- Infantry units never block LoS for a unit in a dominant position.
- When a unit can be targeted by a unit in the spire, the opposite is also true: The outside unit can target the spire or the unit inside it.
5- End of the Game and Victory
American victory: The American player wins the game if the amount of American units eliminated by the German player is less than twice the amount of American units present in the church at the end of turn 6.
For example: If there are 6 American units present in the church and 11 American units were eliminated, the American player wins.
Sainte-Mere-Eglise: In Scenario 4, the sleeping German units are considered to be awake, and the American player can neither deploy his Sharpshooters in the church spire, nor his pathfinders in the buildings of the village.
German victory: The German player wins the game if he eliminates at least twice as many units as the American player gets into the church.
For example: If there are 6 American units present in the church and at least 12 American units were eliminated, the German player wins.
Sainte-Mere-Eglise: In Scenario 4, the sleeping German units are sleeping soundly, and the American player will be able to deploy his Sharpshooters in the church spire, and his pathfinders in the buildings of the village.
Scenario 4 - When You've Gotta Go...
Sainte-Mere-Eglise must fall now. Lieutenant-Colonel Vandy has managed to regroup enough soldiers to launch the assault on the town. He counts on possible reinforcements and on an unknown number of soldiers who had found refuge in the town.
1- Battlefield Setup and Deployment
The battlefield is built from nine tiles, as shown in the printed diagram: SM2-A, SM1-A, C5-B, SM4-A, SM3-A, C2-B, C4-B (with the La Fiere grange building), SM6-B and SM5-A. The German deployment zone is marked on the central tiles, at the top of the map. Several buildings are marked "HoN" as printed.
2- Recruitment of the Armies
US Paratroopers (82nd Inf Div, 505th Inf Reg), tile #1:
- Heavy Weapons Squad (55)
- 1st Lt. John J. "Red Dog" Dolan (star), with Fire Team, .30 cal and Bazooka (85)
- Airborne command tile (insignia)
- Rifle Grenade (10, X3)
US Paratroopers (82nd Inf Div, 508th Inf Reg):
- Paratroopers (60)
- Grenade (5, X3)
- Intel. Norman McVicar (star), with Recon Team, Fire Team, Bazooka and BAR Team (110)
- Hawkins Mines (15, X3)
- .30 Cal Squad (60)
US Field Command (Lt. Col. Benjamin Hayes "Vandy" Vandervoort):
- Airborne command tile (insignia)
- Walking Fire (10, X3)
- Ammo (10, X3)
- Arthur "Dutch" Schultz, "Not the Gangster" (hero, 30)
- Field Command total: 20 (printed "200+" label as shown)
German Panzergrenadiere (I. Battalion, PzGr Lehr Rgt 901):
- Panzergrenadiere, with Recon Group, Fire Group and MG 42 (45)
- Command tile (shield with "L")
- Ob Hauser (star), with Recon Group, Fire Group, MG 42 and Fire Group (65)
- Grenade (5, X3)
- Assault Group, with Fire Group and MG 42 (55)
German Panzergrenadiere (I. Battalion, PzGr Lehr Rgt 902):
- Two command tiles (shield with "L")
- Oblt. Helfer (star), with Recon Group, Fire Group and Fire Group, and Recon Group (70)
- Grenade (5, X3)
- Panzergrenadiere, with Recon Group, Fire Group and MG 42 (45)
German Feldkommando (Major Hans Gruber):
- Bluff (5, +1)
- Veteran (15, X3)
- Panzer-II card, titled "Panzer-II Lunchs" as printed (50)
- Feldkommando total: 30 (printed "200+" label as shown)
Hero: Reino Hamer, "The Wall" (40)
Sainte-Mere-Eglise: Troops that infiltrated (Scenario 3):
- Pathfinders Squad (80), placed in the empty buildings
- Sharpshooters (15), placed in the spire
3- Preparation
Without looking at them, place 2 Bonus tactic markers.
Remove the following cards from the American deck: Repairs, Ram, Precision, all the Artillery and Aviation cards.
Remove the following cards from the German deck: Weak Point, Precision, all the Artillery and Aviation cards.
The German player deploys first in his deployment zone. He can only deploy units inside buildings, with the exception of the sleeping units. He chooses 5 of his units and places them under Sleeping markers. He cannot deploy units in the church.
Sainte-Mere-Eglise: Depending on the results of Scenario 3, the American player can deploy the Pathfinders Squad in the empty buildings (with neither an objective nor an enemy unit) and the Sharpshooters in the spire.
The American player has initiative. Place the corresponding marker on space 1 of the turn counter.
Each player draws 4 cards.
4- Playing the Game
This game lasts 8 turns. The combat takes place on a dark night.
The American player must control the primary objective and two of the three secondary objectives before the end of turn 8.
The American player will bring his units into play through the spaces indicated by the green arrows. They can enter play either by using an Order, or during a Supply Phase. He starts the game with all of his Orders available.
Turn 4: The sky clears; use the Clear Night rules.
5- End of the Game and Victory
American victory: The American player wins the game if he controls the primary objective and at least 2 secondary objectives before the end of turn 8.
Sainte-Mere-Eglise: In Scenario 5, the American player can use the deployment zone instead of having to bring his units in through the spaces marked with a yellow arrow.
German victory: The German player wins the game if the American player does not control the objectives before the end of turn 8.
Sainte-Mere-Eglise: In Scenario 5, the American player will not be able to use the deployment zone, and will have to bring his units into play through the spaces marked with a yellow arrow.
Scenario 5 - La Fiere, Part One
Sainte-Mere-Eglise has been captured. Now the outskirts of town must be secured, particularly the road leading to the river Merderay that crosses the flood zones. For that, we will need to take over La Fiere, the manor overlooking the bridge. From one side of the river, the men of the 82nd division are rushing in hopes that the scattered 101st who were signaled to be on the other side will show up.
1- Battlefield Setup and Deployment
The battlefield is built from nine tiles, as shown in the printed diagram: SM2-B, SM5-B, SM1-B, SM4-B, SM3-B, C1-B, C2-A, C4-B and SM6-A. The diagram marks the La Fiere grange (on SM2-B), La Fiere 01 and La Fiere (on SM4-B and C2-A), the houses SM-4 house 1 and SM 3 house 2, and several buildings marked "HoN" as printed. The German deployment zone is on SM3-B; the US deployment zone is along the bottom edge (SAINTE MERE EGLISE). A printed "Turn 3" marker sits on SM5-B.
2- Recruitment of the Armies
Group #1:
- US Paratroopers (82nd Inf Div, 508th Inf Reg): .30 Cal Squad (60), Grenade (5, X3), Intel. Norman McVicar (star), with Recon Team, Fire Team, Bazooka and BAR Team (110), Walking Fire (10, X3), Paratroopers (60)
- Field Command, Lt. Col. Benjamin Hayes "Vandy" Vandervoort (star, airborne command tile): Ammo (10, X3), Improvisation (20, +1/-1 card); Field Command total 20 (printed "200+" label as shown)
- Hero: Arthur "Dutch" Schultz, "Not the Gangster" (30)
- German Panzergrenadiere (I. Battalion, PzGr Lehr Rgt 901): two command tiles (shield with "L"); Ob Hauser (star), with Recon Group, Fire Group and MG 42 (65); Grenade (5, X3); Panzergrenadiere, with Recon Group, Fire Group and MG 42 (45)
Group #2:
- US Paratroopers (101st Inf Div, 502nd Inf Reg): two airborne command tiles; Grenade (5, X3); 1st Lt. Fred O. Brennan (star), with Recon Team, Fire Team, BAR Team and .30 cal (105); Paratroopers (60)
- German Panzergrenadiere (I. Battalion, PzGr Lehr Rgt 902): two command tiles (shield with "L"); Oblt. Helfer (star), with Recon Group, Fire Group and Fire Group (70); Grenade (5, X3); Panzergrenadiere, with Recon Group, Fire Group and MG 42 (45)
- German Feldkommando (Major Hans Gruber): MG Nest (25); Concealed (10, marked A and B); Gruber (star), command tile (30); printed "200+" label as shown
Heroes: Reino Hamer, "The Wall" (40); Ludwig, Scharfschutze (25)
Sainte-Mere-Eglise: Reinforcements (Scenario 2):
- Engineers Squad (90)
- 60mm Mortar (20)
A blank tile marked X1 is printed beside the German heroes; it carries no printed name.
3- Preparation
Without looking at them, place 2 Bonus tactic markers.
Remove the following cards from both decks: Weak Point, Precision, Ram, Surprise!, Repairs, Don't Stop!, Hit and Run, It Bounced Right Off It, all the Artillery and Aviation cards.
The German player deploys first in his deployment zone.
Sainte-Mere-Eglise: If the American player won Scenario 4, he can deploy the units of Group 1 in the deployment zone instead of having to bring them into play through the edge of the board. Outside the campaign, the American player ignores the deployment zone.
The American player has initiative. Place the corresponding marker on space 1 of the turn counter.
Each player draws 4 cards.
4- Playing the Game
This game lasts 8 turns. The combat takes place on a clear night.
The American player must control the primary objective and two of the three secondary objectives before the end of turn 8.
The American player will bring his units into play through the spaces indicated by the green arrows. They can enter either by using an Order or during a Supply Phase.
Turn 3: During the Supply Phase, the American player can bring his troops from Group 2 into play through the spaces indicated by the blue arrows. Also, place the third bonus tactic.
Sainte-Mere-Eglise: If the American player lost Scenario 2, he cannot bring these reinforcements into play.
Turn 5: The sun rises...
Warning: The Ammo option on Lieutenant Colonel Benjamin Vandervoort's tile can only benefit units of the 82nd and those of the Engineers Squad, and the 60mm Mortar.
5- End of the Game and Victory
American victory: The American player wins the game if he controls the primary objective and at least 2 secondary objectives before the end of turn 8.
Sainte-Mere-Eglise: In Scenario 6, the German player will not be able to bring his reinforcements into play.
German victory: The German player wins the game if the American player does not control the objectives before the end of turn 8.
Sainte-Mere-Eglise: In Scenario 6, the German player will be able to bring his reinforcements into play.
Sainte-Mere-Eglise: In any case, the defensive positions remain for the next scenario where the German player left them.
Scenario 6 - La Fiere, Part Two
The manor has been captured. The American parachutists take position to ward off a German counterattack. They don't have to wait long. Just after they have prepared their artillery, the first Germans show up on the road with 3 Renault tanks, captured at the beginning of the war. They're going to have to hold out at all costs!
1- Battlefield Setup and Deployment
The battlefield is built from eight tiles, as shown in the printed diagram: SM1-B (with the German deployment zone (infantry only)), SM6-B, SM2-B, SM5-B, SM4-B, SM3-B (with the US deployment zone), C2-A and C4-B. The diagram marks La Fiere grange (on SM2-B), La Fiere 01 (on SM4-B), SM 4-house 1, SM 3-house 2, La Fiere (on SM4-B/C2-A) and several buildings marked "HoN" as printed.
2- Recruitment of the Armies
US Paratroopers (82nd Inf Div, 508th Inf Reg):
- Paratroopers (60)
- Grenade (5, X3)
- Norman McVicar (star), with Recon Team, Fire Team, Bazooka and BAR Team (110)
- Camo (10, X3)
- Pathfinders Squad (60)
US Paratroopers (82nd Inf Div, 505th Inf Reg):
- Weapon Squad (60)
- 1st Lt. John J. "Red Dog" Dolan (star), with .30 Cal, Bazooka and Fire Team (85)
- Ammo (10, X3)
- 57mm AT Gun (20)
US Field Command (Lt. Col. Benjamin Hayes "Vandy" Vandervoort):
- Airborne command tile (insignia)
- D-Day Cricket Lore (15, X3)
- 60mm Mortar (20)
- Field Command total: 20 (printed "200+" label as shown)
German Panzergrenadiere (I. Battalion, PzGr Lehr Rgt 901):
- Panzergrenadiere, with Recon Group, Fire Group and MG 42 (45)
- Command tile (shield with "L")
- Ob Hauser (star), with Recon Group, Fire Group, MG 42 and Fire Group (65)
- Grenade (5, X3)
- Assault Group, with Fire Group and MG 42 (55)
German Panzergrenadiere (I. Battalion, PzGr Lehr Rgt 902):
- Panzergrenadiere, with Recon Group, Fire Group and MG 42 (45)
- Grenade (5, X3)
- Oblt. Helfer (star), with Recon Group, Fire Group and Fire Group (70)
- Beutepanzer R35 (40)
- Mechanisierte Sd.Kfz. 251/1 (60, X2)
German Feldkommando (Major Hans Gruber):
- Two command tiles (shield with "L")
- Beutepanzer R35 (80)
- Total 30 (printed "200+" label as shown)
Hero: Ludwig, Scharfschütze (25)
Sainte-Mere-Eglise: Reinforcements (Scenario 5, complete the recruitment tiles):
- Puma (40)
- Zündapp (25)
- Airstrike (15)
3- Preparation
Without looking at them, place 2 Bonus tactic markers.
Sainte-Mere-Eglise: Use the defensive position that the German player held at the end of the previous scenario. Outside the campaign, the American player places them wherever he wants in the American deployment zone. (The defensive position is the blank tile marked X1.)
Remove the following cards from the American deck: Repairs, Ram, all the Artillery and Aviation cards.
Remove the following cards from the German deck: Bogged Down, Weak Point, Booby Trap, Precision, all the Artillery and Aviation cards. The SDKFZ 124 Wespe card should be placed aside.
The American player deploys first in his deployment zone.
The German player can deploy as many infantry units as he wants in his deployment zone. His vehicles and the infantry units they transport are placed outside the gameboard.
The German player has initiative. Place the corresponding marker on space 1 of the turn counter.
Each player draws 4 cards.
4- Playing the Game
This game lasts 8 turns.
The German player must control the primary objective and two of the three secondary objectives before the end of turn 8.
The German player will bring his set-aside units into play through the spaces indicated by the green arrows. They can enter play either by using an Order or during a Supply Phase. The German player starts the game with all his Orders available.
Turn 1: Before the Order Phase, the German player must play the SDKFZ 124 Wespe card. The American player cannot play the No! card.
5- End of the Game and Victory
American victory: The American player wins the game if he controls the primary objective and at least 2 secondary objectives before the end of turn 8.
German victory: The German player wins the game if the American player does not control the objectives before the end of turn 8.
Sainte-Mere-Eglise: If the American player won Scenario 4 and this one, he wins the campaign; otherwise, it is a German victory.
Campaign Map
The final printed page is the campaign map, showing the scenario order (1 Pathfinders, 2 Regroup!, 3 Pigeon Shooting, 4 When You've Gotta Go..., 5 La Fiere Part One, 6 La Fiere Part Two) and a comic strip. It carries no rules text beyond the scenario order.