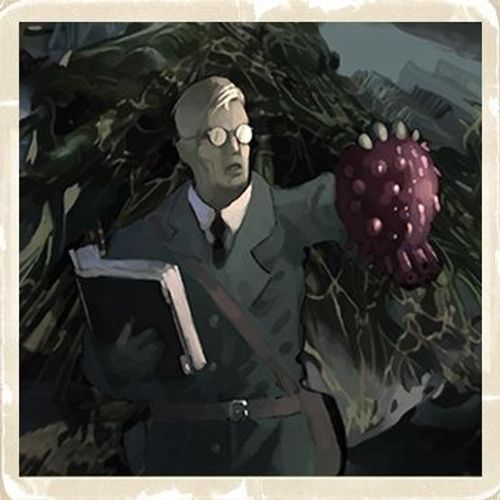
Heroes of Normandie: Achtung! Cthulhu
Heroes of Normandie: Achtung! Cthulhu Rulebook
Table of Contents
Table of Contents
- Special Abilities
- Recruitment Options
- Chapter #1: It Smells Bizarre Sarge!...
- Chapter #1B: Sarge, Where Are You?
- Chapter #2A: Descant in Descent...
- Chapter #2B: Badger's Commandos
- Chapter #3: In the Bowels of Hell
- Chapter #1: Necromantic Demonstration!
- Chapter #2: Exfiltrate a Desecrative Scientist...
- Chapter #3: The Chase...
- Chapter #4: It Is Dark... and It Smells Like Carrion...
- Chapter #5: The Damnable Den...
- Errata
Special Abilities
Mi-Go Brain Extractor
If this unit inflicts one damage during an assault, it feeds on the brain and may turn its counter over back onto its unharmed side.
Weakness: Water
This unit is immediately Destroyed whenever it enters, even partially, a terrain element that has the following icon: [water icon]
Electric Attack
Alternate Firing Action
This unit fires electric blasts. Any light vehicle or heavy vehicle it targets receives 2 Suppressed markers whatever the result (unless the vehicle is Destroyed).
WARNING! The special abilities and recruitment options featured here are not included in Shadows over Normandie Core Box or in the Cthulhu Mythos call 1 blister pack.
In the instructions for these campaigns, the words Zombie or Zombies refer to any zombified unit (Zombies, Fat Zombie, Zombie Dogs, Mutant Zombie). The word "Zombies" between angle quotes is used exclusively to denote units with the name Zombies printed on their counter (so not the Fat Zombie, neither the dogs nor the mutant).
Recruitment Options
Open Portal
Penalty: 3 Suppressed markers
A character can open a breach between dimensions to summon a creature of the Mythos (Mi-Go, Zombies, etc.).
Unless the scenario says otherwise, put into the bag all the available creatures (i.e. all those not 'reserved' by a summoning spell assigned to a character of either army) whose counter is the same size as a common infantry unit, such as a Fire Team.
Draw 1 creature counter. Put it in a square in the spellcaster's ZoC. It may move in the next Supply Phase.
Suppurator
Alternate Firing Action
This option gives you 2 Suppurator markers.
During a firing action, a unit can use the Suppurator to make a portion of reality disappear. Choose a square in the unit ZoC and put the marker in it. The marker completely replaces the square. Units in the square are not affected unless they already have at least 1 Suppressed marker, in which case they need to make a Terror check (2). An active unit that has 1 or more Suppressed markers makes a Terror check if it is in the square or moves/fires through it.
Leave the Suppurator marker until the end of the game.
Professor Deadman - Mi-Go Head
At the end of the Order Phase, he can remove 1 Order token (and only one) from a Mi-Go (any unit whose name includes the name Mi-Go). The Mi-Go must be within 7 squares and the professor needs a clear line of sight to it.
Chapter #1: It Smells Bizarre Sarge!...
2 players / 2 sides
Operation Cobra, (July 25-27). The Allies finally broke out of their confined bridgehead and are now on the move. The British and Canadians are bearing the brunt of German Armoured attacks near Caen. More to the West the Americans are pushing forward at great speed with tremendous amounts of units. A few of these have advanced further and faster than the main body of the army and thus find themselves out there on their own on the second day of operation Cobra.
This is definitely so for Deadman, Hamilton and some Rangers who ventured beyond Allied lines on purpose. Prior to the landings, strange goings-on were noticed in this region, so "Section M" sent Deadman and the Badger's Commandos to investigate. The professor returned across the channel to report their discoveries, but since then, nothing was heard from the Commandos. Distraught about their fate, Richard Deadman requested the aid of investigator Ernest Hamilton, and was granted Majestic's own Rangers as support unit. Unfortunately the rescue mission was suddenly postponed because D-day and following events had become top priority. After an aggravating delay they eventually made it to Normandie. With so much time wasted already, the pack now has force-marched to finally search for the Commandos, hoping it's not too late to find them alive.
So far, some Germans that were destroying secret documents in a most lusterless way were swiftly routed as they seemed to lack any fighting spirit. Upon attempting to contact HQ to report the find, all the wireless emanated was a most outlandish out of tune barrel organ sound... Due to this distortion, the Rangers frowned their eyebrows only to raise them sky high as professor Boelter's Zombies suddenly attacked them...
1 - Battlefield and Deployment
Map tiles: SoN-4-A (top left), AC-2-A (top right), AC-3-A (bottom left), AC-1-A (bottom right).
- Majestic Deployment Zone: on the left edge, at the junction of SoN-4-A and AC-3-A (marked by the Majestic emblem).
- Black Sun Deployment Zone: the top-right corner of AC-2-A.
- Black Sun Deployment Zone: the walled graveyard in AC-1-A.
2 - Composition of the Armies
Majestic
- Rangers Lost Battalion (5th Rangers Battalion), value 90: Rangers Squad (60) with Recon Team, Fire Team and Support Team; Lt. Edward Smith with Support Team; Recon Team; Fire Team; Ammo (10, x3); .30 Cal (15).
- Pr. Richard Deadman, Allied Scientist and Mythos Expert (25): Mi-Go Head; Elder Sign (15, x3); Eldritch Ichor (20, x1).
- Ernest Hamilton, Charismatic Reporter (25).
Black Sun
- Pr. Konrad Boelter (60): Suppurator (15, x2); Paralyse (15); Zombies; Zombies.
- Black Sun Novices, Teufelskommando Regiment 1 (65): an officer card (name only partly legible, read as "H. Glantz") with Recon Group; Recon Group; Fire Group; Fire Group; MG42.
- Novices (50): Recon Group; Fire Group; MG42.
Transcription note: the printed card names are small on the page. Where a subtitle or card name was not fully legible, it is omitted rather than guessed. Check the Black Sun Novices and Boelter card values against the physical card before play.
3 - Preparation
Prepare the bag of madnesses.
Players deploy their units in the appropriate zones.
The Majestic side has initiative and deploys first. Place their marker on turn 1 of the turn track.
Each player draws 4 cards.
4 - Particular Information
This game is played in 8 turns.
In the lower right corner of the battlefield, a ways besides the graveyard lies an entrance to catacombs. This is the objective that the American side must control by placing a unit upon this square.
As long as "Boelter" is within the enclosure of the graveyard he can create Zombies when units are eliminated.
Put any available Zombie units in a bag and draw at random. Apply the Master of the dead ability rules for Creation.
If "Boelter" is eliminated, he is removed from the game. He hasn't died but escaped to his underground temple and returns in chapter #3.
If "Hamilton" is eliminated, he is removed from the game. He does not return in this campaign's subsequent scenarios.
If "Deadman" is eliminated, he is removed from the game. Although only wounded now, he may return at full strength in this campaign's subsequent scenarios.
The turn track in the printed box marks "1 END" at turn 8 for this chapter.
5 - Victory Conditions
Majestic Victory: The Majestic player controls the entrance to the catacombs before the end of turn 8.
Campaign: Proceed by playing chapter #2A.
Black Sun Victory: The Black Sun player wins if the Majestic player does not control the entrance to the catacombs before the end of turn 8.
Campaign: Leave all surviving units in place on the board. Proceed by playing chapter #1B.
Chapter #1B: Sarge, Where Are You?
Whilst the encounter becomes a carnage, the clamor of battle draws more units near. Both sides receive reinforcements...
3 - Preparation
Leave all units as they were at the end of turn 8 of the previous scenario. Reinforcements arrive in their armies' deployment zones.
The Majestic side has initiative. Place their marker on turn 1 of the turn track.
Each player draws 4 cards.
Remove the recruitment options that reached their breaking point and all material or personal options that are spent.
If the Rangers or Novices tile was lost, put these back into the game and replace their losses.
Resupply some of the spent material (f.e. Grenades, ...), to refill vacant option slots or choose from the following options:
- Support Squad (60)
- Greyhound (35)
- Bazooka (15)
- Offensive Grenades (5, x3)
- Grenades (5, x3)
- Novices Panzerschreck (50)
- Der Tote (35, x1)
- Servitors (30)
- Shaggai Sword (10)
- Paralyse (15)
4 - Particular Information
This game is played in 6 turns.
In the lower right corner of the battlefield, a ways besides the graveyard lies an entrance to catacombs. This is the objective that the Majestic side must control by placing a unit upon this square.
As long as "Boelter" is within the enclosure of the graveyard he can create Zombies when units are eliminated.
Put any available Zombie units in a bag and draw at random. Apply the Master of the dead ability rules for Creation.
If "Boelter" is eliminated, he is removed from the game. He hasn't died but escaped to his underground temple and returns in chapter #3.
If "Hamilton" is eliminated, he is removed from the game. He does not return in this campaign's subsequent scenarios.
If "Deadman" is eliminated, he is removed from the game. Although only wounded now, he may return at full strength in this campaign's subsequent scenarios.
The turn track in the printed box marks "1B END" at turn 6 for this chapter.
5 - Victory Conditions
Majestic Victory: The Majestic player controls the entrance to the catacombs before the end of turn 6.
Campaign: Proceed by playing chapter #2A.
Black Sun Victory: The Black Sun player wins if the Majestic player does not control the entrance to the catacombs before the end of turn 6.
Campaign: Boelter finishes his experiments, hordes of zombies spread on the battlefield, pushing back the invasion and prolonging the war by several years. The continent falls to absolute horror as hope slowly fades in the ruins of the capitals from Paristo Moscow. [sic: "Paristo Moscow" as printed.]
Campaign: END.
Chapter #2A: Descant in Descent...
2 players / 2 sides
Reinforced with scattered elements from Ivy Division, the section decides to camp in the graveyard deeming its enclosure a good defensive perimeter. Maybe tomorrow the skies will clear and radio transmission won't be a problem. In the dead of night they are attacked by German soldiers supported by Deep Ones commandos controlled by Master Egon, of the Black Sun. All the while a small team is exploring the entrance to the catacombs.
1 - Battlefield and Deployment
Map tiles are labelled as printed: SoN-3-A, AC-5-A, AC-6-A, AC-3-A, AC-2-A, SoN-4-A, plus unlabelled tiles on the board edges.
- Black Sun Deployment Zone: the top edge of AC-5-A.
- Black Sun Deployment Zone: the left edge, on AC-3-A.
- Black Sun Deployment Zone: the right edge, on SoN-4-A.
- Majestic Deployment Zone: the graveyard in AC-2-A.
2 - Composition of the Armies
Majestic
- Pr. Richard Deadman, Allied Scientist and Mythos Expert (25): Enchant Unit (10); Dreamlands Gate (20); Eldritch Ichor (20, x1).
- Sgt. Carter, Mystic Ranger (40): Rangers Squad (60) with Recon Team, Fire Team and Support Team; Elder Sign (15, x3).
- Ernest Hamilton, Charismatic Reporter (25).
- Rangers Lost Battalion (5th Rangers Battalion) (90): Support Squad (60) with Fire Team, Support Team and .30 Cal; Lt. Edward Smith; Recon Team; Support Team; Fire Team; Bazooka (15); Sherman M4A3(76)W (70).
- Captain Duval, Charismatic Leader (45): Rangers units; Grenades (5, x3).
Transcription note: the Captain Duval and Rangers Lost Battalion card contents were read at page resolution. Check them against the physical cards before play.
Black Sun
- Master Egon Schossleitner (25): Open Portal (3 Suppressed markers); Eldritch Ichor (20, x1).
- Master Horst, Black Sun Master (35): Grenade (5, x3); Planning (10); Der Tote (35, x1).
- Servitor Overlord, Sons of Nyarlathotep (100): Servitors (30) and a further unit card whose name is only partly legible.
- Black Sun Novices, Teufelskommando Regiment 1 (65 and 50): Novices (50) with Recon Group, Fire Group and MG42; an officer card (name partly legible) with Recon Group and Fire Group; Panzerschreck (20, x3); Panzer IV (65).
- Zombies (2), two counters.
3 - Preparation
The Majestic side creates an exploring party of units that may contain other troops but must contain "Carter", "Duval", and either "Deadman" or "Hamilton" together. All 4 of these characters may be present in the party provided "Hamilton" has survived previous chapters. The rest of the army is placed in the appropriate zone.
The Black Sun side also places troops in their deployment zone. Master "Egon" is set aside. He will be deployed underground.
The Black Sun side has initiative. Place their marker on turn 1 of the turn track.
Each player draws 4 cards.
4 - Particular Information
This game is played in 8 turns.
The game stops at the end of the Supply phase of the turn when Eric Badger "Harris" is freed or at the end of turn 8.
The outside battle is fought in Dark Night conditions.
Black Sun must control the center square of AC-2A at the end of turn 8.
Whilst the battle rages, the Majestic player must send his exploring party underground to find Badger's Commandos. These units start next to the gameboard, enter through the square with the green arrow, and start spending movement points as soon as they hit this square.
Each turn, the players divide their available orders, as it pleases them, between troops on the surface or those underground.
There are 4 "Zombies" to be placed underground, their location is chosen by the Black Sun side during the deployment phase. If you have any other Zombie units available and would like some more variation, put all of them in a bag and draw 4 units at random.
Furthermore, Master "Egon" can use the "Open Portal" spell and summon more Mythos creatures. If this happens roll a die:
- 1: one "Zombies" (if none are available nothing happens).
- 2: two "Zombies" (if only one is available take this one; if none are available, replace by a "Mi-Go" with an electricity gun).
- 3: three "Zombies" (if three are no more available take the amount that is left; if none are available, replace by a "Mi-Go" with an electricity gun).
- 4: one "Mi-Go" (assault).
- 5-6: one "Hound of Tindalos".
According to the Black Sun player's choice, the summoned creature appears either outside or adjacent to Master "Egon" or underground in one of the rooms that has this symbol. For extra variation put any available Zombie units in a bag and draw one at random for each "Zombies" summoned.
When a search action is successful, an "Elder Sign" is found. Put an "Elder Sign" counter on the recruitment tile of the character that found it. You can't search the same spot twice in this chapter. There are only two Elder signs hidden, so once these are found any more search actions are useless.
The Badger's Commandos are locked in the cells denoted by the Section M badge. To set them free, one allied unit must enter the room. During each of the next turns, as long as an allied unit (this may be a freed Commando unit) is present inside, one commando counter may be placed in the corridor between the cells. Once positioned in the corridor this unit may perform actions with orders during an Activation phase or move during a Supply phase. All other commandos must be set free before Eric Badger "Harris".
Doors
-
Walls block LOS.
-
LOS can be traced through doors.
-
Doors are denoted by red lines.
-
Any unit being shot through a door gains +3 defense value.
-
In case of doubt about LOS through a door, do allow the shot.
-
Any unit being assaulted through a door gains +3 on their defensive die roll.
-
If "Hamilton" is eliminated, he is removed from the game. He does not return in this campaign's subsequent scenarios.
-
If "Deadman" is eliminated, he is removed from the game. Although only wounded now, he may return at full strength in this campaign's subsequent scenarios.
-
If Eric Badger "Harris" is eliminated, he is merely wounded and comes back in chapter #2B with the wounded side facing up.
-
If Master "Egon" is eliminated, he is removed from this game but being only wounded, may return unwounded in chapters #2B and #3.
5 - Victory Conditions
Majestic Victory: The Majestic side liberates Eric Badger "Harris" before the end of turn 8.
- Leave all units on the outside battlefield as they were at the end of the game.
- The allied units that went underground retain their current state of health.
- Discard the Mythos units that were underground.
Campaign: Proceed by playing chapter #2B.
Black Sun Victory: The Black Sun troops control the objective in the middle of the forest, or the Majestic side didn't liberate Eric "Badger" Harris before the end of turn 8.
Campaign: Destruction, massacres, invocations, Great Ancients, all that, all that...
Campaign: END.
Chapter #2B: Badger's Commandos
2 players / 2 sides
The commandos have surfaced and aid their allies who are engaged in a nightmarish battle. The escape didn't go unnoticed, two Mi-Go and a bunch of zombies are in pursuit.
1 - Battlefield and Deployment
Map tiles are labelled as printed: SoN-3-A, AC-5-A, AC-6-A, AC-3-A, AC-2-A, SoN-4-A, plus unlabelled tiles on the board edges.
- Black Sun Deployment Zone: the top edge of AC-5-A.
- Black Sun Deployment Zone: the left edge, on AC-3-A.
- Black Sun Deployment Zone: the right edge, on SoN-4-A.
- Majestic Deployment Zone: the graveyard in AC-2-A.
2 - Composition of the Armies
Preserve the situation as it was in chapter #2A at the end of turn 8.
The Allied units that survived the underground exploration join forces with the freed commandos and reinforce the troops still fighting on the surface. All these units show up on the board retaining the state of health they had at the end of the previous scenario. If Eric Badger "Harris" was eliminated, he turns out to be merely wounded and comes back in scenario #2B with the wounded side facing up.
Master "Egon" is added unwounded to the Black Sun reinforcements. The other Black Sun units that were underground are eliminated.
Reinforcements (preserve the survivors of the previous scenario)
Majestic
- Badgers Commandos, Captain Eric "Badger" Harris, Heroic Platoon (115): Bind Zombies (5); Mythos Barrier (5); Support; Commandos; Commandos.
Black Sun
- Two Mi-Go units.
- Four Zombies units.
Transcription note: the card values for the Mi-Go and Zombies counters were read at page resolution and are not repeated here. Check them against the physical cards before play.
3 - Preparation
The Mythos reinforcements are deployed in their zones.
The Allied reinforcements deploy next to the gameboard, enter through the squares with the green arrows, and start spending movement points as soon as they hit these squares.
The Black Sun side has initiative. Place their marker on turn 1 of the turn track.
Each player draws 4 cards.
4 - Particular Information
This game is played in 8 turns.
The Black Sun side wants to control the objective before the end of turn 8.
The battle is fought in Dark Night conditions.
Master "Egon" can use the "Open Portal" spell and summon more Mythos creatures. If this happens roll a die:
- 1: one "Zombies" (if none are available nothing happens).
- 2-3: one "Hound of Tindalos".
- 4-6: one "Chthonian".
Position any summoned creatures adjacent to the summoner.
- If "Hamilton" is eliminated, he is removed from the game. He does not return in this campaign's subsequent scenarios.
- If "Deadman" is eliminated he is removed from the game. Being in fact only wounded, he may return at full strength in this campaign's subsequent scenarios.
- If Eric Badger "Harris" is eliminated, he is removed from the game. He does not return in this campaign's subsequent scenarios.
- If Master "Egon" is eliminated, he is removed from this game but being only wounded, may return unwounded in chapter #3.
The Black Sun side can not claim victory before the start of turn 3.
5 - Victory Conditions
Majestic Victory: The Majestic side keeps their adversaries from controlling the objective before the end of turn 8.
The allied units retain their current state of health.
Campaign: Proceed by playing chapter #3.
Black Sun Victory: The Black Sun troops control the objective in the middle of the forest before the end of turn 8.
Campaign: Tentacles, ritual sacrifices, slaughter, Nyarlathotep,...
Campaign: END.
Chapter #3: In the Bowels of Hell
2 players / 2 sides
The Badger's Commandos share their information with their deliverers. Operating behind enemy lines for quite a while, they were on the verge of sussing out the mysterious experiments of Professor Boelter when German soldiers in his service captured them. Back into the underground maze they go, to find out what goes on down there...
1 - Battlefield and Deployment
This chapter is played on two underground levels, printed as Level 1 and Level 2. The layout of each level is shown on the printed page. Level 2 contains a room marked Temple with the Mythos symbol.
Transcription note: the printed map markers (green tentacle-like tokens and arrow markers) are not explained in the text of this chapter and are not transcribed.
2 - Composition of the Armies
All Allied units show up on the board retaining the state of health they had at the end of the previous scenario.
The vehicles are discarded as these can not go in the underground maze.
Reinforcements
Remove the recruitment options that reached their breaking point but keep any surviving units of these options in play.
If a material or personal option is spent, you may discard the counter to open a slot on the recruitment tile.
If the Rangers tile was lost, put it back into the game and replace the losses.
Resupply some of the spent material (f.e. Grenades,...), to refill vacant option slots or choose from the following options:
- Scouts Squad (50)
- Offensive Grenades (5, x3)
- Grenades (5, x3)
Black Sun
- Master Egon Schossleitner, Black Sun Master (25): Life Drain (20).
- Pr. Konrad Boelter (60): Paralyse (15); Eldritch Ichor (20, x1); Boelter; Zombie; Zombie.
3 - Preparation
The Allies deploy on level 1 next to the gameboard, enter through the square with the green arrow, and start spending movement points as soon as they hit this square.
The German side can deploy Master "Egon" on level 1 and Konrad "Boelter" on level 2, of the underground maze in one of the rooms marked with this symbol (green tentacle icon).
Put all other available Mythos creatures, that have the same counter size as a "Fire Team", in a bag, add the 4 "Zombies" from Achtung! Cthulhu. This is bag 1.
If you have any other Zombie units available, put these in another bag. This is bag 2.
The Majestic side has initiative and deploys first. Place their marker on turn 1 of the turn track.
Each player draws 4 cards.
4 - Particular Information
This game is played in two missions totalling maximum 10 turns.
Set the marker on 4 turns for the first objective. At the conclusion of either of these turns at least one Majestic or Section M unit must be present on the first tile of level 2 or the Black Sun side wins.
When the Allies did make it there on time, reset the turn marker to 6 turns for the second objective.
The Allied side now has until the end of turn 6, to enter the temple and kill the "Chthonian".
Respect the initiative order that was in progress. If nothing altered the initiative order, then Majestic should start the second mission with initiative on turn 1.
The game ends as soon as Majestic kills the "Chthonian".
When the first Allied unit enters a new terrain tile, the Black Sun side draws as many creatures out of bag 1 as there are rooms, on that tile, with this symbol (creature icon) and places these on the board, one in each room with such a symbol.
The player chooses what creature goes where.
If you added extra Zombie units: if a "Zombies" is drawn out of bag 1, do not deploy but set it aside. Draw a Zombie unit out of bag 2 and place this on the board instead.
Any eradicated creature goes back into the bag it was drawn from and thus might appear again at a later draw when a new tile is entered.
The "Chthonian" does not appear until a Majestic or Section M unit enters the temple. Place it on the two squares covered by this symbol (Chthonian icon).
Ignore the fact that the "Chthonian" cannot enter or surface into buildings. In this scenario it can move and surface into any room or hall of the underground.
For this scenario, ignore the Terror factor of the Temple hall.
Any die rolls for shots, that pass through any part of these grey terrain elements, suffer the minus shown on the symbol.
Any time a unit enters a square, that has a "Truly Ancient Icon" present, an Assault must immediately be resolved.
Two dice are rolled for the "Truly Ancient Icon", the best result is chosen, with +4 Assault bonus added.
If the unit does not win, it must stop there and resolve another Assault next turn.
Only after the unit wins the Assault, is it allowed to proceed its movement.
When a search action is successful, an "Elder Sign" is found. Put an "Elder Sign" counter on the recruitment tile of the character that found it.
More than one search may be conducted at the same location but characters can not have two "Elder Sign" tokens at the same time. Once the one they had is used, they may search for another one.
5 - Victory Conditions
Majestic Victory: To win, the Allies must kill the "Chthonian" before turn 6 of the second objective segment.
Campaign: The World is SAVED!!!
Black Sun Victory: If the Allies have not succeeded in reaching a level 2 tile before the end of turn 4 during the first objective segment, or if they did not kill the "Chthonian" before the end of turn 6 in the second objective segment.
Campaign: The Chthonian massacres all the Allied Soldiers. It opens a portal, thus releasing an army of monsters that spreads over Normandie. These force the invaders back overseas. Hitler proclaims himself as victor of the war. Horrible honour is bestowed upon the Führer, by Cthulhu... who simply devours him. Cthulhu reigned happily after, on the ashes of earth, during the night of times and had many little Deep Ones...
THE END
Chapter #1: Necromantic Demonstration!
2 players / 2 sides
Operating behind enemy lines, to thwart the schemes of the Black Sun, professor Deadman and the Badger's Commandos receive information from the resistance about a scientist whose practices raise quite a few suspicions. After some investigation they locate their newest target who has chosen to abide in a house formerly inhabited by a graveyard keeper. They decide to peruse this domicile situated within a marshy stretch of sinister repute.
As Professor Herbert P. Lovecrafts' assistant Pamela answered the door, she rapidly studied the "guest" she had welcomed, as this person instantly reminded her of the Aryan sculptures that intrigued her mentor so immensely. In return, not the slightest glance was darted upon her as the SS officer passed and strode apace into the hall...
1 - Battlefield and Deployment
Map tiles: AC-2-A (top left), AC-1-A (top right), SoN-4-A (bottom left), AC-3-A (bottom right), with the house in AC-3-A.
- Section M Deployment Zone: the top-left corner of AC-2-A.
- Mythos Deployment Zone: the right side of AC-3-A, around the stone circle marking.
2 - Composition of the Armies
Majestic
- FFI, Giselle Luceau "Sandy" (80): FFI Squad (50) with FFI, FFI Support and Sandy units; further FFI units and FFI counters as printed on the card.
- Badgers Commandos, Captain Eric "Badger" Harris, Heroic Platoon (115): Leader (15); Elder Sign (15, x3).
- Pr. Richard Deadman, Allied Scientist and Mythos Expert (25): Mi-Go Head; Bind Zombies (5); Shotgun (5).
Transcription note: the card contents above were read at page resolution. Check unit names and values against the physical cards before play.
Black Sun
- Herbert P. Lovecraft (30): The Devoted Nurses (35); Reanimator Serum (15, x3); Serum Dart Gun (15, x3).
- Ilda, She Wolf of the SS, Heroic Platoon (65): Untersuchung (75); MP40 (5); Opel Blitz (10).
Transcription note: the card subtitles for Lovecraft and Ilda are too small to read reliably and are omitted.
3 - Preparation
Prepare the bag of madnesses.
Put all available Zombie counters in a bag.
The Section M side uses the Majestic card deck and turn marker.
Both sides deploy in their assigned zones.
"H P L" (Lovecraft) and "Ilda" must be placed inside the house.
The Black Sun side deploys first.
The Section M side has initiative. Place the Majestic marker on turn 1 of the turn track.
Each player draws 4 cards.
4 - Particular Information
This game is played in 8 turns.
The Section M side must eliminate Lovecraft and his assistants and purge the map of any Zombies that might have been created by the necromancer with his reanimator serum.
The game ends if all these goals are met before the end of turn 8, or if they are no longer possible to achieve.
If Lovecraft manages to escape through the square indicated by a red arrow, the game also ends. He may move and can be targeted but may not leave the board before "Sandy" and "Pamela" are out of action.
When eliminated, Lovecraft and his assistants are removed from the board. They aren't killed but considered captured and may return in later scenarios.
5 - Victory Conditions
Section M Victory: Section M wins if they achieve their goals before the end of turn 8.
- Minor Victory: Lovecraft and two assistants eliminated.
- Major Victory: all Zombies eliminated as well.
Campaign: proceed to chapter #2.
Mythos Victory: The Black Sun side wins if the adversary did not succeed in completing the objectives or if Lovecraft was able to flee.
Campaign: proceed to chapter #3.
Chapter #2: Exfiltrate a Desecrative Scientist...
2 players / 2 sides
The Section M troops have captured Herbert P. Lovecraft and his two assistants. They killed all the mad scientist's anomalous creatures and destroyed his laboratory, probably all the twisted serums as well.
To reach their extraction point, the commandos must find their way back out of the morass that is all around the house. They must not underestimate the tenacity of their enemies. Ilda managed to warn Egon Schossleitner, the Canon of the Black Sun. For now he has to postpone her sanction for failure and pursue the Badgers. He orders nearby Professor Boelter to intercept them...
1 - Battlefield and Deployment
Map tiles: a left-edge tile with red arrow markers, SoN-5-A, SoN-4-B, SoN-6-A, and one unlabelled tile in the middle-right.
- Black Sun Deployment Zone: the left tile, at the left edge.
- Section M Deployment Zone: the centre of SoN-4-B.
- Black Sun Deployment Zone: the right tile, SoN-6-A.
2 - Composition of the Armies
Section M
- Pr. Richard Deadman, Allied Scientist and Mythos Expert (25): Mi-Go Head; Liber Ivonis (10); Shotgun (5).
- Badgers Commandos, Captain Eric "Badger" Harris, Heroic Platoon (115): Leader (15); Eldritch Ichor (20, x1).
- FFI, Giselle Luceau "Sandy" (80): FFI units as printed on the card.
- Liber Ivonis card: Deflect Arm; Bind Zombies (5); Mythos Barrier (5).
Campaign note (printed in the box beside the FFI card): If a Major Victory was achieved in the previous scenario, the Section M side has access to the "Gears" option for the FFI.
Black Sun, Group 1
- Master Egon Schossleitner, Black Sun Master (25): Paralyse (15); Sigil of Blood (10, x2).
- Pr. Konrad Boelter (60): MP40 (5); Zombies; Zombies; Zombies (45).
- Black Sun Novices, Teufelskommando Regiment 1 (65): an officer card (name partly legible) with Recon Group and Fire Group; Der Tote (35, x1).
Black Sun, Group 2
- Ludwig, "An Eye on You" (35).
Transcription note: the card subtitles and some unit names on this page are too small to read reliably and are omitted or given as printed in the card names. Check the Black Sun Novices, Boelter and Zombie card values against the physical cards before play.
3 - Preparation
Prepare the bag of madnesses.
The Section M side uses the Majestic card deck and turn marker.
The Section M side has initiative and deploys first. Place the Majestic marker on turn 1 of the turn track.
Players deploy their units in the appropriate zones.
Group 1 of the Black Sun deploys in zone A.
Group 2 of the Black Sun deploys in zone B.
Campaign: If a Major Victory was achieved in the previous scenario, the Section M side may let the FFI use their "Scout" ability, otherwise they may not.
Each player draws 4 cards.
4 - Particular Information
This game is played in 7 turns.
The Section M troops must escort Lovecraft off the board and exit through any of the squares indicated with a red arrow.
Prisoners: Herbert P. Lovecraft and his assistants are captured by Section M. "H P L", "Sandy" and "Pamela" are secretly placed under Section M units.
There can be only one prisoner under a character counter and several under a unit counter.
Escorting units receive a cumulative -1 on every combat die roll, for each prisoner they are stacked with.
Since Section M and any assailants want the prisoners to survive, every escorting unit receives a +1 defense bonus regardless of the amount of prisoners it is stacked with.
Prisoners aren't hit by shots and remain unscathed during Assaults.
If an escort unit is eliminated, the former prisoners try to flee. They move towards the nearest board edge and try to exit. When moving unescorted through a red arrow exit square, they have also escaped. They move in the Zombie phase, before any Zombies move.
Any unit (except a Zombie) stacking with a fugitive prisoner becomes the new escorting unit.
The Zombies are not attracted to "Ludwig".
A Zombie in a swamp square has a movement of maximum 1 per turn.
5 - Victory Conditions
Section M Victory: Section M wins if they succeed in escorting Lovecraft off the board before the end of turn 7.
Campaign: proceed to chapter #5.
Black Sun Victory: The Black Sun side wins if the adversary did not succeed in completing their objective.
Campaign: proceed to chapter #3.
Chapter #3: The Chase...
2 players / 2 sides
In the smoke and noise of the fray, the necromancer stole away. If his knowledge was to fall into the hands of the Black Sun, their grasp of the manipulation of the exanimate would augment tremendously. Captain Harris and Professor Deadman simply cannot allow this to happen. The Section M troops along with their allies of the French resistance double their efforts to recapture Herbert P. Lovecraft who is trudging out of breath through the sinister mire that surrounds his former lab.
Meanwhile, Egon Schossleitner, Canon of the Black Sun, is most amused as Lovecraft seems to be slogging toward their HQ, also in these marshes. Quite convinced that relentless Section M troops will be hot on the trail of the scientist, he sets up an ambush to slow down and weaken the commandos...
1 - Battlefield and Deployment
Map tiles: SoN-2-A (top left), SoN-6-A (top right), SoN-3-A (bottom left), SoN-4-A (bottom right).
- Section M Deployment Zone: the left edge of SoN-3-A, at the bottom left of the map.
- Black Sun Deployment Zone: the centre of SoN-6-A, on the border with SoN-4-A.
- Red arrows along the right edge of SoN-6-A and SoN-4-A mark the exit squares.
2 - Composition of the Armies
Section M
- Ernest Hamilton, Charismatic Reporter (25).
- FFI, Giselle Luceau "Sandy" (80): FFI Squad (50) with FFI and FFI Support units; further FFI units as printed on the card.
- Badgers Commandos, Captain Eric "Badger" Harris, Heroic Platoon (115): Eldritch Ichor (20, x1).
- Pr. Richard Deadman, Allied Scientist and Mythos Expert (25): Mi-Go Head; Paralyse (15); Shotgun (5).
Campaign
Use only FFI units that survived the previous chapter.
If Sandy was wounded in chapter 2 she comes into this game at full strength. If she was eliminated she enters the game with one step of damage.
Transcription note: the Black Sun composition for this chapter is printed on the following page. The FFI card's secondary unit names are small on the page and are omitted.
Black Sun
- Master Egon Schossleitner, Black Sun Master (25): Liber Ivonis (10); Shaggai Sword (10).
- Liber Ivonis card: Deflect Arm; Sense Life (5); Curse of Azathoth (15).
- Black Sun Novices, Teufelskommando Regiment 1 (65): Novices (50) with Recon Group, Fire Group and MG42; an officer card (name partly legible) with Recon Group and Fire Group; Der Tote (35, x1).
- Two Mythos creature counters (names not legible at page resolution).
Transcription note: the values of the Curse of Azathoth and Sense Life entries and the two creature counters were read at page resolution. Check them against the physical cards before play.
3 - Preparation
Prepare the bag of madnesses.
The Section M side uses the Majestic card deck and turn marker.
The Section M side has initiative and deploys first. Place the Majestic marker on turn 1 of the turn track.
Players deploy their units in the appropriate zones.
Each player draws 4 cards.
4 - Particular Information
This game is played in 7 turns.
The Section M troops must exit the board through the squares indicated with a red arrow.
5 - Victory Conditions
Section M Victory: Section M wins if they succeed in getting half of their units, (round up) off the board before the end of turn 7.
Campaign: (whatever the result) proceed to chapter #4.
Black Sun Victory: The Black Sun side wins if the adversary did not succeed in completing their objective.
Campaign: (whatever the result) proceed to chapter #4.
Chapter #4: It Is Dark... and It Smells Like Carrion...
2 players / 2 sides
The scientist's white lab coat greatly aided the Allies in discerning Lovecraft in the far distance as they were slowly gaining on him. Soon he would be back in their custody... but then he disappeared... suddenly... as if swallowed by the earth. Professor Deadman and Cpt. Harris' commandos scrutinise the spot where H.P.L. was last seen. They find a badly hidden entrance to what might well be a Black Sun hideout. Although quite exhausted because of previous affairs they immediately proceed to explore... with caution...
With a frenetic glint in his eye Konrad Boelter slowly turns the glass tube in front of his eyes as if this is a way to unravel the secret formula of the phial's most vile content. Professor Herbert P. Lovecraft is not very cooperative... But Konrad has no doubt that Master Egon will succeed in... "convincing"... the good professor to... "share"... the fruits of his research. For now, at least, he has some samples to experiment with, on his own creations.
The sudden riotous unrest of his creatures shakes him out of his reverie... Unwelcome guests have gained access to the cave that conceals the secret base of the Black Sun. An excellent occasion to test the efficiency of the liquids now in his possession and maybe expand the number of Zombies that are guarding the secret edifice...
1 - Battlefield and Deployment
Map tiles: SoN-2-B (left), SoN-3-B and SoN-1-B (top row, centre and right), SoN-5-B (bottom, centre).
- Section M Deployment Zone: the centre of SoN-2-B.
- Mythos Deployment Zone: the centre of SoN-3-B, around the pentagram marking.
- Mythos Deployment Zone: the centre of SoN-1-B.
- Mythos Deployment Zone: the centre of SoN-5-B.
The printed map carries numbered objective and search markers (1, 2, 3-4, 5, 6) and red arrows on several tiles. Their meaning is not explained in the chapter text, so they are not transcribed.
2 - Composition of the Armies
Section M
- FFI, Giselle Luceau "Sandy" (80): FFI units as printed on the card.
- Badgers Commandos, Captain Eric "Badger" Harris, Heroic Platoon (115): Search (0); Eldritch Ichor (20, x1).
- Pr. Richard Deadman, Allied Scientist and Mythos Expert (25): Mi-Go Head; Bind Zombies (5); Shotgun (5).
Campaign
If Section M won chapter #3, professor "Deadman" may replace "Shotgun" with "Shaggai Sword".
Black Sun
- Pr. Konrad Boelter (60): MP40 (5); Zombies; Zombies; Zombies (45).
Campaign
If the Black Sun side won chapter #1, either the "Reanimator Serum" or "Serum Dart Gun" (player's choice) may be attributed to Konrad "Boelter".
3 - Preparation
Prepare the bag of madnesses.
The Section M side uses the Majestic card deck and turn marker.
Set aside all "Zombies" called for by the Konrad "Boelter" recruitment tile. Put any other available Zombie units in a bag to provide more variety in Zombies.
Place the search markers at random on the board according to the chapter plan. The Black Sun player can look at their values.
The Black Sun side has initiative and deploys first, two units per zone. Place the Black Sun marker on turn 1 of the turn track.
Each player draws 4 cards.
4 - Particular Information
This game goes on until the Allies are eliminated or until they find the entrance to the Black Sun hideout.
Clear night rules apply.
The vehicle damage counters on the map denote Zombie appearance holes.
Each turn, before the orders phase, roll 2 dice (for an easier game 1 dice, for a harder game 3 dice). For every number rolled, one Zombie unit, drawn at random, enters on the corresponding damage counter.
Use the Zombie rule to activate Zombies.
A unit that's adjacent to a "Search" marker can perform a search as described in the rules. If the search is successful, turn the counter:
- Red: nothing happens.
- Green: the Allies have found the entrance to the Black Sun hideout.
5 - Victory Conditions
Section M Victory: Section M wins if they find the secret entrance to the hideout.
Campaign: proceed to chapter #5.
Mythos Victory: The Black Sun wins if the Allies are eliminated.
Campaign: If Black Sun wins this game, it is a decisive victory.
Campaign: END
6 - Solo Mode
This chapter can be played in solitary mode.
Put the "Reanimator Serum" and the "Serum Dart Gun" counters in a bag.
At the beginning of each turn, before any new Zombies are spawned, draw a counter.
- "Reanimator Serum", one more Zombie spawns this turn.
- "Serum Dart Gun", assign to the first Zombie that spawned this turn.
At the start of the game, draw 6 Zombies at random (8 for a more difficult game), put these on the squares with this symbol:
- Zombie symbol: normal and difficult game.
- Zombie symbol with red arrow: difficult game.
Proceed playing the game as normal.
Chapter #5: The Damnable Den...
2 players / 2 sides
Professor Deadman and Cpt. Harris have found the entrance to the Black Sun haunt. This could well be an HQ or the lair where Master Egon himself conducts his baneful research. Before descending the dimly lit stairs they regroup their forces and resources. The saboteurs are ready for their job, the others grab some grenades... It is time to purge this place...
1 - Battlefield and Deployment
The map is printed on three levels: level 1 (labelled "niveau 1" on the page), level 2 ("niveau 2") and a third underground level. Each level carries green tokens marked with letters (L, C, A, T) that are not explained in the chapter text and are not transcribed.
2 - Composition of the Armies
Section M
- FFI, Giselle Luceau "Sandy" (80): Saboteurs (40); Search (Expert) (5, x3); Heroic (30, x3).
- Badgers Commandos, Captain Eric "Badger" Harris, Heroic Platoon (115): Grenade (5, x3); Eldritch Ichor (20, x1); Elder Sign Medallion (10).
- Pr. Richard Deadman, Allied Scientist and Mythos Expert (25): Mi-Go Head; Leader (15); Shotgun (5).
Campaign
If Section M won chapter #3, professor "Deadman" may replace "Shotgun" with "Shaggai Sword".
Black Sun, Group 1
- Servitor Overlord, Sons of Nyarlathotep (100): Servitors; a further unit card (name not legible at page resolution); Auserwählter (45).
- Herbert P. Lovecraft (20): The Devoted Nurses (35); Reanimator Serum; Laboratory.
Black Sun, Group 2
- Master Egon Schossleitner, Black Sun Master (25).
Transcription note: several Black Sun unit and counter names on this page are small or partly legible. Check them against the physical cards before play.
3 - Preparation
Prepare the bag of madnesses.
Put all available Mythos creatures, that have the same counter size as a "Fire Team", in a bag. Add 4 "Zombies". This is bag 1.
Put any other available Zombie units in another bag. This is bag 2.
The Section M side uses the Majestic card deck and turn marker.
The Black Sun side deploys group 1 on level 1. None of these units may be placed on the stairs or in the first section of the passageway.
Professor Herbert P. Lovecraft and one of his assistants are in the laboratory, place "H P L" and "Sandy" in the "L" room.
The other assistant "Pamela" is in the "C" room.
Master "Egon" is in "T" hall, the temple, and can not leave.
The "Auserwählter" is in the "A" room, next to the stairs leading to level 2. He can not leave this passageway.
Section M has initiative. Place the Majestic marker on turn 1 of the turn track.
Each player draws 4 cards.
4 - Particular Information
This game is played in 6 turns.
The Allied units are reinforced. They all start at full health next to the level 1 terrain tile, enter through the square with the green arrow, and start spending movement points as soon as they hit this square.
In this chapter professor Herbert P. Lovecraft and his assistants do not fight but may only move.
The orders provided by the Lovecraft or a Black Sun recruitment tile are not added to the Black Sun order pool. Any orders provided by a recruitment tile are exclusively reserved for the unit(s) of that particular tile.
As long as no shot has been fired on level 1, Herbert P. Lovecraft and his assistants can not be activated.
The Servitor Overlord tile units can not descend onto level 2.
The primary objective of Section M is to make sure Lovecraft and his assistants meet their maker, to prevent their knowledge from being used by Black Sun. While they try to accomplish this, Section M has 6 turns to destroy the laboratory and reach the stairs, denoted with the red arrow, on the other side of level 1. If they don't succeed, the game ends.
To destroy the laboratory, the FFI "Saboteurs" must use their explosives and detonators.
If, however, these two conditions are met, and any member of Lovecraft's party is still alive, the game proceeds without turn limit.
Professor Herbert P. Lovecraft and his assistants try to escape by reaching and passing through the portal that was opened by Master "Egon" in the temple on level 2.
Once any one of the survivors of Herbert P. Lovecraft's party have entered the Temple, Master "Egon" needs 4 turns to open the portal. The portal is opened when the Supply phase of the last of these 4 turns has ended.
As long as no shot has been fired on level 2, Master "Egon" can not use "Open Portal". Furthermore he must be free of Suppressed markers before he can start. Once he has started, he can do nothing but proceed. He needs no further orders to do so. Any Suppressed markers he may receive after the start do not stop him.
The game ends when Lovecraft and his assistants are either killed or have escaped OR if Master "Egon" is eliminated before he can open the portal.
For this scenario, ignore the Terror factor of the Temple hall.
When the first Allied unit enters a new tile on level 2, the Black Sun side draws as many creatures out of bag 1 as there are rooms, on that tile, with the Mythos Manifestation symbol.
In every room that has the Mythos Manifestation symbol, one creature is placed. The player chooses what creature goes where.
If a "Zombies" is drawn out of bag 1, do not deploy but set it aside. Draw a Zombie unit out of bag 2 and place this on the board instead.
Any eradicated creature goes back into the bag it was drawn from and thus might appear again at a later draw when a new tile is entered.
Extra Zombies: for every Zombie unit that is eliminated and is returned to bag 2, also put one "Zombies", that was set aside, back in bag 1.
Rooms with the "Search" logo may be searched.
When a search action is successful, an "Elder Sign" is found. Put an "Elder Sign" counter on the recruitment tile of the character that found it. More than one search may be conducted at the same location but characters can not have two "Elder Sign" tokens at the same time.
Once the one they had is used, they may search for another one.
To win, the Section M side must eradicate Master "Egon" before he can open the portal or Herbert P. Lovecraft and his assistants, before they escape through it.
5 - Victory Conditions
Minor Section M Victory: Herbert P. Lovecraft's party is eradicated.
Major Section M Victory: Herbert P. Lovecraft's party is eradicated and Master "Egon" is eliminated.
Campaign: Section M wins the campaign.
Minor Black Sun Victory: If Herbert P. Lovecraft OR his assistants escape.
Major Black Sun Victory: If Herbert P. Lovecraft AND his assistants escape.
Campaign: The Black Sun wins the campaign.
THE END
Errata
The printed errata page consists of card and marker images only, with no written text. The images show: the Suppurator card (15, x2); an Elder Sign counter; the Ernest Hamilton card (25) shown twice, the second copy with a large red "2" on its unit box; and the Suppurator marker shown twice, with a blue arrow marked "1" and a green creature icon marked "2" on one side of the marker. The page does not state the change in words, so no rule text is transcribed from it. Check the corrected cards against the physical copy.