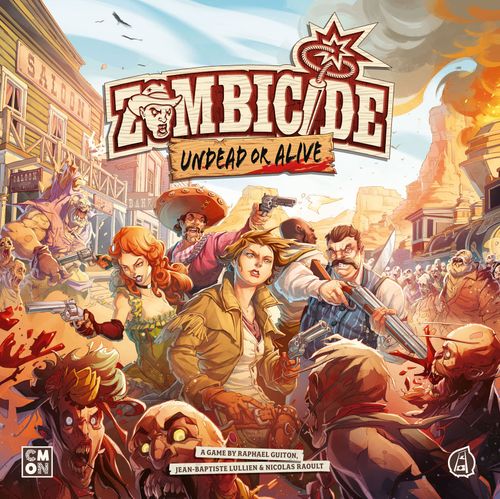
Zombicide: Undead or Alive
Zombicide: Undead or Alive Rulebook
Table of Contents
Table of Contents
Undead or Alive
Zombicide: Undead or Alive is a cooperative game where 1 to 6 players face hordes of Zombies controlled by the game itself. The players control a Survivor posse just after the end of times, with the dead rising and chasing the living.
The goal is to complete the Mission objectives, survive, and kill as many Zombies as possible!
Zombies are slow and predictable, but numerous. Watch out for the Abominations and the corpse piles, too!
Survivors use whatever they can get their hands on to kill Zombies. The better the weapon, the higher the body count, but the more Zombies appear, attracted by the onslaught!
Survivors can trade equipment, and players can share tactics. Only through cooperation can players achieve the Mission objectives and survive. Battling Zombies is fun, but players will also need to rescue other Survivors, find gallons of holy water to purify the unholy places the Zombies rise from, ride steam-powered trains, and much more.
After experiencing Undead or Alive, your posse will be the ultimate Zombie shooters!
Zombicide Through Space and Time
The Zombicide game range allows players to battle Zombies in many settings, creating unique atmospheres with dedicated Survivors, Zombies, and other features. Using the same basic mechanics, all Zombicide core boxes are designed to be entry points to the game. Mix and match elements from each era (classic, fantasy, or sci-fi) to create new Zombicide experiences!
Classic Zombicide follows the Zombie apocalypse as it unfolds in a modern-day world, featuring colorful Survivors in derelict cities.
Fantasy Zombicide enters the Dark Ages through the evil schemes of mad necromancers sweeping through the country with zombie armies. You and your fellow Survivors fight for a better future!
Sci-Fi Zombicide brings you to PK-L7, a distant planet with precious resources. The Xenos, an alien species, became infected by a deadly, unknown agent and started attacking everyone in sight!
Game Components
73 Zombie Miniatures
- 40 Walkers
- 16 Runners
- 16 Brutes
- 1 Bowler Hat Abomination
14 Survivor Miniatures and ID Cards
Carl, Hanna, Concepción, Jeb, Henry, May, Thomas, Kassey, Molly, Jimmy, Pablito, Trixie, Turner, Meg.
9 Tiles (double-sided)
3 Train Tiles (double-sided)
1 Gatling Gun
120 Mini-Cards
80 Equipment Cards
- STARTING WEAPONS — x18
- Old Timer x6
- Pan x6
- Springfield x6
- CLASSIC EQUIPMENT — x55
- Colt SAA x3
- Dynamite x6
- Holy Water x6
- Knife x4
- Machete x2
- Pickaxe x2
- Plenty of Bullets x4
- Plenty of Shells x4
- Remington x3
- Saber x2
- Sawed-Off x2
- Schofield x3
- Shotgun x2
- Tomahawk x2
- Twin Barrel x2
- Water x6
- Winchester x2
- BOUNTY WEAPONS — x7
- Coach Gun x1
- Colt Buntline x1
- Heavy Saber x1
- Henry Repeater x1
- Manitou's Wrath x1
- Mauser C96 x1
- Volcanic Pistol x1
2 Reference Cards
- Wagon x1
- Gatling Gun x1
37 Zombie Cards (#1 to #37)
1 Abomination Card
29 Tokens
- Wagon x1
- Exit x1
- First Player x1
- Noise (Bang!/BOOM!) x1
- Vade Retro x2
- 9 Objectives
- Red/Red x7
- Red/Blue x1
- Red/Green x1
- 14 Zombie Spawn
- Starting Spawn Zone x1
- Mobile x2
- Abomination (Active/Inactive) x2
- Corpse Pile (Active/Inactive) x9
6 Survivor Dashboards
6 Survivor Color Bases
6 Dice
48 Trackers
Setup
An Undead or Alive game usually features 6 Survivors, distributed in any way among 1 to 6 players. We recommend new players join the game with a single Survivor to get a quick grasp on the game mechanics. A veteran player can easily control a whole posse of 6 Survivors and clear hordes of Zombies all on their own! A 3 or 4 Survivor posse may fill its ranks with Companions (P. 42) to even the odds against the Zombies!
-
Choose a Mission.
-
Place game tiles.
-
Place the Spawn Zones, tokens, and miniatures as indicated by the Mission. Objective tokens are placed onto open crates featured on the tiles.
Veteran Zombicide players, please note that there are no door tokens in Zombicide: Undead or Alive.
-
Each player gathers 1 to 6 Survivors for them to play. As they are cooperating against the game, all players form a single team. Players sit around the table in any order they choose.
Undead or Alive features 14 Survivors of the Zombie apocalypse. Players are free to choose any of them for the Mission, or replace them with Survivor(s) from other boxes (their starting Equipment may change). Some Missions have Survivor prerequisites and may prevent players from choosing their favorite Survivor, but don't worry! It means players will be able to find and rescue them somewhere, somehow!
-
Players take 1 Dashboard for each of their Survivors, placing the Survivor's ID Card on it. They take a color base and attach it to the Survivor's miniature to help identify it. They also take 5 plastic trackers of the same color as their base.
-
Set aside the following cards, identified by their category, and their respective color. Shuffle each of these decks, and place them facedown close to the board.
- Equipment: The gear and weapons the Survivors will find during the game.
- Zombies: The foes the posse will face during the game. The more Zombies players kill, the more they rise, in all shapes and sizes!
- Abominations: Undead or Alive includes the Bowler Hat Abomination. Other Abominations may be added from expansions. Each of them has a special ability to spice up the game. Each time an Abomination Zombie card is drawn, a random Abomination is selected.
- Bounty Weapons: The back of Bounty Weapon cards describe the Feat a player needs to achieve to gain the corresponding Bounty Weapon (P. 17). Bounty Weapon cards are shuffled and placed facedown near the board, for all players to see.
Place Starting Equipment cards, unused Survivor ID Cards, along with the Wagon and the Gatling Gun reference cards, within view of all players.
-
Survivors have a favorite Equipment type indicated on their ID Card (Favorite Weapon Slot, P. 19). Each Survivor receives a Starting Equipment card of the corresponding type:
- Pistol: Old Timer
- Melee weapon: Pan
- Rifle: Springfield
- Any: the player chooses between an Old Timer, a Pan, or a Springfield.
If a Survivor's starting Skill lists any starting Equipment, they receive those cards now, in addition to the Starting Equipment that's just been handed out.
There are 4 Survivor Classes in Undead or Alive – Brawler, Faithful, Gunslinger, and Townsfolk. Classes are explained in depth on P. 23.
- Brawlers can move and hit with Melee weapons in the same Action. They can also endure more Wounds than other Survivors.
- Faithful Survivors can use the Vade Retro Class Ability (P. 23) to temporarily immobilize Zombie groups by the power of their faith. They are also able to use ordinary Water in the same way as Holy Water to destroy Spawn Zones (P. 27).
- Gunslingers can use the Fanning Class Ability (P. 24) to fire their pistol in bursts at the expense of accuracy.
- Townsfolk know the city like the back of their hand. They find Equipment easily, and have a better time fighting indoors. They are best used with any kind of long-ranged firearms, like Rifles.
Game Overview
"Y'all, we might be surrounded. BAMBAMBAMBAMBAMBAM!!!! Nope. My mistake." – Molly
Undead or Alive is played over a series of Game Rounds, which proceed as follows:
Player Phase
The player with the First Player token takes their Turn, activating their Survivors one at a time, in the order of their choice. Each Survivor can initially perform 3 Actions per Turn, though Skills may allow them to perform extra Actions as the game progresses. The Survivor may use their Actions to kill Zombies, move around the board, and perform other tasks to accomplish the various Mission Objectives. Some Actions make Noise, and Noise attracts Zombies!
Once a player has activated all their Survivors, the player to their left takes their Turn, activating their Survivors in the same manner. When all players have completed their Turns, the Player Phase ends. (If there is a mobile Train in the Mission, it moves now, see P. 38.)
The Player Phase is explained in depth on page 21.
Zombie Phase
All the Zombies on the board activate and spend 1 Action either attacking a Survivor next to them or, if they have nobody to attack, moving toward the Survivors in sight or the noisiest Zone.
Some Zombies, called Runners, get 2 Actions, so they can attack twice, attack and move, move and attack, or move twice. Once all Zombies have performed their Actions, new Zombies appear in all active Spawn Zones on the board.
The Zombie Phase is explained in depth on page 25.
End Phase
The Noise token is flipped from its BOOM! side to its Bang! side. If it was already on its Bang! side, it is moved to the Zone with the most Survivors (players choose in case of a tie). The first player hands the First Player token to the player on their left.
Another Game Round then begins.
Winning and Losing
The game is lost whenever:
- ANY Survivor has been eliminated (be careful, Companions are Survivors, see P. 42).
- When the Mission Objectives can no longer be fulfilled.
- As soon as the seventh Spawn Zone becomes ACTIVE on the board (watch out for Abomination Spawn Zones and Corpse Piles, see P. 27).
The game is won immediately when all Mission Objectives have been accomplished. Undead or Alive is a cooperative game, so all players win and lose together.
The Basics
"- Let's plan our next move. - Naw. - No? - Hell naw! We're gonna move, bash some heads in, and move again! - Well, I suppose that's a plan as well. Mind if I throw in some shootin'?" – Carl and Hanna
Useful Definitions
Actor: A Survivor or Zombie.
Zone: Inside a building, a Zone is a room. On a street, a Zone is the area between two linear markings (or a linear marking and the board's edge) and the walls of buildings along the street. Balconies are considered to be street Zones.
Tile examples:
- This is a street Zone, delineated by linear markings, a wall, and the board's edge.
- This is a building Zone. The room is delineated by walls.
- This street Zone straddles 2 tiles.
- This building has 3 rooms, forming 3 separate building Zones.
- This street Zone straddles 4 tiles.
- These 7 building Zones form a single building, straddling 2 tiles.
- Balconies are considered street Zones. They're useful for shooting at Zombies coming from different directions.
Line of Sight
Lines of Sight define whether Actors can see each other, such as whether a Survivor can see a Zombie through a door opening, from one room to the next, across the street, etc.
In street Zones, Actors see in straight lines that run parallel to the edges of the board. Actors cannot see diagonally. Their Line of Sight covers as many Zones as the line can pass through before reaching a wall or the edge of the board.
Balconies always straddle over several street Zones forming angles. While standing on a Balcony, Actors are considered as being in each of these street Zones to determine Lines of Sight only. (The Balcony is a separate Zone). Balconies also have special rules that are explained in depth on page 36.
In building Zones, an Actor sees into all the Zones that share an opening with the room the Actor currently occupies. If there is an opening, the walls do not block Line of Sight between 2 Zones. An Actor's Line of Sight is limited, however, to the distance of 1 Zone (except for Townsfolk Survivors, see P. 24).
- If the Survivor is looking from a building Zone out into street Zones, the Line of Sight can go through any number of street Zones in a straight line.
- If the Survivor is looking from a street Zone into a building, the Line of Sight can go only 1 Zone into the building.
Standing in a street Zone, Meg has Lines of Sight in straight lines until they meet either a wall or the board's edge. Meg's Line of Sight is interrupted by the wall. Meg cannot see diagonally. Carl stands in a street Zone. He sees in straight lines, up to walls and the board's edge. Carl can see 1 Zone into the buildings, but no further. Carl can't see the street Zone through the building. Carl and May can't see each other. May has a Line of Sight to the building Zones next to her, but also through the opening in the street. From the Balcony, Kassey is able to see down these streets up to the board's edge. Kassey and Molly can see each other. Molly has a Line of Sight through up the street, up to the board's edge. Molly has also a Line of Sight to the small room beside her.
Movement
Actors can move from one Zone to the next as long as the first Zone shares at least 1 edge with the destination Zone. Corners do not count. This means Actors cannot make diagonal movements.
In the streets, movement from one Zone to another has no restrictions. However, Actors must go through an opening to move from a building to the street and vice-versa.
Inside a building, Actors may move from one Zone to another as long as these Zones are linked by an opening (Eg. doorways and stairs to the Balcony). The position of a miniature in the Zone and the layout of the walls do not matter as long as the Zones share an opening.
Kassey can't move diagonally. To go to the bottom right Zone, she must first move here… then here. Kassey can go to the street through the opening. Kassey can go to the Balcony through the stairs opening. Kassey can go to this Zone through the opening. As strong as she is, Kassey can't go to this street Zone through the wall (no opening)!
Reading an Equipment Card
Melee and Ranged Weapons
"Give me a Winchester and I will show these zombies what a real Apocalypse looks like." – Thomas
Undead or Alive features many Equipment cards. The ones Survivors use to eliminate Zombies have Combat characteristics displayed at the bottom.
Weapons fall into 2 categories: Melee and Ranged. The Melee and Ranged symbols are used to distinguish each type.
Melee weapons bear the Melee symbol. They have a Range 0 value and thus can only be used in the same Zone as the Survivor. They are used with Melee Actions (P. 21).
Pans and Pickaxes are Melee weapons.
Ranged weapons bear a Ranged symbol. They usually have a Range value of 1 (or more). They are used with Ranged Actions (P. 21). Attacking at Range 0 with a Ranged weapon is still a Ranged Action.
The Winchester and the Colt SAA are Ranged weapons. The Winchester is a Rifle. The Colt SAA is a Pistol.
Ammo Type
Most Ranged weapons use ammunition to eliminate Zombies. They have infinite ammo (enjoy!). However, they don't all use the same type of Ammo.
Weapons with the Bullets symbol use bullets of some sort (no matter the caliber).
The Winchester and the Colt SAA use Bullets as ammunition.
Weapons with the Shells symbol use shells of some sort (no matter the caliber).
The Shotgun and the Coach Gun use shells as ammunition.
Noisy Equipment
"When you shoot at a zombie, the bad thing is it makes a big and noisy bang! The good thing is – beside the zombies being shot down – it makes a big and cheerful bang!" – Meg
Some Equipment are noisy and affect the Noise token whenever they are used. Noise attracts Zombies! Noise rules are detailed on page 15.
An Equipment card may feature either the Bang! or BOOM! symbol. Whenever an Action is spent to use it, set the Noise token on its corresponding side. If the Noise token is already on the board, move it to the Zone where the Action was performed (with the exception of Dynamite, see P. 15).
NOTE: A BOOM! is stronger than a Bang!. If a BOOM! token is already on the board, ignore any Bang! produced. Until the End Phase, only another BOOM! can move the Noise token. The Bang! produced by a Colt can't compete with the noise of exploding Dynamite!
The Knife is a silent weapon. The Twin Barrel and the Colt SAA produce a Bang! upon firing. The Colt SAA will produce a BOOM! if used for Fanning! (P. 25)
Combat Characteristics
Weapons display Combat characteristics used to eliminate Zombies in many inventive ways.
- Dual: If a Survivor has Dual weapons (P. 32) with the same name in each Hand slot, they may use them both with a single Action (they must be aimed at the same Zone).
- Weapon type: This Equipment is a Melee weapon. / This Equipment is a Pistol, which is a type of Ranged Weapon. / This Equipment is a Rifle (shotguns count as rifles), which is a Ranged Weapon.
- Range: Min and max number of Zones the weapon can reach. 0 indicates it can only be used in the Survivor's Zone. 0-1 indicates it can be used to shoot at its own Zone or 1 Zone away, no more, and within Line of Sight. A Ranged Attack at Range 0 is still a Ranged Attack! 1-3 indicates it can be used to shoot 1 to 3 Zones away, no more, no less, and within Line of Sight.
- Dice: Roll this many dice when a Melee Action is spent to use this weapon.
- Accuracy: Each roll that equals or exceeds this value is a success. Lower results are failures.
- Damage: Damage inflicted for each success. Damage does not stack up with multiple successes.
- Ammo: This Equipment doesn't use ammo. / This Equipment uses Bullets. / This Equipment uses Shells.
- Silent: This Equipment doesn't produce a Noise token when used in Melee Combat.
- Bang!: This Equipment produces Noise when used.
Noise
"– The zombies are attracted by noise, like a call to murder. Expect them to come for you once you start shooting. – Really? Bang! Bang! – Come on, you zombies!"
Firing a Shotgun or throwing Dynamite makes Noise, and Noise attracts zombies! Noise is represented by the double-sided Noise token:
- The Bang! side represents moderate Noise, from survivor clatter to a gunshot, nothing unusual in the Wild West.
- The BOOM! side represents loud Noise, Pistol Fanning, Gatling fire, or Dynamite, the kind that can be heard from the other side of town.
As a rule of thumb, BOOM! is stronger than Bang!.
During Setup (P. 6), the Noise token is set on the Survivor Starting Zone, on its Bang! side. The token is moved around the board every time a noise of equal or greater intensity is emitted. Set it in the Zone where the new Noise is made, on the side corresponding to the type of Noise made.
NOTE: The Noise token stays in the Zone it was produced, even if the Survivor who produced it leaves.
The Noise token is always on the board, either on its Bang! or BOOM! side. If a game effect removes the Noise token (if it's on the Train and the Train leaves the board, for example), set the Noise token back on the board on its Bang! side, in the Zone containing the most Survivors. If several Zones are eligible, players choose!
Dynamite produces a BOOM!, but the Token is set in the Zone where the Dynamite has exploded, rather than in the Zone from where it has been used.
1 - Jimmy shoots with his Winchester. The shot produces a Bang! The Noise token is therefore set in the Zone from where Jimmy has shot, on its Bang! side. 2 - Then, Jimmy moves 1 Zone away and shoots again. His gunfire produces a Bang!, so the Noise token is moved to his current Zone. 3 - With his last Action, Jimmy moves 1 Zone further. No new Noise has been produced, the Bang! stays where it is.
Pablito throws Dynamite at the Zone next to him. Dynamite produces a BOOM!. The Noise token is removed from its previous location and relocated in the Zone where the Dynamite has exploded, on its BOOM! side. Then, Pablito spends 2 Actions to move 2 Zones away, then shoots once with a Shotgun. Shooting with a Shotgun produces a Bang!. A new Noise has been produced, but BOOM! is stronger than Bang!, therefore the Noise token stays where it is. Had Pablito used his Fanning Class Ability instead, producing a BOOM!, the token would have been moved to Pablito's Zone!
During each End Phase, the Noise dies down:
- If the Noise token is on its BOOM! side, it is flipped to the Bang! side.
- If the Noise token is on its Bang! side, it is moved to the Zone with the most Survivors, on its Bang! side.
If several Zones are eligible, players choose.
At the end of the Game Round, during the End Phase, the BOOM! produced by Pablito lowers in intensity, becoming a Bang! The Noise token is flipped to its Bang! side.
Whenever Zombies reach the Noise token's Zone (see Zombie Phase, P. 25), the Noise token is removed from its current location and set in the Zone with the most Survivors, on its Bang! side. If several Zones are eligible, players choose.
In the ensuing Zombie Phase, a Walker reaches the Zone where the BOOM! token was set. No meal here! The Noise token is removed from the Zone and set in the Zone with the most Survivors (Meg and Pablito), on its Bang! side.
Bounty Weapons
Bounty Weapons are special weapons that form their own separate deck. They have better Combat characteristics than their ordinary counterparts.
There are 2 ways to get Bounty Weapons:
- The Mission provides them as rewards for completing Objectives.
- The Survivor accomplishes the Feat described on the back of the top weapon of the deck. As soon as the Feat is accomplished, the Survivor gets the Bounty Weapon. The Survivor may then reorganize their inventory for free.
Bounty Weapons are acquired in order, one after the other, from the top of the Bounty Weapons deck.
Feats are resolved one at a time, hence an Action may only provide a single Bounty Weapon. However, multiple Bounty Weapons may be acquired during the same Turn.
EXAMPLE 1: Jimmy climbs on a Balcony and shoots 3 times with his Winchester, eliminating 5 Zombies. He has accomplished the Mauser C96 Feat and immediately receives the Bounty Weapon. The next Bounty Weapon's Feat is "Kill 3 Zombies (or more) with a Rifle in a single Turn." Despite Jimmy having met these requirements as well, he doesn't receive the second Bounty Weapon. Each accomplishment only counts towards a single Bounty Weapon.
Adrenaline Points, Danger Level, and Skills
"Practice, guts, and will to survive. That's all ya need. Guns and bullets come and go but ya gotta hold on to hope. Regardin' practice... Zombies'll provide plenty." – Turner
For each Zombie eliminated, a Survivor gains 1 Adrenaline Point (AP) and moves up a notch on their Danger Bar. Some Mission Objectives provide more Adrenaline Points, as does eliminating Abominations and removing or moving Spawn Zones.
There are 4 Danger Levels on the Danger Bar: Blue, Yellow, Orange, and Red. At each Danger Level, the Survivor gains a new Skill (P. 56) to help them during the Mission. Skills stack across Danger Levels, so at Red Level, a Survivor will have 4 Skills (1 for each Danger level), plus 1 Class Ability. As new Skills are unlocked, place new trackers on the Survivor Dashboard to indicate them.
- When the Survivor starts the game at Blue Danger Level, they possess a Starting Skill and their Class Ability.
- The Yellow Danger Level is reached with 7 Adrenaline Points. The Survivor gains a fourth Action.
- The Orange Danger Level is reached with 19 Adrenaline Points. Choose a Skill among the 2 indicated at this Level.
- The Red Danger Level is reached with 43 Adrenaline Points. Choose a Skill among the 3 indicated at this Level.
However, building up Adrenaline has a side effect. When players draw a Zombie card to spawn Zombies, read the line that corresponds to the highest Danger Level achieved by any Survivor (see Zombies Spawn, P. 26).
The stronger the Survivor is, the more Zombies appear. For example, on a Walker card:
- Red Level: 10 Walkers
- Orange Level: 8 Walkers
- Yellow Level: 4 Walkers
- Blue Level: 2 Walkers
Inventory
"Hey! I found a Schofield! How 'bout a trade? My Schofield against your Winchester? I'll toss in these bullets… And a knife! Trade's the lifeblood of civilization." – Jeb
Each Survivor can carry up to 6 Equipment cards, divided into 3 types of Equipment slots on their Dashboard: 2 Hands, 1 Favorite Weapon, and 3 Backpack slots. Players may discard cards from their Survivor's inventory to make room for new cards at any time, for free (even during another player's Turn).
Each Hand slot may hold 1 Equipment card. Weapons and other items in Hand slots may be used normally.
Hand slots: Both Hands are used primarily for combat. Cards bearing the Melee, Pistol, or Rifle symbol may only be used when placed in a Hand slot.
The Backpack can hold up to 3 Equipment cards. Characteristics and game effects described on Equipment cards cannot be used until they are moved to a hand slot.
Equipment cards bearing "May be used in the Backpack" may be used indiscriminately in Hand or Backpack slots.
Backpack: Meg has stored a Winchester and Holy Water here. The Winchester cannot be fired from the Backpack. On the other hand, Holy Water can be used from there!
The Favorite Weapon slot may only receive a weapon corresponding to the type indicated. A slot showing the Melee Weapon symbol may receive a Machete or a Pickaxe, for example. This slot cannot store any other kind of weapon.
If the Favorite Weapon Slot mentions Any, any weapon can be set there, including Dynamite. Non-weapon Equipment cards (like Holy Water or Plenty of Shells, for example) cannot be stored in this slot. Weapons in the Favorite Weapon Slot are considered equipped in Hand and may be used as usual.
Favorite Weapon slot: Meg may only equip a Pistol, like the Schofield, in her Favorite Weapon slot. She can use it from here as if it were equipped in a Hand slot.
Three Hands?
Putting the proper Equipment card in their Favorite Weapon slot, a Survivor could effectively be considered as having three cards equipped in Hand. Choose any combination of two among the three before resolving each Action in a Turn or rolls involving the Survivor.
The Zombies
"Howdy zombie! May I introduce you to my dear friend, Mrs. Pickaxe?" – Henry, trying a new (unsuccessful) approach
Undead or Alive features 4 types of Zombies. Most Zombies have a single Action to spend each time they activate (Runners have 2). A Zombie is eliminated as soon as it is successfully hit with an attack that has the minimum required Damage value. The Survivor that makes the killing blow immediately earns the listed Adrenaline Points.
Walker
Neither quick nor tough. Just plentiful. My favorite.
- Wounds dealt: 1
- To eliminate: Damage 1
- Adrenaline provided: 1 point
Brute
Hard to kill, always on the front line.
- Wounds dealt: 1
- To eliminate: Damage 2
- Adrenaline provided: 1 point
Runner
The quick and the dead both rolled into one.
- Wounds dealt: 1
- To eliminate: Damage 1
- Adrenaline provided: 1 point
- Special rule: Runners have 2 Actions every time they are activated (P. 25).
Abomination
Toughest, ugliest monster I ever seen. Watch for its friends, for it never comes alone.
Undead or Alive lets players add all kinds of Abominations to their games. They spawn randomly from the Abomination deck when their card is drawn, but there can only be 1 on the board at any single time. As long as an Abomination is on the board, all Abomination Spawn Zones are active. Bring on the apocalypse!
- Wounds dealt: 1
- To eliminate: Damage 3 (or Dynamite)
- Adrenaline provided: 5 points
- Special rules:
- A Dynamite or a Damage 3 weapon is required to eliminate an Abomination. Please note no weapon in Undead or Alive has a natural Damage 3 value. It can be reached with Skills (like '+1 Damage', P. 56), or Mission special rules.
- Resolve these game effects whenever a Zombie card spawning an Abomination is drawn:
- If there is no Abomination on the board, draw a card from the Abomination deck. Then, spawn the corresponding Abomination. In addition, flip all Abomination Spawn tokens to their active side (P. 27).
- If there is already an Abomination on the board, it gets an extra Activation.
Player Phase
Starting with whoever holds the First Player token, each player activates their Survivors, one after the other, in the order of their choice. Each Survivor can perform up to 3 Actions at the Blue Danger Level (not counting any free Action their Blue Level Skill may give them). The possible Actions are:
Move
The Survivor moves from 1 Zone to the next, but cannot move through building walls.
- A Survivor must spend 1 additional Action per Zombie standing in the Zone they're attempting to leave.
- Entering a Zone containing Zombies ends the Survivor's Move Action (even if they have a Skill allowing them to move through several Zones per Move Action).
EXAMPLE: Meg is in a Zone with 2 Walkers. To leave this Zone, she spends 1 Move Action, then 2 more Actions (1 per Walker), for a total of 3 Actions. If there had been 3 Zombies in the Zone, Meg would have needed 4 Actions (1 + 3) to Move.
Search
"Huhuhu! The sheriff's office. That's where all the guns are at! Today truly has to be our lucky day!"
Survivors can only Search building Zones and only if there are no Zombies in the Zone. The player draws a card from the Equipment deck. They may then place it in their Survivor's inventory or immediately discard it. After Searching, the Survivor may freely reorganize their inventory. Survivors (with the exception of Townsfolk) can only perform a single Search Action per Turn, even if it's an extra, free Action. Remember, Survivors may discard cards from their inventory to make room for new cards at any time, for free.
When the Equipment deck runs out, reshuffle all the discarded Equipment cards (excluding Bounty Weapons and starting Equipment cards) to make a new deck.
NOTE: Townsfolk can perform as many Search Actions as they want (and are able to).
Reorganize/Trade
A Survivor can reorganize the cards in their inventory in any way the player wishes.
A Survivor can simultaneously exchange any number of cards with only 1 other Survivor currently in the same Zone. This other Survivor may reorganize their own inventory for free.
A Trade Action doesn't have to be equal. Players can trade everything for nothing if both parties agree!
Combat Actions
Combat Actions use Melee and Ranged Equipment cards to eliminate Zombies. For detailed rules on Combat, see page 32.
Melee Action
The Survivor uses a Melee weapon they are holding in their Hand (or Favorite Weapon Slot) to attack Zombies in their own Zone.
Ranged Action
The Survivor uses a Ranged weapon they are holding in their Hand (or Favorite Weapon Slot) to fire at a single Zone within the Range shown on the weapon's card and within Line of Sight.
Survivors shoot at Zones, not Actors. This is especially important for Targeting Priority Order (P. 33).
Using a Ranged weapon at Range 0 is still a Ranged Attack.
Take or Activate an Objective
The Survivor takes or activates an Objective in the same Zone. The game effects are explained in the Mission's description.
Machine Actions
The Wagon and the Gatling Gun are both Machines. Actions can be spent to use them!
Undead or Alive features 2 Machines: the Wagon, and the Gatling Gun. Their reference cards list their abilities.
Machines are not Actors. In order to perform a Machine Action, a Survivor spends a variable amount of Actions at once.
Wagon
"There are no horses! What do we want with a Wagon?! Wait! Is it a Gatling gun I see in there?" – Kassey
Moving the Wagon — Action cost: 3. Any Survivor in the Wagon's Zone (but not inside the Wagon) may spend 3 Actions to move it. The Survivor, the Wagon, and its contents are moved from one Zone to the next. This Action uses the Move Action rules, but does not benefit from additional Skills, Class Abilities, and game effects related to Move Actions.
Getting in or out of the Wagon — Action cost: 1. A Survivor may spend a Move Action in the Wagon's Zone to get in or out of the Wagon. Move penalties still apply (see Move, P. 21). If a Survivor ends their Move in the Wagon's Zone, they may get in the Wagon as a free Action. A Survivor in the Wagon is still considered to be standing in the Wagon's Zone. The Wagon may hold any number of Survivors. Zombies never get in the Wagon, but may Attack Survivors standing in it.
Gatling Gun
"This is… CHEATING! I love it!" – Turner
Moving the Gatling Gun — Action cost: 3. The Survivor and the Gatling Gun both move from one Zone to the next. This Action uses the Move Action rules, but does not benefit from additional Skills, Class Abilities, and game effects related to Move Actions.
Firing the Gatling Gun — Action cost: 1. The Survivor fires the Gatling Gun. This Action uses the Ranged Attack rules (P. 21) with the Gatling Gun's characteristics and Skill (See Escalation: Ranged, P. 57). The Gatling Gun only benefits from its own abilities. Class Abilities, Skills, and game effects related to Ranged Attacks (like the Plenty of Ammo Equipment card, for example), do not apply.
Rolling Thunder
Some Missions feature a Gatling Gun mounted on a Wagon. In these cases, the Gatling Gun cannot be moved on its own, but moves along with the Wagon. The Gatling Gun can be fired by a Survivor in the Wagon.
Make Noise
The Survivor makes Noise in an attempt to attract Zombies. Place the Noise token in their Zone on its Bang! side. This Action can't be used if there is a BOOM! on the board.
Do Nothing
The Survivor does nothing and prematurely ends their Turn. The remaining Actions are lost.
Classes & Class Abilities
Each Survivor from Undead or Alive belongs to a Survivor Class: Brawler, Faithful, Gunslinger, or Townsfolk. Each Class has its own Abilities, reserved for their respective members. For example, Fanning is a Gunslinger Class Ability.
Brawler Class
Hand-to-hand specialists who use melee weapons to bring down Zombies.
- Class Ability: Charge. Once per Turn, the Brawler may spend 1 Action to Move up to 2 Zones to a Zone containing Zombies, then, they perform 1 free Melee Action. Movement penalties apply. For example, an additional Action is needed to leave a Zone containing a Zombie, and entering a Zone containing Zombies still ends the Survivor's Move Action.
- Class Ability: Starts with Health 3. Brawlers may endure 1 more Wound than other Classes.
NOTE: Brawler Companions DON'T give this additional Health to their Leader (see Companions, P. 42).
Faithful Class
Survivors who use their faith and conviction to paralyze Zombies and destroy Zombie nests. Use the Vade Retro token to mark the Zone where Zombies were halted by the Faithful.
- Class Ability: Vade Retro (V.R.). Once per Turn, the Faithful may spend 1 Action to place a Vade Retro token in a Zone within Line of Sight and containing Zombies. As soon as Zombies in the targeted Zone activate, all Vade Retro tokens in the Zone are removed and Zombies in the targeted Zone lose their whole Activation (Runners, for example, won't perform their 2 Actions). Once a group of Zombies have lost their Activation, other Zombies subsequently entering the Zone are unaffected. Vade Retro tokens are automatically removed whenever there are no Zombies in their Zone.
- Class Ability: Can use Water as Holy Water. Faithful may consider ordinary Water Equipment cards as Holy Water to move or remove Spawn tokens (P. 27). In this case, they gain the 5 AP reward for destroying the Spawn token, instead of the 3 AP reward for discarding the Water card.
EXAMPLE: Concepción spends an Action to use her Class Ability and places a Vade Retro token in a Zone containing 2 Walkers, 2 Runners, and 1 Abomination. The Zombie Phase begins. The token is removed. The 2 Walkers, the 2 Runners, and the Abomination will NOT resolve ANY of their Actions. The Runners lose their 2 Actions! 3 other Runners are a Zone away from the Vade Retro token when the Phase starts. They cross the Vade Retro's Zone during their Move Step, unaffected. During the Spawn Step, an Extra Activation is drawn for the Runners. All Runners on the board activate, including the ones standing in the Zone previously affected by the Vade Retro token. Then, an Abomination card is drawn. The Abomination activates, since its Zone no longer contains any Vade Retro tokens.
NOTE: If Vade Retro is used and there are already 2 Vade Retro tokens on the board, players choose which token to move to the new Zone.
Gunslinger Class
Pistol specialists able to unload a heap of lead at short range.
- Class Ability: Fanning. The Gunslinger uses a single Pistol equipped in Hand to perform a Ranged Action, unloading the weapon at amazing speed. For this Action, the Pistol's characteristics are altered as follows:
- Range: Unchanged.
- Dice: 6. This value may be modified as usual (with the +1 die: Ranged Skill, for example).
- Accuracy: 5+. This value may be modified as usual (with the +1 to dice roll: Ranged Skill, for example).
- Damage: Unchanged.
- BOOM!: Fanning produces a BOOM! (P. 15).
- Reload: After Fanning, the Pistol acquires the Reload trait (P. 35) until it is reloaded. The Survivor may spend 1 Action to reload it. The Pistol is automatically reloaded, for free, during the End Phase.
EXAMPLE: Meg performs a Ranged Action to Fan with the Colt SAA. The weapon cannot be used until an Action has been spent to reload it. Meg uses an Action to reload her Pistol. She then fires as usual, without using her Fanning Class Ability. This Ranged Action doesn't suffer from the Reload effect. She can fire several times without having to reload.
NOTE: Fanning is performed with a single Pistol weapon, even if the Survivor has Dual-equipped Pistols. Having enough Actions, such a Survivor could Fan with their first Pistol, then Fan with their second Pistol. They could even Fan with a third action, using a Pistol equipped in their Favorite Weapon slot!
Townsfolk Class
Townsfolk are used to fighting in urban areas and know where to search and find everything they need for killing Zombies.
- Class Ability: Can Search more than once. Townsfolk aren't limited to 1 Search Action per Turn. They may spend as many Actions as they want (and have) to Search.
- Class Ability: Home Defender. Ignore the Line of Sight restriction in building Zones. Townsfolks' Lines of Sight aren't limited to 1 Zone inside a Building. However, they still use openings and draw Lines of Sight parallel to the edge of the board.
1 - Jimmy and Jeb belong to the Townsfolk Class. They ignore building restrictions for Lines of Sight. They can see each other, despite their Lines of Sights crossing 2 building Zones. 2 - Townsfolk still follow all the other rules related to Line of Sight. Jeb can't see through walls and his Lines of Sight must be in a straight line (as much as possible).
Sometimes, the Line of Sight may become a bit tricky to define. Townsfolk still must draw these Lines of Sight parallel to the edges of the board, but when one opening is not aligned with each other, the Line of Sight may draw a Z shape.
1 - Trixie can draw a Line of Sight to Hanna through the room between them. Since the two openings are perfectly aligned, it's easy to see that Hanna and Trixie share a Line of Sight. But… 2 - …This room features two openings on its left wall. Following the edge of the board, Trixie can see through both of these openings, and the one leading to the Zombie generates a Z shape. Trixie can see (and shoot at) the Zombie. On the other hand, the Zombie can only see 1 Zone inside a Building and therefore has no Line of Sight to Trixie.
Zombie Phase
Once the players have activated all their Survivors, the Zombies activate. No single player controls them, they do it themselves, performing the following steps in order.
Step 1 – Activation
"Bang!-Bang!-Bang!-Bang!-Bang!-Bang! They're still coming?!? They're grabbier than this guy in San Pedro who… No, forget about it." – Meg
Each Zombie activates and spends its Action on either an Attack or a Move, depending on its situation. Resolve all the Attacks first, then all the Moves.
Attack
Each Zombie in the same Zone as Survivors performs an Attack. A Zombie's Attack is always successful, does not require any dice rolls, and inflicts 1 Wound.
Survivors in the Zone share the Wounds in any way the players prefer, even if it means inflicting them all on a single Survivor. The Wound Bar's tracker is moved 1 point lower per Wound received. A Survivor is eliminated as soon as their Wound Bar reaches 0 (usually after taking 2 Wounds for a standard Survivor, 3 Wounds for a Brawler). At that point, the game is lost!
Each Zombie Attack deals 1 Wound.
Move
Zombies that have not Attacked use their Action to Move 1 Zone toward Survivors:
-
Zombies select their destination Zone in this order of priority: a) The Zone with Survivors in Line of Sight that has the Noise token (be it a Bang! or a BOOM!). b) The Zone with the most Survivors in Line of Sight with no Noise token. c) If no Survivors are visible, they Move toward the Zone with the Noise token.
In all cases, distance doesn't matter.
-
Zombies move 1 Zone toward their destination Zone by taking the shortest available path.
Splitting Zombies
If there are several possible destination Zones or more than 1 route of the same length, Zombies split into groups of equal numbers and types to follow all possible options. Uneven Zombie groups are split the same way. Players decide the group and direction the extra zombies go to. In case of a single Zombie being offered multiple routes, the players decide which direction it goes.
EXAMPLE: A group of 4 Walkers, 3 Brutes, and 1 Runner move toward a group of Survivors. The Zombies can take 2 routes of the same length, so they split into 2 groups.
- 2 Walkers go one way, the other 2 take the other route.
- 2 Brutes go one way, one takes the other route (players choose).
- The players choose which route the Runner takes.
Playing Runners
Runners have 2 Actions per Activation. After all Zombies (including Runners) have gone through the Activation Step and resolved their first Action, Runners go through the Activation step again, using their second Action to attack a Survivor in their Zone, or Move if there is nobody to Attack.
EXAMPLE 1: At the beginning of the Zombie Phase, a Runner stands in the same Zone as a Survivor. The Runner spends its first Action to Attack, inflicting 1 Wound. Then, the Runner performs its second Action, Attacking again for another 1 Wound.
EXAMPLE 2: A group of 2 Runners and 1 Brute is 1 Zone away from 2 Survivors. For their first Action, since they have nobody to Attack in their Zone, the Zombies Move into the Survivors' Zone. The Runners then perform their second Action. Since they now occupy the same Zone as Survivors, they Attack. Each Runner inflicts 1 Wound.
1 - Hanna's Zone is the noisiest on the board (it contains the BOOM! token). This Walker has Line of Sight on this destination Zone and Moves 1 Zone toward it. 2 - The Abomination has no Line of Sight on any Survivor, and so goes for the BOOM!. After defining the shortest available path to Hanna's Zone, it Moves 1 Zone to the south. 3 - The Brute has Line of Sight on Trixie and Moves 1 Zone toward her, despite Trixie's Zone not being the noisiest on the board. Line of Sight on a Survivor takes precedence! 4 - This Zombie group has two open routes of the same length toward Hanna's Zone. The Walkers are separated to go both routes. Players choose which route the Brute takes.
Step 2 – Spawn
Using Zombie Spawn tokens, the Mission map shows where Zombies appear at the end of each Zombie Phase. These are the Spawn Zones.
Zombie Spawn tokens mark the Spawn Zones' locations. During the Spawn Step, always start from the Starting Spawn Zone, in yellow.
Always begin with the Starting Spawn Zone, then proceed clockwise. For each Spawn token in the Zone, draw a Zombie card, then read the Zombie type and the line that corresponds to the Danger Level of the Survivor with the most Adrenaline (Blue, Yellow, Orange, or Red). Place the indicated amount of corresponding Zombies in the Spawn Zone.
Repeat this for each Active Spawn token.
Spawning an Abomination during this Step may activate up to 2 Abomination Spawn Zones (P. 27), in either the Starting Spawn Zone, the Cemetery, and/or the Mine (depending on what tiles are in use). In that case, continue spawning clockwise: if players already passed these newly activated Spawn Zones, they don't spawn.
When the Zombie deck runs out, reshuffle all the discarded Zombie cards to make a new deck.
Example of a Zombie card's Danger Level lines:
- Red Level: 10 Runners
- Orange Level: 8 Runners
- Yellow Level: 4 Runners
- Blue Level: 2 Runners
EXAMPLE: Pablito has 5 AP, placing him in the Blue Danger Level. May has 12 AP, which puts her in Yellow. As May is the Survivor with the highest AP, the Yellow Level is read to determine how many Zombies spawn.
Spawn Zone Types
There are 4 types of Spawn Zones, distinguished by the color of their Zombie Spawn tokens: Starting, Mobile, Abomination, and Corpse Pile Spawn Zones.
A Survivor moving or destroying a Spawn token with Holy Water (or Water, when used by a Faithful) gains 5 AP.
REMEMBER: If 7 Spawn tokens are active at the same time (whatever their types), the Mission is immediately lost.
Starting Spawn Zone: The Starting Spawn token is ALWAYS the first one to Spawn. Even if other Spawn tokens are added later, start with this one and then continue clockwise.
Unless the Mission states otherwise, the Starting Spawn token can't be moved by any means.
The Zone containing the Starting Spawn token may also contain other Spawn tokens. They should spawn in this order:
- Starting Spawn token
- Mobile Spawn tokens
- Abomination Spawn tokens
Mobile Spawn Zone: Mobile Spawn tokens can be moved, but not deactivated or destroyed (unless the Mission states otherwise). A Survivor may discard Holy Water at Range 0-1, within Line of Sight, to move a Mobile Spawn token to the Starting Spawn Zone. From now on, the Starting Spawn Zone spawns 1 Zombie card for itself and an additional Zombie card for each Mobile Spawn token moved there.
Mobile Spawn tokens always spawn Zombies, but may be moved to the Starting Spawn Zone by using Holy Water. Faithful Survivors may also use Water to do so!
Abomination Spawn Zone: Abomination Spawn tokens start the game on their inactive side. They can be moved, but not destroyed, unless the Mission states otherwise.
- As soon as an Abomination spawns, flip them to their Active side. They may immediately Spawn if players haven't passed them already during the Spawn Step (P. 26).
- As soon as the Abomination is eliminated, flip the Abomination Spawn tokens to their Inactive side. They don't spawn anymore until another Abomination spawns.
A Survivor may discard Holy Water at Range 0-1, within Line of Sight, to move 1 Abomination Spawn token (Active or not) to the Starting Spawn Zone. From now on, the Zone containing the Starting Spawn token receives an additional Zombie card when the Abomination Spawn token becomes Active. This is cumulative!
Corpse Pile Spawn Zone: Corpse Pile Spawn tokens are not set on the board during Setup. Tiles predefine the places where Corpse Pile Spawn tokens are set. They can be destroyed, but not moved.
- When any Survivor enters a building with a Corpse Pile for the first time, place a Corpse Pile Spawn token on the tile's Corpse Pile on its Active side. From now on, it is an Active Spawn Zone! Companions (P. 42) set at the beginning of the game in building Zones don't cause a Corpse Pile Spawn token to be placed.
- A building may spread over multiple tiles and contain several Corpse Piles. In this case, only the Corpse Pile on the same tile (if present) as the entering Survivor becomes Active. The other ones become active whenever a Survivor enters the respective tile within the same building.
- A Survivor may discard Holy Water at Range 0-1, within Line of Sight, to flip a Corpse Pile token on its Inactive side. Unless otherwise stated in the Mission, the Zone is safe and won't spawn Zombies anymore.
Corpse Pile Spawn Zones may be found in most houses. Using Holy Water will get rid of them and get the poor souls to eternal peace.
Extra Activation Cards
When players reveal an Extra Activation card, no Zombies appear in the designated Zone. Instead, all Zombies of the indicated type immediately get an extra Activation (see Activation Step, P. 25). Notice that these cards have no effect at the Blue Danger Level!
At the Yellow, Orange, and Red Danger Levels, all Walkers immediately activate. At the Blue Danger Level, nothing happens.
Running Out of Miniatures
The Undead or Alive box contains enough Zombies to invade the board. However, players may still run out of miniatures of the indicated type when required to place a Zombie on the board through spawning. In this case, the remaining Zombie miniatures are placed (if there are any), and players spawn an Abomination. If there is already an Abomination on the board, it gets an activation (P. 25).
Always keep an eye on the Zombie population on the board, or risk seeing the Abomination rushing to the Survivor's position in an instant!
Abomination Spawn Tokens
Abomination Spawn Tokens are placed on the Cemetery and the Mine tiles. They become active when an Abomination shows up! If none of these tiles are used, 1 Abomination Spawn token is set on the Starting Spawn Zone at the start of the Mission.
Active Abomination Spawn Zones are treated as typical Spawn Zones during the Spawn Step (P. 26). During this step, Spawn Zones spawn clockwise, including any newly activated Abomination Spawn Zones. If players have already passed an Abomination Spawn Zone's position when it activates, it is skipped and does not spawn Zombies during that Spawn Step. When the Abomination is killed, flip all Abomination Spawn tokens onto their Inactive side.
Combat
When a Survivor performs a Melee or Ranged Action to attack Zombies, roll as many dice as the Dice value of the weapon being used.
If the active Survivor has 2 identical weapons with the Dual symbols equipped in their Hands, they can use both at the same time at the cost of a single Action, allowing them to combine dice value. Both weapons must be aimed at the same Zone.
EXAMPLE: Pablito has 2 Colt SAA in his Hands. The Colt SAA has the Dual symbol, so Pablito can shoot them both simultaneously. This allows him to roll 2 dice (1 for each Pistol) as a single Ranged Action.
Each die result that equals or exceeds the Accuracy value of the weapon scores a successful hit.
Each hit inflicts the amount of Damage specified by the Damage value of the weapon to a single target. If all targets get eliminated, extra hits are lost.
- Walkers and Runners are eliminated with a Damage 1 (or more) hit.
- Brutes are eliminated with a Damage 2 (or more) hit. Damage 1 has no effect on them, no matter how many times a Survivor hits them.
- Abominations are eliminated with a Damage 3 (or more) hit, or by throwing a Dynamite stick into their Zone (P. 34).
Melee Attack
Melee weapons are marked with the Melee symbol.
A Survivor holding a Melee weapon in their Hand can attack a Zombie in their own Zone. The player divides their hits as they wish among the possible targets in the Zone.
Melee strikes cannot cause Friendly Fire (P. 34) and are not affected by Target Priority Order (P. 33).
EXAMPLE: May and Meg are in the same Zone as a Brute, a Runner, and a Walker. May attacks with her Manitou's Wrath. She rolls 3 dice, which means 2 hits. The Manitou's Wrath has Damage 1, and thus cannot hurt the Brute. The first hit is allocated to the Runner and the second to the Walker, eliminating them both.
Ranged Attack
Ranged weapons are marked with the Ranged symbol.
A Survivor holding a Ranged weapon in their Hand can shoot at a Zone within the weapon's Range and Line of Sight (P. 10).
IMPORTANT: Missed shots can cause Friendly Fire (P. 34), so carefully consider the risks!
The Range of a weapon, indicated by the Range value on its card, is the number of Zones it can shoot across.
The first of the 2 values shows the minimum Range. The weapon may not shoot at Zones closer than the minimum. In some cases, it may be 0, meaning the Survivor can shoot at targets in the Zone they currently occupy (it is still a Ranged Attack).
The second value shows the maximum Range of the weapon. A weapon cannot fire at Zones beyond maximum Range.
EXAMPLE 1: The Sawed-Off has a Range of 0-1. It can shoot 1 Zone away or in the Survivor's Zone. Shooting at Range 0 is still a Ranged attack!
EXAMPLE 2: The Shotgun has a Range of 1-3, which means it can shoot up to 3 Zones away but cannot be used to fire at the same Zone as the Survivor.
Ignore any Actors in the Zones between the shooter and the target Zone. Survivors may shoot through occupied Zones without danger to either fellow Survivors or Zombies. A Survivor can even shoot at another Zone while there are Zombies in their own Zone!
Targeting Priority Order
When using a Ranged weapon (even at Range 0), the shooting Survivor does not choose the targets hit by successful rolls. Hits are assigned to Actors in the targeted Zone according to the Targeting Priority Order:
- Brute or Abomination (the shooter chooses)
- Walker
- Runner
The hits are assigned to targets of the highest priority until they have all been eliminated, then to targets of the next priority until they have all been eliminated, and so on.
If several targets share the same Targeting Priority Order, players choose the targets hit among them.
| Targeting Priority | Name | Actions | Min. Damage to eliminate | Adrenaline earned |
|---|---|---|---|---|
| 1 | Brute / Abomination | 1 | 2 / 3 | 1 / 5 |
| 2 | Walker | 1 | 1 | 1 |
| 3 | Runner | 2 | 1 | 1 |
EXAMPLE: Armed with a Winchester (Damage 2), Jimmy performs a Ranged Attack at a Zone with a Brute, 2 Walkers, and 2 Runners.
- Jimmy rolls 2 dice for his first Action. Hits are obtained with 4 or more, which means 2 hits. Following the Targeting Priority Order, the first hit is assigned to the Brute, eliminating it. The second hit is assigned to a Walker, eliminating it as well (1 hit = 1 target).
- Jimmy rolls 2 dice with his second Action, obtaining 2 hits. The Targeting Priority Order lists the Walker as the first target, so it's eliminated. The second hit is allocated to either Runner, eliminating it as well. A single Runner remains.
A Universal Targeting Priority Order
The Targeting Priority Order doesn't take the Zombie subspecies into account. Standard Zombies from Undead or Alive and any Zombies from other expansions share the same Targeting Priority Order, by type (Brute/Abomination, Walker, and Runner). If several targets of different subspecies share the same Priority Order, Players choose which to hit first!
NOTE: Brutes are first in the Targeting Priority Order and are immune to Damage 1 weapons. It means they can protect all Walkers and Runners in their Zone from all Damage 1 Ranged Attacks, as they need to be removed before getting to Walkers and Runners. The same applies to Abominations, requiring Damage 3 to be eliminated.
Friendly Fire
"I can understand your mistake, but I'm not a zombie, for God's sake!" – Carl
Survivors can't hit themselves with their own attacks. However, emergency situations can call for Ranged Attacks aimed at a Zone where a teammate is stuck.
In that case, misses during the Attack roll automatically hit Survivors standing in the target Zone. Assign these Friendly Fire hits in any way players want and apply Damage as usual (Damage 2 weapons inflict 2 Wounds, and so on).
REMEMBER: Friendly Fire doesn't apply to Melee Actions.
EXAMPLE: Hanna shoots with her Coach Gun at a Zone containing Carl and 2 Walkers. Rolling 3 dice, she obtains 2 hits… and a miss. Each hit eliminates a Walker. The miss, however, hits Carl for Damage 1. Carl suffers 1 wound.
Equipment Traits
Some Equipment cards have special game effects, either due to their very nature or attached keywords.
Dynamite
Dynamite is great to blast all opposition in a Zone!
Perform a Ranged Attack with the Dynamite. The Equipment card doesn't have to be equipped in Hand. Discard the card, and blast!
- All Actors in the target Zone are eliminated. The Survivor who used the Dynamite earns all the associated Adrenaline Points.
- Set the Noise token, on its BOOM! side, in the target Zone.
Fanning 6+
Old Timers are reliable, yet antiquated. Get a better pistol as soon as you can!
Gunslingers resolving a Ranged Attack with a Pistol with this trait may use their Fanning Class Ability (P. 24), but the Accuracy is modified to be 6+ rather than the usual 5+.
Holy Water
Holy Water is used to destroy Spawn Zones, putting restless souls to eternal peace.
A Survivor may discard Holy Water at Range 0-1, within Line of Sight, to move or destroy all Spawn tokens in a Spawn Zone.
- Mobile and Abomination Spawn tokens (active or not) are moved to the Starting Spawn Zone. They keep their status.
- Corpse Pile Spawn Zones are destroyed. Set their token on its inactive side. They won't Spawn anymore.
In both cases, the Survivor earns 5 AP.
Knife
Coming to a gunfight with a knife? Not a bad idea, after all.
When a Knife is set in a Hand Slot, any Melee Attack performed with another equipped Melee weapon gets a +1 die bonus. This bonus doesn't apply to Dual weapons, except when Dual Knives are used. They provide each other the bonus!
EXAMPLE: May is holding a Pickaxe in her Favorite Weapon Slot and 2 Knives in her Hand Slots. She may use her Pickaxe with +1 die, for a total of 3 dice. She could also choose to attack with her Knives. As both Knives are identical weapons with the Dual symbol, and each Knife gives a bonus of +1 dice to each other, she rolls a total of 4 dice for this attack.
May Be Used in the Backpack
Some Equipment may be used even when not in Hand. They're great support!
These Equipment cards don't have to be equipped in a Hand slot to be used. Plenty of Bullets cards, for example, allow Survivors to re-roll weapon rolls even if they are stored in the Backpack.
Reload
Reloadable weapons have great burst power, but need to be reloaded before being fired again.
Weapons with the Reload trait are emptied each time they are fired. A Survivor may spend 1 Action to reload the weapon, if they want to fire it several times in the same Game Round. All such weapons are freely reloaded during the End Phase, so they start each Game Round ready to fire.
- If such a weapon is fired, and is then given to another Survivor without being reloaded, it must still be reloaded before the new owner can use it in the same Game Round.
- A single Action is enough to reload 2 weapons fired in a Dual manner.
- Spending an Action to fire with a single Dual reloadable weapon in a Zone, then spending another Action to fire the other Dual reloadable weapon in another Zone, is allowed.
Special Zones
Undead or Alive features special Zones with specific rules.
Balconies
"Hey! I can see my house from here! And a whole lotta zombies coming right at us, too!"
Standing above the streets, balconies are great shooting positions. They can also be used to lure Zombies. But be careful, though, as there is only 1 way out through the stairs leading to them!
Balconies are street Zones. Actors get to a Balcony by performing a Move Action via the stairs in the Building.
Skills (Jump, for example, P. 57), or special rules detailed in the Mission's description may allow Actors to get to Balconies by other means.
NOTE: The stairs highlight the link between the building Zone and the Balcony. The stairs are treated like an opening and are not a Zone by themselves.
Balconies have special rules regarding Lines of Sight.
- To determine Lines of Sight, an Actor on a Balcony is considered as standing in all street Zones the Balcony is straddling. Range is still defined from (and to) the Balcony.
- The Actor also shares a Line of Sight with the building Zone the Balcony is linked to with stairs.
- The Actor cannot share Lines of Sight with other building Zones (even with the Townsfolk Class ability, for example).
1 - To get to the Balcony, Hanna spends her first Move Action to reach the room Zone with the stairs. 2 - Then, she spends a second Move Action to reach the Balcony through the stairs. Stairs are treated like an opening, not like a Zone. No additional Move Action is spent to cross them. 3 - Trixie, using her Jump Skill (P. 57), can go to any Zone for which she has a Line of Sight, up to 2 Zones away. She jumps in the Balcony in a single Action, ignoring the stairs (and the height separating the Balcony from the street).
1 - Balconies are a great spot to shoot at the street. They straddle several Zones and provide Lines of Sight in all directions… 2 - …Except inside the building. An elevated position has some disadvantages. Hanna can ONLY see into the room Zone connected by the stairs. 3 - Despite being a Townsfolk, Hanna can't draw a Line of Sight to this room. It isn't connected by the stairs leading to the balcony.
1 - Jimmy has a Line of Sight on all these street Zones, including the Balconies. 2 - This is the ONLY room that Jimmy can see. It's the one connected to his Balcony by the stairs. 3 - Jimmy, despite being a Townsfolk, can't see in these building Zones. A Balcony has disadvantages!
Cemetery, Mine, and Abomination Spawn Zones
The Cemetery and the Mine each host an inactive Abomination Spawn token (P. 27). It becomes active whenever an Abomination is spawned and inactive when the Abomination is eliminated.
Abomination Spawn tokens may be moved to the Starting Spawn Zone using Holy Water or other game effects described in the Mission. They maintain their active or inactive state, depending on the presence of Abominations.
Train
"Our beloved horses were the first to fall to the zombie hunger. From then on, trains were our only means to travel from town to town in this wild country. We have to maintain the machines and lines at all costs!"
The Train is featured on 3 special, double-sided Train tiles labelled 10, 11, and 12. Each of them represents a section of the Train on its front and the railroad on its back. Train Zones are building Zones. Railroad Zones are street Zones.
The Train can be either immobile or mobile.
An immobile Train is added as shown on the Mission's map, adding building and/or street Zones to suit the game's environment.
A mobile Train is meant to cross the board, starting from Train tile 10, following the railroad to the opposite side of the board.
RAILROADS: Railroads merge with the street Zones placed on each side of Train tiles. The white markings help delineate the newly formed street Zones, straddling several tiles.
LOCOMOTIVE (10R):
- Cabin and tender: The locomotive's cabin and tender are both building Zones. Together, they are considered to form a single building.
- Partial street Zones outside the Train: These small areas are considered part of the street Zones they merge with on each side of the Train. If they don't merge with a street Zone, they are ignored.
The locomotive is an obstacle that cannot be entered and blocks Lines of Sight (it cannot be jumped over with the Jump Skill, P. 57).
TRAIN CAR (11R): This Train car features a single building Zone. It is considered a building on its own.
TRAIN CAR (12R): This Train car features 2 building Zones. The Train car forms a single building.
1 - These are street Zones created by merging a railroad tile and 2 classic tiles. 2 - This is a single street Zone straddling several tiles. 3 - These are street Zones, defined by the edge of the building on one side and the Train car on the other side. 4 - A U-shape is formed by the tender. The tender doesn't block Lines of Sight and Actors cannot hide behind it. This street Zone is considered clear for Lines of Sight and Movement purposes. 5 - The front part of the locomotive can't be crossed and blocks Lines of Sight.
A Train Entering the Board
IMPORTANT: Train moves are resolved at the end of the Player Phase, before the Zombie Phase.
A Mission featuring an empty railroad may feature a Train entering the board (after taking Objectives, for example). When it happens, at the end of the Player Phase, flip tile 10V to its 10R side as the locomotive enters the board.
Game elements standing in any Zone altered by the flip are affected as such:
- All Zombies, including the Abomination, are eliminated. No AP is gained.
- Survivors are placed in the nearest street Zone, for free. If several street Zones are eligible, players choose.
- Mobile Spawn tokens are moved to the Starting Spawn Zone.
- Other game elements (such as Objectives or the Wagon placed on the railroad) are removed from the game. Be careful, the Mission may be lost this way!
- Place the Noise token, on its BOOM! side, on the locomotive.
1 - These Zombies are in a street Zone formed by the 10V, 3V, and 6V tiles. They are eliminated before turning tile 10V to the railroad on its 10R side, representing the locomotive. 2 - The Abomination, despite being very tough, is also eliminated by the Train's arrival. 3 - Trixie avoids the Train and has to choose 1 of the street sides, either tile 3V or tile 6V. She chooses the first one and is moved there before tile 10V is turned to its 10R side. 4 - These 3 Zombies are in a large Zone formed by 2 railroad tiles (10V and 12V) and 4 classic tiles (3V, 7V, 6V, and 4V). Being partially on 10V, they are eliminated. The Runners next to them are unharmed. 5 - The Mobile Spawn token is moved to the Starting Spawn Zone. Then, tile 10V is turned on its 10R side.
A Train Moving on the Board
At the end of the Player Phase, if the locomotive is already on the board, it moves. Perform these steps in order:
- Remove the next Train tile in the locomotive's way. Resolve the effect in the same way as a Train entering the board. Don't forget the BOOM! Noise token on the locomotive!
- Move the Train 1 tile further. To do so, move Train tile 10R (the locomotive), along with any Train cars attached behind it, to fill the empty space left by the Train tile that was just removed. Actors and game elements aboard the Train move along, unaffected.
- Place the Train tile removed at Step 1 behind the entire Train (the locomotive, and any Train cars attached to it). According to the Mission, it may be either on its Train side attached to and moving along with the Train, or its railroad side if it doesn't move along with the Train.
A Train Leaving the Board
The Train will keep moving along the railroad, eventually leaving the board, locomotive first, followed by any Train cars in subsequent rounds. This is resolved in a similar way as a Train moving on the board.
When a section of the Train leaves the board, game elements aboard that section of the Train are also considered to have left the map. Game elements are affected in the following ways:
- All Zombies, including the Abomination, are eliminated. No AP is gained.
- Survivors exit the board until the end of the Mission.
- Mobile Spawn tokens aboard the Train are moved to the Starting Spawn Zone.
- Other game elements are removed from the game. Be careful, the Mission may be lost this way!
1 - The Train is arriving: tile 10V is always the entry point and flips to its 10R side. 2 - When the Train moves forward: tile 12V in front of the locomotive is removed. 3 - The locomotive is shifted forward. Then, as determined by the Mission, tile 12V is flipped to its 12R side and queued after the Train. 4 - When the Train leaves the board, the locomotive is removed. The next Train Car in queue (12R) shifts forward to take its place. 5 - Then, the locomotive (10R) is flipped to its railroad (10V) side and placed in the gap, completing the Train track. 6 - Next round, tile 12R is flipped to its 12V side. Tile 10V doesn't move. Now, the Train has fully left the board.
Companions
"– Come with me if you want to surviv-... – Yeah yeah, just gimme a pistol and I'll show you who's escortin' who." – Henry and Meg
Some Missions feature Survivor miniatures as objectives or support characters. They are called Companions and either play as described in the Mission or follow Survivors. Players choose which Companion is set in each of the spots indicated by the Mission. Set aside their ID Cards during Setup for all players to see.
Mission descriptions may differ from rules below. In that case, the Mission's special rules have priority.
Lone Companions don't activate Corpse Piles if they are set in a building Zone at the start of the game.
Escorting a Companion
According to the Mission, a Companion may be linked to a given Survivor during Setup. The Survivor gets the corresponding ID Card and benefits of the Companion's Class Ability. This ID Card doesn't take up an inventory slot. The Companion's miniature is placed next to the Survivor's.
The Companion's ID Card may be traded, along with the corresponding miniature and Class Ability, in the same way as an Equipment card.
The Survivor possessing the Companion's ID Card is called their Leader. A Survivor may be the Leader of several Companions.
The Mission may also feature lone Companions standing on their own. Any Survivor may spend an Action to rally a lone Companion standing in the same Zone. They become the Companion's Leader and acquire their ID Card.
NOTE: Brawler Companions DON'T offer an additional Health.
Companion General Traits
A Companion:
- Is a Survivor. It also means the Mission is lost whenever a Companion is eliminated.
- Is hit by Friendly Fire (P. 34).
- Is eliminated upon receiving any Wound.
- Always stays together with their Leader. All special rules, Move-related Skills, and Class Abilities also apply to the Companion.
- Does not have an inventory.
- Does not have any Actions.
EXAMPLE 1: Henry spends 1 Action to rally Jeb, standing as a lone Companion in his Zone. Henry becomes Jeb's Leader, gets his ID Card, and Jeb's miniature is placed next to his. From now on, Henry benefits from Jeb's Townsfolk's Class Ability. In return, Jeb benefits from the special Move Action given by Henry's Class Ability, Charge, in order to follow him everywhere.
EXAMPLE 2: Meg joins Henry and Jeb in their Zone, then spends 1 Action for a Trade. Meg is now Jeb's Leader, gaining his ID Card and the Townsfolk's Class Ability. Meg can now search multiple times per Turn and has an improved Line of Sight!
Ultrared Mode
"At some point, you'll start to feel God hisself lending you part of His might and that's the point when you begin to create your own miracles. There ain't no word to describe the feeling." – Thomas
The Ultrared Mode allows Survivors to gain Adrenaline Points beyond the Red Danger Level and pick up additional Skills. This mode is great for reaching amazing body counts and completing very large Missions.
Ultrared Mode: When a Survivor reaches the Red Level, move the Adrenaline tracker back to 0 and add any Adrenaline Points gained past the minimum required to hit the Red Level. The Survivor is still on the Red Level and keeps their Skills. Count additional Adrenaline Points as usual and gain unselected Skills upon reaching Danger Levels again.
After all the Survivor's available Skills have been selected, the next time they reach Orange, and subsequently, Red Level, they may choose any Skill among all Skills in Undead or Alive.
EXAMPLE: May just earned her 43rd Adrenaline Point, getting to the Red Level. She has the following Skills: Hit & run (Blue), +1 Action (Yellow), +1 free Melee Action (Orange), and Jump (Red). The player moves the Adrenaline tracker back to the start as the Mission continues. May is still at Red Level and keeps on earning Adrenaline Points as she kills Zombies.
May doesn't get an additional Skill upon reaching the Blue or Yellow Levels for the second time since she has all available Skills for these Levels. Upon reaching the Orange Level again, she gains +1 die: Combat, her second Orange Level Skill. Reaching the Red Level again, the player chooses a new Skill among the 2 remaining ones for this Level and goes for +1 free Combat Action. The Experience counter returns to the start.
During her third go through the Adrenaline bar, May doesn't get any new Skill at Blue, Yellow, or Orange Levels, as she already has them all. Upon reaching the Red Level for the third time, she earns the last Red Level Skill: +1 die: Combat. The Adrenaline counter goes to the start again.
From now on, May still earns Adrenaline Points and gets a player-chosen Skill every time she reaches the Orange Level, and then another upon reaching the Red Level.
Missions
The following Missions can be played in any order, suiting available play time and desired challenge level.
Special rules detailed in Missions supersede common rules and card rules.
Most Missions prevent players from choosing Survivors of a given Class. This is done both for context and gameplay purpose. The posse will likely find Companions (P. 42) of the restricted Class during the game!
M0 – Facing Zombies (Tutorial)
EASY / 10 MINUTES
"Listen here, pardner, it's your first pack o' zombies and your first Zombicide? Well, don't fret none. Bullets put 'em down quick. Buckshot too, and pickaxes… just search them houses for everything you need, keep the herd culled, and everything'll get along fine and dandy. Keep an eye out for them corpse piles though. Half of 'em'll get up if we let 'em, so take this here holy water and go to work!"
Class limitations: None.
Tiles needed: 2R & 3R.
OBJECTIVES
Your first Zombies. Take all Objectives. Then, reach the Exit with all Survivors. Any Survivor may escape through this Zone at the end of their Turn as long as there are no Zombies in it.
SPECIAL RULES
- Setup.
- The player receiving the First Player token during Setup gets a Holy Water card from the Equipment deck as well as an additional Starting Equipment. They may assign the card to any Survivor they control.
- Place a Brute, a Runner, and 2 Walkers in the indicated Zones.
- What you need. Each Objective gives 5 AP and the top Bounty Weapon (if there are any left) to the Survivor who takes it. The Survivor may reorganize their inventory for free.
Map legend: Survivor Starting Zone, 2x Objectives (5 AP), Noise Token, Spawn Zones, Brute, Runner, 2x Walker, Exit Zone.
M1 – The Bandwagon
EASY / 25 MINUTES
"The train's a-comin' and ain't gonna stop! This here's our chance to skedaddle outta this zombie-ridden outpost! Ain't gonna leave empty-handed, though. Place is chock full of bounty weapons that'll soon be ours!"
Class limitations: None.
Tiles needed: 1R, 2R, 5V, 8V, 10V, & 12V.
OBJECTIVES
Prove your worth and get in the Train! Accomplish the Objectives in this order to win the game:
- Get 1 Bounty Weapon per Survivor. Some may be found in town, but you'll need to accomplish some Feats to complete the count.
- Exit with all Survivors on the Train. There must be no Zombies on board.
Be careful! The Train may enter the board before you get all required Bounty Weapons!
SPECIAL RULES
- Setup. Place the Blue Objective in the indicated Zone. The Gatling Gun is mounted on the Wagon.
- The Train is coming! The Blue Objective can't be taken. During each End Phase, move it 1 Zone forward on the railroad. Once it leaves the board, the Train enters through the same location (P. 40).
- What a weapon! Each Objective gives 5 AP and the top Bounty Weapon (if there are any left) to the Survivor who takes it. The Survivor may reorganize their inventory for free.
Map legend: Survivor Starting Zone, Gatling Gun, Spawn Zones, Noise Token, 5x Objectives (5 AP), Wagon.
M2 – Zombie Train
EASY / 35 MINUTES
"We was giving this little town the once-over when the train rolled in, steam gone, and the dang thing deader n' a zombie. And what happens then? Zombies! The entire dang train was full of 'em! But hang on now! That there's a Gatling gun up in the coal tender! Woo! Time to light 'em up!"
Class limitations: No Brawlers.
Tiles needed: 1R, 2V, 3R, 4R, 5V, 9V, 10R, 11R, & 12R.
OBJECTIVES
Gather the posse and blow up the Zombie Train. Accomplish these Objectives in any order to win the game.
- Gather your posse. Rally all Companions and keep them alive.
- Blow up the zombie Train. Throw Dynamite at each Mobile Spawn Zone.
- Secure the area. Make all Corpse Piles Safe.
SPECIAL RULES
- Setup.
- Place 4 Brawler Companions in the indicated Zone.
- In this Mission, the Train is immobile.
- Lone guns. Each Objective gives 5 AP and the top Bounty Weapon (if there are any left) to the Survivor who takes it. The Survivor may reorganize their inventory for free.
- Bigger gun! The Gatling Gun can be fired, but cannot be moved.
- Blowing up the zombie Train. Both Mobile Spawn Zones cannot be moved with Holy Water (or Water, for Faithful Survivors). The only way to move them to the Starting Spawn Zone is to throw Dynamite in their Zone. In that case, move the Mobile Spawn Zone to the Starting Spawn Zone and flip the Train tile to its railroad side. Any Zombies on the Train tile are eliminated (the Survivor earns the corresponding AP). Survivors on the Train tile are moved to the closest street Zone before the tile is placed back.
Map legend: Survivor Starting Zone, 4x Objectives (5 AP), 4x Brawler Companions, Gatling Gun, Noise Token, Spawn Zones, Wagon.
M3 – Family Business
EASY / 35 MINUTES
"Gather 'round, y'all! Bring your favorite hand cannon and let's clean this place of zombies. Plenty of supplies here, and a handy, dandy train all set to haul us to the next stop! And just for fun, let's let the train get the last laugh, what say?"
Class limitations: No Faithful or Gunslingers.
Tiles needed: 1V, 3R, 4R, 5V, 6R, 7V, 10R, 11V, & 12V.
OBJECTIVES
Gather the posse and crush zombies. Accomplish the following Objectives in any order:
- Gather your posse. Rally all Companions.
- Crush the Zombies. Gather all Mobile Spawn tokens in the Starting Spawn Zone.
THEN…
- Exit with all Survivors (and Companions) on the Train. The Train must not leave the board with Zombies on board.
SPECIAL RULES
- Setup. Place 2 Faithful and 4 Gunslinger Companions in the indicated Zones.
- Nice weapon! Each Objective gives 5 AP and the top Bounty Weapon (if there are any left) to the Survivor who takes it. The Survivor may reorganize their inventory for free.
- The Train awaits. As soon as all the Survivors (and Companions) are on board, the Train starts to move (P. 40). It doesn't stop under any circumstance, even when a Survivor leaves the Train. As soon as it reaches the Starting Spawn Zone, all Spawn tokens it holds are destroyed and removed from the game.
Map legend: Survivor Starting Zone, 6x Objectives (5 AP), Spawn Zones, 2x Faithful Companions, 4x Gunslinger Companions, Noise Token.
M4 – Be Quick or Be Dead
MEDIUM / 45 MINUTES
"We heard gunshots on t'other side of town and came a-runnin', quick as we could! These bold folks are in a tight spot! The balcony was a good idea, but now they're outta ammo, but got plenty of zombies! We gotta get to 'em with plenty of ammo and then skedaddle! With the extra help, we might just win this war!"
Class limitations: No Townsfolk.
Tiles needed: 1R, 2R, 3R, 4R, 5V, 7R, 8V, & 9R.
OBJECTIVES
Lock and load. Accomplish these Objectives in any order:
- Gain the townsfolks' trust. Rally the Townsfolk Companions by giving them ammo (see Special Rules).
- Gather the Zombie flock. Gather all Mobile Spawn Zones in the Starting Spawn Zone.
THEN…
- Evacuate. Reach the Exit with all Survivors and Companions. A Survivor may escape through this Zone at the end of their Turn as long as there are no Zombies in it.
SPECIAL RULES
- Setup.
- Place 4 Townsfolk Companions in the indicated Zones.
- Place the Blue and the Green Objectives randomly among the Red Objectives, facedown.
- Reload! Rallying a Townsfolk (P. 42) also requires discarding either a Plenty of Ammo card (no matter the type), the Blue Objective, or the Green Objective.
- Ammunition? Each Objective gives 5 AP to the Survivor who takes it.
- Red Objectives grant the top Bounty Weapon as well (if there are any left). The Survivor may reorganize their inventory for free.
- The Blue and the Green Objectives are considered to be ammunition to recruit the Townsfolk with. Place the Objective token on the Survivor's Dashboard. It doesn't take an inventory slot and can be traded like an Equipment card.
NOTE: Survivors cannot use these tokens as Plenty of Ammo Equipment cards. They are gifts for our new friends!
Map legend: Exit Zone, Survivor Starting Zone, 8x Objectives (5 AP), Noise Token, 4x Townsfolk Companions, Spawn Zones.
M5 – Getting Out of Town
MEDIUM / 25 MINUTES
"The West ain't no place for the faint of heart. Everyone stands on their own two feet, specially against the zombies. Together, we're stronger, ain't no two ways about it. So, when these here folks said, "No, sir, thankee kindly" to our offer of help, well… you can lead the horse to water, but can't make him drink. 'Fraid they'll have to learn the lesson the hard way, and we'll be here to help 'em pick up the pieces, no hard feelings."
Class limitations: No Townsfolk.
Tiles needed: 1R, 3R, 4R, 5R, 6R, 8V, 10R, & 12R.
OBJECTIVES
Save the townsfolk! Accomplish the Objectives in this order to win the game:
- Rescue 4 Townsfolk. 2 of them are already on the board. The other 2 are hidden among the Red Objectives. Take the Objectives until they are found.
- Get to the Train! Reach the Exit with all Survivors and Companions. Any Survivor may escape through this Zone at the end of their Turn as long as there are no Zombies in it.
SPECIAL RULES
- Setup.
- Place the Blue and the Green Objectives randomly among the Red Objectives, facedown.
- Distribute 2 random Townsfolk among the 3 Balconies. Choose the Balconies randomly. Set the corresponding ID Cards aside.
- There you are! Each Objective gives 5 AP to the Survivor who takes it. Taking the Blue or the Green Objective also grants the Survivor a Townsfolk Companion (P. 42). Pick the corresponding ID Card. The Survivor becomes their Leader.
- An immobile, armed Train. The Gatling Gun can be fired but cannot be moved. The Train is immobile.
Map legend: Survivor Starting Zone, 6x Objectives (5 AP), Gatling Gun, Noise Token, Exit Zone, Spawn Zones, 2x Townsfolk Companions distributed among 3 Balconies.
M6 – Blowing Up the Mine
MEDIUM / 35 MINUTES
"Some folks go a hill too far in protectin' their territory. Take this gunslinger posse here, all stuck down in the mine when their cart slipped its rails. Dang foolish, if you ask me. But we're good neighbors, and we'll do our best. There's dynamite round here, sure as sunshine. We'll find it, blast the cart free, and get everyone home in time for supper!"
Class limitations: No Gunslingers.
Tiles needed: 1R, 2R, 3R, 5R, 7R & 8V.
OBJECTIVES
Blow up the mine! Accomplish the Objectives in this order to win the game:
- Destroy the blocking Wagon. Throw Dynamite in the Wagon's Zone to remove it.
- Save the Gunslingers. Rally all Gunslinger Companions.
- Blow up the mine. Find the detonator (the Blue Objective) and the cables (the Green Objective), if they haven't already been found. From then on, the posse can blow the mine at any time and win the Mission!
SPECIAL RULES
- Setup.
- Place 4 Gunslinger Companions in the indicated Zone.
- Place the Blue and the Green Objectives randomly among the Red Objectives, facedown.
- DO NOT place any Objective tokens on the Mine (8V).
- See what I've found! Each Objective gives 5 AP to the Survivor who takes it. Each Red Objective also provides the top Bounty Weapon as well (if there are any left). The Survivor may reorganize their inventory for free.
- Hold your position! The Abomination Spawn Zone stays inactive as long as the Gunslingers are in the mine's Zone (even if an Abomination spawns). As soon as a single Gunslinger has been rallied, the Abomination Spawn Zone is played as usual (it becomes active if an Abomination is already on the board).
- The Wagon is stuck. The Zone containing the Wagon can't be entered and the Wagon can't be moved. The Wagon can be destroyed by throwing Dynamite in its Zone. In that case, remove the Wagon and the Zone is played as usual.
Map legend: Survivor Starting Zone, 5x Objectives (5 AP), 4x Gunslinger Companions, No Objective Token, Noise Token, Wagon, Spawn Zones.
M7 – The Last Station
HARD / 50 MINUTES
"Well, hate to say it, pardners, but the old gal just ain't got no more steam. We were lucky we got as far as we did. It's our own two feet from here on out. Lucky us though, this place is chock full of supplies, probably from folks that fled when the zombies came calling."
Class limitations: No Faithful or Townsfolk.
Tiles needed: 1V, 2V, 3R, 5R, 7V, 9V, 10R, 11R, & 12R.
OBJECTIVES
Prepare for a new journey. Accomplish the Objectives in this order to win the game:
- Gather supplies in the Wagon. Take all Objectives and place them in the Wagon.
- Leave this place. Reach the Exit with all Survivors and the Wagon. Any Survivor (along with the Wagon) may escape through this Zone at the end of their Turn as long as there are no Zombies in it.
SPECIAL RULES
- Setup.
- The Survivors are split as evenly as possible between the 3 Starting Zones.
- Place 2 Faithful and 4 Townsfolk Companions in the indicated Zones.
- Each Objective Zone gets 2 random Objective tokens. Place the Blue and the Green Objectives randomly among the Red Objectives, facedown.
- In this Mission, the train is immobile.
- Clothes, travel gear, and weapons. Each Objective gives 5 AP to the Survivor who takes it. Place the Objective token on the Survivor's Dashboard. It takes a slot in the inventory and may be traded like an Equipment card. The Red Objectives grant the top Bounty Weapon as well (if there are any left). The Survivor may reorganize their inventory for free.
- Travelling Wagon. A Survivor standing in the Wagon's Zone may spend 1 Action to place all Objectives from their inventory into the Wagon. Place the Objective tokens on the Wagon. They move along with it and can't be taken back.
Map legend: Survivor Starting Zones, 8x Objectives (5 AP), 2x Faithful Companions, 4x Townsfolk Companions, Exit Zone, Wagon, Noise Token, Spawn Zones.
M8 – Brother's Keepers
HARD / 35 MINUTES
"Not sure I'm quite what you'd call a churchgoer, but our Faithful friends sure got a talent for keepin' the zombies from gettin' up again. After we sort out the walkin' ones, those with the right touch set about their holy work. Only today, ain't all going as planned. We got another horde comin' in, and it's a doozy. Smart move'd be putting some miles behind us. Wish we could talk our friends into runnin', but they ain't ready to budge. Well, fair enough. Guess it's time for the flock to shepherd them!"
Class limitations: No Faithful.
Tiles needed: 1R, 2R, 3R, 4R, 8V, 9V, 10V, 11V, & 12V.
OBJECTIVES
Hurry up! The Train won't wait! Accomplish these Objectives in any order:
- Prospecting for treasure. Get the 3 hidden Bounty Weapons. They can only be acquired by taking Objectives.
- Heave-Ho! Move the Wagon off the railroad.
- A faithful gathering. Rally the 2 Faithful Companions.
THEN…
- Don't miss the Train! Stay on board the Train with all Survivors and Companions until it exits the board. The Train must leave the board without any Zombies on it, otherwise the game is lost.
SPECIAL RULES
- Setup.
- Place 2 random Faithful Companions in the indicated Zones. Set their ID Cards aside.
- Place the Blue and the Green Objectives randomly among the Red Objectives, facedown.
- Set 3 random Bounty Weapons aside. They can't be acquired through Feats.
- Search the vicinity. Each Objective gives 5 AP to the Survivor who takes it. Each Red Objective provides 1 random Bounty Weapon from the 3 set aside during Setup. The Survivor may reorganize their inventory for free.
- Get the Wagon off before the Train rolls in! As soon as the Blue AND the Green Objectives are taken, the Train enters the board (P. 40). If the Wagon is still on railroad tracks at that moment, the game is lost.
Map legend: Survivor Starting Zone, 5x Objectives (5 AP), 2x Faithful Companions, Wagon, Noise Token, Spawn Zones.
M9 – Rolling Up Our Sleeves
VERY HARD / 50 MINUTES
"These folks are locked in the Church, waiting for a miracle to happen. Well, the angels may not be who you expected, and they will ask you to roll your sleeves up! There is work to do! We have to reclaim the infected train, fill the tender with coal, and get the metal horse rolling out of town. There is no time to get on your knees, battles are won by standing on your feet!"
Class limitations: No Brawlers or Faithful.
Tiles needed: 1R, 2R, 4V, 6R, 8V, 9V, 10R, 11R, & 12R.
OBJECTIVES
Everyone aboard the lost Train! Accomplish these Objectives in any order:
- Gather a few brave souls. Rally the Brawler and the Faithful Companions.
- Clean the Train. Move the Mobile Spawn Zone from the Train to the Starting Spawn Zone (tile 9V).
- Fill the tender. Take the 6 Red Objectives in the Mine (tile 8V) and drop them in the tender. See Special Rules.
THEN…
- Get out of town. Get aboard the Train with all Survivors and Companions and start the Train. The Train must leave the board without any Zombies on it, otherwise the game is lost.
SPECIAL RULES
- Setup.
- Place 2 Faithful and 4 Brawlers Companions in the indicated Zone.
- Place 6 Objective tokens in the Mine on tile 8V. They represent coal bags to fill the tender.
- Private armories. Each Objective (besides the coal bags) gives 5 AP and the top Bounty Weapon (if there are any left) to the Survivor who takes it. The Survivor may reorganize their inventory for free.
- MY Gatl... Our Gatling gun, I mean. The Gatling Gun can be fired but only moves along with the Train.
- Bags of coal. The Red Objectives in the Mine (tile 8V) are big, heavy bags of coal.
- Bags of coal may only be taken by Survivors with at least 1 Brawler Companion. They don't earn AP upon being taken. Each Brawler Companion may hold a single bag of coal at any time. Place it on the Companion's ID Card. These tokens may be traded along with their Brawler Companion.
- Bags of coal cannot be taken if there is an active Abomination Spawn Zone and/or any Zombies in the mine.
- Love me, Tender. A Survivor standing in the tender's Zone, or in any adjacent Zone, may spend 1 Action to place ALL the Objectives carried by their Brawler Companions in the tender. They cannot be taken back. The Survivor earns 5 AP for each Objective they drop in the tender.
- Train ready! Once the 6 coal bags are in the tender, any Survivor on the locomotive may spend 1 Action to start the Train (P. 40). Once started, the Train can't be stopped anymore and moves as usual.
Map legend: Survivor Starting Zone, 9x Objectives (5 AP), 2x Faithful Companions, 4x Brawler Companions, Gatling Gun, Noise Token, Spawn Zones.
M10 – Pillars of Faith
VERY HARD / 35 MINUTES
"Something mighty awful happened in this here old church. Blood and gore as far as you can see with a powerful stench! Our faithful friends say this old place has been downright desecrated. They got a duty to stop and put all to rights. Can't say I disagree. While they set to work, we'll look around for anything we can find. Guaranteed to be both supplies and zombies. Hoping not too many zombies, but if that old church is any indicator, I'm prob'ly hoping in vain."
Class limitations: No Faithful.
Tiles needed: 2R, 3R, 5R, 6R, 8V, & 9V.
OBJECTIVES
Restore the church. Accomplish the Objectives in this order to win the game:
- Find the chalice and the holy cross. Take the Blue and the Green Objectives.
- Give a helping hand. Rally the 2 Faithful Companions.
- Reach the Exit with all Survivors. Any Survivor and their Companions may escape through this Zone at the end of their Turn as long as there are no Zombies in it.
SPECIAL RULES
- Setup.
- Place 2 Faithful Companions in the indicated Zone.
- Place the Blue and the Green Objectives randomly among the Red Objectives, facedown.
- DO NOT place any Objective tokens in the Mine (8V).
- Will that grant me a bounty in the afterlife? Each Objective gives 5 AP to the Survivor who takes it. Remember! The Faithful cannot be rallied until the Blue and the Green Objectives have been taken.
Map legend: Survivor Starting Zone, 4x Objectives (5 AP), Spawn Zones, 2x Faithful Companions, No Objective Token, Noise Token.
Skills
Each Survivor in Undead or Alive has specific Skills with effects described in this section. In case of a conflict with the general rules, the Skill rules have priority.
The effects of the following Skills and/or bonuses are immediate and may be used on the Turn in which they are acquired. This means that if an Action causes a Survivor to level up and gain a Skill, that Skill may be used immediately if the Survivor has any Actions remaining (or the Survivor may use any extra Actions the Skill grants).
+1 Action – The Survivor has an extra Action they may use as they please.
+1 Charge per Turn – The Survivor has 1 extra use of the Brawler's Class Ability, Charge, each time they activate. This allows a Brawler to Charge more than once per Turn!
+1 Damage: [Type] – The Survivor gets a +1 Damage bonus with the specified type of Action (Combat, Melee, or Ranged).
+1 Damage: [Equipment] – The Survivor gets a +1 Damage bonus with the specified Equipment or type of Equipment (Rifle, Pistol, or Melee Weapon).
+1 to Dice Roll: [Action] – The Survivor adds 1 to the result of each die they roll during an Action of the specified type (Combat, Melee, or Ranged). The maximum result is always 6.
+1 die: [Action] – The Survivor rolls an extra die with Actions of the specified type (Combat, Melee, or Ranged). Dual weapons each gain a die, for a total of +2 dice per Dual Action of the specified type.
+1 die: [Equipment] – Roll an extra die with each Combat Action spent with the indicated Equipment or Equipment type (Melee weapon, Rifle, Pistol, etc.). Dual weapons each gain a die, for a total of +2 dice per Dual Action with the indicated weapon.
+1 free [Equipment] Action – The Survivor has 1 extra free Action to spend with the specified Equipment or Equipment type (Melee weapon, Rifle, Pistol, etc.)
+1 free [Type] Action – The Survivor has 1 extra free Action of the specified type (Combat, Melee, Move, Ranged, or Search). This Action may only be used to perform an Action of the specified type. Actions limited to once per Turn (Search, for example) are still limited to 1.
+1 free Charge – The Survivor has 1 extra free Action to use with the Brawler Class Ability, Charge. While the Charge is free, this Class Ability is still limited to once per Turn.
+1 free Fanning – The Survivor has 1 extra free Ranged Action to use with the Gunslinger Class Ability, Fanning.
+1 free Reload – The Survivor has 1 extra free Action to reload a reloadable weapon (P. 35).
+1 free Vade Retro – The Survivor has 1 extra free Action to use with the Faithful Class Ability, Vade Retro. While the Vade Retro is free, this Class Ability is still limited to once per Turn.
+1 max Range – The maximum Range of Ranged weapons the Survivor uses is increased by 1.
+1 Vade Retro per Turn – The Survivor has 1 extra use of the Faithful Class Ability, Vade Retro, each time they activate. This allows the Survivor to cast several Vade Retro per Turn!
+1 Zone per Move – When the Survivor spends 1 Action to Move, they can Move 1 or 2 Zones instead of 1. Entering a Zone containing Zombies still ends the Survivor's Move Action.
Ambidextrous – The Survivor treats all weapons as if they had the Dual symbol.
Born Leader – During the Survivor's Turn, the Survivor may give 1 free Action to another Survivor to use as they please. This Action is used immediately. Then the Born Leader Survivor resumes their Turn.
Brawler – The Survivor is considered a Brawler in addition to their starting Class (P. 23). When this skill is acquired, the Survivor's Health is increased by 1 point, and they immediately heal 1 Wound, up to their maximum Health.
NOTE: If this Skill is acquired through a Companion, the additional Wound Bar level is not acquired.
Brother in Arms: [Game Effect] – The Survivor can use this Skill or game effect whenever they are standing in the same Zone as at least 1 other Survivor. As long as Brother in Arms is active, each Survivor in the Zone (including the one with this Skill) benefits from the indicated Skill or game effect.
NOTE: Brother in Arms may be shortened to BIA.
Charge [Game Effect] – The Survivor can use this Skill or game effect when using the Brawler Class Ability, Charge (P. 23).
Charge: +1 Damage – The Survivor gets a +1 Damage bonus with the free Melee Action given by the Brawler Class Ability, Charge.
Charge: +1 to dice roll – The Survivor adds 1 to the result of each die they roll on the free Melee Action given by the Brawler Class Ability, Charge. The maximum result is always 6.
Charge: +1 die – The Survivor rolls an extra die with the free Melee Action given by the Brawler Class Ability, Charge. Dual weapons each gain a die, for a total of +2 dice per Dual Action.
Charge: +1 Zone – When the Survivor uses the Brawler's Class Ability, Charge, they can move 1 Zone further. Movement limitations still apply.
Charge: Re-roll – The Survivor can re-roll all the dice for each Melee Action given by the Brawler's Class Ability, Charge, once. The new result takes the place of the previous one. This Skill stacks with the effects of Equipment that allows re-rolls.
Combat Reflexes – Whenever any Zombies spawn within their Line of Sight, the Survivor may immediately perform a free Combat Action against them. A Ranged Action is still aimed at the Zone where the Zombies spawned and may eliminate more Zombies than have just been spawned. This Skill may be used once per Zombie card drawn.
Dual Expert – The Survivor has a free Combat Action as long as they have Dual weapons equipped. This Action may only be used with the Dual equipped weapons.
Escalation: [Action] – The Survivor gains 1 extra die to roll for subsequent Actions of the specified type (Combat, Melee, or Ranged). The bonus is cumulative and applies until the end of the Survivor's Turn. The bonus is lost whenever the Survivor performs another kind of Action.
EXAMPLE: A Survivor with the Escalation: Ranged Skill spends their first Action performing a Ranged Action with a Winchester (Dice 2). Their second Action is also spent for a Ranged Action, adding an additional die thanks to the Escalation Skill (Dice 3). The third Action is spent for a Move Action, so the Escalation bonus is lost.
Explosives Expert – Roll a die each time the Survivor discards Dynamite to perform a Ranged Action. On a result of 4 or more, the Dynamite Equipment card may be placed in the Survivor's Backpack instead, for free. The die result may not be altered or re-rolled in any way.
Faithful – The Survivor is considered a Faithful in addition to their starting Class (P. 23).
Fanning [Game Effect] – The Survivor can use this Skill or game effect when using the Gunslinger Class Ability, Fanning (P. 24).
Fanning: +1 Damage – The Gunslinger gets a +1 Damage bonus when using the Gunslinger Class Ability, Fanning.
Fanning: +1 free Reload – The Survivor has 1 extra free Action to reload Pistols when using the Gunslinger Class Ability, Fanning.
Fanning: +1 max Range – The maximum Range of Ranged weapons the Survivor uses when using the Gunslinger Class Ability, Fanning, is increased by 1.
Fanning: +1 to dice roll – The Survivor adds 1 to the result of each die they roll when using the Gunslinger Class Ability, Fanning. The maximum result is always 6.
Fanning: +1 die – The Survivor rolls an extra die when using the Gunslinger Class Ability, Fanning.
Fanning: Reaper – This Skill can be used when assigning hits while resolving a Ranged Action using the Gunslinger Class Ability, Fanning. 1 of these hits can freely eliminate an additional identical Zombie in the same Zone. Only a single additional Zombie can be eliminated per Action when using this Skill. The Survivor gains the Adrenaline for the additional Zombie.
Fanning: Re-roll – The Survivor can re-roll all the dice when using the Gunslinger Class Ability, Fanning, once. The new result takes the place of the previous one. This Skill stacks with the effects of Equipment that allows re-rolls.
Gunslinger – The Survivor is considered a Gunslinger in addition to their starting Class (P. 24).
Hit & Run – The Survivor can use this Skill for free, just after they resolved a Melee or Ranged Action resulting in at least 1 Zombie being eliminated. They can then resolve a free Move Action. The Survivor does not spend extra Actions to perform this free Move Action if Zombies are standing in their Zone. Entering a Zone containing Zombies ends the Survivor's Move Action (even if they have a Skill allowing them to move through several Zones per Move Action).
Improvised Weapon: Melee – The Survivor can use this Skill once during each of their Turns. They perform a free Melee Attack using these characteristics (Range 0, Dice 2, Accuracy 4+, Damage 1). Melee modifiers (other Skills, for example) apply.
Improvised Weapon: Ranged – The Survivor can use this Skill once during each of their Turns. They perform a free Ranged Attack using these characteristics (Range 0-1, Dice 2, Accuracy 4+, Damage 1). Ranged modifiers (other Skills, for example) apply.
Inventor – The Survivor may spend an Action and discard an Equipment card from their inventory to draw a new Equipment card. This is not a Search Action. A Survivor may use Inventor multiple times during their turn.
Ironclad: [Zombie type] – The Survivor ignores all Wounds coming from Zombies having the indicated keyword in their name. Ironclad: Walker works with any Walkers, for example.
Jump – The Survivor can use this Skill once during each of their Turns. The Survivor spends 1 Action. They move up to 2 Zones into a Zone on which they have a Line of Sight. Ignore everything in the intervening Zone. Movement related Skills (like +1 Zone per Move or Slippery) are ignored, but Movement penalties (like having Zombies in the starting Zone) apply. This Skill can be used to reach a Balcony from a Street and vice versa, without using the stairs.
Lifesaver – The Survivor can use this Skill once during each of their Turns, for free. Select a Zone containing at least 1 Zombie and at least 1 Survivor at Range 1 from the Survivor. Both Zones need to share a clear path and a Line of Sight. Choose Survivors in the selected Zone to be dragged to the active Survivor's Zone without penalty. This is not a Move Action. A Survivor may decline the rescue and stay in the selected Zone if their player chooses.
Low Profile – The Survivor can't get hit by Friendly Fire (Dynamite still applies). Ignore them when shooting at the Zone they stand in.
Lucky – For each Action the Survivor takes, the player may choose to re-roll all the dice an additional time. The new result replaces the previous one. This Skill stacks with the effects of Equipment that allow re-rolls.
Marksman – The Survivor may freely choose the targets of all their Ranged Actions. Friendly Fire is ignored.
Medic – This Skill is used during each End Phase. The Survivor, and any Survivor standing in the same Zone, may heal 1 Wound, up to their maximum Health.
Point-Blank – The Survivor can perform Ranged Actions in their own Zone, no matter the minimum Range. When resolving a Ranged Action at Range 0, the Survivor freely chooses the targets and can eliminate any type of Zombies. Their Ranged weapons still need to inflict enough Damage to eliminate the targets. Friendly Fire is ignored for the Point-Blank attack.
Quick draw – All Equipment in the Survivor's inventory is considered equipped in Hand.
Reaper: [Action] – This Skill can be used when assigning hits while resolving an Action of the specified type (Combat, Melee, or Ranged). 1 of these hits can freely eliminate an additional identical Zombie in the same Zone. Only a single additional Zombie can be eliminated per Action when using this Skill. The Survivor gains the Adrenaline for the additional Zombie.
Roll 6: +1 die [Action] – The Survivor may roll an additional die for each 6 rolled during an Action of the specified type (Combat, Melee, or Ranged). Keep on rolling additional dice as long as the dice roll 6. Game effects that allow re-rolls must be used before rolling any additional dice for this Skill.
Roll 6: +1 Damage [Action] – The Survivor gets a +1 Damage bonus for each 6 rolled during an Action of the specified type (Combat, Melee, or Ranged).
Scavenger – The Survivor may Search in street Zones. Basic Search rules apply (no Search in Zones with Zombies).
Shove – The Survivor can use this Skill, for free, once during each of their Turns. Select a Zone at Range 1 from the Survivor. Both Zones need to share a clear path. All Zombies standing in the Survivor's Zone are pushed to the selected Zone. This is not a Movement.
Slippery – The Survivor does not spend extra Actions when they perform a Move Action out of a Zone containing Zombies. The Survivor also ignores Zombies when performing Move Actions (including those allowing them to cross several Zones, with the Sprint Skill for example).
Sprint – The Survivor can use this Skill once during each of their Turns. Spend 1 Move Action with the Survivor. They may move 2 or 3 Zones instead of 1. Entering a Zone containing Zombies still ends the Survivor's Move Action.
Starts with a [Equipment] – The Survivor begins the game with the indicated Equipment. Its card is automatically assigned to them during Setup.
Steady hand – The Survivor can ignore other Survivors of their choosing when missing with a Ranged Action. This Skill does not apply to game effects killing everything in the targeted Zone (such as a Dynamite, for example).
Taunt – The Survivor can use this Skill, for free, once during each of their Turns. Select a Zone up to 2 Zones away from the Survivor with a clear path to them. No Line of Sight is needed. All Zombies standing in the selected Zone immediately gain an extra Activation. They try to reach the taunting Survivor by any means available. Taunted Zombies ignore all other Survivors. They do not attack them and leave the Zone they are standing in if needed to reach the taunting Survivor.
Townsfolk – The Survivor is considered a Townsfolk in addition to their starting Class (P. 24).
Vade Retro [Game effect] – The Survivor can use this Skill or game effect in a Zone containing the Vade Retro token. (See P. 23 for Vade Retro Token effects).
NOTE: Vade Retro may be shortened to V.R.
Vade Retro: +1 Damage – The Survivor gets a +1 Damage bonus to all Combat Actions hitting Zombies standing in a Zone with a Vade Retro token.
Vade Retro: +1 die – The Survivor's weapons get a +1 die bonus when attacking Zombies standing in a Zone with a Vade Retro token. Dual weapons each gain a die, for a total of +2 dice per Dual Action.
Vade Retro: +1 free Combat Action – The Survivor gets a free Combat Action to use against Zombies standing in a Zone with a Vade Retro token.
Vade Retro: +1 to dice roll – The Survivor adds 1 to the result of each die they roll when performing a Combat Action against Zombies standing in a Zone with a Vade Retro token. The maximum result is always 6.
Vade Retro: Re-roll – When attacking Zombies standing in a Zone containing a Vade Retro Token, the Survivor can re-roll all the dice once. The new result takes the place of the previous one. This Skill stacks with the effects of Equipment that allow re-rolls.
Zombie Link – The Survivor takes an extra Turn each time an Extra Activation card (NOT Abomination cards) is drawn from the Zombie deck. They play before the extra-activated Zombies. If several Survivors benefit from this Skill at the same time, players choose their Turn order.
Game Round Summary
Each Round begins with:
1 – Player Phase
The first player activates all of their Survivors, one after the other, in any order. When they're done, the next player's Turn begins. Play clockwise. Each Survivor has 3 Actions to spend, chosen from the following list. Unless stated otherwise, each Action may be performed several times per Turn.
- MOVE: Move 1 Zone (spend extra Actions if there are Zombies).
- SEARCH (1x per Turn, except Townsfolk): In a building Zone free of Zombies only. Draw a card from the Equipment deck.
- REORGANIZE/TRADE: The Survivor can reorganize the cards in their inventory in any way the player wishes. The Survivor can simultaneously exchange any number of cards with 1 other Survivor currently in the same Zone. This other Survivor may reorganize their own inventory for free.
- COMBAT ACTION: Melee Action: Equipped Melee weapon required. Ranged Action: Equipped Ranged weapon required.
- TAKE OR ACTIVATE AN OBJECTIVE in the Survivor's Zone.
- MAKE NOISE: Place a Bang! Noise token in the Survivor's Zone.
- DO NOTHING: All remaining Actions are lost.
After all players have completed their turn, resolve a TRAIN movement.
2 – Zombie Phase (when every player has finished)
STEP 1 – ACTIVATION: ATTACK OR MOVE
All Zombies spend 1 Action doing 1 of these 2 things:
- ATTACK: Zombies in the same Zone as at least 1 Survivor Attack them.
- MOVE: The Zombies who didn't Attack, Move.
Each Zombie favors visible Survivors, then Noise. Choose the shortest path. If several paths share the same length, split the Zombies in equal groups (any odd-numbered Zombie goes with the group of the players' choosing).
NOTE: Runners get 2 Actions per Activation. Once all Zombies have taken their first Action, Runners go through the Activation Step again to resolve their second Action.
STEP 2 – SPAWN
Always draw Zombies cards for all Spawn Zones in the same order (play clockwise). Uses Highest Danger Level among the Survivors.
No more minis of a specified type? Set the remaining ones. Then, spawn an Abomination. If there is already one on the board, it gets an extra Activation.
If an Abomination is Spawned, activate all Abomination Spawn Zones. They spawn if players haven't already passed them during the Spawn Step.
3 – End Phase
Flip the Noise token to its Bang! side. If there is only a Bang!, it is moved to the Zone with the most Survivors.
The next player receives the First Player token (play clockwise).
Targeting Priority Order
When several targets share the same Targeting Priority Order, the players choose which ones are eliminated first.
| Targeting Priority | Name | Actions | Min. Damage to eliminate | Adrenaline earned |
|---|---|---|---|---|
| 1 | Brute / Abomination | 1 | 2 / 3 | 1 / 5 |
| 2 | Walker | 1 | 1 | 1 |
| 3 | Runner | 2 | 1 | 1 |