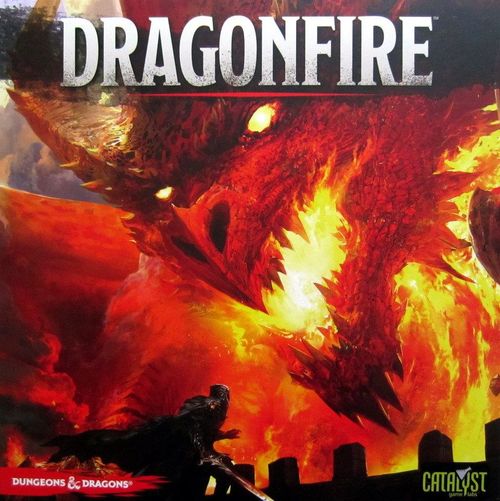
Dragonfire
Dragonfire Rulebook
Table of Contents
Table of Contents
Box Contents
Dragonfire contains everything you need to play:
- Dungeon Difficulty 1 Encounter Deck (20 cards)
- Dungeon Difficulty 2 Encounter Deck (20 cards)
- Wilderness Difficulty 1 Encounter Deck (20 cards)
- City Difficulty 1 Encounter Deck (20 cards)
- Adventurers Difficulty 2 Encounter Deck (20 cards)
- A selection of six Difficulty 3 Encounters
- Basic Market (Equipment Pack) Deck (48 cards)
- Market Deck (60 cards)
- Magic Items Deck (54 cards)
- Character screens (16)
- Adventure cards (8)
- Adventure Environment card
- Adventure Companion booklet
- Sticker sheets
- 8 Class Type markers (2 for each Class Type)
- Tokens
- Plastic clips
- Quick-Start Rules booklet
- Rulebook
Objective of the Game
In Dragonfire, players assume the roles of their favorite Dungeon & Dragons® classes and races. With chosen Character screens ready, the players select an Adventure that determines the details of the current game. Each Adventure is broken up into a number of Scenes. During each Scene, the players face a number of encounter cards representing monsters and villains. Each turn, players each have the opportunity to play cards against encounters and purchase more cards to increase the strength of their decks.
While players must face encounters individually, cooperative play is the name of the game: players will need to work together to defeat all the enemies.
Defeat all of the encounters to complete a Scene. Complete all of the Scenes in the Adventure, and you win the game!
Important Terms: The first time an important term appears it is bolded.
HINTS: Sidebar hints are found throughout the rules to help increase your enjoyment of the game! You do not have to read these sidebars before your first game. Skip them, get through the rules and into a game. Then you can peruse them to increase your expertise!
Getting Started
Summary of Play
The game takes place across a number of Scenes as determined by the selected Adventure. Gameplay follows these basic rules, although some Adventures can modify these. For the complete rules, see page 10.
The party—the players involved in the current game—start by selecting their characters and building their Equipment Packs of starting cards. Then they set up the Encounter Decks that will be used for that Adventure. Encounters are then drawn from the Primary Deck to face each specific player. Finally, depending on the number of players, a Dragonfire card is revealed, read out loud, and placed on top of the Dragonfire Deck.
Starting with the party leader and moving to the left, each player takes their turn. (The party leader stays the same throughout the game.) Once the last player has taken their turn, the round ends.
On their turn, the active player follows these steps in order:
- Start Turn: Choose to move into or out of a Location, as well as resolve any "start of your turn" effects.
- Play Cards: Play cards (including any Assists played by other players) and then apply non-damage effects from card text.
- Deal Damage: Deal damage from cards to encounters.
- Take Damage: Encounter(s) facing the active player attack and deal damage.
- Replenish: During the Replenish phase, if the active player has three or fewer cards in hand, they draw two cards.
- Market: If they have enough gold, the active player may purchase any number of cards from the Market. If they do not purchase a card, the active player must cycle one card into the Market.
- End Turn: The players' turn ends.
At the end of the round, discard the face-up Dragonfire card on top of that deck (if any); if a card is discarded, the Dragonfire level increases by 1. Reveal a new Dragonfire card and read the flavor text aloud, then apply any effects from the card's text (based on the encounters and characters in play, as well as the Dragonfire level), and place the card face-up on top of the Dragonfire Deck. Then the party leader starts the next round by taking their turn.
At the end of any player's turn, if all encounters have been defeated, the round immediately ends—that Scene has been completed. Bury the revealed Dragonfire card by placing it on the bottom of that deck; it doesn't increase the Dragonfire level.
After a Scene ends, there is a Short Rest, during which players can heal HP, purchase cards, and remove Exhausted tokens.
Once the Short Rest is done, a new Scene begins. New revealed encounters face players and will become more difficult (drawn from the Secondary Deck) as the Dragonfire level increases.
If players complete all the Scenes in the Adventure, they complete that Adventure and win the game.
At the end of a game, players earn Experience Points (XP) based on their progress through the Scenes of the Adventure. These can then be used to purchase Features (stickers) that will increase the overall strength of their characters. If they complete the Adventure, they can also earn Magic Item cards to improve their characters.
Card Types
Dragonfire contains a number of different types of cards, which are explained below.
Market Cards
Each Market card has the following stats:
- Name: The name of the card.
- Damage: How much damage the card deals, if any.
- Cost: How much gold the card costs to buy from the Market.
- Class Type: Each card has a Class Type—Devotion, Arcane, Deception, and Martial—with a corresponding color and text for clarity. Some effects, card abilities, and Adventure rules refer to Class Type.
- Basic card: A Basic Market card is used when building a character's Equipment Pack at the start of the game. Basic Market cards denote themselves as such.
- Card Ability: The card's special abilities (which can include extra damage), as well as requirements to purchase and/or play, if any.
- Assist Ability: This ability appears on some cards. You can use Assist abilities only during another player's turn to help them. Assists are particularly important for defeating Locations (see Locations, p. 12).
- Card Number: Used to keep track of cards in a set.
- Market Card Back
Character Screen
Each Character screen has the following stats:
- Name: You can write your character's name here.
- Equipment Pack: The unique build of Basic Market cards that form your starting draw deck. (Some will include non-Basic Market cards.)
- Starting Hand: The number of cards you draw from your deck at the start of the game. (After the start of the game, this has no effect.)
- Starting Gold: The amount of gold you have at the start of the game. (After the start of the game, this has no effect.)
- Health Track: Numbers and icons along the top of a Character screen represent how many HP your character has remaining.
- Starting Hit Points: The number of HP your character has at the start of the game (place a clip on that number on the Health Track). A character can't be healed beyond their starting HP value.
- Class Type/Character Class: Your character's Class Type, as well as a specific Character Class within that Class Type.
- Race: Your character's race.
- XP (Experience Points): Track the XP earned across multiple Adventures here.
- Level: The current Level of the character.
- Racial/Class Ability: If the character has a special racial ability or class ability, it is written here.
Encounter Card
Each encounter card has the following stats:
- Name: The name of the encounter.
- Damage Track: This set of icons shows the types and amounts of damage you must inflict to defeat the encounter. You must clear each level on the track, in order, from top to bottom.
- Encounter Type: Each encounter has a type. Some effects, card abilities, and Adventure rules refer to this type.
- Encounter Color: Each encounter has a color that corresponds to the Class Types: black = Martial, blue = Arcane, green = Devotion, and red = Deception. Some effects, card abilities, and Adventure rules refer to this color.
- Card Ability: Some encounters have abilities that affect the game, usually causing problems for the party. An encounter's ability might be always in effect, or it can trigger when the card is first turned face up into play (SURPRISE and TOKENS), when it is defeated (VANQUISHED), when the Dragonfire level is at a certain threshold, or at other times as described by the ability.
- Attack Strength: The damage the encounter deals to the character it faces.
- Gold: The amount of gold the defeated encounter is worth to the party.
- Tripwire Trait: This white line on the damage track of some cards represents a Tripwire, and corresponds to the underlined Trait text on the card. As soon as any level below the Tripwire line has been cleared, the card's underlined Trait is immediately activated, even if the encounter is defeated (when applicable).
Environments and Encounters
Dragonfire includes the following Encounter Decks (the environments of the obstacles you'll be trying to defeat):
- Dungeon
- Wilderness
- City
- Adventurers
- Coastal
- Any (can be added to any deck)
Future Encounters: New encounters for existing environments (as well as brand new environments) will appear in future releases. Unless specifically stated in an Adventure, use the following guidelines when adding new encounter cards.
- Always add encounters to the appropriate decks, based on the icon, as well as the number of icons (the difficulty).
- Each Encounter Deck should always have at least 20 cards but no more than 40.
- All encounters from an expansion must be included if any will be added.
- If you remove any encounters, all associated encounters (i.e., from the base game or an expansion) must be removed.
Dragonfire Card
Each Dragonfire card has the following stats:
- Name: The name of the card.
- Flavor Text: Text to be read aloud when the card is revealed (has no rules effect).
- Dragonfire Effect: The card's primary effect, if any. These events change gameplay during each round.
- Continuous Effect Icon: Many effects have a continuous effect icon as a reminder that the card has an ongoing effect on the game. Continuous effects end when the card leaves play.
- Dragonfire Level Effect: The card's secondary effect, if any (some cards may only have this secondary effect). It triggers only when the Dragonfire level is at or above the indicated threshold. This effect often enhances the primary effect.
- Deadfall Effect Icon: Many effects have a Deadfall icon. These icons are a reminder that an effect triggers when the card is placed in the Dragonfire discard.
- Card Number: Used to keep track of cards in a set.
- Dragonfire Card Back
Example card — FRENZY: Your foes momentarily shimmer before your eyes. As the effect dissipates, you wonder if you're still seeing things: they appear taller and stronger, their eyes filled with inhuman rage. Each Humanoid encounter heals 1 level. The Attack Strength of each Humanoid encounter increases by 1. In addition, summon Humanoid (or any, if no Humanoid) from the Secondary Encounter Deck and place that encounter facing the character whose Class Type matches it. Then immediately summon any from that deck and place the second encounter facing that character (the second encounter has no gold value). Bury the rest.
Keywords
The glossary starting on page 28 explains keywords for ease of reference during gameplay. However, you'll need to understand a few important concepts and icons as you read through the rules.
Class Type (Color)
There are four color-coded categories of Class Types:
- Arcane: blue cards
- Deception: red cards
- Devotion: green cards
- Martial: black cards
Character Class
The Character Class is the primary definition of what your character can do—your character's calling.
All Character Classes fit into one of the four Class Types above. The base color of each Character screen corresponds to the Class Type, and also has a large Class Type icon watermark.
The base game includes only one Character Class in each Class Type: Wizard (Arcane), Rogue (Deception), Cleric (Devotion), and Fighter (Martial). However, future releases (such as the Heroes of the Sword Coast™ Character Pack) will include additional Character Classes such as Bard (Deception), Druid (Devotion), Ranger (Martial), and Warlock (Arcane).
Race
The lands of the Forgotten Realms are populated by many races: elves, dwarves, half-orcs, humans, and more. Your choice of race will have an impact on the games you play. Both race and Character Class create a final, unique set of Dragonfire stats.
The base game includes five races and four Character Classes across a total of sixteen Character screens. Future expansions will build on the possibilities of these combinations.
Class Types in a Game
For the most balanced game experience, a party should always include all four Class Types: Arcane, Deception, Devotion, and Martial.
Yet players can choose from whatever Character screens are available. If any Class Types are not present among the selected Character screens, those must still be represented in the game. Choose one or more players to represent the absent Class Types: these players still select one Character screen as their primary Class Type, but for the purposes of encounters, Skill Checks—and any "Requires X Class" rules on Market cards—they are also considered to be the second Class Type as well. (You can take both Class Type markers as a reminder.) For example, if no one chooses to be a Deception-based character, one of the players must take a Deception Class Type marker in addition to their chosen Class Type; this means they can buy and play "Requires Deception Class" cards, any encounters that need to be placed in front of a Deception character will face that player, and so on.
The only exception to the above rule is if a card specifically calls out "primary Class Type" for its effect, then the second Class Type does not count. For example, for the Old Enemies Dragonfire card, the drawn encounter will only face the player if the encounter matches the player's primary Class Type, regardless of their second Class Type.
The game assumes that players will choose no more than two of a Class Type per game; hence the two markers per Class Type. If players wish to play more than two of a Class Type in a game they'll need to use some other means for tracking their movement as well as determining first encounter placement.
Number of Players
Two-Player Games
In two-player games, both players must act as two Class Types, as noted in the Class Types in a Game sidebar.
Both players exchange one of their Equipment Pack cards for a Bless Market card.
Additionally, the Dragonfire level starts at -2, meaning that you play two rounds before the first Dragonfire card is revealed.
Locations: If one player is already in a Location and another Location is revealed for the second player, discard it and reveal a new encounter. (Locations are detailed on page 12.)
Three-Player Games
In three-player games, one player must act as two Class Types, as noted in the Class Types in a Game sidebar.
That player exchanges one of their Equipment Pack cards for a Bless Market card.
Additionally, the Dragonfire level starts at -1, meaning that you play one round before the first Dragonfire card is revealed.
Class Types in a Game
The rules above only apply to two- and three-player games, not to four or more player games where some players are playing as two Class Types.
TWO- & THREE-PLAYER GAMES: WHICH CARD TO TRADE OUT? There is no hard-and-fast rule for exactly which card to trade out for Bless when playing two- or three-player games. Generally speaking, the secondary Class Types each player selects won't have as many Basic cards of that color. This means for a portion of the game you'll be deficient in that color, which can cause you problems if too many encounters of that color show up.
For example if in a two-player game both players are human and there's a Fighter (Cleric secondary) and Wizard (Rogue secondary), then they will not have many green or red cards, so the players may decide they will switch out the color they have the most of. For example, the Fighter might switch out a black card, while the Wizard switches out a blue card. Then again, other players may decide to exchange their secondary colors instead.
The Character screens, which Class Types are or are not present, and ultimately players' style of play will help determine the most effective cards to trade out.
Setup
Each player places their Character screen in front of them. They collect gold from the common supply and place a clip at the starting HP on their character's Health Track, as indicated by the Character screen.
Players then build their characters' Equipment Packs (their starting deck). Each Character screen includes a series of Class Type icons that details which Basic Cards make up the character's Equipment Pack, as follows:
- Cantrip (Basic Arcane)
- Stealth (Basic Deception)
- Grace (Basic Devotion)
- Glory (Basic Martial)
Once the Equipment Packs are built, each player shuffles their deck and draws a starting hand according to the icon on the Character screen.
Finally, each player takes a Class Type marker. If more than one player is playing a character of the same Class Type, each player of that Class selects a different-numbered Class Type marker; it may be helpful to note the number of your Class Type marker to remind you which marker is yours.
Once the players have finished setting up, set up the general playing area.
FUTURE CHARACTER SCREENS: Some Character screens in future expansions (such as the Heroes of the Sword Coast™ Character Pack) will include additional Character Classes where the Equipment Pack will indicate either a standard Market card or a unique Basic card included with the expansion. These cards—such as Color Spray, Tinker, and so on—will be noted at the end of the Equipment Pack line, so that a player will know to grab the standard Basic cards and then add the indicated card(s) to complete their Equipment Pack.
Place the oversized Adventure Environment card in the middle of the table. All players place their Class Type markers on it. This card has no effect on play.
Take all remaining tokens and clips and put them into a common pile in the middle of the table.
Shuffle and place the Market Deck within reach of all players, then reveal six cards to create the Market. (Depending on the races chosen, this number may be higher.) Once revealed, if the entire Market is one color, reshuffle the deck and lay out a new Market.
Determine who will be the party leader, who will also take the first turn of the game. Place the Dragonfire Deck to the right of that player; they also take the Dragonfire token.
ADVENTURE ENVIRONMENT CARD: The Adventure Environment card has no rules text. It's simply a way for players to visualize that the party is together, working their way through the Adventure. When a Location is revealed and faces a player, that player is split off from the party and moves their Class Type marker to the newly revealed Location in front of them. If other players move to that Location at the start of their turns, they'll move their markers as well. When a player moves out of a Location (or the Location is defeated), the marker is then placed back on the Adventure Environment card.
Players may find it useful to place the Class Type markers around the outside edge of the Adventure Environment card, with each oriented to where they're sitting around the table. This is especially important when more than one Class Type is in use, to ensure players remember which marker is theirs.
Adventure Environment cards are double-sided, so a given party can decide which visual they wish to use for a given Adventure.
THE MARKET DECK: The metallic hiss of a blade sliding free of its scabbard. The soft-booted, unseen approach behind your target. Magical energies from the Weave surging along your skin, constrained by the words of learned knowledge, until they burst forth at your command.
Each round of Dragonfire emulates the fluid give-and-take of action as players try to fast-talk their way past a tough spot, pull back and wait for a better sneak-attack opportunity, or draw their blades and strike with grim fury. Market cards represent all of the decisions—along with various equipment, spells, abilities, and more—you make to defeat a myriad of encounters and ultimately complete the Adventure!
THE ENCOUNTER DECK: Craven, reptilian kobolds. The slaadi, creatures of utter chaos. Cursed, godless fomorians. Ageless, unstoppable golem constructs. The lands of the Forgotten Realms teem with a superabundance of monsters of every stripe. Whether in a crowded city, the farthest forest wilderness, or the darkest dungeons, terrors lurk at every turn, ready to defeat the unwary hero.
The Encounter Decks represent these creatures from Dungeons & Dragons® lore. Each deck is divided into specific environments (and difficulty ratings) to provide variety during different games, and each card tries to bring that lore to life. A few examples of translating from the tabletop RPG to Dragonfire: the Fomorian's evil eye can damage you or itself; the Red Slaad, when defeated can transform and summon another slaad; the Stone Golem slows players, which translates into losing cards during your Replenish phase; and the Kobold Pack's tokens emulate an unending wall of the beasts washing over your party.
Let each new encounter take you on a new storytelling experience that brings the monsters to life.
Place the Primary and Secondary Encounter Decks in the middle of the table (the Adventure will indicate which decks to use). At the start of each Scene, draw a number of encounters as indicated by the Adventure. Unless stated otherwise by the Adventure:
- First reveal encounters from the Secondary Deck equal to the Dragonfire level. (For most games, the Dragonfire level will start at 0.)
- If more encounters are needed for the Adventure, reveal encounters from the Primary Deck for the remainder.
- When the first encounter is revealed, place it facing the character whose Class Type color matches the encounter's color. If there's more than one such character, flip the Dragonfire token—if the Dragonfire logo is showing, place the encounter with the player with the first Class Type marker; if it's not showing, place the encounter with the player with the second Class Type marker. Distribute and reveal the rest of the encounters, starting with the next player to the left of the first assigned encounter and moving to the left.
- As each encounter is revealed, if there is a SURPRISE keyword on the card, immediately resolve the Surprise effect before revealing the next player's encounter.
Once all encounters are revealed, the party leader reveals the first Dragonfire card and reads the flavor text out loud. Then they read the rules text to determine which effects, if any, are applicable (based on the Dragonfire level, Class Types, encounters in play, and so on), and place the card face-up on top of the Dragonfire Deck.
You're now ready to begin the game!
Revealing Encounters
When revealing encounters at the start of each Scene, several factors will determine the total number of encounters to add. These are noted below, in the order they should be added (some may or may not apply based on the specifics of the game being played).
Locations: If a newly revealed Location would place all players in different Locations, discard it and reveal a new encounter. (Locations are detailed on page 12.)
1. The Adventure
Each Adventure will provide the details of exactly how many encounters are to be revealed per Scene, as well as how often you will draw from the Primary and Secondary Decks.
2. Five- and Six-Player Games
Unless an Adventure specifically states otherwise, the following rules apply:
- Five Players: At the start of each Scene, after revealing all encounters as indicated above, reveal one additional encounter from the Primary Encounter Deck. Place it facing the next player to the left. This new encounter has no gold value. (Players can cover the encounter's gold icon with a generic token to indicate there will be no payout when it is defeated.)
- Six Players: Use all of the five-player rules above, but reveal the additional encounter from the Secondary Encounter Deck instead.
SIX-PLAYER ENCOUNTERS EXAMPLE: A six-player game is starting Scene Three of the Dungeon Crawl Adventure with a Dragonfire level of 5. The following is the total number of encounters:
Scene Three of Dungeon Crawl = Number of Characters +2 = 8 encounters
Six-player game = +1 encounter (no gold value)
9 Total
The following is the difficulty rating of those encounters:
- Dragonfire level = 5 encounters from Secondary Deck (Difficulty Rating 2)
- Remaining Scene Three encounters = 3 encounters from Primary Deck (Difficulty Rating 1)
- Six-player game = draw 1 encounter from Secondary Deck (Difficulty Rating 2, no gold value)
So a total of nine encounters would be revealed—not including any summoned encounters. The first five come from the Secondary Deck (Difficulty Rating 2 cards) due to the Dragonfire level being 5, and the remaining three for the Scene's total encounters (as detailed on the Adventure card, i.e., "Number of Characters + 2") would come from the Primary Deck (Difficulty Rating 1 cards). The ninth encounter—added due to this being a six-player game—is drawn from the Secondary Encounter Deck; this extra encounter does not provide a payout, and so a generic token is placed over its gold icon as a reminder.
SETUP EXAMPLE (SEE DIAGRAM, P. 6): This game has five players—Hilary, Kate, Chris, Dave, and Liz—and they are playing the Dungeon Crawl adventure.
Hilary is playing a male Shield Dwarf Cleric. As indicated by the Character screen, she starts with 5 gold. Then she places a clip on the 8 along the Health Track of her Character screen, representing her starting HP. Next she creates her Equipment Pack. Following the printed icons, she selects four Graces (Basic Devotion), two Glorys (Basic Martial), one Stealth (Basic Deception), and one Cantrip (Basic Arcane), for a total of eight cards. After shuffling those to create her draw deck, she notes on her Character screen that her starting hand is four, so she draws four cards.
Around the table, starting at her left, are the other players and their Character screens: Kate (Half-Orc Fighter), Chris (Human Cleric), Dave (Half-Elf Rogue), and Liz (Sun Elf Wizard). They have also set up their characters. Because they're playing with two of the same Class Type—two Clerics (Devotion)—they determine Hilary will be Devotion 1 and Chris will be Devotion 2, and everyone grabs their Class Type markers.
They then set up the table, placing the Market by laying out six cards, Dungeon Difficulty 1 Encounter Deck (the Primary Encounter Deck), and Dungeon Difficulty 2 Encounter Deck (as the Secondary Encounter Deck), in the middle of the table. They place the various tokens in a common pile. Hilary will be the party leader, so she places the Dragonfire deck to her right and takes the Dragonfire token to mark her as the party leader. She'll then take the first turn.
Now it's time to lay out the encounters. Since it's the first turn and the Dragonfire level is 0 (there are no cards in the Dragonfire discard), they don't draw from the Secondary Encounter Deck. However, since there are five players, they add one additional encounter from the Primary Deck—for a total of six encounters for the first Scene. This sixth additional encounter, which is placed at the end of the other encounters, has no gold value.
They reveal the first card from the Primary Encounter Deck, which is green, so it must be placed facing a Devotion character. Since there are two Devotion characters—Hilary's Shield Dwarf Cleric and Chris's Human Cleric—they pick up the Dragonfire token and flip it. It comes up heads, so the encounter faces the player with the first Devotion token, which is Hilary. Now Hilary looks at the card: it is Swarming Skeletons and has the TOKENS keyword, so she places two green Encounter tokens next to the card.
The next card revealed, Gelatinous Cube, is placed in front of the player to Hilary's left (its color no longer matters for placement) and so goes to Kate. Next an Orog is placed in front of Chris (the 8+ Dragonfire effect on the card doesn't apply). Dave faces a Red Slaad.
The last card is Choke Point, which is a Location. As soon as it is placed facing Liz, she moves her Class Type marker from the Adventure Environment to the card to indicate she's now in that Location. The SURPRISE keyword on Choke Point says "Summon any" and immediately takes effect, so they reveal the next card, a Chuul, which is also placed in front of Liz. Since the Chuul was summoned, it doesn't count as the sixth card they need to reveal, so they reveal a last card, a Troll, and place it in front of Hilary, who is the next person to the left, leaving her also facing two encounters. Finally, since this card was put into play due to five players, she places a generic token over its gold icon to indicate there will be no payout when the Troll is defeated.
Now that all the encounters are placed, Hilary reveals the first Dragonfire card, Magical Surge. She reads the flavor text out loud, then reads the rules: "The Attack Strength of each blue encounter increases by 1." (The 4+ Dragonfire effect text doesn't apply yet.) There is only one blue encounter, the Chuul, so they place a +1 token on that card as a reminder of the Dragonfire card's effect.
With the table all set up, the players spend a few minutes to consider how they will deal with the encounters as a team to complete this first Scene. With a plan in hand, Hilary starts the first turn of round one.
Example encounter cards:
- Swarming Skeletons (Undead, Difficulty 1, Dungeon): TOKENS: 2. 6+: Tokens are instead: 2 + 1. 8+: Tokens are instead: 2 + 2. Animated by dark magic, they heed the summons of spellcasters who call them from their stony tombs. Gold: 1.
- Choke Point (Location (2), Difficulty 1, Dungeon): SURPRISE: Summon any. You can't play more than two cards on your turn. Gold: 2.
- Chuul (Aberration, Difficulty 1, Wilderness): An Arcane character may discard Arcane cards to prevent damage equal to the number of cards discarded. 6+: +1 Attack Strength. 8+: Instead, +2 Attack Strength. Gold: 2.
- Magical Surge (Dragonfire card): Magical runes, writ in blazing light, swirl over and around each of your opponents, dancing to the chant of a hundred whispering voices. They fade, but your enemies' eyes are glowing with renewed purpose—and power. The Attack Strength of each blue encounter increases by 1. In addition, at Dragonfire level 4+: reveal cards from the Secondary Encounter Deck until a blue encounter is revealed and place it facing the Arcane character (or any, if no blue). Bury the rest.
Complete Game Rules
Dragonfire is played across a number of Scenes, as determined by the chosen Adventure. Each Scene is divided into a number of rounds, with each round consisting of each player at the table taking one turn.
The number of rounds in a Scene is dependent on gameplay. A Scene ends when, at the end of any player's turn, all encounters facing the characters have been defeated.
Shuffling Discard Piles: Unless specifically stated otherwise, never shuffle a discard pile of any type to create a new deck unless you must reveal a card from that deck and cannot. This applies to encounters, your draw deck, and so on.
Scenes & Rounds Order
As noted above, Scenes are divided into a number of rounds. Encounters are revealed at the start of a Scene, while the Dragonfire Deck activates during rounds. Each step below is completely finished before moving onto the next step.
Steps of a Scene & Round
- Start Scene: Reveal Encounters (Encounters phase).
- Start Round:
- a. Reveal Dragonfire card (Dragonfire phase)*
- b. Players' Turns: Each player takes their turn.
- c. End Round: Repeat round until Scene is complete.
- End Scene: Bury active Dragonfire card.
**For most Adventures, the game will start with revealing a Dragonfire card. However, after Scene One, the end of a round will often no longer coincide with revealing a Dragonfire card (see Dragonfire Cards, below).
Dragonfire Cards
Immediately prior to the party leader's turn, that player puts the current Dragonfire card (if any) into the discard, then draws the top card of the Dragonfire deck and reads the flavor text aloud. Then the player reads the applicable rules text aloud.
Follow the instructions for that card's effect(s). Many Dragonfire cards have effects that happen only if the Dragonfire level is high enough (see below). For example, if an effect has the Dragonfire-level icon before it, it happens only if the Dragonfire level is 2 or higher at the time it is revealed. While the Dragonfire card is active, it remains face up and in play on top of the Dragonfire Deck. As soon as an active Dragonfire card goes to the discard, its effects no longer apply.
The Dragonfire Deck provides the setting for the current round of the Adventure. The situation changes as an Adventure progresses. Most Dragonfire cards have a primary effect that changes play for an entire round. Many also have a Dragonfire level effect that triggers when the Dragonfire level is at a particular threshold. Some Adventures change when you draw new Dragonfire cards, while others might change the number of Dragonfire cards in the deck.
THE DRAGONFIRE DECK: The Dragonfire deck represents the sound of orc drums in the cavern depths, the clatter of hoofs on cobblestone in pursuit, the spidery claws grasping at your cloak in the tangled wood. It is the driving pressure that keeps the game exciting and grows ever more dangerous the longer you take. At any moment, the orcs might appear, the horse might heave into view, or the claws might snap the cloak tight against your throat.
While it's a keystone of the game, the Dragonfire deck can often be forgotten in the heat of battle, as monsters are slain and gold is shared. Here are several ways to help ensure this crucial component is appropriately played:
- When determining the party leader, make sure that player knows it will be their responsibility to keep track of the Dragonfire cards throughout the entire game. Each time a player's turn starts, the party leader should do a quick review of the current Dragonfire card to ensure that the new player is abiding by its rules.
- The party leader should be the character with the most HP (usually a Martial Class). The order around the table can matter. A good rule of thumb: characters with the most HP should be near the start of a round; characters with the least HP should be near the end of the round.
- The Dragonfire token is intended to help players remember to turn up a new Dragonfire card when it's time. We suggest that the party leader place the Dragonfire token on top of their hand of cards, after completing their turn. That way, when it's time for that player to take their next turn, they will notice the token when they reach for their cards and remember to deal with the Dragonfire deck first.
- Place the current Dragonfire card on top of the deck after reading it. That way it's never confused with the Dragonfire discard, which represents the Dragonfire level.
- Arrange the cards in the Dragonfire discard so that the number of cards can be easily counted at a glance to determine the Dragonfire level.
The Party Leader Rarely Changes: For the first Scene, the above rules will also coincide with the start of a round. However, after the first Scene, new Scenes will often start with other players. The party leader rarely changes, and a new Dragonfire card is always only ever revealed directly before the start of the party leader's turn, regardless of which player took the first turn of a new Scene. Only effects from the game may possibly change the party leader.
Dragonfire Level
Adventuring is dangerous work. You've got to get in, dispatch the evil, and get out fast. If you let the Dragonfire level creep up, you'll find yourself awash in monsters.
The Dragonfire level is equal to the number of cards in the Dragonfire discard; the active Dragonfire card on top of the deck does not count toward the Dragonfire level. Many effects in the game, including those on Dragonfire cards, depend on whether the Dragonfire level is at or above a particular threshold. For example, if there are four cards in the Dragonfire discard, and the Surging Evil Dragonfire card is active, then all black encounters would heal all levels. All such effects only apply if the Dragonfire level in question is reached before the Dragonfire card is revealed.
Example Dragonfire card — SURGING EVIL: A dark malevolence sweeps across the battlefield, dragging with it a harrowing silence that mutes the ring of steel against steel. Your pulse pounds in your ears. And your enemies grin savagely as they push forward with renewed strength in their arms. The Attack Strength of each black encounter increases by 1. In addition, at Dragonfire level 4+: each black encounter heals all levels.
Burying a Dragonfire Card
At the end of any player's turn, if the Scene has ended, the party leader removes the active Dragonfire card from play and puts it on the bottom of the Dragonfire deck (not in the discard). This is called burying the card, and it does not increase the Dragonfire level.
Dragonfire cards with the Deadfall icon on them (see below) have an effect that occurs only when they are put in the discard pile. Burying a Dragonfire card that has a Deadfall effect lets the players avoid that effect.
Reminder Icons
Some Dragonfire cards have the following icons in front of their effects, to remind you that the effect extends beyond when you first reveal them.
- Continuous: This icon indicates that the card's effect lasts as long as the card is active.
- Deadfall: This icon indicates that the effect triggers when the card is placed in the Dragonfire discard. If the card is buried (placed on the bottom of the Dragonfire deck), this effect doesn't trigger.
Dragonfire Icon
Some effects and card abilities trigger only when the Dragonfire level reaches a particular threshold. The number next to the Dragonfire icon shows the Dragonfire level necessary for the ability or effect to trigger. For example, a "5+" Dragonfire icon means that the ability or effect listed after the icon triggers if the Dragonfire level is 5 or higher.
However, these Dragonfire level effects only apply when the card is revealed, unless the effect also includes the Continuous icon. For example, the Green Slaad enters play while the Dragonfire level is at 4. However, because the "5+" effect does not have a Continuous icon, when the Dragonfire level hits 5, even if the Green Slaad is still in play, that effect would not occur; i.e., the "Summon any" effect would only apply if the Dragonfire level were 5 at the time the card is revealed.
Example Dragonfire card — DARK ARTS: Dark, distant chanting, as if a hundred voices screaming miles away, walks a cold chill up your spine. The words darken your vision as your enemies rally, filled with new and terrifying purpose. Each non-Humanoid, non-Location Encounter heals 1 level. 1. The Attack Strength of each non-Humanoid, non-Location Encounter increases by 1. 2. In addition, at Dragonfire level 4+: any non-Humanoid, non-Location Encounters that have a "must Save" immediately Save (regardless of usual requirements) and immediately apply the Success or Failure, as appropriate.
REMINDER ICONS EXAMPLE: This effect happens when Dark Arts is revealed, so there is no reminder icon next to it. 1. This effect lasts while Dark Arts is the active Dragonfire card. 2. If the Dragonfire level is 4 or higher when Dark Arts comes into play, this additional effect applies.
Example encounter card — GREEN SLAAD (Aberration, Difficulty 2, Dungeon): 5+: Summon any (it has no gold value). 7+: Instead, summon any two (they have no gold value). Weakness: Attack Strength is now -1. Spellcasters and infectious shapechangers have no conscience nor one redeeming quality. Gold: 2.
WHEN TO END A SCENE: There are times when players will be in a position to choose when they'll end a Scene. Sometimes it's worth spending most of the cards in players' hands to ensure you end a Scene before you move up a Dragonfire level. However, there may be other situations when it's better to go another round so everyone can draw cards and be prepared for the next Scene. Or players could end the Scene before the next Dragonfire card moves into the discard. However, if they end the round right after the Dragonfire activates then they'll play most of the next Scene without a Dragonfire card. There's plenty of great ways to manipulate ending the Scene for the best effect.
Additional Encounter Rules
Some encounters include the following additional rules.
Example encounter card — GRICK KNOT (Monstrosity, Difficulty 1, Dungeon): TOKENS: 1 (Token Damage Track 1, Token Attack Strength 1). SURPRISE: If another Grick Knot is in play, add one additional token to both cards. "If its tentacles snag you, its beak will quickly eviscerate." Gold: 1.
Tokens: [X]
When TOKENS X is present, X equals the number of Encounter tokens that are immediately put into play; always use tokens whose color matches the encounter color. Following that number is the damage track and the Attack Strength of each token placed this way.
- Damage Track: A colorless number means that dealing that amount of damage, of any color delivered in the same turn, eliminates that token. For example, "2" means that 2 points of damage of any color eliminates each token. If there's a Class Type icon, then damage of the appropriate color must be dealt (red damage, for example) to eliminate each token.
- Attack Strength: Tokens can have an Attack Strength of 0 and higher. During the Take Damage phase (see p. 21), all tokens (along with the card that spawned them) attack, each dealing the indicated damage.
The following additional rules govern the use of Encounter tokens.
- Unless specifically stated otherwise, all tokens must be defeated before the card that spawned them can be dealt damage.
- Each token is considered an encounter and has the color and type of the card that spawned it. If an effect applies to that card's color and type, it also applies to the tokens. For example, the Dragonfire card Surging Evil increases the Attack Strength of all black encounters by 1. If Kobold Pack is in play with all three of its tokens still active, each token now has 2 Attack Strength, for a total damage potential of 8!
- Because each token is its own encounter, you cannot split damage from a single card among them. The exceptions are any cards that specify the damage can be split (such as Magic Missile).
- Unless specifically stated otherwise, encounter tokens always move with the card that spawned them. If an encounter is discarded due to an effect, its tokens (if any) are also discarded.
- Any card effect that states "clear a level," unless specifically stated otherwise, also defeats any Encounter token.
DEALING WITH TOKENS: You might be tempted to ignore tokens. But if the right Dragonfire card is revealed, encounter tokens in play can quickly end your Scene in terrible defeat. There are several excellent "token popper" cards—such as Magic Missile—that are tailor-made to quickly whittle tokens down to manageable levels.
Locations
Locations are a special type of encounter and thus follow all of the same rules for encounters, with the following changes:
Facing a Location
Placing Class Type Marker: When a Location faces you, place your Class Type marker on it. This means your character is physically in that location. You can only face one Location at any time. If a new Location would be placed on a player who is already facing a Location, bury it and reveal a new encounter. (If the Location was the last card, shuffle the discard into a new draw deck—including the Location—and then reveal the new encounter.)
Facing a Location: If your Class Type marker is on a Location, you are considered to be facing that Location, even if it is physically in front of another player.
Movement
Moving In or Out: During your Start Turn phase, you may move into or out of a Location (see Start Turn, p. 14). However, there must always be one character in a given Location at the end of a turn, and you cannot move from one Location to another Location in the same turn (i.e., you can only move from a Location to the Adventure Environment card or vice versa).
Number of Characters: A given Location can contain a maximum number of characters, as indicated by the card's text. For example, Vampire Lair shows "Location (4)," meaning only a maximum of four characters can be present at this Location at any given time. Thus, if four players are already in this Location, someone must move out before another player can move in.
Cannot be Moved: A Location can never be moved by an effect. However, if only a single character is in a Location and the Location is not physically facing that player, you may move it to face that player for convenience.
Non-Location Encounters: Locations do not affect non-Location encounters. If a character moves into or out of a Location, all of the non-Location encounters facing that player always follow them into or out of Locations.
Defeated: If a Location is defeated, any Class Type markers on it are moved to the Adventure Environment card at the end of the Deal Damage phase, and the Location is discarded (after the appropriate gold payout).
Playing Cards
Played Cards: Cards you play on your turn can only directly affect any characters or encounters where your Class Type marker is located. For example, if you are on the Vampire Lair Location, you cannot play cards to characters and encounters on the Adventure Environment card, and vice versa.
Assists: Assists can be played to affect cards even if you are not in the same environment with your character token. However, assists cannot be played from one location to another. For example, if you are on the Cursed Ground Location, then you could play Assists to a character whose Class Type marker is on the Adventure Environment card, but you cannot play Assists to the character on Choke Point. (If you are on the Adventure Environment card, then you can play Assists to characters on either Location.)
Text Effects: If a card played does not have any damage icons in its text, that card's text effect can be applied into or out of a Location, but never to a character or encounter at a different Location if you are also at a Location. Regardless of where the text effect is applied, the damage icons in the upper left of the card can only be applied to encounters where your character is located. For example, if you are on the Moaning Chamber and play Crown of Confusion, you can use the card's effect on the Stone Giant facing a character on the Adventure Environment card, but you could not target the Cyclops facing a player on the Slaad Planar Portal since it's in a different Location. In either case, the two blue damage from Crown of Confusion can only be assigned to an encounter at the Moaning Chamber.
Taking Damage
Take Damage: At the end of your turn, if you are in a Location that has an Attack Strength, it deals damage to you along with all of the non-Location encounters that are facing you (if any).
Facing: Only the non-Location encounters that are physically facing you will deal damage to you, regardless of how many characters are at your Location.
Discarding: If a character in a Location goes Unconscious and no other player is in that Location, discard the Location.
DEALING WITH LOCATIONS: Breaking a player out of a Location is often best done as quickly as possible. Even with great Assist use, Locations weaken the strength of the players by splitting the party. High HP on that Fighter is meant to be used, and leaping into a Location to help teammates defeat it is generally a great tactic.
LOCATION EXAMPLES: Card text overrides Locations unless it includes a damage icon.
For example, Magic Missile has a damage icon in its text, so that card's effect could not be used into or out of a Location (though Magic Missile's Assist portion of the card can be used into or out of a Location, since that is an Assist). However, Lightning Bolt says "Deal 2 consecutive levels of damage to an encounter." Since that text does not include a damage icon, it can affect a Location.
As another example, Command Presence played by a player not in a Location on someone in a Location would allow the second player to draw and play a card, since its rules text generates the ability to draw the card. However, the player in the Location could play only the text effects or Assists on anyone not in the Location unless the text deals damage without a damage icon, such as Fireball.
None of these examples would apply between players in two different Locations, since cards can never be played between Locations.
Location Encounter
Each Location encounter card has the following stats:
- Name
- Damage Track
- Number of Players in Location: A given Location can contain a maximum number of characters, as indicated by the card's text in parentheses.
- Encounter Color
- Card Ability
- Attack Strength
- Gold
- Tripwire Trait
- Card Number
- Encounter Deck
Example Location encounter card — MOANING CHAMBER (Location (3), Difficulty 2, Dungeon): SURPRISE: Dispel magic. At the start of the player's turn, make a Skill Check. Failure: Must discard a card. Terror: Can play only one card; cannot Assist. Gold: 6. Attack Strength: 0.
GLOSSARY: Some encounters (and other cards) contain additional keywords found in the Glossary, starting on page 28.
Turn Order
Each turn is divided into a number of phases, played in order. A player must completely finish the Play Cards phase before moving onto the Apply Damage phase, and so on.
Phases of a Turn
- Start Turn
- Play Cards
- Deal Damage
- Take Damage
- Replenish
- Market
- End Turn
1. Start Turn
Certain card effects apply during the Start Turn phase; their text states "at the start of your turn." Specific effects are resolved in the following order, completing one step before moving onto the next.
Step 1: Dragonfire Card Effects: Whenever the active Dragonfire card has a start-of-turn effect, this is resolved before anything else.
Step 2: Character Movement: The player determines whether they will move into or out of a Location. Move their Class Type marker as appropriate. (See Locations, p. 12.)
Step 3: Location Effects: If a Location has a start-of-turn effect, it is now resolved.
Step 4: Non-Location Encounter Effects: Resolve any non-Location encounter effects that have a start-of-turn effect. If there are more than one, the players choose the order to resolve them.
Step 5: Features/Market Effects: If any Features or Market cards have start-of-turn effects, resolve them in whichever order the player chooses.
2. Play Cards
During this phase you play cards from your hand one at a time. (You may choose to play no cards if you want.) If your cards have any effects other than damage, resolve those effects when you play the card, but don't discard it yet. Instead, place the card next to the encounter(s) where you plan to deal the card's damage. (You may change your mind on where to apply the damage later, but you may not change the text effect once applied.)
Text Effects: When playing cards, text effects are always applied except:
- If there is a cost associated with the text, such as a Skill Check, removing the card from play, and so on.
- If the text includes the term "may."
In both instances above, the player chooses if they will apply the effects (and pay the costs, as appropriate).
Healing: When an effect heals you, increase your HP by the amount healed. You can't go above your starting HP total. If an effect would heal you to beyond your starting HP, any extra is lost.
Discard: You can discard any number of cards from your hand during this phase; those cards have no effect. Discarding is not considered playing a card. For example, Choke Point limits you to playing no more than two cards, but that does not prevent you from discarding any number of your cards while in that Location since they are not being played. Any cards that "protect against discard" do not affect a discard requirement to activate an effect. Finally, cards discarded in this fashion are immediately placed into your discard.
Placing in the Discard: Cards that are played in this phase are not placed in the discard until the last step of the Deal Damage phase. Thus, if you need to shuffle your draw deck to draw a card during this phase, played cards are not shuffled into it.
Additional Rules
Some card effects have special rules, as follows.
Requires X Play: You can't play this card unless you played another card of the specified type this turn.
Sword Icons (Martial Class only): Some Martial cards include one or more Sword icons on the left-hand side. Additionally, some Features have Sword icons and/or provide icons under specific circumstances. If any Martial Class player plays a total of three Swords on their own cards and/or activates Features during the same turn, that player may immediately draw a card. To draw a second card in this way, you must play enough additional cards (as well as other Features) to make a second full set of three Sword icons. For example, if the active player plays cards with a total of three Sword icons, and another Martial Class player plays enough Assist cards to create their own set of three Sword icons, then both players have earned the right to draw a card.
Locations: Locations create specific rules that govern how cards are played (see Locations, p. 12).
Remains in Play: A card whose text includes this phrase is considered active when it is played, and it remains in effect for a duration as indicated by the card, or until another card effect removes it from play. For example "Remains in Play" would be for the full game, while "Remains in Play: Scene" means that at the end of the Scene in which it was played, it is discarded; in both instances, other card effects, such as Dispel Magic, would still discard the card. (A player may voluntarily discard these cards at any time.)
Glossary: Some cards contain additional keywords found in the Glossary, starting on page 28.
Skill Checks
When you must make a Skill Check, reveal the top card of your draw deck. If it matches your Class Type color, the check is a success; if it does not, the result is a failure. The text on the card describes the effects. Always bury the revealed card (place it at the bottom of the draw deck) after each Skill Check.
If you have only one card left in your draw deck, you still bury that card after revealing it. Thus, if you don't draw that card into your hand, you know whether the next Skill Check will be a success or failure. Such is the blessing—or curse—of fate that day.
An automatic success or failure means you do not reveal a card.
Unless a card references an automatic success or failure or it specifically states not to make the check, you must make Skill Checks, even if you normally cannot take actions.
Class Type Specific: Skill Checks might specify a Class Type, which may be different than your character's Class Type. For example, if a Devotion Check is called for, you must reveal a green card to pass the Skill Check regardless of your Character screen's color.
Multiple Class Types: If playing with multiple Class Types (see p. 5), you are considered both Class Types for Skill Checks. The only exception is if it calls for a Primary Skill Check, in which case only the primary Class Type counts.
Saves: While the mechanics are the same, a Skill Check only ever applies to players, while Saves only ever apply to encounters (see Saves, p. 17).
Damage and Text Effects
When a card is played on your turn, you apply the text effect (first), and the damage (if possible). It is not one or the other. Also, the text effect may target a different encounter than the damage.
When a card is played for its Assist ability, you only apply that portion of the text, never the damage or any text effects above the Assist line.
Assists
Some cards have Assist abilities, which you can use only during another player's turn to help them (see the exception, Play at Any Time, below). Assists are particularly important for Locations (see p. 12).
An Assist ability has its own section at the bottom of the card, separated by a line. Only the text below the line is an Assist.
If you play an Assist, the rest of the card is always ignored (except any Class Type Requirements, which always apply).
Damage: Unless specifically stated otherwise, the damage icons in a card's upper left corner are never applied when using the Assist from that card. Either you're using the effect above the line—including damage, if any—or you're using the Assist.
ASSIST EXAMPLES: The Magic Missile Market card has no damage icons in the usual location. However, its text ability deals blue damage if played normally, or colorless damage if played as an Assist on another player's turn.
Cloud of Daggers has 2 blue and 1 colorless damage icons and "Requires Arcane Class." Instead of dealing that damage, the player could use the Assist ability on another player's turn, but they must still be an Arcane Class to play it (or even purchase it, for that matter).
Perception has a Skill Check as a standard ability, along with 1 red damage icon. Alternatively, it can deal 1 red damage on another player's turn as an Assist (without using the Skill Check ability).
Play at Any Time
Future cards, mostly Magic Items, will have Play at Any Time abilities, which can be played either on your turn or during another player's turn, at your discretion.
A Play at Any Time ability has its own section at the bottom of the card, separated by a line like other Assists. Only the text below the line is a Play at Any Time effect; all text above the line is ignored, except Class Type Requirements.
If you play a card's Play at Any Time effect, the rest of the card is always ignored.
When played during another player's turn, a Play at Any Time effect is considered an Assist; otherwise it is treated like a normal card.
Damage: Unless specifically stated otherwise, the damage icons in a card's upper left corner are never applied when using the Play at Any Time effect from that card. Either you're using the effect above the line—including damage, if any—or you're using the Play at Any Time effect.
GAMEPLAY IMMERSION: Most cards deal damage to encounters when played, but that's simply a game mechanic. Dragonfire isn't just about the slash of a blade or the blast of a fireball. Every card contributes to the shared story you're telling, so let the card play describe the unfolding adventure in your mind's eye.
For example, when you play a Perception card to gain 1 gold and deal 1 red damage to a Troll, you're not necessarily stabbing the monster (though you could be). Maybe you're sneaking past it to steal back a ring lost by a wealthy noble (which you then return for further riches). Because that's part of the overall story, it still results in solving a puzzle surrounding the Troll, so that Perception card clears a level of its damage track and you're one step closer to defeating it.
This holds particularly true when facing Adventurers. Sure, Ryana Amcathra can hold her own with a blade, and perhaps a played Glory is really a footpad in the night, but the Lightning Bolt thrown at her that clears two levels can just as easily represent destroying a wagonload of premium dyes imported from Baldur's Gate, which will knock her down a few pegs and draw her off your own plans.
DAMAGE EXAMPLES:
- Magic Missile: This Arcane card deals 1 blue (Arcane) damage, which must be assigned to different encounters; up to a maximum of three (as an Assist, it instead deals colorless damage).
- Lightning Bolt: This card does not deal normal damage. Instead, its effect deals 2 consecutive levels of damage to an encounter, no matter what color or amount the damage track shows.
- Twist the Knife: This Deception card deals 2 red (Deception) damage (or 1 level of damage as an Assist).
3. Deal Damage
Once you finish playing cards and finalizing all text effects that are not damage, all played cards deal damage. Choose an encounter where you've placed cards and deal the damage generated by them to the encounters as explained below. Then put all those cards aside to indicate those have been resolved. Continue this process until you've resolved all of your damage effects.
You defeat encounters by dealing damage. The damage a card deals is indicated by the icon(s) in the upper left corner. Some cards deal special types of damage, as indicated by the text on the card. Such instructions take effect during the Deal Damage phase, not when you first play the card. Cards with Assist abilities might deal damage as well. Any text or damage icons that appear in the Assist portion of the card text takes effect during this step, not when the Assist is played.
Damage is represented by icons indicating a specific amount and color. Damage can be variable based on other conditions, or it might clear one or more levels on a damage track. There are two types of damage icons:
- Colored: Each colored icon represents 1 point of damage of that color. Each color corresponds to the four Class Type colors (green, black, blue, and red).
- Colorless: The number inside the colorless damage icon indicates how many points of colorless damage it deals.
A card can have multiple damage icons. For example, a card that shows two blue icons and one colorless icon deals 2 blue (Arcane) damage plus 1 colorless damage.
DAMAGE TRACK EXAMPLE: If a damage track level requires colored damage, you'll need to deal that amount of that color on the same turn to clear that level. If a damage track level requires a colorless amount, you'll need to deal that much damage, of any color or colorless, to clear that level. In both instances, damage of the wrong color—or colorless damage against a colored level—is useless against it. You can trick a Giant if you can, but once a Cyclops picks up its club, the conversation is over.
A gray icon with a number means that you must deal that much damage of any color (or colorless) to that level to clear it. For example, if a level requires 4 damage to clear, then on your turn you need to deal a total of 4 damage, in any combination of colored or colorless damage.
Damaging Encounters
Encounters have damage tracks consisting of colorless or colored damage icons. Each row of the track is a level, which is cleared by dealing that type and amount of damage.
A colored icon on an encounter's damage track requires damage of that color to clear, although any color of damage can affect a colorless icon (unless a card specifically states otherwise). Colorless damage can't affect colored damage icons on a damage track.
Locations & Non-Location Encounters: If a card references an "encounter" it means both Locations and non-Location encounters. Unless a card specifically uses the word "Location(s)" or "non-Location encounter(s)," it can be applied to both types of encounters.
Defeating an encounter might take several turns of playing cards (including Assists). When a level on a damage track is cleared, that level remains cleared for all players; use a clip to indicate which levels have been cleared.
Partial damage dealt to a level is removed at the end of each player's turn. In other words, if you do not defeat a level in one turn, any damage applied to that level in that turn is lost.
Order of Damage: You must clear the levels on a damage track from top to bottom. Unless a card effect states otherwise, you must deal damage to the topmost uncleared level.
CLEARING A LEVEL EXAMPLE: If a damage track level requires 3 damage to clear, and you deal only 2 damage to it, that level will reset at the end of your turn. The next player will still need to deal 3 damage to clear it during their turn.
Defeating an Encounter
When you clear the last (bottom) level of an encounter's damage track, you defeat the encounter. If the encounter has a Vanquished ability, immediately apply that effect.
DEFEATING AN ENCOUNTER EXAMPLE: The Orc Warchief's damage track has three levels, and the previous player already dealt enough damage to clear the first one. So on your turn, if you can clear the last two levels, you defeat the encounter. To show how this works, let's say Jeremy dealt enough damage to clear the second level of the Orc Warchief's damage track. He placed the clip on the card beside that level to show it's been cleared. Chloe takes her turn next and deals enough damage to clear the last level on the damage track, defeating the encounter.
Additional Damage Rules
The following additional rules apply to dealing damage.
Splitting Damage: Unless an effect specifically states otherwise, you can split the damage from a single card between different levels of a damage track, provided you are clearing each level in order. However, unless specifically stated otherwise (such as with Magic Missile), you can never split damage from a single card between multiple encounters (which includes encounter tokens).
"+": Certain cards and Features include a "+" next to the damage icon(s). This damage cannot be split, and must be applied with another card's damage. In some instances it may indicate a specific card/Feature the damage must be applied with; if that indicated source is no longer applying damage, this extra damage cannot be applied. If the icon(s) do not include the "+" it is its own damage and may be applied to any encounter.
Multiple Color Icons: Some encounters have multiple color icons in a level. This means that the indicated amount of damage of that color must be dealt in a turn to clear that level; e.g., 2 damage for two icons, 3 damage for three icons, and so on.
Immune to Level Damage: If an icon(s) is square, then that row of the damage track is immune to level damage. Cards such as Lightning Bolt or Twist the Knife could not be used against it. Note this is different than an Immune keyword (see p. 29).
Anywhere on the Damage Track: Some cards allow you to deal damage to a level "anywhere on the damage track." You still must meet the color and number requirements for that level, but it can be any level.
DEALING DAMAGE ANYWHERE: In the base game, the only card that allows you to deal damage anywhere along the damage track is Feint. Why would you want to do that? Often it's a great way to get around damage limitations. For example, let's say your group has a scarcity of blue damage and the Death Slaad is in play. You have Crown of Confusion and Feint in your hand and expect to draw a Lightning Bolt from your deck. You could play Feint, then play Crown of Confusion and deal its 2 blue damage to the third level of the Death Slaad's damage track to clear it (as well as an additional +1 damage using the Crown of Confusion text effect, of course). That way, when the Lightning Bolt shows up, it can hammer those first two tough levels, leaving only a 3-point colorless level to clear.
When placing a clip to mark damage anywhere on the damage track, it is strongly recommended that you also place a clip at the very top of the track to remind you that the top levels still need to be cleared.
Saves
When an encounter must make a Save, a player reveals the top card of the corresponding Encounter Deck. If the revealed card's color matches the encounter's color, the Save is a success; if it does not, it is a failure. The text on the card describes the effects.
Bury the revealed card after each Save attempt.
If a card references either an automatic success or failure, do not reveal a card.
As with Skill Checks, unless a card references an automatic success or failure, or specifically states not to, Saves are always made, even if card play would not otherwise be allowed.
Save +X: If an encounter includes a "Save +X," whenever they are forced to Save, they reveal one card, as normal, and then additional cards equal to X, with any success generating a Save. For example, Save +1 would reveal two cards, Save +2 would reveal three cards, and so on.
Skill Checks: While the mechanics are the same, Saves only ever applies to encounters, while Skill Checks only ever apply to players (see Skill Checks, p. 14).
SAVES: FLAVOR VS. MECHANICS: When an encounter makes a Save, you'd expect a success to be good and a failure to be bad. However, that's not always the case due to the way the game plays. In the base game, there's roughly a one-in-four chance of a Save success. However, for some encounters to have the appropriate difficulty, that needs to be switched to more of a three-in-four chance of success. For example, if you read the Fomorian's text, it seems like a success should allow it to deal more damage and a failure would make it hurt itself. Since this is a very difficult encounter and needs to have a good chance of dealing extra damage to the characters, the success and failure results are switched.
Applying Damage and Defeating Obstacles Examples
Here are some more examples of how to apply damage and defeat obstacles.
EXAMPLE 1. Chloe's playing a Fighter, and her turn has come up. She wants to defeat a blue obstacle facing another player—the Minotaur. Chloe has three cards in her hand: Command Presence, Tower Shield, and Stealth, so she'll need some help.
First Chloe plays Command Presence and chooses Brooklynn, who gets to draw a card and then play a card. Brooklynn draws Cloud of Daggers, which would help immensely, but it's far better as an Assist. Instead Brooklynn offers to play Misty Step, but decides not to use its ability to draw and discard since she likes her current hand. Misty Step deals battle damage, which Chloe gets to use. Chloe then places Command Presence and Stealth next to the Minotaur, and Chloe places Misty Step there as well. But to defeat the Minotaur, Chloe still needs another blue damage from somewhere, as well as two other damage. Meg then decides to play Bless as an Assist, and chooses blue damage, placing that card next to the Minotaur. For the other two damage, Chloe's Tower Shield would work fine. However, if played as an Assist, it would stop an encounter from attacking, and the party needs her to save that card to stop the Stone Golem from hitting Meg next turn with its scary 3 Attack Strength. So Ryana steps up and plays Javelin as an Assist, which deals 1 damage, placing it next to the Minotaur as well. Finally, Chloe plays her Stealth. Now that everyone has finished playing cards and applying any text effects, Chloe now deals damage.
The first level of the Minotaur's damage track requires 4 damage of any type, so Chloe clears it by using Command Presence's damage and taking the 1 damage from both Misty Step and Javelin for a total of 4 damage (the colors don't matter). She places a clip over the level to show it's been cleared. Then she uses the remaining damage from Misty Step to clear the second level as well. The damage for the third level comes from the Assist damage from Bless, leaving only the final level on the Minotaur, which is cleared by the damage from the Stealth card Chloe played. While this defeats the Minotaur before it can attack, it did leave one point of damage that couldn't be assigned anywhere: the leftover damage from the Javelin. Since she cannot split damage from a card between encounters, that extra damage is simply lost. While they try hard not to let that happen, the party is just fine with how that played out. They defeated the Minotaur before it could attack, while ensuring that Chloe's Tower Shield can stop another encounter from attacking on a future turn. Now they'll decide if they want to use the Minotaur's Vanquished effect or not.
Note that in the above situation, Chloe could've simply taken the damage from the Javelin Assist and paired it with the damage from Command Presence to clear the first level, leaving the damage from Misty Step as the odd point of damage. However, there would still be a leftover point that can't be assigned.
EXAMPLE 2. Jeremy is playing a Half-Orc Fighter and has a big hand of cards (he had three at the end of last turn, so drew two during Replenish, and then purchased two): Expertise, Flaming Oil, Grapple, Stealth, Glory, Grace, and Tower Shield.
He looks around the table, starting at his left, and sees that Nick, their Cleric, is stuck in the Moaning Chamber but has no other encounters facing him. Meanwhile, Kristian as the Wizard doesn't have any encounters facing him (because the party all concentrated on him to save their Arcane character). However, the last player in their game, Rod, their other Fighter (he also has the Rogue as his secondary Class Type), was Stunned last turn. What's worse, he is also stuck in the Slaad Planar Portal and facing a Kobold Pack and Cloaker. Finally, facing Jeremy is a Death Slaad. There's some seriously scary encounters out there, none of which have damage on them.
But Jeremy is sitting at 6 HP, and he's a Half-Orc after all. And he does have that mega hand of cards. Time for the big play!
During the Start Turn phase, Jeremy takes his Class Type marker and places it on Slaad Planar Portal to indicate he's moved into that Location. Now that Location's "start of turn" text effect is applied: they make a Save for the encounter by revealing the next Secondary Deck card. It's blue, so Slaad Planar Portal fails and doesn't summon another slaad (they bury the revealed encounter), which is a really good thing, since Jeremy is already facing a slaad.
Even though he moved into the Slaad Planar Portal, he's still facing that Death Slaad—changing his Location never changes what monsters are facing him. But he is now also facing that Location (since his Class Type marker is there). However, the Kobold Pack and Cloaker—and their tokens—facing Rod, who is in that same Location, are not facing Jeremy.
Now it's time to lay waste to some encounters in spectacular fashion. He knows that Nick cannot help him with cards, even though Nick probably has a Bless or a Magic Missile in his hand, both of which can be used as Assists. Since they are both now in separate Locations, Nick cannot play any Assists to affect Jeremy or his encounters, and Jeremy cannot play any cards or effects to help Nick or affect his encounters.
Kristian, on the other hand, has a Cloud of Daggers sitting in his hand, and he's not in a Location, so he plays that card as an Assist, which states: "Arcane Class: All colorless levels on one encounter this turn are -1. Wizard Class: All colorless levels on one encounter this turn are -2." Kristian places that card next to the Slaad Planar Portal, where that effect will be applied.
Next Jeremy plays Grapple. Since he's currently resolving card effects, he can't assign damage yet, so the card is not placed next to a specific encounter. Instead, he uses the Grapple ability to pull the Kobold Pack, along with all three of its tokens, to face him (and places a generic token to hide its Attack Strength, as well as the tokens, as a reminder they won't attack this turn).
Now he plays Tower Shield next to the Death Slaad. And once more, before he forgets, due to the card text of Tower Shield, he places a –1 token on the Death Slaad. (Normally that –1 Attack Strength would apply to the Kobold Pack and all its tokens, but since they were grappled this turn, they're not attacking anyway). Jeremy could have chosen to hold onto that card to keep an encounter from attacking if he played it as an Assist on another player's turn, but he wants the extra damage; that card also gives him three Sword icons, so he can immediately draw a card. Based on the drawn card, a Crown of Confusion, he immediately revises how he was playing.
First, he asks if anyone has any Assists that would heal. Kristian has a Healing Word, and Jeremy asks that one point be applied to healing him and one to Rod, since Rod's got a pile of good Martial Assists in his deck. (Even though Kristian didn't want to buy cards that didn't match his Class Type, the Cleric had no gold and the party knew they would need the healing effect.) Kristian plays the card as an Assist and assigns the healing to Jeremy and Rod.
Rod, since he was healed 1 HP while being Stunned, immediately draws two cards and is no longer Stunned (though he still has an Exhausted token). As luck would have it, he draws a Javelin and Tower Shield, both of which have Assists, so he may play them immediately! Rod plays both cards, and they are placed next to the Death Slaad. Rod, using the text on the Tower Shield Assist, nominates the Death Slaad to not attack this turn (no attack is better than the current –1 Attack Strength!). Because Rod played three Swords in a turn, he immediately draws another card, a Grace, which cannot be played during Jeremy's turn.
Then Jeremy plays Crown of Confusion on the Death Slaad and nominates the Kobold Pack for its text ability. He reveals a card from the Primary Deck, which is black. The Kobold Pack Saves, so Jeremy can't use that card's Attack Strength as colorless damage against another encounter.
Next he applies Flaming Oil to the Kobold Pack. Since the tokens are all encounters, that applies to those tokens as well, so all three are immediately defeated since it only takes 1 damage; the extra damage Flaming Oil applies to each token is simply wasted since you can't split damage between encounters. With those tokens gone, he can now apply damage to the Kobold Pack itself. He's already got the damage from Flaming Oil, and he grabs a point from Kristian's Magic Missile Assist to eliminate the first two levels on the Kobold Pack.
Now it's time for that scary Death Slaad. Jeremy takes the damage from Flaming Oil, along with the damage from Rod's Javelin Assist, the damage from Rod's Tower Shield Assist, and the final point from Kristian's Magic Missile Assist to generate a total of six points, which will clear the first level. Next Jeremy grabs damage from Glory and from Grapple to clear the second level. Then he assigns Crown of Confusion's damage to clear the third level. Now, that could've been scary as he can't defeat the Death Slaad this turn, and it's now past its Tripwire Trait so its Attack Strength is now 3. However, due to Rod's Tower Shield, it can't attack, so Jeremy's confident they'll be able to defeat that last level before his next turn.
Meanwhile, since Jeremy's Class Type marker is on the Location, he's facing it—so he clears the Location's first level with damage from Grapple. The damage from Jeremy's Tower Shield clears the next two levels. Then Jeremy uses damage from Stealth to clear the next level. Finally Jeremy uses one point from Kristian's Magic Missile Assist to eliminate the last level, and the Slaad Planar Portal is defeated. (Since he can still change where he's applying damage until his turn is done, they leave the encounter in place for now; he's been tipping his cards as he goes to ensure he remembers which ones have dealt their damage and been defeated.)
All played cards are discarded into their respective piles, and the Slaad Planar Portal is discarded. Jeremy and Rod's Class Type markers go back onto the Adventure Environment card, and the Location's gold is paid out.
Jeremy draws his two cards during his Replenish phase, he can buy from the Market if he wishes, and it's the end of his turn.
He brought a player out of Stunned and broke him out of a Location, defeated five tokens, set up two encounters for an easy defeat, and is ready to help defeat Nick's Moaning Chamber next turn—all without taking any damage. That's how Half-Orc Fighters do it! (Well…you know, with help from the rest of the party.)
Collecting and Distributing Gold
The party earns gold for each encounter defeated. The gold value of each encounter is shown in the upper left corner of its card. On the turn the encounter is defeated, the active player takes 1 gold from the total value of the encounter. Then the player to the left takes 1 gold from the remaining gold, and so on until all the encounter's gold value is distributed. For example, if you defeated a Troll on your turn (which has a value of 11 gold), and there are 5 players, you would get 3 gold and all other players would get 2 gold.
There is no limit to how much gold you can have, but it's best to spend it on improving your deck if you can.
Example encounter card — TROLL (Giant): If Troll is damaged in a turn, it must Save. Success: It heals 1 level. Gold: 11.
COOPERATIVE PLAY AND GOLD: Remember that gold distribution begins with the active player, regardless of whose cards actually defeated the encounter. Even when your Assist was crucial in defeating an encounter but you're not awarded as much gold or other spoils for the spent card as other players, you need to remember it's a cooperative game and sometimes that sacrifice is necessary to carry the day.
Defeating an Encounter When It Isn't Anyone's Turn
Sometimes an encounter gets defeated when it isn't a player's turn. Usually this occurs when drawing a new Dragonfire card. If this happens, treat the player whose turn is next as the active player for resolving any Vanquished abilities and distributing gold.
What If an Encounter Eliminates Itself?
Even if an encounter somehow eliminates itself, it still pays out gold unless otherwise stated. Any other effects that might apply—for example, the ability to heal itself—do not occur. The only exception is the Tripwire Trait, which always occurs, if appropriate (see p. 30).
Placing Cards in the Discard
At the very end of the Deal Damage phase, all played cards—as well as defeated encounters—are placed into their respective discards.
4. Take Damage
When you are done playing cards, if there are any encounters still facing you, including Locations and tokens, each one attacks you and deals damage equal to its Attack Strength. No matter how many encounters deal damage to you, that damage is combined and applied as a single amount.
Some encounters also have abilities that trigger when they attack. If those abilities deal damage, that damage is added to the total damage from encounters attacking you.
When you take damage, reduce your HP by the amount of damage you take. If you take damage that would reduce you to below 1 HP, you become Stunned (no matter how much additional damage you take at the same time).
Multiple Class Types: Encounter cards that deal damage to a specific Class Type deal damage to all characters of that Class Type.
Deals Damage vs. Attacks: There is a difference between encounter effects that state "when [it] deals damage" and "when [it] attacks." Even if an encounter is prevented from dealing damage, unless the card specifically states otherwise, any effects that would occur when it attacks still apply (unless the encounter was completely stopped from attacking).
STUNNED AND UNCONSCIOUS CAN BE GOOD TACTICS: Don't be afraid of being Stunned or Unconscious. Remember that only one character who is not Stunned needs to end the last Scene of an Adventure. That means in a six-player game, if you have three Unconscious characters, two Stunned characters, and one character with only 1 HP left (even with an Exhausted token), if you clear all the encounters in the final Scene without losing that last 1 HP, you still complete the Adventure!
There are numerous times in a game when tactics will decide if it's time to let a player go Stunned. For example, the Fighter who plays Heroic Charge to pull six encounters will likely get Stunned, but it pushes a huge amount of additional cards into active use and it negates all of that extra damage beyond what makes them Stunned. That gives you a full round to deal with the encounters before the Fighter might go Unconscious and the encounters start moving to other characters. Healing Stunned players in this situation can be great as well.
Even letting someone go Unconscious can be advantageous in the right situation—although it doesn't mean "throw your companion under the troll." But Stunned and Unconscious are just more tools in your toolbox for figuring out how to fight your way toward victory.
Becoming Stunned
If a character's HP is reduced to 0, they become Stunned (any excess damage is ignored). If they are in the middle of their turn, they cannot play any further cards and immediately follow the rules below.
The following rules govern becoming Stunned.
- The character also becomes Exhausted and immediately takes an Exhausted token.
- The player shuffles all of their cards (draw deck, hand, and discard pile) into a new draw deck.
- A player with an Exhausted token draws only one card during their Replenish phase (including the turn they become Stunned).
- A Stunned character does not have a Market phase on their turn (including the turn they become Stunned), but they still receive gold.
- No Feature abilities work while a character is Stunned.
- Market cards with "Remains in Play" that were active when the player is Stunned are discarded. Magic Items in this situation, however, remain active.
- Encounters facing the Stunned character remain in place.
Healing
- If a Stunned character is healed any amount, the player immediately draws two cards and is no longer Stunned.
- Unless specifically stated otherwise, Healing outside of a Short Rest never removes an Exhausted token.
Exhausted Token
- Unless specifically stated otherwise, an Exhausted token can be removed only during a Short Rest (see p. 23) or a Long Rest (see p. 23).
- Unless specifically stated otherwise, a player can never have more than one Exhausted token.
Unconscious
- If a character's HP is reduced to 0 while they have an Exhausted token, they immediately become Unconscious. The player shuffles all of their cards (draw deck, hand, and discard pile) into a new draw deck. However, unlike a Stunned character, an Unconscious character is out of the game for the remainder of the Scene. They will return after the Short Rest for the next Scene (see p. 23).
- If damage is dealt to a Stunned character, they immediately become Unconscious.
- All encounters facing the Unconscious character are immediately rotated to the next player to the left. If a Location is facing the character who went Unconscious, and no other character's Class Type markers are at that Location, then discard it (there is no gold payout); otherwise move the Location to the left until it faces a player whose character marker is at that Location.
- If a card indicates an effect for a Class Type no longer active in the current Scene because they've become Unconscious, randomly determine where it applies. For example, if a green encounter is revealed due to The Gods' Displeasure at Dragonfire level 4+ and the only Devotion characters are Unconscious, randomly determine where it is placed.
5. Replenish
During the Replenish phase, if you have three or fewer cards in hand, draw two cards. If you have four or more, do not draw cards. There is no maximum hand size.
DISCARDING CARDS: If you ever want to ensure you have three or fewer cards so you can draw during the Replenish phase, you can also simply discard cards instead of playing them. Cards that are discarded instead of played do not count toward any Requires X Play or Requires X Purchase requirements for that turn. Early on, when you have limited cards in hand, discarding might not be an effective tactic. But as you purchase better cards, discarding less useful cards to have a better chance of drawing your better cards is an excellent choice. Basic Market cards still have their uses, though, so make sure to think ahead before simply tossing them.
6. Market
You can purchase any number of cards from the Market, depending on what you want and how much gold you have. Each Market card specifies a cost in gold. After purchasing a card, place any spent gold back into the common supply, and refill the empty Market slot with a new card from the Market Deck.
Place purchased cards immediately into your hand, not in the discard!
Some cards have additional requirements for purchase, such as the following:
- Requires X Class: You cannot purchase or use this card unless your character is of the specified Class Type. This can specify a Character Class—such as Wizard—not just Class Type. For example Fireball requires an Arcane Class, which means a Wizard, Warlock, or Sorcerer could all purchase and use Fireball. But while any Arcane character can purchase Cloud of Daggers, only the Wizard can use the full Assist ability.
- Requires X Purchase: You cannot purchase this card unless you played a card matching the specified Class Type this turn.
- X Class: If this appears on a Market card, then that portion of the rules text applies only when played by a character of that Class Type. For example, the Cure Wounds Devotion card states "Heal any character 1 HP. DEVOTION CLASS: +1 damage." Any character may play that card to heal any character 1 HP, but a Devotion character can also deal 1 point of green damage to an encounter.
Cycling the Market: If you do not purchase a card from the Market, reveal a new Market card from the deck. You must replace one of the existing Market cards with it and discard the replaced card.
If any effect (such as becoming Stunned) prevents you from purchasing cards, you do not cycle the Market.
Cycling the Market does not occur during a Short Rest (see p. 23).
Character Tokens
Some Market cards use Character tokens to represent various character abilities, such as the Spirit tokens on the Spirit Guardians Devotion card. Unless specifically stated otherwise, no Market card tokens persist through a Short Rest between Scenes. All such tokens are discarded at that time.
THE MARKET: The term "Market" represents purchasing cards with earned gold, not a literal market that springs up in the depths of a dungeon. Rather, the character has gained access to a new ability. For example, a Wizard who purchases a Fireball card is discovering, remembering, or preparing that potent spell.
TO SAVE OR TO SPEND: You might need to save up gold for better cards, but you shouldn't just sit on gold indefinitely. The economy of Dragonfire pays out gold from encounters that players should ideally spend to gain more-effective cards rather than hoarding. For example, let's say three 10-gold cards are available for purchase. If three players all choose to save up to buy those cards, no one is likely to get any of them because there are simply not enough new cards entering play, despite the increasing difficulty of encounters as the Scenes progress and the Dragonfire level climbs. The best option is to decide as a group which player should save up for a particular high-cost card, while the others continue buying cheaper cards and cycling the other, more expensive ones.
7. End Turn
At the end of your turn, check to determine whether all encounters are defeated. If so, the Scene ends; move to the Short Rest (see below). Otherwise, the next player to the left becomes the active player and starts their turn.
Short Rest
A Scene can have any number of rounds, depending on gameplay. A Scene ends when, at the end of any player's turn, all encounters facing characters have been defeated.
Once the player who finished the Scene has fully completed their turn, including their regular Market purchase(s), a Short Rest begins. In other words, a Short Rest is not part of any Scene, round, or turn.
The following rules apply, in the following order.
- Remove Exhausted tokens: All characters except Unconscious characters remove their Exhausted tokens and are no longer Exhausted.
- Heal 1 HP: All characters, including Stunned and Unconscious characters, each heal 1 HP. (Characters cannot heal beyond their maximum HP). Players that were Stunned (or Unconscious) will automatically draw two cards per the normal rules.
- Purchase Cards: Starting with the person to the left of the player who ended the previous Scene, each player may purchase one card from the Market. Any cards that "Requires X Purchase" to purchase cannot be purchased during a Short Rest. If a player chooses to not make a purchase, do not cycle the Market.
- Features and Magic Items in Play: Unless they specifically stated otherwise, Features and Magic Items in play cannot be used during a Short Rest.
COMMUNICATIONS: Players are not allowed to show other players what cards they have in their hand, but they can verbally discuss anything they like in order to form an effective plan as a party. To ensure a fun play experience for everyone, try to respect the other players' wishes about the level of advice they wish to receive.
Winning the Game
The chosen Adventure will detail the completion requirements for winning the game. Usually this involves defeating a number of encounters through several Scenes.
Campaign Play
Campaign play uses the following rules to increase the abilities of characters across multiple games, using Experience Points (XP) and Advancements (Features and Magic Items).
As characters advance through a variety of Adventures, they become more experienced in not only how to survive, but to complete even the most difficult series of encounters. This is represented through XP. XP unlocks a variety of equipment, abilities, and expertise represented by Feature stickers, which are purchased and applied directly to the Character screen for ongoing effects. As players complete Adventures, they also gain access to fantastical and wondrous treasures in the form of Magic Item cards that unlock even greater powers in the game. Both Features and Magic Items are considered Advancements.
Unless stated otherwise, XP and Advancements cannot be acquired or assigned during an Adventure, only in between Adventures.
LONG REST: Players are encouraged to have a post-Adventure session (a Long Rest) after each game to award XP and acquire Advancements (if any). This ensures that all players apply the appropriate amount of XP (especially if any of the Adventure bonuses are used), and lets them plan as a group which Advancements to acquire—or in the case of multiple Magic Items, which ones to use—to maximize effectiveness.
LEVEL 5: The rules within this box only address up to the start of Level 5 and then provide a sneak peek at the Difficulty 3 encounters you will start facing. More robust rules for Level 5—along with the rules for many higher Adventure Levels—will be found in future expansions.
Experience Points
Experience Points (XP)
Each Adventure states what the XP award will be. Unless specifically stated otherwise, each time a party starts a Scene, they will receive XP for that Scene at the end of the game.
For example, the Dungeon Crawl Adventure awards 1 XP for each Scene started, and an additional 2 XP for completing all three Scenes. Each Adventure also has bonus challenge scenarios for extra XP awards. For example, if the group completes the Dungeon Crawl Adventure successfully, each player would update their XP total by 5 on their Character screens. If the players chose to accept the "Charge!" bonus challenge before starting the game, they would get an additional 1 XP each upon completing the Adventure.
The Character screens are laminated, so players can use erasable markers to easily track their total earned XP.
SPENDING XP: Effective Dragonfire campaign play requires players to spend their XP appropriately. For example, if you have a Level 3 character with, say, 50 XP to spend, you might want to wait until you have 60 XP (and become a Level 4 character) so you can purchase a more powerful Feature. However, waiting to buy a 100 XP sticker is another thing entirely, as further Adventures might become more difficult than intended because your character's advancement is delayed. Ultimately, of course, the game is yours to pursue how you see fit. Just be aware of this potential issue.
Character & Adventure Levels
There are two types of progression used in Dragonfire: Character Levels and Adventure Levels.
Character Levels
Character Levels represent the total accumulated XP of a character. When a character accumulates enough XP, as shown on the Character Levels table, they are immediately considered to be the Level indicated.
| Total XP | Character Level |
|---|---|
| 0-9 | 1 |
| 10-29 | 2 |
| 30-59 | 3 |
| 60-99 | 4 |
| 100+ | 5 |
Character Levels are used in two ways: determining the Party Level for the appropriate challenge in Adventures and gaining more Magic Items as Adventure-completion rewards.
Determining Character Levels: A player's Character Level simply represents the total XP they've earned. This should already be tracked on their Character screen.
Character Level is determined after adding any XP from the just-played Adventure.
Example: Brooklynn is playing a Half-Elf Rogue with a current XP total of 28. They just wrapped up a Dungeon Crawl Adventure where they only started two Scenes before the game ended in defeat. During the Long Rest she adds the 2 earned XP from that game to her 28 for a total of 30. Her Half-Elf Rogue just became a Level 3 Character!
Party Levels
The Party Level equals the average Character Level of a party. This determines the Adventures they can face without modifications.
- To determine the Party Level, average all of the Character Levels, and round down.
- A party can play any Adventure equal to their Party Level without modification. They can always attempt a higher Adventure Level, but that will often lead to defeat. If they play an Adventure with a lower level than their Party Level, they must modify the Adventure (see p. 27).
From the previous example of Brooklynn and her Half-Elf Rogue, her group of six players includes a Level 4 character, two Level 3 characters, a Level 2 character, and two Level 1 characters (a total of 14). This means they can play at Adventure Level 2 (14 / 6 = 2.3, rounded to 2) without modification. For the Adventures in this box, that means The Portcullis is Breached*,* Bodyguards*, and* Unholy Presence*. If they wanted to play* Dungeon Crawl or Wastes of Ancient Empire they would need to modify the rules. Any other Adventures they could play as is, but would likely face defeat as they're not ready for that level of challenge just yet.
Advancements
There are two types of Advancements: Feature stickers, which are acquired through earning XP, and Magic Item cards, which are earned by completing Adventures. Both are detailed below.
Feature Stickers
Features represent the hard-earned experience won by completing various Adventures. It also emulates all the tough work in between such excitement as you strive to perfect your current skills while learning new abilities. While everyone at a table will usually earn the same XP for a given Adventure, where you choose to focus and which Features you pick up will tell your unique story.
Features: After a player has completed the Quick-Start Adventure The Village Is Attacked: A Hero Is Born, their character is considered Level 1, and they choose a Background sticker to apply to their Character screen.
There are five other slots for applying Feature stickers. Characters who reach specified XP thresholds may gain Features, which represent the new skills, items, weapons, and powers that come with more experience.
A character can never have two Features with the same primary name; i.e., there are numerous Fighting Style Features with different secondary names, but since the primary name is Fighting Style, a player can only ever have one of those Features (unless another Feature specifically states otherwise). Roman numerals do not count as different names. For example, Preserve Life, Extra Attack, and Expertise each have multiple versions, but you can only ever have one of each of those specific types of Features.
Requires: Some Features require other Features to use, such as Eldritch Knight, Thief, and War Domain; these will be noted on the stickers themselves. These Features must be visible on the Character screen (i.e., they cannot be covered) to purchase and use subsequent Features with that requirement. These represent Subclasses within a given Character Class, and each has a single primary Feature, with several connected secondary Features. A character can never have more than one primary Subclass Feature, within a Class Type, at one time. For example, if a player has the War Domain Feature, they cannot also have the Life Domain Feature.
Activation: Most Features must be activated to be used, except as follows:
- All primary Subclass Features are continuously activated. For example, Life Domain, Eldritch Knight or Thief.
- If the word "Continuous" appears.
- If you are required to write something on a Feature, that element is considered Continuous; the rest of the Feature is not.
Once a Feature is activated, all effects are always applied except:
- If there is a cost associated with the text, such as a Skill Check, removing the card from play, and so on.
- If the text includes the term "may."
In both instances above, the player chooses if they will apply the effects (and pay the costs, as appropriate).
If a Feature has multiple abilities and one or more have an associated cost, you may choose which costs to pay.
Timing: Features will detail how often and when they can be activated. Unless the Feature specifically includes the phrase "during your turn," all Features can be activated at any time during a round, provided the appropriate circumstances of cards and/or effects occur. Features can only be activated outside of a turn, round, or Scene (i.e., during the Encounter phase, Dragonfire phase, Short Rest, and so on) if the Feature specifically states as such. Finally, unless it specifically states otherwise, a Feature can only be activated once within that indicated time frame; i.e., once a turn, once a Scene, and so on.
Equipment Pack: Unless specifically stated otherwise, any Equipment Pack-noted changes only ever involve Basic Market cards.
Purchases Before the Game: Any Feature-generated purchases made before the game apply to any and all Market cards you have access to; i.e. you can purchase from anywhere within the Market, or even purchase cards that will not be included in the Market this game. (This is an exception to the standard rules for building the Market; see p. 28.)
Stunned & Unconscious: Features cannot be used when a character is Stunned or Unconscious.
Counts as X Class: Numerous Features include a "counts as X class" effect, which applies all of the rules for taking two Class Types as discussed in the Class Types in a Game sidebar (see p. 4). For example, if a player takes a Martial Character screen and has the Eldritch Knight Feature, that character also counts as Arcane for the Encounter Phase, Skill Checks, and so on. As noted, however, if a card specifically calls out "primary Class Type" for its effect, then the secondary Class Type does not count. In those instances, only the Class Type of the Character screen counts, and this Martial character would ignore the Eldritch Knight Feature's Arcane Class effect.
Opening New Slots: Feature Slot 1 is open for use and is where the Background sticker is placed. As soon as a player has enough XP to purchase and place a Feature during a Long Rest, they can immediately cover up that Background sticker, if they wish. There is no additional XP cost for that slot.
However, all other sticker slots require the expenditure of additional XP to open, as indicated on the Feature Slots XP Costs table, below. In other words, when placing a sticker into an empty slot, you must add the indicated XP to the sticker's printed cost (see below).
If a Feature states it does not require a slot, place them as you will on the back of the Character screen.
Feature Slots XP Costs
| Slot | XP Cost |
|---|---|
| 1 | 0 |
| 2 | 5 |
| 3 | 10 |
| 4 | 15 |
| 5 | 25 |
| 6 | 40 |
Example: Jeremy has earned 10 XP and chooses his first Feature, War Domain (which has a value of 10 XP). He decides he doesn't want to wait for more XP and so places it on his Character screen, covering up his Background sticker. The War Domain Feature gives him access to abilities requiring Martial Class and opens up the War Domain Subclass set of Features.
After earning 10 more XP (bringing his total XP to 20), he now wants the War Priest Feature. And if War Priest were a generic Feature, he could choose to cover up War Domain. War Priest is worth 20 XP, but that would be OK since he has 20 total XP, and in that instance the value of War Domain no longer counts since it would be covered.
However, this is not a generic Feature. To use War Priest, the War Domain sticker must still be visible, so he cannot cover it. As such, the total value of stickers on the card would be 30 (10 for the War Domain and 20 for the War Priest). What's more, it requires 5 XP to open up the second slot. Meaning Jeremy is 15 XP short. He either needs to select a 5 XP sticker (Acolyte), which he could immediately apply to the second slot, since he'd have the extra needed 5 XP, or he needs to dive into some more games to earn that extra 15 XP. Then again, he could do both!
Acquiring Features: There is a set of generic stickers with no requirements, meaning any character screen may use them. However, unless specifically stated otherwise, you cannot acquire Features for a Character Class or race that does not match your own.
The combined value of visible Features in a character's sticker slots is limited by the amount of total XP they have earned. Each Feature's value is shown on the sticker. When you acquire a Feature, remove the sticker from the sheet and place it on your Character screen in the appropriate sticker slot (see Opening New Slots, above). You can only acquire a new Feature if the total value of all your visible Features—as well as the cost of any slots beyond the first—is equal to or lower than the total XP you have earned.
If you decide you don't like one of your Features, or want to use that slot for a more powerful one, you can cover an existing Feature sticker with a new one. Only the sticker on top counts. The powers of any covered features aren't active, and they don't contribute to the total value of your Features.
Magic Items
Magic Item cards represent the fantastical treasures acquired as you complete Adventures. Weapons, armor, potions, wands: the full gamut of D&D's magical possibilities exists in these cards.
Magic Item Deck: The Magic Item Deck is usually used after a game, during a Long Rest, once players have completed an Adventure.
Each Magic Item Deck contains various rarities of Magic Items: Common, Uncommon, Rare, and Very Rare (future expansions will introduce additional rarities). When the time comes to award Magic Items, separate out each type of rarity cards into decks and place the decks that will not be used back in the tray.
If you're using more than one rarity, ensure that the sets are completely separate and that players know which deck is which. Thoroughly shuffle each deck and then proceed to awarding Magic Items.
Awarding Magic Items: Players earn Magic Items as shown on the Magic Items Award table below. Use the following rules when awarding Magic Items.
- First, players will earn the indicated Magic Items only once after completing an Adventure; replaying the same adventure will earn players XP but not Magic Items. The exception to this rule is the Dungeon Crawl Adventure. The first time players complete Dungeon Crawl at each different Adventure Level, they will receive Magic Items for successful completion. Thus Dungeon Crawl will award players Magic Items a maximum of five times in a base game.
- Second, a player can only "attune" (i.e., control and use) to a number of Magic Items based on their Character Level, as shown on that table. A Level 3 character can only attune to two Uncommon Magic Items. If that character completes a new Adventure, they will draw a new Uncommon Magic Item (as well as a Common Magic Item). However, they must either exchange that new item for one of the two items they already control, or choose to return the drawn Uncommon to the Magic Item Deck (if they decide they like their current items more). They will continue to exchange or return new Magic Items to the Magic Item Deck for each newly completed Adventure until they reach Character Level 4, at which time they can now attune to three Uncommon Magic Items.
- Third, in all instances, Common Magic Items ignore attuning limitations. The only limitations on the number of Common items are Character Limitations (see below).
With those limitations in mind, randomly determine who will draw first. This player draws a face-down card from the top of the appropriate rarity deck.
Players draw cards from the appropriate deck(s) in whatever order is agreed to by the party. Once all cards are drawn, players then reveal their cards.
If a rarity deck runs out, substitute Magic Items from the next lowest rarity; e.g., if no Rare cards are left in the deck, draw Uncommon cards instead. (If no lower rarity level is available, no additional Magic Items are awarded.)
Magic Items Award
| Adventure Level | Magic Items Drawn Per Player |
|---|---|
| 1 | 1 Common |
| 2 | 1 Common |
| 3 | 1 Common & 1 Uncommon |
| 4 | 1 Common & 1 Uncommon |
| 5 | 1 Common & 1 Rare |
| Character Level | Magic Items Attuned Per Player |
|---|---|
| 1 | 2 Uncommon |
| 2 | 2 Uncommon |
| 3 | 2 Uncommon |
| 4 | 2 Uncommon & 2 Rare |
| 5 | 3 Uncommon & 2 Rare |
Using Magic Items: The following rules apply to using Magic Items in a game.
- There are specific limits on how many Magic Items can be used by a given character (see Character Limitations, below).
- A player never needs to use any of their Magic Items. Based on limitations and desirability, the player chooses which Magic Items to use in each game.
- Shuffle the chosen Magic Item cards into a character's Equipment Pack; they do not replace any cards.
- If any Magic Items include "Starts in Play," do not add those to your Equipment Pack, but instead place them next to your Character screen.
- Some Magic Items include the Deplete and Consume keywords (see Deplete vs. Consume, p. 27).
- Magic Items are controlled by a character, not the player; use the back of the laminated Character screen to write down which Magic Items a character can use. If a player is running more than one Character screen through various games, the player cannot mix and match Magic Items between characters.
Character Limitations: The back of each Character screen shows the maximum allowable Magic Items that can be controlled by that character and can be used in a single game for each race/Class combination (note this is different than the limitations for attuning to items). Additional text describes further restrictions (if any). If there is a name, such as "Light," "Arcane," or "Hide," then that name (or color) must appear somewhere on the card; if it doesn't, then that card cannot be used by that character. In the case of Class Type restriction, the character may only use that type of Magic Item if it's the indicated Class Type.
For example, on the Half-Orc Fighter screen, that character can have any four weapons, any one armor, any one shield, and up to three miscellaneous items. For the Sun Elf Wizard, however, while that character may have any two weapons, the single armor the character can use must be Arcane; meanwhile no shields can be used at all, but six miscellaneous items can be used.
If, for whatever reason, you have attuned to more cards of a given type than are allowed by character limitations, at the beginning of each game choose which Magic Item(s) to put into your Equipment Pack.
HOW MANY MAGIC ITEMS TO USE: Just as with the tabletop RPG where a Dungeon Master often rolls up Magic Items from a table in a book, not all Magic Items given will be useful to every player, even if they can attune to them. Players can hold onto those cards with the idea that they can grow the characters toward a given item. Or they can work out trades and exchange Magic Items to maximize their party strength and play enjoyment.
Because of the wide variety of Magic Items vs. Character screens vs. play style, there are no solid guidelines to determine how many and which kinds of Magic Items to include in your Equipment Pack, especially as Magic Items can often hinder as much as help an Equipment Pack and the game, if they are used without thought. If you have too many Common Magic Items, for example, it will slow down how often you can draw your best cards, without giving you enough power in return.
The only real rule of thumb is that players should only add two to four Magic Items (based on limitations) to their Equipment Pack. However, based on the Adventure and the encounters to be faced, along with the Character screen in question, one player may decide they only want one Magic Item, while another builds a very effective five-item deck. Ultimately, it will take play and experience to maximize this great element!
Deplete vs. Consume: Some Magic Items are Depleted when used, and others are Consumed. These two keywords are critical to understanding how some Magic Items work.
- Deplete: This might be the only ability on a card or an optional ability. In both instances, when used, the card is removed from the current game; the player may still use it in future games.
- Consume: This might be the only ability on a card, or an optional ability. In both instances, when used, the card is removed from the current game and is returned to the Magic Items Deck. The player may no longer use that Magic Item in future games, unless they draw it again.
Modifying Adventure Levels
Unless specifically stated otherwise by an Adventure, you can replay any of them at higher Adventure Levels, using the following rules. These only apply when the Party Level is higher than the Adventure Level. If playing an Adventure equal to the Party Level, none of these rules apply:
Additional XP: Instead of those printed on the Adventure, each character gains the following XP award based on the Adventure Level played.
| Adventure Level | XP Awards |
|---|---|
| 2 | 1 XP per Scene + 2 XP for completion |
| 3 | 1 XP per Scene + 2 XP for completion |
| 4 | 2 XP per Scene + 1 XP for completion |
| 5 | 2 XP per Scene + 2 XP for completion* |
**Scene 1 does not provide any XP (see below).
Additional Modifications: When playing at higher Levels, use these additional rules:
| Adventure Level | Dragonfire Level |
|---|---|
| 2 | Dragonfire level 1 |
| 3 | Dragonfire level 2 |
| 4 | Dragonfire level 3 |
| 5 | Dragonfire level 0* |
*Dungeon Crawl At Adventure Level 5: The standard Dungeon Crawl Adventure is modified as follows: After Scene Three ends, start Scene Four; reveal a number of encounters equal to the number of players + 3. Additionally, after selecting the Difficulty 1 and Difficulty 2 Decks to use as the Primary and Secondary Decks, shuffle all Difficulty 3 cards into a new third deck (until future Difficulty 3 cards are available, you may ignore their Environment icons). When revealing encounters at the start of a Scene, for every three Dragonfire levels, first reveal a Difficulty 3 card. Then finish the remaining Dragonfire level count with Difficulty 2 cards, and then the remaining encounters with Difficulty 1 cards (if needed).
For example, if playing a six-player Dungeon Crawl Adventure Level 5 at the start of Scene Four and the Dragonfire level is 7, the following cards would be revealed, in the following order: two Difficulty 3, five Difficulty 2, two Difficulty 1, and finally, due to six players, one Difficulty 2 with no gold.
Other Adventures cannot use these Adventure Level 5 rules.
Five- and Six-Player Games: When playing five- and six-player games at higher Adventure Levels, don't forget that those specific rules always apply (see p. 7); i.e., they are in addition to the rules above.
Two- and Three-Player Games: As previously noted (see p. 5) in two- and three-player games, any player acting as two Class Types exchanges a card from their Equipment Pack for a Bless. This rule still applies, with Bless substituted every time, regardless of Adventure Level.
However, when playing at higher Adventure Levels, each two-Class player's Equipment Pack should also be upgraded in similar fashion, as shown on the Two- and Three-Player Higher Adventure Levels table below. Choose a number of Market cards equal to the total gold cost listed in the table, and exchange that same number of cards from your Equipment Pack.
Two additional rules apply when combining higher Adventure Level play with two- and three-player game rules from that table:
- You cannot add two copies of the same card to your Equipment Pack.
- You do not have to exactly match gold values if you do not wish to. For example, if you are allowed to exchange cards worth a total of 5 gold, you can choose to take a card(s) worth only 4 gold and leave the remaining 1 gold value unused.
Additional Adventure Level Rules: These rules only apply to two- and three-player games. As such, all the standard rules for higher Adventure Level play would still be applied. But remember that two-player games start at Dragonfire level –2 and three-player games start at Dragonfire level –1. So for example, if a two-player game started a Dungeon Crawl Adventure at Level 4, the Dragonfire level would start at 1 (for the standard Adventure Level rules), and both players would substitute the standard Bless, as well as any 4 cost card(s) into their Equipment Pack before the game begins.
Two- and Three-Player Higher Adventure Levels
| Adventure Level | Substitution |
|---|---|
| 2 | Any 2 cost card(s) |
| 3 | Any 3 cost card(s) |
| 4 | Any 4 cost card(s) |
| 5 | Any 5 cost card(s) |
Building the Market
As Dragonfire expansions are released, more Market cards will become available. Unlike encounters, which are readily added to existing Encounter Decks, the Market Deck is a more finicky beast. With that in mind, use the following rules when adding new Market cards.
- Never remove any cards from the base Market; the original sixty cards from the base game must always be included.
- The Market Deck may never contain more than 80 cards.
- Basic Cards may not be added to the Market Deck.
- The party must select Character screens before adding cards.
- If a card has any "Requires X Class" or "Must Include X Class" restrictions, those must be followed; e.g., if you're going to add Flame Blade to the Market Deck, then a Druid must be in the party.
- A player may only add up to six total cards, and those cards must be from their Class.
Note that future rules and Adventures may significantly alter the above, including removing cards from the Market Deck. And that's okay, as they'll be specifically designed for those changes. The rules above cover simply grabbing future Market cards and tossing them into the mix for play with more standard Adventures.
Glossary
A glossary of key terms and a fold-out Reference Sheet close out the rulebook, along with lead designer Matt Heerdt's credits and thanks to the Wizards of the Coast and Catalyst Game Labs teams. (©2017 Wizards of the Coast LLC. Wizards of the Coast, Dungeons & Dragons, Dragonfire, and Forgotten Realms are trademarks of Wizards of the Coast LLC. Crossfire, Catalyst and the Catalyst Game Labs logo are trademarks of InMediaRes Production, LLC.)
Class Type (color): There are four color-coded categories of Character Classes — Arcane (blue), Deception (red), Devotion (green), and Martial (black). A given Character Class belongs to one Class Type.
Sword Icons: Some Martial cards include one or two Sword icons on the middle left. Additionally, some Features have Sword icons and/or provide icons under specific circumstances. If you are a Martial character and play a total of three Swords during a turn (including Assists), you may immediately draw a card. To draw another card in this way, you must play enough additional cards (or activate Features) to reach a new set of three Swords.
Short Rest: Remove your Exhausted token (unless Unconscious); heal 1 HP; purchase cards; Advancements that apply may now take effect.
Locations (summary):
- Cards you play on your turn only directly affect characters or encounters where your Class Type marker is located.
- If you are on a Location, Assists can only be played to a character at your Location or on the Adventure Environment card.
- If a card played does not have any damage icons in its text, that card's text effect can be applied into or out of a Location, but never to a character or encounter at a different Location if you are also at a Location. Regardless of where the text effect is applied, the damage icons in the upper left of the card can only be applied to encounters where your character is located.
- At the end of your turn, if you are in a Location that has an Attack Strength, it deals damage to you along with all of the non-Location encounters that are facing you (if any).