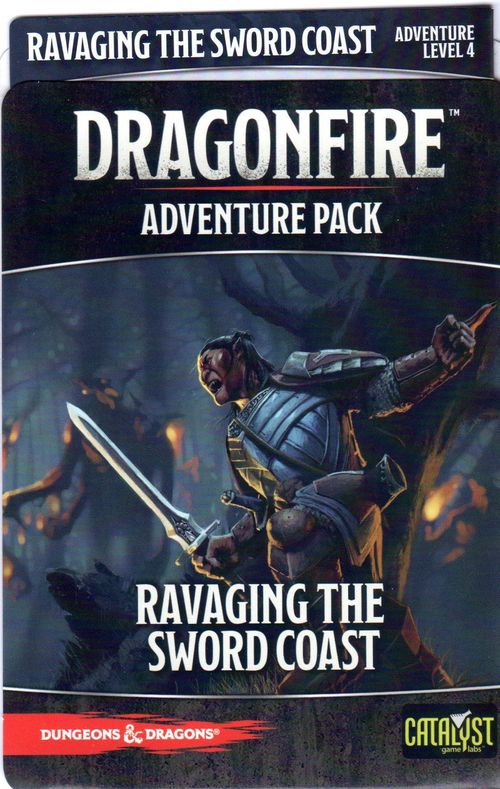
Dragonfire: Adventures – Ravaging The Sword Coast
Dragonfire: Adventures – Ravaging The Sword Coast Rulebook
Table of Contents
Table of Contents
- Cards
- Alternate Card Art
- Market Cards
- Sorcerer
- Alchemy Crafting
- Dragonfire Cards
- Magic Item Cards
- Don't Read the Fiction!
- Milestones
- Scenario: Ravaging the Sword Coast, Adventure Level 4
- Adventure Setup
- Encounters
- Army Groups
- Torog-Kaitan
- Conscription Deck and Defeated Encounters
- Ending a Scene
- Completing the Adventure
- Awarding XP & Magic Items
- Optional Scenarios
Cards
The following rules apply to Adventure: Ravaging the Sword Coast.
Cards: Cards include an "X" icon (a hexagon marked with an X) on the card. They can only be used in Adventures where they were first released or that specifically name those cards.
Alternate Card Art
Additional cards with alternate art will be included in various releases. For example, the Sorcery in Ravaging. Except for the alternate art, these cards are identical to earlier versions.
Market Cards
The following rules govern the new Market cards:
-
Players can add Firebolt to any Adventure using the Building the Market rules (see p. 28, Dragonfire Rulebook), provided a Sorcerer is included in that game (as indicated on the card).
-
Unless specifically stated otherwise, colorless cards do not count as any color for Skill Checks. And if need be, they are discarded and a new card revealed. For example, if you discard a Market card to determine a Class Type color to match, any colorless cards—such as Flanking—cannot apply. Ignore it and discard another card until you can appropriately match the conditions of the card in question.
-
Rodosh is a new type of Market card. When playing 2-player Ravaging the Sword Coast, at the start of the game, choose one player: they place Rodosh in their playing area. Additionally, place the Rodosh Reference card next to that player as well.
Sorcerer
The following rules cover the use of Sorcerers.
Sorcery Cards
Each Sorcerer Character screen details how many Sorcery cards to include in that character's Equipment Pack at the start of a game. Sorcery cards cannot be added to the Market.
Sorcery Points: When played, Sorcery generates Sorcery Points that are used to pay the cost of specific Sorcerer abilities and Features.
Sorcery uses the following rules:
- Metamagic Features cannot affect a Sorcery card.
- All Sorcery Points generated by a single Sorcery card must be spent on a single action. Any excess points after activating a Feature or Flexible Casting are lost.
- "Spent" refers to activating a Sorcerer ability or Feature. A Sorcerer can play a Sorcery card, generating Sorcery Points, and choose to not spend them. Unspent Sorcery Points are lost at the end of the player's turn.
Metamagic Features
Metamagic Features modify a chosen Arcane card. All such Features apply the following rules:
- Each Arcane card played can only have one Metamagic Feature applied to it.
- Spending Sorcery Points, activating a Metamagic Feature and playing the chosen Arcane card are considered a single action.
- The Metamagic effects modify the chosen card before the card applies its effects.
Wild Magic Origin
If a Sorcerer with the Wild Magic Origin Feature has spent one or more Sorcery Points during their turn, they must make a Wild Magic Check during their End Turn phase.
Wild Magic Check
Reveal the top card of the Market Deck. If the card's color is blue, a Wild Magic Surge immediately occurs. The revealed Market card, regardless of outcome, is placed back on top of the Market Deck.
Wild Magic Surge
A Wild Magic Surge occurs under either of the following circumstances:
- A failed Wild Magic Check.
- Activation of a Feature that automatically generates a Wild Magic Surge.
All Wild Magic Surges follow these rules:
Immediately reveal and place the top card of the Dragonfire Deck in front of the player who triggered the Wild Magic Surge; this Dragonfire card only applies its effects to that player and any encounters facing them.
The following rules apply:
- The Dragonfire level for this card is treated as 1.
- Any encounters summoned by this card are placed facing this player.
- Bonus tokens, healing, or other encounter modifications only occur on encounters facing this player.
- All decisions this card requires are made by this player.
- All costs normally paid by a specific player or the whole party must be paid by only this player.
- All direct effects of this card affect only this player.
- Encounters cannot be moved away from this player (e.g., Discombobulation); however, they can be generated to face this player (e.g., Old Enemies).
Bury this Dragonfire card during the End Turn phase of the player's next turn. A player may only be under the effects of one Wild Magic Surge Dragonfire card at a time. If a new Wild Magic Surge Dragonfire card is to be drawn, first bury the active Wild Magic Surge Dragonfire card, then reveal a new one.
Alchemy Crafting
Alchemy Crafting Features introduce a new style of play for Arcane characters. The rules from the Alchemy Crafting Features are included here, allowing players to review the rules at a glance.
The following covers the use of these new Features:
- Alchemy (Apprentice) Crafting is not a primary Subclass Feature (see Features, p. 24, Dragonfire Rulebook).
- Each Alchemy Crafting Feature indicates the total number of non-Devotion Potions that may be chosen. Each additional number on the next-level Feature replaces the previous level's number, e.g., Master Crafting allows for the choosing of three Potions.
- Potion(s) choice is made before a game begins, and the cards are added to a player's Equipment Pack, not the Market.
- Remove any Potion(s) chosen via Crafting Alchemy (Consumed or not) from your deck at the end of every Adventure.
Dragonfire Cards
When playing the Ravaging the Sword Coast Adventure, after shuffling the Dragonfire Deck, take the top twelve cards of the deck, shuffle in the four new Dragonfire cards, and then place them back on top of the Dragonfire Deck.
When playing other Adventures, players can include any of the non-"X" Dragonfire cards in the full Dragonfire Deck.
Relentless Enemy: In all future Adventures, players replace Relentless Enemy with Relentless Warlord.
Magic Item Cards
Shuffle the nine new Magic Item cards into their respective rarity decks, to be awarded per the standard rules (see p. 26, Dragonfire Rulebook).
Don't Read the Fiction!
The fiction in Ravaging the Sword Coast assumes players have completed the An Ancient Evil Arises campaign from the base game and all the previous Adventure Packs, as well as the Moonshae Storms Campaign Box, so it contains spoilers for those Adventures. You are free to play the Ravaging Adventure once you've reached Party Level 4, even if you've not completed the campaign or the other Adventures, hence why there are no indicators on the Ravaging the Sword Coast Adventure card for reading the fiction. But if you want to avoid spoilers, wait to read the Ravaging fiction until after you've completed the An Ancient Evil Arises campaign and other Adventures.
Modifying Adventure Levels: If your Party Level is different than this Adventure Level, you can adjust them using the following rules:
- Party Level Is Below Adventure Level: For every Party Level below the recommended Adventure Level, apply a -1 Dragonfire level.
- Party Level Is Above Adventure Level: For every Party Level above the recommended Adventure Level, apply a +1 Dragonfire level.
However, it is not recommended you play at a -4 or +4 Dragonfire level.
Milestones
Not all Adventures will be a part of the An Ancient Evil Arises campaign from the base game. Nevertheless, all Adventures you play are intrinsically linked by the passage of time. Experience Points do not arise in a vacuum. Instead they represent hard-earned knowledge as your fortunes wax and wane and the seasons change.
To help this immersion there are Milestone Dragonfire cards, which include the red ampersand icon (the D&D logo). For this pack, there are two Milestone cards, The Bigger They Are, The Harder They Fall, and Relentless Warlord, which replaces Relentless Enemy from Chaos in the Trollclaws. Once a character has completed the Ravaging the Sword Coast Adventure, that player must always include this Dragonfire card in the Dragonfire Deck for any Adventure they play, even if other players in the party have not yet completed that Adventure.
Transcriber's note: the printed text says "two Milestone cards" but names three (The Bigger They Are, The Harder They Fall, Relentless Warlord); all three are transcribed as printed.
Scenario: Ravaging the Sword Coast, Adventure Level 4
Companion scenario sheet (printed pp. 1–4 of the scenario setup). Read with the rules above.
Adventure Setup
The party faces off against encounters in three Scenes. Each Scene ends when you have defeated all encounters in one Army Group and any encounters facing characters. Once the third Scene ends, the party completes the Adventure!
Place Torog-Kaitan, from Ravaging the Sword Coast, face up.
Remove all Locations from indicated decks. Then, combine Wilderness 1 from the base game and Wilderness 1 from Ravaging the Sword Coast to create the Conscription Deck. From the Conscription Deck and the Wilderness 2 and Wilderness 3 Encounter Decks from Ravaging the Sword Coast, place face down in three different decks—Army Groups A, B, and C—a number of encounters based on the number of players, as indicated below.
Army Group A
| Number of Players | Conscription | Wilderness 2 | Wilderness 3 | Total |
|---|---|---|---|---|
| 2-3 | 4 | 2 | 0 | 6 |
| 4-5 | 6 | 1 | 1 | 8 |
| 6 | 7 | 2 | 1 | 10 |
Army Group B
| Number of Players | Conscription | Wilderness 2 | Wilderness 3 | Total |
|---|---|---|---|---|
| 2-3 | 4 | 1 | 1 | 6 |
| 4-5 | 5 | 2 | 1 | 8 |
| 6 | 6 | 2 | 2 | 10 |
Army Group C
| Number of Players | Conscription | Wilderness 2 | Wilderness 3 | Total |
|---|---|---|---|---|
| 2-3 | 4 | 0 | 2 | 6 |
| 4-5 | 5 | 1 | 2 | 8 |
| 6 | 6 | 1 | 3 | 10 |
Next, shuffle each Army Group, and rearrange the three decks to ensure the players do not know which deck is which Army Group. Then place each encounter face down in a grouping so each Army Group is clearly separate from the others.
Place the Conscription Deck next to Torog-Kaitan. All Saves are made using the Conscription Deck. Additionally, any effects that would use the Secondary Deck (such as Summon) instead draw from the Conscription Deck.
Shuffle all Flanking Market cards into the Market Deck. If players have more than 60 cards in the Market Deck, shuffle the Flanking Market cards into the top 60 cards.
Finally, do not use the following Dragonfire cards: Relentless Enemy (from Chaos in the Trollclaws), Relentless Warlord (from Ravaging) or The Bigger They Are, The Harder they Fall (from Ravaging). (Relentless Warlord and The Bigger They Are, The Harder they Fall, as Milestone cards, will be used in all future Adventures beyond this one.)
Encounters
Start of Scene: Before the start of each Scene (and before the Dragonfire phase, if one applies immediately at the start of a Scene), all players make two Deception Checks (the players are scouting). For Each Success: Starting with the party leader and then moving left, choose one face-down encounter from one Army Group (during Scene 3 there will be only one group), and reveal it, but it is not faced to any player. The players may choose from any Army Group when revealing encounters at this stage.
The party then chooses which Army Group they will face for that Scene (the rest of the face-down encounters in that chosen Army Group remain face down), and play proceeds with the Dragonfire phase of round one.
If the active player is not facing an encounter at the start of their turn (tokens do not count), that player must choose any one encounter from their chosen Army Group for this Scene and immediately move it to face them. This pull must occur before any other Start Turn phase actions are allowed (including activating Features with "at the start of your turn" wording).
If the active player is already facing an encounter (including if they just moved one), at the start of their turn they may choose to pull any number of additional encounters from the same Army Group, and these encounters are immediately moved to face that character. These pulls are made one at a time, i.e., you reveal a face-down encounter as you pull it, then you decide whether you want to pull and reveal another encounter, and so on.
Players cannot pull from an Army Group they did not choose for the current Scene. (The exception is the Flanking: Martial Market card, which allows players to interact with the other Army Groups during a Scene.)
Army Groups
Players cannot attack any encounters in an Army Group. They may only attack encounters facing them.
Torog-Kaitan
The following rules apply to Torog-Kaitan:
- Players cannot pull Torog-Kaitan until Scene Three.
- During every Dragonfire phase after the first one, after the Dragonfire card has been added to the Dragonfire discard but before a new Dragonfire card has been revealed, Torog-Kaitan makes a Warlord Check. Reveal from the Conscription Deck a number of cards equal to the Dragonfire level. Any black-colored encounters revealed are added to the current chosen Army Group, even if all encounters from that Army Group are already facing players. Discard to the Conscription discard any revealed non-black encounters. Then reveal the Dragonfire card and the next round begins.
- No Warlord Check is made if the number of cards to reveal is 0 (i.e., if modifiers from Flanking: Arcane would reduce the card count to 0).
- If the game starts with a negative Dragonfire level (such as in two- and three-player games), Torog-Kaitan will not make a Warlord Check until the Dragonfire level is at least 1.
- If a player pulls Torog-Kaitan during Scene Three, no more Warlord Checks are made.
- During Scene Three, if Torog-Kaitan has not yet been pulled, there are no other Army Group encounters left to pull, and the active player is not facing any encounters at the beginning of their turn, they must pull Torog-Kaitan.
Conscription Deck and Defeated Encounters
Defeated Difficulty 1 encounters are discarded to the Conscription discard. Defeated Wilderness 2 or 3 encounters are discarded to a separate discard. Whenever the Conscription Deck needs to reveal cards and there are no cards, shuffle only the Conscription discard to form a new Conscription Deck.
Ending a Scene
Each Scene ends when you have defeated all encounters in the chosen Army Group and any encounters facing characters. The standard rules apply for the Short Rest after each Scene.
Completing the Adventure
After Scene Three, the party has completed the Adventure!
Awarding XP & Magic Items
For each Scene that you start, each player receives 2 XP. If the party completes the entire Adventure, the players each receive a bonus of 1 XP, for a total of 7 XP.
The standard rules apply for awarding Magic Items.
Optional Scenarios
- Larger Armies: During setup, for each Army Group, add one additional Difficulty 2 card, regardless of the number of players: +1 XP upon Adventure completion.
Upon Adventure completion of this Optional Scenario, in addition to the standard Magic Item awards, the party finds Bracers of Defense. One person may attune to it, regardless of Character Level; Character Magic Item Limitations still apply.