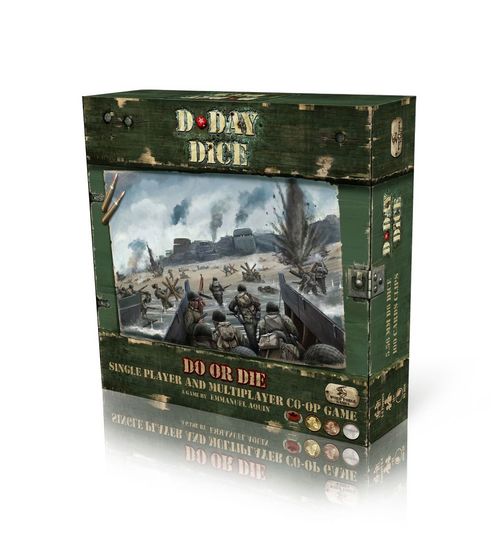
D-Day Dice (Second Edition)
D-Day Dice (Second Edition) Rulebook
Table of Contents
Table of Contents
- Overview
- Components
- Game Start
- Turn Sequence
- Phase 1: Roll the Dice
- Die Results
- Red, White & Blue (RWB)
- Straight
- Phase 2: Upkeep
- Phase 3: Adjust Unit Markers
- Phase 4: Rally a Specialist/Find an Item/Draw an Award
- Trading
- Phase 5: Move
- Phase 6: Combat
- End of Game: Victory
- End of Game: Defeat
- Rule Conflicts and Ties
- Trading Dice with the Lieutenant
- Optional Rules
- Victory Points (VP)
- D-Day Dice Tactics
- Credits
Overview
Players are Allied Soldiers trying to organize Units for an attack against a machine gun nest in a Bunker. Each player starts the game with a Unit of a few Soldiers and nothing else. As the game progresses, you will collect resources and advance up the beach, Sector by Sector, as your Unit grows stronger and deadlier. You will succeed… or die trying.
D-Day Dice is a cooperative game where players must help each other against their common enemy. If one player loses, the game is lost for everyone.
Components
- 12 Battle Maps (6 boards/2-sided)
- 4 Unit Marker dice (in 4 colors)
- 24 RWB dice (4 sets of 2 red, 2 white, 2 blue)
- 4 Black d6's (six-sided dice)
- 4 Resource cards (in 4 colors)
- 24 Regular Specialists (in 4 colors)
- 20 Reserve Specialists (in 4 colors)
- 4 Player Aids (in 4 colors)
- 30 tokens
- Rulebook, Scenario Book
- 16 Awards
- 6 Ranking Specialists
- 4 Unique Specialists
- 16 Regular Items
- 12 Special Items
- 6 Vehicles
Game Start
- Each player selects a country (UK, USA, Canada or France) and takes the matching Specialist deck, Unit Marker, and Resource card.
- Choose a Battle Map, then open the Scenario Book to the Battle Map's list of available Special Items. You'll need this list shortly. First-time players: we recommend you start with battle map no1 – exercise tiger.
- All Players place their Unit Marker dice on one of the Battle Map's starting position icons with 1 chevron showing on top.
- Prepare the card pool for the game: lay out all Unique and Ranking Specialist cards on the table, face-up, where all players have access to them. Then add the Items below, based on the player count:
- 1 player: Add all Regular Items that don't have the special symbol, plus 1 card of your choice: either 1 Special Item from the Battle Map's list or any 1 Regular Item that has the special symbol.
- 2 players: Add all Regular Items that don't have the special symbol, plus 2: either 1 Special Item from the Battle Map's list or any 1 Regular Item with the special symbol (each player chooses 1).
- 3 players: Add all Regular Items, including those that have the special symbol on them, plus 3 cards from the Battle Map's list (each player chooses 1).
- 4 players: Add all Regular Items, including those that have the special symbol on them, plus the cards from the Battle Map's list.
- Return any unused Items to the game box.
- Put the Award card deck nearby, face-down (see about awards p. 8).
- Players record the resources printed on the Battle Map starting position to their own Resource card, and take their Regular Specialist cards and Reserve Specialist cards in hand.
- Each player grabs 2 Red, 2 White and 2 Blue dice. You're now ready to play!
Turn Sequence
Gameplay is simultaneous. All players go through the turn sequence together. A turn is 6 phases. All players complete each phase before starting the next.
- Phase 1: Roll Red, White and Blue Dice until you have your Final Tally.
- Phase 2: Upkeep. Count RWB bonuses, earn Awards, adjust Resource Cards.
- Phase 3: Adjust Unit Markers.
- Phase 4: Rally a Specialist/Find an Item/Draw an Award.
- Phase 5: Move. Fulfill new Sector requirements, if applicable.
- Phase 6: Combat. Lose Soldiers from your Unit according to your Sector.
Phase 1: Roll the Dice
Every turn, roll your 6 Red, White and Blue dice. After the first roll (and only then), choose 2 dice to be locked – these dice cannot be re-rolled. After the second roll, you can keep or re-roll any or all of the remaining dice. After the third and final roll, the dice on the table are your Final Tally.
Tips: After any roll, if you like what you have, you may stop and consider this your Final Tally. You may also consult other players while rolling your dice.
A Sample Roll
This example roll will offer insight into your options when rolling.
The first roll yields 2 Soldiers, 1 Tool, 1 Skull, 1 Courage, 1 Star. We must lock 2 dice. Let's choose the two single Soldiers (red glow) and put them aside.
We can choose 0 to 4 dice to re-roll. Let's select these 3 (green glow). Overall, our second roll isn't what we hoped for. We got a blue Skull!
We can choose 0 to 4 dice to re-roll. We'll choose the 2 blue dice (green glow) to maximize our chances of obtaining an RWB.
Our third and last roll. For our Final Tally, we got lucky: 7 Soldiers, 1 Tool, and an RWB bonus of single Soldiers (yellow glow)!
Die Results
Skull (cancels another die)
For every Skull in your Final Tally, 1 other die is cancelled; choose the die to be affected and ignore its result for this turn. A Skull cannot cancel another Skull. If a Skull is neutralized by another card such as the Sharpshooter Specialist, that Skull is considered ignored and has no negative effect. If you rolled a Straight (see Straight below) you also ignore the Skull's effect.
Star (to rally Specialists)
Every Specialist has a specific cost in Stars. When you have enough Stars, you have the option to rally 1 Specialist who then joins your Unit. You may not rally more than 1 Specialist per turn. See Specialists, p. 9.
Soldiers (more Soldiers strengthen your Unit)
Add 1 Soldier or 2 Soldiers to your Unit, depending on the die result.
Courage (to Advance or to draw Awards)
It takes Courage to move toward the Bunker under enemy fire.
Tool (gain Item Points)
These represent objects collected from fallen comrades such as half-buried supply bags, weapons, and other items. The number of Tools in your Final Tally determines how many Item Points you gain.
Red, White & Blue (RWB)
When you roll 3 identical results on 3 dice of different colors, you score a Red, White & Blue "RWB" bonus. These bonuses are in addition to the face values on the dice, with the exception of Skulls.
The player aids contain unique RWB information for each country. Many RWB bonuses offer 2 different possibilities (as written, these are separated by the word "or") giving you a choice depending on your needs. Some RWB bonuses give resources to other Units in addition to yours. These Units can be anywhere on the Battle Map; they do not need to be in the same Sector with your Unit. Also, some game effects give you colored results to add to your Final Tally: these can also help you gain an RWB bonus.
Very Important: Consult the player aid for your country to see what each RWB bonus gives you, as each country is slightly different.
The RWB bonus icons are:
- Dead Man's Gift: You stumble upon a fallen Soldier's gear bag.
- Leadership: Your tactical knowledge makes a difference.
- Reinforcements: A small group of Soldiers chooses to join you.
- Fresh Troops: Newly-landed Soldiers join your Unit.
- Battle Cry: Inspired by your guidance, your comrades go above and beyond the call of duty.
- Special Find: In the rubble of a crater, you find something that can help you.
Straight
If you roll 1 of each symbol (regardless of color), you have rolled a Straight and you earn an Award of your choice (any color die) in addition to the Resource values shown on the dice. See about Awards, p. 8.
Only dice, and results that have a color, count when determining if you have a Straight in your Final Tally.
Note: When obtained as part of a Straight, the single Skull result does not cancel another die (it is considered ignored).
Phase 2: Upkeep
After looking at your Final Tally, do the following in order.
a. If you rolled a Straight, collect your Award. See about Awards, below. b. If you rolled any Skulls, apply their effects (except for those that are ignored). c. If you rolled any RWBs, collect the bonuses now. d. Record all resources gained from your dice and add those gained from these steps on your Resource Card.
About Awards
Awards can be earned in different ways and in different phases:
- Phase 2: When you have a Straight in your Final Tally, you may look through the Award deck and choose any 1 card from it.
- Phase 4: Spend 6 Courage to draw any 1 card at random from the Award deck. No peeking!
- Special: Certain Battle Map Sectors, and Items, can give Awards to Units.
Awards are played like Regular Items (see Items, p. 10) in any phase except in phase 6, combat. You can earn or draw only 1 Award per turn. Always reshuffle the deck after choosing your Award. When an Award card allows you to rally a Specialist or find an Item, this Item never counts toward the 1-per-turn limit. Once an Award is used, turn it face-down on the table to indicate it is now out of the game. When there are no cards left in the Award deck, no more can be earned.
Reminders: After you obtain a Straight in your Final Tally and gain the Award of your choice, remember to record the resources shown on your dice, ignoring the Skull. Always reshuffle the deck after choosing your Award.
Phase 3: Adjust Unit Markers
Unit Markers serve 2 functions: to track your position on the Battle Map, and your turn progress in the current Sector. In phase 3, you add 1 chevron. If your Unit Marker currently indicates its "must move" or "can't stay here" faces, you must turn it to the appropriate symbol, meaning you must move to a new Sector in the next phase 5. See Phase 5: Move for Battle Map movement.
Unit Marker Die Faces
- Tracks how many turns you have spent in a Sector. Always start at 1 chevron when you enter a new Sector.
- Your Unit must move this turn.
- Use to indicate you will move using a Battle Cry RWB.
- You are in a "Can't stay here" Sector and must move to a new Sector in the next phase 5.
Phase 4: Rally a Specialist/Find an Item/Draw an Award
Specialists
Specially-trained Soldiers are essential for the survival of a Unit. If you have the Stars necessary to rally a Specialist of your choice, you may subtract its cost from your Resource Card, take the Specialist card from either your hand or the pool and place it face-up in front of you. The Specialist is now part of your Unit and its ability is available. You can rally 1 per turn per player.
Rally example: The cost for a Veteran is 3 Stars, so when you have 3 Stars on your Resource card you can spend them to rally the Veteran in phase 4.
Specialists offer a permanent ability to the Unit they join. Use of this ability is optional, you can take advantage of it or not, as you see fit.
Ability example: The Sharpshooter lets you ignore the negative effect of a Skull in the Final Tally, but there may be a situation where you'd want to allow the negative effect instead. Having a Specialist lets you choose your best option.
Some Specialists must be sacrificed to activate their special ability (for example, the Point Man). This single-use ability occurs immediately, once you decide to sacrifice the Specialist. After the ability is resolved the Specialist is considered dead. When a Specialist dies through combat or by sacrifice, its ability is lost as well. Turn its card face-down. The Specialist cannot be rallied again this game.
Specialists count as Soldiers, so you can choose to lose them during combat (see Phase 6: Combat, p. 13), if needed. The abilities of Specialists are cumulative. If you have a Veteran and a Chaplain, you'll get both +1 Soldier and +1 Courage for every RWB you obtain on the battlefield!
The 4 Kinds of Specialists
- Regular Specialists – available to all players, in each country/color.
- Reserve Specialists – available to all players, in each country/color. A Unit can have only 1 Reserve Specialist at a time. If the Reserve Specialist is killed or sacrificed, then the Unit may rally a different Reserve Specialist.
- Ranking Specialists – available in the pool.
- Unique Specialists – available in the pool. Only 1 Unique Specialist can be in play at a time. When a Unique Specialist is rallied, all other Unique Specialist cards become unavailable; turn them sideways or face-down as a reminder. If the Unique Specialist is killed or sacrificed, turn the cards up, making them available again until another is rallied.
Awards (Phase 4)
You may spend 6 Courage to draw 1 Award card at random. See about Awards, p. 8.
Items
Tool results in your Final Tally generate Item Points that you can spend to look for – and find – an Item. Players can find only 1 Item per turn, although there are no limits to how many Items a player can use in a turn. Items may be used at any time except during Combat, unless noted. Subtract the cost of the Item from your Item Point total on your Resource Card, take the Item card from the pool, and place it face-up in front of you. The Item is now part of your inventory. Items may be used the instant they are found.
There are two kinds of Items: Regular Items and Special Items.
- Regular Items – Always available, except when noted.
- Special Items – Only found on certain Battle Maps. See the Battle Map description in the Scenario Book for availability.
All Items have a single-use effect, triggered immediately when you choose to activate it. After use, the Item is discarded. Place it face-down in the pool, as a reminder that it has been used.
Items that affect the DEF value or Machine Gun Fire of Sectors (see Machine Gun Fire, p. 12) affect all Units in the Sector until the end of the turn.
Vehicles
These can be obtained via the Legion of Merit Award or in specific Sectors of some Battle Maps. A Vehicle is obtained the same way an Item is found, by spending Item Points to find it, but in action it works more like a Specialist.
- Its effect is permanent and affects all Units present in its Sector.
- Unlike a Specialist, a Vehicle does not count as a Soldier.
- Vehicles cannot traverse Land Mines (even if your Unit ignores Land Mines).
- Vehicles cannot enter a Bunker.
- A Unit may have only 1 Vehicle at a time.
- A found Vehicle counts toward your 1 Item found per-turn limit.
- Vehicles can be traded or they can be abandoned; once abandoned, however, a Vehicle cannot be found again.
Note: Vehicles are plainly visible on the battlefield so they are not "found" in the strictest sense. The Item points you spend are for the various parts necessary to return them to a functioning state.
Explosives
Some cards have explosive icons at the bottom of their card. They are volatile, or contain explosives. If a Battle Map Sector says "Discard [explosives] to open the doors to the Bunker", the Unit must discard either:
- 2 cards with 1 explosive icon (i.e., Grenade or Engineer Specialist), or
- 1 card with 2 explosive icons (i.e., the Bangalore Torpedo).
Trading
This is a cooperative game: the loss of 1 player means defeat for all. Units must help each other whenever possible. The survival of the operation depends on it!
In any phase except in phase 6, combat, when 2 or more Units are in the same Sector those Units may trade resources, including Soldiers, Courage, Stars, Tools, Items and Vehicles. Awards and Specialists may never be traded. A Unit can trade resources for nothing in return. A Unit cannot trade with a Unit in a different Sector (unless a special card like Carrier Pigeon is used).
Reminder: When an RWB bonus gives resources to "other Units", those Units can be anywhere on the map. This is not considered trading.
Phase 5: Move
Units move through Battle Maps by Sectors. Units may stay in any Sector for a maximum of 3 turns, unless specified otherwise, then they must move. If a Unit must move but cannot, for any reason, it is wiped out and all players lose.
To move, relocate your Unit to an adjacent Sector. Place the Unit Marker in the new Sector and set it to its "1 chevron" face. Movement is summarized below.
| A Unit can... | A Unit cannot... |
|---|---|
| Move once per turn | Visit the same Sector twice |
| Move left or right (laterally) | Move diagonally |
| Move forward (i.e., Advance) | Move backward |
Forward movement, including into the Bunker, is a special move action considered an advance (see Advancing, below).
Advancing
A Unit must spend Courage every time it Advances. The amount of Courage necessary is shown on the Battle Map, on the dividing line between each row. Entering the Bunker is also considered an Advance, since it too displays a Courage value.
Sectors
Each Sector on a Battle Map has specific attributes – this includes the Bunker, which is also a Sector. The icons for Sectors are described in detail below in combat, and in the Battle Map description found in the Scenario Book.
At the bottom of every Battle Map, the starting Sectors can be identified by a special symbol, which also indicates the Battle Map's starting resources.
Sector instructions take precedence over general rules of the game. Those printed in green are beneficial to the players; those in red are not. (Color-blind players: this information is also found in the Scenario Book.)
Phase 6: Combat
In phase 6, every Unit, whether it moved or not, suffers casualties in its current Sector. The number of Soldiers lost is equal to the defense value for the Sector plus Machine Gun Fire, with any other modifiers that apply.
Every Sector contains a shield with a Sector label and a large number indicating the Sector's defensive capabilities (DEF). This value is equal to the number of Soldiers every Unit in the Sector will lose per turn in phase 6. The higher the number, the deadlier the Sector. The shield color shows how long a Unit may stay: a white DEF shield denotes a normal Sector where Units can stay up to 3 turns, while a black DEF shield denotes that Units cannot stay more than 1 turn. The number always indicates the per-turn Soldier casualties.
Some Sectors have multiple DEF shields, one for each turn you spend there. Use the first DEF during your first combat turn, the second one for the second combat turn, and so on. The number of chevrons on your Unit Marker indicates which DEF shield value to use.
Some Items and effects allow players to reduce the DEF of a Sector, such as the Flame-Thrower Item or the Engineer Specialist. When this happens, the DEF value changes affect all Units present in that Sector until the end of the turn. All DEF reducing effects are cumulative, but a Sector's DEF cannot fall below 0.
Machine Gun Fire (MGF)
Some Sectors are exposed to Machine Gun Fire (MGF), making these Sectors more deadly. Such Sectors are identified by a special crosshairs symbol beside the DEF shield. Each phase 6, when Units are present in such a Sector, have one player roll a regular six-sided die (d6) to determine how many additional Soldiers each player will lose during combat.
MGF dice can be modified or re-rolled by special circumstances. For example, the Binoculars Item can change the MGF die in your favor. All Units present in the Sector benefit from or suffer from any change to MGF.
Some Battle Map Sectors have more than 1 MGF symbol. When this happens, roll a die for each MGF symbol, and add them together.
Special Damage
When a black die icon appears beside the MGF symbol, you will suffer Special Damage on any die roll of 6. See the Battle Map description in the Scenario Book for the Special Damage incurred. In Sectors with multiple MGF symbols, rolling more than one 6 means you suffer multiple instances of Special Damage. Special Damage is always in addition to the regular MGF damage.
Casualties
During any phase, when you suffer casualties subtract that number from the total number of Soldiers in your Unit. Since Specialists also count as Soldiers, you may choose to lose some to keep your Unit in action. If your Unit runs out of Soldiers and Specialists, it is wiped out.
A Unit consists of the number of Soldiers being tracked on your Resource Card plus the number of Specialist cards you have in play. If you have 24 Soldiers on your Resource Card and 1 Specialist in play, then your Unit has 25 Soldiers total.
End of Game: Victory
To win the game, every Unit must conquer the Bunker – which means entering the Bunker and surviving combat with at least 1 Soldier remaining. If even 1 Unit fails to make it, all players lose the game.
When a Unit successfully conquers the Bunker, it is no longer in harm's way and stops rolling dice. It can help the remaining Units by placing its surviving Specialists beside the Bunker. Their abilities are ignored, but every Specialist placed there reduces the DEF of the Bunker by 1 point for the remaining Units. If 2 or more Units enter the Bunker at the same time, they cannot benefit from each other's Specialists this way. The game ends when the last Unit conquers the Bunker.
End of Game: Defeat
The game ends in defeat for the players if either of these conditions occurs:
- A Unit is wiped out (it has no more Soldiers and Specialists), or
- A Unit is forced to move but cannot do so due to Sector Requirements, lack of Courage, or another game effect.
Rule Conflicts and Ties
In the event of a conflict between rules or card text, use the following order of precedence to resolve the issue:
- Awards (these override everything else)
- Items and Vehicles
- Specialists
- Battle Map description/Scenario description
- Sector attributes
- Game rules (overridden by all of the above)
If a tie occurs between 2 Units who try to do the same thing (find an Item, pick up an Award from a Battle Map, etc.), the Unit with the least Soldiers has priority. If the tie persists, the players should roll dice or settle without rolling. The important thing is to have fun storming the beach.
Trading Dice with the Lieutenant
Regular Lieutenant
When using the Lieutenant Specialist, any Unit can trade 1 and only 1 non-Skull die with 1 other Unit. In a 3-player game, this means 1 player won't be able to trade dice during any given turn.
Units do not need to be in the same Sector to trade dice, since the Lieutenant communicates with the others by radio and hand signals. Bonus results, like those given by the Scout Specialist, the Leadership RWB bonus or Sector attributes, cannot be traded away: only real dice that don't show Skulls can be traded.
When trading dice with the Lieutenant, at the beginning of phase 3, make sure each player resets his dice to 2 Red, 2 White and 2 Blue.
Solitaire Lieutenant
When playing Solitaire, use the solo play version of the Lieutenant. This card allows you to put aside 1 of the dice from your Final Tally and replace it with 1 from the Lieutenant's roll, once per turn. This is a good way to get rid of unwanted Skulls. Dice need not be the same color. Each die from the Lieutenant can only be traded once and must be discarded afterward, which gives you a maximum of 6 trades per game.
Make sure you take back the die you set aside before rolling again next phase 1: roll the dice.
Optional Rules
Solitaire
D-Day Dice plays very well in solitaire play: all the normal rules apply except for trading. Items, Awards and RWB that mention "another Unit" now affect your Unit (for example, if playing the UK, the "Reinforcement" RWB now gives you 4 + 4 Soldiers). For Awards written in 2 parts (like the Memorial Cross), you should only consider the first part for yourself. The following cards are unavailable in solitaire play: Victoria Cross (Award), Carrier Pigeon (Item), Dispatch Case (Item) and Mortar (Item). Consider all Sectors marked "Max 1 Unit" as being a "Can't stay here" Sector.
You can track your performance using the optional Victory Points rule (p. 16).
Note: There is a version of the Lieutenant with a different ability especially for solitaire play. See Trading Dice with the Lieutenant above.
Bazooka Joe
To make the game a bit less difficult, all Special Items are available (ignore the Map's list). If the game is still too hard, allow Units to rally more than 1 Unique and Reserve Specialist.
Soldier Mulligan (Recommended)
On your first roll of any turn, if your results show no Soldiers, re-roll all 6 dice. You can do this once per game. Use a token as a reminder you used a mulligan.
Blind Start
Players ignore the starting resources on the Battle Map; instead add 1 Soldier to their Resource Cards. Each player then rolls all 4 Unit Marker dice to determine their additional starting resources, adding the results together as follows: 1 chevron = 1 Soldier, 2 chevrons = 1 Courage, "must move" face = 1 Star, "can't stay here" face = Nothing.
A Few Good Men
When this special rule is in play (as specified on some Battle Maps), Soldiers become harder to collect: only 1 Soldier is gained for every 2 obtained (discarding leftovers). The division happens at the end of phase 2: upkeep, so RWB bonuses are compiled before dividing your total by 2 (rounded down). For example, if you obtain 7 Soldiers in your Final Tally, you only add 3 to your Unit during phase 2.
This rule only affects Soldiers gained during phase 1 and phase 2. Soldiers gained with Items and Awards played during phase 3 and up are not divided by 2.
Note: Casualties are not divided by 2. This makes both Land Mines and Machine Gun Fire a lot deadlier!
Veteran players looking to make Exercise Tiger's Advanced Training more challenging can apply "A Few Good Men" to that Map.
Victory Points (VP)
For Solitaire and Competitive Group Players Alike
For solitaire and competitive players, it can be fun to determine the glory of your success or the tragedy of your loss. Count VPs when the game ends, whether in victory or in defeat. This will give players a score to beat on their next game.
- Conquering a Bunker: 20 VP
- Being the first Unit to conquer a Bunker: 20 VP (every player who achieves this in the same turn wins 20 VP)
- Total number of map Sectors (including Bunker): x 10 VP
- Defeat – the number of the last Sector entered: x 10 VP
- For every Soldier still alive in a Unit: 1 VP
- For every Courage Point left in a Unit: 2 VP
- For every Specialist left in a Unit: 3 VP
- For every Award drawn: 10 VP
Solitaire Victory note: When adding up VP for your victory, don't forget to count both the bonus for conquering a Bunker and for being the first to do so.
Group Victory: If you want to know how well you and your partners performed as a group, check the VP for each player. Your group score is equal to the Victory Points achieved by the player with the lowest score.
A Sample Victory Point Score for a Single Player Game
A solitaire player wins on Omaha Beach with 5 Soldiers left, 2 Courage and 4 Specialists. The VP count would be:
- 20 VP for conquering the Bunker (20)
- 20 VP for being the first to conquer the Bunker (20)
- 100 VP for the total number of Sectors, including Bunker (10 Sectors x 10)
- 5 VP for remaining Soldiers (5 Soldiers x 1)
- 4 VP for remaining Courage (2 Courage x 2)
- 12 VP for remaining Specialists (4 Specialists x 3)
- 0 VP for Awards drawn (0 Awards x 10)
- 161 VP total
D-Day Dice Tactics
- Study the Battle Map and select your attack path before starting the game.
- Try to stay as long as you can in the lower Sectors. Higher Sectors are unforgiving, and a good reserve of Soldiers is crucial to storm the Bunkers.
- The key is to focus on which dice to re-roll. Always keep the color of the dice in mind when making your choice.
- Focus on Soldier results. Do not get tempted by RWB bonuses like Leadership, Battle Cry or Special Find unless you really need them.
- To maximize Item Points, concentrate all your Tools in one Final Tally. Ideally, choose a Sector with a "+1 Tool per turn" bonus, rally a Scout, find the Toolkit (if available), and go for it.
- The Bangalore Torpedo is your friend. Use it in the highest possible Sector.
- If playing solitaire, it is highly recommended to roll the dice while making explosion sounds with your mouth.
Credits
Designer: Emmanuel Aquin Cover & Component Art: Dominik Kasprzycki Graphic Design: Dominik Kasprzycki and Emmanuel Aquin Soldier icon: Tom Mouat Editing Team: Mark Rapson and James Hébert Second Edition Play Testers: Craig Andrews, John Booth, George Buss, Doug L. Click, James Hébert, Lutz Pietschker
First Edition thanks: The author wishes to thank the Centre National du Jeu and its terrific staff, the Canadian Game Design Contest, Thomas Provoost from Repos Production, and the wonderful community of the BoardGameGeek — especially Grégory Guazelli (softbug), Eric Herman (Grudunza), Raoul Schaupp (StaggerLee), George Buss (ThatFedoraGuy), Doug Click (Sayburr) and Daniel Jew (Talorien). And the wonderful Julie, who died many times on these beaches before everyone else.
Second Edition thanks: First of all, a big thank you to Mark Rapson & Dominik Kasprzycki, for their patience and understanding; to Craig Andrews, for being there at the right place at the right time; and to all D-Day Dice supporters who kept the flame going in the dark times when the game's future was uncertain.
The Word Forge Games team extends a special thank you to the more than 4000 backers who supported this game on Kickstarter and Indiegogo: without you, we wouldn't be here!
© 2018 Word Forge Ltd. Word Forge Games, the Word Forge Games logo, the RWB system and the RWB logos are trademarks of Word Forge Ltd.