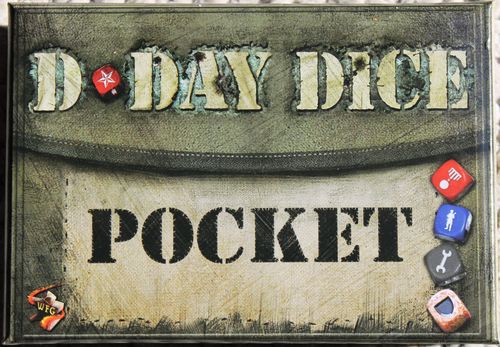
D-Day Dice Pocket
D-Day Dice Pocket Rulebook
Table of Contents
Table of Contents
- D-Day Dice Battle!
- Battlefield Die
- Medals
- RWBs and Straights (Battle!)
- Victory (Battle!)
- D-Day Dice Express!
- Beach Die
- Gantlet
- Specialists
- RWBs and Straights (Express!)
- Victory (Express!)
- Operation: Neptune
- For D-Day Dice Express! — Advanced Beaches
- Advanced Solo Beaches
- The Kommandant — An Advanced Rule for D-Day Dice Battle! and D-Day Dice Express!
- For D-Day Dice! — Machine Gun Fire Dice
D-Day Dice Battle!
A push-your-luck game for any number of players
Components: 6 Allied dice, 6 Axis dice, 2 Reference cards, 1 Battlefield die, 7 Medal cards.
You'll also need to keep player scores, using pen & paper or a smartphone app.
MISSION: Your goal is to cancel Axis dice with your Allied dice by matching the symbols. Along the way you can gain bonuses and medals to bolster your efforts.
GAME START: Each player rolls the 6 Allied dice. The one who rolls the most stars starts the game. The other players take turns in clockwise order.
When it's your turn, start a skirmish! Each skirmish is played in 7 steps:
1 – Roll both the battlefield die (to determine how the terrain will affect the skirmish) and 2 Axis dice (to find out what the enemy throws at you). See the BATTLEFIELD DIE section.
Add 1 Axis die to this step every time you chose to advance after step 7.
2 – Roll all the Allied dice.
3 – Re-roll any or all of the Allied dice, if you want. Then, you may re-roll any or all of them one last time.
4 – Medals cards may be played to boost your roll or affect gameplay (see the MEDALS section). Once done, you have your final tally.
5 – If your final tally contains 1 RWB, 2 RWBs, or a straight (see RWBS AND STRAIGHTS), immediately earn the medal cards corresponding to the results.
6 – Compare your final tally with the Axis dice. If every Axis die is matched by an Allied die, one for one, you win the skirmish. Earn 1 point per Axis die matched. If you don't match every Axis die, you lose the skirmish. Your turn ends and you lose all the points you've accumulated this turn.
7 – If you won the skirmish, make a command decision to advance or retreat:
advance – Start another skirmish and add 1 Axis die to your roll during step 1 (up to the maximum of 6).
retreat – End your turn and collect your points.
Battlefield Die
Rolled during step 1, the battlefield die represents the terrain where the skirmish takes place and the effect it has on battle:
Landing – The skirmish plays normally.
Barriers – The skirmish is worth 2x the points.
Rallying Point – The skirmish is worth 3x the points.
Gantlet – You must advance during step 7.
Bluffs – You must retreat during step 7.
Bunker – You can only roll 5 Allied dice during step 2.
Medals
You earn a medal card when you obtain an RWB or a straight in your final tally. Take the medal card that matches the symbols on your RWB dice from the medal deck (if another player already has it in hand, they must give it to you).
Medals you hold onto are worth 5 points at the end of the game. They can also be played for their effect during step 4 (some instruct you to play them during another player's turn). Each has a different effect, so follow the instructions on the card.
Once played, return medals to the deck. It is possible to play a medal to earn another one, even the one you just played. There are no limits to the number of medals that can be played at the same time.
Medals override the battlefield die and take effect in the order they are played. (If you play the Croix de Guerre medal, forcing you to retreat, and another player plays a Memorial Cross just after, forcing you to advance, you must advance during step 7).
RWBs and Straights (Battle!)
If you roll 3 identical results on a red, white and blue die, you have an RWB. With 6 dice, you can have 2 RWBs.
If you have each of the 6 symbols on your dice, you have a straight. You cannot have a straight when rolling 5 dice.
Victory (Battle!)
Players take turns until one reaches 30 points. Finish the game with each player having had an equal number of turns.
Highest score wins. Remember that unused medals are worth 5 points for their current owner.
In case of ties, play a bonus turn between tied players.
D-Day Dice Express!
A cooperative game for 1-4 players
Components: 6 Allied dice, 6 Axis dice, 2 Reference cards, 3 Beach cards (2-sided), 1 Beach die, 7 Specialist cards.
MISSION: Players form a squad tasked with clearing the Normandy beach sector by sector, all the way to the bunker.
GAME START: Choose a beach to conquer (see GANTLET for beach names).
Designate 1 player as "lead soldier." Each turn, this player carries out steps 1 and 2 for the entire squad. Steps 3 through 7 are played by everyone.
Note: If you own enough Allied dice from additional copies of another D-Day Dice game, all players may play steps 3–6 simultaneously. Otherwise, take turns for these steps.
Steps 1–2: Lead Soldier
1 – If starting a new invasion, set the beach die to the Landing Zone symbol (see the BEACH DIE section).
If returning from step 8, advance the beach die to its next face.
2 – Roll Axis dice equal to the number of the current beach sector (i.e., 1 Axis die on Landing, 2 Axis dice on Barriers, etc.). This is the opposing force.
Steps 3–8: All Soldiers
3 – Roll all your Allied dice.
4 – Re-roll any or all of your Allied dice, if you want. You can do this twice.
5 – Use Specialist cards to improve your results or affect gameplay (see the SPECIALISTS section). Once done, you have your final tally.
6 – Check your final tally. If it contains 1 RWB, 2 RWBs, or a straight rally the corresponding Specialists to your hand (see the RWBs AND STRAIGHTS section).
7 – For the squad to clear the sector, every soldier's final tally must match the Axis dice, one for one.
8 – If the sector is cleared: return to step 1 to tackle the next sector.
If the bunker is cleared: the game ends in victory—well done!
If the sector is not cleared: your squad has failed and lost the game—try again!
Beach Die
Use this die to track your progress as you move up the beach. It starts the game showing the Landing Zone symbol for the Landing Zone sector. Each time you return to step 1, advance the die to the next sector symbol.
SPECIAL NOTE: Sector 4 is especially tricky. When you reach it, to reveal your beach challenge, see GANTLET.
The beach sectors, in order:
- Landing Zone
- Barriers
- Rallying Point
- Gantlet (see GANTLET)
- Bluffs
- Bunker
Gantlet
Sector 4 differs from beach to beach. When your squad arrives here, find the beach below and apply the effect for this turn only. Once the Gantlet is cleared, resume play as normal on the Bluffs sector.
Utah Beach: No Specialists may be rallied.
Gold Beach: At least 1 player must roll an RWB here, or the sector must be replayed.
Juno Beach: If any player rolls an RWB here, you must roll 1 additional Axis die in the next sector (sector 5 is Bluffs, so roll 6 Axis dice there).
Sword Beach: Your unit must lose 1 Specialist at the start of step 8. If you have none to lose, the game is lost.
Omaha Beach: The Axis has 1 additional die for this sector (roll 5 Axis dice instead of 4 here).
Pointe du Hoc: Allied skulls cannot be re-rolled (but can be changed by Specialists).
Specialists
When you obtain an RWB or a straight in your final tally, you rally a Specialist to your squad: take the Specialist card that matches the RWB symbol into your hand. If the Specialist is already there, do nothing. A Specialist's ability cannot be used on the same turn it was rallied.
Most Specialists have a permanent ability. Others must be "sacrificed" for their ability to take effect. Some beach sectors force you to lose a Specialist. Remove sacrificed Specialist cards from the game.
Only 1 Specialist can be rallied per sector (exception: in solitaire play, 2 Specialists may be rallied if 2 RWBs are rolled).
RWBs and Straights (Express!)
If you roll 3 identical results on a red, white and blue die, you have an RWB and may rally a Specialist (with 6 dice, you can have 2 RWBs). If you have 1 each of the 6 symbols on your dice, you have a straight and may rally the Veteran Specialist. You cannot have a straight when rolling 5 dice.
Victory (Express!)
The game is won when the Bunker is cleared by all players. Congratulations, troops! On to the next beach!
Operation: Neptune
For a longer game, and to cement the Allied victory in Europe, clear all 6 sectors on all 6 beaches, in order, from Utah Beach to Pointe du Hoc. Once a beach is conquered, return all Specialists to the deck to be rallied for the next beach.
For D-Day Dice Express! — Advanced Beaches
Every Express! beach card now has 6 unique sectors, each one with a different effect. Find these sector effects on the corresponding Beach card. Good luck!
Advanced Solo Beaches
After selecting your beach, roll 2 dice and choose one: rally the Specialist corresponding to that symbol for free. If you roll doubles, you can choose between the symbol shown or the Veteran.
The Kommandant — An Advanced Rule for D-Day Dice Battle! and D-Day Dice Express!
1 Kommandant die.
The black die represents a high-ranking officer renowned for his unerring leadership: the Kommandant.
When the Kommandant is deployed, replace 1 gray Axis die with the Kommandant's black die. Deployment is explained below for each game.
The Kommandant in DDD Battle!
At the start of each skirmish, choose whether to deploy the Kommandant. When he is deployed, his effect is to prevent you from re-rolling any Allied die showing the same result that he rolled. Also, during step 6 the Kommandant die counts for 2 points.
The Kommandant in DDD Express!
The Kommandant is always deployed in the bunker. The result shown on his die must be matched TWICE. He can be prevented from deploying if you lose 1 Specialist before rolling the Axis dice.
For D-Day Dice! — Machine Gun Fire Dice
A rule card is included in this box to allow you to use the gray dice in Word Forge Games' D-Day Dice, and any of its expansions.