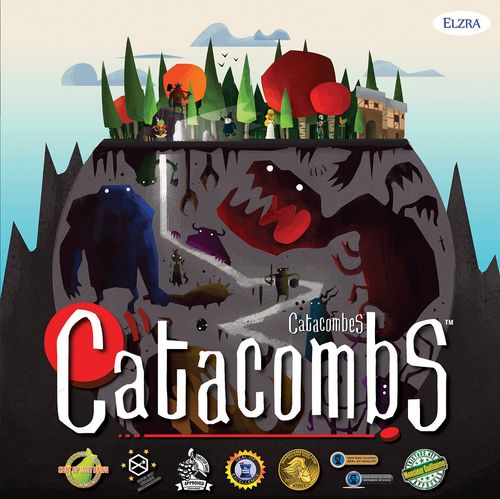
Catacombs (Third Edition)
Catacombs (Third Edition) Rulebook
Table of Contents
Table of Contents
Components
- Hero Rule and Portrait Cards x12
- Hero Ability Cards x4
- Hero Item Cards x16
- Hero Spell Cards x16
- Stunned! Cards x3
- Teleported! Card x1
- Catacomb Lord Rule, Portrait, and Setup Cards x12
- Monster Cards x26
- Room Cards x33
- Poisoned! Cards x15
- Devoured! Card x1
- Antient Card x1
- Health Trackers
- Hero Trackers x6
- Ally Trackers x2
- Monster Trackers x4
- Catacomb Lord Trackers x2
- Target Token x2
- Ruler Token x1
- Gold Coins x40
- Platinum Coins x10
- Hero Pieces x6
- Obstacle Pieces x6
- Familiar Pieces x4
- Ranged Pieces x8
- Shield Pieces x2
- Gelatinous Cube x1
- Liquid Antient Piece x1
- Catacomb Lord Pieces x2
- Mythological Monster Family Pieces x9
- Dungeon Monster Family Pieces x9
- Vermin Monster Family Pieces x9
- Undead Monster Family Pieces x13
- Infernal Monster Family Pieces x11
- Playmats: Mausoleum / Throne Room, Lava Tube / Root Cellar, Campfire / Altar
- Catacomb Lord Player Board x1
- Elzra's Wall System: Wall Segments x10, Plastic Stands x20
- Hero Player Boards x4
Cards in this game are identified by a card-back icon.
The Overseer, Heroes, and Catacomb Lords
The Overseer Player
One player must occupy the role of the Overseer who controls the Catacomb Lord and monsters who inhabit the dark places beneath Stormtryne. The Overseer sets the pace and tone of the game. Although he or she is trying to win by defeating all the heroes, the Overseer will want to make the game enjoyable for the other players as well.
Important: The Overseer is the final arbiter of any disputes that may arise during the game.
Introducing the Catacomb Lords
At the beginning of the game, one of the Catacomb Lords is chosen by the players. From weakest to strongest they are Vasesak the Sorcerer, Shargila the Gorgon, Hmotha the Lich Lord and Phoshar the Dragon. Fighting the Sorcerer is recommended for new players.
The Catacomb Lord appears at the end of the game in the Catacomb Lord's Lair special room. If the heroes defeat the Catacomb Lord, they win the game (see "Winning the Game").
- Vasesak the Sorcerer — The Sorcerer uses powerful magic to conjure an invulnerable shield that can protect him.
- Shargila the Gorgon — The Gorgon's petrifying gaze transforms her enemies into stone, killing them instantly.
- Hmotha the Lich Lord — The Lich Lord summons endless hordes of undead monsters to perform his bidding.
- Phoshar the Dragon — The Dragon strikes fast with a stream of deadly fireballs.
The Hero Players
After an Overseer is selected, the remaining players become the hero team. There are always four heroes chosen for a game of Catacombs. Depending on the number of players, some players may be controlling more than one hero. The table below outlines how players are distributed:
- 5 players: Overseer, 4 players controlling 1 hero each
- 4 players: Overseer, 2 players controlling 1 hero each and 1 player controlling 2 heroes
- 3 players: Overseer, 2 players controlling 2 heroes each
- 2 players: Overseer, 1 player controlling 4 heroes
Introducing the Heroes
As a group, the players choose which four heroes will be used in the game. Heroes are the brave characters who advance through the rooms of the catacomb, fighting monsters along the way. There are six heroes to choose from (though only four are used in a game at a time). For your first few games of Catacombs, it is recommended to use the Wizard, Chicken Champion, Thief, and Barbarian.
- Varesh the Wizard — as a Spell Caster, he has a set of powerful spells at his disposal to assist the party.
- Xoric the Barbarian — has the most health points, enabling him to survive close encounters with the enemy. He can also use his savage Berserker Battle Axe item.
- Roosan the Chicken Champion — is particularly effective at disrupting the Overseer's plans with its Feathers of Fury ability.
- Oleira the Elf — can shoot from a safe distance using her Elven Arrow ability and is assisted by a Spirit Familiar.
- Elani the Thief — can make an additional shot to escape from dangerous situations. She receives one extra gold coin for each monster she slays.
- Marorg the Skeleton Explorer — is a solid, all-round fighter who is immune to poison attacks and buys items at a discount.
Fighters may use "weapons," but not "magic items." Clerics cannot use weapons and cannot use magic items. Spell Casters may use magic items, but not weapons. Monarchs may use both magic items and weapons.
Hero Player Boards
The players place a hero player board in front of them for each hero they control and take the corresponding wooden hero piece and cards.
All heroes have a minimum of two cards: a Portrait card and a Rules card.
The Portrait card shows their name and class.
The Rules card shows:
- their starting health
- base shot sequence
- any Ability, Spell and/or Item cards the hero starts the game with
- any special rules (not shown)
- whether the hero can use weapons and/or magic items
Place the Hero Portrait and Rules cards in the spaces showing a Hero card back on the player board. If the hero has any other cards, place them on the board as well. Ability cards go in the section with the Ability card back and Spells and Items go in the sections with their corresponding card backs. There is a space to place Poison cards as they are accumulated.
Players put a Hero Tracker on the blood drop of the health track corresponding to their hero's starting health.
Heroes must start the game with all Ability cards listed on their Rules cards. Players may choose if they would like to start with any listed Item cards.
The Wizard is the only Spell Caster in the base Catacombs game capable of using magic. At the start of the game, the player using the Wizard chooses ten Spell cards.
Game Phases: Exploring the Catacomb
Each Room card presents a new encounter for the heroes as they explore the catacomb and fight for their lives against the monsters deployed by the Overseer. Starting from the top (the card closest to the heroes), the Overseer flips the next unrevealed Room card.
If the card is a Special Room card:
- If they have reached the Catacomb Lord's Lair Special Room card, then the final battle begins (see "Catacomb Lord's Lair").
- If the heroes have reached any other Special Room card, they complete that encounter and move to the next Room card (see "Special Room Cards").
If the card is a Battle Room card:
- The Overseer guides the other players through the Setup, Battle, and Resolution phases. After completing each room, the Overseer flips over the next Room card (see "Battle Room Cards").
The Setup Phase
During the Setup Phase the Overseer performs the following steps:
- Chooses a playmat and places it on the table, centered within the walls. The same side of a playmat cannot be chosen for two consecutive rooms. This rule does not apply to the Catacomb Lord's Lair.
- Places the black obstacle pieces on top of the Obstacle icons on the playmat.
- Finds the Monster cards from the Monster deck for each monster displayed on the Room card and places them beside the playmat as a reference for the other players.
- Gathers the appropriate type and number of monster pieces to be used from the Monster Pool.
- Places these monster pieces within any legal location behind the line indicating the Monster Start Zone.
The players then place their hero, ally or familiar pieces anywhere behind the line indicating the Hero Start Zone. The room is now ready to play.
Important: The supply of pieces and cards represent hard limits in the game. For example, if there are no more coins in the Treasury, then the heroes do not collect any gold during the Resolution Phase.
The Battle Phase
The Battle Phase for each battle room is where the majority of the action takes place when playing a game of Catacombs. It consists of at least one round during which each hero takes a turn and then the Overseer responds by taking turns with each of the monsters in the room. It is important to remember that a turn is the action a character takes. A round is complete when all the Heroic Forces and all the Catacomb Lord's Forces have taken a turn. These actions typically require skill and dexterity on the part of the players as they flick their hero pieces around the playmat.
Once all monsters in the room have been destroyed, frozen or a combination of the two, the room is complete and the Battle Phase ends. Heroes are freed from the Devoured! and Teleported! cards. All Stunned! cards are removed. All other pieces such as obstacles, shields, and fire walls are removed from the playmat. The Resolution Phase begins.
The Resolution Phase
Assuming at least one hero survived the Battle Phase, the Resolution Phase begins. Each surviving hero is given an amount of gold equal to the total value of the monsters they destroyed during the Battle Phase. The amount of gold each monster is worth is printed on the Monster card. The monster pieces are then returned to the Monster Pool.
After the Resolution Phase is complete, play continues by returning to the Setup Phase. If the heroes have survived to the Catacomb Lord Special Room card, then the final battle begins.
Example: If Varesh the Wizard destroyed two Skeleton Warriors (worth one gold coin each as indicated on the Skeleton Warrior's Monster card) and one Minotaur (worth two gold coins), he would collect four gold coins in total and then return the monster pieces to the Monster Pool.
Winning the Game
Heroes: If the heroes eliminate all of the Catacomb Lord's health and at least one hero in the party remains alive, they are victorious and win the game. Unlike the previous battle rooms, it is not necessary to destroy all the monsters (called minions). Only the Catacomb Lord itself must be destroyed to win.
Overseer: If at any time during any Battle Phase, all four heroes are killed and/or unable to take an action (example: trapped on the Devoured! card) then the game is over and the Overseer wins.
The Battle Phase (In Depth)
Turn Order
The heroes always take their turns first during the Battle Phase. Rounds continue until all the monsters in the room have been destroyed or all the heroes are dead.
- The players take their turns by performing one action for each hero. There is no set order for which hero goes first: players are encouraged to confer amongst themselves to decide who should perform their action next. An action is considered to be either a hero's shot sequence that is found on the Hero Rules card, or playing an Item, Spell or, Ability card (facing page), but not both (unless rules on a card override this condition or a hero is using a Combo item).
- Once all the players have performed an action with the heroes, the Overseer takes a turn for each monster. These actions are the shot sequences described on the Monster cards.
- Once all the monsters have taken a turn, the round is over. At the end of the round, the heroes assess any additional end of round effects that may have occurred.
- A new round then begins with the heroes taking their turns again.
Character Shots
As Catacombs is a dexterity based game, there are several different shot types that can be performed. It will take time and practice to master how to flick the various discs in the game effectively. The three basic character shots in Catacombs are rush, melee, and bite.
- Rush shot — performed by flicking the appropriate piece with the controlling player's finger across the playmat; however, no damage is inflicted. The shot's name suggests haste, thus there is no opportunity to engage in combat. Damage: 0.
- Melee shot — performed in the same way as a rush shot, and is meant to simulate a character charging into battle. By default, a melee shot inflicts one point of damage.
- Bite shot — a character shot that inflicts two points of damage.
Legal Locations
A piece must always end a shot in a legal location on the playmat. No shot can result in a piece ending up on top of another piece — including obstacles. If this happens, the player who took the shot is responsible for moving the piece to the nearest possible location on the playmat where it is able to lay completely flat.
If a piece leaves the playmat as the result of any shot, simply place it back on the edge of the playmat at the point where it left.
Ranged Shots
Unlike character shots, ranged shots involve flicking a separate ranged piece. This ranged piece is placed anywhere within 2.5cm (1") of the character and then shot across the playmat. This simulates a character shooting a projectile during battle.
When a ranged shot is complete, the ranged piece is removed from the playmat. Different ranged shots can inflict varying amounts of damage:
| Ranged Shot | Damage | Additional Rules |
|---|---|---|
| Missile | 1 | No |
| Fireball | 1 | No |
| Target | 1 | See Target Shot |
| Giant Fireball | 2 | No |
| Boulder | 3 | No |
| Ice | 0 | See Ice Shot |
| Wizard's Shield | 0 | See below |
| Sorcerer's Shield | 0 | See below |
Shield Shots
A shield shot is a ranged shot with a few extra rules. When the shield ranged piece is already present on the playmat, a player may choose to flick it from its current position, or place it beside the character and flick it as normal. Shield shots do not inflict any damage.
Immediately after the entire shot sequence (in which the player used the shield shot) is complete, the shield piece is placed within 2.5cm (1") of the shield's owner to help protect them. Shield pieces are removed from the playmat/game board when their owner dies or when the Battle Phase ends.
Shot Sequences and Connectors
One or more shots can be performed during a player's turn when controlling a character; this is called a shot sequence. All shots in a shot sequence are optional.
If a piece leaves the playmat during a shot sequence, place it back on the edge of the playmat at the point where it left and continue the sequence.
Multiple shots that are performed in a row are represented on a card by the "Then" connector icon between each shot icon. For example, in a shot sequence where a thief performs a melee shot and then a rush shot, the two shots are linked by the Then connector, meaning both are performed in that order.
In some cases, a player must choose which shot sequence to perform from two possible alternatives. This is represented by the "Or" connector icon between the sequences. A player must declare which shot sequence they are choosing before performing it. A player can never perform every shot on a card when there is an "Or" connector present. The "Or" connector can also appear horizontally, separating longer shot sequences. For example, the Orc can perform either a melee shot or a missile shot. The Crypt Spider can perform either a single regeneration melee shot, or a rush shot then two stun missile shots (the second option's shots are grouped together in a dotted box).
The "Elastic" connector icon enables the player to perform shots in a sequence in any order they choose. For example, in a shot sequence with the Elastic connector, the Goblin Fighter can perform a Chain Melee shot and a Chain Missile shot in any order. (The Goblin Fighter monster is from the Wyverns of Wylemuir expansion.)
Taking Damage
The Heroic Forces and Catacomb Lord's Forces are trying to inflict damage on each other. Each time a character is damaged they lose health points. The damage can come from being directly hit with character or ranged shot pieces or in the case of the Heroic Forces, hitting a fire wall.
Multiple targets can be damaged by a single (unmodified) shot provided the shot hits them directly. For example, a hero's melee shot can ricochet off a Troll (inflicting one point of damage in the process) then hit a Skeleton Warrior (again inflicting one point of damage).
If a hero's melee shot strikes a Troll who is then pushed into a Zombie, no damage is inflicted on the Zombie, because the hero did not hit the Zombie directly.
Finally, it is possible for a character to damage multiple targets who are adjacent to each other simultaneously.
Important: There is no "friendly fire": heroes, allies and familiars cannot damage each other in any way. Monsters and Catacomb Lords cannot damage each other either.
Tracking Health
When a hero, ally, level 4 monster, or Catacomb Lord is damaged, move the Hero, Ally, Monster, or Catacomb Lord Tracker on the corresponding health track of their player board or card down the required number of blood drops.
If a monster with two health points (as shown on its Monster card) takes one health point of damage, then it is flipped over in place on the playmat, showing an orange background (or a black background in other Catacombs games). It will take one more successful hit to destroy a monster in this damaged state.
If a monster starts with one health point, it is immediately removed from the playmat upon taking damage.
Important: When a hero defeats a monster (by reducing its health to zero), that monster's disc is placed on top of the hero's player board. This does not apply when fighting the Catacomb Lord (see "Catacomb Lord's Lair").
Healing Damage
Healing can restore a damaged character's health. When one or more Heal icons appear on a card, a character increases their health according to the number of Heal icons present. The character can also heal any one hero or ally instead.
Important: A character's health may not be increased beyond its starting level.
The Heal All icon enables all living teammates (including the character performing the healing) to recover one point of health.
Hero Death
If a hero's health track reaches the skull icon, or "0," on their player board, they are dead. The hero's piece, shield pieces and/or familiar pieces are removed from the playmat. All Item and Poison cards are shuffled back into their respective decks (if they have any) and any monsters they have killed are returned to the Monster Pool. The hero retains any unused Spell cards. All of the hero's gold coins are returned to the Treasury. The hero automatically returns to life in the Setup Phase of the next room with half their health (rounded down) restored.
Advanced Rules (for an extra challenge): When a hero dies they are out of the game. The heroes that remain alive may resurrect the dead hero (for example, by visiting Althea the Healer). The dead hero retains their Item cards in addition to their Spell cards.
Playing Spell, Ability, or Item Cards
Heroes can play different cards during their turn instead of their base sequence:
- Spell cards can only be used by characters who are Spell Casters such as Varesh the Wizard. A player may perform one rush shot before casting a spell. A Spell card can only be played once per game and once used is discarded permanently. There are no exceptions to this rule.
- Ability cards — some heroes begin the game with Ability cards. An Ability card is specific to a particular hero and can only be used once during the Battle Phase of a room. After it has been used, it is flipped over face down and is refreshed (flipped face up) during the Setup Phase of the next room.
- Item cards — in the base Catacombs game, Item cards are purchased from Izchak the Merchant or won at the Alewife Tavern. Many items can be used by any hero; however, some have usage restrictions. Item cards are either played once per game, once per room, or are considered permanent.
Refreshing Ability or Item Cards: When a Refresh Ability icon or Refresh Item icon appears in a shot sequence, one of the hero's Ability or Item cards that has been used can be refreshed (flipped face up) so that it can be played again on a later turn. Only once per room can Item cards be refreshed.
When playing as one or more of the heroes, your turn during the Battle Phase consists of one of two possible alternatives:
- Performing the shot sequence on the given Hero's Rules card.
- Playing a card (typically an Ability, Spell or Item card).
Important: Any special rules described on a card take precedence over the basic rules found in this manual.
Example: Varesh the Wizard could play his Rules card shot sequence, his Fireball Ability, one of his 10 Spell cards (such as Magic Missile), or, if he obtained an Item card (such as Healing Salve), he could choose to play that.
Shot Modifiers
As their name suggests, shot modifiers change the shot being performed, typically by enabling an additional effect. When a modifier has been applied, the shot icon will be a different colour from the base shot. For example, a stun modifier applied to a melee shot means that in addition to inflicting damage, this stun melee shot will also stun the affected character.
In the case where a modified shot hits multiple opponents, the modifier is only applied to one of the affected characters (attacker's choice). However, all affected characters still take damage from the base shot as normal.
- Chain Shot Modifier (yellow): The chain shot modifier indicates that the same target cannot be damaged consecutively in a shot sequence and does not appear in combination with any other shot modifier. If the same target is hit consecutively, damage that would have been inflicted by the additional hit(s) is ignored. By preventing damage being applied consecutively, the chain shot modifier ensures that damage from a particular shot sequence is distributed across several targets. Ranged shots with the chain modifier always originate from the location of the character performing them. Example: If Xoric the Barbarian plays the Berserker Battle Axe Item card, he can perform four melee shots in a row. However, these shots cannot damage the same monster or Catacomb Lord consecutively. Therefore, the Barbarian could hit a Zombie (destroying it), then hit a Troll (it is damaged and flips over in place on the playmat), then hit a Fire Spirit (destroying it) and then hit the same damaged Troll again (finally destroying it).
- Corrosion Shot Modifier (brown): If a hero is hit with a corrosion shot modifier, one of their Item cards is destroyed. The player shuffles the affected hero's Item cards. One Item card is drawn randomly and is discarded from the game. Any pieces associated with it on the playmat are removed. If the affected hero does not have any Item cards, they lose 3 gold coins instead. If the affected hero does not have any gold coins, then this modifier has no effect.
- Critical Shot Modifier (red): The critical shot modifier increases the damage inflicted by the base shot by one point.
- Fear Shot Modifier (white): The fear shot modifier strikes fear into the affected character and forces them to run away. The attacker who damages a target with the fear shot modifier may immediately perform a single, unmodifiable rush shot with the affected character (including those that are stunned).
- Petrify Shot Modifier (gray): When a character is hit with the petrify shot modifier, they are turned to stone. The character is dead and is removed from the playmat, no matter how much health they have remaining. If multiple characters are hit, only one is affected by the petrify shot modifier (all characters still take damage). The player performing the shot decides which one is turned to stone.
- Poison Shot Modifier (green): Some monster attacks not only result in loss of health points, but are also poisonous. When a hero is hit by a poison shot modifier, they first must decrease their health by one point (if applicable). By default, one poison card is drawn from the Poison deck and placed face up on the affected hero's player board. In some cases, two cards are drawn. As they are damaged by poison shots, the Poison cards accumulate. If at any time, the total value of all the Poison cards accumulated equals or exceeds the starting health of that hero, then they are overwhelmed by the poison and die (see "Poison Cards" for more).
Fire Walls
When a Fire Spirit transforms, it remains in fire wall form for the remainder of the room and is treated like an obstacle. As such, fire walls can no longer be controlled by any player and do not count as monsters in the room.
A fire wall will inflict one health point of damage to any of the Heroic Forces who come into contact with it in any way: directly or indirectly. If a fire wall is pushed off the playmat, return it to the point where it departed as normal. If it is moved by another piece but stays on the playmat, it remains in the new position.
Defensive Properties
Some characters can be protected with defensive properties which can prevent damage from shots and/or the effects of shot modifiers from occurring.
Nullifying Shots
Some characters can nullify shots which prevents any damage from being inflicted and any shot modifiers taking effect (the modifiers are ignored).
Example: A Skeleton Warrior monster has a missile shot icon in its Nullifies box. This means that it won't suffer any damage from any basic missile shot or any modified missile shot (including the critical modifier). To destroy the Skeleton Warrior, the heroes could use a melee shot or fireball shot.
Example: Marorg the Skeleton Explorer's Hero Rule card has a Nullifies box that contains poison melee, poison missile and poison rush shot icons. Marorg is only protected from being damaged (and therefore poisoned) by these modified shots specifically.
Reflecting Shots
Reflected shots behave the same as those that have been nullified with the exception that one (and only one) point of damage is reflected back at the attacker initiating the shot.
When a Nullifies or Reflects box appears on a Hero Rules card, a Monster card, or Item card with the "permanent" frequency condition, no action is required on the part of the player, as all shot icons in that box will be nullified and/or reflected automatically.
When a Nullifies or Reflects box appears on an Ability card or Item card with the "once per room" frequency condition, then the player affected by a given shot may choose when to use the card to be protected from the shot icons in the box. The card is flipped over and is refreshed (flipped face up) during the Setup phase of the next room.
Finally, when a Nullifies or Reflects box appears on a Spell card or Item card with the "once per game" frequency condition, then the player affected by a given shot must choose when to use the card to be protected from the shot icons in the box, after which the card is discarded.
Example: The Minotaur can reflect missile shots. If a player flicks a missile shot against it, that missile shot is nullified and one point of damage is reflected back at the attacking hero.
Room Cards
Room cards represent an encounter for the heroes within a game of Catacombs. There are two types of Room cards: Battle, where the Heroic Forces fight the monsters in the catacomb, and Special, where the heroes can buy items, heal themselves, test their luck and recruit allies.
Battle Room Cards
Battle Room cards show the Overseer how to populate a room with monsters. Each card will have the following information:
- Room name — the name of this room.
- Room difficulty — difficulty 0 rooms are the easiest while difficulty 2 rooms are the most challenging.
- Suppresses Box — some rooms have restrictions on what types of shots and/or shot modifiers may be used. This effect is called suppression (see below).
- Quadrants — four quadrants which group monsters to be placed on the playmat during the Setup Phase by their respective level (1 to 4).
There are three ways that show the Overseer which monsters to place in the Monster Start Zone during the Setup Phase: Specific Monster icons, Mercenary Monster icons, and Monster Metre icons.
Specific Monster icons: The specific monster and number of pieces to be used is shown in one or more quadrants of the Room card. In the case of the Barracks card, the Overseer takes 4 Orcs (level 1), 1 Troll (level 2) and 1 Pit Viper (level 2) from the Monster Pool and places them in the Monster Start Zone on the playmat.
Mercenary Monster icons: The Setup card for the current Catacomb Lord will indicate to the Overseer which level 1 monster should be used when a Mercenary Monster icon appears in the top left quadrant of a Room card. Example: When fighting through Hmotha the Lich Lord's catacomb, the Mercenary Monster is a Zombie. In this case, if a Room card has four Mercenary Monster icons on it, then the Overseer would take four Zombies from the Monster Pool and place them on the playmat in the Monster Start Zone.
Monster Metre Icons: The Battle Room card has Monster Metre icons in any of the four quadrants. These icons give the Overseer the most freedom and strategic flexibility in choosing the monsters that will populate a room. For each Monster Metre icon, a monster of the specified level from any family (colour) is chosen. At the same time, the Overseer decides how many pieces available for that monster are placed in the Monster Start Zone. The usual answer, to keep things simple and to keep the game moving, is all of them. However, in some cases the Overseer may not want to deploy all the monster pieces available for a specific monster, keeping some back to be summoned later during the Battle Phase.
Example: In the Mitholaq Hive room there are two Monster Metre icons in the first quadrant. This means the Overseer chooses two level 1 monsters from any monster family. This could be Zombies and Fire Spirits, resulting in eight pieces being placed on the playmat (all four Zombie and all four Fire Spirit pieces).
Example: In the Qurlathorm room there are three levels of monsters the Overseer must choose: a level 2 monster, two level 3 monsters and a level 4 monster. This could be two Skeleton Archers (level 2), two Fire Demons (level 3), two Vampire Bats (level 3) and the Gelatinous Cube (level 4). Or, two Trolls (level 2), two Giant Scorpions (level 3), two Ghouls (level 3) and the Owl Bear (level 4).
As an alternative, it is possible to have the monsters for each Monster Metre icon be determined randomly. Each Monster card has a corresponding Monster Metre icon on the back. If, for example, the Overseer is required to place a level 2 monster, shuffle all the Monster cards with a level two Monster Metre on the back and reveal the top card. The Overseer would place as many monsters of that type as desired in the Monster Start Zone up to the maximum number available, if able to do so. For example, for a level 1 Monster Metre icon the Overseer could choose up to 4 Skeleton Warriors, up to 4 Orcs, or up to 4 Centaurs (among other options).
There may be a conflict if, for example, the Swordmaster Ghoul is revealed after the Crypt Spider has already been placed on the playmat (they both share the same piece). In this case, discard the Monster card and draw another one. Repeat this process for any other Monster Metre icons on the Room card.
Suppression
Suppression is a condition where all characters are prevented from performing a certain type of shot and/or modifier in some rooms. This is expressed on a Battle Room card by the icons for the suppressed shots being listed in a Suppresses box. If an unmodified shot is listed, that means that shot type and all its modified versions are suppressed for the duration of that room. If a specific modified shot is listed, only the modifier is suppressed, not the shot itself.
Example: In the Phaoslay Realm room, modifiers for certain shots are suppressed for the duration of the Battle Phase.
Special Room Cards
Unlike Battle Room cards, Special Room cards present unique encounters for the heroes as they explore the catacomb. Each Special Room card has its own rules for the players to follow as explained in the following sections. All gold coins spent by the heroes are returned to the Treasury.
Althea the Healer
Althea the Healer offers rest and relief to the heroes. She will cure one Poison card for free. As a group, the players decide which hero will be able to discard a Poison card and shuffle it into the Poison card deck.
She also enables the heroes to obtain the following services:
| Service | Cost | Effect |
|---|---|---|
| Heal Hero or Ally | 3 gold coins | One health point is restored to the hero or ally. Move the Hero or Ally Tracker up the health track on the hero's player board by one blood drop. |
| Cure Poison | 2 gold coins | A hero is cured of one Poison card (see "Poison Cards"). |
| Resurrect Hero | 10 gold coins | One dead hero is brought back to life with two health points. The hero returns to life with all of his or her gold coins and any unused Item and/or Spell cards. They may pay to be healed further by the Healer. The resurrected hero starts playing in the next room. |
Important: Multiple services can be purchased from the Healer. Players may pool their gold coins in order to make offerings for her services. Allies can be healed by the Healer, but not resurrected.
Amaranth Inn
The heroes stop at the Amaranth Inn and meet with the Innkeeper. They may pool their gold to do any or all of the following activities:
- Sleep for a night at the Inn. Pay eight gold coins and each living hero receives one health (in this case, they can exceed their starting health).
- Help the Innkeeper clear out his cellar. Pay eight gold coins and each living hero receives one of each of the following unused items from the item deck: Vaiel's Urn, Healing Salve, Raisthrim's Potion, and Cloak of Invisibility. Any left over items are shuffled back into the item deck.
- Enjoy a meal in the hall and meet fellow travellers. Pay ten gold coins to recruit an ally. Shuffle all unused Hero Portrait cards together (including any from other Catacombs games). Randomly draw one card: this is the ally that may be recruited (see "Allies").
Izchak the Merchant
When the heroes arrive at Izchak the Merchant, they may use their gold to buy items to aid them in their quest. The Overseer shuffles the deck of Item cards and flips over six cards for the players to examine. These items are available for purchase or the players can pay one gold coin to reveal the next card on the top of the Item card deck. There is no limit as to how many times they may do this. Any player can purchase any number of the revealed Item cards provided they meet the requirements. Players may pool their gold coins to assist in the purchase of items. The Item card is assigned to the hero by placing it in the designated area on the hero's player board. Reshuffle any remaining Item cards back into the deck.
As an additional service, a map may be purchased from the Merchant by any hero for two gold coins. When the map is paid for, all the Room cards in the catacomb are flipped over, thus revealing the path leading to the Catacomb Lord.
Alewife Tavern
At the Alewife Tavern, players can test their luck to win items, regain health or be cured of poison. The Overseer places all the Orcs, Fire Spirits, Centaurs, and four hero pieces in an opaque bag. To place a bet, a player must pay two gold coins then blindly pull three pieces from the bag. They consult the table of rewards from top to bottom to see if they have won. All drawn pieces are placed back in the bag between bets. Winning players may choose a reward that is lower on the table than the one they qualified for.
| Pieces Pulled from the Bag | Rewards |
|---|---|
| 3 Heroes | Gain full health for the chosen hero and their ally (if he or she has one) OR cure all Poison cards affecting one hero. |
| 3 of a kind | Player chooses 1 Item card from the Item card deck, then reshuffles it. |
| 2 Hero pieces | Draw the top card from the Item card deck. If the hero cannot use it, discard it, then draw again until they have an item they can use. Reshuffle any discarded Item cards back into the deck. |
| 3 different coloured pieces | Gain 1 health point OR cure 1 Poison card. |
| 1 Hero piece | Gain 1 gold coin from the Treasury. |
Catacomb Lord's Lair
When the heroes arrive at the Catacomb Lord's Lair Special Room card, their final battle of the game begins. The Overseer controls the Catacomb Lord and its squad of monsters (called minions).
Each Catacomb Lord has three cards: a Portrait card, a Setup card, and a Rules card. Arrange the three cards on the Catacomb Lord player board along with the Monster cards for any minions.
The Setup card indicates how to configure the Catacomb Lord:
- Starting Health — the white number inside the blood drop indicates the maximum health the Catacomb Lord starts the game with. Put a Catacomb Lord Tracker on the indicated blood drop on the Catacomb Lord player board.
- Playmat — image of which playmat is to be used for the final battle.
- Type and number of minions — each Catacomb Lord has monsters that act as its minions. Take the monsters shown on the card from the Monster Pool. Place them in the Monster Start Zone during the Setup Phase of the Catacomb Lord's Lair special room along with the Catacomb Lord piece itself.
- Mercenary monster — as explained in the Room card section of the rules, the Mercenary Monster specified on a particular Catacomb Lord's Setup card is substituted, one for one, with any Mercenary Monster icons that appear on Room cards during the Setup Phase.
The Rules card shows the shot sequences that can be performed by the Catacomb Lord. Catacomb Lords have multiple shot sequences (separated by a black horizontal bar), but only one may be performed by the Overseer per round of the Battle Phase.
Catacomb Lords are immune to the effects of all shot modifiers except chain, critical and regeneration. They cannot be frozen or devoured and their own shots cannot be suppressed.
Important: Catacomb Lords cannot be frozen by the ice shot.
Important: Monsters destroyed during the encounter with the Catacomb Lord are returned to the Monster Pool.
Item Cards
In the base Catacombs game, items to help the heroes in their quest can be purchased from Izchak the Merchant or won at the Alewife Tavern. There is no restriction as to how many items a hero can carry. Items cannot be used when a hero is stunned unless the item is a familiar. Only the hero who owns the item may use it and items cannot be given away or traded.
Some heroes start the game equipped with items. For example, Xoric the Barbarian's Hero Rules card indicates he may begin the game with two Berserker Battle Axe items.
Usage Restrictions
By default, heroes can buy and use most items. Some items have additional restrictions as to which heroes can buy and use them. For example, some items can only be used by heroes with a certain amount of starting health (for example, the Healing Salve requires 11+ starting health).
Items that are weapons are identified with a weapon symbol. This symbol also appears on the Hero Rules card if a hero is able to purchase and wield weapons. If a hero cannot, the symbol appears crossed out.
In the same fashion, Magic items can only be bought and used by Spell Casters and Monarchs, and are identified with a magic item symbol. This same symbol appears on the Hero Rules card if a hero can cast spells. If a hero cannot, the symbol will appear crossed out.
For example, Elani the Thief can purchase and wield weapons, so she can buy the Poisoned Knife item. She cannot buy the Raven Familiar item as she is not a Spell Caster.
Hero Specific Enhancements
Some heroes are more proficient at using certain items. A hero's face on an Item card designates an enhanced shot sequence that is optionally available to them when using that particular item.
Frequency Conditions
There are three types of condition for how many times an item can be used during the game:
- Once Per Game — the item can only be used once and is then removed from the game. It cannot be purchased or used again.
- Once Per Room — the item can be used once every Battle Phase and is flipped over face down to represent this. The Item card is refreshed (flipped face up) during the Setup Phase.
- Permanent — once acquired, the item is always in play and does not require a specific action to take effect. If the item has a shot sequence, a player can choose to perform that sequence instead of the one on their hero's Rules card.
Familiars
All heroes can purchase and use familiar items provided they meet the conditions appropriate to a given familiar. For example, as a magic item, the Raven Familiar can only be purchased by a Spell Caster.
During the Setup Phase, the familiar is placed within 2.5cm (1") of the hero who controls it. On their turn, the player can choose whether the hero or familiar performs their action first. The familiar performs its shot sequence every round until it dies or until the room is cleared. It stays with the hero for the entire game, returning to its owner's side in the Setup Phase of every room.
Familiars are used to help heroes but there are significant differences between what they can do. Familiars cannot earn gold for directly destroying monsters (their owners do not receive any gold). They cannot be poisoned or stunned; however, they can be devoured and teleported.
Important:
- A hero can only have one familiar item.
- If the hero controlling a familiar is stunned or devoured, then that hero cannot take an action (as normal); however, the familiar is still able to do so.
- If a familiar dies during the Battle Phase, it is removed from the playmat but returns in the Setup Phase of the next room.
Combo Items
Combo items enable players to combine the effects of certain Item cards to expand what actions a hero can perform during their turn of the Battle Phase. A Combo item is a special type of Item card that can be played either immediately before (a pre-Combo item) or immediately after (a post-Combo item) the hero's normal turn. This condition is indicated in the item's shot sequence by the Ellipsis icon either before or after the "Then" icon.
Only one Combo Item card may be played per turn either before or after the hero's action.
Example: Xoric the Barbarian has the Throwing Axe Combo item; he can perform the shot sequence listed on his Hero Rules card or play an Ability, Spell or Item card and then immediately play the Throwing Axe Combo Item card to perform a missile shot.
Example: Elani the Thief has the Raisthrim's Potion Combo item. On her turn she can play that card to first perform an ice shot and then immediately perform the shot sequence listed on her Hero Rules card or play another Ability, Item or Spell card.
Monster Cards
Monsters populate every battle room the heroes must clear in order to reach their final foe, the dreaded Catacomb Lord. During the Battle Phase, the Overseer controls all the monsters on the playmat.
Like the heroes, each monster takes one turn per round of the Battle Phase. There are five monster families: Dungeon (green), Infernal (orange), Mythological (blue), Undead (gray) and Vermin (brown).
Each Monster card has the following information:
- Health — indicates how much health a monster has. Monsters have between one and four health points. Monsters with four points of health have a health track on their cards.
- Reward — shows how many gold coins a hero collects in the Resolution Phase for destroying this monster.
- Monster Metre — shows what family a monster belongs to (by the colour) and what level it is (by how many circles are filled in on the metre). Level 1 monsters are the weakest and Level 4 are the strongest.
- Defensive Properties — some monsters have defensive properties (see "Defensive Properties").
- Shot Sequences — summarizes what shots the Overseer can perform with this monster.
Shadow Monsters
Shadow monsters (such as the Phantom) emerge from the "Shadow Realm," the space between the playmat and walls. Instead of a solid blood health drop icon on their Monster cards, they have a dotted one.
In order to be destroyed, shadow monsters must be pushed completely off the playmat by any direct hit from a character or ranged shot by the Heroic Forces.
Advanced Shots
Teleport Shots
A character can be teleported during the Battle Phase, enabling them to be removed from the playmat and then returned to a different location on their next turn.
A character will execute a teleport as part of a shot sequence and the target character being teleported will have its piece removed from the playmat and placed on the Teleported! card.
During the next round of the Battle Phase, the teleported character must come back into play. The player places its piece anywhere along the edge of the playmat and performs a single melee shot. This melee shot can be followed with a post-Combo item, if desired. This is the end of the teleported character's turn during that round of the Battle Phase.
Example: Varesh the Wizard uses the Teleport Hero Spell card to leave the playmat. His wooden piece is placed on the Teleported! card. In the next round, he is returned to the edge of the playmat and performs a single melee shot.
A character who is stunned or frozen cannot teleport themselves, however, they can be teleported by another character. While on the Teleported! card, a character cannot be damaged or killed and the act of teleporting helps characters recover from being stunned or frozen.
Important: No combat occurs between any characters that are on the Teleported! card.
Important: If a hero remains on the Teleported! card at the end of the Battle Phase, they are placed during the Setup Phase of the next room as normal.
Important: The Battle Phase continues while monsters and/or Catacomb Lords are on the Teleported! card and none remain on the playmat itself.
Runic Shift Shot: The character performing a Runic Shift (including Antients, Familiars, and Wyverns) is teleported from their current location and immediately placed on any unoccupied Rune icon on the playmat. The character may then perform a melee shot. Rune icons on the game board represent special locations. Some expansions (sold separately) feature the extended set of rune icons.
Open Portal
A character can open a Magic Portal to switch the positions of any two friendly characters on the playmat (including themselves). This includes characters that are frozen. Unlike teleportation, no pieces leave the playmat, their positions are simply switched.
Example: Elani the Thief only has one point of health left and is surrounded by monsters. Varesh the Wizard uses his Magic Gate Spell card to switch the positions of the Thief and Xoric the Barbarian.
Roll Shot
The roll shot is performed by placing the character piece on its side and rolling it across the playmat. In order to inflict damage, the rolling character must make contact with an enemy target.
An unmodified roll shot inflicts two points of damage. If more than one character is hit by a roll shot, only one is affected: the player performing the shot decides which one.
If the character that performed the roll shot remains on its side when the shot is completed, the player controlling that character flips it such that it lays flat again.
Target Shot
The target shot is a ranged shot, but a player can flick a second time if the first shot misses. The target character must be declared prior to flicking the first shot (place the Target Token on that character). If a player misses the target character, a second shot may be attempted from the last legal position where the first shot ended.
The target shot inflicts one point of damage to the stated target only; damage to other characters is ignored. The Target Token is then removed.
Ice Shot
The Ice shot is a ranged shot using the ice shot piece. When a character is struck by an ice shot, it does not take any damage but is considered to be frozen. Place the ice shot piece on top of the affected character piece. If multiple targets are hit by an ice shot, the player performing the shot decides which one will be frozen.
While frozen, a character cannot take any actions, does not take damage, and any of their defensive properties are suspended. They must remain in place on the playmat with the ice shot piece placed on top of them.
A frozen character can only be freed when the ice shot piece is knocked off by another shot, either directly or indirectly. The ice shot piece is immediately removed from the playmat.
If all other monsters in a room are dead and any remain frozen, the room is complete and the heroes move on to the Resolution Phase. The hero who froze a monster collects gold the same way they would if it had been destroyed.
Important: Catacomb Lords and Antients are not affected by the ice shot.
Summon Shot
Summon shots enable new characters to be brought into play during the Battle Phase.
The character indicated in the shot sequence is placed on the playmat within 2.5cm (1") of the character performing the summon shot. First, the player performs a melee shot with the summoned character and then performs that character's full shot sequence. Afterwards, the character performing the summon shot continues their shot sequence as normal.
In the case of monsters specifically, the monster piece being summoned must be available from the Monster Pool.
Devour Shot
When hit by a devour shot, a character immediately takes one point of damage. If they are still alive, they are removed from the playmat and placed on the Devoured! card. While fighting for life in the monster's stomach, a character that has been devoured cannot take any actions and is considered to be removed from the game.
All devoured characters are released once the room is completed successfully or the monster is destroyed. In the latter case, all characters are returned to the place on the playmat where the monster was destroyed, ready to take their turn as normal. If multiple characters are hit by a devour shot, all take damage; however, only one is devoured: the player performing the shot decides which one will be sent to the Devoured! card.
Important: Characters cannot be teleported off the Devoured! card.
Important: When a hero is devoured, the effect of the stun shot modifier is cancelled.
Important: Multiple characters can be placed on the Devoured! card, but each one has to be affected by a separate devour shot.
The Gelatinous Cube Monster
The Gelatinous Cube is a powerful level 4 monster. It can perform a different shot sequence for each round of the Battle Phase.
To perform this ordered shot sequence, the Overseer starts by taking a melee shot and then a melee shot with the corrosion shot modifier (the corrosion melee shot icon should already be visible on the top of the Cube).
During the next round of the Battle Phase, the Overseer again takes a melee shot and then rotates the Cube piece to reveal the fear melee shot icon, which is then performed.
The Overseer continues through the Battle Phase performing a different shot sequence each round as follows:
- Round 1: Corrosion
- Round 2: Fear
- Round 3: Devour
- Round 4: Critical
- Round 5: sequence restarts
Advanced Concepts
Poison Cards
The use of poison by the Overseer can make the game considerably more difficult and is recommended only for expert players. A Poison card displays a number indicating the strength of the dose. When a hero is hit by a poison shot modifier, they first must decrease their health if the shot inflicts damage. The number of Poison cards shown beside the shot icon are then drawn from the Poison card deck and placed on the affected hero's player board. If at any time, the total value of all the Poison cards accumulated equals or exceeds the starting health of that hero, then they are overwhelmed by the poison and die.
In the unlikely event that no Poison cards are available to draw, the affected hero is considered to have been hit with a lethal dose and dies.
Example: The Sewer Rat hits Varesh the Wizard with its poison melee shot. The Wizard loses one point of health (because it is a melee shot) and then draws one Poison card. The Poison card has a value of "3" on it. Unfortunately, the Wizard has three Poison cards with a total of five already. With the addition of the "3" Poison card, the total amount of poison equals his total starting health of eight. The Wizard dies and the Poison cards are removed from his player board and shuffled back into the Poison deck.
Curing Poison
In the base Catacombs game, heroes can cure themselves of poison in the following ways:
- Playing a card with the Cure Poison icon, for example, the Cure Poison Spell card.
- Visiting a special room such as Althea the Healer.
A hero may discard one Poison card of their choice when being cured of poison which is immediately shuffled back into the Poison deck.
Allies
One player will control the ally and assign it to assist one of the heroes he or she controls. Place the Portrait and Rules cards beside the appropriate hero player board. Use the Ally Tracker to record the health on the hero's main health track.
During the Setup Phase, an ally is placed in the Hero Start Zone along with the other heroes. The player who recruited the ally takes a turn for both the hero and ally during each round of the Battle Phase (in any order).
If a hero dies and their ally is still on the playmat, control of the ally passes to the hero with the lowest current health (regardless of maximum starting health). If two heroes are tied for lowest health, the hero who has the least gold of the two will control the ally. If there is still a tie, the hero with the fewest items controls the ally.
Allies follow the same rules as heroes except for the restrictions noted below:
- Health — unless otherwise stated on their Rules card, allies have a maximum health of four and cannot be healed above their starting health.
- Ability Cards — allies start with one less of their total Ability cards (minimum one). The player recruiting the ally chooses which Ability card(s) the ally will use.
- Item Cards — allies cannot buy or use Item cards.
- Spell Cards — Spell Casters may take any two Spell cards of their choice.
For example, Oleira the Elf starts with two Elven Arrow Ability cards as a hero. When she is recruited as an ally, she will only start with one of these cards (one less Ability card, minimum one) and may not use the Spirit Familiar item.
A second example: Varesh the Wizard starts with one Fireball Ability card and may choose ten Spell cards. When recruited as an ally, he may use his Ability card and may choose only two Spell cards.
Important: Allies cannot earn gold as all gold transfers to the hero whom the ally was assigned to assist.
Important: When dead, allies are out of the game and cannot be resurrected.
Important: Allies cannot be devoured, poisoned, or stunned.
Monster Vulnerabilities
These rules describe vulnerabilities for each monster family which can help make Catacombs easier for new players. These rules do not override any defensive properties that individual monsters may have.
- Dungeon family monsters (green) are vulnerable to missile shots: treat any unmodified missile shot from the Heroic Forces that strikes a member of the dungeon family as having the critical modifier.
- Infernal family monsters (orange) are vulnerable to the ice shot, with their health being reduced by one point in addition to being frozen (if they remain alive).
- Mythological family monsters (blue) are vulnerable in hand-to-hand combat. Treat any unmodified melee shot from the Heroic Forces as having the regeneration modifier.
- Undead family monsters (gray) are vulnerable to fire: treat any unmodified fireball shot from the Heroic Forces as having the critical modifier. In addition, undead monsters are vulnerable to fire walls and fire obstacles, taking one point of damage when hitting them or being pushed into them.
- Vermin family monsters (brown) that are extra small in size (Sewer Rats, Armoured Beetles, Pit Vipers, Vampire Bats) are susceptible to fear: treat any unmodified melee or missile shot from the Heroic Forces as having the fear modifier, unless the target monster's shot sequence contains any shot with the fear modifier (for example, the Blood Skull).
Antients
Antients are powerful, unpredictable and immortal beings that have existed in the darkest depths of Cimathue for aeons. They typically enter play by the heroes playing an Item or Spell card.
In the base Catacombs game, a hero playing the Item card "Vaiel's Urn" can summon Urthoth the Liquid Antient. During the Battle Phase, an Antient is introduced onto the playmat with a summon shot and persists for the remainder of the room.
Antients are part of a class of invulnerable characters (including wyverns and mounts) as indicated by the invulnerable icon on their character card. They cannot be damaged or destroyed, therefore the regeneration shot modifier has no effect when used against them. In addition, invulnerable characters are immune to the effects of all shots and all shot modifiers and cannot, for example, be affected by fear, devoured, frozen, petrified, poisoned, or have their own shots suppressed. Antients specifically cannot be teleported.
An Antient is controlled first by the player that summoned it. However, it is not loyal to one side. Once that player's turn is over, the Antient card is passed to the Overseer. Control of the Antient passes back and forth between the Heroic Forces and the Overseer until the Battle Phase is finished.
Antients can be used strategically by the heroes to eliminate tough monsters and weaken Catacomb Lords; however, when controlled by the Overseer they represent formidable opponents.
Important: Antients cannot be damaged or suppressed and are immune to the effects of all shots and modifiers.
Example: During the Battle Phase, Oleira the Elf uses the Vaiel's Urn Item card to summon the Liquid Antient into play. As part of this process, the player performs the Liquid Antient's shot sequence against the Catacomb Lord's Forces. When Oleira's turn is complete, the Antient card is then handed to the Overseer. During the Overseer's turn, they control the Antient and perform its shot sequence against the Heroic Forces. Upon completion of the Overseer's turn, the Antient card is handed back to the players controlling the heroes who then decide who will use it. This process continues until the Battle Phase is completed, then any Antients leave the room.
Addendum
Alternate Room Card Layouts
The Room card layout described in the Tutorial Manual describes a static sequence of Room cards suitable for the first few games. As players get more familiar with the mechanics of Catacombs, they will want to experiment with different Room card layouts for a greater challenge, variety and to play with some of the advanced rules.
Here is one suggested layout that is configured randomly. The Overseer takes the Battle Room cards and sorts them into three decks according to their difficulty (0, 1 or 2) which is indicated in the top right corner of each card. Each deck is shuffled and then the Room cards are laid out face down in a vertical column: Difficulty 0, Special Room, Difficulty 1, Difficulty 2, Special Room, Special Room / Catacomb Lord's Lair, Difficulty 1, Catacomb Lord's Lair, Difficulty 1. Changing the number and order of these cards will vary both the difficulty and the length of the game.
In addition, there are ways to decide which Special Room cards (Healer, Inn, Merchant or Tavern) to include in a game (perhaps all of them!) and in what order to place them: player's choice and random.
The former method allows the players to choose which Special Room cards they would like included in the game and in what order. The random method is the most challenging style of play. The Overseer shuffles the Special Room cards and places them randomly in each Special Room card slot. Players will not see which ones are in the game until they reveal it during the Setup Phase. The Catacomb Lord's Lair Special Room card is always placed last, face up.
Ranged Piece Placement
Whenever a piece is placed on the playmat with a character piece as its origin (for example when performing a missile shot, or placing a familiar), it is placed within 2.5cm (1") of that character. In a casual game, players can just estimate this distance by eye. In a more competitive game however, players may want to be more exact. In this case, use the included Ruler Token to measure from the center of the origin piece to the edge of the piece being placed to determine exact placement.
Core Strategy
Be Aggressive: The heroes are given the first chance to act in each room. If you can remove some of the starting monsters from the playmat on turn one each time, it will save you damage in the long run.
Coordinate: To be aggressive effectively, you'll need to plan out your turn in advance. Where do you want to end up? What monster do you want to focus on? Can you use your turn to push another hero into a more strategic position?
With Great Power: comes the tendency to hold back and save everything for the end. Abilities should be used early each room to maximize their effect. Once per game spells and items should be used throughout the game. They will do you no good if held onto until the very end, only to never make it to the end...
Resources
Catacombs Third Edition is one of a number of tabletop games that are designed using Elzra's Dexterity Game System™. The Dexterity Game System™ sets a standard of flicking mechanics that are common between all Dexterity Game System™ titles, making them easy to pick up and learn.
Elzra's Deximat™ branded playmats are made of high quality neoprene and are integrated with Elzra's dexterity based game titles. They provide a smooth surface so that each of your Catacombs adventures are consistent and exciting.
Official Catacombs FAQ: elzra.com/catacombs-faq Official Catacombs Shop: shop.elzra.com Web: www.elzra.com Product Support: support.elzra.com Downloads: elzra.com/downloads
Shot Reference
A quick summary of shot icons and their effects, from the Reference Manual's back-cover Shot Reference sheet.
Character Shots
- Rush — 0 damage
- Melee — 1 damage
- Bite — 2 damage
Ranged Shots
- Missile — 1 damage
- Fireball — 1 damage
- Giant Fireball — 2 damage
- Boulder* — 3 damage
- Ice^ — 0 damage
- Target^ — 1 damage
*Not used in the base Catacombs game. ^Only affects one target.
Modified Rush Shots
Poison*, Stun*
Modified Melee Shots
Corrosion, Transform, Critical, Fear, Poison, Regeneration, Stun, Petrify
Modified Missile Shots
Critical, Fear, Poison, Regeneration, Stun, Petrify*
Chain Shot Modifier
No consecutive damage to the same target.
Shield Shots
Reposition shield piece after shot sequence is complete.
Roll Shots^
An unmodified roll shot inflicts two points of damage.
Summon Monster Shots* / Summon Shots
Summon any level 1, 2 or 3 monster; or a specific character such as the Liquid Antient, Zombie, Skeleton Warrior, or Fire Spirit.
Other Effects
- Teleport — Place piece on Teleported! card. Next turn, perform a melee shot from any edge of the playmat.
- Runic Shift* — Place piece on unoccupied Rune icon, then may perform a melee shot.
- Open Portal — Switch the places of two friendly pieces on the playmat.
- Devour Shot^ — Affected character is placed on Devoured! card for the rest of the room and cannot perform any actions.
- Transform — Transform to fire wall.
- Hero is stunned — see Stun Shot Modifier.
- Increase health by one point — see Healing Damage.
- Deduct indicated amount of health.
- Draw indicated number of Poison cards — see Poison Cards.
- Instant death for the affected character — see Petrify Shot Modifier.
Hit Damage Chart
For each target hit by a shot: if the shot does no damage, apply any modifier to one target (attacker's choice) and end. If the shot does damage, check whether the damage is nullified; if nullified, check whether the modifier is also nullified (skip the modifier if so, otherwise apply it to one target). If the damage is not nullified, calculate damage to the target(s); if the target survives, check whether the modifier is nullified as above; if the target is destroyed, the sequence ends.