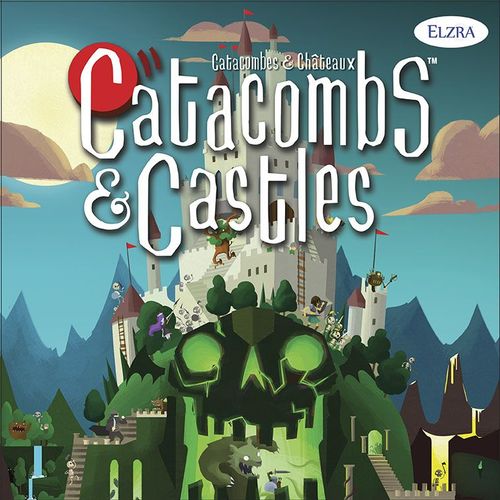
Catacombs & Castles
Catacombs & Castles Rulebook
Table of Contents
Table of Contents
Components
- Castle Hero Cards x8
- Castle Lord Cards x4
- Castle Ability Cards x13
- Castle Warrior Cards x3
- Catacomb Hero Cards x8
- Catacomb Lord Cards x4
- Catacomb Ability Cards x13
- Catacomb Warrior Cards x3
- Castle Hero Pieces x4
- Catacomb Hero Pieces x4
- Catacomb Lord Piece x1
- Castle Lord Piece x1
- Castle Shield x1
- Catacomb Shield x1
- Catacomb Warrior Pieces x12
- Castle Warrior Pieces x12
- Missile Shot x2 (Claw and Grapple shots on reverse)
- Net Shot x1
- Web Shot x1
- Shuriken Shot x1
- Longbow Shot x1
- Fireball Shot x1 (Vortex Shot on reverse)
- Ice Shot x1 (Egg Shot on reverse)
- Catacomb / Castle Health Tokens x64
- Double Sided Punch Board x1
- Reinforcement Tokens x6
- Armour Tokens x12
- Double Sided Game Board x1
NOTE: Wood discs do not come with stickers applied. Apply stickers according to the instructions on the facing page.
Sticker Application Instructions
Sort the wooden pieces by size and colour. Firmly apply the stickers to the centre of the wooden pieces.
- When a piece requires a sticker on both sides, two stickers will be in the box. Arrows indicate that the bottom sticker is placed on the other side of the same piece.
- When a piece only requires a sticker on one side, one sticker will be in the box.
- The colour of the wooden piece is shown by the colour of the box. For example, an orange box means an orange piece would be used.
- In the top-left corner of the box, the size of the piece to be used will be filled in (Extra Large, Large, Medium, Small, Extra Small).
- "x2 pieces" and similar indicates how many pieces have the same stickers.
Medium Pieces: Huntress (x1), Ranger (x1), Assassin (x1), Marauder (x1), Querling (x4), Watch Guard (x4), Raider (x4), Watch Commander (x1), Mage Princess (x1), Queen of Storms (x1), Vampire Princess (x1), Royal Archer (x4), Plunderer (x4), Shaman (x4), Net Shot (x1), Web Shot (x1).
Large Pieces: King's Champion (x1), Wraith Knight (x1), Catacomb Shield (x1), Castle Shield (x1).
Small Pieces: Fireball / Vortex Shot (x1), Egg / Ice Shot (x1), Longbow Shot (x1), Shuriken Shot (x1).
Extra Small Pieces: Grapple / Missile Shot (x1), Claw / Missile Shot (x1).
Team Mode Setup
Setting Up the Walls
The cardboard walls form a square perimeter around the game board to prevent pieces from falling off the table during play.
- Set up the four corner sections some distance from each corner of the game board. Attach a plastic stand to the end of each corner section such that half of it protrudes.
- Align a straight wall section in the centre of two corner sections and secure it in place by pushing each end into the exposed plastic stands at the end of each corner section.
- Repeat this process for the remaining three straight wall sections.
- Unfold the game board in the centre of the walls and ensure it is flat.
Push the wall segments together so they are touching.
Important Note: Take care when inserting the cardboard walls into the plastic stands as to not damage them.
Setting Up The Game
- Select three heroes from your chosen team: Team Castle or Team Catacomb.
- Assemble the walls on your play surface as instructed above.
- Unfold the game board in the centre of the walls.
- Set up the Portrait, Rules and the chosen Ability cards for each hero.
- Arrange eight Team Castle Health Tokens along one edge of the game board and eight Team Catacomb Health Tokens along the opposite edge. These are the Health Pools for each team.
- Place one Armour Token (light green side up) on each of the Rules cards for both teams.
- Place the obstacle blocks on the board using the rules described below.
- Each team now places their chosen hero discs on the board in the indicated Start Zones. The game is then ready to be played (in Team Mode).
TIP: You may decide to use any number of Health Tokens to make the game shorter or longer as desired.
Suggested teams based on player count:
| Players | Configuration |
|---|---|
| 2 players | control 3 heroes (3 vs 3) |
| 4 players | control 1 hero (2 vs 2) (shorter game) |
| 4 players | control 2 heroes (4 vs 4) (longer game) |
| 6 players | control 1 hero (3 vs 3) |
| 8 players | control 1 hero (4 vs 4) |
Team Setup
A team consists of a number of heroes which depends on the number of players. Each player on a team controls at least one hero.
For each hero, the Portrait card, Rules card, and the player's chosen Ability cards are positioned together as shown in the diagram in the manual. The card layout shows the hero's team, the hero's name and class, the hero's shot sequence, the required number of Health Tokens to activate an ability, the recommended Ability cards, and the ability shot sequence performed on activation.
Hero Rules Card
There is a Rules card for each hero. Rules cards have a shot sequence that is performed when it is the hero's turn. Under this shot sequence you will find additional rules or recommended Ability cards for that hero.
Ability Cards
Ability cards are used to activate powerful attacks that are played as an alternative to the hero's normal sequence on their Rules card. Players may take the two Ability cards listed on their hero's Rules card or may choose two different ones from their team instead. The number of the opposing team's Health Tokens required to charge the Ability is displayed on the card, as is the shot sequence that the hero may perform. The player chooses when to activate the Ability card by discarding the Health Tokens on it.
If there is no Health Token icon present, the Ability card is free to use.
Setting Up The Obstacles
Faint white lines divide the game board into four quadrants. The opposing players will take turns placing the wooden obstacle pieces on top of Obstacle Location icons printed on the game board.
When playing on the Castle side of the board, Team Castle chooses and places an obstacle first (the opposite is true if playing on the Team Catacomb side). Cylinders must be placed upright on their base, but other obstacles may be placed on a vertical or horizontal orientation. An obstacle cannot be placed in a quadrant that already contains one until all the other quadrants have at least one obstacle.
Once all four quadrants of the game board have a minimum of one obstacle, a second obstacle may be placed in a quadrant. However, no more than two obstacles may be placed in a quadrant.
Placing The Heroes
The triangular areas marked by the white lines in opposite corners of the game board are the Start Zones. The opposing teams place their three hero discs in opposite Start Zones and the game is ready to begin. The opposite team to the side of the board being played goes first. For example, on the Castle side, the Catacomb team would go first.
Game Overview
Catacombs & Castles
Catacombs & Castles is a fast-paced, dexterity game. The game is divided into two modes: Team Mode and Boss Mode. In Team Mode, heroes from Team Castle face off against heroes from Team Catacomb to eliminate the opposing team's Health Tokens from their Health Pool.
In Boss Mode, a team of Castle heroes confront the Catacomb Lord or a team of Catacomb heroes fight the Castle Lord in an asymmetric battle.
Differences Between the Two Modes
Team Mode
- All players control one or more heroes
- Supports 2 to 8 players
- Recommended for both new and experienced players
- Reinforcement tokens are not used
Boss Mode
- 1 - 3 players control heroes while one player (called the "Overseer") controls the Catacomb or Castle Lord
- Supports 2 to 4 players
- Recommended for experienced players only
- Reinforcement tokens are used
The Dexterity Game System
The game uses Elzra's Dexterity Game System, so players familiar with Catacombs Third Edition will already know many of the basic concepts and shots. This manual will introduce the Dexterity Game System that is applicable to both game modes. It will take players through a tutorial for Team Mode, explain Boss Mode and will finish with a shot reference section.
A game of Catacombs & Castles takes place on one of the two sides of the game board included with the set. Heroes are placed on the board in their Start Zones. Players engage in dexterity based combat (flicking wood discs) in an attempt to eliminate their opponent's Health Tokens, securing victory for their team. Whether controlling a hero in Team Mode or the Catacomb or Castle Lord in Boss Mode, you will perform shots with the character disc or a variety of ranged discs representing missiles, fireballs, etc.
To perform a shot, you shoot a disc across the game board with your finger. Obstacles on the game board are there to provide cover and shots can ricochet off them. If at any time, one or more characters are knocked off the game board, they are all placed back on the edge of the board at the location where they departed.
Don't get discouraged if your aim is poor in the beginning. As this is a dexterity game, it will require practice to improve your accuracy!
Turn Overview
When a player takes their turn, they are taking it for the team of their hero (Castle or Catacomb). Players on a team decide in which order they will take a turn with a hero they control, but the same hero cannot take a turn consecutively. A player taking their turn is referred to as the attacking player or attacker.
As the attacker, a player's chosen hero may take one action, which usually involves performing a shot sequence found on their hero's Rule or Ability cards. A shot sequence consists of several individual shots linked together, read from left to right (see Shot Sequences).
An individual shot consists of flicking either your hero disc or a ranged disc representing a missile, fireball etc. If a shot hits one or more opponents, it will typically inflict damage.
By default, when damage is successfully inflicted by an attacker's shot, an appropriate number of Health Tokens is deducted from the opposing team's Health Pool and transferred to one of the attacking hero's Ability cards. This is called a power transfer.
In Team Mode, when a hero's action is complete, the player turns the hero's Portrait card horizontally to show that it has taken its action. That hero cannot take an action again until all of the other heroes on that team have done so. After a player on the attacking team has completed their hero's action, it is the opposing team's turn. When all heroes on a team have taken an action, all their Portrait cards reset and are rotated vertically again.
In Boss mode, it is not necessary to rotate hero cards as one team completes all of their actions before the other starts its turn.
Characters
Heroes, Catacomb Lords, Castle Lords and Warriors are all characters and are represented by wooden discs on the game board. Characters have both a Portrait card and Rules card with the exception of Warriors who have a single card.
A character belongs to a team, is associated with a Health Pool (except Warriors), can perform shots, and sustain damage. Characters on the same team are teammates and cannot damage each other: there is no friendly fire. Characters on the opposing team are opponents. Obstacles, shields and ranged discs are not characters.
The following discussion refers to heroes; however, what is described below is generally applicable to other characters as well.
Character Shots
The two basic character shots in Catacombs & Castles are Rush and Melee. A player performs a Melee shot by flicking their hero disc across the game board. If the hero disc hits a hero from the opposing team, one point of damage is inflicted. Rush shots are performed in the same way as Melee shots except they don't inflict any damage. They are useful for getting a hero into a better position on the board.
Ranged Shots
Players perform ranged shots by placing the appropriate ranged disc beside their hero disc (within 1" / 2.5 cm) and flicking it across the game board. Most ranged shots inflict one point of damage if they hit an opponent. Ranged shots include Missile, Claw, Fireball, Vortex, Ice, Longbow, Shuriken, Grapple, Net and Web. In most cases, the ranged disc is removed from the board after the shot is complete.
Shot Sequences
Different shots are represented by icons on cards. A shot sequence consists of one or more shot icons. Sequences with multiple shot icons are linked together using connectors and read from left to right.
The simplest of these is the Next connector, that shows a player the order in which shots must be performed. Shots connected by the Next connector cannot be skipped.
The Alternative connector indicates that only one shot or sequence may be performed out of several possibilities. To help visually group them before and after the Alternative connector, sequences that consist of several shots have a light dotted rectangle around them. On Castle and Catacomb Lord Rules cards the Alternative connector appears as a horizontal bar, but functions in the same way.
New in Catacombs & Castles are Elastic connectors that enable the player to perform shots in a sequence in any order they choose.
Example Shot Sequences
- Example Shot Sequence 1 (Use Your Magic! — Castle Ability): the hero performs a Rush shot, then either a Temporal Shift, Egg or Claw shot. The sequence uses a Next connector and Alternative connectors, with a group box around the alternatives.
- Example Shot Sequence 2 (Royal Archer — Warrior): the Warrior performs two Rush shots, and then a Missile shot. The sequence uses Next connectors.
- Example Shot Sequence 3 (Sothemir — Castle Lord Rules card): the Castle Lord performs a Rush shot or Critical Melee in any order, or a Rush shot and Grapple shot in any order. The sequence uses Elastic connectors and an Alternative connector. When Sothemir loses his armour token, he changes into his other form.
Health and Damage Tokens
Each Health Token is double sided with an emblem representing Team Castle and Team Catacomb on each side. Both teams start the game with an equal number of Health Tokens in their respective Health Pools.
When a team has lost all of its Health Tokens, the game is over and the opposing team has won.
When a hero is directly hit and damaged by a shot, one or more Health Tokens are deducted from their team's Health Pool and transferred to one of the attacking hero's Ability cards to charge it up. This is called a power transfer and is the default way that Health Tokens are transferred between teams when damage is inflicted by a shot. If a player's Ability cards are all fully charged or otherwise unable to accept any more Health Tokens from the other team, then these surplus Health Tokens are discarded and are out of the game.
Some shots enable the attacking player to perform an assist transfer, allowing them to choose to transfer a Health Token(s) to one of their teammate's Ability cards to help charge it up instead.
Other shots enable the attacking player to perform a health transfer by flipping the captured Health Token over (showing his or her team emblem) and adding it to their team's Health Pool.
Finally some shots can force players on the opposing team to discard captured Health Tokens from their Ability cards, preventing them from being activated. This is called a void transfer.
If multiple heroes on the opposing team are directly hit by a shot that inflicts damage, then Health Tokens are deducted from that team's Health Pool for each hero hit. If a hero is hit by a shot that ricochets off of another piece on the board, such as an obstacle, that hit counts for damage purposes. Conversely, a hero is not damaged if a shot pushes an opponent into them.
A shot must physically hit a target in order to successfully inflict damage.
Armour Tokens
Armour Tokens are assigned to each hero at the beginning of the game and cannot be transferred to teammates. An Armour Token starts in the "full power" state.
When a hero is damaged by an opponent's shot, the player controlling that hero may choose to block the shot by flipping the Armour Token over. All damage and any other effects from that shot are immediately nullified. When an Armour Token in the "half power" state is used again, it is discarded and permanently removed from the game.
Team Mode Quick Start Tutorial
Team Mode Tutorial Setup
This tutorial assumes that two players (Sam and Jen) will each control a team of three heroes. Sam will control Team Castle and Jen will control Team Catacomb.
It is assumed Sam and Jen have already laid out the game components, placed their obstacle pieces, and selected their heroes as directed in the "Setting Up The Game" section.
For his heroes, Sam chose the Huntress, Ranger, and Mage Princess. Jen picked the Assassin, Marauder, and the Queen of Storms to play as her heroes.
The Huntress and Assassin are versatile fighters whose ranged Longbow and Shuriken shots enable them to help charge up their teammate's Ability cards. The Mage Princess and Queen of Storms command the power of the Net and Web shots to immobilize their opponents in their tracks. The Ranger and Marauder both have the ranged Claw shot at their disposal to capture Health Tokens from the opposing team.
The table below displays the configuration of the game Sam and Jen have chosen. This configuration is the recommended setup for a standard thirty minute game and is a good choice for new players.
| Team Castle (Sam) | Team Catacomb (Jen) | |
|---|---|---|
| Heroes | Huntress, Mage Princess, Ranger | Assassin, Marauder, Queen of Storms |
| Health Pool | 8 Health Tokens | 8 Health Tokens |
| Armour Tokens | 1 Per hero | 1 Per hero |
| Ability Cards | Recommended for each hero | Recommended for each hero |
Catacombs & Castles allows players to set the duration of a Team Mode game. Players may choose to start with more or less Health Tokens and may choose to play without Armour tokens. The more Health and Armour Tokens in use will lengthen the game.
Experienced players will want to experiment with different combinations of heroes and choose the Ability cards each hero will use, instead of relying on the recommended ones.
Tutorial Walkthrough
1. Jen, controlling the heroes of Team Catacomb, takes her turn first. She has three heroes available to her and may choose to take actions with them in any order. She chooses the Assassin. As none of her Assassin's Ability cards are charged up, she must perform the shot sequence on the Assassin's Rules card.
This sequence gives her a choice: she can perform a Rush shot then the Shuriken shot OR she can perform a Melee shot. She chooses the former sequence and performs a Rush shot by flicking the Assassin disc out of her Start Zone. Jen can then perform a Shuriken shot by placing the shuriken ranged disc within 1" / 2.5 cm of the Assassin disc on the board and shoot it towards Sam's forces.
The shuriken disc hits an obstacle, ricochets and misses. Jen's Assassin has completed his action and she rotates the Assassin's Portrait card to indicate that her turn is complete.
2. It is now Sam's turn to choose one of his heroes and he chooses the Mage Princess, Delilah. Again, none of the Mage Princess' Ability cards are charged up, so he looks to her Rules card to choose the shots she is to perform. By default, the Mage Princess may perform an Ice shot (ranged) then a Rush shot or the Net shot (ranged).
Sam places the ice ranged shot on the board within 1" / 2.5 cm of the Mage Princess' disc and flicks it toward the Assassin. The Ice shot hits and moves the Assassin disc across the board.
As they are playing with Armour Tokens, Jen may now choose whether she wishes to spend an Armour Token to nullify the Mage Princess' Ice shot. As Armour Tokens are a non-renewable resource, Jen elects to not use one and one point of damage is inflicted. Sam takes one Health Token from Jen's Health Pool and places it on the Mage Princess' Target Acquired! Ability card which starts the process of charging it up (this is called a power transfer). Sam then performs the Mage Princess' Rush shot, flicking her across the board. Sam then turns the Mage Princess' Portrait card on its side.
3. It is Jen's turn to take an action with one of her two remaining heroes and she chooses to use the Marauder next. Sam's Mage Princess is hiding behind an obstacle, but is peeking out just enough for the Marauder's Claw shot to hit it.
Jen places the claw disc on the board and flicks it toward the Mage Princess. The Claw shot connects and Sam has the opportunity to block it with an Armour Token, which he chooses to do by flipping it over. No damage is inflicted and the Claw shot's secondary effect is nullified.
Jen performs the Marauder's Rush shot next, sending him across the board behind the cover of an obstacle. She then turns the Marauder's Portrait card on its side to indicate it has taken its action.
4. It is Sam's turn and he chooses to use his Huntress next, executing her Rush shot and then her ranged Longbow shot, hitting the Marauder behind cover.
For the sake of illustration, Jen does not block the shot with an Armour Token, so damage is inflicted.
Sam takes a Health Token from Team Catacomb's Health Pool and chooses which of the Huntress' Ability card he would like to charge up. However, with the Longbow, Sam can choose to charge one of his teammate's Ability cards instead of one of the Huntress' Ability cards (which is what would happen by default). This is a unique feature of the Longbow and Shuriken shots called an assist transfer.
Sam does this and places the Health Token on the Mage Princess' Target Acquired! Ability card, charging it up. Finally, Sam turns the Huntress' Portrait card to the side to indicate she has taken her action.
5. It is Jen's turn and only the Queen of Storms has not taken an action. From her hero Rules card, she uses her Fireball shot, but misses. She then flicks the Queen of Storms out onto the battlefield with her Rush shot and rotates her Portrait card.
6. Sam has one more hero to use and that is his Ranger. He shoots his Claw shot and hits the Marauder. Again for the purposes of illustration, Jen does not use an Armour Token and a point of damage is inflicted.
Sam takes a Health Token from Jen's team's Health Pool and uses the unique feature of the claw to flip it over (revealing the Team Castle emblem) and placing it in his own Health Pool. This is called a health transfer.
He completes his turn by rotating the Ranger's Portrait card.
7. All heroes on both teams have taken an action, so both players reset their heroes by turning all their hero Portrait cards upright.
8. Jen decides to use the Queen of Storms and executes her Web shot against the Huntress. She places the web disc on the board, flicks it and successfully hits the Huntress with it.
For the sake of illustration, Sam does not use an Armour Token and the Web shot successfully inflicts one point of damage. It also has a secondary effect of preventing the Huntress from taking an action until she has been freed by one of her teammates. Strategically this is a good move by Jen, as Sam must now divert an action to rescue the Huntress.
If he succeeds and the Web shot disc is knocked off by one of his heroes, then the Huntress will be able to take her action. Again, this was for purposes of illustration, Sam would have strongly considered using an Armour Token in this situation.
As damage was inflicted by the Web shot, Jen takes a Health Token from the Team Castle Health Pool and places it on the Queen of Storm's Embrace The Flames! Ability card, starting the process of charging it up. Finally, she rotates the Queen's Portrait card to indicate her action has been taken.
9. Sam cannot use the Huntress, as she is trapped under the web, so he plans to rescue her before activating the Mage Princess' Ability card. That task falls to the Ranger.
Sam uses the Rescue option of the Claw shot. He flicks the claw disc across the board and manages to hit the Huntress. The claw disc is very light, so the web disc remains on top of the Huntress.
He then picks up the Huntress' disc with the web disc on top and places it within 1" / 2.5 cm of the Ranger.
The next shot the Ranger can execute is a Rush shot, which Sam performs towards the Huntress, knocking the web disc off, freeing her. The web disc is removed from the board.
Sam rotates the Ranger's Portrait card.
10. Jen presses the attack with the Assassin, executing a Rush shot and then flicking his shuriken disc. She hits both the Ranger and the Huntress as they are so close together on the board. Sam decides to use an Armour Token for each of them, to prevent those two points of damage from being inflicted.
Jen rotates the Assassin's Portrait card.
11. Sam activates the Mage Princess's Ability card Target Acquired! by discarding the two Health Tokens. Once an Ability card is activated, the shot sequence on that card is used instead of the one on the Mage Princess' hero Rules card. As the Target Acquired! sequence has a team icon on it, all heroes may execute the sequence found on that card, in any order, regardless of whether they have taken an action already.
For heroes that have taken an action and thus have their Portrait cards rotated, those cards stay as they are despite the temporary effect of the Ability card.
Sam chooses to use the Ranger first. He can now choose to execute the Target Ice shot or the Claw shot. He chooses the Target Ice shot and must declare his target first. If he misses the shot against his intended target, then he may shoot the Ice shot disc again from where it ended up on the board. However, if it hits any opponent other than the target, then no damage is inflicted.
He declares that he is going to target the Marauder by placing the Target Token on top of that disc and shoots the Ice shot at him. The shot hits, Jen declines to use an Armour Token, so Sam takes a Health Token and places it on the Ranger's Join The Charge! Ability card. He removes the Target Token from the Marauder.
Sam next decides to use the Mage Princess and chooses the Claw shot to use against the Queen of Storms (as she is in the open). His shot is successful and Jen chooses to use an Armour Token, protecting the Queen of Storms. If Sam's shot had inflicted damage, he would not have been able to place the captured Health Token on the Target Acquired! Ability card. Instead, it would have to go on the Mage Princess' other Ability card ("Channel The Cyclone!"). You cannot charge an Ability card while it is in use. If there are no Ability Cards available to receive captured Health Tokens, they are immediately discarded.
Finally, Sam chooses the Target Ice shot for the Huntress and executes that shot successfully against the Assassin. Jen, not wanting Sam to charge up any more Ability cards, uses an Armour Token to nullify his shot.
After all heroes have taken a Team Action, only the Mage Princess' Portrait card is rotated.
Play continues in this fashion until one team has eliminated all of their opponent's Health Tokens, making them the winner!
Boss Mode
Boss Mode Overview
Boss Mode features a team of Castle heroes against Xaugorth, the Catacomb Lord or a team of Catacomb heroes against Sothemir, the Castle Lord. The player controlling the lords is referred to as the Overseer. Battles in Boss Mode are expected to be short and intense as both sides deploy their Ability cards and Reinforcements.
The heroes win in Boss Mode if they eliminate all of the Castle or Catacomb Lord's Health Tokens. Conversely, the Overseer wins if he or she eliminates all of the heroes' Health Tokens. Playing as the heroes is the same as in Team Mode, with the exception that the players take all their actions, in any order, together. The Overseer takes all of his or her actions at once as well.
Boss Mode supports two or four players:
| Two Players | Four Players |
|---|---|
| One player controls three heroes (either all Castle or all Catacomb). | Three players each control a single hero from the same team (either Castle or Catacomb). |
| One player controls the Castle Lord (if the other player is using the Catacomb heroes) or the Catacomb Lord (if the other player is using the Castle heroes). | The fourth player controls the Castle Lord (if the other players are using the Catacomb heroes) or the Catacomb Lord (if the other players are using the Castle heroes). |
Boss Mode Setup
Players may choose to play on either side of the game board and can decide which Start Zone the heroes and Overseer forces will start in. Players choose three Catacomb heroes and place them in their chosen Start Zone, while the Castle Lord is placed in the opposite Start Zone along with his three starting Warriors. The other Warriors remain off to the side of the game board.
Players start with twenty-four Health Tokens in their Health Pool. Experienced players can choose to start with sixteen or even twelve Health Tokens for a greater challenge.
The Castle Lord starts with an Armour Token, the Catacomb Lord does not. Both Catacomb and Castle Lords start with two Reinforcement Tokens by default, though these can be increased for a greater challenge. In Boss Mode, it is the Overseer's turn first.
The Castle Lord
The Overseer controls the Catacomb or Castle Lord's character disc and his forces comprised of different types of Warriors.
For the remainder of this explanation, it is assumed that the Castle Lord is being used, but all comments apply to the Catacomb Lord too.
The Portrait card depicts Sothemir in his powerful armoured form. His alternate Portrait card shows him after his armour has been destroyed by the heroes. Each Portrait card has a corresponding Rules card showing what shot sequences he can execute while in that form and any additional rules. The Rules card for his armoured form summarizes the number of Armour, Health and Reinforcement Tokens he starts the game with.
When fighting without his armour, Sothemir always places a shield at the end of his sequence.
The shot sequences on the Castle or Catacomb Lord Rules cards are separated by the Alternative connector (the horizontal black line). The Overseer chooses to play only one of these sequences on his or her turn.
Under certain conditions, the Castle and Catacomb Lord will change to their alternate form. In the case of the Castle Lord, he changes from his armoured form to his alternate form when he discards his Armour Token. Conversely, the Catacomb Lord can change back and forth from his starting form to his alternate form, if the Overseer chooses to do so.
The Warriors
Each Warrior has a card that shows an illustration of their appearance, their class and the shots comprising their sequence. All Warriors have a single health point, so they are removed from the game board when damaged.
At the beginning of the game, the Overseer chooses three different Warriors (for example, Royal Archer, Watch Guard and Querling for the Castle Warriors).
The Overseer may take actions for the Castle or Catacomb Lord and all Warriors on the game board in any order. After a Warrior has taken an action, it is flipped over. This helps the Overseer determine which ones have actions remaining. Once all Warriors have taken an action, they can be flipped back over again.
Reinforcements
During the game, reinforcements can be summoned by the Overseer by spending a Reinforcement Token at the start of their turn.
Each Castle and Catacomb Lord starts with a set number of Reinforcement Tokens and once used are discarded from the game.
When using a Reinforcement Token, the Overseer places three different Warriors in each of the three quadrants of the game board which does not contain the Castle or Catacomb Lord.
After reinforcements have been placed on the board, the Overseer executes each new Warrior's shot sequence in any order. The Castle Lord and any Warriors already on the board then take an action.
The Overseer cannot use a Reinforcement Token on his or her first turn.
Ability Cards in Boss Mode
In Boss Mode, Ability cards behave the same as in Team Mode, with one exception: they do not need to be charged up and may be played at will. Once an Ability card has been played, it is out of the game. This is to balance them with the Overseer's Reinforcement Tokens, which are played once per game as well.
At the start of the game, players may choose two Ability cards from their team for each hero that they control. It is recommended that players choose one Ability card that requires one Health Token to charge up and one that requires two Health Tokens to charge up.
Shot Reference
Character Shots
For all character shots, a character's disc is flicked across the game board and remains in place where it stops. If it leaves the board, place it at the edge of the board where it departed. A character shot may damage multiple adjacent opponents, unless otherwise stated. By default, they inflict one point of damage (power transfer).
The basic character shot type is the Melee shot, which inflicts one point of damage. A Critical Melee shot inflicts two points of damage. A Rush shot enables a character to move across the board, but does not inflict any damage (0 damage).
Target Melee (1 damage) - Place the Target Token on an opponent. Execute a Melee shot. If the shot misses, the player controlling the character may take another shot from where the disc ends up. Damage is only inflicted on the declared target. Remove the Target Token when the shot is finished. Primarily used by Team Castle.
Leech (1 damage) - A Melee shot variant; however, if more than one opponent is hit, only one is damaged (the attacker chooses which). Inflicts one point of damage (power or health transfer). Primarily used by Team Catacomb.
Temporal Shift (1 damage) - This is a Melee shot variant. After damage is inflicted, opponent(s) are returned to their Start Zone. Primarily used by Team Castle.
Open Portal (0 damage) - No flicking required, simply switch the position of two characters on the board from the same team. No damage is inflicted.
Ranged Shots
For all ranged style shots, the indicated ranged disc is placed on the board anywhere within 1" / 2.5 cm of a character disc. It is then flicked across the game board towards an opponent and in most cases is removed once damage and/or an effect has been resolved. A ranged shot may damage multiple adjacent opponents, unless otherwise stated. By default, they inflict one point of damage (power transfer).
The basic ranged attacks are the Ice shot (used by Team Castle) and the Fireball shot (used by Team Catacomb). They each have an enhanced version: the Target Ice and Target Fireball shots which behave in a similar fashion to the Target Melee shot.
The same ranged disc as the Fireball or Ice shot is used. Place the Target Token on an opponent. Execute the Target Fireball or Target Ice shot. If the shot misses, the player controlling the character may take another shot from where the disc ends up. Damage is only inflicted on the declared target. Remove the Target Token when the shot is finished.
Egg (0 damage) - The Egg shot must hit one or more opponents for the egg to crack open. Then one friendly Warrior is placed on the board within 1" / 2.5 cm beside the character performing the Egg shot. The Warrior may not take an action on the turn that it was first placed. When no Warriors are available to place, this shot has no effect.
In Team Mode, a player may execute the sequence of any one friendly Warrior on the board, after a hero they control has taken an action. In Boss Mode, players decide who is going to perform each Warrior's action on their turn.
Grapple (1 damage) - The Grapple shot only affects a single target. There are two options: Rescue and Grab. For Rescue, declare 'Rescue', if the grapple disc hits a teammate(s), move one of them to within 1" / 2.5 cm of the rescuer. For Grab, declare 'Grab', if the grapple disc hits an opponent(s), move one of them to within 1" / 2.5 cm of the attacker and then execute a Rush shot with their character disc. One point of damage is inflicted (power transfer).
Claw (1 damage) - Like the Grapple shot, the Claw shot only affects a single target and includes the Rescue and Grab options. When damage is inflicted the attacking player can choose a power, health or void transfer (attacker's choice).
Longbow / Shuriken (1 damage) - The Longbow shot is primarily used by Team Castle and the Shuriken shot by Team Catacomb. When inflicting damage, they initiate either a power transfer (as normal) or an assist transfer (attacker's choice). This can be used strategically to charge up a teammate's Ability card (the attacker decides which card).
Net / Web (1 damage) - The Net shot is used by Team Castle and the Web shot is used by Team Catacomb. After successfully damaging an opponent, place the net or web disc on top of the affected character. That character may not take an action until the net / web disc is knocked off by a teammate or the attacker decides (on a following turn) to remove the net or web disc to re-use it on a different target. The Net and Web shots only affect a single target (the attacker decides which).
Vortex (1 damage) - The Vortex shot inflicts one point of damage (power or void transfer). For each opposing character hit by the vortex disc, the attacker executes a single Rush shot for that character. This includes shield discs which is useful to disrupt the defences of the Watch Commander and other shield users.
Shields
A shield is an invulnerable disc that can help protect its owner. A Shield icon appears at the end of a hero's shot sequence indicating that the shield can be controlled. It directs the player controlling that hero to remove the shield disc from its current location (if already on the board), then execute the remainder of that hero's shot sequence and then place the shield disc back onto the game board anywhere within 1" / 2.5 cm of the hero's new location.
If another character disc falls within this range, the player may gently push the character away to insert the shield between the hero casting the shield and the character. A shield disc can only be moved if the hero's sequence contains the Shield icon. This means that when playing an Ability card, the shield disc cannot be moved and remains in its last location on the board.
Team Actions
Found primarily on Ability cards, Team Actions allow heroes on a team to take additional actions, even if a hero has taken an action already. A well executed Team Action can determine the winner of the game. After participating in a Team Action, a hero's Portrait card is not rotated.
Horn of Heroes (Team Castle) / Wraith Horn (Team Catacomb) - The icon is the same for both. In place of the hero's action, the hero's teammates immediately perform the indicated shot sequence (this is not optional).
Example: When the Assassin activates the Hail Xaugorth! Ability card, the Marauder and Vampire Princess must execute a Rush shot then a Fireball shot.
Team Action - Both the hero and the hero's teammates immediately perform the shot sequence after the Team Icon (again, this is not optional).
Example: If the Huntress activates the Send Reinforcements! Ability card, the player controlling that hero executes the Egg shot first. Then as a Team Action, the Huntress, Ranger and Watch Commander execute a Rush shot then a Melee shot.
Important: the hero whose Ability card initiated the Team Action cannot be charged up by any Health Tokens captured during that Team Action. This restriction includes assist transfers. If a hero does not have space(s) on a card to allocate captured Health Tokens they are discarded.
Strategy
- Use the Longbow and Shuriken shot's capacity for assist transfers to charge up the Ability cards of the Ranger and / or Marauder enabling them to focus on using their Claw shots for health transfers.
- Activate Ability cards with Team Actions after both your teammates have taken their actions, enabling them to go again.
- Trap opposing heroes with the Net / Web shots, forcing your opponent to waste actions to free their teammate.
- Use the Egg shot for strategic reinforcements. Place Warriors behind the hero disc executing the Egg shot so they are not vulnerable to shots from your opponent.
- Sometimes it is better to use the Rescue option of the Claw / Grapple shots to help an exposed teammate avoid losing a Health Token instead of inflicting damage on an opponent.
- The Grab feature of the Grapple / Claw shots can be used to reposition an opposing hero that has already taken an action. Then additional shots from teammates can be executed against them.
- Temporal Shift shots can frustrate the plans of your opponent by sending their heroes back to their Start Zone.
Reference Chart
Character Shots
- Melee
- Rush
- Leech — Only damages a single target (attacker's choice).
- Critical Melee
- Temporal Shift — Affected characters returned to their Start Zone.
- Target Melee — Declare target character and place Target Token. If shot misses, attacker may take a second shot. Damage only inflicted on declared target. Remove Target Token when shot is finished.
- Open Portal — Switch the places of two friendly pieces on the board.
Ranged Shots
- Missile
- Critical Missile
- Fireball
- Ice
- Shuriken
- Longbow
- Web / Net — Place Net or Web disc on top of the affected target. Target is unable to take an action until freed. Attacker may choose to remove Net or Web from trapped target at the start of their turn.
- Target Fireball / Target Ice — Declare target character and place Target Token. If shot misses, attacker may take a second shot. Damage only inflicted on declared target. Remove Target Token when shot is finished.
- Grapple / Claw — Declare which action is being taken. For Rescue, teammate's disc is placed within 1" / 2.5 cm of the character performing the Grapple or Claw shot. For Grab, opponent's disc is placed within 1" / 2.5 cm of the character performing the shot. Execute a Rush shot with that character.
- Egg — Execute Egg shot against an opposing character to crack it open. Place friendly Warrior within 1" / 2.5 cm of the attacking character.
- Vortex — Execute Rush shots with all affected characters and shields on the opposing team.
Health Token Transfer Options
- Power Transfer (default) — Health Token(s) removed from the opposing team's Health Pool and placed on an Ability card to charge it up (attacker's choice).
- Assist Transfer — Health Token(s) removed from the opposing team's Health Pool and placed on a teammate's Ability card to charge it up (attacker's choice).
- Health Transfer — Health Token(s) removed from the opposing team's Health Pool, flipped over and placed in friendly team's Health Pool.
- Void Transfer — Health Token(s) removed from the opposing hero's Ability card and discarded (attacker's choice).
Shot Sequence Connectors
- Next connector — Shots in sequence performed in order from left to right.
- Elastic connector — Shots in sequence performed in any order.
- Alternative connector — Choose between two or more shots or sequences.
Team Actions
- Horn — Only hero's teammates perform the sequence.
- Team — All heroes perform the sequence.
Shields
Castle Shield / Catacomb Shield — Place shield disc on board within 1" / 2.5 cm of character playing it.
Team Emblems
Castle and Catacomb emblems appear on the Health Tokens, one on each side.