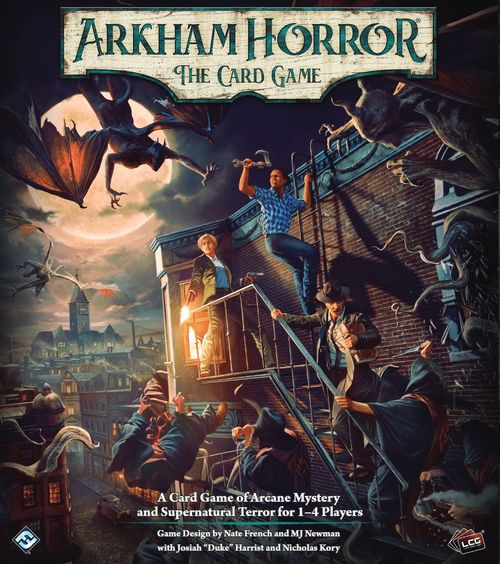
Arkham Horror: The Card Game (2026 Core Set)
Arkham Horror: The Card Game (2026 Core Set) Rulebook
Table of Contents
Table of Contents
- Game Overview
- Using This Book
- A Living Card Game
- Unpacking Your Cards
- Components
- Fundamental Concepts
- First Game Setup
- Round Sequence
- Types of Actions
- Skills and Skill Tests
- The Enemy Phase
- The Upkeep Phase
- The Mythos Phase
- Campaign Play
- Class Archetypes
- Deck Customization
- Changes from the Previous Core Set
- The Abridged Arkham Grimoire
- Card Anatomy
- Glossary of Terms and Keywords
- Ability
- Action Designators
- Alert
- Aloof
- Attachments
- Attack of Opportunity
- Cannot
- Cardtypes
- Chaos Tokens
- Clues
- The Codex
- Constant Ability
- Costs
- Defeat
- Doom
- Doomed
- Elimination
- Elusive
- Encounter Deck
- Health and Damage
- Exceptional
- Exhaust, Exhausted
- Fast
- Forced Ability
- Hunter
- In Play and Out of Play
- Keywords
- Limbo
- Limits and Maximums
- Massive
- Ownership and Control
- Patrol
- Peril
- Permanent
- Prey
- Ready
- Resources
- Retaliate
- Quick Reference
Game Overview
Arkham Horror: The Card Game is a cooperative Living Card Game® (LCG®) in which one to four investigators work together to investigate hidden mysteries and thwart wicked conspiracies brought on by the ancient evils and servitors of the Cthulhu Mythos.
Each player takes on the role of a single investigator and plays with that investigator's deck. An investigator deck represents their talents, friends, and assets, as well as their darkest fears and personal demons.
Investigators become involved in a broader narrative story, which plays out over a series of scenarios. Each scenario is played as a separate game, in which investigators move through and explore various locations, meet new allies and enemies, look for clues that enable them to advance the story, and attempt to overcome the dastardly forces arrayed against them. The actions of the investigators in these discrete scenarios, in addition to their success or failure, determine the eventual outcome of the campaign.
Throughout the campaign, each investigator gains experience, which allows them to grow by adding more powerful cards to their deck. However, their encounters with the Mythos also leave them changed, bringing them closer to insanity or death. Investigators must protect themselves against encroaching madness while attempting to survive and solve the mystery at hand.
Using This Book
This rulebook is both an introduction to Arkham Horror: The Card Game and a reference for the basic rules of how to play. The first third of the rulebook should be used as a guide while learning and playing your first game. We recommend new players start with the first scenario using the pre-constructed decks described in "Starter Decks" on page 24. The latter portion of this book contains an introduction to campaign play, rules for customizing original decks, and an outline of essential rules. A glossary of relevant terms, rules, and keywords necessary to play your first campaign can be found in the appendices, and a quick reference of keywords, icons, and important game symbols can be found on the back cover of this book.
Complete rules of play can be found in the Arkham Grimoire, which also addresses more advanced topics such as the interpretation of card text, the resolution of timing conflicts, frequently asked questions, and a list of all keywords and other rules text. The Arkham Grimoire is a living rules reference that can be found online at www.fantasyflightgames.com.
If you are familiar with previous releases for Arkham Horror: The Card Game, an overview of this core set's changes and how to use it is included on page 31.
A Living Card Game
Arkham Horror: The Card Game is a cooperative game for up to four players. One to four players can play using just the contents of this core set. In addition, Arkham Horror: The Card Game is a Living Card Game® (LCG®), and the experience of the game can be customized and enhanced through the purchase of regularly released expansions. Expansions may introduce new investigators, additional scenarios or campaigns, and new player cards that add variety and depth to investigator decks. Unlike collectible card games, all LCG expansions have a fixed distribution; there is no randomization to their contents.
Unpacking Your Cards
This core set contains nine packs of pre-sorted cards. The following is an overview of the contents of these packs to assist you as you open the cards.
Five packs each contain a playable starter deck for one of the investigators you will use as you play the game. Three packs contain the cards you will need to play the scenarios in the core set campaign. Finally, there is an additional pack of player cards that can be used to customize your investigator after you have played the tutorial.
Details regarding which packs you will need to open for your first game are on page 6 of this rulebook. Divider cards are also provided to assist you in organizing your collection.
Components
The components included in this core set are presented here for identification purposes. A complete card anatomy can be found starting on page 34 of this rulebook, or in the Arkham Grimoire online.
- 44 Chaos Tokens
- Chaos Bag
- 38 Damage Tokens (1s and 3s)
- 51 Resource Tokens (1s, 3s, and 5s)
- 41 Clue/Doom Tokens (double-sided) (1s and 3s)
- 20 Connector Tokens
- 24 Horror Tokens (1s and 3s)
- 5 Investigator Cards
- 5 Investigator Mini-Cards
- Lead Investigator Token
- 5 Investigator Tokens (double-sided)
224 Player Cards
- Player Reference Card
- Asset Cards
- Skill Cards
- Event Cards
- Weakness Cards
133 Scenario Cards
- Agenda Cards
- Act Cards
- Scenario Reference Cards
- Location Cards (revealed and unrevealed)
- Enemy Cards
- Treachery Cards
Fundamental Concepts
This section introduces a number of fundamental concepts important to learning and playing the game.
Winning and Losing
Each game is played as a single scenario during which the investigators gather clues, explore their surroundings, and work to unravel a mystery.
Typically, a scenario ends by advancing the final act in the act deck or the final agenda in the agenda deck. Advancing the act deck often results in a favorable resolution (and can be considered a "win"); advancing the agenda deck likely results in less favorable resolutions that may worsen the investigators' future odds for a positive ending. (For more information, see "Scenario Resolution" on page 33.)
Scenario Decks
The story of each scenario is driven by three distinct decks of cards: the act, agenda, and encounter decks. These decks provide the investigators with a scenario-specific narrative, objectives, and situations, including a variety of foes, hazards, and other perils.
The Act and Agenda Decks
The act deck represents the investigators' progress in achieving their goals, either by delving deeper into the mystery at hand or by accomplishing specific objectives. Investigators want to advance the act deck to reach a more favorable resolution for the scenario.
The agenda deck represents the progress made by the dark forces of the Mythos. During the game, the agenda deck gradually progresses toward a resolution that is unfavorable for the investigators. As a rule of thumb, investigators want to prevent the final agenda from advancing!
Placed side by side, the act and agenda decks form the image of an open book, and work together to form the plot of the current scenario.
Encounter Deck
The perils, monsters, madnesses, and schemes that investigators must overcome are contained in the encounter deck, in the form of enemy and treachery cards. Throughout the scenario, investigators must draw encounter cards from this deck and overcome them using the tools and talents their investigator deck provides them.
Location Cards
Location cards represent all the locales where investigators and enemies may be located during a scenario. An investigator's current location is indicated by that investigator's token or mini-card being placed on a location card. Each location has two sides: a revealed side and an unrevealed side. The unrevealed side can be identified by the presence of a keyhole symbol below the location title.
A location enters play with its unrevealed side faceup. When an investigator enters a location for the first time, it is revealed (turned to its revealed side), and clues equal to that location's clue value are placed on that location from the token pool.
Locations also often include location connection icons. When building the map, use the connector tokens included in this box to show which locations are connected to each other.
Lead Investigator
The lead investigator (chosen during setup) is the player who breaks ties and makes decisions for the group each time there is a conflict. When choosing which investigator token to use during a scenario, the lead investigator uses the lead investigator token in addition to (or instead of) the investigator token of their chosen color.
When the players are required to make a choice among two or more equally valid options (e.g., an enemy must move toward the "nearest investigator," and the two nearest investigators are an equal distance away), the lead investigator chooses between the two options.
If the players cannot agree on a rules/timing conflict, the lead investigator should choose the worst possible option for the players, and continue with the game. (See "The Grim Rule" on page 32 for more information.)
"In Player Order"
The phrase "in player order" is used to dictate the order in which players resolve or execute a game step. When players are instructed to do something "in player order," the lead investigator does so first, followed by each other player, one player at a time, in clockwise order around the table.
Per Investigator (per investigator symbol)
The per investigator symbol next to a value multiplies that value by the number of investigators who started the scenario. The number of clues placed on a location and the number of clues necessary to advance the current act are often denoted with this symbol. This symbol is also often used to indicate the health values of particularly deadly foes the investigators may face.
Ready and Exhausted
Cards enter play in a "ready" position (upright, so that their ability text can be read from left to right). Some game steps and card abilities require cards to "exhaust," which is indicated by rotating the card 90 degrees (sideways). A card in the exhausted position cannot exhaust again until it is readied (turned upright again) by a game step or card ability.
Chaos Bag
Throughout the game, the investigators are asked to randomly reveal tokens from the chaos bag to modify their chances of success or failure in a variety of situations. If an investigator reveals a token with a numerical value during a skill test, apply its modifier to that investigator's skill value for that test. If a symbol is revealed, refer to the current scenario reference card to determine that token's effect.
Skill Tests
During the game, investigators frequently attempt skill tests to determine the outcome of various situations. A skill test uses an investigator's skills, which are represented by four symbols found on their investigator card: willpower, intellect, combat, and agility. The higher an investigator's skill value is, the greater their ability to perform tasks relating to that skill.
When performing a skill test, an investigator compares their skill value with the test difficulty and may use abilities or commit cards to increase their skill value for that test. Then, one or more tokens are revealed from the chaos bag, which further modify the skill value being tested. Finally, the test outcome is determined: if that investigator's total skill value is equal to or exceeds the test's difficulty, they succeed. A more detailed explanation for skill tests can be found under "Skills and Skill Tests" on page 15.
Some card abilities designate the skill being tested with a skill icon in parentheses next to the bold action designator. (For example, ": Fight (combat)" indicates combat is the skill being tested.)
Weakness Cards
A weakness card is a card in an investigator deck that has a negative effect when drawn. These cards are identified by the label "Weakness" or "Basic Weakness" beneath the card's title or artwork. When one of these cards is drawn, the investigator who drew the card must resolve its revelation ability immediately. (See "Weakness" on page 46 for more details on weakness cards.)
First Game Setup
To set up the first game of the Brethren of Ash campaign, perform the following steps in order.
-
Choose Investigator(s): Each player chooses an investigator and takes that investigator's pack of cards. If playing solo, Joe Diamond is the recommended investigator choice.
The investigators in this core set are: Daniela Reyes (the Mechanic), Joe Diamond (the Private Investigator), Trish Scarborough (the Former Spy), Dexter Drake (the Magician), and Isabelle Barnes (the Returned).
-
Gather Decks: Each player opens their investigator's pack of cards, which includes an investigator card and that investigator's starter deck. Each player places their investigator card faceup in their play area, and then shuffles their starter deck. If the pack is already opened, a complete list of the cards required for each starter deck can be found starting on page 25.
-
Choose Lead Investigator: Choose one of the players to be the lead investigator for this game, and give that player the lead investigator token and the campaign guide. Then, each player chooses either an investigator token or their investigator mini-card to represent their position on the map.
-
Assemble Token Pool: Place all of the damage tokens, horror tokens, clue/doom tokens, connector tokens, and resource tokens in separate piles within easy reach of all investigators. The token pool is the repository for all tokens that are not in play.
-
Assemble the Chaos Bag: Place the 16 chaos tokens indicated for standard difficulty into the chaos bag. Return the rest to the game box. (When setting up future campaigns, your preferred difficulty setting will include a full list of which chaos tokens to use.)
-
Collect Starting Resources: Each investigator takes five resources from the token pool and places them near their investigator card. This is the resource pool of that investigator.
-
Draw Opening Hand: Each investigator draws five cards from their deck. If a weakness card is drawn at any time during setup, set it aside and draw an additional card. Each player may take a single mulligan at this time by setting aside up to five of the cards just drawn. Then, they draw an equivalent number of cards, setting aside any weaknesses as normal. (A mulligan is recommended if a player has a poor starting hand.) At the end of this step, all set-aside cards are shuffled back into the investigator's deck.
Scenario Setup
The remaining setup steps contain scenario-specific information for the first scenario in the Brethren of Ash campaign. Open the campaign guide to page 3 and follow along with the setup instructions for the "Spreading Flames" scenario as you perform these following steps.
These instructions are written as though Joe and Isabelle were the two investigators in the game, but you may have different investigators or a different number of players during your first game.
-
Gather Scenario Cards: Open the "Spreading Flames" scenario pack. This pack contains all the cards required to play the first scenario. If the pack is already opened, gather the encounter sets needed to play "Spreading Flames." Each card included in any scenario is part of an encounter set, as indicated by its encounter set icon. When setting up a scenario, refer to the campaign guide in order to tell which encounter sets should be gathered according to their encounter set symbols.
Encounter Sets in Spreading Flames — this is a list of each encounter set and all cards required for the "Spreading Flames" scenario:
- Spreading Flames (11 cards): #105–115
- Ashen Pilgrims (4 cards): #121–122
- Bystanders (3 cards): #123
- Cosmic Evils (3 cards): #124
- Eldritch Lore (4 cards): #125–126
- Fire! (7 cards): #129–130
- Hallucinations (4 cards): #127–128
- Mad Science (4 cards): #131–132
- Miskatonic University (5 cards): #116–120
When gathering encounter cards, gather all copies of each card in the listed encounter sets. Use the encounter set numbers (#/#) at the bottom of each encounter card as reference.
-
Set Agenda Deck: Assemble the agenda deck by stacking the agenda cards from the Spreading Flames encounter set in sequential order so that "1a" is on top, "2a" is next, etc. These cards are: Past Curfew, Lit Up, and Wild Flames.
-
Set Act Deck: Assemble the act deck by stacking the act cards from the Spreading Flames encounter set in sequential order so that "1a" is on top, "2a" is next, etc. These cards are: Where There's Smoke…, Escape the Dorms, Searching For Dr. Armitage, and Blaze of Glory.
-
Place Reference Card: Place the scenario reference card for "Spreading Flames" (#105) next to the agenda deck. Flip it to the side appropriate for your chosen difficulty.
-
Place Locations: Following the setup instructions on page 3 of the campaign guide, put Your Friend's Room (#113) into play, unrevealed side faceup. (By default, locations enter play unrevealed.) Then, set aside all of the remaining locations. The unrevealed side of a location can be identified by the presence of a keyhole symbol below its title.
-
Assemble Encounter Deck: Following the scenario setup instructions, set aside all five copies of the Fire! treachery (#129), the Servant of Flame (#114), and Dr. Henry Armitage (#115). Then, take the remaining encounter cards and shuffle them together to create the encounter deck.
-
Read Scenario Introduction: Read the scenario introduction for "Spreading Flames" followed by the text on the faceup agenda and act cards (Past Curfew and Where There's Smoke…).
Play Area Layout
The play area is organized into: the encounter deck and its discard pile, the scenario reference card, the agenda deck and act deck, an out-of-play area (which includes the victory display, set-aside cards, etc.), and each investigator's play area, containing their investigator token, assets, discard pile, and threat area. The current location sits in the middle of the table, near the token pool. An investigator's threat area is where engaged enemies, lingering threats, injuries, hexes, and other afflictions are placed.
Round Sequence
Arkham Horror: The Card Game is played over a series of rounds. During a round, the investigators confront the terrifying forces of the Mythos, explore new and varied locations, square off against deadly foes, and finally collect their bearings in anticipation of the next round. Each round is divided into four phases:
- Mythos Phase
- Investigation Phase
- Enemy Phase
- Upkeep Phase
Reminder: During the first round of the game, skip the mythos phase and begin with the investigation phase. The mythos phase is described on page 18.
Once all four phases are complete, the round is over and play proceeds to the mythos phase of the next round. Each phase is described in detail below.
The Investigation Phase
In the investigation phase, the investigators take center stage. What they choose to do depends on the circumstances and the investigator in question.
During this phase, each investigator takes a separate turn. When the phase begins, the investigators, as a group, choose which investigator takes the first turn. When that investigator's turn ends, choose another investigator to take the next turn, and so on, until each investigator has taken their turn.
Investigators begin their turn with three available actions that may be used to perform a variety of tasks. The active investigator may perform any of the actions listed below as many times as they choose, and in any order, provided they have the action(s) available to spend. On their turn, an investigator may use an action to:
- Draw 1 card.
- Gain 1 Resource.
- Activate an action trigger ability.
- Play an asset or event card from their hand.
- Move to a connecting location.
- Investigate their current location.
- Engage an enemy at their current location.
- Attempt to Evade an enemy engaged with them.
- Fight an engaged enemy at their current location.
- Parley an enemy at their current location using an ability.
- Resign from the scenario using an ability.
If an investigator is engaged with one or more ready enemies, performing any action other than Evade, Fight, or activating an ability with either a Parley or Resign designator in its text causes each of those enemies to attack that investigator. This is called an attack of opportunity. (For more information on enemy attacks, see "The Enemy Phase" on page 17.)
Each action is described in greater detail in the following pages. In addition, a player reference card including player actions and round order is included with each investigator deck.
An investigator may end their turn early if there are no other actions they wish to perform. To indicate that an investigator's turn is over, flip their investigator token or mini-card facedown, to its grayed-out side. Unused actions are forfeited and cannot be saved for future turns. After each investigator has completed their turn, the investigation phase is over. Proceed to the enemy phase.
First Scenario Tip: When the game begins, investigators are searching for their friend at Miskatonic University. How should they proceed?
In this situation, some actions are better than others. If an investigator has asset cards in hand that seem useful, that investigator should consider using the Play action to play one or two of those cards—this will ensure that the investigator is prepared when an unexpected challenge or enemy comes their way. In order to advance the act, investigators will need to find 2 clues, so keep in mind that your investigator will need to Investigate or use other tricks to discover those clues from their location!
Alternatively, the Draw action or the Resource action could be useful in helping an investigator build up cards and resources for later in the game.
Types of Actions
The following are actions that players may perform during their turn. Some actions are basic actions. (Basic actions are actions that can be taken without activating a card ability or playing a card.)
Draw
Draw is a basic action. An investigator using this action draws one card from the top of their deck.
Note: If an investigator would draw the top card of their deck and that deck is empty, they take 1 horror and shuffle their discard pile into their deck, then draw the top card of the reshuffled deck.
Resource
Resource is a basic action. An investigator using this action gains one resource from the token pool. (Resources are often used to pay for cards and effects.)
Strategy tip: Spending actions to draw cards and gain resources can be effective when you have a specific card you need to play, but it is often time-consuming and inefficient compared to card abilities. Use these actions when you aren't sure what to do, or as a last resort!
Activate
Activate is an action. An investigator using this action resolves an action trigger ability on a card in play that is under their control, on their location or an encounter card at their location, or on the current act or agenda card. Abilities on cards not in play (such as in an investigator's hand or discard pile) cannot be activated in this way unless otherwise stated. Note that some activation abilities may cost more than 1 action to resolve.
Play
Play is an action. An investigator using this action selects an asset or event card in their hand, pays its resource cost, and plays it. A card's resource cost and cardtype are found in its upper left corner.
To pay a resource cost, the investigator playing the card must move a number of resources equal to its cost from their resource pool to the general token pool.
The rules for playing each cardtype are as follows:
- If the played card is an event card, the investigator resolves its effects, then places it in their discard pile.
- If the played card is an asset card, the investigator places it in their play area. It remains in play until an ability or game effect removes it.
- Skill cards are not played. For their abilities and icons to be used, these cards must be committed from an investigator's hand to a skill test. (See "Modifying Skill Values for Skill Tests" on page 15.)
Note: Cards with the "fast" keyword do not cost an action to play.
Equipment Slots
Slots restrict the number of asset cards of a specific category an investigator can have in play simultaneously. The slots available to an investigator are: 1 accessory slot, 1 head slot, 1 body slot, 1 ally slot, 2 hand slots, and 2 arcane slots.
The icons on an asset indicate that it counts against an investigator's capacity for the indicated slot(s). If an asset has no slot symbols on it, it does not take up any slots.
If an investigator wishes to play or gains control of an asset and lacks the appropriate slot, that investigator must choose and discard an asset or assets under their control to make room for the newly acquired asset.
Move
Move is a basic action. An investigator using this action moves to a connecting location. Move that investigator's token or mini-card to any location marked as a connection on the investigator's current location. A location's connections are indicated by the icons at the bottom of the location card, each of which match an identical icon in the title area of one or more connecting locations. If the location the investigator moves into was previously unrevealed, flip it to its revealed side. Remember to place the indicated number of clues on the location when this occurs (see "Location Cards" on page 4).
Use the included connector tokens to indicate which locations are connected to which.
Note: Some location connections may change when a location is revealed, symbolizing a locked door or one-way journey!
Engage
Engage is a basic action. An investigator using this action engages one enemy that is at their location (either not currently engaged with an investigator or currently engaged with another investigator). To engage an enemy, the investigator places that enemy in their threat area.
The engage action is particularly effective when dealing with aloof enemies. Aloof enemies cannot be attacked or evaded unless they are engaged with an investigator (see "Enemy Keywords and Engagement" on page 14).
Strategy tip: Engaging enemies allows you to evade them or safely attack them without risking hitting your partner. Use this action to take the heat off your fellow investigators!
Investigate
Investigate is a basic action. An investigator using this action investigates their current location in an attempt to find clues. The investigator performs an intellect test against the shroud value of that location.
If the investigator succeeds, that investigator discovers one clue from the location. When an investigator discovers a clue from a location, that player takes one clue from the location and places it on their investigator card.
If the investigator fails, no clues are discovered.
Determining Skills for Skill Tests
Several basic actions require an investigator to test a specific skill against a difficulty value, indicated on the targeted card. These are as follows:
- Fight (combat). An investigator tests their combat value against the target enemy's fight value.
- Evade (agility). An investigator tests their agility value against the target enemy's evade value.
- Investigate (intellect). An investigator tests their intellect value against their location's shroud value.
Other actions, such as a fight action on a weapon or an investigate action on a tool, may indicate a different skill that the investigator must test when resolving its ability. This is indicated by the symbol in parentheses after the bolded action.
Example: Cosmic Flame has the ability ": Fight (willpower). […]," indicating that the investigator must test their willpower instead of their combat value for this test.
Evade
Evade is a basic action. An investigator using this action attempts to evade one enemy they are engaged with. The investigator performs an agility test against that enemy's evade value.
If the investigator succeeds, that investigator evades the targeted enemy; the enemy is exhausted, and the engagement is broken. Move that enemy card from the investigator's threat area to the investigator's current location to mark that it is no longer engaged with that investigator.
If the investigator fails, the enemy is not evaded and remains ready and engaged with the investigator.
Some enemies have the alert keyword, which makes evading them more dangerous. (See "Enemy Keywords and Engagement" below.)
Strategy tip: Evading enemies can be crucial to success. Exhausted enemies do not automatically engage investigators, do not perform attacks of opportunity, and do not attack during the enemy phase. If you are unarmed or need to get away from a deadly enemy, consider evading it instead of performing an attack you know you are more than likely to fail.
Fight
Fight is a basic action. An investigator using this action attacks one enemy that is at their current location. That investigator performs a combat test against that enemy's fight value.
If the investigator succeeds, that investigator deals one damage to the attacked enemy. Some weapons, spells, or other special attacks may modify the amount of damage dealt. Place a number of damage tokens on the enemy equal to the amount of damage dealt. If, at any time, an enemy has damage on it equal to, or greater than, its health, that enemy is defeated and placed in the encounter discard pile. If the bottom of the enemy's text box indicates that it provides victory points (indicated by the "Victory X" keyword), place the card in a set-aside area instead of discarding it; that card is considered to be "in the victory display."
If the investigator fails, no damage is dealt to the attacked enemy. If that enemy is engaged with another investigator, any damage that would have been dealt to the enemy is dealt to the engaged investigator, instead.
Some enemies have the retaliate keyword, which makes fighting them more dangerous. (See "Enemy Keywords and Engagement" below.)
Enemy Keywords and Engagement
WARNING! Pay particular attention to enemy keywords and with whom an enemy is engaged when attempting to fight or evade.
- If an investigator fails a combat test against an enemy engaged with another investigator, any damage that would have been dealt to that enemy is instead dealt to the engaged investigator.
- If an investigator fails a combat test targeting a ready enemy with the retaliate keyword, the targeted enemy attacks that investigator. (See "Retaliate" on page 44.)
- If an investigator fails an evasion test targeting a ready enemy with the alert keyword, the targeted enemy attacks that investigator. (See "Alert" on page 38.)
- An enemy with the aloof keyword does not automatically engage investigators. Thus, an aloof enemy cannot be targeted by investigators for a combat or evasion test unless they are engaged with an investigator. (See "Aloof" on page 38.)
- Regardless of whether or not an attack succeeds or fails, a ready enemy with the elusive keyword flees to a connecting location. (See "Elusive" on page 41.)
Parley
Parley is a play or activate action that represents an investigator's attempt to create a distraction and/or talk their way out of a situation.
A parley action is connoted by a bold action designator and does not trigger attacks of opportunity when used. This action type appears on some player cards and/or scenario card abilities.
Each parley ability is unique and may involve a skill test. Parley abilities require an enemy to be present at the performing investigator's location unless explicitly stated otherwise.
Resign
Resign is a play or activate action that allows investigators to remove themselves from the current scenario.
A resign action is connoted by a bold action designator and does not trigger attacks of opportunity when used. When an investigator resigns, place all of their clues and/or scenario-specific tokens on their current location. That investigator is removed from the game and can no longer take actions or be defeated.
Important note: Removing an investigator from the game does not change the per investigator value. (For example, if an investigator resigns from a four-player game, the number of investigators indicated by the per investigator symbol is still four, not three.)
Skills and Skill Tests
Each investigator has four skills: willpower, intellect, combat, and agility. The higher an investigator's skill value is, the greater their ability to perform tasks relating to that skill.
A number of situations require an investigator to make a skill test. A skill test pits the investigator's value in a specified skill against a difficulty value determined by the ability or effect that initiated the test. To perform a skill test, an investigator reveals a random chaos token from the chaos bag, which modifies their skill value. If the modified skill value equals or exceeds the test's difficulty, they succeed. If not, they fail. The consequences of success or failure are provided by the ability or effect that initiated the test.
Skill Test Indicators
When performing a basic action such as Fight, Evade, or Investigate, the skills being tested are combat, agility, and intellect, respectively.
Some card abilities have bolded action designators. Each bolded action designator indicates the skill being tested in parentheses after the indicated action type.
- A card that reads, ": Fight (combat)," indicates that the investigator who triggered it must use their combat during the skill test.
- A card that indicates (willpower or agility) in its ability indicates that the investigator who triggered it may choose which of the indicated skills to use during the skill test.
Modifying Skill Values for Skill Tests
Before drawing a chaos token for a skill test, the investigator may boost their skill value. There are two ways to do this:
First, the investigator may commit eligible cards from their hand to the test. An eligible card bears one or more icons matching the skill being tested. A wild icon matches any skill. Each matching icon committed increases that investigator's skill value by 1 for that test. The investigator performing the test may commit any number of cards from their hand to the test. Each other investigator at the same location as that investigator may commit one card from their hand to help.
Do not pay a card's resource cost when committing it to a skill test.
In addition, investigators may activate free triggered abilities during a skill test player window (indicated in the "Skill Test Timing" graphic below), which may modify the performing investigator's skill value for that test.
A revealed chaos token may also modify an investigator's skill value, as described in the next section.
Revealing Chaos Tokens for a Skill Test
After committing cards and activating free triggered abilities for the skill test, the performing investigator reveals a single chaos token from the chaos bag. Each chaos token has a numerical modifier that influences the outcome of the skill test. The revealed chaos token's modifier is applied to the investigator's skill value for this test. Symbol tokens have additional effects, as described below.
If a Skull, Cultist, Tablet, or Elder Thing token is drawn, refer to the scenario reference card and resolve the corresponding effect.
If an Elder Sign token is drawn, refer to your investigator card and resolve your investigator's Elder Sign effect.
If an Autofail token is drawn, this test automatically fails. Regardless of the investigator's skill value, modifiers, or the test difficulty, the investigator's modified skill value is considered to be 0.
Concluding a Skill Test
Upon calculating the investigator's modified skill value, that investigator either succeeds or fails the skill test and resolves all of its effects. Some skill cards have an ability that resolves upon the completion of a skill test if the skill card is committed to that test.
Upon completion of a skill test, discard all player cards committed to that test and return the revealed chaos token to the chaos bag.
Skill Test Timing
The following is a step-by-step outline of a skill test to use when performing a skill test. The Player Window steps indicate when investigators may trigger free triggered abilities.
- Determine the skill to be tested. (Skill test begins.)
- Player Window.
- Commit cards from hand to skill test.
- Player Window.
- Reveal chaos token(s).
- Resolve chaos token symbol effect(s).
- Determine investigator's modified skill value.
- Determine success/failure of skill test.
- Apply skill test results.
- Skill test ends.
Skill Test Example: Dexter Drake draws the Noxious Smoke treachery, which reads: "Revelation – Test willpower or agility (3). Take 1 damage for each point you fail by."
In Step 1, Dexter determines the skill to be tested. In this case, Dexter's willpower value is 5, and his agility value is 3, so he chooses his willpower for this test.
Investigators commit cards to a skill test during Step 2 (numbered as Step "Commit cards from hand to skill test" above). Unfortunately, Dexter has no remaining cards in hand and cannot commit skill icons to the test! Luckily, Isabelle Barnes is also at his location, and she decides to commit a card with one willpower icon to the test. This gives Dexter a +1 bonus to his willpower skill for the test.
Upon reaching the reveal step, Dexter pulls a chaos token at random from the chaos bag and reveals a "–3." If the chaos token had been a symbol, he would resolve any effects during the following step. However, in this case, the chaos token only applies a numerical modifier.
The chaos token's modifier is then applied to Dexter's willpower value for the test. His value is 5 (from his base value) +1 (from Isabelle's card) and –3 from the chaos token, bringing his total skill value to 3! Because Dexter's skill value is equal to the skill test's 3 difficulty, he succeeds!
After determining whether or not he succeeded, Dexter applies the results of the successful test. The revealed chaos token is returned to the chaos bag and the skill test ends. Noxious Smoke's effects have resolved and it is discarded with no effect. If Isabelle had not been around to commit the card to his test, Dexter would have failed and taken 1 damage!
The Enemy Phase
In the enemy phase, the enemies come for the investigators, and if they are able, they attack!
If there are no enemies in play, proceed to the upkeep phase. Otherwise, resolve the following steps in order:
- Enemies move. Each ready enemy with the hunter or patrol keyword moves during the enemy phase according to their keyword instructions, as described below.
- Ready enemies with the hunter keyword move once to a connecting location, in the direction of the nearest investigator.
- Ready enemies with the patrol keyword move once to a connecting location, in the direction of their target (indicated in parentheses next to the patrol keyword). The patrol keyword may target a specific direction, a specified location, or a particular scenario card (such as an enemy or treachery).
- If an enemy moves to a location with one or more investigators, that enemy immediately engages one of those investigators (see "Enemy Engagement" on page 19).
- Note that exhausted enemies, enemies that are already engaged, and hunter enemies at a location with one or more investigators do not move.
- Enemies attack. Each ready, engaged enemy makes an attack against the investigator with whom it is engaged. If more than one investigator is engaged with an enemy, investigators resolve enemy attacks in player order. An investigator engaged with more than one enemy decides the order in which those enemies attack.
- When an enemy attacks, deal both its damage and its horror, simultaneously, to the engaged investigator (see "Damage and Horror" below). The amount of damage and horror dealt by an enemy's attack can be found at the bottom of the enemy's text box.
After an enemy attacks during the enemy phase, exhaust it to indicate that it has attacked. (During other attacks, such as attacks of opportunity, enemies do not exhaust.)
After each ready, engaged enemy has attacked, the enemy phase is over. Proceed to the upkeep phase.
Damage and Horror
An investigator can take damage and/or horror during a scenario. An investigator's health and sanity values indicate how much damage and horror they can take before being defeated.
- When an investigator takes damage, they must assign that damage to a card they control. To do so, place damage on the investigator card and/or on any of that investigator's asset cards that have health, up to its health value. A card that has no health value cannot be assigned damage.
- If an investigator takes "direct damage" that damage must be assigned to their investigator card.
- When an investigator takes horror, they must assign that horror to a card they control. To do so, place horror on the investigator card and/or on any of that investigator's asset cards that have sanity, up to its sanity value. A card that has no sanity value cannot be assigned horror.
- If an investigator takes "direct horror," that horror must be assigned to their investigator card.
- If a card has an amount of damage that equals (or exceeds) its health value, or an amount of horror that equals (or exceeds) its sanity value, that card is defeated. A defeated asset is discarded. A defeated investigator is eliminated. (See "Elimination" on page 41.)
The Upkeep Phase
In the upkeep phase, investigators and enemies regain their bearings and prepare for the next round.
Resolve the following steps in order:
- Each investigator flips their investigator token or mini-card faceup.
- Ready all exhausted cards. Each unengaged enemy that readies at the same location as an investigator engages that investigator at this time. (See "Enemy Engagement" on page 19.)
- Each investigator draws one card and gains one resource.
- Each investigator with more than eight cards in their hand chooses and discards cards from their hand until only eight cards remain.
After the above steps are complete, the game round is over. Proceed to the mythos phase of the next game round.
The Mythos Phase
In the mythos phase, the arcane forces pitted against the investigators seek to advance their fell agenda.
The mythos phase comprises three steps, described below.
- Place one doom token on the current agenda.
- Compare the total number of doom tokens in play (on the current agenda and on other cards in play) to the doom threshold of the current agenda. (Important note: Unless a card effect specifies that it can cause the current agenda to advance, this is the only time the agenda can be advanced.) If the number of doom tokens in play is equal to or greater than the doom threshold of the current agenda, advance the agenda deck.
- To advance the agenda, discard all doom tokens from play (even those that are on enemies, locations, treacheries, or player cards), turning the current agenda card over, following the instructions on its reverse side, and removing that agenda from play.
- Then, the front side of the next card in the agenda deck becomes the active agenda card.
- In player order, each investigator draws the top card of the encounter deck and resolves its text. Instructions for resolving each type of encounter card are presented on the following pages.
Encounter Cardtypes
There are two encounter cardtypes: Enemies and Treacheries.
Treachery
Treachery cards represent hazards, schemes, powers, or deadly encounters with the arcane forces that are set against the investigators.
- When a treachery card is drawn, note any keywords (see "Peril and Surge" below) and then resolve its revelation ability. This often requires an investigator to attempt a skill test or make a difficult decision.
- After a treachery's revelation ability is resolved, place it in the encounter discard pile unless that treachery has been put into play, either in an investigator's threat area or attached to another scenario card.
Peril and Surge
Peril and Surge are keywords that appear on some encounter cards.
- When an encounter card with the peril keyword is drawn, the investigator who drew it cannot consult with their fellow investigators when resolving its revelation ability. Only the investigator who drew the peril encounter card may commit cards to skill tests on that card.
- When a card with the surge keyword is drawn, after resolving its text, the investigator who drew it must draw a new card from the top of the encounter deck.
Enemy
Enemy cards represent monsters, creatures, or humans who are arrayed against the investigators.
When an enemy card is drawn, spawn it ready and engaged with the investigator who drew it.
- If the enemy has spawn instructions, it enters play at the location indicated by its spawn instructions. It will automatically engage an investigator at that location.
- If the enemy has spawn instructions that cannot be fulfilled, that enemy is discarded.
- When an enemy spawns, it is considered to enter the location in which it spawns (this may have a bearing on some card effects).
- If the enemy drawn has the aloof keyword, it spawns unengaged.
For more information on enemy engagement, refer to the "Enemy Engagement" section below.
Enemy Engagement
While an enemy card is in play, it is either engaged with an investigator and placed physically in that investigator's threat area, or it is unengaged and physically placed at its location. Each enemy in an investigator's threat area is considered to be at that investigator's current location. Should the investigator move, each enemy remains engaged with the investigator and moves with them.
Whenever a ready, unengaged enemy is at the same location as an investigator, it engages that investigator and is placed in that investigator's threat area. Some enemies have the prey keyword, which dictates whom it engages if there are multiple possibilities. (See "Prey" on page 43.)
If multiple investigators are at the same location as a ready, unengaged enemy, the lead investigator chooses which investigator the enemy engages.
An unengaged enemy immediately engages an investigator if:
- It spawns at a location where an investigator is located.
- It moves into a location where an investigator is located.
- An investigator moves into a location where a ready enemy is located.
- An exhausted enemy readies at a location where an investigator is located.
What's Next?
After the mythos phase is resolved, play proceeds to the investigation phase. Continue resolving game rounds until a scenario resolution is reached. (See "Scenario Resolution" on page 33.)
After you've completed your first game, you may wish to continue the campaign. To do so, read "Expanded Campaign Rules" on page 5 of the Brethren of Ash campaign guide. Then proceed to the next scenario, "Smoke and Mirrors" using the setup rules below.
Some players may wish to practice using different investigators before proceeding with the campaign. To do so, we recommend you review the available investigators and class archetypes on page 24 before replaying the first scenario, "Spreading Flames." Further rules on how to customize your investigator deck are available on page 30.
A quick reference of keywords, icons, and important game symbols can be found on the back cover of this rulebook. The answers to many questions that may arise during play can be found in the Abridged Arkham Grimoire starting on page 32. For more in-depth questions, refer to the Arkham Grimoire online.
Setting Up a Game
The following section is a condensed universal version of the setup rules that can be used for any scenario of Arkham Horror: The Card Game.
- Choose investigators. Each player chooses an investigator and places that investigator's card in their play area. (Note that players must each choose a different investigator to play.)
- Take trauma damage/horror. In campaign play, each player places damage equal to their physical trauma, and horror equal to their mental trauma, on their investigator card.
- Choose Lead Investigator. Choose a player to be the lead investigator for this game. That player takes the lead investigator token. Each player chooses either their investigator mini-card or investigator token to represent their position on the map during the game.
- Assemble and shuffle investigator decks.
- Assemble token pool. Place the damage, horror, clue/doom, resource, and connector tokens within easy reach of all players.
- Assemble the chaos bag. Place the chaos tokens as indicated by the campaign setup instructions into the chaos bag. Return the other chaos tokens to the game box.
- In campaign mode, if this is not the first scenario, use the chaos bag as it was composed upon completion of the previous scenario.
- Collect starting resources. Each investigator gains 5 resources from the token pool.
- Draw opening hands. Each player draws 5 cards. Each player may mulligan any cards in their opening hand once.
- Each weakness card drawn during this step is ignored, set aside (without resolving it), and replaced by drawing another card from the deck. Upon completion of this step, shuffle each of the set-aside weakness cards back into their owner's deck.
- Read the scenario introduction in the campaign guide.
- Perform the scenario setup instructions in the campaign guide. This includes gathering the listed encounter sets, placing locations, placing investigator tokens and/or mini-cards at the location where each investigator begins play, setting aside any listed cards, and shuffling the remaining encounter cards together to form the encounter deck.
- Set agenda deck. Assemble the agenda deck in sequential order, with the art side faceup, so that "agenda 1a" is on top. Read the story text on agenda 1a.
- Set act deck. Assemble the act deck in sequential order, with the art side faceup, so that "act 1a" is on top. Read the story text on act 1a.
- Place the scenario reference card next to the agenda deck. The game is now afoot!
There are no action windows during setup. During setup, players may only trigger card abilities or play cards from hand if the ability or card's specific triggering condition is met.
Campaign Play
A campaign is a long-form story set in the foreboding universe of Lovecraft's Mythos, and unfolds over a series of interrelated scenarios. As a campaign progresses, each investigator gains experience and trauma which is reflected by changes in their deck. Decisions, victories, and losses are recorded in the campaign log and may have far-reaching repercussions.
To start a campaign, follow the instructions for that campaign's setup in the campaign guide.
The Campaign Log
The campaign log (near the end of the campaign guide) is used to track the progress and development of the campaign. At the end of each scenario, the players record their results by entering all of the relevant information in the campaign log. This includes any experience earned by an investigator, each investigator's trauma level, earned story assets or weaknesses, and any killed or insane investigators.
For your convenience, we recommend you print or make a copy of the campaign log so that you can play the campaign more than once. Downloadable PDFs for each campaign can be found at www.fantasyflightgames.com.
"Record in your Campaign Log…"
Often the players will be instructed to record an important note or story element in the campaign log. Write these phrases under "Campaign Notes" unless specified otherwise. These notes will often be referenced in later scenarios, allowing decisions from one scenario to carry over into later scenarios. If the players are instructed to cross out one of these notes, the crossed-off note is ignored for the remainder of the campaign.
Because the players may be instructed to check the campaign log for a specific phrase at a later time in the campaign, write the indicated phrase exactly as it appears, without alteration.
For example: If the players are instructed to record in the campaign log that "the investigators discovered 3 notes" this shouldn't be rephrased as "the investigators found some notes," because the exact number of notes might be important in a later scenario.
"Remember that…"
Sometimes a scenario card will instruct the investigators to "remember" a key phrase, often based on an action they have taken or a decision they have made within that scenario. This phrase may come up later during that scenario, and may trigger additional effects. There is no need to record this phrase in the campaign log, because it will only ever matter during the current scenario, or during its resolution.
If a "remember" effect uses the word "you," it is specific to the investigator resolving that effect.
"Become the bearer of…"
At various points in a campaign, players may be instructed to make someone the "bearer" of a particular story asset or weakness. When a player becomes the bearer of such a card, that player adds that card to their deck, ignoring all deckbuilding restrictions and requirements. That card does not count toward that investigator's deck size.
Advancing to the Next Scenario
After completing a scenario, updating the campaign log, and purchasing any new cards, advance to the next scenario in the campaign, as directed by the campaign guide.
Joining or Leaving a Campaign
Once a campaign has begun, players can freely drop in and out of the campaign in between scenarios.
If a player leaves the campaign, do not remove that player's information from the campaign log, as they may re-join at any time between scenarios.
If a new player joins the campaign, they must choose an investigator not previously used during this campaign. That player begins as if it were their first scenario in the campaign, with no experience and no trauma.
Trauma, Death, and Insanity
Through their encounters with the Mythos, investigators may find themselves irreparably scarred, or even worse. Trauma represents permanent damage that has been inflicted upon an investigator's body and mind.
- If an investigator is defeated in a scenario, that investigator is eliminated from the scenario but not necessarily from the campaign.
- If an investigator is defeated by taking damage equal to their health, they suffer 1 physical trauma (recorded in the campaign log). If an investigator has physical trauma equal to their printed health, that investigator is killed.
- If an investigator is defeated by taking horror equal to their sanity, they suffer 1 mental trauma (recorded in the campaign log). If an investigator has mental trauma equal to their printed sanity, that investigator is driven insane.
- In some scenario resolutions, investigators may be devoured by a cosmic entity or horrifying abomination.
- If an investigator is defeated by simultaneously taking damage equal to their health and horror equal to their sanity, they choose which type of trauma to suffer.
- If an investigator is killed, driven insane, or devoured, that investigator cannot be used for the remainder of the campaign. That player chooses a new investigator to use in the next scenario, and creates a new level 0 deck for that investigator.
- If a player attempts to choose a new investigator and there are no investigators remaining in the collection, the players have lost the campaign and the campaign ends.
- For each physical and/or mental trauma an investigator has suffered, that investigator begins each subsequent scenario in the campaign with 1 damage and/or horror, respectively.
Earning and Spending Experience
As an investigator delves deeper into the Mythos, they gain insight into the hidden truths of the world—hidden monstrosities and secrets that humanity was never meant to know. This insight manifests in the form of experience. During the resolution of a scenario, each investigator may earn 1 or more experience. Experience is earned separately by each investigator, and may not be transferred from one investigator to another. Experience can be obtained by placing encounter cards worth victory points in the victory display (often by defeating monsters or clearing all the clues off of a location), or through story decisions and scenario outcomes.
Experience may be spent between scenarios to learn new skills or spells, or to acquire new items and weapons, in the form of additional cards. Adding a new card to a deck costs experience equal to that card's level, denoted by one or more white pips near the top left corner of the card (see "Card Levels" on page 30). Adding a new card to your deck always costs at least 1 experience even if the card you are adding is level 0, and it requires that you maintain your deck size (usually by removing another card that would put you in excess of your deck size).
Some cards may be upgraded to their higher level version. These cards have the same title as their other versions but may have additional effects, additional skill icons, and/or different costs. If a player has a lower level version of a card and wishes to purchase the higher level version, they may upgrade that card by spending experience equal to the difference in level between the two. The new version is added to the deck, and the older version is removed.
A player is not required to spend all of their earned experience between scenarios. They may record any leftover experience under "Unspent Experience" in the campaign log and spend it at a later time.
Reward Cards
Some campaigns contain a unique subtype of player card: the campaign reward card. Campaign reward cards are neutral (classless) cards that are added to a player's collection once they have been unlocked through gameplay.
- Reward cards are identified by the reward keyword as well as by the golden graphic in the upper left corner of the card.
- When the campaign rules inform the players that they have earned a reward card (often through resolution or interlude text), that card is added to the collection of player cards. Players cannot use a reward card in deckbuilding, and cannot play such a card, unless it has been unlocked by an outcome in the campaign.
- Reward cards may adjust the way players play the game by adding deckbuilding options, new abilities, or unique restrictions to an investigator deck.
- Investigators are never required to include any unlocked campaign reward cards in their decks.
Epic Campaign Mode
After completing a campaign, you may wish to continue your investigator's story in another campaign. Epic Campaign Mode offers a challenge to players who wish to see how long their investigator can prevail against countless horrors, and is not for the faint of heart. When your investigator is killed, driven insane, or otherwise removed from the campaign, their accumulated experience across each campaign determines your total score.
In order to play in Epic Campaign Mode, observe the following rules:
- Not all surviving investigators in the original campaign need to be transferred to the next campaign.
- Forfeit all experience earned during the previous campaign. Record the amount of experience (X) previously earned for your specific investigator in the next campaign log as "[investigator name]'s total experience earned: X." At the completion of a campaign, or if that investigator is killed or driven insane, add this total to your final experience amount in order to determine how well you have performed.
- Remove all cards of levels 1–5 from your deck, resetting the deck to only level 0 cards. You may rebuild your investigator deck using any cards from the collection as if you were just beginning a campaign.
- Transfer all physical and mental trauma and all earned story assets and weaknesses to the new campaign. All other notes in the previous campaign's campaign log are wiped clean and do not transfer to the new campaign.
- Reset the chaos bag. Build a new chaos bag when setting up the new campaign. When beginning the next campaign, select a difficulty level equal to or higher than your previous campaign's difficulty level.
- If your investigator has an ability that occurs "at the beginning of the campaign," or "at deck creation," such as bonus experience, that ability triggers one more time upon transferring into a new campaign.
Cards and campaign guides are written and balanced with the assumption that investigators are not being transferred from one campaign to another. For this reason, campaigns are sometimes referred to as "the campaign." (For example, "for the remainder of the campaign…") When interpreting such effects, treat each campaign as being separate from one another. However, some of these effects are to be interpreted as if each campaign is being played as part of one continuous campaign. This includes rules that dictate how an earned weakness or story asset operates, or additional rules that a specific investigator must follow. (For example, "for the remainder of the campaign, the bearer of X weakness must speak in riddles.")
Standalone Mode
All scenarios may be played in standalone mode, as a single game. When playing a scenario in standalone mode, refer to any "Standalone Mode" rules during setup. More information on standalone mode may be found in the Arkham Grimoire online.
Class Archetypes
In Arkham Horror: The Card Game, each player takes on the role of an investigator from the Arkham Horror Mythos and uses a deck of cards to represent that character in the game.
The pool of player cards from which these decks are comprised is divided into five classes. A class is a large group of thematically and synergistically linked cards. Each character's strategy and tactical approach to the game is heavily influenced by the class (or classes) of cards that they are able to use. The five classes are Guardian, Seeker, Rogue, Mystic, and Survivor. Neutral cards have no class and can be used by any investigator. The following pages serve as an introduction to each class, as well as to the investigator deck representing that class in this core set.
Starter Decks
Investigating the deadly machinations of the Mythos is dangerous work. You will confront monstrosities and horrors far beyond your ken, and the knowledge you seek may cause irreparable harm to your psyche. You'll need strong allies, useful skills, and the best tools if you are to succeed in the campaigns to come.
To help you in your investigations, a sample starter deck for each of the five investigators is included in the core set. These decks are a gateway into the world of Arkham Horror, and are ideal for players who wish to get into the action as fast as possible, or for players who do not wish to use the deck customization rules to construct an original deck.
Each of the provided decks is accompanied by tips and tricks on how to make the best use of an investigator's ability, demonstrating card synergy within the deck.
These starter decks are meant to be used at the beginning of a campaign and thus contain only level 0 cards. In the following deck lists, the number in parentheses next to each card indicates that card's collector number. If the number of copies of a card is not specified, use only 1 copy of that card.
Each of these starter decks includes a specific basic weakness instead of a random basic weakness. Do not add an additional random basic weakness to a starter deck when beginning a new campaign.
With the contents of this core set, players can have all five of these starter decks constructed at the same time.
Guardian
Class Overview. Guardian characters are "team players" who favor combat, protecting their fellow investigators, and building an arsenal for the next big confrontation. Guardians support as well as they fight, taking hits for others and healing damage when needed. If the thought of grabbing your weapons, hunting down the dark creatures of the Mythos, and going toe-to-tentacle with them is appealing, the Guardian class is for you!
Class Strengths: High combat value, Healing, Team Support, Heavy Weaponry, Strong Allies, Enemy Management, Extra Damage
Class Playstyles: Enemy "Tank," Melee Fighter, Weapons Expert, Medic
The Guardian character in this core set is Daniela Reyes.
Daniela Reyes Strategy Tips. Daniela is a powerhouse fighter who excels at taking hits from enemies and retaliating using her free triggered ability. In order to maximize her damage output, you'll want to play assets that absorb damage and horror from enemy attacks. Mulligan for resource generators like Logan Hastings or Emergency Cache to pay for Daniela's expensive arsenal.
As a Guardian, many of Daniela's cards require her to take hits and defeat enemies. To prepare yourself, grab a weapon and a means to soak (and heal) more damage from enemies as early as possible. Use Right Tool for the Job to dig for Daniela's Wrench or another weapon such as Machete or the M1911. Assets that heal or may be assigned damage such as Bodyguard, Resilience, and Bandages will also help keep Daniela fighting fit!
Although Daniela may struggle to find clues, events such as "Look What I Found!" allow her to fail forward, while Scene of the Crime gives her a means to easily discover clues from higher shroud locations (provided there is an enemy present).
Be mindful of the amount of horror Daniela takes, as this can easily take her out of the game and saddle her with unwanted mental trauma. Should Daniela put herself In Harm's Way, an ally such as Aleksey Saburov can make all the difference.
Daniela Reyes Starter Deck — Daniela Reyes, the Mechanic ("Point me at the monsters. And get behind me.")
- Investigator: Daniela Reyes (1)
- Assets (17): Daniela's Wrench (2), Bodyguard (16), Endurance (17), Logan Hastings (18), M1911 (19), Machete (20), Resilience (21), Aleksey Saburov (72), Bandages (73), Hunter's Instinct (74), Jumpsuit (75), Levelheaded (76), Meat Cleaver (77), 2x Broken Bottle (86), 2x Hand-Crank Flashlight (88)
- Events (7): Lesson Learned (22), Right Tool for the Job (23), Scene of the Crime (24), "Look what I found!" (78), "Shove off!" (79), 2x Emergency Cache (89)
- Skills (7): Vicious Blow (25), Slippery (80), Timely Intervention (81), 2x Overpower (92), 2x Unexpected Courage (94)
- Weaknesses (2): In Harm's Way (3), Wounded (104)
Upgrading Daniela Reyes. As you play through the campaign and collect experience, consider how you would like to play Daniela and upgrade your deck accordingly. A simple first upgrade would be to purchase Bodyguard (level 2), which deals extra damage on defeat. If you want to have more than one ally out at once, Charisma (level 3) is always a good purchase. For those that want to play the hero, Counterattack (level 1) can cancel a decisive enemy strike if played at the right time. And if you really just want to deal raw damage, Sledgehammer (level 3) and Winchester Model 12 (level 5) both deal extra damage with a sizeable combat boost.
After considering all the options available to you, think about your deck and how you like to play, before you spend the experience on the options that best suit your style!
Seeker
Class Overview. The Seeker's approach to a problem is to understand what is going on and figure out a solution using their mind. They are the intellectuals of the Arkham setting, often represented by students, teachers, scientists, psychologists, detectives, and philosophers. If you believe in the power of the clear and focused human mind, seek no further than the Seeker class.
Class Strengths: Exceptional intellect value, Card Draw, Deck Searching, Horror Healing, Discovering Extra Clues, Powerful Tome Assets, Precise Skill Tests
Class Playstyles: Clue Gatherer, Counselor, Gumshoe, Head Librarian
The Seeker character in this core set is Joe Diamond.
Joe Diamond Strategy Tips. Joe Diamond is a Seeker who isn't afraid to confront the horrors of the hidden world head-on if it means getting to the bottom of a mystery. His investigator ability will keep his hand filled with cards as long as he is investigating, and investigating is the thing Joe does best!
Joe's deck is full of cards that help make sure he can successfully investigate. Cards such as Fingerprint Kit, Local Map, and Magnifying Glass are items that Joe wants to have in play to boost his intellect, get extra clues, and even get some free movement. Dorothy Simmons is a great ally that rewards Joe with resources, and Deduction will get him two clues instead of one for investigating successfully.
But the mysteries of Arkham are often deadly, and thanks to his Guardian access Joe is ready to fight for his life. Resilience and Bodyguard both allow Joe to roll with the punches, and weapons such as M1911 and Machete ensure he can deal damage just as well as he can take it. Keeping enemies at bay allows you to focus on your investigation and advancing the scenario.
Beware if you draw into Dead Ends, Joe's signature weakness. This event is a costly burden, forcing you to spend 5 resources to play it before the scenario ends.
Joe Diamond Starter Deck — Joe Diamond, the Private Investigator ("I'll find the truth, no matter the cost.")
- Investigator: Joe Diamond (4)
- Assets (16): Dorothy Simmons (30), Fingerprint Kit (31), Laboratory Assistant (32), Local Map (33), Magnifying Glass (34), Sharp Rhetoric (35), Bodyguard (16), Endurance (17), Logan Hastings (18), M1911 (19), Machete (20), Resilience (21), 2x Fedora (87), 2x Hand-Crank Flashlight (88)
- Events (9): Detective's Intuition (5), Gather Intel (36), Through the Cracks (37), Working a Hunch (38), Lesson Learned (22), Right Tool for the Job (23), Scene of the Crime (24), 2x Emergency Cache (89)
- Skills (6): Deduction (39), Vicious Blow (25), 2x Perception (93), 2x Overpower (92)
- Weaknesses (2): Dead Ends (6), Overzealous (100)
Upgrading Joe Diamond. Once you've played Joe Diamond through the first scenario, you should have some experience to upgrade your deck. An easy first purchase is Studious (level 3) which allows you to begin each game with an additional card in your opening hand. If you want the power to re-sculpt your hand at just the right moment, you can save up 5 experience for a copy of Unbridled Knowledge (level 5)! Should you find yourself worried about enemy attacks, hire a Bodyguard (level 2) or learn how to slip Through the Cracks (level 2).
There are numerous upgrade options within the cardpool. After reviewing your options, think about how you would prefer to play Joe Diamond and spend the experience on the upgrades that best support your style.
Rogue
Class Overview. Rogue characters make their own rules and find a way to continually tilt the odds in their favor. They are adept at avoiding enemies, taking calculated risks for great rewards, and gathering lots (and lots) of resources. If taking on the guise of a character who lives just outside the law and can melt into the shadows appeals to you, the Rogue class is for you!
Class Strengths: Great agility value, Evasion, Resource Generation, Oversucceeding at Skill Tests, Additional Actions, Movement
Class Playstyles: "Big Money," Push Your Luck, Evasion Expert, Showoff
The Rogue character in this core set is Trish Scarborough.
Trish Scarborough Strategy Tips. Trish is a clever undercover operative who excels at slipping away from enemies and gathering clues. Her extra evade action and signature Covert Ops allow her to move quickly around the map or dig through her deck for staple cards such as Olivier Bishop and Magnifying Glass.
As a Rogue, Trish has access to strong resource generators such as Thieves' Kit and Sticky Fingers. Use resources gained from those to pay for skill boosts via Silver Tongue or Sharp Rhetoric to ensure you oversucceed by 2 or more. This focus on oversuccess, in turn, will get you the most value from cards such as Lucky Cigarette Case or Breaking and Entering!
Fingerprint Kit, Working a Hunch, and Deduction offer additional ways to grab more clues quickly. You'll need to hang on to at least one of those clues in case the shadowy Black Chamber Operative appears, which can turn Trish's penchant for evasion against her. Although Trish excels more at evading enemies than defeating them, the M1903 Hammerless is just what she needs to keep the Operative off her tail permanently.
During the mythos phase, Trish's low willpower makes her especially vulnerable to many treacheries, which is why you'll want to hang on to enough resources to boost Sharp Rhetoric when needed. Should you find yourself out of options, the helpful Laboratory Assistant can grab you some cards and soak some damage or horror you might incur.
Trish Scarborough Starter Deck — Trish Scarborough, the Former Spy ("The only sure thing about luck: it will change.")
- Investigator: Trish Scarborough (7)
- Assets (17): Covert Ops (8), Lucky Cigarette Case (44), M1903 Hammerless (45), Olivier Bishop (46), Silver Tongue (47), Sticky Fingers (48), Thieves' Kit (49), Dorothy Simmons (30), Fingerprint Kit (31), Laboratory Assistant (32), Local Map (33), Magnifying Glass (34), Sharp Rhetoric (35), 2x Broken Bottle (86), 2x Hand-Crank Flashlight (88)
- Events (8): Breaking and Entering (50), Paint the Town Red (51), Prestidigitation (52), Gather Intel (36), Through the Cracks (37), Working a Hunch (38), 2x Emergency Cache (89)
- Skills (6): Out of Sight (53), Deduction (39), 2x Manual Dexterity (91), 2x Perception (93)
- Weaknesses (2): Black Chamber Operative (9), Syndicate Obligations (103)
Upgrading Trish Scarborough. After you have played through the first scenario with Trish, consider her playstyle and how you would like to support that playstyle with your deckbuilding upgrades. For instance, you could spend 2 experience on the Sticky Fingers (level 2) upgrade to give that asset the fast keyword. If you want to lean into the class' exceptional economy, spend 3 experience on Another Day, Another Dollar (level 3) or Decisive Strike (level 2). You could also purchase Mysterious Grimoire (level 2) to help you dig for key assets throughout the game.
You have numerous different upgrade options. Think about how you enjoy playing Trish and what cards you tend to gravitate toward, and use your experience on the cards that excite you the most!
Mystic
Class Overview. While every investigator has a unique connection to the deadly workings of the Mythos, the eccentric and often self-destructive Mystics willingly embrace the void. Drawn like moths to the flame, they risk both body and soul in order to harness the strength of the supernatural for their own ends. This incredible power often comes at a cost, however. If you share this desire to tap into forces too great for human comprehension, consider walking the path of the Mystic!
Class Strengths: High willpower value, Powerful Spell and Ritual Cards, Predicting/Ignoring Chaos Tokens, Encounter Deck Control, Doom Manipulation
Class Playstyles: Blood Witch, Spellslinger, Fortune Teller, Doombringer
The Mystic character in this core set is Dexter Drake.
Dexter Drake Strategy Tips. Dexter is a high willpower spellcaster and showman who can fight, investigate, and evade well, provided he has the proper tools at his disposal. Use his signature "For my next trick…" or his free triggered ability early on to play resource-generating assets such as Thieves' Kit or Sticky Fingers so that you can build up your resources. Then, use those resources to play spells like Cosmic Flame or Second Sight so you can fight and investigate in equal measure using Dexter's high willpower.
Dexter depends on his assets to get things done. You'll want to use cards like Jim Culver and Cloak of Resonance to get extra value out of horror you might incur from enemy attacks. A powerful Ward of Protection can cancel a particularly nasty treachery while also incurring a horror, which in turn triggers other abilities in your arsenal. Use Lucky Charm to heal or defeat assets you control, or pull them back to hand with a flourish through Dexter's excellent use of Prestidigitation.
If you've lost some of your high-value spell assets, you can instead rely on events such as Will of the Cosmos to grab some clues, or Breaking and Entering to investigate and potentially evade a bothersome enemy. Dexter's high willpower makes him a stalwart force against the Mythos. However, an ill-timed reading of The Necronomicon can shut down Dexter's entire play area, so you may want to keep a copy of Premonition in hand (for more information on how Premonition works, see "Seal" on page 44).
Dexter Drake Starter Deck — Dexter Drake, the Magician ("A little fear is nothing compared to the power one may gain.")
- Investigator: Dexter Drake (10)
- Assets (16): Cloak of Resonance (58), Cosmic Flame (59), Jim Culver (60), Lucky Charm (61), Second Sight (62), Spiritual Intuition (63), Lucky Cigarette Case (44), M1903 Hammerless (45), Olivier Bishop (46), Silver Tongue (47), Sticky Fingers (48), Thieves' Kit (49), 2x Broken Bottle (86), 2x Hand-Crank Flashlight (88)
- Events (9): "For my next trick…" (11), Premonition (64), Ward of Protection (65), Will of the Cosmos (66), Breaking and Entering (50), Paint the Town Red (51), Prestidigitation (52), 2x Emergency Cache (89)
- Skills (6): Soul Link (67), Out of Sight (53), 2x Guts (90), 2x Manual Dexterity (91)
- Weaknesses (2): The Necronomicon (12), Paranoia (101)
Upgrading Dexter Drake. Dexter has a number of worthwhile upgrades to bolster his considerable arsenal. As you play through the campaign and earn experience, consider how you want to play Dexter. To improve your fighting capabilities, you can upgrade into Cosmic Flame (level 5) or Decisive Strike (level 2). Alternatively, you may want purchase Relic Hunter (level 3) to keep more accessories on the board at once!
Given that Dexter can function both as a clue-gatherer and fighter in equal measure, consider your upgrade options. Should you pursue a more offensive focus, or a more investigation-focused upgrade path? There is no wrong answer.
Survivor
Class Overview. While many other investigators are accomplished fighters or scholars, Survivors tend to be regular folks who just happened to show up in the wrong place at the wrong time. Thrust into situations beyond their ken, Survivors get by with a combination of grit, common sense, and luck. Like any "last one standing" in a horror movie, these investigators must step up to become the unexpected hero of their own story. If the idea of playing the role of a desperate, unlikely hero appeals to you, play a Survivor.
Class Strengths: Reactive Play, Low-Cost Cards, Recurring Discarded Cards, Discarding Cards for Abilities, Failing Forward, Traps
Class Playstyles: Jack-of-All-Trades, Lose to Win, Trapper, "Final Girl"
The Survivor character in this core set is Isabelle Barnes.
Isabelle Barnes Strategy Tips. Isabelle Barnes is a Survivor who has been through some of the worst the Mythos has to offer, and she isn't easily deterred from her mission. Her investigator ability allows you to commit a skill card from your discard pile to a new skill test, granting you additional uses of each skill, all for the cost of just 1 direct horror.
With an ability like this, you're going to want plenty of useful skills in Isabelle's deck. Neutral skills are good picks for Isabelle, with Guts and Unexpected Courage included in her starter deck. Soul Link is a strong addition from her Mystic access, while Slippery and Timely Intervention each have useful abilities that can be the difference between life and death!
Her affinity for skill cards allows Isabelle to succeed at whatever horrors come her way. She can confidently take on monsters with cards like Meat Cleaver, Cosmic Flame, or her signature weapon Isabelle's Twin .45s.
Cards like Second Sight, Will of the Cosmos, and "Look what I found!" each provide unorthodox means to gather clues. And should she find herself gravely injured, Isabelle can keep herself in the game thanks to Bandages, Jumpsuit, and Aleksey Saburov. Be careful with the amount of horror on Isabelle, however, because drawing her signature weakness Breaking Point at the wrong time could defeat her outright!
Isabelle Barnes Starter Deck — Isabelle Barnes, the Returned ("I'll be fine on my own… I hope.")
- Investigator: Isabelle Barnes (13)
- Assets (17): Isabelle's Twin .45s (14), Aleksey Saburov (72), Bandages (73), Hunter's Instinct (74), Jumpsuit (75), Levelheaded (76), Meat Cleaver (77), Cloak of Resonance (58), Cosmic Flame (59), Jim Culver (60), Lucky Charm (61), Second Sight (62), Spiritual Intuition (63), 2x Broken Bottle (86), 2x Hand-Crank Flashlight (88)
- Events (7): "Look what I found!" (78), "Shove off!" (79), Premonition (64), Ward of Protection (65), Will of the Cosmos (66), 2x Emergency Cache (89)
- Skills (7): Slippery (80), Timely Intervention (81), Soul Link (67), 2x Unexpected Courage (94), 2x Guts (90)
- Weaknesses (2): Breaking Point (15), Pursued (102)
Upgrading Isabelle Barnes. After playing your first scenario and earning experience, consider Isabelle's upgrade options. To make better use of Isabelle's triggered ability, you'll want to pack in horror-healing upgrades like Meat Cleaver (level 3) and Fearless (level 2). Increasing your ally slots with Charisma (level 3) allows you to keep key allies like Jim Culver and Aleksey Saburov out to maximize your damage and horror soak. In addition, cards like Scrape By (level 1) and Old Compass (level 2) allow you to turn failure into success.
After reviewing the different upgrade options, think about what cards were most fun when you first played Isabelle, and pick the upgrades that support your preferred playstyle!
Deck Customization
The Arkham Horror: The Card Game core set is designed to be a complete game experience with significant replayability. After learning the basics of the game, players may wish to explore customizing their own decks.
Why Create a Custom Deck?
Using this process, a player may customize their deck to take on the scenarios using original strategies and ideas. This allows a player to approach the game in new ways, using a deck that suits their preferred playstyle. When a player creates an original deck, that player doesn't just participate in the game: they actively shape who their investigator is.
Deck Customization Rules
Note that for more deckbuilding options, players may want to obtain expansion sets containing new cards. The following are the deck customization rules for Arkham Horror: The Card Game investigator decks.
- Each player must choose exactly one investigator card. Players must choose different investigators when deckbuilding to play together.
- Each player's investigator deck must include the exact number of standard player cards indicated on the back of the investigator card as its "Deck Size." For each of the investigators in the core set, this number is 30. Weaknesses, investigator signature cards, and scenario cards that are added to a player's deck do not count toward this number.
- Each standard player card in an investigator deck must be chosen according to the "Deckbuilding Options" available on the back of the investigator card.
- Each investigator deck cannot include more than two copies (by title) of any given player card.
- Each player must observe any other "Deckbuilding Requirements" on the back of their investigator card.
- At the beginning of a campaign, an investigator may only include level 0 cards in their deck (see "Card Levels" below).
Investigator Signature Cards
An investigator's "signature cards" are cards that are only available to that investigator, and cannot be included in another investigator deck. This includes player cards with the text "[Investigator Name] deck only," as well as non-basic weaknesses that are listed under "Deckbuilding Requirements" and therefore can only be included in that investigator deck.
Signature cards are governed by the following additional rules:
- The number of each signature card listed under an investigator's "Deckbuilding Requirements" are the exact number of copies of that card that is to be included in that investigator deck. If no number is specified, then that number is 1.
- An investigator cannot play or commit another investigator's signature cards, nor can an investigator control another investigator's signature cards at any time.
- If a game effect would force a player to take control of a card with another investigator's signature card attached to it, that effect fails and the signature card is discarded instead.
- Signature cards do not abide by typical deckbuilding restrictions, and do not count toward any deckbuilding limitations if other cards share the same title.
Card Levels
A card's level is indicated by the presence of white pips beneath its cost. The card level is equal to the number of such pips on the card. (For example, two white pips indicate a level 2 card.)
In campaign play, investigators may be rewarded with experience points upon the completion of a scenario. Investigators may spend these points to purchase higher level cards to use in their decks during that campaign. (See "Earning and Spending Experience" on page 22.)
Random Basic Weaknesses
Most investigators have a deckbuilding requirement that instructs the player to add a random basic weakness to their deck.
Unlike investigator-specific weaknesses, basic weaknesses are identified by the basic weakness symbol.
To select a random basic weakness, take the ten basic weaknesses in this core set, shuffle them together, and draw one at random to add to your investigator deck. Some Arkham Horror: The Card Game expansions add additional basic weakness cards to your collection. Simply add these basic weaknesses to the ten basic weaknesses found in the core set when selecting random basic weaknesses in the future.
For example: Sarah owns one copy of the core set, two copies of the first deckbuilding expansion, and one copy of an investigator deck. To create a single set of basic weaknesses, she takes all the basic weaknesses from a single core set, all the basic weaknesses from one copy of the first deckbuilding expansion, and the basic weakness from her copy of an investigator deck. She shuffles them together and draws her basic weakness at random from this pool.
Do not select an investigator's basic weakness until all other cards in that investigator's deck have been chosen. In campaign mode, the selected weakness remains a part of that investigator's deck for the entire campaign, unless it is removed by a card ability. In addition, scenario instructions and card abilities may direct an investigator to become the bearer of additional basic weaknesses and/or campaign-specific weaknesses.
Remember: An investigator's signature weaknesses are never added to the pool of random basic weaknesses.
- Signature cards do not have a level.
Changes from the Previous Core Set
If you are a long-time player of Arkham Horror: The Card Game, this section is intended to get you up to speed on changes from the previously released core sets.
The game has expanded greatly since its initial release through player card and expansion design. While this new core set keeps all essentials of the game intact, a few quality-of-life improvements have been made to card templating, wording, and game rules to reflect the evolving nature of the game. Changes of note include the following:
Current and Legacy Environments
This is not a new edition of Arkham Horror: The Card Game. All previously released content is compatible with cards in this core set as well as in all future releases going forward. This core set and all current releases form a "current environment": a smaller cardpool that is the recommended way to play the game. These reduced options provide players with an ever-changing set of cards that create a true experience of a 'living' card game. Campaigns and scenario content are optimized with an eye to the "current environment" to create a tight, challenging experience.
Players who wish to embrace even more chaos may also play with any (or all) previous releases and/or out-of-print content. This experience is known as a "legacy environment" in which powerful combos and strange interactions between current and past releases are possible.
Skill Test Indicators
When playing cards and triggering card abilities with a bold action designator, a symbol indicating the skill being tested is included in parentheses after the indicated action type. (For example, ": Fight (agility). […]" directs a player to use agility for the attack, rather than combat.)
- Some card abilities may offer a choice between the skills being tested, such as ": Fight (combat or agility). […]" When resolving these abilities, choose which skill is being tested when initiating the ability.
Modified Reprints
A handful of cards from previous releases have been reprinted in this core set, and others may reappear in future products. Most of these cards have been reprinted as written, but a few have been slightly adjusted from their previous versions, keeping the spirit and identity of the card intact. If a player has two versions of a card with the same title, only one version of that card may be used in a deck.
A list of modified reprints can be found in the Arkham Grimoire online.
Updated Card Layouts
Some cardtypes, such as skills and enemies, have updated templates. These cardtypes are the same as before, and all player cards with new templates are compatible with previously released cards.
New Components
This core set includes two new types of player tokens: connector tokens and investigator tokens. Connector tokens allow players to visually indicate which locations are connected to which, rather than referencing location connection icons every time an investigator wishes to move. Additionally, players may now use either their investigator mini-card or one of the included player tokens to indicate their position on the map.
Reward Cards
Campaign expansions may feature a unique subtype of player card: the campaign reward card. Campaign reward cards are neutral cards that can be added to any investigator's deck once unlocked. Reward Cards cannot be added to a player's collection until that player has unlocked that card, usually by winning the campaign in which they were included. For more information on this subject, see "Reward Cards" on page 23.
The Abridged Arkham Grimoire
"The most merciful thing in the world, I think, is the inability of the human mind to correlate all its contents. We live on a placid island of ignorance in the midst of black seas of infinity, and it was not meant that we should voyage far." —H. P. Lovecraft, The Call of Cthulhu
Now that you have played your first game (or campaign) of Arkham Horror: The Card Game, you may have additional questions about certain card interactions, timing, or other elements. This rulebook is not intended to be the definitive source on how to play the game. Instead, you can find a full living rules reference online in the form of the Arkham Grimoire.
The Arkham Grimoire is a comprehensive collection of rulings covering all known situations in the game. It is maintained online and updated regularly as new cards and interactions are introduced or discovered.
The following pages serve as an introduction to the Arkham Grimoire, presenting many of the core concepts and essentials of the game. The first section expands on several more core rules and concepts; the second presents a detailed card anatomy; the final section contains a glossary of terms you may encounter when playing the game.
Treat this section as a convenient, abridged form of the Grimoire. For a full, living rules document, download the Arkham Grimoire at www.fantasyflightgames.com.
The Grim Rule
If players are unable to find the answer to (or come to a consensus on) a rules or timing conflict in the Arkham Grimoire, resolve the conflict in the manner that the players perceive as the worst possible at that moment with regards to winning the scenario, then continue with the game.
When investigators are forced to make a choice and there are multiple valid options, the lead investigator decides among those options. The Grim Rule does not play a part in these choices.
The Grim Rule is not an exhaustive answer to rules/timing conflicts. The Grim Rule is designed to keep the game moving when looking up the correct answer would be too time-consuming or inconvenient.
A Cooperative Game
There are many possible choices of what to do during the investigation phase. New threats, enemies, and situations may emerge during the mythos phase beforehand, and it falls to the investigators to work together to overcome them!
Investigators are encouraged to collaborate and plan out what they hope to accomplish each round. The order in which the investigators take their turns, and the actions each investigator performs during their turn, can mean the difference between success and failure.
While the investigators may plan their turns as a group, each individual player has final authority over the actions their investigator performs. Some of the most memorable moments of the game arise when one investigator finds themselves in over their head, forcing the group to adapt its plans. For further guidelines on investigator communication, see "Table Talk" below.
Additional Rules and Fundamentals
The following section includes some important rules for playing the game as intended.
The Golden Rule
If the text of a card directly contradicts the text of this rulebook, the text of the card takes precedence.
The Silver Rule
If two cards directly contradict one another in a way that is impossible to reconcile, the encounter card takes precedence over the player card. If both cards are encounter cards or both are player cards, the lead investigator decides which takes precedence.
Table Talk
Arkham Horror: The Card Game is a cooperative experience in which each player is encouraged to roleplay their specific investigator. The nature of the game encourages players to work together and communicate, but players are also encouraged to stay "in character" as much as possible during play. The game's areas of hidden information (the cards in a player's hand and deck) exist to maintain the feeling that each investigator is a unique individual in the game world, and makes their decisions without complete and perfect knowledge of what everyone else knows or is thinking. A good means of maintaining this illusion is to not name, read off, or allude to specific cards that are hidden information (e.g., in a player's hand or deck).
For example: Isabelle wants her fellow investigator, Joe, to fight an enemy engaged with her, and she wants to relay the fact that she can help. Instead of saying something like, "Take a fight action against that enemy; I can commit Unexpected Courage" or, "Fight the Servant of Flame; I can contribute two icons," Isabelle stays in character by saying, "Be brave! I can help you take them down!"
Scenario Resolution
When any encounter card triggers a resolution—indicated by the text "(→R#)"—players have completed the scenario and they must refer to the resolution text matching that number in the campaign guide to discover the outcome of the current scenario.
Should all investigators be eliminated during a scenario, use the "if no resolution was reached" outcome for that scenario in the campaign guide.
Easily Missed Rules
If you are just learning the game, here are some important rules that new players (and even some seasoned veterans) of Arkham Horror: The Card Game can forget:
- Attacks of Opportunity. Taking any action other than Fight, Evade, Parley, or Resign provokes attacks of opportunity while one or more enemies are engaged with you. (See "Attack of Opportunity" on page 38.)
- Combat damage. By default, a successful attack against an enemy only deals 1 damage.
- Playing assets during your turn. Even if an asset has the fast keyword, you cannot play an asset unless it is your turn (or if there is a card ability that states otherwise). (See "Fast" on page 41.)
- Committing cards. It does not cost resources to commit a card to a skill test, and only matching skill icons count toward an investigator's skill value for that test.
- Committing cards to another investigator's skill test. You can only commit 1 card at maximum to a skill test being performed by another investigator. You can only commit cards to a skill test at your location.
- "Cannot" is absolute. Card effects and abilities with the word "cannot" are unable to be overridden under any circumstance.
- Forced abilities. "Forced –" effects take priority over player card abilities during timing conflicts.
- Triggering reaction abilities. Reaction abilities are always optional triggers.
- The Autofail token sets your total skill value to 0 during a skill test. This is especially relevant for treachery effects that might deal horror/damage "for each point you fail by."
- Enemies spawn engaged. Unless the enemy has specific spawn instructions or the aloof keyword, an enemy drawn from the encounter deck spawns engaged with the investigator who drew it.
- Treacheries in another investigator's threat area. You may trigger free triggered abilities on treacheries in the threat areas of other investigators at your location if they need help.
- Putting locations into play. Unless otherwise stated, a location always enters play with its unrevealed side faceup (not showing its shroud or clue values).
- Use the Grim Rule only when necessary. The aforementioned Grim Rule is only invoked for situations in which you cannot agree or decide how to proceed. (See "Grim Rule" above.)
Card Anatomy
This section presents a detailed anatomy of each cardtype. Scenario cards include act cards, agenda cards, location cards, treachery cards, enemy cards, and scenario reference cards. Player cards include investigator cards, investigator mini cards, asset cards, event cards, and skill cards.
Scenario Card Anatomy Key
- Encounter Set Symbol: The symbol indicating the encounter set this card belongs to.
- Cardtype: This card's type, which determines how it is used in the game.
- Title: This card's name.
- Traits: Flavorful attributes that may be referenced by card abilities.
- Ability: This card's text box, which may contain keywords or other effects that impact the game.
- Enemy Fight Value: The difficulty of a skill test to attack this enemy.
- Enemy Health Value: This enemy's health value, which determines how much damage it can take before being defeated.
- Enemy Evade Value: Determines the difficulty of a skill test to evade this enemy.
- Damage: The amount of damage this enemy deals when it attacks.
- Horror: The amount of horror this enemy deals when it attacks.
- Shroud: The difficulty of a skill test to investigate this location.
- Clue Value: The number of clues placed on this location when it is first revealed.
- Connection Icons: Symbols used to show which locations are connected to which.
- Act/Agenda Sequence: Numbering indicating the act/agenda deck order.
- Clue Threshold: The number of clues that must be spent to advance this act.
- Doom Threshold: The amount of doom in play required to advance this agenda during the mythos phase.
- Product Set Information: This card's unique ID, paired with its expansion symbol.
- Encounter Set Number: The numerical ID of the current card in the specific encounter set it belongs to and the total number of cards in that set.
Player Card Anatomy Key
- Cost: The number of resources required to play this card.
- Level: The experience cost to purchase this card when deckbuilding.
- Cardtype: This card's type, which determines how it is used in the game.
- Class Symbol: The class to which this card belongs. Neutral cards have no class symbol.
- Title: This card's name.
- Subtitle: A secondary identifier for a card.
- Skills: This investigator's skill values, in order: Willpower, Intellect, Combat, Agility.
- Traits: Flavorful attributes that may be referenced by card abilities.
- Ability: This card's text box, which may contain keywords or other effects that impact the game.
- Elder Sign Ability: The modifier and ability used when this investigator draws the Elder Sign token.
- Health: This card's health value, which determines how much damage it can take before being defeated.
- Sanity: This card's sanity value, which determines how much horror it can take before being defeated.
- Skill Test Icons: Icons which modify an investigator's skill value while this card is committed to a matching skill test.
- Product Set Information: This card's unique ID, paired with its expansion symbol.
Glossary of Terms and Keywords
The following is a limited glossary of rules and keywords essential for playing with this core set. It is not intended to be a definitive reference. For a comprehensive glossary of terms and keywords, refer to the Arkham Grimoire online at www.fantasyflightgames.com.
Ability
An ability is the specialized game text that indicates how a card affects the game. The various types of card abilities are: constant abilities, forced abilities, revelation abilities, triggered abilities, keyword abilities, and enemy instructions such as spawn.
- Card abilities only interact with other game elements if the card bearing that ability is in play, unless the ability (or the rules for the cardtype) specifically references its use from an out-of-play area.
- Card abilities only interact with other cards that are in play, unless that ability (or the rules for the cardtype) specifically references an interaction with cards in an out-of-play area.
- If multiple instances of the same ability are in play, each instance interacts with (or may interact with) its target individually.
Action Designators
Some abilities have bold action designators (such as Fight, Evade, Investigate, or Move). Activating such an ability allows an investigator to perform the designated action as described in the rules, modified according to that ability's designator.
- If the ability requires a skill test, the skill being tested for that ability is indicated after the bold action designator. (For example, Fight (combat) indicates that the skill being tested is combat.)
Alert
Alert is a keyword ability.
Each time an investigator fails a skill test while attempting to evade a ready enemy with the alert keyword, after applying all results for that skill test, that enemy performs an attack against the evading investigator. An enemy does not exhaust after performing an alert attack.
- This attack occurs whether or not the enemy is engaged with the evading investigator.
Aloof
Aloof is a keyword ability.
An enemy with the aloof keyword does not automatically engage investigators at its location.
- When an aloof enemy spawns, it spawns unengaged.
- An investigator may use an engage action or a card ability to engage an aloof enemy.
- An investigator cannot attack or evade an aloof enemy while that enemy is not engaged with an investigator.
Attachments
A card including the phrase "attach to" indicates that as it enters play, it must be attached to (placed beneath and slightly overlapped by) the target game element. Once attached, such a card is referred to as an attachment. An attachment remains attached until either the attachment or the game element it is attached to leaves play (in which case the attachment is discarded), unless a card ability explicitly detaches the card.
Attack of Opportunity
Each time an investigator engaged with one or more ready enemies takes an action other than Fight, Evade, Parley, or Resign, each engaged enemy attacks them. This is called an attack of opportunity.
- The investigator who triggered the attack(s) of opportunity chooses the order in which attacks of opportunity resolve.
- An attack of opportunity is made immediately after the investigator has paid all costs for initiating the action that provoked the attack of opportunity, but before that action's effects are resolved.
- An ability that costs more than one action only provokes one attack of opportunity from each engaged enemy.
- An enemy does not exhaust while making an attack of opportunity.
- After all attacks of opportunity are made, the investigator resolves the action which provoked the attack.
- Attacks of opportunity count as enemy attacks for the purposes of card abilities.
Cannot
The word "cannot" is absolute, and cannot be countermanded by other abilities.
Cardtypes
The game's cardtypes are introduced in "Card Anatomy" on page 34.
If an ability causes a card to change its cardtype, it loses all other cardtypes it might possess and functions as would any card of the new cardtype.
Act Cards
Act cards are part of the act deck, and represent the progress the investigators make during the current scenario. Generally, advancing the act deck is good for the investigators.
Agenda Cards
Agenda cards are part of the agenda deck, and represent the progress and objectives of the dark forces arrayed against the investigators during the current scenario. Generally, advancing the agenda deck is bad for the investigators.
Asset Cards
Asset cards represent items, allies, talents, spells, and other reserves that may assist or be used by an investigator during the current scenario. When an investigator plays an asset, it is placed in their play area. Generally, assets remain in play unless discarded by a card ability or scenario effect.
- Some assets have health and/or sanity. When an investigator is dealt damage or horror, that investigator may assign some or all of that damage or horror to eligible asset cards they control, up to that asset's health/sanity value(s).
- Most assets take up one or more slots while in play. (See "Equipment Slots" on page 12.)
Enemy Cards
Enemy cards represent villains, cultists, terrible monsters, and unfathomable entities from alternate dimensions or the cosmos beyond. Enemies are drawn from the encounter deck and may attack investigators during their turn, the enemy phase, and/or during the mythos phase.
Event Cards
Event cards represent tactical actions, maneuvers, spells, tricks, and other instantaneous effects at a player's disposal. Any time a player plays an event card, its cost is paid, its effects are resolved (or canceled), and the card is placed in that investigator's discard pile.
Location Cards
Location cards represent the places the investigators may explore during a scenario. Place an investigator token or mini-card at a location to indicate where the investigator is located. While an investigator is at a location, that investigator, each of their assets, and each card in that investigator's threat area is considered to be at the same location.
Scenario Reference Cards
The scenario reference card is placed next to the agenda deck during scenario setup. The scenario reference card provides a list of effects for each symbol token used during that scenario.
Skill Cards
Skill cards represent innate or learned attributes or character traits that improve an investigator's skill tests. Skill cards do not have a cost and cannot be played from a player's hand. In order to resolve its ability, a skill card must be committed to a skill test.
Treachery Cards
Treachery cards represent curses, afflictions, madnesses, obstacles, disasters, or other unexpected occurrences an investigator may encounter throughout the course of a scenario. When a treachery card is drawn by an investigator, that investigator must resolve its effects. Then, that card is placed in its discard pile unless otherwise instructed by an ability.
Chaos Tokens
Chaos tokens are revealed from the chaos bag during skill tests to modify or influence the results of a skill test. (See "Skill Tests" on page 15.)
Clues
Clue tokens represent the progress the investigators can make towards solving a mystery, unraveling a conspiracy, and/or advancing the story.
- The first time an investigator enters a location (even during setup), that location is revealed (turned faceup) and a number of clues equal to its clue value are placed on that location from the token pool. Most clue values use a "per investigator" value.
- A clue on a location can be discovered by successfully investigating that location (see "Investigate" on page 13), or by a card ability. If an investigator discovers a clue, they take a clue from that location and place it on their investigator card, under their control.
- If there are no "Objective –" requirements for advancing the current act, during any investigator's turn the investigators may, as a group, spend the requisite number of clues (usually conveyed as a "per investigator" value) from their investigator cards to advance the act deck. This is normally done as a player ability. Any number of investigators may contribute clues towards the total number of clues required to advance the act.
- A card ability that refers to clues "at a location" or "on a location" is referring to the undiscovered clue tokens that are currently on that location card.
- If a player card such as an investigator or asset is defeated or discarded, place all clues that were on that player card on their current location.
The Codex
Some cards have the codex symbol on them. During a scenario, some card effects and abilities may direct players to read a specific codex entry. While playing, keep the campaign guide on hand for easy reference.
Certain locations, characters, and enemies have codex entries. To read a codex entry, pay all costs and/or resolve all effects associated with its triggering ability, then read the corresponding entry for the current scenario in the campaign guide and resolve its text.
- Each codex entry cannot be resolved more than once per scenario unless otherwise stated.
- When resolving a codex entry, the player who triggered that entry resolves all effects (resolving a test, dealing damage, paying resources, etc). If it is unclear who triggered the codex entry, the lead investigator resolves the entry.
- Codex entries that are triggered via a specific action type (such as Fight, Evade, Parley, etc.) are considered to be that action type throughout the resolution of that codex entry.
- While resolving a codex entry, a player only reads the section for which they meet the requirements. If they do not meet the requirements to resolve the first section of a codex entry, skip to the following section.
- If a card effect directs players to resolve a codex entry that does not exist for the scenario being played, that effect fails.
- After resolving a codex entry and making any changes to the game and/or in the campaign log, resume play.
Constant Ability
A constant ability is a type of card ability.
A constant ability is always interacting with other game elements as long as the card it is printed on is in play.
- Some constant abilities require a specific condition to be met. These abilities are denoted by words such as "during" or "while," and the effects of such abilities are active whenever the specified condition is met.
- Constant abilities do not trigger at any specific point.
Costs
Most card abilities require a cost to be paid in order to initiate. There are two types of costs in the game: resource costs and ability costs.
A card's resource cost is the numerical value that must be paid (in resources) to play the card from hand. To pay a resource cost, an investigator takes the specified number of resources from their resource pool and places them in the token pool.
An ability cost is presented in a "cost: effect" construct. Some card abilities require players to spend additional resources, take damage/horror, or meet other conditions in order to trigger. In such a construct, the ability costs and triggering conditions precede the colon, and all of the text following the colon is that ability's effect.
- If playing a card or triggering an ability with multiple costs, those costs must be paid simultaneously.
- Only the controller of the card or ability may pay its costs.
- When a player is exhausting, discarding, or otherwise using cards to pay costs, only cards that are in play and under that player's control may be used, unless the cost specifies an out-of-play state.
- If a cost requires a game element that is not in play (such as discarding one or more cards from hand) the player paying that cost may only use game elements they control, such as their hand or deck, to pay the cost.
- If the investigators are instructed to pay a cost as a group, each investigator (or each investigator in the group defined by the ability) may contribute to paying the cost.
- An ability cannot be initiated—and therefore its costs cannot be paid—if the resolution of its effect will not affect or change its target.
- If an investigator takes damage or horror as an ability cost and assigns any of it to an asset they control, the cost is still considered paid.
Defeat
Taking damage and/or horror may cause an investigator, enemy, or asset to be defeated.
- If an investigator has damage on their investigator card equal to or greater than the card's health value, that investigator is defeated. If an investigator has horror on their investigator card equal to or greater than the card's sanity value, that investigator is defeated. A card ability may also defeat an investigator. When an investigator is defeated, they are eliminated from the current scenario. (See "Elimination" on page 41.)
- In campaign play, an investigator who is defeated by taking damage equal to or greater than their health suffers 1 physical trauma. An investigator who is defeated by taking horror equal to their sanity suffers 1 mental trauma. Taking trauma may cause an investigator to be killed or driven insane. (See "Trauma, Death, and Insanity" on page 22.)
- If an enemy has damage on it equal to or greater than its health value, that enemy is defeated and placed in the encounter discard pile (or in its owner's discard pile if it is a weakness). Defeated enemies with victory X are placed in the victory display.
- If an asset has damage on it equal to or greater than its health value, it is defeated. If an asset has horror on it equal to or greater than its sanity value, it is defeated. A defeated asset is placed in its owner's discard pile.
Doom
Doom tokens represent the progress the forces of the Mythos make towards completing foul rituals, summoning cosmic entities, and/or advancing the story in an unfavorable direction.
- During each Mythos phase, 1 doom is placed on the current agenda. (See "The Mythos Phase" on page 18.)
- If there are no "Objective –" requirements for advancing the current agenda and the requisite amount of doom is in play (among the agenda and all cards in play), the agenda advances during step 2 of the mythos phase. Unless a card or keyword ability specifies that it can advance the agenda, this is the only time at which the agenda can advance.
Doomed
Doomed is a keyword ability.
When an enemy with the doomed keyword is defeated (either by an investigator or a scenario effect), place 1 doom on the current agenda. This effect can cause the current agenda to advance.
- An effect that "discards" an enemy is not considered to defeat that enemy and does not trigger the doomed keyword.
Elimination
A player is eliminated from a scenario when their investigator is defeated, or if they resign. The only manner in which eliminated investigators continue to affect the game is when establishing "per investigator" values (see "Per Investigator" on page 5). Any time a player is eliminated:
- An investigator who has been eliminated from the current scenario is not necessarily eliminated from the campaign.
- For the purpose of resolving weakness cards, the game has ended for the eliminated investigator. Trigger any "when the game ends" abilities on each weakness the eliminated investigator owns that is in play (or, in rare cases, their hand). Then, remove those weaknesses from the game.
- The cards that player owns that are currently in play and all of the cards in their play area (such as hand, deck, discard pile) are removed from the game.
- Any card that player owns but does not control that is currently in play remains in play. If that card leaves play, it is removed from the game.
- All clue tokens that player possesses are placed on the location where the investigator was when they were eliminated, and all of their resource tokens are returned to the token pool.
- All enemies in that player's threat area are placed at the location where the investigator was when they were eliminated.
- All other cards in the eliminated investigator's threat area are placed in the appropriate discard pile(s).
- If the lead investigator is eliminated, the remaining players (if any) choose a new lead investigator to take the lead investigator token.
- If there are no remaining investigators in the game, the scenario ends. Refer to the "no resolution was reached" entry for that scenario in the campaign guide.
Elusive
Elusive is a keyword ability.
Elusive enemies represent enemies who want to avoid the investigators for their own survival or to accomplish their own goals. If a ready enemy with the elusive keyword attacks or is attacked, after that attack resolves, that enemy immediately disengages from all investigators, moves to a connecting location (with no investigators if able), and exhausts.
- This effect occurs whether or not the enemy was engaged with the attacking investigator.
Encounter Deck
The encounter deck contains the encounter cards (enemy, treachery, and other cards specified by the scenario) the investigators must face during the current scenario.
- If the encounter deck is empty, shuffle the encounter discard pile back into the encounter deck.
- If the encounter deck runs out of cards while resolving a card ability or game effect, after resolving that effect in full, shuffle the encounter discard pile back into the encounter deck.
Health and Damage
Health represents a card's physical fortitude. Damage tokens track the physical harm that has been done to a card during a scenario.
Exceptional
Exceptional is a deckbuilding keyword ability.
- A card with the exceptional keyword costs twice its printed experience cost (the card's level) to purchase.
- An investigator deck cannot include more than one copy (by title) of an exceptional card.
Exhaust, Exhausted
A card that is rotated 90 degrees sideways is considered to be exhausted. A card can become exhausted either as part of an ability cost or other game effect. When a card exhausts, it is rotated 90 degrees (sideways).
- An exhausted card cannot exhaust again until it is ready (typically during the upkeep phase or via a card ability).
Fast
Fast is a keyword ability. A fast card does not cost an action to be played and is not played using the "Play" action.
- Playing a fast card does not provoke attacks of opportunity because it does not cost an action to play.
- A fast asset may only be played by an investigator during a player window on their turn.
- A fast event may be played from a player's hand any time its play instructions specify.
- If a card's play instructions specify that it is played "when/after" a specific timing point, that timing point is the triggering condition for playing the card.
- If a card's play instructions specify that it is played during a specific duration or period of time, it may be played during any player window within that period.
- If a card's instructions specify both a "when/after" timing point and a specific duration or period of time, it may be played in reference to any instance of the specified triggering condition during any player window within that time period.
Forced Ability
A forced ability is a type of card ability.
Forced abilities are identified by a bold "Forced –" instruction. Forced abilities trigger at a specific timing point. Such a timing point is usually indicated by words such as: "when," "after," "if," or "at."
-
A forced ability does not trigger if it cannot affect its target.
-
A forced ability must trigger each time its specified timing point is met, so long as it can affect its target.
-
A forced ability that triggers "when" its timing point occurs is triggered as soon as the specified timing point is met, but before its impact upon the game resolves. (For example, an effect that states "Forced – When you play an asset: Take 1 horror." deals 1 horror when the asset is being played, but before that asset enters play.)
-
A forced ability that triggers "after" its timing point occurs is triggered immediately after its impact upon the game resolves.
-
Forced abilities take precedence over player card abilities. All forced abilities triggered at a specific timing point must be resolved in full before triggering any free triggered abilities referencing the same timing point.
-
When a card takes damage, place that many damage tokens on the card.
-
If an investigator card has damage on it equal to or in greater than its health value, that investigator is defeated. When an investigator is defeated, they are eliminated from the current scenario.
-
In campaign play, an investigator who is defeated by damage suffers 1 physical trauma. Taking physical trauma may cause an investigator to be killed.
-
If an enemy has damage on it equal to or greater than its health value, that enemy is defeated.
-
If an asset has damage on it equal to or greater than its health value, it is defeated.
-
An asset card without a health value cannot be assigned damage.
-
A card's remaining health is its health value, plus or minus any active health modifiers, minus the amount of damage on it.
-
If an investigator takes "direct damage" that damage must be assigned to their investigator card.
Hunter
Hunter is a keyword ability.
At the start of the enemy phase, each ready, unengaged enemy with the hunter keyword moves to a connecting location, along the shortest path towards the nearest investigator. Enemies at a location with one or more investigators do not move.
- Some enemies may target specific prey. (See "Prey" on page 43.)
- If there are multiple equidistant investigators who qualify as "the nearest investigator," the hunter enemy moves towards the one who best meets its designated target. If none do, or if the enemy has no prey keyword, the lead investigator decides.
- If a hunter enemy would be compelled to move into a location but is blocked by a card ability, that enemy does not move.
In Play and Out of Play
The cards that a player controls in their play area are considered in play. The current act, the current agenda, the scenario reference card, each location in the play space, and each encounter card in an investigator's threat area or at a location are all considered in play.
Cards in a player's hand, in any deck, in any discard pile, in the victory display, and those that have been set aside and/or removed from the game are all considered out of play.
- A card enters play when it transitions from an out-of-play origin to an in-play area.
- A card leaves play when it transitions from an in-play area to an out-of-play destination.
- Tokens on cards that are in play are considered in-play. Resources in each investigator's resource pool are also considered in-play.
Keywords
A keyword is a type of card ability.
Keywords are used as shorthand for some game effects. Each keyword has its own unique rules.
- Some keywords are deckbuilding keywords, such as permanent and exceptional. These keywords affect deck customization while building and/or leveling up an investigator deck.
- A card cannot gain the same keyword more than once. (For example, an agenda and treachery effect that each give an enemy the retaliate keyword do not give that enemy the retaliate keyword twice.)
- The initiation of any keyword using the word "may" in its rules text is optional; the application of all other keywords is mandatory.
Limbo
While resolving an event or treachery card's effects, or while a skill card is committed to a skill test, those cards are neither in play, in the discard pile, nor in an investigator's hand. This liminal state is called limbo.
An event card enters limbo after costs are paid and attacks of opportunity are made. A treachery card enters limbo after it is drawn, while its revelation ability is being resolved. A skill card enters limbo when it is committed to a skill test.
While in limbo, the card is typically placed on the table to show that its effects are being resolved. While in limbo, a card does not count as being in play for the purposes of other card effects.
After resolving that card's effects in full, it leaves limbo and is placed in its relevant discard pile. If its effects cause it to enter play (by attaching the card to another game element or by placing it in an investigator's threat or play area), it leaves limbo and enters play.
Limits and Maximums
Some cards contain limits and maximums which prevent certain abilities from being used more than once within a given time period.
- Unless stated otherwise, limits are player specific.
- A "group limit" applies to the entire group of investigators. (For example, if an investigator triggers an ability that is "group limit once per game," no other investigator may trigger that ability during that game.)
"Limit X per [period]" is a limit that appears on some cards and represents the number of times (X) an ability's effect can be triggered over the designated period. If a copy of the card with "Limit X per [period]" leaves and re-enters play within the same period, the limit X for that card is reset, as if the card had just entered the game for the first time.
"Limit X per [card/game element]" is a limit that appears on some cards, and restricts the number of copies of that card (by title) that can be in play at the same time.
"Max X per [period]" imposes the maximum number of times that copies of that card (by title) can be played during the designated time period.
- If a maximum includes the word "committed" (e.g., "Max 1 committed per skill test"), it imposes the maximum number of copies of that card (by title) that can be committed to skill tests during the designated period.
- If a maximum appears as part of an ability, it imposes the maximum number of times that ability can be triggered from all copies (by title) of cards bearing that ability (including the card being resolved), during the designated period.
- If the effect of a card or an ability with a limit or maximum is canceled, that effect still counts against the limit/maximum for that ability, because that ability has been triggered.
Massive
Massive is a keyword ability.
A ready enemy with the massive keyword is considered to be engaged with each investigator at its current location.
- An exhausted enemy with the massive keyword is not considered to be engaged with any investigators.
- An enemy with the massive keyword cannot be placed in an investigator's threat area.
- When an enemy with the massive keyword attacks during the enemy phase, resolve an attack against each investigator it is engaged with, one investigator at a time, in the order chosen by the lead investigator. The enemy with the massive keyword does not exhaust until each attack has been resolved.
- When an enemy with the massive keyword makes an attack of opportunity, that attack only resolves against the investigator who provoked the attack.
- An enemy with the massive keyword does not move with an engaged investigator who moves away from its current location.
- If an investigator fails an attack targeting an enemy with the massive keyword, no damage is dealt to other investigators engaged with that enemy.
Ownership and Control
A card's owner is the player whose deck and/or respective in- and out-of-play areas contained the card at the start of the game.
A player controls the cards located in their in- and out-of‑play spaces (such as their hand, deck, and discard pile).
The scenario controls the scenario cards in its in- and out-of-play spaces (such as the encounter deck, act and agenda decks, and the encounter discard pile).
- Cards by default enter play under their owner's control. Some abilities may cause cards to change control during a game.
- If a card would enter an out-of-play area that does not belong to that card's owner, it is physically placed in its owner's corresponding out-of-play area instead. The card is considered to have entered its controller's out-of-play area, and only the physical placement of the card is adjusted.
Patrol
Patrol is a keyword ability.
At the start of the enemy phase, each ready, unengaged enemy with the patrol keyword moves to a connecting location along the shortest path toward the designated target, indicated in the parentheses after the patrol keyword.
- If there are multiple locations that qualify as the designated target, the lead investigator chooses which target the enemy patrols toward.
- If the designated target is not a location (and is instead another game element such as an enemy or story asset), that target's location indicates the target of the patrol keyword's resolution.
- If an enemy with the patrol keyword would be compelled to move toward a target but is blocked by a card ability, that enemy does not move.
Peril
Peril is a keyword ability.
While an investigator is resolving an encounter card with the peril keyword, they cannot confer with the other players. Other players cannot play cards, trigger abilities, or commit cards to that investigator's skill test(s) while the peril encounter card is being resolved.
Permanent
Permanent is a deckbuilding keyword ability.
- A card with the permanent keyword does not count towards an investigator's deck size.
- A card with the permanent keyword still counts as being part of an investigator deck and adheres to all deckbuilding restrictions.
- A card with the permanent keyword starts each game in play and cannot leave play (unless its owner is eliminated).
- A card with the permanent keyword cannot be chosen as a target to be attached to other player cards (although other player cards may target a permanent card and attach themselves to it).
Prey
Prey is a keyword ability.
Given the opportunity, some enemies will pursue a designated investigator. These enemies are identified with the prey keyword.
- The prey keyword is followed by a designated target with whom the enemy should engage in parentheses. For example, "Prey (highest willpower)" means that the enemy will engage the investigator with the highest willpower if given more than one option.
- Given the choice between multiple equidistant investigators (or between investigators at its location), an enemy with the prey keyword chooses the investigator who best meets its designated target.
- If an enemy's designated target contains the word "only," that enemy only moves towards and engages that investigator (as if they were the only investigator in play), and ignores all other investigators while moving and engaging. Other investigators may use the engage action or card abilities to engage the enemy.
- The prey keyword has no immediate effect on where an enemy will spawn.
Ready
A card that is in an upright state so that its controller can read its text from left to right is considered ready.
- Cards enter play in a ready state.
- When an exhausted card readies, it is returned to the ready state and rotated 90 degrees so that it is upright.
- A ready card cannot ready again (it must first be exhausted, typically by a game effect or card ability).
Resources
Resources represent the various financial means of acquiring new supplies, tools, knowledge, favors, allies, etc. Resource tokens are used to pay the resource costs necessary to play cards and trigger different abilities.
- In order to play a card or use an ability that costs resources, an investigator must pay that card or ability's resource cost by taking the specified number of resources from their resource pool and returning them to the token pool.
- Resources can be gained by performing the resource action.
- Investigators acquire one resource during each Upkeep phase, after drawing one card.
Retaliate
Retaliate is a keyword ability.
Each time an investigator fails a skill test while attacking a ready enemy with the retaliate keyword, after applying all results for that skill test, that enemy performs an attack against the attacking investigator. An enemy does not exhaust after performing a retaliate attack.
- This attack occurs whether or not the enemy is engaged with the attacking investigator.
Revelation
A revelation ability is a type of card ability.
Revelation abilities most often appear on treacheries or on weaknesses.
- When an investigator draws an encounter card, that investigator must immediately resolve its revelation ability. This occurs before the card enters play or—if it is a treachery—while it is in limbo. (See "Limbo" above.)
- When a weakness card enters an investigator's hand by any means, that investigator must immediately resolve the revelation ability on that card as if it were just drawn.
Reward
Reward is a deckbuilding keyword ability.
Cards with the reward keyword appear in campaigns and/or scenario packs as campaign rewards.
- Reward cards are neutral cards with a golden graphic in the upper left corner of the card.
- When the campaign rules inform the players that they have earned a reward card (often through resolution or interlude text), that card is added to the collection of player cards. Players cannot use a reward card in deckbuilding, and cannot play such a card, unless it has been unlocked by an outcome in the campaign.
- Reward cards may adjust the way players play the game by adding deckbuilding options, new abilities, or unique restrictions to an investigator deck.
- Investigators are not required to include any unlocked campaign reward cards in their decks.
Sanity and Horror
Sanity represents a character's mental and emotional fortitude, or the emotional strength a card lends to an investigator. Horror tokens track the harm that has been done to the investigator's psyche by exposure to the Mythos.
- When a card takes horror, place that many horror tokens on the card.
- If an investigator card has horror on it equal to or in greater than its sanity value, that investigator is defeated. When an investigator is defeated, they are eliminated from the current scenario.
- In campaign play, an investigator who is defeated by horror suffers 1 mental trauma. Taking mental trauma may cause an investigator to be driven insane.
- If an asset has horror on it equal to or greater than its sanity value, it is defeated.
- An asset card without a sanity value cannot be assigned horror.
- A card's remaining sanity is its sanity value, plus or minus any active sanity modifiers, minus the amount of horror on it.
- If an investigator takes "direct horror" that horror must be assigned to their investigator card.
Seal
Seal is a keyword ability.
When a card ability instructs a player to seal a token, that player must search the chaos bag for the specified chaos token and place it on top of that card, thereby sealing it.
- If there is a choice of which token to seal, the card's controller chooses.
- Treat the seal keyword as a cost to play a player card. If the specified token is not in the chaos bag, the card either cannot be played or its seal ability cannot be triggered.
- A sealed chaos token is not considered to be in the chaos bag, and cannot be revealed from the chaos bag as part of a skill test or ability.
- When a sealed chaos token is released, it is returned to the chaos bag and is no longer sealed. If a card with one or more chaos tokens sealed on it leaves play for any reason, all chaos tokens sealed on it are immediately released.
- If instructed to "seal" a token by a card ability or by a card without the seal keyword, the same process as above is used.
- When sealing a token in this way, search the chaos bag for the specified token, remove it from the chaos bag, and place it on the specified card. If the targeted token is not in the chaos bag, the effect fails.
Starting
Starting is a keyword ability.
After drawing their opening hand and taking a mulligan (but before shuffling any cards that may have been set aside during this step back into the deck), an investigator may search their deck for one copy of a card with the starting keyword and add it to their hand.
- This means that an investigator may begin the game with 1 additional card in their opening hand.
Surge
Surge is a keyword ability.
After an investigator draws and resolves an encounter card that has the surge keyword, that investigator must draw and resolve another card.
- If an investigator draws a card with the surge keyword during setup, the surge keyword still resolves.
Target
An ability or game effect must have a valid target in order to resolve. The term "choose" indicates that one or more targets must be chosen in order for an ability or game effect to resolve. The player resolving an ability must choose a game element (usually a card) that meets the targeting requirements of that ability.
- If an ability or game effect requires an investigator to choose one or more targets, that ability or effect can only be initiated if there is at least one valid target.
- If an ability or game effect requires a player to choose more than one target, the targets are chosen simultaneously.
- If an ability requires a player to choose "any number" of targets, it cannot be initiated if zero of those targets are chosen.
- If a chosen target's status cannot be changed by the resolution of an ability, then that target is not eligible to be chosen for that ability. (For example, an exhausted enemy could not be chosen as the target of an effect that reads "choose and exhaust an enemy.")
Triggered Abilities
A triggered ability is an ability prefaced by a free trigger icon, a reaction icon, or an action icon. If the ability has one or more prerequisites, such as costs and/or conditions, these are listed in text immediately following the icon. A player must always meet the prerequisites of such an ability in order to trigger it. All triggered abilities are governed by the following rules:
- A triggered ability on a card a player controls may be optionally triggered when its timing point is met, as indicated by the ability.
- A triggered ability can only be initiated if a valid target can be chosen, and its ability cost (if any) can be paid in full.
- Once an ability is initiated, players must resolve as much of the effect as possible, unless the effect uses the word "may."
There are three types of triggered abilities:
- Free triggered abilities — These abilities may be triggered as a player ability during any player window.
- Reaction triggered abilities — These abilities have a specific triggering condition and may be triggered at any time that triggering condition is met. (For example: "After you defeat an enemy:")
- A reaction ability that triggers "when" its timing point occurs may be triggered as soon as the specified timing point is met, but before that timing point's impact upon the game resolves.
- A reaction ability that triggers "after" its timing point occurs may be triggered immediately after the timing point's impact upon the game resolves.
- Each reaction ability may be triggered only once each time the specified condition on the ability is met. For example, an ability that is triggered "After X occurs," may be used once each time "X" occurs.
- Action triggered abilities — These abilities may be triggered through the use of the activate action by spending one action for each specified in that ability's cost.
Unique
A card with the unique symbol before its title is a unique card. There can be no more than one copy of each unique card (by title) in play at any given time.
- A player cannot bring a unique card into play if a copy of that card (by title) is already in play.
- If a unique encounter card that shares a title with a unique player card would enter play, discard the player card simultaneously as the encounter card enters play.
Victory X
Victory X is a keyword ability.
An encounter card worth victory points represents a formidable enemy or a particularly puzzling location. Once they have been dealt with, cards with victory X are added to the victory display until the end of the current scenario. The victory display is an out-of-play space shared by all players.
Upon completion of the current scenario, the cards in the victory display provide experience to each player, which can be spent to upgrade that player's investigator deck.
- When an enemy with victory X is defeated, add the card to the victory display instead of discarding it.
- When the current scenario ends, add each location with victory X that is in play, revealed, and with no clues on it to the victory display.
- After a treachery card with victory X is resolved, add it to the victory display instead of discarding it.
Uses (X)
Uses (X) is a keyword ability.
When a card bearing this keyword enters play, place a number of resource tokens (from the token pool) equal to its value (X), on the card. The word following the value defines the type of uses this card bears. The resource tokens placed on that card are considered uses of the established type, and are no longer considered resource tokens. (For example, Cosmic Flame has "Uses (3 charges)." When it is played, 3 resources are placed on it from the token pool. Those resources are now charges, and may be used when resolving Cosmic Flame's free triggered ability.)
- Each card with the uses (X) keyword also has an ability which references the uses on that card as a part of its cost. When such an ability spends a use, a token of that type must be removed from the card.
- Other cards may reference and interact with uses of a specified type, usually by adding uses of that type to a card, or using uses of that type for other abilities or effects.
- Only the type of uses defined by a card can be placed on that card. (For example, a card with "Uses (4 ammo)" cannot be affected by an ability that would place 1 or more charges on a card.)
- Some cards with the uses (X) keyword include a discard condition for when there are no uses remaining. If the card contains no such text, it remains in play even if there are no uses on it.
- If instructed to replenish an asset's uses, place the specified number of uses on that asset, up to (but not exceeding) its initial uses (X) value.
Weakness
Weaknesses are a unique subtype of player cards. These cards represent character flaws, curses, madnesses, injuries, tasks, enemies, or story elements that are part of an investigator's backstory or that are acquired over the course of a campaign. Weakness cards are resolved differently depending upon their cardtype.
- When an investigator draws a weakness card, they resolve that card as if it were just drawn from the encounter deck.
- When an investigator draws a weakness card of a player cardtype (for example, an asset, event, or skill weakness), they resolve any revelation abilities on that card and add it to their hand. That card may then be used as any other player card of its cardtype.
- If a weakness card enters an investigator's hand in a manner that did not involve drawing the card, that investigator must resolve that card (including any revelation abilities) as if they had just drawn it.
- If a weakness card is added to a player's deck, hand, or threat area during a scenario, that investigator becomes the bearer of that weakness. That card does not count toward that investigator's deck size and remains a part of that investigator's deck for the rest of the campaign unless it is removed from the campaign by a card ability or scenario resolution.
- A player cannot choose to discard a weakness card from hand, unless a card explicitly specifies otherwise.
- Some effects reference a "basic weakness." A basic weakness can be identified by the presence of the words "Basic Weakness" and its corresponding symbol.
Quick Reference
Phase Sequence
- Mythos phase (skip during the first round of the game)
- Investigation phase
- Enemy phase
- Upkeep phase
Common Keywords and Game Terms
- Alert: If an investigator fails a skill test while evading a ready enemy that has the alert keyword, that enemy attacks that investigator.
- Aloof: An aloof enemy does not engage investigators of its own accord, and it cannot be attacked unless that enemy is engaged with an investigator.
- Doomed: If this enemy is defeated, place 1 doom on the current agenda. This effect can cause the current agenda to advance.
- Elusive: After a ready enemy with the elusive keyword attacks or is attacked, that enemy moves to a connecting location and exhausts.
- Fast: A player may play a fast card without spending an action.
- Hunter: At the start of the enemy phase, each hunter enemy moves one location toward the nearest investigator.
- Massive: A massive enemy is engaged with each investigator at its location.
- Patrol: At the start of the enemy phase, each enemy with the patrol keyword moves once toward its designated target.
- Peril: When an investigator draws a card with the peril keyword, that investigator cannot confer with or receive assistance from other players while spawning that card or resolving that card's revelation ability.
- Prey: Indicates which investigator an enemy will engage or pursue if there are multiple equally valid options.
- Retaliate: If an investigator fails a skill test while attacking a ready enemy that has the retaliate keyword, that enemy attacks that investigator.
- Revelation: The investigator who drew this card resolves its text.
- Spawn: Indicates where an enemy spawns when drawn.
- Surge: After an investigator draws and resolves an encounter card that has the surge keyword, that investigator must draw and resolve another card.
- Uses (X): The uses keyword indicates a number of resource tokens to be placed on the card when it enters play, of a specified type (ammo, charges, etc.). These tokens are used in conjunction with the rest of the card's ability.
Triggered Abilities
- Free Trigger: Does not cost an action to use this ability.
- Action Trigger: Costs an action to use this ability.
- Reaction Trigger: Does not cost an action, but this ability can only be used when its triggering condition is met.
Action Types
- Fight (combat). Fight an engaged enemy at your location, using combat.
- Evade (agility). Evade an engaged enemy at your location, using agility.
- Investigate (intellect). Investigate your location using intellect.
- Engage. Engage an enemy at your current location.
- Draw. Draw 1 card.
- Move. Move to a connecting location.
- Resource. Gain 1 resource.
- Activate. Activate an action trigger ability.
- Play. Play a card from your hand, paying its cost.
- Parley. Parley an enemy at your location using a card ability.
- Resign. Remove your investigator from the game using a card ability.
Symbols and Icons
- Character Classes: Guardian, Seeker, Mystic, Rogue, Survivor.
- Skills: Willpower, Intellect, Combat, Agility, Wild.
- Per Investigator: the per-investigator symbol multiplies a value by the number of investigators in the game.
Chaos Tokens
- Elder Sign: Reference the investigator's ability.
- Autofail: The investigator automatically fails.
- Skull, Cultist, Tablet, Elder Thing: Reference the revealed token's matching symbol on the scenario reference card and resolve the corresponding ability.