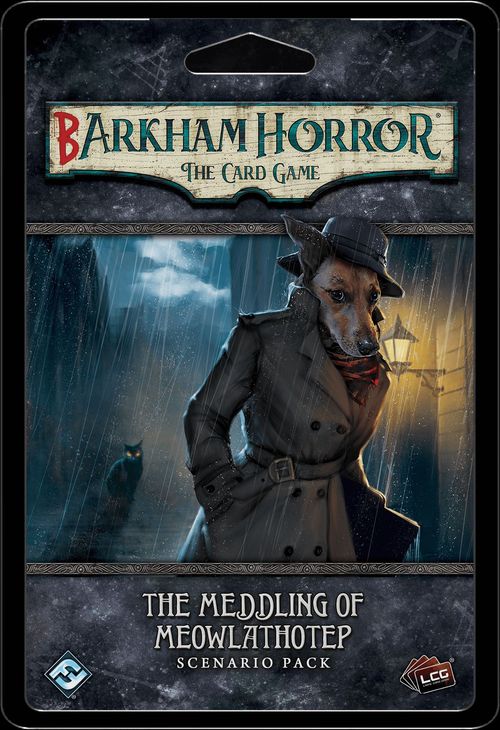
Barkham Horror: The Card Game – The Meddling of Meowlathotep: Scenario Pack
Barkham Horror: The Card Game – The Meddling of Meowlathotep: Scenario Pack Rulebook
Table of Contents
Table of Contents
Expansion Symbol
The cards in this expansion can be identified by the expansion symbol [symbol] before each card's collector number.
Barkham Horror
Barkham Horror is an alternate universe in which the conflict between humanity and the eldritch forces of the mythos takes a back seat, and the conflict between dogs and cats takes center stage.
- Investigator and player cards included in Barkham Horror expansions cannot be used in traditional Arkham Horror: The Card Game scenarios.
- Likewise, only investigators from Barkham Horror expansions should be used while playing a Barkham Horror scenario. Other player cards from any Arkham Horror: The Card Game product may be used.
Game Modes
The Meddling of Meowlathotep can only be played as a standalone scenario. Follow the steps for Standalone Mode on page 19 of the Arkham Horror: The Card Game Rules Reference. This booklet is the campaign guide for The Meddling of Meowlathotep.
Construct the chaos bag with the following tokens:
- Easy: +1, +1, 0, 0, 0, –1, –1, –1, –2, –2, Skull, Skull, Cultist, Tablet, Elder Thing, Auto-fail, Elder Sign.
- Standard: +1, 0, 0, –1, –1, –1, –2, –2, –3, –4, Skull, Skull, Cultist, Tablet, Elder Thing, Auto-fail, Elder Sign.
- Hard: 0, 0, 0, –1, –1, –2, –2, –3, –3, –4, –5, Skull, Skull, Cultist, Tablet, Elder Thing, Auto-fail, Elder Sign.
- Expert: 0, –1, –1, –2, –2, –3, –3, –4, –4, –5, –6, –8, Skull, Skull, Cultist, Tablet, Elder Thing, Auto-fail, Elder Sign.
Transcriber's note: the printed booklet shows the seven symbol tokens in each bag as icons only, with no text labels. They are written here as words. Skull, Cultist, Tablet, Elder Thing and Elder Sign are read from the icons. The curled "2" icon is written as Auto-fail, identified from the base game's standard chaos bag (Arkham Horror: The Card Game Rules Reference, Chaos Tokens). The booklet does not label that icon.
Additional Rules & Clarifications
Alert
Each time an investigator fails a skill test while attempting to evade an enemy with the alert keyword, after applying all results for that skill test, that enemy performs an attack against the evading investigator. An enemy does not exhaust after performing an alert attack. This attack occurs whether the enemy is engaged with the evading investigator or not.
"Lousy with cats"
Six of the locations in this scenario begin play with a facedown Meowsk enemy beneath them. During this scenario, a location with a facedown encounter card beneath it is "lousy with cats." This has no inherent game effect. However, some card effects may change depending on whether or not a location is lousy with cats.
- If the encounter card beneath a location that is lousy with cats enters play or is removed for any reason, that location is no longer lousy with cats.
"Sniffing" Locations
Dogs have a fantastic sense of smell. Kate Winthpup in particular has an ability that allows her to "sniff" a location. You may wish to use a token (such as a resource token) or a piece of scrap paper to record which locations you've sniffed. In general, once you sniff a location, it is sniffed for the rest of the game.
The Meddling of Meowlathotep
"We may, indeed, judge the tone and bias of a civilisation by its relative attitude toward dogs and cats." – H. P. Lovecraft, "Cats and Dogs"
Intro 1: It is a dark and stormy night in the storied and haunted city of Barkham. By the time you hit the streets, it is raining cats and dogs. But you've picked up the scent of something big, and once you sink your teeth into a story, you just can't let go. A little wet fur has never stopped you from finding the truth.
Strange happenings have been going on in Barkham. Cat sightings are at an all-time high, and each day more and more pigeons go missing. While this wouldn't normally be newsworthy, you know that there is more to this story than meets the eye. After all, while a few cats are harmless and adorable, most are nefarious schemers. You have heard the whispers and the howls on the wind. The Order of Dead Rodents on the Doorstep is back, and whatever they are plotting, only you can stop it.
You're heading back to your home in Slobbertown—the Barkham neighborhood closest to the docks—when you catch a whiff of something foul and pungent in the air. Whatever is causing such an acrid stench must be nearby. But just then, another scent—!
The lead investigator must decide (choose one):
- Follow the foul stench. Proceed to Intro 2.
- Follow the scent of bacon. Skip to Intro 3.
Intro 2: No! You cannot be dissuaded, not even by thoughts of tasty bacon and ear scratches from all of the humans who congegrate around Velma's Doghouse. This investigation is too important. You continue tracking the awful odor until you come upon its source: a hairball, hacked up in an alleyway by the docks. Of course. If this isn't proof of feline involvement, you don't know what is. Then you hear it: HRRK! HRRRRK! There's only one thing that could be!
The lead investigator must decide (choose one):
- Confront the barfy cat. Skip to Intro 4.
- Follow the cat to its lair. Skip to Intro 5.
Intro 3: The investigation can wait. Bacon is eternal. You follow that lovely smell northeast to Velma's Doghouse in Beasttown. The sounds of revelry and the sizzling of grilled food make your tail wag faster than the cracking of a whip. And yet, something else tugs at the back of your dog-brain… What was it you were doing before?
The lead investigator must decide (choose one):
- Nope, food. Skip to Intro 6.
- Oh yeah, investigating the Order. Skip to Intro 7.
Intro 4: You are too dogged to turn back now. You soon come across the unfortunate creature, the source of the wretched retching. Once it is done, it goes back to licking its fur, and you wonder if cats truly have no sense of cause and effect. "What is the Order plotting?" you ask pointedly.
"Why should I tell you, mutt?" the cat replies with a hint of apathy in its voice. "You'll be our prey soon enough." With that, the cat leaps gracefully from the street to a low-hanging tree branch, and vanishes from sight.
Prey? You ponder the cat's words. Conflict between your kind and theirs is as old as time, but you have never been their prey. What exactly is their game…?
Proceed to Setup. You will begin play in Slobbertown.
Intro 5: You track the scent of the cat and follow from a distance. Eventually it leaves the docks and makes its way southwest, toward Snoutside. What could a cat be doing way out here?
Your question is answered when the creature is picked up by a robed human outside the manor house of the Barkham Hisstorical Society, an organization devoted to educating the populace about the "noble" cats of the city. It makes sense that such a reviled cult would be involved in this plot. The human brings the cat indoors, presumably to feed it and give it treats and such. Your blood boils. Curse you, foul cat! How dare you trick these humans into thinking you are cute and fluffy and not at all evil—!
Proceed to Setup. You will begin play in Snoutside.
Intro 6: It isn't until your belly is full of yummy food and your tummy has been thoroughly rubbed that you remember why you were out and about in the first place. You patrol the area until you spot several panicked rats scurrying from a nearby sewer drain. "What's the matter?" you bark. They chitter and chirp in response, and it is only then that you remember that rats can't talk. Still, you glean some of their story from their frantic pantomiming. The Order of Dead Rodents at the Doorstep, as evidenced by their very namesake, has been hunting rats for ages. But now it is not just cats hunting them, but horrid cat-abominations that defy all earthly logic. Sounds like the Order is up to its old tricks once again…
Proceed to Setup. You will begin play in Beasttown.
Intro 7: The urgency of your investigation is too important for you to be distracted by thoughts of tasty food. As you turn away from Velma's, you spot a streak of cat-fur dipping gracefully out of sight. Using your keen sense of smell, you keep a tight pursuit as the cat winds its way west to Tailside, where Barkham's train station can be found.
You follow the cat to the tracks on the western edge of town, where it ducks underneath an abandoned train car marked with a cat's paw print. "Meowsachusetts Catnip Co." reads the label beneath the logo. A front for a cult headquarters, no doubt. You are about to eavesdrop on the cats' refuge when suddenly, a creature bursts forth from underneath the train! It is a hideous hybrid of bird, bat, and cat, with webbed paws and membranous wings notably lacking in fur, though its face is unmistakably feline. The sight of the thing makes your fur stand on end.
Proceed to Setup. You will begin play in Tailside.
Setup
- Gather all cards from The Meddling of Meowlathotep encounter set. This set is indicated by the encounter set icon [icon].
- Put all of the locations into play (see Location Placement below).
- Each investigator begins play at the location denoted in the intro text prior to setup.
- Find and shuffle the 7 Meowsk enemies. Remove 1 of them from the game without looking at it. Place 1 of the remaining Meowsk enemies facedown beneath each of the following locations: Barkham Asylum, Barkham City Pound, Velma's Doghouse, Muttskatonic University, Boneyard, and St. Mary's Animal Hospital.
- Each of these locations is "lousy with cats" (see "lousy with cats" on page 3 for further clarification). A location is no longer lousy with cats if the encounter card beneath it is removed for any reason.
- Set Meowlathotep aside, out of play.
- Shuffle the remainder of the encounter cards to form the encounter deck.
- You are now ready to begin playing.
Transcriber's note: the Setup text names "Barkham City Pound". The location card in the Location Placement diagram is printed as "Arkham City Pound". Both are transcribed as printed; they refer to the same location.
Location Placement
The printed page shows the ten locations in this layout (rows read top to bottom, as laid out on the page):
- Row 1: Barkham Asylum, Velma's Doghouse
- Row 2: Tailside, Beasttown, Arkham City Pound
- Row 3: Muttskatonic University, Snoutside, Slobbertown
- Row 4: St. Mary's Animal Hospital, Boneyard
Resolutions
DO NOT READ until the end of the scenario.
If no resolution is reached (each investigator resigned or was defeated): Proceed to Resolution 2.
Resolution 1: The humans will never know the danger that lurked just beyond the edges of their senses—the danger they could not smell despite its foul scent. You will stay alert and loyally sniff out any hazards to your beloved city, for that is the duty and burden you and all dogkind bear. But, until the next time you are needed, you are content to sleep, play, and eat treat after treat. Victory is sweet.
- The investigators win, but only if they, too, are dog people.
- Cat people complete the scenario successfully but feel like traitors.
Resolution 2: It's the end of all dogkind. The a-paw-calypse. A real cat-astrophe. An absolute cat-acylsm.
…I'll see myself out.
- The investigators lose! Players who are cat people win the game, though.