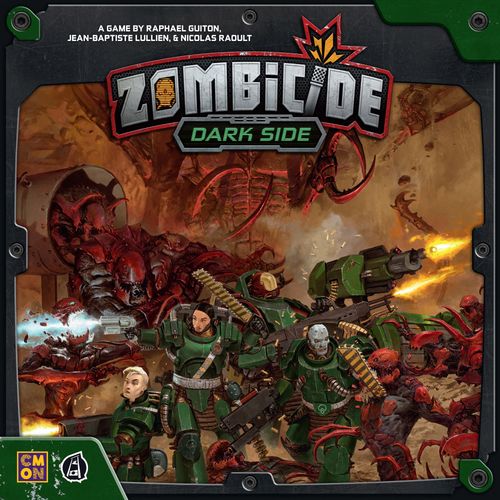
Zombicide: Dark Side
Zombicide: Dark Side Rulebook
Table of Contents
Table of Contents
Zombicide: Dark Side
Zombicide: Dark Side is a cooperative game where 1 to 6 players go underground on a foreign planet, and face Xenos, a swarm of infected aliens controlled by the game itself. Each player controls 1 to 6 Survivors in an underground facility being quickly overrun by Driller Xenos, a Xenos subspecies living below the planet's surface and specialized in mineral extraction. The goal is simply to choose a Mission and complete its objective, survive, and kill as many Driller Xenos as possible!
Most of the time, Driller Xenos are predictable, but there are a lot of them and you may not see them coming. The Driller Abomination, for example, create pits from which its brethren may spawn unexpectedly. Danger is growing as the Driller Xenos are steadily destroying the underground facility.
The Green Squad, your Survivors, use whatever weapons they can get to eliminate the Driller Xenos and reach their objectives. However, the more Driller Xenos you slay, the more they come, attracted by the threat you pose!
Survivors of the Green Squad have specific Skills. They all play together as a team, trading Equipment, and covering each other. Only through cooperation can players achieve the Mission objectives and win. The Green Squad fight Driller Xenos, recover prototype tech, and much more!
Zombicide Through Space and Time
The Zombicide game range allows players to battle Zombies in many settings, creating unique atmospheres with dedicated Survivors, Zombies, and other features.
Using the same basic mechanics, all Zombicide core boxes are designed to be entry points to the game. Core boxes and expansions from each era (classic, fantasy, or sci-fi) are fully compatible with each other.
Classic Zombicide spans three Seasons, following the zombie apocalypse in a modern-day world, over a timespan covering roughly a year.
Fantasy Zombicide enters the Dark Ages through the evil schemes of mad necromancers sweeping through the country with zombie armies. You and your fellow Survivors fight for a better future!
Sci-Fi Zombicide brings you to PK-L7, a distant planet with precious resources. The Xenos, an alien species, infected by an unknown agent begins attacking everyone on sight!
Game Components
- 9 game tiles (double-sided)
- 64 Xeno miniatures: 1 Driller Abomination, 14 Driller Hunters, 14 Driller Tanks, 35 Driller Workers
- 6 Survivor miniatures and ID Cards (Miranda, Drake, Reese, Miles, Umkos, Radka)
- 2 Machine miniatures: Vindicator Bot, Maul Sentry Gun
- 48 trackers
- 6 Survivor color bases
- 6 Survivor Dashboards
- 6 dice
- 71 tokens:
- Doors: Neutral x5, Green x1, Purple x1, Pink x1, Yellow x1
- Exit Point x1
- First Player x1
- Machine Activation x2
- Noise x18
- Objectives: Red/Red x10, Red/Pink x1, Red/Green - Bot Remote x1, Red/Purple - Sentry Gun Remote x1, Red/Yellow x1
- Prototype Weapon x4
- Skill: Camouflage x1
- Xenos Spawn: Red/Red x2, Red/Yellow x1, Red/Green x1, Red/Pink x1, Red/Purple x1
- Pit: Open/Filled x15
- 128 mini-cards:
- 74 Equipment cards: Ablative Armor x4, Assault Rifle x3, Cattle Prod (Starting Equipment) x6, Chainsaw x2, Chainsword x3, Energy Cell x6, Golden Dragon Pistols x1, Heavy Shotgun x3, Light Machine Gun x2, M.R.E. x3, Minigun x2, Pistol (Starting Equipment) x6, Pistol x2, Pit Saw x1, Pit Spawn: 1 Driller Hunter x2, Pit Spawn: 1 Driller Tank x2, Pit Spawn: 1 Driller Worker x2, Plenty of Bullets x3, Prototype Assault Rifle x1, Prototype Heavy Shotgun x1, Prototype Light Machine Gun x1, Prototype Saw AR x1, Prototype Sniper Rifle x1, Reaver Sword x1, Search Drone x2, Searchlight x2, Seismic Grenade x6, Sledge x3, Maul Sentry Gun x1, Vindicator Bot x1
Setup
A Zombicide: Dark Side game usually features 6 Survivors, distributed in any way you see fit, among players. We recommend new players join the game with a single Survivor to get a quick grasp on the game mechanics. A veteran player can easily control a whole team of 6 Survivors and clear Driller Xeno swarms all on their own!
- Choose a Mission.
- Place the tiles.
- Place the Objectives, Spawn Zones and any other tokens and figures as indicated by the Mission.
- Select 6 Survivors and distribute them between the players as you see fit. As they are cooperating against the game, all players form a single team. Players sit around the table in any order they choose.
- Players take 1 Dashboard for each of their Survivors, placing the Survivor's ID Card on it. They take a colored plastic base and attach it to the Survivor's miniature to help identify it. They also take 5 plastic trackers of the same color as their base.
- Set aside the following Equipment cards:
- Starting Equipment: 6 Cattle Prods, 6 Pistols, and 2 Search Drones. These cards are identified by a grey back. This is the standard equipment loadout of the Green Squad. Look for better weapons whenever possible!
- Prototype: Prototype Assault Rifle, Prototype Heavy Shotgun, Prototype Light Machine Gun, and Prototype Sniper Rifle. These cards are identified by a red back. Development of prototype weapons were at its final stages when the Xenos got infected. Look for them if you want a live test!
- Place the Vindicator Bot and Maul Sentry Gun reference cards within view of all players. These cards act as reminders for both Machines' rules and stats, and do not belong to any single player. The Vindicator Bot and Maul Sentry Gun provide supporting fire to keep all kinds of Xenos at bay.
Zombicide: Dark Side features all six members of the Green Squad. Players are free to replace any or all of them with their favorite Survivor(s) from the Zombicide series (the starting Equipment may change)!
EXAMPLE: Miranda is a Soldier. She may only Search in Security Rooms (P. 36). Miranda starts with Armor 3, her maximum amount. As a Green Squad Survivor, Miranda has two Starting Equipment cards: a Cattle Prod and a Pistol. Her Dashboard shows a tracker on the Blue Skill, 3 trackers in reserve, and the XP Tracker in the 0 slot of the Blue Danger Level.
- Every Survivor from the Green Squad receives a Cattle Prod AND a Pistol from the starting Equipment cards. Then, up to two Search Drones from the starting Equipment cards are dealt as you see fit among Green Squad members. A Green Squad Survivor may only receive one Search Drone this way. Green Squad Survivors display this symbol on their ID card.
Unless otherwise stated, other Survivors receive either a Cattle Prod OR a Pistol from the starting Equipment cards. Zombicide: Dark Side is a cooperative game, so decide as a team. Each Survivor starts the game with at least 1 card.
There are 2 Survivor types in Zombicide – Civilians and Soldiers, as indicated by the symbol on their ID Card. All Green Squad Survivors are Soldiers. Cole, from the Zombicide: Invader box, is a Civilian. Miranda is a Soldier.
- Civilians may Search in any room Zone, and tend to have lower Armor (usually 2).
- Soldiers can only Search in Security Rooms, but tend to have higher Armor values (usually 3).
If a Survivor's starting Skill lists any starting Equipment, they receive those cards now, independent of the Starting Equipment you've just distributed.
- Shuffle the Xeno cards into one deck and the Equipment cards into another. Place both decks face down close to the board.
- Place the miniatures representing the chosen Survivors on the starting Zone(s) indicated by the Mission.
- Each Survivor's maximum Armor amount is indicated in their ID Card by the highlighted numbers in their Armor Bar. Place a tracker on the highest slot of their Armor Bar.
- Place another tracker in the slot of the first (Blue) Skill. Place 3 more trackers in the reserve slots on the top of the Dashboard.
- Decide who will be the first player, then give them the First Player token.
Game Overview
Well, technically, we are surrounded. The Xenos got past us to the surface. — They don't think like us, if their infection allows them to think at all. You must see things out of the box: they are like a huge beast, and we're on its back. Give me a minute to find the nape… — Radka and Drake
Zombicide: Dark Side is played over a series of Game Rounds, which proceed as follows.
Players' Phase
The player with the First Player token takes their Turn, activating their Survivors one at a time, in the order of their choice. Each Survivor can initially perform 3 Actions per Turn, though they may gain Skills allowing them to perform extra Actions as the game progresses. The Survivor may use their Actions to kill Xenos, move around the board, and perform other tasks to accomplish the various Mission Objectives. Some Actions make Noise, and Noise attracts Xenos!
Once a player has activated all their Survivors, the player to the left takes their Turn, activating their Survivors in the same manner.
When all the players have completed their Turns, the Players' Phase ends.
The Players' Phase is explained in depth on page 22.
Xenos' Phase
All the Xenos on the board activate and spend 1 Action either to attack a Survivor standing in their Zone or, if they have nobody to attack, to move toward the Survivors or noisy Zones.
Some Xenos, called Driller Hunters, get 2 Actions, so they can attack twice, attack and move, move and attack, or move twice. Once all Xenos have performed their Actions, new Xenos appear in all active Spawn Zones on the board.
The Xenos' Phase is explained in depth on page 27.
End Phase
All Noise tokens are removed from the board, and the first player hands the First Player token to the player to their left. Another Game Round then begins.
Winning and Losing
The game is lost whenever a starting Survivor has been eliminated, or when the Mission Objectives can no longer be fulfilled.
The game is won immediately when all of the Mission Objectives have been accomplished. Zombicide: Dark Side is a cooperative game, so all players win and lose together.
The Basics
I did a quick recon. The uploaded map is still fairly accurate, except for the pits the Xenos opened in these two zones. I also checked a sealed door here, we'll need the pass. Our foes will probably come from these three directions. Best news: the prototype weapons are still here and… Hey, did you hear that? They're coming. The game is on! — Miles
Useful Definitions
Actor: A Survivor, Xenos, or active Machine.
Zone: Inside a building, a Zone is a room. Anywhere else (corridor or tunnel), a Zone is the area between two linear markings (or a linear marking and the board's edge) and the walls of buildings along the facility.
Line of Sight
NOTE: Zombicide: Dark Side also features dark Zones, with special rules for Lines of Sight (P. 12).
Lines of Sight define whether Actors can see each other, such as whether a Survivor can see a Xeno across the corridor, from one room to the next, into a room, etc.
In corridors and tunnel Zones, Actors see in straight lines that run parallel to the edges of the board. Actors cannot see diagonally. Their Line of Sight covers as many Zones as the line can pass through before reaching a wall or the edge of the board.
Inside a room, an Actor sees into all the Zones that share an opening with the room the Actor currently occupies. If there is an opening, the walls do not block Line of Sight between two Zones. An Actor's Line of Sight, however, is limited to the distance of 1 Zone.
If the Survivor is looking out into a corridor or from a corridor into a room, the Line of Sight can go through any number of corridor Zones in a straight line, but only 1 Zone into the room.
EXAMPLE: Drake stands in a corridor Zone. He can see every corridor Zone in straight lines, up to walls and the board's edges. Being a Survivor, Radka cannot see into the dark Zone. Radka's Line of Sight to the Xeno, standing in an enlightened room Zone, is valid. Radka's Line of Sight is stopped by the wall. Line of Sight goes in straight lines — no diagonals allowed! Miles sees one Zone away into rooms, but no further. The door blocks the opening, affecting Miles' Line of Sight into the room. Being a Xeno, the Driller Walker is not hindered by dark Zones. It has a Line of Sight both to the dark Zone and to Radka's Zone. The Driller Hunter sees through all dark Zones in straight lines, but can see only one Zone into the building.
Dark Zone
"Don't be silly. There is nothing to fear in the dark besides your own imagination." That's it. Famous last words!
Survivors can't trace Lines of Sight to Dark Zones, except at Range 0. However, they can trace Lines of Sight past Dark Zones to other Zones.
Survivors can't trace Lines of Sight to Dark Zones, save at Range 0. The Xenos, on the other hand, are not hindered!
Xenos ignore this rule, and can trace Lines of Sight normally. Survivors performing a Ranged Action with a Prototype Weapon, or a Machine Action with a Machine with the Prototype keyword, also trace Lines of Sight normally.
EXAMPLE: Machines with the Prototype keyword ignore Dark Zone rules. The Sentry Gun sees the Driller Worker, the Driller Hunter and the Driller Abomination.
EXAMPLE: Dark Zones have no effect at Range 0. Miles sees the Abomination in his own Zone… but not the Driller Hunter one Zone away. Both Xenos see him. Drake sees the Driller Worker standing in a normal Zone. The Abomination, on the other hand, stands in a Dark Zone. No Line of Sight for Drake. Both Xenos ignore Dark Zone rules, and see the Survivor. Dark Zones block Line of Sight to them, but not past them. Miranda does not see the Driller Hunter… but sees the Driller Tank on the other side. Both Xenos see her.
Movement
Actors can move from a Zone to the next as long as the first Zone shares at least an edge with the destination Zone. Corners do not count. This means Actors cannot make diagonal movements.
In corridor and tunnel Zones, movement from one Zone to another has no restrictions. However, Actors must go through an open door (or opening) to move from a room to a corridor, or from a room to a tunnel Zone, and vice-versa.
Inside a room, Actors may move from one Zone to another as long as their Zones are linked by an opening. The position of a miniature in the Zone and the layout of the walls do not matter as long as the Zones share an opening.
EXAMPLE: Reese can't Move diagonally. To go around this corner, Reese must first Move here… … then here.
EXAMPLE: Miles can go to this Zone through the opening. Miles can enter the corridor through the opening. To Move here, Miles must first open the door. Miles can go to this Zone through the destroyed door.
Reading an Equipment Card
Melee and Ranged Weapons
Wanna hear a secret? I was shooting that thing in my turf, in the good ol' days. Ah, teenage time. — Reese
Zombicide: Dark Side features different kinds of Equipment cards. The ones your Survivors use to eliminate Xenos have Combat characteristics displayed at the bottom.
Weapons fall into 2 categories: Melee weapons and Ranged weapons. The Melee and Ranged symbols are used to distinguish each type.
- Melee weapons bear the Melee symbol. They have a Range 0 value and thus can only be used in the same Zone as the Survivor. They are used with Melee Actions (P. 31). Cattle Prods and Chainsaws are Melee weapons.
- Ranged weapons bear the Ranged symbol. They usually have a Range value of 1 (or more). They are used with Ranged Actions (P. 32). Attacking at Range 0 with a Ranged weapon is still a Ranged Action. Assault Rifles and Pistols are Ranged weapons.
Ammo Type
Most weapons use solid ammunition or a power source to eliminate Xenos. They have infinite ammo (enjoy!). However, the type of Ammo influences several game effects.
- Weapons with the Bullets symbol use solid ammunition of some sort (no matter the caliber). Heavy Shotguns and Pistols use Bullets as ammunition.
- Weapons with the Energy symbol use a power source to function (no matter the battery type). Cattle Prods and Chainswords use Energy as a power source. Prototype weapons, like the Prototype Light Machine Gun, require an Attached Energy Cell to work.
NOTE: Prototype weapons do not possess their own power source. They may only be used when an Energy Cell Equipment card is Attached to them (P. 23).
Weapons featuring multiple Ammo types may be equipped with the corresponding Ammo cards. The game effect only applies to Attacks of their type.
Noisy Equipment
At some point, I hoped we would see doubt in their eyes as we laid down hell in their ranks with automated weapons, and forced them to retreat. That's when we understood the Xenos were beyond redemption. Zombies have no fear. — Radka
Some Equipment are noisy and will produce a Noise token whenever they are used. Noise attracts Xenos! Noise rules are detailed on page 17.
- Equipment bearing the Noise symbol produces a Noise token whenever an Action is spent to use it. Set a Noise token in the Survivor's Zone.
- Equipment bearing the Silent symbol doesn't produce a Noise token when used.
Cattle Prods are silent weapons to kill with. Pistols produce Noise upon firing. Note the Prototype Assault Rifle is Silent!
Combat Characteristics
Weapons display Combat characteristics used to eliminate Xenos in many inventive ways.
- Silent: This Equipment doesn't produce a Noise token when used in Melee Combat.
- Ammo Type: This Equipment uses Energy (or Bullets).
- Weapon Type: This Equipment is a Melee weapon (or a Ranged weapon).
- Range: Min and max number of Zones the weapon can reach. 0 indicates it can only be used in the Survivor's Zone. For Ranged weapons, 1-1 indicates it can be used to shoot at 1 Zone away, no more, no less, and within Line of Sight.
- Noisy: This Equipment places a Noise token when used in Ranged Combat.
- Dice: Roll this many dice when a Melee (or Ranged) Action is spent to use this weapon.
- Accuracy: Each roll that equals or exceeds this value is a success. Lower results are failures.
- Damage: Damage inflicted for each success. Damage does not stack up with multiple successes unless it is a Concentrated Attack (P. 34).
- Hand: Put this Equipment in Hand in order to use it.
- Dual: If you have Dual weapons with the same name in each Hand slot (P. 18), you may use them both with a single Action (they must be aimed at the same Zone).
Noise
The Xenos are entrenched in their pits, and may soon destroy the objective. We must act, now. Ask Drake to play his damn pop music in the nearest loudspeakers. The noise will lure them out of their pits and directly into our line of fire. - What? Why me? How do you know I… Damn you!
Firing a machine gun or throwing a seismic grenade makes Noise, and Noise attracts Xenos. Each Action used to attack with noisy Equipment produces a Noise token.
- Place this token in the Zone where the Survivor resolved the Action. It stays in the Zone where it was produced, even if the Survivor moves.
- A single Action can only produce a single Noise token, no matter how many dice are rolled, how many hits are obtained, or whether Dual weapons are used.
- Noise tokens are removed from the board during the End Phase (P. 09).
NOTE: Each Survivor miniature also counts as a Noise token. Machines also count as Noise tokens when possessing a Machine Activation token (P. 26). Xenos have senses humans can't comprehend, and Survivors are never quiet, anyway!
EXAMPLE: Drake spends his first Action with a Sledge to eliminate a Xeno in his own Zone. The Sledge is a Silent weapon, and doesn't produce Noise tokens.
The second Action is spent to fire one Zone away with an Assault Rifle. It is a noisy weapon. Even if multiple dice were rolled, only a single Action was spent: a single Noise token is set in Drake's Zone.
The Survivor spends his third Action to Move away. The Noise token remains in the Zone it was produced, and does not follow Drake.
Experience, Danger Level, and Skills
It's all about remembering the training, surfing on pure adrenaline, calling on our friendship and discovering powers lying dormant within you. This is what happens with survivors. This is what happens when you stare right at the face of death and smile at it like a defiant teen. — Drake
For each Xeno eliminated, a Survivor gains 1 Experience Point (XP) and moves up a notch on their Danger Bar. Some Mission Objectives provide more experience, as does eliminating Abominations.
There are 4 Danger Levels on the Danger Bar: Blue, Yellow, Orange, and Red. At each Danger Level, the Survivor gains a new Skill (P. 52) to help them on their Mission. Skills stack across Danger Levels, so at Red Level, your Survivor has 4 Skills. As new Skills are unlocked, place new trackers on the Survivor Dashboard to indicate them.
- 0 to 6 Experience Points: Blue Level, possess a starting Skill.
- A Survivor moves to the Yellow Danger Level upon reaching 7 Experience Points. They gain a fourth Action.
- 7 to 18 Experience Points: Yellow Level, gain a fourth Action.
- The Orange Danger Level is reached with 19 Experience Points. Choose a Skill among the 2 indicated at this Level.
- 19 to 42 Experience Points: Orange Level, choose a Skill from the 2 available.
- The Red Danger Level is reached with 43 Experience Points. Choose a Skill among the 3 indicated at this Level.
- 43 Experience Points: Red Level, choose a Skill from the 3 available.
However, gaining Experience has a side effect. When you draw a Xeno card to spawn Xenos, read the line that corresponds to the Survivor with the highest Danger Level (see Xenos Spawn, P. 29). The stronger your Survivor is, the more Xenos appear. (Blue Level: 2 Driller Workers; Yellow Level: 4 Driller Workers; Orange Level: 6 Driller Workers; Red Level: 8 Driller Workers.)
Inventory
There's no such thing as "measured response". Go full auto, or go home! — Miranda
Each Survivor can carry up to 9 Equipment cards, divided into three types of Equipment slots on their Dashboard: 2 Hand, 2 Body, and 5 Backpack slots (not counting cards Attached to other cards). You may discard cards from your Survivor's inventory to make room for new cards at any time, for free (even during another player's Turn).
A Hand Equipment or Body Equipment slot is reserved exclusively for Equipment cards bearing the corresponding symbol (Hand Equipment in a Hand slot, Body Equipment in a Body slot).
- The Hand symbol marks the Equipment cards that can only be used in Hand slots. Both Hands are used primarily for Combat. They can only hold cards bearing the Hand symbol, like weapons.
- The Body symbol marks the Equipment cards that can only be used in Body slots. Both Body slots are used mostly to hold specialist items, like a Search Drone. They can only hold cards bearing the Body symbol.
- The Backpack can hold up to 5 Equipment cards of any type (Hand, Body, or no symbol). The Backpack slots are meant to store any weapon card the Survivor is not currently using, as well as support-oriented cards like the M.R.E. Characteristics and game effects described on Hand/Body Equipment cards cannot be used until they are moved to their appropriate inventory slots.
The Xenos
Always see the bright side of life: since we encountered the Xenos, I almost miss my mother-in-law. Oh. Did I just say that out loud? — Drake
Zombicide: Dark Side introduces a Xeno subspecies known as Driller Xenos. They prosper underground, and possess unique body features enabling them to drill galleries at industrial speed. They gather precious resources through mineral veins. In Zombicide, they are the first Xenos to be infected, and thus the first to go on a killing spree. They drill through human installations, enabling their whole kind to attack from below!
The game features four types of Driller Xenos. Most of them have a single Action to spend each time they activate (Driller Hunters have 2). A Driller Xeno is eliminated as soon as it is successfully hit with an attack that has the minimum required Damage value. Then its assailant immediately earns the listed Experience Points.
IMPORTANT: Driller Xenos standing on an Open Pit Zone are resilient to Ranged Attacks beyond Range 0, requiring 1 extra Damage to eliminate.
Driller Worker
The most common of their underground species, Driller Workers worked tirelessly for days, without need for food or rest. The infection turned them into a legion of mindless killers, using their huge claws to rip everything apart.
- Damage dealt: 1
- To eliminate: Damage 1 (2 if standing in an Open Pit Zone at Range 1+)
- Experience provided: 1 point
Driller Tank
Driller Tanks were the heavy-duty workforce of their species. After being infected, they lead the pack as front-line warriors. Like armored vehicles, they are immune to small weapons, and deal grisly blows to anything standing in their way. Other Drillers hide behind them, so grab your best caliber!
- Damage dealt: 2
- To eliminate: Damage 2 (3 if standing in an Open Pit Zone at Range 1+)
- Experience provided: 1 point
Driller Hunter
Armed with feral features leaving no doubt about their past role, Driller Hunters deal with threats in a fast and gruesome way. As the Xenos were mostly peaceful, Hunters were a rare sight. The infection awoke something within them, and now they're here to deal with us.
- Damage dealt: 1
- To eliminate: Damage 1 (2 if standing in an Open Pit Zone at Range 1+)
- Experience provided: 1 point
- Special rule: Driller Hunters have 2 Actions every time they are activated (P. 27).
Driller Abomination
These hulking instruments of war drill large tunnels at a staggering pace. They were the first to emerge in our mining facilities, and guided their infected brethren straight to us. You will need maximum firepower to deal with them. Oh, and expect the area to crumble as pits open everywhere, spilling Xeno reinforcements.
- Damage dealt: 3
- To eliminate: Damage 3 (4 if standing in an Open Pit Zone at Range 1+)
- Experience provided: 5 points
- Special rules:
- A Damage 3 weapon is required to eliminate a Driller Abomination. It may also be done with either a Seismic Grenade (P. 35) or a Concentrated Attack (P. 34).
- Driller Abominations drill Pits across Zones. Whenever a Driller Abomination stands in a Zone without an Open Pit and gets an extra Activation, set a Pit token in the Zone, on its Open side. It is now a Pit Zone. Drilling a Pit replaces the Driller Abomination's extra Activation. If the Zone has a Pit token on its Filled side, flip it back on its Open side instead.
Pit Rules
A few days ago, lines were still clear. The Xenos were minding their own business while the rest of the world was having a gold rush. Then, the Xenos went mad and drilled huge pits in our mines, pouring wave after wave of mad, infected warriors. Whenever you look into a Xeno pit, keep in mind something may look back at you. — Radka
Pit tokens have Open and Filled sides, respectively. Apply these game effects whenever a Pit token (be it Open or Filled) is set in a Zone, turning it into a Pit Zone.
- A Pit Zone cannot be Searched.
- A Pit Zone cancels any special Zone characteristics it previously had.
- A Dark Zone maintains its characteristics along with it being a Pit Zone.
NOTE: Airlocks from Zombicide: Invader may still be crossed from, and to, exterior Zones.
Open Pits Specific Rules
- Throwing a Seismic Grenade (P. 35) at an Open Pit Zone flips the token to its Filled side.
- Driller Xenos standing on an Open Pit Zone are more resistant to Ranged Actions performed from another Zone. An additional Damage is required to eliminate these entrenched monsters:
- Driller Workers and Driller Hunters are eliminated with Damage 2.
- Driller Tanks are eliminated with Damage 3.
- Driller Abominations are eliminated with Damage 4.
Melee Actions and Ranged Actions performed at Range 0 (within the Pit) are not affected by this rule.
Filled Pits Specific Rule
A Driller Abomination getting an extra Activation while standing on a Filled Pit Zone, flips the Filled Pit token to its Open side instead.
EXAMPLE: The Pit does not hinder Miranda's Line of Sight. The Driller Worker is more resistant as long as it stands in an Open Pit. Radka needs a weapon inflicting 1 more Damage than required (Damage 1 to Damage 2) to eliminate it with a Ranged Attack. If she Moves into the Driller Worker's Zone to perform a Melee Attack, no Damage modifier applies. Trench warfare! A Seismic Grenade was thrown in the Pit, turning it into a Filled Pit. It no longer spawns Xenos, but the Zone still loses its abilities and cannot be Searched. The Pit neutralizes the Security Room's special ability. The Zone cannot be Searched at all. A Driller Abomination Xeno card is drawn, as the Driller Abomination is already on the board. It does not get an extra Activation, but drills an Open Pit instead. Had a Filled Pit been in the Zone, it would have been flipped to its Open side again. Had an Open Pit been in the Zone, the Driller Abomination would have received the usual extra Activation.
Pits and Mold
Zombicide: Dark Side and Zombicide: Invader are fully compatible, allowing players to face the combined threat of two Xenos subspecies, and mix Pit and Mold rules. Pits have these additional effects when used in conjunction with Zombicide: Invader.
- Pits and Mold tokens may overlap each other.
- Pits don't neutralize Airlocks.
- Driller Xenos are the only ones to benefit from the Pits' Damage protection.
- Hellfire eliminates all Actors in a Pit Zone. The Pit token is not flipped, though.
- Seismic Blasts eliminate all Actors in a Mold Zone. The Mold token is not flipped, though.
Players' Phase
Starting with whoever holds the First Player token, each player activates their Survivors one after the other, in the order of their choice. Each Survivor can execute up to 3 Actions at the Blue Danger Level (not counting any free Action their Blue Level Skill may give them). The possible Actions are listed below.
Move
The Survivor moves from a Zone to the next but cannot move through building walls or closed doors.
- A Survivor must spend 1 additional Action per Xeno standing in the Zone they're attempting to leave.
- Entering a Zone containing Xenos ends the Survivor's Move Action (even if they have a Skill allowing them to move through several Zones per Move Action, or the Unstoppable Skill, see P. 54).
EXAMPLE: Miranda is in a Zone with 1 Driller Workers. To leave this Zone, she spends 1 Move Action, then 2 more Actions (1 per Worker), for a total of 3 Actions. If there had been 3 Xenos in the Zone, Miranda would have needed 4 Actions (1 + 3) to Move.
Search
The invasion went so quick, the miners and scientists spread weapons of all kinds everywhere. They are hard to find without a search drone, though. Let's bless the officer who convinced everyone to build compact security rooms in every sector!
Soldier Survivors, like Green Squad members, can only Search Security Rooms (P. 36) and only if there are no Xenos in that Zone.
The Search Drone Equipment cards allow Soldiers to Search in any room Zone. They are precious to the Green Squad!
Civilian Survivors can Search in any room Zones (including Security Rooms), and only if there are no Xenos in that Zone.
The player draws a card from the Equipment deck. They may then place it in the Survivor's inventory and reorganize it for free, or immediately discard it.
A Survivor can only perform a single Search Action per Turn (even if it's an extra free Action).
Some cards, like Pit Spawns, are discarded after resolution, allowing to draw another card.
Are you a Soldier? You may only Search for Equipment in these Security Rooms. Civilians may Search there too!
Door Activation
This Action is free and can be performed once per Turn. The Survivor either places or removes a closed Door token on a door opening in a Zone they occupy. This Action can be performed on a door opening shared with a Pit Zone.
Destroyed doors cannot be removed this way (P. 27).
The neutral door reserve is capped at 5. Once they are set, Survivors can't close more doors until some get back in the reserve.
EXAMPLE: Umkos needs a little more time in the Security Room. He closes the door between the Driller Hunter and himself. The door has been previously destroyed and cannot be closed. Drake faces the Tank (and enjoys it). Radka may close any door in this Room, including the one leading to the Open Pit. This will help contain the Driller Hunter!
Colored Doors
Some Missions feature colored doors. Read the Mission description to know the special rules to apply.
Reorganize/Trade
The Survivor can reorganize the cards in their inventory in any way the player wishes.
The Survivor can simultaneously exchange any number of cards and Remote tokens with one (and only one) other Survivor currently in the same Zone. This other Survivor may reorganize their own inventory for free.
A Trade Action doesn't have to be equal. You can trade everything for nothing, if both parties agree!
NOTE: Reorganizing the inventory allows you to change Attached Equipment (see sidebar).
Attach or Detach Equipment Cards
Energy Cell and Plenty Of Bullets Equipment cards may be Attached to Energy and Bullets weapons respectively, to provide them with additional re-rolls. Attaching an ammo card can be done anytime the Survivor reorganizes their inventory (Search, Reorganize/Trade, etc.). To do so, simply put the ammo card in the horizontal slot under the weapon card. They are now considered as a single Equipment card.
Both cards are automatically detached whenever they are stored in the Backpack.
- An ammo card can only be Attached to a single weapon, but a weapon can receive multiple ammo cards.
- Weapons featuring multiple ammo types may be equipped with the corresponding ammo cards. The game effect only applies to Attacks of their type.
- An ammo card is enough to feed Dual weapons used as a pair (Attach the ammo card to either of the weapons).
- Prototype weapons can only be used when an Energy Cell card is Attached to them.
Combat Actions
Combat Actions use all Melee and Ranged Equipment cards to eliminate Xenos.
Melee Action
The Survivor uses a Melee weapon they are holding in Hand to attack Xenos in their own Zone (see Combat, P. 31).
Ranged Action
The Survivor uses a Ranged weapon they are holding in Hand to fire at a single Zone within the Range shown on the weapon's card and within Line of Sight (see Combat, P. 31).
Survivors shoot at Zones, not Actors. This is especially important for Targeting Priority Order (P. 33). Using a Ranged weapon at Range 0 is still a Ranged Action.
Take or Activate an Objective
The Survivor takes an Objective or activates an Objective in the same Zone. The game effects are explained in the Mission's description.
Zombicide: Dark Side features Prototype weapon tokens, marking the places where such advanced weapons can be found. They can be taken in the same way as Objectives.
The Survivor immediately earns a random Prototype weapon among those still available. They can then reorganize their inventory, for free.
REMEMBER: Prototype weapons can only be used with an Attached Energy Cell (P. 23).
Make Noise
The Survivor makes Noise in an attempt to attract Xenos. Place a Noise token in the Survivor's Zone.
Do Nothing
The Survivor does nothing and prematurely ends their Turn. Any remaining Actions are lost.
Machine Actions
— Friends, the cameras on our bot and sentry gun show incoming Xenos reinforcements. — We are so close. Umkos, can you buy us some… — Sure. Both machines already opened fire. — Buddy, is that an alien smile we see on your face?
Machines can be remote-controlled to execute deadly Actions from the other side of the board. They can be used and even sacrificed for the team's benefit.
Zombicide: Dark Side features 2 deadly Machines: a Vindicator Bot and a Maul Sentry Gun. Their reference cards list their abilities, Equipment, and Skills.
A Survivor can control a Machine by possessing either the corresponding Remote token or Remote control Skill (P. 54). At the cost of 1 Action, the Survivor may perform 1 of the Actions listed below with a Machine they control. Unless they are Machine-related, the Survivor's other Skills don't apply to the Machine. The Survivor gains all Experience Points earned by the Machine's Actions.
A Survivor may activate several Machines under their control during their Turn, in any order the player wants.
Machines can't trade their Equipment.
A Machine Activation token.
A Machine performing at least 1 Action gets a Machine Activation token. The Machine is considered to be a Survivor as long as it possesses the token. The token is removed during the End Phase.
A Machine without an Activation token is ignored by Xenos.
A Machine is destroyed when it takes 1 Damage (or more), or its Zone is blasted by a Seismic Grenade (P. 35). Unless otherwise stated, destroying a Machine is not a defeat condition.
Vindicator Bot Actions
- Move
- Ranged Action (use the Vindicator's Ranged weapon). Having the Prototype keyword, the Vindicator ignores Dark Zone rules.
- Whenever the controlling Survivor stands in the same Zone as the Vindicator Bot and performs a Move Action, the Vindicator Bot may also perform 1 Move Action for free. The Vindicator Bot's movement is not affected by Xenos. Both the Bot and the Survivor must end their Move Action in the same destination Zone. The Survivor may not use Movement-related Skills (like Zero-G run, for example) to benefit from that effect.
Maul Sentry Gun Actions
- Ranged Action (use the Maul's Ranged weapon). Having the Prototype keyword, the Maul ignores Dark Zone rules.
NOTE: A Survivor standing on a Maul Sentry Gun's Zone may control it, as if they had the corresponding Remote token or Remote control Skill.
Swapping Bots and Sentry Guns
The Zombicide: Invader range features several kinds of Bots and Sentry Gun miniatures. Unless otherwise stated by the chosen Mission, Bot miniatures can be swapped from one kind to another, as well as Sentry Gun miniatures.
For the same reason, game effects mentioning "Bot" or "Sentry Gun," without a specific name, apply to any Machine of the indicated type. For example, the Remote control: Bot Skill applies to any Bot, whatever its name.
Xenos' Phase
Once the players have activated all their Survivors, the Xenos activate. No single player controls them: they do it themselves, performing the following steps in order.
Step 1 – Activation
— We should investigate the Xenos infection. This planet will be under quarantine until everyone is sure only the Xenos are affected. — I won't be the first bite. They are hunting us now, but something deeper below got them infected first. Right?
Each Xeno activates and spends its Action on either an Attack or a Move, depending on its situation. Resolve all the Attacks first, then all the Moves. Each Xeno performs either an Attack OR a Move with a single Action.
Attack
Each Xeno in the same Zone as Survivors performs an Attack. A Xeno's Attack is always successful, does not require any die rolls, and inflicts a specific amount of Damage, depending on its type:
- Driller Worker: 1 Damage
- Driller Tank: 2 Damage
- Driller Hunter: 1 Damage
- Driller Abomination: 3 Damage
Survivors in the same Zone split the Xenos' Attacks in any way the players prefer, even if it means dealing them all to a single Survivor (or Machine with an Activation token). Each successful Xeno Attack deals the corresponding Damage amount.
The targeted Survivors lose Armor points. Move the Armor Bar 1 point lower per Damage received. The Survivor is eliminated as soon as the Armor Bar drops to 0.
REMEMBER: The game is lost if any starting Survivor is eliminated (Machines don't count).
Xenos fight in groups: All Xenos activated in the same Zone as a Survivor join the Attack, even if there is so much Damage that it would be overkill.
NOTE: Machines can be lost without losing the game. This rule makes it useful to sacrifice a Machine to a band of Xenos.
EXAMPLE: 2 Workers (Damage 1) is in the same Zone as 2 unscathed Survivors, a Civilian (Armor 2) and a Soldier (Armor 3). The Xenos inflict 2 Damage, which can be allocated in 3 ways:
- 2 Damage on the Civilian, killing them and ending the game.
- 2 Damage on the Soldier, seriously hurting them.
- 1 Damage on each Survivor.
Move
The Xenos that have not Attacked use their Action to Move 1 Zone toward Survivors:
- Xenos select their destination Zone.
- The first Zone they select is the one with Survivors in Line of Sight that has the most Noise tokens. Remember, each Survivor counts as a Noise token.
- If no Survivors are visible, they select the noisiest Zone. In both cases, distance doesn't matter. A Xeno always goes for the noisiest target they can see or hear.
- Xenos move 1 Zone toward their destination Zone by taking the shortest available path. IMPORTANT: Closed doors are not taken into account to determine that path.
If a closed door bars the path to the next Zone toward their destination, all Xenos in the Zone spend their Action destroying it instead of moving. Flip the door token on its destroyed side. The way is now open. A destroyed door cannot be closed again.
Xenos destroy doors on their path toward Survivors.
If there are more than one route of the same length, Xenos split into groups of equal numbers and types to follow all possible routes. They also split up if different target Zones contain the same number of Noise tokens.
Uneven Xenos groups are split the same way. Decide which splitting group gets the extra Xeno and which direction the uneven split groups go. In case of a single Xeno being offered multiple routes, the players decide which direction it goes.
EXAMPLE: Xenos favor sight over Noise. Despite Miranda and Umkos being the noisiest, the Xeno Moves toward Drake, a visible target. Seeing several Survivor groups, a Xeno always goes to the noisiest, no matter the distance. With no target in sight, Xenos favor Noise. Despite Reese being closer, the Xeno Moves toward Miranda and Umkos, the noisiest. Two equal routes to the destination: this Xeno group splits in both directions.
Playing Driller Hunters
Driller Hunters have 2 Actions per Activation. After all Xenos (including Driller Hunters) have gone through the Activation step and resolved their first Action, Driller Hunters go through the Activation step again, using their second Action to attack a Survivor in their Zone or Move if there is nobody to Attack.
EXAMPLE 1: At the beginning of the Xenos' Phase, a Driller Hunter stands in the same Zone as a Survivor. The Xeno spends its first Action to Attack, inflicting 1 Damage. Then, the Driller Hunter performs its second Action, Attacking again for another 1 Damage.
EXAMPLE 2: A group of 2 Driller Hunters and 1 Driller Tank is 1 Zone away from a Survivor. For their first Action, since they have nobody to Attack in their Zone, the Xenos Move into the Survivor's Zone. The Driller Hunters then perform their second Action. Since they now occupy the same Zone as a Survivor, they Attack. Each Driller Hunter inflicts 1 Damage.
EXAMPLE 3: A Survivor stands in the same Zone as 3 Driller Workers, 1 Driller Tank, and 2 Driller Hunters. All the Xenos Attack and inflict 7 Damage (3 Damage is enough to kill the Survivor; the 4 remaining Damage is ignored). None of the Xenos Move, as they all Attacked. Then the Driller Hunters resolve their second Action. They have no one to Attack, so they Move 1 Zone toward their destination Zone.
Step 2 – Spawn
The Mission maps show where Xenos appear at the end of each Xenos' Phase. These are the Spawn Zones.
Xenos Spawn tokens mark the Spawn Zones' locations. Select a Spawn Zone and draw a Xeno card. Read the Xeno type and the line that corresponds to the Danger Level of the most experienced Survivor (Blue, Yellow, Orange, or Red). Place the indicated amount of the corresponding Xeno type in the Spawn Zone.
Repeat this for each Spawn Zone. Always begin with the same Spawn Zone (you choose) and continue clockwise. When the Xeno deck runs out, reshuffle all the discarded Xeno cards to make a new deck.
EXAMPLE: This Xeno card spawns Driller Hunters. Blue Danger Level: 2 Driller Hunters. Yellow Danger Level: 2 Driller Hunters. Orange Danger Level: 6 Driller Hunters. Red Danger Level: 8 Driller Hunters.
EXAMPLE: Miles has 5 Experience Points, placing him in the Blue Danger Level. Radka has 12, which puts her in Yellow. In order to determine how many Xenos spawn, read the Yellow line, which correspond to Radka, the most experienced Survivor.
Colored Spawn Zones
Some Missions feature Purple and/or Green-colored Spawn Zone tokens. Unless otherwise stated, these Zones don't spawn Xenos until a specific event (like taking an Objective of the matching color) happens, which then activates them.
Extra Activation Cards
When you reveal an Extra Activation card, no Xenos appear in the designated Zone. Instead, all Xenos of the indicated type immediately get an extra Activation (see Activation step, P. 27). Notice that these cards have no effect at the Blue Danger Level!
EXAMPLE: At the Blue Danger Level, nothing happens. At the Yellow, Orange, and Red Danger Levels, all Driller Workers immediately activate.
Driller Abomination Cards
Like a kid in a sandbox. A horrible, monstrous, bloodthirsty kid. In our sandbox. — Miranda
Driller Abomination Xeno cards act both to spawn Driller Abominations, make them drill Pits, and provide an extra Activation to all Abominations you may have on the board. Perform the following effects in order:
- All Abominations on the board immediately perform an extra Activation. A Driller Abomination standing in a Zone not containing an Open Pit, drills an Open Pit instead (P. 19).
- Place a Driller Abomination on the Spawn Zone, if you have any. If you don't, ignore this step.
Pit Xeno Cards
I would love to say we're done, but I sense activity all around us. They are coming up the galleries, going and drilling past our position. Soon, the surface base will be invaded as well. Expect trouble coming from everywhere at once. — Umkos
Upon drawing a Pit Xeno card, set the indicated amount of the corresponding Driller Xeno type on every Open Pit Zone (P. 20). If there are not enough miniatures to fill all Open Pit Zones, place the remaining Driller Xenos in any Open Pit Zone which didn't receive some yet, then perform the following effects in order:
- All Abominations on the board immediately perform an extra Activation. A Driller Abomination standing in a Zone not containing an Open Pit, drills an Open Pit instead.
- Place a Driller Abomination (if you have any) on 1 of the Open Pit Zones which didn't receive enough Driller Xenos of the indicated type (if there are multiple eligible Zones, players choose). If no Driller Abomination miniature is available, ignore this step. Running out of Driller Abomination miniatures does not create an extra Activation.
Running Out of Miniatures
The Zombicide: Dark Side box contains enough Driller Xenos to invade a mining facility. However, players may still run out of miniatures of the indicated type when required to place a Driller Xeno on the board through spawning. In this case, the remaining Driller Xenos miniatures are placed (if there are any), then perform the following effects in order:
- All Abominations on the board immediately perform an extra Activation. A Driller Abomination standing in a Zone not containing an Open Pit, drills an Open Pit instead.
- Place an available Abomination you may have (any type) in the Spawn Zone. If you have none, ignore this step. Running out of Driller Abomination miniatures does not create an extra Activation.
Always keep an eye on the Driller Xeno population on the board, or risk seeing Abominations rushing at your position (and drilling Pits everywhere) in an instant!
Combat
When a Survivor performs a Melee, Ranged or Machine Action to attack Xenos, roll as many dice as the Dice number of the weapon or Machine being used.
If the active Survivor has 2 identical weapons with the Dual symbols equipped in their Hands, they can use both weapons at the same time at the cost of a single Action. Both weapons must be aimed at the same Zone.
EXAMPLE: Radka has two Pistols in her Hands. The Pistol has the Dual symbol, so Radka can shoot them both simultaneously. This allows her to roll 2 dice (1 for each Pistol) with a single Ranged Action.
Each die result that equals or exceeds the Accuracy value of the weapon scores a successful hit.
Each hit inflicts the amount of Damage specified by the Damage value of the weapon to a single target. If all targets get eliminated, extra hits are lost.
- Driller Workers and Driller Hunters are eliminated with a Damage 1 (or more) hit.
- Driller Tanks are eliminated with a Damage 2 (or more) hit. Damage 1 has no effect on them, no matter the amount of times a Survivor hits them (except for a Concentrated Attack – see P. 34).
- Driller Abominations are eliminated with a Damage 3 (or more) hit. As no weapon naturally has Damage 3 in Zombicide: Dark Side, the monster must be eliminated with a Seismic Grenade (P. 35) or a Concentrated Attack (P. 34).
EXAMPLE: Drake stands in a Zone along with 3 Driller Workers, and performs a Melee Action with a Cattle Prod. 2 hits! Both of them are allocated to different Driller Workers and inflict Damage 1, eliminating 2 Driller Workers. Drake hits again with a second Melee Action, scoring 2 hits again. 1 of them is enough to eliminate the last Driller Worker. The remaining hit is lost.
Melee Action
Melee weapons are marked with the Melee symbol.
A Survivor holding a Melee weapon in their Hand can attack Xenos in their own Zone. Each die that rolls equal to or higher than the Accuracy value on the weapon's card is a successful hit. The player divides their hits as they wish among the possible targets in the Zone.
Missed Melee strikes cannot cause Friendly Fire (P. 34).
EXAMPLE: Miles and Umkos are in the same Zone as a Driller Tank, a Driller Hunter and a Driller Worker. Miles attacks with his Sledge. He rolls a hit, a hit, and a miss, which means 2 hits. The Sledge has Damage 1, and cannot hurt the Driller Tank. Jared allocates his first hit to the Driller Hunter and the second to the Driller Worker, eliminating them both. It is a Melee Action: although a miss was obtained, Umkos is safe from Miles's swings.
Ranged Action
Ranged weapons are marked with the Ranged symbol.
A Survivor holding a Ranged weapon in their Hand can shoot at a Zone within the weapon's Range and Line of Sight (P. 11).
REMEMBER:
- Inside a room, the Line of Sight is limited to the Zones that shares an opening and just 1 Zone away.
- In corridor and tunnel Zones, the Line of Sight goes in a straight line parallel to the board's edge, until it meets a wall or the board's edge. Dark Zones affect Survivors' Lines of Sight (P. 12).
- Missed shots can cause Friendly Fire (P. 34), so carefully consider the risks!
The Range of a weapon, indicated by the Range value on its card, is the number of Zones it can shoot across.
The first of the two values shows the minimum Range. The weapon may not shoot at Zones closer than the minimum. In some cases, it may be 0, meaning the Survivor can shoot at targets in the Zone they currently occupy (it is still a Ranged Action).
The second value shows the maximum Range of the weapon. A Weapon cannot fire at Zones beyond maximum Range.
EXAMPLE 1: The Pistol has a Range of 1-1. It can shoot 1 Zone away, no more, no less.
EXAMPLE 2: The Light Machine Gun has a Range of 1-3, which means it can shoot up to 3 Zones away but cannot be used to fire at the same Zone as the Survivor.
Ignore any Actors in the Zones between the shooter and the target Zone. Survivors may shoot through occupied Zones without danger to either fellow Survivors or Xenos. A Survivor can even shoot at another Zone while there are Xenos in their own Zone!
Targeting Priority Order
When using a Ranged weapon (even at Range 0), the shooting Survivor does not choose the targets hit by successful rolls. Hits are assigned to Actors in the targeted Zone according to the Targeting Priority Order:
- Driller Tank or Driller Abomination (the shooter chooses)
- Driller Worker
- Driller Hunter
The hits are assigned to targets of the lowest priority until they have all been eliminated, then to targets of the next Priority Level until they have all been eliminated, and so on. If several targets share the same Targeting Priority Order, players choose the targets hit among them.
REMEMBER: Targeting Priority doesn't apply to Melee Actions.
EXAMPLE: Armed with a Heavy Shotgun (Damage 2), Miles performs a Ranged Action at a Zone with 1 Driller Tank, 2 Driller Workers and 2 Driller Hunters.
- Miles rolls a hit and a hit for his first Action. Hits are obtained with 4 or more, which means 2 hits. Following the Targeting Priority Order, the first hit is assigned to the Driller Tank, eliminating it (Damage 2). The second hit is assigned to a Driller Worker, eliminating it as well (1 hit = 1 target).
- Miles rolls a 5 and a 5 with his second Action, obtaining 2 hits. The Targeting Priority Order lists the Driller Worker as the first target, so it's eliminated. The second hit is allocated to either Driller Hunter, eliminating it as well. A single Driller Hunter remains.
NOTE: Driller Tanks are first in the Targeting Priority Order and are immune to Damage 1 weapons. It means they can protect all Driller Workers and Driller Hunters in their Zone from all Damage 1 Ranged Actions, as they need to be removed before getting to Driller Workers and Driller Hunters. The same applies to Driller Abominations, requiring Damage 3 to be eliminated.
Universal Targeting Priority Order: The Targeting Priority Order doesn't take the Xeno subspecies into account. Standard Xenos from Zombicide: Invader and Driller Xenos share the same Targeting Priority Order by type (Worker, Tank, Hunter and Abomination). Same Priority Order? Players choose!
| Targeting Priority | Name | Actions | Min Damage to Eliminate | Experience Earned |
|---|---|---|---|---|
| 1 | Driller Tank / Driller Abomination | 1 | 2/3 | 1/5 |
| 2 | Driller Worker | 1 | 1 | 1 |
| 3 | Driller Hunter | 2 | 1 | 1 |
Friendly Fire
Yes, yes, I know you had no choice, it's just a paint scratch, and you saved my life. But please, if you absolutely have to do it again, keep your eyes open! — Drake
A Survivor can't hit themselves with their own attacks. However, emergency situations can call for Ranged or Machine Actions aimed at a Zone where a teammate is stuck. In that case, misses on the Attack roll automatically hit Survivors standing in the target Zone. Assign these Friendly Fire hits in any way you want, and apply Damage normally.
REMEMBER: Friendly Fire doesn't apply to Melee Actions.
EXAMPLE: Miranda shoots with an Assault Rifle at a Zone containing Drake and 2 Driller Workers. Rolling a hit, a hit, and a miss, she obtains 2 hits… and a miss. Each hit eliminates a Driller Worker. The miss, however, hits Drake for Damage 1. Drake loses 1 Armor point.
Concentrated Attack
Mmmmmh, full auto mode. You, my friend, are about to die from a massive lead consumption. — Reese
A Survivor performing a Melee or Ranged Action (either by themselves or using a Machine) may concentrate their Attack toward a single target to increase their chance of overcoming its defenses and eliminating it.
To Concentrate Attack, designate a single specific target among those the Attack may hit, before rolling dice. Multiply the Damage value by the amount of hits obtained (1 success: Damage x1. 2 successes: Damage x2. 3 successes: Damage x3, etc.). Only the designated target is hit by successful rolls. Leftover Damage is lost.
A Ranged Concentrated Attack still follows the Targeting Priority rules. Misses are dealt among fellow Survivors as Friendly Fire: apply the weapon's base Damage value (no matter the amount of hits obtained).
EXAMPLE 1: Armed with a Light Machine Gun (Damage 1), Umkos fires at a Zone with 2 Driller Tanks and 3 Driller Workers. Target Priority Order shows Driller Tanks are hit first, and the weapon's Damage value is not enough to eliminate any. Umkos decides to Concentrate his Attack on one of them and rolls 5 dice, obtaining 3 hits. 3 successes raise the Damage value to 3 (base 1, x3 successes). It's more than enough to bring the Driller Tank down (though the other Driller Tank and Driller Workers are left unscathed).
EXAMPLE 2: Armed with a pair of Cattle Prods, Miles stands in the same Zone as a Driller Abomination. No matter how many dice he rolls (Dual Cattle Prods roll 4 dice), the basic 1 Damage value is not enough to eliminate the Driller Abomination (Damage 3 is required) so Miles Concentrates his Attack on the Xeno and rolls 4 dice, obtaining 3 hits. 3 successes! The Damage value is raised to 3 (base 1, x3 successes), which is enough to eliminate the Driller Abomination!
Seismic Grenades
Seismic Grenades are great for blasting all opposition in a Zone, and filling Pits!
Perform a Ranged Action with a Seismic Grenade equipped in Hand, discard the card, and blast! A Seismic Blast is created in the targeted Zone:
- All Actors and Machines are eliminated. The Survivor earns all related Experience Points.
- Remove any Objective token.
- Any Open Pit token (P. 20) in the Zone is flipped to its Filled side.
- Set a Noise token in the destination Zone.
NOTE: If you play with Zombicide: Invader, Seismic Grenades can be thrown at exterior Zones.
Special Zone: Security Rooms
Check the inventory for heavy weapons. No inventory? Check the log. No computer? Oh, well. Grab a gun from the toy chest and open fire!
Security Rooms are the only Zones the Green Squad may Search.
All members of the Green Squad are Soldiers. Thus, they can only perform Search Actions in Security Rooms. Equipment cards, like Search Drones, or Skills, may allow them to Search in other ways. Civilian Survivors are allowed to Search in Security Rooms, too!
Security Rooms lose their properties whenever a Pit opens in them.
Ultrared Mode
It's quite a challenge, actually. Am I the only one to start enjoying this? No need to report, no secret defense. It's absolute freedom, and life or death choices at every corner. That sounds rock n' roll! — Miles
The Ultrared Mode allows your Survivors to gain Experience Points beyond the Red Danger Level and pick up additional Skills. This mode is great for reaching amazing body counts and completing very large scenarios.
Ultrared Mode: When your Survivor reaches the Red Level, move the experience tracker back to 0 and add any Experience Points gained past the minimum required to hit the Red Level. Your Survivor is still on the Red Level and keeps their Skills. Count additional Experience Points as usual and gain unselected Skills upon reaching Danger Levels again.
When all the Survivor's Skills have been selected, choose a Skill among all of the Zombicide: Dark Side Skills (except for the Starts with [Equipment] Skill) upon reaching Orange and then Red Level.
EXAMPLE: Reese just earned her 43rd Experience Point, getting to the Red Level. She has the following Skills: Point-blank (Blue), +1 Action (Yellow), +1 free Ranged Action (Orange) and +1 to dice roll: Ranged (Red).
The player moves the experience tracker back to the start as the Mission continues. Reese is still at Red Level and keeps on earning Experience Points as she kills Driller Xenos.
Reese doesn't get an additional Skill upon reaching the Blue and Yellow Levels for the second time since she has all available Skills for these Levels. Upon reaching the Orange Level again, she gains Shove, her second Orange Level Skill. Reaching the Red Level again, the player chooses a new Skill among the 2 remaining ones for this Level and goes for +1 free Combat Action. The experience counter returns to the start.
During her third progression through the experience bar, Reese doesn't get any Skill at Blue, Yellow, or Orange Levels, as she already has them all. Upon reaching the Red Level for the third time, she earns the last Red Level Skill: Hit & run. The experience counter goes to the start again.
From now on, Reese still earns Experience Points and gets a player-chosen Skill every time she reaches the Orange Level, and then another upon reaching the Red Level.
Playing with 7+ Survivors
Zombicide: Dark Side has an expanding gallery of Survivors to play with. Sooner or later, you may be tempted to try playing with more than 6 Survivors. To do so, you'll need the extra Survivor dashboards, plastic trackers, color bases, and Starting Equipment cards contained in expansions that are sold separately.
Playing with an increased number of Survivors (or players!) is quite easy. Follow these guidelines, and adjust them to fit your challenge level.
- For each Survivor above the sixth, add 1 additional Starting Equipment card from the expansion to the pool of cards that will be distributed among Survivors during Setup. If you don't have any, the extra Survivors enter the game with no Starting Equipment.
Be careful, some Equipment may be reserved to Survivors of a given category. Check their special rules to know more.
- Add 1 additional Xeno Spawn token per 2 Survivors above the sixth (rounded up). Stack these additional Spawn tokens in the same Zones as existing ones or in any new Spawn Zone of your choice, if you have several available. Yes, that means some Zones will double or even triple their spawn rate!
| Additional Survivors | Spawn Tokens |
|---|---|
| 7-8 | 1 |
| 9-10 | 2 |
| 11-12 | 3 |
Tuning the Difficulty
Zombicide: Dark Side's difficulty may be tuned up or down using the card numbers.
Cards #1 to #54 are featured in Zombicide: Invader. Cards #55 to #60 are featured in Zombicide: Black Ops.
Xenos are the perfect aliens. Human concepts like mercy, self-preservation or restraint are unknown to them. But sometimes, the game may be too easy, or just too hard, for you or your playing group. In that case, sort your Xeno cards using their card number.
- Xeno cards #61 to #85 form the easier part of a Driller Xeno invasion. These Driller Xenos appear in a limited amount, without extra Activations. Driller Xeno specialties, like Driller Abomination and Pit opening, are still present.
- Xeno cards #86 to #110 are the harder part. Driller Xenos come in greater numbers, especially at low Danger Levels. Keep them for experienced player groups and Zombicide veterans.
- Xenos cards #111 to #114 are extra Activations. Add them for an element of surprise, tuning the difficulty up.
These elements can be mixed in any way you see fit to create your own game experience!
Missions
M0 — Tutorial: They Came From Below
Easy / 6+ Survivors / 45 minutes
Something is wrong. Emergency messages come from everywhere, talking about rogue Xenos going berserk. A couple of them just burrowed through the training grounds and came after us. We had no choice but to put them down. Luckily, we already wear our power armors.
We must come back to our base and get a clear briefing on the situation.
Ho, ho. More are coming!
Tiles needed: 10-V, 12-R, 13-R, & 16-R.
Objectives: Rally your base. Reach the Exit with all Survivors. Any Survivor may escape through this Zone at the end of their Turn, as long as there are no Xenos in it.
Special Rules:
- Setup. Set the indicated Xenos in the corresponding Zones.
- Growing tide. Abominations do not spawn until the Yellow Danger Level is reached. Until then, each Abomination card spawns 1 Driller Tank instead.
- Lost access key. Each Objective gives 5 Experience Points to the Survivor who takes it. The Yellow door cannot be opened until the Yellow Objective has been taken.
- Prototype weapons. Each Prototype weapon token gives a random Prototype weapon to the Survivor who takes it. They can then freely reorganize their inventory.
M1 — Recovery Operation
Medium / 6+ Survivors / 90 minutes
Amidst the chaos, we received priority orders from the surface. Magenta Squadron, a unit detached to exploration and scientific operations, are being overwhelmed by bloodthirsty Xenos. We have to bring them support, secure the classified cargo they are carrying, and help them getting back to the elevators.
Well, it seems someone wants its toys back. We are on route to help our friends.
As we are closing to their position, however, we still can't reach them. The locator show they are still. They are either silent, or dead.
The Xenox, on the other hand, are on war!
Tiles needed: 12-V, 13-R, 14-R, 15-V, 17-V, & 18-V.
Objectives: Recovery mission. Accomplish the Objectives in this order to win the game:
- Recover all sensible material. Take all Objectives.
- Come back home (or die trying). Reach the Exit with all Survivors. Any Survivor may escape through this Zone at the end of their Turn, as long as there are no Xenos in it.
Special Rules:
- Setup. Place the Green, the Pink, the Purple, and the Yellow Objectives randomly among the Red Objectives, facedown.
- They locked the elevator before dying. Each Objective gives 5 Experience Points to the Survivor who takes it. The Pink door cannot be opened until the Pink Objective has been taken. The Yellow door cannot be opened until the Yellow Objective has been taken.
- Prototype weapons. Each Prototype weapon token gives a random Prototype weapon to the Survivor who takes it. They can then freely reorganize their inventory.
M2 — Steps in the Dark
Medium / 6+ Survivors / 60 minutes
Our home sector got stormed by Xenos while we were away, and we had to fall back. There were simply too many of them. Good news, we are all alive and ready to kick some Xeno ass. Bad news, we are split, badly armed, and now homeless.
We found a meeting point in a civilian facility. Chaos reigns, people tried to resist with whatever they had within reach, and failed. The Xenos still hang around, and will soon know we are here. Now is the moment to regroup, find anything useful, and push. We don't have much time, however.
The surface headquarter seems overbusy. I feel serious concern in their voices.
Tiles needed: 10-V, 13-R, 14-R, 15-R, 17-V, & 18-V.
Objectives: Regroup and push. Accomplish the Objectives in this order to win the game:
- Find superior weapons. Take all Objectives.
- To the next level. Reach the Exit with all Survivors. Any Survivor may escape through this Zone at the end of their Turn, as long as there are no Xenos in it.
Special Rules:
- Setup.
- Place the Green and the Purple Objectives randomly among the Red Objectives, facedown.
- The Survivor team is split in two groups, as evenly as possible, between both Player starting areas. Players choose in which group goes every Survivor.
- Light my fire. Each Objective gives 5 Experience Points to the Survivor who takes it. Each Red Objective provides a random Prototype weapon as well. The Survivor can then freely reorganize their inventory.
M3 — Pit Fighters
Medium / 6+ Survivors / 90 minutes
Voices are progressively going silent on the network. We are fighting our way around, looking for a reliable exit for us and the people we are crossing.
New orders just arrived. We may be able to slow down the Xenos invasion by shutting down one of their main route to the surface. The laboratory we are heading to, has reinforced doors, enabling us to contain the Xeno flow for a while. Our battle here may save many lives.
We feel weird, and start to look at each other in a different way. We may be dead the next hour, or worse, be the only ones left underground.
Tiles needed: 10-V, 11-V, 14-V, 15-R, 16-R, & 18-R.
Objectives: Secure the sector. Accomplish the Objectives in this order to win the game:
- Destroy the lab Pit. Destroy the Purple Spawn Zone, either by taking the Objective standing in its Zone, or by throwing a Seismic Grenade in it.
- Contain the tunnels. Pick the yellow Objective to lock the tunnel accesses.
- Empty the lab. Eliminate any Xenos remaining in the building where the Purple Spawn Zone was.
Special Rules:
- Fire in the pit! The Purple Spawn Zone is active at the start of the game. It is removed as soon as the Objective in its Zone is taken, or a Seismic Grenade is thrown in it.
- Prototype weapons. Each Prototype weapon token gives a random Prototype weapon to the Survivor who takes it. They can then freely reorganize their inventory.
- Tactical objectives. Each Objective gives 5 Experience Points to the Survivor who takes it. The Yellow Objective cannot be taken until the Purple Spawn Zone has been removed. Once taken, set closed door tokens on each access separating the buildings from the tunnels. These doors cannot be destroyed or removed.
M4 — Hard Reset
Medium / 6+ Survivors / 90 minutes
We noticed erratic reports in the communication grids. Something altered the bot and sentry gun defense protocols in several sectors, turning the machines against us. Nevermind if it's malfunction or sabotage at this stage: these rogue machines are creating a huge hole into our lines and the xenos have begun to engulf through it. We must reconquer the control of the machine and reestablish our battle lines!
Tiles needed: 10-V, 11-V, 13-R, 14-R, 15-R, 16-R, 17-V, & 18-R.
Objectives: End the threat. Accomplish the Objectives in any order to win the game:
- Take over the machines. Take the Green and the Purple Objectives.
- Destroy the pits. Throw two Seismic Grenades in each Pit on tiles 14-R and 17-V.
Special Rules:
- Setup. Place the Green and the Purple Objectives randomly among the red Objectives, facedown.
- Party crashers. Each Spawn Zones on tiles 14-R and 17-V is removed as soon as two Seismic Grenades are thrown in its Zone, during the same Survivors' Phase.
- Where did I put the remote again? Each Objective gives 5 Experience Points to the Survivor who takes it.
The Bot and the Sentry Gun are hostile toward Survivors. Until it gets under a Survivor's control (either with a remote control token or a Skill), each of them is considered as Xenos during the Attack Step of each Xenos' Phase (the Bot don't move, and going on the Sentry Gun's Zone has no effect until it's under control).
Each of them Attacks its destination Zone if it is within Range and Line of Sight. In that case, Survivors are considered being first in the Targeting Priority Order.
- Prototype weapons. Each Prototype weapon token gives a random Prototype weapon to the Survivor who takes it. They can then freely reorganize their inventory.
M5 — Gallant's Book
Medium / 6+ Survivors / 90 minutes
The Xenos got to the surface, and the battle now rages in the corridors of the base. The command center didn't take long to answer about the rogue machines issue: the bug went up the system and now plague the surface dwellers as well. We need an access to the access codes allowing to unlock some basic containment protocols. Recovering them would help all survivors on PK-L7 to get rid of rogue machines, as well as granting access to locked food and resources.
We are the angels from below.
Tiles needed: 10-V, 12-R, 13-V, 14-V, 15-V, & 18-R.
Objectives: Find the codes and come back. Accomplish the Objectives in this order to win the game:
- Get Gallant's book and ID access. Take the Yellow and the Pink Objectives.
- Escape in the dark. Reach the Exit with all Survivors. Any Survivor may escape through this Zone at the end of their Turn, as long as there are no Xenos in it.
Special Rules:
- Setup.
- Put a Search Drone card, face up, in each marked Zone. They are not available as Starting Equipment.
- Place the Green, the Pink, the Purple, and the Yellow Objectives randomly among the Red Objectives, facedown.
- I found something. Each Objective gives 5 Experience Points to the Survivor who takes it.
- Prototype weapons. Each Prototype weapon token gives a random Prototype weapon to the Survivor who takes it. They can then freely reorganize their inventory.
- Closed backdoor.
- The Yellow Spawn Zone activates as soon as the Yellow Objective has been taken.
- The Pink door cannot be opened until the Pink Objective has been taken. It can be destroyed by Xenos.
M6 — Paths to the Dark
Hard / 6+ Survivors / 120 minutes
The command center got under attack and everything went silent under an hour. We are now on our own, and feel unexpectedly free. What was our home, is now deep within enemy territory.
Before finding a way to get back to the surface, we need to secure a shelter for the team to rest. The first step is controlling the access to our chosen location. To achieve this goal, we will need to seal some tunnel accesses and direct the Xeno flow in another direction!
Tiles needed: 10-R, 11-V, 12-V, 14-V, 16-V, & 18-R.
Objectives: Weld the tunnel accesses. Accomplish the Objectives in this order to win the game:
- Seal the doors. Take the Objectives and use them to seal the tunnel accesses on tiles 11-V, 14-V, and 18-R, as indicated on the map.
- Exit the sector. Reach the Exit with all Survivors. Any Survivor may escape through this Zone at the end of their Turn, as long as there are no Xenos in it.
Special Rules:
- Setup. Note there are no Green or Purple remote Objectives to control the Machines with. They may only be controlled with Skills.
- Welding machines. Each Objective gives 5 Experience Points to the Survivor who takes it. Put the Objective token on the Survivor's ID Card. It does not take place in the inventory, and may be traded as an Equipment. Make sure to not lock yourselves out!
- Closing the gates. Any Survivor standing in front of one of the three marked accesses may spend an Action and discard an Objective token to weld it, earning 5 Experience Points. Set closed door tokens on the access. These doors cannot be destroyed or removed.
M7 — Player Killer
Hard / 6+ Survivors / 60 minutes
Many bots got destroyed either in battle against the Xenos, or during the rogue machines incident. We need one to protect our shelter while we are away, and to support sentinels while the rest of the team is sleeping. Logs show one of them, nicknamed Player Killer by its maintenance officer, was locked down for maintenance a couple hours before the invasion began. We are out to get it, bring it back, and check it on our own.
Will we be able to eat and take a shower sometime soon? I have a bad feeling about this!
Tiles needed: 12-R, 13-R, 15-R, 16-R, 17-V, & 18-R.
Objectives: Recover Player Killer. Accomplish the Objectives in this order to win the game:
- Open the reinforced door. Take the Yellow Objective.
- Get the Bot out. Reach the Exit with the Bot. It may escape through this Zone at the end its controller's Turn, as long as there are no Xenos in it. The Mission is lost whether Player Killer is destroyed.
Special Rules:
- The machine is mine. Each Objective gives 5 Experience Points to the Survivor who takes it.
- Hacked door. The Yellow door opens as soon as the Yellow Objective is taken. Until then, it cannot be opened or destroyed in any way.
- Prototype weapons. Each Prototype weapon token gives a random Prototype weapon to the Survivor who takes it. They can then freely reorganize their inventory.
M8 — Under Pressure
Hard / 6+ Survivors / 90 minutes
We receive muffled messages and coded transmissions. We are not alone! The thing is, we don't know where our fellow survivors are. In the meantime, our shelter needs some energy to enable the defense grid and life systems of our own outpost. And to get us clean, also.
We scouted a pair of generators in surrounding sectors, and found one being intact, albeit shut down. If we manage to restart it and protect it long enough, we will gather enough energy for the coming weeks. To help us with this task, we brought mining gizmos called thumpers. They may lure the Xenos away and get us some extra time.
The noise will lure increasing amounts of Xenos. I say, the more, the merrier!
Tiles needed: 10-V, 11-V, 12-R, 13-V, 15-V, & 18-R.
Objectives: Hold the line! Accomplish the Objectives in any order to win the game:
- Protect the generators. Reach the Red Danger Level with all Survivors. The game is lost if a Xeno activates in a Zone containing the Yellow or the Pink Objectives.
- Recover the tanks. Take all available Objectives (see special rules).
Special Rules:
- Setup.
- Place the Green and the Purple Objectives randomly among the Red Objectives, facedown.
- Place a Red Objective token, and a Noise token on top of it, in the indicated Zones. They represent thumpers (see below).
- Generators. The Yellow and the Pink Objectives represent generators to protect, and cannot be taken. The game is lost if any Xeno activates in their Zones.
- Thumpers. Each Objective with a Noise token beside represents a thumper. The Objective token cannot be taken, and the Noise token is not removed during the End Phase. Remove both the thumper and the Noise token if a Xenos activates in its Zone.
- Incoming! The Green and the Purple Objectives provide 5 Experience Points to the Survivor who takes them. The Purple Spawn Zone activates as soon as the Purple Objective has been taken. The Green Spawn Zone activates as soon as the Green Objective has been taken.
- Tanks. Red Objectives without a Noise token represent tanks to be recovered. Each of them gives 5 Experience Points to the Survivor who takes it.
M9 — Power Display
Hard / 6+ Survivors / 120 minutes
We found and started generators, directly connected to the energy grid. As we now know there are other survivors somewhere around, we hope they will stock and enjoy the power for weeks to come.
We need to make sure, however, the generators runs long enough for the power to flow. The best way to achieve this goal is creating a major diversion, taunting the Xenos, making trouble, and killing as many of them as possible.
We're in for our best times in days!
Tiles needed: 10-R, 12-V, 13-R, 15-V, 16-V, & 18-V.
Objectives: Create a diversion and enjoy the show. Accomplish the Objectives in this order to win the game:
- Show the Xenos who's the boss. Reach the Red Danger Level with all Survivors AND get all Objectives.
- Exit the sector. Reach the Exit with all Survivors. Any Survivor may escape through this Zone at the end of their Turn, as long as there are no Xenos in it.
Special Rules:
- Setup. Place the Green and the Purple Objectives randomly among the Red Objectives, facedown.
- Can't touch this. Each Objective gives 5 Experience Points to the Survivor who takes it.
M10 — Demo Squad
Hard / 6+ Survivors / 120 minutes
Our power display disrupted in the Xeno flow in the area. We are aware it's only temporary, but never expected to deal such a sucker punch to our new foes by ourselves, and without any support. With the proper team spirit, survivors may be an absolute, perhaps the sole, cure to the Xenos invasion.
We decided to press the attack and foil a major invasion route. It involves explosives, collapsing a whole sector, and getting away with it.
Are you game?
Tiles needed: 12-V, 13-R, 15-V, 16-V, 17-R, & 18-V.
Objectives: Destroy the building. Accomplish the Objectives in this order to win the game:
- Collapse the Yellow pillar. You will need explosives and perfect timing. See Special Rules.
- Collapse the Pink pillar. Same as the Yellow pillar.
- Exit the mess. Reach the Exit with all Survivors. Any Survivor may escape through this Zone at the end of their Turn, as long as there are no Xenos in it.
Special Rules:
- Setup.
- Place the Green and the Purple Objectives randomly among the Red Objectives, facedown.
- The Survivor team is split in two groups, as evenly as possible, between both Player starting areas. Players choose in which group goes every Survivor.
- Handle with care. Each Objective gives 5 Experience Points to the Survivor who takes it. Red Objective tokens represent explosive charges. They are put on the Survivor's ID Card. It does not take place in the inventory, and may be traded as an Equipment. The Yellow and the Pink Objectives cannot be taken.
- Destroying the pillars. The Yellow and the Pink Objectives represent structural pillars for the underground installation in the area. A Survivor may spend 1 Action to set an explosive charge (Red Objective) they possess in the same Zone as a pillar. Each pillar can receive up to two charges. A pillar can be destroyed after receiving its second explosive charge, during any Survivor's Turn: players decide collectively.
Upon destroying the Yellow pillar, remove tiles 12-V and 16-V, and everything on them. All Actors on them are eliminated. No XP is gained.
Upon destroying the Pink pillar, remove tiles 13-R and 18-V, with the same effect. The Spawn Zone and Open Pit straddling tiles 17-R and 18-V is moved on its 17-R part. The Spawn Zone and Open Pit straddling tiles 13-R and 15-V is moved on its 15-V part.
- Prototype weapons. Each Prototype weapon token gives a random Prototype weapon to the Survivor who takes it. They can then freely reorganize their inventory.
Skills
Each Survivor in Zombicide: Dark Side has specific Skills with effects described in this section. In case of a conflict with the general rules, the Skill rules have priority.
The effects of the following Skills and/or bonuses are immediate and may be used the Turn in which they are acquired. This means that if an Action causes a Survivor to level up and gain a Skill, that Skill may be used immediately if the Survivor has any Actions remaining (or the Survivor may use any extra Actions the Skill grants).
- +1 Action – The Survivor has an extra Action they may use as they please.
- +1 Damage: [Action] – The Survivor gets a +1 Damage bonus with the specified type of Action (Combat, Melee or Ranged).
- +1 Damage with [Equipment] – The Survivor gets a +1 Damage bonus with the specified Equipment.
- +1 to dice roll: [Action] – The Survivor adds 1 to the result of each die they roll with Actions of the specified type (Combat, Melee, or Ranged). The maximum result is always 6.
- +1 die: [Action] – Each of the Survivor's weapons roll an extra die with Actions of the specified type (Combat, Melee, or Ranged). Dual weapons each gain a die, for a total of +2 dice per Dual Action of the specified type.
- +1 free [Action] Action – The Survivor has 1 extra free Action of the specified type (Combat, Machine, Melee, Move, Ranged, or Search). This Action may only be used to perform an Action of the specified type. Free Machine Actions still require control of a Machine, either through a Skill or Remote token.
- +1 max Range – The maximum Range of Ranged weapons the Survivor uses is increased by 1.
- +1 Zone per Move – When the Survivor spends 1 Action to Move, they can Move 1 or 2 Zones instead of 1. Entering a Zone containing Xenos still ends the Survivor's Move Action.
- Ambidextrous – The Survivor treats all weapons as if they had the Dual symbol.
- Auto repair – During each End Phase, restore the Survivor's Armor to its base level.
NOTE: Brother in arms may be shortened to B.I.A.
- Camouflage – The Survivor may earn a Camouflage token at the start of their Turn, if no Xeno has a Line of Sight on them. Place the token next to their base. The Survivor may keep the token (even from a Game Round to the next) until they resolve any kind of Combat or Machine Action, or make Noise. It may be earned again in the same way.
As long as they have this token, the Survivor is ignored by all Xenos and is not considered a Noise token. Xenos don't attack them and will even move past them.
Even with the Camouflage token, the Survivor still has to spend extra Actions to move out of a Zone crowded with Xenos.
This is a Camouflage token.
- Charge – The Survivor can use this Skill once during each of their Turns, for free. They move up to 2 Zones to a Zone containing at least 1 Xeno. Normal Movement rules still apply. Entering a Zone containing Xenos still ends the Survivor's Move Action.
- Combat reflexes – Whenever any Xenos spawn within their Line of Sight, the Survivor may immediately perform a free Combat Action against them. This Action may eliminate more Xenos than have spawned. Ranged Actions must still be aimed at the Zone where the Xenos spawned. This Skill may be used once per Xeno card drawn.
- Concentrated Attack expert – Whenever the Survivor Concentrates Fire with 2 dice (or more), the base Damage value of the weapon gets +1, and there is no Friendly Fire.
- Dual expert – The Survivor has a free Combat Action as long as they have Dual weapons equipped. This Action may only be used with the Dual equipped weapons.
- Enhanced senses – The Survivor can trace Line of Sight 1 Zone farther in room Zones. They also ignore Dark Zones rules to trace Lines of Sight (P. 11).
- Escalation: [Action] – The Survivor gains 1 extra die to roll for subsequent Actions of the specified type (Combat, Melee, or Ranged). The bonus is cumulative and applies until the end of the Survivor's Turn. The bonus is lost whenever the Survivor performs another kind of Action.
EXAMPLE: A Survivor with the Escalation: Ranged Skill spends their first Action performing a Ranged Action with a Pistol (Dice 1). Their second Action is also spent for a Ranged Action, adding an additional die thanks to the Escalation Skill (Dice 2). The third Action is spent for a Move Action: the Escalation bonus is lost.
- Full auto – When resolving a Ranged Action, the Survivor may substitute the Dice number of the Ranged weapon(s) they use with the number of Xenos standing in the targeted Zone. Skills affecting the dice value, like +1 die: Ranged, still apply.
- Hit & run – The Survivor can use this Skill for free, just after they resolved a Melee or Ranged Action resulting in a least 1 Xeno being eliminated. They can then resolve a free Move Action. The Survivor does not spend extra Actions to perform this free Move Action if Xenos are standing in their Zone.
- Ironclad: [Xeno type] – The Survivor ignores all Damage coming from Xenos having the indicated keyword in its name. Ironclad: Worker works with any Workers, for example.
- Is That All You've Got? – You can use this Skill any time the Survivor is about to take Damage. Negate 1 Damage for each Equipment card you discard from your Survivor's inventory.
- Lifesaver – The Survivor can use this Skill once during each of their Turns, for free. Select a Zone containing at least 1 Xeno and at least 1 Survivor at Range 1 from your Survivor. Both Zones need to share a clear path and a Line of Sight. Choose Survivors in the selected Zone to be dragged to your Survivor's Zone without penalty. This is not a Move Action. A Survivor may decline the rescue and stay in the selected Zone if their controller chooses.
- Low profile – The Survivor can't get hit by Friendly Fire (Seismic Grenades still apply). Ignore them when shooting at the Zone they stand in.
- Lucky – For each action the Survivor takes, you may choose to re-roll all dice an additional time. The new result replaces the previous one. This Skill stacks with the effects of Equipment that allows re-rolls.
- Medic – This Skill is used for free during each End Phase. The Survivor, and all other Survivors standing in the same Zone, may restore 1 Armor up to their base level.
All Xenos standing in the selected Zone immediately gain an extra Activation: they try to reach the taunting Survivor by any means available. Taunted Xenos ignore all other Survivors. They do not attack them and leave the Zone they are standing in if needed to reach the taunting Survivor.
- Tough – The Survivor ignores the first Damage they receive during each Attack Step (Xenos' Phase) and during Friendly Fire (Survivor's Ranged Action).
- Unstoppable – The Survivor does not spend extra Actions when they perform a Move Action out of a Zone containing Xenos. Entering a Zone containing Xenos still ends the Survivor's Move Action.
- Xenos link – The Survivor plays an extra Turn each time an Extra Activation card (NOT Abomination cards) is drawn from the Xenos pile. They play before the extra-activated Xenos. If several Survivors benefit from this Skill at the same time, players choose their Turn order.
- Zero-G run – The Survivor can use this Skill once during each of their Turns. The Survivor spends 1 Action. They move 2 Zones. Ignore everything in the intervening Zone, except walls and closed doors.
Movement related Skills (like +1 Zone per Move or Unstoppable) are ignored, but Movement penalties (like having Xenos in the starting Zone) apply.
Game Round Summary
Game rules override this round summary.
Each round begins with:
01 – Players' Phase: The first player activates all of their Survivors, one after the other, in any order. When they're done, the next player's Turn begins. Play clockwise. Each Survivor has 3 Actions to spend, chosen from the following list. Unless otherwise stated, each Action may be performed several times per Activation.
- Move: Move 1 Zone (spend extra Actions if there are Xenos).
- Search (1x per Turn): In a room Zone free of Xenos only. Draw a card from the Equipment deck. Soldiers can only Search in Security Rooms.
- Door Activation (FREE, 1x per Turn): Place or remove a closed door token on a door opening in a Zone the Survivor occupies. Not if there's a destroyed door.
- Reorganize/Trade: Exchange Equipment with another Survivor standing in the same Zone. You can trade however you want – it doesn't have to be even (may trade Remote tokens). Attach/Detach Equipment cards: Plenty of Bullets for Bullets weapons, Energy Cell for Energy weapon.
- Combat Action: Melee Action (Equipped Melee weapon required); Ranged Action (Equipped Ranged weapon required).
- Take or Activate an Objective in the Survivor's Zone.
- Make Noise: Put a Noise token in the Survivor's Zone.
- Do Nothing: Any remaining Actions are lost.
- Machine Actions: The corresponding Skill or Remote Control token is needed. A Sentry Gun may be controlled by any Survivor in the same Zone. The Survivor's Skills don't apply to the Machine. Move (Bot only); Melee Action (Melee weapon required); Ranged Action (Ranged weapon required).
When every player has finished, 02 – Xenos' Phase:
Step 1 – Activation: Attack or Move. All Xenos spend 1 Action doing 1 of these 2 things:
- Xenos in the same Zone as at least 1 Survivor Attack them.
- The Xenos who didn't Attack, Move instead. Each Xeno favors visible Survivors, then Noise. Choose the shortest path, ignoring closed doors. If several paths share the same length, split the Xenos in equal groups (any uneven Xenos goes with one of the groups of your choosing). If there's a closed door in the way, Xenos spend their action destroying it instead.
NOTE: Hunters get 2 Actions per Activation. Once all Xenos have taken their first Action, Hunters go through the Activation Step again to resolve their second Action.
Step 2 – Spawn
- Always draw Xeno cards for all Spawn Zones in the same order (play clockwise).
- Danger Level uses: Highest Danger Level among the Survivors.
- No more miniatures of a specified type (except Abominations): Place the remaining ones. Then, all Abominations get 1 extra Activation (Driller Abominations drill a Pit instead). Finally, place a Driller Abomination in 1 Spawn Zone.
03 – End Phase
- Remove all Noise tokens from the board.
- The next player receives the First Player token (play clockwise).
Targeting Priority Order: When several targets share the same Targeting Priority Order, the players choose which ones are eliminated first.
| Targeting Priority | Name | Actions | Min Damage to Eliminate | Experience Earned |
|---|---|---|---|---|
| 1 | Tank/Abomination | 1 | 2/3 (3/4)* | 1/5 |
| 2 | Worker | 1 | 1 (2)* | 1 |
| 3 | Hunter | 2 | 1 (2)* | 1 |
*For Driller Xenos standing on an Open Pit Zone at Range 1+ (see P. 20).