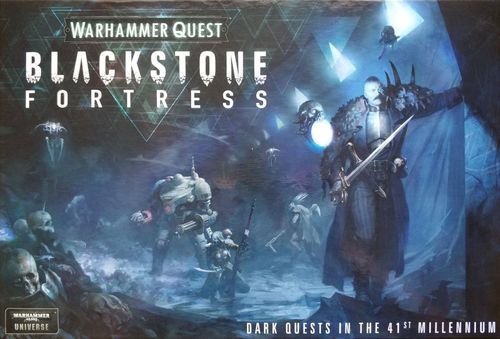
Warhammer Quest: Blackstone Fortress
Warhammer Quest: Blackstone Fortress Rulebook
Table of Contents
Table of Contents
- What's In The Box
- Miniatures
- Setup
- Exploration Rounds
- The Adventure
- Special Rules
- Quick Reference Sheet
- Combat Rules
- The Precipice
- Strongholds
- Tokens and Markers
- Explorers
- Amallyn Shadowguide — Asuryani Ranger (based aboard the Maturin's Steed)
- Dahyak Grekh — Kroot Tracker (based aboard the Kravv'cha'to)
- UR-025 — Imperial Servitor (based aboard the reclamation vessel Gamma-3-β)
- Rein and Raus — Ratling Twins (based aboard the reclamation vessel Gamma-3-β)
- Taddeus the Purifier — Ministorum Priest (based aboard the Reclaimer)
What's In The Box
The Warhammer Quest: Blackstone Fortress set includes the following components:
Citadel Explorer miniatures:
- Janus Draik
- Taddeus the Purifier
- Espern Locarno
- Pious Vorne
- UR-025
- Amallyn Shadowguide
- Rein and Raus (Ratling twins)
- Dahyak Grekh
Citadel enemy miniatures:
- Obsidius Mallex
- 2 Chaos Space Marines
- 4 Chaos Beastmen
- 4 Ur-Ghuls
- 4 Negavolt Cultists
- 2 Rogue Psykers
- 14 Traitor Guardsmen
- 4 Spindle Drones
Booklets:
- 16-page Rules booklet
- 16-page Combat rules booklet
- 24-page Guide to Precipice
- 24-page Background booklet
- 16-page datasheet booklet for using the included miniatures in games of Warhammer 40,000
- 1 assembly instructions leaflet
Boards and tiles:
- 1 Precipice board
- 1 battle tracker (assembled from two parts)
- 6 double-sided spaceship cards
- 2 double-sided maglev pod tiles
- 14 double-sided room tiles
- 10 double-sided special area tiles
- 6 passageway tiles
- 1 line-of-sight ruler
Tokens and markers (see what they look like on the back of the Guide to Precipice):
- 40 double-sided wound/critical wound tokens
- 8 double-sided inspiration point tokens
- 4 discovery markers
- 3 double-sided trap markers
- 2 double-sided threat level tokens
- 2 boost markers
- 2 plasma markers
- 2 "Inferno" markers
- 1 double-sided access marker
- 1 electromagnetic marker
- 1 stasis marker
- 1 rally marker
- 1 psychic barrier marker
- 1 chameleoline cloak marker
- 1 leader marker
Dice:
- 5 six-sided Fate dice
- 16 six-sided Activity dice
- 2 six-sided Action dice
- 2 eight-sided Action dice
- 2 twelve-sided Action dice
- 1 twenty-sided Blackstone die
Cards and maps:
- 8 character cards
- 8 enemy datasheet cards
- 12 initiative cards
- 36 exploration cards
- 36 discovery cards
- 34 skirmish cards
- 72 resource cards
- 12 legacy cards
- 8 mortis cards
- 4 Stronghold cards
- 4 artefact cards
Miscellaneous:
- 1 secret vault envelope
- 9 plastic stasis chamber sleeves
- 1 plastic database sleeve
Miniatures
Before playing you first need to assemble the Explorer and hostile-denizen miniatures. The assembly instructions will show you how to do this correctly.
The brave adventurers who dare to enter the Blackstone Fortress are called Explorers in these rules.
The denizens of the Blackstone Fortress that the Explorers meet along their path are called enemies in these rules. These creatures will try to end the Explorers' Expedition, and to do so in the most brutal way possible.
Setup
1. Choose a leader. One of the players must be appointed leader — give them the leader marker. If the players cannot agree on who will be leader, the owner of the set becomes the leader. The leader will change at certain points in the game. Whenever several players need to carry out actions at the same time, it is the leader who decides the order in which players take their actions. In these instances, the rules say "in an order chosen by the leader."
2. Choose Explorers. Four Explorers go on the Expedition. The number of Explorers each player controls depends on the number of players:
- One player: if there is only one player, they choose all four Explorers.
- Two players: if there are two players, each chooses two Explorers.
- Three players: if there are three players, each chooses one Explorer. Then the leader chooses one additional Explorer for themselves.
- Four players: each player chooses one Explorer.
- Five players: first, the players must decide who will be the enemy player and take control of all enemies encountered during the Expedition. If they cannot agree, the leader appoints the enemy player. Each remaining player then chooses one Explorer to control.
Players choose their Explorer(s) in the order set by the leader. Rein and Raus count as a single Explorer. When choosing an Explorer, take its miniature and place the matching character card next to it, secret objective side up (sometimes during an Expedition an Explorer becomes inspired, letting you flip the card to the other side). Put the miniatures and cards of the remaining Explorers back in the box.
If the rules require an Explorer to do something — move, attack, take an action, make a roll, or draw a card — the player controlling that Explorer carries out the instruction, deciding how the miniature moves and making any necessary rolls.
3. Prepare the Precipice board. Place the Precipice board at the edge of the table. Shuffle the discovery deck and deal it face down onto its space on the board. Split the exploration card deck into battle cards and challenge cards. Take the challenge cards, shuffle them, and deal four face down. Then do the same with the battle cards. Take the resulting two piles of four cards, shuffle them together, and place them face down on the exploration card space on the Precipice board. Put the rest of the exploration cards back in the box. You now have a deck of eight cards, half battle cards and half challenge cards.
4. Prepare the battle tracker. Assemble the battle tracker and place it at the opposite edge of the table from the Precipice board. Place the line-of-sight ruler below the battle tracker. Take the four initiative cards matching the Explorers going on the Expedition and add to them four enemy-group initiative cards. Place these eight cards face up to the left of the battle tracker, and put the rest of the initiative cards back in the box. Take the skirmish cards and find the ones for Traitor Guardsmen, Negavolt Cultists, Ur-Ghuls, and Spindle Drones (twenty cards in total). These cards form the skirmish deck. Shuffle it and place it face down next to the initiative cards, to the left of the battle tracker. Put the rest of the skirmish cards back in the box. Take the miniatures and datasheet cards for the Traitor Guardsmen, Negavolt Cultists, Ur-Ghuls, and Spindle Drones and place them to the right of the battle tracker. Put the remaining enemy miniatures and datasheet cards back in the box.
5. Prepare the spaceships. Each Explorer uses a specific spaceship, docked at the port settlement of Precipice, as their base of operations (some ships house more than one Explorer). The Explorer's character card states which ship they are based on. For example, Dahyak Grekh is based on the Kravv'cha'to.
Each spaceship card has two sides: "Support" and "Facilities." The ability shown on the support side can be used by any Explorer within the Blackstone Fortress. The other side describes special facilities on board the ship that Explorers can use after an Expedition ends (see p. 5 of the Guide to Precipice).
Choose the spaceships that the Explorers are based on and place them support side up on either side of the Precipice board, two on each side. If fewer than four ships were laid out this way, the leader must draw additional ships and place them near the Precipice board until there are four. Put the cards of the remaining spaceships back in the box.
6. Lay out the dice. The following types of dice (technically "dice," though the rules loosely call them "cubes" too) are needed to play Blackstone Fortress. Lay them out as follows:
Fate dice: black six-sided dice numbered 1–6, called Fate dice. Place them in the available Fate dice space on the Precipice board.
Activity dice: the remaining six-sided dice numbered 1–6, called Activity dice. Place four Activity dice next to each Explorer's character card.
Action dice: six-, eight-, and twelve-sided dice marked with special symbols, called Action dice. Place them next to the Precipice board. Each side of an Action die carries one of the following results: Fail, Success, or Critical Success. The die used depends on the stat or weapon in question — the six-sided Action die is marked with a square icon, the eight-sided with a triangle icon, and the twelve-sided with a pentagon icon, matching the icons printed on character and enemy cards (this rulebook writes them out as d6, d8, and d12).
Some rules require you to reroll the result shown on a die. To do this, roll the die again and use the new result to determine the outcome of the action. Unless stated otherwise, the same die can be rerolled no more than once. If a rule says you must roll two dice to determine the success of an action, roll two dice and choose which result to apply — if you have the ability to reroll that result, you may reroll one or both dice. Where a rule refers to a "successful roll," this means a result of Success or Critical Success.
Blackstone die: a twenty-sided die numbered 1–20, called the Blackstone die. Place it next to the Precipice board. It is used when resolving challenges, determining enemy behaviour, and generating random events during the game.
7. Lay out rooms, passageways, and special areas. The double-sided game boards in Blackstone Fortress represent rooms. Stack all the rooms next to the Precipice board — they will be laid out when a battle begins during an Expedition.
Each room is divided into hexagonal zones (called hexagons, or hexes, in these rules). Some hexes have one or more of their six sides marked with a white border, indicating a barrier behind which Explorers or their enemies can take cover. Other hexes may have sides marked with a purple border, marking walls or other obstacles. Models cannot move or draw line of sight through a purple-bordered hex side.
In addition, the box includes passageway and special area tiles. Passageway tiles are placed next to rooms and mark places from which enemy reinforcements can arrive and where the Explorers can call a maglev pod. Lay the passageway and special area tiles next to the stack of rooms by the Precipice board.
Special area tiles are either placed over hexes to mark special zones where particular rules apply, or laid out next to a room to create an additional hex that can be moved onto. If a Stronghold card or exploration card indicates a special area with a marked symbol next to it, that tile must be placed on the marked hex.
8. Lay out a maglev pod. Take the two maglev pod tiles and place one next to the battle tracker. Then, in an order chosen by the leader, each player places their Explorer(s) anywhere within the pod. Up to two Explorers can occupy a single hex. If you are playing Rein and Raus, the two of them can fit together into a hex that already has another Explorer in it. Place the second maglev pod tile with the rest of the rooms — you'll need it later. Some cards show an arrival and/or departure maglev room — in that case, the pod containing the Explorers counts as the arrival room, and the second pod becomes the departure room.
9. Lay out tokens and markers. Blackstone Fortress includes a set of cardboard tokens and markers used to keep track of things such as the number of wounds suffered by Explorers and their enemies, hexes where Explorers have made a discovery, or the use of unique actions. Place all tokens and markers below the Precipice board.
10. Take the reference booklets. Besides the Rules booklet, the box also includes the Combat rules booklet, the Guide to Precipice, and the Background booklet. Keep these on hand so you can consult them at any point during the game.
Combat rules booklet: contains the rules for fighting battles between Explorers and the hostile denizens of the Blackstone Fortress.
Guide to Precipice: contains the rules explaining what happens once an Expedition has ended and the Explorers have returned to their spaceship. It also describes several of the Strongholds that the Explorers can attack once they have found enough clues pointing to the location of these strongpoints.
Background booklet: contains information about the Galaxy in which the game takes place and its inhabitants. Although it contains no rules, reading it will help players better understand the motivations of the various characters and what to expect within the depths of the Blackstone Fortress.
11. Lay out other cards and envelopes. Lay out the legacy cards, resource cards, and mortis cards above the Precipice board. Then put the secret vault envelope, the Stronghold cards, the artefact cards, and the plastic database and stasis chamber sleeves back in the box (you won't need them for your first Expedition).
12. Begin the Expedition. The leader should read the following text aloud:
The Explorers enter the pod of one of the Blackstone Fortress's maglev transports and key in an access code on the control panel. The pod lurches into motion, carrying the Explorers to an unknown location deep within the fortress. Their task: find four clues and return to Precipice safe and sound.
Exploration Rounds
To make their way through the depths of the Blackstone Fortress, the Explorers must use a maglev pod, but the transport then shuts down to recharge and stays inactive for hours, days, or even weeks. This delay means the adventurers are forced to leave the pod and head out into the unknown to find another maglev that will let them press onward or leave the floating hulk altogether. While exploring the station, they may stumble upon caches of archeotech, encounter unfriendly creatures, or find clues that will help them reach specific locations deeper in the Blackstone Fortress during future Expeditions.
Each Expedition into the Blackstone Fortress is played out as a series of Exploration Rounds. Each round is divided into three phases:
- Exploration phase.
- Recovery phase.
- Leader-change phase.
Exploration Phase
In the Exploration phase, the leader determines what the Explorers find by drawing the top card from the exploration deck. Exploration cards are divided into two types: challenge cards and battle cards.
Challenge cards: challenge cards set the players a particular task. Follow the instructions on the card to complete it. After a challenge is resolved, put the card back in the box. Note: actions that normally cost an Activity die in battle (see p. 9 of the Combat rules booklet) are performed without spending an Activity die when resolving a challenge.
Battle cards: battle cards require the Explorers to fight a group of enemies. They are divided into standard battle cards and ambush cards. At the start of a battle, lay out the rooms and determine the enemies by drawing cards from the skirmish deck. You'll find the rules for resolving a battle in the Combat rules booklet. After the battle ends, discard the battle card and put it back in the box.
Recovery Phase
In the Recovery phase, each incapacitated Explorer makes a roll to see whether they recover (p. 14). Then each wounded Explorer makes a Mettle roll to see whether their wounds heal (p. 14).
Leader-Change Phase
In the Leader-change phase, the leader marker is passed to the next player clockwise, skipping the enemy player if there is one. After this, a new round begins.
Trading cards. In the Leader-change phase, Explorers may trade exploration, resource, and/or artefact cards with each other (or simply give these cards to one another).
The Adventure
The Explorers are searching for a vault hidden in the depths of the Blackstone Fortress. This section describes how they can reach their goal.
Discovery Markers and Discovery Cards
During an Expedition the Explorers will find archeotech and clues that will help them locate the secret vault deep within the Blackstone Fortress.
Discovery markers. Discovery markers are used to mark hexes where enemies are set up, as well as places where Explorers can find archeotech and clues (see p. 6 of the Combat rules booklet). Numbers indicate which enemy group is set up next to the marker. Discovery markers are usually placed number-up, but sometimes they are placed question-mark-up so the Explorers don't know what awaits them.
Discovery cards. Discovery cards are of two kinds: archeotech cards and clue cards. These cards can carry over from one Expedition to another (see p. 7 of the Guide to Precipice).
Archeotech cards: archeotech cards provide trade points, which can be spent in Precipice after an Expedition ends to acquire resource cards (see the Guide to Precipice).
Clue cards: clue cards let the Explorers reach specific locations deep within the Blackstone Fortress in future Expeditions (see the opposite column).
Strongholds
To find the secret vault, the Explorers must first get past the four Strongholds surrounding it.
Having chosen their Explorers at the start of a new Expedition, the players may discard four clue cards held by those Explorers. This lets them mount a targeted attack on a Stronghold instead of undertaking a normal Expedition. The discarded clue cards are shuffled back into the discovery deck.
The players then shuffle the deck of Stronghold cards and draw one at random. The Expedition becomes an operation to attack the drawn Stronghold. The rules for attacking a Stronghold can be found on pp. 12–13 of the Guide to Precipice.
Players decide for themselves whether they want to discard their Explorers' clue cards. If the players cannot agree, they go on a normal Expedition instead.
The Secret Vault
If the Explorers have conquered all four Strongholds, then after choosing their Explorers at the start of an Expedition the players may agree to attempt an expedition to the secret vault. The rules for the expedition to the secret vault are on pp. 22–23 of the Guide to Precipice. These rules explain what the Explorers must do to find the vault, uncover its secret, and win Warhammer Quest: Blackstone Fortress.
Failure
If there are no cards left in the legacy deck when one needs to be drawn (see p. 4 of the Guide to Precipice), or if fewer than four Explorers are available at the start of an Expedition, the search for the secret vault ends in failure. If either of these events occurs before the search for the secret vault is complete, the players lose the game of Warhammer Quest: Blackstone Fortress and must start a new one if they want to find out what lies within the secret vault.
New Expeditions
Having finished resolving the sequence of actions in Precipice (see p. 7 of the Guide to Precipice), the players may decide to set out on a new Expedition. The adventure can continue immediately, or the players may arrange a date and time for their next session to continue the search. If they wish, future Expeditions can be played with different players, so if someone can't make it, their friends can go on the Expedition without them.
Players may also swap which Explorers they control from one Expedition to the next — when choosing an Explorer, a player may take any available one. In addition, if five people are playing, the enemy player may also change from one Expedition to another.
When a player chooses an Explorer for an Expedition, any clues, resources, archeotech, and artefacts from Strongholds that the Explorer previously acquired and still has may be used, and must be placed next to the Explorer's card.
Pausing an Expedition
Sometimes you may find that your game session is ending and you haven't managed to finish the Expedition and return to Precipice. In such cases, you can pause the Expedition at the end of any battle or challenge, pack the game away, and then continue during your next game session. Details of how to pack up the game so it's ready to continue the Expedition can be found on p. 7 of the Guide to Precipice.
New Adventures
New adventures the Explorers can undertake are found in expansions to Warhammer Quest: Blackstone Fortress. New adventures let players learn more about the secrets held within the Blackstone Fortress.
Solo Expeditions
Solo Expeditions are a way of playing Warhammer Quest: Blackstone Fortress designed for those who want to finish a game in a single session rather than embark on a long-running campaign. You can undertake Solo Expeditions after finishing the search for the secret vault, or simply whenever you feel like playing a short game.
The goal of a Solo Expedition is to find a set number of clues and archeotech. Before the Expedition begins, players must decide how challenging they want the game to be and choose one of the difficulty levels below:
| Difficulty | Goal |
|---|---|
| Medium | 4 clue cards and 8 archeotech points |
| High | 5 clue cards and 9 archeotech points |
| Extreme | 6 clue cards and 10 archeotech points |
The players then begin the game. Set up everything as for a normal first game in search of the secret vault (pp. 6–10), with the exception that this game uses all of the skirmish cards. This means players will have no resources, and legacy rules and the like are not used.
Then play the Expedition using the normal rules, except that at the end of the Expedition the Explorers do not return to Precipice. Instead, if the Expedition is finished and the players have reached their goal by finding the required number of clues and archeotech, the Expedition counts as a success and the players win. If the Expedition ended before the players achieved their goal, the Expedition is a failure and the players lose.
Special Rules
This section contains special rules describing how Explorers suffer wounds, how they become inspired, and how to play the Rein and Raus Ratling twins.
Wounds
Over the course of an Expedition, it is very likely that one or more Explorers will be wounded or even killed by the enemies they encounter or the challenges they must overcome. Injuries suffered are shown by wound and critical wound tokens placed on the character card as described below.
Wounds and critical wounds affect enemies somewhat differently than they affect Explorers. You can read about this on pp. 12 and 14 of the Combat rules booklet.
Wound and critical wound tokens. Whenever an Explorer suffers a wound or critical wound, the controlling player must place a wound or critical wound token, respectively, on their character card, covering one of the slots meant for Activity dice. When making an activity roll for that Explorer, each wound or critical wound token reduces the number of dice available to roll by 1. If all of an Explorer's slots are covered, they must rely solely on Fate dice (see p. 9 of the Combat rules booklet).
Critical wound tokens work the same way as wound tokens, but critical wounds cannot be healed during a skirmish (see opposite column). Other than this, all rules for Explorers referring to wound tokens also apply to critical wound tokens, unless stated otherwise.
Incapacitated. If all the activity slots on an Explorer's character card are covered by wound or critical wound tokens, and that Explorer suffers another wound or critical wound, they are considered incapacitated. Remove the Explorer's model(s) from the table and their initiative card from the battle tracker, and place them next to their character card. An incapacitated Explorer cannot take actions or use special rules (nor can their special rules be used by other Explorers), and does not take part in battles or challenges.
Recovery rolls. In the Recovery phase of each Exploration round, a recovery roll is made to determine whether an incapacitated Explorer survives, and what the long-term consequences of their injuries are. Each player controlling an incapacitated Explorer must roll the Blackstone die and compare the result to the number of critical wounds that Explorer has suffered:
- Result less than or equal to the number of critical wounds: the Explorer dies of their injuries and cannot be used in future Expeditions. Place a mortis card next to the character to show they are dead. Any discovery, resource, and artefact cards that Explorer had are lost forever. In addition, the Expedition ends (see the New Expeditions section).
- Result greater than the number of critical wounds: place the Explorer's model in the maglev pod with the rest of the Explorers.
Healing wounds. Some rules, such as the Mettle roll described below, let you remove one or more wound tokens from an Explorer's character card. In the rules, this is called "healing a wound." Note: critical wounds cannot be healed unless stated otherwise.
Mettle rolls. Players may make a Mettle roll for an Explorer in the Recovery phase (after recovery rolls have been made) or during a skirmish by taking the "Heal" action (see p. 9 of the Combat rules booklet). To make a Mettle roll, roll the Action die matching the Explorer's Mettle stat and compare the result to the list below:
- Fail: nothing happens.
- Success: remove 1 wound token from the Explorer's character card.
- Critical Success: remove 2 wound tokens from the Explorer's character card.
Inspiration
At the start of the game, every Explorer's character card lies secret-objective side up. During the Expedition, if an Explorer has gathered enough inspiration points or achieved their secret objective (see the opposite column), the character card is flipped to its inspired side.
Inspiration points. An Explorer earns inspiration points by killing enemies in battle (see p. 10 of the Combat rules booklet). In addition, some challenges allow inspiration points to be earned.
Keep track of an Explorer's inspiration points by placing inspiration point tokens next to their character card. Tokens should be placed number-side up. An Explorer cannot have more than four inspiration points at once — if they already have four, any further inspiration points earned are lost.
The table below shows what inspiration points can be spent on. After spending them, return the tokens to the pile next to the Precipice board.
| Cost | Inspiration point spend |
|---|---|
| 3 | Flip the Explorer's character card to its inspired side. |
| 3 | Take the "Search (4+)" action in a hex that has no discovery marker yet (this action still requires spending an Activity die that showed 4+). |
| 2 | Attempt a gambit without spending an Activity die on it. |
| 1 | Reroll the result shown on an Action die. |
You can read about gambits and how Explorers can search in the Combat rules booklet.
Agility Rolls
Sometimes players will need to make Agility rolls. To do this, roll the Action die matching the Explorer's Agility stat and compare the result to the list below:
- Fail: the Agility roll fails.
- Success: the Agility roll succeeds.
- Critical Success: the Agility roll succeeds.
Inspired Explorers
When an Explorer becomes inspired, flip their character card to its inspired side. Wound and critical wound tokens the Explorer has suffered carry over to the inspired side. An inspired Explorer remains inspired for the rest of the Expedition.
Secret Objectives
Each Explorer has a secret objective, printed on the lower part of their character card. On achieving their secret objective, an Explorer immediately becomes inspired without spending inspiration points on it.
Rein and Raus
Rein and Raus are a unique Explorer represented on the table not by one miniature but by two: Rein and Raus. The following rules apply to them:
Both twins are controlled by a single player. When resolving challenges, Rein and Raus count as a single Explorer. During skirmishes, a single activity roll is made for them, and Activity dice are spent to take actions with either model, as chosen by the controlling player. Either twin may use any discovery, resource, or artefact cards the pair has.
When the twins' initiative card comes up, the controlling player may take actions with either twin (or both), in any order. For example, a player might take one action with one twin, then take an action with the other, then return to the first twin and take another action with them, and so on. Note: only Rein may use the sniper rifle (though either twin may use the pistol). An enemy is considered to have cover against an attack from one of the twins only if it was hidden from both twins at the moment of the attack.
Enemies may attack either twin (they do not need to see both). If all the slots on the Rein and Raus character card are covered by wound or critical wound tokens and they suffer another wound or critical wound, both twins are considered incapacitated. When making a recovery roll for them, roll the die only once — the result applies to both. On returning to the game after being incapacitated, they may be set up in different hexes or the same one.
Quick Reference Sheet
Exploration Round (p. 11)
- Exploration phase.
- Recovery phase.
- Leader-change phase.
Precipice sequence of actions (pp. 4–6 of the Guide to Precipice)
- Legacy phase.
- Trade phase.
Action Dice (p. 8) — Fail / Success / Critical Success.
Recovery Rolls. Roll the Blackstone die.
- Result less than or equal to the number of critical wounds: the Explorer dies of their injuries and cannot be used in future Expeditions. Place a mortis card next to the character to show they are dead. Any discovery, resource, and artefact cards that Explorer had are lost forever. In addition, the Expedition ends (see p. 11).
- Result greater than the number of critical wounds: place the Explorer's model in the maglev pod with the rest of the Explorers.
Attack Rolls (p. 12 of the Combat rules booklet)
- Fail: the attacker misses and the target is unharmed (the attack sequence is complete).
- Success: the target suffers 1 wound.
- Critical Success: the target suffers 1 critical wound.
Defence Rolls (p. 14 of the Combat rules booklet)
- Fail: the defender suffers a wound or critical wound as normal.
- Success: the defender ignores the wound, or suffers a normal wound instead of a critical one.
- Critical Success: the defender ignores the wound or critical wound.
Gambit Rolls (p. 8 of the Combat rules booklet)
- Fail: the Explorer's initiative card stays where it is on the battle tracker.
- Success: swap the Explorer's initiative card with the nearest enemy-group initiative card to its left or right on the battle tracker.
- Critical Success: swap the Explorer's initiative card with any enemy-group initiative card on the battle tracker.
Mettle Rolls (p. 14 of the Rules booklet)
- Fail: nothing happens.
- Success: remove 1 wound token from the character card.
- Critical Success: remove 2 wound tokens from the character card.
Inspiration Point Costs
| Cost | Spend |
|---|---|
| 3 | Flip the character card to its inspired side. |
| 3 | Take the "Search (4+)" action in a hex with no discovery marker yet (still costs an Activity die showing 4+). |
| 2 | Attempt a gambit without spending an Activity die. |
| 1 | Reroll an Action die result. |
Combat Rules
As they descend into the depths of the Blackstone Fortress, the Explorers will encounter groups of enemies who will oppose them. This booklet contains the rules for resolving clashes with hostile forces.
Wandering the crypt-like halls of the Blackstone Fortress, Explorers inevitably run into merciless enemies who will not back down without a fight. Among them: roving bands of Chaos-worshipping heretics, guardian drones seemingly related to the citadel itself, and prowling packs of alien creatures that strike from the shadows.
During the tense firefights aboard the Blackstone Fortress, the Explorers must set aside their mistrust (or even open hostility) toward one another to destroy a common enemy. Combatants hide behind wreckage left over from battles fought in ages past, or squeeze into gaps that have opened in the floor and walls of the fortress. From there they lay down covering fire, giving other Explorers the chance to take up advantageous positions, or try to pick off enemies through gaps in the debris. The ancient halls fill with the sound of gunfire, grenade blasts, and thunderous battle cries. The fallen are stripped of their belongings once the fighting is over — unless the ever-shifting structure of the fortress swallows them first.
The rules contained in this booklet will help you resolve a battle. On revealing a battle card, you'll see a map showing how to set up the battlefield. It shows where the Explorers begin the battle and where new discoveries await them. Next you draw skirmish cards, which determine which enemies the Explorers encounter and where exactly they are lurking.
A battle lasts several turns, in each of which Explorers and enemies may move and attack. The order in which combatants act depends on the position of the initiative cards on the battle tracker, and the success of an attack is determined by a roll of the Action dice included in the game.
Fights within the Blackstone Fortress take place at relatively close range, where small- and medium-calibre weapons are most effective. Heaps of debris, along with the nooks and outcroppings of the rooms themselves, provide plenty of cover, so combatants don't fight in the open — instead they use the terrain and the help of allies to flank enemies and suppress them with fire.
Players decide what their Explorers will do. To do this, they first roll Activity dice, then spend those dice to take actions. To find out what enemies will do, roll the Blackstone die and compare the result to the behaviour table on the back of the enemy's datasheet card.
Discovery markers are scattered across the battlefield. On reaching such a marker, an Explorer can search it to draw a discovery card. Keep in mind that spending time searching puts an Explorer in great danger!
At the end of every turn, an events roll is made to determine whether a random event occurs — for example, a maglev pod might arrive on the battlefield, letting the Explorers escape.
Battle Rules
As they descend into the depths of the Blackstone Fortress, the Explorers will meet groups of opponents who will stand against them. This booklet contains the rules for resolving clashes with hostile forces.
The Battle Card
A battle begins when a battle card is drawn from the exploration deck (see p. 7 of the Rules booklet). Every battle card shows an illustration indicating how the rooms should be arranged to form the battlefield. It also shows where passageways, special areas, and discovery markers should be placed, and where the Explorers begin the battle — either at the maglev pod's arrival point, or wherever they were ambushed. On p. 6 you'll find the rules for setting up the battlefield, describing how to lay out the game area based on the information shown on the battle card.
Skirmish Cards
Skirmish cards determine which enemies the Explorers encounter. Each skirmish card shows four skirmish entries (1, 2, 3, 4), whose numbers match the numbers of the discovery markers on the battle card.
Each skirmish entry lists either a set of enemy models (or simply "enemy group") or a special rule (called a "complication"). Lay the skirmish cards out in a row above the battle tracker so you can remember which card corresponds to which enemy group.
Setting Up the Battlefield
Before the battle begins, you must lay out the battlefield and set up the enemies opposing the Explorers. Setting up the battlefield is done in three steps:
- Lay out the battlefield.
- Set up the enemies.
- Assemble the initiative deck.
1. Lay out the battlefield. The battle card indicates which rooms the battlefield should be made from. Take the necessary rooms and lay them out as shown on the card, then add passageways, special areas, and discovery markers as described below.
Special areas: if the battle card indicates any special areas, place their tiles in the corresponding hexes after all rooms have been laid out.
Passageways: lay out passageways next to the marked hexes on the battle card. Passageways mark hexes through which enemy reinforcements can arrive (p. 13), and the place from which the Explorers can call the maglev pod they will use to escape (p. 15).
Discovery markers: the battle card indicates the location of discovery markers. Lay these markers out in the indicated hexes.
Arrival room: if the battle card shows a maglev pod outlined in red, place it with the Explorers set up as indicated on the card. After this, Explorers may, if they wish, stand in a different hex within the pod.
Ambush sites: the title of some battle cards will include the word "Ambush!" An ambush card will not show the location of the arrival pod room; instead you will see several hexes marked with the letter "A." In this case, set up the Explorers in the corresponding hexes. No more than two Explorers may occupy each hex.
2. Set up the enemies. Next, the enemy player (or the leader, if there is none) must set up the enemy models that the Explorers encounter. To do this, the player draws one card from the skirmish deck for each discovery marker shown on the battle card.
Draw the cards one at a time, setting up the enemies listed on one card before drawing the next. A numbered icon shows which column of the card should be used to set up enemies in the hex (or nearby) where the matching numbered discovery marker is located.
The first enemy from a group must be set up in the hex containing the corresponding discovery marker. Subsequent enemies from the same group may be set up in the hex with the discovery marker, or nearby — when choosing which hex to place an enemy in, you should favour hexes that give the enemies cover from the Explorers.
Model limits: if you don't have enough models to set up an entire enemy group, set up as many as you can and disregard the rest.
Hex limits: the number of enemies that can be set up in a single hex depends on the size of the enemy, shown on its datasheet card. A hex may hold: three small enemies, one large and two small enemies, two large enemies, or one huge enemy. For your convenience, the hex-limit table below also shows the limits that apply to Explorers.
HEX LIMITS
- 3 small enemies
- 2 small enemies and 1 large enemy
- 2 large enemies
- 1 huge enemy
- both Ratling twins and 1 other Explorer
- 2 Explorers
Enemy sizes are shown on their datasheet cards.
Complications: sometimes a skirmish card entry will show a complication instead of an enemy group. In that case, the special rule shown on the card applies for the rest of the battle.
3. Assemble the initiative deck. Finally, the enemy player (or the leader, if there is none) must assemble the initiative deck. This deck should include the initiative cards of all Explorers not yet incapacitated, and of every enemy group. Take these cards, shuffle them, and lay them out face down under the battle tracker. Set aside any cards not currently in use. The battle can now begin.
Fighting the Battle
Once you've finished setting up the battlefield, the fighting can begin. A battle lasts several turns, each made up of four phases: Fate, Initiative, Activity, and Events. Once the Events phase ends, the next turn begins. The battle ends once all Explorers are in a hex within the maglev pod's departure room, or once all of them have been incapacitated (p. 15).
Battle Turn Sequence
- Fate phase
- Initiative phase
- Activity phase
- Events phase
Fate Phase
In the Fate phase, the leader makes a Fate roll. To do this, they roll five Fate dice and set aside those that show different values into the available-Fate-dice slot on the Precipice board. The remaining dice (those showing matching values) are placed in the discarded-Fate-dice slot on the Precipice board.
For example, if you roll 2, 3, 3, 4, and 6, place the two 3s in the discarded slot, and the 2, 4, and 6 in the available slot. When an available Fate die is used, move it to the discarded slot (see the rules on Fate dice on p. 8).
Initiative Phase
Once the Fate phase ends, the Initiative phase begins, during which the order in which Explorers and enemies will activate in the following Activity phase is determined. The Initiative phase consists of 4 steps:
- Activity rolls.
- Determine initiative.
- Covering fire.
- Gambits.
1. Activity rolls. First, players make activity rolls for each Explorer they control. To make an Explorer's activity roll, the player must roll one Activity die for each empty slot on that Explorer's activity tracker. This is usually 4 dice, but wounds the Explorer has suffered (see p. 14 of the Rules booklet) reduce the number of dice available. After rolling, place each die in an empty slot on the Explorer's activity tracker without changing the result shown.
Activity dice can be spent to take actions and attempt gambits according to the rules that follow. Remove spent dice from the Explorer's card.
2. Determine initiative. Next, the leader must shuffle the initiative deck and deal the cards face up, left to right, into their designated slots below the battle tracker (if this is an ambush rather than a normal battle, see the box opposite). In the Activity phase, the Explorer (or enemy group) whose card ends up furthest left will activate first, followed by whoever occupies the next slot, and so on. You can read more about this in the "Activity Phase" section on the next page.
3. Covering fire. In this step, two Explorers who can see each other may swap their initiative cards on the battle tracker. The players controlling both Explorers must agree to make the swap. This is called "covering fire": one Explorer is considered to be covering the other while they act. In each Initiative phase, a player may change the position of their initiative card using covering fire only once.
Once all Explorers who chose to take advantage of covering fire have swapped positions, this step ends.
4. Gambits. In this step, Explorers may try to attempt gambits. To do this, the player controlling the Explorer must spend one of the Activity dice from the Explorer's character card and roll the Action die matching that Explorer's Agility stat, then compare the result to the table below:
- Fail: the Explorer's initiative card stays where it is on the battle tracker.
- Success: swap the Explorer's initiative card with the nearest enemy-group initiative card to its left or right on the battle tracker.
- Critical Success: swap the Explorer's initiative card with any enemy-group initiative card on the battle tracker.
Fate dice cannot be spent on gambits, but an Explorer may keep attempting gambits, spending an Activity die on each attempt. If several Explorers try to attempt a gambit at the same time, the leader determines the order in which they make their attempts.
Ambush! If this is an ambush rather than a normal battle, a special procedure is used to assemble the battle tracker on the first turn. First shuffle and lay out the enemies' initiative cards, and only then shuffle and lay out the Explorers' initiative cards. This means enemies will activate first on the first turn of the battle, unless one of the Explorers changes their position on the battle tracker with a gambit.
Activity Phase
In the Activity phase, each Explorer and each enemy group activates in the order determined by the position of the initiative cards on the battle tracker. The Explorer (or enemy group) occupying the first slot activates first. Once a combatant finishes their activity, their initiative card is flipped face down, then the next Explorer (or enemy group) activates, and so on. The Activity phase ends once all Explorers and enemy groups have taken their actions.
Explorers and enemy groups activate somewhat differently. First we'll explain how Explorers activate, then we'll cover enemy groups. Remember the special rules for the Ratling twins (see p. 15 of the Rules booklet).
Explorer Activity
While active, an Explorer may take various actions — for example, moving, fighting, and finding useful items. To take an action, you must spend one of the Activity dice from the Explorer's character card. An Explorer may take the same action multiple times, but must fully resolve one action before taking the next.
Every action has a cost, shown in brackets, indicating the minimum result that must be shown on the Activity die spent to take that action. For example, to take an action with a cost of (4+), you must spend an Activity die that shows 4 or higher.
An Explorer's activity ends when the controlling player no longer wants to (or cannot) take any more actions with that Explorer. Any Activity dice remaining on the Explorer's card can then be used to make overwatch attacks. Also, if the Explorer killed at least one enemy, you may make an inspiration roll (see the next page). After this, the next Explorer (or enemy group) on the battle tracker activates.
Fate dice. The Fate dice on the Precipice board are, in effect, extra Activity dice that any Explorer can use. When taking an action that requires spending an Activity die, a player may spend a Fate die instead, following all the same rules. An Explorer may spend no more than two Fate dice in the same turn.
Basic Explorer actions. Every Explorer may take four basic actions: Move (1+), Heal (1+), Search (4+), and Call (4+).
Move (1+): when taking this action, the Explorer may move a number of hexes equal to their Movement stat on their character card. Each subsequent hex the Explorer moves into must be adjacent to the one they are currently in. Explorers may move through hexes occupied by other Explorers, and enemies may move through hexes occupied by other enemies, but models cannot move through hexes occupied by hostile models or obstacles, or through hex sides representing walls. In addition, a model cannot end its movement in a hex if doing so would exceed that hex's limits (see p. 6), though it may pass through such a hex without stopping there.
If a model moves into a hex adjacent to an enemy model, it must stop and cannot move any further. If a model begins its move in a hex adjacent to an enemy model, it may leave that hex, but must stop if it enters another hex adjacent to an enemy model.
Heal (1+): if the Explorer has been wounded, they may take this action to make a Mettle roll (see p. 14 of the Rules booklet).
Search (4+): an Explorer may take this action if they are in a hex with a discovery marker, or if they spend 3 inspiration points (see pp. 14–15 of the Rules booklet). An Explorer cannot take this action if there is a visible enemy in an adjacent hex, within line of sight. When taking this action, remove the discovery marker from the hex (if there was one), draw the top card from the discovery deck, and place it next to the Explorer's character card.
Call (4+): an Explorer may take this action only if they are in a hex adjacent to a passageway. When taking this action, the passageway is removed from the battlefield and replaced with the maglev departure room, from which the Explorers can leave the battle (see p. 15). This action cannot be taken if the departure room has already been set up.
Special Explorer actions. Every Explorer's character card lists a number of special actions available to them. Special actions are divided into weapon actions and unique actions.
Weapon actions: weapon actions are used to attack enemies. The Explorer handles a weapon by spending the matching Activity die, then makes an attack following the rules below.
Prioritise the closest threat. If a visible model hostile to the attacker is in an adjacent hex, the attacker must choose that model as their target and cannot attack targets at a distance.
Aim (1+): when handling a weapon, an Explorer may spend an additional Activity die (1+) to aim (meaning you'll need to spend two dice: one for the weapon action and one for aiming). Aiming lets you ignore the benefits of cover (see p. 12).
Unique actions: an Explorer's character card may also list one or more unique actions.
Overwatch. Sometimes an Explorer will have unspent Activity dice left over after their activity ends. In that case, first remove any dice that show a result of 1, then reduce the value shown on the remaining dice by 1 (i.e. a 4 becomes a 3, a 6 becomes a 5, etc.). These are called overwatch dice, and can be used to take weapon actions under the rules below.
Overwatch dice may be used to take weapon actions against enemies within line of sight after they have been set up, finished moving, or made an attack. The target of an overwatch attack can only be an enemy that has taken one of those actions. Resolve the Explorer's weapon action, then continue resolving the enemy's activity. Note: only Explorers who have already activated earlier in the turn may make overwatch attacks.
An Explorer may take no more than one weapon action each time an enemy gives them the opportunity for an overwatch attack. If several Explorers have the opportunity to make an overwatch attack, first announce which of them intend to take it. Then, each Explorer who volunteers to attack may take one weapon action against that enemy, in an order set by the leader. If the enemy is killed before all Explorers have taken their attacks, those Explorers whose turn didn't come still must discard one overwatch die.
At the end of the Activity phase, remove any remaining overwatch dice from Explorer character cards.
Inspiration roll. If an Explorer killed at least one enemy during their activity, an inspiration roll is made at the end of their activity to see whether they earn an inspiration point (see pp. 14–15 of the Rules booklet). The inspiration roll is made after the Explorer has taken all the actions they wanted to and has set aside any dice remaining (if any) for overwatch attacks.
To make an inspiration roll, roll the Blackstone die. If the result is less than or equal to the combined Wounds value of all enemies killed by that Explorer during this Activity phase, they earn 1 inspiration point. For example, an Explorer who killed a Traitor Guardsman (2 wounds) and a Chaos Beastman (3 wounds) earns an inspiration point on a roll of 1 to 5. If the combined Wounds value of the killed enemies is 20 or more, the Explorer automatically earns 1 inspiration point without rolling.
Note: inspiration points can only be earned for enemies killed during that Explorer's own activity. Enemies killed at other times (for example, by overwatch attacks described above) do not count toward earning inspiration points.
Setting Up Models During a Battle
In some cases, a rule allows a model to be set up on the battlefield during a battle. In such cases, the rule will describe how the model should be set up. A model cannot be set up in a hex already occupied by a hostile model. A model also cannot be set up in a hex if doing so would exceed that hex's limits (see p. 6). If a model cannot be set up because of these restrictions, it is considered killed.
If an enemy model that was previously killed is set up again during a battle, any wounds it had previously suffered are considered healed.
Attacks
When Explorers take weapon actions, attacks are resolved according to the following rules. The player controlling the Explorer must go through several steps to make an attack. Enemy attacks are described on p. 14.
Attack sequence:
- Choose a target.
- Measure the range.
- Make an attack roll.
- Apply wounds.
1. Choose a target. First, choose a target visible to the attacker. Visibility is checked by drawing an imaginary straight line, called the line of sight, from the centre of the attacker's hex to the centre of the target's hex. A target is considered visible if nothing blocks the line of sight. If the line of sight touches any part of the map edge, an obstacle, or a wall, it is considered blocked.
If you're not sure whether something is blocking the line of sight, use the line-of-sight ruler. Lay it flat along the line of sight and see whether it touches anything that could block visibility.
If a visible model hostile to the attacker is in an adjacent hex, the attacker must choose that model as their target and cannot attack targets at a distance.
2. Measure the range. Next, measure the range from the attacker to the target by counting the number of hexes separating them. Always use the shortest distance from attacker to target, and don't count the attacker's own hex (though the target's hex must be counted).
3. Make an attack roll. Depending on the range to the target and the weapon the attacker is using, you'll need to roll a particular Action die (in some cases, two dice). Roll the Action die and compare the result to the outcomes below (p. 8 of the Rules booklet explains how to interpret Action die results):
- Fail: the attacker misses and the target is unharmed (the attack sequence is complete).
- Success: the target suffers 1 wound.
- Critical Success: the target suffers 1 critical wound.
4. Apply wounds. The target suffers wounds or critical wounds if the attack roll was a Success or Critical Success. For each wound or critical wound inflicted, place the matching token next to the enemy. Each wound inflicts 1 point of damage, while each critical wound inflicts 3 points of damage.
Every enemy has a Wounds stat, reflecting its toughness and ability to withstand injury. Once the damage an enemy has suffered exceeds its Wounds stat, it is killed — remove it from the battlefield.
After applying wounds or critical wounds, the attack is considered resolved — the weapon action is complete.
Cover
Explorers and their enemies wield deadly weapons, so it pays to make use of whatever cover can be found in the halls of the Blackstone Fortress.
An Explorer or enemy is considered to be in cover if the line of sight touches or crosses a hex side that grants cover (see p. 9 of the Rules booklet), provided that the cover-granting hex side is not a side of the hex the attacker occupies (see the example below).
If the target of an attack is in cover, a result that would normally be a Success is instead treated as a Fail, and a Critical Success is treated as a normal Success. Some attacks ignore the benefits of cover — in that case, cover has no effect on the attack and does not change the attack roll's result.
Stun
As a result of certain rules, an Explorer or enemy may be stunned. In that case, lay the Explorer or enemy on its side in the hex where it was standing. During its next activity, a stunned Explorer must discard an Activity die, after which it stands back up and is no longer considered stunned. If an enemy was stunned, during its next activity stand it back up instead of making a behaviour roll (see p. 13 for more on behaviour tables), after which it is no longer considered stunned. If an already-stunned Explorer or enemy suffers a "Stun" result again, it is not stunned a second time — instead it loses 1 wound.
Enemy Actions
When an enemy group's initiative card comes up, first make a reinforcements roll for that group, then activate every enemy in the group. Enemies are controlled by the enemy player. If there is no enemy player, this responsibility falls to the leader, who must also follow all the rules below.
Reinforcements rolls. If at least one model in an enemy group has been killed, the enemy player must immediately make a reinforcements roll when the enemy group's initiative card comes up on the battle tracker.
To do this, roll the Blackstone die and compare the result to the values in the table below, based on the size of the smallest enemy killed from that group.
REINFORCEMENTS
| Roll | Small | Large | Huge |
|---|---|---|---|
| 1 | 6 | 4 | 1 |
| 2 | 4 | 2 | – |
| 3 | 2 | 1 | – |
| 4+ | – | – | – |
If the table shows a number, return that many killed enemies from that group to the battlefield as reinforcements. If fewer enemies from that group were killed than the number rolled, return however many were actually killed.
Reinforcements must be set up in a hex adjacent to a passageway, as close as possible to another enemy from the same group already on the battlefield. If no enemies from that group remain on the battlefield (i.e. they were all killed), set up the reinforcement next to a passageway and as close as possible to an Explorer.
Enemy activity. After reinforcements are set up, the rest of the enemies in that group activate. Note that reinforcements do not activate in the turn in which they return to the battlefield.
The first enemy in the group to activate is the one closest to the Explorers. When measuring distance, use the shortest path from the enemy to the Explorer that does not cross a wall hex side or a closed hex. If several enemies are equally close to the Explorers, the enemy player decides which one activates first. After one enemy has taken its actions under the rules below, the next enemy activates the same way, and so on, until every enemy in that group — except any that arrived as reinforcements this turn — has activated.
Behaviour roll. To find out what an active enemy will do, the enemy player rolls the Blackstone die and compares the result to the value shown in the behaviour table on the enemy's datasheet card. Read the column headers left to right until you find the one that describes the situation the enemy is in. The enemy then takes the indicated action, as described below.
Descriptions of enemy actions. All basic enemy actions are described on the back cover of this booklet. Any enemy can take them. When measuring distances for these actions (for example, to the nearest Explorer), always use the shortest path from the enemy to the Explorer that does not cross a wall hex side or a closed hex.
Some enemies have unique actions. In that case, how to resolve the unique action is described beneath the behaviour table on the enemy's datasheet card.
Enemy movement. When moving, an enemy may move a number of hexes equal to the Movement stat shown on its datasheet card. All the rules that apply to Explorer movement also apply to enemy movement (see p. 9).
The action's description will indicate the enemy's destination — a hex, or an Explorer it must move toward. Each hex the enemy enters must bring it closer to its destination than the previous hex. If the enemy has a choice between several hexes equally close to its destination, it will favour hexes that grant it cover from Explorers who can see it.
If the destination is a hex, the enemy stops once it reaches it. If the destination is an Explorer, the enemy stops in the first hex it reaches that is adjacent to the hex occupied by that Explorer. The enemy will also stop if, for whatever reason, it cannot get any closer to its destination. Within these constraints, the player controlling the enemy may move it however they like.
Enemy attacks. When an enemy makes an attack, the enemy player chooses the target for that enemy, then resolves the attack. If an enemy's datasheet card lists several weapons, use whichever weapon the model is equipped with. The demonstration section on pp. 8–11 of the Guide to Precipice will help you work out which weapon a given model is carrying.
All the rules for making attacks that apply to Explorers also apply to enemy attacks (see pp. 11–12). Most often, the target of an enemy's attack will be determined by its behaviour roll. Subject to those restrictions, the enemy player may choose the target for that enemy as they see fit. If an enemy has no available targets — because Explorers are outside its line of sight or beyond the range of its weapon — it does not attack.
Explorer defence rolls. Unlike enemies, Explorers can attempt to negate wounds or critical wounds they suffer. If an Explorer suffers a wound or critical wound, before applying it the controlling player must make a defence roll. To do this, they check the Defence stat on the Explorer's character card, roll the matching Action die, and compare the result to the following:
- Fail: the defender suffers a wound or critical wound as normal.
- Success: the defender ignores the wound, or suffers a normal wound instead of a critical one.
- Critical Success: the defender ignores the wound or critical wound.
Events Phase
In the Events phase, players must first determine whether the battle continues. If all Explorers are incapacitated, or if every Explorer who is not incapacitated is standing in the maglev departure room, the battle is over.
If the battle continues, the leader must make an events roll by rolling the Blackstone die and comparing the result to the event table below. After resolving the event, the leader passes the leader marker to the player on their left (skipping the enemy player, if there is one). The recipient becomes the leader for the following turn. The turn is then considered complete and the next turn begins.
If the battle has ended, remove all remaining enemies from the battlefield, shuffle the skirmish cards back into the skirmish deck, remove all markers, tokens, passageways, special areas, and rooms from the table (except the maglev departure room), and proceed to the Recovery phase of the Exploration round (see p. 11 of the Rules booklet).
EVENT TABLE
| Roll | Event |
|---|---|
| 1 | Turned to dust: if there are discovery markers left on the battlefield, the leader must discard one of them. If no discovery markers remain, each Explorer loses 1 inspiration point, to a minimum of 0. |
| 2–3 | Not dead yet: do not make a Fate roll at the start of the next turn. |
| 4–6 | Still kicking: the leader must choose one enemy that was killed in battle and has not yet returned to the battlefield, and set it up on the battlefield as close as possible to an Explorer. |
| 7–10 | Circumstances change: draw a skirmish card. If it shows a complication, that complication takes effect and remains in play for the rest of the battle. Otherwise, nothing happens. |
| 11–14 | Departure room: the leader replaces the passageway furthest from the Explorers with the maglev departure room. If several passageways are equally distant from the Explorers, the leader decides which one to replace. If this result has already come up, or the Explorers have already called the maglev pod, nothing happens. |
| 15–17 | Inspiration: the leader chooses an Explorer. That Explorer earns 1 inspiration point. |
| 18–19 | Heroic effort: the leader chooses an incapacitated Explorer. Set up that Explorer in the same hex as another Explorer, or as close as possible to one, and make a Mettle roll for the newly set-up Explorer. If there are no incapacitated Explorers, the leader instead chooses any Explorer, who must make a Mettle roll. |
| 20 | Lucky find: the leader chooses an Explorer. That Explorer draws a discovery card. |
Quick Reference
Setting Up the Battlefield (p. 6)
- Lay out the battlefield.
- Set up the enemies.
- Assemble the initiative deck.
Battle Turn (pp. 7–15)
Fate phase
Initiative phase:
- Activity rolls
- Determine initiative
- Covering fire
- Gambits
Activity phase
Events phase
Basic Explorer Actions (p. 9)
Move (1+): move the Explorer a number of hexes up to their Movement stat.
Heal (1+): make a Mettle roll.
Search (4+): draw a discovery card (the Explorer must be in a hex with a discovery marker, with no visible enemies nearby).
Call (4+): lay out the maglev departure room next to a passageway (the Explorer must be next to a passageway).
Basic Enemy Actions:
Charge: move toward the nearest Explorer, then attack if the Explorer is within line of sight and weapon range.
Snipe: attack the furthest Explorer within line of sight and weapon range. This attack ignores the benefits of cover.
Assault: move toward the nearest Explorer, then attack if the Explorer is in an adjacent hex and within line of sight.
Fall back: this enemy's Movement stat is doubled for the duration of this action. If it can move so as to end up in a hex outside the line of sight of all Explorers, it does so. Otherwise it attacks the nearest Explorer within its line of sight and weapon range.
Hold position: do nothing.
Press the attack: attack the nearest Explorer within line of sight and weapon range. Then attack the nearest Explorer within line of sight and weapon range again (this may be a different Explorer, if the first was incapacitated, or if several Explorers are equally close).
Skulk: advance as close as possible to an Explorer, without entering a hex visible to any Explorer.
Reinforcements (p. 13)
| Roll | Small | Large | Huge |
|---|---|---|---|
| 1 | 6 | 4 | 1 |
| 2 | 4 | 2 | – |
| 3 | 2 | 1 | – |
| 4+ | – | – | – |
Hex Limits (p. 6)
- 3 small enemies
- 2 small enemies and 1 large enemy
- 2 large enemies
- 1 huge enemy
- both Ratling twins and 1 other Explorer
- 2 Explorers
Enemy reinforcement values are shown on their datasheet cards.
The Precipice
The quest the Explorers are on will not be finished in a single Expedition. The Explorers will need to descend into the depths of the Blackstone Fortress many times, and return again and again to Precipice to rest and resupply.
Sequence of Actions in Precipice
Once the Explorers return to Precipice, their activities are divided into two phases:
- Legacy phase.
- Trade phase.
Legacy Phase
The leader shuffles the legacy deck and draws one card at random. That card's effect applies to every subsequent Expedition. If there are no cards left in the legacy deck (because they have all been drawn), the Explorers' search ends in failure.
Using legacy cards. Drawn legacy cards are laid out in a row face up next to the Precipice board at the start of each subsequent Expedition (p. 7). Note: countdown cards have no effect on the game itself, but they reduce the amount of time the Explorers have left to find the secret vault.
Between games, you may store all drawn legacy cards in the plastic database sleeve included in the set. Simply place all the cards in the sleeve when you pack up the game. At the start of your next game session, take the cards out of the sleeve and lay them out next to the Precipice board as described above.
Trade Phase
During this phase of activity in Precipice, Explorers may visit one of the docked spaceships to exchange archeotech they've found for resources. While visiting a ship, they can also make use of any special facilities aboard it.
First, flip each spaceship card to its Facilities side. Every ship has an associated deck of resource cards. The leader takes the resource deck for each ship currently docked at Precipice, shuffles each deck separately, then deals three cards from each and lays them out face up next to the matching spaceship. These three cards are the resources currently available on that ship. If a ship's resource deck runs out, deal as many cards as you can. Put the rest of the cards back in the box.
Then, in an order set by the leader, each Explorer who took part in the Expedition may travel to one of the spaceships to make use of its facilities and trade. Place the Explorer's miniature on the ship and fully resolve trading with it under the rules below. Rein and Raus must visit the same spaceship and, for the purposes of the rules below, count as a single Explorer.
First, the Explorer may make use of the facilities aboard the ship. Note that an Explorer is not required to use a spaceship's facilities if they don't want to.
The Explorer may trade, exchanging one or more of their archeotech cards for trade points (any cards the Explorer chooses not to exchange remain in their possession). The bottom of each archeotech card shows how many trade points it is worth. Trade points can be spent to buy one or more of the resource cards available on that ship. The total cost of the resource cards bought must be less than or equal to the number of trade points available. If an Explorer trades on the ship they are based on, add 1 to their total trade points. Any unused trade points are lost at the end of the Trade phase.
Place purchased resource cards next to the Explorer's character card, and shuffle the archeotech cards exchanged for trade points back into the discovery deck. Note: taking resource cards reduces the number of resources available to other Explorers who decide to trade with the same spaceship during the same Trade phase.
Then the next Explorer travels aboard one of the ships and trades with it, and so on, until every Explorer has had the chance to trade. After this, the Trade phase is considered complete.
Using resource cards. Resource cards an Explorer has bought are placed next to their character card. If an Explorer is placed into a stasis chamber (p. 7), their resources remain with them.
Every resource card states when and how it should be used. Using a resource card is voluntary, and an Explorer may always choose not to use a resource if they want to hold on to it for later. If a resource card lets an Explorer take an action, it may show the value of the Activity die that must be spent to take that action. In that case, the Explorer must both use the resource card and spend an Activity die with a value equal to or greater than the value shown on the card.
Most resource cards must be discarded after use: shuffle discarded resource cards back into the deck they were drawn from. Other resource cards become spent after use: in that case, the card cannot be used again during the same battle turn — place the card face down so you don't forget this. All other resource cards grant a permanent bonus.
Explorers taking part in the same Expedition may trade with each other (or give to each other) discovery, resource, and/or artefact cards during the Leader-change phase of each Exploration round (see p. 11 of the Rules booklet). In addition, Explorers may trade with each other (or give to each other) resource and/or artefact cards at any time while in Precipice, as well as at the start of an Expedition (after setup is complete, but before the first round begins).
Next Expedition
Once the sequence of actions in Precipice is complete, players may begin a new Expedition right away, or arrange the date and time of their next session, at which point their Explorers will continue the adventure.
Stasis Chambers
If the players agree to hold their next Expedition on a different day rather than right away, each Explorer's character card, and all of that Explorer's cards, are placed in one of the plastic stasis chamber sleeves included in the set. Simply place all the cards in the sleeve when you pack up the game. At the start of the next game session, if a player decides to send that Explorer on the Expedition, they take all the cards out of the sleeve and lay them out next to the Explorer's character card.
A stasis chamber sleeve can hold no more than ten cards, not counting the character card. If an Explorer has more than ten cards, place ten of them in the stasis chamber sleeve and return the rest to their respective decks.
Pausing an Expedition
Stasis chambers and the database sleeve can also be used if you decide to pause an Expedition (see p. 13 of the Rules booklet). In this case, pack up the game as you would at the end of a session, but also place the incapacitated Explorer's wound and critical wound tokens into their stasis chamber sleeve. If the Explorer is inspired, place their character card inspired side up in the sleeve; otherwise place it secret-objective side up.
At the start of your next game session, lay out the game as you normally would, but use the same Explorers and don't form a new exploration deck. Then place the wounds the Explorers had suffered back onto their character cards, and return the remaining exploration cards to the Precipice board.
Leader Points (Optional Rule)
If you'd like, players can record the leader points they earn during an Expedition on a leaderboard. This makes the game more competitive and lets you find out who's playing best.
Earning leader points. Leader points are awarded during the Legacy phase (p. 4). Each player earns a certain number of points depending on how well the Explorer they controlled during the Expedition performed (see below for details). If a player controlled more than one Explorer, they must choose one of them for the purposes of scoring leader points — the other Explorers earn them no points.
Add up the value of all archeotech cards the Explorer acquired during the Expedition, then add 3 points for every clue that Explorer found. Add another 6 points if the Explorer is inspired. The resulting total is the number of leader points awarded to that player. Note: only archeotech and clues gained during the most recent Expedition count toward leader points, so if you decide to hold on to clues and archeotech left over from previous Expeditions, it's worth keeping them separate if you're playing with leader points.
Being the leader. If you're using the leader points rule, then at the start of every Expedition after the first, the leader is whichever player has the most leader points (if several players are tied, choose a leader using the normal rules). In addition, the player with the most leader points at the end of each Expedition is recognised as the best player in your group!
Enemies
In the ever-shifting halls of the Blackstone Fortress lurk a wide array of deadly warriors, bloodthirsty beasts, and guardian machines. They defend, seek to escape, or seek to master this labyrinthine prison, venting their bloodlust on any Explorers who dare trespass in their domain.
The enemy roster includes: Obsidius Mallex, Chaos Lord; Chaos Space Marines; Traitor Guardsmen (armed with flamers, lasguns, grenades, pistols and melee weapons, or led by a Traitor Guardsman Sergeant); Spindle Drones; Rogue Psykers; Chaos Beastmen; Negavolt Cultists; and Ur-Ghuls.
Explorers
Hailing from distant corners of the Galaxy, these Explorers have already braved countless dangers to reach the Blackstone Fortress. Yet their greatest trials still lie ahead, so they must set aside their differences and work together if they hope to survive.
Janus Draik, a rogue trader, based aboard the Vanguard: "Venturing into the unknown takes both courage and caution in the right measure. You need both, but favour one too much and you'll ruin everything entirely."
Espern Locarno, an Imperial navigator, based aboard the Wayfarer: "There is more than one path to any destination. We navigators point the way, but we may not tell you which is best."
Taddeus the Purifier, a Ministorum priest, and Pious Vorne, a fanatical missionary, both based aboard the Reclaimer.
Dahyak Grekh, a Kroot tracker, based aboard the Kravv'cha'to: "I
UR-025, an Imperial servitor, and Rein and Raus, the Ratling twins, both based aboard the reclamation vessel Gamma-3-β: "How may I be of assistance?"
Amallyn Shadowguide, an Asuryani Ranger, based aboard the Maturin's Steed: "In ages past, my people made countless worlds — virgin worlds, artificial worlds, uncounted wonders upon them. Many of these are now shattered, and I fear that soon those that remain will be swallowed by darkness. And yet, having endured such horrors, this Blackstone Fortress has remained untouched. I must learn how. The fate of the Aeldari may depend upon it."
Strongholds
To gain access to the treasure vault, the Explorers must first attack and conquer the four Strongholds surrounding it. Each of them holds a new and extremely challenging set of trials for the adventurers. Only once all four Strongholds have fallen can the Explorers finally set out on the Expedition to the secret vault.
These pages contain the information needed to attack a Stronghold and to undertake the expedition to the treasure vault. They include the card for each Stronghold and for the vault itself, along with detailed information on how to reach these locations, descriptions of the enemies awaiting the Explorers within, special rules that affect the fighting, and a list of the rewards awaiting those brave enough to overcome every obstacle.
Before attacking a Stronghold or setting out on the expedition to the secret vault, the Explorers must first undertake several ordinary Expeditions under the rules given in the Warhammer Quest: Blackstone Fortress Rules booklet.
Attacking a Stronghold
Having chosen their Explorers at the start of an Expedition, the players may decide to discard the four clue cards held by the Explorers taking part in the Expedition (see p. 12 of the Rules booklet).
In this case, the players must randomly choose a card from among the unconquered Strongholds, after which the Explorers must attack the chosen Stronghold following the rules below.
To assault a Stronghold, the players must open this booklet to the page containing information about the corresponding Stronghold. They then perform setup as described in the Rules booklet (p. 6), with the following adjustments. In addition, lay out the Stronghold card and its artefact card below the Precipice board.
Approach. To reach a Stronghold, the Explorers must run a veritable gauntlet, following the secret path that forms the approach to the Stronghold. The dangers and enemies the Explorers meet on the way are determined using the exploration deck in much the same way as during a normal Expedition. The Stronghold's page will tell you how to lay out the cards for the approach to it (see the legend on the opposite page).
Note that for most Strongholds the approach exploration deck will consist of fewer than eight cards, drawn at random from the full exploration deck (rather than containing an equal number of battle and challenge cards). This means the Explorers may face nothing but battles, or nothing but challenges, on their way to the Stronghold.
Reaching the Stronghold. Once every card from the approach exploration deck has been resolved, the Explorers are considered to have reached the Stronghold and can begin the assault. Attacking a Stronghold is resolved just like a normal battle, but the Stronghold card is used to set up the battlefield and determine where Explorers and enemies are placed.
The instructions on the Stronghold's page will also tell you which enemy groups guard the strongpoint. Note: the exact location of enemies is usually marked on the Stronghold card (see the legend opposite).
Stronghold event table and Stronghold rules. Every Stronghold has its own event table, which is used instead of the one printed in the Combat rules booklet. In addition, every Stronghold has a set of rules affecting how battles unfold within it. Read these rules carefully before starting the battle!
Conquering the Stronghold. The instructions on the Stronghold's page will tell you what the Explorers must do to conquer the Stronghold, and what reward they receive for doing so (see below). If all the Explorers are incapacitated before this happens, the assault is a failure and no one receives any reward. If the Expedition ends in failure, the Stronghold card and its artefact card are returned to the box. This Stronghold will need to be conquered on a different Expedition.
Having conquered a Stronghold (or having been defeated in the attempt), the Explorers return to Precipice and resolve the sequence of actions there.
Rewards. On conquering a Stronghold, the Explorers receive one or more rewards, which will always include the Stronghold's artefact — and may include additional rewards besides.
The Secret Vault
Once all four Strongholds have been conquered, the players may mount an expedition to the secret vault. It is resolved just like an attack on a Stronghold, but using the card and instructions for the secret vault, found on p. 22. If the Explorers manage to conquer the secret vault, their quest is complete! See p. 13 of the Rules booklet to learn how the Explorers can mount further Expeditions after that.
Reading a Stronghold Page
- Title: the name of the Stronghold.
- Introduction: a brief description of what awaits the Explorers in the Stronghold. The leader should read this passage aloud.
- Map: the map shows which rooms make up the Stronghold, whether it uses passageways or special areas, and where the enemies are located. It also includes notes on how to resolve battles within this Stronghold. Note: enemies should be set up in the indicated hexes rather than next to discovery markers.
- Approach: information on how to build the approach to the Stronghold from exploration cards.
- Enemy groups: this lists the enemies that make up each enemy group in the Stronghold, and the keys used to mark them on the map.
- Special rules: any special rules used in battles fought within the Stronghold. Read these rules carefully before starting the battle!
- Event table: during the Events phase of battles fought in the Stronghold, use this event table instead of the one in the Combat rules booklet.
- Conquering the Stronghold: what the Explorers must do to conquer the Stronghold.
- Rewards: the benefits the Explorers receive if they conquer the Stronghold.
Note: the printed Stronghold maps show detailed hexagon-by-hexagon battlefield layouts, enemy starting positions, and terrain features (turning chambers, laser barricades, staircases, access panels, and so on) that are inherently visual and are not reproduced here — refer to the physical Stronghold cards included in the box. The text below transcribes the introduction, approach, enemy groups, special rules, event tables, victory conditions, and rewards for each Stronghold.
Stronghold: Death Labyrinth
The maglev pod comes to a halt, and you step into a twisted, distorted chamber that was once the bridge of a Chaos cruiser known as the Impaler. You hear the bloodthirsty snarls of Chaos Beastmen and the unholy shouts of Traitor Guardsmen, drowned out by the distant, thunderous voice of Obsidius Mallex, Lord of the Abyssal Chosen.
Approach. Shuffle the full exploration deck and deal four cards to form the approach exploration deck. The Explorers reach the Stronghold once the fourth exploration card has been resolved.
Enemy groups. 1 Obsidius Mallex; 2 Chaos Space Marines; 2 Rogue Psykers; 10 Traitor Guardsmen (with lasguns, grenades, or pistols and melee weapons); 2 Traitor Guardsman Sergeants; 2 Traitor Guardsmen with flamers; 4 Negavolt Cultists; 4 Chaos Beastmen.
Stronghold rules.
- Turning chamber: the turning-chamber special area tile (see the map) rotates 60 degrees clockwise at the end of every Events phase, unless the event table indicates otherwise.
- Bodyguards: if Obsidius Mallex suffers a wound or critical wound and a Chaos Space Marine is adjacent to him, that wound (or critical wound) is instead suffered by one of the Chaos Space Marines (chosen by the enemy player).
- Traitor Guardsmen: the Traitor Guardsmen group in this Stronghold includes two sergeants and two models with flamers. If an Explorer ends an action in one of the defensive-fire hexes marked on the map, the nearest visible Traitor Guardsman makes one attack against them. This attack is resolved after the action that triggered it, but before the Explorer starts a new action (if they have any actions left). This rule does not apply to Traitor Guardsmen who arrive as reinforcements.
- The last stand: until an Explorer enters the turning-chamber hex, Obsidius Mallex and the Chaos Space Marines automatically take the "Hold position" action when activated. Until an Explorer enters the turning-chamber hex, the Traitor Guardsmen automatically take "Hold position" when activated if no Explorer is within their line of sight, and automatically take "Press the attack" in any other circumstance. Once any Explorer enters the turning-chamber hex, make behaviour rolls for the Traitor Guardsmen as normal.
- Protect the warlord: once an Explorer has entered the turning-chamber hex, from the following turn onward reinforcements must be set up as close as possible to Obsidius Mallex, and the "Traitor Guardsmen" rule above no longer applies.
- There can be only one: if Obsidius Mallex is killed, he cannot be set up again during this attack on the Stronghold. In addition, the Explorer whose attack killed him receives the "Thunder Hammer" artefact card.
Event table. Uses the standard event table (see p. 15 of the Combat rules booklet), with the following exceptions: on a roll of 7–10, do not turn the turning chamber this Events phase; on a roll of 11–14, the leader may rotate the turning chamber 60, 120, or 180 degrees clockwise this Events phase.
Conquering the Stronghold. To conquer this Stronghold, Obsidius Mallex must be killed, and every non-incapacitated Explorer must be standing in the maglev departure room at the start of the Events phase.
Rewards. The Explorer whose attack killed Obsidius Mallex receives the "Thunder Hammer" artefact card (see above). In addition, roll a Fate die for each Explorer who took part in this Expedition, and add the result to that Explorer's trade points in the next Trade phase in Precipice. Finally, add this Stronghold's card to the legacy cards affecting future Expeditions, to show that it has been conquered.
Stronghold: Descent
The maglev pod's walls lower to reveal a vast tetrahedral chamber, its corners marked with triangular passages. Each is guarded by a group of heretic warriors. Whatever treasure lies within, the path to it runs through these passages.
Approach. Shuffle the full exploration deck and deal six cards to form the approach exploration deck. The Explorers reach the Stronghold once the sixth exploration card has been resolved.
Enemy groups. Upper level: 2 Rogue Psykers; 4 Negavolt Cultists; 4 Chaos Beastmen. Lower level: 1 Chaos Space Marine; 5 Traitor Guardsmen; 1 Chaos Space Marine; 5 Traitor Guardsmen; 4 Traitor Guardsmen.
Stronghold rules.
- Maglev arrival room: the maglev pod arrives in the centre of the upper level of this Stronghold, as shown on the map. All hexes of the maglev pod are treated as open — they do not block line of sight or grant cover.
- Find the stairs down: the Explorers begin on the upper level of the Stronghold. To find out which passageway leads down, when setting up the battlefield take the marked discovery markers, place them face down, and shuffle them. Then, without turning them over, place one next to each passageway on the upper level. To find out if there are stairs behind a passageway, an Explorer must take the "Search (4+)" action while in a hex adjacent to the passageway. Then flip the marker over. If it shows one of the "no stairs" faces, there are no stairs there, and the marker is discarded. If it shows the "stairs" face, the passageway is replaced with a hex of stairs leading down.
- Using the stairs: Explorers and enemies can move and measure distance between stair hexes as if they were adjacent. In addition, enemies or Explorers on one stair hex can see enemies or Explorers on the other.
- Enemy groups: both levels of this Stronghold have enemy groups (two groups of Chaos Space Marines/Traitor Guardsmen combos and one further group). The lower-level enemy groups are not used until an Explorer sets foot on the lower level. Until then, only make reinforcement and activity rolls for the upper-level enemy groups.
- Reinforcement rolls for lower-level enemy groups: lower-level enemy groups do not begin the game on the battlefield. In addition, they do not use the standard reinforcements table. Instead, if a reinforcements roll for a lower-level enemy group results in 1–10, every enemy from that group not currently on the battlefield arrives as reinforcements — this includes both those killed and those who have not yet arrived on the battlefield.
- Access panel: to use the access panel, an Explorer must take the "Access (6+)" action while in the access-panel hex. The first time this action is taken, place an access marker in that hex, side "1" up. The second time, flip it to side "2." The third time, remove the marker and give the Explorer who took the action the "Energy Cell" artefact card.
Event table. Uses the standard event table (see p. 15 of the Combat rules booklet), with the following exceptions: on a roll of 7–10, the stairs are blocked — Explorers and enemies cannot move or attack from one stair hex to the other stair hex during the next turn; on a roll of 11–14, one Explorer standing in the access-panel hex may immediately take the "Access" action without spending an Activity die (if there is no other Explorer in that hex, treat this result as "Inspiration" instead).
Conquering the Stronghold. To conquer this Stronghold, the Explorers must use the access panel as described above, after which every non-incapacitated Explorer must be standing in the maglev pod at the start of the Events phase.
Rewards. The last Explorer to use the access panel receives the "Energy Cell" artefact card (see above). In addition, roll a Fate die for each Explorer who took part in this Expedition, and add the result to that Explorer's trade points in the next Trade phase in Precipice. Finally, add this Stronghold's card to the legacy cards affecting future Expeditions, to show that it has been conquered.
Stronghold: Corridor of Death
You arrive in a spacious hall whose mosaic ceiling hangs oppressively low. Echoing through the gloom you hear whispers in an unholy tongue and the wet clicking of a pack of Ur-Ghuls lurking somewhere in the darkness.
Approach. Shuffle the full exploration deck and deal four cards to form the approach exploration deck. The Explorers reach the Stronghold once the fourth exploration card has been resolved.
Enemy groups. 2 Chaos Space Marines; 2 Rogue Psykers; 2 Traitor Guardsmen with flamers; 4 Traitor Guardsmen with lasguns; 4 Negavolt Cultists; 4 Chaos Beastmen; 4 Ur-Ghuls.
Stronghold rules.
- Intruder alert!: reroll reinforcement rolls of 4 or more.
- Snipers: when a Traitor Guardsman from the marked group activates, it automatically takes "Charge" if it can't see an Explorer, automatically takes "Fall back" if a visible Explorer is adjacent to it, and automatically takes "Snipe" in any other circumstance. Reroll failed attack rolls made while sniping. If such a Traitor Guardsman is killed and returns as a reinforcement, replace it with a Traitor Guardsman with pistol and melee weapon, who takes actions normally.
- Ur-Ghuls: when Ur-Ghuls activate, they automatically take "Hold position" if they can't see any Explorers, and automatically take "Pounce" in any other circumstance. Ur-Ghul reinforcements arrive in any hex of the Ur-Ghul den, rather than being set up next to a passageway.
- Laser barricade: enemies treat the laser-barricade hex as closed. If an Explorer enters the laser-barricade hex while moving, or takes any action while in that hex, they must make an Agility roll and compare the result to the table below before continuing to move or taking further actions. Defence rolls cannot prevent wounds or critical wounds inflicted by the laser barricade.
- Fail: the Explorer suffers 1 wound and 1 critical wound.
- Success: the Explorer suffers 1 wound.
- Critical Success: the Explorer is unharmed.
- Find the Dark Age weapon: to find the Dark Age weapon, an Explorer must take the "Search (4+)" action while in a hex within the Ur-Ghul den. On taking this action, roll an Activity die. On a result of 1–4, nothing is found (but the Explorer may search again); on a result of 5–6, the Explorer receives the "Dark Age Weapon" artefact card.
Event table. Uses the standard event table (see p. 15 of the Combat rules booklet), with the following exceptions: on a roll of 7–8, add 2 Traitor Guardsman Sergeants to the marked enemy group — they arrive as reinforcements during that group's next activity, in addition to any other reinforcements (if this result comes up again, treat it as "Laser barricade overload" instead); on a roll of 9–10, "Laser barricade overload" — during the next turn, Explorers must reroll successful Agility rolls made when entering the laser-barricade hex or taking an action there; on a roll of 11–14, "Laser barricade disabled" — during the next turn, Explorers do not need to make Agility rolls when entering the laser-barricade hex or taking an action there.
Conquering the Stronghold. To conquer this Stronghold, the Explorers must obtain the "Dark Age Weapon" artefact card as described above, after which every non-incapacitated Explorer must be standing in one of the Ur-Ghul den hexes, with no Ur-Ghuls in the den, at the start of the Events phase.
Rewards. The Explorer who successfully searched the Ur-Ghul den receives the "Dark Age Weapon" artefact card (see above). In addition, roll a Fate die for each Explorer who took part in this Expedition, and add the result to that Explorer's trade points in the next Trade phase in Precipice. Finally, add this Stronghold's card to the legacy cards affecting future Expeditions, to show that it has been conquered.
Stronghold: Zero-Gravity Abyss
The maglev pod halts beside a small chamber with two corridors leading off it. As you step into the chamber, a piercing alarm begins to wail, drowning out every other sound. You realise the alarm is a heavily amplified version of the sound made by Spindle Drones that have become hyper-aggressive.
Approach. Shuffle the full exploration deck and deal four cards to form the approach exploration deck. The Explorers reach the Stronghold once the fourth exploration card has been resolved.
Enemy groups. Upper level: 8 Traitor Guardsmen; 2 Chaos Space Marines; 4 Chaos Beastmen; 2 Rogue Psykers; 4 Negavolt Cultists. Lower level: 4 Spindle Drones.
Stronghold rules.
- Enemy-group discovery markers: after finishing setup for the Stronghold, but before the first turn, take four discovery markers, place them face down, and shuffle them so players don't know which is which. Then, without turning them over, lay them out in the hexes marked on the map.
- Discovering enemy groups: the enemies belonging to a group are set up once the discovery marker bearing that group's number is revealed. A discovery marker is revealed in the following cases: (1) an Explorer enters a hex from which they have a direct line of sight to the hex containing the marker — in this case, the Explorer's activity is interrupted, the marker is flipped, and the corresponding enemy group is set up as described below, after which the interrupted activity continues as normal; (2) a roll on the event table results in "Enemy spotted." On revealing the marker belonging to the lower-level enemy group, that marker is discarded but no enemies are set up (that group is the Spindle Drones on the lower level).
- Setting up enemy groups: the first enemy in a group must be set up in the hex containing the matching discovery marker. The rest of the enemies from that group are set up in that hex or in adjacent hexes. When choosing which hex to place an enemy in, favour hexes that put the enemy in cover from the Explorers.
- Gravity chute: enemies treat the gravity-chute hex as closed. If an Explorer enters the gravity chute while moving, they are transported to the landing-site hex, and their movement is considered complete. Then reroll all of that Explorer's remaining Activity dice and discard any that show a result of 4 or more (dice showing 1–3 are returned to the Explorer's character card). The Explorer's activity then continues. No more than one Explorer may enter the gravity chute each turn (the Ratling twins count as a single Explorer for this purpose).
- Spindle Drones: the Spindle Drones in this enemy group begin the game with a threat level of 3. In addition, they are equipped with defensive energy fields, giving them a Wounds stat of 6. They automatically take "Hold position" if they cannot see any Explorers, and "Press the attack" if they can. Do not make reinforcement rolls for the enemy group containing the Spindle Drones. The Explorer whose attack kills the last Spindle Drone in this group receives the "Spindle Drone Amulet" artefact card.
Event table. Uses the standard event table (see p. 15 of the Combat rules booklet), with the following exceptions: on a roll of 7–10, "Enemy spotted" — if any enemy-group discovery markers remain unrevealed, reveal the one closest to the Explorers (if several are equally close, the enemy player decides; if all markers have been revealed, treat this result as "Still kicking" instead); on a roll of 11–14, "Enemy spotted" — if any enemy-group discovery markers remain unrevealed, reveal the one furthest from the Explorers (if several are equally far, the enemy player decides; if all markers have been revealed, treat this result as "Inspiration" instead).
Conquering the Stronghold. To conquer this Stronghold, all four Spindle Drones in their enemy group must be killed, and every non-incapacitated Explorer must be standing in one of the lower-level hexes at the start of the Events phase.
Rewards. The Explorer who killed the last Spindle Drone receives the "Spindle Drone Amulet" artefact card (see above). In addition, roll a Fate die for each Explorer who took part in this Expedition, and add the result to that Explorer's trade points in the next Trade phase in Precipice. Finally, add this Stronghold's card to the legacy cards affecting future Expeditions, to show that it has been conquered.
The Secret Vault
The maglev pod slows and comes to rest. Its walls begin to lower, revealing a sealed gate before you. This is the entrance to the secret vault — the chamber holding, without doubt, the most precious of all the Blackstone Fortress's treasures. Your path through the darkness has led you here, and all that remains is to fight and claim what is rightfully yours.
Approach. Shuffle the full exploration deck and deal eight cards to form the approach exploration deck. The Explorers reach the vault once the eighth exploration card has been resolved.
Enemy groups. Shuffle the full skirmish deck and deal four cards to determine the enemies making up groups 1, 2, 3, and 4. Set up enemies as close as possible to the passageway matching their group's number. If you draw a complication, ignore it (no enemy group is set up for that card). Reinforcement rolls are not made for enemy groups in this battle. Instead, when an enemy group activates, every killed enemy from that group is set up as close as possible to the matching passageway. If every enemy in a group has been killed, or the card indicated a complication instead of a group, discard that card and replace it with a new skirmish card. During that group's next activity, set up the enemies shown on the new skirmish card as close as possible to the matching passageway.
Secret vault rules.
- Reanimated foes: the enemies guarding the secret vault are corpses reanimated by the Blackstone Fortress. Reduce their Movement stat by 1 and increase their Wounds stat by 1, except for Spindle Drones. If the enemies are Spindle Drones, they begin with a threat level of 3 and have 4 wounds each (instead of 2).
- Vault gate: at the start of the battle, the vault-gate special-area tile lies closed side up. While closed, it is treated as a closed hex. On each turn, the first activated Explorer among those standing in the maglev pod may take the "Open gate (1+)" action to flip the vault-gate tile to its open side. An open gate is treated as an empty hex. Each time an Explorer finishes their activity, after making the inspiration roll, roll an Activity die. On a 1–2, the gate slams shut: flip the vault-gate tile back to its closed side. On the following turn, the first activated Explorer among those standing in the maglev pod may open the gate again as described above. If any Explorers were standing on the gate tile when it closes, they are incapacitated; if any enemies were standing there, they are killed instantly.
- Annihilation turret: at the start of the first battle turn (before Explorers and enemies activate), and again at the start of each Events phase, the annihilation turret rotates and fires an annihilation beam. Roll an Activity die to determine which row of hexes the turret turns to face, then rotate the turret hex in the indicated direction. Every Explorer and every enemy standing on a hex in the corresponding row is struck by the annihilation beam — resolve these attacks starting with the model closest to the turret. In addition, during the following turn, any Explorer or enemy that enters a hex in that row, or takes an action while in such a hex, is attacked before they can continue moving or take any other action. An enemy struck by the annihilation beam dies instantly. If an Explorer is struck by the annihilation beam, they must make an Agility roll and compare the result to the table below. Defence rolls cannot prevent wounds or critical wounds inflicted by the annihilation beam.
- Fail: the Explorer is incapacitated.
- Success: the Explorer suffers 3 critical wounds.
- Critical Success: the Explorer suffers 2 critical wounds.
- Stasis cube: the secret of the vault is hidden within a stasis cube. To open it, an Explorer must be adjacent to it at the end of the Events phase, with no visible enemies adjacent to that Explorer. If several Explorers could open the stasis cube, the leader decides who does so that turn. The first time an Explorer opens the stasis cube, place an access marker in its hex, side "1" up. The second time, flip the marker to side "2." The third time, the cube opens completely — open the secret vault envelope and follow the instructions found inside.
Event table. Uses the standard event table (see p. 15 of the Combat rules booklet), with the following exceptions: on a roll of 1, each Explorer loses 1 inspiration point, to a minimum of 0 (there are no discovery markers to discard in this battle); on a roll of 4–6, "Defence protocols" — Explorers cannot open the stasis cube this turn; on a roll of 7–10, "Barrage" — during the next turn, the annihilation turret fires at each of the six rows it can face; on a roll of 11–14, "Brief respite" — the leader must choose an enemy group; during the next turn, killed enemies from that group are not set up when the group activates — use only the enemies from that group already on the battlefield (if any).
Completing the quest. To complete the search for the vault's treasure, an Explorer must open the stasis cube as described above and then follow the instructions on the card found inside the secret vault envelope.
Rewards. The rewards the Explorers receive for completing the search for the secret vault's treasure are listed on the card found inside the secret vault envelope.
Tokens and Markers
- Wound token — marks a wound suffered by an Explorer or enemy.
- Critical wound token — marks a critical wound suffered by an Explorer or enemy.
- Inspiration point token — tracks inspiration points earned by an Explorer.
- Discovery marker — marks hexes where enemies are set up or where Explorers can find archeotech and clues.
- Trap marker — marks a hex containing a trap (for example, one placed by Dahyak Grekh).
- Threat level token (0–1) and threat level token (2–3) — track a Spindle Drone's threat level.
- Boost marker — used by certain enemy or resource rules to mark a boosted state.
- Plasma marker — used to track weapons or effects related to plasma.
- "Inferno" marker — used to track weapons or effects related to the Inferno pistol/ability.
- Access marker — tracks progress toward opening an access panel or stasis cube (double-sided, sides "1" and "2").
- Electromagnetic marker — used by certain special-area or resource rules.
- Stasis marker — used to mark a model or hex affected by a stasis effect.
- Rally marker — placed by Taddeus the Purifier's "Rallying Speech" unique action.
- Psychic barrier marker — used by certain psyker-related rules.
- Chameleoline cloak marker — placed by Amallyn Shadowguide's "Chameleoline Cloak" unique action.
- Leader marker — identifies the current leader.
Explorers
Each Explorer's character card shows their stats (Movement, Defence, Agility, and Mettle), their weapon actions (with the Action die required at each range band), their unique actions, any special rules, and their secret objective. Defence, Agility, and Mettle stats, and weapon ranges, show which Action die to roll: d6, d8, or d12 (a doubled entry, e.g. "d8, d8," means two dice of that type are rolled for the attack, per the Continuous Fire rules on some weapons). Each character card has an inspired side, unlocked once the Explorer becomes inspired (see p. 14 of the Rules booklet), which typically improves their stats and actions and may add further unique actions or special rules.
Amallyn Shadowguide — Asuryani Ranger (based aboard the Maturin's Steed)
"Know yourself. Know your enemy. These are the first steps on any path."
Base stats. Movement: 3. Defence: d6. Agility: d12. Mettle: d8.
Weapon actions.
| Weapon | Range 1 | Range 2–3 | Range 4+ |
|---|---|---|---|
| Long rifle (1+/4+)¹ | N/A | d8 | d12 |
| Power blade (1+) | d8, d8 | N/A | N/A |
¹ Ranger's Sight: if the long rifle is used by spending an Activity die showing 4+, the action counts as aiming. In addition, Amallyn may reroll a failed result on the attack die.
Unique actions.
- Chameleoline Cloak (4+): this action cannot be taken if a visible enemy is adjacent to Amallyn. Place a chameleoline cloak marker next to Amallyn. While this marker remains next to her, her Defence stat is d12. Remove the marker if Amallyn moves or a visible enemy becomes adjacent to her.
- Phase Crystal (6+): Amallyn takes the "Move" action. During this move she may pass through walls and enter closed hexes, but cannot end her movement in a closed hex. In addition, during this move she does not need to stop upon entering a hex adjacent to a visible enemy.
Secret objective. Acquire the "Splinters of the Fall" discovery card. If Amallyn has this card at the start of an Expedition, she begins the Expedition inspired.
Inspired side. Movement: 4.
Weapon actions (inspired).
| Weapon | Range 1 | Range 2–3 | Range 4+ |
|---|---|---|---|
| Long rifle (1+/4+)¹ | N/A | d12 | d8, d8 |
| Power blade (1+) | d12, d12 | N/A | N/A |
Unique actions (inspired).
- Chameleoline Cloak (2+): as above, but Defence while cloaked is d12 with a lowered cost.
- Phase Crystal (4+): as above, at a lowered cost.
Dahyak Grekh — Kroot Tracker (based aboard the Kravv'cha'to)
"I
Base stats. Movement: 3. Defence: d6. Agility: d8. Mettle: d8.
Weapon actions.
| Weapon | Range 1 | Range 2–3 | Range 4+ |
|---|---|---|---|
| Kroot rifle (1+) | d8 | d12 | d8 |
| Pistol and rifle bayonet (4+) | d8, d8 | N/A | N/A |
Unique actions.
- Set Trap (6+): place a trap marker in a hex adjacent to and visible from Dahyak Grekh that contains no Explorers, enemies, or other trap markers. If an Explorer or enemy enters a hex with a trap marker, their activity ends, they suffer 1 critical wound, and are stunned — then remove the trap marker. Up to three trap markers may be set in a single battle — after a marker is removed, flip it face down so you remember it has already been triggered and cannot be used again in that battle.
Special rules.
- Trait Absorption: Dahyak Grekh has no secret objective. Instead, when making an inspiration roll for Dahyak Grekh, double the combined Wounds value of the enemies he killed during that activity.
- Stealth: if Dahyak Grekh is in cover from an attacking enemy, his Defence stat is d12.
- Tracker: after the battlefield is set up, but before the first turn, Dahyak Grekh may take the "Move" action and then set a trap. This does not require activating Dahyak Grekh, and no Activity dice are spent on these actions.
Weapon actions (inspired).
| Weapon | Range 1 | Range 2–3 | Range 4+ |
|---|---|---|---|
| Kroot rifle (1+) | d12 | d8, d8 | d12 |
| Pistol and rifle bayonet (2+) | d8, d8 | N/A | N/A |
UR-025 — Imperial Servitor (based aboard the reclamation vessel Gamma-3-β)
"How may I be of assistance?"
Base stats. Movement¹: 1. Defence: d12. Agility: d6. Mettle: d12.
¹ Overdrive: increase Movement from 1 to 2 if an Activity die showing 4+ is spent.
Weapon actions.
| Weapon | Range 1 | Range 2–3 | Range 4+ |
|---|---|---|---|
| Assault cannon Mk I (1+/4+/6+)² | N/A | d12 | d8 |
| Power claw (1+) | d8, d8 | N/A | N/A |
² Sustained Fire: when using the assault cannon Mk I, UR-025 can attack once by spending an Activity die showing 1+, twice by spending a die showing 4+, or three times by spending a die showing 6+. Resolve attacks one at a time; the target of the second and third attacks must be the same as the first target or in an adjacent hex.
Special rules.
- Walking Bastion: reroll failed defence rolls made for UR-025. In addition, UR-025 never benefits from being in cover.
- Self-Repair Systems: if a Mettle roll for UR-025 results in a Critical Success, instead of removing two wound tokens you may flip one critical wound token, turning it into a normal wound.
Secret objective. Kill a Spindle Drone with the power claw during the Expedition.
Movement (inspired)¹: 1 (Overdrive triggers on 2+).
Weapon actions (inspired).
| Weapon | Range 1 | Range 2–3 | Range 4+ |
|---|---|---|---|
| Assault cannon Mk I (1+/3+/5+)² | N/A | d12 | d8 |
| Power claw (1+) | d12, d12 | N/A | N/A |
Rein and Raus — Ratling Twins (based aboard the reclamation vessel Gamma-3-β)
"You take the high ground, I'll take the low..."
Base stats. Movement: 2. Defence: d8. Agility: d8. Mettle: d8.
Weapon actions.
| Weapon | Range 1 | Range 2–3 | Range 4+ |
|---|---|---|---|
| Sniper rifle (4+)¹ | N/A | d8 | d12 |
| Pistol (1+) | d8 | d6 | d6 |
¹ High Penetration: if a sniper-rifle attack inflicts a wound or critical wound on the target (accounting for cover), place 1 additional wound token on that target.
Unique actions.
- Two Birds, One Stone (2+): first one Ratling twin moves or handles the pistol, then the other twin moves or handles the pistol.
- Grapnel (6+): choose a hex visible to Raus that contains no Explorers or enemies, and place Raus in that hex.
Special rules.
- Twins: the rules for how Rein and Raus activate, take actions, and suffer wounds are found on p. 15 of the Rules booklet.
Secret objective. Acquire the "Lost Tome" discovery card. If Rein and Raus have this card at the start of an Expedition, they begin the Expedition inspired.
Agility (inspired): d12.
Weapon actions (inspired).
| Weapon | Range 1 | Range 2–3 | Range 4+ |
|---|---|---|---|
| Sniper rifle (4+)¹ | N/A | d12 | d8, d8 |
| Pistol (1+) | d8, d8 | d8 | d6 |
Special rules (inspired).
- Welcome Guests: add 1 to Rein and Raus's trade points when trading on any spaceship, not only the Gamma-3-β.
Taddeus the Purifier — Ministorum Priest (based aboard the Reclaimer)
"There is no forgiveness for heretics and blasphemers for their crimes."
Base stats. Movement: 2. Defence: d8. Agility: d6. Mettle: d8.
Weapon actions.
| Weapon | Range 1 | Range 2–3 | Range 4+ |
|---|---|---|---|
| Power maul and laspistol (1+) | d12 | d8 | d6 |
| Autogun servo-skull (3+/5+)¹ | N/A | d8, d8 | d8 |
¹ Sustained Fire: when using the autogun servo-skull, Taddeus can attack once by spending an Activity die showing 3+, or twice by spending a die showing 5+. Resolve attacks one at a time; the target of the second attack must be the same as the first target or in an adjacent hex.
Unique actions.
- Rallying Call (6+): remove 1 wound token from Taddeus's card and from the cards of all other Explorers in his hex or an adjacent hex.
Secret objective. Kill a Rogue Psyker during the Expedition.
Mettle (inspired): d12.
Weapon actions (inspired).
| Weapon | Range 1 | Range 2–3 | Range 4+ |
|---|---|---|---|
| Power maul and laspistol (1+) | d8, d8 | d8 | d6 |
| Autogun servo-skull (2+/4+)¹ | N/A | d8, d8 | d8 |
Unique actions (inspired).
- Rallying Call (5+): as above, at a lowered cost.
- Rallying Speech (6+): this action can be taken once per Activity phase. Place a rallying-speech marker next to Taddeus. While the marker remains, he and any other Explorers in his hex may reroll their attack rolls. Remove the marker during Taddeus's next activity (or if he is incapacitated).
Note: the full card set also includes character cards for Janus Draik (rogue trader), Espern Locarno (Imperial navigator), and Pious Vorne (fanatical missionary); their weapon-action tables, unique actions, and secret objectives follow the same format as the entries above and are printed on the Explorers' physical character cards included in the box.