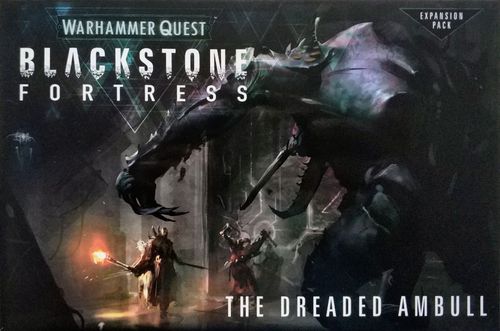
Warhammer Quest: Blackstone Fortress – The Dreaded Ambull
Warhammer Quest: Blackstone Fortress – The Dreaded Ambull Rulebook
Table of Contents
Table of Contents
Introduction
The Ambull is a deadly foe, hardy enough to survive the harshest environments and able to traverse the Blackstone Fortress at will. In this expansion, the explorers will be tasked with finding this terrifying creature's lair, in order to steal valuable Ambull eggs. As well as overcoming the many defences of the Blackstone Fortress, the explorers must brave the attentions of the beast itself.
The Dreaded Ambull is an expansion for Warhammer Quest Blackstone Fortress that adds a new quest to be undertaken by groups of explorers who are brave enough to seek out the lair of this most dangerous creature. Tasked by a rogue Adeptus Mechanicus Genetor to locate and secure several priceless Ambull eggs for his research, the explorers will be pushed to the limits of their endurance.
To complete their quest, the explorers must return to Precipice with three of these eggs in their possession, though the Ambull will not let these go lightly. Although the explorers may encounter the Ambull during the course of their searching, the beast will be at its most deadly when cornered in its lair. The explorers will need to track down the Ambull, collecting evidence that will allow them to locate its lair, before venturing into this dangerous environment to claim their prize.
The Dreaded Ambull expansion includes a new series of expeditions for your explorers to undertake, as they search for the location of the Ambull's nesting site, followed by an expedition into the Lair of the Beast itself. You will find complete rules for using the Ambull and its Borewyrm offspring in this expansion, as well as for including these new miniatures in your other games of Blackstone Fortress.
The quest for the Ambull's lair is a new quest which you can choose to play instead of starting a different quest. We recommend completing the quest for the hidden vault before starting the quest for the Ambull's lair, as it will give you a good knowledge of the game, and the narrative running through it, before starting this new quest.
Components
Blackstone Fortress: The Dreaded Ambull includes the following components:
Hostile Citadel Miniatures
- Ambull
- 2 Borewyrm Infestations
Booklets
- 16-page Dreaded Ambull booklet
- Lair of the Beast sheet
- Assembly guide
Boards and Tiles
- 1 double-sided Sett VII Bio-containment Facility
- 2 double-sided location tiles
Counters and Markers
- 1 Ambull location marker
- 2 Ambull trail counters
- 4 Ambull egg counters
- 5 Ambull spoor counters
- 3 double-sided booby trap markers
Cards
- 18 discovery cards
- 10 exploration cards
- 3 encounter cards
- 3 hostile reference cards
Other Components
- 1 Lair of the Beast envelope
The Sett VII Bio-containment Facility is placed next to the Precipice board as shown below. (Its completed and under-construction sides are both printed; see the setup text below for which side is used.)
The Dreaded Ambull expansion icons are shown here in purple and black.
From left to right: discovery card, exploration card, encounter card, hostile reference card.
The Quest
In this expansion, the explorers embark on a quest to retrieve eggs from the Ambull's nest. Before they can do this, however, they must track down its lair.
Starting the Quest for the Ambull's Lair
The quest for the Ambull's lair is a standalone quest that can be attempted if the explorers are not currently on another quest, such as the quest for the hidden vault. Before starting an expedition, the explorers can choose to undertake the quest for the Ambull's lair. If they do so, follow the rules presented here to set up an expedition for this quest. Once the explorers have started this quest, they may not start another until it has been completed. The quest for the Ambull's lair uses some new rules and some existing rules from those presented for the quest for the hidden vault on pages 12–13 of the Blackstone Fortress: Rules booklet. Use the existing rules for Discovery Markers and Discovery Cards, and New Expeditions, along with the following new rules.
Dreaded Ambull Discovery Deck
This expansion uses a new discovery deck for expeditions as part of the quest for the Ambull's lair. The discovery cards for this quest are divided into two types:
Archeotech cards: Archeotech cards award trading points that can be used after the expedition to acquire resource cards at Precipice. Two of the archeotech cards in this expansion are item cards which will help the explorers on their quest. These are also valuable, and each can instead be used to award trading points in the same manner as archeotech if the explorer holding it wishes.
Ambull spoor cards: Ambull spoor are one of the requirements allowing the explorers to enter the Lair of the Beast. Ambull spoor is also a valuable commodity, and can instead be used to award trading points in the same manner as archeotech if the explorer holding it wishes.
The Ambull's Lair
After picking explorers at the start of an expedition, if the databank contains 1 or more Ambull trail counters and 3 or more Ambull spoor counters, those explorers can enter the Lair of the Beast, in the same manner as attacking a stronghold in the quest for the hidden vault. Instead of setting up an expedition as normal, the players take the Lair of the Beast sheet and set up the expedition using the rules for the Access Route, Reaching the Stronghold, Stronghold Event Table & Stronghold Rules and Conquering the Stronghold from page 12 of the Precipice book, but replace all references to 'stronghold' with 'Lair of the Beast'.
Failure
The quest for the Ambull's lair ends in failure if fewer than four explorers are available at the start of an expedition, or the explorers end the Lair of the Beast with two or fewer Ambull eggs. If either of these things happen, the players have failed this quest and the Ambull moves to another area of the Blackstone Fortress. The explorers will have to restart this quest, or choose another quest.
One-off Expeditions
If you wish to play a one-off expedition using the contents of this expansion, add the encounter cards for the Ambull and Borewyrm Infestations to the Blackstone Fortress encounter card deck used for one-off games. You can also add the exploration cards from this expansion, but do not use any which are marked with the Dreaded Ambull expansion icon (shown on page 5). You can find more instructions for how to use the cards from this expansion in future games on page 11 of this booklet.
Setting Up an Expedition for the Quest for the Ambull's Lair
Set up the expedition as described in the Blackstone Fortress: Rules booklet, but with the following changes:
- During Step 3, instead of creating the discovery deck as normal, take the Dreaded Ambull discovery deck from this expansion, shuffle it and place it face down on the Precipice board. If you run out of cards in this deck during an expedition, you may not draw any more cards from this deck during this expedition.
- Do not use the exploration cards from Blackstone Fortress. Instead take the exploration deck from this expansion, shuffle it and place it face down on the Precipice board.
- During Step 4, instead of creating the encounter deck as normal, take all of the encounter cards from Blackstone Fortress, shuffle them and deal 9 cards in a stack, face down. Add the 3 Dreaded Ambull encounter cards from this expansion to this stack and then shuffle it to create a new encounter deck and place that to the left of the combat track face down.
- Take the Ambull and Borewyrm hostile reference cards and add them to the other hostile reference cards to the right of the combat track.
- During Step 5, when placing spacecraft, take the Sett VII Bio-containment Facility card and place it on the top left side of the Precipice board, with the 'under construction' side facing up as shown on page 3 of this booklet.
- During Step 12, the leader reads aloud the following text instead: 'The explorers have entered a maglev transport chamber which lurches into motion, taking them to an unknown location somewhere deep inside the fortress. Their objective is to find evidence that will reveal the location of the Ambull's lair and then return safely to Precipice…'
Tunnel Entrance Hexes
Wherever an Ambull has been, there are also cramped tunnels and passageways that it leaves in its wake. A cunning explorer can use these to avoid the fortress' defences. Explorers can move and measure distances from the tunnel entrance hexes to the hexes at each end of a tunnel as if they were adjacent hexes. The hexes which are treated as adjacent are shown on the map on the appropriate combat card.
Tunnel entrance hex
Tunnel Boards
The explorers will encounter tunnel boards as they seek the Ambull's lair, such as that shown in the combat example on the right. Whilst on the tunnel board, an explorer can only take Recuperate (1+) or Crawl (1+) actions (see below for Crawl actions).
Hostiles cannot move into tunnel entrance hexes, but otherwise treat them as empty hexes. If a hex on a tunnel board is holding the maximum number of models allowed by its hex limit (see the Blackstone Fortress: Combat booklet, page 6), then no other models can pass through this hex.
The combat card shows how each tunnel entrance hex connects to each end of the tunnel board as part of a combat. The tunnel entrance hex marked A is treated as being adjacent to the hex on the tunnel board marked A. The same applies to the tunnel entrance hex marked B, and the hex marked B on the tunnel board.
Crawl (1+): This action can only be taken on a tunnel board. When an explorer takes this action, they can make a move, in the same manner as a Move (1+) action, up to a maximum of 2 hexes.
The Ambull and Borewyrms
The Ambull and its offspring are a rogue element within the Blackstone Fortress, hunting and being hunted by its many denizens. The following rules apply at all times when using the Ambull or Borewyrm Infestation miniatures in games of Blackstone Fortress:
- The Ambull and Borewyrm Infestations treat all other hostiles (other than Borewyrm Infestations or Ambulls) as explorers.
- Hostiles (other than Borewyrm Infestations) treat the Ambull as an explorer.
If a Dreaded Ambull encounter card is one of the encounter cards revealed when a combat card is drawn from the exploration deck, use the Ambull hostile card for the Ambull itself. When using the Ambull in the Lair of the Beast, use the Ambull Enraged hostile card instead.
Ambull (hostile reference card)
"To hunt when hunted is the most dangerous. I know this, and the Ambull knows this also." – Dahyak Greekh
- Move: 3
- Wounds: 16
- Size: Huge
- Weapons: Enormous Mandibles and Claws¹ – Range 1: two purple triangle icons; Range 2–3: N/A; Range 4+: N/A.
- ¹ Eviscerating Blows: Each time an explorer or hostile suffers a wound or grievous wound from Enormous Mandibles and Claws, they also suffer an additional wound.
Special Rules
- Hulking Creature: When the Ambull is activated, it takes two actions, one after the other. Roll on the behaviour table for the first action, then take it. Then roll on the behaviour table again for the second action, and then take it. In addition, the Ambull never has to halt if it moves into a hex that is adjacent to an enemy.
- Symbiotic Healing: When the Ambull is activated, if it has any wound counters next to it, remove 1 wound counter that is next to it. If it has no wound counters, but does have a grievous wound counter next to it, instead remove 1 grievous wound counter.
- Driven Off: Once the damage caused to the Ambull equals or exceeds its Wounds value, the Ambull tunnels away to recover from its wounds, and is removed from play. Place the Ambull location marker on the hex the model was removed from. For all rules purposes, the Ambull is treated as having been slain. If the Ambull is returned as a result of a reinforcement roll, instead of being deployed adjacent to a portal, it must be deployed as close as possible to the Ambull location marker. The Ambull location marker is then removed.
- Tenacious: You can return the Ambull to the board on a reinforcement roll of 1, 2 or 3, instead of just 1.
Ambull Enraged (hostile reference card)
"RRRAAAAAAAHRRR!"
- Move: 3
- Wounds: 24
- Size: Huge
- Weapons: Enormous Mandibles and Claws¹ – Range 1: two blue pentagon icons; Range 2–3: N/A; Range 4+: N/A.
- ¹ Eviscerating Blows: Each time an explorer or hostile suffers a wound or grievous wound from Enormous Mandibles and Claws, they also suffer an additional wound.
Special Rules
- Hulking Creature: When the Ambull is activated, it takes two actions, one after the other. Roll on the behaviour table for the first action, then take it. Then roll on the behaviour table again for the second action, and then take it. In addition, the Ambull never has to halt if it moves into a hex that is adjacent to an enemy.
- Protective: The Ambull always treats an explorer carrying an Ambull egg as the closest explorer.
- Symbiotic Healing: When the Ambull is activated, if it has any wound counters next to it, remove 1 wound counter that is next to it. If it has no wound counters, but does have a grievous wound counter next to it, instead remove 1 grievous wound counter.
Precipice
When the explorers return to Precipice during the quest for the Ambull's lair, additional rules apply:
- Do not carry out the legacy step. In the quest for the Ambull's lair, explorers are not held to the same time constraints as during the quest for the hidden vault.
- At the start of the trading step, in leader order, explorers can trade any Ambull spoor discovery cards they are carrying for Ambull spoor counters, then add these, and any Ambull trail counters they have, to the databank sleeve. Any traded Ambull spoor discovery cards are added back to the discovery deck.
- All of the discovery cards in this expansion list a trading point value at the bottom, in the same manner as archeotech cards, and may be used to purchase resource cards in the same way during the trading step. Any discovery cards used in this way are added back to the discovery deck.
The Ambull Spoor card can either be traded for an Ambull spoor counter when the explorers return to Precipice, or kept and converted to trading points to buy resource cards in the same manner as an archeotech card. (Ambull Spoor: trading point value 1.)
The Xenologist's Report card can be kept for as long as the explorer holding it wishes in order to use its ability, or converted into trading points during any trading step whilst the explorers are on Precipice. (Xenologist's Report, archeotech: "Use this card to re-roll failed attack rolls for this explorer if the target is an Ambull." Trading point value 2.)
After the Quest
The quest for the Ambull's lair is just the beginning. The spawn of this terrible beast are at large and it won't be long before you encounter more of these creatures on your journeys through the Blackstone Fortress…
All of the cards from the Dreaded Ambull expansion are marked with a symbol allowing them to be added to and removed from your existing Blackstone Fortress card decks with ease, enabling full customisation of your Blackstone Fortress adventures.
The Miniatures and Encounter Cards
You can add the miniatures from this expansion to the Blackstone Fortress game for other quests you may embark upon in the future. To do so, when setting up an expedition for that quest, or during one-off games, simply add the Dreaded Ambull encounter cards to your encounter deck. This means that there is a chance that the Ambull and Borewyrm Infestations will appear while playing through other quests – this also allows you to replay ones you have already completed with a new element, as well as ensuring a new challenge for one-off expeditions.
The Discovery Deck
The discovery card deck for the quest for the Ambull's lair should not be mixed in with the discovery cards from the quest for the hidden vault for playing one-off games, or for future quests. These cards are marked with a symbol so that they can be identified easily and removed from the other discovery deck should they become mixed together.
The Exploration Cards
The exploration cards for this expansion are marked with a symbol and can be added to your existing exploration deck for one-off games or other quests (such as the quest for the hidden vault). Two of the cards are marked with a different symbol, and should not be included if you wish to mix the decks together.
The Lair of the Beast
The Lair of the Beast is supplied as a separate sheet, which is used together with the rules in this booklet. As the maglev transport doors slide open, a sickly smell tells you that you have arrived at the beast's nest. Shed Borewyrm and rad-maggot husks litter the floor, and echoing in the distance you can hear the unmistakable movement of a vast creature. You must proceed with caution…
The Lair of the Beast map shows the hex layout of the lair, with four face-down hostile group discovery markers (marked with a ? triangle), two egg cluster hexes, three blocked hexes and the ARRIVAL hex.
Access Route
Shuffle all of the Blackstone Fortress exploration cards and deal out four to create the access route exploration deck. The explorers reach the Lair of the Beast after the fourth exploration card has been resolved.
Hostile Groups
The hostile groups are numbered 1 to 4 (shown as numbered purple triangles):
- Group 1: 1 Ambull
- Group 2: 2 Borewyrm Infestations
- Group 3: 4 Spindle Drones
- Group 4: 4 Ur-Ghuls
Lair of the Beast Rules
Unclear Signals: After setting up the Lair of the Beast, but before the first turn begins, take the four discovery markers, place them face down, and shuffle them around so that the players do not know which is which. Then, keeping the markers face down, place one in each of the hexes indicated with a ? triangle on the map.
Revealing the Hostile Groups: The hostiles in a hostile group are deployed when the corresponding discovery marker is revealed. A discovery marker is revealed when an explorer enters a hex from which they have an unblocked line of sight to the hex with the marker. When this happens, the explorer's activation is paused, the discovery marker is flipped over, and the hostiles from the corresponding group are deployed as described below. The explorer's activation then continues. After the second discovery marker is revealed, reveal all the remaining discovery markers.
Deploying the Hostile Groups: The first hostile from a group must be placed in the hex with the corresponding discovery marker. Other hostiles from the group must be placed in the same hex as the discovery marker, or in a hex adjacent to the discovery marker. If there is a choice of hexes in which a hostile can be deployed, you must deploy it in a hex that puts it in cover from any explorers in preference to one that does not.
Securing the Ambull Eggs: When setting up the Lair of the Beast, place 2 Ambull egg counters in each of the egg cluster hexes.
To pick up an Ambull egg, an explorer must take an Extract (4+) action while in a hex with any Ambull egg counters. Each time the action is taken, that explorer takes 1 Ambull egg counter from that hex and places it on their character card so it covers one of the activation dice spaces. This prevents that activation dice being rolled in the initiative phase in the same manner as a wound or grievous wound counter. At the start of the initiative phase, before rolling activation dice, an explorer can drop 1 or more Ambull eggs they are carrying. If an explorer is taken out of action, they immediately drop all the Ambull eggs they are carrying. Place dropped Ambull egg counters in the closest egg cluster hex, until that hex has a maximum of 2 Ambull egg counters in it, then place any remaining in the other egg cluster hex.
Elimination Protocols: Spindle Drone hostiles are always treated as being on Threat Level 3 in the Lair of the Beast.
Roused to Fury: Use the Ambull Enraged hostile reference card for the Ambull in the Lair of the Beast.
Lair of the Beast Event Table
| Roll | Event |
|---|---|
| 1 | All Is Dust: Each explorer loses 1 inspiration point, to a minimum of 0. |
| 2–3 | Unfulfilled Destiny: Do not make a destiny roll at the start of the next turn. |
| 4–6 | Surprise Attack: The leader must pick an unrevealed discovery marker, and reveal it. If this is not possible, the leader must instead pick one hostile that has been slain during the combat and has not returned to the battlefield, and then deploy them as close to an explorer as possible. |
| 7–10 | Squirming Larvae: Each explorer must roll an activation dice for each Ambull egg counter they are carrying. On a 1, they drop that egg. |
| 11–14 | Newborn: Place a Borewyrm Infestation model in the egg cluster hex that is closest to an explorer. If this is not possible, nothing happens. |
| 15–17 | Inspiration: The leader picks an explorer. That explorer gains 1 inspiration point. |
| 18–19 |
Conquering the Lair of the Beast
The Lair of the Beast ends when all the explorers who have not been taken out of action are in a maglev escape chamber at the start of the event phase, and there are no hostiles in the maglev escape chamber. If at least 3 Ambull egg counters are being carried by the explorers in the maglev escape chamber, the explorers have conquered the Lair of the Beast. If the explorers in the maglev escape chamber are carrying 2 or fewer Ambull egg counters, the quest is a failure.
Rewards
If the explorers conquer the Lair of the Beast, they can open the Lair of the Beast envelope.