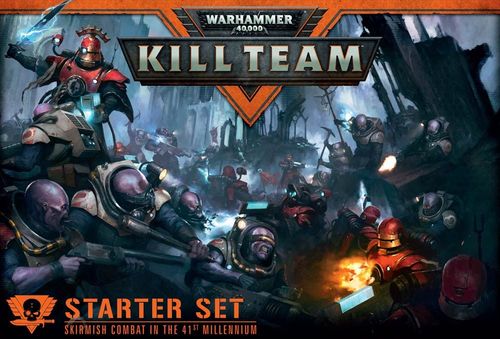
Warhammer 40,000: Kill Team
Warhammer 40,000: Kill Team Rulebook
Table of Contents
Table of Contents
Shadow War
'One blade, driven into the correct heart, at the right moment, will save or slay a world as surely as the firepower of entire armies.' — Warmaster Hokaeto, Supreme Imperial Commander, Desmaxian Crusade
Squad Warfare
A single squad of warriors, well equipped and well trained, can tip the balance of a war. Whether daring assassins, hawk-eyed scouts or grizzled veterans out for revenge, these warriors can alter the destiny of entire planets through their efforts.
Dark Imperium. The Warhammer 40,000 setting is a sprawling and horrific dystopia where all is war. For ten millennia, battle has raged from one end of the galaxy to the other, fought across countless strange worlds, between myriad factions and races. Scattered across the stars, the Imperium of Mankind fights wars beyond count. The Space Marines, the Astra Militarum, the Adeptus Mechanicus and more battle furiously for the survival of their species. The Imperium is the single largest empire in the galaxy and its military might is colossal, yet it is assailed from without and within; only faith, hatred and a never-ending butcher's bill of martyred soldiery keeps Humanity from being overrun.
Even as the Emperor's servants fight to preserve the Imperium, so the worshippers of the Chaos Gods pour all their hatred, fury and obsession into tearing it down. The Heretic Astartes are dark mirrors of the Emperor's noble Space Marines, their ranks twisted by mutation and riddled with corruption. Such forces as the diseased Death Guard and sorcerous Thousand Sons lead their attack, while hidden cults scramble to do their masters' bidding. Alien hordes of every stripe surge into battle: the android Necrons rise up from beneath the surface of ancient worlds; the enigmatic Aeldari send forth hosts of Asuryani, Drukhari and Harlequins; barbaric hordes of Orks and ravenous Tyranid swarms scour entire worlds of life; Genestealer Cults stage vicious uprisings; the T'au Empire annexes one world after another. In the closing years of the 41st Millennium the mayhem and bloodshed has grown worse after the Great Rift split the galaxy in two.
Yet not every conflict is apocalyptic in scale, and it is not always the largest army that carries the day. Sometimes, amidst the screaming madness and billowing flames of the wider war, victory or defeat lies in the hands of a small band of heroes or villains, hell bent upon achieving their mission at any cost.
Behind Enemy Lines. The battles fought by kill teams take many forms. Sometimes a vital enemy commander, demagogue priest or dangerous witch must be slain by a sniper's bullet or glinting blade from the shadows. Alternatively, a vital strategic asset may need to be eliminated. Other battles may see a band of embattled scouts attempting to reach friendly lines, bearing vital strategic information, or a kill team may need to cut off the enemy's communications or supply routes before a major offensive can begin. Some kill teams scout the foe's strength prior to battle, locate and eliminate enemy patrols, or simply wreak as much havoc upon the foe's infrastructure as they can.
In all instances, battles between kill teams tend towards close-quarters firefights through tangled terrain — desperate and bloody affairs that see deeds of incredible heroism and breathtaking savagery enacted on a close and personal scale. Every shot, every blade-stroke and hurled grenade counts, every moment of sudden inspiration or low cowardice can mean the difference between victory and defeat.
A Galaxy Vast and Dark… It is the 41st Millennium, and the human race stands upon a precipice. Ruled by the immortal Emperor from his Golden Throne on Terra, the Imperium of Mankind stretches out to the very fringes of the galaxy, assailed from within and without by the alien, the mutant and the heretic. Only the guiding light of the Emperor holds the Imperium together, the psychic beacon of the Astronomican guiding Mankind's ships through the darkness of the void as they plunge into the warp, the hellish dimension of raw psychic energy inhabited by myriad predatory abominations known as Daemons. In the closing years of the 41st Millennium a storm like no other — the Great Rift — has torn its way across the stars, splitting the Imperium almost in two and leaving countless worlds cut off from the Astronomican. So has the war for survival become more desperate than ever before.
Heroes All
Every kill team is different, but all have certain features in common. Each is directed by a determined leader, and each contains a handful of skilled specialists whose martial abilities make them vital assets in the field. Kill teams are assembled for a vast variety of missions, many of which simply could not be completed by a larger and less specialised force. Some are assassins or saboteurs, using stealth or rapid-deployment technologies to strike without warning at targets far behind enemy lines. Other kill teams are protectors rather than destroyers, escorting a vital dignitary or providing skilled sentries for a hidden arco-laboratory. Other kill teams receive even more esoteric assignments, from the ritualised slaughter of specific targets to lacing an enemy army's rations with mutagenic gene-poisons.
In some cases, a team is assembled intentionally to fulfil a specific mission, carrying precisely the correct equipment and munitions to eliminate their targets — Deathwatch kill teams, squads of combat-optimised Skitarii and perfectly balanced Asuryani assassination bands are good examples. On other occasions, kill teams may be formed in the field, drawn wholesale from amongst the ranks of a larger army and assigned a specific mission before returning to their comrades. Though they may lack the diversity of specialists available to a more mixed kill team, their warrior bond and clearly defined way of making war stand such kill teams in good stead when the fighting intensifies.
The Best of the Best. Regardless of a kill team's origins and composition, it will always be directed in battle by an especially charismatic, cunning or domineering individual — some through respect or rank, others such as Ork Boss Nobz by dint of being the biggest and toughest, others still through fear, mind control or sacred religious station. Specialists are the other asset common to every kill team. Though they can take many forms — from master assassin to berserk killer, volatile pyromaniac to wily trapper — these skilled individuals bring vital equipment and talents to the battlefield, and it is the specialists who most often land the killing blow.
The longer a kill team fights together, and the more missions that they successfully complete, the more deadly a military force they become. Warriors initially thrown together by fate learn to fight seamlessly alongside one another, becoming adept at anticipating each other's actions and building bonds of loyalty. Many teams develop private combat languages — subtle inflections, hand signals or encoded voxclicks — that allow them to communicate stealthily and efficiently when fighting behind enemy lines. As kill teams gain experience, so too do their leaders and specialists reach ever higher levels of personal skill: commanders become bellowing firebrands or shrewd strategists, snipers become increasingly accurate, close-combat specialists become more dangerous, explosives experts become artists of destruction, zealots find the fires of their faith burning ever higher, heavy weapons troopers become engines of slaughter and field-medics become adept at swiftly restoring even catastrophically wounded warriors to fighting efficiency.
Theatres of War
The galaxy is vast, and in this dark age there is precious little of its immense span that does not echo to the sound of gunfire and burn with the fires of war. From storm-tossed ocean planets and hellish jungle-covered death worlds to ruined cityscapes, fortified strongholds and even the claustrophobic corridors of derelict spacecraft, kill teams go into action across myriad different battlefields, each bringing its own variety of conditions, challenges and opportunities — and dangers untold.
Many missions must be accomplished in secrecy, while for other conflicts the element of surprise is as valuable a weapon as any amount of heavy artillery. On Prassima V, a kill team of Alpha Legionnaires used the shrine world's long-defunct network of holy water aqueducts to bypass thousands of zealot militia and assassinate Cardinal Munce, their escape covered by explosive booby traps left in their wake. Sometimes, a commander must wield kill teams and massed forces in concert. On Stenoth, during the Wars of Admonishment, the Imperial advance was stymied by the immense Ork fortress of Gork's Gut; before the third Imperial offensive went in, kill teams of Blood Angels Primaris Space Marines infiltrated the structure, knocking out its shield generators, demolishing its main gate from within and assassinating the Orks' warlord, allowing the final assault to surge to victory.
Thousands more war zones have seen drastic changes in fortune after a kill team struck a crushing blow. The tangled arboreal world of Lucifere II is all but unnavigable for anything larger than infantry on foot — it is here that Gunnery Sergeant 'Stonetooth' Harker and his Catachan Devils hunted down Tyranid vanguard broods before they could call down a full-scale invasion. The cramped tunnelplexes of Elboryth see raiding bands of Drukhari, Adepta Sororitas and Necrons do constant battle over the planet's buried catacombs. On the forge world of Ryza, raiding parties of Skitarii sabotage greenskin war engines while Ork Kommandos strike at crucial production sites.
Many Imperial worlds boast sprawling hive cities that rapidly devolve into labyrinthine hellscapes once war consumes them, terrain in which kill teams excel — snipers and heavy weapon specialists clamber up to vantage points amidst burned-out manufactorums while combat experts dash between smouldering craters. Jungle worlds, with their throttlevines, fang trees and carnivorous undergrowth, are host to ambushes, booby traps and bladework where battle tanks or massed infantry would flounder and fail. Even upon the most sweeping and apocalyptic of battle-fronts, a subtle and well-placed kill team blade may achieve what thousands of screaming warriors cannot: command bunkers vanish in sudden fireballs, ammunition shipments disappear without trace, artillery strikes are called in with shocking accuracy, and whole armies strike from unexpected quarters thanks to infiltrating elements.
Rules
'In a battle such as this, there is no help to be had, no support incoming or reinforcements to be called upon. Lay your plans carefully and consider every move, lest it prove your last.' — Blood Angels Scout Sergeant Rafaen, during the battle for Hades Hive
Core Rules
Kill Team puts each player in command of a force of hand-picked fighters tasked with a vital mission. The core rules on these pages contain everything you need to know in order to use your Citadel Miniatures to wage covert war against one or more opponents for control of the battlefields of the 41st Millennium.
Tools of War. In order to play a game of Kill Team, you will need your Citadel Miniatures, a tape measure, a playing surface (which could simply be a table), and some dice. You may also find it helpful to have tokens that you can use to show when your models have acted. Distances in Kill Team are measured in inches (") between the closest points of the bases of the models you're measuring to and from. An object is said to be within a certain range (e.g. 6") of something if the distance to that thing is that range or less. If a model does not have a base, measure to and from the closest point of that model instead. You can measure distances whenever you wish.
Most games of Kill Team are played on an area of 30" by 22", the size of the gameboard included in the boxed game, though you can play on a playing surface of any size (below 24" by 24" may feel cramped). Kill Team uses six-sided dice (D6). Some rules refer to 2D6, 3D6 and so on — roll that many D6s and add the results together. If a rule requires a D3, roll a D6 and halve the result, rounding fractions up before applying modifiers. All modifiers are cumulative. An 'unmodified roll' means the result shown by the dice before any modifiers are applied. A dice roll requirement such as "3 or more" is often abbreviated to 3+.
Fighting a Battle. Once you have your tools of war, you'll need to choose a mission to play — the Covert War mission is included in the core rules, but you can use other missions or make up your own.
Kill Teams, Enemy Models and Players. The models that a player brings to a game of Kill Team are collectively known as that player's kill team. All models in the same kill team are referred to as 'friendly models', while all other models are referred to as 'enemy models'. All other players are referred to as 'opponents' or 'enemy players'. A player is said to be 'controlling' the models in their kill team, and may be referred to as the 'controlling player'.
Random Determination. Some rules or abilities will ask you to randomly determine something, usually a model from a kill team. Assign a number to each and roll a number of D6 (or D10), re-rolling any results not assigned to an eligible model. If the group you're randomising is larger than 10, split it into 2 or more smaller groups (of no more than 10), randomly determine one of those groups and then randomly determine the result within that group.
Datasheets and Weapons
The characteristics of models are described on datasheets. Each datasheet includes: Model Name; Profiles (the characteristics below); Description (what the model is armed with — all weapons have a profile described later in the same Faction section); Wargear Options (some models can exchange listed wargear for other options); Abilities (special abilities not covered by the core rules); Specialists (which kind of specialist, if any, this model can become — pg 66); and Keywords (sometimes separated into Faction keywords and other keywords; a rule that applies to models with a specific keyword, e.g. "all ADEPTUS ASTARTES models," only applies to models bearing that keyword).
Profile characteristics:
| Characteristic | Meaning |
|---|---|
| Move (M) | The speed at which a model moves across the battlefield. |
| Weapon Skill (WS) | A model's skill at hand-to-hand fighting. A Weapon Skill of '-' means the model cannot fight in melee at all. |
| Ballistic Skill (BS) | How accurate a model is when shooting with ranged weapons. A Ballistic Skill of '-' means the model cannot make shooting attacks at all. |
| Strength (S) | How strong a model is and how likely it is to inflict damage in hand-to-hand combat. |
| Toughness (T) | The model's resilience against physical harm. |
| Wounds (W) | How much damage a model can sustain before it succumbs to its injuries. |
| Attacks (A) | How many times a model can strike blows in hand-to-hand combat. |
| Leadership (Ld) | How courageous, determined or self-controlled a model is. |
| Save (Sv) | The protection a model's armour gives. |
| Max |
Modifying Characteristics. All modifiers are cumulative, though you apply any multiplication or division (rounding fractions up) before any addition or subtraction. A characteristic may be a random value (e.g. Move 2D6", Attacks D6) — roll to determine it each time the model uses that characteristic. Characteristics of '-' can never be modified, and Strength, Toughness and Leadership can never be modified below 1.
Weapons. Weapon characteristics: Range (weapons with Range 'Melee' can only be used in hand-to-hand combat; all others are ranged weapons); Type (explained under the Shooting and Fight phases); Strength (S) (how likely the weapon is to inflict damage — 'User' means equal to the wielder's current Strength; a modifier such as '+1' or 'x2' modifies the user's current Strength, e.g. a Strength 'x2' weapon used by a Strength-6 model has Strength 12); Armour Penetration (AP) (how good it is at getting through armour); Damage (D) (the amount of damage inflicted by a successful hit); Abilities (additional rules for how the weapon is used). All of a model's weapons are described in the appendix for that model's Faction.
Aura Abilities. Some models have abilities that affect certain models within a given range. Unless stated otherwise, a model with such an ability is always within range of its own effect (e.g. an Acolyte Hybrid with a cult icon benefits from its own Cult Icon re-roll aura).
Points and Force. Each model and each piece of wargear has a points cost, listed in each Faction's section. Points costs are used when choosing a Battle-forged kill team (pg 62); the total points cost of all models and wargear in a kill team is its 'Force', used to compare kill team strength.
The Battle Round
Each Kill Team mission is played in a series of battle rounds, each consisting of six phases resolved in order:
- Initiative phase — players roll off to determine who acts first in each phase.
- Movement phase — players move models and may charge enemies.
- Psychic phase — psykers use powerful mental abilities.
- Shooting phase — models may shoot at enemy models.
- Fight phase — models pile in and attack with melee weapons.
- Morale phase — players test whether their kill team is broken and whether models keep their nerve.
Once these phases have been played, the next battle round begins, and so on until the battle is concluded.
1. Initiative Phase. Each player rolls 2D6. Results determine turn order in each phase this battle round, highest first; ties are re-rolled between the tied players. The player with the first turn is the player 'with the initiative'.
Roll-offs. Some rules instruct players to roll off: each rolls a D6 (2D6 if more than two players), highest wins; ties are re-rolled (this is the only time you can re-roll a re-roll).
Sequencing re-rolls. A re-roll of a result made from several dice (2D6, 3D6, etc.) means re-rolling all of those dice, unless stated otherwise. You can never re-roll a dice more than once, and re-rolls happen before modifiers are applied.
When two or more rules are to be resolved simultaneously, the player with the initiative chooses the order; if this happens before the player with the initiative for the round is decided, players roll off and the winner decides. Rules used 'at the beginning of the phase' apply before any player's turn in that phase; rules used 'at the end of the phase' apply after all players' turns in that phase.
2. Movement Phase. Following initiative order, each player moves all the models in their kill team they wish to move, one at a time, until all players have moved all the models they want to. No model can be moved more than once in each Movement phase.
Moving. A model can be moved in any direction, cannot cross other models/bases or the battlefield edge, and can pivot at the end of its move (a pivot alone still counts as a move). Distance is measured using the part of the model's base that moves furthest from its starting position. A model must end its move on a surface it can stand on.
Moving over terrain. A model can be moved over a piece of terrain but not through it, and can move vertically to climb or cross terrain, counting vertical distance as part of its move.
Fly. A model with the FLY keyword can move across models and terrain (other than impassable terrain) as if they were not there, but must end its move on a surface it can stand on other than a model or its base. Vertical distance is not measured for FLY models.
Normal move. A model can move a distance equal to or less than its Move characteristic. When making a normal move or Advance, a model may not be moved within 1" of any enemy model; if a model is already within 1" of an enemy model when picked to move, it cannot make a normal move or Advance.
Falling Back. If a model started the Movement phase within 1" of an enemy model, it cannot make a normal move — instead it can remain stationary or Fall Back (unless an enemy model finished a charge move within 1" of it this phase, in which case it cannot Fall Back). Falling Back allows a move up to its Move characteristic, ending more than 1" from all enemy models. A model that Falls Back cannot Advance, charge, React or be Readied that phase, and cannot shoot later that battle round unless it can FLY. Place a Fall Back token as a reminder.
Advancing. Instead of a normal move (unless within 1" of an enemy model), declare an Advance and roll a D6, adding the result to the model's Move characteristic for the phase. A model that Advances cannot charge, React or shoot later that battle round. Place an Advance token as a reminder.
Readying. Instead of a normal move (unless within 1" of an enemy model), a model can be Readied, gaining an advantage in the subsequent Shooting phase (pg 28). Place a Ready token as a reminder; if the model moves for any reason, it is no longer Readied.
Charging. If a model is not within 1" of an enemy model but is within 12" of one, it can attempt to charge instead of making a normal move, using the charge sequence:
- Choose target(s) — one or more enemy models within 12" of the charging model.
- Enemy Reacts — opponents take it in turn, in initiative order, to make Reactions with any eligible models. A model can React if it is a target of the charge and more than 1" from an enemy model, choosing to either fire Overwatch (a special shooting attack, pg 31, that can potentially be fired several times a round) or Retreat (move up to 3", ending further from the charging model and more than 1" from any other enemy model; cannot Retreat if it has already moved or attempted to charge this phase, though it can Retreat after firing Overwatch; a model that Retreats cannot React or shoot later this battle round unless it can FLY — place a Fall Back token). If the charging model is slain, no further Reactions are made.
- Roll 2D6 and make charge move — the charging model can move up to this many inches, and must finish within 1" of at least one target model to have successfully charged (it cannot move within 1" of an enemy model that was not a target). If it cannot finish this way, the charge fails, but the model may still move up to its charge distance as close as possible to a target without coming within 1" of any enemy model. A model can only attempt one charge per Movement phase, and cannot shoot later in the battle round if it does so. Place a Charge token as a reminder.
The Most Important Rule. When unsure how to resolve a situation, discuss with your opponent(s) and apply whichever solution seems most sensible or fun. If no solution presents itself, roll off and the winner chooses.
Wobbly Model Syndrome. If terrain makes it hard to balance a model exactly in place, it is acceptable to leave the model in a safer position as long as all players agree and know its 'actual' location, restoring it to that spot to check visibility if needed.
Reinforcements. Some models can be set up on the battlefield mid-battle-round (teleporters, grav-chutes, etc.), typically at the end of the Movement phase. They cannot move further, Advance or charge the round they arrive, but count as having made a normal move for rules purposes (e.g. shooting Heavy weapons). A model not arrived by the end of the battle counts as taken out of action.
3. Psychic Phase. Models noted as PSYKER can manifest psychic powers and attempt to deny enemy sorceries. Each player chooses a single psyker from their kill team (in initiative order) to attempt to manifest one or more powers, following this sequence:
- Choose power — declare the power the psyker will attempt; a psyker cannot attempt the same power more than once per battle round. Unless stated otherwise, all psykers know Psybolt (warp charge 5: if manifested, the closest enemy model within 18" and visible to the psyker suffers 1 mortal wound, or D3 mortal wounds if the Psychic test result was 11+).
- Take Psychic test — roll 2D6; if equal to or greater than the power's warp charge value, it is manifested. Perils of the Warp: a double 1 or double 6 inflicts D3 mortal wounds on the psyker; if this takes them out of action, the power automatically fails and every model within 3" suffers D3 mortal wounds.
- Enemy takes Deny the Witch test — an eligible enemy psyker within 24" may attempt to resist by rolling 2D6; if greater than the Psychic test result, the power is negated. Only one model may attempt to deny each manifested power.
- Resolve psychic power — if manifested, not negated, and the psyker was not taken out of action by Perils of the Warp, the power's effect is resolved.
4. Shooting Phase. Split into a Ready, Fire! section (Readied models shoot first, in initiative order) and a Fire at Will section (remaining eligible models shoot, in initiative order). A model cannot be chosen to shoot if it made a charge attempt, Advanced, Fell Back (unless it can FLY) or Retreated this battle round, or if it is within 1" of an enemy model. No model can shoot more than once per Shooting phase. Sequence:
- Choose model to shoot with.
- Choose ranged weapon and targets. The target must be within the weapon's Range and visible to the shooter. Models cannot target enemy models within 1" of friendly models. If a weapon makes more than one attack, its shots can be split between an initial target and any other eligible enemy targets within 2" of it — declare the split before rolling, and resolve all shots at one target before the next.
Weapon Types. A model shooting a weapon makes a number of attacks equal to the number after its type (e.g. Assault 1 = 1 attack, Heavy 3 = 3 attacks); some weapons make a random number (D3, D6, etc.).
- Assault — can be fired even if the model Advanced this battle round (only Assault weapons may be fired, and subtract 1 from hit rolls).
- Heavy — subtract 1 from hit rolls if the model moved in the preceding Movement phase.
- Rapid Fire — doubles the number of attacks if all targets are within half the weapon's Range.
- Grenade — may be fired in Overwatch or the Shooting phase; if so, no other weapon may be fired that phase by that model, and no other model in the kill team may fire a Grenade weapon that phase.
- Pistol — can be fired even within 1" of an enemy model, but must target the closest enemy model and only Pistol weapon(s) may be fired; cannot fire a Pistol if charged this battle round. A model with both a Pistol and another ranged weapon type chooses Pistol(s) or all other weapons before making hit rolls.
Obscured. If the target is even partially hidden from the firing model's best point of view (considering the main body, including limbs and head, but not bases or protrusions like aerials/weapons), it is obscured.
- Resolve attacks:
- Hit roll — roll a D6, applying cumulative modifiers: -1 target at long range (more than half the weapon's Range; Grenade weapons unaffected); -1 target obscured; -1 per flesh wound on the attacking model; -1 if the attacking model's kill team is broken. Hit if the (modified) result is ≥ the attacker's Ballistic Skill. An unmodified 1 always fails; an unmodified 6 always hits.
- Wound roll — roll a D6 against the table below, comparing weapon Strength to target Toughness:
| Strength vs Toughness | D6 roll required |
|---|---|
| Strength is TWICE (or more) Toughness | 2+ |
| Strength is GREATER than Toughness | 3+ |
| Strength EQUALS Toughness | 4+ |
| Strength is LOWER than Toughness | 5+ |
| Strength is HALF (or less) Toughness | 6+ |
An unmodified 1 always fails; an unmodified 6 always succeeds. 3. Saving throw — the target's controller rolls a D6, modified by the weapon's Armour Penetration; if ≥ the target's Save characteristic, damage is prevented. An unmodified 1 always fails. 4. Inflict damage — the target loses wounds equal to the weapon's Damage characteristic. If reduced to 0 wounds, further attacks from that weapon against it are not resolved, and the attacker's controller makes an Injury roll.
- Choose another ranged weapon and targets, if any remain, returning to step 2.
Overwatch uses all normal shooting rules (range/visibility checked when the charge is declared) except it must target the charging model, and a hit roll of 6 is always required regardless of Ballistic Skill or modifiers.
Fast Dice Rolling. Attacks with the same relevant Skill, the same modifiers, and the same Strength/AP/Damage, directed at the same model, can have all hit rolls made together, then all wound rolls, with saving throws and damage resolved one at a time.
Injury Roll. When a model is reduced to 0 wounds, its controller rolls a D6 (unless stated otherwise) with modifiers depending on the cause:
| Injury roll modifier (psychic/shooting) | |
|---|---|
| Injured model is obscured from the psyker/shooter and within 1" of intervening cover | -1 |
| Each flesh wound on the injured model | +1 |
| Injury roll modifier (close combat) | |
|---|---|
| Each flesh wound on the injured model | +1 |
| D6 result | Effect |
|---|---|
| 3 or less | Flesh wound |
| 4+ | Out of action |
If the killing attack had a Damage characteristic greater than 1, roll a number of dice equal to that Damage characteristic and apply the highest result (after modifiers); for random Damage, use the rolled value.
Flesh Wound. A model reduced to a flesh wound is restored to 1 wound. It suffers hit-roll penalties and is more likely to be taken out of action; mark a Flesh Wound box on its datacard. If all Flesh Wound boxes are marked, the next flesh wound instead takes it out of action. Nerve tests are taken for models with flesh wounds each Morale phase.
Out of Action. A model taken out of action is removed from the battlefield and plays no further part in the battle.
Invulnerable Saves. A model with an invulnerable save may use it instead of its normal Save characteristic for any given save (never both) — invulnerable saves are never modified by Armour Penetration. Only one invulnerable save may be used if a model has more than one.
Mortal Wounds. Mortal wounds inflict damage directly with no wound roll or saving throw (including invulnerable saves). If a mortal wound reduces a model to 0 wounds, further mortal wounds from that attack are not resolved, and an Injury roll is made.
5. Fight Phase. Split into a Hammer of Wrath section (models that charged this battle round fight first, in initiative order — a player cannot pass while they have a charged model that can fight) and a Fight for Your Lives section (all other eligible models fight, in initiative order — a player cannot pass while they have a model that can fight). No model can be chosen to fight more than once per Fight phase. Any model that charged or was charged this battle round, or is within 1" of an enemy model, can be chosen to fight. Sequence:
- Pile in — move the model up to 3", ending closer to the nearest enemy model.
- Choose targets — the attacking model must be within 1" of the target, which must be visible. Models that charged this round can only target models they charged or that charged them. Attacks can be split between eligible targets (declare the split before rolling).
- Choose melee weapon — a model may also always fight with the basic close combat weapon profile (Range Melee, Type Melee, Strength User, AP 0, Damage 1). With multiple melee weapons and multiple attacks, attacks can be split between weapons (declare the split first).
- Resolve close combat attacks — identical sequence to shooting, using Weapon Skill instead of Ballistic Skill, with cumulative hit-roll modifiers: -1 if there is intervening terrain (terrain between the models that makes base contact impossible); -1 per flesh wound on the attacking model; -1 if the attacking model's kill team is broken.
- Consolidate — move the model up to 3", ending closer to the nearest enemy model.
6. Morale Phase. In initiative order, each player: (1) checks if their kill team is broken — if all models currently have flesh wounds, are shaken, or are out of action, the kill team is broken automatically; if more than half do, roll 2D6, and if greater than the highest Leadership of any eligible model in the kill team, it is broken (once broken, a kill team stays broken for the rest of the game); (2) removes Shaken tokens from all shaken models; (3) takes Nerve tests for every model with a flesh wound, and for every model if the kill team is broken. To take a Nerve test, roll a D6 with cumulative modifiers: +1 per other friendly model that is shaken or out of action; -1 per other friendly model (other than shaken models) within 2". If the result exceeds the model's Leadership, the test is failed and the model becomes shaken (place a Shaken token) until the token is removed; an unmodified roll of 1 always passes.
Models in a broken kill team suffer the -1 hit penalties noted above in the Shooting and Fight phases, and some missions impose additional penalties on broken kill teams.
Fighting a Battle
In games of Kill Team, your hand-picked fighters will be tasked with a specific objective, whether infiltrating enemy territory, sabotaging critical resources, or disrupting supply lines.
The Mission. Choose a mission before playing — the core rules include Covert War (below), or use a mission from elsewhere in this book, another product, or one you create. If players cannot agree, roll off and the winner decides.
The Kill Teams. Once a mission is chosen, choose your kill team following the rules on page 62 (for Covert War, any miniatures from your collection can be used). The mission may include additional rules that change how you choose your kill team.
The Battlefield. A battlefield can be any surface a model can stand on. The standard assumption is 30" by 22" (the Kill Team gameboard size), though missions may state other dimensions; increase the size if needed to fit all models, or for three/four-player games. Create an exciting battlefield with a mix of terrain: some that hides models, some that gives a better view, and some that provides cover — we recommend at least one, preferably two, terrain features providing shelter in each 12" by 12" area (or each quarter of a 30" by 22" battlefield). A killzone or expansion may add rules for setting up the battlefield or altered terrain interactions.
Scouting Phase. Some missions call for the Scouting phase (pg 49) once the battlefield is set up — new players are advised to skip this until after their first few games.
Deployment. Once the battlefield is set up (and the Scouting phase played, if relevant), set up kill teams as described by the mission, then begin the first battle round.
Open Play Mission: Covert War
The time has come to prove your worth as the leader of a covert kill team. All that stands between you and success is another kill team determined to thwart you.
The Kill Teams. Each player chooses a kill team from the miniatures in their collection — any models can be included. 10 or fewer models per kill team is recommended.
The Battlefield. Create the battlefield and set up terrain. Players roll 2D6, re-rolling ties, to determine strategic advantage (highest = greatest). In order of greatest to least advantage, players take turns placing a single objective marker, each at least 8" from any other objective marker and 6" from any battlefield edge. A player controls an objective marker if they have more models within 2" of it than the enemy does (shaken models don't count). Measure to/from the centre of a marker.
Deployment. The player with least advantage divides the battlefield into as many equal portions as there are players; players then choose their deployment zone in order of greatest to least advantage. In order of least to greatest strategic advantage, players take turns deploying one model at a time, wholly within their own deployment zone and more than 6" from any enemy deployment zone, until all models are set up (skipping any player who runs out of models).
Scouting Phase. If all players agree, resolve the Scouting phase (pg 49).
Battle Length. The battle lasts five battle rounds.
Victory Conditions. The player with the most victory points at the end wins a major victory. If tied, the tied player with the least strategic advantage wins a minor victory.
Primary Objective (roll D3, the player with the greatest advantage rolls):
- Secure the Battlefield — at the end of the battle, each objective marker is worth 2 victory points to the player who controls it.
- Retrieve the Cache — at the start of the first battle round, before the Initiative phase, randomly select one objective marker and remove the others from the battlefield; at the end of the battle it is worth 6 victory points to the player who controls it.
- Infiltrate — at the end of the battle, each objective marker in an opponent's deployment zone is worth 2 victory points to the player who controls it (a player scores nothing for controlling a marker in their own deployment zone).
Advanced Rules
This section adds further detail and complexity. It is not necessary to play, so is gathered here for players who wish to use it — new players are advised to ignore it to start with.
Terrain. Terrain is open ground, difficult terrain, dangerous terrain, or impassable terrain; agree on unclear terrain with your opponent(s) before the game. Terrain that slows movement affects all of that model's movement in any phase, including random movement distances (determined normally, then affected).
- Open ground — flat and free of obstacles; the battlefield surface, floors, platforms, walkways, doors, hatches and ladders. Models move across it without penalty.
- Difficult terrain — steep slopes, dense foliage, non-hazardous liquid, ice, spoil heaps. Models move at half rate (1" of movement = 2" across it); models that can FLY ignore this.
- Dangerous terrain — tar pits, deep/noxious pools, predatory vegetation. Moves at half rate like difficult terrain; as soon as a model would move into it (or begins its move already inside it, unless remaining stationary), take a dangerous terrain test (D6): on a 1, suffer 1 mortal wound. FLY models ignore the movement penalty but still test if they begin or end their move in dangerous terrain.
- Impassable terrain — models cannot enter or move over it for any reason.
Climbing. Models can climb/traverse barriers of 1" or higher, measuring distance normally for the terrain; a model cannot end its move mid-climb. A model can traverse an overhang protruding less than 1". FLY models ignore climbing rules and can move vertically without measuring distance.
Barriers, gaps and leaping. A model can leap onto a barrier less than 1½" high, or leap over a barrier less than 1½" high and no more than 1½" deep, without counting the vertical distance. A model can leap a gap of less than 2" (with enough movement to land wholly across it and ending less than 1" higher than before), without counting vertical distance — if ending 6" or more lower, use the jumping down rules instead. FLY models ignore barrier and gap penalties.
Falling. Agree before the game which terrain features a model can fall from (most multi-level buildings/ruins qualify). A model on such a feature within 1" of the edge that is hit by an attack (or otherwise loses a wound) may be knocked off: after the attack is resolved, its controller takes a Falling test (D6) — passed on a 2+; on a 1, the model is knocked off, moved over the edge by the shortest route, then straight down to a lower level.
Falling damage. Roll a D6 per full 3" fallen; each 5+ inflicts 1 mortal wound. If the model would land on another model, roll the same number of dice for the model underneath. The falling model's controller makes any resulting Injury rolls, then the model is placed as close as possible to where it would have landed (which can be within 1" of an enemy model).
Jumping down. A model on a fall-capable feature can choose to jump down, using the falling rules but rolling one fewer dice than normal (e.g. jumping 5" needs no dice; jumping 6" needs 1 dice). A model jumping down cannot land on another model, and cannot jump within 1" of an enemy model unless charging that model. FLY models ignore these rules.
Killzones
Each killzone has its own rules governing how models interact with the battlefield and terrain, used in addition to the terrain rules above. This book includes rules for the Sector Imperialis killzone; others are available in other Kill Team products. Where players have a choice and cannot agree, roll off — the winner decides.
Killzone: Sector Imperialis. Shattered streets and ruins stretch for miles as kill teams pick through the blasted remains of the lives of whatever luckless civilians once dwelt here. Once the battlefield is set up but before kill teams are set up, one player rolls a D6 on the environment table below to determine the additional rule for the mission. Sector Imperialis Tactics (found in other Kill Team products) may also be used.
| D6 | Environment | Effect |
|---|---|---|
| 1 | Deserted Habs | No additional rule. |
| 2 | Abandoned Munitions | One extra model in each kill team can shoot with a Grenade weapon they are armed with in each battle round. |
| 3 | Smoke in the Air | All players must subtract 1 from their hit rolls in the Shooting phase. |
| 4 | Traps | The upper floors of ruins are dangerous terrain. |
| 5 | Tunnels | A model within 1" of a manhole and more than 1" from any enemy model, and not shaken, may enter the tunnels in the Movement phase (remove from the battlefield). At the end of your Movement phase turn next battle round, place it within 1" of any manhole within 24" of the one it entered, more than 1" from any enemy model — it counts as having made a normal move. While off the battlefield it counts as out of action for Nerve tests and checking if the kill team is broken; if still off the battlefield at the end of the battle, it is out of action. |
| 6 | Hidden Cache | In a campaign game, the player who wins the mission gains 1 Materiel (pg 204). Otherwise no additional rule. |
Missions
'Damnation man, this is a critical moment! Brute force simply won't be enough! Send word to Sergeant Marius. His Blood Angels will get the Governor out alive.' — General Kasmund Dar-Galot, during the last days of the Aximal Secession
Countless Battles
In a galaxy at war there are no limits to the kinds of missions your kill teams will undertake, and no end to the dangers they face. Kill Team gives you the freedom to play the games you want, how you want.
Different Ways to Play. There is huge variety in the games you can play, described here under three headings:
- Open play is the least restrictive — as simple or complex as you like. All you need are your painted miniatures, their datasheets, the core rules, a mission, dice, a tape measure and a flat surface. A simple mission is included (Covert War, pg 41), with more ideas on pages 50-51.
- Matched play tests kill teams against each other under conditions that give no particular advantage to either side, using each model and piece of wargear's points value (found at the end of each Faction section) to build a Battle-forged kill team. Ideal for competitive play.
- Narrative play is about telling stories in the grim darkness of the far future — as simple as devising a reason for two kill teams to battle (a rivalry, a vital objective), turning Kill Team into more than a competitive game. Kill teams might be modified to fit the plot, terrain might recreate the landscape, and house rules might represent the consequences of victory and defeat. The campaign rules (pg 202-205) help turn narrative battles into an ongoing saga.
No Wrong Way to Play. Each mission tells you what type of play it is designed for, but nothing stops you from mixing elements between types.
Tactics. Some missions include Tactics that one or more players gain access to during that mission (pg 64-65).
Objective Markers. Each objective marker should be around 1" across. If a marker can't be placed exactly as described (e.g. terrain in the way), place it as close as possible to its correct position. Measure to/from the centre of a marker, and only measure horizontal distance to another marker or the battlefield edge. A player controls a marker if they have more models within 2" of it than the enemy does (shaken models don't count).
Scouting Phase
Operatives creep into position, eliminating sentries, disarming or laying traps and relaying information about enemy dispositions. Once a mission and kill teams are chosen and the battlefield is set up, but before kill teams are set up, some missions call for the Scouting phase. Each player secretly chooses one of six strategies by hiding a D6 showing the relevant number behind their hand, then all reveal simultaneously:
- Scout Out Enemy Forces — set aside up to 20% of your kill team (rounding up) during deployment, setting them up (per the mission's deployment rules) once all kill teams have otherwise been set up. If more than one player chooses this, roll off for the benefit.
- Plant Traps — booby-trap up to D3 pieces of terrain (not impassable, no bigger than 8" in any dimension), noted secretly. If an enemy model moves within 1" of (or begins its move within 1" of, unless stationary) a booby-trapped piece, reveal it and roll a D6 for that model: on a 1, it suffers 1 mortal wound. FLY models only trigger it by beginning/ending their move within 1" (not stationary). Afterwards, that terrain and open ground within 1" becomes dangerous terrain for enemy models, and is no longer booby-trapped.
- Disarm Traps — choose an enemy player who chose Plant Traps; their strategy has no effect (or your strategy has no effect if no such player exists).
- Scout Out Terrain — choose up to D3 pieces of difficult or dangerous terrain (no bigger than 8" in any dimension); your models move through it without penalty this mission, and if a friendly model suffers a mortal wound from it, a D6 roll of 5+ ignores that wound.
- Take Forward Positions — before the first battle round, up to 20% of your kill team (rounding up) can make a normal move as if in the Movement phase. Roll off if more than one player chooses this.
- Eliminate Sentries — before the first battle round, up to 20% of your kill team (rounding up) can make a shooting attack as if in the Shooting phase, targeting a model that moved via Take Forward Positions. If more than one player chose this, roll 2D6 for initiative order among them and resolve attacks in that order. Has no effect if no one chose Take Forward Positions.
Behind Enemy Lines
Kill team operations take place under any number of unusual circumstances. Further open play mission ideas: a numerically superior foe surrounds an elite force that must break out or drive off the enemy; a ragtag band of survivors must get back to friendly lines; a patrol ambushed in dense terrain must escape with vital intelligence; defenders must hold a communications array until reinforcements arrive; anti-air guns covering the one viable bomber route to an enemy HQ must be destroyed; a small team must defeat a sorcerer's elite guards before he completes a fell ritual; a wounded spy must be hunted down before reaching his comrades; a key artefact buried in a ruined city must be retrieved before the enemy finds it; a traitor must be found and eliminated before giving up secrets; explosives seeded through an area must be disarmed before the army can advance.
Open Play Mission: Aerial Strike
Sometimes the only way to get troops into a critical fortified position is from above, dropping from the sky on grav-chutes or by other means to sabotage vital enemy equipment.
Two players — an attacker and a defender (roll off if undecided). Each chooses a kill team (pg 62).
The Battlefield. Set up terrain; the defender places 3 objective markers, at least 6" apart.
Scouting Phase. Not used in this mission.
Deployment. The defender sets up anywhere on the battlefield. The battlefield is divided into four quarters, numbered 1-4; the attacker rolls a D6 per model — on a 1-4 it is set up in the corresponding quarter, on a 5-6 the attacker chooses the quarter — always more than 4" from any defender model.
Battle Length. Ends automatically at the end of battle round 5.
Victory Conditions. An attacker's model within 1" of an objective marker at the end of a battle round may attempt to destroy it (D6, 5+ destroys it — remove from the battlefield). At the end of the battle, each marker is worth 2 victory points to the attacker if destroyed, or 2 to the defender if still on the battlefield. Each player also scores 1 victory point per enemy specialist taken out of action. Most victory points wins; the defender wins ties.
Open Play Mission: Search and Rescue
When a key operative is lost behind enemy lines, the rest of their unit must retrace their steps and locate their missing comrade before the enemy does.
Two players — a rescuer and a defender (roll off if undecided). Each chooses a kill team.
The Battlefield. Set up terrain; the defender places 5 objective markers, at least 4" from each other and the battlefield edge, then the battlefield is divided into even halves.
Scouting Phase. Resolve as described above.
Deployment. The rescuer picks a half as their deployment zone and sets up a model anywhere in it, more than 8" from the enemy deployment zone; players alternate setting up models this way (a player who finishes early lets the other continue).
Battle Length. Ends at the end of battle round 5.
Victory Conditions. At the end of the Movement phase, roll a D6 in turn for each objective marker within 1" of any of your models and more than 1" from any enemy models (in initiative order if both players qualify). On a 6, immediately remove all other markers (including unrolled ones) — make no further objective rolls. At the end of the battle, whoever has the most models within 2" of the remaining marker wins; if neither does, or if all markers remain, the rescuer wins.
Open Play Mission: Lines of Battle
Sometimes it is up to a single unit to try to hold a flank and stop the enemy from breaking through to their defenceless support and supply trains. If they fail, the war is almost certainly lost!
Two players — an attacker and a defender. Each chooses a kill team.
The Battlefield. Set up terrain; the defender picks the battlefield edge they must hold.
Deployment. The defender sets up anywhere within 6" of their edge; the attacker sets up anywhere within 6" of the opposite edge.
Battle Length. At the end of round 4, the attacker rolls a D6 — continues on 3+; at the end of round 5, rolls again — continues on 4+. Ends automatically at the end of round 6.
Scouting Phase. Resolve as described above.
Victory Conditions. The attacker can move models wholly off the defender's edge (breaking through — not out of action, but takes no further part). The attacker scores 1 victory point per model that broke through; the defender scores 1 per attacker model that did not. Most points wins; defender wins ties.
Narrative Play Missions
Each narrative mission below is for two players — an attacker and a defender, each choosing (and revealing simultaneously) a single Faction keyword, then a Battle-forged kill team (pg 62) restricted to that keyword. Unless noted, the Scouting phase is resolved as described above; deployment has players roll off, then alternate setting up models (loser of the roll-off first) wholly within their own deployment zone; battle length follows the standard 4/5/6-round escalating-D6 pattern (continues on 3+ after round 4, on 4+ after round 5, ends automatically after round 6) unless a mission-specific end condition triggers first.
Disrupt Supply Lines
The success or failure of an army depends on how well it is supplied, and kill teams play a vital part in both sabotaging and safeguarding supply lines.
The Battlefield. Players roll off; the winner picks which short edge their deployment zone touches. The defender places three objective markers in their own territory, at least 6" from each other and the battlefield edge.
Victory Conditions. Each marker is worth 3 victory points to whoever controls it at the end of the battle. The attacker scores 1 per marker they destroyed, and either player scores 1 if the enemy kill team is broken. Most points wins; defender wins ties.
Resources (campaign). If the attacker wins, the defender loses 2 Materiel; if the defender wins, the attacker loses 1 Morale.
Disrupt Supply Line (Attacker Tactic, 1 CP). Use at the end of a battle round: destroy an objective marker you control (once per battle round).
Protect the Assets (Defender Tactic, 2 CP). Use at the start of a battle round: until the start of the next battle round, objective markers cannot be destroyed while within 2" of any of your models.
Ambush
When a choke point is found, a kill team can cause significant damage to a superior force.
The defender may spend an additional 20 points on their kill team. Players roll off for which short edge their deployment zone touches; deployment alternates starting with the defender.
Battle Length. Ends immediately if all the defender's models are shaken, out of action, or have escaped at the end of a battle round; otherwise follows the standard escalating pattern.
Escape. The defender can move models wholly off the battlefield edge labelled 'escape route' in the Movement phase — an escaped model is not out of action but takes no further part.
Victory Conditions. If more of the defender's models escaped than did not, the defender wins; otherwise the attacker wins.
Resources (campaign). If the attacker wins, the defender loses 1 Intelligence and 1 Territory; if the defender wins, the attacker loses 1 Territory.
You're Going Nowhere (Attacker Tactic, 1 CP). Use at the start of the Movement phase: choose a non-shaken model from your kill team — enemy models within 1" of it cannot Fall Back this phase.
Slink Away (Defender Tactic, 1 CP). Use at the start of the Movement phase: choose a model and roll a D6 — on a 6, it is removed from the battlefield and treated as having escaped.
Feint
By staging a suitably loud, brutal and spectacular attack, a kill team can cause enough disruption and mayhem to make a commander believe they face a much larger force.
The Battlefield. Players roll off for which short edge their zone touches; starting with the defender, players alternate placing three objective markers each, more than 5" from each other and the battlefield edge.
Victory Conditions. The defender scores 2 victory points for each marker still on the battlefield; the attacker scores 1 per marker they destroyed, plus 1 if the enemy kill team is broken and 1 per enemy specialist taken out of action. Most points wins; defender wins ties.
Resources (campaign). If the attacker wins, the defender loses 1 Materiel and 1 Territory; if the defender wins, the attacker loses 1 Territory.
Cause Mayhem (Attacker Tactic, 1 CP). Use at the end of a battle round: destroy an objective marker you control.
Reinforcements Inbound (Defender Tactic, 1 CP). Use at the start of the Morale phase: subtract 1 from any Nerve tests you make this phase.
Assassinate
An army without its commanders is helpless, a beast ready for the slaughter.
Deployment. The defender's Leader must be set up wholly within 5" of the centre of the defender's deployment zone.
Battle Length. Ends immediately if the defender's Leader is taken out of action; otherwise the standard escalating pattern.
Victory Conditions. If the attacker takes the defender's Leader out of action, the attacker wins; otherwise the defender wins.
Resources (campaign). If the attacker wins, the defender loses 1 Intelligence and 1 Morale; if the defender wins, the attacker loses 1 Morale.
Cut Off the Head (Attacker Tactic, 1 CP). Use at the start of the Shooting or Fight phase: for the rest of the phase, re-roll wound rolls of 1 for attacks targeting the enemy Leader.
Staying Low (Defender Tactic, 2 CP). Use at the start of the Shooting phase: for the rest of the phase, enemy models cannot target your Leader unless it is the closest visible enemy model to them.
Matched Play Missions
Each matched play mission below is for two to four players, each choosing (and revealing simultaneously) a single Faction keyword, then a Battle-forged kill team restricted to that keyword. Deployment: players roll 2D6 (re-rolling ties) for strategic advantage, choose deployment zones in order of greatest to least advantage, then deploy one model at a time in order of least to greatest advantage until all kill teams are set up. The Scouting phase is resolved as described above.
Sweep and Clear
When securing territory, it is imperative that all enemy forces are driven out of it, lest lurking saboteurs strike at supposedly safe locations.
The Battlefield. Four objective markers are set up midway between the centre of the battlefield and the middle of each battlefield edge.
Battle Length. Ends at the end of a battle round if only one unbroken kill team remains; otherwise the standard escalating pattern (advantage-leader rolls).
Victory Conditions. If the battle ends due to only one unbroken kill team remaining, that player wins. Otherwise, each player scores 3 victory points per objective marker they control and 1 per enemy model they took out of action. Most points wins; ties go to the lower-Force player, then a draw.
Resources (campaign). Losing player(s) each lose 2 Territory; no loss on a draw.
Take Prisoners
Kill team operatives are often privy to sensitive information such as the locations of high-ranking personnel, hidden supply caches and secret routes through defensive lines.
Battle Length. Standard escalating pattern.
Victory Conditions. Each player scores 3 victory points per captured enemy Leader and 1 per other captured enemy model. Most points wins; ties go to the lower-Force player, then a draw. Captured: an enemy model is captured if it is taken out of action while within 1" of one of your (non-shaken) models and no other enemy (non-shaken) models are within 2" of that model — it is still out of action, and its player still makes a Casualty roll for it in a campaign.
Resources (campaign). Losing player(s) each lose 1 Materiel and 1 Morale; no loss on a draw.
Recover Intelligence
Strategic intelligence is a weapon more deadly than any amount of plasma warheads or bolt rifles.
The Battlefield. One objective marker in the centre, plus four more midway between the centre and each corner.
Battle Length. Standard escalating pattern.
Victory Conditions. Each player scores victory points per battle round for markers they control (cumulative): 1 for each marker closest to their own deployment zone, 3 for the centre marker, 2 for each other marker. Most points wins; ties go to the lower-Force player, then a draw.
Resources (campaign). Losing player(s) each lose 2 Intelligence; no loss on a draw.
Terror Tactics
An enemy force whose nerve has failed them is little more than a gaggle of victims waiting to be slaughtered.
Battle Length. Ends at the end of a battle round if only one unbroken kill team remains; otherwise the standard escalating pattern.
Wreak Havoc. Any player can move models wholly off the battlefield edge directly opposite their own deployment zone in the Movement phase — such a model has broken through enemy lines, takes no further part, and is not out of action.
Victory Conditions. If the battle ends due to only one unbroken kill team remaining, that player wins. Otherwise, each player scores 2 victory points per model that broke through and 1 per enemy model they took out of action. Most points wins; ties go to the lower-Force player, then a draw.
Resources (campaign). Losing player(s) each lose 2 Morale; no loss on a draw.
Kill Teams
'Each of those valiant Players was worth one hundred lesser warriors. When they fought as one in Cegorach's name, their might was magnified still further, so that none could stand against them.' — The Lay of the Harlequins' Blades, from the Song of Decay and Rebirth
Choosing a Kill Team
No two kill teams are alike — each is assembled to accomplish a specific vital mission, and each contains individuals of exceptional and unique talents. The rules for choosing a kill team differ depending on which way you want to play (open, matched or narrative — pg 48). Whichever way you choose, complete a datacard for each model in your kill team: a reminder of that model's characteristics, wargear and abilities, and a place to record flesh wounds. For matched play (and sometimes narrative play) you also complete a command roster listing all the models available for you to choose a kill team from.
Open Play. Simply choose a kill team from the models available to you, choose one model to be the kill team's Leader, and fill in a datacard for each model. Any other rules on this page can be used if you and your opponent(s) agree.
Matched Play. Create a command roster of up to twenty models, all sharing a Faction keyword (a blank command roster is on page 206). Once the mission is determined, choose a Battle-forged kill team (below) from the models on your command roster. It's a good idea to work out your kill team on scrap paper first, since you may have to juggle wargear and models to get close to the 100-point limit.
Narrative Play. The mission may dictate how you choose your kill team, or you may choose as for open or matched play, adjusting as needed for the best narrative experience. In a Kill Team campaign (pg 202-205), the command roster tracks every operative used across missions, and you can add new models to it as the campaign progresses; you may also note details such as which specialists have used a Tactic on your roster or datacards.
Forging a Narrative. We strongly encourage you to come up with background for your team — personalities, quirks, names and the like. Tables for inspiration can be found in the Faction sections of this book. Some require a D10 roll (a ten-sided dice); others use a D66 — roll two six-sided dice in sequence, the first as tens and the second as digits, giving a result between 11 and 66.
Battle-forged Kill Team. For your kill team to be Battle-forged:
- It must consist of at least three models, and no more than twenty.
- It must include one (and only one) Leader (pg 68).
- It can include up to three other specialists (pg 66).
- It cannot include more of any particular model than its datasheet's Max.
- All models must share a Faction keyword.
- It cannot cost more than 100 points. Each model and piece of wargear has a points cost (detailed per Faction); the kill team's total cost is its Force.
Command Points and Tactics
When you choose a Battle-forged kill team, you gain access to Command Points, spent to use Tactics — tactical assets available to your kill team. All Battle-forged kill teams generate 1 Command Point at the beginning of each battle round. At the start of the first battle round, a kill team also generates 1 additional Command Point for every 10 points its Force is lower than the highest Force among the kill teams in the battle (e.g. 19 points lower = 1 extra CP; 20 points lower = 2 extra CP). Unused Command Points carry over to subsequent battle rounds.
The Tactics available depend on the mission: players can always use the six generic Tactics below; each specialism has its own Tactics; each Faction has unique Tactics; and some missions, killzones and expansions add further Tactics. Unless stated otherwise, a Tactic can be used multiple times during a battle but only once per phase (the beginning/end of a battle round is not a phase, so some Tactics can be used multiple times there). If open play or narrative play, you may choose to use the Command Point rules by agreement — recommended for any mission that includes Tactics.
| Tactic | Cost | Effect |
|---|---|---|
| Decisive Move | 2 CP | Use at the start of the Movement phase. Pick a model and move it (including Advance, Fall Back or charge) before any other models. Roll off if another player also uses this. |
| Decisive Strike | 1 CP | Use at the start of the Fight phase. Pick an eligible model and fight with it before any other models. Roll off if another player also uses this. |
| Decisive Shot | 2 CP | Use at the start of the Shooting phase. Pick an eligible model and shoot with it before any other models. Roll off if another player also uses this. |
| Insane Bravery | 1 CP | Use before taking Nerve tests in the Morale phase. Automatically pass a single Nerve test for a model. |
| Tactical Re-roll | 1 CP | Re-roll a single Advance roll, charge roll, Psychic test, Deny the Witch test, hit roll, wound roll, saving throw, Injury roll or Nerve test. |
Specialists
Each kill team is led by a hard-bitten Leader, supported by specialists — fighters a cut above the rest in bravery, tenacity or skill.
Choosing Specialists. Each specialist has an ability tree: it starts at Level 1 with the Level 1 ability, and in a campaign can advance up to Level 4 (pg 204). A model's datasheet lists which specialisms it can take; choose one when adding it to your command roster and note it on its datacard — it cannot be changed later. Some models can take the Leader specialism; your kill team must include exactly one model with this specialism, who becomes its Leader. A Battle-forged kill team can include up to three other specialists besides the Leader, each with a unique specialism (you may still have duplicate specialists on your command roster). Advancing to Level 2, choose one of the two Level 2 abilities (this determines which Level 3 abilities are available — you cannot pick the ones connected to the other Level 2 option). Advancing to Level 3, choose one of the two connected Level 3 abilities. Advancing to Level 4, choose any unchosen ability from the tree. A specialist cannot advance beyond Level 4; each new level's ability is gained in addition to earlier ones.
Tactics. If a specialist in your kill team is not shaken or out of action, you have access to Tactics specific to their specialism; each Tactic has a level requirement.
Worth Their Weight. In a Battle-forged kill team, a specialist's abilities carry an increased points cost for that model: +0 at Level 1, +4 at Level 2, +8 at Level 3, +12 at Level 4. A normal matched play game only allows Level 1 specialists — Level 2-4 costs exist for Kill Team campaigns.
Leader Specialists
A kill team's Leader is its brain and its heart — typically the most experienced warrior, with ultimate responsibility for the team's actions and the mission's success. Most are exceptional combatants with access to some of their force's most powerful weapons and wargear.
| Tactic | Level | Cost | Effect |
|---|---|---|---|
| Lead by Example | 1 | 1 CP | Use when a Leader is picked to fight in the Fight phase. Choose another friendly model within 3" that is eligible to fight — fight with each (your choice of order) before the next player's turn. |
| Fire on My Target | 2 | 1 CP | Use when a Leader of Level 2+ is picked to shoot. Choose another eligible friendly model within 3" — shoot with each (your choice of order) before the next player's turn. |
| Force of Will | 3 | 1 CP | Use at the start of the battle round if a non-shaken Leader of Level 3+ is on the battlefield. Your kill team does not suffer the broken penalty this battle round. |
| Level | Ability |
|---|---|
| 1 | Resourceful — while this model is on the battlefield and not shaken, gain an additional Command Point at the beginning of the battle round. |
| 2 | Bold — this model automatically passes Nerve tests. OR Inspiring — friendly models within 3" (while this model is not shaken) automatically pass Nerve tests. |
| 3 | Paragon — re-roll hit rolls of 1 for friendly models within 3" (while not shaken). OR Tyrant — enemy models within 6" (while this model is not shaken) must add 1 to Nerve tests. |
| 4 | Tactician — while on the battlefield and not shaken, roll a D6 each time you use a Tactic; on a 5+ gain a Command Point. OR Mentor — once per battle round, when a friendly model within 3" is chosen to shoot (while this model is not shaken), re-roll its failed hit rolls this phase. OR choose any unchosen ability from this tree. |
Combat Specialists
Sublimely skilled bladesmen, berserk savages or calculating murderers — combat specialists lead headlong charges, intercept breakthroughs, eliminate sentries, and often strike the blow that breaks the enemy's nerve.
| Tactic | Level | Cost | Effect |
|---|---|---|---|
| Up and at 'Em! | 1 | 1 CP | Use in the Fight phase after a model attacks. Pick a Combat specialist that hasn't attacked yet this phase — fight with them immediately. |
| Defensive Fighter | 2 | 1 CP | Use at the start of the Fight phase. Pick a Combat specialist of Level 2+: until the end of the phase, subtract 2 from their Attacks (minimum 1), but opponents must re-roll successful hit rolls against them. |
| Deadly Charge | 3 | 1 CP | Use when a Combat specialist of Level 3+ finishes a charge within 1" of an enemy model. Roll a D6; on a 5+ that enemy model suffers 1 mortal wound. |
| Level | Ability |
|---|---|
| 1 | Expert Fighter — add 1 to this model's Attacks characteristic. |
| 2 | Warrior Adept — add 1 to hit rolls in the Fight phase. OR Deadly Counter — if a hit roll of 1 or less is made against this model in the Fight phase (while not shaken), roll a D6; on a 5+ the attacker suffers 1 mortal wound after its attacks resolve. |
| 3 | Deathblow — wound rolls of 6 in the Fight phase inflict 1 additional mortal wound. OR Combat Master — add 1 to this model's Attacks for each enemy model within 1" at the start of the Fight phase, until the end of the phase. |
| 4 | Killer Instinct — re-roll failed wound rolls in the Fight phase. OR Bloodlust — re-roll failed charge rolls. OR choose any unchosen ability from this tree. |
Comms Specialists
Vox operators, signal-jamming Meks, or Tyranid node-beasts with synaptic pulses — Comms specialists provide an eagle-eye view of the battlefield, relaying orders and targeting data or jamming the enemy.
| Tactic | Level | Cost | Effect |
|---|---|---|---|
| Rousing Transmission | 1 | 1 CP | Use in the Morale phase before Nerve tests. Until the end of the phase, treat models in your kill team as though a Comms specialist were within 2" for Nerve test purposes (subtract 1). |
| New Intelligence | 2 | 2 CP | Use when a model within 6" of a friendly Comms specialist of Level 2+ is chosen to shoot. It can target a non-visible enemy model — a 6 is required to hit regardless of Ballistic Skill or other modifiers, even for auto-hitting weapons; the target is treated as obscured. |
| Scanner Uplink | 3 | 1 CP | Use at the end of the Movement phase. Pick a model within 12" of a friendly Comms specialist of Level 3+: Ready that model. |
| Level | Ability |
|---|---|
| 1 | Scanner — once per Shooting phase, when a model within 6" (while this model is not shaken) is chosen to shoot, add 1 to its hit rolls this phase. |
| 2 | Expert — roll a D6 at the start of each battle round (while not shaken); on a 5+ gain 1 additional Command Point, lost at the end of the round if unused. OR Static Screech — once per battle at the start of the Fight phase (while not shaken), subtract 1 from hit rolls for enemy attacks made within 6" until the end of the phase. |
| 3 | Vox Ghost — subtract 1 from enemy Leadership while this model is on the battlefield and not shaken. OR Command Relay — roll a D6 each time you use a Tactic while this model is on the battlefield and not shaken; on a 6, refund the Command Points spent. |
| 4 | Triangulator — once per Shooting phase, when a model is chosen to shoot a Heavy weapon (while this model is not shaken), re-roll the dice for the number of attacks made. OR Vox Hacker — after a battle in which this model was in your kill team (and not in Convalescence or dead), roll a D6; on a 5+ gain 1 Intelligence. OR choose any unchosen ability from this tree. |
Demolitions Specialists
Booby traps, explosive launchers and roaring flamethrowers — Demolitions specialists ply an explosively lethal trade.
| Tactic | Level | Cost | Effect |
|---|---|---|---|
| Custom Ammo | 1 | 1 CP | Use when a Demolitions specialist is chosen to shoot. Add 1 to wound rolls for their ranged weapons this phase. |
| Lucky Escape | 2 | 1 CP | Use at the start of the Shooting phase. Pick a Demolitions specialist of Level 2+: roll a D6 each time it loses a wound this phase; on a 5+, that wound is not lost. |
| High Explosive | 3 | 1 CP | Use when a Demolitions specialist of Level 3+ is chosen to shoot. This phase they may shoot only a single weapon, firing only 1 shot (even if it would fire more), but its Damage is increased by 2. Cannot be used in the same battle round as Custom Ammo. |
| Level | Ability |
|---|---|
| 1 | Breacher — add 1 to wound rolls against obscured targets. |
| 2 | Pyromaniac — re-roll wound rolls of 1 for auto-hitting weapons. OR Grenadier — add 3" to the range of Grenade weapons this model uses, and re-roll hit rolls of 1 for them. |
| 3 | Saboteur — if this model is in your kill team and not out of action when you make Casualty rolls, roll a D6; on a 5+ choose an opponent from that mission to lose 1 Materiel. OR Sapper — if you choose Plant Traps (pg 49) with this model in your kill team, add 1 to the number of terrain pieces you can booby-trap. |
| 4 | Siegemaster — add 1 to Injury rolls this model causes in the Shooting phase against obscured targets. OR Ammo Hound — if this model is in your kill team and not out of action when you make Casualty rolls, roll a D6; on a 5+ gain 1 Materiel. OR choose any unchosen ability from this tree. |
Heavy Specialists
A doughty warrior toting a heavy weapon can be as devastating as a battle tank — the Heavy specialist suppresses and slaughters the foe while allies advance.
| Tactic | Level | Cost | Effect |
|---|---|---|---|
| More Bullets | 1 | 1 CP | Use when a Heavy specialist is chosen to shoot. Add 1 to the number of shots fired by their ranged weapons this phase, except weapons that would otherwise fire 1 shot. |
| Overwhelming Firepower | 2 | 2 CP | Use when a Heavy specialist of Level 2+ is chosen to shoot. They shoot twice this phase (shoot again immediately after the first time). Cannot be used the same battle round as More Bullets. |
| Unkillable | 3 | 1 CP | Use at the start of your turn in the Morale phase. Pick a Heavy specialist of Level 3+ with one or more flesh wounds: remove one flesh wound. |
| Level | Ability |
|---|---|
| 1 | Relentless — no -1 penalty for shooting a Heavy weapon after moving, or an Assault weapon after Advancing. |
| 2 | Suppressor — enemy models targeted by this model in the Shooting phase suffer -1 to hit rolls until the end of the phase. OR Extra Armour — ignore AP -1 for attacks that target this model. |
| 3 | Devastator — re-roll the damage for this model's random-Damage ranged weapons. OR Rigorous — re-roll hit rolls of 1 in the Shooting phase. |
| 4 | Indomitable — once per battle round, make your opponent re-roll the Injury dice for this model. OR Heavily Muscled — re-roll wound rolls of 1 in the Fight phase. OR choose any unchosen ability from this tree. |
Medic Specialists
Field surgeons, flesh-stitchers, or something stranger — Medic specialists keep comrades in the fight, repairing hurts that would otherwise be permanent.
| Tactic | Level | Cost | Effect |
|---|---|---|---|
| Stimm-Shot | 1 | 2 CP | Use at the start of the Movement phase. Pick a model within 2" of a non-shaken friendly Medic specialist: add 1 to its Advance and charge rolls, and add 1 to its Attacks characteristic, until the end of the battle round. |
| Painkiller | 2 | 2 CP | Use at the end of the Movement phase. Pick a model within 2" of a non-shaken friendly Medic specialist of Level 2+: add 2 to its Toughness until the end of the battle round. |
| Emergency Resuscitation | 3 | 1 CP | Use when a non-shaken Medic specialist of Level 3+ is within 2" of a friendly model that suffers an Out of Action Injury result. That model suffers a Flesh Wound result instead. |
| Level | Ability |
|---|---|
| 1 | Reassuring — this model is never treated as shaken when taking Nerve tests for other models in your kill team. |
| 2 | Field Medic — roll a D6 when a friendly model within 3" (while this model is not shaken) suffers a wound; on a 6, the wound is not lost. OR Anatomist — re-roll wound rolls of 1 in the Fight phase. |
| 3 | Trauma Specialist — when an Injury roll is made for a friendly model within 3" (while not shaken), roll an additional dice and use the lowest. OR Triage Expert — if this model is in your kill team and not out of action at the end of a battle, and you roll Dead on a Casualty roll for a model, roll a D6; on a 4+ apply Convalescence instead. |
| 4 | Interrogator — at the end of a victorious battle in which this model was not out of action, roll a D6; on a 5+ gain 1 Intelligence. OR Toxin Synthesiser — before deployment, pick up to D3 models: until the end of the battle, add 1 to wound rolls for their melee weapon attacks. OR choose any unchosen ability from this tree. |
Scout Specialists
Ghosting ahead of their comrades, Scout specialists track the enemy to their lair, spot traps and ambushes, and locate objectives.
| Tactic | Level | Cost | Effect |
|---|---|---|---|
| Quick March | 1 | 1 CP | Use when a Scout specialist is chosen to move. Either increase its Move by 2" this phase, or re-roll its Advance dice this phase. |
| Marked Positions | 2 | 1 CP | Use at the start of the Shooting phase. Pick an enemy model within 6" of a non-shaken Scout specialist of Level 2+: re-roll hit rolls of 1 against it for the rest of the phase. |
| Move Unseen | 3 | 2 CP | Use at the start of your Movement phase turn. Pick a non-shaken Scout specialist of Level 3+: remove and re-deploy it anywhere within 18" of its previous position and more than 3" from any enemy model. It is considered to have Advanced. |
| Level | Ability |
|---|---|
| 1 | Swift — re-roll Advance rolls for this model. |
| 2 | Forward Scout — automatically passes dangerous terrain tests. OR Pathfinder — if not in Convalescence, add or subtract 1 when rolling to determine a mission (this model must then be in your kill team). |
| 3 | Skirmisher — opponents subtract 1 from hit rolls against this model if the shooter is more than 12" away and this model is not shaken or obscured. OR Vanguard — re-roll hit rolls of 1 in the Shooting phase for attacks against enemies within 6" of this model (while not shaken). |
| 4 | Observer — roll a D6 at the start of the Scouting phase; on a 4+ pick an additional strategy. OR Explorer — after a battle in which this model was in your kill team (and not in Convalescence), roll a D6; on a 5+ gain 1 Territory. OR choose any unchosen ability from this tree. |
Sniper Specialists
Predators of the battlefield, lying concealed for hours to place a single perfect, killing shot.
| Tactic | Level | Cost | Effect |
|---|---|---|---|
| Careful Aim | 1 | 1 CP | Use when a Sniper specialist is chosen to shoot. Add 1 to its hit rolls until the end of the phase. |
| Headshot | 2 | 1 CP | Use when a Sniper specialist of Level 2+ is chosen to shoot. Until the end of the phase, obscured targets are treated as not obscured. |
| Quick Shot | 3 | 1 CP | Use when a Sniper specialist of Level 3+ is chosen to shoot. Double the shots fired by its ranged weapons this phase, but subtract 1 from its hit rolls. Cannot be used the same battle round as Headshot. |
| Level | Ability |
|---|---|
| 1 | Marksman — re-roll hit rolls of 1 when shooting. |
| 2 | Assassin — re-roll wound rolls of 1 when shooting. OR Sharpshooter — if this model is Readied, add 1 to hit rolls when shooting. |
| 3 | Deadeye — an unmodified wound roll of 6 when shooting increases that attack's Damage by 1. OR Armour Piercing — an unmodified wound roll of 6 when shooting improves that attack's AP by 1. |
| 4 | Mobile — no -1 penalty for shooting a Heavy weapon after moving, or an Assault weapon after Advancing. OR Eagle-eye — increase the Range of all Rapid Fire and Heavy weapons this model carries by 6". OR choose any unchosen ability from this tree. |
Veteran Specialists
Warriors who have fought through dozens of war zones, able to be relied upon absolutely to do their duty no matter the circumstances.
| Tactic | Level | Cost | Effect |
|---|---|---|---|
| Adaptive Tactics | 1 | 1 CP | Use at the start of the first battle round, before the Initiative phase. Pick a Veteran specialist: it can make a normal move or Advance. Once per battle. |
| Well Drilled | 2 | 2 CP | Use at the start of your Shooting phase turn. Pick a Veteran specialist of Level 2+: Ready them (unless within 1" of an enemy) — they can shoot as if they had not moved in the Movement phase. |
| Roll with the Hits | 3 | 1 CP | Use during your opponent's Shooting phase turn, before an Injury roll for an Injured Veteran specialist of Level 3+. Your opponent rolls only a single dice for that Injury roll. |
| Level | Ability |
|---|---|
| 1 | Grizzled — ignores penalties to its Leadership characteristic and Nerve tests. |
| 2 | Practised — re-roll one hit roll or wound roll for this model each battle round. OR Seen It All — subtract 1 from Nerve tests for models within 3" of this model (while not shaken). |
| 3 | Survivor — add 1 to saving throws for this model. OR One-man Army — this model generates 1 additional Command Point at the start of each battle round (unless shaken/out of action), usable only for Veteran Tactics. |
| 4 | Battle Scarred — enemy models within 6" (while this model is not shaken) suffer -1 Leadership. OR Nerves of Steel — re-roll failed hit rolls when firing Overwatch. OR choose any unchosen ability from this tree. |
Zealot Specialists
Driven by absolute belief, Zealots shrug off wounds that ought to have killed them, and think nothing of martyring themselves for their creed.
| Tactic | Level | Cost | Effect |
|---|---|---|---|
| Killing Frenzy | 1 | 2 CP | Use when a Zealot specialist is chosen to fight. Until the end of the phase, each hit roll of 6+ generates an additional attack with the same weapon against the same target (these cannot generate further attacks). |
| Martyr | 2 | 2 CP | Use when a Zealot specialist of Level 2+ loses their last wound, before the Injury roll. Immediately shoot with one weapon (as in the Shooting phase) or pile in and make one attack (as in the Fight phase). |
| Terrifying Rampage | 3 | 1 CP | Use at the start of the Morale phase. Pick a Zealot specialist of Level 3+ that took an enemy model out of action last Fight phase: every enemy model within 6" must take a Nerve test or become shaken. |
| Level | Ability |
|---|---|
| 1 | Frenzied — add 1 to this model's Attacks and Strength in a battle round in which it charged. |
| 2 | Exultant — opponents must re-roll unmodified hit rolls of 6 for models within 3" of this model (while not shaken). OR Flagellant — roll a D6 each time this model loses a wound; on a 6, the wound is ignored. |
| 3 | Puritan — re-roll Fight phase hit rolls against enemies sharing no Faction keyword with this model. OR Rousing — add 1 to the Leadership of models within 6" (while this model is not shaken). |
| 4 | Fanatical — this model automatically passes Nerve tests. OR Strength of Spirit — subtract 1 from Injury rolls made for this model. OR choose any unchosen ability from this tree. |
Adeptus Astartes
The Adeptus Astartes, more commonly known as Space Marines, are Humanity's finest warriors — genetically modified super-soldiers of superlative skill, courage, strength and resilience, organised into self-contained Chapters each with its own warrior culture, heraldry and combat doctrines derived from the Codex Astartes. Space Marines are accustomed to fighting in compact, elite strike forces, and thus form kill teams with ease: whether despatched to assassinate a key enemy leader, secure a site of strategic importance, or recover a vital dignitary or sacred artefact, Adeptus Astartes kill teams use unparalleled training and equipment to complete their missions with terrifying efficiency.
The Holy Bolter. Of all the weapons used by the Emperor's Space Marines, none are more iconic of their might than those that fire self-propelled micro-missiles known as bolt shells — from the widely used boltgun and compact bolt pistol to the more specialised bolt rifles and bolt carbines of the Primaris Space Marines.
Adeptus Astartes Kill Teams. If every model in your kill team has the ADEPTUS ASTARTES Faction keyword, you can use Adeptus Astartes Tactics.
| Tactic | Cost | Effect |
|---|---|---|
| Death to the Traitors! | 1 CP | Use when a model is chosen to fight in the Fight phase. Until the end of the phase, each hit roll of 6+ against a HERETIC ASTARTES target lets you immediately make an extra attack with the same weapon against the same model. These extra attacks cannot generate further attacks. |
| Honour the Chapter | 2 CP | Use at the end of the Fight phase. Pick a model — it can immediately fight an additional time. |
| Armour of Contempt | 1 CP | Use when a model suffers a mortal wound. Roll a D6 for that wound and every other mortal wound it suffers for the rest of the phase; on a 5+ each is ignored. |
| Masterful Marksmanship | 1 COMMAND POINT | Use in the Shooting phase when an INTERCESSOR shoots with a stalker bolt rifle. Until the end of the phase, add 1 to hit and wound rolls for that model. |
| Hellfire Shells | 2 CP | Use when a model shoots with a heavy bolter. Make only a single hit roll for the weapon this phase; if it hits, the target suffers D3 mortal wounds instead of the normal damage. |
Datasheets
| Model | M | WS | BS | S | T | W | A | Ld | Sv | Max |
|---|---|---|---|---|---|---|---|---|---|---|
| Scout | 6" | 3+ | 3+ | 4 | 4 | 1 | 1 | 7 | 4+ | - |
| Scout Gunner | 6" | 3+ | 3+ | 4 | 4 | 1 | 1 | 7 | 4+ |
Armed with a boltgun, bolt pistol, frag grenades and krak grenades. Up to two Scouts can be Scout Gunners, and one Scout can be a Scout Sergeant. Wargear options: a Scout may replace their boltgun with a combat knife or Astartes shotgun, or a sniper rifle and camo cloak; a Scout Gunner may replace their boltgun with a heavy bolter or missile launcher, or a sniper rifle and camo cloak (a Gunner with a missile launcher may also take a camo cloak); a Scout Sergeant may replace their boltgun with an Astartes shotgun or chainsword, or a sniper rifle and camo cloak. Abilities: And They Shall Know No Fear (re-roll failed Nerve tests); Transhuman Physiology (ignore the hit-roll penalty from one flesh wound); Camo Cloak (a hit roll against an obscured model with a camo cloak suffers an additional -1). Specialists: Leader (Sergeant only), Heavy (Gunner only), Comms, Demolitions, Scout, Sniper. Keywords: IMPERIUM, INFANTRY, SCOUT (Faction: ADEPTUS ASTARTES).
| Model | M | WS | BS | S | T | W | A | Ld | Sv | Max |
|---|---|---|---|---|---|---|---|---|---|---|
| Tactical Marine | 6" | 3+ | 3+ | 4 | 4 | 1 | 1 | 7 | 3+ | - |
| Tactical Marine Gunner | 6" | 3+ | 3+ | 4 | 4 | 1 | 1 | 7 | 3+ |
Armed with a boltgun, bolt pistol, frag grenades and krak grenades. Up to two Tactical Marines can be Tactical Marine Gunners, and one can be a Tactical Sergeant. Wargear options: one Gunner may replace their boltgun with a flamer, meltagun, plasma gun or grav-gun; one Gunner may replace their boltgun with a missile launcher or heavy bolter; the Sergeant may replace bolt pistol and boltgun with a combi-flamer, combi-grav, combi-melta or combi-plasma, or instead take a bolt pistol, plasma pistol or grav-pistol plus a chainsword, power fist, power sword or auspex. Abilities: And They Shall Know No Fear; Transhuman Physiology; Auspex (at the start of the Shooting phase, another Adeptus Astartes model within 3" of a friendly non-shaken model with an auspex ignores obscured-target penalties to hit and Injury rolls). Specialists: Leader (Sergeant only), Heavy (Gunner only), Comms, Demolitions, Sniper, Veteran. Keywords: IMPERIUM, INFANTRY, TACTICAL MARINE.
| Model | M | WS | BS | S | T | W | A | Ld | Sv | Max |
|---|---|---|---|---|---|---|---|---|---|---|
| Reiver | 6" | 3+ | 3+ | 4 | 4 | 2 | 2 | 7 | 3+ | - |
| Reiver Sergeant | 6" | 3+ | 3+ | 4 | 4 | 2 | 3 | 8 | 3+ |
Armed with a bolt carbine, heavy bolt pistol, frag grenades, krak grenades and shock grenades. One Reiver can be a Reiver Sergeant. Wargear options: a Reiver (or the Sergeant, for their bolt carbine or heavy bolt pistol) may replace it with a combat knife; either may take a grav-chute and/or a grapnel launcher. Abilities: And They Shall Know No Fear; Transhuman Physiology; Grav-chute (never suffers falling damage or falls onto another model); Grapnel Launcher (can climb any vertical distance on a normal move without measuring it); Terror Troops (enemy models within 3" of any Reiver/Reiver Sergeant subtract 1 from Leadership). Specialists: Leader (Sergeant only), Combat, Comms, Demolitions, Scout, Veteran. Keywords: IMPERIUM, INFANTRY, PRIMARIS, REIVER.
| Model | M | WS | BS | S | T | W | A | Ld | Sv | Max |
|---|---|---|---|---|---|---|---|---|---|---|
| Intercessor | 6" | 3+ | 3+ | 4 | 4 | 2 | 2 | 7 | 3+ | - |
| Intercessor Gunner | 6" | 3+ | 3+ | 4 | 4 | 2 | 2 | 7 | 3+ |
Armed with a bolt rifle, bolt pistol, frag grenades and krak grenades. Up to two Intercessors can be Gunners, one can be a Sergeant. Wargear options: may replace bolt rifle with an auto bolt rifle or stalker bolt rifle; a Gunner may take an auxiliary grenade launcher; the Sergeant may take (or replace their bolt rifle with) a power sword or chainsword. Abilities: And They Shall Know No Fear; Transhuman Physiology; Auxiliary Grenade Launcher (increases the Range of any Grenade weapons the bearer has to 30"). Specialists: Leader (Sergeant only), Demolitions (Gunner only), Combat, Comms, Sniper, Veteran. Keywords: IMPERIUM, INFANTRY, PRIMARIS, INTERCESSOR.
'Strike swift, brothers, and strike true. Wield your weapons with the Primarch's own might and turn them upon the Emperor's foes until none remain standing to oppose his will.' — Brother Sergeant Lytornus, Imperial Fists 4th Company during Operation Black Sunrise
Weapon Profiles and Points
| Ranged Weapon | Range | Type | S | AP | D | Abilities | Points |
|---|---|---|---|---|---|---|---|
| Astartes shotgun | 24" | Assault 2 | 4 | 0 | 1 | If the target is within half range, add 1 to this weapon's Strength. | 0 |
| Auto bolt rifle | 24" | Assault 2 | 4 | 0 | 1 | — | 0 |
| Bolt carbine | 24" | Assault 2 | 4 | 0 | 1 | — |
| Melee Weapon | Range | Type | S | AP | D | Abilities | Points |
|---|---|---|---|---|---|---|---|
| Chainsword | Melee | Melee | User | 0 | 1 | Each time the bearer fights, it can make 1 additional attack with this weapon. | 0 |
| Combat knife | Melee | Melee | User | 0 | 1 | Each time the bearer fights, it can make 1 additional attack with this weapon. | 0 |
| Power fist | Melee | Melee | x2 | -3 | D3 |
Other wargear: Auspex 1pt · Auxiliary grenade launcher 0pt · Camo cloak 1pt · Grapnel launcher 1pt · Grav-chute 1pt.
Points per model (excludes wargear): Scout 10, Scout Gunner 11, Scout Sergeant 11, Tactical Marine 12, Tactical Marine Gunner 13, Tactical Sergeant 13, Reiver 16, Reiver Sergeant 17, Intercessor 15, Intercessor Gunner 16, Intercessor Sergeant 16.
Deathwatch
The Deathwatch are the foremost alien hunters in the Imperium, the finest warriors of the Adeptus Astartes Chapters seconded to defend Humanity from the xenos menace. Deathwatch kill teams make use of every weapon, technology and tactic they can, adapting their way of war to best suit each new foe, carrying armaments tailored to the elimination of particular enemy types. Though few in number even compared to the wider Adeptus Astartes, a single Deathwatch kill team, delivered to the right location at the right moment and equipped with the correct weapons, can change the course of an entire war.
Deathwatch Kill Teams. DEATHWATCH models in your kill team use the Special Issue Ammunition ability: when firing an auto bolt rifle, bolt carbine, bolt pistol, bolt rifle, boltgun, combi-melta (boltgun profile), combi-plasma (boltgun profile), heavy bolt pistol, stalker bolt rifle or stalker pattern boltgun, choose one ammunition type from the table below. Fortis Kill Team: when adding an Intercessor or Reiver to your command roster, you can give it the DEATHWATCH Faction keyword instead of ADEPTUS ASTARTES — it gains Special Issue Ammunition, but uses the Deathwatch ranged weapon points values below. If every model in your kill team has the DEATHWATCH Faction keyword, you can use Deathwatch Tactics.
| Special Issue Ammunition | Modifier |
|---|---|
| Dragonfire bolt | Add 1 to hit rolls when targeting an obscured model. |
| Hellfire round | This weapon always wounds on a 2+. |
| Kraken bolt | Add 3" range if the weapon is a Pistol (otherwise 6"), and improve AP by 1 (max AP-2). |
| Vengeance round | Subtract 3" range if the weapon is a Pistol (otherwise 6"), and improve AP by 2 (max AP-3). |
| Tactic | Cost | Effect |
|---|---|---|
| Only in Death Does Duty End | 1 CP | Use when a model is taken out of action — it can immediately shoot (as in the Shooting phase) or fight (as in the Fight phase) once more. |
| Hellfire Shell | 2 CP | Use when a model shoots with a heavy bolter or an infernus heavy bolter's heavy bolter profile. Make only a single hit roll (subtracting 1 as normal if also firing the heavy flamer profile); if it hits, the target suffers D3 mortal wounds instead of the normal damage. |
| Rival Chapters | 1 CP | Use when a model attacks in the Shooting or Fight phase while another kill team model is within 2" of it. Until the end of the phase, both models re-roll hit rolls of 1. |
| Decapitation Doctrine | 1 CP | Use when a model attacks in the Shooting or Fight phase. Until the end of the phase, re-roll failed wound rolls for that model against an enemy Leader. |
Datasheet
| Model | M | WS | BS | S | T | W | A | Ld | Sv | Max |
|---|---|---|---|---|---|---|---|---|---|---|
| Deathwatch Veteran | 6" | 3+ | 3+ | 4 | 4 | 1 | 2 | 8 | 3+ | - |
| Deathwatch Veteran Gunner | 6" | 3+ | 3+ | 4 | 4 | 1 | 2 | 8 | 3+ |
Armed with a boltgun, frag grenades and krak grenades. One Deathwatch Veteran can be a Black Shield, up to four can be Deathwatch Veteran Gunners, one can be a Watch Sergeant. Wargear options: may replace boltgun with a combi-melta, combi-plasma, stalker pattern boltgun, power sword, power maul or storm shield, and may also take a power sword or power maul (a Watch Sergeant may take a xenophase blade instead); alternatively a Veteran may replace their boltgun with a Deathwatch shotgun or heavy thunder hammer; a Gunner may replace their boltgun with a Deathwatch frag cannon or infernus heavy bolter. Abilities: Special Issue Ammunition; Storm Shield (3+ invulnerable save); And They Shall Know No Fear; Atonement Through Honour (re-roll failed charge rolls for a Black Shield); Transhuman Physiology. Specialists: Leader (Sergeant only), Heavy (Gunner only), Combat, Comms, Demolitions, Sniper, Veteran, Zealot. Keywords: IMPERIUM, ADEPTUS ASTARTES, INFANTRY, DEATHWATCH VETERAN (Faction: DEATHWATCH).
Weapon Profiles and Points
| Ranged Weapon | Range | Type | S | AP | D | Abilities | Points |
|---|---|---|---|---|---|---|---|
| Boltgun | 24" | Rapid Fire 1 | 4 | 0 | 1 | — | 0 |
| Combi-melta | — | — | — | — | — | Choose one or both profiles (Boltgun as above; Meltagun 12" Assault 1 S8 AP-4 D6, roll 2 dice discard lowest within half range). If both, subtract 1 from all hit rolls. | 3 |
| Combi-plasma | — | — | — | — | — |
The Auto bolt rifle, Bolt carbine, Bolt pistol, Bolt rifle, Heavy bolt pistol and Stalker bolt rifle use the same profiles as in the Adeptus Astartes section (pg 86), but cost 2 points each for a Deathwatch model.
| Melee Weapon | Range | Type | S | AP | D | Abilities | Points |
|---|---|---|---|---|---|---|---|
| Heavy thunder hammer | Melee | Melee | x2 | -3 | D6 | Subtract 1 from the hit roll when attacking. | 5 |
| Power maul | Melee | Melee | +2 | -1 | 1 | A wound roll of 6+ is resolved with a Damage of 6. | 2 |
| Power sword | Melee | Melee | User | -3 | 1 |
Other wargear: Storm shield 3pts.
Points per model (excludes wargear): Deathwatch Veteran 14, Deathwatch Veteran Gunner 16, Black Shield 16, Watch Sergeant 16.
Grey Knights
An ancient order of Space Marines shrouded in mystery and legend, the Grey Knights are Humanity's greatest defence against the threat of daemonkind — an entire Chapter of psychically gifted Space Marines whose mental, spiritual and physical purity are beyond question. They sally forth from their fortress monastery on Titan to hunt down daemonic infestations, seal hellish warp portals, and slay those who threaten to unleash the entities of the empyrean upon realspace, aided by the Prognosticars, battle-brothers gifted with the power to scry the Imperium's future. Each battle-brother is armed with sanctified bolters, psychically charged Nemesis force weapons and warded armour of blessed adamantium and silver.
Grey Knights Kill Teams. If every model in your kill team has the GREY KNIGHTS Faction keyword, you can use Grey Knights Tactics.
| Tactic | Cost | Effect |
|---|---|---|
| Psybolt Ammunition | 2 CP | Use when a model shoots with a storm bolter. Until the end of the phase, that weapon's Strength is 5 and its AP is -1. |
| Honour the Chapter | 1 CP | Use at the end of the Fight phase. Pick a model — it can immediately fight an additional time. |
| Heed the Prognosticars | 2 CP | Use at the start of the battle round. Pick a model — add 1 to its saving throws until the end of the battle round. |
| Psychic Channelling | 2 CP | Use when taking a Psychic test for a model. Roll three dice instead of two and use the two highest. |
Datasheet
| Model | M | WS | BS | S | T | W | A | Ld | Sv | Max |
|---|---|---|---|---|---|---|---|---|---|---|
| Grey Knight | 6" | 3+ | 3+ | 4 | 4 | 1 | 1 | 7 | 3+ | - |
| Grey Knight Gunner | 6" | 3+ | 3+ | 4 | 4 | 1 | 1 | 7 | 3+ |
Armed with a Nemesis force sword, storm bolter, frag grenades, krak grenades and psyk-out grenades. Up to two Grey Knights can be Gunners, one can be a Justicar. Wargear options: may replace their Nemesis force sword with a Nemesis force halberd, Nemesis Daemon hammer, Nemesis warding stave or two Nemesis falchions; a Gunner may instead replace their Nemesis force sword and storm bolter with an incinerator, psilencer or psycannon. Abilities: And They Shall Know No Fear; Transhuman Physiology; Rites of Banishment (when this model manifests Psybolt, it has a range of 12" and, if the target is a DAEMON, inflicts D3 mortal wounds unless the Psychic test result was 11+); Daemon Hunters (re-roll failed wound rolls against DAEMONS, even in the Fight phase); PSYKER (can attempt to manifest and deny one psychic power each Psychic phase; knows Psybolt). Specialists: Leader (Justicar only), Heavy (Gunner only), Combat, Comms, Demolitions, Veteran, Zealot. Keywords: IMPERIUM, ADEPTUS ASTARTES, INFANTRY, PSYKER, GREY KNIGHT (Faction: GREY KNIGHTS).
'Mercy is a luxury we cannot afford, brothers. Mercy might spare a life, only to end a billion more. Mercy burns worlds. Mercy damns souls. Mercy would be the undoing of all that we have wrought…' — Justicar Thrayl, before the Diaclades Purge
Weapon Profiles and Points
| Ranged Weapon | Range | Type | S | AP | D | Abilities | Points |
|---|---|---|---|---|---|---|---|
| Frag grenade | 6" | Grenade D6 | 3 | 0 | 1 | — | 0 |
| Incinerator | 8" | Assault D6 | 6 | -1 | 1 | Automatically hits its target. | 3 |
| Krak grenade | 6" | Grenade 1 | 6 | -1 | D3 | — |
| Melee Weapon | Range | Type | S | AP | D | Abilities | Points |
|---|---|---|---|---|---|---|---|
| Nemesis Daemon hammer | Melee | Melee | x2 | -3 | 3 | Subtract 1 from the hit roll when attacking. | 2 |
| Nemesis falchion | Melee | Melee | User | -2 | D3 | If armed with two, make 1 additional attack each time it fights. | 1 |
| Nemesis force halberd | Melee | Melee | +1 | -2 | D3 |
Points per model (excludes wargear): Grey Knight 18, Grey Knight Gunner 19, Justicar 19.
Astra Militarum
'Give me ten good men and women with the sense to fight smart and the skills to fight well, the faith to hold their ground and the wits to follow orders. Give me that, and I'll give you victory.' — Lieutenant Obadiah Sterophensky, mission commander of Operation Sudden Blade
The Astra Militarum is the Imperium's largest fighting force by far, its numberless regiments drawn from a million worlds. Kill teams of hardy Guardsmen and elite Militarum Tempestus Scions bring disciplined firepower and coordinated orders to the battlefields of the 41st Millennium.
Astra Militarum Kill Teams. ASTRA MILITARUM Leaders in Kill Team use the Voice of Command ability: once per battle round, if your Leader is on the battlefield and not shaken, at the start of the Shooting phase they can issue an order (from the table below) to another friendly non-shaken ASTRA MILITARUM model within 12". A model may only be affected by one order per battle round. If every model in your kill team has the ASTRA MILITARUM Faction keyword, you can also use Astra Militarum Tactics.
| Order | Effect |
|---|---|
| Take Aim! | Re-roll hit rolls of 1 for the ordered model until the end of the phase. |
| Bring it Down! | Re-roll wound rolls of 1 for the ordered model until the end of the phase. |
| Forwards, for the Emperor! | The ordered model can shoot even if it Advanced last Movement phase. |
| Get Back in the Fight! | The ordered model can shoot this phase even if it Fell Back in the Movement phase. |
| Move! Move! Move! | Instead of shooting this phase, the ordered model immediately makes an Advance move as if it were the Movement phase. |
| Fix Bayonets! | Only issuable to a model within 1" of an enemy model — it immediately fights as if it were the Fight phase. |
| Tactic | Cost | Effect |
|---|---|---|
| Cunning Strategy | 2 CP | Use after your Leader has issued an order — they may immediately issue an additional order. |
| Defensive Stand | 1 CP | Use when a charge is declared against one of your models. That model's Overwatch this phase hits on a roll of 5 or 6. |
| Get Down! | 2 CP | Use in your opponent's Shooting phase turn when they target an obscured model of yours. Attacks against it this phase suffer an additional -1 to hit. |
| Reserves of Courage | 1 CP | Use at the start of your Morale phase turn. Pick a model required to take a Nerve test — roll a D3 instead of a D6 for that test. |
Datasheets
| Model | M | WS | BS | S | T | W | A | Ld | Sv | Max |
|---|---|---|---|---|---|---|---|---|---|---|
| Guardsman | 6" | 4+ | 4+ | 3 | 3 | 1 | 1 | 6 | 5+ | - |
| Guardsman Gunner | 6" | 4+ | 4+ | 3 | 3 | 1 | 1 | 6 | 5+ |
Infantry Squad Guardsman — armed with a lasgun and frag grenades. One Guardsman can be a Guardsman Gunner, one can be a Sergeant (instead armed with a laspistol, chainsword and frag grenades). Wargear options: one Guardsman may take a vox-caster; the Gunner may replace their lasgun with a flamer, grenade launcher, meltagun, plasma gun or sniper rifle; the Sergeant may replace their laspistol with a bolt pistol or plasma pistol, and their chainsword with a power sword. Abilities: Voice of Command; Vox-caster (re-roll failed Nerve tests for ASTRA MILITARUM models while a friendly non-shaken model with a vox-caster is on the battlefield). Specialists: Leader (Sergeant only), Heavy (Gunner only), Comms (vox-caster Guardsman only), Demolitions, Scout, Sniper, Veteran. Keywords: IMPERIUM, INFANTRY, INFANTRY SQUAD GUARDSMAN (Faction: ASTRA MILITARUM).
| Model | M | WS | BS | S | T | W | A | Ld | Sv | Max |
|---|---|---|---|---|---|---|---|---|---|---|
| Special Weapons Guardsman | 6" | 4+ | 4+ | 3 | 3 | 1 | 1 | 6 | 5+ | - |
| Special Weapons Gunner | 6" | 4+ | 4+ | 3 | 3 | 1 | 1 | 6 | 5+ |
Special Weapons Squad Guardsman — armed with a lasgun and frag grenades. Up to three can be Special Weapons Gunners. Wargear options: a Gunner may replace their lasgun with a flamer, grenade launcher, meltagun, plasma gun or sniper rifle. Abilities: Voice of Command. Specialists: Heavy (Gunner only), Leader, Comms, Demolitions, Scout, Sniper, Veteran. Keywords: IMPERIUM, INFANTRY, SPECIAL WEAPONS SQUAD GUARDSMAN.
| Model | M | WS | BS | S | T | W | A | Ld | Sv | Max |
|---|---|---|---|---|---|---|---|---|---|---|
| Scion | 6" | 4+ | 3+ | 3 | 3 | 1 | 1 | 6 | 4+ | - |
| Scion Gunner | 6" | 4+ | 3+ | 3 | 3 | 1 | 1 | 6 | 4+ |
Militarum Tempestus Scion — armed with a hot-shot lasgun, frag grenades and krak grenades. Up to four Scions can be Gunners, one can be a Tempestor (instead armed with a hot-shot laspistol, chainsword, frag and krak grenades). Wargear options: one Scion may take a vox-caster; a Gunner may replace their hot-shot lasgun with a flamer, meltagun, plasma gun or hot-shot volley gun; the Tempestor may replace their hot-shot laspistol with a bolt pistol or plasma pistol, and their chainsword with a power sword or power fist. Abilities: Voice of Command; Vox-caster. Specialists: Leader (Tempestor only), Demolitions (Gunner only), Heavy (Gunner only), Comms, Medic, Scout, Sniper, Veteran. Keywords: IMPERIUM, MILITARUM TEMPESTUS, INFANTRY, MILITARUM TEMPESTUS SCION.
Weapon Profiles and Points
| Ranged Weapon | Range | Type | S | AP | D | Abilities | Points |
|---|---|---|---|---|---|---|---|
| Bolt pistol | 12" | Pistol 1 | 4 | 0 | 1 | — | 0 |
| Flamer | 8" | Assault D6 | 4 | 0 | 1 | Automatically hits its target. | 3 |
| Frag grenade | 6" | Grenade D6 | 3 | 0 | 1 | — |
| Melee Weapon | Range | Type | S | AP | D | Abilities | Points |
|---|---|---|---|---|---|---|---|
| Chainsword | Melee | Melee | User | 0 | 1 | Each time the bearer fights, it can make 1 additional attack with this weapon. | 0 |
| Power fist | Melee | Melee | x2 | -3 | D3 | Subtract 1 from the hit roll when attacking. | 2 |
| Power sword | Melee | Melee | User | -3 | 1 |
Other wargear: Vox-caster 5pts.
Points per model (excludes wargear): Infantry Squad Guardsman 5, Guardsman Gunner 5, Sergeant 5, Special Weapons Squad Guardsman 5, Special Weapons Gunner 5, Militarum Tempestus Scion 9, Scion Gunner 10, Tempestor 10.
Adeptus Mechanicus
'Detecting a seven-point-three per cent operational weakness in left flank of enemy defensive formation. Direct all fire on the following targeting coordinates for optimal strategic exploitation…' — Vanguard Alpha Dorox-0.4343
The Adeptus Mechanicus worship the Emperor as the Omnissiah, the god of all machines. To the Tech-Priests, mortal flesh is weak, and the Adeptus Mechanicus augment their bodies with cybernetic components, transcending human emotion for cold, inescapable logic. Their armies are made up of warriors known as Skitarii, whose maniples are part religious procession and part grinding, inexorable war machine, rendered fearless and martially optimised by doctrina imperatives beamed from ruling magi. Their weapons incorporate technologies so potent that they resemble dark and murderous miracles.
Adeptus Mechanicus Kill Teams. ADEPTUS MECHANICUS models use the Canticles of the Omnissiah ability: at the start of each battle round, pick which Canticle from the table below is in effect until the end of the round (the same Canticle cannot be picked twice in the same battle), or randomly determine one by rolling a D6 (a randomly determined Canticle can repeat). If every model in your kill team has the ADEPTUS MECHANICUS Faction keyword, you can also use Adeptus Mechanicus Tactics.
| D6 | Canticle | Effect |
|---|---|---|
| 1 | Incantation of the Iron Soul | Re-roll failed Nerve tests for models in your kill team. |
| 2 | Litany of the Electromancer | Roll a D6 for each enemy model within 1" of your models at the start of the Fight phase — on a 6, that model suffers 1 mortal wound. |
| 3 | Chant of the Remorseless Fist | Re-roll hit rolls of 1 for your models in the Fight phase. |
| 4 | Shroudpsalm | Hit rolls against obscured models in your kill team suffer an additional -1. |
| 5 | Invocation of Machine Might | Add 1 to the Strength characteristic of models in your kill team. |
| 6 | Benediction of the Omnissiah | Re-roll hit rolls of 1 for your models in the Shooting phase. |
| Tactic | Cost | Effect |
|---|---|---|
| Conqueror Doctrina Imperative | 2 CP | Use when a model is chosen to fight. Add 1 to its hit rolls until the end of the phase (add 2 instead if within 6" of a friendly model with an enhanced data-tether). |
| Protector Doctrina Imperative | 2 CP | Use when a model is chosen to shoot. Add 1 to its hit rolls until the end of the phase (add 2 instead if within 6" of a friendly model with an enhanced data-tether). |
| Dunestrider | 1 CP | Use in the Movement phase when a model Advances. Roll two dice and pick which result to use for the Advance roll. |
| Gloria Mechanicus | 1 CP | Use after determining which Canticle is in effect this battle round. Randomly determine a Canticle instead — that one is in effect. |
Datasheets
| Model | M | WS | BS | S | T | W | A | Ld | Sv | Max |
|---|---|---|---|---|---|---|---|---|---|---|
| Skitarii Ranger | 6" | 4+ | 3+ | 3 | 3 | 1 | 1 | 6 | 4+ | - |
| Ranger Gunner | 6" | 4+ | 3+ | 3 | 3 | 1 | 1 | 6 | 4+ |
Armed with a galvanic rifle. Up to three Rangers can be Gunners, one can be a Ranger Alpha. Wargear options: one Ranger may take an enhanced data-tether or an omnispex; a Gunner may replace their galvanic rifle with an arc rifle, plasma caliver or transuranic arquebus; the Alpha may replace their galvanic rifle with one pistol (arc pistol, phosphor blast pistol or radium pistol) and one melee weapon (arc maul, power sword or taser goad). Abilities: Canticles of the Omnissiah; Bionics (6+ invulnerable save); Enhanced Data-tether (re-roll failed Nerve tests for SKITARII models while a friendly non-shaken model with one is on the battlefield); Omnispex (at the start of each Shooting phase, another SKITARII model within 3" of a friendly non-shaken model with an omnispex ignores obscured-target penalties to hit and Injury rolls). Specialists: Leader (Alpha only), Heavy (Gunner only), Comms, Scout, Sniper, Zealot. Keywords: IMPERIUM, SKITARII, INFANTRY, SKITARII RANGER (Faction: ADEPTUS MECHANICUS).
| Model | M | WS | BS | S | T | W | A | Ld | Sv | Max |
|---|---|---|---|---|---|---|---|---|---|---|
| Skitarii Vanguard | 6" | 4+ | 3+ | 3 | 3 | 1 | 1 | 6 | 4+ | - |
| Vanguard Gunner | 6" | 4+ | 3+ | 3 | 3 | 1 | 1 | 6 | 4+ |
Armed with a radium carbine. Up to three Vanguard can be Gunners, one can be a Vanguard Alpha. Wargear options: as Skitarii Ranger, above. Abilities: Canticles of the Omnissiah; Bionics; Rad-saturation (enemy models within 1" of one or more models with this ability have Toughness reduced by 1); Enhanced Data-tether; Omnispex. Specialists: Leader (Alpha only), Heavy (Gunner only), Comms, Scout, Sniper, Zealot. Keywords: IMPERIUM, SKITARII, INFANTRY, SKITARII VANGUARD.
| Model | M | WS | BS | S | T | W | A | Ld | Sv | Max |
|---|---|---|---|---|---|---|---|---|---|---|
| Sicarian Ruststalker | 8" | 3+ | 3+ | 4 | 3 | 2 | 3 | 6 | 4+ | - |
| Ruststalker Princeps | 8" | 3+ | 3+ | 4 | 3 | 2 | 4 | 7 | 4+ |
Armed with a transonic razor and chordclaw. One Ruststalker can be a Princeps. Wargear options: may replace the transonic razor (and chordclaw, for a standard Ruststalker) with transonic blades. Abilities: Canticles of the Omnissiah; Bionics. Specialists: Leader (Princeps only), Combat, Comms, Scout, Veteran, Zealot. Keywords: IMPERIUM, SKITARII, INFANTRY, SICARIAN RUSTSTALKER.
| Model | M | WS | BS | S | T | W | A | Ld | Sv | Max |
|---|---|---|---|---|---|---|---|---|---|---|
| Sicarian Infiltrator | 8" | 3+ | 3+ | 4 | 3 | 2 | 2 | 6 | 4+ | - |
| Infiltrator Princeps | 8" | 3+ | 3+ | 4 | 3 | 2 | 3 | 7 | 4+ |
Armed with a stubcarbine and power sword. One Infiltrator can be a Princeps. Wargear options: may replace the stubcarbine and power sword with a flechette blaster and taser goad. Abilities: Canticles of the Omnissiah; Bionics; Neurostatic Aura (enemy models within 3" of one or more models with this ability suffer -1 Leadership). Specialists: Leader (Princeps only), Combat, Comms, Scout, Veteran, Zealot. Keywords: IMPERIUM, SKITARII, INFANTRY, SICARIAN INFILTRATOR.
Weapon Profiles and Points
| Ranged Weapon | Range | Type | S | AP | D | Abilities | Points |
|---|---|---|---|---|---|---|---|
| Arc pistol | 12" | Pistol 1 | 6 | -1 | 1 | — | 0 |
| Arc rifle | 24" | Rapid Fire 1 | 6 | -1 | 1 | — | 0 |
| Flechette blaster | 12" | Pistol 5 | 3 | 0 | 1 | — | 0 |
| Melee Weapon | Range | Type | S | AP | D | Abilities | Points |
|---|---|---|---|---|---|---|---|
| Arc maul | Melee | Melee | +2 | -1 | 1 | — | 0 |
| Chordclaw | Melee | Melee | User | 0 | D3 | Can only make one attack each time the bearer fights. | 1 |
| Power sword | Melee | Melee | User | -3 | 1 | A wound roll of 6+ inflicts D3 mortal wounds instead of the normal damage. |
Other wargear: Enhanced data-tether 5pts · Omnispex 1pt.
Points per model (excludes wargear): Skitarii Ranger 9, Ranger Gunner 10, Ranger Alpha 10, Skitarii Vanguard 9, Vanguard Gunner 10, Vanguard Alpha 10, Sicarian Ruststalker 14, Ruststalker Princeps 15, Sicarian Infiltrator 14, Infiltrator Princeps 15.
Heretic Astartes
'A single one of us is worth ten of your weakling so-called warriors and more. You stand as much chance of prevailing against us as does your pathetic Imperium against the tide of madness that rises now to engulf it utterly. Kneel before us, mortal, for we are the heralds of your end…' — Ashrok Korda, Aspiring Champion of the Black Legion
The Heretic Astartes are dark mirrors of the Emperor's noble Space Marines, their ranks twisted by mutation and riddled with corruption after the Horus Heresy. Renegade Chaos Space Marines lead bands of desperate Chaos Cultists in the Long War against the Imperium that made them, some pledged to one of the four Chaos Gods, others serving Chaos undivided.
Heretic Astartes Kill Teams. If every model in your kill team has the HERETIC ASTARTES Faction keyword, you can use Heretic Astartes Tactics.
| Tactic | Cost | Effect |
|---|---|---|
| Veterans of the Long War | 2 CP | Use when a CHAOS SPACE MARINE model attacks in the Shooting or Fight phase. Add 1 to wound rolls against IMPERIUM models until the end of the phase. |
| Fury of Khorne | 2 CP | Use at the end of the Fight phase. Pick a KHORNE model within 1" of an enemy model — it can immediately fight again. |
| Beseech the Gods | 2 CP | Use at the start of the first battle round. Pick a model and roll a D6: on a 1, it is found unworthy and suffers D3 mortal wounds; on a 2+, add 1 to its hit and wound rolls for the rest of the battle. Once per battle. |
| Daemon Spirit | 2 CP | Use at the end of the Movement phase. Pick an enemy model within 1" of your Leader and roll a D6 — on a 4+ it suffers 1 mortal wound. |
Datasheets
| Model | M | WS | BS | S | T | W | A | Ld | Sv | Max |
|---|---|---|---|---|---|---|---|---|---|---|
| Chaos Cultist | 6" | 4+ | 4+ | 3 | 3 | 1 | 1 | 5 | 6+ | - |
| Chaos Cultist Gunner | 6" | 4+ | 4+ | 3 | 3 | 1 | 1 | 5 | 6+ |
Armed with an autogun. Up to two Cultists can be Gunners, one can be a Cultist Champion. Wargear options: a Cultist may replace their autogun with a brutal assault weapon and autopistol; a Gunner may replace their autogun with a flamer or heavy stubber; the Champion may replace their autogun with a shotgun, or a brutal assault weapon and autopistol. Abilities: Mark of Chaos (when added to your kill team, choose to give the model the KHORNE, NURGLE, TZEENTCH or SLAANESH keyword, or no mark — note it on its datacard). Specialists: Leader (Champion only), Heavy (Gunner only), Combat, Demolitions, Veteran, Zealot. Keywords: CHAOS, INFANTRY, CHAOS CULTIST (Faction: HERETIC ASTARTES).
| Model | M | WS | BS | S | T | W | A | Ld | Sv | Max |
|---|---|---|---|---|---|---|---|---|---|---|
| Chaos Space Marine | 6" | 3+ | 3+ | 4 | 4 | 1 | 1 | 7 | 3+ | - |
| Chaos Space Marine Gunner | 6" | 3+ | 3+ | 4 | 4 | 1 | 1 | 7 | 3+ |
Armed with a boltgun, bolt pistol, frag grenades and krak grenades. Up to two can be Gunners, one can be an Aspiring Champion. Wargear options: a Marine may replace their boltgun with a chainsword; one Marine may take a Chaos Icon (matching their Mark of Chaos keyword, or an Icon of Vengeance if unmarked); one Gunner may replace their boltgun with a flamer, meltagun or plasma gun; one Gunner may replace their boltgun with a heavy bolter; the Champion may replace their bolt pistol with a plasma pistol, and their boltgun with a chainsword, power sword or power fist. Abilities: Death to the False Emperor (each hit roll of 6+ against an IMPERIUM model in the Fight phase lets you make an additional attack with the same weapon against the same target — these cannot themselves generate further attacks); Mark of Chaos; Transhuman Physiology. Specialists: Leader (Champion only), Heavy (Gunner only), Demolitions, Sniper, Veteran, Zealot. Keywords: CHAOS, INFANTRY, CHAOS SPACE MARINE.
Chaos Icons:
| Icon | Restriction | Effect |
|---|---|---|
| Icon of Wrath | KHORNE model only | Re-roll charge rolls for KHORNE models within 6" of any friendly model with this Icon. |
| Icon of Flame | TZEENTCH model only | At the start of your Psychic phase turn, roll a D6 for each model equipped with this Icon — on a 6, inflict 1 mortal wound on the closest enemy model within 12". |
| Icon of Despair | NURGLE model only | Enemy models within 6" of any model with this Icon suffer -1 Leadership. |
| Icon of Excess | SLAANESH model only | Death to the False Emperor triggers on hit rolls of 5+ instead of 6+ for models within 6" of any friendly model with this Icon. |
| Icon of Vengeance | Cannot be taken by KHORNE, TZEENTCH, NURGLE or SLAANESH models | Add 1 to the Leadership of models within 6" of any friendly model with this Icon. |
Weapon Profiles and Points
| Ranged Weapon | Range | Type | S | AP | D | Abilities | Points |
|---|---|---|---|---|---|---|---|
| Autogun | 24" | Rapid Fire 1 | 3 | 0 | 1 | — | 0 |
| Autopistol | 12" | Pistol 1 | 3 | 0 | 1 | — | 0 |
| Bolt pistol | 12" | Pistol 1 | 4 | 0 | 1 | — | 0 |
| Melee Weapon | Range | Type | S | AP | D | Abilities | Points |
|---|---|---|---|---|---|---|---|
| Brutal assault weapon | Melee | Melee | User | 0 | 1 | Each time the bearer fights, it can make 1 additional attack with this weapon. | 0 |
| Chainsword | Melee | Melee | User | 0 | 1 | Each time the bearer fights, it can make 1 additional attack with this weapon. | 0 |
| Power fist | Melee | Melee | x2 | -3 | D3 |
Other wargear (Chaos Icons): Icon of Wrath 5pts · Icon of Flame 1pt · Icon of Despair 3pts · Icon of Excess 5pts · Icon of Vengeance 1pt.
Points per model (excludes wargear): Chaos Cultist 4, Chaos Cultist Gunner 5, Cultist Champion 5, Chaos Space Marine 12, Chaos Space Marine Gunner 13, Aspiring Champion 13.
Death Guard
'Remember, brothers, that we too were soldiers of the false Imperium before the Primarch opened our eyes. Do not hate your enemy, but rather pity them their ignorance, and be generous with your gifts so that they too might know the glory of Nurgle.' — Plague Champion Repugnus Grolg of the Sevenfold Stricken
The Death Guard are Chaos Space Marines dedicated to Nurgle, Chaos God of decay and disease — bloated, diseased warriors whose bodies host a myriad of foul organisms, indifferent to wounds that would kill a lesser being. Ranks of shambling Poxwalkers, animated by Nurgle's plague-daemons, join the Plague Marines in spreading contagion and despair across the battlefield.
Death Guard Kill Teams. If every model in your kill team has the DEATH GUARD Faction keyword, you can use Death Guard Tactics.
| Tactic | Cost | Effect |
|---|---|---|
| Putrid Splatter | 2 CP | Use when a model loses a wound in the Fight phase. Roll a D6 for each enemy model within 1" — on a 6, that model suffers 1 mortal wound after all its attacks resolve. |
| Cloud of Flies | 2 CP | Use at the end of the Movement phase. Pick a model — until the end of the battle round, enemies can only shoot it if it is the closest visible target. |
| Veterans of the Long War | 2 CP | Use when a PLAGUE MARINE attacks in the Shooting or Fight phase. Add 1 to wound rolls against IMPERIUM models until the end of the phase. |
| Grandfather's Blessing | 2 CP | Use at the start of the first battle round. Pick a model and roll a D6: on a 1 it suffers D3 mortal wounds; on a 2+, add 1 to its hit and wound rolls for the rest of the battle. Once per battle. |
| Nurgling Infestation | 2 CP | Use at the end of the Movement phase. Pick an enemy model within 1" of your Leader and roll a D6 — on a 4+ it suffers 1 mortal wound. |
Datasheets
| Model | M | WS | BS | S | T | W | A | Ld | Sv | Max |
|---|---|---|---|---|---|---|---|---|---|---|
| Plague Marine | 5" | 3+ | 3+ | 4 | 5 | 1 | 1 | 7 | 3+ | - |
| Plague Marine Gunner | 5" | 3+ | 3+ | 4 | 5 | 1 | 1 | 7 | 3+ |
Armed with a plague knife, boltgun, blight grenades and krak grenades. Up to two can be Gunners, up to two can be Fighters, one can be a Plague Champion. Wargear options: a Gunner may replace their boltgun with a plague spewer, plague belcher, blight launcher, meltagun or plasma gun; a Fighter may replace their boltgun with a bubotic axe, great plague cleaver or flail of corruption, a second plague knife, or a mace of contagion and bubotic axe; the Champion may replace their plague knife with a plaguesword, and/or their boltgun with a bolt pistol, plasma pistol or plasma gun, and may take a power fist; one Plague Marine may take an Icon of Despair. Abilities: Death to the False Emperor; Disgustingly Resilient (each time the model loses a wound, roll a D6 — on a 5+ it does not lose that wound); Icon of Despair (as Heretic Astartes); Transhuman Physiology. Specialists: Leader (Champion only), Heavy (Gunner only), Zealot (Fighter only), Combat, Demolitions, Veteran. Keywords: CHAOS, NURGLE, HERETIC ASTARTES, INFANTRY, PLAGUE MARINE (Faction: DEATH GUARD).
| Model | M | WS | BS | S | T | W | A | Ld | Sv | Max |
|---|---|---|---|---|---|---|---|---|---|---|
| Poxwalker | 4" | 5+ | 6+ | 3 | 3 | 1 | 2 | 4 | 7+ | - |
Armed with an improvised weapon. Abilities: Disgustingly Resilient. Specialists: Combat, Zealot. Keywords: CHAOS, NURGLE, HERETIC ASTARTES, INFANTRY, POXWALKER.
Weapon Profiles and Points
| Ranged Weapon | Range | Type | S | AP | D | Abilities | Points |
|---|---|---|---|---|---|---|---|
| Blight grenade | 6" | Grenade D6 | 3 | 0 | 1 | Re-roll wound rolls of 1. | 0 |
| Blight launcher | 24" | Assault 2 | 6 | -2 | D3 | Re-roll wound rolls of 1. | 3 |
| Bolt pistol | 12" | Pistol 1 | 4 | 0 | 1 | — |
| Melee Weapon | Range | Type | S | AP | D | Abilities | Points |
|---|---|---|---|---|---|---|---|
| Bubotic axe | Melee | Melee | +1 | -2 | 1 | Re-roll wound rolls of 1. | 2 |
| Flail of corruption | Melee | Melee | +2 | -2 | 2 | Re-roll wound rolls of 1. Make D3 hit rolls each time you attack with this weapon. | 4 |
| Great plague cleaver | Melee | Melee | x2 | -3 | D6 |
Other wargear: Icon of Despair 3pts.
Points per model (excludes wargear): Plague Marine 14, Plague Marine Gunner 15, Plague Marine Fighter 15, Plague Champion 15, Poxwalker 3.
Thousand Sons
The Thousand Sons are the arch-sorcerers of Chaos, devoted to Tzeentch, Chaos God of Change. Thousand Sons warbands launch their assaults from the Planet of the Sorcerers, led by potent Sorcerers of Tzeentch whose command over the warp engulfs foes in mutating fires. Advancing alongside them come the Rubric Marines — warriors reduced millennia ago to armour shells filled with semi-sentient dust, pitilessly turning enemies to ash with inferno bolts and warpflame — and mutated Tzaangors that scavenge arcane treasures from slain foes.
Thousand Sons Kill Teams. If every model in your kill team has the THOUSAND SONS Faction keyword, you can use Thousand Sons Tactics.
| Tactic | Cost | Effect |
|---|---|---|
| Sorcerous Focus | 2 CP | Use at the start of your Psychic phase turn. Pick a PSYKER within 2" of at least two other kill team models. Add 6" to the range of its Psybolt power until the end of the phase. |
| Immovable Automaton | 2 CP | Use when a Rubric Marine or Rubric Marine Gunner is taken out of action. Roll a D6 — on a 4+ it suffers a flesh wound instead. |
| Veterans of the Long War | 2 CP | Use when a RUBRIC MARINE attacks in the Shooting or Fight phase. Add 1 to wound rolls against IMPERIUM models until the end of the phase. |
| Cycle of Slaughter | 2 CP | Use at the end of the Fight phase. Pick a TZAANGOR — it can immediately fight an additional time. |
| Malicious Familiar | 1 CP | Use at the end of the Movement phase. Pick an enemy model within 1" of your Leader and roll a D6 — on a 4+ it suffers 1 mortal wound. |
Datasheets
| Model | M | WS | BS | S | T | W | A | Ld | Sv | Max |
|---|---|---|---|---|---|---|---|---|---|---|
| Rubric Marine | 5" | 3+ | 3+ | 4 | 4 | 1 | 1 | 7 | 3+ | - |
| Rubric Marine Gunner | 5" | 3+ | 3+ | 4 | 4 | 1 | 1 | 7 | 3+ |
Armed with an inferno boltgun. One Rubric Marine can be a Gunner, one can be an Aspiring Sorcerer (instead armed with a force stave and inferno bolt pistol). Wargear options: the Aspiring Sorcerer may replace their inferno bolt pistol with a warpflame pistol; a Rubric Marine may replace their inferno boltgun with a warpflamer; the Gunner may replace theirs with a soulreaper cannon; one Rubric Marine may take an Icon of Flame. Abilities: Death to the False Emperor; All is Dust (add 1 to saving throws against Damage-1 attacks; Rubric Marine Gunners ignore the Heavy-weapon-after-moving hit penalty); Favoured of Tzeentch (5+ invulnerable save); Icon of Flame (as Thousand Sons Icon of Flame, pg 116); PSYKER (Aspiring Sorcerer only — can manifest and deny one power each Psychic phase; knows Psybolt); Transhuman Physiology (Aspiring Sorcerer only). Specialists: Leader (Aspiring Sorcerer only), Heavy (Gunner only), Combat, Demolitions, Veteran. Keywords: CHAOS, TZEENTCH, HERETIC ASTARTES, INFANTRY, PSYKER (Aspiring Sorcerer only), RUBRIC MARINE (Faction: THOUSAND SONS).
| Model | M | WS | BS | S | T | W | A | Ld | Sv | Max |
|---|---|---|---|---|---|---|---|---|---|---|
| Tzaangor | 6" | 3+ | 4+ | 4 | 4 | 1 | 1 | 6 | 6+ | - |
| Twistbray | 6" | 3+ | 4+ | 4 | 4 | 1 | 2 | 7 | 6+ |
Armed with Tzaangor blades. One Tzaangor can be a Twistbray. Wargear options: may replace Tzaangor blades with an autopistol and chainsword; one Tzaangor may take a brayhorn. Abilities: Aura of Dark Glory (5+ invulnerable save); Brayhorn (add 1 to Advance and charge rolls for TZAANGORS within 6" of a friendly model with one). Specialists: Leader (Twistbray only), Comms (brayhorn Tzaangor only), Combat, Medic, Veteran, Zealot. Keywords: CHAOS, TZEENTCH, HERETIC ASTARTES, INFANTRY, TZAANGOR.
Weapon Profiles and Points
| Ranged Weapon | Range | Type | S | AP | D | Abilities | Points |
|---|---|---|---|---|---|---|---|
| Autopistol | 12" | Pistol 1 | 3 | 0 | 1 | — | 0 |
| Inferno bolt pistol | 12" | Pistol 1 | 4 | -2 | 1 | — | 0 |
| Inferno boltgun | 24" | Rapid Fire 1 | 4 | -2 | 1 | — |
| Melee Weapon | Range | Type | S | AP | D | Abilities | Points |
|---|---|---|---|---|---|---|---|
| Chainsword | Melee | Melee | User | 0 | 1 | Each time the bearer fights, it can make 1 additional attack with this weapon. | 0 |
| Force stave | Melee | Melee | +2 | -1 | D3 | — | 0 |
| Tzaangor blades | Melee | Melee | User | -1 | 1 | Each time the bearer fights, it can make 1 additional attack with this weapon. |
Other wargear: Brayhorn 3pts · Icon of Flame 1pt.
Points per model (excludes wargear): Rubric Marine 16, Rubric Marine Gunner 16, Aspiring Sorcerer 17, Tzaangor 7, Twistbray 8.
Asuryani
'Ours is not a fight for conquest, or riches, or glory. It is a fight for the survival of our species, for the right to see another dawn. It is the very desperation of our cause that renders us so dangerous…' — Iradil the Wanderer, Ranger of Craftworld Alaitoc
Vast interstellar arks constructed from living wraithbone, the craftworlds of the Aeldari are marvels of grace and beauty. The Asuryani are the survivors of the ancient Aeldari empire's Fall, sublimely focused and terrifyingly skilled warriors for whom war is a path trodden with absolute discipline. Their line troops, the Guardians, lay down covering fire with shuriken weapons; Rangers pick off targets from elegant long rifles; and Dire Avengers, warriors of the Aspect Shrines, lead the charge with ritual armaments and honed martial skill.
Spirit Stones. Upon death, an unguarded Aeldari soul is drawn into the warp and consumed by Slaanesh. To prevent this, the Asuryani wear spirit stones — psycho-receptive crystals that capture and preserve a fallen warrior's soul until it can be returned to its craftworld's infinity circuit.
Asuryani Kill Teams. If every model in your kill team has the ASURYANI Faction keyword, you can use Craftworlds Tactics.
| Tactic | Cost | Effect |
|---|---|---|
| Matchless Agility | 1 CP | Use in the Movement phase when a model Advances. Add 6" to its Move characteristic instead of rolling a dice. |
| Feigned Retreat | 1 CP | Use after a model Falls Back. It can still shoot this battle round. |
| Fire and Fade | 2 CP | Use after a model shoots in the Shooting phase. It can immediately make a normal move of up to 7" as if it were the Movement phase. |
| Phantasm | 2 CP | Use at the start of the first battle round. Pick a model and set it up again anywhere in your deployment zone. |
| Asurmen's Blessing | 1 CP | Use when a DIRE AVENGER is chosen to shoot. Re-roll failed hit rolls for it until the end of the phase. |
| Rune of Ynnead |
Datasheets
| Model | M | WS | BS | S | T | W | A | Ld | Sv | Max |
|---|---|---|---|---|---|---|---|---|---|---|
| Guardian Defender | 7" | 3+ | 3+ | 3 | 3 | 1 | 1 | 7 | 5+ | - |
| Heavy Weapon Platform | 7" | 6+ | 3+ | 3 | 3 | 2 | 1 | 7 | 3+ |
Armed with a shuriken catapult and plasma grenades. One Guardian Defender can be a Heavy Weapon Platform (instead armed with a shuriken cannon). Wargear options: the Platform may replace its shuriken cannon with an Aeldari missile launcher, bright lance, scatter laser or starcannon. Abilities: Ancient Doom (re-roll failed Fight-phase hit rolls in a round it charges or is charged by a SLAANESH model, but add 1 to Nerve tests while within 3" of a SLAANESH model); Battle Focus (moving or Advancing does not affect this model's non-Heavy weapons, as if it had remained stationary); Crewed Weapon (a Heavy Weapon Platform can only move, Advance, React, shoot or fight if a non-shaken friendly Guardian Defender is within 3"; that Guardian Defender cannot fire its own weapons the same phase the Platform shoots; Platforms cannot charge, cannot be specialists, are not part of a fire team, and do not gain experience). Specialists: Leader, Comms, Medic, Scout, Veteran. Keywords (Guardian): AELDARI, WARHOST, INFANTRY, GUARDIAN, GUARDIAN DEFENDER; (Heavy Weapon Platform): AELDARI, WARHOST, INFANTRY, ARTILLERY, GUARDIAN, HEAVY WEAPON PLATFORM (Faction: ASURYANI).
| Model | M | WS | BS | S | T | W | A | Ld | Sv | Max |
|---|---|---|---|---|---|---|---|---|---|---|
| Storm Guardian | 7" | 3+ | 3+ | 3 | 3 | 1 | 1 | 7 | 5+ | - |
| Storm Guardian Gunner | 7" | 3+ | 3+ | 3 | 3 | 1 | 1 | 7 | 5+ |
Armed with a shuriken pistol, Aeldari blade and plasma grenades. Up to two can be Gunners. Wargear options: may replace their Aeldari blade with a chainsword; a Gunner may replace their shuriken pistol and Aeldari blade with a flamer or fusion gun. Abilities: Ancient Doom; Battle Focus. Specialists: Leader, Combat, Comms, Medic, Scout, Veteran. Keywords: AELDARI, WARHOST, INFANTRY, GUARDIAN, STORM GUARDIAN.
| Model | M | WS | BS | S | T | W | A | Ld | Sv | Max |
|---|---|---|---|---|---|---|---|---|---|---|
| Ranger | 7" | 3+ | 3+ | 3 | 3 | 1 | 1 | 7 | 5+ | - |
Armed with a shuriken pistol and Ranger long rifle. Abilities: Ancient Doom; Battle Focus; Cameleoline Cloak (a hit roll against this model when obscured suffers an additional -1). Specialists: Leader, Comms, Medic, Scout, Sniper, Veteran. Keywords: AELDARI, WARHOST, INFANTRY, RANGER.
| Model | M | WS | BS | S | T | W | A | Ld | Sv | Max |
|---|---|---|---|---|---|---|---|---|---|---|
| Dire Avenger | 7" | 3+ | 3+ | 3 | 3 | 1 | 1 | 8 | 4+ | - |
| Dire Avenger Exarch | 7" | 3+ | 3+ | 3 | 3 | 2 | 2 | 8 | 4+ |
Armed with an avenger shuriken catapult and plasma grenades. One can be an Exarch. Wargear options: the Exarch may replace their avenger shuriken catapult with two avenger shuriken catapults, a shuriken pistol and power glaive, a shuriken pistol and diresword, or a shimmershield and power glaive. Abilities: Ancient Doom; Battle Focus; Defence Tactics (Overwatch hits on a 5 or 6); Battle Fortune (Exarch has a 4+ invulnerable save); Shimmershield (DIRE AVENGER models within 2" of a friendly model with one have a 5+ invulnerable save). Specialists: Leader (Exarch only), Combat, Comms, Medic, Scout, Veteran. Keywords: AELDARI, ASPECT WARRIOR, INFANTRY, DIRE AVENGER.
Weapon Profiles and Points
| Ranged Weapon | Range | Type | S | AP | D | Abilities | Points |
|---|---|---|---|---|---|---|---|
| Aeldari missile launcher | — | — | — | — | — | Choose one profile: Sunburst missile 48" Heavy D6 S4 AP-1 D1; Starshot missile 48" Heavy 1 S8 AP-2 D6. | 5 |
| Avenger shuriken catapult | 18" | Assault 2 | 4 | 0 | 1 | A wound roll of 6+ is resolved with AP-3. | 0 |
| Bright lance | 36" | Heavy 1 | 8 | -4 | D6 |
| Melee Weapon | Range | Type | S | AP | D | Abilities | Points |
|---|---|---|---|---|---|---|---|
| Aeldari blade | Melee | Melee | User | 0 | 1 | Re-roll failed hit rolls. | 0 |
| Chainsword | Melee | Melee | User | 0 | 1 | Each time the bearer fights, it can make 1 additional attack with this weapon. | 0 |
| Diresword | Melee | Melee | User | -2 | 1 |
Other wargear: Shimmershield 4pts.
Points per model (excludes wargear): Guardian Defender 7, Heavy Weapon Platform 8, Storm Guardian 6, Storm Guardian Gunner 7, Ranger 11, Dire Avenger 10, Dire Avenger Exarch 11.
Drukhari
'Why simply kill what you can first make suffer? Where is the art in such dull butchery? Where is the pleasure and the satisfaction?' — Kaethr Stryxx, Kabal of the Black Heart
The Drukhari are a race of cruel killers who feed upon agony, striking forth from the Dark City of Commorragh in search of new souls to torment. Dark kin of the Asuryani, their beauty hides blackened souls that drain away like sand through an hourglass, recoverable only through feeding off pain and terror. Drukhari kill teams combine the vicious firepower of Kabalite raiders with the whip-fast combat prowess of Wyches, striking with speed and ruthlessness before vanishing with captives, leaving only fear and ruin.
Drukhari Kill Teams. DRUKHARI models use the Power From Pain ability; WYCHES also use Combat Drugs. If every model in your kill team has the DRUKHARI Faction keyword, you can also use Drukhari Tactics.
Power From Pain (bonuses are cumulative round to round):
| Battle Round | Bonus |
|---|---|
| 1 | Inured to Suffering — roll a D6 each time the model loses a wound; on a 6, that wound is not lost. |
| 2 | Eager to Flay — re-roll the dice determining how far the model moves when it Advances or charges. |
| 3 | Flensing Fury — add 1 to the model's hit rolls in the Fight phase. |
| 4 | Emboldened by Bloodshed — re-roll failed Nerve tests for the model. |
| 5+ | Mantle of Agony — enemy models within 6" of a model with this bonus suffer -1 Leadership. |
Combat Drugs (roll once before the battle for your whole kill team):
| D6 | Drug | Bonus |
|---|---|---|
| 1 | Adrenalight | +1 Attacks |
| 2 | Grave Lotus | +1 Strength |
| 3 | Hypex | +2 Move |
| 4 | Painbringer | +1 Toughness |
| 5 | Serpentin | +1 Weapon Skill (e.g. WS 3+ becomes WS 2+) |
| 6 | Splintermind | +2 Leadership |
| Tactic | Cost | Effect |
|---|---|---|
| Fire and Fade | 1 CP | Use after a model shoots. It can immediately make a normal move of up to 7" as if it were the Movement phase. |
| Cruel Deception | 1 CP | Use after a model Falls Back. It can still shoot this battle round. |
| Pray They Don't Take You Alive | 2 CP | Use if a model takes an enemy Leader out of action in the Fight phase. For the rest of the battle, that enemy kill team subtracts 1 from Leadership. |
| Torment Grenade | 2 CP | Use when a model shoots with a phantasm grenade launcher. If it hits an enemy model, roll 3D6 in addition to the normal effects — if higher than the target's Leadership, it suffers 1 mortal wound. |
Datasheets
| Model | M | WS | BS | S | T | W | A | Ld | Sv | Max |
|---|---|---|---|---|---|---|---|---|---|---|
| Kabalite Warrior | 7" | 3+ | 3+ | 3 | 3 | 1 | 1 | 7 | 5+ | - |
| Kabalite Gunner | 7" | 3+ | 3+ | 3 | 3 | 1 | 1 | 7 | 5+ |
Armed with a splinter rifle. Up to two can be Gunners, one can be a Sybarite. Wargear options: one Gunner may replace their splinter rifle with a splinter cannon or dark lance; one Gunner may replace it with a shredder or blaster; the Sybarite may take a power sword or agoniser, and/or a phantasm grenade launcher, and may replace their splinter rifle with a splinter pistol or blast pistol. Abilities: Power From Pain. Specialists: Leader (Sybarite only), Sniper (Gunner only), Comms, Scout, Veteran, Zealot. Keywords: AELDARI, INFANTRY, KABALITE WARRIOR (Faction: DRUKHARI).
| Model | M | WS | BS | S | T | W | A | Ld | Sv | Max |
|---|---|---|---|---|---|---|---|---|---|---|
| Wych | 8" | 3+ | 3+ | 3 | 3 | 1 | 2 | 7 | 6+ | - |
| Wych Fighter | 8" | 3+ | 3+ | 3 | 3 | 1 | 2 | 7 | 6+ |
Armed with a splinter pistol, Hekatarii blade and plasma grenades. Up to three can be Wych Fighters, one can be a Hekatrix. Wargear options: a Fighter may replace their splinter pistol and blade with hydra gauntlets, razorflails, or a shardnet and impaler; the Hekatrix may replace their blade with a power sword or agoniser, may take a phantasm grenade launcher, and may replace their splinter pistol with a blast pistol. Abilities: Power From Pain; Combat Drugs; No Escape (if an INFANTRY model within 1" of an enemy model with this ability would Fall Back, both players roll off — it may only Fall Back if its controller wins); Dodge (4+ invulnerable save in the Fight phase). Specialists: Leader (Hekatrix only), Combat, Scout, Veteran, Zealot. Keywords: AELDARI, INFANTRY, WYCH.
Weapon Profiles and Points
| Ranged Weapon | Range | Type | S | AP | D | Abilities | Points |
|---|---|---|---|---|---|---|---|
| Blast pistol | 6" | Pistol 1 | 8 | -4 | D6 | — | 2 |
| Blaster | 18" | Assault 1 | 8 | -4 | D6 | — | 3 |
| Dark lance | 36" | Heavy 1 | 8 | -4 | D6 | — | 4 |
| Melee Weapon | Range | Type | S | AP | D | Abilities | Points |
|---|---|---|---|---|---|---|---|
| Agoniser | Melee | Melee | * | -2 | 1 | This weapon wounds on a 4+. | 2 |
| Hekatarii blade | Melee | Melee | User | 0 | 1 | Each time the bearer fights, it can make 1 additional attack with this weapon. | 0 |
| Hydra gauntlets | Melee | Melee | User | -1 | 1 |
Points per model (excludes wargear): Kabalite Warrior 7, Kabalite Gunner 8, Sybarite 8, Wych 8, Wych Fighter 9, Hekatrix 9.
Harlequins
'Dance with me now, in fear, in terror, in pain, then take your final bloody bow upon the cold and unforgiving stone.' — The Thiefling Prince, Player of the Dark
To the warrior-acrobats of the Harlequins, who fight for the Laughing God Cegorach, warfare and art are inseparable disciplines. Each Player takes on a role in body and soul until the chosen ritualised dance is done. When a Harlequin dies, their soul is snatched away into the webway by Cegorach before Slaanesh can devour it — but the price is abandoning their old life entirely for the Troupe. Harlequins fight with an elegance and grace that is breathtaking to behold, utilising polychromatic domino fields, anti-grav flip belts and lethal close-range weaponry to confound and outfight their foes.
Harlequins Kill Teams. If every model in your kill team has the HARLEQUINS Faction keyword, you can use Harlequins Tactics.
| Tactic | Cost | Effect |
|---|---|---|
| Prismatic Blur | 1 CP | Use in the Movement phase when a model Advances. It has a 3+ invulnerable save until the start of the next battle round. |
| Cegorach's Jest | 2 CP | Use after an enemy model has Fallen Back from one of your models. Provided no other enemy models are within 1" of your model, it can shoot at the model that Fell Back as if it were the Shooting phase. |
| War Dancers | 1 CP | Use in the Movement phase when a model Advances. Add 6" to its Move characteristic instead of rolling a dice. |
| Warrior Acrobats | 2 CP | Use at the end of the Fight phase. Pick a model that has already fought this phase — it can immediately fight an additional time. |
| Fire and Fade | 1 CP | Use after a model shoots. It can immediately make a normal move of up to 7" as if it were the Movement phase. |
Datasheet
| Model | M | WS | BS | S | T | W | A | Ld | Sv | Max |
|---|---|---|---|---|---|---|---|---|---|---|
| Player | 8" | 3+ | 3+ | 3 | 3 | 1 | 4 | 8 | 6+ | - |
Armed with a shuriken pistol, Harlequin's blade and plasma grenades. Wargear options: may replace the shuriken pistol with a neuro disruptor or fusion pistol; may replace the Harlequin's blade with a Harlequin's embrace, Harlequin's caress or Harlequin's kiss. Abilities: Flip Belt (moves across other models and terrain as if they were not there; never suffers falling damage or falls on another model); Rising Crescendo (roll 3D6 instead of 2D6 for charge rolls, and may target an enemy model within 18" rather than 12"); Holo-suit (4+ invulnerable save). Specialists: Leader, Combat, Medic, Scout, Veteran, Zealot. Keywords: AELDARI, INFANTRY, PLAYER (Faction: HARLEQUINS).
Weapon Profiles and Points
| Ranged Weapon | Range | Type | S | AP | D | Abilities | Points |
|---|---|---|---|---|---|---|---|
| Fusion pistol | 6" | Pistol 1 | 8 | -4 | D6 | — | 3 |
| Neuro disruptor | 12" | Pistol 1 | 3 | -3 | D3 | — | 2 |
| Plasma grenade | 6" | Grenade D6 | 4 | -1 | 1 | — |
| Melee Weapon | Range | Type | S | AP | D | Abilities | Points |
|---|---|---|---|---|---|---|---|
| Harlequin's blade | Melee | Melee | User | 0 | 1 | — | 0 |
| Harlequin's caress | Melee | Melee | +2 | -2 | 1 | A wound roll of 6+ is resolved with AP-3. | 3 |
| Harlequin's embrace | Melee | Melee | +1 | -3 | 1 | — |
Points per model (excludes wargear): Player 12.
Necrons
'We have awoken, we who are the rightful rulers of the stars themselves. We shall ascend, now, to retake our rightful place, and these vermin that scurry and grub and make their nests amidst the ruins of our former glories, they shall hinder us not.' — Overlord Azmartek, the Ever-Glorious
Ancient beyond reckoning and utterly without mercy, the Necrons are soulless creatures whose skeletal bodies are formed from living metal. Having slumbered in stasis-crypts for sixty million years, their legions have awoken to reclaim an empire now infested with what they see as fleshy vermin. Necron kill teams are chosen by an Overlord from amongst his most favoured warriors, invariably led by elite Immortals who have retained more individuality than the mindless Necron Warriors, obliterating their foes from afar with relentless storms of atomising gauss energy.
Necron Kill Teams. If every model in your kill team has the NECRONS Faction keyword, you can use Necrons Tactics.
| Tactic | Cost | Effect |
|---|---|---|
| Prime Reanimation Protocols | 2 CP | Use when an Injury roll is made for a model. Roll an additional dice and apply the lowest result. |
| Disruption Fields | 1 CP | Use when a model is chosen to fight. Increase its Strength by 1 until the end of the phase. |
| Targeting Routines | 1 CP | Use when a model is chosen to shoot. Add 1 to its hit rolls against obscured targets. |
| Mindshackle Scarabs | 2 CP | Use at the start of the Shooting phase. Pick an enemy model within 6" of one of your models and roll 2D6 — if higher than its Leadership, immediately make a shooting attack with one of its ranged weapons as if it were one of your models. |
| Flensing Fury | 1 CP | Use when a FLAYED ONE is chosen to fight. Until the end of the phase, each wound roll of 6+ with its flayer claws adds 1 to the Damage of that attack. |
Datasheets
All Necron models share the Reanimation Protocols ability: when an Injury roll is made for the model, an unmodified 6 means it is not taken out of action and does not suffer a flesh wound — instead it is restored to 1 wound with no flesh wounds.
| Model | M | WS | BS | S | T | W | A | Ld | Sv | Max |
|---|---|---|---|---|---|---|---|---|---|---|
| Necron Warrior | 5" | 3+ | 3+ | 4 | 4 | 1 | 1 | 10 | 4+ | - |
Armed with a gauss flayer. Specialists: Leader, Comms, Veteran. Keywords: INFANTRY, NECRON WARRIOR (Faction: NECRONS).
| Model | M | WS | BS | S | T | W | A | Ld | Sv | Max |
|---|---|---|---|---|---|---|---|---|---|---|
| Immortal | 5" | 3+ | 3+ | 4 | 4 | 1 | 1 | 10 | 3+ | - |
Armed with a gauss blaster. Wargear options: may replace their gauss blaster with a tesla carbine. Specialists: Leader, Comms, Veteran, Zealot. Keywords: INFANTRY, IMMORTAL.
| Model | M | WS | BS | S | T | W | A | Ld | Sv | Max |
|---|---|---|---|---|---|---|---|---|---|---|
| Flayed One | 5" | 3+ | 6+ | 4 | 4 | 1 | 3 | 10 | 4+ | - |
Armed with flayer claws. Specialists: Leader, Combat, Veteran, Zealot. Keywords: INFANTRY, FLAYED ONE.
| Model | M | WS | BS | S | T | W | A | Ld | Sv | Max |
|---|---|---|---|---|---|---|---|---|---|---|
| Deathmark | 5" | 3+ | 3+ | 4 | 4 | 1 | 1 | 10 | 3+ | - |
Armed with a synaptic disintegrator. Specialists: Leader, Comms, Scout, Sniper, Veteran. Keywords: INFANTRY, DEATHMARK.
Weapon Profiles and Points
| Ranged Weapon | Range | Type | S | AP | D | Abilities | Points |
|---|---|---|---|---|---|---|---|
| Gauss blaster | 24" | Rapid Fire 1 | 5 | -2 | 1 | — | 0 |
| Gauss flayer | 24" | Rapid Fire 1 | 4 | -1 | 1 | — | 0 |
| Synaptic disintegrator | 24" | Rapid Fire 1 | 4 | 0 | 1 | Does not suffer the long-range hit penalty. A wound roll of 6+ inflicts a mortal wound in addition to any other damage. |
| Melee Weapon | Range | Type | S | AP | D | Abilities | Points |
|---|---|---|---|---|---|---|---|
| Flayer claws | Melee | Melee | User | 0 | 1 | Re-roll failed wound rolls. | 0 |
Points per model (excludes wargear): Necron Warrior 12, Immortal 16, Flayed One 10, Deathmark 15.
Orks
'Orks. Are there any more dangerous or belligerent enemies in all the wide, dark galaxy? Has Humanity ever encountered an enemy more difficult to eradicate, more senselessly violent and needlessly destructive than the greenskin menace? I highly doubt it…' — General Grumman van der Vosteen, 884th Brachtovarian Dragoons
Boisterous, brutal and bred for war, Orks fight because they love it, growing stronger and more confident the longer a scrap goes on. Ork kill teams — Boyz, sneaky Kommandos, pyromaniac Burna Boyz and the gun-toting Lootas — bring cobbled-together but devastating dakka to bear on any foe foolish enough to stand in their way.
Ork Kill Teams. If every model in your kill team has the ORKS Faction keyword, you can use Orks Tactics.
| Tactic | Cost | Effect |
|---|---|---|
| Krump 'Em! | 1 CP | Use when a model is chosen to fight. Increase its Strength by 1 until the end of the phase. |
| Gnasher Squig | 2 CP | Use at the start of the Fight phase. Pick an enemy model within 1" of one of your models and roll a D6 — on a 4+ it suffers 1 mortal wound. |
| Dakka Dakka Dakka | 1 CP | Use after a model shoots. It can immediately shoot an additional time. |
| Just a Flesh Wound | 2 CP | Use when a model is taken out of action. Roll a D6 — on a 4+ it suffers a flesh wound instead. |
| Grot Shield | 2 CP | Use at the start of the Shooting phase. Pick a model within 2" of a GRETCHIN model. Until the end of the phase, while that Gretchin is on the battlefield, attacks against the chosen model are resolved against the Gretchin instead. |
Datasheets
| Model | M | WS | BS | S | T | W | A | Ld | Sv | Max |
|---|---|---|---|---|---|---|---|---|---|---|
| Ork Boy | 5" | 3+ | 5+ | 4 | 4 | 1 | 2 | 6 | 6+ | - |
| Ork Boy Gunner | 5" | 3+ | 5+ | 4 | 4 | 1 | 2 | 6 | 6+ |
Armed with a slugga, choppa and stikkbombs. Two can be Gunners, one can be a Boss Nob. Wargear options: may replace slugga and choppa with a shoota; a Gunner may replace them with a big shoota or rokkit launcha; the Boss Nob may replace their slugga with a kombi-weapon (rokkit launcha or skorcha), and their choppa with a big choppa or power klaw. Abilities: 'Ere We Go (re-roll failed charge rolls). Specialists: Leader (Boss Nob only), Heavy (Gunner only), Combat, Demolitions, Veteran. Keywords: INFANTRY, ORK BOY (Faction: ORKS).
| Model | M | WS | BS | S | T | W | A | Ld | Sv | Max |
|---|---|---|---|---|---|---|---|---|---|---|
| Gretchin | 5" | 5+ | 4+ | 2 | 2 | 1 | 1 | 4 | 6+ | - |
Armed with a grot blasta. Specialists: Leader, Scout. Keywords: INFANTRY, GRETCHIN.
| Model | M | WS | BS | S | T | W | A | Ld | Sv | Max |
|---|---|---|---|---|---|---|---|---|---|---|
| Kommando | 6" | 3+ | 5+ | 4 | 4 | 1 | 2 | 6 | 6+ | - |
| Kommando Boss Nob | 6" | 3+ | 5+ | 5 | 4 | 2 | 3 | 7 | 6+ |
Armed with a slugga, choppa and stikkbombs. One can be a Kommando Boss Nob. Wargear options: the Boss Nob may replace their choppa with a power klaw. Abilities: 'Ere We Go; Sneaky Gits (a hit roll against this model when obscured suffers an additional -1). Specialists: Leader (Boss Nob only), Combat, Demolitions, Scout, Veteran. Keywords: INFANTRY, KOMMANDO.
| Model | M | WS | BS | S | T | W | A | Ld | Sv | Max |
|---|---|---|---|---|---|---|---|---|---|---|
| Burna Boy | 5" | 3+ | 5+ | 4 | 4 | 1 | 2 | 6 | 6+ | - |
| Burna Spanner | 5" | 3+ | 5+ | 4 | 4 | 1 | 2 | 6 | 6+ |
Armed with a burna and stikkbombs. Up to three can be Burna Spanners (instead armed with a big shoota and stikkbombs). Wargear options: a Spanner may replace their big shoota with a kustom mega-blasta or rokkit launcha. Abilities: 'Ere We Go. Specialists: Comms (Spanner only), Leader, Combat, Demolitions, Veteran, Zealot. Keywords: INFANTRY, BURNA BOY.
| Model | M | WS | BS | S | T | W | A | Ld | Sv | Max |
|---|---|---|---|---|---|---|---|---|---|---|
| Loota | 5" | 3+ | 5+ | 4 | 4 | 1 | 2 | 6 | 6+ | - |
| Loota Spanner | 5" | 3+ | 5+ | 4 | 4 | 1 | 2 | 6 | 6+ |
Armed with a deffgun and stikkbombs. Up to three can be Loota Spanners (instead armed with a big shoota and stikkbombs). Wargear options: a Spanner may replace their big shoota with a kustom mega-blasta or rokkit launcha. Abilities: 'Ere We Go. Specialists: Comms (Spanner only), Leader, Combat, Demolitions, Heavy, Veteran. Keywords: INFANTRY, LOOTA.
Weapon Profiles and Points
| Ranged Weapon | Range | Type | S | AP | D | Abilities | Points |
|---|---|---|---|---|---|---|---|
| Big shoota | 36" | Assault 3 | 5 | 0 | 1 | — | 0 |
| Burna | — | — | — | — | — | Used as a ranged weapon (8" Assault D3 S4 AP0 D1, automatically hits) or a melee weapon (Melee, S User, AP-2, D1) as appropriate. | 0 |
| Deffgun | 48" | Heavy D3 | 7 | -1 | 2 |
| Melee Weapon | Range | Type | S | AP | D | Abilities | Points |
|---|---|---|---|---|---|---|---|
| Big choppa | Melee | Melee | +2 | -1 | 2 | — | 2 |
| Choppa | Melee | Melee | User | 0 | 1 | Each time the bearer fights, it can make 1 additional attack with this weapon. | 0 |
| Power klaw | Melee | Melee | x2 | -3 | D3 | Subtract 1 from the hit roll when attacking. |
Points per model (excludes wargear): Ork Boy 6, Ork Boy Gunner 7, Boss Nob 10, Gretchin 3, Kommando 8, Kommando Boss Nob 12, Burna Boy 12, Burna Spanner 10, Loota 12, Loota Spanner 10.
T'au Empire
The T'au Empire is a rising force in the galaxy. United by the Greater Good (the T'au'va), guided by mysterious spiritual leaders known as Ethereals, the T'au strive to bring enlightenment to other races — by force of superior technology if necessary. T'au kill teams tend to be perfectly specialised and equipped for their task, warriors of the Fire caste bonded by the ta'lissera ritual, supported by anti-gravitic drones and prioritising swift movement and superior firepower over melee combat.
T'au Empire Kill Teams. Some T'au models carry markerlights: if a model fires one, it cannot fire any other weapon that phase; place a counter next to a model hit by a markerlight for the rest of the phase. Benefits from markerlight counters on a target are cumulative:
| Markerlight Counters | Benefit |
|---|---|
| 1 | Re-roll hit rolls of 1 against this model. |
| 2 | Add 1 to hit rolls against this model if it is obscured. |
| 3 | Attackers ignore the moving-and-firing-Heavy or Advancing-and-firing-Assault hit penalties against this model. |
| 4 or more | Add 1 to hit rolls against this model. |
If every model in your kill team has the T'AU EMPIRE Faction keyword, you can use T'au Empire Tactics.
| Tactic | Cost | Effect |
|---|---|---|
| Uplinked Markerlight | 2 CP | Use after your model hits an enemy with a markerlight. Place D3+1 counters instead of 1. |
| Breach and Clear | 1 CP | Use in your Shooting phase turn when a FIRE WARRIOR BREACHER targets an obscured enemy model. Re-roll failed wound rolls against it until the end of the phase. |
| Recon Sweep | 1 CP | Use in the Shooting phase when a PATHFINDER is chosen to shoot. Instead, it makes a normal move of up to 2D6" as if it were the Movement phase. |
| Stimulant Injector | 1 CP | Use when a model (other than a DRONE) loses a wound. Roll a D6 for that wound and each other wound it loses this phase — on a 5+, the wound is not lost. |
Datasheets
| Model | M | WS | BS | S | T | W | A | Ld | Sv | Max |
|---|---|---|---|---|---|---|---|---|---|---|
| Shas'la | 6" | 5+ | 4+ | 3 | 3 | 1 | 1 | 6 | 4+ | - |
| Shas'ui | 6" | 5+ | 4+ | 3 | 3 | 1 | 2 | 7 | 4+ |
Fire Warrior — a Shas'la or Shas'ui is equipped with a pulse rifle and photon grenades; one Shas'la can be a Shas'ui. Wargear options: may replace the pulse rifle with a pulse carbine; either may take a pulse pistol (a Shas'ui may instead replace their pulse rifle with a pulse pistol); a Shas'ui may take a markerlight; one Shas'la may be accompanied by a DS8 Tactical Support Turret (armed with a missile pod or smart missile system). Abilities: For the Greater Good (models with this ability within 6" of a charge target may fire Overwatch even if not the target themselves, but then cannot fire Overwatch or Retreat again this phase); Bonding Knife Ritual (subtract 1 from Nerve tests for Shas'las/Shas'uis within 3" of a non-shaken friendly model with this ability); DS8 Tactical Support Turret (set up within 2" of the model it accompanies when that model deploys; a separate model that cannot move for any reason; removed from the battlefield without counting as taken out of action if ever more than 2" from that model; cannot be a specialist, is not part of a fire team, and does not gain experience). Specialists: Leader (Shas'ui only), Comms, Medic, Scout, Sniper, Veteran. Keywords: INFANTRY, FIRE WARRIOR (Faction: T'AU EMPIRE).
| Model | M | WS | BS | S | T | W | A | Ld | Sv | Max |
|---|---|---|---|---|---|---|---|---|---|---|
| Pathfinder | 7" | 5+ | 4+ | 3 | 3 | 1 | 1 | 6 | 5+ | - |
| Pathfinder Gunner | 7" | 5+ | 4+ | 3 | 3 | 1 | 1 | 6 | 5+ |
Armed with a pulse carbine, markerlight and photon grenades. Up to three can be Gunners, one can be a Shas'ui. Wargear options: a Gunner may replace their pulse carbine and markerlight with an ion rifle or rail rifle; the Shas'ui may take a pulse pistol. Abilities: For the Greater Good; Bonding Knife Ritual. Specialists: Leader (Shas'ui only), Sniper (Gunner only), Comms, Demolitions, Medic, Scout, Veteran. Keywords: INFANTRY, PATHFINDER.
| Model | M | WS | BS | S | T | W | A | Ld | Sv | Max |
|---|---|---|---|---|---|---|---|---|---|---|
| Breacher Shas'la | 6" | 5+ | 4+ | 3 | 3 | 1 | 1 | 6 | 4+ | - |
| Breacher Shas'ui | 6" | 5+ | 4+ | 3 | 3 | 1 | 2 | 7 | 4+ |
Fire Warrior Breacher — armed with a pulse blaster and photon grenades; one Shas'la can be a Shas'ui. Wargear options: either may take a pulse pistol (the Shas'ui may instead replace their pulse blaster with one); the Shas'ui may take a markerlight; one Breacher Shas'la may be accompanied by a DS8 Tactical Support Turret. Abilities: For the Greater Good; Bonding Knife Ritual; DS8 Tactical Support Turret. Specialists: Leader (Shas'ui only), Comms, Demolitions, Medic, Scout, Veteran. Keywords: INFANTRY, FIRE WARRIOR BREACHER.
| Model | M | WS | BS | S | T | W | A | Ld | Sv | Max |
|---|---|---|---|---|---|---|---|---|---|---|
| Stealth Shas'ui | 8" | 5+ | 4+ | 4 | 4 | 2 | 2 | 7 | 3+ | - |
| Stealth Shas'vre | 8" | 5+ | 4+ | 4 | 4 | 2 | 3 | 8 | 3+ |
XV25 Stealth Battlesuit — armed with a burst cannon. One Shas'ui can be a Shas'vre. Wargear options: one may replace their burst cannon with a fusion blaster; a Shas'vre may take a markerlight and target lock. Abilities: For the Greater Good; Target Lock (no penalty for Advancing and firing Assault weapons); Camouflage Fields (opponents subtract 1 from all hit rolls against this model); Bonding Knife Ritual. Specialists: Leader (Shas'vre only), Comms, Heavy, Scout, Veteran. Keywords: BATTLESUIT, INFANTRY, JET PACK, FLY, XV25 STEALTH BATTLESUIT.
| Model | M | WS | BS | S | T | W | A | Ld | Sv | Max |
|---|---|---|---|---|---|---|---|---|---|---|
| MV1 Gun Drone / MV4 Shield Drone / MV7 Marker Drone | 8" | 5+ | 5+ | 3 | 4 | 1 | 1 | 6 | 5+ | - |
| MV36 Guardian Drone / MV33 Grav-inhibitor Drone / MV31 Pulse Accelerator Drone | 8" | 5+ | 5+ | 3 | 4 | 1 | 1 | 6 |
An MV1 Gun Drone is equipped with two pulse carbines; any MV1 Gun Drone can instead be an MV4 Shield Drone (shield generator instead of pulse carbines) or MV7 Marker Drone (markerlight instead). If your kill team includes FIRE WARRIOR BREACHERS or FIRE WARRIORS, one MV1 Gun Drone can be an MV36 Guardian Drone (no equipment). If it includes PATHFINDERS, one MV1 Gun Drone can each be an MV33 Grav-inhibitor Drone (no equipment), an MV31 Pulse Accelerator Drone (no equipment), and an MB3 Recon Drone (burst cannon instead of pulse carbines). Abilities: Support Subroutines (Drones cannot be specialists, are not part of a fire team, and cannot gain experience); For the Greater Good; Saviour Protocols (if a Drone within 3" of a friendly T'AU EMPIRE INFANTRY model would let that model be wounded, you can instead inflict a mortal wound on the Drone and the model suffers no damage); Guardian Fields (Guardian Drone only — 5+ invulnerable save; friendly T'AU EMPIRE models within 6" get a 6+ invulnerable save); Gravity Wave Projector (Grav-inhibitor Drone only — enemy models beginning a charge within 12" reduce their charge distance by D3"); Pulse Accelerator (Pulse Accelerator Drone only — a friendly T'AU EMPIRE INFANTRY model within 3" adds 6" to the Range of its pulse pistol, pulse carbine or pulse rifle); Recon Suite (Recon Drone only — at the start of the Shooting phase, a PATHFINDER within 6" ignores obscured-target hit and Injury penalties until the end of the phase); Shield Generator (as below). Keywords: FLY, DRONE.
Weapon Profiles and Points
| Ranged Weapon | Range | Type | S | AP | D | Abilities | Points |
|---|---|---|---|---|---|---|---|
| Burst cannon | 18" | Assault 4 | 5 | 0 | 1 | — | 0 |
| Fusion blaster | 18" | Assault 1 | 8 | -4 | D6 | If target is within half range, roll two dice for damage and discard the lowest. | 4 |
| Ion rifle | — | — | — | — | — | Choose one profile: Standard 30" Rapid Fire 1 S7 AP-1 D1; Overcharge 30" Heavy D3 S8 AP-1 D2 — one or more unmodified hit rolls of 1 inflicts a mortal wound on the bearer after all shots resolve. |
Other wargear: Target lock 1pt · Shield generator (4+ invulnerable save) — cost included in Drone model cost.
Points per model (excludes wargear except where noted): Shas'la 8, Shas'ui 8, DS8 Tactical Support Turret 0, Breacher Shas'la 8, Breacher Shas'ui 8, Pathfinder 6, Pathfinder Gunner 7, Pathfinder Shas'ui 7, Stealth Shas'ui 20, Stealth Shas'vre 20. Every Drone variant costs 7 points including its wargear.
Tyranids
'They came from the darkness, moving faster than the eye could follow. Monsters, with jagged fangs and slashing talons and yellow eyes. We fought as best we could, Emperor knows we did. It wasn't enough. Not nearly enough. Only Jenks and I made it out, and if it takes me the rest of my days I swear we will have vengeance…' — Veteran Sergeant Rachelyn Culcher, 45th Nachtmor Chargers
Driven by an all-consuming imperative to feed, the Tyranids devour entire worlds, leaving them as barren rocks devoid of all life. Guided by the godlike meta-sentience known as the Hive Mind, Tyranid kill teams — from swarming Gaunts to towering Tyranid Warriors and stealthy Lictors — infiltrate a prey world's cities and fortresses to undermine its defences and sow terror ahead of full-scale invasion.
Tyranid Kill Teams. If every model in your kill team has the TYRANIDS Faction keyword, you can use Tyranids Tactics.
| Tactic | Cost | Effect |
|---|---|---|
| Caustic Blood | 1 CP | Use when a model loses a wound in the Fight phase. Roll a D6 for each enemy model within 1" — on a 6, that model suffers 1 mortal wound after its attacks resolve. |
| Feeder Tendrils | 1 CP | Use when a GENESTEALER or LICTOR takes an enemy Leader out of action in the Fight phase. Gain D3 Command Points. |
| Metabolic Overdrive | 2 CP | Use in the Movement phase, after moving a model. It can make a second move, but then cannot shoot this battle round; roll a D6 — on a 1 it suffers 1 mortal wound. |
| Scorch Bugs | 1 CP | Use when a Termagant with a fleshborer is chosen to shoot. Add 1 to its wound rolls until the end of the phase. |
| Lurk | 1 CP | Use in the Movement phase. Pick a model that has not yet moved — it cannot move this phase, but for the rest of the battle round, shooting attacks against it while obscured suffer an additional -1 to hit. |
Datasheets
| Model | M | WS | BS | S | T | W | A | Ld | Sv | Max |
|---|---|---|---|---|---|---|---|---|---|---|
| Termagant | 6" | 4+ | 4+ | 3 | 3 | 1 | 1 | 5 | 6+ | - |
Armed with a fleshborer. Wargear options: may replace it with a devourer or spinefists; may take toxin sacs and/or adrenal glands. Abilities: Instinctive Behaviour (unless within 24" of a friendly SYNAPSE model, subtract 1 from hit rolls when shooting a target other than the nearest visible enemy, and subtract 2 from charge rolls against a target other than the nearest enemy); Adrenal Glands (add 1" to Advance/charge distance); Toxin Sacs (wound rolls of 6+ in the Fight phase cause 1 additional damage). Specialists: Scout, Veteran. Keywords: INFANTRY, TERMAGANT (Faction: TYRANIDS).
| Model | M | WS | BS | S | T | W | A | Ld | Sv | Max |
|---|---|---|---|---|---|---|---|---|---|---|
| Hormagaunt | 8" | 4+ | 4+ | 3 | 3 | 1 | 2 | 5 | 6+ | - |
Armed with a pair of scything talons. Wargear options: may take toxin sacs and/or adrenal glands. Abilities: Instinctive Behaviour; Adrenal Glands; Toxin Sacs; Bounding Leap (can move up to 6" when it piles in or consolidates). Specialists: Combat, Scout, Veteran. Keywords: INFANTRY, HORMAGAUNT.
| Model | M | WS | BS | S | T | W | A | Ld | Sv | Max |
|---|---|---|---|---|---|---|---|---|---|---|
| Lictor | 9" | 2+ | 4+ | 6 | 4 | 4 | 3 | 9 | 5+ | - |
Armed with flesh hooks, grasping talons and rending claws. Abilities: Chameleonic Skin (a hit roll against this model when obscured suffers an additional -1). Specialists: Leader, Combat, Comms, Scout, Veteran. Keywords: INFANTRY, LICTOR.
| Model | M | WS | BS | S | T | W | A | Ld | Sv | Max |
|---|---|---|---|---|---|---|---|---|---|---|
| Tyranid Warrior | 6" | 3+ | 4+ | 4 | 4 | 3 | 3 | 9 | 4+ | - |
| Tyranid Warrior Gunner | 6" | 3+ | 4+ | 4 | 4 | 3 | 3 | 9 | 4+ |
Armed with a pair of scything talons and a devourer. One can be a Gunner. Wargear options: may replace scything talons with rending claws, boneswords, or a lash whip and bonesword; may replace the devourer with a deathspitter, spinefists, rending claws, boneswords, a pair of scything talons, or a lash whip and bonesword (a Gunner may instead take a barbed strangler or venom cannon); may take flesh hooks, and/or toxin sacs and/or adrenal glands. Abilities: Synapse (TYRANIDS models automatically pass Nerve tests within 12" of a friendly model with this ability); Shadow in the Warp (enemy PSYKERS within 18" subtract 1 from psychic tests; TYRANIDS PSYKERS unaffected); Adrenal Glands; Toxin Sacs. Specialists: Heavy (Gunner only), Leader, Combat, Comms, Veteran. Keywords: INFANTRY, SYNAPSE, TYRANID WARRIOR.
| Model | M | WS | BS | S | T | W | A | Ld | Sv | Max |
|---|---|---|---|---|---|---|---|---|---|---|
| Genestealer | 8" | 3+ | 4+ | 4 | 4 | 1 | 3 | 9 | 5+ | - |
Armed with rending claws. Wargear options: may take a pair of scything talons; may take toxin sacs and/or an extended carapace; one Genestealer may take an acid maw, one other may take flesh hooks. Abilities: Swift and Deadly (re-roll failed charge rolls); Lightning Reflexes (5+ invulnerable save); Extended Carapace (Save becomes 4+ but loses Swift and Deadly); Toxin Sacs. Specialists: Leader, Combat, Scout, Veteran. Keywords: INFANTRY, GENESTEALER.
Weapon Profiles and Points
| Ranged Weapon | Range | Type | S | AP | D | Abilities | Points |
|---|---|---|---|---|---|---|---|
| Barbed strangler | 36" | Assault D6 | 5 | -1 | 1 | — | 3 |
| Deathspitter | 24" | Assault 3 | 5 | -1 | 1 | — | 2 |
| Devourer | 18" | Assault 3 | 4 | 0 | 1 | — | 3 (Termagant) / 0 (Tyranid Warrior) |
| Melee Weapon | Range | Type | S | AP | D | Abilities | Points |
|---|---|---|---|---|---|---|---|
| Acid maw | Melee | Melee | User | -3 | 1 | — | 0 |
| Boneswords | Melee | Melee | User | -2 | 1 | Can make 1 additional attack with them in the Fight phase. | 0 |
| Grasping talons | Melee | Melee | User | -1 | 2 | Re-roll hit rolls of 1. |
Other wargear: Adrenal glands 1pt · Extended carapace 0pts · Toxin sacs 1pt.
Points per model (excludes wargear): Termagant 4, Hormagaunt 4, Lictor 25, Tyranid Warrior 20, Tyranid Warrior Gunner 20, Genestealer 11.
Genestealer Cults
'Now is the time, brothers and sisters! Cast off the shackles of Imperial oppression! Embrace the love of the Four-Armed Emperor. Cry rapturous welcome to the Star Children, for with their coming we shall all be raised up to a higher state of unified glory. Praise be, brothers and sisters, for the Day of Ascension is upon us!' — Neophyte Leader Mordecai Storn
Genestealer Cults arise from the heaving masses of Humanity that make up the Imperium — clandestine networks bound by fanatical belief in deliverance by star-borne saviours, guided by the whispers of a monstrous Patriarch (in truth a Genestealer, using its parasitic Genestealer's Kiss to inject genetic material into unwitting human hosts). Cult kill teams fight with industrial tools turned to violence — drills, saws, cutting lasers and demolition charges — alongside more advanced mutants who fight with diamond-hard claws and fangs.
Genestealer Cult Kill Teams. If every model in your kill team has the GENESTEALER CULTS Faction keyword, you can use Genestealer Cults Tactics. Purestrain Genestealers: when adding a Genestealer (pg 179) to your command roster, you can give it the GENESTEALER CULTS Faction keyword instead of TYRANIDS.
| Tactic | Cost | Effect |
|---|---|---|
| Industrial Brutality | 1 CP | Use after a model armed with a heavy rock drill, heavy rock saw or heavy rock cutter attacks in the Fight phase. Roll a D6 — on a 4+ it may immediately fight again. |
| Inhuman Reflexes | 1 CP | Use when a model fails a Falling test. It suffers no falling damage and does not land on another model — it is instead placed as close as possible to where it would have landed (which can be within 1" of an enemy). |
| Unnatural Senses | 1 CP | Use when a model is declared the target of a charge. It may fire Overwatch at the charging model even if not visible to it; the target is treated as obscured. |
| Frenzied Hammering | 2 CP | Use when an ABERRANT armed with a power hammer attacks in the Fight phase. Increase its Attacks by D3 until the end of the phase, but subtract 1 from its hit rolls. |
| Density Analysis Lenses | 2 CP | Use when a model is chosen to shoot. Add 1 to its hit rolls against obscured targets. |
Datasheets
All datasheets below share the Cult Ambush ability: after deployment but before the first battle round, roll a D6 for the model — on a 5+ it can immediately move up to 6". Models with a cult icon grant Cult Icon: re-roll hit rolls of 1 for models within 6" of a friendly model with one in the Fight phase.
| Model | M | WS | BS | S | T | W | A | Ld | Sv | Max |
|---|---|---|---|---|---|---|---|---|---|---|
| Acolyte Hybrid | 6" | 3+ | 4+ | 4 | 3 | 1 | 2 | 7 | 5+ | - |
| Acolyte Fighter | 6" | 3+ | 4+ | 4 | 3 | 1 | 2 | 7 | 5+ |
Armed with an autopistol, cultist knife, rending claw and blasting charges. Up to four can be Fighters, one can be a Leader. Wargear options: may replace the autopistol with a hand flamer; the Leader may replace their cultist knife with a bonesword, or their autopistol and cultist knife with a lash whip and bonesword; a Fighter may replace their cultist knife and rending claw with a heavy rock drill, heavy rock saw, heavy rock cutter or demolition charges; one Acolyte Hybrid may take a cult icon. Specialists: Leader (Leader only), Demolitions (Fighter only), Combat, Comms, Zealot. Keywords: TYRANIDS, INFANTRY, ACOLYTE HYBRID (Faction: GENESTEALER CULTS).
| Model | M | WS | BS | S | T | W | A | Ld | Sv | Max |
|---|---|---|---|---|---|---|---|---|---|---|
| Aberrant | 6" | 3+ | 6+ | 5 | 4 | 2 | 2 | 7 | 5+ | - |
Armed with a power pick and rending claw. Wargear options: may replace the power pick with a power hammer. Abilities: Cult Ambush; Bestial Vigour (damage against this model is reduced by 1, to a minimum of 1). Specialists: Leader, Combat, Demolitions, Zealot. Keywords: TYRANIDS, INFANTRY, ABERRANT.
| Model | M | WS | BS | S | T | W | A | Ld | Sv | Max |
|---|---|---|---|---|---|---|---|---|---|---|
| Neophyte Hybrid | 6" | 4+ | 4+ | 3 | 3 | 1 | 1 | 7 | 5+ | - |
| Neophyte Gunner | 6" | 4+ | 4+ | 3 | 3 | 1 | 1 | 7 | 5+ |
Armed with an autogun, autopistol and blasting charges. Up to four can be Gunners, one can be a Leader. Wargear options: may replace the autogun with a shotgun; the Leader may replace their autogun and autopistol with one pistol (autopistol, bolt pistol or web pistol) and one melee weapon (chainsword, power maul or power pick); up to two Gunners may replace their autogun with a flamer, grenade launcher or webber; up to two (other) Gunners may replace theirs with a heavy stubber, mining laser or seismic cannon; one Neophyte Hybrid may take a cult icon. Specialists: Leader (Leader only), Heavy (Gunner only), Demolitions, Medic, Scout, Zealot. Keywords: TYRANIDS, INFANTRY, NEOPHYTE HYBRID.
| Model | M | WS | BS | S | T | W | A | Ld | Sv | Max |
|---|---|---|---|---|---|---|---|---|---|---|
| Hybrid Metamorph | 6" | 3+ | 4+ | 4 | 3 | 1 | 3 | 7 | 5+ | - |
| Metamorph Leader | 6" | 3+ | 4+ | 4 | 3 | 1 | 4 | 8 | 5+ |
Armed with an autopistol, rending claw, Metamorph talon and blasting charges. One can be a Leader. Wargear options: may replace the rending claw with a Metamorph talon, or the Metamorph talon with a Metamorph whip, or both with a Metamorph claw; may replace the autopistol with a hand flamer; the Leader may take a bonesword; one Hybrid Metamorph may take a cult icon. Specialists: Leader (Leader only), Combat, Comms, Demolitions, Zealot. Keywords: TYRANIDS, INFANTRY, HYBRID METAMORPH.
Weapon Profiles and Points
| Ranged Weapon | Range | Type | S | AP | D | Abilities | Points |
|---|---|---|---|---|---|---|---|
| Autogun | 24" | Rapid Fire 1 | 3 | 0 | 1 | — | 0 |
| Autopistol | 12" | Pistol 1 | 3 | 0 | 1 | — | 0 |
| Blasting charge | 6" | Grenade D6 | 3 | 0 | 1 | — | 0 |
| Melee Weapon | Range | Type | S | AP | D | Abilities | Points |
|---|---|---|---|---|---|---|---|
| Bonesword | Melee | Melee | User | -2 | 1 | Each time the bearer fights, it can make 1 additional attack with this weapon. | 1 |
| Chainsword | Melee | Melee | User | 0 | 1 | Each time the bearer fights, it can make 1 additional attack with this weapon. | 0 |
| Cultist knife | Melee | Melee | User | 0 | 1 |
Other wargear: Cult icon 5pts.
Points per model (excludes wargear): Acolyte Hybrid 7, Acolyte Fighter 8, Acolyte Leader 8, Aberrant 15, Neophyte Hybrid 5, Neophyte Gunner 6, Neophyte Leader 6, Hybrid Metamorph 8, Metamorph Leader 9.
Squad Colours
The book closes its Faction chapters with a gallery of painted kill teams for each Faction — Skitarii, Genestealer Cultists and others — captioned with each miniature's name, role and equipment, showing how a collection's individual operatives can be marked out as a distinct kill team.
Kill Team Campaigns
Kill Team campaigns let you collect operatives and fight battles of Kill Team in a series of connected missions, forming a narrative of covert battles fought alongside a greater war. Kill Team can be played and enjoyed in one-off missions — you do not need to use these extra rules — but a campaign lets you and your friends write the story of your own kill teams as they grow in experience, with one of you claiming the glory of total victory.
The War Effort. The missions your operatives fight are part of a larger war effort, represented by four resources: Intelligence (spy networks and intelligence-gathering assets), Materiel (military resources — weaponry, armour, transport and more), Morale (a faction's will to keep fighting) and Territory (locations and facilities currently controlled). Each player begins with a set number of resource points in each (8 is suggested, though players can agree on a different or randomised starting amount, e.g. D6+3), noted on their command roster. Each mission tells you its impact on the resources of the players involved; record any changes after the mission. A player reduced to 0 or less in any resource becomes a guerrilla faction (see below).
Victory. Unless players agree otherwise, the last player who hasn't been reduced to a guerrilla faction wins the campaign. Players can instead agree their own victory condition (a target number of victories, or highest combined resources after a set number of games). If all remaining non-guerrilla factions are reduced to guerrillas after the same mission, the campaign is decided by sudden death (see below).
Mission Critical
Choosing a Mission. Choose a mission you and your opponent(s) agree on, or roll off and have the winner roll 2D6 on the table below. Where a mission has an attacker and defender, whichever player has more Territory is the defender (roll off on a tie to determine the attacker).
| 2D6 | Mission |
|---|---|
| 2 | The player with the highest total resources decides the mission (tied players roll off; the winner decides). |
| 3-4 | Disrupt Supply Lines (pg 52), or Take Prisoners (pg 57) with more than two players. |
| 5 | Ambush (pg 53), or Recover Intelligence (pg 58) with more than two players. |
| 6 | Feint (pg 54), or Terror Tactics (pg 59) with more than two players. |
| 7 | Choose Assassinate (pg 55) or Sweep and Clear (pg 56). |
| 8 | Take Prisoners (pg 57). |
| 9 | Recover Intelligence (pg 58). |
| 10-11 | Terror Tactics (pg 59). |
| 12 | The player with the lowest total resources decides the mission (tied players roll off; the winner decides). |
Campaign Command Roster. Each player has a campaign command roster, created as for matched play (pg 62) except it starts with up to twelve models rather than up to twenty, and can grow beyond twenty as the campaign progresses. Once a player has played a mission, they choose their kill team from any models on their roster, and/or add new models with new datacards (subject to Adding Members to a Fire Team, below) — this is the only way to grow the roster, which becomes a record of every model used across the campaign.
Choosing a Kill Team. Choose Battle-forged kill teams (pg 62) subject to the mission being played, except each player must choose from their campaign command roster. Choose kill teams in secret, revealing them together once the battlefield is set up. It's suggested each player keeps the same Faction keyword for the length of the campaign.
Play the Mission. Once teams are chosen, play the mission.
Strategic Withdrawal. At the end of the third battle round, and each subsequent round, before rolling to see if the battle ends, a player may (in initiative order) make a strategic withdrawal — they lose the mission (if only one other player remains, that player wins it) and remove all their models from the battlefield, rolling for each model with a flesh wound as described under Casualties, below.
Consequences of Battle
After each mission, each participating player plays through: 1. Resources (update as described by the mission — a player may be reduced to a guerrilla faction; if only one non-guerrilla faction remains, they win the campaign unless another victory condition was agreed). 2. Casualties. 3. Experience.
Casualties. Roll a D6 for each model on the battlefield with one or more flesh wounds: on 1-3 it recovers, on 4-6 it goes out of action. For each model out of action at the end of the mission, roll a D10 on the Casualty table:
| D10 | Result |
|---|---|
| 1 | Dead — the model can no longer be included in your kill team; discard its datacard and delete it from your roster. |
| 2 | Convalescence — cannot be used in your next mission (check the box on its datacard). |
| 3-8 | Full Recovery — can be used in your next mission. |
| 9-10 | Hard Knocks — full recovery, and if a specialist it gains an additional experience point. |
After casualty rolls, remove all flesh wounds from your models.
Experience. Each specialist gains an experience point (check a box on its datacard), plus another if you used at least one Tactic from their specialism. Checking a box with an orange outline advances the specialist to the next level (choose a new ability as on page 66; new Tactics may become available). Once all boxes are checked, a specialist cannot progress further.
Fire Teams. Non-specialist models chosen from a single datasheet form a fire team (e.g. six non-specialist Rangers form one fire team). If two or more models from a fire team were in your kill team and are not dead from Casualty rolls, all models in that fire team (even those not in the mission) gain an experience point — plus another if an enemy model was taken out of action by an attack or psychic power from a fire team member. Checking a box with an orange outline advances the whole fire team a level; roll a D6 and consult the table below for the advance gained (each result can only be gained once per fire team — re-roll duplicates):
| D6 | Advance |
|---|---|
| 1 | Fleet — add 1" to Move. |
| 2 | Lucky — re-roll saving throws of 1. |
| 3 | Courageous — re-roll failed Nerve tests. |
| 4 | Skilled — choose: re-roll hit rolls of 1 when shooting, or re-roll hit rolls of 1 in the Fight phase. |
| 5 | Lethal — choose: re-roll wound rolls of 1 when shooting, or re-roll wound rolls of 1 in the Fight phase. |
| 6 | Die-hard — subtract 1 from Injury rolls. |
Once all boxes on a fire team's datacards are checked, it cannot progress further.
Crack Troops. In a Battle-forged kill team, fire team members cost more per model as they advance: +0 points at Level 1, +1 at Level 2, +2 at Level 3, +3 at Level 4.
Adding Members to a Fire Team. When choosing your kill team, you can add a new fire team member (fill in its datacard) — you must include it in the kill team that mission, alongside at least one experienced member of that fire team for every new member added. New members cannot use the fire team's advances in their first mission (check the New Recruit box); at the end of that mission, erase the check and bring them up to the same experience and advances as the rest of the fire team. If all members of a fire team die from Casualty rolls, their experience is lost and no new members can be added to it — but a player may disband a fire team after a mission (discarding its datacards) and add a new one from the same datasheet next mission.
Guerrilla Factions. A player with one or more resources reduced to 0 or less becomes a guerrilla faction — broken and fighting without central leadership, unable to normally win the campaign (except via sudden death). A guerrilla faction has no resources and cannot gain any, but otherwise plays missions as normal, and cannot add new fire team members (though it can still disband one).
Sudden Death. If all non-guerrilla players are reduced to guerrillas after the same mission, the campaign enters sudden death — any player can win. Play a mission that allows all campaign players at once (agreed or randomly determined); whoever wins, wins the campaign. If there's no victor, resolve the normal post-mission steps and play again until one is decided.
Escalation. By agreement, after a set point in the campaign, Battle-forged kill teams can be increased to cost up to 150 points (still applying any mission adjustments).
Command Roster and Datacards
The book closes with a photocopiable blank Command Roster sheet (player name, Faction, resources, kill team's Force and name, and a list of models with experience, points, specialism/abilities and demeanour) and a page of blank Datacards — one per model, recording its characteristics, wargear, abilities and flesh wounds — both © Games Workshop Ltd 2018, for personal use.
Reference
The final pages of the Core Manual reprint a quick-reference summary of the six battle round phases and the core dice-roll modifier tables (Shooting and Close Combat hit roll modifiers, the Wound Roll table, Injury Roll modifiers and results, and Nerve Test modifiers) that already appear in full under Core Rules, above, for easy reference during play.