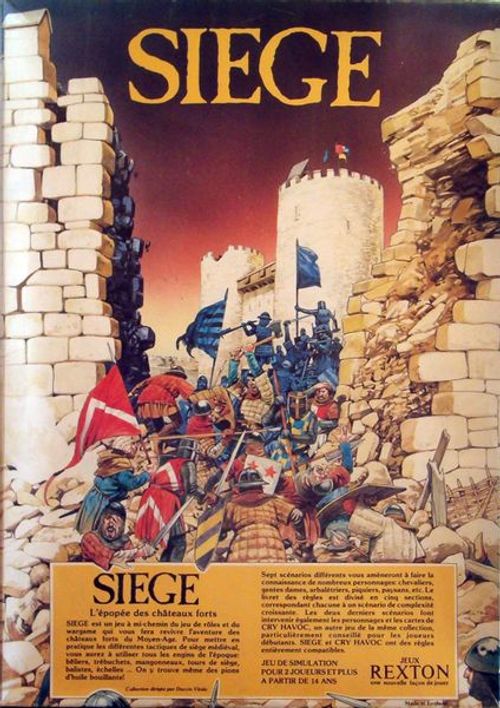
Siege
Siege Rulebook
Table of Contents
Table of Contents
- Introduction
- Section One
- Section Two
- Section Three
- Section Four
- Section Five
- Optional Rules
- How to Play SIEGE (Rules Summary)
- The Scenarios
- Game Aid Card (Reference Tables)
Introduction
SIEGE is both a stand-alone game and an expansion to CRY HAVOC. The rules of both games are entirely compatible, and while five of the seven scenarios can be played with SIEGE material alone, the other two require CRY HAVOC as well. Players are strongly encouraged to design their own scenarios. Additional maps are also available separately.
SIEGE contains many new rules, since it introduces a range of 13th-century castle attack and defense techniques. So that players can learn the rules progressively, they are divided into five sections, each corresponding to a scenario. At the end of each section you can immediately play the scenario that puts into practice the rules you have just read.
Section One
1.1 Terrain Types / Castle Map
Characters standing on squares that contain a piece of special equipment are not affected by the natural terrain beneath it. As we shall see below, the kind of cover a square offers affects ranged fire, while a terrain's advantage (+) or disadvantage (-) is taken into account in hand-to-hand combat.
1.2 Sequence of Play
In SIEGE each game is made up of a succession of game turns, and each turn has two distinct phases, one for each side. When it is a side's phase, each player may move, fire missiles, and engage in combat with their characters. Each scenario states who moves first. When several players share a side, all players on that side may move, fire, and fight during the same phase.
1.21 Organization of the Turn
Each phase of a turn proceeds as follows (when we say "all," we mean all characters of the same side):
First player's phase
- All archers and crossbowmen may fire, except those who engaged in hand-to-hand combat on the previous turn.
- All characters may move, except crossbowmen who have just fired.
- All archers may fire again, including those who engaged in hand-to-hand combat on the previous turn.
- All characters adjacent to enemy characters may engage in hand-to-hand combat.
- All friendly characters who were stunned during the opponent's phase recover (their counter is flipped back over).
Second player's phase
This unfolds exactly like the first player's phase. When step 5 ends, a new turn begins and the first player starts the sequence again from step 1.
Note: It is essential to respect the order of these steps and not begin one before the previous one has finished.
1.3 Bow or Crossbow Fire
Although the die ultimately decides whether a shot succeeds or fails, several factors can modify the conditions of the shot. Consult the Game Aid Card.
There you will first find the Table of Modifiers by Distance and by the shooter's condition. Next come the tables of shooting results against mounted and unmounted targets. Depending on the case, consult the Longbow, Short Bow, or Crossbow column, roll a die (10-sided), modify it for distance and the shooter's condition, and find the intersection of the roll's row with the column matching the target's cover. The letter shown there (explained at the foot of the table) gives the result.
Note: SIEGE is a three-dimensional simulation, so differences in elevation affect play. On the back of the scenario booklet is a summary table of the elevation levels present in the game, along with the shooting restrictions that apply when shooter and target are not at the same height.
1.4 Restrictions on Fire
1.41 Line of Fire
A character may fire on an enemy if there is a clear line of fire between the shooter's square and the target's square. This is an imaginary straight line drawn from the center of the shooter's square to the center of the target's square. If the line of fire crosses a square containing a character or any terrain that is not open ground, the shot suffers the restrictions listed below.
1.42 Firing Over Other Characters
If a crossbowman's line of fire passes through a square containing a standing character, the shot is impossible (living animals count as standing characters).
Archers, on the other hand, may fire over other characters if the target is at medium or long range and has at most medium cover.
Shots fired from, or against, battlements and arrow-slits, as well as shots into the moat, have particular conditions because they involve two levels of elevation (see 1.44, 1.45 and 1.46).
1.43 Firing Through Doorways
A character standing outside or inside a building may fire through a doorway if they are at the same height as it and their line of fire does not cross any piece of wall. When firing from a doorway, the line of fire starts at the center of the opening rather than the center of the square. Special case: No one may fire through the keep's doorway, or from it.
1.44 Firing From Battlements and Arrow-Slits
When a character on a battlement aims at a target outside the castle, their line of fire leaves from the center of the opening rather than the center of the square, and the same applies to arrow-slits. In all other cases, the line of fire is calculated normally.
In SIEGE, characters on the keep stand higher than those on towers or curtain walls, who in turn stand higher than those on other terrain types, except for characters on ladders or siege towers. Thus, within a radius of 8 squares for tower battlements or arrow-slits, and 12 squares for keep arrow-slits, the shooter may ignore obstacles or characters that are lower. However, the shot is not possible if there is a character of the same side as the shooter adjacent to the target and at the same height. (For added realism you may use the optional rule found on page 26.) In addition, targets on scrub and embankment squares (see Section Three) do not benefit from cover within the indicated radius.
CAUTION: Trees, siege towers, the keep and the towers continue to block the line of fire. From the keep, however, it is possible to fire over battlements, towers and siege towers if the lower character is at least as far from the wall (or siege tower) as the shooter. For distance purposes regarding battlements, the wall is counted as straddling exactly the two squares on either side of it (see illustration further on).
1.45 Firing Against Arrow-Slits or Battlements
If a shot is possible from top to bottom, it is also possible in reverse, with two exceptions: 1) To fire against a character behind an arrow-slit, the shooter must be positioned directly in line with it; 2) Characters in the moat may not fire against battlements or arrow-slits.
The following example illustrates cases 1.44 and 1.45:
From the keep, A can fire on G and D but not on C, who is 1 square from the wall while A is 2 squares away. A cannot fire on E and F because they are too close to the tower.
From the battlements, B can fire on C, G, D and E, but not on F, since the wall blocks the line of fire.
On the other side, C, G, D and E can fire on B, who has strong cover. G and D can also fire on A (who has strong cover) because they are directly in line with the arrow-slit. If there were someone in the tower's arrow-slits, only E could fire at them, and only at the center arrow-slit. If B were an infiltrated enemy, A could fire on them without B benefiting from any cover. If D were a friend, neither A nor B could fire on G.
1.46 Firing Against Characters in the Moat
Characters behind tower arrow-slits and on battlements may fire into the moat if the curtain wall does not block their line of fire. From the keep's battlements, the possibilities for firing are more limited, since characters in the moat are usually too close to the wall.
Characters outside the castle who want to fire into the moat must be adjacent to it or inside it. Since the moat is quite deep, a shooter in a square adjacent to its edge may fire over characters who are inside it.
In the example, A and E can fire on all the others, but B cannot fire on D and C. D and C cannot fire on B or E since they are in the moat.
1.5 Cover
1.51 Battlements and Arrow-Slits
Characters on arrow-slits or battlements receive strong cover when the line of fire passes through the battlement wall or the arrow-slit opening behind which they shelter.
1.52 The Interior of the Castle
When the drawbridge is raised, every character inside the castle receives total cover from the outside, unless they are on battlements or arrow-slits. The only exceptions are explained in Section Two (2.32 and 2.43).
1.53 Doorways
A character in a doorway has medium cover, limited to one side (interior or exterior) of it. If they receive crossfire, they must specify which side they are sheltering behind.
Any character inside a building receives medium cover when fired on through a doorway, but not if the shooter fires from the doorway square itself.
1.54 The Keep's Doorway
A character on the keep's doorway square has total cover. These doors were built in a particular way, with great sturdiness, meaning that neither an arrow nor a crossbow bolt can pass through them.
1.55 The Moat
Characters in the moat receive no cover at all.
1.56 Walls
Characters behind a wall with no openings have total cover and cannot be fired upon.
1.57 The Drawbridge
When lowered, the two castle squares on either side of it have strong cover against shots from outside. When raised, the cover is total.
1.6 Movement
Each character has a certain number of movement points, printed on the counter (in blue). Each square crossed costs a number of points proportional to the difficulty it represents (see the Terrain Types Table). Each turn, a player may move all, some, or none of their characters, using all or part of each one's movement potential. Unused movement points cannot be transferred from one character to another, nor saved for future turns.
1.61 Movement Restrictions
- Characters may not pass through squares containing living enemy characters, unless those characters are stunned. However, it is possible to pass through squares containing friendly characters.
- Walls and arrow-slits cannot be crossed. To enter a tower or the keep you must pass through a doorway. Arrow-slits are only accessible from the inside.
- Battlements cannot be crossed from the outside except with a ladder (or siege tower, see Section Two). Battlements are accessible from the inside via stairways.
- Squares containing three human corpses or one horse corpse cost one extra movement point.
- Squares containing six human corpses or two horse corpses (or the equivalent of three humans and one horse) are impassable.
1.62 Stacking of Counters
During the game, characters may pass through squares containing a friendly character, a stunned character, or a dead character. But, at the end of any movement, there cannot be two living characters on the same square, even if one of them is stunned.
EXCEPTIONS: A character who falls from a ladder may end up on top of another character (see 1.94), and a siege tower may hold 2 characters per square (see 2.45).
1.7 Combat
When two or more characters find themselves on adjacent squares, they may engage in hand-to-hand combat (this is optional). The decision to attack is made by the player whose turn it is, and their characters are called the attackers. In the following phase of play, they will defend themselves from the counterattacking enemy.
To resolve a combat, divide the attacker's strength (the figure in black) by the defender's defense value (the figure in red). This gives a force ratio corresponding to one of the columns in the appropriate Combat Results Table. The attacker rolls a die to learn the exact result. On the Game Aid Card there are two Combat Results Tables, one against opponents on foot and one against riders.
When calculating the force ratio, round the resulting figure in the defender's favor (if necessary) to match one of the ratios possible on the table. Thus, an attacker of strength 8 against a defender of defense 3 gives a ratio of 2.3 to 1, which is rounded down to 2 to 1 (2-1). It is impossible to attack at less than 1 to 1 (1-1).
1.71 Effects of Terrain on Combat
The force ratio of a combat may be modified by the nature of the terrain each of the characters involved stands on. As shown on the Terrain Types Table (on the Game Aid Card), a terrain may be neutral (0), favor its occupant (+), or put them at a disadvantage (-). Depending on the terrain occupied by attacker and defender, the original force ratio may be shifted left or right, as indicated by the explanatory chart placed before the results tables.
1.72 Multiple Combat
When a character is adjacent to several opponents, they may choose to attack all of them, some of them, or none. If they decide to attack more than one, they must add together the defense points of those attacked to calculate the force ratio.
When two (or more) characters decide to attack the same target, they may add their attack points together to calculate the force ratio. If they attack together they may also shift the ratio one column to the right (see example below). This rule does not apply against riders. When a combat result indicates that one of the attackers or defenders has been stunned or wounded, it is the player who controls those characters who decides which one is affected. By contrast, an "attacker retreats" or "defender retreats" result applies to all characters of that side who took part in the combat.
If the attackers decide to attack together while standing on different terrain, the least favorable terrain applies to the whole combat.
Example: Suppose two characters attack an enemy at 4-1. If one of them is on (+) terrain and the other on (-) terrain, both are considered to be on (-) terrain. If the defender were on (+) terrain, the force ratio would need to shift 2 columns to the left, i.e. down to 2-1, but since several attackers are involved, it shifts one column back to the right, so the combat is resolved on the 3-1 column.
1.73 Advance After Combat
If, as a result of combat, the attackers or the defenders had to retreat (or one of them was stunned or killed), the victorious player may advance one of their characters: 2 squares if on foot, 3 squares if mounted. The first square crossed must be one vacated by the enemy (or the one occupied by the stunned or dead character). This advance is limited to one square if the character making it is adjacent to an enemy before moving.
Advancing after combat is not mandatory, but the option to advance must be exercised immediately, without waiting for other ongoing combats to be resolved. Only one character involved in the combat may make this kind of advance. Movement points used in an advance after combat are not deducted from that character's movement allowance on the following turn.
1.74 Combat Restrictions
It is not possible to fight an opponent on the other side of an arrow-slit. As a general rule, an attack is impossible when the attacker cannot enter the attacked square.
EXAMPLE: A character on a ladder may only attack the character on the battlement square their ladder is resting against.
NOTE: Given the three-dimensional nature of the game, see the back of the scenario booklet for combat restrictions in cases where attacker and defender are not at the same height.
1.75 Special Case: The Keep's Doorway
A character attacking from outside against an enemy standing on the keep's doorway is considered to be on unfavorable terrain (-).
1.8 Special Equipment: The Drawbridge
To raise or lower the drawbridge, there must be a character on the winch square (South tower). They must spend an entire turn there without moving, firing, or fighting, in order to operate it.
At the end of the turn, the drawbridge counter is placed or removed depending on the action taken.
Any character on the drawbridge when it is raised is thrown into the moat, onto a square adjacent to the drawbridge (the controlling player chooses which one), and is stunned by the fall. If they were already stunned, or already wounded, the fall is fatal.
1.9 Special Equipment: Ladders
1.91 Transport and Setup
A ladder may be carried by any two characters. In that case the "horizontal ladder" counter is used and the characters are placed beneath it. Characters carrying a ladder cannot engage in combat or fire. Their movement potential is reduced by 2 points.
When one of the characters (or both) reaches the foot of the curtain wall, the ladder may be raised, replacing the "horizontal ladder" counter with a "vertical ladder" counter, which may be placed on either of the two squares previously occupied by the horizontal ladder, pointed at one of the two adjacent wall squares.
Note that towers cannot be scaled, nor can the bastions on either side of the drawbridge.
1.92 Changing Orientation
A vertical ladder may be shifted one square, or turned to face a different (and of course adjacent) wall square, by two characters who must be adjacent to the ladder's square and who spend 2 movement points on the operation. It is impossible to shift or pivot a ladder if someone is on it.
1.93 Movement, Fire and Combat
Climbing the ladder costs 3 movement points, as does crossing the square it occupies.
A shooter on a ladder may only fire at the wall square directly in front of them, and the target receives strong cover.
Characters on ladders have no cover and, in addition, are considered to be on unfavorable terrain (-) in combat.
Characters may move from the top of the ladder to the battlement square facing it by spending 4 movement points, or via an advance after combat (see 1.73).
1.94 Toppling a Ladder
A character occupying a wall square directly opposite a ladder may, instead of making a normal attack or shooting, attempt to knock it down. The attempt is made during that character's combat sequence, by rolling a die.
- 1 to 6: the ladder falls
- 7 to 10: the ladder stays up
If a ladder falls, its counter is replaced with a "horizontal ladder" counter, placed by the player who knocked it down so that one of the two squares it occupies is the one where it had been standing. A character who was on the ladder when it falls, falls as well, and must be placed by their owner on one of the squares adjacent to the one the vertical ladder occupied — except, of course, wall squares.
A character who falls may land on top of another character, or on the freshly toppled ladder; the one who falls is wounded, and the one underneath is stunned. A character who is already stunned or wounded dies if they fall from a ladder. If a ladder falls onto a character, it does not affect them.
ATTENTION: WITH THE RULES SEEN SO FAR, YOU CAN ALREADY PLAY SCENARIO 1. WANT TO TRY IT?
Section Two
2.1 Special Terrains
2.2 "Filled Moat" Counters
Before launching the assault on the walls, the besieging player may place "filled moat" counters on any squares they wish. The number of such counters available is stated in each scenario.
Filling in a moat square not only makes it easier for characters on foot to move through, it is also the only way to bring siege towers and battering rams up to the foot of the wall.
In scenarios covering several days of siege, these counters are redeployed each day, before the assault.
2.3 "Breached Wall" Counters
2.31 Placement of Counters
In one-day scenarios (such as Scenario 2), the attacker places their breach counters ("breached wall") following the same procedure as the filled-moat counters. In scenarios covering the whole siege, however, they are only placed on squares that have been damaged by catapults, ballistas, or battering rams (see Section Four).
2.32 Fire and Cover
You may fire through or at a "breached wall" square. The breach allows firing into the interior of the castle. Characters in a breach have medium cover from anywhere they are fired upon.
2.33 Movement
When a breach opens in battlements, walls, or arrow-slits, the square it occupies becomes accessible from all the squares surrounding it, except where an intact wall section still blocks passage. From a moat square (filled or not) or from battlements, you can move into a breach square by spending 2 movement points. Conversely, to move from a breach square to a battlement, tower, or keep square costs 3 points.
2.4 Special Equipment: The Siege Tower
2.41 Moving the Tower
Three characters placed inside the tower allow it to move 2 movement points per turn, and only in a straight line, forward or backward (see illustration). At the start of the assault, the attacker must bring the tower onto the map from one of its edges, after giving it the desired orientation.
If one of the characters used to move the tower engages in combat, the tower cannot move on the following turn.
A tower may only advance across open-ground squares or filled-moat squares.
2.42 Movement Inside the Tower
A tower can carry 3 characters on its upper level, in addition to the three who move it. A character entering a square occupied by a tower must spend 2 movement points to cross it or to access the lower level. To climb to the top they must spend 2 more points. Moving between squares on the same level only costs 1 movement point per square. Each square of the lower level is considered connected to the corresponding square of the upper level, and vice versa.
2.43 Firing From a Tower
Within a radius of 10 squares, the shooter need not worry about characters or obstacles in between. However, firing is not possible if the target has a character of the shooter's own side adjacent to them and at the same height (for greater realism you may use the option proposed in the optional rules, page 26). In addition, targets on scrub or embankment squares have no cover at all within the indicated radius.
CAUTION: Trees, the keep and the castle's towers continue to block the line of fire. You can fire over the walls if the character being fired upon (inside the castle) is at least as far from the wall as the one firing from the tower (for distance purposes the wall is counted as straddling the two squares it separates).
2.44 Restrictions on Fire and Cover
It is possible to fire at a tower square, but not through it. Characters on top of a tower receive light cover. Characters inside the tower receive total cover, but cannot fire.
2.45 Movement and Combat in a Siege Tower
When a tower is adjacent to one or more battlement squares, characters on top of the tower may move onto them (or vice versa), unless they are occupied by enemy characters. Such a move costs 2 points and may be made as an advance after combat (see 1.73).
Characters on top of a tower and those on battlements may engage in combat if they are on adjacent squares. Combat is also possible among the three squares that make up the top of the tower. However, combat is not possible between characters on different levels of the tower.
Characters inside the tower may attack characters on adjacent ground-level squares (and be attacked by them).
2.46 Stacking
The tower's lower level holds three characters, and so does the upper level; they are placed respectively beneath and above the tower counter, meaning there can be two characters on the same square.
ATTENTION: WITH THE RULES SEEN SO FAR, YOU CAN ALREADY PLAY SCENARIO 2. WANT TO TRY IT?
Section Three
3.1 Terrain Types / Camp Map
3.2 Restrictions on Fire and Cover
3.21 Scrub
You may fire at scrub squares, and through them. If the target is on a scrub square, or the line of fire crosses one, the target receives light cover.
3.22 Trees
If there are trees between the shooter and the target, the shot is impossible. However, you may fire at a tree square if the line of fire does not cross any other tree square. The target receives light cover.
3.23 Embankments
Embankments do not block the line of fire unless it crosses over the top of one. When that is the case, the shot is only possible if the character below is at least as far from the embankment as the one above. If they are closer, the shot is impossible, unless the lower character is on the embankment square itself, in which case they may fire, but may also be fired upon. Note that the distance here is measured from the square itself, unlike shots over battlements, which are based on distance from the wall rather than from the battlement square. A character on an embankment has medium cover if the line of fire crosses over the top of it.
3.24 Tents
You may fire at a tent square, but not through it, unless it has been destroyed by fire. A character in a tent receives light cover.
3.25 Trenches
You may fire at a trench square, and through it, even if it is occupied. A character in a trench receives strong cover.
3.3 Rules Exclusive to Riders
3.31 Cover
A rider (with their horse) occupies 2 squares. If the two do not offer the same cover, the more favorable of the two applies.
Example: A rider occupying one open-ground square and one scrub square receives light cover.
3.32 Movement Restrictions
The following terrains are impassable to horses and their riders: battlements, stairways, doorways and the interior of towers or the keep, the moat (filled or not), breached walls, trees and tents, as well as any squares occupied by siege engines.
As for trenches, riders may cross them, even if occupied, but may not stop on them (an exception to the general rule forbidding passage through squares containing living enemy characters, see 1.61).
3.33 Mounting and Dismounting
Mounting or dismounting are actions that use up a whole turn. To mount, the character must be on one of the squares adjacent to their horse.
Only riders may mount horses captured in combat. When a rider mounts or dismounts, the appropriate counters are exchanged (mounted knight for dismounted rider plus loose horse, or vice versa).
A wounded rider may not mount or dismount.
3.34 Riderless Horses
Riderless horses remain motionless until mounted again or led by the bridle.
To lead a horse by the bridle, any character, even a wounded one, need only pass through one of the squares adjacent to the animal. The character may continue on their way, followed from then on by the horse, which is treated as an extension of the character leading it.
3.35 Fire and Combat Against Horses and Riders
When a rider is unhorsed as a result of combat or missile fire, the appropriate counter (stunned, wounded, or dead rider) is placed on one of the squares adjacent to the horse's, whose own counter is also changed to a horse alone, alive or dead depending on the combat result.
If a player decides to attack a riderless horse, the combat or shooting is resolved on the same table as against a mounted rider, of course ignoring any reference to the rider in the result. Riderless horses have 1 defense point.
Important: For hand-to-hand combat purposes, a rider is considered to occupy the less favorable of the two terrain squares they occupy.
3.4 Special Equipment: The Ballestón (Heavy Crossbow)
3.41 Operation
A ballestón may fire once every three turns, in the same sequence as crossbowmen. For this to be possible, there must be 2 characters adjacent to it, one of whom must be an engineer. To determine the result of the shot, roll a die and consult the table appropriate to the type of target.
Note: To track the turns in which the ballestón cannot fire, blank counters marked 1, 2 and 3 may be placed on its counter.
3.42 Restrictions on Fire
It is impossible to fire through a square containing a ballestón.
3.43 Movement Restrictions
Once deployed on the map, a ballestón cannot be moved. In scenarios covering several days, it may be redeployed between assaults.
No one may pass through a square containing a ballestón.
3.5 Fires: Starting and Extinguishing
3.51 Starting a Fire
A character may set fire to a siege tower or a tent by remaining on an adjacent square for a full turn. If, on the turn following their arrival, they are not driven off by an opponent and do not move during their movement phase, the character loses their combat and shooting phases and, instead, places a flame counter on the desired square.
Note: A character on a battlement cannot use this method to set fire to a siege tower; they must use incendiary arrows or boiling oil instead (see Section Five).
3.52 Spread of Fire
At the end of their opponent's phase of play, the player checks, for each square where they started a fire, whether it spreads — which can only happen if one of the adjacent squares contains a siege engine (or part of one), or a tent (or part of one). Roll one die for each adjacent square that meets these criteria and consult the "Spread" column of the Fire Table. This does not apply to fires extinguished by the opposing player during their own phase.
3.53 Extinguishing
A character adjacent to a square on fire may attempt to put it out. Each character may make only one attempt per turn, and only against one square. Several different characters may make separate attempts against the same square. While attempting to extinguish a fire, a character cannot move, fire, or engage in hand-to-hand combat. During the combat phase, roll on the Fire Table, "Extinguish" column, once per attempt.
3.54 Evacuating a Burning Square and Movement Restrictions
If a fire spreads to a square occupied by a character (or starts there), that character must retreat one square immediately, or else be wounded on the first turn spent on the burning square, and killed on the second. A burning square is impassable.
A stunned character whose square catches fire immediately regains consciousness if the controlling player rolls 6 or less on a die. Otherwise, they perish in the flames.
3.55 Fire Damage
If a square burns for three turns in a row, its contents are irretrievably destroyed. Blank counters marked 1, 2 and 3 may be used to track the time.
Note: It is enough for one square of a siege engine to burn for 3 turns for the whole engine to be considered destroyed.
ATTENTION: WITH THE RULES SEEN SO FAR, YOU CAN ALREADY PLAY SCENARIO 3. WANT TO TRY IT?
Section Four
4.1 How to Destroy the Castle Walls
Means Available to the Attackers
To bring down the walls, attackers have three different siege engines available: catapults, ballistas, and battering rams. The first two hurl large stones from a distance and are generally deployed off the map in scenarios. Battering rams, by contrast, must be brought up to the foot of the wall to attack it by direct contact. While bombardment from a distance excludes any other form of action, the ram is used during the assault on the castle.
4.12 The Siege Sheet
Damage inflicted on the walls is recorded on the Siege Sheet included with the game (players may photocopy one of the sheets for this purpose). It carries a reduced plan of the castle and, close by, the Bombardment Table, which allows actions taken to be resolved quickly. The explanations on the sheet complete the operating rules for the various siege engines described in this section.
4.13 The Degrees of Demolition
The castle's walls are destroyed in four stages:
- Lightly damaged wall
- Damaged wall
- Heavily damaged wall
- Demolished wall
Each stage of demolition corresponds to a "D" result on the Bombardment Table.
In bombardment from a distance, demolition is limited to one stage per square per day. Using a battering ram, by contrast, allows several stages of wall demolition to be achieved in a single assault. However, while the ram is a faster and more effective means of demolition, it is also more dangerous to use and easier to neutralize.
For movement, combat and cover purposes, damaged squares are treated as normal until destruction is complete.
4.14 Consequences of Demolition
When a battlement, wall, or arrow-slit square is demolished, a "breached wall" counter is placed there (see Section Two). Any character on that square at the moment of demolition is wounded by the collapsing wall.
4.2 Special Equipment: The Catapult and the Ballista
4.21 Operation
The same catapult or ballista cannot bombard more than one square per day, although it may change targets from day to day. On a given day, several siege engines may bombard different squares, or combine to bombard a single square.
A catapult has 1 bombardment point. A ballista has 3 bombardment points.
Each day, the besieger chooses which square (or squares) to bombard and how many engines to assign to each. They then add up the bombardment points against each square and consult the Bombardment Table. They are entitled to one die roll per square. If it is a tower or keep square, subtract 1 from the roll (their walls are rounded and thicker).
The keep's walls cannot be bombarded until at least one section of the outer walls has been destroyed, and even then only the three keep-wall squares closest to the breach may be targeted.
The two outer-wall squares flanking the drawbridge are treated as battlements for bombardment purposes.
4.22 Restrictions on Fire and Movement
When deployed on the map, catapults and ballistas suffer the same firing and movement restrictions as ballestóns (see 3.4).
4.23 Repairing Damaged Catapults and Ballistas
As you might expect, both types of engine — not always well built to begin with — can break down with use (result "C" on the Bombardment Table). Their power may be reduced or nullified (the reduction in bombardment points is distributed among the engines as the player prefers). It takes one day to repair damaged engines, however many there are. A machine under repair cannot be used. Engines destroyed by fire, even partially, cannot be repaired.
4.3 Special Equipment: The Battering Ram
4.31 Movement
A battering ram moves in the same way as a siege tower (see 2.41). However, no characters may ride on top of it, only beneath it, and a maximum of three (one per square), who move it and operate it.
4.32 Operation
If a ram reaches a square adjacent to a castle wall, it may be used starting from the combat phase following its move (step 4 of the phase of play).
A battering ram has 9 impact points.
Roll the die every two turns, ignoring "C" results. Damage is recorded each time on the siege sheet. A ram may attack damaged squares or intact squares. If it attacks a tower square, subtract 1 from the roll. A ram cannot be used against the keep's walls.
The two squares flanking the drawbridge are treated as battlements when attacked with a ram.
4.33 Restrictions on Fire and Cover
The three squares occupied by the ram block the line of fire of characters at the same level of elevation.
Characters sheltering behind the ram receive total cover, but cannot fire.
4.34 Rams and Hand-to-Hand Combat
If any of the three characters operating the ram engages in hand-to-hand combat, or attempts to extinguish a fire, the ram's operation is interrupted and cannot resume until the following turn.
A character sheltering behind the ram may attack adjacent squares and be attacked from them. If one of its three operators is stunned or killed, the ram cannot resume operation until that operator recovers or is replaced by another character.
ATTENTION: WITH THE RULES SEEN SO FAR, YOU CAN ALREADY PLAY THE LONG SIEGE OF SCENARIO 4. WANT TO TRY IT?
Section Five
5.1 Carts and Draft Animals
5.11 General Case
Carts must be pulled by a horse or an ox. The animal must always be on one of the squares in front of the cart, as shown in the following illustration.
The ox (which occupies a single square) or the rear half of the horse must be on one of the squares marked with an "X." Note that only the rear half of the horse needs to be adjacent to the cart.
Draft animals are led just like riderless horses (see 3.34) and suffer the same movement restrictions as they do. The two squares occupied by a cart block the line of fire of characters at the same level of elevation.
Harnessing an animal to a cart, or freeing it, uses up a character's entire phase of play, regardless of whether the animal is alive or dead.
5.12 Fire and Combat Against Draft Animals
If a player decides to attack a draft animal, the combat or shot must be resolved as though against a mounted character, of course ignoring any reference to the rider. Draft animals have 1 defense point.
5.2 Special Equipment: The Mantlet
5.21 Movement
A character may move a mantlet if they are on its square, which reduces their movement potential by 2 points. Terrain impassable to horses is also impassable to mantlets, except for filled moats.
5.22 Orientation and Cover
From the moment it appears on the map, the mantlet's orientation must be made very clear. Its base must be set flush against one side of the square (it is suggested that the counter be trimmed along the base of the drawing for greater clarity).
If fired upon while on the mantlet's square, and the line of fire passes through the side it faces, or either of the two adjacent sides, the bearer receives strong cover, wherever the shooter is. Against shots whose line passes through any of the other three sides, there is no cover at all.
5.23 Restrictions on Fire and Movement
The square occupied by a mantlet blocks the line of fire of characters at the same level of elevation. A character behind a mantlet may fire in any direction. Squares containing a mantlet are impassable to horses.
5.24 Combat Restrictions
Combat through the front square is impossible, and it is likewise impossible to retreat through that side.
5.3 Incendiary Arrows and Boiling Oil
5.31 Incendiary Arrows
Archers may fire incendiary arrows instead of normal ones. They are harmless against characters, but can set siege engines ablaze.
Incendiary arrows may only be fired at targets at short range. Instead of consulting the shooting tables, roll a die and consult the Fire Table in the column corresponding to the target (since it reflects both the difficulty of hitting it and of setting it alight).
If the attempt succeeds, a flame counter is placed.
5.32 Barrels of Boiling Oil
Defenders on the battlements may pour barrels of boiling oil onto attackers and their siege engines while they are on squares adjacent to their own. Oil may be poured onto characters climbing a ladder, occupying a section of breached wall, or inside a siege tower, but not against those on top of it, who are out of range (although, if the tower catches fire, they will have to abandon it).
A character pouring oil uses their combat phase to do so, and therefore cannot fire or engage in hand-to-hand combat that same turn.
When a character moves a barrel of oil, both counters are placed together, and the character's movement potential is reduced by 2 points.
Any attacker struck by boiling oil while not sheltered by a siege engine immediately suffers an attack on the 8-1 column of the table against characters on foot. If sheltered by a siege engine, the pourer must roll a die and consult the Fire Table, "oil barrels" column, to see if it catches fire. If so, the 8-1 attack takes place and, in addition, the flame counter (the reverse side of the barrel counter) is placed on the square. Whatever the combat result, the character must retreat immediately. If the fire does not catch, the barrel is removed from play.
When an attack is aimed solely at a character and not at a siege engine, the barrel is removed after the combat.
Important: All the rules on fire in Section Three (spread, extinguishing, evacuation and damage) also apply to incendiary arrows and boiling oil.
5.4 Healing Wounds
In scenarios that run over several days or weeks, wounded characters may recover before the siege ends. At the end of each day, roll one die for each newly wounded character and consult the Healing Table (Siege Sheet). Note on the sheet when they will have recovered, and on that day the "wounded" counter may be replaced with the normal one, unless the character died in combat before then. (Translator's note: This means that in a pinch, a player may send wounded characters into battle. If they suffer no new wound, this does not affect their healing schedule; but if they are wounded again while already wounded, they die.)
Optional Rules
Each player may invent their own optional rules and further enrich the world of SIEGE. Here we offer two, and you will find others in CRY HAVOC.
Panic and Rout
When a character dies, those on the same side standing near them may fall prey to panic, which does not affect everyone equally, which is why characters are divided into 3 categories: knights, soldiers, and peasants (or civilians).
Knights feel no fear and, for that reason, are never subject to panic. Soldiers may be, if a knight or another soldier dies within a radius of 3 squares of them. Peasants and civilians may be, if any character dies within a radius of 3 squares of them. This, of course, applies only to friendly characters, not enemies. Every time someone dies and panic could result, roll a die and consult the following table, applying the results immediately.
The affected player is the one who rolls the die and who decides which of their characters (among those eligible) are affected. The appropriate counter is placed (PANIC or ROUT, printed in English on the counters). Remember that only characters within a 3-square radius can be affected, so there may be fewer eligible characters than the result calls for. Conversely, if the player wishes, they may put into panic or rout all of their characters within the 3-square radius, even if the result does not require it.
Effects of Panic
A character in the grip of panic must immediately retreat 3 squares, moving as far from the enemy as possible with each square crossed. If they are an attacker who had already breached the castle, they head for the nearest escape route: a breach in the wall, a ladder, a siege tower, or a lowered drawbridge. The retreat may pass through friendly characters, but not through squares adjacent to enemies in an attacking position. If they cannot retreat, the panicked character is wounded.
Retreat due to panic does not prevent movement on the following turn.
Characters in the grip of panic cannot come into contact with enemy characters: if attacked, their opponents receive a one-column adjustment in their favor, and results affecting the attackers are not taken into account.
A character remains panicked until, at the end of their movement phase, they find themselves adjacent to a knight or sergeant, or more than 6 squares from the nearest enemy. In either case, the panic counter is removed.
Effects of Rout
A character in rout behaves like one in panic, with the following changes:
- They must retreat a distance equal to their movement allowance, respecting terrain limitations, each turn, moving as far from the enemy as possible.
- To stop routing, the character must end a movement sequence adjacent to a knight or sergeant, in which case the rout counter is removed.
Leaving the Map
Characters who leave the map due to panic or rout cannot return, but unless they were wounded, they do not count as casualties at the end of the game.
Important note: A panicked character automatically goes into rout if they again find themselves within a 3-square radius of a friendly death that could trigger panic once more.
Defenders of the castle are not subject to panic or rout while they remain inside it.
Aim
This optional rule has two parts. The first deals with characters who miss a shot against a target in contact with a friendly character. This rule overrides the shooting prohibitions established in 1.44 and 2.43. The second part aims to individualize each shooter by giving them greater or lesser shooting skill.
"Errare humanum est"
In the Middle Ages, combats were often an enormous mess, made worse by the absence of uniforms. To simulate this, every time a shooter misses, the controlling player must roll a die a second time to see whether they have accidentally wounded one of their own companions, consulting the Misfire Table. This rule only applies if the friendly character is on one of the 6 squares adjacent to the target and at the same level of elevation. If there are several possible candidates, the "lucky" one is chosen at random. Naturally, if the line of fire is blocked by an obstacle, the character cannot be hit.
The usual modifiers for distance and the shooter's condition apply.
Shooting Skill
To individualize the shooting skill of their characters, players write in pencil on each counter a number from -3 to +3. The total of the numbers assigned must equal 0 within each category: crossbowmen, short bow archers, and long bow archers. This number is added to or subtracted from the die roll whenever the character fires or checks whether they wounded a friend. This modifier does not replace the usual ones.
Example (Scenario 5)
- Normans: Crossbowmen/Alric (+2), Edric (-2)
- Welsh: Crossbowmen/Emlyn (-1), Gawain (+1) With longbow/Aylwin (0), Dylan (-1), Gwyn (-2), Idris (0), Owen (+3), Myrlin (0)
We conclude that the best crossbowman is Edric and the best archer is Gwyn.
Attention: Once these modifiers are assigned, they cannot be changed during the game.
How to Play SIEGE (Rules Summary)
Sequence of Play
At the start, players choose one of the proposed scenarios. Some scenarios cover a single day, others several weeks of siege. For the latter, players must use a siege sheet on which to record damage suffered by the castle walls and mark the end of each day of siege. When play begins, each side places its characters in the positions indicated at the outset. The first turn then begins. In turn, players move and fight with their characters. Archers and crossbowmen may fire. The detailed organization of each turn is given on the back of the historical booklet. The victory conditions specific to each scenario determine the winner at the end of the game.
Movement
The number printed in blue on each counter indicates the number of movement points that character has each game turn. The character may use all or part of these points and move in any direction. Depending on the difficulty of the terrain crossed, each square costs more or fewer movement points (see the Terrain Type Table). Note that certain moves are forbidden, or require particular conditions inspired by reality: to climb onto battlements you must use a stairway or climb a ladder, a mounted character cannot enter the castle moat, and so on.
Combat
To attack, a character must be on a square adjacent to the enemy's. Certain special restrictions are found on the back of the scenario booklet. Combats are resolved using the 10-sided die numbered 0 to 9 (0 counts as 10). The combat result also takes into account the attacking character's attack strength (the number printed in black) and the defending character's defense strength (printed in red). Comparing the two figures gives an attacker/defender force ratio corresponding to one of the possible result columns (see the Combat Table). The die then gives one of the 10 results in the corresponding column.
Example: A knight of strength 24 attacks a soldier of defense strength 7. The force ratio is 24 against 7, i.e. 3.4 to 1, which is rounded to 3 to 1 (column 3-1 of the Combat Table against characters on foot). If the player controlling the knight rolls a 2, the result is D = defender stunned, so the soldier's counter is flipped over. If the die had shown a 7 (result A), it would have been the knight who was wounded instead. Note that the force ratio in a combat can be modified if there are several attackers, or if the characters involved are on different terrain.
Shooting
Whenever a shot is possible, its effectiveness depends not only on the weapon used (longbow, short bow, crossbow, or ballestón), but also on the shooting distance and the cover the target has. Obviously, it is easier to hit someone who is close and in the open than someone who is far away and hidden behind a tree... As with combat, the die is rolled to determine the shooting result (see the Shooting Table). Note that knights are better protected even on foot, and that a wounded shooter has poorer aim. On the back of the scenario booklet we explain certain special cases, chiefly those in which shooter and target are at different heights.
The Scenarios
The scenarios are presented in order of increasing complexity, from the simplest and shortest, involving few characters, to the most complex and lengthy, such as Scenario 6, which brings together in a single campaign almost all the characters from both CRY HAVOC and SIEGE.
Before starting a scenario, read it all the way through, paying special attention to the victory conditions. It is also important to lay out the maps as indicated at the start. Letters A through H refer to the SIEGE maps, and numbers 1 through 8 to the CRY HAVOC maps.
Scenarios 1 through 5 can be played with SIEGE material alone, while playing 6 and 7 also requires CRY HAVOC.
Characters entering the map: Characters who enter the map during a scenario begin spending movement points from the first square they reach, and move normally, subject to the limitations of the terrain. Half-squares along the edges are usable and count as full squares.
Characters leaving the map: Any character who voluntarily leaves the map cannot return until the end of the game (or of the day, for scenarios covering several days). A character who must retreat as a result of missile fire or combat, and who would be forced to leave the map at some point during that movement, instead stays on their square and is wounded. If already wounded, they die.
Scoring for losses inflicted on the opponent: In some scenarios, one side or the other (or both) scores victory points for inflicting casualties on the other. The scale is as follows:
- Per KNIGHT KILLED: 5 points
- Per PEASANT KILLED: 2 points
- Per OTHER CHARACTER KILLED: 3 points
- Per KNIGHT WOUNDED: 3 points
- Per PEASANT WOUNDED: 1 point
- Per OTHER CHARACTER WOUNDED: 2 points
Small map glossary
- Side: Lado
- The Camp: El Campamento
- The Castle: El Castillo
- The Peep (Keep): El Torreón
- The Winch: El Torno
- North Gatetower: Torre al Norte de la puerta
- South Gatetower: Torre al Sur de la puerta
- Morrigan's Tower: Torre de Morrigan
- Owl Tower: Torre de la Lechuza
- The Round Tower: Torre Redonda
Scenario 1: Wulfric the Felon
Playing Surface: Castle map
The Story
Sir Wulfric pays a courtesy visit to his neighbor Sir Lacy, intending to seize the castle by surprise. To carry out his dark designs he counts on the knights accompanying him and on a small troop of men-at-arms waiting hidden near the castle. After a hearty and peaceful dinner, insults are exchanged between Sir Wulfric and Sir Lacy, and combat begins in the keep.
The Cast
Defenders
- Knights on foot: Sir Lacy, Sir Mortimer.
- Civilian: Blodwin (Sir Lacy's wife).
- Archer (longbow): Aylwin.
- Pikemen: Aki, Bryn, Mordred, Stori.
- Sergeant: Morgen.
Attackers — Group 1
- Knights on foot: Sir Clarence, Sir Hughs, Sir Wulfric.
Attackers — Group 2
- Knight on foot: Sir Fitzwaren.
- Sergeants: Pugh, Llewellyn.
- Crossbowmen: Edric, Emlyn.
- Men-at-arms: Cliff, Godric, Shawn.
- Halberdiers: Bors, Evans, Fursa.
Equipment: Attacker Group 2 carries 3 ladders.
Starting Positions and Start of Play
- The Defender places their characters first, with the knights and Blodwin anywhere in the keep except the doorway. The others anywhere else, except the keep and the winch square. The drawbridge is lowered at the start of the game.
- After the defenders are placed, the Attacker places Group 1 anywhere in the keep and begins the first turn of play. Group 2 may enter the map from any of its edges starting on turn 2. The whole group must enter on the same turn, but may be split into subgroups at the Attacker's discretion.
SPECIAL RULE: No defender may occupy the winch square before turn 2.
Victory Conditions
- If all the knights and sergeants on one side die, their men flee or surrender and the game ends, with the other side winning.
- If the attackers control the keep but cannot take the rest of the castle, the defenders win. A side is considered to control the keep if all of their opponents inside it have been eliminated (Blodwin may be captured, see below).
- If, at any point in the game, Blodwin finds herself adjacent to an enemy knight who is not himself in contact with a friendly knight, she surrenders. The attackers then win the game, unless Blodwin's surrender took place in the keep and the attackers cannot get out. In that case the game is declared void, since Sir Wulfric will manage to save his life and those of his men, along with a purse of gold, in exchange for Blodwin's life (but he will not have taken the castle).
Scenario 2: Storming the Breach
Playing Surface: Castle map
The Story
Sir Lacy's border castle has been under siege for a month. The besiegers have finally managed to breach the wall, but Sir Lacy has refused every offer of surrender, because he knows Sir Wulfric's army is on the verge of deserting. Harvest time is near, and before his forces melt away, Sir Wulfric decides to launch the final assault. (Translator's note: Medieval armies, made up mostly of peasant levies from the same district, suffered extremely high desertion rates during the farming season.)
The Cast
The Besieged
- Knight on foot: Sir Lacy.
- Sergeant: Morgen.
- Peasants: Harry, Jasper, Mathew.
- Pikemen: Aki, Arnold, Brendan, Bryn, Gareth, Hayden, Mordred, Stori.
- Archers (longbow): Aylwin, Gwyn, Myrlin.
The Besiegers
- Knights on foot: Sir Clarence, Sir Fitzwaren, Sir Hughs, Sir Mortimer, Sir Wulfric.
- Halberdiers: Bors, Evans, Fursa.
- Crossbowmen: Alric, Edric, Emlyn, Gawain.
- Men-at-arms: Cliff, Godric, Shawn.
- Sergeants: Llewellyn, Pugh.
- Peasants: David, Geoffry, Ivor, Morris, Roger, Will'm.
Equipment: The besiegers have 3 ladders and 1 siege tower at their disposal.
Starting Positions
- The besieger places three "breached wall" counters on 3 battlement squares of their choice, and 8 "filled moat" counters on as many moat squares.
- The besieged place their characters as they wish inside the castle.
- The besieger begins the first turn of play, bringing in their characters from anywhere on the map. They may keep some in reserve and bring them in later.
Victory Conditions
- The besiegers win if, at any point in the game, there is no besieged character on the "breached wall" squares or adjacent to them. The besieged will withdraw to the citadel and negotiate their surrender.
- The besieged win if the besiegers fail to meet the condition above.
- The following scale allows the level of victory to be measured according to losses (the loss-point calculation was explained earlier).
If the besieger wins:
- Decisive victory, if losses do not exceed 20 points.
- Substantial victory, if losses do not exceed 30 points.
- Marginal victory, if losses exceed 30 points.
If the besieged win:
- The same as for the besieger, but with 10, 15, and more than 15 points respectively.
Scenario 3: The Camp Is Burning!
Playing Surface: Camp map
The Story
During the siege of his castle, Sir Fitzwaren, accompanied by a small troop, decides to attack the besiegers' camp in order to burn the siege engines and the food stores, delaying the assault as long as possible.
The Cast
Camp Defenders
- Knights on foot: Sir Mortimer, Sir Wulfric.
- Riderless horses: those of Sir Mortimer and Sir Wulfric.
- Sergeant: Pugh.
- Peasants: Harry, Ivor, Jasper, Morris, Roger.
- Crossbowmen: Edric, Gawain.
- Pikemen: Arnold, Brendan, Bryn, Gareth, Mordred, Stori.
- Engineers: Baldric, Jones.
Defenders' equipment: 1 ballestón, 1 catapult, 2 ballistas and 1 siege tower.
Note: Catapults and ballistas have the same movement restrictions as ballestóns. In this scenario the siege tower cannot move.
The Attackers
- Mounted knights: Sir Clarence, Sir Hughs, Sir Fitzwaren, Sir Lacy.
- Sergeants: Llewellyn, Morgen.
- Archers (longbow): Aylwin, Owen.
- Halberdiers: Bors, Evan, Fursa.
Equipment: Each attacker carries oil and tow, allowing them to start fires following the procedure described in the rules.
Starting Positions
- The camp defender deploys first. Characters may be anywhere on the map, and the war machines must be within the area bounded by the trenches and the trees. No machine may be on a tree, embankment, or tent square.
- The attacker begins the first turn of play, bringing their characters in from edges A and/or D of the map. Some may be kept in reserve and brought in later from either of those two edges.
Victory Conditions
- The attackers must achieve at least 16 destruction points to win, according to the following scale: Ballestón or catapult: 4 points — Siege tower: 10 points; Tent: 1 point per square destroyed — Ballista: 6 points.
- The defenders win if they manage to inflict at least 25 loss points (as explained earlier) on the attackers.
- If both sides achieve their victory conditions, the game is considered a draw.
Scenario 4: The Duke's Justice
Playing Surface: Castle and Camp maps
The Story
Sir Lacy owes fealty to his Duke, Sir Clarence. However, the rapacity of Sir Lacy and his mercenaries has stirred discontent among the peasants and the other nobles of the duchy. The Duke has summoned Sir Lacy to the ducal court to answer for his conduct, but Sir Lacy refuses to appear. Rallying his loyal men, the Duke lays siege to Sir Lacy's castle, which he must take within less than two weeks — time enough for Sir Wulfric, Sir Lacy's brother, to come to his aid with a small band of mercenaries.
The Cast
The Besieged — Castle Garrison
- Knight on foot: Sir Lacy.
- Sergeant: Morgen.
- Archers (longbow): Aylwin, Idris, Dylan.
- Pikemen: Brendan, Bryn, Mordred, Stori.
The Besieged — Reinforcements
- Mounted knight: Sir Wulfric.
- Sergeant: Llewellyn.
- Archers (longbow): Gwyn, Myrlin, Owen.
- Pikemen: Aki, Arnold, Gareth, Hayden.
The Besiegers
- Knights on foot: Sir Clarence, Sir Fitzwaren, Sir Hughs, Sir Mortimer.
- Riderless horses: those of Sir Clarence, Sir Fitzwaren, Sir Hughs and Sir Mortimer.
- Sergeant: Pugh.
- Crossbowmen: Alric, Edric, Emlyn, Gawain.
- Halberdiers: Bors, Evans, Fursa.
- Men-at-arms: Cliff, Godric, Shawn.
- Engineer: Jones.
- Peasants: David, Geoffry, Harry, Ivor, Jasper, Mathew, Morris, Roger, Will'm.
Besiegers' equipment: 1 ballista, 4 catapults and 5 ladders.
In addition, the besiegers may build one siege tower, or one battering ram, or one ballista per week (only one of the three, not one of each). The player announces at the start of each week what they will build, and will have the engine available on the eighth day after the announcement, i.e. at the start of the following week.
Starting Positions and Start of Play
- The besiegers may bombard the castle from off the map, recording the results on the siege sheet.
- On days when the besiegers decide to assault, the map is set up. The besieger places "breached wall" counters on the squares they have managed to destroy, and 8 "filled moat" counters on as many squares of their choice. Bombardment is not possible on assault days.
- The besieged place the garrison freely inside the castle.
- The besieger may then place their characters and the siege engines they wish to use on the Camp map, the Castle map, or both. Characters and engines placed off the map may enter during any phase of play, but the edge they enter from must be stated at the start of the assault and cannot be changed.
- In each assault, the besiegers take the first turn.
Arrival of Reinforcements
Starting on day 14, the besieged roll a die once each assault day until they get 6 or more. On the day they succeed, Sir Wulfric appears with the reinforcements from edge A, during any phase of play in the assault.
Special Rule
If, during an assault, all the besieged are inside the keep, the besiegers may halt the assault, ending the day. On subsequent days, when a new assault is declared, all the besieged must be inside the keep, and the besiegers anywhere except the keep. If the besieged still have shooters, the besiegers must be out of their range (in the towers, for example). The assault may then begin.
Victory Conditions
The besiegers win if they manage to capture the castle (keep included) in 40 days or fewer. Otherwise, the besieged win.
Scenario 5: For the Honor of the King
Playing Surface: Castle map
The Story
The Welsh have risen up against their Norman lords. A band of rebels is besieging a poorly provisioned border castle, which cannot expect reinforcements since the King is occupied with the main body of the rebellion. However, a prolonged resistance may raise the morale of the loyalists and sow doubt among the rebels...
The Cast
The Normans
- Knights on foot: Sir Clarence, Sir Fitzwaren.
- Crossbowmen: Alric, Edric.
- Men-at-arms: Cliff, Godric, Shawn.
- Peasants: Geoffry, Harry.
- Pikemen: Aki, Arnold, Hayden, Stori.
Equipment: 6 barrels of oil.
The Welsh
- Knights on foot: Sir Hughs, Sir Lacy, Sir Mortimer, Sir Wulfric.
- Sergeants: Llewellyn, Morgen, Pugh.
- Archers (longbow): Aylwin, Dylan, Gwyn, Idris, Myrlin, Owen.
- Crossbowmen: Emlyn, Gawain.
- Pikemen: Brendan, Bryn, Mordred, Gareth.
- Halberdiers: Bors, Evan, Fursa.
- Peasants: David, Ivor, Jasper, Mathew, Morris, Roger, Will'm.
- Engineer: Dai.
Equipment: 3 catapults, 3 ballistas, 2 battering rams, 5 ladders, 4 mantlets, 1 siege tower.
Starting Positions and Start of Play
Identical to Scenario 4 (points 1 to 5) except:
- The besiegers have 10 filled-moat counters instead of 8.
- Before an assault, the besiegers and their engines are placed off the map, since only the Castle map is used.
The Specter of Hunger
- Starting on day 15, the Normans go on half rations. To simulate the resulting weakness, all Norman attacks (except crossbow shots and boiling-oil attacks) are shifted one column to the left (a 3-1 becomes a 2-1, etc.).
- Starting on day 22, they go on quarter rations, and all Welsh attacks are shifted one column to the right (except crossbow and archer shots), in addition to the previous modifier.
- At the end of turn 35 the Normans surrender, their provisions exhausted.
Special Case
Use of the optional panic and rout rule is recommended.
Special Rule
The same as in Scenario 4.
Victory Conditions
- If the Welsh player takes the castle (keep included) in 7 days or fewer, they achieve a decisive victory.
- If the castle only surrenders at the end of turn 35 for lack of provisions, the decisive victory goes to the Norman.
- If neither condition is met, victory is decided by points scored by the Norman, who, besides the usual loss points, scores 1 point for each day they hold out (if the castle falls on day 15, they score 14 points, etc.).
Note: The Norman player scores no points for wounded enemy characters who have healed by the time the castle surrenders.
If the Norman player scores:
- 34 points or fewer: Welsh victory.
- 35 to 45 points: draw.
- 46 points or more: Norman victory.
Scenario 6: Before the Ring Closes...
Playing Surface: Camp, Village and Crossroads maps
ATTENTION: TO PLAY THIS SCENARIO YOU NEED "CRY HAVOC."
The Story
The enemy is drawing near, and the castle's defenders are trying to gather as many provisions as possible before they are cut off. The attackers-to-be, led by Sir Conrad, want to strike the mule trains and supply wagons before they reach the castle, or at least inflict a hard blow on the defenders to undermine their morale.
The Cast
Castle Defenders — Group 1
- Mounted knight: Sir Gaston.
- Sergeant: Martin.
- Pikemen: Bertin, Crispin, Hal, Mark.
- Archers (short bow): Chretien, Engerrand, Mathias.
Castle Defenders — Group 2
- Peasants: Baker, Carpenter, Cedric, Farmer, Gam, Giles, Gobin, Radult, Salter, Smith, Wulf.
- Archer (short bow): Fletcher.
- Plus 1 ox and 1 cart.
Castle Defenders — Group 3
- Mounted knights: Sir Alain, Sir Clugney, Sir Gunter, Sir Jacques, Sir Roger, Sir Roland.
- Sergeants: Arnim, A'Wood.
- Halberdiers: Hubert, Wynken.
- Pikemen: Aki, Ben, Hayden, Mordred, Odo, Wat.
- Plus 6 mules, 1 draft horse and 1 cart.
The Attackers
- Mounted knights: Sir Conrad, Sir Fitzwaren, Sir Gilbert, Sir James, Sir John, Sir Mortimer, Sir Peter, Sir Piers, Sir Richard, Sir Thomas, Sir William, Sir Wulfric.
- Sergeants: Llewellyn, Morgen, Pugh, Tyler.
- Crossbowmen: Alric, Edric, Emlyn, Gawain.
- Halberdiers: Ben, Bors, Evans, Fursa, Geoffrey, Frederick, Naymes, Otto, Tom, Watkin.
- Men-at-arms: Cliff, Godric, Guy, Jean, Rees, Robin, Shawn, Tybalt.
- Peasants: David, Geoffry, Harry, Ivor, Jasper, Mathew, Morris, Roger, Will'm.
Starting Positions and Start of Play
- The defender deploys first, placing Group 1 inside the castle. Group 2 must be in the houses and yards of the village, with the ox and cart in the yard of building 3. Group 3 must be on the crossroads map. The drawbridge must be lowered.
- The attacker begins the first turn, bringing in their people. They may only enter from edges 7 and 8.
- Play continues until all the defenders have taken refuge inside the castle.
Victory Conditions
The defender first totals:
- 5 points for each mule that reaches the castle alive.
- 10 points for each cart that reaches the castle.
- 3 points for each enemy horse captured and brought into the castle.
They then subtract from this total the loss points inflicted on them (see page 1). If the total is positive, the defenders win. If negative, the attackers win, and if zero, it is a draw.
THIS SCENARIO CAN BE TURNED INTO A CAMPAIGN USING THE SUPPLEMENTARY RULES EXPLAINED BELOW.
First Day of the Campaign
Play unfolds just as in the basic scenario, with the following changes.
- The defenders have 7 barrels of oil (in the castle).
- Combat continues until all the defenders are inside the castle, or the attackers decide to break off their attack, in which case the defenders also take refuge in the castle. The defenders' withdrawal ends the first day.
In the unlikely event that the defenders manage to drive the attackers off the map in this first engagement, the game ends with a resounding victory for the defender.
Reinforcements
On day 2 the besiegers receive the following reinforcements:
- Mounted knights: Sir Clarence, Sir Hughs.
- Crossbowmen: Arbalister, Denys, Jacopa, Jaques, Nicholas, Roland.
- Engineers: Baldric, Dai, Jones.
Equipment: 2 ballestóns, 2 ballistas and 6 catapults.
Supplementary Equipment
In addition to the equipment brought by the reinforcements, the besiegers may build, every 5 days, one of the following: 1 ballista, or 1 catapult, or 1 siege tower, or 1 battering ram, or 1 ballestón, or else 6 ladders or 3 mantlets.
Construction may only begin from day 3 onward, and is interrupted on assault days or on days when the defenders make a sortie.
Structure of a Day of Siege
From day 2 onward, and every day, players must follow this sequence:
- Initiative: The besieged and the besieger each roll 1 die, and the besieger always adds 4 to their result. Whoever rolls higher (as modified for the besieger) has the initiative. In case of a tie, the besieger has it.
- If the besieged have the initiative, they may make a sortie (see Action 2) or attempt to bring a supply wagon into the castle (see Action 3). Only one resupply attempt may be made during the whole game.
- If the besieger has the initiative, they may launch an assault (see Action 1). If they do not, they may bombard and build more siege equipment.
- If a player decides not to act, the initiative passes to their opponent.
- At the end of each day, events are recorded on the siege sheet, calculating the healing date for the wounded (this also applies to the first day).
Resupply and Rationing
- If neither a mule nor a cart reaches the castle on the first day, the besieged must begin rationing from day 18 (unless there is a resupply, see below), and the castle must surrender at the end of day 26 for lack of provisions.
- For each mule that reaches the castle on the first day, the start of rationing is delayed by 1 day (for example, if 4 arrive, it begins on day 22). For each cart, whether it arrives on the first day or via resupply, it is delayed by 6 days.
- Effects of rationing: All attacks by the besieged (except crossbow shots and boiling oil) are shifted 1 column to the left (a 4-1 becomes a 3-1, etc.). At the end of the eighth day after rationing begins, the castle surrenders (for example, if it begins on day 29, it surrenders at the end of day 37).
Actions
Each of the following actions lasts 1 day. While its combats are taking place, no other action is allowed.
Action 1: To the Assault!
Playing Surface: Castle map
The Cast: Each player may use whatever characters they have left.
Starting Positions and Start of Play
- The besieger places "breached wall" counters on the squares they have managed to destroy. They also place 10 "filled moat" counters wherever they wish.
- The besieged arrange whoever remains inside the castle.
- The besieger places their people and equipment on the Village map, or off the map, on edges E, G and H, as they choose. Characters off the map may enter whenever they wish, but always from the edge where they are deployed. If the besieger wants to use ballestóns, they must be placed on the Village map.
- The besieger takes the first turn.
- Play continues until the castle has been taken or all the besiegers have left the Castle map.
SPECIAL RULE: The special rule explained in Scenario 4, page 7, applies here.
Action 2: Sortie Against the Camp
Playing Surface: Camp map
The Cast
The besieger may use one third of the characters they have left (rounded down). They may not use more than half of the characters of any one class. Example: if they have 9 knights, they may not use more than 4.
The besieged may use half of theirs (also rounded down), with no particular restriction.
Starting Positions and Development of the Action
- The besieger places their people anywhere on the Camp map. In addition, at least one third of their siege engines (rounded up) must be there — ladders and mantlets do not count. Example: if the besieger has 3 catapults, 3 ballistas, 1 siege tower and 3 ballestóns, that is 10 siege engines, and at least 4 must be on the Camp map.
- The besieged begin the first turn of this action, bringing in their characters from any edge of the map. They may enter from several edges and in separate groups. Some groups may delay their entry if desired.
- The action continues until all the characters of one side or the other have left the map.
SPECIAL RULE: The besieged may set fire to the enemy's war machines and tents following the procedure explained in the rules, and in addition the archers may fire incendiary arrows. Each archer carries 6, and may receive more from a companion if they spend a whole turn adjacent and doing nothing else.
For every multiple of 5 tent squares destroyed by fire, the besieger must spend 1 full day rebuilding them (and replacing their contents), during which they may not bombard or assault. For example: if 12 tent squares are destroyed, they must spend 2 days on repairs (during which the besieged, if they win the initiative, may make sorties).
Action 3: Resupply Sortie
This action may only be carried out once during the game.
The Cast
The Besieged — Group 1: All characters from the castle still alive at the start of the action.
The Besieged — Group 2:
- Mounted knight: Sir Lacy.
- Archers (short bow): Aylward, Bowyer.
- Pikemen: Arnold, Bryn, Gareth.
- Plus 1 draft horse and 1 cart.
The Besiegers
The player distributes their remaining characters into patrols of a maximum of 6 men, with no more than one knight or one crossbowman per patrol.
Starting Positions and Start of Play
- The besieger places one of their patrols on the Village map.
- The besieged place Group 1 inside the castle, with the drawbridge raised.
- The besieged begin the first turn, bringing Group 2 in from edge 2 or edge 4 of the Village map.
- The action continues until all the besieged have returned to the castle.
SPECIAL RULE: Before each of their phases of play, the besieger rolls a die and consults the following table to see whether a new patrol comes into play. Several patrols may enter over the course of the action.
Each time a new patrol is triggered, the besieger chooses one of those not yet in play and brings it in from any one edge of the map.
Campaign Victory Conditions (Extension of Scenario 6)
- The besieger achieves a decisive victory if they take the castle (keep included) in 32 days or fewer.
- If they do so in 40 days or fewer, it is a substantial victory.
- If they capture the castle (but not the keep) in 40 days or fewer, and the number of besiegers remaining is at least double the number of besieged, they achieve a marginal victory (through unconditional surrender of the besieged).
- If the besieger captures the castle but not the keep, and does not have at least double the living characters of the besieged, the besieged achieve a marginal victory (through negotiated surrender).
- The besieged achieve a decisive victory if the castle holds out beyond turn 40.
Scenario 7: To the Rescue!
Playing Surface: Camp, Village and Crossroads maps
ATTENTION: TO PLAY THIS SCENARIO YOU NEED "CRY HAVOC."
The Story
After weeks and weeks of siege, the castle's defenders no longer believe in miracles. And yet, one morning, Sir Gilbert's banner can be seen in the distance, leading a relief column, drawing cries of joy from the battlements. Will he manage to break the siege?
The Cast
The Besieged — Group 1
- Knights on foot: Sir Richard, Sir Piers.
- Sergeant: Pugh.
- Crossbowmen: Codemar, Francisco, Jaques, Roland.
- Pikemen: Brendan, Gareth, Hayden, Odo, Stori, Wat.
The Besieged — Group 2
- Mounted knights: Sir Conrad, Sir Gaston, Sir Gilbert, Sir James, Sir John, Sir Peter, Sir Thomas, Sir William.
- Sergeants: Llewellyn, Morgen.
- Archers (short bow): Aylward, Chretien, Fletcher.
- Crossbowmen: Alric, Forester.
- Pikemen: Aki, Arnold, Ben, Bertin, Bryn, Crispin, Hal, Mark, Mordred, Perkin.
- Men-at-arms: Cliff, Godric, Guy, Jean, Rees, Robin, Shawn, Tybalt.
- Peasants: Baker, Cedric, Farmer, Gam, Gobin, Radult.
The Besiegers
- Mounted knights: Sir Alain, Sir Clarence, Sir Clugney, Sir Fitzwaren, Sir Gunter, Sir Hughs, Sir Jacques, Sir Lacy, Sir Mortimer, Sir Roger, Sir Roland, Sir Wulfric.
- Sergeants: Arnim, A'Wood, Martin, Tyler.
- Archers (longbow): Aylwin, Dylan, Gwyn, Idris, Myrlin.
- Halberdiers: Ben, Bors, Evans, Frederick, Fursa, Goeffrey, Hubert, Naymes, Otto, Tom, Watkin, Wynken.
- Peasants: David, Carpenter, Geoffry, Giles, Harry, Ivor, Jasper, Mathew, Morris, Roger, Salter, Smith, Wulf, Will'm.
Starting Positions and Start of Play
- The besieger deploys first on the Camp and/or Village maps.
- The besieged place Group 1 inside the castle.
- The besieged begin the game, bringing in all or part of Group 2 from edges A, D, 6 and/or 7. Characters not entering on the first turn may do so later, but always from the stated edges.
Victory Conditions
- The besieger must maintain the siege to win. If, at any point in the game, all the besieged are either inside the castle or off the map, the besieger wins.
- The besieged win if, at any point in the game, there is no besieger in the camp, i.e. on trench squares or those inside the ring of trenches (bordering tree squares do not count).
- Special case: If all the knights on one side die or are wounded, their side must fall back in retreat and the other side is declared the winner.
Elevation Levels and Restrictions on Fire and Combat
Although the map is two-dimensional, SIEGE is a game that plays out in three dimensions, so it is important to consider each situation individually to know when a shot is possible or when combat can take place. The following table summarizes the different levels of elevation present in the game (open ground, moat, battlements, tower interior/top, keep interior/top, siege-tower top, ladder, etc. — see the Terrain Types table on the Game Aid Card for the height of each terrain type).
Notes on the castle map: Morrigan's Tower should have a stairway, and the North Gatetower's doorway does not connect to the adjacent battlement square (there is a 2-level difference).
Restrictions on Fire
- As a general rule, when shooter and target are at the same level of elevation, the shot is impossible if there is an obstacle between them: a living character or animal, a cart, a ballestón, a catapult, a ballista, a mantlet, a siege tower, a battering ram, a tent, the top of an embankment, a tree, or a wall with no opening.
- When they are not at the same level, the shot is possible if the lower character is at least as far from the obstacle as the other. CAUTION: Trees, siege towers, the keep and the castle's towers continue to block the line of fire. However, from the keep you can fire over the castle's towers and over siege towers, respecting the conditions set out above. From the moat you cannot fire against battlements or arrow-slits.
- Special case: Within a radius of 8, 10 or 12 squares — depending on whether the shooter is at a tower's arrow-slit (or battlement), on top of a siege tower, or at a keep arrow-slit, respectively — the following obstacles are ignored for line-of-fire purposes: a lower character, an animal, a cart, a ballestón, a catapult, a ballista, a mantlet, a battering ram, a tent, the top of an embankment. In addition, characters on scrub and embankment squares receive no cover within the indicated radius. By contrast, battering-ram, mantlet, tent, trench, and breached-wall squares continue to offer their usual cover, as do trees, battlements, and siege towers (interior and top).
- Firing at an enemy adjacent to a friendly character: this can only be done if the difference in level between shooter and target is at least 1 full level (a difference of 1/2 level counts as being at the same height). The optional rule described at the end of the rulebook may also be used here.
Restrictions on Combat
- Combat is impossible if the attacker cannot enter the square they are attacking, or if there is more than one level of difference between the combatants. EXCEPTION: From a breached-wall square (level 0) you may attack a battlement square (level 2) and vice versa.
- Retreating after combat: as a general rule you cannot retreat onto a square adjacent to an enemy, unless that enemy has no way to attack the square being retreated to.
Game Aid Card (Reference Tables)
The box includes two card-stock Game Aid sheets summarizing the rules and the combat, shooting, and fire tables, plus a Siege Sheet with the bombardment and healing tables and a reduced castle plan. The tables below are transcribed from those cards.
Shooting: Range Modifiers
| Weapon | Short range (no modifier) | Medium range (+1 to die) | Long range (+2 to die) |
|---|---|---|---|
| Short bow | 1 to 25 squares | 26 to 50 squares | 51 to 75 squares |
| Crossbow | 1 to 25 squares | 26 to 75 squares | 76 to 130 squares |
| Longbow | 1 to 30 squares | 31 to 90 squares | 91 to 150 squares |
| Ballestón | 1 to 50 squares | 51 to 100 squares | 101 to 175 squares |
A wounded archer or crossbowman: +1 to the die's result.
Shooting Against Characters on Foot
Roll a die and cross-reference the weapon's column with the row for the roll (1-10), then read off the result letter under the target's cover (None / Light / Medium / Strong).
- A: No effect.
- B: Attacker (shooter) — n/a; target retreats 1 square (*)
- C: Target stunned
- D: Target stunned and wounded
- E: Target wounded
- F: Target dead
/ (*) Retreating characters are also subject to the withdrawal rules; a character who cannot retreat is instead stunned or wounded, as noted in the rules text.
Shooting Against Riders
If the target is a rider, add 1 to the die roll. Cross-reference the weapon's column (Ballestón, Crossbow, Longbow, Short bow) and the roll against the target's cover (None / Light / Medium).
- A: The rider retreats 4 squares (*)
- B: Horse dead
- C: Horse unhurt, rider stunned and dismounted
- D: Horse wounded and dismounted
- E: Horse unhurt, rider wounded and dismounted
- F: Horse and rider both dead
Hand-to-Hand Combat Against Characters on Foot
Cross-reference the force-ratio column (1-1, 2-1, 3-1, ... up to 12-1+) against the die roll (1-10). If several characters attack one target together, shift one column to the right.
- A: Attacker retreats 1 square
- B: Attacker wounded
- C: Defender retreats 1 square
- D: Defender stunned
- E: Defender wounded
- F: Defender dead
Hand-to-Hand Combat Against Riders
Same force-ratio columns and die roll as above; if several characters attack one rider together, shift one column to the right.
- A: Attacker retreats 1 square
- B: Attacker wounded
- C: Horse unhurt, rider retreats 1 square (*)
- D: Horse dead, rider stunned and dismounted
- E: Horse unhurt, rider wounded
- F: Horse dead, rider wounded and dismounted
- G: Horse unhurt, rider dead and dismounted
- H: Horse dead, rider dead and dismounted
Terrain Adjustment to the Force Ratio
| Attacker's terrain | Defender's terrain | Shift |
|---|---|---|
| + | + | none |
| + | 0 | 1 column to the left |
| + | - | 2 columns to the left |
| 0 | + | 1 column to the right |
| 0 | 0 | none |
| 0 | - | 1 column to the left |
| - | + | 2 columns to the right |
| - | 0 | 1 column to the right |
| - |
If both sides are on equivalent terrain, there is no adjustment to the force ratio.
Fire Table
Spread (one die roll per adjacent square containing a siege engine or tent; result F means the fire spreads to that square): rolls of roughly 6-10 spread against ballistas, catapults, ballestóns and mantlets; rolls of roughly 7-10 spread against tents, siege towers, battering rams and ladders (lighter, more flammable targets catch on a wider range of rolls; sturdier ones only on the highest rolls).
Extinguish (one roll per attempt): result B = fire goes out; result E = fire keeps burning; result EF = fire keeps burning and spreads to the character trying to put it out.
Explanation of results:
- F: Fire catches (or spreads)
- E: Fire keeps burning
- B: Fire goes out
- EF: Fire keeps burning and spreads to that square only if it was caused by an incendiary arrow.
Bombardment Table
Cross-reference total bombardment points (0 to 12+) against the die roll (1-10):
- Result blank: no effect.
- 1C: the engine is damaged (see 4.23).
- D: the wall square advances one stage of demolition (see 4.13).
- Combined results such as 2C, 3C, D/1C or 2C/D apply both effects together (damage to the engine(s) and/or demolition, as printed on the card).
If a bombarded square is a tower or keep square, subtract 1 from the roll.
Healing Table
| Die roll | The wounded character heals in |
|---|---|
| 1 | 1 day |
| 2 | 2 days |
| 3 | 3 days |
| 4 | 4 days |
| 5 | 4 days |
| 6 | 5 days |
| 7 | 6 days |
| 8 | 8 days |
| 9-10 | 10 days, or several months, or after the scenario ends |
Siege Sheet
The Siege Sheet carries a 40-day tracker (marked in squares 1 through 40) on which the besieger crosses off a day each time a bombardment roll produces a "D" result against a battlement or wall square, noting the healing date for wounded characters and, four crosses later, when the wall becomes fully "breached wall." It also carries a reduced plan of the castle showing which wall squares can be bombarded (the outer curtain wall, thinner than the keep's).
Terrain Types
Camp map
| Terrain | Movement cost | Cover | Combat modifier |
|---|---|---|---|
| Open ground | 1 | None | 0 |
| Scrub | 2 | Light | - |
| Tree | 2 on foot, impassable to horse | Light | 0 |
| Embankment | 2 | Medium | - |
| Tent (or part of tent) | 2 on foot, impassable to horse | Light | - |
| Trench | 1 (horses may cross but not stop) | Strong | + |
| Filled moat |
Castle map (adjacent to and inside: impassable to horse, except as noted)
| Terrain | Movement cost | Cover | Combat modifier |
|---|---|---|---|
| Curtain wall | Impassable | Total | Impossible |
| Arrow-slit | Impassable | Total (see 1.54 for the keep's doorway) | Impossible |
| Battlements | 1 on foot | Strong | + |
| Stairway | 1 on foot | Medium | 0 |
| Keep's doorway | 1 on foot | Total | 0 |
| Interior of tower or keep | 3 of "breached wall" demolished, 4 on foot | Total (total if torreón) | Depends on position |
(Wall, arrow-slit, battlement, stairway, doorway, tower/keep interior, moat, and winch icons appear on the printed card alongside the numeric values; consult the rules text in Sections One, Two and Four for how each interacts with fire, movement, and combat.)