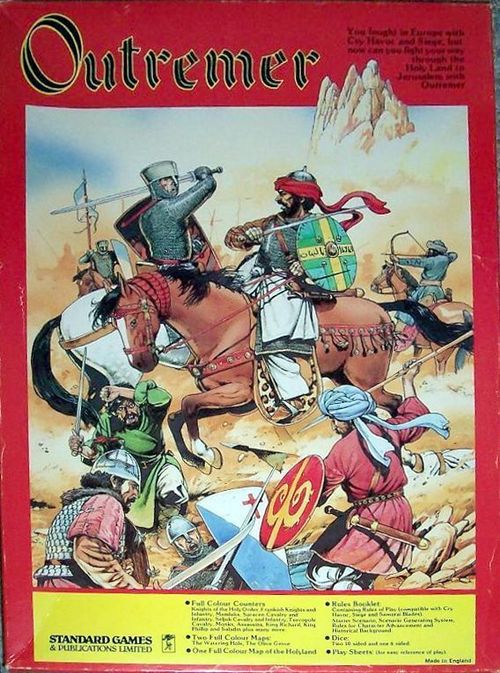
Outremer (1987)
Outremer (1987) Rulebook
Table of Contents
Table of Contents
- Historical Background
- The Characters
- Richard I of England
- Philip II of France
- Saladin
- A Rich Knight or Baron of the Third Crusade 1190 - 1192
- An Average Knight
- The Squire
- The Sergeant
- Turcopole
- The Military Orders
- The Hospitallers
- The Teutonic Knights
- The Templars
- The St Lazarus
- The Halberdier
- The Billman
- The Crossbowman
- The Shortbowman
- The Spearman
- The Mamluks
- Bedouin Tribesmen
- Syrian Cavalrymen
- Seljuk Cavalry
- Seljuk Infantry
- The Peasant
- Innocent Bystanders
- Horse Archers
- Slingers
- Assassins
- Description and Use of the Playing Pieces
- Rules of Play
- Section One
- Scenario Generation System
- Scenarios
- Character Advancement Tables
Historical Background
History of 'Outremer' and the Crusades
The era of the crusades started on Tuesday, 27 November 1095 when Pope Urban II preached to the bishops and nobility of France and its neighbouring countries at the council of Clermont. In 1096 an abortive crusade led by Peter the Hermit was destroyed by the Turks, and it was not until 1097 that a serious attempt was made by the Christians of the west to come to the aid of those in the east. In this year a number of armies travelled to Constantinople where, not without some difficulty, the Byzantine Emperor, Alexius, managed to forge them into one large army.
Some of the more notable nobles in the first crusade, as it was to become known, were Prince Hugh of Vermandois, brother to the then King of France (newly excommunicated, so unable to go himself); Bohemund of Taranto, son of a Norman noble who had carved out a dukedom for himself in southern Italy; Raymond of Toulouse, a land owner who owned a large region of South West France; Robert of Normandy, William the Conqueror's eldest son, and Stephen of Blois who was married to William the Conqueror's daughter. After defeating the Seljuk Turks at the battle of Dorylaeum the army besieged and captured Antioch in North Syria. The following day, 4 June 1098, the crusaders defeated another large Moslem army consisting of Seljuk Turks and Arabs who had been on the way to relieve the garrison of Antioch. Marching south from Antioch some months later the crusaders were greeted by the local people who hated their nominal rulers the Fatimids of Egypt, and in early June 1099 the crusaders at last sighted the Holy city of Jerusalem. After a six weeks' siege Jerusalem fell to the crusaders and its inhabitants were massacred.
The crusaders then 'elected' Godfrey of Bouillon to be King of Jerusalem. He agreed to assume leadership, but refused to be called 'king', taking instead the title Advocatus Sancti Sepulchri, the Defender of the Holy Sepulchre, claiming there could only be one King of Jerusalem, and that was Christ. His 'reign' lasted just under a year, but in this time he managed to defeat two large Fatimid Egyptian armies, capture a number of coastal cities and make friendly treaties with most of the emirs in the remaining coastal cities. Godfrey's brother Baldwin, who had carved out a kingdom based on Edessa which was east of Antioch, took over the leadership in Jerusalem. He, unlike his brother, had no religious scruples about claiming the kingship, and on Christmas Day 1100 he was crowned King of Jerusalem.
Baldwin I of Jerusalem reigned for eighteen years, and during this period he did more to establish the crusader kingdoms of 'Outremer' than any other man. When he died in 1118 his kingdom stretched from Beirut in the north to Beersheba in the south, and from the River Jordan in the east to the Mediterranean Coast, with only Ascalon and Tyre not under his rule.
At about this time the military orders were gaining in strength and support (their histories up to the third crusade are briefly outlined at the end of this section), their members were an elite body of utterly dedicated professional soldiers who had no rivals in the world at that time.
As the old rulers of 'Outremer' died out, less competent rulers took over and the Moslems, who because of the divisions had allowed the crusaders to defeat them one by one, began to unite. In 1119 the army of Antioch was crushed on the 'Field of Blood', as it was to become known, and only about 100 knights out of a force of 700 knights and 3-4,000 infantry escaped. However, the last great coastal city to remain in Moslem hands was captured in 1124 with the help of a large Venetian fleet, redressing the balance. Unfortunately, a new Moslem leader emerged to unite most of the Moslem peoples of Syria. His name was Imad Ad-Din Zengi. Zengi captured a number of strategic castles and then defeated the new King of Jerusalem, Fulk the Count of Anjou (who had married Baldwin II's daughter, and became king when he died). After a short interlude during which most of his forces were fighting one of those rare excursions into Syria by the Byzantines, Zengi again took the offensive and on Christmas Eve 1144 captured Edessa and massacred its western Christians. Thus the crusader kingdom of Edessa, founded by Baldwin I of Jerusalem before he became King of Jerusalem, was destroyed. Zengi probably would have gone on to recapture the whole of Northern Syria from the Christians had he not been killed on the night of 14 September 1146 (by a eunuch) whom he had angrily reprimanded for drinking out of his own personal wine glass.
The fall of Edessa shocked the Christian rulers of 'Outremer', who knew that they would be hopelessly outnumbered if the Moslems united. They therefore sent an ambassador to the Pope urging him to call a new crusade. It took a year for the ambassador to reach Rome and the newly elected Pope, Pope Eugenius III, was deeply disturbed by what he heard. He agreed to preach a new crusade immediately, and on Christmas Day 1145 he preached to the nobility of France who had gathered at Bourges to hear him. He received a cool reception from the nobles, and the King of France, Louis VII, who was in favour of a new crusade, did not wish to antagonise them by pressing the matter. Louis VII therefore enlisted the help of the Abbot of Clairvaux, who was a spell-binding speaker and a preacher of great brilliance, to preach to his nobles at their Easter gathering at Vezelay on 31 March 1146. This time the call was received with enthusiasm and a new crusade was assured. Not content with his success at Vezelay he travelled to the German court and persuaded the German Emperor, Conrad III, to join the new crusade. The German army, some twenty thousand strong, and the French army, about fifteen thousand strong, met at Constantinople on their way to the Holy Land. The distrust of both forces to each other was such that Conrad decided to make his way across Anatolia (Turkey) separately. He then made the mistake of dividing his army. Both divisions of the German army were defeated by the Seljuk Turks and Conrad, with the remnants of the army, arrived back near Constantinople in late October 1147. The French army and the remnants of the German army moved out to cross Anatolia in early November, were harried all the way and reached Antioch half-starved and demoralised. After resting for several weeks the army moved on to Jerusalem, where Louis discharged his vows as a pilgrim, visiting the Holy places. Conrad, who accompanied him in Jerusalem, had arrived in the Holy Land by ship as he was too ill to travel overland. Afterwards they held a conference at Acre and a decision was taken to attack Damascus. Damascus was the only Moslem city anxious to remain on friendly terms with the Christians because of Nur Ed-Din's ambition to unite the whole of the Moslem states against 'Outremer'. Nur Ed-Din was the son of Imad Ad-Din Zengi and he had spent much of his first year in power uniting the various Moslem factions. The only one not in his control was Damascus. The crusader army set out for Damascus in July 1148 and after defeating a small Moslem force reached the city on Saturday, 24 July. The attack was a succession of blunders. On 28 July the crusaders beat a hasty retreat, and Damascus had become an ally of Nur Ed-Din. Bitter recriminations followed, and early in September angry Conrad sailed home, followed in March 1149 by Louis. So ended the second crusade.
Nur Ed-Din capitalised on the ignominious second crusade by taking advantage of the confusion of the 'Outremer' leaders by attacking one of the few remaining castles east of the River Orontes still in Christian hands. Raymond of Antioch marched to the rescue but his army was surrounded and wiped out by Nur Ed-Din's. In the Spring of 1150 Joscelin of Edessa, leader of what was left of Edessa, was captured and handed over to Nur Ed-Din, who had him blinded and thrown into prison where he died nine years later. Raymond was replaced as ruler of Antioch by Reynald of Chatillon, who was married to Raymond's sister. He was a most obnoxious character and possessed more disagreeable traits than are usually found in one man.
Although the Christians in 'Outremer' were in disarray the Fatimid Caliphate in Egypt was in a worse predicament. Baldwin III of Jerusalem, son of Fulk, decided to take advantage of this to offset the losses in the north. He attacked Ascalon, still held by the Egyptians, and after a month's siege the garrison surrendered the city on 19 August 1153. This was offset on 23 April 1154 when Nur Ed-Din took complete control of Damascus. Luckily for the Christians, Nur Ed-Din became seriously ill shortly afterwards and was never to fully regain his usual energy or brilliance. His illness gave breathing space to the Christians and this was prolonged by an earthquake in Syria in 1156. During this enforced truce, Reynald of Chatillon decided to invade and sack Cyprus, a Christian island which was part of the Byzantine Empire, allied to and at peace with 'Outremer'. Having extorted the money for the expedition by torturing the Archbishop of Antioch, he sailed to Cyprus at the head of his army and after defeating the local militia conducted a three week rampage of the island, killing, burning, raping or mutilating everyone in sight, in an act of brutality unparalleled in the middle ages. This prompted another rare visit by the Byzantine Army and when it reached Antioch in early 1159 Reynald abased himself before the Byzantine Emperor and eventually received his grudging forgiveness. A week later the emperor signed a truce with Nur Ed-Din in which 'Outremer' was protected from any further attacks by the Moslem leader. Most Christians in 'Outremer' realised that this treaty had saved them from Nur Ed-Din, for as long as the Moslem leader did not attack them, the emperor would not interfere. The exception was Reynald of Chatillon. A little over a year after he had abased himself in the dust before the Byzantine Emperor, Reynald broke the terms of the treaty by raiding Nur Ed-Din's territory. It could have meant war but luckily he was captured and put into prison in Aleppo, and as none of his fellow Christians would pay his ransom he remained there for sixteen years. Two years later on 10 February 1162 Baldwin III of Jerusalem died. He was loved by his people and even the Moslem peasants lined the road to pay their last respects to him as his body was carried to Jerusalem.
Baldwin was succeeded by his younger brother Amalric. Amalric's first thought was to secure the kingdom of Egypt which was in a state of virtual anarchy before Nur Ed-Din tried to seize power there. Unfortunately for Amalric, Nur Ed-Din sent an army to Egypt in April 1168 commanded by his most reliable General, Shirkuh. With him was his nephew, Salah Ed-Din Yusuf, soon to be known by a different name. Moving with great speed the Moslem army had a puppet on the throne by the end of May. The puppet however did not wish to remain so and he called on Amalric to help him. Needless to say Amalric was delighted to assist. The Moslem army was trapped in the fortress of Bilbeis, but Nur Ed-Din came to his rescue by attacking Antioch, thus forcing the Christians to come to their aid. Once this was achieved the Moslem army returned to Syria.
Two years later, in 1167, Nur Ed-Din tried again, sending in Shirkuh once more; and for a second time he took his nephew, now named Saladin, with him. Amalric followed, but after an indecisive battle a stalemate developed and a truce was signed. In October 1168 he returned with a larger army and also attacked the Egyptians who had originally sought his help. This was too much for the Egyptians who asked Shirkuh to become their leader. A few weeks later Shirkuh died from over-eating and Saladin became ruler of Egypt. In the meantime the Christian invasion had ended after a couple of Egyptian cities had been taken and all their inhabitants had been massacred. Amalric attacked again in October 1169 but was stopped by the fortress of Damietta on the Nile. He returned home in December after a number of unsuccessful assaults on Damietta's walls.
Saladin, who soon established himself in Egypt, was causing Nur Ed-Din much concern over the strength of his lieutenant, although Saladin sought to allay suspicion, and in 1172 things came to a head. Saladin retired when Nur Ed-Din attacked 'Outremer' in the north (having done the same the year before), and Nur Ed-Din had no doubt that Saladin was using 'Outremer' as a buffer state between them. In 1174 before Nur Ed-Din could act, he died. Amalric immediately took advantage of this and marched on Damascus, but he was feeling unwell and after taking a small city south of Damascus he returned to Jerusalem where, on 11 July 1174, he died. Then in 1176 an even greater disaster befell the Christians in 'Outremer' when the only thing standing between them and the Moslems, the Byzantine Army, was destroyed by the Seljuk Turks at the Battle of Myriokephalon. Saladin took advantage of the situation and in the Autumn of 1177 he marched north towards Ascalon. For Baldwin IV, Amalric's fifteen year old leprous son, it was to prove almost fatal. Coming to the aid of Ascalon with most of his army he was bottled up in the city while Saladin bypassed it and headed for a now defenceless Jerusalem. Baldwin, however, rose to the challenge and breaking out of Ascalon, he encountered the unsuspecting Egyptian army at Montgisard. Saladin escaped, returning to Egypt with only a few men. In 1179 Saladin avenged this defeat at Marj'Ayyun, and for the next few years harassed the young king with raids.
In 1180 a truce was arranged between the two sides. Saladin was apparently more worried about the chances of a famine after a drought in Syria than he was with the Christians. The truce lasted for two years until Reynald of Chatillon returned to the scene. His wife had died during his years of imprisonment, and finding that he was not welcome in Antioch he moved south and married an heiress to a large estate in Southern 'Outremer'. Almost immediately he attacked a party of merchants on their way to Mecca. One of the terms of the truce was assurance of free movement of both Christian and Moslem merchants through each other's countries. Saladin captured a large party of pilgrims in revenge and told Baldwin that he would release them when the merchants' goods were returned. Reynald flatly refused, and war followed. There was a short respite. Saladin acquired Syria after the death of Nur Ed-Din's son As-Salih but this now meant that the Moslems were united under one leader.
With Saladin busy in the north, Reynald of Chatillon launched an attack on the southern caravan routes. The Moslems reacted swiftly and killed or captured nearly all of Reynald's men, not before they had caused havoc to the caravan routes. Reynald managed to escape and Saladin swore a solemn oath to make the man pay the penalty for his crimes. Saladin invaded 'Outremer' in the late Summer of 1183. For the next two years the fighting was sporadic, and in the Spring of 1185 both sides agreed to a four-years' truce with Saladin having troubles of his own in both Egypt and Syria. The Christians were delighted and the new king, Guy of Lusignan, did nothing that would jeopardise the peace. But they had reckoned without Reynald of Chatillon. Again the sight of rich Moslem caravans moving unmolested through 'Outremer', which was one of the treaty terms, was too much for him and early in 1187 he attacked a caravan travelling through his territory. Saladin sent an envoy to demand the release of the prisoners and their goods but Reynald would not even see them. War inevitably followed. On 1 July 1187 he invaded 'Outremer' and defeated the crusader armies at the battle of the Horns of Hattin. On 4 July 1187, after the battle, Saladin personally cut off the head of Reynald of Chatillon. Saladin then proceeded to mop up all Christian strongholds in the kingdom of Jerusalem with only Tyre holding out. Jerusalem was taken on 2 October 1187.
When news of the disaster at Hattin reached Europe, Pope Urban III, already a sick man, died from shock. He was succeeded by Gregory VIII, who issued an appeal for a new crusade, but died less than two months later and the new pope, Clement III, took up the call to arms. The first person to be ready was the German Emperor, Frederick Barbarossa. Leading by far the largest and probably the most well equipped and well disciplined army to leave Europe for the Holy Land, he set off on 11 May 1189, brushing aside the Seljuk Turks at the Battle of Iconium on 18 May 1190. Then disaster struck. On a scouting trip ahead of his army, Frederick fell into the River Saleph and drowned. With Frederick's death the army disintegrated and few Germans ever saw Antioch. Fortunately the French and English kings were on their way. The French king, Philip, arrived in Tyre in mid April. Richard the English king was however blown off course to Cyprus, which he promptly captured, and did not arrive in Tyre until the beginning of June. Meanwhile, Saladin had freed King Guy on condition that he returned home. As soon as he was free, however, the church agreed to release him from his vow and he went to Tyre to claim back the remnants of his kingdom. However he was in for a shock. Conrad of Montferrat, who had saved the city, refused to recognise him as king. This divided the kingdom. Realising that he was not making any progress outside Tyre, Guy mobilised his supporters and besieged Acre. Saladin's army failed to dislodge him so the Moslem army invested him instead. In time more and more Christians came to Guy's aid and he was greatly strengthened by the arrival of two western kings. Richard took command of the Christian army on reaching Acre and pursued the siege with such vigour that the city surrendered to him on 12 July 1191. Richard then pushed down the coast to defeat Saladin twice on the way, and finally stopped at Jaffa, which he made into a secure base for his fleet. By now Richard was having trouble with his governors in Cyprus and Conrad in Tyre and he sent envoys to Saladin to make peace. The negotiations lasted a year and during this time Richard had to come to the rescue of the garrison at Jaffa, where he again defeated Saladin. The situation became so serious at home in England that he had to agree to the terms Saladin had set before him so that he could reclaim his throne.
Saladin died on 3 March 1193 in Damascus at the age of fifty-four. Richard followed him on 11 April 1199, dying from a gangrenous wound received while fighting in France. The Islamic world mourned the passing of their greatest champion and Christendom's most noble defender.
The Characters
Richard I of England
Richard, who was thirty-two years old at the time of the third crusade, was one of the great fighting kings of England. He was tall, immensely strong, fair-haired with a superb physique, and so handsome that he fascinated his enemies as well as his friends. He was a good general, courageous, had limitless energy, and also had a love for the arts. However, he was psychologically unstable, and tended to wander from one emotional extreme to the other.
Philip II of France
Philip was the complete opposite to Richard, twenty-four at the time, a dull and somewhat timid young man, he was blind in one eye. Personally untidy, he had no love of war, did not like the arts and hated pomp. However as a politician he excelled, being both wiser and more cunning than Richard in the art.
Saladin
Saladin was fifty-three at the time of the third crusade. A fanatical Moslem, his appearance was unimpressive, he was short, rather red faced, and blind in one eye. He was a man who was never known to break his word to friend or foe; by the standards of the day this was incredible and it won him enormous respect among both Moslems and Christians.
A Rich Knight or Baron of the Third Crusade 1190 - 1192
A rich knight of the late 12th century would be dressed in a mail hauberk which would reach from his head to his knees. Beneath this he would be wearing a quilted undergarment called a gambeson. This was worn to prevent the mail chafing or being driven into a wound by a heavy blow. Mail mittens were attached to the sleeves of the hauberk, and in addition chausses (mail leggings) were worn to protect the legs and feet. Several types of helmet were worn. From a conical one very similar to that of the Norman knight of 1066, to elaborate ones that covered the whole face and carried crests. A shield was also carried and this would bear the heraldic coat-of-arms of the knight. Most horses of this period would be without the cloth covering or housing that was characteristic of knights from the mid 13th century.
The mounted knight was the most powerful soldier on the battlefield. Trained from birth in weapon handling and horsemanship, the weight of his horse added to his skill at arms and made him a foe to be reckoned with. On a mounted knight's playing piece this is reflected in his very high attack strength, as is the excellence of his protective armour in his defence strength.
Seen here in his dismounted state the knight has lost a lot of his attack strength as he can no longer ride down his enemy. His defence strength is not reduced to such a great extent as the sufficiency of his armour is not affected. The weight of his mail and shield etc., reduce his movement factor, making him move a lot slower than the more lightly armoured or unarmoured bowmen and men-at-arms.
- This would include military order knights.
An Average Knight
This is the type of knight who would have held a small manor from his lord or, if forced to do so, actually have fought for wages. His lower status is reflected in his equipment. He would probably have only a mail hauberk without mail mittens and without chausses. A warhorse or destrier was an expensive item and it is doubtful whether this character's mount would have been as powerful as that of the previous one.
The Squire
A squire was a knight in training. His equipment was similar to that of a sergeant or whatever his lord could afford. His whole life was devoted to learning his military art, in between looking after his lord.
The Sergeant
The sergeant was, by the late 12th century, the holder of a grant of land called a sergeanty. They were less heavily armoured than a knight, wearing light or old-fashioned equipment, but with the same armament as a knight. More often mounted than not he was used to fill out the rear ranks of knightly units in battle and as scouts and unit leaders at other times.
Turcopole
Turcopoles were at first Syrian mercenaries in Christian service. As time went on half-breeds, Moslem converts and native Christian sergeants born in 'Outremer' were included in their ranks. There is some dispute over how they were armed but the most probable combination seems to be that they were non- or lightly armoured, had a conical helmet, a small round shield and carried a light lance and a sword. A number (possibly as many as 75%) also had bows.
The Military Orders
These orders were the most important source of troops in 'Outremer', contingents of templars and hospitallers appearing in every army mustered by the King of Jerusalem from the mid 12th century onwards.
The Hospitallers
The Hospitallers were so named because of their original foundation in 1070 as a nursing brethren for pilgrims in a monastery hospital in Jerusalem. Granted papal protection in 1113 the order probably had a military contingent by the late 1130's, and by 1204 the order was based on its military brethren although the nursing role remained important throughout the middle ages.
The Teutonic Knights
The Teutonic Knights were only a hospital order at the time of the third crusade, although this order was to become notorious in Northern Europe later in history. They were founded in 1190 by the Merchants of Bremen and Lubeck. It did not turn into a full military order until 1198 during the abortive German crusade. We have included them in this game so that if you wish, you may play this campaign as well.
The Templars
The Templars were formed in about 1118 by two French knights, Hugh de Payens and Godfrey de St Omer, for the protection of pilgrims on the road from Jaffa to Jerusalem. Due to their early reliance on gifts and cast-offs (because of their dedication at first, to poverty) they were at first known as the poor knights of Christ, but very soon they were granted lodgings in the royal palace of Jerusalem, said to have been the site of the Temple of Solomon; hence the order's full title, the 'poor knights of Christ and the Temple of Solomon'. The Hospitallers and Templars were the most important military orders in 'Outremer' but there were other smaller orders:
The St Lazarus
The order of St Lazarus was the third military order to be established in 'Outremer'. Probably established as an offshoot of the Hospitallers in the early 12th century, the order concentrated on the treatment of leprosy. Turning military at about the same time as the Hospitallers, most of its military brethren were knights of the Hospitallers and the Templars who had contracted leprosy.
The Halberdier
This man-at-arms' armour protection could range from a three quarter mail hauberk to a gambeson, depending upon how rich his lord was. The pole-arm could be used to cut or thrust and its effectiveness is shown by his high attack strength.
The Billman
The bill was originally a hedging implement hastily tied to a pole as a makeshift weapon. It developed into a purpose made pole-arm that was almost as effective as the halberd.
The Crossbowman
The crossbow was a powerful weapon with a slow rate of fire. To load, the crossbowman dropped the string over a hook on his belt and placed his foot in the metal stirrup on the end of the weapon. Pressing the foot down hard cocked the weapon, which, when a bolt was placed in the central groove, was ready to fire. A lengthy process. Introduced into the Holy Land from Europe by the Franks in the first crusade, the crossbow soon earned a reputation for its accuracy and deadliness and was quickly adopted by the Moslems. Included in 'Outremer' are both armoured and unarmoured crossbowmen. Obviously the armoured crossbowmen merit a higher defence value.
The Shortbowman
Unlike the longbow, which was during the period portrayed by 'Outremer', confined almost totally to Wales and some of the adjoining English counties, the shortbow was in use in most European countries. Its lack of power, certainly against armoured targets, was to some extent offset by its fast rate of fire. The shortbow was also used by the Moslems, the main users being the Sudanese who supplied large numbers of them to the armies of the period. The Sudanese 'uniform' was usually richly decorated in bright colours. He was also armed with a shield (unlike his European counterpart) and a spear or mace.
The Spearman
The spearman in both Christian and Moslem armies was one of the cheapest forms of soldier to equip. The only difference would be in the different clothing of the two cultures as the spearmen of this period were rarely armoured.
The Mamluks
Mamluk (from the Arabic word for 'owned'), were white slaves, mainly Turks, who were purchased and trained at their master's expense. When competent as soldiers they were legally freed and became part of the standing army. Senior Mamluks held the rank of emir and were expected to supply a number of troops to the army on campaign. The most important body of Moslem cavalry was undoubtedly the royal Mamluks. Usually 1,000 strong they were Saladin's personal bodyguard and were the pick of the Moslem mounted troops in the Holy Land (almost comparable to the military orders).
Bedouin Tribesmen
The Bedouins were noted as brigands during this period and they would rob Moslems and Christians. Bedouins wore long flowing robes and a turban, not wearing armour because of their belief that they would not die except on the appointed day. They also did not use bows, as to take a man's life with an arrow was base beyond measure.
Syrian Cavalrymen
The mainstay of the cavalry in Moslem armies of the northern Holy Land, Syrian cavalrymen wore an assortment of different armour types and mail; lamellar and scale were all seen. The armour was normally three quarter length with short sleeves. The helmets were of two types: conical, called 'baida' (egg) or hemispherical. Armament was normally the lance and the sword (the lance was lighter than that of a knight's) and sometimes a bow was also carried.
Seljuk Cavalry
The Seljuk Turks originally ranged from Anatolia (Turkey) to Afghanistan and north to the Caucasus. At the time of the third crusade only those in Anatolia held any power and it was these that defeated the Byzantine Empire. The majority of Seljuk Cavalry were horse archers (see page 12), but there was some heavy cavalry. Their armour consisted of a waist-length lamellar corselet, a mail hood, and a helmet. Also carried was a shield and a spear in addition to a bow.
Seljuk Infantry
Although predominantly a cavalry nation, infantry was not uncommon in Seljuk armies. Unarmoured, infantrymen normally carried a shield and were armed with a spear and a sword.
The Peasant
The peasants in 'Outremer' may be used in two main roles. Firstly they may appear as actual peasantry, and secondly as the type of poorly armed foot soldiers who sometimes appeared on medieval battlefields. These people would normally have acted as grooms, servants and so on and if ever called upon to fight would have done so with whatever weapons they could find. All were under-armoured and would never have stood a chance against a well-armed force unless deployed in large numbers.
Innocent Bystanders
These characters are included to add a little colour to the game. They are essentially non-combatants who have been caught up in events not of their making. They do, however, provide scope for murder and kidnap scenarios and other mayhem that the players may care to invent.
Horse Archers
Horse archers were probably the most numerous type of cavalry in a Moslem army, during this period. With little if any armour, they were mounted on small swift horses and their main weapon was the composite bow although they were also armed with a small sword. The horse archer's main tactic was to wear down an opponent with a constant barrage of arrows, always keeping out of range of his spears and halberds, and only charging into him when he was too weak to fight back effectively.
Slingers
Used by Moslem peasants, the sling if used properly could be more effective against armoured targets than the bow. Whereas an arrow had to penetrate the armour to cause damage, the stone from a sling can cause concussion or serious bruising without penetrating.
Assassins
Founded in 1090 by a Persian, Hasan As-Sabah, the assassins (named from a corruption of the latin for hashish, to which they were allegedly addicted) were an extremist group of a Shi'ite Moslem sect, the Ismailites. Their most lasting contribution to this period was the art of political assassination, to which they gave the name. The dress of the assassin was similar to that of any other Moslem. Disguises were sometimes used and mentioned are assassins dressed as monks, merchants and even Christian soldiers. In their own stronghold they wore white cloaks and red caps.
Description and Use of the Playing Pieces
A Note on Time and Distance
As 'Outremer' is a game of man-to-man, the game turns represent a very short period of time - five seconds. Just time to loosen a bolt or to make a blow and parry with a sword. A hex on the map is one metre across. Room for a foot soldier to swing a weapon but not really big enough for a cavalryman. This is why the mounted knights occupy two hexes and why no stacking is allowed for live characters.
Missile fire usually, but not always, takes place at short and medium range. Long range has been included to allow players to use maps from two games to form a larger playing area if they so wish. It is also hoped to produce add-on sets in the future with totally new terrain maps, characters and scenarios. With these possibilities in mind, long range fire might well feature quite strongly in a game where 4 or more maps were in use.
(Diagram: a mounted character piece, with labels: Attack Strength printed in black; Defence Strength printed in red; circle round Defence Strength denotes armoured character; arrow denotes direction of mounted characters; Movement value printed in blue.)
Playing pieces for a mounted character
This represents an unwounded, armoured, mounted character, hereafter referred to as 'healthy'.
This piece represents the horse without its rider. If a character dismounts or falls from his horse as a result of combat or missile fire, flip over piece 1 and replace the rider with the dismounted version of the character appropriate to his condition. (This may be 'healthy', 'wounded', 'stunned' or 'dead'. (See 'playing pieces' on page 14 for a foot character or dismounted rider).
This represents the character when wounded. Note that the character's attack and defence strengths are greatly reduced. If in doubt of a character's casualty status, a glance at the combat values will tell you at once if he is wounded or healthy. If a mounted character is wounded as a result of combat but does not fall from his horse, replace piece 1 with piece 2.
This represents a horse which has been killed as a result of combat or missile fire. If the horse was being ridden by a character at the time it was killed, he is replaced with his appropriate dismounted playing piece. (See 'playing pieces for a foot character or dismounted rider', below).
Playing pieces for a foot character or a dismounted rider
A foot character is represented by two playing pieces.
This piece represents a healthy foot character.
This piece represents a character who has been stunned as a result of combat. If a healthy character is stunned, flip piece 1 over to represent his casualty status.
A character who is stunned remains so for one complete game turn. During this time he may not move, fire or attack an opposing character. He has a low defence strength to simulate his dazed condition.
This represents a wounded character. If as a result of combat or missile fire, a healthy character is wounded, replace the playing piece with this one.
This represents a character who has been killed. If he was healthy or stunned when killed, replace piece 1 with this piece. If already wounded, merely flip over the wounded counter.
Playing pieces for a mule
The mule is represented by one playing piece.
This piece represents a laden pack mule in a healthy state.
This represents the mule when as a result of combat or missile fire it is killed. Simply flip the piece over in the normal manner.
N.B. Combat and movement values always follow the same colour-code:
- Attack strength - Black
- Defence strength - Red
- Movement value - Blue
- Armoured target - Ring around defence strength
Obviously pieces without movement values may not move e.g. a stunned character, and pieces without attack strengths may not attack anyone.
This system of flip-over and piece replacement is used for all characters, including knights, men-at-arms, archers and so on.
Rules of Play
Introduction
'Outremer' is both a self-standing game in its own right and a companion game for 'Cry Havoc' and 'Siege'. 'Outremer' is compatible with 'Cry Havoc' and 'Siege' and some of the rule changes in 'Outremer' can be incorporated in 'Cry Havoc' and 'Siege'. Where rules in 'Cry Havoc', 'Siege' and 'Outremer' conflict, the rules in 'Outremer' should be followed.
'Outremer' has a scenario generation system in it rather than fixed scenarios (although there are three scenarios to demonstrate how the system works), which will give a large number of scenarios.
'Outremer' contains many new rules and should be read carefully by players familiar with 'Cry Havoc' and 'Siege' as well as those new to the system.
Section One
1.1 Terrain Types
| Hex Type | Movement Point Cost per Hex | Cover Type | Terrain Advantage |
|---|---|---|---|
| Arrow-slit * | Impassable to Horses; 1 - Foot | Heavy | + (combat not permitted through arrow-slit) |
| Battlements | Impassable to Horses; 1 - Foot | Heavy | + (from other side of Battlement); 0 (from adjoining Battlement) |
| Castle Wall | Impassable | Infinite | N/A |
| Door in Building Wall | 1 | Medium | + |
| Flat Ground | 1 | None | 0 |
| Slope (top lip) | 2 | Medium | - |
For Elaboration of Cover Types - See 'Cover' (1.4)
* Note that movement through the arrow-slit is not permitted. Characters in hexes containing Special Equipment ignore the natural terrain in the hex.
1.2 Game Turns
Each Game Turn is played in two phases. First one player or side moves, shoots and engages in combat, followed by the opposing player or side.
Before each Game Turn each player or side rolls one die. The side with the highest total is the first player or side for that turn. On the next Turn the side or player who rolled first in the last Turn gets a -1 on the number he rolls this Turn. This continues until the opposing side, or player goes first. (i.e. if one side or player goes first for three turns that side or player gets a -3 on his next turn's die roll).
1.21 Sequence of Play
Each player's phase of a Game Turn is divided into seven distinct steps. In each phase the term 'all' refers to all the characters of one player/side. The sequence of play is as follows:
First Player/Side
- All longbowmen, shortbowmen and crossbowmen may shoot; EXCEPTION: Characters who engaged in combat in the previous game turn may not shoot.
- All horse archers may shoot; EXCEPTION: Horse archers who engaged in combat in the previous game turn may not shoot.
- All characters may move; EXCEPTION: Crossbowmen who shot in step 1 may not move.
- All longbowmen and shortbowmen may shoot again; EXCEPTION: Longbowmen who moved in step 3 may not shoot, shortbowmen who moved more than half move in step 3 may not shoot. (Those who were engaged in the previous game turn and who are not adjacent to any enemy characters may shoot this turn).
- All horse archers may shoot; EXCEPTION: Horse archers who moved more than half may not shoot.
- All characters adjacent to enemy characters may engage in combat (and some may advance after combat)!
- All friendly characters stunned during opponent's phase are flipped back over.
END OF FIRST PLAYER/SIDE'S PHASE
Second Player/Side
Follow the same sequence of steps as for the first Player/Side.
1.3 Shooting
To shoot at an enemy:
(i) calculate the range to the target (so many hexes excluding the shooter's hex). (ii) note the target type - for 'mounted knight' refer to the first 'missile result table' ('missile against armoured mounted target') - for 'dismounted knight', refer to the third 'missile result table' ('missile against armoured foot target') (iii) note the target's cover type ('none', 'light', 'medium' or 'heavy'), and the shooter's weapon, and refer to the appropriate column in the Missile Results Table (iv) throw one die and read the result of the shot from the table.
PLAYERS SHOULD ALSO REFER TO THE SECTION 'RESTRICTIONS ON SHOOTING' (1.33).
1.31 Missile Weapon Ranges
Ranges are given in hexes.
| Weapon | Short Range | Medium Range | Long Range |
|---|---|---|---|
| Thrown Dagger | 1-3 | 4-6 | 7-9 |
| Javelin | 1-8 | 9-15 | 16-30 |
| Sling | 1-15 | 16-30 | 31-50 |
| Mounted Shortbow | 1-12 | 13-35 | 36-55 |
| Shortbow | 1-15 | 16-45 | 46-75 |
| Crossbow | 1-25 | 26-50 | 51-90 |
| Longbow |
1.311 Additions to die roll
| Condition | Addition |
|---|---|
| Medium Range | +1 |
| Long Range | +2 |
| Firer Wounded | +2 |
| Firer Moving on Horseback | +2 |
| Fast Moving Target (greater than 10 hexes) | +1 |
1.32 Missile Results Table (see 1.321)
- Defender must retreat immediately. He may retreat through friendly characters. He must not retreat through hexes adjacent to enemy characters. If unable to retreat the full distance defender is 'wounded' instead. Special - stunned and wounded characters are considered dead if they receive further injury. Armoured characters have a circled defence strength.
(Diagram: a mounted piece with a ring around its defence strength.)
1.321 Missile against mounted targets
(Transcriber's note: on the printed page this table is rotated, with three die-roll columns, one per weapon type, staggered by one row each against a single set of result rows. It is shown here with the rows aligned as printed. A "-" is a blank cell in the original.)
Die roll by weapon type: Longbow; Crossbow/Sling; Shortbow/Javelin/Dagger. Results for Armoured Horsemen and Unarmoured Horsemen by Cover Type (None / Light / Medium).
| Longbow | Crossbow/Sling | Shortbow/Javelin/Dagger | Armoured: None | Armoured: Light | Armoured: Medium | Unarmoured: None | Unarmoured: Light | Unarmoured: Medium |
|---|---|---|---|---|---|---|---|---|
| 1 | - | - | E | D | C | F | E | D |
| 2 | 1 | - | D | C | B | E | D | C |
| 3 | 2 | 1 | C |
(Heavy Cover Impassable to Horses)
Result key:
- A - Defender retreats 4 hexes +
- B - Horse killed - rider stunned and dismounted
- C - Horse unharmed - rider wounded
- D - Horse killed - rider wounded and dismounted
- E - Horse unharmed - rider killed and dismounted
- F - Horse killed - rider killed and dismounted
1.322 Missile against foot targets
(Transcriber's note: as with 1.321 the printed table is rotated and the three weapon die-roll columns are staggered against one set of result rows; shown here with rows aligned as printed. "-" is a blank cell in the original.)
Die roll by weapon type: Longbow; Crossbow/Sling; Shortbow/Javelin/Dagger. Target Type Armoured Foot and Unarmoured Foot, by Cover Type (None / Light / Medium / Heavy).
| Longbow | Crossbow/Sling | Shortbow/Javelin/Dagger | Armoured: None | Light | Medium | Heavy | Unarmoured: None | Light | Medium | Heavy |
|---|---|---|---|---|---|---|---|---|---|---|
| 1 | - | - | C | C | B | A | C | C | C | B |
| 2 | 1 | - | C | B | B | A | C | C | B |
Key:
- A - Defender retreats 2 hexes +
- B - Wounded
- C - Killed
- * Repeat from missile against mounted targets table.
1.33 Restrictions on Shooting
1.331 General
For clarification of cover types, see Cover (1.4).
A character may shoot at a target if an unobstructed 'line of sight' exists between the shooter's hex and the target hex. The 'line of sight' is a straight line drawn by the shooting player from the Centre of the shooter's hex to the Centre of the target's hex.
If this 'line of sight' crosses a hex containing either a character or terrain other than flat ground, then shooting is restricted as explained in the following sections.
1.332 Shooting over intervening characters
Shortbowmen, longbowmen and javelinmen may shoot over a maximum of 4 intervening characters subject to all other 'cover' limitations providing:
- The target is at medium or long range.
- The target is either in no cover or light cover.
(Diagram: a row of hexes with, left to right, characters A, B, C, D, and to the right X, Y, Z in scrub terrain. Key: A. Fatimid Spearmen; B. Sudan Bowmen; C. Bedouin (dismounted); D. Armoured Mamluk (dismounted); X. Peasant; Y. Knight; Z. Foot Sergeant.)
A can shoot at X and Y but not Z. B cannot shoot at X, Y or Z.
1.333 Shooting over intervening terrain
If there is a scrub hex between the shooter and the target, the latter receives light cover.
If the line of sight crosses the lip of a slope hex (see diagram) AND the slope hex is closer to the character on the lower ground than to the character on the higher ground, then the line of sight is blocked and the shooter may not shoot at the target. Note that if the slope hex is an equal distance between shooter and target, then the line of sight is blocked and the target cannot be shot at. EXCEPTION: If there are two inward-facing slope hexes between the shooter and the target, then the slopes have no effect, as they form a 'dip' rather than a 'ridge'.
EXAMPLE
(Diagram: hex map with slope lips and scrub, showing characters A, B, C, D and E.)
Key
- A may shoot at D, because the slopes form a 'dip'.
- A may not shoot at E, because the slope hex is an equal distance between shooter and target.
- B may shoot at D, because the slopes form a 'dip', but D receives light cover, because the line of sight passes through a scrub hex.
- B may not shoot at E, because the slope hex intervenes.
- C may shoot at E, because no slope lip intervenes.
- C may shoot at D, because no slope lip intervenes (note that terrain in shooter's hex does not apply).
1.334 Shooting through windows
Characters may shoot from window hexes at any angle provided that other characters and/or terrain do not intervene.
Characters shooting into buildings through windows may only shoot at targets occupying window hexes. EXCEPTION: if the shooter is outside the building and directly adjacent to the window, he may shoot at any target inside the building subject to normal cover limitations.
A character may shoot from a window hex into another door or window hex; he may not shoot from one window hex through another window or door hex.
1.335 Shooting through doorways
Characters may shoot from door hexes at any angle provided that other characters and/or terrain do not intervene.
Characters wishing to shoot in, or into the interior of, a building must be inside the building, or directly adjacent to a window of the same building, or in a doorway hex of the same building. They may then shoot at anyone in the building subject to normal cover limitations.
Characters shooting through gaps in exterior walls (i.e. entrances to courtyards) may shoot at any target that is not in infinite cover, and into door and window hexes subject to normal terrain and cover limitations.
Shooting at targets in tree hexes. Characters may shoot into tree hexes. Characters may not shoot over or through tree hexes.
1.337 Infinite Cover
Targets in infinite cover may not be shot at.
No character may shoot over or through buildings or courtyards, as these supply infinite cover. Only apertures such as doors and windows afford an opportunity for building walls to give less than infinite cover.
1.4 Cover
Doors/Corners Characters in door or exterior corner hexes receive medium cover.
(Diagram: A and B fire simultaneously (in one turn) at a target which is in an exterior corner hex. Obviously, the target cannot receive medium cover from the corner if both are firing at once. The player controlling the target character should nominate from which crossbowman's point of view he is in cover.)
1.41 Scrub
Characters may shoot missiles into, over or through scrub hexes. Characters in scrub hexes receive light cover.
1.42 Slopes
Characters in slope hexes are in medium cover from missiles crossing the top lip of slope. If the missile does not cross the top lip of the slope the target receives no cover. Also see 1.333.
1.43 Trees
Characters may shoot missiles into tree hexes, but missiles may not be shot over or through tree hexes.
Characters in tree hexes receive light cover.
1.44 Walls
Characters behind walls receive infinite cover and may not be shot at.
1.45 Windows
Characters in window hexes receive medium cover from missiles passing through the window aperture.
EXCEPTION: Character receives only light cover if missile fired from hex adjacent to window.
(Diagram: a window hex containing C, with B adjacent outside and A beyond B. C receives medium cover when shot at from A. C receives light cover when shot at from B.)
1.46 Horsemen in Cover
A mounted character occupies two hexes. For cover classification, if he is in two different terrain types, he is considered to be totally in cover of the heavier type. EXAMPLE: a mounted character occupies a 'flat ground' hex and a 'scrub' hex; he is considered to be in light cover for cover purposes.
1.5 Movement
Each character has a movement point value printed on his piece. These are given in hexes as follows.
| Healthy | Wounded | |
|---|---|---|
| Unarmoured foot | (illegible in the scan) | 4 |
| Armoured Infantry | 6 | 3 |
| Dismounted knights | 4 | 2 |
| Unarmoured cavalry | 15 | 15 |
| Armoured cavalry | 12 | 12 |
As each character moves through each hex he expends points depending on the amount that each hex costs to pass through each turn, a player may move all, some or none of his characters up to his maximum movement point value. Unused movement points may not be accumulated and used in later turns.
1.51 Restrictions on Movement
1.511 Characters may not pass through hexes containing live enemy characters. Note that characters may pass through hexes containing live friendly characters.
1.512 Walls are impassable, buildings, courtyards etc., must be entered via doors or windows.
1.513 Horses may not enter tree hexes or the interior of any building, they may however occupy door hexes and may enter courtyards.
1.514 Hexes containing a dead horse have their terrain movement cost doubled.
1.515 Hexes containing 3 or more dead men have their terrain movement cost doubled.
1.516 Hexes containing 2 dead horses or 6 dead men become impassable. Note that where a hex contains a mixture of dead men and horses three dead men are considered to be of equal mass to one dead horse.
1.52 Moving Through Windows
Only dismounted characters may move through windows. Characters may not move through a window if the hex adjacent to the other side of the window is occupied by a live enemy character.
1.53 Mounting and Dismounting
To mount/dismount from a horse takes a character 1 complete turn.
To mount, a character must be in one of the hexes that are to either side of the horse, example.
(Diagram: Horse can only be mounted from hex marked X - the two hexes to either side of the horse.)
Characters that can normally ride a horse may mount a horse acquired as a result of combat. If they do so, remove the dismounted horse piece from play and substitute that character's normal mounted character piece.
Wounded characters take 2 turns to mount a horse.
1.54 Riderless Horses
Unharmed riderless horses remain stationary until remounted or led.
Horses do not have independent movement, they may only move when attended by a human character (wounded or healthy).
Horses may be led by an infantryman at his appropriate movement allowance. To lead a horse move a character to the head of the horse (marked with an arrow on the counter) and continue to move the character as normal treating the horse as an extension of the character piece. Note that horses which are led are still restricted in the types of terrain they can enter.
1.55 Movement Direction for Horses
A horse 'faces' in the direction of the arrow on the counter and normally moves into the three hexes directly in front of it. If however the horse wishes to move into one of the other hexes surrounding it, one point of movement must be added to the normal movement points value to enter that hex.
(Diagram: a horse facing right. The three hexes in its frontal arc are marked with movement cost 1 on open ground (and 2 for a scrub hex); the other surrounding hexes are marked 2 on open ground (3 for a scrub hex). Arrows indicate frontal arc.)
It also takes 3 movement points to turn a horse through 180 degrees so that it is facing in the opposite direction.
1.56 Frontal Arc (see * below)
1.57 Charges
Horsemen may try to charge into hand-to-hand combat to achieve a combat bonus. To do this the horseman must be facing his target (have the target in the frontal arc) and be able to move at least the last four hexes in a straight line towards the target.
EXAMPLE
(Diagram: horsemen A, B, C and D on a hex map with scrub and slope terrain.)
- A can charge B
- B can charge A and D
- C cannot charge
- D can charge B
* Frontal Arc (horses only) The frontal arc of a horse extends from the three hexes in front of the horse along the line of hexes.
Only one charge can be made at a target at one time; they may not be added to any other attack on that target in hand-to-hand combat.
1.58 Counter-Charging
If a horseman is subjected to a charge and the charge is directed through his frontal arc he may counter-charge as long as he can move two hexes in a straight line towards his opponent without reducing his opponent's obligatory four hex charge move.
Therefore in the example in 1.56, A cannot counter charge B whereas D could.
1.59 Evading
If a horseman is subjected to a charge he may try to evade the charge. To do this he must be outside of his opponent's four hex charge move and roll on the evade table.
Evade Table
| Die Roll | Result |
|---|---|
| 1 - 4 | No Movement |
| 5 | Evade 4 hexes to the right |
| 6 | Evade 4 hexes to the left |
| 7 | Evade 2 hexes to the right |
| 8 | Evade 2 hexes to the left |
| 9 | Evade 4 hexes away from charger |
| 10 | Routs one full move away from charger |
1.6 Stacking
Only one live character may occupy a hex at any one time. Characters may pass through hexes containing a friendly live character.
Characters may occupy a hex containing dead characters subject to movement limitations i.e., if a character cannot move into a hex obviously he cannot stack on it.
1.7 Combat
When two or more characters are in adjacent hexes they may engage in combat. EXCEPTION: Combat is not permitted if the terrain prevents movement between the two hexes concerned. Example: A character in a building hex may not have combat with a character outside that building unless it was through a door or window hex.
To resolve combat the attacking character divides his attack strength by the defending character's defence strength, this produces a 'combat odds' which is then referred to the "Combat Results Table" (CRT). A die is thrown by the attacking player and the result is read off the CRT.
When computing 'combat odds' attack strengths are always rounded down to the nearest divisible figure. EXAMPLE: an attack strength of 8 against a defence strength of 3 would give combat odds of 2-1.
Attacks at less than 1-1 are made at 1-1.
Special 'Combat Odds' may be altered depending on the terrain over which the combat is being fought, see 'Advantage of terrain in combat' (1.71), and the number of characters involved, see 'Multiple Combat' (1.72).
1.71 Advantage of Terrain in Combat
If two characters who are involved in combat are in different types of terrain, one may have an advantage which would modify the combat odds. For classification of advantageous terrain see terrain (1.1) and check 'effect of terrain on combat' (1.73).
NB A mounted character is considered to be in the most disadvantageous terrain of the two hexes he occupies.
1.72 Multiple Combat
When a character enters a hex which is adjacent to 2 or more opponents he may elect to fight some, all or none of them. If a character elects to give combat to 2 or more opponents he must combine his opponents' defence strengths into 1 defensive factor. If the defender or attacker sustain a casualty on the combat results table, the controlling player chooses which of his characters is affected.
When 2 or more characters attack a single character they may make individual attacks or they may combine their attack strength into one attack. If two or more attackers combine their attack strengths against a single infantry character, the attacking player may move one column to the right on the CRT. This rule does not apply to attacks on mounted characters, but it does apply if mounted characters attack an infantry character.
If the attacking characters are in different types of terrain, the most disadvantageous terrain modifier applies to the attackers; EXAMPLE: two characters attack one enemy, combining their attack strengths; one is at '+' terrain modifier and one is at '-', while the enemy is at '0', so the attack is at '-', and the odds column is shifted one to the left on the CRT. However, as there are two attackers, the odds column is shifted one to the right, so the two effects are cancelled.
1.73 Effect of Terrain on Combat
- -- = Disadvantage
- 0 = Neutral
- + = Advantage
| Attacker in | vs | Defender in | Result |
|---|---|---|---|
| -- | + | Move left 2 columns on CRT. | |
| -- | 0 | Move left 1 column on CRT. | |
| 0 | + | Move left 1 column on CRT. | |
| 0 | -- | Move right 1 column on CRT. | |
| + | 0 | Move right 1 column on CRT. | |
| + | -- | Move right 2 columns on CRT. |
If both sides are in terrain that places them at a mutual advantage/disadvantage this does not affect the CRT.
1.74 Horses in Combat
When a horseman is dismounted as a result of combat or missile attack the appropriate counter is placed by the owning player in a hex adjacent to the now riderless horse.
Characters that can normally ride a horse may mount a horse acquired as a result of combat. If they do so, remove the dismounted horse piece from play and substitute that character's normal mounted character piece.
Wounded characters take 2 turns to mount a horse.
1.741 Charges and Counter-Charges
A charging or counter-charging horseman will receive a hand-to-hand combat bonus of half his attack strength added to his attack for that turn only, fractions rounded down. EXAMPLE: a knight with a normal attack strength of 28 will have a charge bonus of 14 on the first turn of hand-to-hand combat thus giving the knight a total attack strength of 42.
1.75 Combat Results Table
1.751 Combat against mounted opponents
| Die | 1-1 | 2-1 | 3-1 | 4-1 | 5-1 | 6-1 | 7-1 | 8-1 | 9-1 | 10-1 | 11-1 | 12-1+ |
|---|---|---|---|---|---|---|---|---|---|---|---|---|
| 1 | C | D | D | E | E | F | F | G | G | H | H | H |
| 2 | C | C | D | D | E |
Key
- A - Attacker Wounded
- B - Attacker Retreat 1 Hex +
- C - Defender Retreat 1 Hex +
- D - Horse unharmed rider stunned and dismounted
- E - Horse unharmed rider wounded
- F - Horse killed rider wounded and dismounted
- G - Horse unharmed rider killed and dismounted
- H - Horse killed rider killed and dismounted
1.752 Combat against infantry
| Die | 1-1 | 2-1 | 3-1 | 4-1 | 5-1 | 6-1 | 7-1 | 8-1 | 9-1 | 10-1 | 11-1 | 12-1+ |
|---|---|---|---|---|---|---|---|---|---|---|---|---|
| 1 | C | D | E | E | F | F | F | F | F | F | F | F |
| 2 | B | C | D | E | E |
Key
- A - Attacker wounded
- B - Attacker retreat 1 hex +
- C - Defender retreat 1 hex +
- D - Defender stunned
- E - Defender wounded
- F - Defender killed
+ Retreating character may not displace other characters, nor may it move adjacent to an enemy. If unable to retreat, the character is wounded instead.
Special Stunned and wounded characters are considered dead if they receive further injury.
1.76 Advance After Combat
After a combat result has been resolved, one character who was involved in the combat may be moved up to two hexes if:
- The first hex the moving character moves into is the hex from which the enemy character was forced to retreat from or in which he was killed in combat.
- The moving character is in a hex adjacent to an enemy character who was forced to retreat or killed in the combat.
- Before he is moved, the advancing character is not adjacent to any other living enemy character. If the advancing character is adjacent to another living enemy character, he may advance one hex only.
Note that, depending on the combat result, the advancing character could be from EITHER side.
The movement points used in 'advance after combat' do not count against the movement point allowance for the next turn.
Characters who have not been involved in combat cannot move in the combat step.
1.77 Pack Animals
Pack mules are treated in the same manner as riderless horses - EXCEPTION: Pack mules may never be mounted.
Pack mules may be strung together and led in file in the same manner described for leading a horse; see 1.54.
It takes one man one entire turn to attach/detach one mule to/from a string of mules, whether the animals are alive or dead.
1.78 Attacking Pack Animals
When a player wishes to attack a pack animal, resolve combat/missile attack in the normal manner referring to the relevant result table. Use tables for unarmoured mounted target/opponent. When obtaining result ignore rider casualties. Treat 'wounded' results as 'killed'.
If a pack mule which is part of a string of mules is retreated, all the mules will retreat - characters leading mules will not retreat in this instance.
1.8 Morale
1.81 Morale Check
A morale check has to be taken in the following circumstances:
- Charged by Armoured Cavalry
- Ambushed
- Leader killed or captured
- Knight/Mamluk killed within 3 hexes
- Friendly character routing within 3 hexes.
1.82 Each Character Has a Morale Value
| Character | Morale Value |
|---|---|
| Knights, Royal Mamluks | 10 |
| Other Mamluks, Sergeants | 9 |
| Squires, Assassins, Clergy | 8 |
| Halberdiers, Syrian Cavalry | 7 |
| Billmen, Turcopoles, Bedouin | 6 |
| All Spearman | 5 |
| All Missilemen (including Horse Archers) | 4 |
| Engineers | 3 |
| Peasants | 2 |
| Civilians | 1 |
1.83 Additions and Deductions to Morale Value
| Condition | Modifier |
|---|---|
| Enemy characters panicking within 6 hexes | +1 |
| Enemy characters routing within 6 hexes | +2 |
| Outnumber present opponent by 3:1 | +1 |
| Defending obstacle or doorway | +3 |
| Friendly characters panicking within 6 hexes | -1 |
| Friendly characters routing within 6 hexes | -2 |
| Outnumbered 3:1 by present opponent | -1 |
| Knight/Mamluk killed within 3 hexes | -1 |
| Three other friendly characters killed within 3 hexes | -1 |
| Leader killed or captured within 6 hexes | -2 |
| Character is wounded | -2 |
Characters must throw equal to or under their morale value after modifications to stay in good morale. If a character rolls over his morale value he panics. If his morale value reaches 0 or less he routs.
1.84 Effects of Panic
Characters who panic must retreat 3 hexes immediately. The retreat may be through hexes containing friendly characters, but must not be through hexes adjacent to enemy characters. This movement does not count against the character's movement point allowance.
If a panicking character has to pass adjacent to an enemy character the panic becomes a rout. If attacked, panicking characters suffer a shift of one column to the right on the CRT and no results affecting the attacker(s) will apply.
A character may not return to normal status until EITHER a sergeant or knight for the christians or an amir or mamluk for the moslems is in an adjacent hex at the end of the player's movement step. OR the panicking character is at least 6 hexes away from the nearest enemy character. If either of the above occur, remove the 'panic' piece from the character.
1.85 Effects of Rout
A routing character acts as a panicking character except where noted below. A routing character must retreat his maximum movement point allowance immediately. On each friendly movement step a routing character must move his maximum movement point allowance away from the enemy.
If a routing character has to pass adjacent to an enemy character he has to surrender to that character.
A routing character may not return to normal status until a sergeant or knight for the christians or an amir or mamluk for the moslems is in an adjacent hex at the end of the player's movement step.
If panicking or routing characters move off the map, they cannot return.
Scenario Generation System
Introduction
This Scenario Generation System should be used as a guide to help you set up your scenarios. Although it is orientated towards the middle-east with some changes it could be used to set up scenarios in western Europe of the same period. One of the many ways in which this system can be used other than for one-off scenarios is in a mini-campaign, with a group of 'pilgrims' who have travelled from Europe and are going from Antioch in the north to see the wondrous sites of the Holy Land in the south. You can start off by creating your party from the pilgrim generation table and then bribing, fighting and praying your way south to the Holy Land, gaining in experience and prowess (and purse) as you go. So to start your mini-campaign you will need a pen and paper in order for you to keep track of your party's position on the Historical Map, from game to game.
Each hex on the Historical Map approximately equals 20 miles i.e. one average days travel for your party.
Each time your party enters a new hex you have to roll the percentage dice, to see if you have encountered anything in that hex.
If you roll 50 per cent or less, you have encountered something in that hex. If the die roll was 51 per cent or more, then that hex is clear and you may go on to the next hex.
If an encounter is to take place, then go to the Scenario Generation System.
On page 39 you will see the Initial Encounter Table, then, if you look at your present position on the Historical Map, you will see which one of the headings apply, are you and your party near a town, on a highway or in the countryside.
Once you have found out which one of these apply, you then take the percentage dice and using the appropriate column you find out what your party has encountered, for example (the party is on the highway during the day, a dice roll of 78 was rolled, by looking down the column, we see that the party has bumped into a saracen raiding party).
Now we have to see what's going to happen next, so if you look at the Effects Tables you will see that each of the encounters has its own table. The one we want to look at is on page 42 under the Moslem Raiders Table, another dice roll is made to see what their intentions are, or what course of action they might take. A dice roll of 63 is made, which is a party of Saracens 1-20 strong, being chased by 10 to 15 Turcopoles.
Now the choice is yours, do you think that your party should get involved and attack the saracens or should you let them go by and not let your party get involved.
Dice
(Supplied with the game).
d6: Roll a six-sided dice, taking the result as the number of digits appearing on the top face.
d10: Roll a ten-sided dice, taking the result as the number of digits appearing on the top face.
d20: Roll two ten-sided dice, taking the result as the number of digits appearing on the top faces and adding them.
d100: Roll two ten-sided dice. One dice should be a different colour from the other. One dice represents numbers from 1 to 10. The other represents multiples of 10. EXAMPLE: If a 4 was rolled on the unit dice and a 5 was rolled on the multiples-of-ten dice the number rolled would be 54. A 0 on the multiples-of-ten dice means that only the result from the unit dice counts (a number from 1 to 9). If a 00 result occurs on the dice 100 has been rolled.
Upkeep of Characters
Money scales in this section are not meant to be historical, they are a guide to the players on how large a force can be maintained (*) with the amount of money available in their purse. Feudal economics was largely run on barter of goods and services and not on the exchange of coins, which were rare.
(* or on how far they can go).
The monetary system below is more representative of the systems in use at the time rather than based on any single example.
- Copper Centime (CC) 25CC = 1SC
- Silver Centime (SC) 5SC = 1SF, 25 SC = 1 GF
- Silver Franc (SF) 5SF = 1GF
- Gold Franc (GF)
The figures given below are the cost to keep one character for one day in the essentials (food, wine, clothes etc).
| Character | Pay | Upkeep |
|---|---|---|
| Knight | 1GF | 1SF |
| Sergeant | 1SF | 1SC |
| Squire | - | 1SC |
| Men-at-Arms | 1SC | 3CC |
| Peasant | - | 1CC |
| Mercenaries | * (see below) | * (see below) |
| Civilians | - | 3CC |
| Noble Civilian | - | 1SC |
* The cost of mercenaries is double that of ordinary troops. Mounted sergeants cost three times the amount to pay and keep as against sergeants on foot. Also, on leaving the company they would demand severance pay of one week and if not paid would attack the party. (As would happen if wages were not paid).
As for the rest of the party loyalty could normally be maintained provided that the soldiers' upkeep was maintained and a definite date or destination had to be given when they would be paid. If their pay was not forthcoming at the specified time they would attack the loyal (paid) members of the party in order to receive their pay.
If the party leader runs out of money he will either have to hire out his party as a mercenary unit, raid a village or rob wayfarers to stay alive.
Duty if hired as mercenaries (normal mercenary rates per day)
| d100 | Duty |
|---|---|
| 01-30 | Patrolling/Guarding Region (Use encounter table for encounters). |
| 31-40 | Looking for Moslem Raiders (Use Moslem Raider Chart*). |
| 41-50 | Looking for Brigands (Use Brigand Chart*). |
| 51-80 | Escorting Merchant (Use encounter table for encounters). |
| 81-00 | Raiding Moslem Village |
* You do the ambushing and pursuit. Roll on table below if raid on moslem village indicated.
Numbers in Moslem Village
| Type | Number |
|---|---|
| Amir | d6 (minus 5 from die roll) |
| Armoured Mamluks | d6 (minus 4 from die roll) |
| Unarmoured Mamluks | d6 (minus 3 from die roll) |
| Bedouin Tribesmen | d6 |
| Syrians | d6 (minus 2 from die roll) mounted, d6 foot |
| Moslem Spearmen | d10 |
| Moslem Missilemen | d10 |
| Moslem Peasants | d10 |
| Civilians | d6 |
Loot from Moslem Village
Roll d100 for each room entered
| d100 | Loot |
|---|---|
| 01 | Village Chest d10 Silver Francs |
| 02-05 | Personal Belongings d6 Copper Centimes |
| 06+ | Nothing |
Pilgrim Generation Table
Pilgrims as we now know them are unarmed groups of churchmen seeking the truth; this was not so in the 10th and 11th centuries. Most male members of the group would be armed (indeed many females of the party would also be armed). A group of pilgrims would probably be a knight and his retainers 'visiting the holy land' as a number of churchmen with an escort of mercenaries. A trip to the holy land was a 'once in a lifetime' experience for most of these people who probably had never before left their village. Many however never managed to reach the holy land and even less returned to relate their experiences.
Group Determination Table 1
Roll d100 to determine what type of group of pilgrims are to be used.
| d100 | Group |
|---|---|
| 01-05 | Abbot/bishop with escort |
| 06-20 | Churchmen with escort |
| 21-35 | Group of villagers |
| 36-50 | Men-at-arms and retainers |
| 51-75 | Sergeant and retainers |
| 76-95 | Knight and retainers |
| 96-00 | High ranking noble and retainers |
A high ranking noble (duke, baron, etc) would be attended by knights, squires, sergeantry, men-at-arms, ladies, his personal chaplain and a whole host of other people under his protection and a large baggage train of mules and wagons. The same could be said about most of the other group above except that the numbers would be less and the trappings not so grand.
The churchmen would have escorts in direct proportion to their importance and the number of mercenaries that they could afford. An abbot, for instance, would have a number of knights escorting him, and if he was important enough the escort would consist of members of a fighting order (who would not have to be paid).
Group Determination Table 2
To help you generate the composition of the party the following table has been included as a guideline.
(Transcriber's note: this table is printed in very small type and some cells are blurred in the scan; cells marked "(illegible)" could not be read, and a few readings are uncertain. Blank cells are blank in the original; "*" and "x" are marks printed after the entry.)
| Type | Abbot/Bishop & Escort | Churchmen & Escort | Villagers | Men-at-arms & Retainers | Sergeants & Retainers | Knights & Retainers | Noble & Retainers |
|---|---|---|---|---|---|---|---|
| Knight | d10x | d6 (minus ? from die roll) (partly illegible) | d6 | d10x | |||
| Sergeants | d6* | 1 (uncertain) | 2* | d6* | d6* | ||
| Squires |
+ No more than one squire per knight in the party. * At least one would be mounted. x 1-3 on d10 and two are from a military order. (With some of the large parties counters from 'Cry Havoc' and 'Siege' could be used).
Note: The above chart is also used with the encounter tables. This need only be a basis for your party and changes can and should be made to suit the circumstances.
Once the composition of the party has been finalised the abilities of the individual members should be noted. These can either be as per the counter or as per the Character Advancement Section.
Encounter Tables
Now that you have worked out your party, you will need 'Encounters' for them to get through, either as a one-off or as part of a campaign. The following tables will help you work out these 'Encounters' with friendly (or otherwise) people of the country.
Initial Encounter Table
Roll d100.
(Transcriber's note: the table is printed in very small type; entries were read from an enlarged scan.)
| Encounter Type | Near Town Day | Near Town Night | On Highway Day | On Highway Night | In Countryside Day | In Countryside Night |
|---|---|---|---|---|---|---|
| Peasants to/from town/fields | 01-10 | 01-06 | 01-04 | 01-02 | 01-22 | 01-06 |
| Drovers with herds | 11-13 | 07-08 | 05-10 | 03-05 | 23-30 | 07-09 |
| Pedlars (tinkers etc) | 14-18 | 09-11 | 11-14 | 06-07 | 31-33 | 10-11 |
| Tradesmen with wagon, cart, mule |
Encounter Effects Table
Once the encounter type has been determined turn to the appropriate Encounter Effects Table to determine the details of the encounter. EXAMPLE: If an encounter with a great lord or prince is rolled up on the initial encounter table, proceed to the great lord or prince encounter table to find out the details of the encounter.
Peasants
Peasants normally move around in small groups and possess little of value. However if aroused they will travel in large groups and attack the first group of strangers they encounter, using them as the cause of the trouble. If peasants are encountered a 0 on a d10, this means that it is a large angry group (10-20 peasants) and that they will attack you unless you buy them off.
Drovers
When drovers are encountered they have a herd worth d10 Silver Francs with one drover for each franc. If rustled the herd needs two people per franc and it needs to be driven to the nearest town and there is a 20% chance that the town militia will be suspicious and will try to arrest you.
Pedlars/Tradesmen
Large amounts of money would not be carried by these people for fear of theft, and the main monetary value obtained from robbing these people would be their stock which would be bulky and hard to sell with only d6 Silver Centime being raised from the sale of the merchandise.
Merchant with escort
01-50 Merchant with d6 mules, one wagon, and an escort the size of the men-at-arms chart (on Group Determination Table 2).
51-90 Merchant with d6+2 mules, one wagon, and an escort the size of the sergeants' chart (on Group Determination Table 2).
91-00 Merchant with d10 mules, two wagons, and an escort the size of the knights chart (on Group Determination Table 2).
Each mule in a merchant's caravan is worth d6 Silver Francs and each wagon d6 Gold Francs. If any of the merchant's party escapes your partie's description will be circulated and there is a 35% chance that you will be recognised in the next town you pass through or by the next patrol of fighting men you meet, in which case they will try to arrest you.
Fighting Men
(Transcriber's note: some of the "minus" figures in this small-print table are blurred in the scan and the readings given are uncertain.)
| d100 | Fighting men encountered | Knights | Sergeants | Men-at-arms |
|---|---|---|---|---|
| 01-30 | Vassals of local noble | d6 | d6 (minus 3 from die roll) | d10 |
| 31-40 | Vassals of the king | d10 | d6 | d10 |
| 41-60 | Members of a fighting order | d6 | d6 | d10 |
| 61-70 | Mercenaries in service of a town | d6 (minus 4 from die roll) | d6 (minus 2 from die roll) | d10 |
| 71-80 | Town Militia | - | d6 |
If larger parties of fighting men are desired just double the amount rolled up.
Intentions of Fighters Encountered
| d100 | Intention |
|---|---|
| 01-25 | Patrolling/Guarding Region |
| 26-30 | Checking out/arresting suspicious strangers (35% chance) |
| 31-45 | Recruiting |
| 46-50 | Hunting |
| 51-55 | Looking for moslem raiders |
| 56-60 | Camped |
| 61-70 | Escorting a lady |
| 71-75 | Going to/coming from visiting town |
| 76-80 | Talking, wagering |
| 81-85 | Demanding a road toll (2 copper centimes per person) |
| 86-87 | Looking for fight |
| 88-99 |
Pilgrims
Use pilgrim generation table and roll 1d6 for number of coins of each type if you rob them.
Messenger/Royal Official
These will be on fast horses and will carry little of value (about 1d6 Silver Centimes) perhaps a message. If attacked and managing to escape there will be a 40% chance of being recognised in the next town you pass through and a 20% chance of being recognised every time you meet vassals of the king or knights of a holy order. If recognised an attempt will be made to arrest you.
Churchmen with escort
Use churchmen with escort chart and roll d10 for number of coins of each type if you rob them.
Great Lord/Prince
Use high ranking noble chart. If attacked, the knights and men-at-arms will cover the retreat of the caravan and the result will be the same as if a messenger/royal official was attacked and escaped. If any of the baggage train is captured it will yield d6 number of coins of each type, except gold francs, for each mule that is captured and d10 number of coins of each type for each wagon that is captured. After the attack the great lord/prince will circulate a description of your party around the countryside and if spotted (40% chance per hex travelled) there is a 25% chance that a force of knights and men-at-arms (from the noble and retainers chart on the group determination table 2) will be waiting for them in the next hex they enter.
Runaway
A runaway will carry little of value with him but there will be a 35% chance that he will ask to join your party. If you accept him he will be equivalent to a peasant.
Animals
| d100 | Animal Encountered | Number Encountered | Value if killed | Chance of kill | Damage to self |
|---|---|---|---|---|---|
| 01-10 | Stag | 1 | 1SF | 7% | 3% killed 6% wounded |
| 11-30 | Deer | d6 | 1SC, 5CC | 10% | 1% killed 4% wounded |
| 31-50 | Boar | d6 | 1SC | 15% | 5% killed 10% wounded |
| 51-80 | Wild Goats | d10 | 1SC | 25% | 1% killed 4% wounded |
The killed and wounded chart is for each person that takes part in the hunt of that particular animal. The killed and wounded takes into account anything from being mauled to death by a bear, thrown from your horse while chasing a deer and breaking your leg.
Moslem Raiders (includes Saracens and Bedouin Tribesmen)
Nearly all raiders would be mounted although in an organised ambush some would be on foot.
Intentions of Raiders d100
| d100 | Intention |
|---|---|
| 01-30 | Ambush by d20 mounted |
| 31-40 | Ambush by d20+10 mounted |
| 41-50 | Ambush by d20 mounted and d20+10 foot |
| 51-60 | d20 mounted ahead, d10 mounted pursuing |
| 61-65 | d20 being pursued by d10+5 Turcopoles |
| 66-70 | d20 looking for captives |
| 71-80 | d10 ignore party |
| 81-90 | d20 looking for entertainment (females, torture etc) |
| 91-99 | Pursuit by d20+10 mounted |
| 00 | Challenge to party leader by armoured Mamluk. |
75% of Bedouin Tribesmen will be 'friendly' near a town; only 25% will be 'friendly' the rest of the time. The main aim of Saracen raiders is to kill as many Christians as possible and Saracens will continue to fight until at least half their number have been killed. Bedouin Tribesmen however, are only after loot. They will try to evade hand-to-hand combat and will leave the board immediately they have captured a part of your baggage or suffered 25% killed or wounded.
Brigands
Depending on the area brigands may be mounted or on foot. Generally, brigands would be on foot.
Intentions of Brigands
| d100 | Intention |
|---|---|
| 01-20 | Ambush and Robbery by d20+10 on foot |
| 21-40 | Ambush and robbery by d20 mounted |
| 41-50 | Ambush and robbery by d20-10 mounted |
| 51-60 | d20+5 on foot ahead, d20 mounted behind |
| 61-70 | Pursuit by d20 on foot |
| 71-75 | d20+10 camped |
| 76-80 | d20 on demanding toll (2 copper centimes per person) |
| 81-85 | d20 on pretending to be wayfarers |
| 86-90 | d20+5 on foot robbing others |
| 91-99 | d20+10 on foot looking for entertainment (females, gambling) |
| 00 | Challenge to party leader |
Scenarios
Scenario One: Rally to the Standard
The Defending Knights may set up in the area marked on the maps.
The Moslems may come on any map edge.
Setting the Scene
At the Battle of Arsouf in 1191, while marching along the coast road towards Arsouf, an army of crusaders under King Richard I of England, came under attack by a large force of Moslems under Saladin.
Towards mid-day Saladin launched an all out attack. In this attack a party of hospitallers, normans and english knights were guarding the Royal Standard, when they were cut off and surrounded by Moslems.
A short time later a rescue party, led by King Richard, set out to save the Standard, before it fell into the hands of the Moslems.
Map Layout
(Map diagram: the Olive Grove and Watering Hole maps side by side, with the defenders' set-up area outlined in a box on the Olive Grove map.)
The Sides
Defenders
Mounted
- 2 Knights Hospitallers
- 1 Royal Standard
- 1 Knight St Lazarus
Dismounted
- 4 Christian Shortbowmen
- 2 Christian Crossbowmen
- 2 Sergeant-at-Arms
- 4 Unarmoured Spearmen
Rescue Party
- 1 King Richard
- 6 Holy Knights
- 6 Turcopoles
Attackers (Moslems)
- 6 Unarmoured Mamluk
- 5 Armoured Mamluk
- 6 Horse Archers
- 10 Fatimid Spearmen
- 4 Sudanese Spearmen
- 4 Sudanese Bowman
Special Rules
While defending the Standard, the knights will always gain a minus one on the attacking die roll. To determine when Richard and his knights will turn up, roll a six-sided die, disregard a one or a two, the remaining number is how many turns it will be before Richard may come on to Olive Grove map side 1.
Victory Conditions
In order for the Moslems to win, they must capture the Royal Standard and remove it off the edge of the Watering Hole map side 1.
In order for Richard to win, he and his knights must come on as per above and escort the Standard off the table, or recapture the Standard and then escort it off the edge of the Olive Grove map side 1.
Scenario Two: Ambush
Map Layout
(Diagram: the Olive Grove map on the left and the Watering Hole map on the right, side by side. The edges are numbered: Olive Grove has side 3 along the top, side 2 on the left and side 1 along the bottom; Watering Hole has side 1 along the top, side 2 on the right and side 3 along the bottom.)
The Defending Moslems may set up anywhere on Map B or A. Frankish players may only enter on Map A, Side 1.
Setting the Scene
After two days on the road with very little water, the Frankish horse is in desperate need of water.
The Moslems are laying in wait at the water hole for the Frankish Knights.
The Sides
Moslem
- 1 Amir
- 5 Spearmen
- 5 Bowman
- 3 Armoured Crossbowmen
- 2 Armoured Mamluk
- 4 Unarmoured Mamluk
- 4 Horse Archers
Frankish
- 5 Spearmen
- 4 Billmen
- 5 Bowmen
- 3 Mounted Knights
- 6 Turcopole
- 1 Sergeant-at-Arms
- 1 Lady
- 2 Mules
Special Rules
Hidden deployment: The Moslem player may hide his infantry in any cover available, such as behind a hill, tree or wall, by using the letters across the top edge of the map and counting the full hexes in that row so that it reads as per example below, B3 or E3.
Cavalry may only be hidden behind a hill or forest. If the hidden character fires or moves, he is no longer classed as hidden from view, and must then be placed on the map where written down.
Example:
(Diagram: a map section with column letters A to F along the top edge, showing hidden positions B3 and E3.)
Victory Conditions
- Win for Arab: to kill 12 or more Franks.
- A draw for Arab: to kill 6 to 11 Franks.
- Loss for Arab: forced off maps by Franks due to morale loss.
- Win for Frankish player: to kill 12 Arabs or force them off the maps.
- Draw for Frankish player: to kill 6 to 11 Arabs.
Scenario Three: Road to Jerusalem
Background
The Christians have been on the road since dawn. Two hours later they come under attack from a large force of Moslems.
The Christians have beaten off two attacks already.
The Moslems have taken a lot of dead and wounded. They only have enough men left for one more attack before the Christians reach safety.
The Set-Up
(Diagram: the Olive Grove and Watering Hole maps side by side. The Christian player enters at the left edge (side 4) of the Olive Grove map, and must leave by the opposite edge (side 2 of the Watering Hole map). The top edges of both maps are marked 1 and the bottom edges 3.)
The Christians must enter where shown above, and must leave by the opposite edge.
The Sides
Christian
- 8 Holy Knights
- 6 Turcopole
- 2 Normal Knights
- 6 Spearmen
- 4 Billmen
- 5 Bowmen
- 5 Crossbowmen
Moslem
- 4 Armoured Mamluk
- 4 Seljuk Heavy Cavalry
- 7 Horse Archers
- 6 Sudanese Spearmen
- 6 Bedouin Tribesmen
- 4 Crossbowmen
- The Arab Player may pick 6 more counters of their own choice.
Victory Conditions
- A win for the Christians: by getting 50% or more of their own forces off the opposite edge.
- The Arab player wins: by preventing the above.
Character Advancement Tables
Introduction to Advancement Tables
By using the Character Advancement System you can improve the fighting capacity of your knight by defeating your opponents in battle. By using the counter with Sir Mathew, with an attack strength of 27 and a defence value of 13, you could improve both of these values.
Sir Mathew and his party are attacked by some knights who were trying to collect a toll. Sir Mathew refused to pay the toll, and in the ensuing fight, Sir Mathew killed a knight of equal strength, and forced a second knight of equal strength to surrender.
Now that the game is over, we look at Character Advancement Tables for a knight. For killing a knight of equal strength we see that a bonus of 0.5 is awarded. For capturing the second knight of equal strength, we find a bonus of 1.0 has been gained. By adding the two values we end up with a total of 1.5 for this particular game.
It is useful to keep a record of these scores, for only the whole number are added to Sir Mathew's attack and defence strengths. The fractions must be carried over to the next game and added to any further fractions. Therefore, after this game, Sir Mathew would end up with an attack value of 28 and a defence value of 14 and has 0.5 to carry over to the next game.
It is important to read the following tables carefully before using the System, and it is important to keep an accurate record of your scores from game to game.
Christian Character Strength Table
| Character Type | Healthy Attack | Healthy Defence |
|---|---|---|
| Holy Order Knights (mounted) | 24-36 | 10-22 |
| Holy Order Knights (dismounted) | 12-18 | 8-14 |
| Other Knights (mounted) | 20-30 | 8-18 |
| Other Knights (dismounted) | 10-15 | 7-12 |
| Squire (mounted) | 12-20 | 6-11 |
| Squire (dismounted) | 6-10 | 5-7 |
| Sergeant (mounted) | 16-24 | 7-12 |
| Sergeant (dismounted) | 8-12 | 6-8 |
Wounded Characters attack and defence strengths are half that of their strengths when healthy (all fractions rounded down).
Knights Advancement Table
(Transcriber's note: the number is missing in the scan for the first line, which prints only "+ attack point".)
| Event | Result |
|---|---|
| Defeat a superior knight | + attack point |
| Defeat an equal or inferior knight | +0.5 attack points |
| Defeat a man-at-arms | +0.25 attack points |
| Capture a superior knight | +2 attack points |
| Capture an equal or inferior knight | +1 attack point |
| Defeat an infidel (Moslem) | +0.5 attack points (+1 for a member of a fighting order) |
All the above are for single combat.
| Event | Result |
|---|---|
| Defeated by a superior knight(s) | -0.5 attack points |
| Defeated by an equal or inferior knight(s) | -1 attack point |
| Defeated by men-at-arm(s) | -1.5 attack points |
| Captured | -2 attack points |
| Defeated by peasant(s) | -2.5 attack points |
| Defeated by the infidel(s) | -2 attack points (-3 for a member of a fighting order) |
If a knight falls below the minimum attack strength of 20 he is deemed to have committed a cowardly or unchivalric act and will be reduced to a spearman and can only regain knighthood if he should perform an immense 'deed of valor' e.g. (killing an opposing leader in battle, rescuing a king, etc).
For every one attack point gained one defence point is also gained.
Sergeant and Squire Advancement Table
These are the only troops with any hope of becoming a knight. For the squire this is when he is considered fully trained (has reached the attack strength of a knight), can find a knight to sponsor him and has performed some 'deed of valor' e.g. (rescued a damsel, rid a village of brigands, killed an important infidel, etc). For the sergeant this is when an exceptional 'deed of valor' has been noted by a knight who sponsors him with three other knights to afford to be knighted (he must have the minimum attack strength of a knight).
| Event | Result |
|---|---|
| Defeat a knight | +2 attack points |
| Defeat a man-at-arms | +0.5 attack points |
| Defeat an infidel (Moslem) | +0.5 attack points |
| Capture a knight | -3 attack points (as printed) |
| Capture a man-at-arms | +1.5 attack points |
All the above are with the possible help of no more than one other person.
| Event | Result |
|---|---|
| Defeated by a knight | -0.25 attack points |
| Defeated by man-at-arms | -0.5 attack points |
| Captured | -1 attack point |
| Defeated by peasant(s) | -2.5 attack points |
| Defeated by the infidel (Moslems) | -2 attack points |
If a sergeant falls below the minimum attack strength of 16 (mounted) or 8 (dismounted), for his vocation he has to drop to the next level with that attack strength (i.e. halberdier). If a squire falls below the minimum attack strength of 12 (mounted) or 6 (dismounted) he is deemed as being unfit to become a knight and he becomes a spearman.
For every 1.5 attack points gained one defence point is gained.
Men-at-arms Advancement Table
As well as halberdiers, billmen and spearmen this class of troops also include all missilemen (short, long and crossbowmen). Once the maximum attack strength for each class of troop has been reached, the man-at-arms may try to advance up to the next class. For all missilemen and spearmen this is the billman class. For the billman it is the halberdier class and for halberdiers it is sergeant class.
After each engagement any men-at-arms that have the maximum attack strength for their class may try to advance up one level if, 1) they performed a 'deed of valor' or a feat of arms in the aforementioned engagement and, 2) he rolls under 35% on 1d100.
| Event | Result |
|---|---|
| Defeat a knight | +2 attack points |
| Defeat a sergeant or squire | +1.5 attack points |
| Defeat a superior man-at-arms | +1 attack point |
| Defeat an equal or inferior man-at-arms | +0.5 attack points |
| Defeat an infidel (Moslem) | +0.5 attack points |
| Capture a knight | +3 attack points |
| Capture a sergeant or squire | +2 attack points |
| Capture a man-at-arms | +1 attack point |
An opponent must be defeated in hand-to-hand combat and not killed by missile fire. The attack points 'won' in combat are taken by the man-at-arm(s) with the greatest attack strength (if equal roll a dice), and any number of men-at-arms or peasants may have taken part in the combat.
(Transcriber's note: in the scan, the printed values for the two "man-at-arm(s)" lines below appear as -1.5 and -0.5, with handwritten marks over them that appear to swap them.)
| Event | Result |
|---|---|
| Defeated by a knight | -0.25 attack points |
| Defeated by a sergeant or squire(s) | -0.5 attack points |
| Defeated by a superior man-at-arm(s) | -1.5 attack points |
| Defeated by an equal or inferior man-at-arm(s) | -0.5 attack points |
| Defeated by an infidel (Moslem) | -1 attack point |
| Captured | -2 attack points |
| Defeated by peasants | -2.5 attack points |
If a man-at-arm(s) falls below the minimum attack strength of his class he has to drop down to the next class with his present attack strength even if this means becoming a peasant.
For every 2 attack points gained one defence point is gained.
Peasants
There is no advancement table for peasants as the chances of the advancing even to man-at-arms status was rare. If however a peasant performs an exceptional 'deed of valor' such as rescuing a knight or defending his position against great odds and this deed of valor was noticed by a knight then that knight may if he wishes (50% chance) make that peasant into a spearman.
The next table shows the minimum and maximum attack and defence strengths for each type of moslem character.
Moslem Character Strength Table
| Character Type | Healthy Attack | Healthy Defence |
|---|---|---|
| Armoured Mamluk (mounted) | 20-30 | 8-18 |
| Armoured Mamluk (dismounted) | 10-15 | 7-12 |
| Unarmoured Mamluk (mounted) | 12-22 | 5-15 |
| Unarmoured Mamluk (dismounted) | 6-11 | 4-9 |
| Syrian Cavalryman (mounted) | 10-18 | 5-10 |
| Syrian Cavalryman (dismounted) | 5-9 | 4-6 |
| Seljuk Cavalryman (mounted) | 12-20 | 5-10 |
| Seljuk Cavalryman (dismounted) | 6-10 | 5-7 |
Wounded characters' attack and defence strengths are half that of their strengths when healthy (all fractions rounded down).
The next set of tables are for the advancement of Moslems.
Mamluk Advancement Table
For a mamluk to defeat an opponent normally means to kill him. If an unarmoured mamluk reaches his maximum attack and defence levels he has a 50% chance of becoming an armoured Mamluk after each engagement.
| Event | Result |
|---|---|
| Defeat a Holy Order Knight | +1 attack point |
| Defeat a Knight | +0.5 attack points |
| Defeat other infidels (Christians) | +0.25 attack points |
| Capture a Holy Order Knight | +1.5 attack points |
| Capture a Knight | +1 attack point |
All the above are with the possible help of no more than one other Mamluks only.
| Event | Result |
|---|---|
| Defeated by a Knight | -0.5 attack points |
| Defeated by other infidels (Christians) | -0.25 attack points |
| Captured | -1 attack point |
| Defeated by Peasants | -2.5 attack points |
If an armoured Mamluk's attack strength falls below its minimum shown in the character strength table he then becomes an unarmoured Mamluk. If an unarmoured Mamluk, he then becomes a Syrian cavalryman.
For every one attack point gained one defence point is also gained.
Cavalrymen Advancement Table
This includes the following classes: Syrian and Seljuk Cavalrymen, Bedouin Tribesmen and Assassins. The only troops with any chance of advancement in this table are the syrian cavalrymen who once they reach their maximum attack level have a 25% chance of advancing to become an unarmoured mamluk. The other troops types in this table become leaders, when they reach their maximum attack strength.
| Event | Result |
|---|---|
| Defeat a Holy Order Knight | +1.5 attack points |
| Defeat a Knight | +1 attack points |
| Defeat other infidels (Christians) | +0.5 attack points |
| Capture a Holy Order Knight | +2 attack points |
| Capture a Knight | +1.5 attack points |
All the above are with the possible help of no more than one other person.
| Event | Result |
|---|---|
| Defeated by a Knight | -0.25 attack points |
| Defeated by other infidels (Christians) | -0.5 attack points |
| Captured | -1 attack points |
| Defeated by peasants | -2 attack points |
If a Syrian Cavalryman falls below the minimum attack strength stated on the Moslem Character Strength Chart he becomes a Syrian Spearman. If a Seljuk Cavalryman falls below his minimum attack strength he becomes a Seljuk Infantryman. If either a Bedouin Tribesman or an assassin fall below their minimum attack strength they become peasants.
For every 1.5 attack points gained one defence point is gained.
Infantry Advancement Table
This includes the following troop types: Horse archers, Syrian and Fatimid Spearmen, Seljuk Infantrymen, Moslem Crossbowmen, slingers and Sudanese Bowmen and Spearmen. Syrian Spearmen have a 25% chance of becoming Syrian Cavalryman after each engagement as long as they have reached the maximum attack strength stated on the Moslem Character Strength Table. The above is also true of Fatimid Spearmen trying to become a Seljuk Cavalryman. All the other troop types in this table become leaders when they reach their maximum attack strength.
| Event | Result |
|---|---|
| Defeat a Holy Order Knight | +1.5 attack points |
| Defeat a Knight | +1 attack point |
| Defeat other infidels (Christians) | +0.5 attack points |
| Capture a Holy Order Knight | +2 attack points |
| Capture a Knight | +1.5 attack points |
| Capture other Infidels (Christians) | +1 attack point |
An opponent must have been defeated in hand-to-hand combat and not killed by missile fire. Any number of infantry men or peasants may take part in the combat but only the infantryman with the highest attack strength may have the attack points won (if equal attack strengths roll a dice).
| Event | Result |
|---|---|
| Defeated by a Knight | -0.25 attack points |
| Defeated by other infidels (Christians) | -0.5 attack points |
| Captured | -1 attack point |
| Defeated by peasants | -2 attack points |
If any troops on this table fall below their minimum attack strength as stated on the Moslem Character Strength Table they become peasants.
Peasants
Moslem peasants have the same chances of advancement as christian peasants. (See peasants under Christian Advancement Table for details).
Hints on determining initial character strengths
When determining initial character strengths for a campaign game all characters except peasants should start at their minimum attack strength and work their way up. For peasants, characters encountered on a campaign and one-off scenarios roll a d10 (0 = 0 on this occasion) to determine each character's attack strength, work out their defence strength at the same time. EXAMPLE: A d10 is rolled to find out the attack strength of a sergeant and a 7 is rolled. This gives the sergeant a mounted attack strength of 21 and a mounted defence strength of 10 (1 defence point for every 1.5 attack point). The sergeant's dismounted attack strength is half his mounted attack strength (fractions rounded down) which make it 10. His dismounted defence strength is worked out from this figure, not from half of his mounted defence strength.