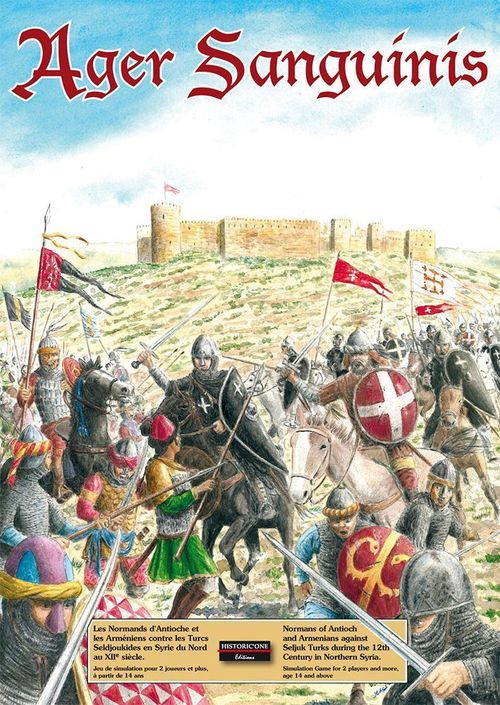
Ager Sanguinis
Ager Sanguinis Rulebook
Table of Contents
Table of Contents
- 1 - Description and Use of the Counters
- 2 - Sequence of Play
- 3 - Environment
- 4 - Movement
- 5 - Shooting, Casting & Throwing
- 6 - Combat
- 7 - Combat Tactics
- 8 - Houses & Other Buildings
- 9 - Castles
- 10 - Siege Tactics
- Campaign Rules
1 - Description and Use of the Counters
1.1 - Some comments on time scales and distance
Ager Sanguinis is a game that simulates man-to-man combat on tactical maps. In other words, each game turn represents a very short period of real time: a few tens of seconds at most. Enough time to shoot an arrow, to strike a blow with a sword, or to run a few metres. The width of a hexagon is equivalent to two metres (about 6 feet), a space sufficient for one soldier to wield his weapon comfortably but not enough for a rider on a horse. It is for this reason that each mounted character occupies two hexes, and that it is forbidden to have two living characters in the same hex.
Shooting, throwing and casting generally takes place at short or medium range. However, shooting at long range has been included for the benefit of players who wish to use additional maps to create a much larger game board.
1.2 - The counters representing the characters
Each foot character is represented by two double-sided counters. The first shows the character on one side in good health and on the other the character stunned. The second counter shows the same character wounded on one side and on the other side ... dead.
Characters possessing a mount have four counters: two on foot and two mounted. On the back of the healthy mounted character's counter is a picture of the horse without a rider, and on the back of the wounded mounted character is the horse dead.
On each counter is the name and image of the character, as well as three numbers:
- a black number: this represents the attack strength of the character. It is determined by the length and heft of his weapon, the skill of the character using it, and his physical condition.
- a red number: this represents the defence strength of the character. It is determined by the skill of the character in parrying and dodging blows, as well as his physical condition. Characters in armour have their red number surrounded by a circle.
- a blue number: this represents the movement allowance of the character, in other words the number of movement points he can spend each game turn. It is determined by the mode of transport - on foot or on horseback, the weight of armour worn, and the physical condition of the character.
Other symbols can be found:
- Mounted characters have a small triangle to show where the head of the horse is, and hence the direction of the movement. The triangle is also used to determine the frontal arc of the horse.
- Character counters display a 3-letter acronym to indicate their origin and troop type as detailed below:
| First letter (Origin) | Second letter (Type) | Third letter (Class) |
|---|---|---|
| B Byzantine | c Cavalry | a Archer |
| C Crusader or Pilgrim | i Infantry | b Bedouin |
| N Norman or Frank | c Civilian | |
| O Military Order | g Ghulam | |
| R Armenian (or Oriental Christian) | h Hashishin | |
| T Turk | j Javelin thrower | |
| k Knight | ||
| l Light infantry |
The system of double-sided counters is the same for all the characters in the game, with the exception of animals (horses and camels) which only have one counter (Good health / Dead).
It should be noted that a stunned character can neither move nor attack, and that his defence strength is reduced to the passive protection offered by the equipment worn or carried.
Counter illustrations (using the example character Raymond, a Hospitaller):
- Counter A, face: Healthy mounted character: Raymond is ready to add a new chapter to the legend of the Hospitallers. Reverse: Horse without its rider: Raymond dismounted to fight on foot, unless something happened to him on the battlefield.
- Counter B, face: Wounded mounted character: Raymond overestimated his strength and found a stronger opponent than anticipated. Reverse: Killed horse: Raymond must borrow another horse to continue the fight.
- Counter C, face: Healthy foot character: Raymond found it more convenient to dismount to continue the fight. Reverse: Stunned character: Raymond didn't see the large Saracen warrior whose mace felled him.
- Counter D, face: Wounded foot character: Raymond's end is in sight and he should be very careful. Reverse: Killed character: Raymond will never become the Grand Master of the Order.
2 - Sequence of Play
The players first choose one of the scenarios to play. Before commencing play, maps are selected and laid, and characters drawn from the counter set, according to the scenario.
The game itself is composed of a number of successive game turns. Each game turn is composed of two phases, each giving the initiative to one side or the other. During their phase, each player makes their characters shoot, move and fight. When there are several players on either side, the characters on the same side shoot, move and fight in the same phase. As we will see, a player can also intervene with defensive shooting or counter-charge during his opponent's phase.
2.1 - Structure of the game turn
Each game turn occurs in the following way:
Phase of player A
- OFFENSIVE SHOOTING: All the missile troops of Side A can fire if they are not in contact with an enemy character.
- ANNOUNCEMENT OF CAVALRY CHARGES AND COUNTER-CHARGES: Player A announces, one by one, the charges they intend to make with their cavalry. Player B may sometimes declare counter-charges (see § 7.1).
- MOVEMENT AND DEFENSIVE SHOOTING: All characters on Side A who didn't shoot the previous phase can move. Others must respect the limitations of their weapon type (see § 5.1 Shooting & Movement). Side B can shoot while the characters from Side A move, using characters that are not in contact with the enemy. These characters must respect the rules for defensive shooting (see § 5.1 Shooting & Movement, and § 5.3 Defensive shooting).
- COMBAT: All the characters on Side A in contact with enemy characters can attack, except those who shot during offensive shooting.
- STUNNED CHARACTERS: All the characters on Side A who were stunned during Player B's phase recover and regain their feet (turn their counters over).
Phase of Player B
This is played in exactly the same way as that of Player A, but this time it is Side B that has the initiative and plays instead of Side A. Player A can intervene in Phase 2 with counter-charges and in Phase 3 with defensive shooting. When Phase 5 is finished, a new Game Turn starts and Player A resumes with the first step.
Note: It is important to keep strictly to the sequence of play. Do not start a new Phase or step until the preceding one is finished.
3 - Environment
3.1 - Types of terrain appearing on the maps
| Terrain | Movement Point Cost per Hex | Cover Type | Terrain Advantage |
|---|---|---|---|
| Flat terrain | 1 | None | 0 |
| Oasis | 2 | Light | - |
| Palm Tree (foliage) | 1 - Foot; 2 - Horse/Camel | Light | Foot: 0; Mounted: - |
| Palm Tree (trunk) | 2 - Foot; Impassable to horses/camels | Light | Foot: - |
| Shrub | 2 - Foot; 4 - Horse/Camel | Light | - |
| Slope | 2 - Foot; 4 - Horse/Camel | Medium if shot crosses the top lip | - |
4 - Movement
Each character has a number of movement points printed on their counter (the blue number). The following table summarizes the various movement rates found in the game:
| Type of character | Movement for healthy characters | Movement for wounded characters |
|---|---|---|
| Woman | 4 | 2 |
| Merchant | 6 | 3 |
| Foot character with armour | 6 | 3 |
| Foot character without armour | 8 | 4 |
| Pack camel, camel with litter | 8 | 8 |
| Camel rider | 12 | 12 |
| Horse rider with armour | 12 | 12 |
| Mounted Saracen archer with armour | 14 | 14 |
Each hex entered costs a number of movement points corresponding to the difficulty of the terrain (see § 3.1 Types of terrain appearing on the maps). Each turn, a player can move all or some of their characters, by using all or part of the movement allowance. Movement points cannot be transferred between characters, and nor can they be held in reserve for following turns.
4.1 - Stacking of counters
During the game it is possible for characters to pass through hexes containing a friendly character, a stunned character or a dead character. But at the end of each movement phase there must be no more than one living character on any hex (in good health, wounded or stunned).
4.2 - Restrictions on movement
Characters cannot pass through hexes containing enemy characters unless the enemy is stunned or dead. On the other hand, crossing hexes containing friendly characters causes no problem.
4.2.1 - Hexes containing dead characters
Hexes containing three dead characters or one dead horse or camel cost one movement point more than the normal cost. Hexes become impassable if they contain six dead persons or two dead horses or camels (or three dead persons and one dead horse or camel).
4.2.2 - How to clear a hex that has become impassable
Two characters on foot can move three dead characters or one dead horse/camel one hex. The two characters cannot do anything else during their turn, move, shoot nor fight. If the corpses are thrown into water they will sink into the depths and the counters representing them are removed from the map.
Note: This action is impossible if there is an enemy in a position to attack on an adjacent hex.
4.2.3 - How to carry a stunned character
A character on foot who moves through a hex containing a stunned character may carry that character on his back, but his remaining movement points will be divided by two (rounding down if necessary). At the end of his movement he drops the stunned character onto one of the six hexes beside his own.
Note: Carrying is not allowed if there is an enemy in a position to attack from an adjacent hex.
4.3 - Infiltration of enemy lines
When a character crosses a hex adjacent to an enemy who is in a position to attack, he must immediately face an infiltration test before continuing his movement. The consequences of an infiltration test are put in effect immediately (a wounded character may not end his movement as a result). The opposing player rolls 1D10 and checks the Infiltration Table in § 4.3.1. He rolls the die as many times as there are enemies adjacent to the hex in question (only one attack per enemy per phase). This rule only applies to hexes that are crossed. A character ending movement in a hex adjacent to an enemy does not cause a die-roll.
Only roll the die once for mounted characters, even though they occupy two hexes. It is the front part of the counter that is used for the infiltration rule.
The infiltration rule does not apply when the enemy is on the other side of a window or arrow-slit.
Example 1: Arnould wants to attack both Syrian infantrymen located 3 hexes away. He must stop on the first orange hex during his movement phase to face an infiltration test. Aïtekin rolls 1D10. Based on the results of the infiltration table, Arnould may continue to move towards his targets. Note that the second orange hex doesn't require any infiltration test. Should Arnould decide to only attack Yazid, the adjacent character won't be able to perform an infiltration test.
Example 2: If Arnould wants to attack Yazid safely, he should use the path adjacent to the mounted Turk as he cannot attack a foot soldier on a palm tree trunk hex. Alternatively, the path to the right will lead to an infiltration test from Kutbeddin. In both cases, there is no test in the final hex adjacent to Yazid if someone attacks Yazid in the combat step.
During the combat phase, advances and retreats are also count as movement. Only advances extending over more than one hex can lead to an infiltration test on the hex(es) crossed before the final destination. In case of advance after combat, the defeated character(s) cannot perform an infiltration test.
Example 3: Ancelin fought Daoud and forced him to retreat. Ancelin moves forward after the combat and crosses first the hex previously occupied by the Arab peasant, then stops on his final hex adjacent to Marwan. There is no infiltration test.
Retreat (following shooting or combat) is an exception: Infiltration tests are performed on all hexes crossed, including the final one. Note that retreat is impossible on a hex adjacent to an enemy that was involved in the combat. In this case, the retreating character doesn't move but is wounded instead.
Example 4: Rollin must retreat 2 hexes following shooting. The Frank can choose between 3 itineraries:
- Only one infiltration test in H1 for the blue path;
- One test in H1 as well for the red path;
- Two tests in H4 and one in H5 for the green path.
Note: As explained in the retreat rules, the first hex crossed must be in the opposite direction to the incoming missile. Rollin cannot retreat to the hex North East of H1 and end in H2. Thus, he cannot avoid the infiltration test.
4.3.1 - Infiltration table
| Die roll | Result |
|---|---|
| 1-5 | No effect |
| 6-7 | Halt |
| 8-9 | Character wounded |
| 10 | Character killed |
| Die roll modifiers due to the infiltrating character (cumulative) | |
|---|---|
| Rider | -1 |
| Armoured | -1 |
| Wounded | +2 |
| Die roll modifiers due to the opposing character (cumulative) | |
|---|---|
| Rider | +1 |
| Wounded | -2 |
4.3.1.1 - Restrictions due to terrain
An enemy can only oppose an infiltration if he can attack the hex of the infiltrating character. For example, the infiltration rule does not apply when the enemy is on the other side of an arrow-slit, or if he is mounted and the opponent is on a tree trunk hex.
4.3.1.2 - Special rule for mounted characters
Only roll the die once for mounted characters, even though they occupy two hexes. It is the front part of the counter that is used for the infiltration rule.
4.4 - Special movement rules for mounted characters
4.4.1 - Turning
The arrow printed on the counters of mounted characters shows the general direction of movement. To advance into the hex towards which the arrow is pointing or into one of the two hexes adjacent - the counter's frontal arc - the rider spends movement points (MPs) normally. However, once the rider turns his mount more sharply than this, he spends 1, 2 or 3 points more than the normal cost for the hex, as shown on the diagram that follows.
The numbers on the hexes show the movement cost, taking into account terrain and turn. The orange hexes illustrate the frontal arc of the rider (see § 7.1.1).
Note. A rider who makes an about-face (a 180° turn) spends 5 MPs.
4.4.2 - Mounting and dismounting a horse
To mount or dismount a horse, a light cavalryman (unarmoured) spends 2 Movement Points and a heavy cavalryman (armoured) spends 3 MPs. These points are deducted from the Movement Allowance shown on the counter before the character mounts or dismounts. The remaining Movement Points can be used as follows:
- If the character is mounting a horse, double the character's remaining (foot) Movement Points.
- If the character is dismounting a horse, halve the character's remaining (mounted) Movement Points (divide by 4 if he is wounded). New Movement Points may not exceed the character's normal foot allowance. Round down if necessary.
Example: Guérin on foot spends 1MP to get closer to his horse and 3MPs to mount it. His remaining 2MPs become 4MPs once on horse. Ernoul, who is mounted, moves 4MPs before dismounting. His remaining 8MPs become 4MPs once on foot.
To be able to mount a horse, a character must be on one of the 2 hexes adjacent to the animal, as shown in the illustration. Neither the rider nor the horse can be adjacent to an enemy in a position to attack. Replace the counters for the character on foot and the horse with the single counter representing that character mounted. Only characters with a mounted counter can mount horses belonging to other characters. When a character dismounts, replace him with the counter for the horse and place the counter for the character on foot on an adjacent empty hex. There is no special restriction on dismounting.
4.4.3 - Mounting and dismounting a camel
Use the same rule as for horses, but the cost in Movement Points is 6 for both mounting and dismounting, as the camel first needs to kneel down.
A character can mount the litter or dismount for the same PM cost. Simply position the counter of the character on top of the camel counter with the litter.
Pack camels can't be mounted.
4.4.4 - Mounts without a rider
Horses or camels without a rider are immobile until they are mounted or led by the bridle.
To lead a mount by the bridle it is enough for a character, mounted or on foot (even wounded) to enter the mount's frontal arc. This action is impossible if there is an enemy in a position to attack next to the horse or camel. A character on foot can then continue moving, followed by the mount, which is treated as an extension of the character leading it.
While moving, a mounted character can attempt to catch a mount by the bridle. Roll 1D10 to see if he succeeds:
- 1-6: He is successful and the character can finish his move leading the rider-less horse or camel with him. The rider-less mount must be placed on one side or the other of the mounted character, facing the same direction and behind the character's frontal arc.
- 7-10: He fails. The rider-less mount remains where it is. Even if the character ends the move adjacent to the horse or camel, he will not be able to control it this turn.
A mounted character who finishes his move adjacent to a riderless mount in its frontal arc may take control without testing, and move as normal at the beginning of the next movement turn.
A mount without a rider stays under the control of the original player long as it has a living character who is not stunned adjacent to it. When this is not so, the horse or camel will belong to the first player who takes control of it.
A character holding a mount by the bridle will automatically lose control of it if he engages in combat or is attacked.
Note: A character on foot can lead up to three horses or three camels by their bridles as shown in the illustration. Camels and horses cannot be led together. A mounted character can only lead one at a time.
4.4.5 - Mounts and Terrain
Only the front portion of the counter with the direction arrow is impacted by the terrain. A mounted character riding through a slope hex, for example, will spend 4 Movement Points like a single-hex counter rather than 8.
4.4.6 - Horses near camels
Horses unused to camels had difficulty closing with them because of their smell and were likely to bolt. For this reason, any horse moving in a hex adjacent to a camel must pass a fear test. Roll 1D10:
- 1-4: the horse is scared and retreats 1 hex. If the rider is fighting that turn, he will suffer a one column left shift penalty due to his difficulty controlling his horse. The other rules related to retreat apply.
- 5-7: though spooked, the horse is nonetheless forced to enter the hex by his rider. If the rider is fighting that turn, he will suffer a one column left shift penalty due to his difficulty controlling his horse.
- 8-10: No effect.
Horse-mounted Saracens and Turcopoles add 2 to the die roll as their horses are supposed to be accustomed to the presence of camels nearby.
This test doesn't need to be performed if the horse begins its move adjacent to the camel (it has already passed the test).
5 - Shooting, Casting & Throwing
Six different missile weapons are available in this game: the lance, the javelin (j), the knife (h), the bow (either shortbow or composite bow, both "a" for archer) and the crossbow (x). Only characters possessing one of the four letters j/h/a/x on the lower right hand corner of their counter can use them during the shooting phases. Naphtha throwers (n) can spread fire at range, but their specifics are detailed in § 7.3.
In addition, any character, mounted or on foot, shown with a lance without a flag can use it as a missile weapon. This action can only be carried once per scenario. For the rest of the scenario, the character will fight with another weapon for close combat, like a sword. Put a Lance marker on the character counter to show that the lance whas been thrown.
Each character can only shoot once per shooting phase, but it is possible to shoot more than once at the same target with different characters. Note that the composite bow and the lance can be used both on foot and on horseback.
Each weapon has its own specific characteristics that will influence how it is used: strength, rate of fire, range, handiness, and in some cases ammunition limitation.
5.1 - Shooting & movement
Rate of fire and handiness are two factors that influence the mobility of the shooter. Thus, the handier a weapon is, the less his movement is limited. However, a character wanting to take both an offensive shot and a defensive shot will generally move less than a character who only makes the one offensive shot. The relevant characteristics of each weapon are summarized on Play Sheet 2.
5.2 - Shooting and combat
A character cannot shoot when he is in a hex adjacent to an enemy character. He is treated as being involved in hand-to-hand combat. This rule obviously does not apply if the enemy character is not in a position to attack the hex occupied by the shooter (see § 6.6 Restrictions on combat).
Once a player decides that their character will shoot during their turn (offensive shooting) and/or the enemy player-turn (defensive shooting), the character cannot attack an enemy character in hand-to-hand combat. This does not prevent him from defending normally if he is attacked during the enemy turn.
Note: The limitations on combat only apply in the game-turn preceding the defensive fire. A character that decides not to fire during his turn and the subsequent enemy turn can always attack normally.
5.3 - Defensive shooting
Only characters whose movement does not prevent them and who have not been attacked during the previous turn can carry out defensive shooting.
Unlike offensive shooting, which is directed against immobile characters, defensive shooting takes place while the enemy is moving. The player using defensive shooting can thus interrupt a character's move at any moment on a specific hex and declare that they are firing on him there with one or more characters. As a result of simultaneous shooting, all characters shooting defensively must be identified before the shots are resolved. Whatever the result of the action, all are treated as having shot. If a player identifies, for example, three archers and the enemy character is killed by the second shot, the third archer will still be considered to have shot. His shot will not have any additional effect, as indeed was often the case in reality.
If, having survived one or more shots in a hex during his movement, the enemy character can still move, further defensive shooting cannot be carried out against him until he has moved:
- 1 hex further if he is on foot and wounded
- 2 hexes further if he is on foot and unharmed
- 3 hexes further if he is mounted
- 4 hexes further if he is mounted and charging
So from here to there he may perhaps have the time to hide behind a tree or arrive in contact with the character that has just shot at him...
Note: It is not possible to use defensive shooting against a character who has not started his move, unless the other player declares that the character will not be moved that turn. It is also not possible to fire at one character, then at another, and then to return to fire again at the original target. Once the shots against one character have been resolved, that character cannot be targeted again until the next game turn.
5.4 - Resolving shooting
To shoot at an enemy:
- Identify the type of weapon used by the shooter;
- Check the distance between the shooter and his target (the number of hexes excluding the one the shooter is in) to establish the range (short, medium or long);
- Determine the impact hex (see § 5.4.1);
- Check the type of target (on foot or mounted);
- Note when shooting at a rider or animal: The shooter can select which of the target's two hexes is the target hex.
You will now determine the impact hex, then resolve the missile fire.
5.4.1 - Determining the impact hex
- Roll 1D10 and check the figure to the right to identify the actual impact hex. The two arrows indicate the possible direction of fire depending on the position of the shooter;
- If a character (whether friend or foe) is in the impact hex, he suffers the consequences of the shooting table.
- Note the cover type of the target (None, Light, Medium or Heavy), and check the appropriate column on the shooting table;
- Roll 1D10 and read the result on the appropriate table (mounted or foot);
Note that you don't need to determine the impact hex if the target is within 2 hexes of the shooter (which is about 4 meters / 12 feet in the real world).
5.4.2 - Modifiers to the die roll
Although it is primarily the die that determines the outcome of shooting, there are several factors that can affect the determination of the impact hex. Any result greater than 10 is considered lost, and has no effect.
| Modifier | Circumstances affecting die roll |
|---|---|
| +2 | Shooter at long range |
| +1 | Wounded shooter |
| +1 | Shooter at medium range |
| -1 | Turkish mounted archer * |
| -2 | Archer within 4 hexes of his target |
* Doesn't apply to Turcopoles (see the historical section)
5.4.3 - Assessing damage
Check one of the two tables, mounted or foot, for resolution of shooting on Play Sheet 2. The result varies according to the type of fire weapon used and the target's cover.
Roll 1D10. Follow the horizontal line for the number rolled (after modifiers), and in the column corresponding to the target's cover will be found the result of the shot: A, B, C, D, E or F. The description of the results is given at the bottom of each table.
It should be remembered that the result of a shot against a character on foot or mounted is different if the character is wearing armour. Any result exceeding 10 is considered as 10.
5.4.4 - Effects of retreat
The character affected must immediately retreat. He can retreat across hexes occupied by friendly characters. He can also displace friendly characters in order to end his move at the required distance. But if the retreating character, or a displaced character, is forced to cross or stop on a hex adjacent to an enemy, he must roll on the infiltration table.
It is impossible to retreat across a hex occupied by an enemy. A character that cannot retreat the full distance is wounded. Riders retreat with a straight backwards movement, i. e. they do not turn while retreating.
Important: A stunned or wounded character is considered to be dead if wounded or stunned again. A stunned character that is forced to retreat also dies.
5.5 - Restrictions on shooting and cover
5.5.1 - Line of sight
A character can only fire on an enemy character if an unblocked line of sight exists between the shooter's hex and the target hex. The line of fire consists of an imaginary straight line drawn from the centre of the shooter's hex to the centre of the target's hex. If that line of fire crosses a hex containing either a character or any type of terrain other than flat terrain, the shot is subject to the restrictions explained in the following paragraphs.
When shooting along a hex border, the less restricting hex counts for determining line of sight and cover.
5.5.2 - Shooting across terrain and types of cover
5.5.2.1 - Palm trees
If there are trees or the branches of trees between the shooter and his target, the shot is impossible. It is possible, however, to fire at a target in a palm tree hex so long as the line of fire does not cross any other tree hex. A character in a palm tree hex benefits from light cover.
5.5.2.2 - Slope
Slope hexes do not block the line of sight so long as it does not cross the top lip of the slope. When the line of sight crosses the lip of a slope, shooting is not possible unless the character on the lower level is the same distance or further from the slope hex as the character on the upper level. If he is closer, no shooting is possible between them because they cannot see each other.
Exception: Shooting is possible when the character on the lower level is on the slope hex itself. He can then shoot, but he can also be shot at because it is considered that he is half-way up the slope. A character on a slope hex benefits from medium cover if the line of fire passes over the lip of the slope.
Example: Three Frankish archers, A, B & C, shoot at Armenians D & E. For A & B, E benefits from medium cover as their shots cross the top lip of the slope. On the other side, they can't shoot at D who is closer to the slope than they are. For C, D doesn't benefit from any protection as the shot doesn't cross the top lip of the slope.
Characters who can't be seen by the shooter don't impede the shot. For example, a character closer to the base of a slope than a shooter on the crest does not block line of sight (see § 5.5.2.2).
5.5.2.3 - Water
A character in a water hex (sea or river) never blocks line of sight. He benefits from light cover except if the shooter is in an adjacent hex. A character in a water hex cannot shoot.
Characters in water receive no cover from a shooter at a higher elevation (see § 5.5.4).
5.5.3 - Shooting over other characters
Characters, horses and camels block line of sight for crossbows, knives and lances. Note that stunned characters do not block line of fire.
Bows and javelins can be shot or cast over other characters on condition that the target is at medium or long range and only benefits from light cover or no cover at all.
5.5.3.1 - Exceptions
- A character in a water hex does not block line of fire. He can be shot over freely;
- Horse archers can fire over friendly characters that are immediately adjacent to them. They are, however, bound to observe all the other restrictions on firing;
- Characters invisible to the shooting unit never block a shot. For instance, if the shooter is on a slope and cannot see a character at a lower level (see § 5.5.2.2), he can fire overhead freely.
Example: A, B, D and E are fighting against C, F and G. Character A is a horse archer. Because he is higher than B, A can shoot over him at C. D is also an archer, but he is not mounted. Consequently he cannot fire over E at F. A cannot fire over E at G because he is not adjacent to E.
5.5.4 - Shooting from a higher elevation
Two hexes separated by a slope are considered to be one level apart.
Terrain impact can be neutralised when shooting from a higher elevation. Targets in scrub, shallow water or on a slope don't benefit from their normal cover if:
- The shooter is one level higher in elevation and is located less than half of the short range distance;
- The shooter is more than one level higher in elevation and is within short range distance.
Most terrain bordering hexes (such as those providing medium cover like low walls, or those providing higher cover like battlements) only provide cover for the hex immediately behind the cover.
5.5.5 - Shooting from a lower elevation
A character in line of sight can be ignored if he is within N hexes of the target, N being the number of levels above the shooter.
6 - Combat
When two or more characters are on adjacent hexes, they can engage in combat, i. e. hand-to-hand fighting. Each combat is optional. The decision whether or not to attack rests with the active player. His/her characters are called the attackers (in the following player turn they may become defenders and defend against the opponent's attackers). Each character can only make one attack per turn, but a defender can be attacked several times by different attackers.
To resolve a combat, calculate the difference between the attacker strength (black figure) and the defender strength (red figure). You get a differential that corresponds to a column of possible outcomes listed in the appropriate Combat Table on Play Sheet 2. The attacker then rolls a die to determine the exact result of the combat in question. There are two Combat Tables - one is used to resolve combats against mounted characters, the other against characters on foot.
6.1 - Effects of terrain on combat
The odds differential of a combat can be modified by the nature of the terrain occupied by each of the characters involved. You can see from the Terrain Types table (see Play Sheet 1) that terrain can influence combat in three ways: it can be neutral (0), or disadvantageous to the character occupying it (-), or advantageous (+).
According to the terrain that each occupies, the odds differential may need to be modified by shifting the column of possible results to the left or to the right.
A mounted character is considered to be in the least advantageous terrain of the two hexes he occupies.
| Attacker in terrain | Defender in terrain | Effect on the odds column (0/4, 5/8, 9/15, etc.) |
|---|---|---|
| - | + | Shift 2 columns to the left |
| - | 0 | Shift 1 column to the left |
| 0 | + | Shift 1 column to the left |
| 0 | - | Shift 1 column to the right |
| + | 0 | Shift 1 column to the right |
| + | - | Shift 2 columns to the right |
If the two sides are in equivalent terrain, the column does not change and the odds remain the same.
6.2 - Combat against more than one character
When two or more characters decide to attack one enemy character, they can attack individually, or they can add their attack points to create a single total factor which is used to calculate the odds differential against the defender's strength. If they attack together, they may, as a bonus, shift the odds differential column so obtained by one column to the right (see example below). This rule does not apply when attacking a mounted character unless he is attacked by several riders.
When the result of the combat shows that one of the attackers or defenders has been stunned or wounded, the player of the side affected decides which of the characters receives the blow. On the other hand, the result "Attacker retreats" or "Defender retreats" applies to all the characters that participated in the attack or defence.
A stunned character is automatically killed if, at any time, enemies occupy all accessible hexes surrounding him.
If the attackers decide to attack jointly and they are on different types of terrain, the least advantageous terrain counts for their advantage/disadvantage.
If several defenders are attacked jointly and they are on different types of terrain, the least advantageous terrain counts for their advantage/disadvantage.
Example: Assume that two characters attack an enemy with a differential of 9. If one attacking character is on terrain (0) and the other attacking character on terrain (-), the two attackers are considered to be on terrain (-). If the defender occupies a terrain (0), the Terrain Effects table (see the Play Sheet) shows that the odds differential must be shifted one column to the left (9/15 becomes 5/8). But since the two characters are attacking together, they can shift the odds differential one column to the right. The combat will thus be resolved as a differential between 9 and 15, the number of attackers having counterbalanced the terrain disadvantage.
6.3 - Combat against a defender in armour
When a character attacks a defender in armour (a defence strength with a circle around it), he adds 1 point to the number rolled on the die when determining the result on the Combat Results Table. It is this modified number which indicates the result of the combat. If there are several defenders and not all are in armour, this rule does not apply but any resulting wounds or kills will be inflicted on an unarmoured character.
6.4 - Retreat after combat
Retreat affects all defenders or attackers involved. A character can retreat across hexes occupied by friendly characters. He can also displace friendly characters in order to complete his move. Displaced characters can displace other friendly characters, which can lead to a cascading retreat. If a retreating character or one of the displaced characters is forced to pass or stop on a hex adjacent to an enemy, he must submit to an infiltration check.
It is impossible to retreat across a hex occupied by an enemy. A character that cannot retreat the full required distance is wounded.
Important: A stunned or wounded character dies immediately if wounded or stunned again. A stunned character who is forced to retreat also dies.
6.5 - Advance after combat
If at the end of a combat the attacker or the defender have been forced to retreat (or if one or the other has been stunned or killed), the victorious player can advance one of their characters by a number of MPs equal to half of their movement allowance. The first hex crossed must always be one of the hexes evacuated by the enemy (or the hex of the stunned or killed character).
Advance after combat is not obligatory but it must be carried out immediately, without waiting for the resolution of the other combats in progress. Only a character involved in the combat can advance after combat. The MPs used during the advance after combat do not prevent the character concerned from moving normally during the next game turn.
Note: The advance after combat must take account of the rules for infiltration of enemy lines (§ 4.3), but with the following restriction: an enemy character adjacent to the hex crossed cannot roll the die if he is simultaneously engaged in combat, either in attack or defence. Whether the combat has or has not already taken place is irrelevant.
6.6 - Restrictions on combat
As a general rule, no combat is ever possible if the attacker would not be allowed to move into the hex he is attacking. Examples: a soldier in armour cannot attack a character in a water hex; a rider cannot attack a character in a tree hex.
6.7 - Shooting & combat concerning horses and camels
When a rider is dismounted following combat or shooting, the player to whom he belongs places the appropriate counter - rider stunned, wounded or dead - on one of the hexes adjacent to his animal. In the event that all the adjacent hexes are occupied, a friendly character is shifted one hex to make room for the dismounted rider. If he is completely surrounded by enemies, a dismounted rider is automatically killed. The horse or camel itself remains in the same place and must be represented by its own counter (dead or alive according to the result shown).
If a player decides to attack a riderless horse or camel, he resolves the combat or shooting as for an unarmoured mounted character. However, the results D or E for shooting, and G, H or I for combat, kill the animal.
Note: All the horses and camels have a defence strength of 1.
6.7.1 - Combat between horse riders and camel riders
Any horse-mounted character attacking or defending in a hex adjacent to a camel suffers a one column left shift penalty due to his difficulty controlling his horse, even if he is not fighting a camel rider.
Cavalry cannot charge camels. Camel riders cannot charge.
6.7.2 - Camel with litter
A character inside the litter benefits from light cover.
The passenger in the litter is effectively passive and cannot attack. From a defensive point of view, only the camel can be attacked by direct combat, not the passenger, as the nature of the litter and the size of the camel would make it impossible to inflict direct hits on the occupant of the litter. If the camel is killed, it collapses and the occupant of the litter can then be fought (or captured) normally.
Don't read any further! You are ready to play Scenarios 1 and 2.
7 - Combat Tactics
7.1 - Cavalry charges and counter-charges
7.1.1 - Single rider charge
The cavalry charge is a form of attack that allows improved combat odds. Before commencing his/her moves, a player may announce cavalry charges. The player identifies each charging rider, target, and route.
To be permissible, a rider's charge must meet the following conditions:
- The target must, at the beginning of the charge, be within the frontal arc of the rider (see the diagram) and visible to him. Line of sight is the same as for shooting but only mounted characters will block the line of sight of a rider.
- The rider must travel at least 6 hexes and his movement cannot include any sharp turns that would require the expenditure of extra movement points above the normal cost for each hex (see § 4.4).
- The four final hexes of the charge must be in a straight line towards the target's hex.
(Diagram: Frontal arc of a rider. The orange hexes form the frontal arc of a rider.)
7.1.2 - The counter-charge
After the announcement of each charge, the opposing player has the opportunity to declare a counter-charge by one of their own riders. This declaration must be made immediately, before the announcement of further charges. The counter-charge is executed during the opponent's movement phase. The character who counter-charges need not be the character chosen as a target of the charge. To be permissible, a rider's countercharge must meet the following conditions:
- The counter-charging rider must have the charging rider within his frontal arc (see the diagram above) and must be able to see him.
- A counter-charge must always end with the designated rider occupying the final 2 hexes of the route of the opposing charge. In other words, charge and counter-charge will encounter one another face-to-face in the 4 final hexes of the originally declared charge, with each rider occupying 2 of these hexes (see the diagram below).
- To reach this position, the counter-charging rider cannot travel more than half of the number of hexes declared for the original charge (rounding down if necessary). In addition, as for the opposing rider, his movement cannot include any sharp turning that would require the expenditure of additional movement points.
Example of charge and counter-charge: A knight Hospitaller declares a charge against a Syrian javelinman over 10 hexes. A Syrian mounted lancer decides to counter-charge and moves to encounter the Hospitaller by occupying the 2 final hexes of the original charge route. The other Syrian mounted lancer could alternatively have been chosen to counter-charge, but the Turkish cavalryman could not because he did not have the knight within his frontal arc at the beginning of the charge.
It is not possible to carry out more than one charge or counter-charge against the same character in the same game turn. Once a charge or counter-charge has been declared, it cannot be withdrawn nor can the route be modified. No defensive shooting is allowed against a charging rider if a counter-charge has been declared.
If a rider is subjected to an enemy charge of a range of at least six hexes and this charge is directed against his frontal arc, he can counter-charge. In this situation, he advances two hexes to meet the enemy, according to the enemy's route.
In scenarios with a large number of riders, it is recommended the charge/counter-charge markers be used. These markers are placed on top of characters as the charges and counter-charges are declared.
7.1.3 - Effect on combat
A charging rider has his attack strength increased by half. A counter-charging rider has his defence strength increased by half. If necessary the results are rounded down.
Example: A knight Hospitaller with an attack strength of 28 charges a Syrian cavalryman with a defense strength of 9. The knight gains a bonus of 14 points, which gives him an attack strength of 42 points this turn. If the Syrian cavalryman counter-charges, he adds 4 points to his defense strength.
Charges and counter-charges are always resolved as a separate combat, independent of any other attacks against one or other of the riders involved.
Note: In the event that the counter-charging rider's defence strength is greater than the attack strength of the charging rider, their roles are reversed between them, so the defender becomes the attacker. In this case, results unfavourable to the counter-charging rider are not taken into account.
7.1.4 - The lance charge
Any group of at least 3 adjacent Frankish or Order knights charging in a straight line apply the charge rules explained above and, in addition, the die roll result is shifted one column to the right.
7.2 - The feigned flight
This tactic was a specialty of the Turkish cavalry, but it was also known and used by the Western armies, as William the Conqueror had shown at Hastings.
7.2.1 - Performing the feign
Any group of at least 5 characters including at least 2 mounted men can simulate a flight by moving away from an enemy group for at least 7 hexes. Each hex moved must increase the distance between the groups. A group is defined as any number of characters who are never separated by more than one empty hex.
The enemy group cannot be located inside a building or castle. It must include more than half of the headcount of the feigning group (ignoring wounded characters). Its members cannot be adjacent to any opponents except members of the feigning party.
When its turn comes, the enemy group rolls 1D10 to learn whether it has been deceived by the feigned flight. If the feint succeeds, the enemy group must pursue the feigning group with all its movement points. If it fails to make contact this turn, it will repeat the test each turn until it makes contact, or it realizes the deception and halts. Wounded characters are not taken into account for the headcount, and they do not take part in the pursuit.
- From 1 to 4: The feigned flight succeeds and the enemy group pursues.
- From 5 to 10: The feigned flight doesn't succeed and the enemy group stands its ground.
7.2.2 - Modification to the die roll
| Modification | Circumstances affecting the die roll |
|---|---|
| +2 | The tested group includes fewer mounted characters than the feigning group. |
| +1 | Another enemy group is within 3 empty hexes of the testing group. |
| +2 | The testing group includes more mounted characters than the feigning group. |
7.3 - The naphtha throwers
7.3.1 - Casting naphtha
A naphtha thrower has 2 pots full of naphtha. He can cast any pot up to a maximum range of 5 hexes during his offensive shooting phase. Use the standard rule to determine the impact hex (see § 5.4.1). The flammable mixture spreads over the impact hex and the 6 hexes around it. The mixture floats on the surface of water. The fire burns for one turn. The thrower will have to wait at least one turn to cast his second pot.
Example: Ktulu wants to cast one of his naphtha pot against the Armenians who are attacking the castle. He aims at the hex marked with an "X". The resulting die roll is a 5. The hex with this number is set on fire along with the 6 surrounding hexes. The 3 Armenians located in these hexes must test for damage, as described below.
7.3.2 - Damage
All 7 hexes of naphtha ignite simultaneously. Any character on a burning hex rolls 1D10.
If the character is on foot:
- 1 - 2: The character is killed;
- 3 - 7: The character retreats one hex and is wounded;
- 8+: The character retreats one hex.
If the character is mounted:
- 1 - 2: Character stunned, horse killed;
- 3 - 4: Character stunned, horse retreats two hexes;
- 5+: The mounted character retreats two hexes.
Note: Results for mounted characters are always checked for the hex in which the direction arrow is located.
Any stunned character in a fire hex rolls 1D10:
- 1 - 4: He regains his senses immediately and retreats one hex;
- 5 - 6: He is wounded;
- 7+: He perishes in the flames!
Should the character retreat on another burning hex, roll 1D10 again.
7.4 - Capture of an important character
If during a fight, the combined combat differential of several characters is 60 or more against an important character (Knight or Ghulam) who is not adjacent to any character from his side, he may be captured. Roll 1D10 to determine if the character is taken prisoner:
- From 1 to 4, the important character surrenders;
- From 5 to 10, the important character courageously continues the fight!
When the important character surrenders, use his "Wounded" stance. He must then be escorted to one of the edges of the map by at least two men-at-arms. The escort must remain in the hexes adjacent to the prisoner at all times (the prisoner moves with his guards).
The important character may attempt to escape during his movement phase in the following circumstances:
- If fewer than 2 escorting characters are in hexes adjacent to his (whether by negligence or because he was killed or forced to retreat after shooting or combat).
- If his escort is attacked such that fewer than 2 escorting characters remain unattacked. In this case, instead of fleeing, the important character can join the attack.
- If his escort is reduced to only one character by any circumstances, he may try to escape.
The important character can get his full strength back (if he was not already wounded when captured) by staying one full turn next to a dead character to take his weapon.
If the important character attempts to flee or attacks a member of his escort, and is currently adjacent to an enemy character, they can try to take him prisoner again or attack him instead.
Don't read any further! You are ready to play Scenarios 3 & 4.
8 - Houses & Other Buildings
8.1 - Terrain types
| Name | Movement Cost per hex | Type of cover | Effect of terrain on combat |
|---|---|---|---|
| House Interior | 1 - Foot; impassable to mounted characters (except doorway hexes) | None | + |
| Building Wall | Impassable | Infinite | 0 |
| Window in Building Wall | 4 - Foot (to cross); impassable to mounted characters | Medium | Att. -, Def. + |
| Doorway in Building Wall | 1 | Medium | Def. + |
| Staircase | 2 - Foot; impassable to mounted characters | None | - |
| Low Wall | 3 | Medium |
8.2 - The village
The village displayed on the map is typical of the 12th century Middle East. The houses extend on several levels, which are represented by different floor colors, from the lightest (Level 0) to the darkest (Level 3). Unlike other maps in the series, buildings and their terraces are often shown from the outside. It is always possible to move and fight inside by either using special markers or by using another copy of the map to show the characters at another level.
The palace is only represented at level 0 with its door opening onto the village square and with several windows. It is possible to enter the inner courtyard with its fountain. Building B is also shown at Level 0 with two windows. Building A is shown with a Level 2 accessible via a 2-hex staircase and with an additional Level 3, but a side door provides access to Level 0. For buildings C and D, Level 1 is shown, but a door on the side opens onto Level 0. Buildings E and F are shown at Levels 1 and 2 with a door to Level 0. You can only enter the buildings through the doors drawn on the map (represented by a trapezoidal notch on the wall).
Access to the terraces is provided by a removable ladder located under the wooden trap doors of buildings A, C, D, and F (see the movement rules in the section below), or via their external staircases.
Most buildings have balconies and canopies that should just be treated as regular windows for game play. The vine on the terrace of building C provides a refreshing shade but has no impact on gameplay. It is not possible to climb the vine.
There is a well and an olive press in the village square. The press is at Level 1.
8.3 - The large nomadic tent
The large tent is open on two sides; the three visible open hexes in the front side are considered tent entrance hexes. The six hexes marked in orange represent the closed sides of the tent; they are impassable. Hex edges printed in grey mark the six hexes of the tent interior. The 6 hexes with ropes and stakes on the closed sides are treated like the 10 hexes with lines on the open sides.
8.4 - Shooting
8.4.1 - Shooting through windows
a) From the interior: a character inside a building can only shoot at a character outside from a window hex. The Line of Sight is determined from the middle exterior edge of the window and not from the centre of the hexagon.
b) From the exterior: a character outside can only shoot through a window if the target is immediately behind the window. The Line of Fire must be able to reach the centre of the window hex without touching the walls, otherwise the shot is impossible.
Exception: A shooter in the hex adjacent to the window-sill can fire into the building. His range of fire is however limited solely to the room itself. His Line of Sight is determined from the middle of the interior edge of the window.
In both cases, characters in the interior of a building gain medium cover when shot at through a window.
8.4.2 - Shooting through doorways
A character that is either outside or inside a building can shoot through a doorway as long as no section of wall blocks his Line of Sight. The calculation of Line of Fire is done normally. However, when a character shoots from a doorway hex, his Line of Sight starts from the middle of the door and not from the centre of his hex.
Restrictions for doorways are also applied to courtyard entrances or any combination of these two types of entrance.
8.4.3 - Walls
Walls block Lines of Sight, except when firing through a doorway or a window. Fire is impossible if the line of sight is blocked.
8.5 - Cover
8.5.1 - Interior of building
Characters inside a building benefit from medium cover when shot at through a doorway or a window. If the shooter is in the doorway hex, characters inside the building receive no cover.
8.5.2 - Flat roofs
Characters on a flat roof benefit from medium cover when shot at from outside the house (even from another roof at the same level) or from a lower level. There is no cover if the shooter is at a higher level.
8.5.3 - Courtyards
Characters in the courtyard of a building benefit from medium cover when shot at through a doorway or a window.
8.5.4 - Walls
Characters behind a wall without an opening benefit from infinite cover. It is thus impossible to shoot at them over the wall.
8.5.5 - Tents
Tents cover 4 hexes. A character in a tent hex is mostly hidden from Line of Sight and benefits from heavy cover, unless the Line of Sight passes through the opening, in which case cover is only light.
8.5.6 - Doorways & courtyard entrance
Characters in doorways or courtyard entrance benefit from medium cover. This cover is limited to one side (exterior or interior) of the door or courtyard entrance. The character must select which side is covered in the event of cross-fire. He will gain no cover when shot at from the other side.
8.5.7 - Exterior building corner
Characters in hexes containing a building corner benefit from medium cover if the shooter is on a hex that does not allow him to see two sides of the building at the same time. If he is subjected to a cross-fire, the character must choose the side from which he will be protected.
Example of crossfire: Two Franks shoot in the same turn at a dismounted Syrian cavalryman who is in a building corner hex. He can't benefit twice from medium cover, so the owning player must choose from which shooter he is covered.
8.6 - Movement
Walls are impassable. To enter a building, a character must be on foot and pass through a doorway or a window. Horses and camels, with or without a rider, cannot enter a building interior hex. They can enter courtyards and doorway hexes.
8.6.1 - Movement through windows
Only foot characters can pass through a window hex. This move is impossible if the other side of the window is occupied by an enemy.
Note: Wounded characters with armour cannot cross a window hex due to their reduced movement points of 3 or 2, as 4 points are necessary to cross a window.
8.6.2 - Flat roofs
It is possible to move on the ground floor of a house even if it is not shown on the map. Place an "Inside Building" marker on the character to show his position.
A flat roof can be reached from the ground floor using a ladder located under the trapdoor drawn on each roof. Trapdoors are considered closed (characters on the flat roof can therefore walk on them) except temporarily during the movement of a person who uses the ladder to reach the roof. A raised ladder is considered to be already under each of these trapdoors. Climbing up or down the ladder costs 3 movement points (4 for building A), including the cost of opening the trapdoor.
The trapdoor cannot be opened if it is occupied by a character (dead or alive). In this case, the character on the ground floor can still climb the ladder at a reduced cost of 2 movement points (3 for building A), and may open the trapdoor for an extra point when it is clear. He can then move onto the roof, spending movement points as usual.
Example: To move from inside the house up onto the flat roof, Khattab must spend: 2 MP to move two hexes inside the house, 3 MPs for the ladder, 2 MPs for the two flat roof hexes, for a total of 7 MPs.
8.6.3 - Parapets
A parapet hex can be crossed at a cost of 3 MP, which is the sum of +2 to cross the hexside and +1 MP to enter the hex (this can matter if a wall is adjacent to a tree).
8.7 - Combats
8.7.1 - Combat through a doorway or a window
When combat is fought across a doorway or a window, the defender is always considered on favourable terrain (+), regardless of whether he is located (inside or outside the building).
8.7.2 - Tents
Combat across a tent hex is impossible, except through the tent opening hexes.
A character can tear down a tent hex to get inside or outside. He must spend a full turn and can't perform any other action during this turn. Once torn down, the tent hex is treated like a tent opening hex.
Example: the Franks Lancelin and Thibaud stand in their tents and are attacked by the Turks Ergun and Borsok. The orange hexes represent the opening of each tent. Borsok can shoot at Lancelin who only benefits from light cover as the Line of Sight crosses the tent opening hex. He can also shoot at Thibaud who benefits from heavy cover. Ergun either needs to first move through the tent opening hex or must spend a full turn to tear down the canvas to be able to attack Lancelin in combat.
Don't read any further! You are ready to play Scenarios 5, 6 and 7.
9 - Castles
9.1 - Terrain Types
| Name | Movement Cost per hex | Type of cover | Effect of terrain on combat |
|---|---|---|---|
| Castle Wall | Impassable | Infinite | Impossible |
| Arrow-slit | 1 - Foot (impassable from outside) | Heavy | Def: + (combat impossible across) |
| Tower Gate | 1 - Foot; impassable to mounted characters | Medium | Def. + |
| Stairway | 2 - Foot; impassable to mounted characters | None | - |
| Glacis | Impassable | ||
| Rocks | 4 - Foot; impassable to mounted characters | Light | - |
9.2 - The castle
The castle was inspired by the castle of Arima (Qalaat Areimeh) in Syria near Tartus, as well as elements of the castle of Saône, further North, East of Latakia (Laodicea). It is made up of two parts separated by a moat. The first castle can be entered through the Gate of the Levant, a simple gate in the curtain wall, without elaborate defense. This castle has two quadrangular towers, the Tower of Harim and the Tower of Sheizar and a walkway at the same level. In the courtyard is a guard room and access to the Postern of the Sunset which leads to the second castle. To go to the second castle, you have to cross the moat over a small footbridge that cannot be used by mounted riders. The curtain walls of the second castle are higher than those of the first castle. Access to the castle is through the postern of the Franks. The only building in the courtyard is a kitchen, leaning against a square tower called the Tower of Antioch. Two stairways make it possible to reach the curtain wall connecting the 4 towers of the building. The tower is the strongest part of the castle. Its two external faces are protected by an impassable glacis. The arrow slits allow shooting outside the castle as well as into the courtyard.
The castle's defences extend over several levels, which are represented by different tile colors. The inner courtyards of the castle are at Level 1, which are separated from the ground of the surrounding terrain (Level 0) by a slope and rocks. The guard room and the kitchen are on Level 1 (pink floor). The curtain wall and the towers of the castle entrance are on Level 2 (blue floor). Those of the second castle are at Level 3 (brown floor) while the Master Tower is at Level 4 (green floor).
9.3 - Shooting
9.3.1 - Shooting from different levels
As a general rule when the shooter and the target are not on the same level and are separated by an obstruction (curtain wall, house, etc.), shooting is possible if the character situated on the lower level is at least as far away from the obstruction as the character on the upper level.
Example: The map shows the hexes which can't be targeted by a shooter located on the curtain wall of the second castle. The inner yard of the first castle and the guardroom, the tower hexes except the 2 hexes adjacent to the door and the hexes behind the second curtain wall are all out of reach. Note that a character on the stairway can be shot at.
9.3.2 - Shooting through doorways
A character outside or inside a building can shoot through a doorway if he is at the same level of elevation as the doorway and Line of Sight does not cross a section of wall.
When a character shoots from a doorway hex or from a hex behind a doorway, line of fire is traced from the middle of the opening and not from the centre of the hex.
9.3.3 - Shooting from behind arrow-slits
When a character in an arrow-slit hex aims at a target outside the castle, his Line of Sight is traced from the middle of the arrow-slit hex-side and not from the centre of the hex. In the same way, when a character in an arrow-slit hex shoots through the arrow-slit, the Line of Sight is traced from the aperture of the arrow-slit. In all other situations the Line of Sight is calculated normally.
A few arrow-slits are positioned between 2 hexes. Line of Sight rules are applied as in the example below. Two characters, one on the lower level inside the walls, and the other on the curtain wall, can shoot at each other.
Example: The Line of Sight of the Norman archers in the tower are highlighted in red. Achard can shoot at both Güksün and Kismet, but nobody can shoot at Evhad. Conversely, Güksün can shoot at Achard as he stays in the arc of the arrowslit (see rule § 9.3.5).
9.3.4 - Restrictions on shooting
When shooting from an elevated position, such as an arrow slit hex, targets within the specified ranges will not benefit from any cover if they are in scrub, slope, rock or oasis hexes.
Only archers and crossbowmen can shoot through an arrow-slit.
9.3.5 - Shooting at characters on a castle wall or in arrow-slits hexes
If a shot is possible from above, it will also be possible from below with one exception:
- To shoot at a character in an arrow-slit hex, the shooter must be in an exact straight line with the arrow-slit.
9.4 - Cover
9.4.1 - Arrow-slits
Characters in these hexes benefit from heavy cover when the line of fire crosses the arrow-slit aperture.
9.4.2 - Interior of the castle
When the gate is closed, any character inside the castle benefits from infinite cover from the outside unless he is behind an arrow-slit. If a gate hex is destroyed, shooting across the hex is possible; the target benefits from light cover.
9.4.3 - Doorways
A character in a doorway hex benefits from medium cover. This cover is however limited to one side (exterior or interior) of the doorway. If he is subjected to a cross-fire, the character must choose the side from which he will be protected.
All characters inside a building benefit from medium cover when shot at through a doorway. This situation does not apply if the shooter is standing in the doorway hex. When the shooter is standing in a doorway hex, any target inside the building receives no cover.
9.4.4 - Walls
Characters behind a section of wall without an opening in it benefit from infinite cover. It is impossible to shoot at them.
9.5 - Movement
9.5.1 - Restrictions of movement
Curtain wall hexes are impassable from the outside of the castle unless a character is on a scaling ladder. They can be accessed from the interior of the castle by stairways. The castles can only be entered through one of their gate.
Arrow-slits are impassable. Arrow-slit hexes can only be entered from within the tower.
9.5.2 - Movement and combat on stairways
If the top or bottom of a stair opens onto a single hex, it can only be climbed or attacked from that hex. Likewise, if the stair opens onto two hexes, while if the stair ends in the middle of a hex it can be entered from all adjacent hexes.
10 - Siege Tactics
Note: For complete siege rules and tactics, use the expansion game The Anarchy.
10.1 - Gate defences
| Name | Movement Cost per hex | Type of cover | Effect of terrain on combat |
|---|---|---|---|
| Gate | Impassable when the gate is closed | Infinite (if fired through) | 0 |
| Bridge | 1, impassable from a Moat hex | None | 0 |
| Burnt Bridge | Impassable when bridge is destroyed | None | - |
The various gates of the castle can be smashed open.
10.1.1 - Opening/closing the gate
A character must end his movement in the door hex, and can neither move, shoot, nor engage in combat for one full turn. At the end of this turn, the door may be opened or closed. When opened, place the gate marker in the hex containing the character opening the door.
When the gate is closed you cannot shoot into or through the gate hex from outside.
The door can only be opened from inside the castle.
10.1.2 - Smashing the gate
A gate can be smashed open by two attackers placed on hexes adjacent to the gate (and on the same side). They can't perform any other action for 2 full turns (not necessarily consecutive) to succeed. Once smashed open, the gate remains open until the end of the game.
10.1.3 - The bridge
The wooden bridge is used to cross the moat. The defenders can destroy it to slow down an attacking party.
Two characters must stay for 2 full turns (not necessarily consecutive) in hexes adjacent to the bridge to destroy it. In those turns they may not move, fire or engage in combat.
When a bridge is destroyed, place the Burnt Bridge marker on the hex, which is now impassable. Two characters adjacent to this hex, and who do not perform any other action for 2 full turns, can install a footbridge to replace the destroyed bridge.
10.2 - Scaling ladders
Note: Rules to move the ladders are included in the other games of the Norman Saga series.
| Name | Movement Cost per hex | Type of cover | Effect of terrain on combat |
|---|---|---|---|
| Upright Ladder | 3 on foot | None | - |
10.2.1 - The height of the ladders
Scaling ladders can bridge 1 level of elevation; thus, they can reach the top of walls and towers of the first castle. They can't be used against the walls and towers of the second castle as they are at Level 2.
10.2.2 - Movement on a ladder
Climbing up or down a scaling ladder costs 3 movement points. Characters can move from the top of a ladder into the castle hex that the ladder is resting against at a cost of 4 Movement Points or as a result of Advance after Combat.
Roll 1D6 to successfully advance onto the castle wall from the top of the battlement. A character in armour adds 1 to the result of the die:
- From 1 to 5, the jump is a success;
- 6, the character is wounded.
Note: For a character with 8 movement points it is possible to climb a ladder and move onto a castle wall hex during the same game turn.
10.2.3 - Moving an upright ladder
An upright ladder can be moved one hex, or turned to face in a different direction within the same hex, by two characters adjacent to the ladder hex. Each character must spend 2 Movement Points to turn the ladder one hexside, or move the ladder one hex. It is impossible to move or turn a ladder if someone is on it.
10.2.4 - Shooting and combat
A missile shooter at the top of a ladder can only shoot into the castle wall hex facing him. His target will still benefit from heavy cover. Characters on a ladder do not benefit from any cover and are considered to be in disadvantageous terrain (-) in the event of combat.
10.2.5 - Toppling a scaling ladder
A character on a castle wall hex facing the top of a ladder may attempt to topple the ladder instead of normal shooting or combat. The attempt is made during the character's Combat Phase. Roll one die:
- 1-6: The ladder is toppled.
- 7-10: The ladder stays in place.
Any character that was on a toppled ladder falls down and must be placed by his owner in one of the hexes adjacent to the upright ladder hex, but not (of course) in a castle wall hex.
The fallen character may be placed on top of another character or on top of the toppled ladder. The character is automatically wounded by his fall, and if he ends up stacked on top of another character that other character will be stunned. As usual, a character that is already wounded or stunned will be killed.
The ladder itself does not have any effect on characters below if it falls onto them.
10.2.6 - Toppling a ladder from below
A character can attempt to topple a ladder from below in exactly the same way as an attempt made from above (see rule § 10.2.5). To do this the character must be on a hex adjacent to the bottom of the ladder.
10.3 - Rubble
| Name | Movement Cost per hex | Type of cover | Effect of terrain on combat |
|---|---|---|---|
| Rubble | 2 on foot, impassable for horses | Medium | - |
10.3.1 - Placing the markers
Rubble markers are positioned according to the instructions provided in each scenario.
10.3.2 - Shooting and cover
It is possible to shoot into or across a rubble hex. The breach represented by the rubble also allows shooting into the interior of the castle. Characters on rubble hexes benefit from medium cover regardless of the direction of the shot.
10.3.3 - Movement
When a rubble marker is placed on a castle wall or arrow-slit hex, this hex becomes accessible from all the hexes around it, unless there is an intact wall that blocks passage. Characters can thus move from a castle wall hex into a rubble hex by spending 2 Movement Points. However, in order to move from a Rubble hex directly onto a battlement hex, tower hex or keep hex, a character must spend 3 Movement Points.
You can now play all the scenarios.
Campaign Rules
1 - Goal
You are a young Frankish knight who is going to carry out a number of missions by order of your lord. Your missions will include joining an existing siege as a reinforcement party, raiding and plundering the outskirts of a city held by the Turks, and escorting a group of pilgrims on their way to Jerusalem. By completing these missions, you will gain experience and glory, and you can expect to become, ultimately, a lord yourself.
Or you may play the role of a seasoned Turkish Ghulam paid by the atabeg of Aleppo and in charge of supervising the construction of a castle, fetching reinforcements from Shaizar or convincing the inhabitants of an Armenian village to rebel against the Frankish yoke.
The scenarios are designed to generate confrontations which are resolved on tactical maps.
The Campaign game is based on two essential things:
- The resources in settlements, castles or supply convoys. These resources allow combat groups to replenish their supplies, but they are also a target for looting.
- The faith of the various factions, which lead them to seek armed confrontation or a middle ground with the enemy. Newly arrived Crusaders or military order knights may want to fight at first sight of the enemy, while Franks who have been living in Syria for decades may be more willing to look for a compromise.
2 - The map
The double map shows part of Northern Syria, from the Mediterranean Sea to Aleppo west to east, and from Antioch (modern Antakya) to Laodicea (modern Latakia) north to south. This is the part of the principality that saw the most armed clashes and sieges during the first half of the 12th century.
Each hex represents about 3 km (2 miles) of land.
Note that Northern Syria is much greener and wooded than most people imagine. Snow is even common in the winter!
2.1 - Terrain
The cost in movement points (MP) to enter a hex varies according to the terrain, as mentioned on Play Sheet #4. When a hex combines several types of terrain, consider only the most unfavorable terrain cost (for instance, the cost to use a road hex in a mountain hex is 2, not 1).
3 - The play sheets
The first sheet includes all the necessary tables for the campaign game.
The other campaign sheets are used, to keep track of the headcount of the various combat groups, (as well as their faith in some cases), their level of supply and money, the prestige and faith of the nobles, and the resources available in settlements, castles and supply convoys.
4 - The counters
These either represent siege markers, combat groups, supply convoys or group leaders (typically knights for the Franks, Crusaders or military Orders, Ghilman for the Seljuk Turks and Didebuls for the Armenians). All group leaders will be named nobles in this rulebook.
- The blue number in the bottom left is the movement allowance of the counter, the number of movement points that he can spend each game turn.
- The red number in the top left section is used to differentiate the various counters.
- The black letter to the right identifies the type (N for the Normans - also named Franks, O for the military orders, C for the Crusaders, R for the Armenians and T for the Seljuk Turks).
- The background color identifies the faction of the noble or group: Red for Antioch, yellow for Edessa, black for the Hospitallers, white for the Templars (in the future MONTGISARD expansion game), blue for the newly arrived Crusaders and green for the Seljuk Turks. Unless mentioned otherwise in the scenario, Antioch, Edessa, the Crusaders, the Hospitallers and the Templars are allied factions.
5 - Buildings
5.1 - Towns & cities
Towns are settlements with a blue name on the map. The 3 cities of Antioch, Laodicea and Aleppo are in green.
In the case of tactical combat in a town, the player to whom the town belongs chooses a group of 15 men-at-arms whose composition is determined by the Combat Group Headcount table on Play Sheet Nr 4. The group increases to 30 men-at-arms if the combat takes place in a city.
Each town or city belongs to a noble and his faction. Each settlement has a resource level between 1 and 10. Cities have unlimited resources. The resource level has an impact on the ability of a combat group to resupply or recruit new members.
The resources available in each settlement are provided on Play Sheet 5 based on the year the scenario takes place. Only supply convoys can replenish lost resources.
5.2 - Castles
Each castle has a garrison of 10 men-at-arms at the beginning of the scenario. The composition of the garrison is given by the Headcount Table on Play Sheet 4. The garrison is commanded by a noble. Members of these garrisons can be hired by combat groups, but there must always be at least 5 soldiers to defend the castle. The only exception is the result of a siege or attack, which may bring the number of defenders down to less than 5. In that case, priority must be given in the following days to bring reinforce the garrison to at least 5 defenders.
The resources in each castle are noted in Play Sheet 5 based on the year the scenario takes place.
6 - The game turn
Each turn corresponds to one day. The campaign turn is also used as a siege turn when the situation arises.
Follow these steps in a campaign turn.
Game turn sequence. Both factions complete each step before they continue to the next:
- Check the supply status of all groups with 10 soldiers or more (see § 8.4)
- Reorganise groups on the same hex (see § 8.1)
- Pay ransoms for noble prisoners (see § 15.8)
- Create supply convoys in towns, cities or castle hexes and resource transfer (see § 12)
Movement is then performed, along with any ensuing encounters, in order of the prestige of the nobles; the noble with the highest prestige playing first, then the next, etc. When 2 nobles of opposing factions have the same prestige level, the group with the most characters plays first. Groups with no prestige level play last with priority given to the group with the highest character count. Encounters can lead to tactical battles or sieges.
7 - Faith
Faith is related to religion, be it Latin Christian, Oriental Christian, Sunni Muslim or Shiite Muslim.
Each combat group, town, city or castle has a faith level between 1 and 10 at the beginning of the scenario (see Play Sheet 5).
The faith of combat groups can be affected by 2 factors:
- Traits of the noble commanding the group,
- Headcount of an incoming group.
When he enters a hex with another combat group from a different faction, each player must first make a faith test, using his current faith level and adding or subtracting the modifiers listed below.
- If each group draws a result of 6 or lower, no combat takes place,
- If a least one group draws a result of 7 or more, combat is possible.
Faith Test:
| Faith | Religious behavior |
|---|---|
| 1 | Pragmatic |
| 2 | Pragmatic |
| 3 | Pragmatic |
| 4 | Pragmatic |
| 5 | Moderate |
| 6 | Moderate |
| 7 | Faithful |
| 8 | Faithful |
| 9 | Fanatic |
| 10 | Fanatic |
Faith modifiers
Traits of the noble: The more personal prestige the noble has, the more combat groups will want to be hostile. Apply the following modifiers to the existing loyalty level:
| Noble prestige | Modifier |
|---|---|
| 1 or 2 | -2 |
| 3 or 4 | -1 |
| 5 or 6 | 0 |
| 7 or 8 | +1 |
| 9 or 10 | +2 |
Headcount: When meeting with another combat group, calculate the difference between the number of armed characters in each group located in the same hex. Apply the following modifiers to the existing faith level:
| Difference in favor of the active player | Modifier |
|---|---|
| 10 or more | +2 |
| 5 to 9 | +1 |
| -4 to +4 | 0 |
| -5 to -9 | -1 |
| -10 or less | -2 |
8 - Combat groups
8.1 - Combat group management
Each group is composed of at least three characters. This minimum quota allows you to create groups of decoys, scouts or reinforcements. Your opponent does not know the composition of a combat group, he only knows its existence on the map. He can only learn about its composition if one of his groups is on the same hex.
If a combat group is made up exclusively of riders, a cavalry group marker is used. This type of group can move faster than a group consisting solely of infantry or a mixture of both.
During the reorganization phase, a player can break a group into several smaller ones. He can also combine several groups to form a single, larger one, providing that they are all on the same hex at the same time. When a group breaks up, the faith of the smaller groups is the same as the previous, larger group. When several groups combine into a larger one, the faith level of the noble of the largest previous group becomes the faith level of the new group.
Two or more combat groups of the same faction cannot stay on the same hex for more than one turn, otherwise they must be grouped together. In other words, several "Combat Group" counters of the same faction cannot be present on the same hex for more than one turn.
Any group of fewer than 3 characters dissolves automatically and the remaining characters are removed from play (they got lost in the wild...).
The number of groups that can be created is only limited by the availability of characters on the campaign map. They don't need to be led by a noble (see § 9).
8.2 - Combat group headcount
The scenarios specify the total number of soldiers in each group. The soldier types follow a standard distribution that varies by faction as shown on Play Sheet #4. If there are more than 12 characters, simply add the results of two or more lines, using the "10" line for each set 10 characters.
Example: A group of 15 Turks will be assembled by adding the headcounts of lines 10 and 5.
8.3 - Movement
A combat group can move up to 8 hexes per turn (shown in blue at the bottom left of the counter). If the group is exclusively made of riders, it can move up to 12 hexes per turn.
The type of terrain affects movement, as shown on Play Sheet 4.
A combat group can end its movement phase on a hex occupied by another group, be it friend, foe or neutral. But there can only be one combat group per hex at the end of a game turn - several groups of the same faction must regroup (see § 8.1) and groups of opposing factions must fight or one faction must retreat. The withdrawing group is the one with the lowest score on the Test of Faith.
8.4 - Supply for combat groups
A combat group with fewer than 10 soldiers is considered to be supplied at all times. However, any combat group of 10 or more soldiers consumes resources and must find supplies each day. It cannot store supplies for more than one day. Supply is only possible (but not certain) if the group is in a hex with a town, a city, a castle of the same or allied faction, or a supply convoy.
The resources necessary to supply a combat group depend on the number of soldiers it has:
- 1 if the combat group has between 10 and 19 characters,
- 2 if the combat group has 20 characters and more.
A combat group will be affected in its next combat phase if it was unable to resupply fully for 2 days in a row:
- The combat group must modify all combat and missile fire result die rolls by +1.
- In addition, without supply, the combat group will only be able to use half of its movement points (rounded down) in the movement phase (both in the campaign and in tactical games).
The supply of a combat group can affect the level of resources in a settlement, castle or convoy:
- -1 if the combat group has between 10 and 19 characters,
- -2 if the combat group has 20 characters or more.
9 - The nobles
Each noble has a certain prestige that can affect the faith of groups encountered. The number of nobles and their initial prestige is mentioned in each scenario.
Each noble is represented by a counter and behaves like a combat group if he is accompanied by soldiers. For movement purposes, consider only the movement point allowance of the group.
The prestige of a noble increases by 1 for every tactical battle won. It is decreased by 1 point for every battle lost or withdrawal before battle. It is also decreased by 1 point if he loots a town or city. The prestige level for a noble may never fall below 1.
A new noble may appear during the game if a group without a noble wins at least two tactical battles. Its highest ranking character becomes its noble, with a prestige of 2.
If in the meantime the group is reorganized, the above rule is still valid if at least 50% of the initial group members are still present.
10 - Siege engines and engineers
A group of siege engines is made of at least one engineer, one siege engine on wheels (Battering ram, gallery, belfry or mangonel), 2 oxen (4 for the belfry) and 3 peasants.
An engineer can be hired in a city for the duration of the campaign at a cost of 4 Deniers.
11 - Supply convoys
Supply convoys are represented by a counter. They can be created in friendly town, city or castle hexes during a specific game turn phase.
A counter represents up to 5 pack animals and a driver. Supply convoys can move 8 hexes per day as long as there is a driver to guide them. Without a driver, a convoy cannot move and stays in its location.
Up to 5 points of resources can be transferred between a convoy and a town, a city or a castle during the resource transfer step. Any resource transferred to a supply convoy must be deducted from the settlement count. Each pack animal, represented by a camel, a horse or a donkey in the tactical game, transports 1 supply point.
Supply convoys in the scenario setups are neutral. They will join a faction when an escorting combat group is located in the same hex. When unescorted, a convoy plies between its starting and finishing locations as mentioned in the scenario setup.
12 - Spies
Spying was an integral part of medieval diplomacy and helped to dispel the fog of war. A spy is used to reveal the size and composition of any combat groups of other factions within 2 hexes of his position. He reveals his secrets as soon as he comes into contact with a noble or combat group of his own faction: The opposing player must then reveal the size and composition of those of his groups the spy met to the player who owns the spy.
The spy counter only represents one individual and can be stacked with other counters.
A spy can be discovered if an opposing combat group is in the same hex. Throw 1D10 and check the result in the table below:
| Die | Result |
|---|---|
| 1 to 5 | Spy discovered |
| 6 to 10 | - |
The following modifiers can impact the die roll:
- +2, if the encounter takes place in a town,
- +4, if the encounter takes place in a city.
A discovered spy is eliminated from the game.
13 - Finances
Each combat group starts the game with a sum of money in Deniers (D) as detailed in the scenario. This money can be used to recruit troops in towns and cities.
Money can be earned by looting towns of the opposing faction (see § 13.2).
13.1 - Troop recruitment
Subject to adequate resources, a noble or knight can recruit one or more characters in a town or city of his faction at a cost of 1 denier per light infantryman or 0.5 denier per peasant (see the recruitment table on Play Sheet #4). He can do the same in a town or city of different faith if his modified faith test results in a 4 or less (pragmatic).
13.2 - Looting
If a combat group attacks a town or castle and wins the ensuing tactical battle, it can loot its remaining resources. One loot point is equivalent to 1 level of resources, and is worth 1D for future trades. The resource level of the location is adjusted after the looting.
14 - Encounters
This phase of the game determines the effect of an encounter between two groups, or when entering a settlement.
14.1 - Two groups of the same faction meet
It is possible to rearrange the groups during the reorganization phase (see § 8.1). This is not an encounter in the sense of these rules.
14.2 - Encounter between two groups of different factions
Combat is possible based on the results of the faith test.
Note that even if the groups are hostile, combat only occurs if one or both players decide to enter combat.
14.3 - Encounter with a supply convoy
It is possible to purchase all or part of the supplies carried by a convoy when the convoy is of the same faction as, or is allied to, the group. If the faith test determines that the escort combat group is hostile, looting is possible after a successful tactical battle. Unescorted convoys automatically belong to the first combat group that encounters them.
14.4 - Entering a town or city
It is possible to resupply and recruit new troops if the town or city belongs to the same faction. If not, it is possible to attack a town to loot it. A city is too large to be attacked.
14.5 - Attacking a town
The number of available fighters is related to its resource level: The higher the resources, the more fighters are available. The type of fighters available is detailed in the tables on Play Sheet 4.
At the end of the fight, and regardless of its result, surviving settlement defenders are removed from the game. In case of a new attack in a subsequent round, the procedure for selecting defenders is repeated, based on the new resource level of the town.
15 - Combat
15.1 - Relations between the campaign map and tactical maps
The number of tactical maps used to resolve a battle depends on the total number of characters involved in the fight:
- 30 or fewer: 1 map,
- 31 to 60: 2 maps,
- Over 61: 4 maps.
If only one tactical map is used:
- The groups arriving from the north or northeast are deployed along the top side of the tactical map,
- The groups arriving from the northwest are deployed along the left side of the tactical map, etc.
If 2 tactical maps are used:
- The groups arriving from the north are deployed along the top side of the upper tactical map,
- The groups arriving from the northwest are deployed along the left side of the upper tactical map,
- The groups arriving from the southwest are deployed along the left side of the lower tactical map, etc.
If 4 tactical maps are used:
- The groups arriving from the north are deployed along the top left side of the upper tactical map,
- The groups arriving from the northwest are deployed along the left side of the two tactical maps placed on the left,
- The groups arriving from the southwest are deployed along the bottom left side of the lower tactical map,
- The groups arriving from the south are deployed along the bottom side of the lower right tactical map, etc.
15.2 - Setup of the tactical maps
The choice of tactical maps depends on the nature of the campaign map hex. Use at least one of the maps below, and complete the battleground with maps of terrain without a building (such as The Meadow or The Crusader Trail).
Players in turn place one tactical map oriented as they see fit. The first map is always chosen by the inactive/defending player. Once all the maps are laid out, players designate jointly or at random the northern edge, which corresponds to the north on the campaign map.
| Campaign map hexes | Maps published by Historic-One | Original Cry Havoc maps |
|---|---|---|
| Open Terrain | The Plateau, The Desert, The Meadow, The Crusader Trail | The Watering Hole, The Crossroads, The Open Field |
| Forest | The Woods | The Olive Grove, The Forest |
| Hills | The Plateau, The Ditch, The Knoll, The Hill, The Sheepfold | - |
| Swamp | The Lagoon, The Ditch | - |
| River | The River, The Woodbridge, The Creek, The Lagoon | The Watermill, The Ford |
| Coast | The Beach, The Cove | The Watchtower, The Abbey, The Coast 1, The Coast 2 |
| Town/City | The Syrian Village, The Caravanserai, The Hamlet, The Priory | The Village, The Fortified Medieval Town |
15.3 - Multiple groups participating in a battle
Other groups, friends or foes, located in adjacent hexes to the one where the battle will take place can join the combat. These groups won't be able to move later in this turn. Take a note of where each group entered the battle hex, as this will affect the setup and the conclusion of the tactical battle.
15.4 - Deployment
Depending on the situation after the Encounter phase, the various groups are deployed along the side of the tactical map corresponding to their arrival on the hexagon of the campaign map.
The attacking player chooses whether or not to deploy first. He can then choose to take the first turn of the tactical game or let his opponent go first.
15.5 - Refusing combat
If the attacked group doesn't want to fight, each character in this group must face an infiltration test. Roll 1D10 for each member of the group and check the results on the following table. The infiltration tactical modifiers are used for these characters:
- Rider: -1
- Armoured: -1
- Wounded: +2
Furthermore, the commanding noble loses one point of prestige.
Table for Refusing Combat:
| Die | Result |
|---|---|
| 1-4 | - |
| 5-7 | Character taken prisoner |
| 8-9 | Character wounded |
| 10 | Character killed |
15.6 - End of the battle
The fight ends with one of the following 4 results:
- An opponent is completely eliminated. The victorious faction remains on the hex of the campaign map in which the battle took place. The counter representing the opposing group is removed from play.
- An opponent decides to flee the battlefield. The vanquished group is positioned on the campaign map in one of the three hexes located in the direction of its arrival. The victorious faction remains on the hex of the campaign map in which the battle took place.
- An opponent decides to surrender. The victorious faction remains on the hex of the campaign map in which the battle took place while all the surviving opponents are held prisoners. See § 15.8 for the management of prisoners.
- The battle lasts 12 turns and neither side was able to achieve one of the above outcomes. Each opponent retreats to one of the three hexes located in the direction of their arrival on the campaign map. If one side was already present in the campaign hex at the start of the campaign turn the battle was fought in, it must retreat to the hex opposite to the direction taken by its opponent.
15.7 - Wounded characters after a tactical battle
A character wounded during a tactical battle can move in the following turns with a penalty of 4 MPs on the campaign map. If he is part of a group with other healthy characters, the entire group is penalized (as the wounded characters slow down the entire group).
A character wounded during a tactical battle must move towards the nearest friendly settlement for healing. He won't be able to leave it until complete recovery.
He must reach a loyal settlement or castle,
Use the Healing Table on the Play Sheet 3 to see how many turns will be needed for the character to recover.
If the settlement where the wounded character is staying is attacked, he can fight with his wounded combat potential.
15.8 - The prisoners
A group made prisoner at the end of a battle will be escorted from the next turn by a group of at least 3 men to:
- the nearest town, city or castle belonging to the same or allied faction;
- Place the counter representing the prisoners under the group counter used for the escort.
Prisoners (except nobles for whom a ransom is expected) are eliminated from the game once the destination is reached. The escort can then be used as a combat group again.
If an escort group can't be assembled, prisoners are massacred.
Noble prisoners are ransomed. Their ransom is in direct relation to their prestige level (1 point of prestige = 2 Deniers of ransom). When the ransom for a noble is paid, he is free to leave with an escort of 2 friendly riders, taken among the other prisoners as a priority.
Note for the tactical game: If the convoy of prisoners is attacked in the following days, unarmed prisoners only have 1 defence potential. A friendly character must remain one full turn next to a prisoner without performing any other action to release him. The released character must remain one full turn next to a dead or stunned character to take his weapons (re-arming himself to his normal defence and attack values in the process).
16 - Sieges
Use the tactical rules of The Anarchy or Guiscard with the following modifications:
Each resource point provides enough supply for the besieged party to sustain two days of siege. When all their resources are exhausted, the defenders must surrender. Their fate depends then on the table on Play Sheet 3:
Consequences of surrender: If the die is between:
- 3-4: Test each defender with 1D10, in reverse order of their attacking potential. He is killed on a result between 1 and 5. Stop the test when half the defenders are dead.
- 5-7: The winner forms one or more combat groups with the prisoners. All riders are dismounted. Each group of prisoners must be accompanied by an escort group.
(Only these two entries appear in the printed text; the rest of the Play Sheet 3 table is not reproduced in the rulebook.)
17 - Setup on the campaign map
The scenarios require placement of groups near a landmark (a town or a castle in most cases). The position relative to a location is expressed by its orientation on the cardinal points as shown in the illustration in the rulebook.
18 - Quick combat resolution
Use this rule if you don't have time to play a tactical battle, or if it doesn't look very attractive to play.
18.1 - Calculating the value of each faction
A value is given to the characters in each faction according to the following table:
| Type of character | Points |
|---|---|
| Infantryman w/o armour | 1 |
| Infantryman w/ armour | 2 |
| Foot shooter w/o armour | 2 |
| Foot shooter w/ armour | 3 |
| Cavalryman on foot w/ armour | 3 |
| Cavalryman w/o armour | 3 |
| Mounted shooter w/o armour | 3 |
| Mounted shooter w/ armour | 4 |
| Cavalryman w/ armour | 5 |
The value of a wounded character is half.
Note: In the case of a siege, all mounted characters are considered on foot and their values on foot are used.
Multiply these individual values by the number of characters in each class to get the total value of each faction.
Example:
| Type of character | Points | Attacker number | Attacker value | Defender number | Defender value |
|---|---|---|---|---|---|
| Infantryman w/o armour | 1 | 6 | 6 | 6 | 6 |
| Infantryman w/ armour | 2 | 3 | 6 | 9 | 18 |
| Foot shooter w/ armour | 3 | 2 | 4 | 4 | 8 |
| Mounted shooter w/o armour | 3 | 6 | 18 | 6 | 18 |
(As printed; the rulebook's own example figures are reproduced unchanged.)
Apply the following location modifiers to the total:
| Location modifiers | |
|---|---|
| Defender in a castle | 100% |
| Slope separating both factions (for the faction on higher ground) | 20% |
| River separating both factions | 20% |
| Defender in a village | 30% |
Note: Obstacles are evaluated at the full map level and are based on the entrance sides of each faction, and whether the majority of the characters of a faction can benefit from them.
Example: If a battle takes place on The Plateau map, with the attacker entering through Side 4 and the defender through Side 3, then the defender is considered to benefit from the slope. Likewise if the attacker enters through Side 1 and the defender through Side 3. Using the example above, use the formula 74*1.2=88.8, rounded up to 89, to get the blended total of the defender.
18.2 - Combat resolution
The combat is then resolved by calculating the difference of points between the Attacker and the Defender using the following table. In open field combat, the ratio of attacker to defender may have an influence on the results. In the case of a siege, damage caused by siege engines may affect the result:
| Outnumber modifier | Siege modifier | ||
|---|---|---|---|
| 1.5 <= Number ATT/DEF < 2 | -1 | Siege engine | -1 |
| Number ATT/DEF >= 2 | -2 | Mine at least 80% completed | -2 |
| Rubble hex | -2 |
| Die | <-120 | -120/-81 | -80/-41 | -40/-21 | -20/0 | 1/20 | 21/40 | 41/80 | 81/120 | >120 |
|---|---|---|---|---|---|---|---|---|---|---|
| 1 | E | F | F | G | G | H | H | I | I | J |
| 2 | E | E | F | F | G | G | H | H | I |
(The first column is headed "<120" in the printed table; "<-120" is evidently meant.)
In our example, we then have ATT=74 - DEF=89 = -15. The result is read in column [-20 / 0].
18.3 - Calculation of the losses
The final result depends on the type of confrontation (open field combat or siege). Check one of the following tables to see who remains in possession of the battlefield, and the losses on each side. Loss percentages are applied equitably for each type of character.
Open field combat:
| Result | Att outcome | Att deaths | Att wounded | Def outcome | Def deaths | Def wounded |
|---|---|---|---|---|---|---|
| A | A | 30% | 45% | 0% | 10% | |
| B | A | 25% | 40% | 5% | 10% | |
| C | B | 20% | 35% | 5% | 15% | |
| D | B | 15% |
Siege:
| Result | Att outcome | Att deaths | Att wounded | Def outcome | Def deaths | Def wounded |
|---|---|---|---|---|---|---|
| A | C | 20% | 40% | 0% | 5% | |
| B | C | 20% | 35% | 5% | 5% | |
| C | 15% | 30% | 5% | 10% | ||
| D | 15% |
Key: A: Rout; B: Retreat; C: Siege is lifted; D: The garrison surrenders.
In our example, the roll of 1D10 gives a 7, or a result D: the attacker must retreat and suffers losses of 15% dead and 30% wounded while the defender gets away with only 5% dead and 20% wounded.
Losses are calculated as follows, after rounding:
| Attackers | Dead | Wounded | Defenders | Dead | Wounded |
|---|---|---|---|---|---|
| 5 knights | =15%*5=0.75 -> 1 | =30%*5=1.50 -> 2 | 6 mounted shooters | =5%*6=0.30 -> 0 | =20%*6=1.50 -> 2 |
| 4 infantrymen w/ armour | =15%*4=0.60 -> 1 | =30%*4=1.20 -> 1 | 4 foot shooters | =5%*4=0.20 -> 0 | =20%*4=0.80 -> 1 |
| 2 foot shooters | =15%*2=0.30 -> 0 | =30%*2=0.60 -> 1 | 9 infantrymen w/ armour | =5%*9=0.45 -> 0 | =20%*9=1.80 -> 2 |
| Etc. | ... | ... | Etc. | ... |
18.4 - Case of the faction leader
The leader of each faction is tested separately using the result of the table in § 18.3. Roll 1D10 and multiply the result by the % of deaths:
- Any result greater than 2 leads to the death of the faction leader
- Any result between 1 and 1.99 has the faction leader wounded.
Example: The example above gave a D result. The attacker rolls 1D10 and gets a 7. Multiply this result by 15%, or 715%=1.05: The leader of the attackers is wounded. The defender rolls 1D10 and gets a 10. Multiply the result by 5%, or 105%=0.50: The leader of the defenders is unarmed.
19 - Optional: The environment
These parameters are determined at the beginning of the game and will not change for the duration of the campaign.
19.1 - The weather
Bad weather can destroy the crops of the previous year, excellent weather can in turn improve crop yields, and thus have an effect on the level of available resources. Weather testing is done at the beginning of the scenario and its effect will be permanent for the duration of the campaign (as each turn represents one day, it is unlikely that a scenario lasts long enough for the weather to change significantly over the course of the campaign).
| Die | Effect on Resources |
|---|---|
| 1 | -3 |
| 2 | -2 |
| 3 | -1 |
| 4-7 | - |
| 8 | +1 |
| 9 | +2 |
| 10 | +3 |
19.2 - The seasons
The season the scenario takes place may have an effect on the movement of troops (bad weather, floods, or snow may make the roads impassable).
Season is determined at the beginning of the scenario and its effect will not change throughout the game.
| Die | Season | Effect on movements |
|---|---|---|
| 1-2 | Winter | -2 |
| 3-4 | Spring | -1 |
| 5-7 | Summer | - |
| 8-10 | Fall | -1 |