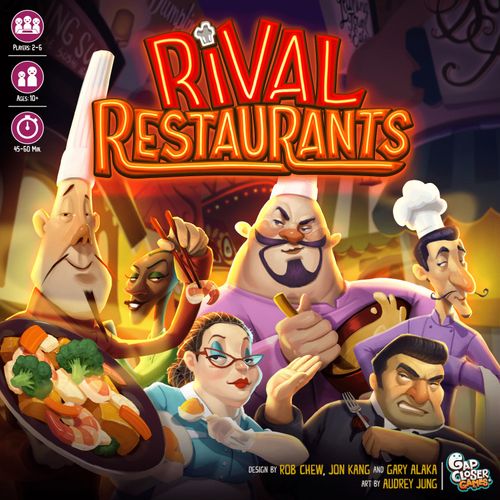
Rival Restaurants
Rival Restaurants Rulebook
Table of Contents
Table of Contents
- 1. Components
- 2. Setting up the Market Board & Restaurants
- 3. Object of the Game
- 4. Overview of the Game
- 5. How Each Day Works
- 6. The Island
- 7. Beyond the Basics
- A. Recipes
- B. Discarding and Discard Piles
- C. Buying: Counters vs. Shelves
- D. Bidding Wars: When 2 or More Chefs Want the Same Ingredient
- E. Counters: Restocking the Markets
- F. Mystery Mart: Where You Go to Buy Special Ingredients
- G. Ingredient List
- H. "Fruit" Stand: Fruitology 101
- H. Using Chef Powers
- I. Action Card Distribution
- 8. Chef Powers
- 9. Kitchen Squad: 2-Player Mode
- 10. Base Game Variants
- 11. Quick Glossary of Terms
- 12. Index
1. Components
Components may vary depending on edition.
- 8 Restaurants
- 6 Popularity Point Sliders
- 96 Coins (64 x 100, 32 x 300)
- 6 Movement Wheels
- 1 Garbage Bin & 44 Garbage Tokens
- 1 Discard Tray
- 30 Upgrade Clips: x 6 Celebrity Endorsement, x 6 Social Media Advertising, x 6 Double Cooktop, x 6 Gourmet Recipe Book, x 6 Basic Recipe Book
- 36 Action Cards
- 12 Chef Cards
- 12 Chef Cutouts & 12 Stands
- 6 Cost Guides
- 1 Sand Timer (optional)
- 24 Basic Recipes
- 24 Gourmet Recipes
- 174 Ingredient Cards (6 of each kind): Carb-tastic x 30, Fruit Stand x 30, Vegetable Garden x 30, Chop Shop x 30, Dairy King x 24, Mystery Mart x 30
Not shown:
- Market Board (see pages 4-5)
- Rival Restaurants Timer App (download optional) — Available in the iPhone App Store and on Google Play
Rival Restaurants is best enjoyed on a large playing area or table space. All players should be able to reach the board easily. During gameplay, almost all cards will be placed faceup on the table, so keep that in mind when picking your game space.
From now on, the terms "player" and "chef" will be used interchangeably. Welcome to Rival Restaurants!
Don't like reading rules? Visit www.rivalrestaurants.com to watch a short instructional video as well as answers to any questions you might have!
2. Setting up the Market Board & Restaurants
Setting up the Market Board
- Place removable discard tray in the center of The Island on top of the Rival Restaurants logo. This is where the discarded ingredients will go.
- Place colored upgrade clips into the 5 smaller pockets of the tray.
- Place garbage tokens in the garbage bin and put on allocated garbage area.
- Shuffle action card deck and place it facedown on allocated Action Card area.
- Shuffle and place each market deck facedown on the shelf (leftmost slot) of its corresponding market.
- Fill each empty counter space with a faceup ingredient from that shelf.
- Designate which market(s) each player will be responsible for restocking (usually whoever's closest to it). Restocking is only done during COOK and COUNTER. (More on how to COUNTER on page 9.)
- Separate recipes into 2 piles (Basic and Gourmet).
- Shuffle each pile of recipes and place them facedown off the board.
- Place money tokens somewhere so that all the players can easily access them. We suggest making 2 or more piles.
Setting up Your Restaurant
- Deal a random restaurant to each player. (If you'd like, you may deal 2 or more restaurants to each player as long as everyone is given the same number of restaurants to choose from. Each player will then choose 1 restaurant to play with.)
- Take a popularity point slider and place it on the "0" in the top-left corner of your restaurant. This will be used to keep track of your restaurant's popularity points.
- Pass out a movement wheel to each player.
- Pass out a cost guide to each player.
- Draw an action card from The Island. Place it facedown until you are ready to use it. Action cards have specific powers and are the only cards in the game that are kept secret/facedown. (More on action cards on page 7.)
- Randomly deal 1 Basic Recipe and 1 Gourmet Recipe to each player. Recipes must be placed faceup next to your restaurant so that everyone can see them. Restaurants are public, so everyone needs to see what's on your menu!
- NOTE: Players may trade recipes during BUY and BARTER but must always have 2 recipes: 1 Basic and 1 Gourmet.
- Randomly deal 1 ingredient from each market shelf (except the Mystery Mart) to each player. You should have a total of 5 ingredients (Carbtastic, Chop Shop, Dairy King, "Fruit" Stand, and Vegetable Land) to start the game.
- If any of the ingredients you drew is listed in one of your recipes, place the ingredient next to that recipe so that others can see your progress. Do the same for all future ingredients.
- Place unused ingredients in "storage" (below your restaurant). Everyone should be able to see your unused ingredients. Make sure you can see theirs as well so that you can offer trades, strategically use action cards, etc.
- Deal a random chef card to each player. (If you'd like, you may deal 2 or more chef cards to each player as long as everyone is given the same number of chefs to choose from. Each player will then choose 1 chef to play with.)
- Find the chef cut-out that corresponds with the chef you chose and insert it onto a plastic base. Then, place the chef on your restaurant.
- Introduce your chef and restaurant to the other players. Read your chef's power aloud so that everyone knows each other's abilities.
Recommended chefs for first time players:
- Angus Khan
- Biff Brobeque
- Lovehandles McFatterson
- Mortimer Sleazburger
- Phyllis Grubman
- Señor Fuego
Board Layout
The Market Board has The Island at its center, surrounded by six markets. Each market has a shelf (leftmost slot, holding the facedown deck) and numbered counter spaces holding faceup ingredients:
- Carb-tastic — $100 — Counter 1: Rice, Counter 2: Potato, Counter 3: Noodles, Counter 4: Flour
- "Fruit" Stand — $100 — Counter 1: Tomato, Counter 2: Avocado, Counter 3: Sweet Fruit
- Vegetable Land — $100 — Counter 1: Onion, Counter 2: Leafy Greens, Counter 3: Garlic, Counter 4: Carrot
- Chop Shop — $200 — Counter 1: Shellfish, Counter 2: Beef, Counter 3: Fish, Counter 4: Poultry
- Dairy King — $200 — Counter 1: Milk, Counter 2: Butter, Counter 3: Egg
- Mystery Mart — $300 — Counter 1: Alien Goo, Counter 2: Chocolate, Counter 3: Secret Sauce, Counter 4: Tofu
The Island itself holds the special ingredients for purchase — Pork, Cheese, Bread, Wine, Peppers, Scallions — the Action Card deck ($300), the garbage bin, the discard tray, and the restaurant upgrades: Basic Recipe Book $200, Gourmet Recipe Book $300, Double Cooktop $300, Social Media Advertising $400, Celebrity Endorsement $600.
3. Object of the Game
Become the first restaurant to earn 20 popularity points and be crowned "The Wiener!"
If There's a Tie
If more than 1 chef reaches 20 or more popularity points on the same day, whoever has more popularity points wins. If there's a tie, then whoever cooked more Gourmet Recipes wins. If there's still a tie, whoever has more money wins. (In the unlikely event that there is still a tie, have the other chefs vote for the winner ... or you can arm-wrestle, play tic-tac-toe, or better yet, have an actual cook-off!)
4. Overview of the Game
Unlike in many games where you have to wait for your turn, in Rival Restaurants, IT'S ALWAYS YOUR TURN. That's because in the restaurant world, TIME WAITS FOR NO ONE!
Each "Day" is Separated into 3 Phases
- Money and Move: Take $300 from the bank (MONEY) and use your movement wheel to choose where you'd like to go (MOVE).
- Buy and Barter: Make purchases only from the location you are in (BUY) and trade with other chefs (BARTER).
- Cook and Counter: Master any completed recipes (COOK) and restock the markets (COUNTER).
In each of these phases, all chefs act simultaneously.
Head Chef
Before you begin playing, designate 1 player as the Head Chef. The Head Chef moves the game from phase to phase by controlling the timer. If you're the Head Chef, do not start the next phase until all chefs are ready or until time has run out, whichever comes first.
- TIP: If you have a phone with an audible timer, we recommend that you use it instead of the sand timer. You can also download the Rival Restaurants Timer app, available for iPhone (App Store) and Android (Google Play).
5. How Each Day Works
A. Money and Move (Not Timed*)
Take your daily income, and decide where you want to shop.
- MONEY: Take $300 from the bank. (You can increase your daily income by purchasing upgrades at The Island.)
- MOVE:
a. Use the movement wheel to choose your destination for the day. (You can only go to 1 place per day, so choose wisely!) Afterwards, place your wheel facedown to let the Head Chef know you're ready to move.
b. When everyone's ready, move your chef to the market you chose and place your chef on top of the ingredient you want most. (If multiple chefs want the same ingredient, see "Bidding Wars" on page 9.) If you chose The Island, place your chef on The Island.
c. If you have a chef power that works during MONEY and MOVE, you may use it now. (More on chef powers on page 11.)
- NOTE: You may talk with other chefs during this phase, but you cannot make any transactions until BUY and BARTER.
*Although MONEY and MOVE is typically not a timed phase, if players are taking too long to decide where to move, you may implement a 1 minute time limit. If time runs out before you choose a destination, you must go to The Island.
B. Buy and Barter (1 Minute)
Make purchases only from your current location. You can also trade with other chefs.
- BUY: You can buy as much as you want only from the location you are currently in. If at a market, you may buy from the counters (faceup ingredients) and/or the shelf (facedown ingredients).
- BARTER:
a. You can trade the following with other chefs: money, ingredients, action cards, garbage, recipes, upgrades, favors.
b. Here are a few rules to keep in mind while bartering:
- All chefs must have 1 Basic and 1 Gourmet Recipe at all times.
- Each chef can have a max of 1 of each upgrade. (You may buy an upgrade for another chef if you are at The Island, but you cannot have more than 1 of each upgrade.) c. Once time is up for BUY and BARTER, move your chef back to your restaurant. If you already paid for a transaction or agreed on a trade before time was called, you may finish it up.
- NOTE: BUY and BARTER is the only phase in which things can be bought or traded. You can discuss deals during the other phases, but you must wait until BUY and BARTER to carry them out.
C. Cook and Counter (Not Timed)
Cook recipes and restock the counters.
- COOK:
a. If you have all the ingredients for a recipe, you may cook it. Announce what you are cooking and have another chef double check your ingredients.
- NOTE: You may only cook 1 recipe per day (unless you own a Double Cooktop upgrade).
b. Discard the used ingredients into the center discard tray. Place ingredients faceup.
c. Gain popularity points for however much your recipe is worth.
i. GARBAGE PENALTY: If you already had garbage in your restaurant before you started cooking, subtract 1 popularity point for each garbage you had from the recipe you were cooking. Recipes can never be worth negative popularity points. The garbage remains in your restaurant.
- NOTE: You can always choose to not cook to avoid the garbage penalty, even if you said you were going to cook. ii. CUISINE BONUS: If your restaurant's cuisine matches the recipe you cooked (e.g. Korean recipe in the Korean restaurant), earn +1 popularity point.
- NOTE: You may only cook 1 recipe per day (unless you own a Double Cooktop upgrade).
b. Discard the used ingredients into the center discard tray. Place ingredients faceup.
c. Gain popularity points for however much your recipe is worth.
i. GARBAGE PENALTY: If you already had garbage in your restaurant before you started cooking, subtract 1 popularity point for each garbage you had from the recipe you were cooking. Recipes can never be worth negative popularity points. The garbage remains in your restaurant.
After gaining popularity points, do the following in any order:
d. Take garbage according to the number of garbage icons in the bottom right of your recipe (some recipes have no garbage). e. Flip over the recipe you just cooked. f. Draw a new recipe of the same type (i.e. Basic for Basic, Gourmet for Gourmet) and place it on top of your completed recipe(s). g. Use your level up bonus (if applicable). i. LEVEL UP BONUS: Your restaurant levels up whenever you reach or pass 3, 7, or 12 points. There are 2 different types of level up bonuses: one time and continuous. ii. One time bonuses take effect immediately and cannot be saved for a later time. iii. Continuous bonuses (bonuses that begin with the phrase "From now on ...") apply to any recipe(s) that you just cooked and remain in effect for the rest of the game. 2. COUNTER: Restock the counters for each market. (More on how to counter on page 9.)
The day is now finished. Repeat the 3 phases until someone has 20 or more popularity points and is declared "The Wiener!"
Popularity Track (restaurant levels)
- 0 — Small Fry
- 3 — Rising Dough — Free Social Media Advertising (if already owned, take $300)
- 7 — Hot Sauce — Free Celebrity Endorsement (if already owned, take $500)
- 12 — Big Cheese — Free Double Cooktop (if already owned, take $300)
- 20 — The Wiener!
6. The Island
The Kitchen Island (referred to simply as "The Island") is one of the most important destinations in Rival Restaurants. The Island is an all-purpose restaurant supplier. Chefs go to The Island for 4 reasons:
-
Buy action cards (See section below)
-
Buy upgrades (See page 8)
-
Dispose of garbage (See page 8)
-
Sell Chocolate (See page 9)
-
NOTE: The Island is not a "market." Anything that references a "market" is referring to 1 of the 6 markets (Carbtastic, "Fruit" Stand, Vegetable Land, Chop Shop, Dairy King, and Mystery Mart).
A. Action Cards
The thing that makes everything a little more interesting.
Action cards are powerful one-time use tools that can be used to boost your restaurant ahead or drag others through the dumpster. Don't underestimate the power of action cards. They can completely turn the tables for even the most hopeless of culinary fiascos.
Here's everything you need to know about Action Cards:
- When you use an action card, the Head Chef must pause the timer (time resumes once the action card is resolved)
- Action cards can only be purchased at The Island for $300 during BUY and BARTER
- Action cards can only be used during MONEY and MOVE or BUY and BARTER (unless otherwise indicated)
- You can use an action card as soon as you buy it
- You can only use 1 action card per day
- Action cards take priority over chef powers
- Action cards can be used to override other action cards
Clam-Voyance
Clam-Voyance is one of the most powerful action cards in Rival Restaurants. Clam-Voyance allows you to block any negative action made directly against you, whether it was through another action card or a chef power. Using Clam-Voyance does not count toward the 1 action card per day limit. Also, Clam-Voyance can be used to negate another chef's Clam-Voyance.
-
E.G. You play Armed Robbery and decide to steal from Antoine. Antoine plays Clam-Voyance to negate your Armed Robbery. However, you also have a Clam-Voyance which you then use to negate his Clam-Voyance, thus allowing the original Armed Robbery to go into effect.
-
NOTE: This card only protects you; it does not extend to other affected chefs.
B. Restaurant Upgrades
More is better.
You can buy 5 different upgrades at The Island. You must be at The Island in order to purchase upgrades. Each chef may only have 1 of each upgrade.
- BASIC RECIPE BOOK ($200): After you cook a Basic Recipe, draw 4 new recipes from the Basic Recipe deck. Choose 1 and discard the other 3 to the bottom of the recipe deck.
- GOURMET RECIPE BOOK ($300): After you cook a Gourmet Recipe, draw 4 new recipes from the Gourmet Recipe deck. Choose 1 and discard the other 3 to the bottom of the recipe deck.
- DOUBLE COOKTOP ($300): Allows you to cook both your Basic Recipe and Gourmet Recipe simultaneously. (Normally, you're only allowed to cook 1 recipe per day.) You do not collect garbage for these recipes until after both recipes have been cooked. Conversely, if you already had garbage in your restaurant before you started cooking, the garbage penalty would apply to both of your recipes.
- SOCIAL MEDIA ADVERTISING ($400): Reach new customers and increase your daily income by $100.
- CELEBRITY ENDORSEMENT ($600): There's nothing like a little star power to bring new customers through the doors. Increase your daily income by $100.
C. Garbage
Garbage is generated from cooking.
- Place your garbage on your restaurant.
- If you still have garbage the next time you cook, the amount of popularity points you earn for that recipe is decreased by 1 for each garbage you have. Recipes can never be worth negative popularity points.
- You can get rid of garbage by going to The Island during BUY and BARTER and disposing it in the garbage bin for $100 each.
7. Beyond the Basics
Now that you understand how each day works, let's explain some specific aspects of the game and address special situations.
A. Recipes
At the beginning of the game, each player is randomly dealt 1 Basic Recipe and 1 Gourmet Recipe.
- CUISINE BONUS: If you master a recipe that matches the cuisine of your restaurant, you earn +1 popularity point.
- E.G. If you own the Japanese restaurant and cook Chirashi Bowl (a Japanese recipe usually worth 6 popularity points), you will actually earn 6+1 or 7 popularity points.
- After cooking a recipe during COOK and COUNTER, you must immediately draw a new recipe from the corresponding recipe deck. If there are not enough recipes to draw from, collect all players' finished recipes of that type and shuffle them back into the deck.
- TIP: Don't forget that the Basic and Gourmet Recipe Book upgrades allow you to draw 4 new recipes instead of 1. This would allow you to choose your next recipe based on what ingredients you already have, cuisine bonuses, popularity point value, etc.
- At no point in the game may chefs discard recipes simply because they don't like them. Chefs may trade recipes with one another during BUY and BARTER but must always have 1 Basic Recipe and 1 Gourmet Recipe.
B. Discarding and Discard Piles
Whenever an ingredient is used in a recipe, or if it's discarded because of an effect from an action card, place it in the removable discard tray.
When there are no more ingredients on the shelf (facedown deck) of a market, take the discarded ingredients for that market out of the removable tray, shuffle them, and place them back on the shelf, facedown. Do this during COOK and COUNTER only. If a shelf runs out of ingredients during BUY and BARTER, do not replenish the shelf until COOK and COUNTER. In other words, that's all the market had for that day!
C. Buying: Counters vs. Shelves
When buying from a market, you can purchase ingredients from the counters and/or the shelf. You can buy as many ingredients as you'd like.
- THE COUNTERS: Each of the markets has either 3 or 4 counter slots. Ingredients in the counter slots are always faceup, so you will know exactly what you're buying.
- THE SHELF: The deck of facedown ingredients at each market is known as the shelf. When you buy from the shelf, you draw randomly from the top of the deck. You won't know what you are getting, but at least it's something!
D. Bidding Wars: When 2 or More Chefs Want the Same Ingredient
Whenever you move to a market, you must place your chef on top of the ingredient you to buy first. If 2 or more chefs choose the same ingredient, a bidding war is triggered. Whoever bids the most for that ingredient must buy that ingredient. The minimum bid is always the market price. If the bidding war ends in a tie and time runs out, then none of the chefs may buy that ingredient that day. However, if the interested chefs have the same amount of money and bid all of it, they may draw garbage as a tiebreaker.
- E.G. Gohan, Kim, and Biff all want to buy Alien Goo (market price is $300). Gohan has $300 while Kim and Biff each have $400. Kim and Biff both state that they're willing to pay $400 for the Alien Goo, so Gohan is automatically eliminated from the bidding war. Since Kim has no more money to bid, she offers to take 1 garbage from The Island in addition to the $400 she bid. Biff says that he'll take on 2 garbage in addition to the $400 he bid. Kim decides that's too high a price and drops out of the bidding war. Biff pays $400, takes 2 garbage from The Island, and takes the Alien Goo.
You can only be in 1 bidding war at a time; however, you can drop out of a bidding war at any time. If the person you're bidding against drops out of the bidding war, you must immediately buy that ingredient for whatever you last bid or the market price (whichever is higher). After you've resolved your bidding war, you may buy whatever ingredients remain on a first-come, first-served basis.
E. Counters: Restocking the Markets
During the COUNTER phase of COOK and COUNTER, chefs must restock the markets that they are responsible for (typically the ones closest to them). Here's how "countering" (or restocking) works:
- STEP 1: If there is an ingredient in the counter slot furthest to the right, it has now "expired" and must be discarded into its allotted section in the tray.
- STEP 2: Slide any remaining counter ingredients to the right, filling up any empty counter slots.
- STEP 3: After you've finished sliding over the ingredients, fill any empty counter slots with new ingredients from that market's shelf, going from right to left.
If a market runs out of shelf ingredients, take the ingredients from the discard pile, shuffle them, and place the ingredients facedown back on the shelf. Do this only during COOK and COUNTER.
F. Mystery Mart: Where You Go to Buy Special Ingredients
Although it's the most expensive market ($300 per ingredient), the Mystery Mart is usually worth a visit.
Here's what each Mystery Mart ingredient does:
-
ALIEN GOO: Use this in place of any ingredient in your recipe when you cook.
-
CHOCOLATE: Can be sold at The Island for $500. You must be at The Island. Discard Chocolate afterwards.
-
TOFU: Meat substitute. When cooking, draw 1 less garbage when you replace a Chop Shop ingredient with tofu.
-
SECRET SAUCE: Add this to any Basic Recipe and earn 1 popularity point extra when you cook with it. Max 1 per recipe.
-
WINE: Add this to any Gourmet Recipe and earn 1 extra popularity point when you cook with it. Max 1 per recipe.
-
NOTE: Alien Goo turns into whatever ingredient you want it to be the moment you cook with it (but not before that point). Alien Goo can only be used to replace required recipe ingredients. (E.g. Alien Goo can never be used as Secret Sauce because Secret Sauce is not a required ingredient in any recipe.)
-
NOTE: Use Tofu as a substitute for any Chop Shop ingredient in your recipe. You must use Tofu to replace a meat in order to get the garbage discount. If Tofu is already a required ingredient, then you do not get the garbage discount.
G. Ingredient List
Here is a list of all the ingredients in Rival Restaurants. There are 6 of each ingredient.
-
Carb-tastic — $100: Bread, Flour, Noodles, Potato, Rice
-
"Fruit" Stand — $100: Avocado, Beans, Peppers, Sweet Fruit, Tomato
-
Vegetable Land — $100: Carrot, Garlic, Leafy Greens, Onion, Scallions
-
Chop Shop — $200: Beef, Fish, Pork, Poultry, Shellfish
-
Dairy King — $200: Butter, Cheese, Egg, Milk
-
Mystery Mart — $300: Alien Goo, Chocolate, Secret Sauce, Tofu, Wine
-
NOTE: If a Mystery Mart ingredient is required in your recipe, you do not get to use that ingredient's power when cooking. (E.g. If Wine is required in your recipe, then you do not get the extra popularity point. However, if you add a 2nd Wine to that recipe, then that one would give you 1 extra popularity point when you cook.)
H. "Fruit" Stand: Fruitology 101
Avocados. Beans. Peppers. And the infamous Tomato...
Are they fruits or are they vegetables? If you thought vegetable, think again! In botany, a "fruit" is the "seed-bearing structure found in flowering plants." Translation: avocados, beans, peppers, and tomatoes are all technically fruits! We don't blame you if you don't want to use them in your next smoothie ... but for the purposes of Rival Restaurants, make your way to the "Fruit" Stand to purchase one of these ingredients! And of course, you can also buy the "Sweet Fruit" ingredient there as well!
"Fruit" Stand ingredients: Avocado, Beans, Peppers, Sweet Fruit, Tomato.
H. Using Chef Powers
Each chef has a unique power that gives him/her a particular advantage (see page 12). Because each chef is so different, the dynamic of every game changes depending on who's playing, as well as how their powers are being used.
A few notes about chef powers:
- Chefs who have MONEY and MOVE powers (Angus, Fuego, Kim, and Mortimer) can only use their powers during MONEY and MOVE. After all powers are resolved, the day moves into the BUY and BARTER phase.
- You always have the option to limit who your power affects.
I. Action Card Distribution
There are 36 action cards in the game, some more rare than others.
| Action Card | Description | Frequency | Rarity Indicator |
|---|---|---|---|
| CLAM-VOYANCE | Stop any action card or chef power used against you (protects only you). Can be used to negate another Clam-Voyance. Does not count toward the "1 action card per day" limit. | 8 of 36 | Common |
| RAIDERS OF THE LOST PORK | Steal 1 ingredient of your choice from any chef. | 5 of 36 | Uncommon |
| ARMED ROBBERY | Steal half of 1 chef's money (rounded down). | 5 of 36 | Uncommon |
| UNIQUES | Varies. There are 18 unique action cards, each with its own power. | 18 of 36 | Rare |
See page 7 for more info on action cards.
Examples of unique action cards:
- DISCOUNT: During BUY and BARTER, each purchase you make is half off (rounded up). The minimum price is $100.
- FOOD RECALL: Discard 1 non-Mystery Mart ingredient of your choice from as many chefs as you choose.
- RAT INFESTATION: Place this on any market. Until a total of $500 is paid to the bank by the other chefs, you are the only one who can shop there. Cannot be removed the same day it is placed.
8. Chef Powers
Here is a reference list of all the chefs' powers.
- ANGUS KHAN: The Mysterious Chef — Wok Away: During MONEY and MOVE, Angus can kick out 1 chef who is at the same market as him. Does not work at The Island or Mystery Mart. The affected chef must immediately choose a different location.
- ANTOINE BAGUETTE: The Pompous Chef — Aristocratic Taste: All chefs in the same location as Antoine must pay $100 more for each thing they buy. Does not work at the Mystery Mart.
- BIFF BROBEQUE: The Meathead Chef — Bro-Tein Style: Biff can use any Chop Shop ingredient in place of any Vegetable Land ingredient. When he cooks a dish with 2 or more meats (including any that were substituted for vegetables), he immediately earns $200.
- GARDENA EDEN: The Vengeful Vegan — Save the Animals: When cooking, Gardena can use any 2 Vegetable Land ingredients in place of any meat. Each time she does this, she can force a chef to discard a meat of her choice that they're not cooking with that day.
- GENERAL STROGANOV: The Military Chef — Share with Me, Comrade: During BUY and BARTER, Stroganov can take 1 non-Mystery Mart ingredient from a chef by paying them $100. The ingredient must not be listed in the other chef's recipes.
- GOHAN SUSHIDO: The Samurai Chef — The Way of Foodshido: During BUY and BARTER, Gohan can buy 1 shelf (facedown) ingredient from any market (except the Mystery Mart).
- KIM CHI: The Dramatic Chef — Drama Queen: During MONEY and MOVE, Kim can pay $100 to the bank in order to force 1 chef to switch locations with her. Can't be used against chefs at the Mystery Mart. The same chef can't be targeted 2 days in a row.
- LOVEHANDLES MCFATTERSON: The Plus-Size Chef — Jelly Rolls: When Lovehandles is in a market, all the counters are blocked to other chefs (except for at the Mystery Mart). Chefs may still buy shelf (facedown) ingredients.
- MORTIMER SLEAZBURGER: The Dirty Chef — Dirty Dealing: During MONEY and MOVE, Mortimer can take 1 garbage from his restaurant and give it to another chef. The same chef can't be targeted 2 days in a row.
- PHYLLIS GRUBMAN: The Lunch Lady — Mystery Meat: When Phyllis buys an ingredient from the , she can take another ingredient for free from the (once per day). When cooking, Phyllis can use ingredients interchangeably.
9. Kitchen Squad: 2-Player Mode
Kitchen Squad is Rival Restaurant's 2-player mode designed to have an extra layer of strategy without taking away any of the excitement.
IMPORTANT: Kitchen Squad 2-Player Mode is a variant from the base game, so please be sure to read the base game's instructions before moving forward.
2-Player Setup
- Take the following chef cards (ANGUS KHAN, ANTOINE BAGUETTE, LOVEHANDLES MCFATTERSON and SEÑOR FUEGO) and randomly deal 2 to each player. Each player will choose 1 chef as his/her NPC (more on this later). Remove the other chef for the rest of the game.
- Shuffle the remaining 8 chefs and randomly deal 4 to each player. Each player will then choose 3 chefs to form his/her Kitchen Squad (more on this later). Remove the other chef for the rest of the game.
- Take 2 Movement Wheels: 1 for your Kitchen Squad and 1 for your NPC.
- Set up the Market Board just like in the base game. (See page 5 for details.)
- Set up your restaurant, just like in the base game. (See page 4 for details.)
- NOTE: You should have 2 movement wheels, 3 Kitchen Squad chefs and 1 NPC.
What's New?
Kitchen Squad features two main innovations that are different from the base game:
- KITCHEN SQUAD: CHEF OF THE DAY a. Instead of controlling just 1 chef, you will lead a team of 3 different chefs. Each day you will choose 1 of your chefs to be your "Active Chef" (i.e. Chef of the Day).
- THE NPC: NON-PLATING CHEF a. You will also control an NPC. You can think of your NPC as a quasi-ally who has 2 purposes: disrupting your opponent and helping you make extra purchases.
Gameplay
MONEY and MOVE
- MONEY: a. Take $300 from the bank. (NPC's do not collect income.)
- MOVE:
a. Choose 1 chef from your Kitchen Squad to be your "Active Chef." Place that chef's card facedown in front of you.
i. This will be your chef for the rest of the day.
ii. You can only use your Active Chef's power each day.
iii. At the start of the next day, and each successive day, you can either keep your Active Chef or pick a new one from your Kitchen Squad.
b. ACTIVE CHEF: Use the first movement wheel to choose your Active Chef's destination for the day. Place the movement wheel facedown on top of the Active Chef card.
c. NPC: Use your second movement wheel to choose your NPC's destination for the day. Place the movement wheel facedown on top of the NPC chef card.
i. You cannot send your NPC to The Island.
ii. You cannot send your NPC to the same location as your Active Chef.
- Note: Though rare, your Active Chef can end up at the same location as your NPC as a result of chef powers or action cards. If this happens, your own NPC power affects your Active Chef. d. When both players are ready, reveal all the movement wheels and move the chefs to their respective destinations. e. Resolve NPC Chef Powers. NPC powers only affect Active Chefs. i. NPC Chef powers are slightly modified for the Kitchen Squad Variant:
- ANGUS KHAN: Angus immediately kicks out any Active Chefs who are at the same market as him. The affected chef(s) must immediately choose a different location. Does not work at the Mystery Mart.
- LOVEHANDLES MCFATTERSON: When Lovehandles is in a market, any Active Chefs at that market can only buy from the shelf. All counter (faceup) ingredients are blocked. Does not work at the Mystery Mart.
- ANTOINE BAGUETTE: All Active Chefs in the same location as Antoine must pay $100 more for each thing they buy (including at The Island). Does not work at the Mystery Mart.
- SEÑOR FUEGO: At the end of MONEY and MOVE, any Active Chefs who are at the same market as Fuego must discard $200 to the bank (not the other player). Does not work at the Mystery Mart.
BUY and BARTER
- BUY:
a. ACTIVE CHEF: You can buy as much as you want from the location your Active Chef is currently in.
b. NPC: You can also use your NPC to buy things on your behalf. However, each time your NPC buys something for you, you must pay $100 more than the market price.
- E.G. You send your NPC, Señor Fuego, to the "Fruit" Stand. You want Señor Fuego to buy two things for you: Tomato and 1 shelf ingredient. Since "Fruit" Stand ingredients are normally $100 each, you must now pay $200 for each ingredient (i.e. for a total of $400). c. BIDDING WARS: Bidding wars occur as usual between opposing Active Chefs. (See page 9 for details.) i. You can also use your NPC to bid against your opponent's Active Chef or NPC. When bidding using an NPC, the only difference is that your minimum starting bid must be $100 more than the market price. But other than that, everything remains the same as in the base game.
- BARTER: a. Bartering works the same as in the base game. (See page 6 for details.)
COOK AND COUNTER
- COOK: a. You can only use your Active Chef to cook. Otherwise, cooking works the same as in the base game. (See page 7 for details.)
- COUNTER: a. Countering works the same as in the base game. (More on how to counter on page 9.)
The day is now finished. Repeat the 3 phases until someone has 20 or more popularity points and is declared "The Wiener!"
As a reminder, at the start of the next day, and each successive day, you can keep your Active Chef or pick a new one from your Kitchen Squad.
Chef Draft Pick Variant
Instead of forming your Kitchen Squad around random chefs, you can increase the strategy by draft picking your Kitchen Squad.
Lay out the 8 playable Kitchen Squad chefs (the non-NPC Chefs). Both players will take turns picking chefs. Each player will also get to ban a chef (rendering them unplayable this game).
- Player 1 picks first chef
- Player 2 picks first chef and bans a chef
- Player 1 picks second chef and bans a chef
- Player 2 picks second chef
- Player 1 picks third chef
- Player 2 picks third chef
Play then continues as normal. (See page 6 for details.)
10. Base Game Variants
Sometimes it's fun to change things up or just play the game your own way. Here are a few suggestions to get you started.
- AMATEUR CHEF: Grow as You Go a. This is good for introducing new players to Rival Restaurants b. No time limit during BUY and BARTER c. Chefs cannot use their powers until their restaurant reaches Rising Dough
- START UP: From Scraps to Dishes a. This is good for veterans who want longer gameplay b. Start with 2 Basic Recipes instead of 1 Basic and 1 Gourmet c. You can only draw a Gourmet Recipe after you've cooked your first Basic Recipe d. Players do not begin the game with an action card or any starting ingredients
- "TWO" MANY COOKS IN THE KITCHEN: Rivalry Loves Company a. Recommended for 2 or 3 player games b. Each player controls 2 chefs with individual movement wheels c. You cannot send both of your chefs to the same destination d. Things are guaranteed to get crazy with double the movements, chef powers, and buying ability—not to mention twice as many things to keep track of.
11. Quick Glossary of Terms
So when we use a word, you know exactly what we're talking about.
- COUNTERS: The spaces that show which ingredients are available for puchase that day
- DAY: Refers to 1 full round of play (MONEY and MOVE, BUY and BARTER, and COOK and COUNTER = 1 "Day")
- THE ISLAND: The area in the center of the board that contains the discard tray, upgrades, action cards, and garbage bin. The Island is not a market.
- MARKET: All locations that sell ingredients and have counters (i.e. Does not include The Island)
- MEAT: Any Chop Shop ingredient (Beef, Fish, Pork, Poultry, Shellfish)
- POPULARITY (popularity points): Points that you need to earn to win. The first to 20 popularity points wins the game
- SHELF: Facedown deck of ingredients for each market
- STORAGE: Where you keep ingredients that do not match either of your recipes (typically above or below your restaurant)
- UPGRADES: Clips that can be bought at The Island to modify your restaurant and increase your abilities
12. Index
- Action Cards - 4, 7, 11
- Alien Goo - 9
- Armed Robbery - 11
- Basic Recipe Book - 8
- Bidding War - 9, 14
- BUY and BARTER - 6, 7, 8
- Celebrity Endorsement - 8
- Chef/Chef Power - 11, 12
- Chocolate - 9
- Clam-Voyance - 7, 11
- COOK and COUNTER - 7, 8, 9
- Counters - 7, 8, 9, 15
- Cost Guide - 4
- Cuisine Bonus - 7, 8
- Day - 6, 15
- Discarding - 7, 8
- Discard Tray - 4, 5, 7, 8, 9
- Double Cooktop - 8
- "Fruit" Stand - 11
- Garbage / Garbage Penalty - 7, 8
- Gourmet Recipe Book - 8
- Head Chef - 6
- The Island - 7, 8, 15
- Level-Up Bonus - 7
- Market - 4, 15
- MONEY and MOVE - 6, 9, 10
- Movement Wheel - 4, 6
- Mystery Mart - 9
- Popularity - 6, 7, 8, 9, 15
- Raiders of the Lost Pork - 11
- Recipe - 4, 7, 8
- Restaurant - 4, 7
- Restocking - 9
- Secret Sauce - 9
- Shelf/Shelves - 8, 9, 15
- Social Media Advertising - 8
- Storage - 4, 15
- Tie - 6
- Timer - 6
- Tofu - 9
- Upgrades - 8, 15