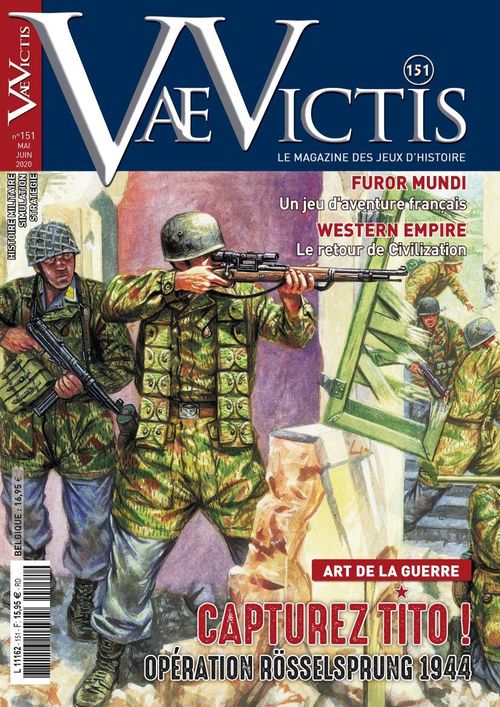
Opération Rösselsprung 1944
Opération Rösselsprung 1944 Rulebook
Table of Contents
Table of Contents
1 - General
1.1 - Terms and designations
- Company: base unit of Yugoslav partisans containing 20 to 100 men.
- D10: 10-sided die – the 0 counts as 0 and not 10.
- D6: 6-sided die.
- DZ: a Drop Zone is composed of six geographic zones (1 to 6) in which the paratroopers can land.
- ?: appears on the chronological scale to indicate that a random event must be determined.
- AF: Assault Factor.
- FF: Fire Factor.
- Peloton: base unit of paratroopers containing 35 to 40 men.
- SP: Strength Points representing a unit's combat capacity.
- MP: Movement Points spent to move a unit.
- R: Radius. R = 1 for any GZ with a connection to another GZ (adjacent GZ).
- Yugoslav: generic term for the National Liberation Army of Yugoslavia (NOVJ).
- GZ: Green, orange or red Geographic Zones in which the units operate.
1.2 - Terrain
- Green: Open GZ providing no protection.
- Orange: GZ providing light protection (houses, shelter, trench).
- Red: GZ providing strong protection (industrial buildings, concrete walls, grottos, dense forest, rocky ground).
Note: the green crossed-out zones represent the DZ, landing zones for the paratroopers and gliders (see 10).
1.3 - Game scale
A game turn is equivalent to 2 hours in the daytime and 5 hours in the night. The GZ are between one and several hundred metres apart.
The scenario begins at 6.00 on 25 May 1944 and ends at 12.00 on 26 May, for 12 game turns.
The front side of a counter represents its full strength – 35 to 40 German paratroopers, a company of 20 to 100 Yugoslav partisans, one officer, two anti-aircraft machine guns (DCA), or two Italian CV-35 tanks. The back of the counter represents its reduced strength or an eliminated officer.
1.4 - Materiel and play aid
The map represents the area around Drvar where the raid took place. It also includes a chronological scale, a graduated scale from 0 to 9 on which mobile cursors are used to track the alert level, the ammunition level and an assault resolution zone.
Two 6-sided dice (one white and one colour) as well as a 10-sided die are required.
1.5 - Objectives
The Germans earn victory points (VP) by reaching designated objectives (see 14.).
2 - Counters
2.1 - Units
The outlines of the paratroopers have a grey background and the Yugoslav partisans have a beige background.
A unit is characterised by six parameters: Arms affiliation (NATO symbol), Nationality, Fire Factor (FF), Assault Factor (AF), and the maximum movement capacity. The group and owner unit are given for information purposes only.
There are two strength levels:
- Front side: unit at full strength, or two strength points.
- Back side: unit at reduced strength (white outline), or one strength point, destroyed unit or destroyed objective.
Symbols and designations:
| Colour and Symbol | Designation |
|---|---|
| Blue band | Group Blau |
| Green band | Group Grün |
| Red band | Group Rot |
| Orange band and Hammer | Group Brecher |
| Orange band and Jawbone | Group Beisser |
| Orange band and Ax | Group Draufganger |
| Orange band and clawed paw | Group Greifer |
| Orange band and feline head | Group Panther |
| Brown band | 2nd wave |
| VI, XI | Partisan army corps |
2.2 - Stacking
Each unit has a corresponding number of SP:
- Two SP for each unit counter at full strength; the German infantry, Yugoslav partisans, CV-35 tanks, anti-aircraft guns.
- One SP for each back side of an infantry unit counter, reduced tank or gun.
- Zero SP: officers and all other markers.
Yugoslav and German units can never be in the same GZ during movement except as prisoners. They are only located in the same GZ during an assault. Each camp may stack up to 10 SP in a GZ. There can therefore be a maximum of 20 SP (10 per camp) in a GZ during an assault.
The stacking rule must be respected when the units are immobile in a GZ but may be temporarily broken during movement.
The combat unit on the top of the stack is considered "in the front line"; its Fire Factor (FF) is taken into account for the combat and it suffers the result of the combat.
After the combat result has been established, the German player may reorganise the participating units. For the Yugoslavs, after each combat, the units must be reorganised to place the unit with the highest FF of the stack on top.
A unit that has carried out an action may be stacked with a unit that has not and is differentiated by rotating it clockwise 90°.
| GZ colour | Type of terrain | Protection value | Maximum stacking expressed in SP (Movement and fire phases / Assault) |
|---|---|---|---|
| Green | No protection | 0 | 10 / 20 (10 max per camp) |
| Orange | Light protection | 1 | 10 / 20 (10 max per camp) |
| Red | Strong protection | 3 | 10 / 20 (10 max per camp) |
3 - Game set-up
3.1 - Markers and counters
- Chronological scale: the game turn marker is placed in the space turn #1 (6.00-8.00).
- Accounting scale:
- Alarm level: the alarm level marker is placed in space 0 on the track on the map.
- Ammunition level: markers of tens and ones are placed on the accounting scale on the map. We offer three levels of difficulty.
- Difficult: 50
- Medium: 60
- Easy: 70
- Markers A, B and C: the markers are mixed together then positioned front side up on the GZs marked A, B and C. A GZ can contain two different markers.
3.2 - The Yugoslav units
There are thirty-four counters of Yugoslav units to be placed on the map. They are identified by a B (seven counters) and C (twenty-seven counters) then divided into two activation groups. There are seventeen counters identified as Jeunesses Communistes (NATO infantry symbol); if the event "e" occurs (see 5.), certain counters may be removed from the game.
When a B or C marker is activated, the number of counters indicated on the back side is drawn at random, taking into account the type of unit activated, indicated by the NATO symbol (infantry, pioneers, tank, HQ infantry, anti-air mitrailleuse).
When an A marker is activated, turn it over; the back side may reveal Tito, R. Churchill, secret documents or Tito's uniform (without Tito...).
The twenty Yugoslav unit counters that arrive as reinforcement (identified by R) are organised into three groups – black, blue and red. When a reinforcement arrives, the number of counters indicated is drawn at random and they are placed in the GZ identified R0, R1, R2, R3, R4, R5 and R6 on the map. A colour code for the letter "R" indicates the edge of the map toward which the counters are placed: black for the western edge, blue for the south and red for the north and east (see 11.).
3.3 - The German units
They are organised into two waves of airdrop/landing:
- The first wave (identified by a parachute symbol with a "1" on the counters and the chronological track): the SS-Hauptsturmführer officer Kurt Rybka and nineteen platoons of paratroopers.
- The second wave (identified by a parachute symbol with a "2"): the SS-Hauptsturmführer officer Josef Obermaier and six platoons of paratroopers.
4 - Sequence of play
Each game turn comprises 7 game phases from A to F. Each phase must be completed before moving on to the next phase.
A. Determination of random events occur on game turns 1, 3, 4, 5 and 10 only. Determination of the arrival of the second wave of paratroopers occurs on the third turn only.
B. German actions (in this order):
- Rotate each activated counter of the German camp CW by 90°.
- Air Support (see 9.)
- Airdrop and landing (see 10.)
- Activation (see 8.)
- Movement (see 12.)
- Activation (see 8.)
- Combats (see 13.)
C. Yugoslav actions (in this order):
- Rotate each activated counter of the Yugoslav camp CW by 90°.
- Placement of reinforcements (when the alarm level is ≥ 7) (see 11.)
- Movement (for the activated units) (see 12.)
- Fire (for the activated units) (see 13.)
D. Remove the air support markers and reposition all the counters by rotating them 90° anti clockwise (for the units that carried out a single action) or 180° (for those that performed two actions).
E. Move the time marker forward one space.
F. Determination of victory occurs on the last turn of the game (12th turn or 10th / 11th turn if the random event "g" occurs).
5 - Random events
In sequence A, the determination of random events only takes place on turns 1, 3, 4, 5 and 10. A "?" is placed on the chronological track as a reminder.
- The first series of events only concerns turn 1; these events are identified by the letters a, b, c, d, e, f, g.
- The second series of random events concerns turns 3, 4, 5 and 10.
5.1 - First series of events
The result of the D10 roll indicates the events and their consequences:
[0]: (a) No event.
[1, 2]: (b) The welcoming committee.
Historical note: the gliders and, to a lesser extent, the paratroopers suffer the fire of DCA and light arms. Five gliders and paratroopers will be shot during their landing.
Roll 1D10 to determine which group is impacted.
| D10 | Group | Loss |
|---|---|---|
| 0 | Blau, Grün, Rot (choice) | 1SP |
| 1 | Draufganger | 1SP |
| 2 | Draufganger | 2SP* |
| 3 | Sturmer | 1SP |
| 4 | Panther | 2SP* |
| 5 | Greifer | 1SP |
| 6 | Panther | 2SP* |
| 7 | Brecher | 1SP |
| 8 | Panther |
* Distribute the losses between two different counters.
The German officers are not concerned by this event.
[3; 4]: (c) Where are you, Tito?
Historical note: Tito had a second hideout at Bastati, west of Drvar, where he sometimes hid during the day. He very well could have been there that day, compelling the attempt to eliminate him to fail.
Roll 1D6; for a result that is:
- Odd: remove an A marker at random from the map without looking at the back side and put it to the side.
- Even: remove two A markers at random from the map, without looking at the back side and put them to the side.
[5]: (d) Happy birthday!
Historical note: born on 7 May, Tito had to celebrate his birthday on the 25th and his troops were spread out between the grotto that housed his HQ and Podbrina.
Roll 1D6; on a:
- 1, 2, 3: move the B marker B from the grotto GZ (G) and place it in the Soviet mission GZ (identified by a star).
- 4, 5, 6: move the B marker B from the Soviet mission GZ (identified by a star) and place it in the grotto GZ (G).
This translates as the movement of his close guard to be lodged with Tito… or not!
[6]: (e) The young communists.
Historical note: a convention of the anti-fascist youth of Yugoslavia that regrouped a little more than eight thousand young men and women of the League of the Communist Youth just ended a few days before the operation. Certain young partisans had already left, some were still there……
Roll 1D6; the result indicates the number of counters C identified by an infantry NATO symbol to be eliminated among the seventeen present.
[7; 8]: (f) Good landing, bad location.
Historical note: certain gliders landed farther away than planned for various reasons (wounded pilot, dense smoke from the bombardments that affect visibility, etc).
Roll 1D6; the result indicates the group from which a unit (to be drawn at random if the group contains several counters) lands in the DZ numbered VII.
| D6 | Group with an orange band / symbol (number of counters from the group) |
|---|---|
| 1 | Beisser / Jaw (1) |
| 2 | Brecher / Hammer (1) |
| 3 | Draufganger / Axe (2) |
| 4 | Greifer / Clawed paw (1) |
| 5 | Panther / Feline head (3) |
| 6 | Sturmer / Dagger (1) |
[9]: (g) The relief.
Historical note: Drvar is the focal point of a vast encirclement operation involving numerous troops – including the 7th SS Division Prinz Eugen – that must annihilate the partisans and relieve the paratroopers. The progression is slow and difficult because the terrain lends itself to ambushes and the partisans excel in this type of war. Nevertheless, the combined German and Croatian forces could have arrived a little earlier.
At the end of turn 9 only, roll 1D6: the result indicates the last turn of the game. The Fin (End) marker is placed on the corresponding space on the time track.
- Odd: turn 11
- Even: turn 10
5.2 - Second series of events
Turns 3, 4 and 5.
-
Arrival of the paratroopers of the 2nd wave: roll 1D6. The result indicates the number of paratrooper counters available for the airdrop/landing sequence on turn 3. Repeat this D6 roll on turn 4 then turn 5, until all the counters of the 2nd wave have been exhausted. If there are still counters remaining after these three rolls, the excess is considered lost. The remaining units are considered eliminated and are credited toward the victory points for the Yugoslavs.
-
Ammunition supply: any paratroopers reinforcement comes with an ammunition supply. We propose three levels of difficulty. The result of the die/dice roll indicates the number of ammunition points added to the ammunition accounting scale. Adjust the cursors to reflect the supply.
- Difficult: 1D6
- Medium: 1D10
- Easy: 2D6
The die roll(s) to determine the additional ammunition does not occur if all the paratroopers of the 2nd wave have already landed.
-
Turn 10: roll 1D10; the result indicates the number of ammunition points added to the ammunition accounting scale. Adjust the cursors to reflect this change.
6 - Alarm level
The alarm level ranges from 0 to 9; at the beginning of the game it is at zero. Certain events increase the alarm level and make it easier to activate Yugoslav units. The increase in the alarm level has a ratchet effect.
The adjustment of the alarm level happens immediately and each time a triggering event occurs. These events and their alarm level increase value are as follows:
- First air support that gives a bonus: +1/1
- First landing (paratroopers or gliders): +1/1
- First German or Yugoslav fire: +1/1
- First assault: +1/1
- First A, B or C marker activated: +1/1
- The GZ G is occupied by paratroopers: +2/2
- Tito revealed*: +1/1
- Tito taken prisoner: +2/2
- Each foreign GZ mission (GB, USSR, USA) occupied by paratroopers without a partisan unit (at least one counter present in the GZ): +1/3
* Tito's identification has a direct effect on the activation of the A, B, C markers and on the alarm level and an indirect effect on Yugoslav movement.
Important: the alarm level has a direct impact on Yugoslav activation (see 8.), reinforcements (see 11.) and Yugoslav movements (see 12.).
7 - Actions
Only the actions initiated by a camp during its sequence are taken into account.
Example: an assault initiated by the German camp counts as an action for all the German units engaged in this assault, not for the Yugoslav units.
A stack may contain one or more units with an action to perform (fire for example) and one or more units with no more actions to perform (after movement, for example). A unit that has an action to perform may do so.
A German unit (paratroopers, officer) may perform one or two different actions per phase or none at all. Each unit performs an action then moves on to the next one in this order:
- Airdrop and landing
- Movement
- Combats: Fire & Assault
A Yugoslav unit must carry out a single action per phase when the alarm level is less than 7, and two different actions when the alarm level is greater than or equal to 7. Each unit performs the same action then moves on to the next one in this order:
- Placement of reinforcements (when the alarm level is ≥ 7)
- Movement (for the activated units)
- Fire (for the activated units)
Important: rotate the counter (or stack of counters) 90° for each action performed. Thus, a counter turned upside down – 180° rotation – has performed two actions.
8 - Activation
The GZ identified A, B and C with one or two corresponding markers on the map are the activation zones of the Yugoslav units. The activation depends on the Yugoslav alarm level and the position of at least one German unit compared to the GZ marked A, B, C.
-
Case 1: When a German unit is located in an A, B, C GZ, the activation is automatic. The back side of the marker indicates the type and number of infantry, tanks, DCA mitrailleuses, as well as the presence or absence of Tito, top secret documents and Randolph Churchill.
The Yugoslav counters are drawn at random from their respective activation group A, B, C within the limit of their availability for groups A and C (they can be reduced if events "c" and "e" occur). The counters are placed in the GZ and an assault is resolved during the combat sequence (see 13.).
Historical note: only Tito's uniform was found on site by the paras. The son of Winston Churchill, Randolph, was part of the British mission but was absent that day.
-
Case 2: When a German unit is adjacent to an A, B, C GZ, at the end of its movement or airdrop/landing.
Roll 1D10 for each stack of German units to determine the activation of each stack of Yugoslav units (one die roll per stack, regardless of the number of counters it contains):
- If the die roll result is less than or equal to the alarm level, the activation is successful; the marker (or markers if there are more than one in the GZ) is turned over and reveals the number of Yugoslav units that come from the activation group to be placed in the GZ.
- If the activation fails, the activation marker is left in place.
A single German unit can potentially activate several different GZ at the end of its movement. If the "Tito absent" marker represented by a uniform alone is revealed, it is eliminated from the game.
-
Case 3: The A, B, C markers are automatically revealed when:
- The alarm level is 9; all the markers are revealed.
- As soon as an A marker reveals Tito's presence, all the markers are revealed.
- When a Yugoslav unit stops in or crosses a GZ with an A, B, C marker, the markers of that GZ are revealed.
At the end of the activation of a stack of Yugoslav units, the stack is reorganised to place the unit with the greatest FF on top.
Important: the activation of the Yugoslav units is not an action, the counter is not rotated 90°, and it may perform an action during the D phase of the turn.
9 - Air support
Air support is not required and can only be implemented alone. Each turn, the air support gives the possibility of a combat bonus of +1 or +2 – fire or assault – for the German player for the selected GZ. This bonus is valid for one turn for a single GZ and for any type of combat, fire (in attack or defence) or assault. If no combat takes place or if the A, B, C marker does not reveal a Yugoslav combat unit, the air support is lost.
The procedure is as follows:
- Choose the GZ which will benefit from the air support.
- Place the air support counter in this GZ that may contain an A, B, C marker or activated Yugoslav units.
- Roll 1D10.
- Add any modifiers to the die roll result.
- Consult the modified die roll result to get the bonus.
| Modified D10 | Bonus |
|---|---|
| ≤ 2 | 0 |
| 3 | +1 |
| 4 | +1 |
| 5 | +1 |
| 6 | +2 |
| 7 | +2 |
| 8 | +2 |
| 9 | +2 |
Modifier applied to the D10:
- Turns 1, 7, 10: -1
- Turns 8, 9: -3
- Yugoslav DCA mitrailleuse: -1 per counter present on the map (two in number). Even if these two units are not activated, apply this modifier by default. Only the suppression of these counters by combat removes their modifier. The eliminated DCA counters are placed on the accounting scale as a reminder, spaces 1 and 2.
Example: on Turn 1 the modifier is -3.
Historical note: starting on 26 May the allied aircraft based in Italy intervene at the direct request of the partisans and fight over air control with the Croatian aviation and the Luftwaffe.
10 - Airdrops & landings
Airdrop and landing procedure: there are two waves of airdrops and landings, on turn 1 for the paratroopers and the gliders (counters identified by a parachute symbol with "1") and starting with turn 3 for the rest of the paratroopers (counters identified in the same way with a "2"). The arrival turns for the second wave are determined at random (see 5.2). After an airdrop/landing, a German unit's movement is reduced by half, rounded down (3 MP and 2 MP become 1 MP).
Except in the case of random event "f" (Good landing, bad location), the DZ are assigned, as indicated in this table.
| Unit | Drop zone |
|---|---|
| Paratroopers 1st wave | |
| Blue (Blau) | IV |
| Green (Grün) | I |
| Red (Rot) + Rybka | V |
| Gliders 1st wave | Orange group |
| Jaw (Beisser) | VIII |
| Hammer (Brecher) | IX |
| Axe (Draufganger) | III |
| Clawed paw (Greifer) | VIII |
| Feline head (Panther) | VI |
| Dagger (Sturmer) | II |
Note: (1) An officer does not land alone; he must be attached to a unit (player's choice for the 2nd wave).
The exact GZ in which each paratrooper counter lands must be determined. The GZ of each DZ are numbered 1 to 6. Roll 1D6; this indicates for the designated DZ (I to IX) the GZ in which each counter, including officers, lands independently. Proceed with all the airdrops and landings in the order indicated in the column. A GZ may receive several para counters during the landing.
Historical note: the 2nd wave took place at 12.00.
Tip for going faster: simultaneously roll a red 1D10 for the alarm, a white D6 for the GZ and a coloured D6 for the number of reinforcement units.
11 - Reinforcements
Historical note: the reinforcements come principally from elements of the 6th Lika Division and the 9th Dalmatian Division.
Once the alarm level reaches 7 and each turn thereafter until the three groups of reinforcements are exhausted (identified by R, black, blue and red), roll 1D10:
- If the die roll result is greater than the alarm level, no reinforcements arrive.
- If the result is less than or equal to the alarm level, reinforcements arrive in a GZ of the same colour as the R of the unit.
- Turns 1 and 2: Reinforcements identified R red only.
- Turns 3 to 6: Reinforcements identified R blue and remainder of the R red reinforcements, if necessary.
- Turns 7 to 12: Reinforcements identified R black and the remainder of the R blue and red reinforcements, if necessary.
Roll 1D6 again; the result indicates the reinforcements' entrance GZ (numbered from R1 to R6 black, red, blue). Then, roll 1D6 to determine the number of counters that enter this GZ:
| D6 | Number of unit(s) in reinforcement |
|---|---|
| 1-2 | 1 |
| 3-4 | 2 |
| 5-6 | 3 |
Reinforcements are drawn at random from three groups of units that are potential reinforcements. If the reinforcements' arrival GZ is occupied by paratroopers, the reinforcements do not enter the game this turn but do so on the following turn in an adjacent GZ identified R. The arrival of a reinforcement (1, 2 or 3 units) counts as a Yugoslav action.
12 - Movements
Movement Points (MP) are spent by units to carry out movement from one GZ connected to another. GZ are connected by lines symbolising the movement cost or the possibility of fire.
| Connection | Movement cost | Fire |
|---|---|---|
| Full | 1 MP | Authorised |
| Dotted | 2 MP | Authorised |
After the movement of a German unit or stack, several activations A, B, C markers are possible.
A German unit that enters a GZ – by movement or after a landing/airdrop –, containing an unrevealed activation marker or Yugoslav units must immediately stop its movement in the concerned GZ; it is fixed there. A German unit cannot enter a GZ containing at least one Yugoslav unit or an activation marker unless it has a second action that allows it to launch an assault. An officer cannot enter an enemy GZ alone.
Reminder: after an airdrop/landing, a German unit's movement is reduced by half, rounded down (3MP and 2MP become 1MP).
12.1 - Role of the officers
A German officer gives a bonus of +1 MP to each infantry unit with which he is positioned at the beginning of the movement phase. The bonus is not cumulative and remains limited to +1 MP. The officer keeps his movement capacity and does not benefit from the bonus.
12.2 - German movement
Movement is not obligatory for the Germans. Each unit may use all or part of its MP to move. Paratroopers may move without being stacked or adjacent to a German officer.
Example of landing and activation
Turn 1: airdrop of the Rot (Red) group in the DZ V. The D6 rolls indicate 1, 2, 2 and 3 respectively for the units (2-3-3, 2-3-3, Rybka, 2-3-3) of the Rot group in their DZ V. The alarm level is 3 (1 for a first landing, 1 for a first air support that gives a bonus and 1 for an A marker activated elsewhere on the map). During the airdrop sequence, the movement capacity is reduced to 1. The landing is an action and the German counters are turned clockwise 90°. Each stack adjacent to an A, B marker must test the activation. Only one unit is adjacent; the D10 roll is 2, less than the alarm level of 3 which activates the markers and authorises fire.
12.3 - Yugoslav movement
Yugoslav movements must enable units to group together and form large stacks (8 to 10 SP).
A Yugoslav unit already adjacent to a German unit of any type (paratroopers, officer) does not carry out movement; it is fixed.
A Yugoslav unit that is not adjacent to a German unit must carry out a movement according to the alarm level. Tito, R. Churchill and the secret documents (we imagine they are transported by intelligence officers) cannot move alone; they all have 2 MP and move accompanied by the Yugoslav units with which they are stacked.
Alarm level and consequences
-
1 to 6: The Yugoslav movement proceeds toward the closest enemy unit in terms of MP*.
- Design note: the Yugoslav reaction is disordered and instinctive.
-
7 and +: The Yugoslav movement proceeds toward the closest friendly unit in terms of MP*.
- Design note: the Yugoslav reaction becomes organised and consolidated.
-
1 to 9: A stack between 8 SP and 10 SP (maximum stacking) always moves toward the closest enemy unit regardless of the alarm level.
Exception: a stack of 8 to 10 SP with which the Tito counter is stacked must always move toward the closest edge of the map in MP (North, West, South) to exit by a zone marked R (for reinforcements); it is never fixed.
* When there is more than one choice, the movement priority is as follows:
- The stack of units with the most SP is moved first, then by decreasing order until the unit with only one SP.
- Movement is first carried out toward the stack with the most SP (enemy SP for an alert level between 1 and 6 and friendly SP for an alert level of 7 and higher) down to the fewest SP.
- Lastly, if several choices are equivalent (for movement or other priorities), a die roll determines the choice.
A Yugoslav movement can cross GZ containing A, B, C markers; these are immediately turned over and added to the stack.
At the end of each movement of a stack of Yugoslav units, the stack is reorganised to place the unit with the greatest FF on the top of the stack.
A Yugoslav stack or unit cannot enter a GZ containing German units and stops at the closest in a GZ located at a distance of R=1 (adjacent).
If the units' movement causes the stacking limit to be exceeded, the extra units (preferably those with the smallest FF) are either:
- Left in the GZ immediately before the GZ where the excess occurred if their movement capacity does not allow them to enter another GZ.
- Authorised to pursue their movement to circumvent the GZ with maximum stacking in order to get them closer to the GZ containing a friendly or enemy unit, depending on the alarm level.
13 - Combats
Combats comprise fire and assaults. Only combatting units – paratroopers, partisans, officers, DCA (AA machine guns), tanks – that have not yet performed an action or have only performed one action (identified by the counter being rotated 90°) may initiate combat. A stack of counters may include units that have performed an action or actions, as well as those that have not yet performed an action.
One or more units may suffer several rounds of fire and assaults from units coming from different GZ.
Fire is a combat between adversaries located in adjacent GZ (R = 1).
Each combat is resolved separately before proceeding to the following combat. They are resolved in the order of appearance for the Yugoslavs and as the player chooses for the Germans.
Combats are resolved by comparing the attack value to the defence value (see 13.2). A unit can only carry out one fire and one assault per combat sequence, in either order for the Germans.
It is not possible to fire on a GZ that contains a friendly unit.
13.1 - Ammunition level
The evolution of the German ammunition level is tracked on an accounting scale. As of certain ammunition levels used, a penalty is applied to the Germans' attack or defence value. The cursors x1 and x10 are placed on the accounting scale from 0 to 9 at the beginning of the game then are moved based on their consumption.
Each combat – fire and assault turn –, initiated by the German or the Yugoslav costs one ammunition point for the Germans; the cursors are adjusted on the scale. The penalties are indicated below:
| Ammunition level | 20-29 | 10-19 | 0-9 |
|---|---|---|---|
| Die roll modifier | -1 | -2 | -3 |
Historical note: the paratroopers only count on their on-board or airdropped ammunition. The intense combats cause them to consume a great deal of ammunition and their reduction becomes extremely problematic as the combats progress.
The ammunition level can increase by a certain number of points with the arrival of the second wave of paratroopers (turn 3, 4 or 5) and at dawn on the second day (turn 10). (See 5.)
Immediate victory: if the ammunition level reaches 0, it's an immediate victory for the partisans.
13.2 - Fire resolution
13.2.1 - The target
Fire is resolved from one GZ to another GZ at a time. A stack cannot divide its fire among several different GZ. A single GZ attacks and a single GZ defends. A GZ may be the target of several fires that are resolved successively, coming from different GZ.
Defending oneself is not considered an action. Firing at a GZ with an A, B or C marker that has not yet been activated is prohibited. Two enemy units positioned in the same GZ cannot fire at an adjacent GZ; they must resolve an assault. A unit cannot fire at a GZ containing both friendly and enemy units.
Examples of Yugoslav movement
- Alarm level 6: the Yugoslav movement occurs toward the closest enemy unit in terms of MP and only one action is possible. The unit in GZ39 is fixed and remains immobile. The units in GZ42 and 37 must move closer to the paras in GZ 30. The stack of units in GZ42 contains 4 SP and moves first, then the unit in GZ37 that must move closer to the enemy in GZ30 and forming the biggest stack carries out movement toward GZ38.
- Alarm level 8: the Yugoslav movement occurs toward the closest friendly unit in terms of MP and two actions are possible. The two stacks have 8SP. The stack in GZ22 moves toward the closest enemy in GZ30 for 1 MP and stops. The stack in GZ42 with Tito moves (for example) toward the north, is not fixed in GZ37 and stops in GZ41.
13.2.2 - Fire priority
-
For the Yugoslav: the Yugoslav stack with the most SP fires first at the adjacent German stack with the fewest SP or the weakest FF in the case of a tie. A stack only fires at a single enemy GZ; there is no separation of fire from the same friendly GZ, even if certain units still have the possibility of being activated.
In the case of a tie in the number of SP between several stacks of Yugoslav units, the stack that fires first is the one with the counter on top of the stack with the highest FF, then the stack whose sum of FF is the highest.
Other fire is resolved for the Yugoslav stack immediately inferior in terms of SP and so on until all fire situations are resolved.
A stack of German units may be the target of several shots coming from adjacent Yugoslav stacks.
-
For the Germans: no priority, player's choice.
13.2.3 - Fire resolution
Determination of the attack value of the shooter and the defence value of the target:
Shooter
Determination of the attack value of the unit that fires (top of the stack).
Fire factor, +1D6, plus:
- +1 for each infantry strength point in support* of the Shooter (don't count the Shooter's SP).
- +1 for the presence of one or two officers (+1 maximum).
- -2 for turns 8 and 9**.
- -1 for turns 1, 7 and 10**.
- -1, -2 or -3 according to the Germans' ammunition level.
- +1 or +2 for the air support.
- +1 for an AA machine gun (limited to +1).
Target
Determination of the defence value of the targeted unit (top of the stack).
Fire factor, +1D6, plus:
- +1 for each infantry strength point in support* of the Target (don't count the target's SP).
-
- Protection value of the GZ.
- -1, -2 or -3 according to the Germans' ammunition level.
- +2 for a tank (limited to +2).
All modifiers are cumulative.
(*) Only the support modifiers of units that can still perform an action are taken into account.
(**) This modifier is linked to the lack of light.
13.2.4 - Results
- If the Attack value is greater than or equal to the defence value of the target on top of the stack, the latter is hit.
- If the Attack value is strictly less than the defence value, the shooter on the top of the stack is hit.
A unit hit by fire suffers a loss. The officers follow the same rule. If the counter is at full strength, it is turned over. If it is already reduced, it is removed from the game.
A unit may only fire once per game turn but may be the target of several fires.
A German unit cannot fire at a non-activated Yugoslav GZ.
Note: it is not possible to advance into a GZ left vacant after fire.
At the end of each fire by a stack of Yugoslav units, if necessary, the stack is reorganised to place the unit with the highest FF on the top.
The reorganisation of a stack of German units is left up to the player. Adjust the paratrooper ammunition cursors.
Example of German fire
The markers reveal Tito's uniform (he isn't there!) and two infantry units from HQ. Two counters are drawn at random from the reserve of units identified by a B. The fire is resolved: German attack value: 2 (FF) + 1 (air support) – 1 (penalty for lack of visibility on turn 1) + 6 (D6 result) = 8. Yugoslav defence value: 3 (FF) + 2 (2SP in support) + 1 (protection value of the identified GZ in orange) + 1 (D6 result) = 7. The result of the attack value is greater than the result of the defence value; the Yugoslav unit is hit and loses one SP. The counter on the top of the stack is turned over to its back side (2-1-2). The stack is reorganised to place the unit with the greatest FF on top, in this case the unit that still has 2 SP (3-2-2). The ammunition level is reduced by one point. The counter is rotated 90° to indicate that it just performed its 2nd and final action for the turn.
13.3 - Resolution of the assault
Reminder: an assault costs an action, regardless of the number of rounds, and so the units that enter a GZ must have an action left to lead this assault.
An assault is mandatory when enemy units are in the same GZ after movement or an airdrop / landing. Only the paratroopers may initiate an assault. The Yugoslavs may never initiate an assault but they do defend themselves during a German assault.
If the GZ contains one or two A, B or C markers, they are turned over. If they reveal units, the assault is resolved during the assault action. If they only reveal the presence or absence of Tito, secret documents or Randolph Churchill, there is no assault. In this case each one is taken prisoner (see 13.4).
13.3.1 - Placement and resolution
Sequence 1: positioning of units. All the counters (German units and officers and Yugoslav units) are removed from the GZ and placed in their respective assault zones (indicated on the map by the outlines of soldiers of the two camps) in two parallel columns (the front of the Fin (End) counter symbolises an explosion; place this counter in the GZ concerned by the assault as a reminder). There are two types of units: units in contact with the enemy and units placed immediately behind in support of a friendly unit. The length of the column is determined by the camp with fewer units.
The assault is resolved in an undetermined number of rounds. An assault round comprises the following sequences:
- Positioning of the units according to cases 1 and 2.
- Resolution of combats line by line, from the top to the bottom and immediate application of the results.
- Adjustment of the German ammunition cursors.
- End or continuation of the round.
There are two possible cases:
-
Case 1: the number of German counters is greater than or equal to the number of Yugoslav counters. The Yugoslav positions his counters first: all the counters are placed in a column in order of decreasing AF, from the top to the bottom of the column. The German goes second: at least one German counter must be in contact with each Yugoslav unit. The rest of the counters – if need be – are placed in support behind a unit in contact, as the player chooses.
-
Case 2: the number of Yugoslav counters is strictly greater than the number of German counters. The German positions his counters first: all the counters are placed in a column, as the player chooses. The Yugoslav goes second: all the counters are placed in a column in order of decreasing AF, from the top to the bottom of the column. Each German counter must be in contact with a Yugoslav counter. The remaining Yugoslav counters are placed in support by decreasing AF from highest to lowest so that each unit in contact has one supporting unit, then two, etc. until all the units are positioned.
Sequence 2: resolution of combats line by line. Determination of the attack value and the defence value.
Attack value of the German unit in contact
- Assault factor, +1D6
- +1 per SP in additional support
- -1, -2 or -3 according to the ammunition level
- +1 or +2 for the air support
- +1 for the presence of one or two officers (+1 maximum) for each round of assault for all of the units
Defence value of the Yugoslav unit in contact
- Assault factor, +1D6
- +1 per SP in additional support
-
- Protection value of the assaulted GZ in which the Yugoslavs are located
- +1 Tito's presence (that galvanises the partisans)
- +1 for an AA machine gun (limited to +1)
- +2 for a tank (limited to +2)
Results
- If the attack value of the German unit is greater than or equal to the defence value of the Yugoslav unit, the latter is hit.
- If the attack value of the German unit is strictly less than the defence value of the Yugoslav unit, the German unit is hit.
A unit at full strength that is hit loses one SP; turn it over to its reduced side. If it only had one SP left, it is eliminated.
Sequence 3: adjust the German ammunition cursors.
Sequence 4: end or continuation of the round. The assault rounds continue:
- until all the Yugoslav units are eliminated or until the player decides to stop the assault, in which case the remaining German units return to the GZ from which they assaulted the Yugoslav GZ.
- Exception: following an airdrop / landing action on turns 1 and 3 only (4 and 5 possible during the second series of events, see 5.2), when the player decides to stop the assault, the remaining German units retreat toward the closest GZ free of Yugoslav units or A, B, C markers.
- OR until all the units of one camp are eliminated.
At the end of the assault, if the Yugoslavs are victorious, the stack of Yugoslav units is reorganised to place the unit with the highest FF on the top of the stack.
If the Germans are victorious, they remain in the GZ.
For each line, if a unit has been eliminated, it must be replaced by another available unit (not already fixed elsewhere). Otherwise, the unit that won the assault on the preceding turn is placed in support on another line of assault. The supporting unit with the highest AF for the Yugoslavs or as the player chooses is then placed in the first line.
Reminder: if the ammunition level reaches 0, it's an immediate victory for the partisans.
Example of assault
Turn 2: the German units have not yet fired and can carry out a movement to lead an assault which requires two actions. All the counters are removed from the map and placed in the assault zone. An Assault marker is placed in the GZ as a reminder.
Example of assault (continued): the number of Yugoslav counters is less than the number of German counters; they are placed in the contact column in decreasing order of AF. The player must place a counter in contact with a Yugoslav counter then the other counter is placed in support of the first unit. The German ammunition level is 27, a penalty of -1.
- Round 1
- Line 1: German attack value: 3 (AF) -1 (ammunition penalty) + 1 (officer bonus) +2 (support of 2 SP) + 1 (D6 result) = 6. Yugoslav defence value: 2 (AF) + 1 (protection value of the identified GZ in orange) + 4 (D6 result) = 7. The attack value of the German unit is strictly less than the defence value of the Yugoslav unit. The German unit is hit and loses one SP. The counter in contact is turned over (2-1-2).
- Line 2: German attack value: 3 (AF) -1 (ammunition penalty) + 1 (officer bonus, valid for each assault round for all the units) + 4 (D6 result) = 7. Yugoslav defence value: 1 (AF) + 1 (protection value of the identified GZ in orange) + 2 (D6 result) = 4. The attack value of the German unit is greater than the defence value of the Yugoslav unit. The Yugoslav unit loses one SP and is eliminated. The counter is removed from the game because it had already lost a step.
- The ammunition level is reduced by one point.
- Round 2: the counters are arranged for the new assault round.
- Line 1: German attack value: 3 (AF) -1 (ammunition penalty) + 1 (officer bonus) +3 (support of 3 SP) + 5 (D6 result) = 11. Yugoslav defence value: 2 (AF) + 1 (protection value of the identified GZ in orange) + 6 (D6 result) = 9. The attack value of the German unit is greater than the defence value of the Yugoslav unit. The Yugoslav unit loses one SP. The counter in contact is turned over (2-1-2).
- The ammunition level is reduced by one point.
- Round 3: etc.
13.4 - Taking prisoners
If the Tito or Churchill counter, unaccompanied by Yugoslav units, is stacked with at least one German unit in a GZ after an assault, movement or landing, roll 1D6:
- On a result of 1, 2 or 3 he is taken prisoner.
- On a result of 4, 5 or 6, he is eliminated.
If he is taken prisoner, the German unit must take him to the GZ 48 (identified by the German cross). The Tito/Churchill counter is placed with a paratroopers counter and carries out its movements with it. If the Tito / Churchill counter is alone in a GZ following the elimination of his paratrooper guards, he is considered eliminated.
Design note: we consider that before surrendering or being eliminated, the paratroopers eliminate their precious prisoners.
14 - Objectives and victory
The realisation of each of these objectives allows the player to obtain victory points (VP). VP are calculated at the end of the game; on turn 12 or on turns 10 and 11 for the event g (see 5.1).
-
Eliminate or take prisoner Tito and/or Randolph Churchill ("Cherry on the Cake…")
- Tito: Dead: 15 VP. Prisoner: 20 VP.
- R. Churchill: Dead: 3 VP. Prisoner: 4 VP.
It is possible to evacuate Tito (and not R. Churchill, it wasn't in the plans…) by air with the help of an aircraft (see marker with a Storch observation aircraft symbol). Once Tito is taken prisoner, he must be transported and placed in the GZ 48. Place the Storch marker on the Tito counter. On the following turn, during phase D, if Tito is still a prisoner in the same GZ, the Tito/Storch stack is definitively removed from the game and the associated VP are counted.
The R. Churchill counter must remain with a paratroopers counter until the end of the game.
-
Seize documents: the discovery of the Secret Documents marker gives 2 VP. When this A marker is revealed in a GZ, a German unit must carry out a movement through this GZ or position itself in it to take advantage of the VP. The document marker is removed from the game.
-
Position a German unit alone in the foreign missions: the mission GZ (9, 28 and 69) are identified by a flag that corresponds to their nationality; United States, Great Britain, Union of Soviet Socialist Republics. 2 VP are given per GZ occupied by a unit of paratroopers during the last victory determination phase on the last turn.
-
Limit the loss of paratroopers: each paratrooper counter that leaves the game removes 1 VP.
-
Preserve the German officers: the elimination of Kurt Rybka removes 2 VP, that of Josef Obermaier removes 1 VP.
Victory
The total number of VP determines the success or failure of Operation Rösselsprung:
- If the total number of VP is 20 or more, it's a complete success; the paratroopers have accomplished their missions. It's a resounding victory and you are awarded the 1st class Iron Cross and make the headlines of Die Deutsche Wochenschau.
- If the total number of VP is between 10 and 19, it's a semi success. The raid has certainly disorganised the command of the Yugoslav resistance, but the losses are heavy and not enough information has been collected. The next mission in the Bosnian mountains will be entrusted to the Ustaša or the Chetniks…
- If the total number of VP is strictly less than 10, it's a failure. Your battalion of paratroopers (or what remains) is sent directly to Normandy where things are beginning to heat up...
Historical note: despite the value of the paratroopers, Operation Rösselsprung is a failure for the Germans with approximately 600 dead, wounded and missing, Obermaier killed, Rybka wounded, Tito who escapes, R. Churchill absent the day of the raid, few important documents taken. Seen in terms of VP, the result is close to zero… Will you be able to do better?