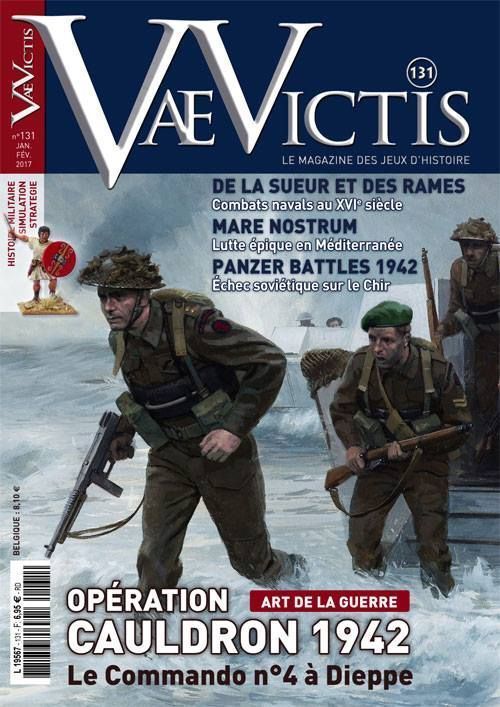
COMMANDO n°4: Dieppe 1942
COMMANDO n°4: Dieppe 1942 Rulebook
Table of Contents
Table of Contents
1 - Overview
1.1 - Terms and Designations
- D6: 6-sided die. This die is used for the British in attack and defence.
- D10: 10-sided die – the 0 counts as 0 and not 10. This die is used in attack and defence for the Germans.
- GZ: Geographical Zone which situates the units.
- MP: Movement points spent to move a unit.
- Troop: Base unit of a commando with approximately 60 men.
- Group: grouping of several troops. Group 1 is under the command of Major Mills-Robert and Group 2 is under the command of Lieutenant-Colonel Lovat.
- R: Radius, corresponds to the distance separating several GZ in number of connections. Examples: R = 1 for one connection separating two adjacent GZ; R = 2 for two connections separating two GZ.
Design note: the introduction of the D10 for the Germans enables a balanced game and brings uncertainty to the German reactions generated by the game system. It also requires the player to keep his commandos grouped in order to face the threat (which is historical).
1.2 - Terrain
| Colour of GZ | Type of terrain | Protection value | Maximum stacking expressed in levels (Mvt & Fire/Assault) |
|---|---|---|---|
| Solid blue | Sea | 0 | 4 x LCA / irrelevant |
| Dotted blue | Ship waiting zone | 0 | 4 x LCA / irrelevant |
| Solid yellow | No protection | 0 | 10/20 (10 max per camp) |
| Orange | Light Protection | 1 | 10/20 (10 max per camp) |
| Red | Strong protection | 3 | 10/20 (10 max per camp) |
1.3 - Game Scale
A game turn equals 15 minutes. The GZ are between one and several hundred metres apart. The scenario begins at 4:45 am and finishes at 7:30 am, for 12 game turns.
A counter represents 10 British or German soldiers at full strength (recto) or 5 soldiers at reduced strength (verso), a machine gun and its operators, an officer, a sniper and one or more cannon.
1.4 - Game Help
A chronological scale and an alarm level scale are printed on the map.
1.5 - Objectives
The British obtain victory points (VP) by meeting designated objectives (see chapter 12).
2 - Counters
2.1 - Units
The outlines of British soldiers have a brown background and the Germans have a grey background.
A unit is characterised by six parameters: Arms affiliation, Nationality, Fire Factor (FF), Assault Factor (AF), maximum movement capacity and stacking level (0, 1 or 2). The group and owner unit are given for information purposes only.
There are two strength levels:
- Recto (front side): unit at full strength;
- Verso (back side): unit at reduced strength, unit eliminated or objective destroyed.
Counter types shown: reduced commando that has suffered a loss, sniper, mortar, officer, machine gun, Flak, cannon of the Hess battery (eliminated cannon on the verso), Pillbox (reduced Pillbox on the verso), Landing Craft Assault.
2.2 - Stacking
There is a stacking level associated with each unit:
- Two levels for each counter unit at full strength; the German infantry, the commandos;
- One stacking level for each counter: 20/37 mm flak cannon, 155 mm cannon from the Hess battery, machine gun, Landing Craft Assault (LCA), howitzer and any reduced infantry unit;
- No level: the officers, snipers, Pillbox, and all other markers.
British and German units may not be located in the same GZ during movement unless they are prisoners. They are only in the same GZ during an assault. The maximum number of stacking levels possible depends on the GZ in which the units are located. These values are given in 1.2.
The stacking rule must be respected when the units are immobile in a GZ but may be temporarily broken during land movement, landing or embarking.
The combat unit on the top of the stack is considered "in the front line"; its Fire Factor (FF) is taken into account for combat and it suffers the result of the combat, except in the resolution of sniper fire (see 11.1).
After a combat and the combat's result, the British player may reorganise the participating units. For the Germans, after each combat, the units must be reorganised to place the unit with the highest FF of the stack on the top. A unit that has executed an action may be stacked with a unit that has not.
3 - Game Set-up
3.1 - Markers and Counters
- Chronological scale: The game turn marker is placed in the turn 1 square (4:45 am).
- Alarm level: the alarm level marker is placed on 0.
- Markers A and B: Markers A and B are mixed together then positioned recto side up on the GZs marked A and B. Once activated, they are replaced by a number of units indicated on the verso (infantry, machine gun, officer identified with a G for garrison).
- Telephone line counters: the 2 counters are placed recto side up in the GZs marked T.
3.2 - German Units
The cannon of the Flak, the Hess battery and the Pillbox are positioned respectively in the GZ marked F, H and P.
- GZ F: one Flak cannon counter per GZ.
- GZ H (code name Hess): the two counters of 155 mm cannon that comprise the battery 813.
- GZ P: one Pillbox counter per GZ.
The 28 counters of the Garrison group (identified by a G) are placed in a container. When an A or B marker is activated, the number of counters indicated is drawn at random, taking note of the type of unit activated (infantry, machine gun, officer).
The 10 counters of the Reinforcements group (identified with an R) are placed in a container. When a reinforcement arrives, the number of counters indicated is drawn at random and placed in the GZ indicated R0 to R9 on the map.
3.3 - British Units
They are divided into two groups:
- Group 1 (marked G1 on the counters): Officer Mills-Robert and eight commandos, a sniper and a howitzer section distributed freely under the LCA 1, 2 & 3 respecting the stack limit of 8 levels per LCA.
- Group 2: Officer Lovat and sixteen commandos distributed freely under the LCA 4, 5, 6 & 7.
Each group is placed in its respective D/E GZ.
4 - Sequence of Play
Each game turn comprises 7 game phases from A to F. Each phase must be completed before moving to the following phase.
- A. Determination of random events for the first turn only.
- B. British actions (choice of order): Maritime movement; Landing; Embarkation; Land Movement; Combats: Fire & Assault.
- C. Remove the Job Done markers.
- D. German actions (in the order indicated): Fire (for activated units); Movement (for activated units); Positioning of reinforcements (when the alarm level is 6 or higher).
- E. Remove the Alles Gemacht markers (indicating their job is done) and move the game turn marker ahead one square.
- F. Determination of victory on the last game turn.
Design note: the Germans do not carry out assaults and remain at a distance from the commandos. This, however, does not prohibit them from staying on their heels until their departure from the beach.
5 - Unforeseen Events
In sequence A, the determination of random events only takes place during turn 1. It is ignored afterward. Its results only concern the British camp. To familiarise yourself with the rules during your first playing of the game, avoid the random events.
For subsequent games, roll 1D6, the result of which gives these events and their consequences:
a - Result = 1-2. Historical note: the battery of Saint Valery en Caux, in the vicinity of Quiberville (outside of this map), opens fire on the fleet. Increase the alarm level by +1. Roll 1D10, on a:
- 0: nothing happens (but it was close…).
- 1 to 7: the result indicates the number of the LCA that was destroyed with all the units aboard.
- 8: Group 1 cannot land until after 5:00 (turn 2).
- 9: Group 2 cannot land until after 5:00 (turn 2).
b - Result = 3-4. Historical note: the fleet of ships encounters a convoy of German ships (bad luck for the fleet transporting No. 3 Commando). Increase the alarm level by +1. Roll 1D10, on a:
- 0: nothing happens (but it was close…).
- 1 to 7: the result indicates the number of the LCA that was destroyed with all the units aboard.
- 8: Group 1 cannot land until after 5:15 (turn 3).
- 9: Group 2 cannot land until after 5:15 (turn 3).
c - Result = 5-6. Historical note: an error in course leads to one of the commando groups landing in an area not anticipated in the plan. If the die roll result is 5, the commandos of Group 1 land in the GZ Gorge des Moûtiers (C5). If the die roll result is 6, the commandos of Group 2 land in the GZ of Quiberville (C6). Note: the LCA of each group remain in their Landing/Embarkation zone (G1 and G2).
d - Odd result (1, 3, 5). The consequence of this result is added to the result obtained above. Historical note: Mechanical problems arose on the transports of No. 3 Commando during this raid compromising 3 LCP (Landing Craft Personnel) transports, which were made of wood as opposed to the armoured LCA, and depriving the raid of 60 commandos. An LCA designated by the roll of 1D10 is eliminated (if the result is 0, 8 or 9, roll the die again until a LCA is designated).
6 - Actions
A British unit (commandos, officer, sniper, howitzer, LCA) may execute two different actions per phase, in any order, or execute no action. The actions are:
- Landing
- Embarking
- Land movement
- Fire
- Assault
- Maritime movement
An activated German unit must carry out either:
- one fire OR one movement, unless impossible, per phase when the alarm level is less than 6,
- one fire AND one movement when the alarm level is greater than or equal to 6.
Place a Job Done action marker (recto) for the British and an Alles gemacht (on the verso of the same marker) for the Germans on each unit or stack that carried out one or two actions. Each unit or stack must have carried out all its actions before activating other units.
7 - Alarm Level
The alarm level ranges from 0 to 9; at the beginning of the game it is at zero. Certain events increase the alarm level and make it easier to activate German units. The adjustment of the alarm level happens immediately and each time a triggering event occurs. These events, with their associated value of alarm level increase are:
- First landing (regardless of the beach and the number of commandos): +1
- First British or German fire: +1
- Explosion of mines or a Bangalore torpedo (success or failure of the attempt): +1
- First assault: +2
- First A marker activated: +1 (except mines and Barbed wire)
- First B marker activated: +2
- Detection of ships (if unexpected event 5a or 5b occurs, or on a die roll of 1 to 4): +1
The alarm level has a direct impact on German activation, movement and combat. Their consequences are described in chapters 8, 9 and 10.
Once the alarm level reaches level 9 or immediately after the elimination of the two Hess battery counters, all the markers A and B are turned over and the alarm level marker is placed in square 9.
Alarm level:
- 0 to 5: German movement proceeds toward the closest friendly unit in terms of MP. An active German unit can either move or fire.
- 6 to 9: The German movement proceeds toward the closest enemy unit in terms of MP. An active German unit can move and fire.
- 6 and higher: Determination of the arrival of reinforcements (location and quantity) until the depletion of the German reinforcements Group.
8 - Reinforcements
Historical note: Reinforcements come from part of the 1st Battalion of the 571st Infantry Regiment.
Once the alarm level reaches 6 and each turn thereafter until the German reinforcements group is exhausted and placed in a container, roll 1D10.
- If the die roll result is greater than or equal to the alarm level, no reinforcements arrive.
- If the result is less than the alarm level, reinforcements arrive.
Roll again 1D10; the result indicates the reinforcements' entrance GZ. Then, roll 1D6 to determine the number of counters that enter this GZ:
| D6 | Number of reinforcement unit(s) |
|---|---|
| 1-2 | 1 |
| 3-4 | 2 |
| 5-6 | 3 |
Tip for going faster: Roll at the same time a red 1D10 for the alarm, a blue 1D10 for the GZ and 1D6 for reinforcements.
Reinforcements are drawn at random from the container with the 10 units that are potential reinforcements. If the reinforcements' arrival GZ is occupied by commandos, the reinforcements do not enter the game this turn but do so on the following turn in the GZ whose number is immediately greater (note: in this case, GZ R0 follows GZ R9). The arrival of a reinforcement (1, 2 or 3 units) counts as a German action.
9 - Movement
Movement Points (MP) are spent by units to carry out movements from one GZ connected to another. GZ are connected by lines symbolising the movement cost or the possibility of fire.
- Solid yellow: 1 MP
- Dotted yellow: 2 MP
- Solid blue: 1 MP. Maritime movement for the LCA only. Movement prohibited for land units.
- Dotted blue (for embarkation and landing): 2 MP
- Dotted red: Movement prohibited. Fire is nonetheless authorised.
9.1 - Role of the Officers
A British or German officer gives a bonus of +1 MP to each infantry unit with which it is positioned at the beginning of the movement phase. The bonus is not cumulative and remains limited to +1 MP.
9.2 - British Movement
Movement is not mandatory for the British. Each unit may use all or part of its MP to move. Commandos may move without being stacked or adjacent to a British officer. The movement of a British unit or stack of units may provoke several activations of A or B markers. A unit – commandos or mortars – that enters a GZ containing an unrevealed activation marker (A or B) or containing Germans must stop its movement immediately in the GZ and may not move again for this turn. An activation of the zone then an assault, if necessary, must be realised. Officers and snipers may not enter an enemy GZ alone.
A unit lands when it moves from an LCA present in a GZ D/E to a beach GZ (Orange I & II, Quiberville/zone C6, gorge de Moûtiers/zone C5). It embarks when it moves from a beach GZ to a LCA present in a GZ D/E. A unit that embarks again may not land again.
A unit may not penetrate an embarkation GZ if it is not occupied by a LCA. An embarking unit is placed under a LCA unit.
British Movement Example: Turn 1: 4 commandos at full strength (8 stacking levels) arrive from LCA7 from the Landing/Embarking zone of Group 2. They spend 2 MP to land and enter the GZ Orange 2 Beach. They have 1 MP left to continue their movement. Since they were stacked with the officer Lord Lovat at the beginning of their turn, each unit has a movement bonus of +1 MP. The stack of units passes by the Quiberville GZ containing 4 commando units, of which 3 are reduced, or 5 stacking levels. The stacking level total is 13 which exceeds the authorised limit of 10 stacking levels per GZ. This excess is authorised temporarily during movement. The 4 commandos and Lord Lovat finish their movement adjacent to a GZ that is not yet activated but for which an activation test must be taken. They just carried out one of two possible actions per round. The stack of commandos is reorganised so that a unit (3-4-3), and not Lord Lovat, is placed in the first line, on the top of the stack.
9.3 - German Movement
An activated German unit already adjacent to a British unit of any type (commando, howitzer, sniper, officer), does not engage in movement. An activated German unit that is not adjacent to a British unit must carry out movement. The movement of units depends on the alarm level and therefore the current situation for the turn.
The stack of units with the greatest number of stacking levels moves first, followed by units with stacking levels of decreasing order until the unit with only one stacking level.
- Alarm level 0 to 5: movement proceeds toward the closest friendly unit in terms of MP. If several units fulfil these conditions, priority goes to the largest stack down to the smallest (in number of levels), in order to join it within the authorised limit.
- Alarm level 6 to 9: movement proceeds toward the closest enemy unit in terms of MP. If several units fulfil these conditions, priority goes to the stack with the greatest number of levels, to the fewest (in levels).
German movement must go around GZ containing unrevealed A and B markers and GZ containing mines or barbed wire.
At the end of each movement of a stack of German units, the stack is reorganised to place the unit with the greatest FF on the top of the stack.
If the units' movement brings about an excess of the stacking limit, the extra units (preferably those with the smallest FF) are left in the GZ ahead of the path taken.
German units cannot cross mine or barbed wire GZ; they must go around them. This is the only case in which the MP spent for their movement may be greater to go toward the closest enemy.
Example of German Movement: Two turns have been played, we are in turn 3, the alarm level is 7. The priority for German movement is toward the closest British unit starting with alarm level 6. The two stacks of commandos are located at a distance from the German reinforcements which requires 2 MP from each. The priority is toward the stack containing more stacking levels; here, one stack has 8 stacking levels (4 commandos at full strength) and the other has 6 (2 commandos at full strength, 2 reduced commandos and an officer that does not count for a stacking level). The movement is conducted toward the British stack with 8 stacking levels.
10 - German Activation
The markers can be revealed by approaching them or are automatically revealed by entering their GZ.
Pillboxes and artillery are always considered activated and may therefore fire on the British as soon as the situation permits.
The GZ marked A or B and with a corresponding marker on the map are activation zones of the German units or obstacles (mines, barbed wire). Only the British units may activate these A and B markers. The activation depends on two factors:
- The alarm level of the Germans.
- The position of at least one British unit (of any type) in relation to the GZ marked A or B.
There are two possible situations:
1- If it is located in the GZ A or B, the activation is automatic. A marker may reveal mines, barbed wire or German units with the following consequences:
- Mines: roll 1D10 and add +1 per stacking level as necessary. If the modified result is 8 or higher, the unit or the unit on the top of the stack is reduced by one level (and can therefore be eliminated). The "mines" marker is left in place as long as it has had no effect.
- Barbed wire: the player has two options: either the unit or stack of units stops its movement and remains in the GZ for this turn, or he can attempt to clear the passage by exploding a Bangalore torpedo. If the unit or stack of units succeeds in exploding a Bangalore torpedo, it may continue its movement. If it fails, it remains stuck in the GZ for this turn. Roll 1D10: On an even numbered result, the barbed wire is removed. On an odd numbered result, the unit or stack of units stops its movement for this turn. On the following turn, the unit or stack may continue its movement normally (consider that the commandos have gone around the obstacle or made a passage). The explosion of a Bangalore torpedo – failure or success – is considered an attempt and increases the alarm level by +1 for each attempt.
- German units: the units drawn at random in the Garrison container are placed in the GZ and an assault is resolved immediately (see Chapter 11).
2- If it is adjacent, take a test for each situation in which a British unit or stack of units carries out an action in an adjacent GZ (including the movement that allows it to become adjacent) to a GZ marked with an A or B. Thus, a British unit may activate several GZ during its action phase. Roll 1D10:
- If the die roll result is less than or equal to the alarm level, the activation is successful, the marker is turned over and reveals either the number of German units coming from the Garrison group to be put in the GZ, or the presence of an obstacle (mines or barbed wire).
- If the activation fails, the activation marker is left in place on its recto.
At the end of the activation of a stack of German units, it is reorganised to place the unit with the highest FF on the top of the stack.
The activation of a German unit is not an action and does not warrant an Alles gemacht marker. It can carry out an action during the German camp's D phase for this turn.
Activation Example: The activation level is 4. This is the sum of the alarm values based on: the first landing (+1) by the commandos placed in the Quiberville GZ; the marker A (+1) that occupied Quiberville (one infantry and one machine gun); the first assault (+2) realised successfully by the same commandos on the garrison activated by marker A. Since the commandos are adjacent to a GZ with an activation marker A, an activation test must be taken. The result of the 1D10 roll is 4; the A marker is turned over and depicts infantry x 1 and machine gun x 1. The marker is removed and replaced by a German infantry unit (3-2-3) and a machine gun (5-1-0) drawn from the Garrison container. The German unit with the highest Fire Factor (FF) – the machine gun – is placed on the top of the German stack and is considered "in the front line".
11 - Combats
Combats comprise fire and assaults. Only units without a Job done or Alles gemacht marker may initiate combat. A stack of counters may include units that have executed an action as well as those that have not yet executed an action.
One or more units may suffer fire then an assault or several rounds of fire and assaults from units coming from different GZ.
Fire is a combat between adversaries located in adjacent GZ (R = 1) for the LCA, Pillbox, commandos, snipers, German infantry, officers, Flak or in distant GZ (R = 2) for the howitzers. The Hess battery may not fire.
Historical note: Such batteries do not fire at point-blank range, especially not on infantry. They are there to sink ships.
Each combat is resolved separately before proceeding on to the following combat. They are resolved in the order of appearance for the Germans and as the player chooses for the British.
Combats are resolved by comparing the attack value to the defense value. A unit can only carry out one fire and one assault per combat sequence, in either order for the British.
11.1 - Fire Resolution
The Target: Fire is resolved from one GZ to another GZ at a time. A stack may not fire on several different GZ at once. Only one GZ attacks and only one defends. A GZ may be the target of several instances of fire, resolved successively, coming from different GZ. Defending oneself is not considered an action. Firing on a GZ with an A or B marker that has not yet been activated is prohibited.
Fire priority:
- For the Germans: the German stack containing the greatest number of levels fires first on the adjacent British stack with the fewest levels. Other fire is resolved for the German stack immediately inferior in terms of number of stacking levels and so on until all fire situations are resolved. If there are equivalent situations, determine the unit or stack that fires first with the help of a D6. A British stack may be the target of several shots coming from adjacent German stacks.
- For the British: no priority, player's choice.
Sniper: A sniper is not required to fire on the German unit in the front line. He may fire on any unit in a stack.
Mortar: A mortar may fire at two distances, R = 1 and R = 2. A unit or stack hit by a howitzer suffers two losses.
Example of German Fire: The two German stacks contain 5 and 4 stacking levels respectively. The priority to fire belongs to the stack with the greater number of stacking levels (5 and the machine gun). The adjacent targets are two stacks of commandos containing 6 and 8 stacking levels. The priority for German fire is carried out on the stack with the smallest stacking level (6).
Fire resolutions — Determination of the attack value of the firing unit (on the top of the stack, where necessary), called the Shooter:
- FF
- +1D6 for the British
- +1D10 for the Germans
- +1 for each stacking level of infantry that accompanies the Shooter (don't count the Shooter's levels) or additional LCA (1) (non applicable to the sniper and the mortar)
- +1 for the presence of one or two officers (+1 max, non-cumulative bonus, non applicable to the sniper and mortar)
- -2 for a game turn from 4:45 to 5:45 (concerns only the mortar or the sniper) (2)
- -1 for a game turn from 6:00 to 6:30 (concerns only the mortar or the sniper) (2)
- -1 if R = 2 (only concerns the mortar)
Determination of the defense value of the targeted unit (on the top of the stack, where necessary, or as the player chooses in the case of sniper fire) called the Target:
- FF
- +1D6 for the British
- +1D10 for the Germans
- +1 for each stacking level of infantry that accompany the target (don't count the target's levels) or additional LCA (non applicable to the sniper and mortar)
-
- Protection value of the GZ
All modifiers are cumulative. Only the modifiers of units that have not yet undertaken an action are counted.
(1) Commandos aboard the LCA (placed under the counters) are not counted when the LCA are targeted. Only the other LCA are taken into account. (2) This modifier is linked to the light.
Results:
- If the Attack value is greater than or equal to the target's defense value, the target is hit.
- If the Attack value is strictly less than the target's defense value, the shooter is hit.
A unit hit by fire suffers a loss. If it is at full strength, the counter is turned over. If it is already reduced, the counter is eliminated from the game.
A unit hit by mortar fire suffers two losses. If the unit is at full strength, it is eliminated from the game. If the unit is already reduced, the counter is eliminated from the game and the other loss is attributed to the unit positioned underneath the unit that was just eliminated.
A unit may only fire once per game turn but can be the target of several shots.
A British unit may not fire on a non-activated German GZ.
Note: There is no advance into a GZ left vacant after fire.
At the end of each fire of a stack of German units, if necessary, it is reorganised so the unit with the highest FF is on the top of the stack. The reorganisation of a stack of British units is left up to the player.
Example of British Fire: The commandos may carry out a second action; they will fire on a nearby German stack. The British attack value is 10. This corresponds to: the sum of the Fire Factor of the unit in the front line (3+); additional stacking levels of the infantry that accompany the Shooter (6 levels for 3 commandos at full strength); the presence of an officer (+1). The German defense value is 7. This corresponds to: the sum of the Fire Factor of the unit in the front line (5+); additional stacking levels for the infantry that accompany the Target (+2 levels for a unit at full strength). The result of a D6 roll for the Brit is 2, giving a total attack value of 10+2 = 12. The result of the D10 roll for the German is 6, giving a total defense value of 7+6 = 13. The attack value is strictly less than the defense value. The commando on the top of the stack is hit. The counter is turned over to indicate it has suffered a loss (2-2-2). If he wishes, the player may place it on the bottom of the stack and a unit at full strength (3-4-3) is placed on top to be the most effective against enemy fire. The fire is completed; this is the second and final action for the Brit. A Job Done marker is placed on the top of the stack of commandos.
11.2 - Resolution of the Assault
An assault takes place when a British unit or stack of units enters a GZ containing one or more German units. Only the commandos may initiate an assault. The Germans may never initiate an assault but they do defend themselves during a British assault.
If the GZ contains an A or B marker, it is turned over. If it reveals units, the assault is resolved immediately. If it reveals mines or barbed wire, there is no assault.
Placement: All the German and British units are removed from the GZ and placed in their respective assault zones (indicated on the map) in two parallel columns. There are two types of units: units in contact with the enemy and units placed immediately behind in support of a friendly unit. The length of the column depends on the smallest number of units.
The assault is resolved in an undetermined number of rounds. An assault round comprises the following sequences:
- Positioning of the units according to cases 1 and 2.
- Resolution of combats line by line, from the top to the bottom and immediate application of the results.
- End or continuation of the round.
Sequence 1: Positioning of units. There are two possible cases:
- Case n° 1: the number of commando units is greater than or equal to the number of German units. Position the Germans first: all units are placed in a column in order of decreasing AF, from the top to the bottom of the column. Position the British units second: at least one British unit must be in contact with each German unit. The rest of the units – if need be – are placed in support behind a unit in contact, as the player chooses.
- Case n° 2: the number of German units is strictly greater than the number of commando units. British Placement: all the units are positioned in a column, as the player chooses. German Placement: all the units are positioned in a column in order of decreasing AF, from the top to the bottom of the column. Each British unit must be in contact with a German unit. The remaining German units are placed in support by decreasing AF from highest to lowest so that each unit in contact has one supporting unit, then two, etc. until all the units are positioned.
Sequence 2: Resolution of combats line by line.
- Attack value of the British unit in contact: AF + 1D6 + 1 per additional support level
- Defense value of the German unit in contact: AF + 1D10 + 1 per additional support level + protection value of the attacked GZ in which the Germans are located
Results:
- If the Attack value of the British unit is greater than or equal to the defense value of the German unit, the latter is hit.
- If the Attack value of the British unit is strictly less than the defense value of the German unit, the British unit is hit.
A unit at full strength that is hit is turned over to its reduced side. If it is already reduced, it is eliminated.
Sequence 3: End or continuation of the round. The assault rounds continue until all the German units are eliminated or until the player decides to stop the assault, in which case the remaining commandos return to the GZ from which they assaulted the German GZ.
At the end of the assault, if the Germans are victorious, the stack of German units is reorganised to place the unit with the highest FF on the top of the stack. If the British are victorious, they remain in the GZ and enjoy a cup of tea.
Prisoners: if there remains only one German unit (one stacking level) and commandos, the German unit may be taken prisoner (see 12).
Example of Assault: A stack of four commandos enters a GZ occupied by Germans to execute an assault. All the units are moved to their respective assault zone. The number of commando counters (4) is greater than the number of German units (2). The latter are placed in a column with the unit with the highest Assault Factor (AF) on the top (infantry 3-2-3) then the following unit by descending order of AF (machine gun 5-1-0). The British units are placed in a column so that each German unit is in contact with a British unit. Once each British unit is facing a German unit, the remaining supporting units are positioned at will. Here, 3 commandos face German infantry and a commando faces a machine gun. The first assault round is resolved line by line. The attack value of the first line of commandos is 7. This corresponds to the sum of: AF of the unit in contact (+4); the additional stacking levels for this unit (+3 levels brought by 1 commando at full strength and another commando at reduced strength). The defense value of the German infantry is 2 (it is located in a GZ of 0 protection). The D6 roll result for the Brit is 1, giving a total attack value of 7+1 = 8. The D10 roll result for the German is 8, giving a total defense value of 8+2 = 10. The attack value is strictly less than the defense value. The commando in contact is hit. The counter is turned over to indicate it has suffered a loss (2-2-2). Do the same for the second line. The attack value of the commando is 4. The defense value of the German is 1. The D6 roll result is 4 for the British player, giving a total attack value of 4+4 = 8. The D10 roll result for the German is 6, giving a total defense value of 6+1 = 7. The German suffers a loss, the unit is eliminated since it only has one level.
12 - Objectives and Victory
The realisation of each of these objectives allows the player to obtain victory points.
Destroy battery 813 (Hess): The two 155 mm counters that form the battery may only be destroyed by a successful assault. The elimination of each 155 mm cannon counter awards 10 VP for a total of 20 VP. As soon as the two counters are eliminated, all A and B markers are turned over and the alarm level marker is placed in square 9.
Timetable for the destruction of the Hess battery (the turn during which the last Hess battery counter is eliminated gives a VP bonus):
- Turns 1 to 5: +5 VP
- Turns 6 to 8: +2 VP
- Turns 9 to 12: 0 VP
Cutting the telephone line: A commando unit must carry out a movement in one of the two GZ identified by a T (for Telephone line) at any point in the game. The T markers are positioned in the GZ as a reminder. The suppression of one or two markers only awards 2 VP.
Taking prisoners: The last German unit (reduced infantry, machine gun, officer) remaining at the end of an assault may be taken prisoner by a commando (with one or two stacking levels) and awards 2 VP (4 VP for an officer). One may only take one prisoner per game (unit or officer). The stacking level of the German prisoner unit is counted in the stacking limit. A British commando – except for the sniper, the howitzer section and the officers – must accompany this prisoner to an LCA and depart with him in order to count the VP. The commando unit is free to accompany the prisoner during any game turn following his capture. If the prisoner is alone in a GZ following the elimination of the commando, he is considered eliminated and does not count toward VP.
Take on board as many commandos as possible and move the LCA to the zone of Newhaven: At the end of the game, each stacking level of British commandos remaining on the ground, eliminated or present in an LCA that is not in the zone of Newhaven deducts 1 VP.
Historical note: crossing the Channel during the day was perilous due to the great number of Luftwaffe present that day. The Commandos aren't considered in the clear until they arrive at Newhaven.
Death of a superior British officer: The elimination of Lieutenant-Colonel Lord Lovat or Major Mills-Robert reduces the victory level by 5 VP and 3 VP respectively.
Flak and Pillbox: The elimination of each Flak cannon or Pillbox procures 1 VP.
At the end of turn 12, tally up the VP:
- If the total number of VP is 20 or more it's a complete success; the commandos accomplished their missions. It's a resounding victory and you make the cover of the "Times".
- If the total number of VP is between 10 and 19, it's a semi success. The raid prevented the battery from firing but the losses are heavy. The next mission will be entrusted to the paratroopers…
- If the total of VP is strictly less than 10, it's a failure. Your commando (or what's left of it) returns to the training camp at Achnacarry in Scotland and you make the cover of the German propaganda magazine "Signal".
Historical note: historically this was a British success with approximately 24 VP (50 dead and missing on the commando side, the Hess battery completely destroyed, the gunners and the garrison eliminated).
13 - A Tougher Nut to Crack
Here is a list of optional rules to improve playability. They increase the level of difficulty required for the British player to reach his objective.
- Bad luck!: the number of infantry units indicated on the first A and B markers activated revealing infantry is multiplied by two for the first activation. The doubling of infantry units must respect the maximum authorised stacking level.
- Alarm!: the alarm level cursor is moved ahead at the beginning of the game and placed on square 2 instead of 0.
- Vorwärts!: each German unit with nonzero movement capacity now has a capacity of 4 MP.
Here are the difficulty levels with which you are confronted:
- Level of difficulty Green commando if you apply the optional rule 1.
- Level of difficulty Hardened commando if you apply the optional rules 1 and 2.
- Level of difficulty Seasoned commando if you apply the optional rules 1, 2 and 3.