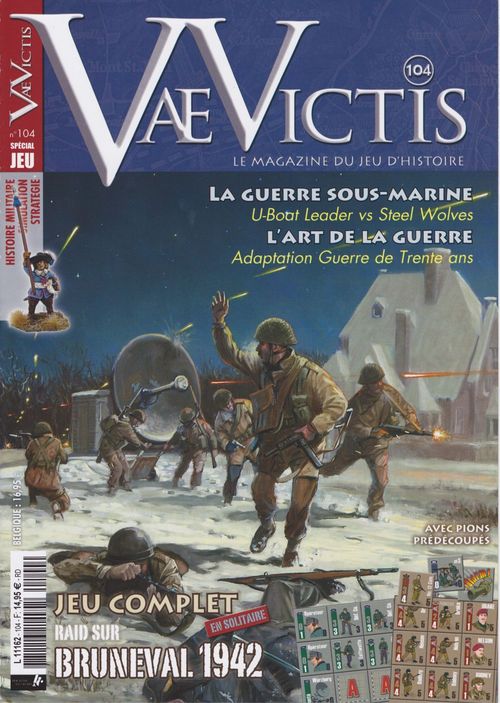
Raid sur Bruneval 1942
Raid sur Bruneval 1942 Rulebook
Table of Contents
Table of Contents
- 1. Description
- 2. The Counters
- 3. Game Setup
- 4. Sequence of Play
- 5. Unexpected Events
- 6. Actions
- 7. Parachute Drop
- 8. Movement
- 9. Combat
- 10. Objectives
- 11. Embarkation and Disembarkation
- 12. Activation
- 13. German Reinforcements
- 14. Boats
- 15. Alert Level
- 16. The Role of Officers
- 17. Victory
- 18. Optional Rule
- 19. Design Notes
- 20. Bibliography
1. Description
1.1 Terms and Designations
1D6: the result of a roll of a six-sided die.
1D10: the result of a roll of a ten-sided die.
ZG: geographic zone where units are placed.
At Random (Al Azar): each number on the die designates a ZG or a unit; the result determines one or the other.
PM: movement points spent by units when moving.
DZ: "drop zone" for the paratroopers.
Unit or Stack: a tactical unit of paratroopers that jump together.
Group: there are three groups of paratroopers: DRAKE with Commander Frost, RODNEY with Lieutenant Timothy and NELSON with Lieutenant Charteris. Each is made up of several units.
R: radius, the distance separating several ZGs in number of connections. Examples: R=1 for one connection separating two ZGs; R=2 for two connections separating two ZGs.
Arrow: entry zones for reinforcements (identified as R1 and R2) and for unexpected events (identified as 5C, in reference to this rule).
Square with a grey circle and three arrows in the upper left corner: zone that provides good protection (bunker, pillbox).
1.2 Terrain
The ZGs are as follows:
- Plain square: open zone.
- Square with a wave symbol: embarkation and disembarkation zone (optional).
- Square with a red circle and an arrow in the upper left corner: zone that provides some protection.
- Square with a grey circle and three arrows in the upper left corner: zone that provides good protection (bunker, pillbox).
During the resolution of combat, the protection values are associated with these ZGs.
The ZGs are linked by connections that allow combat and movement from one to the other, depending on the difficulty of the terrain (solid line, dashed line).
A connection with a red dashed line means that only combat is permitted.
1.3 Game Scale
The scenario begins at 00:15 hours and ends at 03:15 hours.
A Game Turn lasts fifteen minutes, for a total of 13 Turns.
A unit represents approximately ten men.
An officer or radar operator unit represents one man.
A machine gun represents a weapon and its crew.
The scale is approximately 1/25,000.
1.4 Game Aid
Terrain: Geographic Zones
| ZG | Protection value in combat | Stacking points allowed |
|---|---|---|
| Embarkation zone (LCA boats, with or without units on board) | 0 | 4 |
| Open ground | 0 | 10 |
| Protected zone (red circle) | 1 | 8 |
| Good protection (bunker, pillbox) | 3 | 4 |
Two dice are needed: one six-sided and one ten-sided.
The map represents the place where the raid took place.
Here is a paratrooper unit at full strength (front side of the counter).
1.5 Objectives
The British earn Victory Points (VP) by achieving the designated objectives:
- The Würzburg radar
- Radar operators
- The installations of the Villa
At the end of the game, the level of VP achieved determines the success or failure of the raid.
2. The Counters
2.1 The Units
The silhouettes of the British soldiers are on a brown background; the Germans are greenish grey.
A unit is characterised by five parameters:
- The branch of the armed forces, the nationality, the attack and defence factors, and the maximum movement capacity.
The group and the affiliation of the unit are given as a general guide. There are two strength levels:
- Front side: unit at full strength.
- Back side: unit at reduced strength, unit eliminated, or objective achieved (destroyed, taken prisoner, dismantled).
2.2 The Markers
- Activation Zone (front): zone "A" or "B" that activates German units.
- Number of Activated Units (back): the number of German units placed when the zone is activated (1x or 3x).
- Action completed (back of the marker): "DONE" for the British ("Trabajo Realizado") and "Alles gemacht" for the Germans, placed on a unit or stack that has taken its action.
- Villa (front) and destroyed Villa (back).
- Würzburg (front) and dismantled Würzburg (back).
- Dismantling, 1st turn (front) and 2nd turn (back).
- Alert Level (front).
- Turn Marker (back).
2.3 Stacking
Each unit has a corresponding number of stacking points:
- Two points: each unit at full strength; German infantry, paratroopers, engineers;
- One point: machine-gun positions, LCA boats, Commandos, and all reduced units;
- No points: officers, radar operators, the Würzburg (dismantled or not), the Pillboxes, and all markers.
British and German units cannot be stacked together, except for captured radar operators and the Würzburg "dismantled into pieces" (reverse side of the counter).
The number of stacking points allowed depends on the ZG in which the units are located. These values are given in the table in section 1.4.
The stacking rules must be respected when units are stationary in a ZG, but they may be temporarily violated during movement.
The combat unit at the top of the stack is considered the "front line"; it is the attack or defence factor of this unit that is used in combat, and this unit suffers the result. Radar operators are on the front line only if there is no other German unit in the ZG.
After a combat and its result, the British player may reorganise the units involved.
For the Germans, after each combat, the units must be reorganised so that the unit with the highest attack factor is placed at the top of the stack.
A unit that has taken an action may be stacked with a unit that has not taken any.
3. Game Setup
3.1 Counters and Markers
All are placed face up on the front side.
- ZG W (code name Henry): the Würzburg radar, one radar operator and one German Luftwaffe unit;
- ZG Villa (code name La Casa Solitaria, "the Lonely House"): the Villa and one radar operator;
- ZG M: the seven machine-gun positions;
- ZG P: the three Pillboxes;
- ZG M Protection 1 (code name "the Beach Fortress"): one German coastal defence unit;
- Chronological track: the Game Turn marker is placed on box no. 1 (00:15);
- Alert Level: the Alert Level marker is placed on box 0;
- ZG A and B: six A markers and four B markers are placed at random in the activation ZGs. The rest are set aside.
3.2 German Units
They are divided into two Groups:
- A reinforcement group: with units of the 685th Infantry Regiment, which arrive as reinforcements through the arrow zones R1 and R2;
- A garrison group: made up of Luftwaffe and Coastal Defence elements, which arrive progressively with the activations of ZGs A and B.
The maximum number of Coastal Defence and Luftwaffe units able to take part in a game is limited by the number of counters supplied. Additional activated units are ignored.
3.3 British Units
They are divided into three Groups:
- Nelson Group: the officer and the three paratrooper units;
- Rodney Group: the officer and the four paratrooper units;
- Drake Group: the officer, the three paratrooper units, and the engineer unit.¹
Decide whether the optional rule applies (see 18).
¹ The term "Engineers" in this game does not refer to sappers, but to the group of Flight Sergeant Charles William Cox, engineers and radar specialists. (Translator's note)
4. Sequence of Play
The game is played over 13 Turns. Each Turn is divided into 7 phases, from A to G. Each phase must be completed before continuing to the next.
The order is as follows:
- A. Determine Unexpected Events (Turns 1 and 2);
- B. Determine the arrival of the boats (Turns 10 to 13);
- C. British Actions (in any order):
- Parachute drop.
- Movement.
- Combat.
- Objectives.
- Embarkation.
- Disembarkation (optional).
- Boats set sail.
- D. Adjust the Alert Level;
- E. German Actions (in this order):
- Combat.
- Movement.
- Arrival of reinforcements.
- F. Remove all used Action markers and advance the Turn marker.
- G. Determine Victory.
Note:
- Phase A is only played in Turns 1 and 2;
- Phase B is played from Turn 10.
5. Unexpected Events
Each Unexpected Event can only occur once per game. If the same Event from the first Turn appears again on the second Turn, it is simply ignored and is not replaced by any other Event.
Roll 1D6; if the result is 6, an Unexpected Event occurs. Roll 1D6 again; the result determines the Event and its consequences as follows:
a. Result = [1; 2]: Flak over Le Havre. Part of the formation of aircraft carrying a group is destroyed or must return to its base in England. Eliminate one group of paratroopers at random (Drake, Rodney, Nelson).
Historical note: although it was present, the Flak did not shoot down any aircraft that night.
b. Result = [3; 4]: A LCA runs into a German convoy. One LCA boat is eliminated, and the arrival time of the boats is modified by a DRM of -1.
Meanwhile, none of the paratroopers who have been dropped will be able to return to England.
Historical note: that night, a German convoy made up of two destroyers and two torpedo boats, sailing along the coast, did not detect the LCA flotilla.
c. Result = [5; 6]: Wrong identification of the DZ. A group, chosen at random, jumps outside the drop zone. Roll 1D6; the result indicates in which Game Turn they can enter the map game through the south border edge (ZG with the arrow, 5C). Place the units on the Chronological Track. These units enter the game during the British action phase. They are placed in the ZG with an Action Completed marker.
Historical note: one group jumped too early, and therefore outside its DZ. This group arrived much later than planned.
6. Actions
A British unit may take one action per phase, in any order, or no action at all. The actions are as follows:
- Parachute jump;
- Movement;
- Combat (on land and at sea);
- Objectives;
- Arrival of the boats;
- Embarkation;
- Disembarkation (optional);
- Boats set sail.
A German unit must take one action per phase, in this order:
- Combat;
- Movement;
- Arrival of reinforcements.
On each unit or stack that has taken an action, place a "Work Done" marker (front side) for the British, and "Alles gemacht" (the back of the same marker) for the Germans.
7. Parachute Drop
Drop procedure: there are two waves of parachute drops. In Turn 1, DRAKE and NELSON; in Turn 2, RODNEY.
To determine the DZ, roll 1D6 for each group. The result of the die indicates the DZ, as follows:
| Die | 1-4 | 5 | 6 |
|---|---|---|---|
| DZ | A | B | C |
The ZG of each DZ is numbered from 1 to 6. Roll 1D6; the result indicates, for the designated DZ, the ZG in which each unit, including officers, lands. Continue with all the parachute drops.
The stacking rule must be respected. If not, move the unit(s) that exceed the stacking limit to the ZG with the next higher number, until the stacking limit is respected.
8. Movement
Movement is not mandatory for the British, but it is for the Germans. Movement Points (PM) are spent by units to move from one ZG to a connected ZG, as follows.
For each connection, the cost is:
- Solid line: 1 PM (road, track, path, any cleared area);
- Dashed line: 2 PM (forest, uneven ground, any rough area);
- Red dashed line: only combat is permitted; movement is forbidden.
The movement capacity printed on a counter, on its front or back, is the maximum capacity per Turn. The number of PM a unit has determines the movement it can make at that time, under the conditions below.
- If a unit, or a stack of several units, is separated from an officer by a radius R greater than 2, roll 1D10 and divide the result by two to obtain the movement capacity of each of the units during this Turn (rounding down to the nearest whole number).
- Any officer may approach a British unit to allow it to have its full movement capacity for that Turn.
8.1 British Movement
- If a unit, or a stack of several units, is located with or adjacent to an officer (that is, radius R less than or equal to 1), the movement capacity is the maximum value indicated for each unit.
Example: a paratrooper unit with a movement capacity of 5 PM is located at a radius of 3 from an officer. The result of 1D10 is 7; divided by 2, this gives a movement capacity of 3 for this Turn.
British movement example: the maximum movement capacity is 5 PM for each paratrooper unit. Units located at a radius R less than or equal to 1 from an officer may use all their PM; here, the units located in ZG 4 and ZG 5 are at R=1 and R=0 from the officer respectively. The paratrooper unit located in ZG 6 is separated from the officer by two ZG connections, so R=2. Its movement capacity for this Turn is determined by rolling 1D10. The result is 5; divided by 2 and rounded down to the nearest whole number, this gives 2 PM for this Turn for this unit.
8.2 German Movement
The movement capacity of all German units during a Turn corresponds to the Alert Level divided by two, rounded down (see the Table on the map). Units without movement capacity remain stationary (garrison, machine gun, radar operator, pillbox).
Automatic movement of the Germans: the player moves the German infantry units along the route that costs the fewest PM toward the most directly accessible ZG, according to the priorities listed below. In the case of identical situations (PM cost, number of stacked units), the option is chosen at random by rolling 1D6:
- Toward the nearest British stack with the greatest number of stacking points;
- Toward the nearest British unit;
- Toward the nearest German stack with the greatest number of stacking points, and then joining that stack if the stacking limit allows;
- Toward the nearest German unit, and then joining it if the stacking limit allows;
- Toward a beach ZG;
- Toward the Würzburg radar.
If one of the above priorities is not feasible (or no longer feasible), move on to the next.
If the movement of a German unit passes through an activation zone, the number of units indicated on the back of the activation marker is immediately placed in that ZG.
Activated units do not "accompany" the unit that activated them. The unit that activated them may continue its movement; its action is handled separately.
If the movement of units would exceed the stacking limit, the surplus units are left in the ZG from which they entered the ZG of the stack.
German movement example: the Alert Level is 5 for this Turn. The movement capacity of the Germans follows the Alert Level scale and in this case is 2 PM. The ZG that holds two British units at full strength represents 4 stacking points. The other ZG, with one unit at full strength, one unit at reduced strength and an officer, represents 3 stacking points. The movement priority requires movement toward the ZG with 4 stacking points. Movement of unit 685/1: it has two routes of equal PM cost, to the right toward friendly units (2 PM) or to the left toward Rodney's group (2 PM). The choice is made at random; let us say that an even result on 1D6 directs it to the left and an odd result to the right. The result is a 4; the unit goes to the left. The connection to reach the first ZG costs 1 PM; the second ZG is occupied by paratroopers. Enemy units cannot be stacked in the same ZG. The unit stops its movement for this Turn, and the "Work Done" marker is placed on it.
Movement of the three Luftwaffe units: the upward movement is the shortest and costs 2 PM. The connection to reach the first ZG costs 1 PM; the second ZG is occupied by the paratroopers. The units stop their movement for this Turn and an "Alles gemacht" marker is placed on them. Since the movement of these units takes them through an activation ZG, the number of units indicated on the back of the counter is immediately placed in that ZG. The maximum number of stacking points in this type of ZG is 8. The stacking points of these 5 German units at full strength total 10, an excess of 2 levels; one excess unit is left in the ZG from which it entered, that is, the ZG where its movement began.
9. Combat
Combat is not mandatory for the British, but it is for the Germans. Combat takes place from one ZG to another, linked by a solid line, a dashed line or a red dashed line.
Each combat is resolved separately before proceeding to the next, for the Germans, and in the order the player chooses for the British.
Combats are resolved by comparing the attack value and the defence value. Modifiers may be added, and they are all cumulative. The only modifiers counted are those of units that have not taken any action.
Attack value of the front-line unit: its attack factor, plus:
- +1D6;
- +1 per additional infantry stacking point, or LCA (optional);
- +1 for the presence of one or more officers.
Defence value of the front-line unit: its defence factor, plus:
- +1D6;
- +1 per additional infantry stacking point, or LCA (optional);
- +1 for the presence of one or more officers;
-
- the protection value of the ZG.
Results:
- If the Attack Value is greater than or equal to the Defence Value, the unit whose defence factor was used is hit.
- If the Attack Value is less than the Defence Value, the unit whose attack factor was used is hit.
If a unit at full strength is hit, it is flipped to its reduced side. If it was already reduced, it is eliminated.
A unit may attack only once per Turn, but it may be attacked several times.
A British unit may attack non-activated German ZGs. In this case, immediately place the number of German units indicated on the back of the activation marker in order to resolve the combat.
Radar operators and officers may defend themselves if they are attacked while alone in a ZG.
There is no advance into a ZG that is left vacant after a combat (exception: see Radar Operator).
A German stack is systematically reorganised after each combat, with the unit with the highest attack factor placed at the top of the stack. The reorganisation of a British stack is left to the player's discretion.
British combat example: the British combat is not mandatory. The 2 units of Rodney's group attack the Germans in the ZG of Calvaire, permitted by the connection. The attack factor of the front-line unit is 4, to which +1 is added per infantry stacking point, that is +2 for the other unit at full strength placed beneath the previous one, for a final attack value of 6 before the dice roll. For the German player, the defence factor of the front-line unit is 3, to which +1 is added per infantry stacking point, that is +2 for the unit at full strength placed beneath the previous one, as well as +1 for the protection value of the ZG, for a final defence value of 6 before the dice roll. The only modifiers counted are those of units that have not taken any action; the two units at the bottom of the stack are therefore ignored.
The die result for the British is 4 and for the Germans is 3. The British attack value of 10 (6+4) is greater than the German defence value (6+3=9). The 685th unit on top of the stack is hit; the counter is flipped to its back side, with the reduced value. A "Work Done" marker is placed on the paratroopers. The German stack is reorganised so that the unit with the highest attack factor is placed on top of the stack—in this case, the 685th unit placed immediately beneath. The reorganisation of a British stack is left to the player's discretion.
9.1 Automatic German Combat
The player resolves combat for the German units in the following order of priority:
- The stack with the highest modified attack factor, followed by the others in descending value;
- The unit with the highest attack factor, followed by the others in descending value.
In the case of identical modified attack factors, the stack or unit that fights first is determined at random.
The choice of enemy target is made according to the following order of priority:
- The ZG that holds the stack with the greatest number of British stacking points;
- The ZG that holds a boat.
In the case of identical situations, the choice is made at random to determine which ZG is attacked.
Example of German combat priority: the German stack with the highest modified attack factor begins the combat. The stack with unit 685/1, with an attack factor of 3 + 2, has a total of 5 points. The other stack has a modified attack factor of 3 + 1 because of the reduced Luftwaffe unit, which equals 4. The first target is the ZG with the greatest number of British stacking points: the stack of two units at full strength has 4 stacking points, then the stack with the officer has 3 points (the first paratrooper unit with 2 points, the next reduced unit with 1 point, and an officer with none).
10. Objectives
The objectives are:
1 - The Würzburg Radar (code name Henry) (10 VP)
The Engineers of Drake Group are designated for this objective. This means taking the dismantled pieces and destroying the installations.
If the Engineers are eliminated, a unit of Paratroopers may attempt to achieve this objective, with a modifier.
To attempt this objective, a unit of Engineers must remain in the Würzburg Radar ZG for at least two complete Turns. Place the "Dismantling 1" marker on the chronological track after one complete Turn spent in this ZG, then flip it to "Dismantling 2" after the second Turn spent in this ZG.
The objective may only be attempted after these two Turns.
The longer a unit remains in this ZG, the greater its chances of achieving the objective.
Roll 1D6 and apply any modifiers. If the result is less than or equal to the value indicated in the table below, the objective is achieved.
If the attempt fails, the advantage of the time spent in the ZG is not lost, and the "Dismantling 1" or "2" marker remains on the chronological track, even if ZG "W" is again occupied by a German unit.
| Number of Turns in the ZG | 2 | 3 | 4+ |
|---|---|---|---|
| Modified die value | 3 | 4 | 5 |
Modifiers: attempt to take it by:
- Paratroopers: +2
- Reduced Engineers: +1
If the objective is achieved, flip the Würzburg counter to show the dismantled side (British colour code). This marker is stacked with a British unit that must carry it to the LCA. The movement capacity is only three when carrying the main dismantled parts of the Würzburg, which are carried on a dismountable cart, and therefore limit the movement capacity of the British unit responsible for carrying it.
The movement capacity of the dismantled Würzburg is always three, and it must always be accompanied by a British unit: Engineers, Paratroopers or Commandos.
A lone officer cannot carry the dismantled Würzburg. If the dismantled radar ends up alone in a ZG because its units have been eliminated, it remains in place, but it may be reclaimed and carried again.
2 - The Villa (code name La Casa Solitaria, "the Lonely House") (1 VP)
Any unit may achieve this objective.
Historical note: it was believed that the installations were present there, but this proved to be false.
No German unit may be in the Villa ZG for the British unit to enter there. Roll 1D6; if the result is less than or equal to the attack value (that is, the modified attack value) of the British unit, the Villa is destroyed and the objective is achieved. Flip the Villa counter to its back side, the destroyed Villa.
3 - Radar Operator (2 VP each)
To take a prisoner, a combat must be started against a radar operator who is alone in a ZG; all German units stacked with them have been eliminated. If the result of the combat indicates that the operator is eliminated, they are instead considered a prisoner. Flip the counter (the British colour code serves as a reminder) and at least one British unit that took part in the combat must move to the ZG of the radar operator.
This is the only case in which a unit may carry out a combat and a movement in the same action.
The movement capacity is only three when carrying a prisoner, and this limits the movement capacity of the British unit responsible for carrying them.
The movement capacity of the prisoner is always three, and they must always be accompanied by a British unit: Engineers, Paratroopers, Commandos or Officer. If the units accompanying them are eliminated, the radar operator is also eliminated. In this case no VP is gained.
4 - Embarkation (1 VP per unit at full or reduced strength)
As many paratrooper units as possible must be saved.
11. Embarkation and Disembarkation
A unit is considered to have embarked when it passes from a beach ZG to an embarkation ZG that holds an LCA boat counter.
An embarked unit may not disembark again. It is placed beneath the LCA unit.
Once a unit has embarked, if the LCA has not taken its combat action, it may set sail and is removed from the game with its cargo.
A unit may not enter an embarkation ZG unless it is occupied by a boat.
Additional movement costs may apply:
- +2 PM if a German unit is in a ZG located at radius R=1 from the embarkation ZG;
- +1 PM if a German unit is in a ZG located at radius R=2 from the embarkation ZG.
If both situations occur, the greater modifier of +2 PM applies. This rule applies regardless of the type of connection linking the ZGs.
12. Activation
The ZGs on the map marked with the letters A or B that hold a marker are the activation zones of the German units. Activation depends on two factors:
- The Alert Level of the Germans;
- The presence, or the proximity, of British units passing through these ZGs.
The radius R is the distance, in number of connections, separating the German activation ZG from the ZG in which the British unit is located during or after its movement.
When a British unit is located at a radius R less than or equal to 2 from a German activation ZG (that is, connected by a dashed or solid line, but not a red dashed line), and for each additional unit in the same situation, roll 1D6. If the result of the die plus the value of R is less than or equal to the Alert Level, Activation occurs and a number of units from the German garrison group are activated. Otherwise, the activation marker is left in place, front side up.
The value indicated on the back of the marker is the number of German units that must be placed in that ZG. The marker is then removed, since an activation occurs only once per ZG.
If the movement of the British unit was not completed, it may continue and possibly trigger other activations.
Activation example: any British unit located at a radius R less than or equal to 2 from an activation zone may activate it and cause the appearance of garrison German unit(s). The paratroopers of Rodney's group are at R=2 from the activation zone "Calvaire". The result of 1D6 is "3", to which we add the value of R, for a total of "5". This result is greater than the Alert Level of 4, so the activation has failed. Other paratroopers of Nelson's group are at R=1. The result of 1D6 is "2", to which we add the value of R, giving "3". This result is less than the Alert Level of 4, so activation occurs, and we flip the marker, which shows that one German garrison unit must be placed in this ZG.
A German unit's activation is not an action. No "Alles gemacht" marker is placed, and the unit may take an action during phase E of the Turn (German Actions).
These units are taken from the Reinforcement Group of the 685th Regiment and distributed evenly between the two ZGs. If the number of reinforcement units is odd, place an extra counter in ZG R1.
13. German Reinforcements
Historical note: this is the first Company of the 1st Battalion of the 685th Infantry Regiment.
Once the Alert Level reaches box 4, and for each Turn from then on until the Reinforcement Group is exhausted, roll 1D6. If the result is less than or equal to the Alert Level, a number of units equal to the result of the die appear through the arrow ZGs R1 and R2; if the result is greater, no reinforcements arrive.
14. Boats
Boats may begin to be placed in the embarkation ZGs from Turn 10, under certain conditions. Roll 1D6; if the result, including any modifier, is greater than or equal to the value of the Game Turn number, place all the chosen LCAs in the embarkation ZG, respecting stacking limits.
| Turn no. | 10 | 11 | 12 | 13 |
|---|---|---|---|---|
| Die + DRM | 6 | 4 | 2 | 0 |
Modifiers:
- +1 for each British unit (except officers) at full or reduced strength in a beach ZG adjacent to an embarkation ZG;
- -1 if the boats were discovered during the determination of an Unexpected Event (see 5-b).
Each boat can embark four stacking points, not counting Commandos if the optional rule is used.
Boats may be attacked by German units and may therefore be eliminated (a boat has no reduced value). Regardless of the unit embarked, it is the combat factors of the boat that are taken into account, except when optional rule 18 applies.
A boat may set sail as soon as at least one stacking point has embarked. To do so, it is removed from the game during the British action phase. Its passengers count toward the determination of victory.
15. Alert Level
The Alert Level runs from 0 to 6. It starts the game at 0. Certain events increase this Alert Level and make the activation of German units easier. These events, with their associated increase in Alert Level, are:
- First Group of Paratroopers*: +1
- Second Group of Paratroopers*: +1
- First combat: +1
- Second combat: +1
- Detection of the boats (by Unexpected Event 5-b): +1
- Arrival of the boats (possibly starting in Turn 10): +1
*This applies even if Unexpected Event 5-c occurs for one of these groups and it arrives on the map later.
The Alert Level track printed on the play aid shows the movement capacity of the German units for each level: 0 = 0 PM; 1 = 0 PM; 2 = 1 PM; 3 = 1 PM; 4 = 2 PM; 5 = 2 PM; 6 = 3 PM. (The track is shown in the play aid image on page 14 of the source document.)
16. The Role of Officers
If an officer is stacked with one or more units and combat causes British losses, roll 1D6. If the result is 6, the officer is eliminated. A lone officer may take part in a combat and be eliminated (the officer has no reduced side).
The distance separating an officer from a British unit determines the unit's movement capacity for the Turn (see 8 - Movement).
17. Victory
At the end of the game, or when all British units have embarked and left the game, the Victory Points are compared with the table below to determine the success of the raid.
Victory Points are earned as follows:
| Objective achieved | VP earned |
|---|---|
| If the dismantled Würzburg radar has been embarked | 10 |
| For each captured radar operator that has embarked | 2 |
| If the Villa has been destroyed | 1 |
| For each unit at full or reduced strength that has embarked | 1 |
The level of success of the mission is determined as follows:
- If the total VP is greater than 20, it is a complete success; the paratroopers accomplished their mission. A resounding success.
- If the total VP is between 10 and 19, the raid is a partial success, despite the losses.
- If the total VP is less than 10, it was a bitter failure.
18. Optional Rule
Commando units embarked in the LCAs may disembark at a cost of 2 PM, and then act like any other British unit. In this case, the rule on proximity to an officer also applies.
Embarked Commandos are not included in the VP count.
If this rule is applied, replace the LCAs (4-6-X) with LCAs (1-2-X), and place one Commando unit (3-4-5) per LCA.
If boats are involved in a combat and have an embarked Commando unit, it is the combat factor of the unit that is taken into account. If the Commandos have disembarked, the combat factors of the boat are the ones taken into account.
19. Design Notes
The operation was a complete success (24 VP), and it caused a great sensation at the time in the British press and in the morale of the Allies. German losses were 7 killed and 18 missing; the British had 2 killed, 7 wounded and 6 missing (who were taken prisoner because they reached the beach too late). Units eliminated in the game do not necessarily represent soldiers killed or wounded, but units that are tactically put permanently out of action.
This brilliant result should not hide the difficulties inherent in this raid. There were organisational difficulties, since it was the first raid of this kind to involve all three branches of the armed forces—land, sea and air—and there were added difficulties due to the snowy terrain that night and to the German defence. Although few in number, the Germans had at their disposal pillboxes, heavy machine guns, and reinforcements that could be mobilised quickly.
The British player must fulfil the plan and the objectives set for the three groups: take possession of the Würzburg radar, protect the Engineers group who had the mission of dismantling and carrying it, and open the way to the beach and neutralise the numerous pressure points.
"Good luck... and good game!"
20. Bibliography
- The Bruneval Raid: Operation Biting 1942, Ken Ford, Osprey Publishing 2010
- Army Commando 1940-45, Mike Chape [as printed in the source], Osprey Publishing 1996
- Commandos "Chruchill's hands of steel" [title as printed in the source], Simon Dunstan, Spearhead 2003
- Histoire des Commandos, Pierre Montagnon, Pygmalion 2001
- Les raids des Commandos Alliés en Normandie avant le débarquement 1940-1944, collective work, Ouest France 2010
- Bruneval 1942 in Militaria Magazine No. 319, Nicolas Bucourt, February 2012
The credits block at the end of the source (designer, component, map, layout, playtesting, proofreading and translation credits) is omitted.