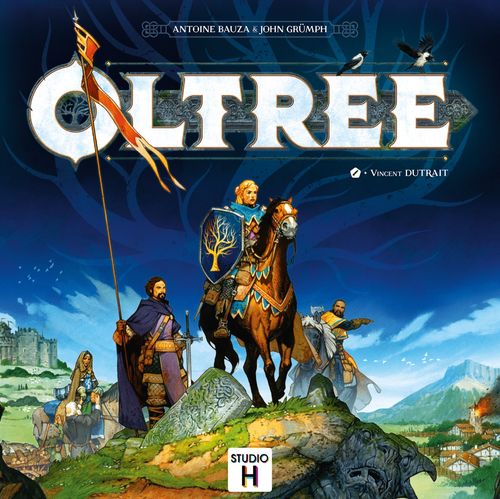
Oltréé
Oltréé Rulebook
Table of Contents
Table of Contents
Contents
- 1 Main game board
- 1 Side board
- 100 Incident cards
- 25 Event cards
- 25 Problem cards
- 69 Chronicle cards
- 11 Assignment cards
- 16 Building tiles
- 5 Profession dice
- 1 Adversity die
- 1 Location die
- 8 Shield tokens
- 12 Provision tokens
- 8 Ranger cards and their figurines
- 30 Resource tokens (5 Stone, 5 Fur, 5 Plant, 5 Fire and 10 Treasure)
- 4 Health tokens
- 8 Status tokens
- 8 Goal tokens
- 8 Success markers
- 1 Adversity marker
- 1 Prestige marker
- 1 Defense marker
- 8 Damaged markers
Chronicle-specific items
- 3 Imp tokens
- 2 Servant tokens
- 1 Portal tile
- 1 Dragon figurine
- 1 Dragon fortress tile
- 1 Lover token
- 1 Special Building tile: Tomb
- 4 Special Goal tiles
- 1 Rebel village tile
Setup
Note: In these rules, items are simply referred to by their type. For example "Draw 1 Incident" (instead of "Draw 1 Incident card").
- Place the main game board in the center of the table.
- Set up the side board near the main game board.
- Shuffle the Problem and Incident decks and place them in their respective spaces on the side board.
- Each player chooses a Ranger card and takes a Health marker. They place this marker on the first space at the top of the Health bar. Each player takes the figurine that corresponds to their Ranger and places it in the Fortress. Each player also takes 1 Provision and places it next to their Ranger card.
- Place the Adversity marker on the first square of the Adversity track on the side board.
- Place the Prestige and Defense markers on space 3 of their respective tracks.
- Place all the Building tiles, construction side up, next to the board.
- Keep the various resources, tokens, and dice within reach.
Choosing a Chronicle (& Incidents)
- Choose a Chronicle from those available and place it in its space, making sure that the cards in the Chronicle are in the correct order (like a closed book, cover on top, then Chapters, in increasing order).
- Choose an Assignment (3 difficulty levels: easy, moderate, difficult). These Assignments have three Goals that are separate from the Chronicle, which will make victory easier if you complete them.
- Take the two decks of Incidents listed on the chosen Assignment and shuffle them together to form a deck. The three remaining decks will not be used for the game.
- Place 3 Incidents (at random) on each of the eight Incident spaces on the board (Rumor side up).
- Place the remaining Incidents in their space on the side board.
Play your first game
Oltree offers you a special short Chronicle to introduce you to the game: "Open Doors". This Chronicle comes with 3 specific Assignments for short Chronicles.
We recommend that you use the Moderate Assignment "A New Start" for your first game.
Additional Setup for 2 & 3 Player Games
- in a 3-player game, choose 1 Building from the 4 below,
- in a 2-player game, choose 2 Buildings from the 4 below,
Barracks — Library — Tavern — Workshop
- Place the chosen Building(s) on the Fortress' Building spaces, Built side up. They have already been built and the Rangers benefit from their effects from the very start of the game.
Concept
In this cooperative game, players are brave Rangers who assist the people of a satrapy — an administrative province — that their hierarchy has put them in charge of. They must rebuild a Fortress to ensure the safety and tranquility of the inhabitants.
Rangers are given an Assignment at the start of the game. These are the tasks that have been assigned to them by their hierarchy. Completing them will be the best way to win the game.
This assignment would be easy to carry out if external events did not get in the Rangers' way. A story, called the Chronicle, will unfold throughout the game, adding new situations that the Rangers will have to deal with.
Along the way, the Rangers will experience Incidents, short scenes in which they will be able to win fame for themselves (or not). They will also have to assist the communities of the Satrapy when Problems cause them danger, and they must face all kinds of unforeseen Events.
If they can stay the course, while keeping the Fortress' Prestige and Defense intact, they will reach the final chapter of the Chronicle and can end the tale. For a happy ending, they must complete their Assignment to the best of their ability.
Game Elements
The Game Board
The game board represents the satrapy where the Rangers are stationed. It is divided into 9 zones: 8 Regions and 1 Fortress.
The Regions
The satrapy, like many of the lands of the former Empire, is home to a wide variety of landscapes, natural resources... and dangers!
The regions are numbered from 1 to 8. Each Region is adjacent to two other Regions (so the Regions on either side of each corner of the board are adjacent to each other, such as Regions 2 and 3). All Regions are adjacent to the Fortress.
Each Region has a Community space and an Incident space.
The Communities
Each Region is home to a Community, the men and women who work and live out their lives in the Satrapy, come what may.
Each Community offers an action, provided that there is no Problem in its location.
- Gain 1 Resource (Fur, Fire, Stone, or Plant).
- Gain 1 Defense. The Rangers recruit men-at-arms to fortify the garrison.
- Gain 1 Prestige. The Rangers recruit individuals with special qualities: emissaries, messengers, craftspeople.
- Exchange Resources. The Ranger can trade any amount of resources, one for one.
- Heal. The Ranger gets all of their Health back (the Health marker is moved back to the top of the bar).
The Fortress
The fortresses fell into disrepair after the collapse of the Empire. Rebuilding them and restoring them to even a fraction of their former glory will make the Rangers proud.
The Fortress is the Rangers' home base. It occupies the central part of the main board and provides access to each of the 8 Regions of the satrapy.
The Fortress contains:
- a Prestige track,
- a Defense track,
- a Storeroom,
- 12 Construction spaces,
- 4 Tower spaces.
The Fortress gives each Ranger one permanent Profession die from each of the 4 Professions: Craftsperson, Scholar, Soldier, Traveler. The 4 profession symbols are displayed on the Fortress as a reminder. Therefore Rangers have — for the entire game and regardless of their position — at least one die for each of their Profession tests.
Prestige
Prestige is a reflection of the Rangers' work in the Satrapy: if they perform their duties well, their Prestige will increase. If not, it will decrease.
If the Prestige drops to 0: the game is immediately over!
If the Prestige exceeds 8: the marker stays on the 8 space and the Rangers gain 1 Treasure instead. This can happen at most once per round (ignore any subsequent earnings).
Defense
Defense represents the quality of the Fortress' fortifications, the skills of its garrison and the overall security in the Satrapy.
If the Defense drops to 0: the game is immediately over!
If the Defense exceeds 8: the marker stays on the 8 space and the Rangers can remove 1 Incident from the Region of their choice. This can happen at most once per round (ignore any subsequent earnings).
The Storeroom
The center square of the Fortress is the Storeroom. This is where all the Resources earned by the Rangers are stored. The Resources in the Storeroom are shared by all the Rangers. There is no limit to the number of Resources that can be kept in the Storeroom.
Construction Spaces
The Fortress also allows Rangers to build a number of Buildings in the 12 spaces outlined there.
Tower Spaces
Towers can be built in the 4 corners of the Fortress. Each Tower is tied with the two neighboring Regions and makes them secure (see "Build a Tower").
Rangers
In addition to a name and an illustration, each Ranger has a die from one of the 4 Professions, an Ability and a Health bar.
Profession: each Ranger has a Profession die from one of the 4 Professions: Soldier, Craftsperson, Scholar or Traveler.
Ability: Each Ranger has an Ability. All of the Abilities are described in the Rangers section.
Health: A Ranger's Health represents their energy and ability to overcome the obstacles that will stand in the way of their assignment. The Ranger's Health has a maximum value (4 or 5 depending on the Ranger), and a minimum value (0).
Fatigue threshold: There is a Fatigue threshold on the Health bar. When a Ranger's Health marker drops to (or below) this threshold, they may no longer use their Ability. The Ranger regains the use of their Ability as soon as the Health marker goes back above the Fatigue threshold.
When the Health level is 0, it is not possible to go any lower. The Ranger may no longer use the Effort sides of the Profession dice.
Resources
Rebuilding a fortress and protecting the roads and villages throughout the satrapy requires a lot of effort, as well as high-quality materials.
There are 5 types of Resources in Oltree.
- Stone represents mineral resources (rocks, gems, ore, etc.).
- Fur represents animal resources (fur, skin, wool, etc.).
- Plant represents the plant-based resources (wood, plants, medicinal herbs, etc.).
- Fire represents fuel resources (oil, coal, etc.).
- Treasure represents manufactured objects (money, jewelry, etc.).
Resources are mainly used to construct Buildings and Towers, to resolve certain Problems or to deal with specific situations in Incidents and Chronicles.
Resources are Shared
As soon as a Ranger gains a Resource, they immediately place it in the Storeroom. It is now available for any Ranger to use.
Once a Ranger loses or spends a Resource, they remove it from the Storeroom.
There is no limit to the number of Resources in the Storeroom, but the quantity of each Resource is limited (10 for Treasure and 5 for each of the other Resources).
Provisions
Assignments take the Rangers on the road, sometimes for days and nights at a time. Filling their bags well helps them to recover during their breaks.
Unlike Resources, which are shared, Provisions are individual. Each player keeps their Provision tokens in front of them.
Provisions allow Rangers to do two things:
- By spending 1 Provision, a Ranger can re-roll the Profession dice of their choice once during a test (see "Profession test"). The new result must be taken into account.
- By spending 2 Provisions, a Ranger can perform a Bonus Action (see "Bonus action").
A Ranger can only spend Provisions for themselves.
It is possible to spend a Provision to re-roll the dice, and then spend another Provision to re-roll all or part of the same dice.
A Ranger cannot have more than 3 Provisions. If a Ranger earns more than that, ignore the excess earning.
Buildings
Restoring the Fortress they are responsible for is one of the Rangers' long-term assignments. Repairing the walls and constructing buildings will make life better for all of its occupants.
Each Building has two sides:
- Construction side: The Construction side shows the Resources needed to build the Building as well as a description of the benefits it provides.
- Built side: Once built, a Building is placed on an empty space in the Fortress, Built side up. The benefits it provides are listed on the tile.
Refer to the Buildings section for a detailed description of each Building and its benefits.
During the game, a Building can be damaged or destroyed. If not specified, the Players decide which Building is affected (including a Building that has already been damaged).
- Damaged building: place the Damaged marker on it. The benefits it provides are no longer applicable. It can be repaired (see "Repair a building"). If a Building that has already been damaged is damaged again, it is immediately destroyed.
- Destroyed building: a building that is destroyed is removed from the Fortress. The benefits are obviously lost, but it can be rebuilt during the game (by paying the full cost again).
Some Buildings increase Defense or Prestige upon construction. When one of these Buildings is damaged or destroyed, the extra Prestige and Defense are lost. It can be gained back when the Building is repaired or built again.
Towers
Keeping the people of the Satrapy safe is undoubtedly the Rangers' most important job. To do this, they will need to build strong watchtowers.
Towers work like Buildings, but they cannot be damaged or destroyed.
A Tower provides security for the two Regions that are associated with it (see "Securing a region").
Dice
The life of the Rangers, like that of commoners, will certainly be more peaceful if unexpected events do not rain down at the worst possible time...
There are 3 types of dice: the Profession dice, the Adversity die and the Location die.
Profession Dice
The Profession Dice allow Rangers to perform their Profession tests to resolve Incidents, Problems, and the chapters of the Chronicle.
Location Die
The Location die is used to select one of the 8 Regions at random. It can sometimes be used to resolve certain Incidents and Events.
Adversity Die
The Adversity die is rolled at the start of each player's turn to move the game forward. It causes the Adversity marker to move and determines which type of card is played (Chronicle, Incident, Problem, Event).
Choices, Tests and Consequences
Throughout the game, Rangers will be faced with a variety of situations: some will require them to make a choice, others will require them to spend resources or perform a Profession test.
Losses, Expenses & Gains
Most losses, expenses, and gains are represented by symbols. They are rarely indicated with text.
An item is combined with one of three symbols:
- Minus (red): The Ranger must lose the items indicated.
- Arrow (orange): The Ranger may spend the items indicated.
- Plus (green): The Ranger gains the items indicated.
List of items: Resources (Stone, Fur, Plant, Fire, Treasure), Any Resource, Prestige, Defense, Provision, Action.
Examples:
- Gain 1 "Fire" Resource to place in the Storeroom.
- Discard 2 "Stone" Resources from the Storeroom.
- Gain 1 Prestige; move the Prestige marker up one space on the track.
- Get all your health back.
Specific Remarks About Losses
If a card causes you to discard Resources or Provisions that you do not have, ignore the loss, unless the card says otherwise.
Loss of an action: the Ranger loses their next action. To indicate this, the player places her figurine on its side in the zone where it is located. Her next action (on this turn or the next) will be to place her figurine in standing position.
Profession Test
There are 4 types of Profession tests: Soldier, Craftsperson, Scholar and Traveler. To perform a Profession test, the Ranger determines the number of Profession dice they have for the profession being tested:
- the Fortress gives all Rangers 1 die for each Profession, regardless of their position. Each Ranger has at least 1 Profession die, regardless of the test required,
- each Ranger has 1 Profession die,
- some Buildings grant 1 Profession die to all the Rangers, regardless of their position.
Example: Gaspard must perform a Soldier Profession test. He rolls 3 dice (1 from the Fortress, 1 from his Ranger card, and 1 die because the Forge has been built).
The Ranger rolls the Profession dice and calculates the number of Successes achieved.
- Blank Side: No Effect.
- Success Side: Grants 1 Success.
- Effort Side: The Ranger may spend 1 Health to gain 1 Success. If the Ranger's Health is at 0, this side has no effect.
By default, you need at least 1 Success to pass a test. However, some tests require more Successes. Others may have variable consequences, depending on the number of Successes.
Reminder: A Player who has at least 1 Provision may spend one during a test to re-roll the dice of their choice. It is possible to spend several Provisions during the same test.
Threshold Test
Some cards require you to assess your Prestige or Defense level, or a quantity (for example, the number of Status tokens on the Chronicle). Just look at the level or number and apply the corresponding result.
Examples:
- Evaluate your Prestige level.
- Evaluate the number of Status tokens.
- Evaluate the number of Problem cards in play.
- Evaluate the number of Assignment goals successfully completed.
Location Die
Some situations require you to roll the Location die to select a random location or result. In this case, roll the Location die and apply the corresponding result.
Chronicles
Completing the assignments entrusted to them by their hierarchy should not be a concern for the valiant Rangers. Unfortunately, this does not account for fate, which always finds a way of making life exciting... but complicated.
Oltree is a story-driven game. These stories are called Chronicles. There are two types of Chronicles: short Chronicles and long Chronicles.
The Chronicles are a series of cards, in numerical order, that outline the Rangers' adventure during the game, chapter by chapter.
Each Chronicle starts with a cover that indicates the Chronicle's name. The back of the cover features the first chapter. The number of chapters (1) and the length of the Chronicle (2) are indicated at the top. Then there is the first chapter with its name (3) and the situation the Rangers face (4). The front of the next card features an illustration of this Chapter (5).
During the game, when the Adversity marker reaches the Chronicle space on the track, the right Chronicle card is flipped over to the left space, as if turning a page in a book. The next chapter of the Chronicle is revealed.
Alternative Chapters
Some Chronicles have a branching storyline: depending on a choice made by the Rangers or an event, the Chronicle may take one direction or another. Several versions of the Chapter are presented (2, sometimes 3). These are easily identifiable by a bookmark in the upper right corner indicating a letter (such as "A" or "B"). Players will be asked to keep only one of these chapters and discard the other versions (multiple versions of the same chapter are never played in a given game).
Last Chapter
When the last Chapter is revealed, the Rangers discover their final test and the end of the game is, depending on the Chronicle, either immediate or imminent.
- When the end is immediate, this final test must be resolved immediately after the card is read.
- When the end is imminent, the Rangers have time to solve this final test. In this case, if the Adversity marker goes around the track and returns to the Chronicle square, the game is over.
Reminder: The more Assignment goals the Rangers have accomplished, the easier the final test will be.
Defeat, Minor & Major Victories
Depending on the Rangers' performance, the last chapter of the Chronicle will end in victory or defeat (in the case of a long Chronicle, the victory can be minor or major). Depending on the result (Defeat, Minor Victory, Major Victory), the players must turn the page to read the end of their adventure.
Regardless of the outcome, players may, of course, play the same Chronicle again — preferably with a different Assignment — in a future game.
List of Chronicles
In this box you will find the following Chronicles:
- Open Doors (short)
- In the Shadow of the Dragon (long)
- Underground threat (long)
- Damsel not in distress (long)
- A Rebel Problem (long)
- Things were better before (long)
Most of the Chronicles require additional items (tokens, markers, tiles). They are identifiable by their back, which mentions the Chronicle they belong to. Avoid looking at the front side to avoid spoiling the Chronicle.
Assignments
Rangers are not left to their own devices in the middle of the Satrapy. They must report to their superiors and carry out the assignments entrusted to them.
- Assignments are classified based on to the duration of the Chronicle being played (short or long). If you are playing a short Chronicle, use one of the short Assignments. If you are playing a long Chronicle, use one of the long Assignments.
- Assignments are also classified according to their difficulty, indicated by the number of crows under the title. Choose as an Assignment based on the difficulty level you want for the game.
- 1 crow: Easy
- 2 crows: Moderate
- 3 crows: Difficult
- The Assignment card shows the icons of 2 decks of Incident cards that will be used for the game (see "Setup"). The five decks are: Rural Life, Lands, Creatures, Mysteries, Encounters.
- Assignments represent your superior's requests and give you Goals that are independent of the Chronicle. Achieving these Goals is essential because it will help you win the game. The Goals can be accomplished in any order and at any time.
- When a Goal has been completed, use a Goal token to record it. Each item required for a Goal can only be used once: a single secure zone counts for only one Goal.
Example: To complete the 3 Assignment Goals above, the Rangers will need to secure a total of 5 zones (2 for the 1st, 2 for the 2nd, and 1 for the 3rd) in addition to the other required items.
Types of Assignment Goal
- Secure Regions: The Rangers must secure X Regions. Note: This Goal is present for all Assignments.
- Prestige: The Prestige level must meet or surpass the required value. Once this Goal has been completed, it remains completed, even if the Prestige drops afterwards.
- Defense: The Defense level must meet or surpass the required value. Once this Goal has been completed, it remains valid, even if the Defense drops afterwards.
- Building: The Building(s) mentioned must be built (without being Damaged). Once this Goal has been completed, it remains valid, even if the buildings are destroyed or damaged afterwards.
- Resources: All of the resources listed must be spent at one time.
- Problems: The Rangers must resolve X Problems. Keep the Problems that have been resolved next to the Assignment card to keep track of them. Once the Goal has been completed, you can then discard the Problems.
- Note: A Problem that is discarded as a result of a card effect is not considered resolved.
Incidents
The satrapy is full of unknowns, surprises, and dangers! The Rangers will have to prove their worth in many situations, sometimes at the risk of their lives.
Incidents are brief adventures that await the Rangers in every corner of the satrapy.
Rumor side: The back of each Incident has a title that gives the Players a clue about the situation described on the front.
Adventure side: The front of each Incident describes a situation with text, sometimes accompanied by icons.
When they are placed on the boards (Main and Side), the Incidents are always placed Rumor side up. The Adventure side is only revealed when a Ranger decides to resolve the Incident.
At the start of each game, each of the 8 Regions contains 3 Incidents. When a Region no longer contains any Incidents, it becomes possible to make it secure. When a Region contains 4 Incidents, it becomes perilous. The Shield tokens (double-sided) are used to show the state of the Region.
Reading an Incident
When reading an Incident to another player, feel free to act out the situation described on the card. Oltree is an adventure game, and it's up to you to make it come to life! Reading an Incident is telling a story. An admittedly very short one, but a story, nonetheless.
When the card gives you a choice, do not read the consequences of each choice out loud. Let the player make their choice and, once they have made it, read only the consequence that corresponds to their choice.
Similarly, if the card suggests a test or condition, do not give the Player any indication of the consequences and only read the relevant result.
Some Profession tests require multiple Successes: you can tell the player this. They need to know what is expected from their Ranger, after all!
There is a wide variety of situations featured in the Incidents: encounters, conflicts to manage, opportunities you can take or leave, risks and potential rewards, mysteries to unravel, etc.
Depending on the situation they describe, some Incidents require a Profession test. Others require Resources to be spent, or simply need you to make a choice, usually between two options.
Example — the Incident "Adventure Ahead!": As you ride, light-hearted, towards a future full of promise, your horse suddenly passes under a low branch.
- To perform this test, the Player involved in the Incident counts the Traveler Profession dice their Ranger has: one, which is always granted by the Fortress, and a second one, since the Tavern has been built.
- They roll the 2 dice and get one success and one failure. A success overall.
- The player who reads the card announces the result corresponding to "Success". — Success: You duck your head at the very last moment and avoid the collision with this vegetal adversary. You continue on your way, being more vigilant.
- If the Player did not roll any successes, their partner would have read them the "Failure" result. — Failure: You react too slowly and hit the branch head-on. You fall off your horse, stunned, and are badly injured. (Lose 1 Health.)
- In either case, the Incident card is discarded, and the game continues...
Problems
Rangers have the weighty responsibility of ensuring the safety and well-being of the people of the satrapy. In practical terms, this means dealing with small issues and major problems.
It is the Rangers' duty to ensure the well-being of the communities, so when one of them encounters a Problem, they must try to resolve it. As long as a problem is placed on a Community, it is no longer possible to call on this Community (see "The communities").
Each card describes a situation and the conditions required for the Rangers to resolve the problem.
For some Problems, more than one Success is required to resolve them. If a player has fewer successes than needed, the successes achieved are noted on the Problem card with the Success markers. On another turn, the missing Successes may be scored by the same Player or another Player. The Problem is resolved when the required number of Successes has been achieved.
Events
Life in the Satrapy is hard, and the Rangers will have to face conditions ranging from tricky to extreme, which will not make their job any easier.
There are two types of Events:
- One-time Events: Their effect is applied immediately.
- Persistent Events: They remain active until they are covered up by a new Event (one-time or persistent).
Gameplay
Play continues until the Rangers win or lose.
To win the game, the Rangers must successfully complete the last Chapter of the Chronicle. The more Goals they complete during the game, the more likely they are to win.
The Rangers lose the game if the Prestige or Defense drop to 0, or if they fail to successfully complete the last Chapter of the Chronicle.
Round
The Rangers take turns playing one at a time, moving clockwise. A round is divided into 2 phases:
- Determining the Adversity
- Performing 2 different actions
A) Determining the Adversity
The Player rolls the Adversity die and moves the marker to the right along the Adversity Track based on the roll. The track forms a loop of 4 spaces. When the marker moves past the 4th space, it comes back to the 1st.
- Single arrow: Move the Adversity marker forward one space on the Adversity Track, and resolve the space you land on.
- Double arrow: Move the Adversity marker forward 2 spaces on the Adversity Track, and resolve the space you land on.
- Important: the marker cannot skip the space corresponding to the Chronicle. If a double arrow is rolled when the marker is on the space just before the Chronicle (Event space), move the marker forward just one space.
- Point: The Adversity marker remains in its current position. Resolve this location again.
- Important: the marker cannot stay on the space corresponding to the Chronicle. If it is there and the POINT symbol is rolled, move it forward one space and apply the effect of the arrival space (Incident).
Note: At the start of the game, the Adversity marker starts on the Chronicle space. Since it will have to move forward during the first round of play, the Chronicle space will only be resolved after the marker goes around the track once.
Chronicle Space (1)
Flip the right Chronicle card over and place it on the left, as if you were turning the pages of a book. The next Chapter is revealed. Read it and follow the instructions. (See "Chronicles".)
When you need to add Status tokens (check / cross) to the Chronicle, place them on the reserved spaces.
Incident Space (2)
First, for each perilous region in play, you lose 1 Prestige.
Then, roll the Location die and check the status of the indicated Region:
- if the Region is perilous or secure, nothing happens,
- otherwise, place the first Incident from the pile on the Incident space in the Region, without reading it (leave it Rumor side up).
There can never be more than 4 cards on an Incident space. When a Region contains 4 Incidents, it becomes perilous immediately. Place a Shield on the stack red side up to indicate its status.
Problem Space (3)
Roll the Location die. Take the first card from the Problem pile and place it face up on the Problem space in the indicated Region. If a Problem is already present in the Region, place the new Problem on the next free space in the clockwise direction.
If all the Problem spaces are already taken and you need to put a new Problem card into play, do not put a new Problem into play: lose 1 Prestige instead.
As long as there is a Problem present in a Region, it is not possible to Call on the Community there.
Event Space (4)
Take the first card from the Events pile. Read it and follow the instructions. Then, place the card face up in the dedicated space, on top any Events already there.
B) Performing 2 Different Actions
After rolling the Adversity die and playing a card, the Player can perform 2 regular actions. These two actions must be different. In addition, they can also perform bonus actions.
Actions
Some actions can only be performed at the Fortress or in the Regions: this is specified in brackets.
- Move
- Rest
- Call on a community (Region)
- Handle a Problem (Region)
- Experience an Incident (Region)
- Build a Building (Fortress)
- Repair a Building (Fortress)
- Build a Tower (Fortress)
- Ranger-specific action
- Temporary action
Regular Actions
Move
The Player moves their Ranger figurine to an adjacent zone.
Reminder: The Fortress is adjacent to all the Regions of the satrapy.
Note: Some moves may be prohibited, temporarily or permanently, during the game.
Rest
The Ranger gains 1 Health and 1 Provision (see "Provisions").
Reminder: A Ranger cannot have more than 3 Provisions.
Call on a Community
The Ranger benefits from the effect of the Community in the Region where the Ranger is located.
Reminder: To perform this action, the Region must not have any Problem cards in it. The community effects are described in "The Communities".
Handle a Problem
The Ranger resolves (or tries to resolve) the Problem in the zone where the Ranger is located.
Some Problems require a Profession test.
The player performs the indicated Profession test.
- If they roll the required number of Successes, the Problem is resolved.
- If they only roll part of the Successes required, they place one Success marker for each Success achieved on the Problem. On the next attempt to resolve the Problem, they or another Player may complete the number of Successes required to resolve the problem.
- If they are unsuccessful, their Ranger or another Ranger may attempt to resolve the Problem later in the game.
Example: Maeva tries to handle the "Hard Blow" Problem. Two successes are required to successfully handle this Problem. The player rolls the Profession dice but only rolls one Success. They place a Success marker on the card. Now only one Success is needed to resolve this Problem.
Some Problems require you to spend a Resource, others require you to spend a Provision.
Example: to resolve the "Dark Temple" problem, a Ranger must spend a Fire resource.
When a Problem is resolved, the card is discarded, and it is possible to "Call on the Community" in the Region again.
Note: Handle a Problem and Call on the Community are two different actions. With their two regular actions, a Ranger can Handle a Problem. Then, if they are successful, they can Call on the Community.
Experience an Incident
The Player takes the first Incident from the pile in the Region where their Ranger is located. They hand it to the player on their right. This player reads the Incident to them out loud.
Regardless of the performance of the Ranger concerned, and regardless of the consequences and earnings, the Incident is resolved and discarded.
If there are no Incidents in the pile and the Tower associated with the Region has been built, the Region is immediately secured (see "Build a Tower").
Build a Building
To build a Building, the Ranger must be located in the Fortress and must spend the Resources that correspond to the cost of the building.
The Building tile is placed, Built side up, on one of the free Building spaces. The Building's effect then becomes available (see "Buildings").
Repair a Building
To repair a damaged Building, the Ranger must be in the Fortress, perform a Craftsperson Profession test and roll at least one Success.
- If this is done, the Player may remove the Damaged token from that Building. The Building becomes functional again and the Rangers benefit from its effects once again.
- Otherwise, the Damaged token remains on the tile, and the players can attempt to repair the building again later.
Build a Tower
To build a Tower, the Ranger must be located in the Fortress and must spend the Resources that correspond to the cost of the Tower.
The Tower tile is then placed on one of the corners of the Fortress, Built side up. The Tower's effect then becomes available (see "Towers").
Securing a Region
A Region is secure — a green shield is placed there — when the 2 following conditions are met:
- There are no Incidents in the Region,
- the Tower associated with the Region has been built.
The order in which the two conditions are met does not matter. The Tower can be built before all the Incidents in a Region are resolved, or vice versa.
Example: During the game, Region 4 was emptied of all its Incidents. Since the Tower associated with this Region has not been built yet, the Region is not secure. A Ranger in the Fortress performs a "Build" action and spends 1 Plant resource to build a Tower in the associated space. The Region is immediately secure, and the Player places a green Shield on the Incident space in the Region.
Region 5 is also associated with this Tower, but it still has Incidents on it, so it is not secure at this time. It will become secure once the last Incident card in the Region is resolved.
Special Actions
Bonus Action
A bonus action may be performed by a Ranger in addition to their two regular actions. It may be identical to one of the regular actions. It can be done before, after or between the two regular actions.
- A Player can acquire a bonus action by spending 2 Provisions.
- Some cards (Incident, Chronicle) may also grant a bonus action.
- Some Ranger Abilities grant a bonus action.
Example: During their turn, Tomyris moved (regular action 1), then experienced an Incident (regular action 2). There is only one Incident left and, since they have 2 Provisions, they decide to spend them to perform a bonus action and experience the last Incident in the zone.
Example: Tomyris moved (regular action 1) to Region 5, and then called on the Community (regular action 2) of that Region ("Gain 1 Fur"). Since they have a bonus action (move TO the Fortress) thanks to their Ranger Ability, they choose to return to the Fortress (bonus action).
Immediate Action
An immediate action can (optional) or must (mandatory) be taken by the indicated Ranger(s). This is an additional action, and the Ranger still have their two regular actions.
Each wording indicates who performs the action. The most common cases are: "You" (the Ranger whose turn it is), "Any one Ranger", or "Each Ranger".
Once they have performed the immediate action, the turn continues as usual.
Example: The "Official Visit" event mentions the effect "Immediate action — All Rangers must go to the Fortress". All players must therefore move their Rangers to the Fortress.
Temporary Action
A temporary action is added to the list of possible actions. It can be performed by the Ranger, using a regular or bonus action.
Temporary actions may appear during the game on certain Chronicle cards. They can appear directly on these cards or be tied to other game elements (tokens, tiles, etc.).
Each temporary action includes instructions that specify, as appropriate:
- Where it is available ("in the Fortress", "in a Region"),
- When it is available ("until the card is covered by the next Chronicle card," "until the action is successful," "until the end of the game," etc.)
Example: The players have started a game with the Chronicle "The Imaginary epic". One player has just revealed a new Chapter on which, among other things, the following text appears:
Temporary action — until the next Chronicle card
You may compose a lyric poem. (Scholar test)
Success: Add 1 Status token to the Chronicle.
The action is available until the next Chronicle card covers the current Chapter, or one of the Rangers is successful. It can be performed as a regular action, possibly several times. Each successful Profession test grants 1 Status token.
End of the Game
To achieve victory, the Rangers must successfully complete the last Chapter of the Chronicle.
In short Chronicles, the last Chapter leads either to a Defeat or a Victory.
In long Chronicles, the last chapter leads to either a Defeat, a Minor Victory or a Major Victory.
Reminder: A Defeat can occur during the game, before the players have revealed the last Chapter of the Chronicle, if the Defense or Prestige drop to 0.
Player Recommendations
Cooperate and Communicate
Oltree is a cooperative game where the Rangers are part of a tight-knit group that confronts the hazards of living in a world full of danger. Players are encouraged to share their strategy with their group (Which building should I build? Which Assignment Goal should we focus on first? What Problems should we handle? Which zone should we secure?).
Some situations, such as Incidents, involve a single Ranger. When resolving these situations, it is appropriate to let the Player concerned make their decision alone.
Completing Goals
Completing the Assignment Goals is the surest path to victory. Sometimes, completing all the Assignment Goals will not be easy. Sometimes it is a good idea to monitor the overall progress of the Chronicle and to give priority to one of the Goals over another.
Playing a Chronicle Again
If your Chronicle ended in Defeat, play it again with a different Assignment, possibly with a lower difficulty level.
If you have achieved a Major Victory, you may play this Chronicle again with a different Assignment, possibly with a higher difficulty level.
Playing with Children
Oltree can be played as a family, with children, but the gameplay involves a lot of reading. If their reading level is still weak, you may want to read the cards for them so that they can fully enjoy the playing experience.
Buildings Reference
Profession Buildings (x8)
- Barracks: Each Ranger gains 1 Soldier Profession die.
- Library: Each Ranger gains 1 Scholar Profession die.
- Forge: Each Ranger gains 1 Soldier Profession die. Gain 1 Prestige.
- Observatory: Each Ranger gains 1 Scholar Profession die. Gain 1 Prestige.
- Tavern: Each Ranger gains 1 Traveler Profession die.
- Workshop: Each Ranger gains 1 Craftsperson Profession die.
- Inn: Each Ranger gains 1 Traveler Profession die. Gain 1 Prestige.
- Factory: Each Ranger gains 1 Craftsperson Profession die. Gain 1 Prestige.
Special Buildings (x4)
- Garden: Gain 3 Prestige.
- Main Hall: Gain 1 Prestige. When a Ranger resolves a Problem, gain 1 Prestige.
- Dungeon: Gain 3 Defense.
- Temple: Rangers may re-roll the Location die and the Adversity die once for each roll. The second result is then necessarily used.
Towers Reference
Towers cannot be destroyed or damaged.
- Watchtower (x2): The 2 Regions associated with the Watchtower can be secured.
- Keep (x2): The 2 Regions associated with the Keep can be secured. Gain 1 Defense.
Rangers Reference
- Gaspard has a Soldier Profession die. Snooper: If Gaspard is in a Region, he can use one of his regular actions to gain a Resource of his choice.
- Maeva has a Soldier Profession die. Hardy: Maeva never spends/loses Health when she performs a Soldier Profession test. When Maeva performs a Soldier Profession test:
- she benefits from the Successes of the Effort sides of the die without spending any Health,
- she does not lose any Health as a result of the test.
- Conrad has a Scholar Profession die. Assiduous: Conrad's two regular actions can be the same.
- Tomyris has a Traveler Profession die. Diligent: Tomyris can perform a bonus action: Move TO the Fortress.
- Selina has a Scholar Profession die. Persevering: Selina can re-roll one Profession die for each of her tests. The chosen die is re-rolled only once, and the new result must be used.
- Berenice has a Craftsperson Profession die. Builder: Berenice can perform a Build or Repair bonus action if she is in the Fortress.
- Lars has a Craftsperson Profession die. Adventurer: when Lars performs the Rest action, he gains 1 additional Health and 1 Provision.
- Ernest has a Traveler Profession die. Dedicated: when Ernest resolves a Problem, he gets a bonus action: Call on the Community of the Region where the Problem has been resolved.
Symbol Reference
Profession test: Soldier, Craftsperson, Traveler, Scholar. Location die.
Threshold test: Prestige level, Number of Goals achieved, Number of Problem cards, Number of Status tokens.
Losses, expenses & gains: Gain 1 Resource, Get all your health back, Spend 1 Resource, Lose 1 Action, Gain 1 Prestige, Lose 1 Defense.