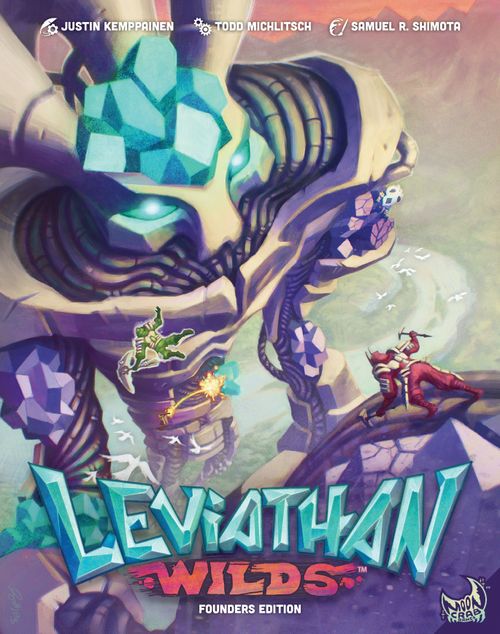
Leviathan Wilds
Leviathan Wilds Rulebook
Table of Contents
Table of Contents
- Contents
- Key Concepts
- Leviathan Setup
- Climber Setup
- Playing the Game
- Actions
- Anytime Actions
- Health and Blight
- Grip
- Terrain & Map Effects
- Focus Tokens
- Injury
- Falling
- Unique Scenario Rules
- End of the Game
- Solo Play
- Strategy Tips & Examples
- Basic Turn Example
- Advanced Turn Example
- Rule Clarifications
- Keywords
- Component Clarifications
- Quick Reference
Contents
- 8 Climber Figures
- 1 Spiral-Bound Book of Leviathans (17 Leviathans)
- 12 Dice (6 Purple, 6 Teal)
- 4 Player Boards
- 2 Attack Markers
- 1 Threat Board
- 22 Climber Cards & 72 Class Cards
- 12 Injury Cards
- 107 Threat Cards & 17 Story Cards
- 9 Tracking Cubes (4 Red, 4 Teal, 1 Purple)
- 11 Climber & Class Tokens
- 4 Focus Tokens
- 16 Mushroom Tokens
- 16 Scenario Tokens
Key Concepts
Climbers
In Leviathan Wilds, players cooperate as a crew of skilled and daring climbers: specialists in healing frenzied leviathans. Each climber has a figure to track their position on the map and uses a unique deck to represent their capabilities.
Leviathans
In each game, players challenge any of the 17 leviathans, each using a map created by the leviathan book lying open on the table.
Binding Crystals
Each leviathan is covered in binding crystals: the cause of their sickness and frenzied behavior.
Binding crystals are tracked on the map using two colors of dice, and each die indicates the quantity of crystals in that space.
Threat Cards & Map
Each leviathan has a unique deck that represents its attacks and other effects. Additionally, certain types of map spaces cause a various effects, such as health loss or falling.
Falling
Climbing is risky, and certain effects cause you to fall downward until you reach a ledge.
Climber Deck
During setup, each player "shuffle-builds" their deck by combining the cards from any one character and any one class.
Multi-Use Cards
During play, cards from your deck have multiple uses:
-
Action Points: During your activation, you play 1 card for its action point (AP) value. AP is used to traverse the map, remove crystals, recover health, etc.
-
Skill: The bottom half of each card features a unique skill. Skills provide various effects, including movement, striking, and supporting fellow climbers.
Example skill: "Any climber may climb 1."
Skills can be played from hand at any time, including during other player turns.
-
Grip: The number of cards left in your deck (not including those in your hand), represent your climber's grip. When your deck is empty, you lose your grip and fall.
Attributes & Complexity
To help guide setup choices for your play group, attributes and complexity ratings are included on many components (for example: Mobility: 1, Power: 1, Support: 4).
Attributes indicate the types of effects featured in a character or class. They include mobility (movement), power (attack and defense), and support (assisting other players).
Complexity (gear icon) indicates the density of additional rules, components, and strategy that a character, class, or leviathan may require.
Leviathan Setup
1. Choose Leviathan
Flip through the book and choose any leviathan to face. Gather its set of cards using the info in the lower right corner.
Leviathan #1, the Sage, is a tutorial intended to teach the mechanics. Experienced gamers: feel free to skip it!
2. Prepare Map
- Place the leviathan book on the center of the table, horizontal or vertical, based on the orientation of the leviathan's name.
- Place dice matching their space's color with the indicated number showing.
- Take 6 random mushroom tokens and place 1 facedown on each matching space. Return the rest to the box.
- Place the attack markers and the shuffled injury deck facedown near the map.
3. Prepare Threat
- Place the threat board below the map.
- Place the story card near the map. If the set contains scenario cards (rules text on both sides), place them near the map, then resolve any "Setup" instructions.
- Shuffle the 5 threat cards. Deal them facedown in a row below the threat board, purple halves upright.
4. Choose Difficulty
- Choose Casual, Normal, Hard, or Expert, and place the threat marker (purple cube) on the matching space of the threat board.
- Normal is recommended for your first game. If you choose Hard, rotate the leftmost card 180 degrees (teal half upright). If you choose Expert, rotate the two leftmost cards.
Climber Setup
1. Shuffle-Build Climber Decks
Each player chooses any character set and any class set.
Set aside the two cover cards, then ensure you have all of the action cards for each set (they are numbered along the right side).
Shuffle the action cards from both sets together to create your deck.
2. Prepare Player Boards
- Each player takes 1 player board.
- If there are any "Setup" rules on the back of your character cover card or your class cover card, resolve them. (For example: "Setup: Place the farseer token faceup in your play area." / "Setup: Place the 3 arcane tokens faceup in your play area.")
- Place the character cover card, the health marker (red cube), blight marker (teal cube), focus token, and any other setup components on or near your player board as shown.
- Place your deck to the left of your player board, then draw your starting hand of 3 cards.
3. Place Climbers
Randomly choose a climber to take the first turn.
In clockwise order starting with that climber, take your matching climber figure and place it on any space on the starting row of the map: the bottom row unless a scenario card indicates otherwise.
4. Read Introduction & Begin Play
Read the introduction text on the leviathan story card, then proceed with the first turn of the game.
Playing the Game
Take turns in clockwise order, following these 4 steps each turn:
- Reveal Threat
- Activate Climber
- Resolve Threat
- Draw to 3
1. Reveal Threat
Flip over the leftmost facedown card in the threat row.
The threat card shows how the leviathan is going to attack or harm you, but the effect does not resolve until later in the turn, giving you a chance to react.
Each threat card has a normal half (purple) and an enraged half (teal). You always resolve the "upright" half of a threat card, ignoring the upside down half.
Cards in the threat row can be normal or enraged, depending on the current position of the threat marker (see "End of Round" on page 7).
Events
Most threat cards specify a target climber, such as "Active" (the climber taking their turn) or "Highest" (the climber farthest from the bottom row of the map, your choice if tied), followed by an effect. When the threat card resolves, any targets suffer the effect.
Keep in mind that the target of the effect can change between revealing and resolving; the highest climber at the start of the turn might not be highest after you activate.
Attacks
Some threat cards are attacks, featuring area of effect diagrams. When you reveal an attack, place an attack marker around the specified target on the board.
The attack marker is the point of origin. Anyone caught in that space or any of the spaces highlighted in the diagram suffers the listed effects of the attack when it resolves.
Fortunately, the attack marker does not move after being placed; any climbers in the area have the chance to scramble out of the way before the attack lands.
Other Points of Origin for Attacks
Certain attacks use non-climber points of origin (crystals, scenario features, etc.). Since those are already "marked" on the map with icons and tokens, the attack markers are not used.
Multiple Attacks
Some attacks use multiple markers and/or other points of origin. Even if you are in overlapping attack areas you suffer the effect only once.
Threat Keywords
Threat cards frequently make use of keywords like "push" or "swift" as shorthand for detailed rules (see "Keywords" on page 17).
2. Activate Climber
Choose and play 1 card from your hand into the slot at the top of your player board.
The card generates AP (action points) equal to the top left number on the card.
Spend your AP to do actions, described in detail on page 8. You can mix, match, and repeat any actions until you run out of AP or choose to end your activation.
- When using a card for AP, the skill effect on the bottom half is ignored and not resolved.
- If your card has one or more protection icons (blight, harmful, and/or difficult) below the AP value, you are protected from the matching effects during your activation (see "Terrain & Map Effects" on page 10).
- You cannot save unspent AP to use later.
When your activation ends, place your AP card faceup in your discard pile.
Empty-Handed
In the rare case that you start your activation with no cards in hand, you do not play a card for AP. Instead, you automatically generate 2 AP with no protection icons.
3. Resolve Threat
Resolve the effects of the threat card revealed earlier in the turn.
If a threat card has multiple parts, they are always resolved from top to bottom and left to right.
4. Draw to 3
You (and only you) discard as many cards as you wish, then draw from your deck until you have 3 cards in hand.
If your deck runs out while drawing, you do not reshuffle it. Instead, you fall (see "Falling" on page 10).
Hanging By a Thread
You may choose not to draw the last card from your deck. If so, you will have fewer than 3 cards in hand, but you will not start falling.
End of Round
The round ends after your turn if all threat cards have been revealed and resolved. When the round ends, follow these steps:
1. Shuffle & Deal New Threat Row
Shuffle the threat cards and deal them facedown in a row below the threat board, normal halves upright.
2. Advance Marker & Enrage Cards
Advance the threat marker 1 space to the right along the track. Then, from left to right, enrage a number of cards equal to the track's current value.
Enraging Cards
When a threat card is enraged, rotate it 180 degrees so that the enraged half (teal) is upright.
When enraged cards are revealed and resolved, the enraged half will be upright, and the normal half ignored.
Next Player's Turn
The next player in clockwise order takes their turn: revealing the leftmost facedown threat card in the row, activating their climber, and so on.
Actions
1 AP: Climb 1
Move your figure to an adjacent space. This movement is orthogonal (up, down, left, right), not diagonal.
3 AP: Jump 2
Move your figure directly to a space within 2 spaces (counted orthogonally).
You enter the space you land on, not the space you jumped over. This lets you cross gaps without falling, avoid harmful terrain, and so on.
X AP: Glide X
Move your figure directly to a space based on the AP you choose to spend. Count the spaces down and/or down-diagonal. Like jump, you only enter the space you land in, ignoring any you glide over.
X AP: Strike X
Reduce binding crystals on your space equal to the amount of AP you choose to spend. Reduce the number on the die accordingly. If it reaches 0, the crystal breaks, and the die is removed from the map.
If you strike a blighted crystal (teal die), you gain 1 blight. See "Blighted Crystal" on page 10 for details.
2 AP: Rest
Shuffle your discard pile and place those cards under your deck. You must be on a ledge to rest.
The card you used for AP does not get shuffled with your discards; it remains in the AP slot of your player board until the end of your activation.
1 AP: Mend 1
Gain 1 health. You do not need to be on a ledge.
Anytime Actions
Anytime actions do not require AP to use and can be used at any time: between actions of any climber's turn (including yours), just before a leviathan threat effect, before you draw back up to 3 cards, and so on.
If multiple anytime actions or other effects would occur at the same time, resolve each of them, one at a time, in the order of your choice.
Use Skill
Each card in your deck has a skill on its bottom half. When you play a card for its skill, resolve the effect, while ignoring the AP value and protection icon. Then, place the card faceup in your discard pile.
Skills normally affect your climber only. If the skill specifies "any climber," choose yourself or a fellow climber to receive the effect.
Character Skills
Your character card also has a unique skill that is always available to be used as long as costs and conditions are met.
Skill Keywords
Skills with action keywords, like "climb" or "jump," follow the normal rules of that action. Some skills make use of other keywords, like "anchor" or "secure," as shorthand for detailed rules (see "Keywords" on page 17).
Jump Skills
Jump skills contain diagrams, letting you move directly from your space to one of the highlighted spaces.
Let Go
You can choose to let go and begin falling (see "Falling" on page 10).
Forage
Each map has several mushroom tokens, each containing a single-use skill effect.
As an anytime action, you may:
- Pick Up: Take a mushroom from your space and place it faceup near your player board. There is no limit to the number of mushrooms you can carry.
- Use: Discard a mushroom near your player board to use its skill effect. See the "Mushroom Guide" on the back of this rulebook for details on each mushroom.
- Toss: Give a mushroom to another climber within 3 spaces, counted orthogonally.
The climber "Cheer" interacts with mushrooms in additional ways (see "Cheer" on page 18).
Health and Blight
Many game effects will cause you to lose health and gain blight, representing the amount of punishment that your climber can take.
When you lose health, move the health marker on your board to the right equal to the amount lost. When you gain blight, move the blight marker on your board to the left equal to the amount gained.
The markers occupy the same track, and if they ever are in the same slot or cross over, you are defeated.
Be Cautious: You can regain health in a lot of ways, but reducing blight is very rare!
Defeated
When you are defeated, your activation immediately ends (if applicable). Place all of your action cards in your discard pile, and place your figure and any other climber and class components on your board. You are eliminated from the scenario.
Last Chance
After any climber is defeated, the remaining climbers must quickly finish removing binding crystals from the leviathan, or they lose the game.
Continue with the remaining steps for the current turn (finishing an activation if necessary, resolving threat, drawing). Then, proceeding in clockwise order, each climber takes one more full turn, skipping any defeated climbers. After those turns, the game ends, and all players lose.
Grip
The cards in your deck (not your hand) represent your climber's grip. When you lose grip, discard that number of cards from the top of your deck faceup.
If your deck is empty, you fall (see "Falling" on page 10).
Gaining Grip
Some effects cause you to gain grip; take the indicated number of cards randomly from your discard pile. You may look at them, then shuffle and place them under your deck.
Terrain & Map Effects
Spaces on the map have different effects.
- Normal: Normal terrain has no additional effect.
- Harmful: When you enter harmful terrain, lose 1 health.
- Difficult: When you enter difficult terrain, lose 1 grip, discarding the top card of your deck.
- Ledge: When you enter a ledge, you may stop falling. You must be on a ledge to rest.
- Open: When you enter an open space, you immediately start falling.
Blighted Crystal
When you strike a blighted crystal (teal die), gain exactly 1 blight. This happens regardless of the strike amount or the range between you and the blighted crystal.
Protection Icons
While activating, if your chosen AP card has blight, harmful, and/or difficult icons, you are protected from the matching effect and do not suffer it. This protection does not apply to other effects, like threat cards.
Focus Tokens
When your climber becomes focused, ready your focus token by flipping it faceup.
When you use any skill while focused, you may apply +1 to one numerical value on that skill. Then, exhaust your focus token by flipping it facedown.
Important: Focus can apply to skills on cards in your hand, your character card, and even mushrooms!
Focus cannot modify skill costs, such as grip or blight.
Injury
Certain game effects cause your climber to become injured, often indicated as "+1 Injury." When this happens, draw a card from the injury deck and place it near your board.
Each injury applies its effect and can be removed as described. When an injury is removed, shuffle it back into the injury deck.
Falling
The common ways to start falling are:
- You enter an open space.
- You are out of grip (your deck is empty). This applies immediately and at all times.
- You use the "Let Go" anytime action.
While falling, move down one space at a time until you are on a ledge.
- You are affected by terrain you enter while falling, but you do not suffer any penalty from the fall itself.
- Anytime actions, such as using skills or foraging, can be triggered during the fall from any space, including the starting space.
- You cannot spend AP while falling.
- While falling, you may ignore ledges and keep falling (except "through" the starting row).
Unique Scenario Rules
Keywords & Anytime Actions
Some leviathan scenario cards define special keywords and anytime actions. (For example: "Frost X: Take X frost tokens (max 3). If you would take a 4th, gain 1 blight instead." / "Anytime: While activating, pick up a relic on your space.")
Scenario Tokens
Some leviathans use a supply of special scenario tokens. Each scenario thematically defines what the tokens are, such as "Frost Tokens."
Scenarios use tokens in a variety of ways, including certain color mixes and faceup or facedown placement: see the scenario card for details.
Map Overlays
Some leviathans use cards that are placed directly on the map. These often use special rules, change terrain, or even move to different places.
An overlay is always placed in a way that aligns with specified map elements. When an overlay is on the map, it overrides any terrain under it.
Unless otherwise indicated by scenario rules, if an overlay moves, all game components on that overlay (climbers, attack markers, scenario tokens, etc.) move with it, staying in their respective spaces.
Crystal Pools
Some scenarios use crystal pools: a single larger crystal that a climber can strike from multiple spaces, using multiple dice to form a larger total value. If there is a crystal pool, you must remove all crystals in it to win, along with all other crystals on the map.
Scenario rules specify how you strike or reduce crystals in the crystal pool. When any die reaches 0, remove it. If the crystal pool uses blighted dice, gain 1 blight each time you strike it.
End of the Game
Win - Break All Crystals
When you remove the last binding crystal and resolve win conditions on the scenario card (if any), you save the leviathan and immediately win! Flip over the story card and read the conclusion.
Lose - Failed Last Chance
If there are crystals or scenario win conditions remaining after the Last Chance (see page 9), you lose.
If you are struggling on any repeat plays, consider lowering difficulty or changing your climber and class combinations.
Solo Play
You can play solo, coordinating the efforts of two climbers with a single deck and hand of cards.
Setup
Set up the game for two climbers, but create a single deck using the cards from 2 characters and 1 class.
Playing the Game
Play proceeds as in the multiplayer game with a few changes. Alternate turns with your two climbers, who share a single deck and hand of cards.
- You use both climber boards to track each climber's health, blight, focus, injuries, and any mushrooms they have picked up.
- Any card in your hand can apply to either character, even if it isn't one of their own cards.
- Character cards, focus tokens, picked-up mushrooms, and injuries apply only to the matching character.
- When you rest, gain 7 grip instead of shuffling your entire discard pile.
- If your deck runs out, both climbers fall, resolved in the order of your choice.
- The "Paranoid" injury has no effect. If drawn, discard it and draw a different injury.
Strategy Tips & Examples
This section highlights rules, interactions, and opportunities that may not be obvious at first glance.
Difficulty Escalates
Climbers must be quick and efficient, as the leviathans become more dangerous as the game progresses:
- Each round, the rage track increases, causing more of the threat cards to be enraged, making them much deadlier.
- Your climbers are likely accumulating blight from threat cards and blighted crystals. Because blight is difficult to remove, it brings you closer to defeat.
Game Philosophy
Leviathan Wilds has a fairly straightforward ruleset, but the different characters, classes, and leviathans can create some complex interactions.
The goal of the experience is to empower the players as much as possible. You decide when and how to use your anytime actions (skills, mushrooms, etc.) in whatever combination.
- If multiple effects, such as skills or threat cards, would occur simultaneously, resolve each of them, one at a time, in the order of your choice.
- If you're not sure how to resolve a complex interaction, do so in a way that seems most fun and beneficial to the players.
If this makes the game feel too easy, try increasing the difficulty! No matter what tricks you learn to pull out, the leviathans are ready to offer a challenge!
Use Your Skills
Skills are on the cards in your hand, on your character card, and on mushrooms. They are powerful and highly efficient, so look for opportunities to use them!
Be Aggressive: You always draw back up to 3 at the end of your turn, so spend those cards!
If you're worried about losing grip and falling, try to figure out where your next resting ledge will be, then use your cards to make sure you get there!
Lend A Hand: Pay attention to the plight of your fellow climbers, and pitch in skills to help!
If +1 strike breaks a crystal, or if "Glide 1" gets them out of a jam, it's almost always worth it.
Power Nap: Ledges are plentiful, and the 2 AP rest action gets you all of your discarded cards back. This includes any skill cards you played just before resting!
Gravity Is Your Friend
Letting go and strategically falling can be highly beneficial:
Use Anytime Actions: While falling, you can use as many anytime actions as you like, in any combination, from any space. For example:
- Fall two spaces and pick up a mushroom (Forage).
- Continue falling one more space, and another climber plays a skill on your behalf with a strike effect (Use Skill).
- Continue falling one more space, then play a jump skill. In this example, Hazard jumps to the ledge, so she (finally) stops falling (Use Skill).
Avoid Attacks: With good positioning, you can "Let Go" to fall out of an attack area without breaking a sweat.
Rest Easy: Regardless of what you do or how many cards you spend, if you still have 2 AP when you let go or fall, you'll reach a ledge and have the option to rest.
Save Low Crystals For Later: Ignoring low crystals early in the game is a valid option. It can give slow climbers (or climbers who fell) something to work on. Even if that's not necessary, getting back to those crystals is usually easier: it's faster to go down than up.
Efficiency Adds Up
Every advantage and optimization can help you to master the game and heal those leviathans.
Use Protection Icons: Protection icons on your AP card apply to your entire activation, regardless of how much you climb, jump, glide, strike or fall.
Play Cards Before Drawing: If you're about to do "Step 4: Draw to 3," consider playing a useful skill first; you'll get the advantage of the skill and still draw a fresh hand of 3 cards.
Hang By A Thread (Or Not): You're never forced to draw your last card (see "Hanging By A Thread" on page 7), but if you're already on or near a ledge, you may want to draw it anyway just to have more options.
Don't Worry About Full Skill Value: Because you're drawing through your deck quickly, and because resting is efficient, it's often better to use just part of a skill (like "Strike 2" on a 1-value crystal) than to let that card sit in your hand for several turns.
Learn the Threat Cards: If you can predict what may be coming, you can mitigate a lot of risk.
Focus is Flexible: The +1 can apply to any numeral on any skill. This includes character card skills and mushroom skills!
Basic Turn Example
Let's look at a basic way in which a player's turn could resolve, starting with Step 1 of the turn: Reveal Threat.
- The threat card "Sideswipe" is revealed. It's an attack, and we (Fix) are the "Active" climber. We place the attack marker around Fix. The red highlight marks all spaces that will be affected by the attack when it resolves (after Fix activates).
- Then, Step 2 of the turn begins: Activate Climber. We have "Vault," "Dyno," and "Ol' Rusty" in our hand.
- We play 1 card ("Dyno") from our hand to the AP slot on our board, giving us 4 AP and a harmful protection icon.
- Conveniently, there happens to be a crystal nearby, so we'll spend 1 AP to climb into that space (1 AP: Climb 1).
- Then, we use our remaining 3 AP to do a Strike 3 action (X AP: Strike X). Our activation ends, and "Dyno" is moved from the top of our board to the discard pile.
- We move on to Step 3 of the turn: Resolve Threat. We are still in the affected area when "Sideswipe" resolves, so we lose 2 health and are pushed 1 space to the right. Since we are in an open space, we fall all the way to the bottom row. Finally, Step 4 of the turn: Draw to 3. We draw back up to 3 cards.
Advanced Turn Example
Let's look at the same turn, but with an eye towards skill usage and efficiency. There's quite a bit more to go through, so let's repeat #1-4 from the Basic Turn Example: 1) It's Fix's turn, and "Sideswipe" is the threat card. 2) Fix activates with "Vault," "Dyno," and "Ol' Rusty" in hand. 3) We play "Dyno" for 4 AP and harmful protection. 4) We spend 1 AP to move into the crystal space.
- We spend just 1 AP striking the crystal, playing "Ol' Rusty" as a skill for +2, which is enough to break it. We still have 2 AP left.
- Then, we play "Vault" as a skill to jump across the gap. That's the last card we have in our hand, but we still have 2 AP left.
- As an anytime action, we let go. We could choose to stop on the ledge, but instead continue downward. We suffer -1 grip when we enter the difficult space and continue until we reach the space with the crystal.
- Another climber plays "Get 'Em!" while Fix is in the space with the crystal, so we strike 2. We also use "Hit it Harder" to apply +1 to that strike, which is enough to smash that 3-value crystal. Unfortunately, without blight protection, we gain 1 blight for striking the blighted crystal, but this is a small price for fully destroying a crystal while falling. After all that, keep in mind that we're still falling, and we still have 2 AP.
- We continue to fall, passing through harmful terrain along the way. The harmful protection from our AP card (see #3 on the left) is still active and prevents the -1 health. We stop falling when we reach a ledge on the bottom row.
- We still have 2 AP left, so we rest. We shuffle all of our discarded cards, including "Ol' Rusty" and "Vault" (used in #5 and #6 above) placed them under our deck. Then, our activation ends.
- Next is Step 3 of the turn: Resolve Threat. Sideswipe completely misses (we fell out of the attack area back in #7). Finally, Step 4 of the turn: Draw to 3. We draw back to 3 cards. Overall, we destroyed two crystals, evaded the leviathan's attack, fully utilized our cards, and ended our turn with a full deck!
Rule Clarifications
Contradictions
If core rules contradict rules on components, priority is given first to leviathan/scenario rules, then player effects (skills, etc), then lastly rules in this book.
Ties
If there are multiple options for an effect, players decide how to resolve it. For example, if multiple climbers are "highest" or closest to a specified space on the map, choose from among the tied climbers to receive the effect.
Game Effects
Game effects include anything that alters the current state of the game: climber actions and skills, terrain, threat cards, and leviathan special rules.
Multi-Part Effects: Threat cards, skills, and scenario cards frequently have effects with multiple parts: health loss and push, climbing and striking, etc.
Falling: Falling is not a single continuous effect. Rather, it applies sequential "move 1 space down" effects until you enter a ledge.
Modifiers: Modifiers change other effects: applying +X to a strike, reducing health loss, or scenario rules that trigger immediate reactions, such as a strike closing the Watcher's eye and reducing the crystal pool.
Timing Conflicts
If game effects interrupt each other or are triggered simultaneously, resolve them in the order of your choice. When resolving a multi-part effect, do so completely: don't "mix and match" the different parts with other effects.
Example 1: If you play "Twin Talons" while falling, you strike 1, strike 1, anchor, then discard it. You cannot Strike 1, fall a little, strike 1 again, fall even more, and then anchor.
However, you can use a skill that modifies one of the strikes (such as "Any climber may apply +1 to their strike").
Example 2: You cannot use a skill between the -2 health and Push 1 of "Sideswipe" to move into the attack diagram (avoiding the health loss but taking advantage of the push).
Skills
- If a skill has multiple parts, such as Climb 2 and Strike 2, you can resolve them in any order (unless the effect specifies an order).
- You may choose not to use the "full value" of an effect (e.g., if given Climb 2, you may Climb 1 or 0 instead), but you cannot "save" any unused value to use later.
- If a skill has a cost, such as grip, it must be fulfilled before you resolve the effect.
Diagrams (Attack and Jump)
Certain threat and skills cards may show multiple highlight colors and/or arrows:
Threat Cards
Colors: Some attacks cause you to suffer different effects depending on which highlighted space you are on.
Arrows: Some attacks also affect all spaces above, below, to the left, and/or to the right of spaces in the diagram, shown by the arrows.
Skills
Some jump diagrams contain highlighted spaces that have additional costs or requirements.
"Or"
Certain threat and scenario effects force you to choose between multiple parts. When this happens, you must choose an effect that you can fulfill if possible.
For example, if your deck is empty and an effect specifies -1 grip or -1 health, you must choose -1 health.
Open Information
Climber hands and discard piles are open information that can be freely examined and shared.
Edge of Map
You cannot move or be pushed past spaces at the edge of the map.
Sharing Spaces
Climbers can enter and share spaces with each other.
Keywords
Active
The climber currently taking their turn.
Anchor
You may stop falling without having to enter a ledge. Your deck cannot be empty, and you cannot stop in an open space.
Any Climber
Choose any climber on the map (including your own) for the effect. The chosen climber decides how the effect is used.
Block X
When you would lose health or grip, or if you would be pushed, reduce the amount by X to a minimum of 0.
- You can split the block value however you choose among the health, grip, and/or push of threat cards and other multi-part effects.
- Block can reduce health or grip loss from terrain.
- Block cannot prevent blight, injury gain, or scenario keyword effects, such as "Frost."
Crystal Pool
See page 11.
Delayed
When the threat card is revealed, the attack marker is not placed immediately as normal. Instead, it is placed at the start of "Step 3. Resolve Threat" and then resolved immediately. Climbers can use anytime actions after placing the marker but before resolving the attack.
Focus
See page 10.
Enrage
Rotate the leftmost facedown "normal" threat card in the row to its enraged half. No effect if all threat cards are already enraged.
Exhaust / Ready
Certain effects are exhausted when used; a component (token or card) is flipped facedown as a reminder.
That effect cannot be used again until the component has been "readied" (flipped back faceup). Each effect specifies when it readies.
Highest, Lowest, Leftmost & Rightmost
Refers to the climber or component closest to the top/bottom row or the left/rightmost column of the map. If there is a tie, players choose among the tied options.
Miss
An additional effect on an attack that is resolved if the attack does not affect at least 1 climber.
If you use block to prevent some or all of the attack, you were considered to be "hit," so you do not resolve the Miss effect.
Next
The climber who will activate next in clockwise order.
Push X
Move your figure a number of spaces in the indicated direction. After the push resolves, remember to suffer applicable terrain effects for all spaces entered.
Range
The number of spaces from one component and/or specific map space to another. Range is counted orthogonally, but it does not have to be counted in a straight line.
Certain effects allow striking from "+X range."
Secure
When you lose grip, if the card has the "Secure" keyword, place it in your hand instead of discard pile.
Strike +X
Apply +X to a strike. Has no effect without an accompanying strike and cannot be split among multiple strikes.
Swift
The threat card resolves immediately when revealed (usually during Step 1 of the turn "Reveal Threat"). Climbers can use anytime actions after revealing the card (and placing the marker if applicable) but before resolving the threat card.
After a swift effect, place an attack marker on the card as a reminder that it has been resolved.
Component Clarifications
Climbers
Cheer
- When planting extra mushrooms during setup, you choose any 2 different spaces on the map that already have mushrooms.
- If you need to take a mushroom, and there are none left, mix the discarded mushrooms facedown to create a new supply. If no mushrooms have been discarded, skip the effect.
Hazard
- When you use "Relic Shield," you suffer another climber's threat effect. This may be in addition to threat effects you are already suffering (e.g., if you use it on an "All" effect, you would suffer the effect twice).
Hornet
- You still gain 1 blight when using "Sting" or "Stinger" to strike a blighted crystal.
Savvy
- "Scope It Out" does not allow a climber to ignore the effects of a blighted crystal.
- If you are on an open space with the farseer token (via "Hidden Paths"), you may choose not to fall. If the token moves and you are still on that space, you fall.
Classes
Breaker
- Removing a die from a crystal pool is considered breaking a crystal for your effects.
Gambler
- "My Lucky Day" and "Double or Nothing" can interrupt skills with Heads/Tails effects. This may change the flip result and resolved skill effect.
Herald
- For "Teamwork," climbers can (but do not have to) choose the same effect. If they do, and the effect is focused, the +1 only applies once.
- "Onward!" has no effect if played at a time other than your activation.
Magus
- You can choose only 1 Arcane effect per skill played.
- You still gain 1 blight when using "Arcane Blast" on a blighted crystal.
Roughneck
- "Retaliate" and "Daredevil" remain in play until after the effect they block (threat card, terrain, etc) is fully resolved. Then, the remaining effects resolve, and the card is placed in your discard pile.
Leviathans
All
- Special strike effects for scenario cards can be generated through AP or skills, and you can apply "+x range" to those effects. Any special rules or modifiers triggered by the strike effect resolve immediately as part of that strike.
Collector
- Each climber can pick up any number of relics.
- If you are defeated while carrying a relic, keep it. You cannot use its effect, but it counts toward the win condition.
Deep
- Only gliding and falling direction is affected by "Swimming." Jump and attack diagrams do not have reversed orientation.
- If you use an air token for "Swimming" and end your activation on an open space, you fall.
Forsaken
- Faceup rot tokens with terrain effects remain on the map for the rest of the game (excepting tokens that are replaced with blighted dice).
- Protection icons prevent the matching penalties from rot tokens with terrain effects.
- The "Creeping Rot" attack does not originate from crystals that have been removed.
Fury
- If there are no fury tokens, "Erupt" has no effect.
Hive
- You cannot split strike effects between swarms (i.e., Strike 2 cannot discard 2 swarms on your space).
- Per timing conflict rules (see page 16), you cannot interrupt the "Swarm" keyword effect (i.e., you cannot strike to discard a swarm that enters your space before it causes you to lose health).
Hunger
- "Sprout Thorns" can target a climber in the stomach.
- If all climbers are in the stomach, the attack marker for "Gobble" is not placed or resolved. The "All in stomach..." effect still resolves.
- "Metabolize" increases the lowest-value crystal in the stomach or on the map, prioritizing the stomach if there is a tie. If there's still a tie, climbers choose among the tied crystals.
Tunneller
- An attack marker stays on the lift when it moves.
Twins
- For enraged "Gore," the Flee effect is also swift.
- The chosen climber for "Lock Horns" suffers the effects of the H / I space they enter (unless they are already on that space).
- If a climber is left behind when a Twin flees, they enter the matching space "underneath" the Twin. Since it is an open space, they start falling.
- The Blighted Twin always flees in D - E - F - repeat order, and the Normal Twin A - B - C - repeat order.
- Attack markers stay on Twins when they flee.
Tyrant
- Enraged "Impale" resolves twice; once during Step 1 of the turn as a "Swift" effect, and again during Step 3 as a "Delayed" effect.
Vortex
- When resolving "Wind," rotate climber figures to match the arrow (a reminder of current gravity).
- Any effects that push down do so based on the current direction of gravity.
- Movement actions, skills, etc. do not allow you to "wrap around" the map: only falling.
Watcher
- If the crystal pool is empty, "Eye Open" threat effects still apply and you can still strike the eye to close it (you do not gain blight).
Quick Reference
Icons
- Health: Move the red cube on your player board when gaining/losing.
- Blight: Move the teal cube on your player board when gaining/reducing.
- Grip: Discard cards from deck when losing. Place cards under deck when gaining.
- Harmful Terrain: Lose 1 health when entering.
- Difficult Terrain: Lose 1 grip when entering.
- Open Terrain: Fall when entering.
- Ledge: Stop falling. Required for rest action.
- Blighted Crystal: Gain 1 blight when striking.
- Up / down / left / right arrows: Direction of an effect (usually push).
- Attack marker icon: Point of origin for a leviathan attack.
- Climber icon: Point of origin for a climber jump skill.
Most Common Keywords
- Anchor: Stop falling. Cannot be in open space and deck cannot be empty.
- Block: Prevent health loss, grip loss, or push.
- Exhaust/Ready: Exhaust (flip facedown) component to use an effect. Cannot be used again until readied (flipped faceup).
- Secure: If the card is discarded for grip loss, place in hand instead.
- Swift: Threat card resolves when revealed.
Mushroom Guide
- +2 health: Gain 2 health.
- +2 grip: Gain 2 grip.
- -1 blight: Reduce your blight by 1.
- Strike X: Strike X.
- Climb X: Climb X.
- Glide 2: Glide up to 2.
- Harmful: Ignore harmful terrain once, or while activating, your AP card gains the harmful icon.
- Difficult: Ignore difficult terrain once, or while activating, your AP card gains the difficult icon.
- Blight: Ignore blight when striking once, or while activating, your AP card gains the blight icon.
- Anchor: Stop falling. Cannot be in open space and deck cannot be empty.
- Focus: Become focused.
- +1 AP: During your activation, gain +1 AP.
- Block 1: Prevent 1 health loss, grip loss, or push.
- Draw 1: Draw 1 card from your deck.