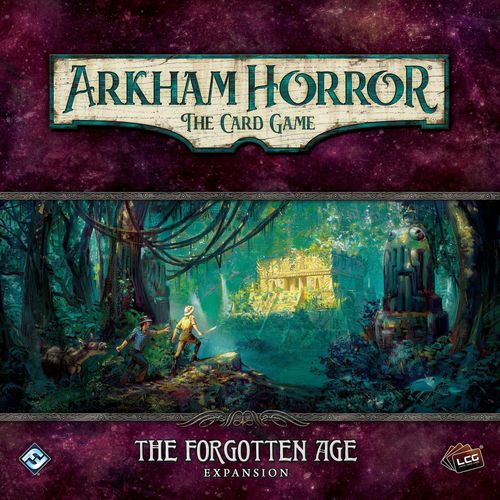
Arkham Horror: The Card Game – The Forgotten Age: Expansion
Arkham Horror: The Card Game – The Forgotten Age: Expansion Rulebook
Table of Contents
Table of Contents
- Additional Rules and Clarifications
- Campaign Setup
- Prologue
- Scenario I: The Untamed Wilds
- Interlude I: Restless Nights
- Scenario II: The Doom of Eztli
- Interlude II: Expedition's End
- Scenario III: Threads of Fate
- Resupply Point
- Scenario IV: The Boundary Beyond
- Interlude III: The Jungle Beckons
- Scenario V–A: Heart of the Elders, Part 1
- Scenario V–B: Heart of the Elders, Part 2
- Scenario VI: The City of Archives
- Interlude IV: Those Held Captive
- Scenario VII: The Depths of Yoth
- Interlude V: The Darkness
- Scenario VIII: Shattered Aeons
- Epilogue
Additional Rules and Clarifications
The cards in The Forgotten Age campaign can be identified by the expansion icon before each card's collector number.
Supplies
At certain points throughout The Forgotten Age campaign, investigators are given the opportunity to choose supplies to bring on their expeditions into the wilds. These supplies are recorded in the Campaign Log, under each investigator's "Supplies" section.
Supplies are purchased with supply points, which are granted to investigators whenever they are given the opportunity to purchase supplies. Leftover supply points are not recorded, and are lost.
An investigator's supplies will determine the possible options available during gameplay and throughout the story of this campaign. Each supply has no effect on its own. Some card effects, story options, and resolutions may change or become available depending on the supplies carried by the investigator(s).
Vengeance X
Some encounter cards are worth vengeance points. The text Vengeance X indicates that a card is worth X vengeance points. Like Victory X, when an encounter card with Vengeance X is overcome by the investigators, it is stored in the victory display until the end of the scenario. However, unlike victory points, vengeance represents the awareness and animosity of the Father of Serpents, and it is generally a good idea to avoid accruing vengeance points whenever possible. Vengeance points in the victory display have no impact upon the game unless specifically referenced by another encounter card.
- As an enemy with Vengeance X is defeated, place the card in the victory display instead of in the discard pile.
- At the end of a scenario, take each location with Vengeance X that is in play, revealed, and has no clues on it, and place it in the victory display.
- As a treachery card with Vengeance X completes its resolution, place it in the victory display instead of in the discard pile.
- Cards worth vengeance points are not also worth victory points unless the card has both Victory X and Vengeance X.
Explore
Some abilities in this campaign are identified with an Explore action designator. Such abilities are generally used to find new locations to put into play and are initiated using the "activate" action.
Explore abilities instruct you to draw the top card of the "exploration deck," which is a separate deck that is constructed during the setup of some scenarios. This deck consists of several single-sided locations and treachery cards.
- Each Explore ability indicates a particular type of location that you are seeking to draw. If a location of that type is drawn, it is put into play, and you move to that location. This is considered a "successful" exploration.
- If any other location is drawn, place it next to the exploration deck, and draw the next card from the exploration deck. Repeat this process until a location of the indicated type is drawn or a treachery is drawn. After this action has ended, shuffle each location next to the exploration deck back into the exploration deck.
- If a treachery card is drawn, it is resolved as normal. If it is discarded, place it in the encounter discard pile as you would normally. There is no discard pile for the exploration deck. This is considered an "unsuccessful" exploration.
- As a single-sided location is put into play from the exploration deck, place clues on that location equal to its clue value.
Example: Agenda 1a—"Expedition into the Wild" has the following ability: "Explore. Draw the top card of the exploration deck. If it is a connecting location, put it into play and move to it." Ursula Downs is at the Expedition Camp and wishes to find a new location to travel to. She spends her first action to explore, drawing the top card of the exploration deck. The card she draws is Circuitous Trail. Because Circuitous Trail is a location that is not connected to the Expedition Camp, it is placed next to the exploration deck, and Ursula draws the next card in the exploration deck. This time, she draws the Low on Supplies treachery card, which she resolves as normal and places in the encounter discard pile. Her exploration is unsuccessful, and she must shuffle the Circuitous Trail that she drew previously back into the exploration deck. Ursula decides to explore one more time, spending a second action. This time, she draws Path of Thorns, which is connected to the Expedition Camp. Her exploration is successful. Path of Thorns is put into play with clues on it equal to its clue value, and Ursula immediately moves from the Expedition Camp to the Path of Thorns.
Alert
Each time an investigator fails a skill test while attempting to evade an enemy with the alert keyword, after applying all results for that skill test, that enemy performs an attack against the evading investigator. An enemy does not exhaust after performing an alert attack. This attack occurs whether the enemy is engaged with the evading investigator or not.
Campaign Setup
To set up The Forgotten Age campaign, perform the following steps in order.
- Choose investigator(s).
- Each player assembles their investigator deck.
- Choose difficulty level.
- Assemble the campaign chaos bag.
- Easy (I want to explore): +1, +1, 0, 0, 0, –1, –1, –2, –3, skull, skull, [insect icon], [tablet icon], [star icon].
- Standard (I want a tough journey): +1, 0, 0, 0, –1, –2, –2, –3, –5, skull, skull, [insect icon], [tablet icon], [star icon].
- Hard (I want to be forgotten): +1, 0, 0, –1, –2, –3, –3, –4, –6, skull, skull, [insect icon], [tablet icon], [star icon].
- Expert (I want Yig's vengeance): 0, –1, –2, –2, –3, –3, –4, –4, –6, –8, skull, skull, [insect icon], [tablet icon], [star icon].
You are now ready to begin at the Prologue.
Prologue
Each investigator must choose supplies to bring for the expedition. In the Campaign Log, under each investigator's "Supplies" section, record the supplies that investigator chose to bring. (Note: Provisions and medicine can each be taken more than once by recording their name multiple times and spending the appropriate number of supply points each time.)
- Each investigator may spend supply points to purchase one or more of the supplies listed below. The number of supply points available to each investigator is based on the number of investigators in the campaign:
- 1 investigator: 10 supply points
- 2 investigators: 7 supply points each
- 3 investigators: 5 supply points each
- 4 investigators: 4 supply points each
- The description of each supply below gives some insight into how it might be used during the campaign. Choose wisely.
- Available supplies:
- 7 Provisions (1 supply point each): Food and water for one person. A must-have for any journey.
- 7 Medicine (2 supply points each): To stave off disease, infection, or venom.
- 7 Rope (3 supply points): Several long coils of strong rope. Vital for climbing and spelunking.
- 7 Blanket (2 supply points): For warmth at night.
- 7 Canteen (2 supply points): Can be refilled at streams and rivers.
- 7 Torches (3 supply points): Can light up dark areas or set sconces alight.
- 7 Compass (2 supply points): Can guide you when you are hopelessly lost.
- 7 Map (3 supply points): Unmarked for now, but with time, you may be able to map out your surroundings.
- 7 Binoculars (2 supply points): To help you see faraway places.
- 7 Chalk (2 supply points): For writing on rough stone surfaces.
- 7 Pendant (1 supply point): Useless, but fond memories bring comfort to travelers far from home.
- If Ursula Downs, Leo Anderson, or Monterey Jack was chosen as an investigator for this campaign: Choose one of those investigators to be the expedition leader. That investigator begins Scenarios I and II as the lead investigator.
Proceed to Scenario I: The Untamed Wilds.
Narrative journal entries in the Prologue are omitted.
Scenario I: The Untamed Wilds
Read-aloud narrative text ("DO NOT READ until the end of the scenario" and the journal entries that follow) is omitted.
Setup
- Gather all cards from the following encounter sets: The Untamed Wilds, Rainforest, Serpents, Expedition, Guardians of Time, Agents of Yig, Poison, and Ancient Evils. (These sets are indicated by their icons.)
- Put the Expedition Camp into play. Each investigator begins play at the Expedition Camp.
- Create the exploration deck. This is done by taking the five single-sided Jungle locations and shuffling them together, along with one copy each of the following treachery cards: Lost in the Wilds, Overgrowth, Snake Bite, Low on Supplies, and Arrows from the Trees.
- Set the following cards aside, out of play: The three single-sided Ruins locations, the Agents of Yig encounter set, the four Poisoned weaknesses, the Alejandro Vela story asset, and the Ichtaca enemy. The Agents of Yig encounter set can be identified by its icon.
- Shuffle the remainder of the encounter cards to build the encounter deck.
- You are now ready to begin.
Do Not Read Until the End of the Scenario
Read-aloud text under "DO NOT READ until the end of the scenario" is omitted.
- If no resolution was reached (each investigator resigned or was defeated):
- In your Campaign Log, record that the investigators were forced to wait for additional supplies.
- If it was act 1 or 2 when the scenario ended:
- Record in your Campaign Log that Ichtaca observed your progress with keen interest.
- Record in your Campaign Log that Alejandro followed the investigators into the ruins. Any one investigator may choose to add Alejandro Vela to their deck. This card does not count toward that investigator's deck size.
- If "you fought with Ichtaca":
- Record in your Campaign Log that Ichtaca is wary of the investigators.
- Record in your Campaign Log that Alejandro followed the investigators into the ruins. Any one investigator may choose to add Alejandro Vela to their deck. This card does not count toward that investigator's deck size.
- If "Ichtaca is leading the way":
- Record in your Campaign Log that the investigators have earned Ichtaca's trust.
- Record in your Campaign Log that Alejandro chose to remain at camp. Do not add Alejandro Vela to any investigator's deck.
Resolution 1
Read-aloud journal text ("Resolution 1," Thursday, July 2nd, 1925) is omitted.
- In your Campaign Log, record that the investigators cleared a path to the Eztli ruins.
- Record in your Campaign Log that Alejandro chose to remain at camp. Do not add Alejandro Vela to any investigator's deck.
- Record in your Campaign Log that the investigators have earned Ichtaca's trust.
- For each vengeance point in the victory display, record one tally mark under "Yig's Fury" in your Campaign Log. Beware the anger of the Father of Serpents, as his fury will haunt you in the future.
- Each investigator earns experience equal to the Victory X value of each card in the victory display.
- Proceed to Interlude I: Restless Nights.
Resolution 2
Read-aloud journal text ("Resolution 2," Thursday, July 2nd, 1925) is omitted.
- In your Campaign Log, record that the investigators cleared a path to the Eztli ruins.
- Record in your Campaign Log that Alejandro followed the investigators into the ruins. Any one investigator may choose to add Alejandro Vela to their deck. This card does not count toward that investigator's deck size.
- Record in your Campaign Log that Ichtaca is wary of the investigators.
- For each vengeance point in the victory display, record one tally mark under "Yig's Fury" in your Campaign Log. Beware the anger of the Father of Serpents, as his fury will haunt you in the future.
- Each investigator earns experience equal to the Victory X value of each card in the victory display.
- Proceed to Interlude I: Restless Nights.
Interlude I: Restless Nights
In order, read each of the following sections. Then, proceed to Scenario II: The Doom of Eztli.
- Check your supplies. Each investigator with a blanket reads Restful Sleep. The rest read Tossing and Turning.
- Restful Sleep (read-aloud text omitted): You suffer no ill effects.
- Tossing and Turning (read-aloud text omitted): You suffer 1 physical or mental trauma (your choice).
- Check your supplies. The investigators, as a group, must cross off one provisions per investigator from their supplies. For each provisions they cannot cross off, choose an investigator to read Low on Rations.
- Low on Rations (read-aloud text omitted): You begin the next scenario with 3 fewer resources.
- Check your supplies. Each investigator with medicine may cross it off from their supplies to choose and remove a Poisoned weakness from any investigator's deck. Each investigator who still has a Poisoned weakness in their deck reads The Poison Spreads.
- The Poison Spreads (read-aloud text omitted): You suffer 1 physical trauma.
- The lead investigator must choose one investigator to be the group's lookout. Then, that investigator checks their supplies. If they have binoculars, they read Shapes in the Trees. Otherwise, they read Eyes in the Dark.
- Shapes in the Trees (read-aloud text omitted): You earn 2 additional experience.
- Eyes in the Dark (read-aloud text omitted): You suffer 1 mental trauma.
Scenario II: The Doom of Eztli
Intro
The intro journal entries (Intro 1, Wednesday, July 8th, 1925; Intro 2, Friday, July 3rd, 1925) are read-aloud text and are omitted.
- Check Campaign Log. If the investigators were forced to wait for additional supplies: Read Intro 1.
- If the investigators cleared a path to the Eztli ruins: Skip to Intro 2.
- Proceed to Setup.
Standalone Mode
If you are playing in Standalone Mode and do not wish to refer to any other setups or resolutions, you may use the information below when setting up this scenario:
- Assemble the chaos bag using the following tokens: +1, 0, 0, 0, –1, –2, –2, –3, –5, skull, skull, [hooded-figure icon], [insect icon], [tablet icon], [star icon].
- The investigators cleared a path to the Eztli ruins.
- You have no supplies.
Setup
- Gather all cards from the following encounter sets: The Doom of Eztli, Agents of Yig, Yig's Venom, Temporal Flux, Deadly Traps, Forgotten Ruins, Poison, and Chilling Cold. (These sets are indicated by their icons.)
- Put the Entryway into play. Each investigator begins play in the Entryway.
- Create the exploration deck. This is done by taking the five single-sided Ancient locations and shuffling them together, along with one copy each of the following treachery cards: Ill Omen, Deep Dark, Final Mistake, Entombed, and Crypt Chill.
- Set the following cards aside, out of play: The Harbinger of Valusia enemy, the Chamber of Time location, and the Relic of Ages asset.
- Set aside each Poisoned weakness that is not already in an investigator's deck.
- Shuffle the remainder of the encounter cards to build the encounter deck.
- You are now ready to begin.
Do Not Read Until the End of the Scenario
Read-aloud text under "DO NOT READ until the end of the scenario" is omitted except for the rules below.
- Before resolving any other resolution, if at least one investigator was defeated: The defeated investigators read Investigator Defeat first.
- Check Campaign Log. If there are four or more tally marks under "Yig's Fury": The creatures are upon you before you have time to react.
- Each investigator who was defeated is killed. (If there are not enough investigators to continue the campaign, the campaign is over and the players lose.)
- If another resolution was reached, the remaining investigators proceed to that resolution.
- If no resolution was reached (each investigator was defeated): Go to Resolution 2.
- If there are three or fewer tally marks under "Yig's Fury": Suddenly, a distant voice hisses to the others, and the serpents tentatively retreat into the darkness. You run for your life, not taking any chances.
- Record three tally marks under "Yig's Fury."
- If another resolution was reached, the remaining investigators proceed to that resolution.
- If no resolution was reached (each investigator was defeated): Go to Resolution 3.
- If no resolution was reached because each investigator resigned before act 3: Go to Resolution 3.
Resolution 1
Resolution 1 (each defeated investigator should resolve Investigator Defeat first). Read-aloud journal text is omitted.
- In your Campaign Log, record that the investigators recovered the Relic of Ages. One investigator must add the Relic of Ages to their deck. This card does not count toward that investigator's deck size.
- If the Harbinger of Valusia is still in play or set aside, record in your Campaign Log that the Harbinger is still alive. Next to this, in parentheses, record how much damage is on the Harbinger of Valusia.
- For each vengeance point in the victory display, record one tally mark under "Yig's Fury" in your Campaign Log.
- Each investigator earns experience equal to the Victory X value of each card in the victory display.
- Proceed to Interlude II: Expedition's End.
Resolution 2
Resolution 2 (the journal entry is scrawled below the previous one). Read-aloud journal text is omitted.
- In your Campaign Log, record that Alejandro recovered the Relic of Ages.
- If the Harbinger of Valusia is still in play or set aside, record in your Campaign Log that the Harbinger is still alive. Next to this, in parentheses, record how much damage is on the Harbinger of Valusia.
- For each vengeance point in the victory display, record one tally mark under "Yig's Fury" in your Campaign Log.
- Each investigator earns experience equal to the Victory X value of each card in the victory display.
- Proceed to Interlude II: Expedition's End.
Resolution 3
Resolution 3 (each defeated investigator should resolve Investigator Defeat first). Read-aloud journal text is omitted.
The investigators must decide (choose one):
- "We can't stop now—we have to go back inside!" Proceed to Resolution 4.
- "It's too dangerous. This place must be destroyed." Proceed to Resolution 5.
Resolution 4
Resolution 4 (the journal entry is scrawled below the previous one). Read-aloud journal text is omitted.
- The investigators must replay Scenario II: The Doom of Eztli. Reset the game to this scenario's Setup. Do not record anything in your Campaign Log except for any trauma suffered from your previous game. No experience points are earned from your previous game.
- Any player whose investigator was killed or driven insane must choose a new investigator to play, as normal.
- During setup, when the Entryway is put into play, place one doom on it for each time this resolution has been reached.
Resolution 5
Resolution 5 (the journal entry is scrawled below the previous one). Read-aloud journal text is omitted.
- In your Campaign Log, record that the investigators recovered the Relic of Ages. One investigator must add the Relic of Ages to their deck. This card does not count toward that investigator's deck size.
- If the Harbinger of Valusia is still in play or set aside, record in your Campaign Log that the Harbinger is still alive. Next to this, in parentheses, record how much damage is on the Harbinger of Valusia.
- For each vengeance point in the victory display, record one tally mark under "Yig's Fury" in your Campaign Log. Record an additional ten tally marks, as you have angered Yig with your foolish actions.
- Each investigator earns experience equal to the Victory X value of each card in the victory display.
- Proceed to Interlude II: Expedition's End.
Interlude II: Expedition's End
- Check Campaign Log. If the investigators recovered the Relic of Ages: Read Expedition's End 1.
- If Alejandro recovered the Relic of Ages: Skip to Expedition's End 5.
Expedition's End 1
Read-aloud journal text (Friday, July 17th, 1925) is omitted.
- The lead investigator must decide (choose one):
- "It belongs in a museum." Alejandro and the museum staff will be able to study it and learn more about its purpose. Proceed to Expedition's End 2.
- "It is too dangerous to be on display. We should keep it hidden and safe until we know more about it." Skip to Expedition's End 3.
Expedition's End 2
Read-aloud journal text (Sunday, July 19th, 1925) is omitted.
- Record in your Campaign Log that the investigators gave custody of the relic to Alejandro.
- Record in your Campaign Log that the investigators have earned Alejandro's trust. If it is not already in an investigator's deck, any one investigator may choose to add Alejandro Vela to their deck. This card does not count toward that investigator's deck size.
- Add 1 [hooded-figure icon] token to the chaos bag for the remainder of the campaign.
- Skip to Expedition's End 4.
Expedition's End 3
Read-aloud journal text (Sunday, July 19th, 1925) is omitted.
- Record in your Campaign Log that the investigators gave custody of the relic to Harlan Earnstone.
- Record in your Campaign Log that Alejandro is continuing his research on his own. If Alejandro Vela is currently in an investigator's deck, remove him from that investigator's deck.
- Proceed to Expedition's End 4.
Expedition's End 4
Read-aloud text is omitted.
- Proceed to Scenario III: Threads of Fate.
Expedition's End 5
Read-aloud text is omitted.
- Proceed to Scenario III: Threads of Fate.
Scenario III: Threads of Fate
Intro
Intro journal and dialogue text (Intro 1 through Intro 6) is read-aloud and is omitted; only the rules instructions are kept.
Intro 1
- Check Campaign Log. If the investigators gave custody of the relic to Alejandro, or if Alejandro recovered the Relic of Ages: Proceed to Intro 2.
- If the investigators gave custody of the relic to Harlan Earnstone: Skip to Intro 3.
Intro 2
Read-aloud text is omitted.
- The lead investigator must decide (choose one):
- "You're not going anywhere until you tell me what is going on." Skip to Intro 4.
- "Have it your way." Skip to Intro 5.
Intro 3
Read-aloud text is omitted.
- The lead investigator must decide (choose one):
- "You're not going anywhere until you tell me what is going on." Proceed to Intro 4.
- "Have it your way." Skip to Intro 5.
Intro 4
Read-aloud text is omitted.
- Remember that "you listened to Ichtaca's tale."
- Add 1 [hooded-figure icon] token to the chaos bag for the remainder of the campaign.
- Skip to Setup.
Intro 5
Read-aloud text is omitted.
- Remember that "Ichtaca left without you."
- Check the Campaign Log. If the investigators gave custody of the relic to Harlan Earnstone, proceed to Intro 6. Otherwise, skip to Setup.
Intro 6
Read-aloud text is omitted.
- The investigators must decide (choose one):
- "We should be wary of them." Remove all [hooded-figure icon] and [shield icon] tokens from the chaos bag and replace them with 1 [insect icon] token. In your Campaign Log, record that you are forging your own path. For the remainder of the campaign, each investigator cannot include Alejandro Vela or Ichtaca in their deck. Anytime an investigator would be given the option to include either of them, each investigator earns 2 experience instead. Proceed to Setup.
- "Maybe I should listen to them after all..." Proceed to Setup.
Setup
- Gather all cards from the following encounter sets: Threads of Fate, Pnakotic Brotherhood, The Midnight Masks, Locked Doors, Nightgaunts, and Dark Cult. (These sets are indicated by their icons.)
- When gathering The Midnight Masks encounter set, only gather the 5 treachery cards (2x False Lead and 3x Hunting Shadow) and the following locations: Northside, Downtown (First Bank of Arkham), Easttown, Miskatonic University, and Rivertown. Do not gather the rest of the locations or the act, agenda, and scenario reference cards from that set.
- Before drawing opening hands, search the collection and each player's deck for Alejandro Vela and Relic of Ages, and set them aside, out of play.
- Put Northside, Downtown, Easttown, Miskatonic University, Rivertown, Velma's Diner, and Curiositie Shoppe into play. Each investigator begins play in Rivertown.
- Set the Town Hall location, the Ichtaca (The Forgotten Guardian) asset, and the Expedition Journal asset aside, out of play.
- Adjust the contents of each act deck, as noted under "Three Acts, Three Threads" below.
- Shuffle the remainder of the encounter cards to build the encounter deck.
- You are now ready to begin.
Three Acts, Three Threads
This scenario contains three different act decks—an "a/b" deck, a "c/d" deck, and an "e/f" deck. Each of these act decks is constructed separately, in numerical order, as usual. During the course of this scenario, all three of these act decks will be in play, and players may choose which acts to pursue and which to ignore. The text of all three acts is considered active at all times. You might not have time to accomplish all three tasks, so choose which leads you wish to pursue wisely!
The contents of each of these act decks is altered depending on the circumstances below.
- Adjust the contents of the "a/b" deck as follows:
- Check Campaign Log. If Alejandro recovered the Relic of Ages or if the investigators gave custody of the relic to Alejandro, remove the following act cards from the "a/b" deck: Harlan Is in Danger!, both copies of Harlan's Curse, and one of the two copies of At the Exhibit, at random.
- If the investigators gave custody of the relic to Harlan Earnstone, remove the following act cards from the "a/b" deck, instead: The Relic Is Missing!, both copies of At the Exhibit, and one of the two copies of Harlan's Curse, at random.
- The investigators must choose one of the following options, and adjust the contents of the "c/d" deck accordingly:
- If you wish to go to the police to inform them about Alejandro's disappearance, remove the following act cards from the "c/d" deck: Search for Alejandro, both copies of Friends in High Places, and one of the two copies of At the Station, at random.
- If you wish to look for Alejandro on your own, remove the following act cards from the "c/d" deck, instead: Missing Persons, both copies of At the Station, and one of the two copies of Friends in High Places, at random.
- Adjust the contents of the "e/f" deck as follows:
- If "you listened to Ichtaca's tale," remove the following act cards from the "e/f" deck: Trial of the Huntress, both copies of The Cave of Darkness, and one of the two copies of Strange Relics, at random.
- If "Ichtaca left without you," remove the following act cards from the "e/f" deck, instead: The Guardian's Inquiry, both copies of Strange Relics, and one of the two copies of The Cave of Darkness, at random.
Standalone Mode
If you are playing in Standalone Mode and do not wish to refer to any other setup/resolutions, you may use the information below when setting up and playing this scenario:
- Assemble the chaos bag using the following tokens: +1, 0, 0, 0, –1, –2, –2, –3, –5, skull, skull, [hooded-figure icon], [shield icon], [insect icon], [tablet icon], [star icon].
- Do not alter the contents of the chaos bag during the intro.
- Either (choose one):
- The investigators gave custody of the relic to Alejandro.
- The investigators gave custody of the relic to Harlan Earnstone.
- You have no supplies.
The suggested play area diagram on the printed guide's page 14 shows the opening act and agenda cards for this scenario; their printed card text is not repeated here.
Resolutions
Read-aloud text under "DO NOT READ until the end of the scenario" is omitted except for the rules below.
- If no resolution was reached (each investigator resigned or was defeated): Read Resolution 1.
Resolution 1
Read-aloud text is omitted.
- Check which acts were completed during this scenario.
- If act 3b was completed, record in your Campaign Log that the investigators found the missing relic. If the Relic of Ages is not already part of an investigator's deck, any one investigator must choose to include it in their deck. This card does not count toward that investigator's deck size. For the remainder of the campaign, anytime the owner of the Relic of Ages leaves the campaign for any reason, choose another investigator and add it to that investigator's deck.
- If the "a/b" act deck is still in play, record in your Campaign Log that the relic is missing. If the Relic of Ages is part of an investigator's deck, remove it from that investigator's deck for the remainder of the campaign.
- If act 3d was completed, record in your Campaign Log that the investigators rescued Alejandro. If Alejandro Vela is not already part of an investigator's deck, any one investigator may choose to include him in their deck. This card does not count toward that investigator's deck size.
- If the "c/d" act deck is still in play, record in your Campaign Log that Alejandro is missing. If Alejandro Vela is part of an investigator's deck, remove it from that investigator's deck for the remainder of the campaign.
- If act 3f was completed, record in your Campaign Log that the investigators forged a bond with Ichtaca. Any one investigator may choose to include Ichtaca (The Forgotten Guardian) in their deck. This card does not count toward that investigator's deck size.
- If the "e/f" act deck is still in play, record in your Campaign Log that Ichtaca is in the dark. Do not add Ichtaca (The Forgotten Guardian) to any investigator's deck.
- The lead investigator earns the Expedition Journal card and may include it in their deck. This card does not count toward that investigator's deck size.
- Each investigator earns experience equal to the Victory X value of each card in the victory display. Each investigator earns 1 additional experience for each act 1 card that was completed during this scenario, as you gain insight into the schemes of the Brotherhood.
- Proceed to Resupply Point.
Resupply Point
It is clear now that you will have to venture once more into the wilds before the mystery behind the Relic of Ages is solved. Each investigator has the option to choose additional supplies to add to their current list of supplies. In the Campaign Log, under each investigator's "Supplies" section, record the supplies that investigator chooses to bring. (Note: Provisions, medicine and gasoline can each be taken more than once by recording their name multiple times and spending the appropriate number of supply points each time.)
- Before departing from Arkham, it might be a good idea to take a visit to St. Mary's Hospital.
- Each investigator who has a Poisoned weakness in their deck may spend 3 experience points to remove that weakness from their deck.
- Each investigator may spend 5 experience points to remove a single point of physical or mental trauma from their investigator.
- Each investigator may spend supply points to purchase one or more of the supplies listed below. The number of supply points available to each investigator is based on the number of investigators in the campaign:
- 1 investigator: 8 supply points
- 2 investigators: 5 supply points each
- 3 investigators: 4 supply points each
- 4 investigators: 3 supply points each
- Available supplies:
- Provisions (1 supply point each): Food and water for one person. A must-have for any journey.
- Medicine (2 supply points each): To stave off disease, infection, or venom.
- Gasoline (1 supply points each): Enough for a long journey by car.
- Blanket (2 supply points): For warmth at night.
- Canteen (2 supply points): Can be refilled at streams and rivers.
- Compass (2 supply points): Can guide you when you are hopelessly lost.
- Binoculars (2 supply points): To help you see faraway places.
- Chalk (2 supply points): For writing on rough stone surfaces.
- Pocketknife (2 supply points): Too small to be used as a reliable weapon, but easily concealed.
- Pickaxe (2 supply points): For breaking apart rocky surfaces.
Scenario IV: The Boundary Beyond
Intro
Read-aloud narrative in this scenario's introduction is omitted; the rules instructions are kept.
In order, read each of the following sections:
- Check Campaign Log. If the investigators forged a bond with Ichtaca, the lead investigator reads Ichtaca's Quest. If Ichtaca is in the dark, the lead investigator reads Silent Journey instead.
- Ichtaca's Quest (read-aloud text omitted): You suffer no ill effects.
- Silent Journey (read-aloud text omitted): Each investigator begins this scenario with 2 fewer cards in their opening hand.
- Check Campaign Log. If the investigators rescued Alejandro, the lead investigator reads Alejandro's Thoughts. If Alejandro is missing, the lead investigator reads An Empty Seat instead.
- Alejandro's Thoughts (read-aloud text omitted): Each investigator begins this scenario with 2 additional resources.
- An Empty Seat (read-aloud text omitted): You suffer no ill effects.
- Check Campaign Log. If the investigators found the missing relic, the lead investigator reads Arcane Thrumming. If the relic is missing, the lead investigator reads Growing Concern instead.
- Arcane Thrumming (read-aloud text omitted): The investigator with Relic of Ages (…A Device, of Some Sort) in their deck swaps it with Relic of Ages (Forestalling the Future).
- Growing Concern (read-aloud text omitted): Remove Relic of Ages (Forestalling the Future) from the game.
- Check your supplies. Any one investigator must cross off one gasoline from their supplies. If no gasoline was crossed off, read Out of Gas.
- Out of Gas (read-aloud text omitted).
- When drawing opening hands during this scenario, investigators cannot take a mulligan.
- The rest of the introduction (Mexico City and Padma Amrita) is read-aloud and is omitted.
Setup
- Gather all cards from the following encounter sets: The Boundary Beyond, Temporal Flux, and Poison. (These sets are indicated by their icons.)
- If there are 2 or more [hooded-figure icon] tokens in the chaos bag, also gather the Pnakotic Brotherhood and Dark Cult encounter sets, indicated by their icons.
- If there are 2 or more [shield icon] tokens in the chaos bag, also gather the Yig's Venom and Guardians of Time encounter sets, indicated by their icons.
- If neither of the above are true, also gather the Pnakotic Brotherhood and Guardians of Time encounter sets, indicated by their icons.
- Put Metropolitan Cathedral, Zócalo, Temple Ruins, Xochimilco, Chapultepec Park, and Coyoacán into play. Each investigator begins play in either Zócalo or Coyoacán (their choice).
- Create the exploration deck. This is done by taking the 12 single-sided Ancient locations and shuffling them together, along with 1 copy each of the following encounter cards: Window to Another Time, Timeline Destabilization, A Tear in Time, and Lost in Time.
- Set the Padma Amrita enemy aside, out of play.
- Set act 3a and agenda 3a aside, out of play. They are not part of the act or agenda decks, for now...
- Set aside each Poisoned weakness that is not already in an investigator's deck.
- Shuffle the remainder of the encounter cards to build the encounter deck.
- You are now ready to begin.
The suggested location placement diagram on the printed guide's page 18 is not reproduced here.
Replacing Locations
Throughout this scenario, you may be instructed to place new locations on top of existing ones. When a location is placed on top of a location that is already in play, it takes its place. All tokens, attachments, investigators, enemies, and other cards at the former location are considered to now be at the new location (they have not "moved"—the location simply changed). If a location leaves play and there is another location underneath it, that location takes its place. All tokens, attachments, investigators, enemies, and other cards at the location leaving play are considered to now be at the former location.
Standalone Mode
If you are playing in Standalone Mode and do not wish to refer to any other setup/resolutions, you may use the information below when setting up and playing this scenario:
- Assemble the chaos bag using the following tokens: +1, 0, 0, 0, –1, –2, –2, –3, –5, skull, skull, [hooded-figure icon], [shield icon], [insect icon], [tablet icon], [star icon].
- Skip each of the "Check Campaign Log" and "Check your supplies" sections in this scenario's introduction.
- You have no supplies.
Resolutions
Read-aloud text under "DO NOT READ until the end of the scenario" is omitted.
If no resolution was reached (each investigator was defeated)
- If it was act 2 when the game ended, add each Tenochtitlán location in play that has no clues on it to the victory display.
- In your Campaign Log, record that X paths are known to you. X is the number of Tenochtitlán locations in the victory display.
- If the Harbinger of Valusia entered play during this scenario:
- If it is in the victory display, cross out "the Harbinger is still alive" in your Campaign Log.
- If it is still in play or is set aside, next to "the Harbinger is still alive" in your Campaign Log, record in parentheses how much damage is on the Harbinger of Valusia, replacing the number that was previously in parentheses.
- For each vengeance point in the victory display, record one tally mark under "Yig's Fury" in your Campaign Log.
- Each investigator earns experience equal to the Victory X value of each card in the victory display. Each investigator earns 1 additional experience for each Tenochtitlán location in the victory display.
- Proceed to Interlude III: The Jungle Beckons.
Resolution 1
Read-aloud text is omitted.
- In your Campaign Log, record that X paths are known to you. X is the number of Tenochtitlán locations in the victory display. If X is 3 or more, also record that Ichtaca has confidence in you.
- If the Harbinger of Valusia entered play during this scenario:
- If it is in the victory display, cross out "the Harbinger is still alive" in your Campaign Log.
- If it is still in play or is set aside, next to "the Harbinger is still alive" in your Campaign Log, record in parentheses how much damage is on the Harbinger of Valusia, replacing the number that was previously in parentheses.
- For each vengeance point in the victory display, record one tally mark under "Yig's Fury" in your Campaign Log.
- Each investigator earns experience equal to the Victory X value of each card in the victory display. Each investigator earns 1 additional experience for each Tenochtitlán location in the victory display.
- Proceed to Interlude III: The Jungle Beckons.
Resolution 2
Read-aloud text is omitted.
- If it was act 2 when the game ended, add each Tenochtitlán location in play that has no clues on it to the victory display.
- In your Campaign Log, record that X paths are known to you. X is the number of Tenochtitlán locations in the victory display.
- If the Harbinger of Valusia entered play during this scenario:
- If it is in the victory display, cross out "the Harbinger is still alive" in your Campaign Log.
- If it is still in play or is set aside, next to "the Harbinger is still alive" in your Campaign Log, record in parentheses how much damage is on the Harbinger of Valusia, replacing the number that was previously in parentheses.
- For each vengeance point in the victory display, record one tally mark under "Yig's Fury" in your Campaign Log.
- Each investigator earns experience equal to the Victory X value of each card in the victory display. Each investigator earns 1 additional experience for each Tenochtitlán location in the victory display.
- Proceed to Interlude III: The Jungle Beckons.
Interlude III: The Jungle Beckons
Read-aloud narrative is omitted.
In order, read each of the following sections. Then, proceed to Scenario V–A: Heart of the Elders, Part 1.
- Check your supplies. Any one investigator must cross off one gasoline from their supplies. If no gasoline was crossed off, read Out of Gas.
- Out of Gas (read-aloud text omitted).
- When drawing opening hands during the next scenario, investigators cannot take a mulligan.
- Check your supplies. If any investigator has a map, they read A Path Discovered.
- A Path Discovered (read-aloud text omitted): In your Campaign Log, record that the investigators mapped out the way forward.
- Check your supplies. The investigators, as a group, must cross off one provisions per investigator from their supplies. For each provisions they cannot cross off, choose an investigator to read Low on Rations.
- Low on Rations (read-aloud text omitted): You begin the next scenario with 3 fewer resources.
- Check your supplies. Each investigator with medicine may cross it off from their supplies to choose and remove a Poisoned weakness from any investigator's deck. Each investigator who still has a Poisoned weakness in their deck reads The Poison Spreads.
- The Poison Spreads (read-aloud text omitted): You suffer 1 physical trauma.
- Check your supplies. If any investigator has a canteen, they read Patterns in the Stone. Otherwise, read Secrets in the Stone.
- Patterns in the Stone (read-aloud text omitted): Each investigator who has a canteen begins the next scenario with 1 clue (from the token bank).
- Secrets in the Stone (read-aloud text omitted): You suffer no ill effects.
- Check the chaos bag and the Campaign Log. If all of the following are true, the lead investigator reads Faith Restored.
Scenario V–A: Heart of the Elders, Part 1
Intro
Read-aloud narrative in this scenario's introduction is omitted; the rules instructions are kept.
- Intro 1: The investigators must decide (choose one):
- "Let's consult with Ichtaca." Choose this option only if Ichtaca is in an investigator's deck. Proceed to Intro 2.
- "Let's consult with Alejandro." Choose this option only if Alejandro Vela is in an investigator's deck. Skip to Intro 3.
- "Let's consult the expedition journal." Choose this option only if the Expedition Journal is in an investigator's deck. Skip to Intro 4.
- "I wish we knew more about this..." Skip to Setup.
- Intro 2: Begin this scenario with Ichtaca in play. Skip to Setup.
- Intro 3: Begin this scenario with Alejandro Vela in play. Skip to Setup.
- Intro 4: Begin this scenario with Expedition Journal in play. Proceed to Setup.
Setup
- Check Campaign Log. If 6 paths are known to you, skip this scenario and proceed immediately to Resolution 1.
- Gather all cards from the following encounter sets: Pillars of Judgment, Heart of the Elders, Rainforest, Serpents, Expedition, and Poison. (These sets are indicated by their icons.)
- Put the Mouth of K'n-yan into play (The Cavern's Maw side faceup). Each investigator begins play at the Mouth of K'n-yan (The Cavern's Maw).
- Check Campaign Log. Your journey beyond the boundary of time has granted you insight into how to enter K'n-yan. For each path that is known to you, place 1 resource on the Mouth of K'n-yan, as a pillar token.
- If you have played this scenario before during this campaign and have reached act 2 before, flip act 1a over and place it in the Mouth of K'n-yan.
- Create the exploration deck. This is done by taking the 6 single-sided Jungle locations and shuffling them together, along with 1 copy each of the following encounter cards: Pitfall, Ants!, Lost in the Wilds, and Low on Supplies.
- Randomly choose one of the following 3 Ruins locations: Overgrown Ruins, Temple of the Fang, and Stone Altar. Shuffle the randomly chosen location into the exploration deck. Remove the other 2 from the game.
- Check Campaign Log. If the investigators mapped out the way forward, instead of shuffling the randomly chosen location into the exploration deck, put it into play.
- Set aside each Poisoned weakness that is not already in an investigator's deck.
- Shuffle the remainder of the encounter cards to build the encounter deck.
- You are now ready to begin.
Standalone Mode
If you are playing in Standalone Mode and do not wish to refer to any other setup/resolutions, you may use the information below when setting up and playing this scenario:
- Assemble the chaos bag using the following tokens: +1, 0, 0, 0, –1, –2, –2, –3, –5, skull, skull, [hooded-figure icon], [shield icon], [insect icon], [tablet icon], [star icon].
- When playing Heart of the Elders, Part 1, the investigators may choose how many paths are known to you (choose a number between 0 and 5). The more paths are known to you, the quicker and easier the scenario will be.
- For a quick and simple experience, choose 4 or 5.
- For an average experience, choose 2 or 3.
- For the ultimate challenge, choose 0 or 1.
- You have no supplies.
Resolutions
Read-aloud text under "DO NOT READ until the end of Part 1" is omitted except for the rules below.
If no resolution was reached (each investigator resigned or was defeated)
- If there are more pillar tokens on the Mouth of K'n-yan than there were when the scenario began, in your Campaign Log, cross out how many paths are known to you. Then, record that X paths are known to you. X is the number of pillar tokens on the Mouth of K'n-yan.
- The investigators must replay Scenario V–A: Heart of the Elders, Part 1. Reset the game to this scenario's Setup. Do not record anything else in your Campaign Log except for any trauma suffered from your previous game. No experience points are earned from your previous game.
- Any player whose investigator was killed or driven insane must choose a new investigator to play, as normal.
Resolution 1
Read-aloud text is omitted.
- In your Campaign Log, record that the jungle watches. Next to this, in parentheses, record the names of each card with Vengeance X in the victory display. Do not record any tally marks under "Yig's Fury."
- Each investigator earns experience equal to the Victory X value of each card in the victory display.
- Investigators may not spend experience or alter their decks in between Scenarios V–A and V–B. Proceed immediately to Scenario V–B: Heart of the Elders, Part 2.
Scenario V–B: Heart of the Elders, Part 2
Intro
Read-aloud narrative is omitted.
Setup
- Gather all cards from the following encounter sets: K'n-yan, Heart of the Elders, Agents of Yig, Yig's Venom, Forgotten Ruins, Deadly Traps, and Poison. (These sets are indicated by their icons.)
- Put the Mouth of K'n-yan into play (The Depths Beneath side faceup). Each investigator begins play at the Mouth of K'n-yan (The Depths Beneath).
- Search the collection for each card listed in parentheses next to "the jungle watches" in your Campaign Log. Add those cards to the victory display.
- Set the Descent to Yoth location aside, out of play.
- Create the exploration deck. This is done by taking the 5 remaining single-sided locations from the K'n-yan encounter set and shuffling them together, along with 1 copy each of the following encounter cards: Pitfall, No Turning Back, Deep Dark, and Final Mistake.
- Set aside each Poisoned weakness that is not already in an investigator's deck.
- Shuffle the remainder of the encounter cards to build the encounter deck.
- You are now ready to begin.
Resolutions
Read-aloud text under "DO NOT READ until the end of Part 2" is omitted except for the rules below.
If no resolution was reached (each investigator was defeated)
- Check Campaign Log.
- If the investigators rescued Alejandro, proceed to Resolution 1.
- If Alejandro is missing, proceed to Resolution 2.
Resolution 1
Read-aloud text is omitted.
- If the Harbinger of Valusia entered play during this scenario:
- If it is in the victory display, cross out "the Harbinger is still alive" in your Campaign Log.
- If it is still in play or is set aside, next to "the Harbinger is still alive" in your Campaign Log, record in parentheses how much damage is on the Harbinger of Valusia, replacing the number that was previously in parentheses.
- For each vengeance point in the victory display, record one tally mark under "Yig's Fury" in your Campaign Log.
- Each investigator earns experience equal to the Victory X value of each card in the victory display.
- Proceed to Scenario VI: The City of Archives.
Resolution 2
Read-aloud text is omitted.
- If the Harbinger of Valusia entered play during this scenario:
- If it is in the victory display, cross out "the Harbinger is still alive" in your Campaign Log.
- If it is still in play or is set aside, next to "the Harbinger is still alive" in your Campaign Log, record in parentheses how much damage is on the Harbinger of Valusia, replacing the number that was previously in parentheses.
- For each vengeance point in the victory display, record one tally mark under "Yig's Fury" in your Campaign Log.
- Each investigator earns experience equal to the Victory X value of each card in the victory display.
- Proceed to Scenario VI: The City of Archives.
Scenario VI: The City of Archives
Intro
Read-aloud narrative in this scenario's introduction is omitted; the rules instructions are kept.
- Intro 1: The investigators must decide (choose one):
- "Cooperate and tell the creatures everything you know." Proceed to Intro 2.
- "Refuse and resist captivity." Skip to Intro 3.
- Intro 2: In your Campaign Log, record that the investigators cooperated with the Yithians. Skip to Setup.
- Intro 3: In your Campaign Log, record that the investigators resisted captivity. Proceed to Setup.
Setup
- Gather all cards from the following encounter sets: The City of Archives, Agents of Yog-Sothoth, Locked Doors, Chilling Cold, and Striking Fear. (These sets are indicated by their icons.)
- Before drawing opening hands, each investigator searches their deck and play area for all unique Item assets. Set each of those assets aside, out of play. They do not exist in this time period.
- Before drawing opening hands, if a player has Alejandro Vela in their deck, search that investigator's deck for Alejandro Vela and set him aside, out of play.
- Replace each player's investigator card with a Body of a Yithian investigator card (see "Body of a Yithian" on the next page).
- Check Campaign Log.
- If the investigators cooperated with the Yithians, put the Interview Room (Arrival Chamber) into play (it is one of the three Interview Room locations). Each investigator begins play in the Interview Room (Arrival Chamber). Randomize the other two Interview Room locations and put them into play, as well.
- If the investigators resisted captivity, put the Interview Room (Restraining Chamber) into play (it is one of the three Interview Room locations). Each investigator begins play in the Interview Room (Restraining Chamber). Randomize the other two Interview Room locations and put them into play, as well.
- Check Campaign Log.
- If the investigators cooperated with the Yithians, search the gathered encounter sets for a Yithian Observer and spawn it unengaged in the lead investigator's location (note that it gains aloof due to the text on act 1a). Then, each investigator gains 1 clue from the token pool.
- If the investigators resisted captivity, search the gathered encounter sets for a Yithian Observer and place it in the victory display.
- Put the three Halls of Pnakotus locations into play (see the suggested location placement on the printed guide's next page). Set each remaining location aside, out of play.
- Set The Custodian aside, out of play.
Body of a Yithian
During the setup for this scenario, each investigator is instructed to replace their investigator card with one of the Body of a Yithian investigator cards.
- Each investigator's deck remains the same, but for the duration of this scenario, they must use a Body of a Yithian investigator card, and therefore cannot use any of their investigator's abilities.
- Each investigator should still use their investigator mini-card so they can tell who is who.
- Any trauma that would normally be placed on your investigator is transferred to your Body of a Yithian investigator card.
- Any cards that were attached to or placed underneath your investigator card are attached to or placed underneath your Body of a Yithian card.
- For the duration of the scenario, your Body of a Yithian card has the same card title as your former investigator card. For example: If you were playing as Wendy Adams, treat the Body of a Yithian card as if its title were "Wendy Adams" for the duration of this scenario.
- The Body of a Yithian card bears the encounter set icon for The City of Archives, and therefore cannot be used in any scenario other than The City of Archives unless otherwise noted.
The suggested location placement diagram for the Halls of Pnakotus locations on the printed guide's page 26 is not reproduced here.
Standalone Mode
If you are playing in Standalone Mode and do not wish to refer to any other setup/resolutions, you may use the information below when setting up and playing this scenario:
- Assemble the chaos bag using the following tokens: +1, 0, 0, 0, –1, –2, –2, –3, –5, skull, skull, [hooded-figure icon], [shield icon], [insect icon], [tablet icon], [star icon].
- You have no supplies.
Resolutions
Read-aloud text under "DO NOT READ until the end of the scenario" is omitted except for the rules below.
If no resolution was reached (each investigator was defeated)
- In your Campaign Log, record that the investigators had their memories expunged.
- Each investigator is driven insane.
- The investigators lose the campaign.
Resolution 1
Read-aloud text is omitted.
- Check the number of tasks on act 2b that were completed during this scenario.
- If all 6 tasks were completed, record in your Campaign Log that the process was perfected. Each investigator earns 4 bonus experience as they gain insight into the secrets of the Earth.
- If 5 tasks were completed, record in your Campaign Log that the process was successful. Each investigator earns 2 bonus experience as they gain insight into the secrets of the Earth.
- If 4 tasks were completed, record in your Campaign Log that the process backfired. Each investigator earns 1 bonus experience as they gain insight into the secrets of the Earth.
- If 3 tasks were completed, record in your Campaign Log that the process backfired spectacularly.
- Each investigator earns experience equal to the Victory X value of each card in the victory display.
- Proceed to Interlude IV: Those Held Captive.
Interlude IV: Those Held Captive
In order, read each of the following sections. Then, proceed to Scenario VII: The Depths of Yoth.
- Check Campaign Log. If the process backfired, each investigator reveals a random chaos token from the chaos bag. Consult the list below to see what side effects result from your mishap. If the process backfired spectacularly, each investigator reveals two random chaos tokens instead of one, choosing the token that is lower on this list to resolve, and ignoring the other.
- Each investigator who reveals a [star icon] or +1 token suffers no ill effects.
- Each investigator who reveals a [skull] token or any number other than +1 gains the Out of Body Experience weakness, and must add it to their deck.
- Each investigator who reveals a [hooded-figure icon], [shield icon], [insect icon], or [tablet icon] token must use the Body of a Yithian investigator card as their investigator card for the remainder of the campaign. They also gain the Out of Body Experience weakness, and must add it to their deck.
- Check the chaos bag and the Campaign Log. If all of the following are true, the lead investigator reads A Mind Recovered. If any of the following are not true, the lead investigator reads Forever Lost instead.
- There are 2 or more [shield icon] tokens in the chaos bag.
- The investigators rescued Alejandro.
- The Custodian was under an investigator's control when the previous scenario ended.
- A Mind Recovered (read-aloud text omitted): In your Campaign Log, record that Alejandro remembers everything. Add 1 [shield icon] token to the chaos bag for the remainder of the campaign.
- Forever Lost (read-aloud text omitted): In your Campaign Log, record that Alejandro is set against you. If Alejandro Vela is part of an investigator's deck, remove him from that investigator's deck for the remainder of the campaign.
- Check your supplies. If any investigator has chalk, they read The Way Is Open. Otherwise, the lead investigator reads The Way Is Shut.
- The Way Is Open (read-aloud text omitted): You suffer no ill effects.
- (read-aloud text omitted).
Scenario VII: The Depths of Yoth
Opening Rest
Read-aloud narrative is omitted.
- Check your supplies. Each investigator with a blanket reads Restful Sleep. The rest read Tossing and Turning.
- Restful Sleep (read-aloud text omitted): You suffer no ill effects.
- Tossing and Turning (read-aloud text omitted): You suffer 1 physical or mental trauma (your choice).
Intro
Read-aloud narrative in this scenario's introduction is omitted; the rules instructions are kept.
Intro 1
- Check Campaign Log.
- If you are forging your own path, proceed to Intro 2.
- If Ichtaca's faith is restored, skip to Intro 3.
- Otherwise, skip to Intro 4.
Intro 2
Read-aloud text is omitted.
- In your Campaign Log, record that Ichtaca is set against you. Add 1 [insect icon] token to the chaos bag for the remainder of the campaign.
- Skip to Setup.
Intro 3
Read-aloud text is omitted.
- Skip to Setup.
Intro 4
Read-aloud text is omitted.
- In your Campaign Log, record that Ichtaca is set against you. If Ichtaca is part of an investigator's deck, remove her from that investigator's deck for the remainder of the campaign.
- Check Campaign Log.
- If the relic is missing, proceed to Intro 5.
- If the investigators found the missing relic, skip to Intro 6.
Intro 5
Read-aloud text is omitted.
- Skip to Setup.
Intro 6
Read-aloud text is omitted.
- Check your supplies. If any investigator has a pocketknife, that investigator reads Intro 7. Otherwise, skip to Intro 8.
Intro 7
Read-aloud text is omitted.
- Skip to Setup.
Intro 8
Read-aloud text is omitted.
- If Relic of Ages is part of an investigator's deck, remove it from that investigator's deck for the remainder of the campaign.
- In your Campaign Log, cross off the investigators found the missing relic and record the relic is missing.
- Proceed to Setup.
Setup
- Gather all cards from the following encounter sets: The Depths of Yoth, Agents of Yig, Yig's Venom, Expedition, Forgotten Ruins, and Poison. (These sets are indicated by their icons.)
- Check the number of tally marks under "Yig's Fury" in your Campaign Log.
- If there are 0 tally marks, search the gathered encounter cards for Yig and each copy of Pit Warden. Remove those cards from the game.
- If there are 1–5 tally marks, no changes are made.
- If there are 6–10 tally marks, remove agenda 1a from the game. The game begins at agenda 2a.
- If there are 11–14 tally marks, remove agendas 1a and 2a from the game. The game begins at agenda 3a.
- If there are 15–17 tally marks, remove agendas 1a, 2a, and 3a from the game. The game begins at agenda 4a.
- If there are 18–20 tally marks, remove agendas 1a, 2a, 3a, and 4a from the game. The game begins at agenda 5a.
- If there are 21 or more tally marks, remove agendas 1a, 2a, 3a, 4a, and 5a from the game. The game begins at agenda 6a.
- Set each of the 10 single-sided locations aside, out of play. Draw one of those locations at random other than Steps of Yoth, and put it into play. Each investigator begins play at the randomly chosen location.
- Check Campaign Log. If the Harbinger is still alive, search the collection for the Harbinger of Valusia and set it aside. Place damage on it equal to the amount of damage recorded in parentheses in your Campaign Log.
- If it is agenda 5a or 6a, move the set-aside Harbinger of Valusia enemy to the pursuit area. (See "Pursuit" on the next page.)
- Set the Yig enemy aside, out of play.
- If it is agenda 6a, move the set-aside Yig enemy to the pursuit area.
- Create the exploration deck. This is done by taking the set-aside Steps of Yoth and 4 of the remaining single-sided locations and shuffling them together.
Depth Level
Throughout this scenario, the number of resources under "Current Depth" on the scenario reference card indicates the current depth level. As the investigators journey deeper into Yoth by completing act 1, resources are added to the current depth level, and play continues until the investigators reach a certain depth level, or are defeated. Deeper levels of Yoth are deadlier, but the deeper the level the investigators are able to reach, the better the resolution of this scenario will be.
The current depth level has no game effect on its own; however, some encounter card effects may change or become stronger depending on the current depth level.
Pursuit
Some cards in this scenario reference an area called the "pursuit area." The pursuit area is an out-of-play area next to the act and agenda deck that enemies can enter and leave via card effects. Generally speaking, enemies in play will move to the pursuit area whenever the investigators reach the next depth level. Although the pursuit area is out of play, whenever an enemy moves to the pursuit area, it keeps all tokens and attachments.
Enemies in the pursuit area are considered to be "in pursuit." Enemies that are in pursuit are considered to be out of play, and cannot be affected by player cards or investigator actions. However, enemies that are in pursuit can re-enter play by a variety of card abilities.
Standalone Mode
If you are playing in Standalone Mode and do not wish to refer to any other setup/resolutions, you may use the information below when setting up and playing this scenario:
- Assemble the chaos bag using the following tokens: +1, 0, 0, 0, –1, –2, –2, –3, –5, skull, skull, [hooded-figure icon], [shield icon], [insect icon], [tablet icon], [star icon].
- Do not alter the contents of the chaos bag during the intro.
- You are not forging your own path.
- Ichtaca's faith is not restored.
- The relic is missing.
- The investigators may choose how many tally marks are under "Yig's Fury." The lower the number chosen, the safer and easier the scenario will be.
- For a safer and easier experience, choose 0 or 5.
- For an average experience, choose 10 or 14.
- For a more brutal experience, choose 17 or 20.
- For the ultimate challenge, choose 21 or higher.
- You have no supplies.
- This scenario is unwinnable in Standalone Mode. Your goal is to continue playing for as long as you can. Once each investigator has been defeated, the current depth level will determine how well you performed.
Resolutions
Read-aloud text under "DO NOT READ until the end of the scenario" is omitted except for the rules below.
- If no resolution was reached (each investigator resigned or was defeated): Read Resolution 1.
Resolution 1
Read-aloud text is omitted.
- In your Campaign Log, record that the investigators fell into the depths. Check the current depth level when the scenario ended.
- If the current depth level is 1, the fall is fatal. Each investigator is killed. The investigators lose the campaign.
- If the current depth level is 2, each investigator suffers 2 physical trauma and searches the collection for a random basic Injury weakness, adding it to their deck. If this trauma causes all investigators to be killed, the investigators lose the campaign.
- If the current depth level is 3, each investigator suffers 1 physical trauma. If this trauma causes all investigators to be killed, the investigators lose the campaign.
- If the current depth level is 4, you suffer no ill effects.
- If the Harbinger of Valusia entered play during this scenario:
- If it is in the victory display, cross out "the Harbinger is still alive" in your Campaign Log.
- If it is still in play or is set aside, next to "the Harbinger is still alive" in your Campaign Log, record in parentheses how much damage is on the Harbinger of Valusia, replacing the number that was previously in parentheses.
- For each vengeance point in the victory display, record one tally mark under "Yig's Fury" in your Campaign Log.
- Each investigator earns experience equal to the Victory X value of each card in the victory display. Each investigator earns additional experience equal to the current depth level.
- Proceed to Interlude V: The Darkness.
Resolution 2
Read-aloud text is omitted.
- In your Campaign Log, record that the Nexus is near.
- If the Harbinger of Valusia entered play during this scenario:
- If it is in the victory display, cross out "the Harbinger is still alive" in your Campaign Log.
- If it is still in play or is set aside, next to "the Harbinger is still alive" in your Campaign Log, record in parentheses how much damage is on the Harbinger of Valusia, replacing the number that was previously in parentheses.
- For each vengeance point in the victory display, record one tally mark under "Yig's Fury" in your Campaign Log.
- Each investigator earns experience equal to the Victory X value of each card in the victory display. Each investigator earns additional experience equal to the current depth level.
- Proceed to Interlude V: The Darkness.
Interlude V: The Darkness
Check Campaign Log.
- If the investigators fell into the depths, proceed to The Darkness 1.
- If the Nexus is near, skip to The Darkness 2.
The Darkness 1
Read-aloud text is omitted.
- Proceed to The Darkness 2.
The Darkness 2
Read-aloud text is omitted.
In order, read each of the following sections. Then, proceed to Scenario VIII: Shattered Aeons.
- Check Campaign Log. If the investigators found the missing relic, the lead investigator reads Arcane Thrumming. If the relic is missing, the lead investigator reads Growing Concern instead.
- Arcane Thrumming (read-aloud text omitted).
- Check Campaign Log. If the investigators recovered the Relic of Ages, and if you are forging your own path, read Final Dawning, below. Otherwise, you suffer no ill effects.
- Growing Concern (read-aloud text omitted). Depending on your difficulty mode, add the following chaos token to the chaos bag for the remainder of the campaign:
- Easy: –3
- Standard: –4
- Hard: –5
- Expert: –7
- Final Dawning (read-aloud text omitted).
- The investigator with Relic of Ages in their deck swaps it with Relic of Ages (Repossess the Past).
- Arcane Thrumming (read-aloud text omitted).
- Check your supplies. If any investigator has torches, they read Torchlight. Otherwise, read The Abyss.
- Torchlight (read-aloud text omitted). In your Campaign Log, record that the braziers are lit.
- The Abyss (read-aloud text omitted). In your Campaign Log, record that the braziers remain unlit.
- Check Campaign Log. If the braziers are lit, check your supplies. If any investigator has a map, they read Reading Signs.
- Reading Signs (read-aloud text omitted). Each investigator with a map earns 2 additional experience as they gain insight into the caverns beneath the surface of the Earth.
Scenario VIII: Shattered Aeons
- Check Campaign Log. If the braziers are lit, proceed to Intro 1. If the braziers remain unlit, skip to Intro 2.
Intro
Read-aloud narrative in this scenario's introduction is omitted; the rules instructions are kept.
- Intro 1: Skip to Intro 3.
- Intro 2: Each investigator begins this scenario with 2 fewer cards in their opening hand. Proceed to Intro 3.
- Intro 3: If the investigators found the missing relic, proceed to Intro 4. If the relic is missing, skip to Intro 5.
- Intro 4: Skip to Setup.
- Intro 5: Proceed to Setup.
Setup
- Gather all cards from the following encounter sets: Shattered Aeons, Pnakotic Brotherhood, Temporal Flux, and Ancient Evils. (These sets are indicated by their icons.)
- If there are more [hooded-figure icon] tokens in the chaos bag than [shield icon] tokens, also gather the Dark Cult encounter set, indicated by its icon.
- If there are more [shield icon] tokens in the chaos bag than [hooded-figure icon] tokens, also gather the Agents of Yig encounter set, indicated by its icon.
- If there is an equal number of [hooded-figure icon] and [shield icon] tokens in the chaos bag, also gather both the Dark Cult and Agents of Yig encounter sets, indicated by their icons.
- Put the Nexus of N'kai into play. Each investigator begins play in the Nexus of N'kai.
- Set the 2 enemy cards depicted here aside, out of play: Ichtaca (Scion of Yig) and Alejandro Vela (Or, Is He?).
- Note: These cards are double-sided and have story cards on their other side. For the best experience, do not look at the other side unless an effect instructs you to do so.
- Set the following cards aside, out of play: Formless Spawn, Relic of Ages (Unleash the Timestream), A Pocket in Time, Act 4a—"Paradise Lost," Act 4a—"Timelock," and the 6 single-sided Shattered locations.
- Create the exploration deck. This is done by taking the 3 remaining single-sided locations and shuffling them together, along with 1 copy each of the following encounter cards: Wracked by Time, Between Worlds, and Ancient Evils.
- Check Campaign Log. For every 10 tally marks under "Yig's Fury," place the top card of the lead investigator's deck in the victory display, facedown. For the remainder of the scenario, treat each of those cards as if it has Vengeance 1.
- Shuffle the remainder of the encounter cards to build the encounter deck.
- You are now ready to begin.
Story Cards
Story cards are a new card type that appears in this scenario. These cards serve as an avenue for additional narrative and typically appear as the reverse side of another scenario card. When you are instructed to resolve a story card, simply read its story text and resolve its game text, if any.
Standalone Mode
If you are playing in Standalone Mode and do not wish to refer to any other setup/resolutions, you may use the information below when setting up and playing this scenario:
- Assemble the chaos bag using the following tokens: +1, 0, 0, 0, –1, –2, –2, –3, –4, –5, skull, skull, [insect icon], [tablet icon], [star icon].
- The braziers are lit.
- The relic is missing.
- The investigators may decide (choose one):
- Ichtaca is set against you. Add 3 [shield icon] tokens to the chaos bag.
- Alejandro is set against you. Add 3 [hooded-figure icon] tokens to the chaos bag.
- Ichtaca is set against you. Alejandro is set against you. Add 2 [insect icon] tokens to the chaos bag. Choose this option for the ultimate challenge.
- You have no supplies.
Resolutions
Read-aloud text under "DO NOT READ until the end of the scenario" is omitted except for the rules below.
- If no resolution was reached (each investigator resigned or was defeated): Read Resolution 4.
Resolution 1
Read-aloud text is omitted.
- In your Campaign Log, record that the investigators mended the tear in the fabric of time.
- Each investigator suffers 2 physical trauma and 2 mental trauma, as they never fully recover from the expedition into N'kai.
- Each location attached to the Relic of Ages with Victory X is added to the victory display.
- Each investigator earns experience equal to the Victory X value of each card in the victory display. Each investigator earns 5 bonus experience, as they have mended the shattered timeline and saved the Earth from catastrophe.
- The investigators win the campaign!
- Do not read the Epilogue.
Resolution 2
Read-aloud text is omitted.
- In your Campaign Log, record that the investigators saved the civilization of the Serpents.
- The Earth is saved, and the investigators win the campaign…
- …But the investigators have reshaped the world, existing in another time altogether. These investigators cannot be transferred to a different campaign. (You must start fresh.)
- Do not read the Epilogue.
Resolution 3
Read-aloud text is omitted.
- In your Campaign Log, record that the investigators saved the civilization of the Yithians.
- The Earth is saved, and the investigators win the campaign…
- …But the investigators have reshaped the world, existing in another time altogether. These investigators cannot be transferred to a different campaign. (You must start fresh.)
- Do not read the Epilogue.
Resolution 4
Read-aloud text is omitted.
- In your Campaign Log, record that the fabric of time is unwoven.
- Each investigator is driven insane.
- The investigators lose the campaign.
Resolution 5
Read-aloud text is omitted.
- In your Campaign Log, record that the investigators turned back time.
- Each location attached to the Relic of Ages with Victory X is added to the victory display.
- Each investigator earns experience equal to the Victory X value of each card in the victory display.
- Proceed to the Epilogue.
Epilogue
Check Campaign Log.
- Read the following only if the investigators turned back time.
- Epilogue narrative (read-aloud text omitted).
- Proceed to Scenario IX: Turn Back Time.
Secret Scenario IX: Turn Back Time
This secret scenario is read only after the Epilogue (see the printed guide's "Do Not Read unless you have read the Epilogue" section).
Check Campaign Log.
- If the investigators were forced to wait for additional supplies, read Intro 1.
- If the investigators cleared a path to the Eztli ruins, skip to Intro 2.
Intro 1
Read-aloud text is omitted.
- In your Campaign Log, cross off all entries after the first three entries. The crossed-off entries have been undone by your actions.
- Proceed to Setup.
Intro 2
Read-aloud text is omitted.
- In your Campaign Log, cross off all entries after the first three entries. The crossed-off entries have been undone by your actions.
- Proceed to Setup.
Setup
- Open the packet of cards labeled "Do Not Open Unless You Are Instructed."
- Gather all cards from the following encounter sets: Turn Back Time, The Doom of Eztli, Agents of Yig, Yig's Venom, Temporal Flux, Deadly Traps, Forgotten Ruins, Poison, and Chilling Cold. (These sets are indicated by their icons.)
- When building the act deck, use the three new act cards provided in the Turn Back Time encounter set instead of the original act deck from The Doom of Eztli. The Turn Back Time encounter set can be identified by its icon.
- Remove the Relic of Ages (Repossess the Past) from its owner's deck and set it aside, out of play.
- Remove the Relic of Ages (…A Device, of Some Sort) from the game.
- Put the Entryway into play. Each investigator begins play at the Entryway.
- Create the exploration deck. This is done by taking the five single-sided Ancient locations and shuffling them together, along with one copy each of the following treachery cards: Ill Omen, Deep Dark, Final Mistake, Entombed, and Crypt Chill.
- Set the Harbinger of Valusia enemy and the Chamber of Time location aside, out of play.
- Add 1 [insect icon] token to the chaos bag, for the remainder of the campaign.
- Set aside each Poisoned weakness that is not already in an investigator's deck.
- Shuffle the remainder of the encounter cards to build the encounter deck.
- You are now ready to begin.
Resolution (no resolution reached)
Read-aloud text under "DO NOT READ until the end of the scenario" is omitted.
- If no resolution was reached (each investigator resigned or was defeated):
- In your Campaign Log, record that the fabric of time is unwoven.
- Each investigator is driven insane.
- The investigators lose the campaign.
Resolution 1
Read-aloud text is omitted.
- In your Campaign Log, record that the investigators sealed the Relic of Ages forever.
- Each investigator earns experience equal to the Victory X value of each card in the victory display.
- The investigators win the campaign!