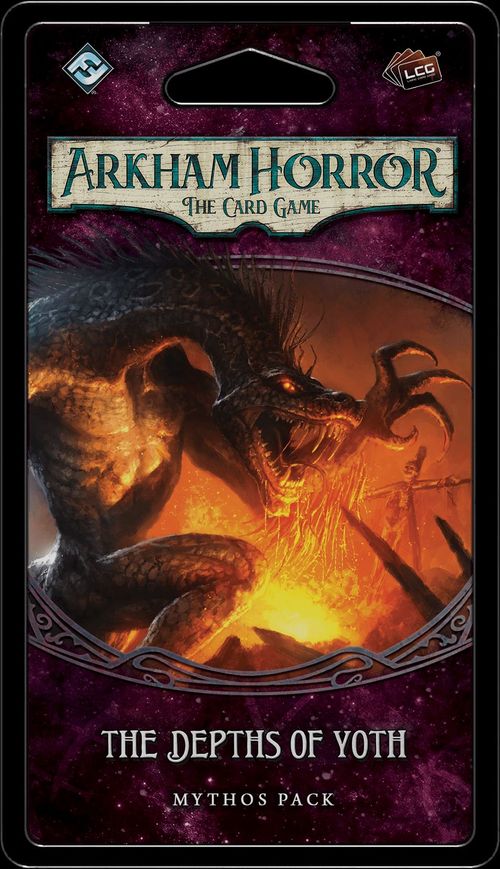
Arkham Horror: The Card Game – The Depths of Yoth: Mythos Pack
Arkham Horror: The Card Game – The Depths of Yoth: Mythos Pack Rulebook
Table of Contents
Table of Contents
Interlude IV (Closing Passage)
The passage below closes Interlude IV, immediately before Scenario VII. The printed page carries no heading for it; the heading here is editorial.
Check your supplies. Each investigator with a blanket reads Restful Sleep. The rest read Tossing and Turning.
- Restful Sleep: Though you long for a proper bed, at least your blanket protects you from the frigid chill that permeates the cavern. When "morning" arrives, your body longs for more sleep, but you know you must press onward and reach the Nexus as fast as you can… You suffer no ill effects.
- Tossing and Turning: Sleep does not come easily for you. Barely any layers protect you from the bitter cold of the underground cavern, and you lie shivering for hours before exhaustion finally claims you. You awaken every hour or so as the shifting of your body almost causes you to tumble off your stone perch. When "morning" comes, you are even more weary than you were the previous night. You suffer 1 physical or mental trauma (your choice).
Scenario VII: The Depths of Yoth
Intro 1
Several hours after you wake, your laborious descent pays dividends. The red glow emanating from the bottom of the stairs grows brighter with each step. The stone floor finally levels off, and the choking tunnel walls open to reveal a labyrinthine network of immense, far-reaching caverns. Littered throughout the caverns are the ruins of a vast city, the likes of which you have never seen. The elaborate stone architecture has been worn away by ages of abandonment, but you sense that there is a history here that runs deeper than you can even fathom.
When you turn around to question Ichtaca, you notice a faint yellow glow in her eyes, her pupils narrowed and contracted. "Yoth…the last refuge of Valusia…" she quietly intones.
Just then, a terrifying roar echoes throughout the cavern. The walls and floor shake with tremendous force, and the red glow that permeates the area brightens. A flood of hisses emerges from the tunnels all around you. Ichtaca walks to the edge of a nearby precipice and looks out over the vast depths. "He is here. I feel his presence. The Father of the Serpents…Yig."
Check Campaign Log. If you are forging your own path, proceed to Intro 2. If Ichtaca's faith is restored, skip to Intro 3. Otherwise, skip to Intro 4.
Intro 2
You realize now that Ichtaca has her own agenda. Alejandro, as well—both have been using you for their own ends, keeping you from the truth. You raise a weapon and demand answers from her, catching her by surprise. "Yig demands the relic be brought to the Nexus," she responds anxiously. Her eyes glow brightly, and her skin starts to scale over. Your eyes narrow, and you move to corner her against the edge of the precipice, so she cannot escape. "The relic cannot be trusted to the hands of the Brotherhood: this much is true…For it is Valusia that shall be restored to glory. Yig has called, and I must answer." Before you can react, she throws herself off the edge and into the depths below.
In your Campaign Log, record that Ichtaca is set against you. Add 1 [icon] token to the chaos bag for the remainder of the campaign.
Skip to Setup.
Intro 3
You approach Ichtaca and rest a hand on her shoulder. Your companion takes a deep breath and turns to face you. Her eyes are cast downward in shame, and they have returned to their normal color. "I…I'm sorry. I have brought you to your ruin. He called out to me, long ago, told me of my heritage, of my people. I did his bidding willingly." She clenches her fists, her gaze meeting yours. "But now I realize I was wrong. Humanity deserves its time on Earth. You may have inherited it from far more powerful forces, but it is humanity's time, not theirs." You don't completely understand what she is saying, but you understand the implication. Whatever Ichtaca truly is, she is on your side. A calm silence lingers between you, an unspoken bond that joins you as one. "We must get to the Nexus and prevent the serpents from recovering the relic," she explains after a few moments, breaking the silence. You nod in agreement.
Skip to Setup.
Intro 4
You hesitate, unsure what to do next. What are Ichtaca's true motives? Why has she led you here? Before you have the chance to react, she draws her bow and aims an arrow at your heart. "Thank you for aiding me this far," Ichtaca says curtly, "but the time has come for us to part ways. Yig has called, and I must answer." Her yellow eyes narrow and shine brightly.
In your Campaign Log, record that Ichtaca is set against you. If Ichtaca is part of an investigator's deck, remove her from that investigator's deck for the remainder of the campaign.
Check Campaign Log. If the relic is missing, proceed to Intro 5. If the investigators found the missing relic, skip to Intro 6.
Intro 5
"You must leave this place at once. This is not humanity's battle. It is ours. We cannot let you or the Brotherhood foil our plans. Not now, not when we are so close." Her hand wavers for a moment, and her eyes flicker again. You can tell that something is tearing at her, weighing on her mind. Finally, she speaks again. "Go now. Before I change my mind. And if you wish to live, do not follow. I will not give you a second chance." Ichtaca swiftly departs, eyes trained on you until she leaves your sight. Despite her warning, you feel that you have no choice but to follow. If you don't, who will protect humanity?
Skip to Setup.
Intro 6
"Now drop your weapons." The betrayal stings your chest, and you are gripped with anger and despair. Thoughts of escape flash across your mind, but you have seen her skill with a bow—with her steady aim, you would be dead before you took two steps. You have no choice but to comply. Your weapons clatter to the ground, one at a time. "Good. Now the relic: hand it to me." Grimacing, you take a few steps forward and offer the relic to Ichtaca.
Check your supplies. If any investigator has a pocketknife, that investigator reads Intro 7. Otherwise, skip to Intro 8.
Intro 7
As Ichtaca reaches out to grab the relic, you pull out your concealed pocketknife and quickly attack, catching her by surprise. The blade cuts deeply across her forearm. Blood sprays across your chest, and she staggers with pain, gripping her arm. Her heel clips a rock near the edge of the precipice, and she tumbles over the side of the ledge, her scream growing distant as she falls. You barely have time to recover from the shock of what just happened, as another colossal roar fills the cavern, and the ground shakes. You gather your belongings and continue your descent.
Skip to Setup.
Intro 8
Ichtaca grabs the relic. You can see the skin on the back of her hand growing hard and scaly. You take a few steps back, knuckles white with anger. "Go now. Before I change my mind," she says. "And if you wish to live, do not follow. I will not give you a second chance." Ichtaca swiftly departs, eyes trained on you until she leaves your sight. Despite her warning, you feel that you have no choice but to follow. If you don't, who will protect humanity?
If Relic of Ages is part of an investigator's deck, remove it from that investigator's deck for the remainder of the campaign. In your Campaign Log, cross off the investigators found the missing relic and record the relic is missing.
Proceed to Setup.
Setup
- Gather all cards from the following encounter sets: The Depths of Yoth, Agents of Yig, Yig's Venom, Expedition, Forgotten Ruins, and Poison. These sets are indicated by icons in the printed rulebook.
- Check the number of tally marks under "Yig's Fury" in your Campaign Log.
- If there are 0 tally marks, search the gathered encounter cards for Yig and each copy of Pit Warden. Remove those cards from the game.
- If there are 1–5 tally marks, no changes are made.
- If there are 6–10 tally marks, remove agenda 1a from the game. The game begins at agenda 2a.
- If there are 11–14 tally marks, remove agendas 1a and 2a from the game. The game begins at agenda 3a.
- If there are 15–17 tally marks, remove agendas 1a, 2a, and 3a from the game. The game begins at agenda 4a.
- If there are 18–20 tally marks, remove agendas 1a, 2a, 3a, and 4a from the game. The game begins at agenda 5a.
- If there are 21 or more tally marks, remove agendas 1a, 2a, 3a, 4a, and 5a from the game. The game begins at agenda 6a.
- Set each of the 10 single-sided locations aside, out of play. Draw one of those locations at random other than Steps of Yoth, and put it into play. Each investigator begins play at the randomly chosen location.
- Check Campaign Log. If the Harbinger is still alive, search the collection for the Harbinger of Valusia and set it aside. Place damage on it equal to the amount of damage recorded in parentheses in your Campaign Log.
- If it is agenda 5a or 6a, move the set-aside Harbinger of Valusia enemy to the pursuit area. (See "Pursuit" below.)
- Set the Yig enemy aside, out of play.
- If it is agenda 6a, move the set-aside Yig enemy to the pursuit area.
- Create the exploration deck. This is done by taking the set-aside Steps of Yoth and 4 of the remaining single-sided locations and shuffling them together.
Depth Level
Throughout this scenario, the number of resources under "Current Depth" on the scenario reference card indicates the current depth level. As the investigators journey deeper into Yoth by completing act 1, resources are added to the current depth level, and play continues until the investigators reach a certain depth level, or are defeated. Deeper levels of Yoth are deadlier, but the deeper the level the investigators are able to reach, the better the resolution of this scenario will be.
The current depth level has no game effect on its own; however, some encounter card effects may change or become stronger depending on the current depth level.
Pursuit
Some cards in this scenario reference an area called the "pursuit area." The pursuit area is an out-of-play area next to the act and agenda deck that enemies can enter and leave via card effects. Generally speaking, enemies in play will move to the pursuit area whenever the investigators reach the next depth level. Although the pursuit area is out of play, whenever an enemy moves to the pursuit area, it keeps all tokens and attachments.
Enemies in the pursuit area are considered to be "in pursuit." Enemies that are in pursuit are considered to be out of play, and cannot be affected by player cards or investigator actions. However, enemies that are in pursuit can re-enter play by a variety of card abilities.
Standalone Mode
If you are playing in Standalone Mode and do not wish to refer to any other setup/resolutions, you may use the information below when setting up and playing this scenario:
- Assemble the chaos bag using the following tokens: +1, 0, 0, 0, –1, –2, –2, –3, –5, skull, skull, cultist, tablet, elder thing, [icon], [icon].
- Do not alter the contents of the chaos bag during the intro.
- You are not forging your own path.
- Ichtaca's faith is not restored.
- The relic is missing.
- The investigators may choose how many tally marks are under "Yig's Fury." The lower the number chosen, the safer and easier the scenario will be.
- For a safer and easier experience, choose 0 or 5.
- For an average experience, choose 10 or 14.
- For a more brutal experience, choose 17 or 20.
- For the ultimate challenge, choose 21 or higher.
- You have no supplies.
- This scenario is unwinnable in Standalone Mode. Your goal is to continue playing for as long as you can. Once each investigator has been defeated, the current depth level will determine how well you performed.
Resolution 1
Do not read until the end of the scenario.
If no resolution was reached (each investigator resigned or was defeated): Read Resolution 1.
After hours and hours of travel, you've only just scratched the surface of this boundless subterranean world. Humanity could spend centuries mapping out these tunnels and never complete the task. No matter how quickly you plumb the depths, the serpents chasing you are hot on your tail. You are intruders in their home, and they know these hellish tunnels better than you. With your wounds slowing you down and panic seeping into every one of your decisions, your death at the hands of these creatures is inevitable. Despair worms its way into your mind. When the serpents inevitably catch up to you, you are crossing one of the cavern's many long bridges of stone that span a wide, dark chasm. Serpent creatures on both sides of the chasm flank you, spear tips corralling you against the precarious edge of the bridge. A small hunk of stone cracks at your heel and detaches, falling into the inky void below. You do not hear it strike the floor of the chasm. There is no hope to escape or flee this time—you have no choice but to accept your fate. The spear tips press you closer to the edge. You close your eyes and fall.
- In your Campaign Log, record that the investigators fell into the depths. Check the current depth level when the scenario ended.
- If the current depth level is 1, the fall is fatal, and the darkness of N'kai devours the shattered corpses. Each investigator is killed. The investigators lose the campaign.
- If the current depth level is 2, each investigator suffers 2 physical trauma and searches the collection for a random basic Injury weakness, adding it to their deck. If this trauma causes all investigators to be killed, the investigators lose the campaign.
- If the current depth level is 3, each investigator suffers 1 physical trauma. If this trauma causes all investigators to be killed, the investigators lose the campaign.
- If the current depth level is 4, you suffer no ill effects.
- If the Harbinger of Valusia entered play during this scenario:
- If it is in the victory display, cross out "the Harbinger is still alive" in your Campaign Log.
- If it is still in play or is set aside, next to "the Harbinger is still alive" in your Campaign Log, record in parentheses how much damage is on the Harbinger of Valusia, replacing the number that was previously in parentheses.
- For each vengeance point in the victory display, record one tally mark under "Yig's Fury" in your Campaign Log.
- Each investigator earns experience equal to the Victory X value of each card in the victory display. Each investigator earns additional experience equal to the current depth level.
- Proceed to Interlude V: The Darkness.
Interlude V and Scenario VIII are not part of this Mythos Pack and are not reproduced here.
Vengeance X
Printed on page 2 ("Additional Rules and Clarifications") of the same campaign guide. The general Supplies rule on that page is not reproduced here.
Some encounter cards are worth vengeance points. The text Vengeance X indicates that a card is worth X vengeance points. Like Victory X, when an encounter card with Vengeance X is overcome by the investigators, it is stored in the victory display until the end of the scenario. However, unlike victory points, vengeance represents the awareness and animosity of the Father of Serpents, and it is generally a good idea to avoid accruing vengeance points whenever possible.
Vengeance points in the victory display have no impact upon the game unless specifically referenced by another encounter card.
- As an enemy with Vengeance X is defeated, place the card in the victory display instead of in the discard pile.
- At the end of a scenario, take each location with Vengeance X that is in play, revealed, and has no clues on it, and place it in the victory display.
- As a treachery card with Vengeance X completes its resolution, place it in the victory display instead of in the discard pile.
- Cards worth vengeance points are not also worth victory points unless the card has both Victory X and Vengeance X.