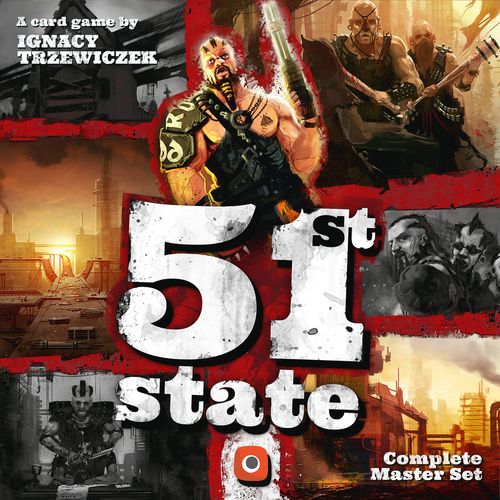
51st State: Master Set
51st State: Master Set Rulebook
Table of Contents
Table of Contents
Components Overview
- 1 Victory Point board
- 4 Victory Point markers
- 1 First Player token
- 4 Faction boards
- 200 cards (63x88):
- 88 51st State base cards
- 12 Connection cards
- 50 New Era cards
- 50 Winter cards
Goods Markers & Tokens
- Min. 30 Brick pieces
- Min. 30 Gun pieces
- Min. 30 Fuel pieces
- Min. 30 Iron pieces
- Min. 38 Worker pieces
- 10 Shield tokens
- 13 Bullet tokens
- 9 Development tokens
- 20 Red Contact tokens
- 20 Blue Contact tokens
- 30 Grey Contact tokens
- 7 Universal Contact tokens
- 4 Multiplier tokens
- This rulebook
Cards Overview
Anatomy of a Card
Each Location card shows:
- Distance to the Location. It tells you how far you have to move your ass to interact with the card.
- Spoils. You gain this stuff when you Raze the Location.
- The Type(s) of the Location. These are important when Developing the Location into something new and hopefully better.
- Category (Production, Feature, or Action).
- Deal. You gain this stuff by making a Deal with the Location.
- Ability of the card.
- You can easily see if this card belongs to the base 51st State base set or an expansion. We're helpful. We love you.
Goods Icons
Fuel, Iron, Gun, and Brick are called Resources.
Ammo is universally valuable and may be used in place of any of the four basic Resources. When paying for Actions, you may spend Ammo instead of a Resource, but not the other way around.
- Worker.
- Card.
- Blue, Grey, and Red Contact tokens.
- Universal Contact token. When needing a Contact token, you can use a Universal one as any of the three basic Contact tokens.
- Development token.
- Defense token.
- Victory Point.
Other Icons
- Location.
- Location Type icons.
Managing Your Locations
As you can see from the picture here, you are going to be Building a lot of Locations! To make it easier for you to manage - and no, I am not telling you that you don't look smart or something - we divided them into three Categories: Production, Feature, and Action. Keep your Locations in different rows according to their Category and you will be just fine. Put Production Locations in the top row, Features in the middle, and Actions in the bottom. Easy peasy.
Ah, one more thing!
For the dim-witted Mutant, when you make a Deal, flip the card upside down when placing the card under your Faction board so you can read the word Deal.
Rules of Play
Basic Game Concepts
Interact with Location Cards in 3 Different Ways
Each card in the game represents a Location from the world of Neuroshima. Your goal is to Build a new State by controlling a bigger and better region. You want to control it all! You do this by interacting with Locations.
You can Build a Location. Put the card in front of you and use the Ability in every round of the game. The more Locations you Build, the more Abilities you gain and your power will grow. Sounds good, right?
You can Raze a Location. Discard the card from your hand and get the Goods shown in the Spoils field. The Location is burnt to the ground, and you took their stuff. Pity, huh?
You can make a Deal with a Location. Put the card under your Faction board so that only the blue Deal field shows. This Location is not part of your State and does not provide you with an Ability. Instead, The card provides you with the Good shown on the Deal field of the card. I don't want to complain, but that's exactly what happens when you try to be a nice scout and you don't Raze people. You should Raze them. Raze them all!
Use Contact Tokens to Interact
If you want to Build, Raze, or make a Deal with a Location you will need Contact tokens. They represent your means of interacting with the Locations. There are Blue tokens that represent your merchants and are used for making Deals. The Grey tokens represent your Building skills and are used to Build Locations. There are also Red Contact tokens - all your gangers, mutants, and mercenaries that you use to Raze Locations.
All kinds of cool tokens. Remember, Red is for Raaaaazing them all!
Burn Them to the Ground!
In the game, you will also be able to Raze the other player's Locations. It's 51st State bro, either you burn them, or they burn you. There is no middle ground.
Each Location has a Defense value. All Production Locations have a Defense value of 3, all Feature Locations have a Defense value of 4, and all Action Locations have a Defense value of 5. If you have a number of Red Contact tokens equal to the Defense value of another player's Location that pisses you off, you can spend them to Raze this Location. We will talk about this again later, I'm just giving you a heads up, because it looks like you kinda like this whole Razing concept. Am I right?
Flow of a Round
Each round is divided into 4 Phases so people don't get lost (no offense).
- Draft
- Production
- Action
- Cleanup
1. Lookout Phase
- Reveal the top card of each Connection pile. Place it on top of the pile, or beside it, whatever works best for you.
- Draw a number of cards from the Deck equal to the number of players, plus 1 (e.g. 4 cards in a 3-player game) and place them face-up in the center of the playing area. Starting with the first player and proceeding clockwise, each player selects one card from those revealed and adds it to their hand. After everyone has chosen a card, discard the remaining card face-up to the discard pile.
- Again, draw a number of cards from the Deck equal to the number of players, plus 1 and place them face-up in the center of the playing area. This time, starting with the last player and proceeding counter-clockwise, everyone again chooses one card and adds it to their hand. Once again, discard the remaining card.
NOTE: There is no limit to the number of cards you may have in your hand.
2. Production Phase
Now it's time to get some free stuff! I guess I've got your attention, huh? You now get Goods from three different sources.
Faction board – your board shows your Faction's basic Production. Mutants do Guns, Merchants do Fuel. It's really pretty simple, it's not rocket science.
Deals – each Deal you signed in a previous round now provides you with the Good depicted on the Deal. This is additional income, take it!
Production Locations – each Production Location produces Goods. Have an Oil Station? You'll get Fuel. Simple as that.
If you like order, perform the Production Phase starting with the First player and continuing clockwise. If you value your time, do it simultaneously. It's really easy, check your Faction board, check your Deals, check your Production Locations, gather your Goods and you are done!
The Goods are collected in the following way:
Cards are drawn from the Deck and added to your hand.
Victory Points are marked by adjusting your score marker on the Victory Point track.
All other Goods are taken from the general supply and placed in your own supply.
FOR EXAMPLE: Angelina is playing the Mutant's Union. She also has one SCHOOL, one PUB and two Deals in play. From her Faction, she gains 3 Workers, 1 Gun, 1 Grey Contact token and 1 Card. From her Deals, she gains 1 Gun and 1 Fuel. From her Locations, she gets 1 Worker and 1 Card. So in total Angelina takes 2 Cards, 4 Workers, 2 Guns, 1 Fuel and 1 Grey Contact token.
3. Action Phase
Starting with the First Player, and continuing clockwise, each player performs one Action at a time. You can perform any of the following Actions.
Available Actions:
- Build a Location
- Make a Deal
- Raze a Location
- Use an Action from a card
- Use an Action from your Faction board
- Use another player's Open Production Location
- Take or play a Connection card
- Pass
Once you pass in the Action Phase, you may not perform any other Actions in the current round.
Also, their Locations are immune from other players attempting to Raze them, or otherwise interact with them. For example, no one can Raze your Location or use your Open Production Locations with you when you pass.
There is no other limit to the number, type, or order of Actions that you can take during the entire Action Phase, as long as you take them one at a time and have any required Goods.
The Action Phase continues until all players have passed.
Build a Location
There are two ways you can place a Location into your State.
CONSTRUCT: Choose a card from your hand and discard a number of Grey Contact tokens equal to its Distance value. Put the card in front of you. Then, smile and say something nice to your opponents.
New Location cards are placed next to your Faction board according to their Category:
- Production Locations are built in the top row,
- Feature Locations are built in the middle row,
- Action Locations are built in the bottom row.
DEVELOP: Choose one card from your hand and one Location you already have in your State that shares a Type with it. Spend 1 Brick* and then remove this Location from your State and place it on the discard pile. Then, put the card from your hand in front of you in the appropriate row. As a reward you get 1 Victory Point. Voilà! You did it, you are awesome. You developed your old Location into something new and magnificent.
* Instead of 1 Brick you can discard 1 Development token. If you do this, the cards don't need to share a common Type. Development tokens are cool.
NOTE 1: Most cards have 2 Types. You only need to match 1 Type to Develop a Location.
NOTE 2: The new card does not have to be the same Category as the one you are replacing and may therefore be placed into a different row.
NOTE 3: Ruins (see next page - Raze Location) are treated as if they have any Type. You Build over them with whatever Type you want.
REMEMBER: Each time you Develop a Location, you gain 1 Victory Point!
EXAMPLE OF DEVELOPING: The RUINED LIBRARY and the MURDERERS' PUB share a matching Type. Therefore, you can spend 1 Brick to Develop the Location.
FOR EXAMPLE: Scarlett has Ruins (a Razed Location) in her State (we will explain soon how this can happen, honestly). She wants to Build a SCHOOL and she decides to Develop the Ruins. She pays 1 Brick, discards the Ruins, and places the SCHOOL in the top row of her State. Because she is Developing, she gets 1 Victory Point. Contact tokens are not needed. She immediately takes 2 Workers from the supply: 1 as a Building Bonus and 1 from the SCHOOL Production.
I am tired. We are done with Building.
Production Locations immediately produce when built. You Build it, you get the stuff. Take the appropriate Goods from the supply. Simple.
Some Locations have a Building Bonus. This provides you with the Goods depicted when the Location is built. This is a one-time bonus only. You Build, you get it, and it's done. Like a first kiss. You can't have it every freaking Tuesday, right?
NOTE 1: If a Production Location also has a Building Bonus, you gain both benefits when you Build it.
NOTE 2: If a card gives you a bonus for Building a certain type or Category of Location, it counts itself.
Make a Deal
You can make a Deal with a Location from your hand by discarding Blue Contact tokens equal to its Distance. Put the card under your Faction board so that only the blue Deal field is visible and immediately take the depicted Goods. You made a Deal, you get the Goods. I hope you are happy.
FOR EXAMPLE: if Charlize wants to make a Deal with the SCHOOL, she must discard 1 Blue Contact token. She places the card under her Faction board so only the blue area with the Worker is visible. She immediately takes 1 Worker from the supply.
Raze Location
You can Raze Locations from your hand or you can Raze your opponent's Locations. No pressure, but if I were you, I'd focus on razing your opponent's... Either way, you get the Goods shown in the Spoils field.
RAZING FROM YOUR HAND - discard the card and a number of Red Contact tokens equal to the Distance on the card. Take the Goods shown in Spoils field.
RAZING YOUR OPPONENT'S LOCATIONS - discard Red Contact tokens equal to the Defense value of the Location you want to Raze (based on its Category). Take the Goods shown in the Spoils field. As compensation, the opponent whose card you Razed takes the Good depicted in the Deal field. Then, he turns the Location face-down, it is now considered to be Ruins. Good job! You ruined their place. Now you can laugh at them.
NOTE 1: Once a player has passed, their Locations may not be Razed by the other players for the rest of that round.
NOTE 2: Any tokens on the Location that was Razed (from activations) are returned to the general supply. If there were tokens stored on the card, the owner gets to keep them. It's not fair, huh? Why wouldn't you get them?! Who wrote these damn rules?!
NOTE 3: Shield tokens increase the Defense of a Location by 1. Don't forget this when you go Raze your opponents. You'll have to spend 1 extra token to Raze a Location with a Shield on it. There can only be 1 Shield token on the Location.
FOR EXAMPLE: Salma has one SCHOOL in her State and Penelope wants to Raze it. The SCHOOL is a Production Location, and therefore has a Defense of 3. The SCHOOL also has a Shield token on it. To Raze it, Penelope discards 4 Red Contact tokens and takes 2 Workers from the supply. Salma takes 1 Worker from supply, and turns the SCHOOL face down. It is now a Ruins.
Use an Action From a Location or Your Faction Board
Some Locations provide you with the ability to perform an Action. They give you Victory Points or Contact tokens or other weird stuff the designer came up with. To use these Action, you must spend the Goods indicated and place them on the card. That way you won't forget you already used the Location this round. Smart, huh?
Note: You can only use an Action on a card once per round unless the text says otherwise. If it can be used more than once, you can choose to activate it all at once or on different turns. If any decisions are involved in the Action you can choose differently each time, even if you did them all at once.
Your Faction board also provides some Actions. This is stuff you can do even if you don't have any Locations. As with Actions on cards - you can only do this stuff once per round unless the text says otherwise.
FOR EXAMPLE: The Faction Action. Discard 2 Workers to take one Resource of your choice or 1 Card, can be taken any number of times as noted on the Faction board. Thus, a player can discard 4 Workers to take 1 Card and 1 Gun.
Send a Worker to Another Player's Open Production Location
Your Workers can be sent to your opponent's Locations to work as long as that Location has the Open Production keyword. Place your Worker on their card and take the Production Goods indicated. Then, your opponent gets 1 Worker from the general supply.
Wait, what? Yes, we know that you could just give them your Worker but we didn't write this rule just to confuse you; there is a good reason for it. Listen, you place the Worker on their card because each Open Production Location can only be used once each round. This way, you don't forget if it was already used. Now it makes sense, huh?
FOR EXAMPLE: Megan has the Location GENERATORS. Eva wants to use it. She places one of her Workers on the Generators. She takes 2 Workers from the supply. Megan also takes 1 Worker from the supply.
NOTE 1: You cannot send a Worker to use your own Open Production Locations.
NOTE 2: Once a player has passed, their Open Production Locations cannot be used for the rest of that round.
NOTE 3: An Open Production card is a Production card therefore it produces Goods during the Production Phase for its owner.
Take or Play a Connection Card
You can discard 2 Workers to take one of the face-up Connection cards. If there aren't any face-up, you can't do this. And no taking from the discard pile either. Man, why would you even try?
Connection cards provide Goods when played. It takes an Action to play a Connection card – you just play the card from your hand, place it on the Connection discard pile and take the appropriate Goods. Simple as that.
NOTE: If there is a cost to use this card you must discard the Goods when using it, not when taking it.
Other Options
At any point during your turn, you can place 1 Shield token on one of your Locations. Obviously, you have to have a Shield token first. Placing a Shield token does not count as your Action and once placed, it cannot be moved.
A Shield token on a Location increases the Defense of the Location by 1. If you forgot why this is important already, you can go back to the Raze a Location section and start over. You obviously have a memory problem. Also remember that Locations may only have maximum of 1 Shield token at any time.
Passing
If you can't or don't want to take any Actions on your turn, you pass. After you pass, you may not take any other Actions for the round.
Once you pass, you are safe from the other players, they cannot interact with your Locations in any way. This includes Razing Locations, using Open Productions, targeting Locations with Actions etc. You are holed up in your little base like a bunch of chickens.
Yes, I am serious. You can't be Razed. You are out for the round. Your opponents must find themselves another target and stop whining.
Once everyone has passed, the Action Phase is over, and you proceed to the Cleanup Phase.
4. Cleanup Phase
During this Phase, if your Locations have any storage abilities you can use them to save the Goods described on the card. All other Goods are discarded back into the supply. This includes resources, workers, contact tokens, and shields, everything. The only thing you can keep between rounds apart from Goods in storage are the cards in your hand.
Discard all face-up Connection cards that were not taken in the round and place them on the Connection discard pile. You missed your chance bub.
Pass the first player token to the left and start a new round.
FOR EXAMPLE: Megan, after using her Actions, still has 3 Workers, 1 Iron and 1 Fuel on her Faction board. Luckily she has the HIBERNATORS built in her State so there is no need to discard her Workers. She discards the Fuel and the Iron. She also removes all the Goods from the Action Locations she used and the opponent's Workers from her Open Production cards.
End of Game
The game end is triggered when any player reaches 25 Victory Points. When this happens, finish the current Action Phase but skip Cleanup. If a player reaches 25 points during the Production Phase, proceed to the Action Phase as normal. After the Action Phase is completed, skip the Cleanup Phase and calculate the final score of each player.
Score 1 Victory Point for each Location in your State and add the total to your score.
The player with the highest score is the winner. Of course.
In the case of a tie, the player with the most total Goods is the winner. If the tie persists, the player among those ties with the most Locations wins. If there is still a tie, all tied players share the victory. Now kiss. Isn't that just adorable?
Clarifications and Reminders
Golden rule: If a specific rule on a card or Faction board is in conflict with the rulebook, always follow the specific rule and ignore the rulebook. For example, most Actions can be used once per round but the SHIPWRECK states that it can be used twice. The Action on the SHIPWRECK overrules the rulebook and is considered correct. You may use it twice.
- When a Feature or Production Location provides Goods for Building specific Types of Locations, include that card as well, even if it was just built.
- Resources are not intended to be limited. Enough pieces have been provided for most games. However, should you run out, use any suitable substitute or note them down on paper.
- The number of cards, resources, tokens etc. in a player's possession is open information available to all other players.
- If you need to draw a card from the Deck and there none remaining, shuffle the discard pile to create a new Deck.
- Open Production Locations can be used once per round. Keep the opponent's Workers on your Locations until the end of the round to track this.
- You can only Raze Locations from your hand or Locations built in opponent's States. You cannot Raze Locations built in your own State.
- There is no limit to the number of Locations you may Build or Deals you may have.
- You may have multiple Locations with the same name in your State.
- There is no hand limit.
- When stealing an opponent's Production (e.g. SUPPLIERS), if that Location provides Goods according to the number of Locations of a certain type, count the Locations of the Location's owner.
Solo Game Rules
Goal
To have more victory points than the virtual player at the end of the game. The Virtual Player collects points by Razing your Locations, and Building his own Locations.
The game end is triggered when either you or the Virtual Player reaches 25 points. Complete the Action Phase of that round, then add the number of Locations in each player's State to their total score.
Setup
Set up the game normally except that the Virtual Player does not need a Faction board. Put both point markers on the Victory Point track on the space marked "0". Take the first player token for yourself. You deserve it.
The game is played according to the following rules:
Lookout Phase
- Reveal the top card of each of the the Connection piles.
- Draw the top four cards from the Deck, place them face up on the table.
- Choose one of the four cards and add it to your hand.
- Shuffle the remaining three and draw a card at random, placing it face up in front of the Virtual Player.
- From the remaining two cards, choose one and add it to your hand.
- Put the last remaining card face up in front of the Virtual Player.
- Draw one more card from the Deck and place it in front of the Virtual Player.
Production Phase
The Virtual Player doesn't receive Goods during Production. You do, though…
Action Phase
You always play first during the Action Phase. You have the first player marker, right?
When you Raze a Virtual Player's Location, it is discarded. They don't keep the card as a Ruins.
- On the Virtual Player's turn, they will claim a Connection card if there is one available. It costs them nothing and scores them 2 Victory Points. Discard the card. If there is more than one Connection card for the Virtual Player to choose from, choose one at random and return the other card back face up onto its pile.
- Once there are no Connection cards left to take in that round, the Virtual Player will proceed to attack you. Are you ready? This is going to hurt.
- The virtual player will stop attacking as soon as they successfully raze one of your Locations. Also the virtual player will try to attack a maximum of three times each round even if none of the attacks was successful. After that the virtual player will pass on the next turn. Isn't that sweet??
- Also, once you pass, you cannot be attacked anymore, and the Virtual Player passes on his next Action.
- To execute the Virtual Player's attack, reveal one card from the Deck and place it nearby to form an attack pile. Each attack by the Virtual Player in the round adds another card to this pile, and once it contains 3 cards, the Virtual Player will pass on their next Action. At that point, discard the cards in the attack pile to the discard pile.
- To carry out the attack on you, compare the Location Types on the revealed attack card with those in your State. If you do not have any matching Location Types, the attack is unsuccessful. You live to see another day.
- However, if you have a Location that matches at least one Location Type with the attack card, your Location is Razed. Give the Virtual Player two points and you receive the Goods shown in the blue Deal field as normal. Flip your Location face down to become a Ruins... just like normal.
- What if you have more than one card that matches the Location Type? It's simple: The Location with the most matching Types is Razed.
What if there is still a tie? We give you tie breakers! Check them in this order:
- The card with the greater Distance
- Unused Actions
- Used Actions
- Features
- Productions
- Seriously? It's still tied? Okay, fine… check the Goods gained by Razing the Location. The priority is: Card, Worker, Victory Point, Universal Contact token, Blue Contact token, Grey Contact token, Red Contact token, Ammo, Brick, Fuel, Iron, Gun, Development token, and Shield token. The card with the most Goods of the highest order is destroyed first. Keep checking this list until you break the tie.
- Okay, if you make it here, take a picture and share it with us because we don't believe you. If two Locations give exactly the same Goods when Razed, you can decide which is destroyed… or pick randomly. Chances are they are the same Location anyway… we really don't care which one you lose.
- If a card with a Shield token is about to be Razed, discard the Shield token instead. You got lucky. The attack is still considered successful and the virtual player will pass on the next turn.
- Discard the card drawn for the attack.
- You can interact normally with the Virtual Player before they pass with the following differences:
- When you send a Worker to an Open Production Location, the Virtual Player gains 1 Victory Point instead of a Worker.
- When the Virtual Player Razes your Locations, they don't receive Goods. They got points, remember?
Example of a Virtual Attack
Monica plays a solo game against a virtual player. This is how a round would look. She keeps one of them of her choice and then chooses randomly one of the remaining three cards and places it in the virtual player's playing area. She then chooses one more card for herself and gives the last one to the Virtual Player. Finally, she draws one more card and places it in front of the Virtual Player.
Monica executes her production phase normally but the Virtual Player does not receive any goods.
Monica: As her first action Monica sends 2 Workers and claims one connection card.
Virtual Player: Claims the last connection card.
Monica: Builds a production location and gets the goods that it provides.
Virtual Player: It's time for the virtual player to attack! Monica draws one card from the deck and places it nearby. She checks the types of the locations but none of them matches any of her locations. She was lucky.
Monica: Activates one action from her faction board.
Virtual Player attacks again. This time Monica draws one more card from the deck and places it over the previous one. She is not that lucky this time and one of her locations is razed. She flips it to make it Ruins. The Virtual Player scores two points.
Monica: She sends one worker to one open production location of the virtual player. The virtual player does not take a Worker but scores 1 Victory Point instead.
Virtual Player: The virtual player had one successful attack so it's time to pass.
Monica: Monica can now takes any number of consecutive actions. But she can't interact with the virtual player any more.
Monica executes the Cleanup phase normally but keeps the first player token because she is awesome.
Cleanup Phase
Execute the Cleanup Phase as normal but you keep the first player token. It's your special little power.
Game End
The game ends when either you or the Virtual Player reaches 25 Victory Points on the victory point track. When that happens, complete the Action Phase normally and then add 1 Victory Point to your score for each Location in your State. Do the same for the Virtual Player. Duh.
If you have the same or fewer points you lose. Try again mate. Go ahead, I'll wait.
If you have more points than the Virtual Player you win! Be honest, you cheated didn't you?
If you win, you can compare your score to the following table to see the level of your awesomeness.
Achievement Table
| Score | Rank |
|---|---|
| 30> | Mutant |
| 30+ | Survivor |
| 40+ | Human |
| 50+ | Trader |
| 60+ | Soldier |
| 70+ | Cyborg |
| 80+ | Grand Master |
Cards in Detail
BODY HUNTERS - Action cards from which you removed Goods and Workers may be used again this round.
SUPPLIERS - When you Build this card its Production can not be activated because other player's Production cards don't produce anything at that moment. You activate only the Building Bonus.
RADIOACTIVE COLONY - This card has no Type. You can Develop it with a card of any Type and you can Develop any card into Radioactive Colony.
FOUNDATION - This card has no Type. You can Develop it with a card of any Type and you can Develop any card into Foundation.
HIDDEN FORGE - This card is treated as having a Shield token on it.