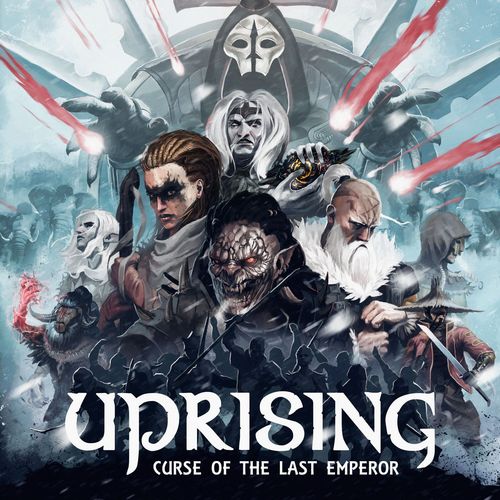
Uprising: Curse of the Last Emperor
Uprising: Curse of the Last Emperor Rulebook
Table of Contents
Table of Contents
- Introduction and Objective
- Component List
- Setup
- Game Concepts
- Chapters & Phases
- Refresh Phase
- Events Phase
- Build Phase
- Actions Phase
- Nemesis Phase
- Production Phase
- Scoring Phase
- Winning the Game
- Combat
- Unit Types
- Terrain Types
- Walls and Towers
- The Graveyard
- The Nemesis
- The Empire
- Chaos
- Hints for Your First Games
- Most Overlooked Rules
- Icons and Cards
Introduction and Objective
Uprising: Curse of the Last Emperor is a fully cooperative, strategically challenging and deeply immersive experience for 1-4 Players.
The game takes place on the Isles of Azuhl — a backwater of the known world and one of the last remaining pockets of civilization.
You take on the leadership of a formerly enslaved faction — the fierce Khrow, the unbending Duerkhar, the mysterious Druwhn, and the vengeful Mohyar — and lead their uprising against the broken remnants of The Empire. But beware, for beyond the frozen seas lurks a far greater danger: the Hordes of Chaos, driven by an insatiable hunger, are on their way to Azuhl. Both will fight you, and fight each other if they can!
Over the course of multiple Chapters every Faction collects VP: Victory Points. The Empire and Chaos also collect VP, and their actions are controlled by the players, and the game itself. When any Faction gains VP, move their VP Tracker around the map.
The goal of the game is for all players, individually, to have more VP than The Empire and Chaos at the end.
You can gain VP by defeating the armies of The Empire and Chaos in combat, providing shelter to the survivors by building Havens, or solving Quests. At the end of the game, if each player has more VP than both Chaos and The Empire, you all win together.
Component List
- 120 resources
- 32+ Action Points
- 8 Legion cards
- 8 Horde cards
- 25 Quest cards
- 4 Hero cards (double sided)
- 28 dice (in 6 colors)
- 15+ Threat Trackers
- 28 Event cards (7 for each Level)
- 9 Druid cards
- 43 Item cards (the Market Deck)
- 80 Feat cards (8 decks, 1 for each Hero)
- 4 Player Boards (1 for each Faction)
- 1 First Player Token
- 8 Chaos Horde standees
- 8 Imperial Legion standees
- 8 Hero standees
- 48 Unit standees
- 20 Activation Tokens
- 11 Skeleton standees
- 9 Curse standees
- 1 Chapter Tracker
- 33 hexes (5 Advanced Hexes)
- 20 Havens (5 for each Faction)
- 10 Walls
- 10 Towers
- 8 Targets (1 for each Legion)
- 6 VP Trackers (1 for each Faction)
- 30 Garrisons (10 for each Level)
Setup
The Drakorean Empire wasn't built in a day...
The Map and the Reserve
The game is played on the map. Any pieces that are not on the map or in play are in the reserve (for example Units on the player board). If an effect removes a component from the game, put it back into the box. All components are limited to the number included in the box.
Prepare Your Player Area
Your player board is where you track your economy and the Actions you take. When you spend Resources, return them to the reserve. When you spend an AP: Action Point, place it on the Action you took.
- Each player decides on a faction and takes the player board, Units, and Home Hex.
- Flip the Hero card to the Hero you want, and take its standee, and Feat deck.
- From your feat deck place the Feats marked START next to your Hero card. Shuffle your remaining Feats.
- Place your Havens on your player board, covering the resource production spots.
- Gain 5 Salt, 5 Plunder, and 5 Food.
- Take 8 Action Points and your VP Tracker.
Build the Map
- Put the map, the Story sideboard and the Nemesis sideboard shown above in the middle of the table. If your table isn't big enough, you can decide to leave out the two sideboards and organize the cards and tokens freely on your table.
- See the setup diagram (below) for 2, 3, or 4 factions.
- Place The Capital hex showing the X on the indicated space in the middle of the map.
- Remove any advanced hexes marked with the Advanced icon for your first games. Randomly place hexes face-down on the indicated spaces.
- Place 1 random Sea Tower hex on the indicated spaces, face-down.
- Place 3 Garrisons on The Capital and 1 Garrison on 3 adjacent hexes.
- Place 1 Curse on the indicated hexes.
- Place 1 Skeleton on the indicated hexes.
- Each faction places their home hex on one of the indicated spaces. Then place the faction's Hero standee and their leftmost Haven from the player board there.
- Place 4 random Druid cards face-up, on each of the indicated spaces.
- Place the VP Trackers of The Empire, Chaos and all player factions on zero on the VP Track.
Setup diagrams for 2, 3, and 4 factions show how the map hexagons combine: each faction's map cluster includes a Home Hex, two Sea Tower hexes, and a Capital hex shared at the center where clusters meet. Curse and Skeleton standees are placed on indicated hexes; Level 1 and Level 3 Garrisons are placed on the Capital hex. Ice Waste hexes (explored, empty) and one random face-down hex are placed per the diagram. For a solo game, you can play any number of factions.
Last Steps
- Remove any Events, Quests, Hordes, Legions and Items marked as Advanced for your first games.
- Shuffle the Item deck and place it face-down on the map.
- Shuffle the Quest deck and place it face-down on the map.
- Shuffle the Horde and Legion decks. For a game with 2 factions place 5 Legion and 5 Horde cards face-down on the map. Add 1 Horde and 1 Legion card for each additional faction. Place all Legion and Horde standees and Targets next to their decks.
- Shuffle the four Event decks and place 1 Chapter I Event on Chapter 1, 1 Chapter II Event on Chapter 2, 1 Chapter III Event on Chapter 3, and 1 Chapter IV Event on Chapter 4.
- Place the dice in a bowl or tray.
- Place the resources into their trays.
- Place the inlay next to the map with the Activation Tokens, Threat Trackers, Walls, Towers, Curses, Skeletons, and Garrisons.
- All remaining components (hexes, Legion and Horde cards, etc.) are placed back into the box.
- Give one player the First Player Token. Play passes to the left on the Actions Phase.
- Start the game by placing the Chapter Tracker at the top of the Chapter Track and resolve each step one by one (ignore the "Pass the First Player token left" on Chapter 1).
Game Length and Difficulty
Uprising can be challenging — therefore the game length and difficulty can easily be adjusted to your wishes.
For your first games, or if you want to have a shorter and easier game, you may just play Chapters 1 and 2. If you want a medium length game, play Chapters 1, 2, and 3. And for an epic evening of 4X goodness, go for all 4 Chapters.
We also offer you different difficulty settings as an option. The setup section in this rulebook covers the normal difficulty. Feel free to alter Uprising by using any of the options in the table below.
Advanced Components
For the biggest challenge, there are a number of hexes and cards (Events, Items, Quests, Legions of The Empire and Hordes of Chaos) that significantly increase the level of complexity and difficulty.
All these cards are marked with the Advanced icon. We recommend new players not include these cards in the first few games.
In later games, add some or all of these cards and hexes, to the total available, as you like. You can find some suggestions below:
Difficulty Settings
| Components | Rebel | Veteran | Nightmare | Apocalypse |
|---|---|---|---|---|
| Starting Resources | Each player gains 6 of each. | Each player gains 5 of each. | Each player gains 5 of each. | Each player gains 5 of each. |
| Curses | Place no Curses in setup | Place 2 Curses | Place 3 Curses | Place 3 Curses |
| Garrisons | Place 3 Garrisons on The Capital | Place 3 on The Capital and 1 on 3 adjacent hexes | Place 3 on The Capital and 1 on all adjacent hexes | Place 3 on The Capital and 1 on all adjacent hexes |
| Items | No advanced Items | No advanced Items | Add all advanced Items | Add all advanced Items |
| Quests | No advanced Quests | No advanced Quests | Add 3 random advanced Quests | Add all advanced Quests |
| Hordes & Legions | No advanced cards | No advanced cards | Add all advanced cards | Add all advanced cards |
| Sea Tower hexes | No advanced Sea Towers | No advanced Sea Towers | Add 1 random advanced Sea Tower | Add all advanced Sea Towers |
| Hexes | No advanced hexes | No advanced hexes | Add 2 random advanced hexes | Add all advanced hexes |
| Events | No advanced Events | No advanced Events | Add 1 random advanced Event to each Chapter | Add all advanced Events |
Game Concepts
As the Hordes of Chaos lay waste around them, the lands become Cursed, forever destroyed.
Chapters and Phases
A game of Uprising can last from two to four game turns, called Chapters. Each Chapter is divided into seven Phases in which you will resolve unique Events, upgrade your Hero and faction, build armies, and fight epic battles. Use the Chapter Track on the side of the map to keep track of where you are in the Chapter.
Factions and Units
At the start of each game the players will choose a faction. The different factions all have different Units and Heros. Your bands of fighters are represented by standees, called Units, each with their individual powers shown on your faction's player board. The Empire and Chaos also have Units: Legion and Horde standees that match their cards from their decks; Garrison miniatures that stack together; and Skeleton standees.
Heros
Each faction comes with two iconic Heros: pick the side of the Hero card you like best, and use the matching standee. Your Hero is your avatar through which you will take all your actions in the game. A Hero has attributes (Might, Magic, Leadership, Guile) that give Hero Dice for Quests. Each Chapter you will gain Feats from your Hero's Feat deck to increase your power, and you can gain Items as well.
Actions
The Actions of the game are performed by your Hero. Heros use AP, or Action Points, 8 per Chapter. Every Action costs 1 AP. First your Hero may Move any number of hexes for 1 AP each. Heros in the same hex may also Trade Resources and Items. After Moving or Trading your Hero may take one additional Action: Explore (to flip an unrevealed hex); Command (to bring Units into this hex); Haven (to build a shelter for the survivors and gain control over a hex); Market (to buy an Item); and Quest (to go on an adventure).
Hexes, Havens and Resources
The map, depicting the Isles of Azuhl, is divided into hexes. They form a modular board, which will be different each game. You start the game with your first Haven on your home hex. From there you will explore the hexes around you, eliminating enemy Units to place your Havens to provide shelter for the survivors. Hexes with Havens are also the primary source of the resources that are generated in the game: Salt, the primary trade good of the end times; Plunder, to build defenses and warm your people; and Food, to recruit and move your Units.
Nemesis: The Empire and Chaos
Your enemies in the game are Chaos and The Empire - collectively called the Nemesis. Those two factions are controlled by the players and the game itself. They are enemies of each other as well and will begin combat with each other if they are in the same hex.
The most dangerous Units of The Empire are their Legions and for Chaos their Hordes. They are represented on the map by their unique standees, but what makes them most distinct from player Units is their Threat. This number tells you which dice they roll and how much damage they can take. Threat is tracked by a clip, called Threat Tracker, which slides up and down on the side of a Legion or Horde card.
Legions will deploy from The Capital (the last province of the broken Empire, in the middle of the map) and move towards the players' Havens to root out the rebellion with their Warlocks, Lizard Riders and dreaded Orgons.
The Hordes of Chaos (made of ghosts, skeletons, zombies, and monsters) emerge from the devastation beyond the Ice Wastes surrounding the board to destroy the last vestiges of civilization and claim the world for their own.
Combat
Whenever your Units are in the same Hex with enemy Units (Empire or Chaos), or The Empire and Chaos meet in a hex, combat occurs. Combat lasts until all Units of one side are destroyed. Each Unit contributes their dice. These come in six different colors, with different symbols on each:
- A Skull destroys 1 Unit.
- A Shield cancels 1 Skull.
- A Bolt cancels a 1 Shield, or activates a Godpower.
Heros do not provide dice in combat, and are not Units. But the presence of your Hero in combat is still important, as many Feats and Items can only be used if your Hero is in the hex with a combat.
Heros and Hero Dice
Your Hero represents you as the leader of your faction, and is the way you take Actions in Azuhl. Some Actions a Hero takes affect the hex they are on, such as Explore and Haven; while some can be used anywhere, such as Market and Quest.
Heros do not provide dice in combat, and are not Units. But the presence of your Hero in combat is still important, as many Feats and Items can only be used if your Hero is in the hex with a combat.
Attributes and Hero Dice
Heros have attributes which are important for Quests, rolls outside of combat, and using Items:
- Might is your ability to withstand hardship and conquer by force. 1 Might gives you 1 red die.
- Magic affects your ability to manipulate the map and cards. 1 Magic gives you 1 purple die.
- Leadership is your ability to inspire loyalty among the survivors. 1 Leadership gives you 1 blue die.
- Guile is your cunning and trickiness, improving your movement and profits. 1 Guile gives you either 1 white or 1 yellow die — your choice.
Rolling Your Hero Dice
During a Quest or any other rolls outside of combat, the number of each attribute indicates how many dice of the respective color you may roll. Guile lets you choose either white or yellow for each number.
EXAMPLE: Hanzo is asked to roll his Hero Dice. Because he has 1 Magic, he rolls 1 purple die, and because he has 3 Guile he chooses 3 dice from yellow or white. He decides to roll 2 yellow and 1 white with his purple die.
Feats and Items
Feats are a range of powerful abilities your Hero gains, typically once per Chapter on the Build Phase. Each Hero comes with their own deck of Feats. 2 of them are marked START - you begin play with these.
Buying and Using Items
Items are always available on the market, and can be bought during the Actions Phase. In order to buy an Item from the market, or receive an Item from another Hero during the Trade Action, your Hero must be able to use it. This means having at least the attribute number printed on the Hero card. If an effect says "Gain an Item, even if you could not use it", ignore this rule.
General Rules for Feats & Items
- Your Hero has a 10-card limit for Feats and Items. If you would exceed the 10-card limit by gaining a new one, you may always discard any Feat or Item, even the one you just gained. Other cards do not count towards this limit.
- Whenever a card's rules breaks the rules in this book, follow the card instead. Otherwise all rules apply normally.
- Some cards must be flipped to be used - they are unavailable until the next Refresh Phase.
- Some cards say "on your Hero's Hex." Your Hero must be on the hex of the combat to use the effect of this card.
- If the game says draw a feat, take the top card of your feat deck, place it by your player board - it is now in play.
- If the game says gain a feat, search your feat deck for any feat of your choice and put it into play.
- If the game says to discard a feat, place it at the bottom of your feat deck. It might come back.
- Discarded Items are placed in the discard pile next to the market.
- If a card says ALWAYS it can be used in any Phase. If a card says anything else (ACTIONS, for instance), it can only be used during that Phase when it is your turn.
- You can use multiple Feats and Items at the same time. They do not count as Actions.
- Every Feat deck contains two Feats that give an attribute and 3 resources. Select the attribute on the card and place it beneath your Hero card, showing the chosen attribute.
- Feats and Items that affect combat can only be used during combat with YOUR Units.
Hexes and Regions
Hexes represent the distant Isles of Azuhl, now bound together by the inhospitable frozen sea, known as the Ice Wastes.
Most hexes begin the game unexplored (face-down), except for The Capital and the faction home hexes. Player Units CAN NOT be moved or placed onto an unexplored hex, but Heros and all Legions, Hordes, Garrisons and Skeletons can. Players can use the Explore Action to flip hexes face-up.
There is a piece limit for each hex:
- 5 player Units (of 1 faction)
- 1 Haven, 1 Wall and 1 Tower (on a Haven only)
- 3 Garrisons
- 2 Skeletons (a third Skeleton becomes a Horde)
- 1 Curse
Some effects reference an empty hex. This is a hex that has no Havens, Units or Curses, but could contain a Hero.
Regions
Once trade galleys plied the seas, bringing news and spices from afar. Now the cracking ice brings only death.
Howling White, Fog Grave, and Screaming Sea are the three regions surrounding the map. The hexes of the regions are already explored, and can be moved through normally, but the "cannot gain a Haven" icon indicates you can never place a Haven in one. Any effect that names a region can affect any of the hexes in it. Any region spaces covered by another hex tile are not part of the region.
- Hex effect. Read this when you Explore (flip) the hex. Make any decisions or rolls required. Often those effects Reinforce, or place Skeletons or Garrisons - you can find more on placing and reinforcing on page 50.
- Terrains have a strong effect in combat (see page 42). Terrain is not active if the hex is unexplored (unflipped), and hexes with a Curse lose any other Terrain type.
- Resources show what the hex produces on the Production Phase if you have a Haven there (in addition to your production from the number of Havens).
- Impassable Terrain represents mountains, deep swamps and canyons. Player Units, Skeletons, Hordes and Legions can not cross Impassable Terrain, but Heros can. Hexes with Impassable Terrain between them are not adjacent.
- VP show extra VP you gain on the Scoring Phase if you have a Haven there (in addition to your VP from Havens).
- The cannot-gain-Haven icon indicates a hex that CAN NOT gain a Haven.
- Ongoing effects (such as on a Sea Tower) are active as soon as the hex is flipped, even if there is a Curse.
- Hex alignment shows if Chaos or The Empire will place Units here if empty.
Chapters & Phases
Each game will be a very different story from the last, and so the story is told in Chapters.
A full game of Uprising consists of 2-4 Chapters. Each Chapter consists of 7 Phases:
- Refresh Phase
- Events Phase
- Build Phase
- Actions Phase
- Nemesis Phase
- Production Phase
- Scoring Phase
At the end of each Chapter, if it was not the last one, start again from the Refresh Phase. The Chapter Track (on the side of the map) allows you to track the current phase and all its steps with the Chapter Tracker. It is helpful to have the player who can read and reach the Chapter Track best to champion it for the entirety of the game.
Refresh Phase
Even at the end of the world, there is bookkeeping.
- Flip all your face-down cards back to face up, allowing them to be used again.
- Remove your spent Action Points from the player board and place them next to you.
- Deal 3 new Items (discard the old ones).
- Deal 3 new Quests (discard the old ones, unless that Quests says not to) and resolve any immediate effects on the new Quests.
- Pass the First Player Token left (skip this on Chapter 1).
Events Phase
The Events represent the unfolding final days of Azuhl. The remnants of The Empire, frightened but rich, lash out. Grim hordes of undead and barbarians approach from the darkness of the Ice Wastes. And strange visitations by uncanny things breed great fear among the smallfolk.
In the Events Phase the players will populate the map with Imperial Legions and Chaos Hordes as well as other effects shown on the Event card that is revealed each Chapter.
Whenever a Horde or Legion comes into play, draw the top card of the matching deck. Place its standee on the map and set its Threat. Threat represents its fighting power and how much damage it can take (see page 45).
To set the Threat, use the Threat Tracker and put it on the card at the number given by the current Event.
Each Legion and Horde also has an immediate effect that occurs when it is drawn and placed. A Horde or Legion's immediate effect overrules the Event's placement effect. Complete the immediate effect, then resolve any combats, before continuing with the Event.
The Events Phase has the following steps:
- Add 2 Threat (by sliding the Threat Tracker up on each card) to each Legion and Horde in play. If Threat goes above their maximum, that faction gains 1 VP for each Threat missed.
- Then the first player reveals the Event for this Chapter and resolves it, reading each part aloud. Resolve each effect on the card from top to bottom. Only the first player makes the final decisions.
- Finally, place 1 Activation Token on the card of each Legion and Horde. On the last Chapter, do this twice, so that each gets 2 Activation Tokens. An Activation Token represents how often the Legions and Hordes will move later in the game (see page 27).
If you place Activation Tokens at any other time, place it on one of the Legions or Horde cards with the fewest Activation Tokens.
Build Phase
Although not as advanced as The Empire, your people are willing and resourceful, and new armies and infrastructure are constantly in production to win your freedom. Your Hero is also gaining experience...
All players resolve this phase simultaneously. At the beginning of the Build Phase draw 2 Feats from your Feat deck, then pick 1. The Feat is immediately active, so you can use it as you play it. Discard the other Feat by putting it at the bottom of the Feat deck.
You may build Units or Defenses by paying the resources listed on your player board now. Place any Units, Walls or Towers (see page 42) you paid for on any of your Havens. Remember the hex limit of 5 player Units, 1 Haven, 1 Tower and 1 Wall.
Unlike all other Actions listed on your player board, you may ALWAYS use the Trade Action (even during the Build Phase) to exchange 1 AP into 1 Salt.
You may ALWAYS exchange 3 of the same resource into 1 resource (for example, 3 Plunder into 1 Food, or 3 Food into 1 Salt) - this is not an Action and does not cost AP.
If you have no Havens, place your Hero on any explored empty hex and build Units there.
Hint: Build lots of your basic Units, to absorb casualties in combat. Also make sure to save at least 1 Food and 2 Plunder, so you can attack a hex and place a Haven.
Build Example
Yanny has 2 Havens in play, but one of them already has 5 Units. She decides to improve the defenses there and builds a Tower and a Wall on the Haven, paying 2 Plunder.
On her other Haven there is nothing else on the hex, so she decides to build more Units. She places 2 Younglings (which cost either 2 Salt or 2 Plunder) and a Spearsinger (same choice) from the reserve there.
She decides to pay 2 Plunder for each of the Younglings and 2 Salt for the Spearsinger. In total, she spent 4 Plunder and 2 Salt for the Units and 2 Plunder for 1 Tower and 1 Wall. If she needed to, she could have spent AP for Salt using the Trade Action, but AP are more useful to her now for taking Actions.
Actions Phase
This is the main part of the Chapter, when players will use their limited time to move their Heros to new lands, solve puzzles, and command their armies into battle.
During the Actions Phase, in clockwise order, players spend their Action Points (AP). This continues until all players are out of AP. All players start the game with 8 AP.
Every Action always costs 1 AP — some Actions also have an additional cost in resources. You can find a short summary of each action on your player board together with the cost in AP and resources. They may differ for each faction, so take a close look. When you take an Action, place 1 AP on the according box on your player board — this way you never lose track of what you did.
When it is your turn, you may take the Move and/or Trade Action as often as you want, and then you may take 1 other Action. You MUST take at least one of these. You can not skip spending an AP! Then the next player takes their turn, until everyone is out of AP.
If a Feat or Item says it can be used in ACTIONS, you can use it when it is your turn. This does not normally cost any AP.
If you have no AP you may still generate effects that do not require AP, even after you have passed. After you pass, play passes to the left. If you have passed but gain AP later, you are no longer passed.
Hint: the basic Actions you usually take at the start of Chapter 1 are, in order: 1. Move (to an unexplored hex with resources you want) and Explore (flipping the hex); 2. Command your Units into that hex to free it; 3. Haven if you have won the combat.
Here is a closer look at each of the seven Actions:
Move (1 AP per Hex, does not end your turn)
The lands around you are only rumors, and it takes a long time to march across them on foot or claw.
Place your Hero's standee on an adjacent hex, even if it is unexplored or has enemy Units. You may take another Move for 1 AP now, or another Action. So you could move all the way across the map and do a Quest, for instance, but it would cost you a lot of AP. Most often you will Move then take another Action.
Your Hero CAN cross impassable terrain, unlike Units. Your Hero won't start combat against enemy Units — so do not worry about Legions, Garrisons, Hordes or Skeletons. You just sneak around them.
The Sea Towers are portals to the Nethersea, a dark realm used by The Empire for centuries to move their armies quickly, and are now open to you. Heros and Units (Player Units, Skeletons, Hordes and Legions) on an explored Sea Tower are adjacent to any hex, so if you Move from one, you may move to any hex. Legions and Hordes will also use this effect (see pages 54 & 55).
Hint: Ending a Chapter on a Sea Tower can be very advantageous.
Move Example
Ronja wants to expand her dominion beyond 1 Haven, so she Moves onto an unexplored hex adjacent to her standee. This costs her 1 AP. She may immediately take another Action if she wants by spending AP, but she chooses to wait and see what the other Heros do.
Trade (1 AP per Salt, Always, does not end your turn)
Your allies can help your tribe, if you take the time to go and parley.
Spend 1 AP to gain 1 Salt. You may take another Trade for 1 AP now, or another Action.
This Action can be taken ALWAYS, unlike the other Actions, which must be taken on your turn on the Action Phase, so you can use this on the Event, Build or any other Phase.
Heros on the same hex during the Trade Action may also freely give or take resources from each other, as well as any Item the receiving Hero could use.
Trade Example
Kha'al needs Plunder for his expensive Havens. Luckily he is close to Ronja, who agrees to help him. Kha'al Moves to her hex for 1 AP, then begins the Trade Action for 1 AP and gains 1 Salt. Ronja then gives him 3 Plunder. Kha'al doesn't have to give anything in exchange, but he could give Ronja an Item she could use, or any resources, if he wanted. Kha'al can now continue with his Action, or stop.
Command (1 AP and 1 Food, ends your turn)
No matter your subterfuge, the resources of The Empire and virulence of Chaos will require your people to fight! Best is to fight them away from your home territories.
Pay 1 Food, then designate an explored hex, then move any of your adjacent Units and/or your adjacent Hero into that hex. This means a hex can be Commanded into from all its neighboring hexes. Units and Heros on a Sea Tower always count as adjacent to all hexes.
Follow these restrictions:
- Players may not have more than 5 Units on a hex. Supplies are scarce, and large armies are difficult for you to supply (but not for The Empire or Chaos).
- The peaks of Azuhl are deadly cold. Units may not cross impassable terrain, but Heros may.
- Player Units may not move onto an unexplored hex. They need a map. Hint: the outer Ice Wastes around the map are already explored.
- Player Units may not move onto the Haven or Units of another player faction. Although you are cooperating, trust is still in short supply.
Command Example
Ronja explored Rigga on her last Action. She Commands by paying 1 Food and 1 AP, chooses Rigga and then checks the hexes adjacent to Rigga for her Units:
She can move 2 Sellswords from the home hex and 1 Berserker from the Screaming Sea onto Rigga, but not the Slaver from Torment, because Rigga's impassable terrain blocks it.
If Ronja were on an adjacent hex, she could also be moved with the Command Action.
If your Units enter a hex with any enemy Units, combat begins. If there is an Imperial Garrison or Chaos Skeletons, fight those before fighting any Legion or Horde; if there is more than one Horde, or more than one Legion, fight them in their initiative order from lowest to highest.
Each combat counts as a distinct and separate combat, so you can gain Before Combat and After Combat effects multiple times.
Player Units (and Heros) on a Sea Tower are adjacent to any hex. If you have Units on multiple Sea Towers they may all Command into the same hex.
Hint: Command also lets you move your Hero! Always try to attack with more dice than your opponent, and always try to free at least 1 hex for one of your Havens every Chapter.
Explore (1 AP, ends your turn)
Your tribes have been in hiding for so long their knowledge of their surroundings is limited at the start of the game. The more you find, the more dangerous you learn Azuhl is...
When your Hero is on an unexplored hex, use the Explore Action to flip it, then read the name of the hex and then the effects aloud. Unless stated otherwise, you make any decisions. Often the effects on a hex will also place or reinforce Garrisons or Skeletons (for more details about placing see page 50):
If empty, place... means that if there are no other Units (Garrisons, Skeletons, Legions, Hordes or Players Units) then place that Unit. Note that Heros are NOT Units.
Reinforce means that if there are Units of The Empire or Chaos here, add 1 more of the same type: A hex with any Garrisons or Legions will add 1 Garrison, while a hex with any Skeletons or Hordes will add 1 Skeleton. Player Units are never reinforced.
Place 1 Activation Token on a Legion or Horde card means place it on the card of one of the Legions or Hordes with the fewest Activation Tokens.
If there is impassable terrain, place the hex in any orientation you want. Only Heros can cross impassable terrain, but not Units.
Explore Example
Ronja moved onto an unexplored empty hex on her last Action. She Explores by paying 1 AP, then flips the hex, revealing Rigga.
The effect says "Gain 2 Food. If empty, place 1 Garrison here; if not reinforce here. Place 1 Garrison on an empty hex with no [cannot-gain-Haven icon]."
She gains 2 Food immediately. Since there is no Unit on Rigga, she must place 1 Garrison here, but if there had been a Horde or Skeleton here, she would have placed another Skeleton instead. Then she places 1 Garrison, in an empty hex (not in Rigga, because it is no longer empty). Finally she orients Rigga's impassable terrain edges to create a buffer against The Empire and allow her to Command through it.
There are many other effects on hexes - for instance, most hexes will give you 2 resources when flipped. If an effect such as an Event or Item allows you to flip a hex, the player who flipped it gains any benefits.
Once a hex is flipped over, it is considered explored. You may not Explore an unexplored hex with a Curse.
Haven (1 AP and 2 Plunder, ends your turn)
The many races of Azuhl are eager for assistance against both the hated Empire and the impending invasion by the Hordes of Chaos. Building them a place of safety where their families can sleep securely will ensure their help.
Pay 2 Plunder (for most factions, but 3 for the Krowh), then place one of your Havens on your Hero's hex. The hex must:
- Be explored
- Have no cannot-gain-Haven icon — neither The Capital nor the outer Ice Wastes can get a Haven, nor can a hex with a Curse
- Have no Units of any other faction
- Have no Haven (only one per hex)
A hex with a Haven can have Units and Defenses placed on it during Build, will generate VP, and will produce more resources for you. You can not have a Wall or Tower without a Haven, and if a Haven is removed, so is the Wall or Tower.
Hint: Try to build at least one Haven per Chapter.
Haven Example
Rigga has no enemy Units or Havens, so Ronja spends 2 Plunder and 1 AP for the Haven Action, then places the leftmost Haven from her player board onto Rigga. This is the third Haven she has placed.
Now she will increase her production as shown on the player board by 1 more Salt and Food during the Production Phase, as well as 2 bonus Food for having that Haven on that hex.
It will also score 2 VP during the Scoring Phase, and on the Build Phase of the next Chapter she can place Units and Defenses there.
Market (1 AP and X Salt, ends your turn)
The market represents the many refugees who have survived the Curse and have congregated at the Sea Towers, and even some from The Capital who do not trust Drakorea to win this conflict...
The artifacts and services offered on the market are all called Items.
After taking the Market Action, if your Hero can use an Item (has the required attribute number or higher), pay the Salt cost of the Item, then place it next to your Hero, then draw and place a new one on the market immediately.
Remember the 10-card limit for Feats and Items.
The market is always full, although it is also replaced every Refresh Phase. Buying an Item on a Sea Tower reduces the Salt cost by 1, even to zero.
Hint: Don't spend all your Salt on Items on Turn 1. More will come later.
Market Example
The Market has the Whip of Thorns, the Flenser and the Xyxrit Leaves.
Ronja can not use the Whip, because her Leadership is not 2 or higher. She could use the Flenser. Any Hero can use the Xyxrit Leaves because it has no requirements except 1 Salt.
She spends 1 AP to take the Market Action, and pays 1 Salt to buy the Xyxrit Leaves. She draws a new Item and places it where the Xyxrit Leaves was on the market.
Quest (1 AP, ends your turn)
Azuhl is filled with threats and opportunities, and a clever hero will win by fighting off of the battlefield.
When a Hero uses the Quest Action, choose a Quest, then roll your Hero Dice from your attributes. Each number in Might is 1 red die, each Magic is 1 purple, each Leadership is 1 blue. Before rolling, for each Guile choose 1 white or 1 yellow.
Add any bonus dice as printed on the bottom of the Quest card if your Hero meets those conditions, and for Items and any other modifiers to the roll.
To solve a Quest, you need to succeed at 1 or more of its quest goals. After rolling, compare each of your symbols to the quest goals. If you have enough symbols, you succeed at that quest goal. Most Quests require you to succeed at just one quest goal, indicated as 1+, but some can require more.
If you solve the Quest, gain the solve effect, and any rewards from quest goals you succeeded at (Skulls, Shields or Bolts). If you did not solve the Quest, resolve the fail effect only - so you cannot get any rewards from quest goals.
Some solved Quests are taken into your play area, much like a Feat. They do not count against your Hero's 10-card limit, and you may not normally discard them from in front of you.
If a Quest is discarded, from succeeding or failing, do not replace it until the next Refresh Phase (although sometimes the Quest will also tell you to draw a new Quest immediately).
If a Quest is discarded with other cards attached (Items, for instance) they are discarded too. Some Quests are not discarded when you Solve or Fail them.
Some Quests have an immediate effect when drawn, exactly like a Legion or Horde. Resolve these effects immediately in exactly the same way.
Hint: Quests are a great way to advance the game, but be careful: if you draw too many new ones something bad might pop up.
Example — Druidic Prophetess: A Quest card with three quest goals: 3 Skulls (reward: 1 VP), 1 Shield (reward: place 1 Basic Unit on any of your Havens), and 1 Bolt (reward: place 1 Basic Unit on any of your Havens). Its solve threshold is 2+ (succeed at 2 or more of the three goals). Solve effect: "Take this card. When a Horde activates, place 1 Basic Unit of any player on any of their Havens." Fail effect: "Chaos gains 2 VP. Discard this Quest." Bonus condition printed on the card: if your Hero is on a hex with a Curse, add +1 to a die of your choice.
Quest Example
Ronja wants to attempt the "Instruction of the Druids" Quest. She has 2 Might (2 red dice), 1 Leadership (1 blue die) and 1 Guile, for which she chooses to roll a white die.
She is on a marsh, so gains 1 purple die. She also decides to discard her Xyxrit Leaves Item, which lets her add a die of her choice - and chooses a black die.
She rolls 3 Skulls, 1 Bolt and 2 Shields. She does not succeed at the Skulls quest goal, but she achieves 2 successes from the 2 Shields and 1 Bolt.
The Quest needs 2+ successes to be solved. She gains the solve effect and looks through her Feat deck and picks one and puts it into play immediately.
Because she succeeded at the Shield quest goal and the Bolt quest goal, she gains their rewards: 1 VP for each.
She discards the Quest and does not refill the space.
Example card — Instruction of the Druids: Quest goals: 4 Skulls (no reward), 1 Shield (reward: 1 VP), 1 Bolt (reward: 1 VP). Solve threshold 2+. Solve effect: "Gain any 1 of your Feats. Shuffle your Feat Deck. Discard this Quest." Fail effect: "Chaos gains 1 VP." Bonus condition: if your Hero is on a Marsh Hex, +1 purple die.
Nemesis Phase
After all the players have acted, The Empire moves methodically to recapture their territory from the rebel uprising. Then the Hordes of Chaos take their turn, attacking where their whim takes them.
Activation & Activation Tokens
On the Nemesis Phase, activate a Legion or Horde once for each Activation Token on the card by removing the Activation Tokens one by one. Resolve each card in initiative order, from the lowest to the highest.
Some effects activate a Horde or Legion – this does not use or need an Activation Token.
Whenever a Horde or Legion is activated, it will move across the map following a specific ruleset. You can find the rules for activating a Legion on page 54 and for a Horde on page 55.
Activation Tokens are placed on the cards of Legions and Hordes and will be used in the Nemesis Phase to activate them.
Activation Tokens are produced at the end of every Events Phase. Outside of the Events Phase they are produced by hexes, Quests and other effects and are placed on one of the Legion or Horde cards with the fewest Activation Tokens.
Some effects let you move a Legion or Horde - this is not an activation. It does not leave a Garrison or Curse, and is not restricted in its direction of movement, but can not cross impassable terrain.
Initiative
Initiative is used to determine the order of activation, and also when fighting multiple Hordes or Legions in the same hex: you fight the lowest initiative first (after any Garrisons or Skeletons).
Hint: You can find a brief summary of the activation of a Legion and Horde on the player aid.
Example — The Butcher (a Legion card, Threat 15, Initiative 2): "Nobody in The Empire ever complained about his lack of strategy..." Immediate: Lizard Riders — "Place his Target. Every player loses half their Plunder (round down)." Destruction rewards: "Gain 3 red dice during Archery on Badlands." / "Remove a Haven here or in an adjacent hex. Once per Combat."
Production Phase
The farmers, herders and miners of your loyal provinces, and the trappers and scouts in the Ice Waste, will all contribute to their bid for freedom.
The more Havens you have in play, the more resources you gain. Look at the space on your player board with the highest production that is uncovered, and then gain those resources. Even if you have no Havens on the map, you will still produce some resources.
You also gain bonus resources from each hex with a Haven. Normally a Woods or a Highlands with a Haven produces 2 Plunder; a Marsh or Badlands 2 Food; and an Ice Waste 2 Salt. A hex with a Curse can never gain a Haven or produce resources.
There is no limit to how many resources you can store.
Production Example
Syndra has 3 Havens on the map, one on the Druwhn home hex, one on Grim Fangs, and one on the Dawngaard Sea Tower.
Her player board shows that she produces 5 Salt, 2 Plunder and 1 Food for having 3 havens on the map.
Her home hex produces 1 Salt, 1 Plunder and 1 Food, Grim Fangs produces 2 Salt, and Dawngaard produces 2 Salt.
In total she gained 10 Salt, 3 Plunder and 2 Food.
Scoring Phase
Collectively, you all must defeat the oppressive Empire and the dreaded Chaos invaders. If you fail, your people will become thralls of the enemy!
At then end of each Chapter, all factions will score VP.
The Empire
- 1 VP for each hex with any number of Garrisons
- 1 VP for each Legion on the map
- 2 VP for each faction in the Imperial Graveyard (so if there was 1 Krowh Unit and 2 Druwhn Units, The Empire would score 4 VP)
The Empire does not gain any VP shown on a hex. After you score The Empire, return any Units in their Graveyard to the reserve.
Chaos
- 1 VP for each Curse on the map
- 1 VP for each Horde on the map
- 2 VP for each Faction in the Chaos Graveyard
Chaos does not gain any VP shown on a hex. After you score Chaos return any Units in their Graveyard to the reserve.
Player Factions
- 2 VP for each Haven they have on the map (each faction scores only their own Havens)
- Some hexes show 1 VP next to their resources. If a player has a Haven on such a hex, gain that VP now.
- Players may now spend any 5 resources for 1 VP, without limit, and give each VP to any 1 faction. This is normally done on the last Chapter.
Hint: Garrisons and Skeletons are worth 1 VP each as soon as they are destroyed (so a level 3 Garrison would be worth 3 VP). Each Legion and Horde gives VP (and possibly another effect) only when you destroy it, shown on the bottom of the card. The Empire and Chaos normally only score VP on the Scoring Phase – even for Garrisons and Skeletons.
Scoring Example
Syndra has 3 Havens on the map, one on the Druwhn home hex, one on Grim Fangs, and one on the Dawngaard Sea Tower.
She scores 8 VP: 2 for each Haven and 1 for the hex bonus on her home hex and on Dawngaard.
Example hex — Dawngaard (a Sea Tower): "Units and Heros here are adjacent to any Hex. If your Hero is here, Pay 1 Salt less for Items on the Market." Explore effect: "For scam, even in times of need, opportunities arose at... Gain 2 Salt. + Remove any Skeletons here. + Place 2 Garrisons here." Resources: Plunder 2. VP: 1.
Winning the Game
At the end of the last Chapter, the game is over. If all the players each individually have more VP than The Empire and Chaos (at the end of the last Chapter), congratulations. You have collectively built the strongest possible bulwark against the encroaching Chaos, and defeated the relic of the Empire. Your allied people will be able to forge new nations in the ruins of Azuhl.
At the end of the last Chapter, if The Empire has equal or more points than a player, your people face enslavement again as they are outflanked and ground down by their military machine.
At the end of the last Chapter, if Chaos has equal or more, you have suffered a fate worse than death. Either way, there is little hope left for life in Azuhl - the free factions have faltered before the tide.
Combat
Although your allies are willing to talk and trade, neither The Empire nor Chaos has any interest in diplomacy. The only way to defeat them is to get them before they get you.
Whenever player Units are in the same hex with Imperial or Chaos Units (or Chaos and Imperial Units are together!), combat occurs. Player Units do not enter combat with each other, nor may they share the same hex.
Combat is resolved in one or more combat rounds, starting with a single Archery round, then continuing with Clash rounds until one side is destroyed. To resolve a combat round add up the dice contributed by your different Units on the hex and roll them, and do the same for The Empire or Chaos simultaneously (it's usually faster if someone else rolls them).
Heros and Units of different factions can not participate in each others' combats – the different races don't trust each other fully yet.
Dice in Combat
Your Units each add 1 die to the combat, of the color shown on the standee.
Heros do not add their Hero Dice in combat.
The Threat of a Horde or Legion determines what dice they use in the Archery or any Clash round - just look across the row of the card.
Garrisons gain more dice depending on how many are in a hex (see page 46), while Skeletons always use red dice (see page 48). Dice from both factions in combat are rolled simultaneously, so Units don't normally get destroyed before they roll. You do not have to use every symbol you rolled.
Example — The Mage Breaker (a Legion card, Threat 18): Immediate: Arcane Hunger — "Place her Target. Remove 1 Sea Tower, empty if possible, from the game. Place the Mage Breaker in that Hex." Effects: "Every time she enlarges, remove 1 Sea Tower from the game." / "Gain 1 die for each of ALL dice types. Dice per Round."
Skulls
Skulls are damage. Each player Unit, Garrison level and Skeleton can take only 1 Skull of damage, then it is destroyed. You decide which of your Units are destroyed.
Hordes and Legion can take as many Skulls as they have Threat. When you damage a Legion or Horde, slide the Threat Tracker down for each Skull. If they have no Threat left, they are destroyed.
- If The Empire destroys a player Unit or Skeleton, place it into the Imperial Graveyard.
- If Chaos destroys a Player Unit or Garrison, place it into the Chaos Graveyard.
- If players destroy a Skeleton or Garrison, they score 1 VP for each immediately. Place them back in the reserve.
- If a Horde or Legion is destroyed, resolve the bottom effect on the card. Remove it from the game.
Shields
Each Shield you roll cancels 1 Skull from your enemy.
Bolts
A Bolt either cancels 1 Shield from your enemy; or activates a Godpower (see page 40). 1 Bolt can do either, but not both.
Combat Example
3 Duerkhar Younglings Units enter a combat with 2 Chaos Skeletons. The Duerkhar roll 3 blue dice, and simultaneously the Skeletons roll 2 red dice. The Younglings get a blank, a Skull and a Shield, and the Skeletons get a blank and a double Skull.
The Younglings cancel 1 Skull with their Shield but have to destroy 1 Unit: They place 1 Younglings in the Chaos Graveyard. The Skeletons have no Shields, so 1 Skeleton is destroyed: The Duerkhar score 1 VP immediately and place the Skeleton back in the reserve. Combat continues until one side is destroyed.
Rerolls
If an effect allows you to reroll 1 or 2 dice, you may choose the dice from the ones just rolled; reroll ANY allows you to freely choose from the dice you just rolled; reroll ALL means every die you just rolled MUST be rerolled.
If an effect (such as Woods terrain) gives The Empire or Chaos a reroll, they only reroll blanks. If they lose dice from an effect (such as the Highlands terrain), they lose them in this order: white, yellow, blue, red, purple, black.
Cards in Combat
Many Feats and Items can be used in combat. They will tell you which part of combat they are used in.
Every card will tell you if your Hero needs to be on that hex, and the timing in the round, in red.
Your Feats & Items can only be used during combat with YOUR Units.
Example — Phalanx (a starting Feat): "Archery & Clash — You may turn 1 of your dice to show 1 single Shield. Before Damage. Once per Combat. On your Hero's Hex."
On Your Hero's Hex
Your Hero must be on the hex of the combat to use the effect of this card. Most Items that are used in combat require this.
Before Rolling
These abilities must be used before any dice are rolled. If the dice have been rolled, it's too late to add them!
Before Damage
After the results of the dice are known, but before any Units are lost. This is when Shields are applied. If an effect generates more symbols, they are added to the dice total, but are not considered rolled or "on dice." If an effect rerolls dice, the original symbols from the rerolled dice are lost.
After Damage
After Units are destroyed and Threat has been reduced. If an effect lets you roll more dice, apply the Skulls immediately – you do not enter a new combat round.
Once Per Round
An effect that can be used once in every Combat round, no matter how long the combat.
Once Per Combat
An effect that can be used once per combat resets if you enter a new combat. It is helpful to turn the card to the side to note it has been used this combat.
Combat Sequence
Every combat is divided in 4 parts. Every part has its own icon, displayed on a card to clarify when the effect takes place.
Before Combat (once per combat)
Normally this is very fast: check if the terrain (see page 42) has any effect; see if a Legion or Horde has any combat abilities; and check for any other effects on cards.
Archery Round (once per combat)
If any Unit has Archery dice, roll the dice for both sides simultaneously. Destroy any Units or Threat that receive a Skull, modified by Shields and Bolts. If both sides have Units left, move on to Clash. Players score VP for any destroyed Skeletons or Garrisons immediately, while player Units are placed in the Graveyard of The Empire or Chaos (see page 42).
Clash Round(s) (until one side is destroyed)
All remaining Units roll their dice simultaneously. Destroy any Units or Threat that receive a Skull, modified by Shields and Bolts, then do Clash again if there are any survivors.
Players score VP for any destroyed Skeletons or Garrisons, while player Units are placed in the Graveyard of The Empire or Chaos (see page 42). Repeat Clash until one side is destroyed. Player Archer Units also add their Dice in Clash, but Legions, Garrisons and Hordes only use their depicted Clash Dice, not both!
After Combat (once per combat)
After all destroyed Units have been placed in the Graveyards, if there are only enemy Units on the hex, they remove any Haven and Defenses (Walls & Towers) there immediately. A player's Hero is never destroyed, but can not prevent the removal of Havens after all Units were lost in combat.
Check the bottom of the Hordes and Legion cards – they usually give you VP if you destroy them, and sometimes have additional effects. Once destroyed, Legions and Hordes are removed from the game.
If a Legion destroys a Horde, or a Horde destroys a Legion, the winning faction gains the VP, then remove the destroyed Unit from the game.
Note that Legions and Hordes are not placed in Graveyards - only player Units are, and Skeletons and Garrisons if The Empire and Chaos fight each other.
Combat Sequence Reference
Combat overview (Before Combat → Archery Round → Clash Round → Repeat Clash → After Combat):
- Before Combat: Check terrain. Use Feats and Items. Check combat abilities on Legions or Hordes.
- Archery Round: Roll Archery dice. Use Archery Feats and Items.
- Clash Round: Roll Clash dice (player Archer Units can also add their dice). Use Clash Feats and Items.
- Repeat Clash: Repeat Clash until one side has no Units or a Horde or Legion loses all its Threat.
- After Combat: Remove Haven. Legions retarget. Resolve effects of destroyed Hordes and Legions. Use After Combat Feats and Items. Combat ends.
Each Combat Round in detail (Before Rolling → Rolling → Before Damage → Damage → After Damage):
- Before Rolling: Check terrain. Use Feats and Items. Gather dice.
- Rolling: Roll your dice. Roll enemy dice simultaneously.
- Before Damage: Assign Shields and Bolts. Activate Godpowers. Use Feats and Items. Use rerolls.
- Damage: Assign enemy Skulls to your Units of your choice (but not Walls or Towers). Assign your Skulls. Place destroyed player Units into the Graveyard.
- After Damage: Activate Godpowers. Use Feats and Items. Gain 1 VP per destroyed Garrison and Skeleton and place them back in the reserve.
Terrain Effects (Quick Reference)
- Ice Waste: No effect.
- Woods: Reroll up to 2 dice.
- Marsh: Replace red dice with white dice.
- Badlands: Rider Units add their dice.
- Highlands: Only 1 die.
- Curse: Only Chaos can use Bolts.
Full Combat Round Example
Before Combat: The New Emperor has Threat 5 and enters combat on a Badlands against 2 Duerkhar Younglings, 2 Spearsingers and 1 Koloth. Yanny is on the hex, and she has the Abad Warpaint Item.
As this is a Badlands all Rider Units will add their dice to Archery, so the Koloth will add a black die. Checking The New Emperor's combat ability, it says he will gain 2 red dice in the Archery round on Badlands.
Example Legion card — The New Emperor (Threat 8): "Add 2 red dice during Archery on Badlands." Immediate: "Place his Target. Activate every Legion. (You do not need an Activation Token to Activate.)" Destruction reward: "The Empire gains 2 VP per dice." If Destroyed: "remove his Target and gain 5 VP. Place 2 Garrisons on Empty Hexes with no [cannot-gain-Haven icon]."
Archery Round: According to his Threat Tracker, The New Emperor rolls 1 blue and 2 white dice, and adds 2 red from his combat ability. He gets a Bolt-Skull, a Skull-Shield and 3 Blanks.
The Spearsingers add 1 white die each, since they are Archer Units, in addition to the Koloth's black die for being a Rider on a Badlands. The Duerkhar get 3 Skulls, a Blank and a Skull.
The Emperor takes 3 damage after he applies his Shield to the 4 Skulls, reducing his Threat from 5 to 2. The New Emperor uses the Bolt to activate his Godpower, so The Empire gains 2 VP. Yanny will take 2 damage since she does not have any Shields. She chooses to destroy the 2 Spearsingers, who are placed in the Imperial Graveyard.
Clash Round: The New Emperor will only roll a purple, a yellow and a white die now. Yanny still has two Younglings and the Koloth left, giving her 2 blue and 1 black dice. Before rolling, Yanny decides to use the Abad Warpaint, and adds a red die.
Example Item card — Abad Warpaint: "Clash — Discard this to gain 1 red die. Before Rolling. On your Hero's Hex."
The New Emperor rolls a Bolt-Bolt, a Skull and a Skull-Shield. Uh oh. Yanny rolls a Skull, Skull-Skull, and 2 Shields.
The New Emperor loses 2 more Threat, and will be destroyed this round. With his Bolt-Bolt The Empire gains another 2 VP and cancels 1 of Yanny's Shields with the other. Yanny has to take 2 damage but can block 1 with a Shield, and chooses to destroy a Youngling, who is placed in the Imperial Graveyard. Since one side has been destroyed, there are no further Clash rounds.
After Combat: Since the New Emperor was destroyed, let's have a look at his card: It says "If Destroyed, place 2 Garrisons on empty hexes with no [cannot-gain-Haven icon], remove his Target, and gain 5 VP."
Yanny destroyed him, so she places 2 Garrisons in hexes without a cannot-gain-Haven icon, removes The New Emperor's Target, and then the Duerkhar gain 5 VP. The standee and the Legion card are removed from the game.
Yanny also has the "Younglings" Feat in play and face-up, so she flips it face-down to exchange a Youngling here with an Oathsworn from the reserve. She only has 2 Units left, but they are good ones.
Example Feat card — Younglings (a starting Feat): "After Combat — Flip this, to exchange 1 Youngling here with 1 Oathsworn."
Druids & Godpowers
After the Curse brought wrack and ruin upon the world, the Druids of Azuhl began their quest to awaken the Old Gods from oblivion. As the deities regain their strength through your worship, they provide you with vigor and succor.
At the start of the game, four Druid cards are placed, making their Godpowers available to all players. When you roll a Bolt in combat, you may either use it to cancel 1 Shield from your enemy, or activate a Godpower on a Druid. You may activate more Godpowers if you have more Bolts. Godpowers can not be activated outside of Combat.
Hordes, Skeletons and Legions have their own Godpowers, representing Drakorea's mastery of magic, and the primal destructive sorcery of Chaos.
Whenever a Horde or Legion rolls a Bolt, it will always activate its Godpower. If a Legion or Horde Godpower says once per Round or once per combat, additional Bolts are used to cancel Shields. Chaos and The Empire can never use the Godpowers shown on any Druids.
Only Chaos can use a Bolt on a hex with a Curse! Their enemies can not use Godpowers or cancel Shields.
Example Druid card — Watcher: "Archery & Clash — You may reroll any of your Dice that do not show Bolt. Before Damage. Once per Round."
Example Horde card — The Lich Queen (Threat 22): Immediate: "Place 1 Curse on her Hex. If there are less than 1 Curses on the Map, Chaos gains 1 VP." Godpower: "Every Horde in play (excluding hers) gains 1 Threat. Before Damage. Once per Round." Destruction reward: "If Destroyed, gain 1 VP."
Combat Abilities
Most Hordes and Legions have unique powers that provide special rules in their Combats. Those combat abilities are found on Legion and Horde cards.
Example Horde card — Oda the Fallen (Threat 30): "Oda was once the Empire's biggest hope. Now he is its biggest threat..." Immediate: Doomsday — "Oda gains 2 Threat. Every other Horde and Legion gains 1 Threat." Combat ability: "Skip the Archery round against Oda." Godpower: "= 2 Skulls."
Unit Types
Thundering Koloths, elite Druwhn Rangers, waves of Krowh Tribesmen - prepare for battle!
Warriors, Riders & Archers
All player Units are listed on the player boards with their cost and their type - "Warrior" for example. These designators are very important for Terrain (page 42) and other effects.
Example Unit — Oathsworn (Elite Warrior): Cost 2 Salt or 3 Plunder.
Basic & Elite Units
Every player Unit is either Basic or Elite. Cards that just say "Unit" can affect Basic AND Elite Units, but cards that specify the type must affect that type of Unit. So a card that says "Place 1 Basic Unit" must be Basic (but could be a Warrior, Archer or Rider).
Legions, Hordes & Threat
Imperial Legions are well-equipped and trained to die for the Emperor. Chaos Hordes are seething swarms of demons and their corrupted pawns.
The strength of both is represented by their Threat, which moves up regularly each Chapter, and is usually only brought down by combat. When you damage a Legion or Horde, slide the Threat Tracker down for each Skull.
Garrisons & Skeletons
Garrisons are fortified towns and crossroads essential to the Empire's economy. As a hex gains Garrisons, stack the next piece with it, up to the maximum of 3 per hex.
Skeletons are foot soldiers of the forces of Chaos, drifting in from the Ice Wastes to feed.
If there is a combat on a hex with Garrisons and a Legion, or Skeletons and a Horde, fight the Garrison or Skeleton first.
Legions, Garrisons, Hordes & Skeletons are Units.
Terrain Types
The varied, wild landscapes of Azuhl present obstacles and opportunities to different Units. Be careful of where you pick your battles.
Combat always takes place on a type of terrain. Before combat, apply the terrain effects to the combat for the entire combat. Look at each hex for these icons:
- Badlands. The open plains give cavalry an advantage. Riders add their dice to Archery here.
- Highlands. Attacking at range is difficult here. Roll only 1 die for Archery. Nemesis prefers a die in this order: black, purple, red, blue, yellow, white.
- Marshes. The soft terrain prevents swift maneuver. Red dice become white in Archery and Clash.
- Woods. Trees make perfect cover for ambushes. 2 Archery dice may be rerolled, once. Nemesis only rerolls blanks.
- Ice Waste. The seas are now a great plain of ice, frozen solid enough for even Koloths to cross. Ice Wastes have no effect on combat.
- Curse. The depredations of Chaos leave a smoking ruin behind them, and even the Old Gods are powerless. A hex with a Curse is its own type of terrain, and loses the terrain of the original hex. Only Chaos can use Bolts on Cursed Lands.
Walls and Towers
Once you have built a Haven, you may later build Towers and Walls, called Defenses, in the Build Phase for 1 Plunder each. Each Haven can have 1 Tower and 1 Wall.
If your Haven is removed, so are its Wall and Tower. Walls and Towers do not take damage from Skulls.
- Towers give you 1 white die in Archery and Clash rounds if you have any of your Units on that hex.
- Walls give you 1 blue die in Clash rounds if you have any of your Units on that hex.
The Graveyard
The Graveyard is where you place player Units when The Empire or Chaos destroys them in combat. Both of these factions have their own Graveyard. If a Unit is placed in a Graveyard, they are unavailable to the player until they are returned during the Scoring Phase of the Chapter. Only effects that reference the Graveyard can access it before then.
Skeletons destroyed by The Empire go to the Imperial Graveyard, and Garrisons destroyed by Chaos go to the Chaos Graveyard. Legions and Hordes do not go to the Graveyard. Sometimes effects remove Units – these are returned to the reserve instead.
The Nemesis
And while the mortals were captivated with themselves, dark storm clouds rose on the horizon...
Your enemies in the game are Chaos and The Empire - collectively called the Nemesis. Those two factions are controlled by the players and the game itself.
They are enemies of each other as well - when they meet on a hex, they will start a combat.
On the map The Empire is represented by its Legions and Garrisons and Chaos appears with Hordes, Skeletons and Curses.
The Empire and Chaos collect VP, just like the players, trying to win the game by defeating you and each other in combat and gaining influence on the map: The Empire will score VP for having Garrisons and Legions and Chaos for Curses and Hordes.
Threat
Threat is the measure of how mighty the Legion or Horde is - the single standee represents a much larger force. Its range goes from 7 (the strongest possible Threat) down to 1 (the weakest). At zero, a Horde or Legion is destroyed.
Use the Threat Tracker, the small black clip, to indicate the current Threat by clipping it directly to the Card. The Archery and Clash columns will show you, which dice to use at each Threat level.
When a Legion or Horde comes into play, the latest Event card will always tell you the initial Threat in the lower left corner.
When fighting against Legions and Hordes, your goal is to reduce its Threat to zero to destroy it. Every Skull you score in combat reduces the Threat by 1.
Move the Threat Tracker up or down the card to match the new Threat whenever it changes.
If an effect would cause Threat to go above the maximum (usually 7), score 1 VP for that Faction instead for each.
Card Example — The Banished (Initiative 26)
- Immediate: Primordial Pleasures — "Set The Banished's Threat to 5. Choose 1 Quest and resolve its failure effect."
- Combat ability — "Reroll 1 blank for every revealed Druid. Once per round."
- Godpower — "Destroy the most expensive Unit or 2 Imperial Threat here. Once per round, Before damage."
- Threat/dice table: at Threat 4 and above roll Archery 2 (dice: blue); at Threat 3, Archery 1 (blue); at Threat 2, Archery 1 (blue); at Threat 1, Archery 1 (blue). Clash dice progress from purple/red/light-blue combinations at higher Threat down to fewer dice at lower Threat.
- Insatiable Revenant (destruction effect) — "If destroyed, gain 3 VP. Once per game: place this card at the bottom of the Horde deck."
Card anatomy: (1) Initiative number, (2) Name, (3) Immediate effect, (4) Combat ability, (5) Godpower, (6) Threat Tracker, (7) Threat, (8) Archery dice (do not add these to Clash), (9) Clash dice, (10) Effect when destroyed.
The Empire
The Empire is alert to the rumors of rebellion and is devoting its remaining forces to rooting them out before they deal with the invaders from the devastated mainland. Once Imperial spies become aware of the rebels, the Empire will keep trying to eradicate them with its technologically superior war machine.
Garrisons
The Empire has had centuries to fortify the Isles of Azuhl. Garrisons represent the outposts and magical arsenals of The Empire. They count as Units and fight the same way (so each level of a Garrison counts as 1 Unit).
Any player Unit or Chaos Unit on a hex with a Garrison must begin combat with it. A Garrison must be destroyed before you engage a Legion in the same hex. Entering a hex with both means you will have 2 combats in a row.
A hex can have up to 3 Garrisons, which you track by stacking the pieces on top of each other: the largest piece is level 1, the next largest is level 2, and the smallest is level 3.
Each Garrison increases the total fighting power, and each level requires a Skull to be destroyed. Remember that their Archery dice are only rolled in the Archery round, and are not added to any Clash rounds afterwards.
When you destroy a Garrison, gain 1 VP per Level immediately. If Chaos destroys a Garrison place it into the Chaos Graveyard.
If you run out of Garrisons or can not place a Garrison, the Empire scores 1 VP for each instead.
Garrison Dice in Combat
| Level | Archery | Clash |
|---|---|---|
| Level 1 | 1 white die | 2 blue dice |
| Level 1+2 | 2 white dice | 1 blue, 2 yellow, 1 white die |
| Level 1+2+3 | 3 white dice | 2 blue, 2 yellow, 1 white die |
Legions
When an Imperial Legion is placed, draw the top Legion card. Place the matching Imperial Legion standee on The Capital and clip its Threat Tracker to the card, then resolve the immediate effect. Complete the immediate effect before any other effects or combats are generated. Then place the Legion card on the map in Initiative order.
If a Legion is destroyed, resolve the effect at the bottom of the card and remove it from the game. If you generate an effect that destroys a Legion, you gain the bottom effect.
Targets
Every Legion is sent out of The Capital with a clear goal, represented by its Target. Every Legion has its own Target, that is placed by its immediate effect. Choose one player faction with no Target. Then place the Target on one of that faction's Havens that has the fewest Units.
A faction can only have one Target at a time.
If every player already has a Target and a new Legion is placed, place its Target on The Capital. Targets on The Capital stay there for the rest of the game - the Legion will activate normally but will not move out from the Capital. Some Legions may Target a hex with no Haven. In this case, they will move there and stop. If the Legion has an effect that only affects the player with the Target, ignore it.
A Legion that reaches its targeted Haven and destroys all enemy Units there, will destroy that Haven and retarget.
Retarget
If a Haven with a Target is removed by any effect, and the Legion is still in play, the Legion will still try to root out the uprising of that faction.
If there are more Havens of that faction on the map, place the Target on one that has the fewest Units. If the faction has no other Haven, then place the Target on The Capital. The Legion will try to return to The Capital and stay there generating Garrisons for The Empire.
Targets not placed on a player Haven never retarget.
The Capital
The Imperial Capital is the last bastion of The Empire, perhaps the only city left in the world. It is a special hex that is always in the middle of the map. The Capital has no terrain type, and has no effect in combat.
Like any other hex, The Capital can have up to three Garrisons. But unlike other hexes, the Empire does not gain 1 VP if you would place a fourth Garrison on it. Instead, place it on 1 empty hex with no cannot-gain-Haven icon. If there is none, place 1 Garrison with another Garrison (increasing its level).
If there are ever ONLY non-Imperial Units on The Capital (such as from the Command Action or a Horde activation), place 1 Legion on The Capital immediately. This will repeat until there are no more Legions or no more non-Imperial Units. If you can not draw a Legion, flip The Capital and give 5 VP to the faction with Units on it.
Chaos
As the forces of darkness emerge from the wastes of the North, their tendrils creep insidiously into Azuhl. Skeletons are murderous undead, monsters and cultists bent on destruction. Chaos Hordes are vast armies of these. They befoul the land and move on, leaving ruin behind them.
Skeletons
Any player Unit or Imperial Unit on a hex with Skeletons must begin combat with it. Each Skeleton has a red die in combat. If they roll a Bolt, place another Skeleton on this hex (After Damage). This can lead to a long combat, but it is all one combat. This can also produce a Horde if there are 3 Skeletons, but only After Damage.
A Skeleton must be destroyed before you engage a Horde in the same hex. Entering a hex with both means you will have 2 combats in a row. When you destroy a Skeleton, gain 1 VP per Skeleton, and place it in the reserve. If The Empire destroys a Skeleton place it in the Imperial Graveyard.
Skeleton Dice in Combat
| Level | Archery | Clash |
|---|---|---|
| 1 Skeleton | none | 1 red die |
| 2 Skeletons | none | 2 red dice |
Bolt effect: Place 1 Skeleton here (After Damage).
Skeletons Becoming Hordes
If there are ever 3 Skeletons on the same hex, remove them and place 1 new Horde on that hex.
If there are no Skeletons in the reserve and you must place one, choose a hex with 1 or 2 Skeletons on it, remove them to the reserve and place 1 new Horde on that Hex. If there are more Skeletons to place, continue doing so.
Activate Skeletons
If an effect activates Skeletons, move all Skeletons from 1 hex at a time following the rules for activating a Horde (see page 55), but do not place a Curse. Resolve that combat and then repeat this for all other hexes with Skeletons. You can freely pick which Skeleton(s) to move first. This might result in 3 or more Skeletons in one Hex – remove 3 and form a new Horde.
Hordes
When a Chaos Horde is placed, draw the top Horde card. Place the matching standee on the appropriate hex, clip the Threat Tracker to the card, then resolve the immediate effect. Complete the immediate effect before any other effects or combats are generated. Then place the Horde card on the map in initiative order.
If a Horde is destroyed, resolve the effect at the bottom of the card and remove it from the game. If you generate an effect that destroys a Horde, generate the bottom effect yourself.
Curses
Curses represent the total degradation of the land by Chaos, through the foul toxicity of the undead and depredations of the demons. Only the bravest venture there.
Curses are placed most often when Hordes activate. When a Curse is placed on a hex, destroy any Garrisons (place them in the Chaos Graveyard), and remove any Haven, Tower and Wall there. You can not use the Haven Action in this hex, and if the hex was unexplored, you can not use the Explore Action here.
A hex with a Curse is its own type of explored terrain, and loses all the properties of the original hex, except impassable terrain, or ongoing effects (like on a Sea Tower). So, you can Command Units onto a hex with a Curse, even if it was unexplored.
During Combats on a Curse, only Chaos can use Bolts!
If you can not place a Curse, because there are none in the Reserve, or there is already a Curse in that hex, Chaos gains 1 VP instead.
Removing Curses
If an effect (through an Item or Quest for example) removes a Curse, the hex regains its properties and is available for Haven and Explore Actions. If there are player Units here, they remain and may be Commanded off of it; if you explore the Hex and there are player Units here, it is not empty, so will not normally place a Garrison or Skeleton there, nor reinforce anything.
Garrison Example
Rigga was just explored by Ronja, and it says "If empty, place 1 Garrison here; if not reinforce here. Place 1 Garrison on an empty hex with no [cannot-gain-Haven icon]."
Since Rigga is not empty, the effect will reinforce the level 1 Garrison there by placing a level 2 Garrison on it. There is only 1 Empty Hex without a cannot-gain-Haven icon so 1 Level 1 Garrison must go there.
If there were no empty hexes without a cannot-gain-Haven icon, Ronja would have to place a Garrison with another Garrison - even on Rigga.
Placing Nemesis Units
Through Events or other effects, Hordes, Legions, Garrisons and Skeletons will be placed on the map. Sometimes, the Event or the hex will tell you exactly where to place them. But in some cases, they will tell you to simply "place 1 Horde" for example, allowing the acting player to choose.
If you can not follow the instructions of a place effect, or there are no instructions, place the Unit on either an empty hex or a hex with Units of the same faction. If you can not place or reinforce a Garrison, Skeleton, Legion or Horde for any reason, give that faction 1 VP.
"Place a Garrison on an empty hex with no [cannot-gain-Haven icon]"
The Empire attempts to spread as much as possible. If you need to place multiple Garrisons, place them in as many empty Hexes as you can.
Take a level 1 Garrison (the largest garrison piece) from the reserve and place it on an empty hex with no cannot-gain-Haven icon. An empty hex contains no Haven, Units or Curse. The hex may be explored or unexplored.
If there is no empty hex, you may place it on a hex with a Legion. If you have already placed all the level 1 Garrisons, place a level 2 or level 3 Garrison on a hex with other Garrisons. Up to 3 Garrisons can be placed on a hex.
If you can not place or reinforce a Garrison (by running out of models, or exceeding 3 on a Hex), the Empire gains 1 VP.
"Place a Skeleton with other Skeletons"
Take 1 Skeleton from the reserve and place it on a hex with 1 or 2 Skeletons. If there are ever 3 Skeletons in the same hex, remove them and place 1 new Horde in this hex.
If an effect tells you to place 2 Skeletons with other Skeletons, you may split them into different hexes.
If there are no Skeletons on the map, place it on an empty hex.
If there are no Skeletons in the reserve and you must place one, choose a hex with 1 or 2 Skeletons on it, remove them and place 1 new Horde on that hex.
If you can not place a Skeleton for any other reason (such as all Hordes having been placed), Chaos gains 1 VP instead.
Skeleton Example
Grim Fangs was just explored by Syndra, and it says "If empty, place 1 Skeleton here; if not reinforce here. Place 2 Skeletons with other Skeletons."
Grim Fangs already has 1 Skeleton, so it is not empty and Syndra must reinforce the hex by adding another Skeleton there.
Now it is time for her to place the 2 Skeletons with other Skeletons: There is only one other hex with only 1 Skeleton, so Syndra places her first Skeleton there, to avoid a Horde right away.
She decides to place the last Skeleton in Grim Fangs. Since there are 3 Skeletons in the same hex, they are removed and replaced by a Horde!
"Place a Legion on the Capital"
Draw the top card of the Legion deck. Put the matching standee on The Capital, at the center of the Map, set its Threat Tracker (equal to the Threat on the Event card if there are no other instructions), then resolve its immediate effect, and only afterwards resolve any combats.
To place its Target, choose one faction in play with no Target. Then place the Target on one of that faction's Havens that has the fewest Units (see page 47).
Afterwards place the Legion card according to its initiative – from the lowest Initiative on the left to the highest on the right – on the map.
If an effect does not specify where a Legion is placed, place it on the Capital. If an effect places a Legion from the box, randomly draw a Legion that was not put into the Legion deck. If you can not place a Legion, the Empire gains 1 VP.
Legion Example
An Event says "Places 1 Legion at Threat 4 on The Capital," so Syndra, the first player, draws the top card from the Legion deck. It is the Butcher, and she places its standee on The Capital, and sets the Threat Tracker on The Butcher's card to 4.
The Butcher's immediate effect starts with: "Place his Target." Syndra decides she wants to fight the Butcher herself (since she has no Target yet), and places the Butcher's Target on her home hex, which has zero Units on it (even though it also has a Tower and Wall, these aren't Units).
The Butcher's immediate effect then says "Every player loses half their Plunder (round down)." Yanny has 7 Plunder and loses 3, while Syndra has only 1 and loses zero.
After resolving the Butcher's immediate effect she places the Butcher's card in initiative order with the other Legions on the map.
Example Legion card — The Butcher (Threat 15, Initiative unspecified): Immediate: Vanguard Riders — "Place his Target. Every player loses half their Plunder (round down)." Combat ability: "Gains 3 red dice during Archery on Badlands." Destruction reward: "Remove a Haven here or in an adjacent hex. Once per Combat."
"Place a Horde"
Draw the top card of the Horde deck. Put the matching standee on an empty hex (remember, a hex with a Curse is not empty), or a hex with a Skeleton or Curse if you can not, then set its Threat Tracker (equal to the Threat on the Event card if there are no other instructions), then resolve its immediate effect, and only afterwards resolve any combats.
Afterwards place the Horde card according to its initiative – from the lowest initiative on the left to the highest on the right – on the map.
If a region (such as the "Howling White") is specified, any hex with that name printed on it is valid.
If an effect places a Horde from the box, randomly draw a Horde that was not put into the Horde deck. If you can not place a Horde, Chaos gains 1 VP.
Horde Example
An Event says "Place 1 Horde at Threat 4 in the Fog Grave, not adjacent to a Haven." Kha'al, the first player, draws the top card from the Horde deck. It is the Counter of Omens, so he places the standee on an empty hex in the Fog Grave, and sets the Threat Tracker on the Horde card to 4.
The Horde's immediate effect says "Place 2 Skeletons on his hex," so 2 are placed on the hex with The Counter of Omens.
After resolving the Counter of Omen's immediate effect he places its card in initiative order with the other Hordes on the map.
Example Horde card — The Counter of Omens (Threat 24): Immediate: "Place 2 Skeletons on his Hex." Godpower: "Place 2 Skeletons on an Empty Hex. After Damage, Once per Round."
Activate a Legion
Follow these steps for each activation, in order:
- Place 1 Garrison here, or gain 1 VP if there are already 3 in that hex (and it is not The Capital).
- Move the Legion 1 hex, closer to its Target. Count the hexes that form a route to its Target hex. Remember, Legions can not cross impassable terrain. If a Legion is on the same hex as its Target, it does not move. If the Legion has multiple options to reach its Target, use this priority:
- A. Into a Haven. If there are multiple Havens, choose the Haven with the fewest Units.
- B. Into a Hex with enemy Units. If there is no Haven, choose the hex with the fewest enemy Units and/or Threat.
- C. If none of the above apply, into an empty hex. A hex with a Curse or Garrison is not empty.
- D. Any hex closer to its Target. Count the shortest path.
- Begin combat if there are enemy Units (player or Chaos), and do not forget the Legion's combat ability.
- If the Legion survives combat, remove any Haven here.
- If the Target is here and there was a Haven, retarget by placing the Target on another Haven of that faction, with the fewest Units. If the Faction has none left, place the Target on The Capital (where it will stay).
Legion Activation Example
The Butcher has 2 Activation Tokens on his card in the Nemesis Phase. He must move towards his Target, but can not pass through Rhun, because of the impassable terrain. On his first activation, he moves into the unexplored hex adjacent, even though the hex does not have a Haven or Units, because that is the only way The Butcher can get closer to his Target. The Butcher places 1 Garrison when he leaves The Capital. One Activation Token is removed from his card.
On his next activation, he places a Garrison on the Hex, and then moves directly into the Druwhn home hex. Combat begins! The Butcher wins, barely. The Druwhn Haven and its Tower and Wall are removed. Since there is no other Druwhn Haven for his Target to go to, it is placed on The Capital. The Butcher will make his way back, placing Garrisons along the way.
Activate a Horde
Follow these steps for each activation, in order:
- Place 1 Curse here, or Chaos gains 1 VP if there is already a Curse in that hex.
- Move the Horde 1 Hex, not farther from The Capital. Count the hexes that form a route to The Capital if you are not sure (do not take the Sea Tower effect into account). Remember, Hordes cannot cross impassable terrain. While moving, ONLY look at the adjacent hexes and then choose a hex with this priority:
- A. Into a Haven. Hordes always choose a Haven over another hex, and choose the Haven with the fewest Units.
- B. Into a Hex with enemy Units. If there is no Haven, choose the hex with the fewest enemy Units and/or Threat.
- C. If none of the above apply, onto an empty hex. Remember: a hex with a Curse or Skeleton is not empty.
- D. Any hex not farther from The Capital (count the hexes that form a route to The Capital if you are not sure).
- Begin combat if there are enemy Units (player or Empire), and do not forget the Horde's combat ability.
- If the Horde survives combat, remove any Haven here.
Horde Activation Example
The Counter of Omens is activated. There are no Havens next to him, but there are two hexes with enemy Units, which would not take him farther from The Capital.
Since a Horde prefers the weaker enemy, it will move into the unexplored hex with just 1 Garrison instead of the hex with 2 Garrisons.
The Counter of Omens places a Curse on his hex, then moves into the hex with the Garrison. Combat begins, with no terrain effects, since none are showing on the unexplored hex.
Hints for Your First Games
- At the beginning, don't take big risks. Build lots of cheap Units to overwhelm the weaker enemies near you.
- Try and save 1 Food for a Command and 2 Plunder for a Haven. A good first play is to move your Hero to a hex whose resource you need, Explore it, and Command into it (unless something truly horrible appeared there). You should have a good chance of winning if you have more Units, and then you can build your second Haven, which is vital for getting more than 5 Units on the map.
- Later on in the game you want to make sure you have a Unit on each of your Havens, but in the first Chapter you are (probably) safe if you leave one empty.
- It is important to stop Chaos from cursing too many hexes. If they have too many early on, that makes it very difficult to ever overtake them, so at least 1 player should attack a Horde on Chapter 1 (or 2 at the latest), because more Hordes will come.
- By the same token, it is important to attack isolated Garrisons quickly, since a single Garrison gains 1 VP for the Empire every Chapter just like a triple Garrison.
- Since The Empire moves predictably, try and fight their Legions on advantageous terrain for you. Since you can control The Empire's VP more easily by eliminating Garrisons, it is not as critical to keep their score down early.
- Don't feel bad if you lose most or all of your Units. This usually means you got some VP, and rebuilding is quick since you can turn AP into Salt. When in doubt, attack!
- It's better to fight away from your Havens if you have no Walls and Towers.
- Gaining 1 new Haven per Chapter is good, but getting more is obviously better, especially a Sea Tower.
- Don't hesitate to attack an enemy that threatens your allies. You all win together!
- We also highly recommend a five minute break between each Chapter. This lets you talk about strategy, grab a snack, and makes the game more fun. Enjoy!
Most Overlooked Rules
Combat
- Only Chaos can use a Bolt on a hex with a Curse.
- Your Hero does not contribute any dice to combat.
- Your Hero is not a Unit and does not count against the limit of 5 Units per hex, or start a combat on its own.
- Destroyed player Units go to the Graveyard (of either The Empire or Chaos). Removed Units go to the reserve.
- Towers & Walls are not Units and cannot receive damage and do not roll dice in combat without your Units there.
- Archers also contribute their dice in Clash rounds.
- A Level 3 Garrison needs 3 Skulls to be destroyed and is worth 3 VP. A Level 2 Garrison is 2 and 2.
- If Chaos destroys Garrisons, place them in the Chaos Graveyard. If The Empire destroys Skeletons, place them in the Imperial Graveyard. VP are scored later.
Nemesis
- Legions leave a Garrison behind when they activate, Hordes a Curse.
- When Units of The Empire and Chaos are in the same hex, they begin a combat with each other.
- Whenever a Garrison, Legion, Skeleton or Horde can not be placed or reinforced, that faction gains 1 VP.
- A hex with a Curse is not empty.
- An Activation Token is placed on one of the Legion or Horde cards with the fewest Activation Tokens.
Actions
- You can ALWAYS turn 1 AP into 1 Salt, or 3 resources of one type into 1 other resource.
- The Move Action only lets you move your Hero, but Command moves Units AND your Hero.
- Player Units can not be moved onto unexplored hexes, but Legions, Skeletons and Hordes can.
- The Command Action costs 1 AP AND 1 Food.
- The Haven Action costs 1 AP AND 2 Plunder.
- The Ice Wastes around the map are considered explored, and can be Commanded into immediately.
- If you explore a hex with impassable terrain, you can orient the hex any way you want.
Icons and Cards
Hex Key
- Hex effect. Often those effects reinforce, or place Skeletons or Garrisons - you can find more on placing and reinforcing on page 50.
- Terrain has a strong effect in combat.
- Resources show what the hex produces on the Production Phase if you have a Haven there.
- Bonus VP show extra VP you gain on the Scoring Phase if you have a Haven there.
- Impassable terrain. Player Units, Skeletons, Hordes and Legions can not cross impassable terrain, but Heros can.
- Ongoing effects (such as on a Sea Tower) are active as soon as the hex is flipped.
- Hex alignment shows if Chaos or The Empire will place Units here if empty.
Example hex — Zeegaard: "Already plagued by parasites before the rebellion, none prevented by the Empire to be further looted." Ongoing effect: "Units and Heros here are adjacent to any Hex. If your Hero is here, Pay 1 Salt less for Items on the Market." Explore effect: "Gain 2 Salt. + Remove any Skeletons here. + Place 3 Garrisons here."
Icons
- Before Combat, Archery Round, Clash Rounds, After Combat — the four parts of the Combat Sequence.
- Skull, Shield, Bolt — the three combat dice symbols.
- Die colors — White die, Yellow die, Red die, Blue die, Purple die, Black die.
- Immediate, Always, Refresh — timing icons for when a card's effect triggers.
- Action Point, Victory Point, "This hex can not gain a Haven" — resource/status icons.
- Attributes — Might, Magic, Leadership, Guile.
- Resources — Plunder, Salt, Food.
- Terrain icons — Badlands, Marshes, Ice Waste, Woods, Highlands.
- Card types — Legion card, Horde card, Quest card, Event card, Hero card, Feat card, Item card, Druid card.