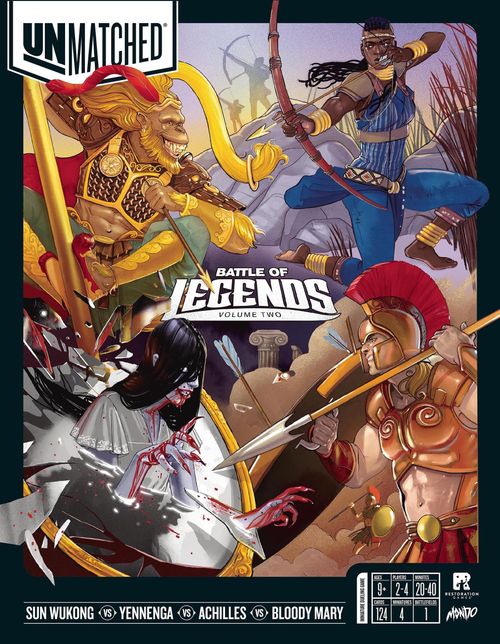
Unmatched: Battle of Legends, Volume Two
Unmatched: Battle of Legends, Volume Two Rulebook
Table of Contents
Table of Contents
Contents
- 4 miniatures
- 120 action cards
- 5 health dials
- 4 character cards
- 6 sidekick tokens
- 1 game board
Sun Wukong
- 30 action cards
- 1 Sun Wukong hero miniature
- 1 Sun Wukong character card
- 3 Clone sidekick tokens
- 1 health dial
Yennenga
- 30 action cards
- 1 Yennenga hero miniature
- 1 Yennenga character card
- 2 Archer sidekick tokens
- 1 health dial
Bloody Mary
- 30 action cards
- 1 Bloody Mary hero miniature
- 1 Bloody Mary character card
- 1 health dial
Achilles
- 30 action cards
- 1 Achilles hero miniature
- 1 Achilles character card
- 1 Patroclus sidekick token
- 2 health dials
Before you play for the first time, assemble the health dials by punching out the circles for each character and connecting them with a rivet.
Heroes & Sidekicks
All of your characters in the battle are called your fighters, but your primary fighter is called your hero. Heroes are represented by miniatures that move around on the battlefield.
Your other fighters are called sidekicks. Heroes may have multiple sidekicks, a single sidekick, or no sidekicks at all. Sidekicks are represented by tokens that move around on the battlefield.
Each hero has a special ability noted on their character card. This card also lists your fighters' stats, including the starting health of your hero and their sidekick. Fighters' health is tracked on separate health dials. Fighters cannot gain health higher than the highest number on their health dial.
How to Play
Players take turns maneuvering their fighters on the battlefield, playing schemes, and attacking their opponent's fighters. To win, you must be the first to defeat your opponent's hero, which happens when they are reduced to zero health.
Setup
Note: These setup instructions and the following rules are for games with 2 players. For rules on playing with 3 or 4 players, see the Free-for-All and Team Play sections.
- Choose a battlefield and place it on the table.
- Each player chooses a hero and takes the corresponding action cards, character card, hero miniature, sidekick tokens (if any), health dials, and any other components for their hero.
- Each player sets their hero's starting health on the matching health dials. Starting health is found on the character cards.
- Each player shuffles their action cards to form a single deck and places it face down, then draws 5 cards as their starting hand.
- The younger player places their hero in the 1 space on the battlefield. If they have sidekicks, place them in separate spaces within the same zone as their hero. If their hero is in a space that is part of multiple zones, their sidekicks may be in any of those zones.
- The older player places their hero in the 2 space on the battlefield, then places their sidekicks, if they have them, based on the same rules as in step 5.
- The younger player takes the first turn.
The Field of Battle
Spaces and Zones
The battlefield is made up of circular spaces that the fighters will move between. Each space can only contain one fighter at a time.
Two spaces connected by a line are adjacent. Adjacency is used to determine targets of attacks and various card effects.
The spaces of the battlefield are divided into zones, which are indicated by different colors. All spaces with the same color are part of the same zone (even if they are in different parts of the battlefield).
If a space has multiple colors, it is considered to be part of multiple zones. Zones are used to determine targets of ranged attacks and various card effects.
This set contains the same battlefield on both sides of the board. On one side, the colored spaces are filled in with different patterns, which can be especially helpful for players with vision deficiencies. The other side has empty circles, where zones are only indicated by the circle's color. Both sides play exactly the same.
Your Turn
On your turn, you must take 2 actions; you cannot skip an action. You may choose two different actions or the same action twice.
The possible actions are:
- Maneuver
- Scheme
- Attack
You have a hand limit of 7 cards. At the end of your turn, if you have more than 7 cards in your hand, you must discard down to 7 cards, placing any discarded cards in your discard pile.
Then it is your opponent's turn.
Anatomy of a Card
- A — Overall card type: Attack, Defense, Scheme, or Versatile (attack or defense).
- B — Attack or defense value (if any).
- C — Fighter allowed to use the card.
- D — Name of the card.
- E — Effect when played (if any).
- F — BOOST value.
- G — Deck that the card appears in.
- H — Number of copies in the deck.
Each hero's deck is different, though they may share some cards with other heroes' decks.
Action: Maneuver
When you take the maneuver action, you first draw the top card of your deck, then you may move your fighters.
Step 1: Draw a Card (Mandatory)
Draw the top card of your deck and add it to your hand.
You can have more than 7 cards in your hand during your turn, but you must discard down to 7 cards at the end of your turn.
Drawing cards — whether via the maneuver action or due to a card effect — is mandatory, unless otherwise specified.
When your deck is empty, your fighters are exhausted. If you need to draw a card while your fighters are exhausted, do not reshuffle your discard pile. Instead, each of your fighters immediately takes 2 damage.
Step 2: Move Your Fighters (Optional)
Your character card lists your move value. During this step, you may move each of your fighters, one at a time, a number of spaces equal to or less than your move value. You may also choose to BOOST your movement (see below).
When you move a fighter, each space they move into must be adjacent to their previous space. You may move a fighter through spaces occupied by other friendly fighters (i.e., your own fighters), but they cannot end their movement in an occupied space. You may not move a fighter through spaces occupied by opposing fighters.
You may move your fighters in the order of your choice, but must finish each fighter's move before starting the next. You are not required to move all of your fighters the same distance as each other; you get to choose for each fighter. You are allowed to move a fighter zero spaces.
Note: If an effect ever lets you move your opponent's fighters, you must respect all of the same movement rules, but from your opponent's perspective.
Boost
When you take the maneuver action, you may boost your movement. To do this, discard 1 card from your hand and add that card's BOOST value to your move value. Ignore any effect on the discarded card.
Certain effects (like Bloody Mary's Ghostly Touch card) allow you to boost other things, such as the value of an attack.
Cards that can no longer legally be played — because the corresponding fighter or fighters have been defeated — may still be discarded from your hand to boost.
Action: Scheme
When you take the scheme action, you choose a scheme card (indicated by the scheme icon) from your hand and play it onto the table, face up.
You must declare which of your fighters is playing the scheme card; they are the active fighter. Each card in your deck indicates which fighters are allowed to play it. You may not play a scheme card if the listed fighters are defeated.
Resolve the card's effect, then place the card into your discard pile.
Discard Piles
Maintain your own discard pile. All cards, once played and resolved, should be placed in the discard pile. Keep your discard pile face up to differentiate it from your deck. Both you and your opponent are allowed to look through your discard pile at any time.
Action: Attack
When you take the attack action, you must declare which of your fighters is performing the attack; they are the active fighter. You may not take the attack action if you do not have an attack card in hand or if none of your fighters have valid targets to attack.
Step 1: Declare Target
Any fighter may target a fighter in an adjacent space, regardless of what zone they are in.
Fighters with melee attacks (indicated by the melee icon) may only target a fighter in an adjacent space.
Fighters with ranged attacks (indicated by the ranged icon) may target an adjacent fighter or they may target a fighter anywhere in the same zone, regardless of adjacency.
Step 2: Choose and Reveal
As the attacker, you must choose an attack card from your hand and play it face down in front of you; it must be a card that your attacking fighter is allowed to use. Then the defender may (but is not required to) choose a defense card from their hand and place it face down in front of them; it must be a card that their defending fighter is allowed to use. Once both players have chosen their cards, reveal them at the same time.
Versatile cards: Cards with the versatile icon are versatile cards. They can be used as attack cards or defense cards. Versatile cards also count as both attack cards and defense cards for the purposes of other game effects.
Step 3: Resolve Combat
Most cards have effects, with labels indicating when they occur: IMMEDIATELY, DURING COMBAT, or AFTER COMBAT. Unless otherwise specified, card effects are mandatory (which can result in dealing damage to your own fighters or other negative effects).
If two effects would ever appear to resolve at the same time, the defender's effect resolves first.
After cards have been revealed, resolve any effects that occur IMMEDIATELY. Then resolve any effects that occur DURING COMBAT.
Then determine the result of the combat. The attacker deals combat damage to the defender equal to the value of their played attack card. If the defender played a defense card, subtract the value of their played defense card first. For each damage that the defender takes, reduce that fighter's health by one, adjusting their health dial accordingly.
After the result of the combat has been determined, resolve any card effects that occur AFTER COMBAT. Even if a player's fighter is defeated during the combat, as long as that does not trigger the end of the game, any AFTER COMBAT effects of their played card still resolve.
After card effects are resolved, resolve any other game effects that occur after combat, such as a hero's special ability.
Finally, all played cards are placed in their respective discard piles.
Winning the Combat
Some AFTER COMBAT effects check to see who won the combat.
The attacker won the combat if they dealt at least one combat damage (i.e., damage to the defender from the attack itself, not from any effects).
The defender won the combat if they took no combat damage from the attack itself (even if they took damage from effects).
Combat Example
Antonia is playing Achilles. Brooklyn is playing Bloody Mary.
It's Antonia's turn, and she wants to attack Bloody Mary with Patroclus, who is currently at 4 health.
Antonia decides to attack with Battle Frenzy and plays it as her attack card, face down.
Brooklyn chooses Broken Glass, hoping they can trigger the effect and draw a card. They play it as their defense card, face down.
Broken Glass has a DURING COMBAT effect. Brooklyn could adjust the value of their card. But it is already the same as the attack card, so they do not trigger it. The value of both cards is 3, so the attack deals no damage.
Both cards have an AFTER COMBAT effect. The defender's card, Broken Glass, resolves first. The cards' values matched, so Brooklyn draws a card, taking their hand back to 3 cards. That will trigger Bloody Mary's special ability and give them a third action at the start of their next turn. It also deals 2 damage to Patroclus, taking him down to 2 health.
Then Battle Frenzy resolves, dealing 2 damage to Bloody Mary and Patroclus. That is enough to defeat Patroclus, triggering Achilles's special ability. Antonia discards 2 random cards from her hand.
Defeating a Fighter
When one of your fighters is reduced to zero health, for any reason, they are defeated.
If your hero's sidekick is defeated, immediately remove that sidekick token from the battlefield. A sidekick without a health dial has either 1 health (Sun Wukong's Clones) or 2 health (Yennenga's Archers).
If your hero is defeated, you immediately lose the game.
Winning the Game
When your opponent's hero is defeated, which happens when they are reduced to zero health, the game ends immediately and you win!
(In a team game, both opposing heroes must be defeated.)
Gameboard: High Ground
Some paths on the Hanging Gardens map are marked with a high-ground arrow icon showing +1. These represent high ground and give an advantage in combat. During an attack, when the attacker is on a space where the arrow starts and the defender is on a space where the arrow points, the attack gains +1 to its value. There is no effect if the defender is in the starting space or the attacker is in the space where the arrow points.
Because the attack bonus is not an effect on the card, it cannot be canceled by cards like Feint that cancel effects on the card. High-ground arrows have no effect on movement between the spaces. (Other maps in Unmatched feature orange, one-way arrows. High ground arrows are a separate effect and do not act like one-way arrows.)
EXAMPLE: On Achilles' turn, he attacks Bloody Mary and gains +1 attack because of his high ground advantage.
On Yennenga's turn, she could attack Achilles but would not receive an attack bonus because the arrow is not pointing toward the defender. There is no arrow pointing toward Bloody Mary, who is also adjacent, so Yennenga does not have a high ground option for her attack.
Special Rules for This Set
Sun Wukong: Clones
Sun Wukong's sidekicks are his clones. Do not place any Clones at the start of the game. At the start of your turn, Sun Wukong may take 1 damage to summon a Clone in an empty space adjacent to him. Summoning a token uses the following rules:
- If you have a token off the board, place one of those on the empty space.
- If all of your clone tokens are on the board, take one and place it on an empty space adjacent to Sun Wukong.
All of Sun Wukong's cards may be played by him or his Clones.
Yennenga: Archers
Yennenga's Archers have 2 health. Their tokens have one side showing them at full health and one side at 1 health. They start the game at full health.
Whenever Yennenga takes damage, you may apply none, some, or all of that damage to one or more of her Archers in her zone. You may not apply more damage to an Archer than their current health.
EXAMPLE: Yennenga gets hit for 7 damage from an Ox Form card from Sun Wukong. She has two Archers in her zone, both at 2 health. Yennenga applies 2 damage to one Archer, which defeats it. She applies 1 damage to her other Archer, reducing it to 1 health by flipping the token to its 1-health side. She takes the last 4 damage herself.
Bonus Attacks
Each hero in this set has cards with a bonus attack that allows the fighter to make a second attack with one attack action. When you play a card with a bonus attack, resolve the main attack as normal. The bonus attack is triggered by the AFTER COMBAT effect of the first attack. If that effect is canceled — by Feint for example — the bonus attack does not occur.
If the bonus attack triggers, resolve that attack like a normal attack between the same attacker and defender as if the attacker played the bonus attack as a new attack card. The bonus attack has a new name, value, and effect. The BOOST value is the same. The bonus attack targets the same defender even if they are no longer a valid target. If the defender is defeated during the first attack, there is no bonus attack.
EXAMPLE: Jack, playing Yennenga, attacks Achilles with Rain of Arrows. Isabelle, playing Achilles, plays Skirmish on defense. They resolve the first attack. Achilles takes no damage and wins the combat. As a result of the effect on Skirmish, he moves two spaces away, into a different zone.
Then, the AFTER COMBAT effect on Rain of Arrows resolves, triggering the bonus attack, Volley. This attack resolves, even though Achilles is out of Yennenga's range. Isabelle plays Feint on defense. Achilles takes 1 damage from the bonus attack. The Feint would cancel any effects on the attack, but Volley does not have any effects. (If Isabelle had played Feint against the main attack, Achilles would have taken 1 damage and the bonus attack would have been canceled.)
Free-for-All
You can play Unmatched with three or four players using the following rules:
- On a hero's first turn of the game, they may only attack the hero whose turn is immediately after them or a hero who has already taken their turn. In a game with three heroes, this means that the hero going first cannot attack the hero going third. (In a game with four heroes, the hero going first may not attack the hero going third or fourth, and the hero going second may not attack the hero going fourth.)
- When an effect on a combat card refers to "your opponent," that means the other player in the combat.
- A player is eliminated when their hero is defeated. Immediately remove their sidekicks from the board, if any. The winner is the last player whose hero is not defeated.
You can also play Unmatched in teams of 2.
Team Play
Teammates sit next to each other on the same side of the battlefield, and they may communicate about their cards and tactics, but each player controls their own hero and sidekicks. Your teammate's fighters are considered friendly fighters. For team play with three players, one player will control both heroes and sidekicks for one team.
Choose a battlefield with four starting spaces. (Some battlefields in other sets have only two starting spaces and therefore cannot be used for team play.)
During setup, players place their heroes in alternating order:
- First player on Team A places their hero in the 1 space.
- First player on Team B places their hero in the 2 space.
- Second player on Team A places their hero in the 3 space.
- Second player on Team B places their hero in the 4 space.
When placing their hero, each player also places their sidekick within the same zone, as normal.
During the game, players take turns in alternating order:
- First player on Team A takes their turn.
- First player on Team B takes their turn.
- Second player on Team A takes their turn.
- Second player on Team B takes their turn.
This order repeats for the rest of the game.
When a player's hero is defeated, immediately remove that hero miniature from the battlefield. That player still takes their turns as normal, as long as they have their sidekick left. If all of a player's fighters are defeated, they are eliminated and do not take any more turns.
When both heroes on one team have been defeated, the opposing team wins!
Icon Reference
- Attack icon: This card can only be used to attack.
- Defense icon: This card can only be used to defend against an attack.
- Versatile icon: This card can be used to attack or defend.
- Scheme icon: As an action, this card can be played for its effect.
- Ranged icon: This fighter may make ranged and melee attacks.
- Melee icon: This fighter may only make melee attacks.
Cultural Consultants
Sun Wukong Consultation by Calvin Wong Tze Loon 黃子倫: Calvin is a board games writer and Unmatched aficionado who you may know as that guy from Crazy Rich Asians. His recent projects include Twilight Imperium and Project NISEI's Netrunner. You can find him on Twitter @ithayla.
Yennenga Consultation by Lollita Koech: Lollita Koech is a cultural theorist and African historian focusing on the study of African indigenous ways of life. Her current interests lie in the fields of art, culture, mass media, digital media, and the conceptualization of the African self. You can find her on her website, lollitakoech.com.