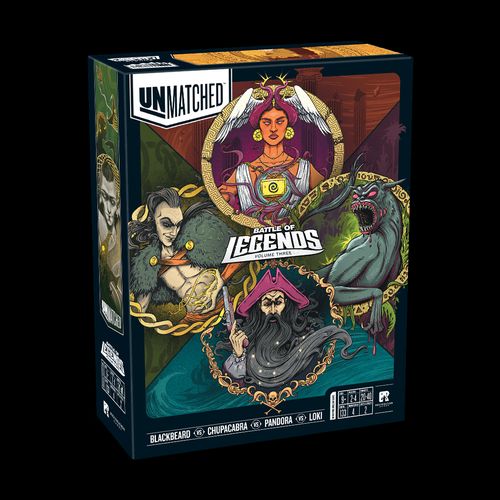
Unmatched: Battle of Legends, Volume Three
Unmatched: Battle of Legends, Volume Three Rulebook
Table of Contents
Table of Contents
The Legends
Blackbeard
Edward Teach captained the Queen Anne's Revenge under this more colorful moniker as one of the most infamous pirates of the West Indies and American colonies. Certainly a skilled captain and ruthless combatant, his greatest weapon was his fearsome demeanor and charisma, cowing his enemies and earning the loyalty of his crew.
Loki
The exploits of the Norse god recounted in the Prose and Poetic Eddas are considerably darker than their recent manifestation on the silver screen, while every bit as mischievous. In one notable story, the trickster shapeshifts into a mare to lure a builder's stallion away so he can't finish the fortification of Valhalla and win the hand of Freyja as payment. Sometime later, Loki gives birth to an eight-legged foal, Sleipnir, who would become Odin's steed.
Pandora
At Zeus's command, Hephaestus, the smith of the Greek gods, created the first woman, upon whom the gods bestowed many gifts. Zeus sent her to earth with a box in which he placed countless miseries. Pandora opened the box, releasing the ills upon the world. Only hope remained within. Her myth explains the presence of evil in the world but offers that we might persevere with hope.
Chupacabra
In the 1970's in Puerto Rico, the mysterious death of some goats, bearing circular bite marks, gave rise to the legend of the "goat-sucker" with a spiked spine, cadaverous odor, and a mouth of vicious ringed fangs. In the decades that followed, strange sightings and widespread reports of similar occurrences have only caused the legend to grow in stature.
Contents
- 4 miniatures
- 120 action cards
- 7 misery cards
- 4 health dials
- 4 character cards
- 4 sidekick tokens
- 4 hero ability tokens
- 1 double-sided board with 2 battlefields
Blackbeard
- 30 action cards
- 1 Blackbeard hero miniature
- 1 Blackbeard character card
- 2 Sea Dog sidekick tokens
- 3 doubloon tokens
- 1 treasury token
- 1 health dial
- 1 reference card
Pandora
- 30 action cards
- 1 Pandora hero miniature
- 1 Pandora character card
- 2 Kakodæmon sidekick tokens
- 7 misery cards
- 1 health dial
- 1 reference card
Loki
- 30 action cards
- 1 Loki hero miniature
- 1 Loki character card
- 1 health dial
Chupacabra
- 30 action cards
- 1 Chupacabra hero miniature
- 1 Chupacabra character card
- 1 health dial
Before you play for the first time, assemble the health dials by punching out the circles for each character and connecting them with a rivet.
Heroes & Sidekicks
All of your characters in the battle are called your fighters, but your primary fighter is called your hero. Heroes are represented by miniatures that move around on the battlefield.
Your other fighters are called sidekicks. Heroes may have multiple sidekicks, a single sidekick, or no sidekicks at all. Sidekicks are represented by tokens that move around on the battlefield.
Each hero has a special ability noted on their character card. This card also lists your fighters' stats, including the starting health of your hero and their sidekick. Fighters' health is tracked on separate health dials. Fighters cannot gain health higher than the highest number on their health dial.
How to Play
Players take turns maneuvering their fighters on the battlefield, playing schemes, and attacking their opponent's fighters. To win, you must be the first to defeat your opponent's hero, which happens when they are reduced to zero health.
Setup
Note: These setup instructions and the following rules are for games with 2 players. For rules on playing with 3 or 4 players, see the Free-for-All and Team Play sections.
- Choose a battlefield and place it on the table.
- Each player chooses a hero and takes the corresponding action cards, character card, hero miniature, sidekick tokens (if any), health dials, and any other components for their hero.
- Each player sets their hero's starting health on the matching health dials. Starting health is found on the character cards.
- Each player shuffles their action cards to form a single deck and places it face down, then draws 5 cards as their starting hand.
- The younger player places their hero in the 1 space on the battlefield. If they have sidekicks, place them in separate spaces within the same zone as their hero. If their hero is in a space that is part of multiple zones, their sidekicks may be in any of those zones.
- The older player places their hero in the 2 space on the battlefield, then places their sidekicks, if they have them, based on the same rules as in step 5.
- The younger player takes the first turn.
The Field of Battle
Spaces and Zones
The battlefield is made up of circular spaces that the fighters will move between. Each space can only contain one fighter at a time.
Two spaces connected by a line are adjacent. Adjacency is used to determine targets of attacks and various card effects.
The spaces of the battlefield are divided into zones, which are indicated by different colors. All spaces with the same color are part of the same zone (even if they are in different parts of the battlefield).
If a space has multiple colors, it is considered to be part of multiple zones. Zones are used to determine targets of ranged attacks and various card effects.
This set contains two different battlefields, one on each side of the board: Santa's Workshop (see its special board effects below) and a second battlefield.
Your Turn
On your turn, you must take 2 actions; you cannot skip an action. You may choose two different actions or the same action twice.
The possible actions are:
- Maneuver
- Scheme
- Attack
You have a hand limit of 7 cards. At the end of your turn, if you have more than 7 cards in your hand, you must discard down to 7 cards, placing any discarded cards in your discard pile.
Then it is your opponent's turn.
Anatomy of a Card
- A — Overall card type: Attack, Defense, Scheme, or Versatile (attack or defense).
- B — Attack or defense value (if any).
- C — Fighter allowed to use the card.
- D — Name of the card.
- E — Effect when played (if any).
- F — BOOST value.
- G — Deck that the card appears in.
- H — Number of copies in the deck.
Each hero's deck is different, though they may share some cards with other heroes' decks.
Action: Maneuver
When you take the maneuver action, you first draw the top card of your deck, then you may move your fighters.
Step 1: Draw a Card (Mandatory)
Draw the top card of your deck and add it to your hand.
You can have more than 7 cards in your hand during your turn, but you must discard down to 7 cards at the end of your turn.
Drawing cards — whether via the maneuver action or due to a card effect — is mandatory, unless otherwise specified.
When your deck is empty, your fighters are exhausted. If you need to draw a card while your fighters are exhausted, do not reshuffle your discard pile. Instead, each of your fighters immediately takes 2 damage.
Step 2: Move Your Fighters (Optional)
Your character card lists your move value. During this step, you may move each of your fighters, one at a time, a number of spaces equal to or less than your move value. You may also choose to BOOST your movement (see below).
When you move a fighter, each space they move into must be adjacent to their previous space. You may move a fighter through spaces occupied by other friendly fighters (i.e., your own fighters), but they cannot end their movement in an occupied space. You may not move a fighter through spaces occupied by opposing fighters.
You may move your fighters in the order of your choice, but must finish each fighter's move before starting the next. You are not required to move all of your fighters the same distance as each other; you get to choose for each fighter. You are allowed to move a fighter zero spaces.
Note: If an effect ever lets you move your opponent's fighters, you must respect all of the same movement rules, but from your opponent's perspective.
Boost
When you take the maneuver action, you may boost your movement. To do this, discard 1 card from your hand and add that card's BOOST value to your move value. Ignore any effect on the discarded card.
Certain effects allow you to boost other things, such as the value of an attack.
Cards that can no longer legally be played — because the corresponding fighter or fighters have been defeated — may still be discarded from your hand to boost.
Action: Scheme
When you take the scheme action, you choose a scheme card (indicated by the scheme icon) from your hand and play it onto the table, face up.
You must declare which of your fighters is playing the scheme card; they are the active fighter. Each card in your deck indicates which fighters are allowed to play it. You may not play a scheme card if the listed fighters are defeated.
Resolve the card's effect, then place the card into your discard pile.
Discard Piles
Maintain your own discard pile. All cards, once played and resolved, should be placed in the discard pile. Keep your discard pile face up to differentiate it from your deck. Both you and your opponent are allowed to look through your discard pile at any time.
Action: Attack
When you take the attack action, you must declare which of your fighters is performing the attack; they are the active fighter. You may not take the attack action if you do not have an attack card in hand or if none of your fighters have valid targets to attack.
Step 1: Declare Target
Any fighter may target a fighter in an adjacent space, regardless of what zone they are in.
Fighters with melee attacks (indicated by the melee icon) may only target a fighter in an adjacent space.
Fighters with ranged attacks (indicated by the ranged icon) may target an adjacent fighter or they may target a fighter anywhere in the same zone, regardless of adjacency.
Step 2: Choose and Reveal
As the attacker, you must choose an attack card from your hand and play it face down in front of you; it must be a card that your attacking fighter is allowed to use. Then the defender may (but is not required to) choose a defense card from their hand and place it face down in front of them; it must be a card that their defending fighter is allowed to use. Once both players have chosen their cards, reveal them at the same time.
Versatile cards: Cards with the versatile icon are versatile cards. They can be used as attack cards or defense cards. Versatile cards also count as both attack cards and defense cards for the purposes of other game effects.
Step 3: Resolve Combat
Most cards have effects, with labels indicating when they occur: IMMEDIATELY, DURING COMBAT, or AFTER COMBAT. Unless otherwise specified, card effects are mandatory (which can result in dealing damage to your own fighters or other negative effects).
If two effects would ever appear to resolve at the same time, the defender's effect resolves first.
After cards have been revealed, resolve any effects that occur IMMEDIATELY. Then resolve any effects that occur DURING COMBAT.
Then determine the result of the combat. The attacker deals combat damage to the defender equal to the value of their played attack card. If the defender played a defense card, subtract the value of their played defense card first. For each damage that the defender takes, reduce that fighter's health by one, adjusting their health dial accordingly.
After the result of the combat has been determined, resolve any card effects that occur AFTER COMBAT. Even if a player's fighter is defeated during the combat, as long as that does not trigger the end of the game, any AFTER COMBAT effects of their played card still resolve.
After card effects are resolved, resolve any other game effects that occur after combat, such as a hero's special ability.
Finally, all played cards are placed in their respective discard piles.
Winning the Combat
Some AFTER COMBAT effects check to see who won the combat.
The attacker won the combat if they dealt at least one combat damage (i.e., damage to the defender from the attack itself, not from any effects).
The defender won the combat if they took no combat damage from the attack itself (even if they took damage from effects).
Defeating a Fighter
When one of your fighters is reduced to zero health, for any reason, they are defeated.
If your hero's sidekick is defeated, immediately remove that sidekick token from the battlefield.
If your hero is defeated, you immediately lose the game.
Winning the Game
When your opponent's hero is defeated, which happens when they are reduced to zero health, the game ends immediately and you win!
(In a team game, both opposing heroes must be defeated.)
Special Rules for This Set
Blackbeard: Privateer Turned Pirate
Blackbeard wants his treasure! He uses 3 doubloons during the game. At the start of the game, place the treasury token near your opponent and place one of the doubloons on it. You start with the other two doubloons; place them near your character card.
When you pay doubloons, place them on the treasury. When an opponent pays doubloons or you steal them, take them from the treasury and give them to yourself.
Many of Blackbeard's cards have effects in gold text followed by a doubloon icon. This means the effect will only happen if the opponent does not pay that many doubloons. The opponent gets to choose whether to pay or not. (In a game with multiple opponents, any opponent may choose to pay.) If the ransom is paid, the effect is ignored. Otherwise, the effect resolves as normal.
At the start of your turn, you may pay 1 doubloon to gain 1 action. You may only do this once each turn.
Whenever you take combat damage, pay 1 doubloon to the treasury. If you do not have any doubloons, ignore this effect. This effect does not apply to your Sea Dogs.
Pandora: Pandora's Box
Pandora is the keeper of a box that she cannot resist opening. The box contains great power but risks unleashing misery upon the world, overwhelming her with regret.
Pandora's box is a special set of 7 cards called miseries. They are separate from your deck of regular action cards and never go into your hand. At the start of the game, shuffle your misery cards and create a face-down stack.
Each misery card has a number of feather symbols on it (from 0 to 2 symbols). At the start of your turn, reveal the top card of the stack and resolve its effect. Then, decide if you want to stop or reveal another card. You may keep revealing cards in this way until you either decide to stop or 3 or more feather symbols have been revealed. If 3 or more feathers are revealed, you must immediately stop drawing and Pandora takes damage equal to the number of misery cards you revealed (not the number of symbols). For example, if you have revealed 4 misery cards and there are 3 feathers, Pandora takes 4 damage.
After resolving Pandora's box, take your turn as normal. Misery cards stay revealed until the end of your turn. At the end of your turn, shuffle all of your revealed and unrevealed misery cards together to create a new stack.
Blackbeard and Pandora have effects that summon their sidekicks. Summoning a sidekick token uses the following rules:
- If you have an available sidekick token off of the board, place one of those tokens as described by the effect.
- If all of your sidekick tokens are already on the board, take any one of them and place it instead.
Loki: God of Mischief
Loki uses tricks to confound their opponents. Each of Loki's action cards with TRICK in the card name has a different effect based on whether you played the card or your opponent played it. (All of Loki's TRICK cards can be played by any fighter.)
When you play one of your TRICKS, that card goes to your opponent's hand during the cleanup step instead of your discard pile (see the Unmatched Core Rules). Your opponent may play TRICK cards from their hand as if it were one of their own cards. When your opponent plays one of your TRICKS, that card goes to your discard pile during the cleanup step.
If an opponent ever discards a TRICK card from their hand (such as from an effect or due to their hand size), you may choose to put the TRICK card into your hand or on top of your deck instead of your discard pile.
Loki adds +1 to their move value for each TRICK card in all of your opponents' hands.
TRICK cards do not have BOOST values and cannot be used to boost. If an effect uses the BOOST value of a TRICK card, use 0.
Loki's Sindri's Bet card subtracts 3 from the value of your opponent's card. If that card's value would be below 0, it becomes 0.
Loki's Svaðilfari's Lure and Lævateinn cards let you reveal a card in your opponent's hand. You will be able to see the card backs and know which cards in their hand are TRICK cards, and you may choose accordingly based on that information.
Chupacabra: The Hunger
After you attack, you may draw a card. This effect happens at the end of combat after all AFTER COMBAT effects have been resolved.
Chupacabra's The More They Struggle attack card refers to the printed value of your opponent's played card. If your opponent did not play a card, the value is 0.
Battlefield: Santa's Workshop
Santa's Workshop has two board effects, conveyor belts and one-way paths.
Conveyor Belt: The conveyor belt is represented by the purple arrows between some spaces. At the end of each player's turn, any fighters on the conveyor belt simultaneously move to the next space on the conveyor belt, as indicated by the arrows. Each fighter moves regardless of whose turn it was. If a fighter is on the end space of the conveyor belt, place them in any empty space in the gift bin (the yellow zone), including the dual-colored spaces in that zone. The player who controls that fighter decides which space to place them in. If an effect prevents a fighter from leaving their space, do not move that fighter. If the conveyor belt would cause a fighter to move into a space with another fighter, do not move that fighter; other fighters that can move still do. Large fighters are not moved by the conveyor belt. (There are no large fighters in this set.)
One-Way Paths: Some paths on the map are orange and have a one-way arrow. Fighters may move between spaces connected by a one-way path only in the direction indicated by the arrow. This includes movement from card effects. However, spaces connected by a one-way path are still considered adjacent, and they do not affect whether fighters are in the same zone or not. Additionally, they do not affect effects that let you place a fighter in a space.
Free-for-All
You can play Unmatched with three or four players using the following rules:
- On a hero's first turn of the game, they may only attack the hero whose turn is immediately after them or a hero who has already taken their turn. In a game with three heroes, this means that the hero going first cannot attack the hero going third. (In a game with four heroes, the hero going first may not attack the hero going third or fourth, and the hero going second may not attack the hero going fourth.)
- When an effect on a combat card refers to "your opponent," that means the other player in the combat.
- A player is eliminated when their hero is defeated. Immediately remove their sidekicks from the board, if any. The winner is the last player whose hero is not defeated.
You can also play Unmatched in teams of 2.
Team Play
Teammates sit next to each other on the same side of the battlefield, and they may communicate about their cards and tactics, but each player controls their own hero and sidekicks. Your teammate's fighters are considered friendly fighters. For team play with three players, one player will control both heroes and sidekicks for one team.
Choose a battlefield with four starting spaces. (Some battlefields in other sets have only two starting spaces and therefore cannot be used for team play.)
During setup, players place their heroes in alternating order:
- First player on Team A places their hero in the 1 space.
- First player on Team B places their hero in the 2 space.
- Second player on Team A places their hero in the 3 space.
- Second player on Team B places their hero in the 4 space.
When placing their hero, each player also places their sidekick within the same zone, as normal.
During the game, players take turns in alternating order:
- First player on Team A takes their turn.
- First player on Team B takes their turn.
- Second player on Team A takes their turn.
- Second player on Team B takes their turn.
This order repeats for the rest of the game.
When a player's hero is defeated, immediately remove that hero miniature from the battlefield. That player still takes their turns as normal, as long as they have their sidekick left. If all of a player's fighters are defeated, they are eliminated and do not take any more turns.
When both heroes on one team have been defeated, the opposing team wins!
Icon Reference
- Attack icon: This card can only be used to attack.
- Defense icon: This card can only be used to defend against an attack.
- Versatile icon: This card can be used to attack or defend.
- Scheme icon: As an action, this card can be played for its effect.
- Ranged icon: This fighter may make ranged and melee attacks.
- Melee icon: This fighter may only make melee attacks.