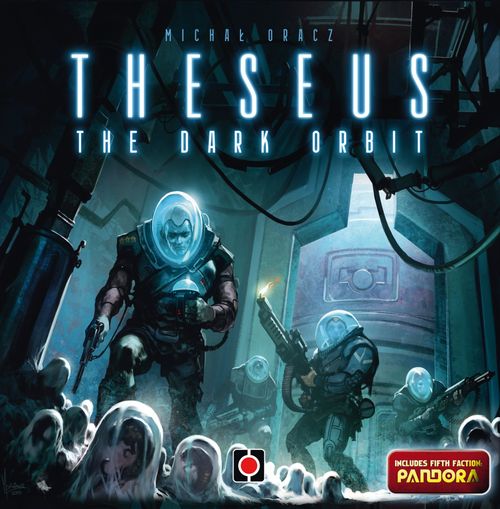
Theseus: The Dark Orbit
Theseus: The Dark Orbit Rulebook
Table of Contents
Table of Contents
- Game's Goal
- Game Components
- Setup
- Sectors in the Game
- Game Sequence
- 1) Movement Phase
- 2) Action Cards Phase
- 3) Sector Action Phase
- 4) Pending Card Phase
- Ending the Game
- Sector Description
- Life and Data Points Board
- General Tactical Advice
- Card Description
- Card Features:
- Comments for Specific Cards
- Multiplayer Game
- Pandora
- Game Example
Game's Goal
Each player commands one of the chosen factions. These factions are fighting each other on a space station - Theseus, created with a few boards called Sectors. By moving his three units around the boards and by playing cards, each player tries to destroy or weaken the enemy factions as much as possible. In addition, two of the factions in the game can acquire data that can also bring them victory.
At the beginning of the game, each faction has 20 Life Points (LPs) and 0 Data Points (DPs). If during the game one player brings his opponent's Life Points to 0 or scores 20 Data Points, he immediately wins the game. In a 2-player game, if both players have more than 0 Life Points and less than 20 Data Points at the end of the game, the player with the highest sum of both Life Points and Data Points wins.
Game Components
Before playing for the first time, carefully remove the cardboard components from their frames.
7 Sector Boards
(4 faction sectors and 3 common sectors)
Players will use the Sector boards to create the playing area - players will place their cards there and move their units on it. Sectors are described in detail on pages 6 and 10.
1 Life and Data Points Board
This board is used to track the players' Life Points and Data Points. The Life and Data Points board is described in detail on page 12.
12 Faction Unit Pawns
(3 pawns for each one of the 4 factions, represented by different colors)
Alien unit, Greys unit, Marines unit, Scientists unit.
Before the first game, you need to put the stickers on the tokens according to the colors - e.g. the red background sticker on the red token, etc. Each token should show a base unit on one side and an upgraded unit on the other.
Base unit, Upgraded unit.
These tokens represent units of the players' factions. Players will move them around the Sectors to conduct different Actions and trigger various card effects.
100 Faction Cards
(25 cards in each of the 4 faction colors)
The faction card decks consist of cards the player will place on the Sector boards, and a few Instant cards played to carry out some immediate effects. These cards can give the player some advantages or enable him to act against his opponents. The different types of cards are described in detail on page 13.
4 Alliance Tokens
These tokens are only used in the multiplayer game. For more details, see page 15.
6 Faction Markers
(2 markers for both the Scientists and the Greys and 1 for the Aliens and the Marines)
These markers are used to mark the players' Life Points and Data Points.
Bonus Cards
Bonus cards do not belong to any faction. They are placed on Sector boards at the beginning of the game and can be gained by players during the course of play.
1 End Token
This token is used to establish the game's end.
1 Malfunction Token
This token is used to mark a card disabled by the Control Room sector action. For more details, see page 11.
20 Upgrade Tokens
Players can use these tokens to upgrade their units or several card effects. For more details, see page 11.
Supplemental Tokens
These tokens are introduced to the game by various card effects. Each faction has its own supplemental tokens in their faction color.
2 Defence System tokens, 2 Fire tokens, 2 Tentacles tokens, 2 Gripper tokens, 2 Invisibility tokens, 3 Deactivation tokens, 3 Minor Alien tokens, 2 Parasite tokens, 4 Creepers tokens, 5 Hidden tokens, 5 Camcorder tokens.
Pandora
The game includes an additional, fifth faction - Pandora. It has its own set of elements, different from other factions. For more details, see page 16.
3 standard unit tokens (Creatures), 1 faction marker, 10 smaller unit tokens (Embryos): 2 Catchers, 4 Runners, 4 Warriors, 1 Pandora's sector token.
The rules on the following pages refer to a two-player game. All adjustments necessary for a three- or four-player game are presented on page 15.
Setup
Each player chooses the faction he wishes to play and takes all the components of the chosen faction.
Each of the four factions in the game consists of the following components in the same color:
- A faction Sector board
- 3 units
- 25 faction cards
- One (or two) small markers to mark the Life Points level (and Data points level).
- Other faction tokens
All of the faction pieces that do not participate in the game should be put back into the box.
The owner of the game has the privilege to start the game. He may also choose another starting player or the starting player may be chosen randomly.
Now you can proceed with creating the playing area.
1) Place the Boards
1A) Place the Life and Data Points board in the middle of the playing area (put the End token next to it).
Then, each player places a wooden marker of his faction on the "20" space of the Life Points track.
If a player chooses the Scientists or Greys faction, he also places a second wooden marker of his faction on the "0" space of the Data Points track.
Now place the Sector boards around the Life and Data Points board in the following order as shown in the picture:
1B) Corridors
1C) Control Room (place the Malfunction token over the Malfunction symbol)
1D) The Faction sector of the first player
1E) Tech Bay
1F) The Faction sector of the second player
The order in which the sectors are placed determines the order of the players during the game: the first player is the player whose Faction sector is placed first after the Corridors (clockwise). The order of the other players is determined by the order - in clockwise direction - in which the other faction sectors are placed.
Example: There are two factions in the game, the Marines and the Aliens. The Sector boards are placed in the following order: Corridors, Control Room, Alien Hive, Tech Bay, Unloading Dock. The first player is the one commanding the Aliens.
Setup for Advanced Players
Place the Sector boards around the Life and Data Points board in any order (players can place the boards randomly or, for example, alternately place one selected sector at a time).
First Games
The rules of Theseus can be learned very quickly, but tactical expertise is achieved only after many games. Both installing cards and the upgrade of units, upgrading cards or activation of specific actions requires a lot of expertise in movement planning. To avoid first-time players getting the impression that they cannot do anything throughout the game, you may use the following 'starter rules'.
We strongly recommend using the following modifications for the first games.
Gradual Introduction of Cards
On the back of the cards there is a card difficulty level indicated in the right margin: 0 (no mark), 1, 2 or 3. These marks do not affect the course of the game in any way. During the first games we recommend to only use the 0 level cards to prepare the faction deck (consisting of 15 cards). This will allow players to easily deal with a situation and not be overwhelmed by the variety of different cards.
Cards of higher difficulty levels should be introduced into the game gradually; for example, after a few games use the cards of level 0 and 1 to create the faction deck, and in the next game use cards of level 0, 1 and 2, etc.
Start with Three Cards Installed
During the game setup, when players place their starting cards, each player takes 5 cards from the top of his faction deck (instead of only 3) and installs 3 of them (not just 1). The other rules for the placement of starting cards placement are the same - players choose which cards to install and in which slots, they install the cards alternately one at a time, etc.
This will teach players how to move their units through the sectors.
2) Place the Bonus Cards
Shuffle the Bonus cards and then, starting with the Corridors sector and continuing clockwise, place one random Bonus card in each Installed card slot marked with the Bonus symbol. Place the cards face up.
Return the unused Bonus cards to the box - they will not take part in the game.
3) Deal the Starting Cards
Each player shuffles his faction cards, then takes the first 15 cards and returns the rest to the box without looking at them (the returned cards will not take part in the game). The 15 selected cards are placed face-up in a stack and are called the player's deck (he will always know what the first card is).
Each player draws three cards from the top of his deck and then (in turn order):
3A) Selects one of them and places it (face up) in any empty Installed card slot in any sector.
Note: If the selected card is an instant card, the player keeps it next to him instead of placing it on the board.
3B) Places the other two cards (face up) in his Faction sector's two Pending card slots.
3C) The remaining 12 cards create a deck from which the player will draw his cards during the game.
4) Place the Units
Each player has three identical units represented by the pawns in his faction color.
Each unit has two sides, a base unit and an upgraded unit.
4A) Starting with the first player, each player places his two units (base side up) in any Rooms in his Faction sector.
4B) Then, in turn order each player places his third unit (base side up) in any empty Room in any sector.
5) Tokens
5A) Each player places all his remaining tokens in front of him.
5B) The Upgrade tokens should be placed in easy reach of all the players, creating a general supply.
Sectors in the Game
Scientist Laboratory (Scientists), Greys' Shipwreck (Greys), Unloading Dock (Marines), Alien's Hive (Aliens), Corridors (common sector), Control Room (common sector), Tech Bay (common sector).
Sector Example
1) Pending Card Slots
The effect of the cards placed here are not taken into consideration. In order for these cards to begin to operate in the normal way, the players have to install (place) them in any of the Installed card slots during the game. The Sectors have 0, 1 or 2 Pending card slots.
There can be only one card in each Pending card slot.
2) Installed Card Slots
The effect of the cards placed here are resolved in the normal way during a player's turn.
Placing a card on the Installed card slot is called card installation.
There can only be one card on each Installed card slot.
3) Unit's Area (Rooms)
Each Unit's area consists of four Rooms (3a, 3b, 3c, 3d). There can only be one unit in each Room at the same time. The individual Rooms may be connected with passages - the passages indicate which units can attack each other (more about Attacks on page 10).
4) Trap Tokens Area
Players can place Trap tokens next to the Unit's area, to remind players of the Trap cards placed in the sector:
- Crescent-shaped Trap tokens (e.g. Fire, Tentacles, Defense System) are placed on the left side of the sector. These tokens will remind you of Trap cards installed here that are active while moving through the sector.
- All other Trap tokens (e.g. Hidden) are placed on the right side of the sector.
5) Sector Action Symbol
Each sector has its own sector action, which is represented by an icon on the Sector board. Sector actions are described on pages 10-11.
Game Sequence
Golden Rule
Installed Card rules take precedence over and modify the general rules.
Game Sequence
The first player starts the game by taking his turn. A player's turn consists of four consecutive steps:
- Movement Phase
- Action Cards Phase
- Sector Action Phase
- Pending Cards Phase
1) Movement Phase
The player chooses one of his units from any sector and makes a MOVE.
Note: The player may choose to move his unit located on the Space field instead of a unit located in one of the sectors. In this case follow the rules presented on page 12.
Move Rules
Move the unit a number of sectors equal to the number of all units (regardless of faction) standing in the sector from which the unit starts its move.
The unit must move the exact number of sectors (neither more nor less).
The number of sectors that the unit has to move during its Movement Phase is called its Move points.
The unit can only move clockwise.
The unit may be placed in an empty Room of the player's choice in the sector it ends up in.
Move example:
Any unit in sector A must move 2 sectors (to sector C), because there is a total of 2 units in sector A.
Any unit in sector B must move 4 sectors (to sector A), because there is a total of 4 units in sector B.
A unit in sector C must move 1 sector (to sector D), because there is only 1 unit in sector C.
Any unit in sector D must move 2 sectors (to sector A), because there is a total of 2 units in sector D.
Note: There are several cards that modify the movement of units. Particular attention should be paid to the Shortcut cards, which allow the player to completely skip the sector in which they are placed.
A) Ejection into Space
If there is no empty Room in the sector in which the unit ends its Move, an Ejection occurs: one of the units already in the sector (selected by the ejector) is transferred to the SPACE field (located on the Life and Data Points board - a detailed description of the Space field can be found on page 12). The unit that moved in takes the place of the ejected unit. The ejecting unit therefore fills up the sector and - after resolving all the Traps in the sector (see below) - it starts the Lesser Onslaught (for a description of the Lesser Onslaught, see page 10).
The player can, if he wishes to, eject his own unit into Space.
Note: If you move an enemy unit (e.g. using the Control or Team Tactics cards), you are still the ejector, even though you move an enemy unit, and not your own.
B) Possible Traps
If the unit has completed its Move in the sector with an installed enemy Trap card (or has been moved there using a card effect), the Trap effect is resolved immediately after the Move is finished (for a description of Trap cards, see page 13).
Trap cards are marked with the Trap icon.
Note 1: There are several Traps (e.g. Fire, Tentacles) which are resolved not only when the player completes its Move in the particular sector, but also when the enemy passes through this sector - the crescent-shaped tokens are placed on the left side of the sector board to remind player of active Traps during a Move through the sector.
Note 2: If the order of resolving Traps in the sector is important, the player taking his turn decides in which order they take effect.
C) Lesser Onslaught
If a unit fills up a sector (all Rooms of this sector contain a unit) at the end of its Move and all Traps have been resolved, it triggers the Lesser Onslaught in this sector (more on page 10).
Move Example (see the image below): The player commanding the Aliens moves one of his units standing in the Alien Hive (1). There are two units standing there, so the player must move the unit two sectors forward. It should, therefore, end its Move in the Unloading Dock, but the player has a Vent Shortcut (2) card that allows him to skip this sector during the Move. The player decides to end his Move in the Corridors sector (3) and proceeds to resolve Traps. There is one enemy Trap - it is a Landmine (4), so the Aliens lose two Life Points, and - as it is a single use card - it is removed from the game. The Alien unit that has just entered the sector is the fourth in this sector, so it triggers a Lesser Onslaught - according to its Attack rule it deals one wound to each enemy unit in this sector (it's an upgraded unit) - each of the three Marine units are in Attack range (the Rooms in which these units are stationed are connected by passages), so the player commanding the Marines loses 3 Life Points. The Movement Phase is over and the player commanding the Aliens may proceed to the Action Cards Phase.
Summary: The Order of the Possible Movement Effects
- Move the unit to the appropriate sector.
- If all the Rooms are occupied in the sector, an Ejection into space occurs.
- Resolve possible Traps.
- If all the Rooms are now occupied in the sector, perform the Lesser Onslaught.
Note: In some cases these phases may repeat; for example, a player moves his unit, which fills up the sector - he resolves Traps and a Lesser Onslaught is triggered, then continues to resolve an Installed card action that allows him to Move an enemy unit after which another sector is filled up and again Traps are resolved and a Lesser Onslaught is carried out.
2) Action Cards Phase
After finishing his Move, the player resolves all the Actions of all his installed Action cards in the sector in which he stopped (if he has any installed Action cards there). The exact rules of the actions are described on the particular cards (for a description of Action Cards, see page 13).
Action cards are marked with the Action icon.
Note: If the order of resolving the installed Action cards in the sector is important, the active player decides in which order the cards take effect.
Example (see the image below): A unit enters the Corridors sector and after resolving the Landmine card and triggering a Lesser Onslaught the sector still contains the following cards: Battle Position (it activates during Marine attacks), Tentacles (Alien Trap - activates when an enemy unit enters the Room) and Alien Onslaught. The player therefore triggers an Onslaught (5) - all the units in all the sectors attack. There are no Marine units that the player could attack in the other sectors - all three enemy units are in the Corridors - the player commanding the Marines receives another three wounds, therefore losing 3 Life Points.
3) Sector Action Phase
Then the player performs the sector action in which he ended his Move (i.e. Onslaught, Additional Turn, Malfunction, Upgrade token). These actions are described in detail in the Sector section on page 10.
Note: The player only resolves the action in the common sectors and his faction sector. If the player stops in an opposing faction's sector, he does not perform its action.
Example (see the image on the previous page): The Corridors sector action is Onslaught (6) - in the depicted situation the player commanding the Marines loses another 3 Life Points.
4) Pending Card Phase
Now the player may take one of the following actions:
A) If there are no Pending cards (his or his opponent's), the player draws the top card from his deck and places it in the empty Pending card slot in this Sector.
B) If there is an enemy Pending card, he discards it, replacing it with the top card from his own deck.
C) If the sector contains his own Pending card, the player installs it (face-up) on any empty Installed card slot in any sector. Then the player immediately places the top card from his deck in the emptied Pending card slot.
If there are two Pending card slots in the sector, the player selects only one of these slots for the purpose of this action.
Example: A player finishes his Move in his faction sector, where there are two Pending cards: one belonging to him, the other to the enemy. The player has to choose one of the following:
- Discard the enemy Pending card and replace it with his own card (from the top of his deck).
- Install his Pending card (in any sector) and place a new card in the emptied Pending card slot (from the top of his deck).
The Pending cards phase is not mandatory. You may choose one of the above options: (A), (B), or (C) - or nothing. But if you choose option (B) or (C) you can't stop halfway - you must replace the card that you discard or install.
Note: When installing the card, the player may, if he wishes, discard any of his already Installed cards and install the new card in the emptied card slot instead.
Example (see the image on the previous page): In the Corridors sector there is only one Pending card slot and there is an enemy card (7) - the player commanding the Aliens discards it and replaces it with the top card from his deck.
Once the Pending card replacement is done, the next player takes his turn.
Bonus Cards
The player can install a card in the Installed card slot in which a Bonus card is already placed. If the player chooses to do so, he takes the Bonus card and can use it right away or at any time of any of his future turns (for a description of the Bonus cards, see page 13).
Bonus cards are kept visible to other players.
Once taken, a Bonus card is not replaced on the Sector boards.
Ending the Game
When any player has to place a card in the Pending card slot but he no longer has cards in his deck, he moves the End token one spot towards the end symbol. This happens during the Pending card replacement, when the player has removed his opponent's Pending card or installed his own card and has to place a card in the emptied Pending cards slot - he must move the token on the Final Sequence track instead when he has no more cards in his deck.
Note: Discarded cards are never reshuffled to create a new deck.
The first time this happens, the player places the token on the "3" space, the next time it moves to "2", then to "1" and finally to the end symbol.
Note: If the Pending card slot is empty and the player has no more cards, he does not perform the Pending card replacement and therefore does not move the End token on the Final Sequence track.
When the End token moves to the end symbol space, the game ends immediately and players should sum up their scores on the Life Points track and Data Points track.
The winner is the player who ended the game with the highest sum of both results.
Example: There are two factions in the game, the Scientists and the Aliens. When the game ends the Scientists have 8 Life Points and 7 Data Points, 15 points in total. The Aliens have only 13 Life Points (Aliens do not collect Data Points). The Scientists win.
In case of a tie, each player takes an extra turn - starting with the next player after the player who ended the game and continuing in turn order.
If the players are still tied, then the game ends in a draw and the tied players share the victory.
The Game May Also End Immediately in the Following Cases:
- If during the game the Life Points of any faction drop to 0, this player immediately loses the game.
- If during the game any faction scores 20 Data Points, this player immediately wins the game.
Sector Description
Corridors
Sector Action: Onslaught
All your units (in all sectors!) automatically attack enemy units in accordance with the rules of Attacks (see below).
Note: Only the units of the player that caused the Onslaught attack enemy units. The enemy units do not attack the units of the player that caused the Onslaught.
Attack Rules:
1) The unit attacks enemy units standing in the same sector only if their Rooms are connected by passages (such units are considered to be in Attack range).
Example: In the picture below you can see a Marine unit attacking only two out of three Alien units in the sector because the third unit is in a Room separated by a Wall (and there is no passage to its Room).
2) The unit can attack up to as many enemy units as its Attack limit allows (the Attack limit is depicted on the unit).
Attack Types
- Attack inflicts one wound on up to one enemy unit in Attack range in the sector
- Attack inflicts one wound on each enemy unit in Attack range in the sector
- Attack up to one enemy unit in Attack range in the sector; this Attack gives the player one Data Point instead of inflicting one wound
3) Each attack on an enemy unit results in wounds for the enemy. All of the wounds received by a faction should be immediately noted on the Life Point track by adjusting the faction marker respectively (1 wound decreases a player's Life Points by 1).
Note: The Greys gain Data Points instead of dealing wounds.
Example: Two of a player's units are dealt one wound each, so he decreases his Life Points by 2.
| Faction/Attack | Base Unit | Upgraded |
|---|---|---|
| Marines | attacks one enemy unit | attacks all enemy units |
| Aliens | none | attacks all enemy units |
| Scientists | none | attacks one enemy unit |
| Greys | none | attacks one enemy unit (DP) |
Lesser Onslaught
Whenever the unit is the fourth one to enter the sector and therefore fills up this sector, it triggers a Lesser Onslaught in this sector. This is resolved in the same way as a standard Onslaught, but only in the sector in which the fourth unit entered.
Note 1: In case the unit is the fourth one to enter the Corridors sector, it triggers a Lesser Onslaught (by filling up the sector), and then a standard Onslaught is carried out across the sectors (by resolving the Corridors sector action).
Note 2: If you move an enemy unit (e.g. using the Control or Team Tactics cards) and you fill up the sector, it is still you who triggers the Lesser Onslaught, although you move an enemy unit, and not your own.
Tech Bay
Sector Action: Additional Turn
Choose another of your units (located in any sector) and take an extra turn with it.
During a player's turn, none of his units may move twice (in any way).
Example: if a player moved a second unit as a result of an Additional Turn action, and it also ended its Move in the Tech Bay, it would allow another Additional Turn action. If the third unit Moves, and also finishes its turn in the Tech Bay, then the player cannot resolve the Additional Turn action a third time, because there are no more units that he can move.
This sector action is mandatory, even if its effect would be disadvantageous for the player.
Note: If a player has the possibility to move a few of his units because of the Tech Bay action (as in the example above), he can indicate and easily remember which units the player already moved during his turn by moving them to the edge of the Room. There are spaces indicated on the sector board for this purpose. At the end of his round, the player moves his units back to the middle of the Rooms.
Control Room
Sector Action: Malfunction
Take the Malfunction token (from where it is currently placed) and place it on any Pending or Installed card of your opponent (in any sector).
Note 1: The Malfunction token can be placed on any card, and therefore it can be placed back onto the same card where it was to start off with.
Note 2: You cannot place the Malfunction token on a Bonus card.
As long as the Malfunction token is on a Pending card, this card cannot be installed or discarded by any player.
As long as the Malfunction token is on an Installed card, this card's effect is not taken into consideration, it cannot be discarded, no Upgrade token can be placed on it, etc. It is completely excluded from the game.
Note 1: If the card has already introduced a token into the game (e.g. Parasite, Minor Aliens, Invisibility), despite the card's exclusion from play these tokens are not removed from the board but stay in effect.
Note 2: If the card does not introduce any tokens into the game but you use a supplemental token (Fire, Tentacles, Defense System, Hidden) as a reminder of the card's effect, then for the time the card is excluded from the game by the Malfunction, this token should be removed and for example placed back onto its card (because this token is used only as a reminder of the Installed card in the sector).
Note 3: If the card's effect has already been improved with the Upgrade tokens or activated (e.g. Defense System), or another token is placed on the card (e.g. on the Camcorders card) and the card is excluded from the game by the Malfunction, the token is not removed from the card nor is the card deactivated, but it is also temporarily excluded from the game.
Faction Sectors
(Marines' Unloading Dock, Scientists' Laboratory, Aliens' Hive, Greys' Shipwreck)
The player resolves the sector action only if it is his own faction sector. If a player stops in an enemy faction sector, he does not resolve its action.
Each faction sector gives the player the choice of one of two possible actions.
Player's Faction Sector Action: Upgrade Token
Receive 1 Upgrade token from the general supply.
Player's Faction Sector Alternative Action: Base Clean-Up
Discard one of your enemy's Installed cards from your faction sector, removing it from the game.
Enemy's Faction Sector Action: None
Upgrade Tokens
Upgrade tokens can be used in one of the following ways:
1) You can discard 1 Upgrade token to turn any of your units to its reverse side (upgraded side).
2) You can place an Upgrade token on any of your Installed card that has a number depicted on the Upgrade symbol. Each Upgrade token placed on the card increases the number on the card by 1.
Example: A Landmine card deals 2 wounds to an enemy. If there's one Upgrade token on this card, it deals 3 wounds.
Placement of the first Upgrade token on a card is free. To place another token on the same card the player must first discard as many Upgrade tokens as there are already on the card.
Example: There are two Upgrade tokens on the Battle Position card. To place a third token the player must have three Upgrade tokens - two need to be discarded, and the third is then placed on the card.
Upgrade tokens are kept visible to other players.
Each card can have up to 6 Upgrade tokens.
3) You can keep the Upgrade token for later and use it at any time during one of your future turns in any of the ways outlined above.
If a player has many Upgrade tokens, he can use any number of them in his turn, even using them all at once.
Life and Data Points Board
Each faction has 20 Life Points. Life Points are shared by all faction units.
Whenever a faction's unit takes a wound (whether as a result of enemy attacks, or inflicted by a Trap), the faction's Life Points level is decreased accordingly on the Life Points track.
The Scientist and Grey Factions collect Data Points during the game, starting at 0 at the beginning of the game.
Whenever a faction collects Data Points, the faction's Data Points level is increased accordingly on the Data Points track.
Space Field
There are 3 Space fields on the Life and Data Points board. There is no limit to the number of units that can be in the Space field, regardless of faction.
Space Field Rule:
Units ejected from a sector into the Space field (see Move rules on page 8) remain there until a player chooses to Move it on his turn (instead of one of his units in one of the sectors).
If, on his turn, a player moves the unit standing on the Space field, he can place it in any empty Room of any sector.
This unit does nothing more (besides resolving Traps, if there are any) and the player's turn ends (no Installed cards action or sector action are resolved, no Pending card replacement occurs, and no Lesser Onslaught is triggered, even if the sector is full).
Life and Data Points board description:
- Life Points track
- Data Points track
- Final Sequence track
- Space fields
Tokens Limit
There are different types of tokens in the game, such as Upgrade tokens, Invisibility tokens, Parasites, and Minor Aliens etc.
The number of tokens of each type also defines the maximum number of such tokens in the game. This means that if at any time the player needs another token of a specific type, but there are no more tokens of this type available (all of them are currently in use), the player does not receive the token (e.g. Incubator does not create a Minor Alien, the player does not receive an Upgrade token, etc.).
Tokens discarded from the game return to the available token pool.
General Tactical Advice
The situation in the sectors changes rapidly during the game, and every game is completely different, so it is impossible to develop one legitimate strategy. It will take a player many games to respond properly to the situation in the game, but there are a few basic tactics you should know from the beginning:
- Avoid accumulating your units in one sector - you will deprive yourself of various Move options in the next round.
- Try not to end your Move in the Corridors sector without a reason, because the enemy can move there and activate his Onslaught and wound you with ease.
- At the start, try to end your Move in your faction sector as often as possible, because it's the easiest way to install your cards (there are always two Pending cards available at the beginning).
- In the beginning, install many cards and throughout the game try to install more, upgrading your units and cards in locations that give you the best results.
- Try to block the enemy's best possible card sets, especially the ones including Duplication cards to stop him from copying the action of his most powerful upgraded cards.
- Make use of all the cards, not just the ones that seem most powerful at first. In time, you'll find that each card can lead to victory.
- Note that for many cards the installation is just the beginning - it is often important to upgrade these cards several times, if possible, or to install a Duplication or another card to improve its effectiveness (some sets of 2-3 cards can crush an enemy in a single turn).
- Be careful not to end your Move in a Sector with three of your units or in a filled-up sector with a few of your units. If the opponent will be able to, he will perform a Move that will eject your unit into Space and / or fill up the sector, triggering a Lesser Onslaught and dealing you a lot of wounds.
- Install your best Action cards in the Tech Bay, so you have the option to activate it several times in one round.
- Install less useful cards in the slots for Bonus cards.
- Do not allow your enemy to install only his cards in one sector - each sector should bring you some benefits.
Card Description
Cards' Sides
Face-up cards, face-down cards.
All cards in the game are always placed face up.
On the front of a card you will find the summarized rules of the card, which functions as a reminder of the full rules described in detail on the back.
The back of the card contains a detailed description of the rules of the card. During the game a player can always look at the back of a card to find out the exact rule of that card.
Note: There is a symbol on the back of some cards that reminds the player to place a token when the card is installed in the sector (a crescent-shaped symbol on the Fire and Tentacles cards, circle symbol on the Hidden card, a symbol of a few tokens on the Creepers card).
Card Types:
Action Cards
Whenever your unit ends its Move in a Sector with an installed Action card, resolve the card's action.
The Action icon means: "When your unit ends its Move here, resolve this card"
Module Cards
A Module card affects other cards or units in the sector in which it is installed.
Trap Cards
A Trap card affects an enemy unit that ends its Move in the sector in which the Trap is installed.
Traps are resolved both when the unit ends its Move in the sector, and when it is moved to the sector as a result of a card effect.
Some Traps (Fire, activated Defense System, Tentacles) are also resolved when the enemy passes through the sector in which they are installed. These Traps also use crescent-shaped tokens placed in the Trap tokens area on the Sector board to remind players of their effects.
The Trap icon means: "When the enemy ends his Move here, resolve this Trap"; (in case of Traps with crescent-shaped tokens like Fire, Defense System, and Tentacles it means: "When the enemy ends his Move here or passes through, resolve this Trap").
Instant Cards
An Instant card is not installed in any sector but is played from a player's hand and is resolved immediately.
If you do not want to use the Instant card immediately when you acquire it, you can keep it and use it at any time during your future turn. Keep it face up and visible for the opponent.
If a player has many Instant cards, he can use any number of them in his turn, even playing them all at once.
All Instant cards are single use and are discarded afterwards.
Shortcut Cards
A Shortcut card modifies the movement of your own units through the sector in which they are installed.
Duplication Cards
A Duplication card copies the effect of each card (including all the tokens placed on the card) of the same faction that is directly adjacent to it (vertically or horizontally - Duplication does not work diagonally).
It is possible for the Duplication to copy up to 3 cards at a time if it is directly adjacent to these cards (this can happen in the Corridors and the Tech Bay).
A Duplication card cannot copy a card excluded from the game by a Malfunction or removed from the game.
Adjacent Duplication cards do not copy each other.
Special Cards
A Special card affects the whole game (e.g. according to the card rule it can affect all the sectors, all the units, etc.).
Bonus Cards
A Bonus card does not belong to any faction.
All Bonus cards are Instant cards (see above).
Bonus cards can be used immediately when acquired.
Supplemental Tokens
Some cards, such as Parasite, Invisibility, Incubator, and Gripper, introduce some tokens into the game that are placed when the card is resolved.
Other cards: Fire, Tentacles, Defense System, Hidden, and Creepers also use some supplemental tokens, but only to remind players of the corresponding Installed card's effects, which are resolved during a Move (crescent-shaped tokens: Fire, Tentacles, Defense System) or during the Onslaught (Hidden token).
Card Features:
Upgraded
If the card has a number inside the Upgrade symbol, it means that each Upgrade token placed on this card adds +1 to the number on the card.
There can be up to 6 Upgrade tokens on one card.
When you acquire an Upgrade token but you are unable to place it on any of your cards, you can keep the token and use it at any time during any of your subsequent turns.
Single Use
Discard the card after resolving its effect.
Comments for Specific Cards
You don't have to read this section when you play for the first time. Information gathered here refers to special cases and situations. Only check this section when you have any doubts about what a specific card does.
Duplication or More of the Same Card in One Sector
If there are multiple copies of a card in one sector (or a card is copied by the Duplication card), the effect of the card can be:
-
multiplied in the normal way MARINES: Armory, Landmine, Fire, Battle Position, Trap Detector, Onslaught SCIENTISTS: Archives, Med Bay, Small Laboratory, Defense System, Station Schematics, Detonation ALIENS: Tentacles, Hive, Hidden, Habitat, Incubator, Onslaught GREYS: Chamber, Landmine, Probe, Enhancer, Time Loop, Downgrade, Transfer, Life Tapping Device
-
resolved only once, since the card's effect cannot be duplicated MARINES: Barricade, Ambush, Safeguard, Malfunction, Hideout, Secret Passage SCIENTISTS: (as above) ALIENS: Vent Shortcut, Vent Shaft, Creepers GREYS: Teleportation
-
with some cards duplication is a little more complicated - check the notes to individual cards, see below.
Malfunction Token and Its Influence on Some Cards
Taking the Malfunction token off a card immediately activates the card, even before placing the Malfunction on a new card (e.g. Safeguard immediately forces the enemy to place Malfunction back on the Safeguard card; Creepers immediately deactivate the opponent's cards in the sector, etc).
Abduction (Aliens)
If the Abduction is upgraded or this card is copied by Duplication, the player can relocate different enemy units from the sector (you cannot move one unit twice). Each unit is moved separately.
Incubator (Aliens)
If the appearance of a Minor Alien fills up the sector, a Lesser Onslaught is triggered by the Aliens.
If there is no empty Room for the Minor Alien to appear, the Minor Alien ejects a chosen unit into the Space field.
Ghost Strike (Aliens)
If the Ghost Strike is upgraded or there are more of the same cards in one sector (or the card is copied by Duplication), you can activate Attacks of different units in any sectors (one unit's Attack cannot be activated more than once per turn).
Hidden (Aliens)
Hidden is not treated as a unit, so the Ghost Strike card cannot activate the Attacks of the Hidden.
Parasite (Aliens)
If this card is copied by Duplication, two Parasite tokens are placed on the enemy unit, causing it to receive two wounds for each Move point used. When the unit is freed from the Parasite, both tokens are removed.
Camcorders (Scientists)
When you install this card place a supplemental Camcorder token to indicate a value of 0 - this token is used to mark the number of gained Camcorder points. When an enemy unit ends its Move in this sector, the Camcorders token should be moved the appropriate number of scored Camcorder points. When the Scientist faction unit stops in this sector, the Scientists receive a number of Data Points equal to the number of collected Camcorder points and reset it - move the Camcorder token back to the 0 value (the number of collected points is zero again).
When the Camcorder token indicates a value of 6, the Camcorder is full and cannot collect any more points until it is reset.
Camcorders + Duplication:
Duplication copies the current value of the Camcorder points (even though it is not possible to mark the Camcorder points value on the Duplication card); for example: current value of Camcorders points is 2. When a Scientist unit stops in the sector with the Camcorder (copied by Duplication), then the player receives 4 DP (2 from the Camcorder and 2 from the Duplication). Afterwards the Camcorder points are reset to zero.
Gripper (Scientists)
If a unit that is released by another unit from the Gripper causes the Lesser Onslaught, the release from the Gripper takes effect BEFORE the Lesser Onslaught.
Gripper + Duplication
Duplication does not copy a Gripper. When there are 2 Gripper cards in one sector, each one is considered separately - when the first enemy unit stops in the sector, activate one Gripper, and only when the next enemy unit stops in the sector, the other is activated.
Remote Control + Duplication (Scientists)
If this card is copied by Duplication, the player may trigger actions of two different Action cards (you can't trigger one action twice), from any sectors. Each action is triggered separately.
Downgrade (Greys)
When the opponent has to lose a certain number of Upgrades of his faction but does not have enough, he loses all upgrades he can.
You cannot discard the Upgrade tokens from the card excluded by the Malfunction.
Invisibility (Greys)
If this card is upgraded or copied by Duplication, you can place Invisibility tokens on different units in any sectors (you can't place more than one token on one unit).
Control (Greys)
The player commanding the Greys selects an empty Room in which the enemy unit will end its Move.
If there is no empty Room in the sector to which the enemy unit is moved, it's the player commanding the Greys who chooses a unit to be ejected into Space (it may even be the unit of the moved player).
If you move an enemy unit, the enemy unit takes no action (neither a card nor a sector action), but your Trap cards affect him in the standard way.
While moving your enemy you can use your Shortcut cards.
Module cards (e.g. Barricade, Hideout) still protect the enemy normally.
Control + Duplication
If this card is upgraded or there are multiple copies of this card in one Sector (or it is copied by Duplication), the player may move different enemy units (you can't move one unit twice), from any sectors. Each unit is moved separately.
Teleportation (Greys)
When a Grey unit ends its Move in the sector with the Teleportation card, it can be moved to any sector and end its Move there. In this case, it does not resolve any actions in the sector with the Teleportation card, nor does it fall into the Traps installed there. It resolves the actions in the standard way in the sector to which it teleports.
Note: The player can move the unit to any sector, therefore it can be moved to the same sector in which the Teleportation card was already located.
Time Loop (Greys)
If the card Time Loop is upgraded, it allows the player to use more Move points in the sector, and each time the player decides whether he uses 0, 1, or more Move points.
Ambush + Duplication (Marines)
If there are two of the same card in one sector (or a card is copied by Duplication), the Ambush is resolved twice.
Double Shot + Duplication (Marines)
If there are two of the same card in one sector (or a card is copied by Duplication), each such card allows to launch all Attacks of a Marine unit one more time.
Team Tactics (Marines)
The player commanding the Marines selects an empty Room in which the enemy unit will end its Move.
If there is no empty Room in the sector to which the enemy unit is moved, it's the player commanding the Marines who chooses a unit to be ejected into Space (it may even be the unit of the moved player).
If you move an enemy unit, the enemy unit takes no action (neither a card nor a sector action), but your Trap cards affect him in the standard way.
While moving your enemy you can use your Shortcut cards.
Module cards (e.g. Barricade, Hideout) still protect the enemy normally.
Team Tactics + Duplication:
If this card is copied by Duplication, the player may move two different enemy units (you can't move one unit twice), from any sectors. Each unit is moved separately.
Trap Detector (Marines)
If the Trap Detector is upgraded and creates a few Deactivation tokens, the tokens can be placed in different sectors.
Card from the Deck (Bonus Card)
You can play the card you draw immediately after taking it, even before replacing the Pending card that you just installed in the Installed Card slot in which this Bonus card was placed.
Gateway (Bonus Card)
The additional sector that a unit can move using this card also counts as a Move point.
Multiplayer Game
This section presents adjustments necessary to play a 3- or 4-player game.
3 or 4 Players: Deathmatch
The changes are as follows:
1) Place the Sector boards around the Life and Data Points board in any order (players can place the boards randomly or, for example, alternately place one selected sector at a time). The order in which the sectors are placed determines the order of the players during the game.
2) During the setup each player places his faction marker on the "0" space of the Life Points track.
Note: If a Sector is filled up during the setup, the Lesser Onslaught is not triggered.
3) Every time you wound any enemy (in any way, e.g. as a result of an Attack, or with a Trap), the wounds inflicted count as Life Points you gain instead of decreasing the enemy's Life Points level.
Note: In this mode, the Med Bay card (from the Scientists faction deck) decreases LPs gained by the enemies instead of restoring the Scientists' LPs - the player commanding the Scientists divides the number of LPs each player must lose.
Note: In case of Traps, it's always the Trap owner who gains the Life Points, even if a third player moved an enemy unit into his Trap (e.g. using the Mind Control or Team Tactics cards).
4) When any player gains 20 Life Points or 20 Data Points, he immediately wins the game.
5) In case of a tie, remove the markers of the losing factions from the Life and Data board (the cards, units and sectors of such faction remain and act in the normal way). Then each of the tied players takes an extra turn - starting with the next player after the player who ended the game and continuing in turn order.
If the players are still tied, then the game ends in a draw and the tied players share the victory.
Cooperation Between Factions?
The Aliens, reproduced in the scientists' laboratories, have been taught not to attack humans with a special chip, versus the Marines and Greys, fighting together to destroy this dangerous husbandry.
Scientists and Greys sharing their researches peacefully in the neutral zone of the station, against the Marines holding the Alien queen as a hostage.
An expedition of scientists, protected by the soldiers, sent to check the situation on the distant station, and discover two alien species: united and hostile.
There are no impossible alliances on the Theseus.
4 Players: Team Match
The changes are as follows:
1) Players create two teams of two players. The alliances are marked with alliance tokens placed as in the picture (tokens placed vertically belong to the players of alliance A and the horizontally placed tokens belong to alliance B).
The order in which the tokens are placed is also the turn order. The players take their turns in the following order:
- First player of alliance A
- First player of alliance B
- Second player of alliance A
- Second player of alliance B
2) During the setup, each alliance uses only one faction Sector for their alliance (the players decide which of the two factions they will use).
3) Each player shuffles his faction cards and takes the first 10 cards (instead of 15), creating his own deck of cards.
Then each player takes the 2 (instead of 3) top cards from his deck. In turn order, each player chooses one of his two cards and installs it in any empty Installed card slot in any sector and places the other one in the Pending card slot in the alliance sector.
4) Each player uses only two units (instead of 3).
In turn order, each player first places one of his units in any empty Room of his alliance sector, then each player places his second unit in any empty Room of any sector.
Note: If a Sector is filled up during the setup, the Lesser Onslaught is not triggered.
5) During the game, each player of an alliance treats the cards, units of his ally, and alliance Sector as his own with the following exceptions:
- You cannot move an allied unit (even when you activate the Additional Turn action of the Tech Bay sector).
- You can never draw a card from the allied player's deck.
- When an Onslaught is launched only the units of the player that caused the Onslaught attack enemy units.
Note 1: Bonus Cards are also shared by the allied players and either player can use them.
Note 2: Cards such as Battle Position or Chamber, which make the player deal [X] more wounds during an Attack or gain [X] more DPs, affect the ally only when he actually inflicts wounds / gain DPs.
6) If during the game one player brings his opponent's Life Points to zero or scores 20 Data Points, his alliance immediately wins the game. If all players have more than 0 Life Points and less than 20 Data Points at the end of the game, the alliance with the highest sum of both Life Points and Data Points wins.
Pandora
The struggle for control over Theseus absorbed whole factions' attention and powers. For a long time they were oblivious to the presence and emanations of something else - present and active on the station. How long would it take to discover the secret segment, absent from the Theseus' plans? And if they find it - will they manage to realise the mystery of its residents... and survive?
Pandora is an additional, fifth faction, and is very different from the basic four. This faction is recommended for players who have mastered the game and want a more advanced experience. Pandora works best in a 3-player game.
Faction Description
1) The Pandora faction consists of 3 standard units (called Creatures) and 10 smaller units (called Embryos): 2 Catchers, 4 Runners, and 4 Warriors. Just like in every other faction, each Pandora unit has two sides, the base unit and the advanced unit. Pandora has no faction cards, but offers a variety of units instead.
Creature:
Base unit - Attack inflicts one wound on up to one enemy unit that is in Attack range in the sector.
Upgraded unit - Attack inflicts one wound on each enemy unit that is in Attack range in the sector.
Catcher:
Base unit - can permanently take over one enemy card.
Upgraded unit - can permanently take over one enemy card. Attack inflicts one wound on up to one enemy unit that is in Attack range in the sector.
Runner:
Base unit - during its Move it can move one sector further; can take over one enemy card for a single use.
Upgraded unit - during its Move it can move one sector further; can permanently take over one enemy card; Attack inflicts one wound on up to one enemy unit that is in Attack range in the sector.
Warrior:
Base unit - can take over one enemy card for a single use; Attack inflicts one wound on up to one enemy unit that is in Attack range in the sector.
Upgraded unit - can permanently take over one enemy card; Attack inflicts one wound on each enemy unit that is in Attack range in the sector.
2) At the beginning of the game the Pandora faction has 20 LP just like the other factions. This faction does not collect DP.
3) Pandora does not have its own Sector board (which means that, for example in a 2-player game, the playing area will consist only of four Sector boards). Instead, the player commanding Pandora takes a Pandora sector token and places it on any sector included in the game (on its left or on its right). From now on, this sector is also the Pandora's faction sector.
If the player places his Pandora sector token on an enemy faction sector, they both treat the sector as their own.
Note: If the player places the Pandora sector token on an enemy faction sector, then placing it on the left or on the right side will affect the player order; for example: two factions are playing the game, the Marines and the Pandora. The player commanding the Pandora places the Pandora sector token on the left side of the Marine sector - in this situation he will be the first player.
4) The initial unit placement in the sectors is performed according to the standard rules.
Note: If the player commanding Pandora and his enemy share one sector, all the Rooms in this sector will be filled up at the beginning of the game and a Lesser Onslaught is not triggered.
5) Budding: Each time the player moves a Creature and it ends its Move in a sector where there are no enemy units, one Embryo is automatically born there (after resolving any Action cards if Pandora has taken over any). The player chooses any of the available Embryo tokens and places it in an empty Room in this sector.
If there is no empty Room in the sector for an emerging Embryo, it ejects a chosen unit into the Space field.
6) Taking Over a Card: If a player commanding the Pandora moves an Embryo, then after the Action Card Phase (if Pandora has already taken over any) and a possible Budding, but before the Sector Action Phase, the player can decide to take over an enemy card - he can place that Embryo token on any enemy Installed card in this sector and thus take it over. The Embryo token stays on the taken over card and is no longer a unit. Depending on whether the Embryo was the base unit or an advanced unit, place its token the same side up. The symbol on the token shows whether the card has been taken over for only a single use or permanently. The card is taken over with all the Upgrade tokens on this card and from this moment it is treated as a Pandora card. If the card is taken over only for a single use, after resolving the card the Embryo token is removed and returns to the available token pool of the player commanding the Pandora. The enemy card then reverts back to its original faction.
7) The Pandora sector action is Upgrade token - the player receives 1 Upgrade token.
It can be used in the standard way to Upgrade any Pandora unit or can be placed on a taken over Installed card that has a number depicted on the Upgrade symbol.
Note: If the Pandora sector is one of the common sectors, then the player controlling the Pandora performs this sector action as well as the action of the Pandora sector when he ends his Move in this sector. The player chooses in what order he takes the actions; for example, if the Pandora sector is Corridors, the player chooses whether to receive the Upgrade token first (which he can use immediately) and then perform an Onslaught, or vice versa.
Note: If the Pandora sector is one of the common sectors, the sector's action is still available to the enemy.
8) When the Pandora player shares his sector with an enemy, he can still discard Pandora cards (taken-over ones) from their sector using the alternative sector action. The Embryo token from the discarded card returns to the available token pool of the player commanding the Pandora.
9) The player commanding the Pandora does not perform Pending card phase.
Game Example
Setup: Players place their sectors (along with Malfunction token and Final Sequence token). Set the markers on the Life Points track. (Scientists also place a marker on the Data Points track). Place one random face up Bonus card on each Installed card slot marked with the Bonus card symbol. Each player shuffles his Faction cards, takes the first 15 cards and returns the rest into the box.
Each player draws three top cards from his deck and then - in the order of players - selects one of them and places it face up on any empty Installed card slot and places the other two cards face up in both Pending card slots of his faction sector (Aliens install Hive in their sector and the Scientists install Camcorders in the Corridors). Each player places two units in his own faction sector and the third unit in any empty Room in any sector (Both players decide to place their third unit in the sector before his faction sector).
Turn 1: Aliens. MOVEMENT PHASE: Player selects a unit standing in the Control Room. The unit moves one sector ending its Move in the Aliens faction sector. ACTION CARDS PHASE: None. SECTOR ACTION PHASE: Player receives an Upgrade token and immediately upgrades one of his units. PENDING CARDS PHASE: Player installs Vent Shortcut in the Control Room in place of a Bonus card, so he takes the Bonus card "Card from the Deck" placed there and keeps it for later use. Then, he refills the Pending card slot.
Turn 2: Scientists. MOVEMENT PHASE: Player selects a unit standing in the Tech Bay. The unit moves one sector ending its Move in the Scientists faction sector. ACTION CARDS PHASE: None. SECTOR ACTION PHASE: Player receives an Upgrade token (and keeps it for later use). PENDING CARDS PHASE: Player installs Med Lab in the Tech Bay in place of a Bonus card, so he takes the Bonus card "Card from the Deck" placed there. He uses the card immediately and installs the Defence System on an empty slot, so he can't acquire another Bonus card. Then, he refills the Pending card slot. Now the player uses the Upgrade token and puts it on the Defensive System.
Turn 3: Aliens. MOVEMENT PHASE: Player selects one of his units standing in the Aliens' Nest. The unit moves three sectors ending its Move in the Corridors. Camcorders Trap card is resolved immediately (Camcorders collect 2 Camcorders Points). ACTION CARDS PHASE: None. SECTOR ACTION PHASE: The Onslaught has no effects (currently no Alien can deal wounds to the Scientists). PENDING CARDS PHASE: The player places the top card from his deck in the Pending card slot.
Turn 4: Scientists. MOVEMENT PHASE: Player selects one of his units standing in the Scientists' Laboratory. The unit moves three sectors ending its Move in the Aliens' Nest. Hive Trap card is resolved immediately, dealing 1 wound to Scientists. ACTION CARDS PHASE: None. SECTOR ACTION PHASE: None. PENDING CARDS PHASE: The player removes one of the Aliens' Pending cards in this sector and replaces it with the top card from his deck.
Turn 5: Aliens. MOVEMENT PHASE: Player selects his unit standing in the Corridors. The unit should move one sector but the player uses Vent Shortcut during his Move (skipping the Control Room) and ends in the Aliens' Hive. He fills up the sector, therefore he triggers a Lesser Onslaught: only 1 Alien attacks a Scientist and deals one wound to the Scientists (the following phases are described in the next step). ACTION CARDS PHASE: None. SECTOR ACTION PHASE: Player receives an Upgrade token and immediately upgrades one of his units. PENDING CARDS PHASE: The player can choose to: either take his own Pending card (Hole), or remove Scientists' Pending card (Camcorders). He decides to take his Hole card (and keep it for later use). Then, he refills the Pending card slot.
Turn 6: Scientists. MOVEMENT PHASE: Player selects his unit standing in the Aliens' Hive (he should escape from there as soon as possible, otherwise Aliens could repeat a Lesser Onslaught during their turn). The unit moves four sectors ending its Move in the Control Room. ACTION CARDS PHASE: Med bay recovers 1 Life Points of the Scientists. SECTOR ACTION PHASE: The player takes the Malfunction token and decides to block the Vent shortcut with it. PENDING CARDS PHASE: The player places the top card from his deck in the Pending card slot.
Turn 7: Aliens. MOVEMENT PHASE: Player selects one of his units standing in the Aliens' Nest. The unit moves three sectors ending its Move in the Corridors. Camcorders Trap card is resolved immediately (Camcorders collect another 2 Camcorders Points). ACTION CARDS PHASE: None. SECTOR ACTION PHASE: The Onslaught has no effects (currently no Alien can deal wounds to the Scientists). PENDING CARDS PHASE: The player installs the Pending card Ghost Strike in the Control Room. Then, he refills the Pending card slot.
Turn 8: Scientists. MOVEMENT PHASE: Player selects one of his units standing in the Scientists' Laboratory. The unit moves two sectors ending its Move in the Control Room. ACTION CARDS PHASE: Med bay recovers 1 Life Points of the Scientists. SECTOR ACTION PHASE: The player takes the Malfunction token and decides to place it on the Ghost Strike card (the player can place it on any Pending or Installed card in any sector). PENDING CARDS PHASE: The player installs the Pending card Duplication in the Tech Bay (it copies the Defense System with a Bonus card, taking the Upgrade Bonus card) (and keeps it for later use). Then, he refills the Pending card slot.
Turn 9: Aliens. Now the player uses the Hole instant card and moves the Vent shortcut card to Corridors sector. Then he uses Card from the deck Bonus card and installs the top card from his deck (Onslaught) in the Control Room in the slot from which the Vent shortcut was taken (he couldn't place this card on Vent shortcut, because Card from the deck instructs you to install a card on an empty slot). MOVEMENT PHASE: Player selects one of his units standing in the Corridors. The unit moves one sector ending its Move in the Control Room. ACTION CARDS PHASE: Onslaught. At this moment only one Alien unit can deal a wound to the Scientists. Scientists receive 1 wound. Unfortunately, the second Action card (Ghost strike) is blocked by the Malfunction, so Aliens can't use it. SECTOR ACTION PHASE: The player takes the Malfunction token and decides to block the Med bay with it (his Ghost strike card is active again). PENDING CARDS PHASE: The player removes the Pending card Gripper and replaces it with the top card from his deck.
Turn 10: Scientists. MOVEMENT PHASE: Player selects his unit standing in the Scientists Laboratory. The unit moves one sector ending its Move in the Corridor. ACTION CARDS PHASE: Player exchanges the 4 Camcorder Points collected by Camcorders to 4 Data Points (and resets the Camcorders to zero). SECTOR ACTION PHASE: Onslaught does not bring any effect (no Scientists unit is upgraded to be able to deal wounds). PENDING CARDS PHASE: The player removes the Pending card Hidden and replaces it with top card from his deck.