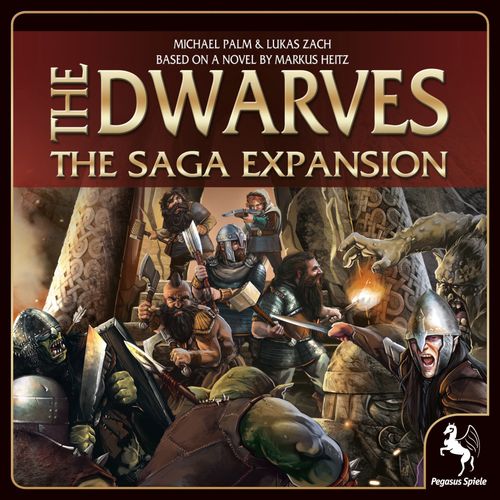
The Dwarves: The Saga Expansion
The Dwarves: The Saga Expansion Rulebook
Table of Contents
Table of Contents
Components
Expansion-independent material
- 2 new game boards. Use the new game boards instead of the base game board. The large board shows Girdlegard, the Doom track and spaces for the Armies of Evil. The small board shows the Dwarven Council and holds spaces for the scenario deck and 3 adventure cards for the base game, or for the Saga deck and the Saga cards of this expansion.
- 4 new figures: 1 Gandogar figure, 1 Council bust, 1 Hero bust, and 1 Doom bust. With Gandogar you get a new dwarf to play with. The busts replace the corresponding markers from the base game.
- 1 Gandogar character sheet. Printed text: "King of the Fourth Clan." "May also fight Armies of Evil on neighbouring spaces."
- 16 additional attribute tiles.
- 6 new "Higher Life Energy" tiles. Whenever you gain 1 more life point, you may show it with these tiles by placing them on your character sheet.
- 1 life marker.
- 10 additional scenario stones.
- 75 new army figures: 30 Orcs, 25 Trolls, 20 Albae. The new figures replace the wooden cubes from the base game.
- 1 new Tunnel tile. The new Perished Land tiles and the Tunnel tile replace the tiles from the base game when you play with the new boards.
- 36 new Perished Land tiles.
Expansion-specific material
- 36 Saga cards: 12 each for Book 2, Book 3 and Book 4.
- 15 Threat cards.
- 2 Council tiles "Saga" (1 in English, 1 in German). Printed text, English tile: "As soon as the Quest of a Saga card has been completed, you may move 1 hero up to 3 spaces." German tile: "Nach jeder bestandenen Sagakarte dürft ihr sofort 1 Helden 1-3 Felder weit bewegen." (After each completed Saga card you may immediately move 1 hero 1-3 spaces.)
- 1 card "Blacksmith" (Schmied).
- 1 card "Dispatches" (Depesche).
- 1 card "Hidden Shortcut" (Unentdeckte Abkürzung).
- 1 card "High King" (Großkönig).
- 29 new game tiles.
Sample cards
The following card texts are printed in the rulebook. Each Saga card shows its Book number on its back, and its letter on its front.
The New Realm of the Fifthlings (Saga card, Book 2, A): Travel to the Gate of the Fifthlings [gate icon]. There, within a single turn, discard 1 crafting test 4+ to place 1 scenario stone on this card. Each scenario stone makes further crafting tests harder by 1 (to 5+ and 6+ respectively). The quest is completed when 3 scenario stones lie on this card. Remove 3 armies of your choice from the map and/or cards back to the supply. Or draw 1 equipment card and decide together who receives it.
Save the Son (Saga card, Book 3, A): Travel to a space with a lake that is not Perished Land, and within a single turn discard 2 movement checks 4+. Reward: Heal 1 player 2 life points immediately, or 1 life point each to 2 players. Or draw 1 equipment card and decide together who receives it.
Build a Line of Defense (Saga card, Book 4, A): Discard 1 crafting test 4+ to place 1 Rampart marker on the space occupied by your figure (only 1 per space, not on Perished Land). The quest is completed when 5 Ramparts lie on the map. Rampart: when Armies of Evil enter a space with a Rampart, you may remove 1 of the armies. Then check whether the space turns into Perished Land. Spaces with a Rampart only turn into Perished Land at 7+ armies; then also remove the Rampart. Reward: Draw 1 equipment card and decide together who receives it. Place this card beside the game board as a memory aid.
Black Water (Threat card): Effect: Orcs can only be defeated in combat by a 5+. Task: As soon as you have defeated 1 or more Orcs in 1 combat, discard 1 crafting test 6+ without taking an action to avert this threat.
Blacksmith (card, Book 2): Travel to the Blacksmith [icon]. There, for 1 action, discard 1 crafting test 4+ to draw 2 equipment cards. Decide together who receives them.
Dispatches (card, Book 3): Travel to a Gate with no scenario stone. There, for 1 action, place 1 scenario stone. A fellow player who enters your space or a space adjacent to yours may take the "Dispatch" in his turn without an action. Discard the "Dispatch" and all scenario stones as soon as each Gate holds 1 scenario stone. The "Dispatch" does not count as equipment.
Hidden Shortcut (card, Book 3): Travel to [icon]. There, use 1 action to move yourself and 1 other player together to 1 space of your choice.
High King (card, Book 4): Place 1 scenario stone on each fulfilled task. The printed tasks, listed in the order of the card's two columns:
- The High King has full life points.
- The Council marker is on the far-right box of the board.
- Collect 12+ armies defeated on the map on this card.
- The High King discards 1 crafting test 5+ at 1 of the 4 Gates.
- The High King defeats 3 or more Armies of Evil on the map within a single turn.
Note: the card's five tasks are transcribed in column order from the card scan at print resolution; the pairing of each task with its box should be checked against the physical card.
Setup
Lay out both game boards where everyone can reach them in your play area. Except for the cards, place all material as described in the base game on and next to the game boards. Place the Council tile of your language on the second box to the right of the middle of the Dwarven Council. It replaces the effect of this box. As described under "Components", replace the base game material with the material contained in this expansion.
Choose 1 character sheet with its matching figure and place it on the matching space of the map. (If you choose Xamtys II from the Character expansion: instead of an adventure, in a game with the Saga expansion she must complete a Saga card to use her special ability.)
Decide together which part of the Saga you want to play. Take the matching Saga cards. (You recognise them by the number on the book on the card back.) Once you have chosen a book, sort its Saga cards by letter and shuffle the A, B and C cards separately.
Build your Saga deck now: the C cards lie at the very bottom. On top of them place the B cards. Then draw 3 of the 7 A cards face down and place them on the very top.
You may increase the difficulty of the game by drawing additional A cards.
Return the remaining Saga cards to the box; you do not need them for this game.
Place the Saga deck on the leftmost space of the small board. Then reveal 3 cards from the Saga deck and place them on the 3 spaces to the right of the Saga deck. You do not need the scenario and adventure cards of the base game for the Saga expansion.
Now shuffle all Threat cards of the Saga expansion and place them as their own draw pile next to the small board. Unlike the base game, do not shuffle any of these cards into the Saga deck. You do not need the Threat cards of the base game for the Saga expansion.
Finally, shuffle the Equipment cards of the base game and place them as a face-down pile.
Note: wherever this rulebook refers to "dwarves" as game material, non-dwarf heroes of the players (for example Narmora from the Character expansion) are also meant.
Note: unlike the base game, the Saga expansion can also be played with six players. For this there is 1 additional life marker.
Dwarven Council Board
The Dwarven Council row of the small board has eight boxes, read from left to right. Each box carries a threshold label (3+ to 6+). The second box to the right of the middle is replaced by the Saga Council tile, as described in Setup.
- 3+: At the start of your turn, you must move the Doom marker 1 step in the direction of the Hero marker.
- 3+: After rolling the recruitment dice, you must reroll all dice without a skull symbol.
- 4+: After each roll of the number dice, you must reroll the die showing the highest number.
- 4+: Each time a Threat card is revealed, 1 player loses 1 life point. Decide together who this is.
- 5+: Each time a Threat card is revealed, 1 player regains 1 life point. Decide together who this is.
- 5+ (replaced by the Saga Council tile): After each adventure you pass, you may discard 1 face-up Threat card without further effects.
- 6+: After each roll of the number dice, you may reroll 1 die of your choice.
- 6+: You may, for 1 action, discard 1 crafting test 4+ to draw 1 equipment card. Decide together who receives it.
Rules of the Saga
For the Saga expansion, all rules of the base game The Dwarves apply, with the following exceptions.
Saga cards
As soon as you have completed the Quest of a Saga card, discard the card. In the "Reveal new cards" step of the next player's turn, draw 1 further card from the Saga deck for each completed card. If this is a card of the next letter, place it face down first. If, in the "Reveal new cards" step of a turn, all face-up Saga cards of type A have been completed and discarded, reveal all cards of type B. If all B cards are also completed, reveal only 1 single card of type C. Do not reveal any further Saga cards until the end of the game. As soon as you complete this C card, you have won the game as usual!
IMPORTANT: Face-up Threat cards do not count as Saga cards. They are laid out additionally!
Rewards
If a Saga card shows a reward, you receive it as soon as you have completed the Quest of the card.
Threat cards
Unlike the base game, in this expansion you do not shuffle the 2 Threat cards into the Saga deck each time the Hero marker reaches the matching space on the Doom track. Instead, the player whose turn it is draws 2 new Threat cards from the Threat deck. Decide together which of the two cards you choose as the new threat, and place it face up next to the deck. Place the other card face down at the bottom of the deck. If you choose a card with an immediate ("Sofort") effect, carry it out immediately and then return the card to the box; it cannot come into play again in this game. Unlike the base game, you do not then draw a further Threat card.
Threat cards that you do not have to resolve immediately show an effect that applies for as long as the card lies face up. When you fulfil the stated task, return the card to the box; it cannot come into play again in this game.
Special case: If the Equipment card "Passende Verkleidung" (Matching Disguise; English title translated from the German) from the base game is discarded for its effect, it prevents the effects of a Threat card until the end of the turn.
Special Features of the Saga Books
Book 2
For this scenario you need the following additional game material. Place it ready next to the play area:
- The Blacksmith card and 12 Saga cards for Book 2.
- The Hammer hex tile and the hex tile "Albin with Flame Blade".
Special features: For Book 2 there are no special features in setup and no special rules.
Book 3
So that the mighty diamond does not fall into the wrong hands, ten further copies of it were made and hidden in Girdlegard. Now the forces of evil set out to find it. You must get there first!
For this scenario you need the following additional game material. Place it ready next to the play area:
- 11 diamonds (values 0, 1, 1, 1, 1, 1 and 2, 2, 2, 2, 3).
- The Dispatches card and the Hidden Shortcut card.
- 12 Saga cards for Book 3.
- The "Lore" tile.
Setup: Shuffle the 11 diamonds marked with the diamond symbol and distribute them on the spaces of the map.
Special rules: As soon as an Army of Evil is on a space with a diamond, or that space turns into Perished Land, reveal the diamond and place it beside the Dwarven Council on Bislipur. Then roll 2 dice and add the results. If the total is equal to or less than the sum of the values of all diamonds collected on Bislipur, the forces of evil have found the true diamond. This makes things harder for you on the B and C cards (see the black diamond symbol). In this case, remove all other diamonds from the map.
If one of you is on a space with a diamond, that player may, for 1 action, discard 1 crafting test 4+. On success, the player may reveal the diamond and place it beside the Dwarven Council on Balendilin. Then the player rolls 2 dice and adds the results. If the total is equal to or less than the sum of the values of all diamonds collected on Balendilin, the heroes have found the true diamond. This helps you on the B and C cards (see the white diamond symbol). In this case, remove all other diamonds from the map. It is also possible that neither side finds the true diamond. In that case, follow the normal instructions of the B and C cards.
Note printed beside the Book 3 rules: When a Saga card speaks of a "lake", the spaces with the light-blue lakes on the map are meant.
Book 4
For this scenario you need the following additional game material. Place it ready next to the play area:
- The High King card and 12 Saga cards for Book 4.
- The Dragon Lohasbrand and the Dragon Kordrion hex tiles.
- The Orc Leader, Albae Leader and Troll Leader tokens.
- 5 catapults.
- 5 Ramparts.
Special features: For Book 4 there are no special features in setup.
Special rules:
Leaders
Saga cards can bring Leaders of the Armies of Evil into play. The place where the marker comes into play is named on the Saga card. Leaders follow the normal movement rules of armies: they move in the direction of the arrow on Perished Land (also when turning into Perished Land, so they never move sideways). When a space turns into Perished Land, however, Leaders count as 2 armies. So a space with 1 Leader and 3 armies already turns into Perished Land. Otherwise Leaders are not treated as armies. Cards or other effects that refer to armies do not apply to Leaders.
To remove a Leader, a player needs 2 hits during one combat. That means that to remove an Orc Leader you need a 4+ twice in your roll. As usual, the dwarf loses 1 life point if he could not remove an Army of Evil or the Leader in 1 combat. If 5 or more Armies of Evil are removed from the Schwarzjoch and at least 1 Leader is located there, the Doom marker moves 2 spaces toward the Hero marker (instead of usually only 1 space). The Leader remains standing on the Schwarzjoch.
Dragons
Saga cards can bring Dragons into play. The place where the marker comes into play is named on the Saga card. A Dragon is not an army in any respect and therefore does not affect turning a space into Perished Land. Cards or other effects that refer to armies do not apply to Dragons.
At the end of each turn, each Dragon moves 3 spaces in a random direction. Roll 1 die and check the Dragon's marker to see in which direction it moves 3 spaces according to the result. It moves through heroes, armies and Perished Land without restriction and does not use tunnels. If its movement reaches the edge of Girdlegard, its movement ends there. Dwarves that, after a Dragon's movement, are on the Dragon's space or adjacent to it lose 1 equipment card or 1 life point. If the player chooses to lose 1 life point, fellow players may take the damage on themselves. How to defeat the respective Dragon is stated on the Saga card.
Translator's note on "Perished Land"
The German text uses "Totes Land" (dead land) for the terrain and, in the Ramparts rule (twice) and the Leader rule (twice), "Totem Land". Both are rendered "Perished Land" here, as in the English edition. "Totem Land" appears to be a printing variant of the same terrain; the wording is otherwise kept as printed.