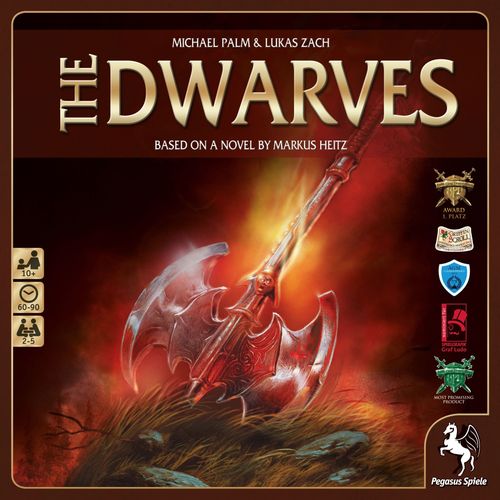
The Dwarves
The Dwarves Rulebook
Table of Contents
Table of Contents
COMPONENTS
All Inclusive Components
- 12 Hero boards
- 12 Hero figures
- 1 large Game board: Map of Girdlegard
- 1 small Game board: The Dwarven Council
- 1 Hero marker
- 1 Doom marker
- 1 Council marker
- 75 Army of Evil Troops: 30 Orcs, 25 Trolls, 20 Élfar
- 15 Scenario markers
- 7 Number dice
- 3 Recruitment dice
- 6 Health markers
104 tiles
- 36 Perished Land tiles
- 30 Attribute Value Modification tiles
- 6 Increased Health tiles
- 1 Tunnel tile
- 1 Portal tile for the Élfar expansion for Book 1
- 1 Council tile for Books 2–4
- 1 Élf bearing Keenfire tile for Book 2
- 1 Hammer tile for Book 2
- 1 Mine Cart tile for Book 3
- 11 Diamond tiles (with values 0, 1, 1, 1, 1, 1, 2, 2, 2, 2, 3) for Book 3
- 3 Leader tiles for Book 4: Orc, Troll, Élfar
- 2 Dragon tiles for Book 4: Lohasbrand & Kordrion
- 5 Ramparts tiles for Book 4
- 5 Catapult tiles for Book 4
212 Cards
57 Cards for Book 1
- 10 Divider cards
- 12 Scenario cards
- 30 Adventure cards
- 15 Threat cards
9 Spell cards for Andôkai the Tempestuous
9 Élfar expansion cards for Book 1
- 1 Scenario card
- 1 Adventure card
- 5 Threat cards
- 2 Equipment cards
22 Equipment cards for Books 1–5 (all Élfar expansion cards will have an A on the bottom right of the faceup side; all Combined Might expansion cards will have a B)
29 Combined Might expansion cards for Book 1
- 14 Scenario cards
- 8 Adventure cards
- 5 Threat cards
- 2 Equipment cards
13 Cards for Book 2
- 1 Blacksmith card
- 12 Saga cards for Book 2
14 Cards for Book 3
- 1 Dispatches card
- 1 Hidden Shortcut card
- 12 Saga cards for Book 3
13 Cards for Book 4
- 1 High King card
- 12 Saga cards for Book 4
21 Cards for Book 5
- 13 Scenario cards
- 8 Special Equipment cards
15 Threat cards for Books 2–4
COMPONENT DETAILS
(Details for individual Heroes can be found in the Glossary on page 15.)
Hero boards
Your Hero is depicted on your Hero board. On the right side of the board there is a scroll showing your Hero's name and start location, their special ability, and the values for their Battle, Craft, and Speed Attributes. These Attribute values show the number of dice your Hero will use for battles, when moving, and when sending dispatches to the Dwarven Council, as well as for making various Attribute checks.
You can place an unlimited number of Equipment cards along the bottom of the Hero board. On the left are heart icons that show your Hero's current Health. If this value drops to 0, your Hero dies.
Important: As soon as even a single Hero dies, the game is lost, and evil has triumphed.
The scroll shows: Name and Start Location for your Hero, Special Ability, Battle Attribute, Craft Attribute, Speed Attribute, Health Points, and the Equipment card display area.
Cards
(Details for the cards can be found in the Glossary on pages 15–16.)
Scenario Cards — Scenario cards have three levels: A, B, and C. You must complete the quest on each Scenario card before you can venture on to the next card. First, you must complete all the level A cards and then the level B card or cards. Finally, to win the game, you must successfully complete 1 level C card. Each Scenario card shows: its Level, the Title of the card, and the Quest.
Adventure Cards — Adventure cards provide a quest that may be completed by any Hero. The indicated reward will be granted once one of your Heroes has completed the quest. Then the Adventure card will be discarded. Each Adventure card shows: the Title of the card, Flavor Text, the Quest, and the Reward.
Threat Cards — Threat cards are similar to Adventure cards, except they don't provide any reward. Instead, each of these cards reveals a threat that makes the game more difficult. You can only avert this threat by completing the depicted quest. Once you have averted the threat, discard the Threat card without further effect. Each Threat card shows: the Title of the card, Flavor Text, the Quest, and the Threat (effect).
Equipment Cards — Equipment cards support your fight for Girdlegard. Some offer a permanent advantage, while others must be discarded for particularly strong advantages. Use them wisely. Each Equipment card shows: the Title of the card and its Ability.
Important: The following pages will explain the general course of the game for Book 1. New rules for Books 2–5 can be found in the companion file dwarves-saga-books-2-5.md. However, before you face the challenges of Books 2 through 5, we recommend you begin by playing a few games using the rules for Book 1 first.
SETUP
Game Boards
Place the large and small game boards in the play area within easy reach of all players. The large game board shows a map of Girdlegard divided into its 7 kingdoms (beginning in the north and continuing clockwise): Gauragar, Urgon, Idoslân, Sangreîn, Rân Ribastur, Weyurn, and Tabaîn.
In addition, several locations important to the plot are indicated, as well as the Tunnel Entrances for the Tunnel system, and the Gates through which the Army of Evil will invade Girdlegard.
Place the markers for the Doom track located in the north at the top of the map.
- Place the Hero marker in its start space at the left end of the track.
- Place the Doom marker in its start space at the right end of the track.
Important: These two markers will advance towards one another during the course of the game. If the 2 markers meet, the Heroes have immediately lost the game allowing evil to triumph.
In addition, 3 supply areas for the Army of Evil troops are depicted at the top of the board: Orcs on the left, Élfar in the middle, and Trolls on the right. Place the troops for each type as a supply on these pictures. During the game, as the Army of Evil troops populate the map, the more the visage of each troop type will show and the more horrific the Army of Evil will become.
The small board shows the Dwarven Council: flanked on the left side by Bislipur and by Balendilín on the right. Place the Council marker on the axe in the middle of this area. The position of the Council marker in the Dwarven Council will influence your actions in the game. If you manage to move the marker in the direction of Balendilín, you will enjoy certain advantages. On the other hand, if the marker moves in the direction of Bislipur, your efforts to defeat the Army of Evil will be made more difficult.
Place the Attribute Value Modification tiles, the Tunnel tile, the Number and Recruitment dice, and the Scenario markers in easy reach of all players. Place the Perished Land tiles facedown and mix them together. Then place them in a pile next to the board ready for use.
Hero Boards
Players may choose a Hero board and the corresponding Hero figure, or they can be distributed randomly. When playing Andôkai, that player also takes Andôkai's Spell cards (see page 15). Next, each player places a Health marker on the top heart icon on their Hero board to track their Hero's Health.
Then, each player places their Hero figure in the listed start location (Examples: the Gate for a clan, such as Tungdil at the Fourthlings' Gate; or, other Locations such as Furgas in Mifurdania).
Cards
Separate the cards into their 4 types:
- Scenario Cards (brown frame)
- Adventure Cards (white frame)
- Threat Cards (black frame)
- Equipment Cards (red frame)
First create the Scenario deck by sorting the Scenario cards (brown frame) according to their level (A, B, C). Next, shuffle the three level C cards and place them facedown to create the deck. Then place the single level B card (or cards in later Books) facedown on top of them. Finally, shuffle the level A cards and place them facedown on top to complete the deck (see illustration next page).
You may adjust the level of difficulty by removing level A cards from the Scenario deck as shown below and returning them to the box without looking at them. You won't need them for this game.
| Difficulty | Cards Removed |
|---|---|
| Easy | Remove 4 Cards |
| Normal | Remove 3 Cards |
| Challenging | Remove 2 Cards |
| Brave | Remove 1 Card |
| Heroic | Keep all Cards |
When first learning the game or when playing with inexperienced players, we recommend playing the Easy level of difficulty.
Create the Adventure deck: Shuffle the Adventure cards (white frame) and place them as a facedown draw deck to the right of the small game board. Then turn over 3 Adventure cards and place them on the corresponding storage spaces on the small game board.
Create the Threat deck: Shuffle the Threat cards (black frame) and place them as a facedown draw deck next to the game board. Then take the top 3 Threat cards and shuffle them into the Adventure deck without looking at them.
Create a common discard pile for all of the Adventure and Threat cards discarded during the game. If the Adventure deck runs out, shuffle all discarded Adventure and Threat cards and use them to create a new Adventure deck.
Finally, create the Equipment deck: Shuffle the Equipment cards (red frame) and place them as a facedown draw deck next to the game board. If the Equipment deck runs out, shuffle all discarded Equipment cards and use them to create a new Equipment deck.
WINNING AND LOSING
You all win as a team if you successfully complete 1 level C Scenario card.
You all lose as a team, if either:
- The Hero and the Doom markers meet one another on the Doom track, OR
- Any Hero dies.
COURSE OF PLAY
First, agree on a start Hero. The start Hero takes their turn first, and then the other Heroes will each take their turns in clockwise order. Continue play using this same Hero order for the entire game.
Throughout the game players should discuss everything they want to do so they can decide together what might be best for their Heroes and for achieving the goal of the game. However, the final decision for what to do is always made by the Hero whose turn it is.
Important: Player and Hero are used interchangeably in the game. Whenever the game refers to players or Heroes, it always refers to all players or Heroes unless otherwise noted. This includes the player/Hero whose turn it is.
When it's your turn, perform the following steps in the order given:
- Advance the Hero Marker
- Reveal New Cards
- Perform 2 Actions
1. Advance the Hero Marker
Advance the Hero marker 1 space on the Doom track in the direction of the Doom marker. The icon in the space the Hero marker now occupies indicates which of the following 3 actions you must now take immediately:
- Dwarven Council: Move the Council marker 1 step in the direction of Bislipur (to the left). If the Council marker is already on the leftmost space, it remains there. The text in the space occupied by the Council marker is now in effect (until the Council marker moves to a new space putting a new text space into effect).
- Threat cards: Draw 2 cards from the Threat deck and shuffle them into the Adventure deck without looking at them.
- Place Army of Evil troops on the map: Roll all 3 Recruitment dice. Take troops of the respective colors (Élfar, Trolls, Orcs) from their supply according to the number of skulls on the matching color Recruitment dice. Place these troops on the Gate indicated by the Roman numeral above the Hero marker. (If there are no more troops of a color available in the supply, then no troops of that color are placed)
The Dwarven Council spaces, from Bislipur's side to Balendilín's side, have the following effects:
| Requirement | Effect |
|---|---|
| 3+ | At the beginning of your turn, advance the Doom marker 1 space towards the Hero marker. |
| 3+ | After rolling the Recruitment dice, re-roll any dice showing a blank side. The new result counts. |
| 4+ | After rolling Number dice, re-roll one die with the highest number showing. The new result counts. |
| 4+ | After revealing a new Threat card, decide which Hero must lose 1 Health point. |
| 5+ | After revealing a new Threat card, decide which Hero gains 1 Health point. |
| 5+ | After completing an Adventure card, you may discard 1 faceup Threat card without consequence. |
| 6+ | After rolling the Number dice, you may re-roll 1 die of your choice. The new result counts. |
| 6+ | As an action, you may make a Craft check 4+. If successful, you may draw 1 Equipment card and then decide which Hero will keep it. |
Army of Evil Troop Movement (Place Army of Evil troops on the map, continued)
- If there are 5 or more troops in a hex on the map after moving armies or resolving a card, this hex immediately turns into Perished Land. Randomly draw 1 Perished Land tile and place it faceup on the affected hex so that the direction of the large arrow in the center of the tile matches with the direction of the arrow of the same color in this space. (If all of the Perished Land tiles are already on the map, no further hexes can be converted into Perished Land. In addition, there can now be 5 or more troops in a hex.)
- The tile also depicts 2 troops (colored squares) on each side of the arrow. If available, move the 2 troops matching that color from each hex side to the corresponding adjacent hexes on the map. If there are not enough troops in the hex for a color, only move the matching troops that are available. If the movement would take the indicated troops to a Perished Land hex or beyond the edge of the map, those troops will remain in place and will only be moved in the next step 3.
- Now move all remaining troops to the hex indicated by the large arrow. If this results in 5 or more troops on a hex, this hex also becomes a Perished Land. Repeat the process as described.
- If troops enter a map hex that is already Perished Land, continue moving these troops in the direction of the large arrow to the next hex. If necessary, repeat this until the troops reach a hex without Perished Land. (If there are 5 or more troops there, this hex also becomes Perished Land.)
Blacksaddle
Eventually, all Perished Land tiles lead to the Blacksaddle hex. After moving all of the Army of Evil troops, if 5 or more troops have accumulated in the Blacksaddle hex, remove all of these troops and return them to their respective supply. In addition, immediately advance the Doom marker 1 space in the direction towards the Hero marker. (The Doom marker doesn't activate icons on the Doom track.) The Blacksaddle hex never turns into Perished Land.
2. Reveal New Cards
A. Scenario Cards
If there is no faceup Scenario card, reveal the top card of the Scenario deck. If the quest for the new Scenario has already been completed, discard it and immediately reveal the next Scenario card. If you are required to place troops on the new card and there are not enough in the supply, take the necessary troops from hexes of your choice on the map.
Some level C Scenario cards have a condition. If this condition is not met, discard it and reveal the next card from the deck. There will always be at least 1 level C Scenario card whose requirement will be met when drawn. Carry out the preparations described on the card.
Important: After you have revealed a new Scenario card, the effects for all of the Threat cards in the display must be resolved. Follow the text under the Threat icon.
If a Threat card turns a map hex into a Perished Land, any troops in that hex must immediately move per the usual rules.
Once all of the Threat cards have been resolved, discard them along with any unresolved Adventure cards to the discard pile (maximum of 3).
B. Adventure and Threat Cards
If there are now fewer than 3 Adventure and/or Threat cards in the display, you must reveal new cards from the Adventure deck one-by-one until there are 3 cards in the display. If a Threat card requires troop placements and there are not enough of the necessary troops in the supply, you must first resolve any effects on the card and then discard it and reveal a new card. If you reveal a Threat card with an IMMEDIATE effect, resolve the immediate effect and discard it. Then reveal another card from the Adventure deck.
3. Perform 2 Actions
You may take 2 actions each turn. You may choose the same action twice.
- A. Move on the Map
- B. Fight the Army of Evil
- C. Send Dispatches to the Dwarven Council
- D. Make an Attribute Check
A. Move on the Map
Roll Number dice equal to the Speed Attribute value on your Hero board. Then, using the highest number rolled, move your Hero figure up to that many hexes on the map.
If your Hero enters a hex with Army of Evil troops, you must immediately end your move there. In your next, or a later action, you may continue your movement from this hex. You are not required to fight troops when you are in the same hex with them. Troops on cards do not end your movement.
Moving on the map is not a Speed Attribute check.
Movement through Perished Land
For each Perished Land hex your Hero enters(!), you must decide to either lose 1 Health point or to advance the Doom marker 1 space in the direction of the Hero marker. For each hex, as usual, discuss your choice of penalty with your team. (NOTE: The Doom marker doesn't activate icons on the Doom track.)
These same penalties apply whenever a Hero is moved to a Perished Land by a card effect. There is no effect if a Hero begins their turn on Perished Land or if their current hex is turned into Perished Land.
Example: Your movement ends after 3 hexes because there are troops on the 3rd hex. During your movement you entered 2 Perished Land hexes. You must now decide for each of these hexes whether you will lose 1 Health point or whether you will advance the Doom marker 1 space closer to the Hero marker.
Tunnel System
On the map of Girdlegard, there are several entrances to an underground Tunnel system.
During movement your Hero can move to a Tunnel entrance hex with one movement point and can then continue their move from any other Tunnel entrance hex with their next movement point, all in the same turn.
During the game, once you have successfully completed a quest on certain Adventure cards, you can create an additional Tunnel entrance through the use of the Tunnel tile.
Important: Tunnel entrance hexes located on Perished Land hexes no longer provide access to the Tunnel system. (Note: the Tunnel tile can still be moved.) You should protect Tunnel entrance hexes as best as you can. All other Location hexes can still be visited even if they have been turned into Perished Land.
B. Fight the Army of Evil
If your Hero is in a hex with one or more troops, they may fight them in battle. Roll Number dice equal to the value of the Battle Attribute on your Hero board. Depending on your dice results, you will defeat a specified number of troops:
- For each 6 rolled, defeat 1 troop of your choice: Élfar, Troll, or Orc.
- For each 5 rolled, defeat 1 troop of your choice: Troll, or Orc.
- For each 4 rolled, defeat 1 Orc troop.
Remove all defeated troops from the hex and return them to their respective supplies on the board. Rolls of 3 or less will not defeat any troops (unless otherwise specified).
Important: Your Hero must lose 1 point of Health if they were unable to defeat any troops with your Fight the Army of Evil action. Decrease your Hero's Health marker by 1 point on your Hero board.
Example: Using the dice rolls shown, you can remove 2 troops: the 6 allows you to remove 1 troop of your choice (probably the Élf) and the 4 allows you to remove the Orc troop. The second 4 is ignored as there aren't any more Orcs in the hex. To successfully fight a Troll troop, you would have needed at least a 5. Since you successfully defeated at least 1 troop, you won't lose a Health point.
Troops on Cards
Some Scenario, Adventure, and Threat cards will require you to place Army of Evil troops on them. In order to fight these troops, your Hero must be in the Location indicated on the card. (To make this clear on the map, place a scenario marker on this Location hex.) Fight the battle as described above. (Keep in mind that if you don't defeat at least 1 troop, you will lose 1 Health point). If there are also troops on the Location hex, you fight all of the troops at the same time: both those on the map hex and those on the card.
Fighting Army of Evil troops is not a Battle Attribute check.
C. Send Dispatches to the Dwarven Council
You may Send Dispatches to the Dwarven Council from any hex on the map to influence the election of the new king. Roll Number dice equal to the value of the Craft Attribute on your Hero board. If at least 1 of the dice rolled is equal to or greater than the number to the right of the Council marker (in the direction of Balendilín), move the Council marker 1 space to the right.
If the value of your highest die is lower than the required number, your attempt fails, and your action is over without further effect.
Send Dispatches to the Dwarven Council is not a Craft Attribute check.
Important: You can only move the Council marker by 1 space per action. The text in the box where the Council marker is currently located is now in effect until the Council marker is moved to another space which would put that new text into effect instead.
Example: To successfully Send Dispatches to the Dwarven Council, you need at least a 5 (indicated by 5+ to the right of the Council marker). Even though you rolled a 6 in addition to a 5 as shown, you can still only move the Council marker 1 space. The text in the new space with the Council marker is now in effect.
D. Make an Attribute Check
If an Adventure, Threat, or Scenario card on display requires the completion of 1 or more Attribute checks (Craft, Speed, or Battle), roll Number dice equal to the value of the corresponding Attribute for the check as shown on your Hero board. Each die with the required value or higher counts as 1 successful check. This means you can complete several successful checks with a single Make an Attribute Check action. You can only use successful checks for 1 card per action. If you complete more successful checks than required, the excess checks have no effect. (For example, the box on the far right of the Dwarven Council only allows you to take 1 Equipment card no matter how many successful checks you rolled because it only requires 1 successful Craft check.) If you succeed in all the checks required on an Adventure card, you gain the reward shown below the Quest, and then you discard it. If you have not successfully completed all of the required checks during your turn, the card remains in place, and these checks must all be completed again on another turn by any Hero.
Important: New cards are only revealed by the next player!
If you make a Speed Attribute check, you do not move your Hero. If you make a Battle Attribute check, you do not fight the Army of Evil and you don't lose a Health point if you fail. If you make a Craft Attribute check, you are not performing Send Dispatches to the Dwarven Council.
Example: To complete this Adventure card, you must make a Craft Attribute check by rolling 4 or more three times during your turn (maximum of 2 actions). With your current Craft Attribute value of 4, you roll 4 Number dice. For your 1st action, you roll 2 successful checks (a 4 & 6). Then for your 2nd action, you manage to make the third check (a 5). You may not use the remaining successful checks (a 5 & 6) from your 2nd roll to complete an Attribute check on another card. With your success, you now gain the reward described on the card and discard it.
If you had not rolled another 4+ with your 2nd action you would have failed. Then, any Hero on a subsequent turn can try again, but they will still need three 4+ rolls to complete the Attribute check (and hopefully with only 1 action).
THE ÉLFAR AND COMBINED MIGHT EXPANSIONS
These two expansions allow you to experience new adventures in Girdlegard by providing more variety to your Book 1 games either as individual additions or all together. You can also use the Equipment cards from both expansions for games in all 5 Books. The expansion cards are all marked on the front with a letter on the bottom right: A for the Élfar expansion and B for the Combined Might expansion.
A. Élfar Expansion
Girdlegard faces a terrifying new threat: a portal to the kingdom of Phondrasôn has opened and horrible things are emerging from it.
During setup, shuffle the expansion cards into the corresponding decks. Place the new level C Scenario card Seal the Élfar Portal facedown in the Scenario deck in place of all previous level C cards. Place the Élfar Portal tile 3 hexes south of Gate I. Return the Tunnel tile back in the box; you won't need it for this game. The Portal tile provides the same abilities as the Tunnel tile. It can be used as a Tunnel entrance and you can move the Portal tile with Adventure cards that can move the Tunnel tile. If the Portal tile is on a hex that has been turned into Perished Land, it can no longer be used as a Tunnel entrance. However, the Portal itself still remains active and cards related to the Portal still have their effect.
B. Combined Might Expansion
The Army of Evil has taken advantage of the quarrels in Girdlegard and have invaded with renewed strength. You will need to support one another to withstand them.
During setup, shuffle the expansion cards into the corresponding decks. Create the Scenario deck: first, shuffle the 9 level C cards and place them facedown. Then place 1 randomly drawn level B card facedown on top. Finally, shuffle the level A cards and place them facedown on top of the deck. Depending on the level of difficulty you want to play, remove level A cards from the deck and return them to the box without looking at them; you won't need them in this game.
| Difficulty | Cards Removed |
|---|---|
| Easy | Remove 10 cards |
| Normal | Remove 9 cards |
| Challenging | Remove 8 cards |
| Brave | Remove 7 cards |
| Heroic | Remove 6 cards |
HERO SPECIAL ABILITIES
Andôkai the Tempestuous — We recommend playing Andôkai only after you become familiar with some other Heroes.
When playing Andôkai, take the Spell cards in addition to the Hero board and the figure during setup. Use the Spell cards to create your Magic deck: Shuffle the Spell cards and place them facedown next to your Hero board.
As an action during your turn, you can draw 1 spell and put it in your hand. If you ever have more than 3 Spells in hand, you must immediately discard down to 3 cards and return the discards facedown to the bottom of the Spell deck. You can play spells at any time – even during other heroes' turns – and they don't require taking an action. Discard played spells facedown to the bottom of the Spell deck so that you can draw and cast them again later.
The Spell Book card counts as equipment. If you draw it, immediately place it faceup in front of you. If you discard it as the result of a card, return it facedown to the bottom of the Spell deck.
Balyndis Ironfinger — Balyndis may re-roll all dice once after a Make a Craft Check action, even after re-rolling a single die using the Dwarven Council box that allows you to re-roll 1 die. After the second roll, the Dwarven Council box can be used again.
Bavragor Hammerfist — Bavragor can move through Perished Land without effect.
Boëndal Pinnhand — Boëndal may increase 1 die result of his choice by 1 point when using the action Fight the Army of Evil. He may use his special ability before or after using the Dwarven Council box that allows you to re-roll 1 die, but only once per action.
Boïndil "Ingrimmsch" Two Blades — Boïndil may re-roll all dice during a Fight the Army of Evil action once, even after re-rolling a single die using the Dwarven Council box that allows you to re-roll 1 die. After the second roll, the Dwarven Council box can be used again.
The Fabulous Rodario — Rodario may increase 1 die result of his choice by 1 point when using any Make an Attribute Check action. He may use his special ability before or after using the Dwarven Council box that allows you to re-roll 1 die, but only once per action.
Gandogar Silverbeard — When using the action Fight the Army of Evil, Gandogar may fight troops in his hex as well as any troops in adjacent hexes by allocating his successful rolls into several hexes. All hexes directly adjacent to the hex with his Hero count as adjacent.
Narmora — Narmora may only remove an additional troop from the hex in which her Hero is standing. She can't use her special ability when fighting troops on a card.
Tungdil Goldhand — Tungdil may increase 1 die result of his choice by 1 point when using the action Send Dispatches to the Dwarven Council. He may use his special ability before or after using the Dwarven Council box that allows you to re-roll 1 die, but only once per action.
Xamtys II The Stubborn — Her special ability is used when Xamtys completes Adventure cards in Books 1 & 5 and Saga cards in Books 2–4.
THE CARDS
General Information for Cards
Some cards introduce new action choices. These will be available to you in addition to the usual actions A–D.
Equipment Cards — Heroes can have any number of Equipment cards, but never 2 of the same card. You may never transfer an Equipment card to another Hero during the game. If all Heroes already have a copy of a newly drawn Equipment card, return it facedown to the bottom of the Equipment deck and draw a new card.
Scenario Cards — At any point during your turn, you may complete the quest for a faceup Scenario card and then immediately discard it. New Scenario cards are not revealed until the next player's turn. Exception: If the quest on a Scenario card is already fulfilled when it is revealed, it is immediately discarded, and the next Scenario card is revealed.
Adventure Cards — Adventure cards can be completed during your turn. In order to complete some Adventure cards, it is sufficient to simply enter their specified location during the action Move on the Map. You don't have to end your movement there, unless the card requires you to perform a specific quest in that location (such as making an Attribute check or meeting up with another Hero). If an Adventure card requires that you travel from one gate or location to another gate or location, the following rule applies: You may not perform any other actions or complete any other Adventure card during this movement as you must complete your travel first.
Threat Cards — If you must place troops on a card, take them from their respective supply. If there are not enough troops in the supply, first apply any effect on the card and then discard it. Then reveal a new card in its place. Once you have defeated all of the troops on a card, the threat is averted, and the card is discarded without any further effects.
Individual Card Explanations
Equipment cards
Deceptive Disguise: In Books 1 and 5, discarding this card allows you to discard 1 Threat card with no effect as soon as the threat occurs. In Books 2–4 discarding this card allows you to prevent the effect of the respective Threat card for the duration of 1 Hero's turn. Discarding this card also allows you to prevent any IMMEDIATE effects on Threat cards, which are then discarded with no further effect.
Book 1
Persuade the Kings of Mankind / Hold the Gates: The Craft checks can be completed in different turns and by different Heroes.
Forge Keenfire: The card can be given to any of the Heroes. (It doesn't have to go to one of the two Heroes in the Dragonsfire location). Also give that Hero the necessary Attribute Value Modifier tile.
Vanquish Nôd'onn: If the condition of this card is met, immediately move all of the Hero figures to the Blacksaddle hex (except for any Heroes affected by the Sinthoras' Assassination card or the Élfar Ambush card).
Midnight Assault by the Élfar: Decide which Hero will lose 1 Health point for each Health point a Hero must lose.
Protective Shield: If another Hero must lose 2 Health points, your Hero can take 1 or 2 points of the damage instead.
A Never-ending Nightmare / Defeat the Overwhelming Power of the Orcs / The High King's Last Battle: If the mentioned Location has already been converted into Perished Land, move the troops according to the usual rules.
The Forest Fights Back / Tion's Minions Attack the Secondlings / Surrounded!: The hexes with 1+ troops are converted into Perished Land. Then the troops are moved. This effect does not repeat. Then, any hexes that now have 5+ troops are converted into Perished Land.
Combined Might Expansion
To the Death!: see Midnight Assault by the Élfar (Book 1)
A Trap for Nôd'onn: You are not allowed to transport more than 1 Scenario marker at any time. However, once you have delivered a Scenario marker to Blacksaddle, you can pick up another one. You don't have to transport the Scenario marker that your Hero brought into play.
ICONOGRAPHY
- Increased Health tile: If a card increases your total Health points, place an Increased Health tile on the top left of your Hero board above the heart icons.
- Attribute Value Modifier tiles: If a card increases the value of one of your attributes, place the corresponding Attribute Value Modifier tile on your Hero board. If the card is discarded during the course of the game, re-adjust your corresponding attributes accordingly.
- Kingdom: To complete a kingdom quest on a card, you must travel to any hex of your choice in the specified kingdom.
- Important Map Locations: Porista (depicted), Dsôn Balsur, Toboribor, Dragonsfire, Blacksaddle, Green Haven, Roodacre, Elven Kingdom of Âlandur, Mifurdania, Lot-Ionans Vault (see Map Legend), Queen Xamtys II.
- Gates I, II, IV, V: These icons represent the Gate spaces on the map.
- Battle Check, Craft Check, Speed Check — the three Attribute check icons.
- Tunnel Entrance, Tunnel tile — icons marking the Tunnel system.
- Number Die Result (e.g. 6 depicted) — the die-face icon used to indicate a required roll.
- Hero marker, Doom marker, Council marker — the three track markers.