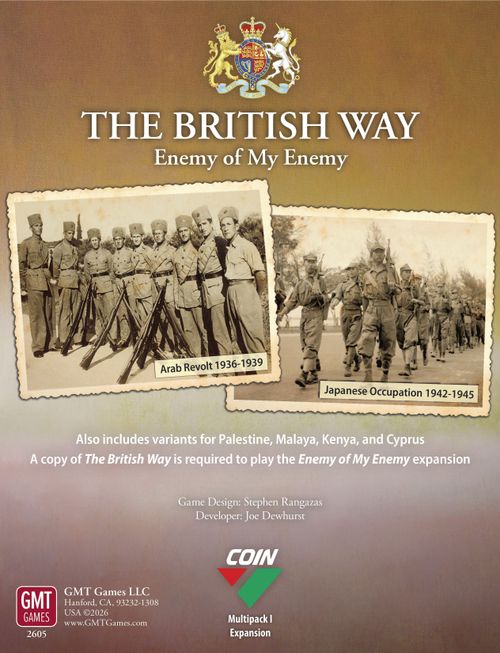
The British Way: Enemy of My Enemy
The British Way: Enemy of My Enemy Rulebook
Table of Contents
Table of Contents
- Arab Revolt
- 1.0 Introduction
- 2.0 Sequence of Play
- 3.0 Operations
- 4.0 Special Activities
- 5.0 Events
- 6.0 Propaganda Round
- 7.0 Victory
- 8.0 Example of Play
- 9.0 Event Tips and Background
- Key Terms Index
- Setup Instructions (2.1)
- Japanese Occupation
Arab Revolt
The British Way: Arab Revolt — Rules of Play.
1.0 Introduction
The British Way: Arab Revolt is a game in the Enemy of My Enemy expansion for The British Way COIN multipack. Alongside its accompanying game, Japanese Occupation, the historical simulations included in the expansion allow players to explore how earlier conflicts shaped the insurgencies in post-war Palestine and Malaya. More specifically, the games illustrate how the British in each conflict made alliances of convenience with future insurgent opponents to combat an immediate common threat.
The British Way: Arab Revolt covers British counterinsurgency efforts against Palestinian Arab rebels from 1936-1939. The game particularly focuses on the period from the start of the widespread rural insurgency in 1937 to the White Paper announced at the conclusion of the revolt in 1939. It foregrounds the two major sides: the British colonial government and a loose collection of Palestinian Arab rebels nominally led by the Arab Higher Committee (AHC). Each side of the conflict was composed of a wide coalition with its own internal divisions, such as the contribution of Jewish armed groups to the British counterinsurgency efforts and the divisions between local rebel commanders and the AHC. These divisions and their long-term consequences are explicitly modeled in the game's mechanics.
The British response to the Arab Revolt consisted of widespread coercive measures in the form of collective punishments against the Palestinian population, including punitive fines, searches, detention, home demolitions, and hostage taking. The game does not shy away from these harsh measures and instead highlights them as core mechanics, because to do otherwise would invalidate any educational benefit. To understand the Palestinian Arab community's difficulties in forming effective resistance against Jewish armed groups in the 1940s, one must understand the exhaustion caused by British measures to subdue the earlier revolt. Similarly, British cooperation with Jewish armed groups, Irgun and Haganah, against the Arab rebels strengthened these groups ahead of their own resistance to British rule.
Although it is part of an expansion to The British Way, and uses many components from the original Palestine game, Arab Revolt is an entirely standalone game with new mechanics unique to this conflict. Players should carefully read the rules that follow and not assume any mechanical similarities with previous multipack games.
1.1 General Course of Play
In The British Way: Arab Revolt, one Event card at a time is revealed from the shared draw deck, and both players will have an opportunity to either execute that Event or perform an Operation from a unique menu, possibly adding a Special Activity. Propaganda cards mixed in with the Event cards provide periodic interruptions where the general board state is assessed and British Political Will is adjusted, possibly triggering an instant victory for the Rebels side, after which both players receive an opportunity to collect additional assets and redeploy their forces.
1.2 Components
The following components from The British Way multipack and the Enemy of My Enemy expansion are required to play The British Way: Arab Revolt:
- A 17"x22" mounted Palestine game board (1.3).
- A Rebel Available Forces (1.4) overlay tile that goes over the Irgun Available Forces box printed on the board.
- A Unity Track (6.6) overlay tile that goes over the Haganah Track printed on the board.
- A deck of 35 Arab Revolt cards (5.0).
- 9 light blue cubes ('Police'), 15 tan cubes ('Troops'), 6 blue embossed octagonal cylinders ('Irregulars'), 15 red embossed octagonal cylinders ('Guerrillas'), 5 flat red discs ('Bases'), 2 embossed cylinders (blue and red)—note that this is fewer than the total number of wooden pieces included in The British Way multipack; any excess should be set aside while playing Arab Revolt.
- Six black and three white pawns (3.1.1).
- Specific markers from The British Way countersheet: 1x Political Will, 3x Curfew, 9x Support/Oppose, 15x Sabotage/Terror, 7x Capability—all other markers should be set aside while playing Arab Revolt.
- Specific markers from the Enemy of My Enemy countersheet: 6x Punish, 9x Operations, 1x Unity, 2x Out of Play.
- Two player aid sheets.
- One Propaganda Round aid sheet.
- Two six-sided dice (one red, one blue).
- This rules booklet.
1.3 The Map
The map shows British Mandatory Palestine with some of the southern portion of Beersheba subdistrict removed for gameplay purposes. The map also includes the four Foreign Country spaces adjacent to Palestine—ignore the text in these spaces reading 'Out of Play' while playing Arab Revolt. Two overlay tiles, Rebel Available Forces and Unity Track, are placed over Irgun Available Forces and Haganah Track respectively.
1.3.1 Map Spaces
Map spaces include Districts, Cities, Railways, and Foreign Country spaces. All spaces can hold forces (1.4).
1.3.2 Districts
The map shows the six Districts of Mandatory Palestine. Several Districts include a City space in them or have Railway spaces cutting through them. Rebel pieces and Opposition markers in Districts affect Victory (7.0). Curfew markers may be placed in Districts by British Deploy (3.2.1) and Events (5.0).
1.3.3 Cities
There are 3 major City circles on the map: Haifa, Tel Aviv-Jaffa, and Jerusalem. Rebel pieces and Opposition markers in Cities affect Victory (7.0). Curfew markers may be placed in Cities by British Deploy (3.2.1) and Events (5.0). NOTE: Ignore the numerical values in each District and City while playing Arab Revolt.
1.3.4 Railways
There are 4 major Railway spaces on the map: Egypt to Tel Aviv-Jaffa, Tel Aviv-Jaffa to Jerusalem, Tel Aviv-Jaffa to Haifa, and Haifa to Syria. Railways cutting through Districts are a separate space but are adjacent to all spaces they touch. Sabotaged Railways do not affect movement but do count towards Victory (7.0). Railways may never hold Bases (1.4.2).
EXAMPLE: British Troops on the Tel Aviv-Jaffa to Haifa Railway are adjacent to Tel Aviv-Jaffa, Haifa City, Haifa District, Samaria District, and Lydda District.
1.3.5 Adjacency
Adjacency affects the movement of forces and implementation of certain Events (5.0). Any 2 spaces that border one another are adjacent.
1.3.6 Prison
The Prison box is where Rebel Guerrillas are placed when removed through the British 'Detain' Punishment Chit (1.7) used with their Punish Special Activity (4.2.1) or Events (5.0). Some Events may also send Bases to Prison. All pieces in Prison are returned during the Reset Phase of the Propaganda Round (6.5).
DESIGN NOTE: Unlike Irgun during the Jewish insurgency, the Arab Revolt was a large widespread insurgency. Although the British used massive and indiscriminate detention of Palestinians during the conflict, such efforts had a less severe attritional effect on the movement than against the much smaller clandestine group of specialists that made up the Jewish insurgent organizations.
1.3.7 Foreign Country Spaces
Ignore the "Out of Play" text printed on the map board for the Lebanon, Syria, Transjordan, and Egypt spaces. Instead, Lebanon and Syria begin in play as playable spaces for the Rebels. At setup, "Out of Play" markers are placed on Transjordan and Egypt. They may enter play through Events (5.0). Rebels may select Foreign Country spaces in play for Rally (3.3.1), March (3.3.2), and Mobilize (4.3.1). British Operations (3.2) and Special Activities (4.2) may never select Foreign Country spaces.
1.4 Forces
The wooden pieces represent the Factions' various forces: British Troops (tan cubes) and Police (light blue cubes), Irregulars (blue cylinders), Rebel Guerrillas (red cylinders), and Rebel Bases (red discs).
IMPORTANT: The British in Arab Revolt uses only 9 light blue cubes. The remaining 6 light blue cubes should be set aside and not used while playing Arab Revolt.
DESIGN NOTE: The British Way: Arab Revolt uses Guerrillas unlike the "Cells" of The British Way: Palestine because the Arab Revolt was a large rural insurgency with more in common with the insurgent organizations included in The British Way: Malaya and The British Way: Kenya.
1.4.1 Availability and Removal
Keep forces Available for placement in the Faction's Available Forces box. Forces removed from the map go to Available. EXCEPTION: Rebel pieces removed to Prison (1.3.6).
- Unless otherwise instructed (by Event, 5.1.1), forces may only be placed from or replaced with those in the Available boxes. A piece to be replaced by a piece that is unavailable is simply removed.
IMPORTANT: Factions, while executing an Operation, Special Activity, or Event to place their own forces, may take them from elsewhere on the map if the desired force type is not Available. Rebel pieces in Prison may not be moved in this way.
EXAMPLE: Rebels without Available Guerrillas could remove Guerrillas from the map during a Rally (3.3.1) to place them Underground, either in the same space or a different space.
1.4.2 Stacking
No more than two Rebel Bases (1.4) may occupy a single space. Rebel Bases may never occupy Railways (1.3.4). British pieces may never occupy Foreign Country spaces (1.3.7).
- Bases placed (such as a Rebel Base via Mobilize 4.3.1, Propaganda Round 6.0, or Event 5.0) may never violate stacking.
- More than one Sabotage marker may be placed on Railways (1.3.4) whether by Sabotage (3.3.3) or Events (5.0).
- Only one Curfew marker may be placed in each District (1.3.2) or City (1.3.3) space, and never in any other kind of space.
1.4.3 Underground/Active
Guerrillas and Irregulars are either Underground—symbol end down—or Active—symbol end up. Operations and Events flip them from one to the other state. Rebel Bases, Troops, and Police are always Active. Always set up and place new Guerrillas and Irregulars Underground (including if replacing a piece).
NOTE: Unless instructions specify "Underground" Guerrilla or Irregular, it is sufficient to "Activate" already Active ones (they stay Active). Also, "moving" or "relocating" Guerrillas or Irregulars does not affect Underground status unless specified.
1.5 Players & Factions
The game requires two players, each playing as one Faction: the British (blue), and the Rebels (red).
DESIGN NOTE: The British Faction includes the British colonial government, British military, and Jewish paramilitary organizations and Arab 'peace bands' working with British forces to crush the revolt. The Rebels include the Arab High Committee (AHC), various local rebel commanders, and a small number of foreign fighters.
1.6 Opposition
Opposition markers may be placed in Districts and Cities, affecting some Operations and Special Activities and Political Will during the Propaganda Round (6.1). Cities (1.3.3) and Districts (1.3.2) always show one of two levels of attitude toward British rule in Palestine that can shift during play. Each space may be either Opposition or Neutral (indicated by the absence of any marker). Operations (3.0), Special Activities (4.0), and Events (5.0) that add or remove Opposition simply add or remove the marker.
DESIGN NOTE: This game does not allow the British player to build up Support for their rule over Palestine. Although a given community in Palestine may collaborate with the British or use them to protect their interests, there was little political support for the British mandate itself. Instead, Opposition markers represent areas where the Rebels have successfully mobilized the population, often through the provision of governance and coercive threats, away from passive neutrality. Unlike the widespread "Loyalism" encouraged in Kenya, during the Arab Revolt the British instead relied on more selective cooptation of Jewish irregulars and Palestinian groups into 'peace bands'.
1.7 British Punishment Chits
The key resource of the British Faction is Punishment chits that reflect the different forms of collective punishments imposed on the Palestinian civilian population during the revolt.
1.7.1 Punishment Chits
There are six Punishment Chits with three types (two of each): Detain, Demolish, and Fine. The Punishment chits are placed in an opaque container. When a player is instructed to "draw" a Punishment chit, the chit should be drawn randomly. If a player is instructed to "select" a Punishment chit, they may choose any available chit rather than drawing randomly. Punishment chits held by the British player are public knowledge.
The British player draws and uses Punishment chits with the Punish Special Activity (4.2.1) and some Events (5.0). Once a chit is selected, any unused chits drawn this turn are returned to the pool. Used Punishment chits are set aside and not returned to the pool until the Resources Phase of the next Propaganda Round (6.2). Some Events (5.0), Passing (2.3.3), and the Resources Phase of the Propaganda Round (6.2) grant the British Punishment chits to hold. A held Punishment chit may be used in place of any drawn chits.
1.7.2 Types of Punishment Chits
Punishment chits come in three types: Detain, Demolish, and Fine. Each type of chit has a Punishment effect and a Mobilization effect. The Punishment effect is typically carried out before the Mobilization effect. The Punishment and Mobilization effects of each chit are as follows:
- Detain: Remove 1 Guerrilla to Prison, then place an Opposition marker if none (Mobilization).
- Demolish: Remove any Opposition marker, then place 1 Guerrilla (Mobilization).
- Fine: Remove 1 Sabotage marker from an adjacent Railway (no Mobilization effect).
DESIGN NOTE: Punishment chits represent the British military commanders appealing to the civilian colonial government to approve different collective punishments on the population. The random draw of chits represents commanders working with the punishments already approved by civilian officials, while the ability to select chits represents commanders lobbying for a specific form of punishment. The Mobilization effect represents counter-mobilization among the population generated due to outrage from being targeted indiscriminately.
1.8 Rebel Operations Chits
The key resource of the Rebels Faction is Operations chits. To reflect the highly fragmented nature of the insurgency, the Rebels Faction draws Operations chits each round to determine how many spaces they may select for Operations, and what negative effects they might suffer.
1.8.1 Operations Chits
There are nine Operations chits with values ranging from 1 to 3 (three of each), which should be placed in an opaque container. When a player is instructed to "draw" an Operations chit, the chit should be drawn randomly. If a player is instructed to "select" an Operations chit, they may choose any available chit rather than drawing randomly. Operations chits held by the Rebel player are public knowledge. Each round, the Rebel player draws two Operations chits, or only one if the Unity Track is at Decentralized (6.6.4), before selecting an option on the Initiative Track (2.3) and choosing which Operations chit to use. Once an option is selected, any unused chits drawn this turn are returned to the pool. Chits used by the Rebel player are set aside and not returned to the pool until the Resources Phase of the Propaganda Round (6.2). Some Events (5.0) and the Resources Phase of the Propaganda Round (6.2) grant the Rebels Operations chits to hold. A held Operations chit may be used in place of any drawn chits. The Rebels player may increase the value of their selected Operations chit through the Coordinate Special Activity (4.3.2).
1.8.2 Types of Operations Chits
Operations chits have three types based on their value (1 to 3) and an accompanying effect. The value determines the number of spaces the Rebels may select when conducting Operations, regardless of whether they selected the Limited Operation or Operation & Special Activity box of the Initiative Track (but not if they selected Event or Pass). After the Rebel player carries out their choice of Operation, Event, or Pass, the British player resolves the chit effect as listed below (even if the Rebel player did not perform any Operations; but not if the Unity Track is at Centralized, 6.6.3):
- 3 Value: British may replace one Active Guerrilla with an Irregular.
- 2 Value: British may remove one Active Guerrilla.
- 1 Value: No effect.
DESIGN NOTE: The Operations chits reflect the advantages and disadvantages of a decentralized insurgency. The main advantage is that independent actions by local commanders allow the Rebel player to circumvent the one space restriction of Limited Operations. However, the main disadvantages are that the decentralized structure restricts the ability to launch coordinated plans with local commanders, and local commanders' tendency to defect when pushed into higher levels of activity. The latter is represented by the chit effect carried out by the British player. The disadvantages are accentuated or lessened by the level of unity among the rebel commanders, depicted by the Unity Track's effects on Operations chits.
1.9 Sabotage
Sabotage markers are placed on Railway spaces by the Rebel Sabotage Operation (3.3.3) and some Events (5.0), and affect Political Will during the Political Will Phase of the Propaganda Round (6.1). There is no limit to the number of Sabotage markers that may be placed on Railway spaces.
NOTE: Neither Rebels nor British place Terror markers, so that side of Sabotage markers can be ignored while playing Arab Revolt.
1.10 British Political Will Marker
British Political Will is tracked with a marker on the edge track. The position of this counter will determine Victory (7.0) for either side. The marker is moved during the Campaign and during the Political Will Phase of the Propaganda Round (6.1). It may never be lower than 0 or greater than 20.
1.11 Unity
The level of unity among rebel commanders within the Rebels Faction is tracked with a marker on the Unity Track (6.6), affecting Rebel Operations chits (1.8) and the British Divide Special Activity (4.2.2).
1.12 Curfews
The three Curfew markers form a pool available to the British. Curfews can only be placed if one is available. Curfews are placed in Cities and Districts by Deploy (3.2.1) and some Events (5.0). They block Rebel Rally (3.3.1) and assist in activating Guerrillas during March (3.3.2). There may only be one Curfew in each City or District space. Curfews are removed in one of three ways:
- If a Curfew space is ever empty of British pieces.
- Curfews are removed by the British with the Deploy Operation (3.2.1).
- All Curfews are removed during the Reset Phase of Propaganda Rounds (6.5).
NOTE: Unlike The British Way: Palestine, Curfews may also be placed in Districts.
2.0 Sequence of Play
2.1 Set Up
Follow the instructions on the second to last page of this booklet to prepare the draw deck and set up markers and forces. A full setup diagram can be found on the back page of this booklet.
2.2 Start
Begin play by revealing the top card of the draw deck and placing it onto a played cards pile. All played cards and the number of cards in the draw deck are open to inspection.
NOTE: Unlike in most previous COIN series volumes, only one Event card is revealed at a time.
RECORD STEPS: As the steps of each Event card play are completed, place a cylinder of the Faction's color (1.5) into the Initiative Track's appropriate box.
2.3 Initiative Track
One player takes the British Faction and the blue Eligibility cylinder, the other the Rebels Faction and the red Eligibility cylinder.
When playing an Event card, the British or Rebels player will execute Operations or the Event described on the card. At all times one player will be First Eligible, and the other will be Second Eligible. In each Event card round, the First Eligible player is first to choose what they will do, followed by the Second Eligible—whose choices are limited by what the First Eligible player did.
2.3.1 Eligibility
Each player puts one cylinder (blue and red respectively) on the First or Second Eligible spaces of the Initiative Track.
NOTE: Rebels always start the game in the 1st Eligible Box.
2.3.2 Options for Eligible Factions
First Eligible: The First Eligible player may perform a Limited Operation (2.3.5), execute the Event (5.0), or perform an Operation (3.0) with Special Activity (4.0), or Pass (2.3.3). The player selects their desired box and places their Eligibility cylinder in the appropriate box on the Initiative Track, then immediately executes the chosen action (Limited Operation, Event, Operation with Special Activity, or Pass).
Second Eligible: The Second Eligible player may then choose one of the boxes not containing the First Eligible player's cylinder and conduct the action in the box selected (or Pass).
2.3.3 Passing
After selecting a box, players may forgo the action in the box to Pass. If British pass they select a Punishment chit to hold (1.7). If Rebels pass, they may place a Rebel Base in one District or Foreign Country space with at least one Guerrilla. Both players may pass and the order of cylinders in the Initiative Track will still decide eligibility (2.3.6).
NOTE: Ignore the Pass options written on the Initiative Track and instead consult the bottom right corner of the player aid sheets for reference.
2.3.4 Rebel Operations
Whether First or Second Eligible, the Rebel player must draw two Operations chits (1.8) and select one to play before choosing a box of the Initiative Track (draw only one if Unity Track at Decentralized, 6.6.4). The Rebel player may always conduct an Operation in spaces up to the chit value when selecting either the Limited Operation or Operation & Special Activity boxes. If they choose the Event box or choose to Pass, the Rebel player must still select and play an Operations chit. At the end of the Rebel player's action, even if Pass or an Event, the British player always carries out any chit effect on the played Operations chit before setting it aside (unless Unity Track is at Centralized, 6.6.3).
2.3.5 Limited Operation
For the British, a Limited Operation is an Operation in just one space with no Special Activity. A Rebel Limited Operation may instead select spaces up to their selected Operations chit's value (1.8), but may not be combined with a Special Activity. If the Limited Operation is a Patrol (3.2.2) or Sweep (3.2.3), it can involve pieces from multiple spaces but only one destination space.
2.3.6 Adjust Eligibility
After both players have selected and executed their actions, replace the Eligibility cylinders on the Initiative Track, with the cylinder in the furthest left box becoming First Eligible, and the other cylinder becoming Second Eligible.
DESIGN NOTE: Selecting the Limited Operation box guarantees the player first eligibility. Likewise, selecting the Operation & Special Activity box guarantees second eligibility on the next card. Eligibility after selecting the Event space will depend on what the other player has chosen. The only way to block Events in The British Way is to take the Event space and then either play the Event or Pass.
2.3.7 Next Card
After eligibility has been reset, reveal the draw deck's next card and continue play.
2.4 Propaganda Card
When a Propaganda card is revealed, conduct a Propaganda Round (6.0).
NOTE: Each series of Event Cards up to a Propaganda Round is called a "Campaign". Note that one Propaganda card, A34, has an additional effect during the Reset Phase.
3.0 Operations
3.1 Operations in General
A Faction executing an Operation (Op) chooses one of the four Operations listed on its Faction sheet and selects the map spaces (typically several) to be involved. Select a given space only once for a given Operation.
British Operations are generally allowed in up to three spaces unless a Limited Operation, in which case they are allowed in only one space. Rebel Operations are allowed in spaces up to their selected Operations chit (1.8) even if a Limited Operation.
The executing Faction chooses the order of the spaces in which the Operation is resolved, the enemy pieces to be affected (targeted), and the friendly pieces to be placed, replaced, or moved. Once targeted, a Faction's pieces are affected to the maximum extent possible. Actions affecting another Faction's pieces do not require that Faction's permission.
3.1.1 Pawns
If desired, mark spaces selected for Operations (3.0), Special Activities (4.0), or other actions with white and black pawns. The pawns are for convenience, not a limit on play.
3.2 British Operations
The British choose from Deploy, Patrol, Sweep, and Assault Operations.
3.2.1 Deploy
Deploy adds Police or Irregulars and then can place or remove a Curfew in one space selected for Deploy. Select up to three District and/or City spaces with more British pieces than Rebel pieces.
PROCEDURE: In each selected space, place up to two Police or one Irregular. Then, in one selected space, may place a Curfew if none, or if a Curfew already present, may remove the Curfew and any Opposition there.
3.2.2 Patrol
Patrol moves cubes and protects Railways. Select up to three destination Cities and/or Railways.
PROCEDURE: May move any cubes to any selected Cities and Railways. Then, in each selected Railway, Activate (1.4.3) one Guerrilla for each cube there and, if desired, free Assault on one selected Railway.
3.2.3 Sweep
Sweep moves Troops and Activates Guerrillas. Select up to three destination Cities and/or Districts.
PROCEDURE: First, simultaneously move any adjacent Troops desired into selected spaces. Then, in each selected space, Activate (1.4.3) one Guerrilla for every two cubes. If British choose to Activate an Underground Irregular in the space, instead Activate one Guerrilla for every cube.
3.2.4 Assault
Assault uses cubes to remove Rebel pieces. Select up to three spaces with British cubes and Rebel pieces.
PROCEDURE: In each selected space, remove one Active Rebel piece for every Troop in Neutral Districts, one for every cube in Neutral Cities and Railways, one for every two Troops in Opposition Districts, or one for every two cubes in Opposition Cities. First remove Active Guerrillas, then remove Bases only once no Guerrillas remain (even Underground). For each Base removed, shift Unity Track (6.6) one step toward Decentralized.
3.3 Rebel Operations
Rebels choose from Rally, March, Sabotage, or Ambush Operations. Rebels may select Operation spaces up to the value of their selected Operations chit (1.8).
3.3.1 Rally
Rally places Guerrillas and Opposition markers. Select non-Railway spaces without Curfews and with Rebel pieces or Opposition markers, up to Operations chit value.
PROCEDURE: In each selected space, place one Guerrilla, or up to two Guerrillas if at least one Rebel Base present. Then, in one District selected for Rally, if Rebel Base and more Rebel pieces than British pieces, Rebels may add an Opposition marker to the space if none there.
3.3.2 March
March moves Guerrillas. Select any spaces as origins, up to Operations chit value.
PROCEDURE: Move any Guerrillas in each selected origin space to any adjacent spaces. Set Guerrillas moving from one origin space to one destination space Active (1.4.3) if:
- The destination is a Railway or Curfew space and
- The number of moving Guerrillas plus the number of British forces in that destination exceeds three.
NOTE: Like Travel in The British Way: Palestine, the Rebels player selects origin rather than destination spaces. However, unlike Travel, the Rebel player does not flip their moving pieces Underground and may only move to adjacent spaces.
3.3.3 Sabotage
Sabotage places Sabotage and Opposition markers. Sabotage may select any spaces in Palestine with at least one Underground Guerrilla, up to Operations chit value.
PROCEDURE: In each selected space, Activate one Underground Guerrilla and place a Sabotage marker if Railway, or an Opposition marker if District or City.
3.3.4 Ambush
Ambush removes Police and Irregulars. Select any spaces with Underground Guerrillas and Police or Irregulars, up to Operations chit value.
PROCEDURE: In each selected space, Activate an Underground Guerrilla and remove one Police or Irregular. If three or more pieces are removed across all selected spaces, reduce Political Will (1.10) by 1.
4.0 Special Activities
4.1 Special Activities in General
When a Faction per the Initiative Track (2.3) executes an Operation (3.0), it may also execute one Special Activity (EXCEPTION: Limited Operation, 2.3.5). As with Operations, the executing Faction selects spaces, pieces affected, and the order of actions. Select a given space only once as a location for a given Special Activity. Events may grant free Special Activities (not further affecting Eligibility, 2.3.1).
IMPORTANT: A Faction may execute its Special Activity at any one time immediately before, during, or after its Operation.
EXAMPLE: Rebels Sabotage, then pause to Coordinate to increase their Operations chit value, then Sabotage in another space.
4.1.1 Accompanying Operations
Some Special Activities specify that they may only accompany certain types of Operations (3.0). If not otherwise specified, Special Activities may accompany any Operations and take place in any otherwise valid spaces.
4.2 British Special Activities
The British choose from Punish, Divide, or Air Recon Special Activities.
4.2.1 Punish
Punish enables the use of Punishment chits (1.7). It may accompany any British Operation (3.2) and takes place in up to two Districts and/or Cities with Troops.
PROCEDURE: First, draw two Punishment chits, then select one to play and return others drawn this turn to the pool. Then, resolve the chit's Punishment effect in two selected spaces, followed by the chit's Mobilization effect in the same two spaces.
NOTE: British may draw and select a Punishment chit before selecting the two spaces for Punish.
4.2.2 Divide
Divide strikes with Irregulars or lowers the Unity Track (6.6). It may only accompany Deploy (3.2.1) or Patrol (3.2.2). Divide selects spaces up to the Unity Track value with Irregulars, or the Unity Track itself.
PROCEDURE: In spaces up to the Unity Track value (6.6.2), Activate an Underground Irregular to replace a Guerrilla with an Irregular in or adjacent to the space OR roll a die—less than or equal to the number of Irregulars on the map shifts the Unity Track one step toward Decentralized.
4.2.3 Air Recon
Air Recon reveals Underground Guerrillas. It may accompany any British Operation (3.2) and takes place in up to two Districts and/or Railways.
PROCEDURE: In each selected space, Activate one Guerrilla (1.4.3).
4.3 Rebel Special Activities
Rebels choose from Mobilize, Coordinate, or Raid Special Activities.
4.3.1 Mobilize
Mobilize allows the Rebels to place Bases and Guerrillas. It may accompany Rally (3.3.1) or March (3.3.2) and takes place in up to two spaces that are either Districts with more Guerrillas than Irregulars and/or Foreign Countries.
PROCEDURE: In each selected space, place a Rebel Base. Then, the Rebel player may place a Guerrilla in each space with Opposition (even if not selected).
4.3.2 Coordinate
Coordinate allows the Rebels to select an additional space for Operations and potentially improves Rebel Unity (6.6). Coordinate may accompany any Rebel Operation (3.3).
PROCEDURE: Increase the value of the Operations chit selected for this turn by 1 and roll a die—less than or equal to the number of Rebel Bases on the map shifts the Unity Track one step toward Centralized.
4.3.3 Raid
Raid moves Guerrillas and then acts with them. It may accompany Rally (3.3.1), Sabotage (3.3.3), or Ambush (3.3.4) and takes place in up to two spaces adjacent to a Rebel Base.
PROCEDURE: In each selected space, move in one or two Guerrillas from an adjacent space with a Base and if desired perform a Limited Sabotage or Ambush there.
5.0 Events
Each Event bears a title, italicized flavor text, and Event text. Flavor text provides historical interest and has no effect on play.
5.1 Executing Events
When a Faction executes an Event, it carries out the Event text literally and in order (sometimes involving actions or decisions by the other Faction). Unless otherwise specified, the executing Faction makes all selections involved in implementing the text, such as which pieces are affected. If another Faction is specified or selected to take an action, that Faction decides the details of the action. Some Events with lasting effects have markers as aids to play.
5.1.1 Event Text Precedence
Where Event text contradicts rules, the Event takes precedence. However:
- Events may not violate stacking (and so never place Bases where there are already two, or a Curfew where there is already one).
- Events place only Available pieces (1.4.1) and markers; they remove rather than replace if the replacement is not Available or if stacking (1.4.2) would be violated.
- Events may not raise British Political Will beyond 20 or reduce it below 0 (1.10).
5.1.2 Contradicting Events
If two Events contradict, the currently played Event takes precedence.
5.1.3 Partial Implementation
An executed Event's text that can be implemented must be. If not all of its text can be carried out, implement that which can.
5.2 Dual Use
Many Events have both unshaded and shaded Event text. The executing Faction may select either the unshaded or shaded text to carry out (not both). While the unshaded text often favors the British, a player may select either text option regardless of Faction.
DESIGN NOTE: Dual-use Events represent opposed effects of the same cause, forks in the historical road, or instances subject to alternative historical interpretation.
5.3 Capabilities
Dual-use Events marked "BRITISH CAPABILITY" or "REBEL CAPABILITY" have lasting effects mainly relating to that Faction, either positive or negative. These labels are for flavor only, and both Factions may execute Capability Events with either label. The Event's effects last for the rest of the game.
NOTE: Set out executed Capability Event cards near the board as added reminders, using a Capability marker to indicate which option was selected.
5.4 Mandatory Events
Two Event cards are designated as "Mandatory Events" (A11 Italian Aid and A24 Tensions in Europe). A Mandatory Event's effect occurs immediately when drawn, before the 1st Eligible player acts. Neither player may then select the Event box of the Initiative Track (2.3) during this round.
DESIGN NOTE: The two Mandatory Events, alongside the Munich Conference Propaganda card, represent exogenous shocks to the trajectory of the Arab Revolt caused by the rising political turmoil in Europe. Axis aid threatened to bolster the rebels' chances while tensions with Germany could rapidly shift British willingness to repress the revolt or make concessions to rapidly end it.
6.0 Propaganda Round
Conduct a Propaganda Round in the sequence of phases below as each Propaganda card is played. The Propaganda Round aid sheet also lists this sequence.
6.1 Political Will Phase
Calculate the net effect to Political Will of the following adjustments before shifting the marker:
6.1.1 Sabotage?
First, place a Sabotage marker on each Railway with more Guerrillas than British pieces. Then, reduce Political Will by 1 for each Railway with a Sabotage marker, and increase Political Will by 1 for every two Railways without a Sabotage marker.
6.1.2 Rebellion Contained?
Reduce Political Will by 2 for each City or District with more Rebel pieces than British pieces. Then, increase Political Will by 1 for every two Cities or Districts without any Rebel pieces or Opposition markers.
6.1.3 Rebel Leaders?
Reduce Political Will by 1 for each District with a Rebel Base.
6.1.4 Enemy of My Enemy?
Reduce Political Will by 1 for every three Irregulars on the map.
NOTE: It's important to calculate the net shift in Political Will during these steps before moving the marker and checking victory, rather than adjusting the marker one step at a time.
6.1.5 Victory?
If Political Will is now at 0, the game immediately ends with a Rebel victory.
6.1.6 Game End?
If final Propaganda card and Rebels have not won, the game immediately ends with a British victory.
6.2 Resources Phase
6.2.1 British
The British player may select any one Punishment chit (1.7) to hold, then returns all other Punishment Chits to their draw pool.
6.2.2 Rebels
Roll a die—if less than or equal to the number of Rebel Bases on the map, Rebels may either choose to shift the Unity Track (6.6) one step toward Centralized or may select any one Operations chit (1.8) to hold. Then, return all other Operations chits to their draw pool.
6.2.3 Foreign Assistance
The Rebel player draws an Operations chit and may Rally (3.3.1) in Foreign Country spaces up to the value of the drawn chit, even if no Rebel pieces there. Ignore any chit effect and return the chit to its draw pool after resolving.
6.3 Support Phase
6.3.1 Divide
British may perform a Divide Special Activity.
6.3.2 Mobilize
Rebels may perform a Mobilize Special Activity.
6.4 Redeploy Phase
6.4.1 British Redeploy
British must move Troops on Railways to any Cities, then may move any Police to any Railways or Cities. British may also remove up to half (round down) of the Irregulars on the map to Available.
6.4.2 Rebels Redeploy
Rebels must move Guerrillas on Railways and in Cities to any spaces with Rebel Bases, or if none, then to any Foreign Country spaces.
6.5 Reset Phase
Then prepare for the next card as follows:
- Remove all Curfew and Sabotage markers from the map.
- Return all Rebel pieces in Prison (1.3.6) to Available.
- Flip all Guerrillas and Irregulars Underground (1.4.3).
- If Munich Conference Propaganda Card (A34), place all Out of Play British Troops in any Cities.
- Reveal the next card from the draw deck and continue play (2.3.2).
6.6 Unity Track
The Unity Track reflects the level of centralized command the rebel leadership, notably the Arab Higher Committee (AHC), possesses over local rebel commanders in Palestine. Higher levels of centralization reflect a coordinated rebellion against British rule. Lower levels of centralization reflect a fragmented resistance with significant opportunity for the British to use 'divide and rule' tactics that split off local rebel commanders as 'peace bands'.
6.6.1 Moving the Track
The Unity Track is shifted toward Centralized by the Coordinate Special Activity (4.3.2), during the Propaganda Round (6.2.2), and some Events (5.0). The Track is shifted toward Decentralized by the British removing Rebel Bases with Assault (3.2.4), the Divide Special Activity (4.2.2), and some Events (5.0).
6.6.2 Modifying British Divide
The value of the Unity Track determines the number of spaces that the British can select for activating Irregulars with the Divide Special Activity (4.2.2).
6.6.3 Centralized
When the Unity Track is in the farthest rightmost space (Centralized), the Rebel player ignores all Operations chit effects (1.8).
6.6.4 Decentralized
When the Unity Track is in the farthest leftmost space (Decentralized), the Rebel player only draws one Operations chit each round (2.3.4) before selecting which chit to use (they may still use a held chit). Furthermore, if the Unity Track must shift further toward Decentralized when already at Decentralized, the British gain 1 Political Will for each shift.
7.0 Victory
Victory is determined by the level of British Political Will (1.10). British Political Will is measured on the track and can range from 0-20.
7.0.1 Early Victory
At the victory check during the Political Will Phase of a Propaganda round, Rebels win if British Political Will is at 0.
7.0.2 Final Victory
If the Rebels have not won at the end of the Political Will Phase of the final Propaganda Round, the game ends in a British victory.
7.1 Raising Political Will
British Political Will is raised in the following ways:
- Unity Track shifts toward Decentralized while already at Decentralized (+1 PW)
- Events (+1 PW)
- At Propaganda Round, every two Railways without Sabotage (+1 PW per two Railways)
- At Propaganda Round, every two Cities and/or Districts without Rebel pieces or Opposition (+ 1 PW per two spaces)
7.2 Lowering Political Will
British Political Will is lowered in the following ways:
- Each Ambush that removes at least three pieces across all selected spaces (–1 PW)
- Events (–1 to –4 PW)
- At Propaganda Round, each Railway with a Sabotage marker (–1 PW per Railway)
- At Propaganda Round, each City or District with more Rebel pieces than British pieces (–2 PW per space)
- At Propaganda Round, each District with a Rebel Base (–1 PW per District)
- At Propaganda Round, every three Irregulars on the map (–1 PW per three Irregulars)
8.0 Example of Play
Set up the game as indicated in section 2.1 (consult the setup diagram on the back of this booklet), but construct only the first part of the deck with these cards in the following order, facedown from top to bottom: Arab Investigation Centres (A13), Arab Ladies of Jerusalem (A14), Ex-Black and Tans (A10), Italian Aid (A11), al-Hajj Muhammad (A23), Montgomery (A25), Propaganda! (A33). We are now ready to begin.
Reveal the first card, Arab Investigation Centres, from the top of the deck. Rebels are 1st Eligible and must first select an Operations chit before carrying out their turn. They draw two chits at random, one '1 Op' and one '3 Ops', and decide to use the 3 Ops chit, setting it to one side and returning the 1 Op chit to the pool. They now decide to perform a Rally Operation with the Mobilize Special Activity.
First they will Mobilize, which allows them to place a Base in up to two spaces, either Districts with more Guerrillas than Irregulars or any Foreign Country spaces. They choose to place one Base in Galilee and one in Lydda. Mobilize then also allows them to place one Guerrilla in each space with Opposition, even if not selected for the Special Activity, so they place one in Samaria.
Next they will Rally, which they can do in up to three non-Railway spaces (the value of their selected Operations chit), each of which must already have Rebel pieces or an Opposition marker, and cannot have a Curfew marker. In each selected space they can place one Guerrilla, or up to two Guerrillas if there is a Base there. They place two Guerrillas each in Galilee and Lydda (which now have Bases), and one Guerrilla in Jerusalem District. Finally, they can place Opposition in one selected District with a Base and more Rebel pieces than British pieces, so they place an Opposition marker in Lydda.
At the end of every Rebel turn the British can apply the effect of the selected Operations chit (if any). In this case the Rebels selected a 3 Ops chit, which allows the British to replace an Active Guerrilla with an Irregular, but as there are not yet any Active Guerrillas this does not have any effect. The chit is placed to one side until the next Propaganda Round and the Rebel turn is now complete.
Rebel Mobilize and Rally
British can now choose from the other two boxes on the Initiative Track, Limited Operation or Event. The current Event would not have any effect as there are no Rebel pieces in Prison, so British decide to perform a Limited Sweep Operation, which allows them to move Troops into one destination from any adjacent spaces, then Activate Guerrillas in the destination. They select Jerusalem District as the destination and move in two Troops from Jerusalem City. Sweep only Activates one Guerrilla per two cubes, unless British choose to also Activate an Irregular in the space, but as there are now four Troops and one Police in Jerusalem District both Guerrillas there are Activated.
British Sweep into Jerusalem District
The British turn is now complete, and as both players have completed their turns, we reset Eligibility. The Faction whose cylinder is furthest to the left, in this case British, becomes 1st Eligible, and the other Faction becomes 2nd Eligible.
Eligibility is reset at the end of each round
Reveal the next card: Arab Ladies of Jerusalem. British is 1st Eligible and decides to perform an Assault Operation with the Air Recon Special Activity. They will use Air Recon first, which allows them to select up to two Districts and/or Railways, and Activate one Guerrilla in each. They Activate one Guerrilla in Haifa District and one in Lydda.
Next, they will Assault in Haifa District and Jerusalem District, removing one Active Rebel piece per Troop there, in this case removing all Guerrillas in both Districts (Assault in Cities and on Railways also removes one Rebel piece per Police, and if there is any Opposition in a space it only removes one Rebel piece per two cubes). The British turn is now complete.
British Air Recon and Assault
The Rebels draw a 1 Op chit and a 2 Ops chit, and decide to use the 2 Ops chit to perform a Limited March Operation. This will allow them to select two spaces as March origins, even though the Operation is Limited. They select Samaria and Lydda as origins, meaning they can move any number of Guerrillas from these spaces to any adjacent spaces. They move as follows:
- One Guerrilla from Samaria to Haifa District.
- One Guerrilla from Samaria to the Haifa-Tel Aviv Railway.
- One Guerrilla from Samaria to Jerusalem District.
- One Guerrilla from Lydda to the Tel Aviv-Jerusalem Railway.
- One Guerrilla from Lydda to the Tel Aviv-Egypt Railway.
- One Active Guerrilla from Lydda to Gaza, which remains Active after moving.
The Rebel March is now finished, but the British are then able to use the effect of the selected 2 Ops chit to remove the Active Guerrilla in Gaza. The chit is set aside and the Rebel turn is complete, so we reset Rebels to 1st Eligible and British to 2nd Eligible.
Rebel Limited March
Reveal the next card: Ex-Black and Tans. Rebels are 1st Eligible and draw a 1 Op chit and a 3 Ops chit. They would like to perform the Event but still need to select an Operations chit, even though they won't use its value (the British will still get to use its effect). Usually this would be a good opportunity to choose a 1 Op chit, but in this case they choose the 3 Ops chit, knowing that they will be safe from its effect as there are no Active Guerrillas (and the Event will not Activate any).
The Rebels choose to execute the shaded option of the Event, which allows them to draw a Punishment chit and resolve only its Mobilization effect in two spaces with Police. They draw a Detain chit, which usually removes Guerrillas to Prison and places Opposition, but in this case will just place Opposition. The Rebels place Opposition in Tel Aviv-Jaffa and Jerusalem City, then return the Detain chit to the pool of Punishment chits.
The Rebel turn is now complete, and because there are no Active Guerrillas there is no effect from their Operations chit.
The British decide to perform a Patrol Operation with the Punish Special Activity. They will Punish first, which allows them to draw two Punishment chits and select one to use in up to two spaces with Troops. They draw Fine and Detain, and decide to use the Detain chit, returning the Fine chit to the pool. Each Punishment has a positive effect for the British, followed by a negative Mobilization effect (except for Fine). In this case they use the Detain chit in Haifa District and Jerusalem District, removing one Guerrilla from each District to Prison, but also placing an Opposition marker in each District.
The British then Patrol, which allows them to move any cubes to up to three Cities and/or Railways, regardless of adjacency. They move two Troops from Haifa City to the Haifa-Tel Aviv Railway, one Troop from Tel Aviv-Jaffa to the Tel Aviv-Egypt Railway, and one Troop from Tel Aviv-Jaffa to the Tel Aviv-Jerusalem Railway. Patrol also allows them to Activate one Guerrilla for each cube on selected Railways and then Assault on one Railway, so they Activate all three Guerrillas on the Railways and remove the Guerrilla from the Haifa-Tel Aviv Railway. The British turn is now complete, so we reset Rebels to 1st Eligible and British to 2nd Eligible.
British Punish (Detain) and Patrol
Reveal the next card: Italian Aid. This is a Mandatory Event, so its effect is resolved immediately before either player acts, in this case allowing the Rebels to perform two Limited Operations (equal to the number of Foreign Country spaces where they have pieces). They Rally twice, placing one Guerrilla each in Tel Aviv-Jaffa and Jerusalem City (where they are able to Rally due to the presence of Opposition, despite having no pieces there).
The Rebels are then 1st Eligible and draw a 2 Ops chit and a 3 Ops chit. They decide to use the 3 Ops chit for an Ambush Operation with the Raid Special Activity. They Ambush first, which allows them to Activate an Underground Guerrilla in each selected space to remove one Police or Irregular there (but not Troops). Their 3 Ops chit allows them to do this in three spaces, and they select Galilee, Tel Aviv-Jaffa and Jerusalem City, removing one Police from each. Furthermore, if Ambush removes at least three pieces across all selected spaces then it also reduces Political Will by 1, so we reduce Political Will to 17.
Next the Rebels will Raid, which allows them to move one or two Guerrillas each into two spaces adjacent to Bases, then Ambush or Sabotage there if desired. They move one Guerrilla from the Base in Syria to the Haifa-Syria Railway and Sabotage there, Activating it to place a Sabotage marker. Then they move one Guerrilla from Galilee to Samaria and Ambush there, Activating it to remove the Police cube. The Rebel turn is now complete, and their Operations chit allows the British to replace one Active Guerrilla with an Irregular, which they do in Tel Aviv-Jaffa.
Rebel Ambush and Raid
British decide to perform a Limited Deploy Operation. Deploy can select Districts and Cities with more British pieces than Rebel pieces and allows them to place up to two Police cubes or one Irregular. In this case they decide to place one Irregular in Jerusalem District. Deploy also allows the British to place (or remove) a Curfew in one selected space, so they also place a Curfew in Jerusalem District. The British turn is now complete, so we reset British to 1st Eligible and Rebels to 2nd Eligible.
Reveal the next card: al-Hajj Muhammad. British are 1st Eligible and decide to perform another Deploy Operation with the Divide Special Activity. They will Divide first, which gives them two options: they can either Activate Irregulars up to the Unity Track value (currently 1) to replace Guerrillas with Irregulars, or roll to try and shift the Unity Track toward Decentralized (succeeding if the roll is equal to or under the number of Irregulars on the map). They decide to do the former, and Activate the Irregular in Jerusalem District to replace the Guerrilla in Jerusalem City with another Irregular.
Then they Deploy to place two Police each in Tel Aviv-Jaffa and Haifa District, and one Irregular in Jerusalem District. This time, instead of placing a Curfew, they decide to remove the Curfew in Jerusalem District, which allows them to remove the Opposition marker there as well. The British turn is now complete.
The Rebels draw two 2 Ops chits, so they just pick one of these and decide to perform the Event. They execute the shaded effect, rolling a die and aiming for a result less than or equal to the number of Bases on the map. With four Bases on the map they have good odds, but they get unlucky and roll a 5, so the Event has no effect. The British still get to resolve the effect of the 2 Ops chit the Rebels selected, which allows them to remove an Active Guerrilla, and they remove the Guerrilla from the Haifa-Syria Railway. The Rebel turn is now complete, so we reset Rebels to 1st Eligible and British to 2nd Eligible.
Reveal the next card: Montgomery. Rebels are 1st Eligible and draw two 1 Op chits. They decide to use one to perform a Rally Operation with the Coordinate Special Activity. They Coordinate first, which will allow them to select an additional space for their Operation, as well as roll a die to try to shift the Unity Track toward Centralized, again requiring a result less than or equal to the number of Bases on the map. This time they roll a 2 and succeed, so they shift the Unity Track to the rightmost '1' space.
They then Rally to place two Guerrillas each at the Bases in Lydda and Galilee, also adding Opposition to Galilee. The 1 Op chit has no additional effect, so the Rebel turn is now complete.
The British decide to execute the unshaded Event effect, allowing them to perform a Limited Operation in or adjacent to Haifa District and then Punish, also in or adjacent to Haifa District. They Sweep in Samaria, moving in two Troops from the Haifa-Tev Aviv Railway [sic] and two Troops from Jerusalem District. Then they Punish, drawing a Fine chit and a Demolish chit, and use the Demolish chit to remove the Opposition markers in Haifa District and Samaria, but the Mobilization effect allows the Rebels to place a Guerrilla in both Districts. The British turn is now complete.
Montgomery Sweeps and Punishes
The next card revealed is the Propaganda! card, triggering a Propaganda Round. We will work through each phase in turn, starting with the Political Will phase.
- Political Will: Political Will is reduced by a net total of 7 (–1 for one Sabotaged Railway, +1 for three non-Sabotaged Railways, -4 for two Districts with more Rebel pieces than British pieces, +1 for three Districts and Cities without any Rebel pieces or Opposition, –3 for three Districts with Bases, –1 for four Irregulars on the map), down to 10. If Political Will was 0 then the Rebels would immediately win the game.
- Resources: British choose to hold a Fine chit, and return the other Punishment chits to the pool. Rebels roll a 2 and shift the Unity Track to Centralized then return all Operations chits to the pool. Rebels then draw a 2 Ops chit but decide not to Rally in any Foreign Country spaces (as they do not have any Guerrillas Available). The chit is returned to the pool.
- Support: British Divide to try and shift the Unity Track (as its current value of 0 doesn't allow them to Activate any Irregulars), but roll a 6 and fail. Rebels Mobilize to place a Base in Haifa District and one Guerrilla each in Galilee and Lydda, moving them from Lebanon and Syria as none are Available.
- Redeploy: British move their two Troops on Railways to Tel Aviv-Jaffa, and decide not to move any Police, but do remove the Irregulars in Tel Aviv-Jaffa and Jerusalem City. Rebels move one of their Guerrillas on Railways to Samaria and the other to Syria.
- Reset: Remove all Sabotage and Curfew markers from the map, return all pieces in Prison to Available, flip all Guerrillas and Irregulars Underground, then reveal the next card and continue play.
This example of play is now complete. You can continue the current game by constructing the rest of the deck (two stacks of six random Event cards, each with a random Propaganda card shuffled in with the bottom two Event cards) and revealing the next Event card. One of the two Propaganda cards you use now should be A34, which has an additional effect during the Reset Phase, bringing all Out of Play British Troops back into play as the Munich Agreement in Europe frees them up for deployment to Palestine.
The Rebels have got off to a strong start and are now fully Centralized, which will allow them to avoid negative effects from their Operations chits so long as they maintain it. This is a powerful advantage, so the British should be looking to shift the Unity Track as soon as possible, possibly by removing Rebel Bases with Assault—which will also weaken the Rebel position and reduce Political Will loss from Bases on the map. If the Munich Agreement is reached in time the British will be able to flood Palestine with additional Troops, but otherwise they will be in for a tough fight.
9.0 Event Tips and Background
The card backgrounds below provide brief summaries of the historical events and the rationale behind the effects on the cards. For those looking to read more, I'd recommend starting with a new popular history book on the revolt, Kessler's Palestine 1936, that provides a good basic overview of the events covered in the game. For those looking for a more detailed treatment of the revolt or Britain's response, I'd consult Matthew Hughes' Britain's Pacification of Palestine: The British Army, the Colonial State, and the Arab Revolt, 1936-1939 or Matthew Kelly's The Crime of Nationalism: Britain, Palestine, and Nation-Building on the Fringe of Empire. Both utilize Arab and British primary sources to offer more complete depictions of the events.
A1. Mass Detention
BRITISH CAPABILITY
Unshaded: Detain all suspects: Detain chit removes 1 additional Guerrilla from spaces with Curfews.
Shaded: Widespread opposition: Rebels may add Opposition to 1 adjacent space when Detain chit used in a space already at Opposition.
Tips: If the top effect is in play, Detain removes 1 additional Guerrilla from each selected space with a Curfew.
Background: The British relied on mass detention to repress civilians suspected of supporting the revolt, and the level of detention far exceeded the similar strategy used during the later 1945-1947 Jewish insurgency (depicted in The British Way: Palestine). The British held most of those detained for a brief period of time, but the number of people cycling through the detention system remained enormous, with approximately 37% of the total Palestinian Arab population detained formally or informally at some point during the conflict. The least fortunate detainees found themselves at "Arab Investigation Centres" where the British tortured prisoners to gain information on the insurgency (A13).
This Capability reflects the two sides of these controversial detention policies, either heightening the repressive impact of Detain chits (removing 1 additional Guerrilla) or risking counterproductive mobilization by indiscriminately arresting civilians (spreading Opposition to adjacent spaces).
A2. Central War Committee
REBEL CAPABILITY
Unshaded: Orders ignored by leaders: Add 1 to all rolls against number of Rebel Bases on map.
Shaded: Improves coordination: Subtract 1 from all rolls against number of Rebel Bases on map.
Tips: Affected rolls include those granted by Coordinate, the Resources Phase, and Events A7, A20, and A23.
Background: Shortly after fleeing Palestine in late 1937, Hajj Amin al-Husayni (A9) worked to form the Central Committee of Jihad to help centralize the insurgency's efforts. However, like with other attempts at achieving better coordination, the Central Committee failed to unite the dispersed rebel commanders.
The unshaded Capability effect illustrates the difficulty of unifying the rebels' activities when subordinate commanders ignored directives from the exiled political leadership. In contrast, the shaded Capability effect models a more successful Central Committee that manages to exert greater control over subordinate rebel leaders.
A3. Peace Bands
Unshaded: Palestinian collaboration: British may Divide to Activate Irregulars then also roll to shift Unity Track toward Decentralized.
Shaded: Defect back to rebellion: Rebels may replace 2 Irregulars with Guerrillas. Shift Unity Track 1 step toward Centralized.
Tips: The top effect allows British to use both Divide options in turn.
Background: The British encouraged the formation of Palestinian 'peace bands' to counter the rebellion and protect local communities. As with other insurgencies, the predatory behavior of less disciplined rebel bands drove communities to form local self-defense militias, known as peace bands in Palestine. Many of the early peace bands formed without encouragement from the British. However, the British quickly exploited the opportunity to further splinter the insurgency. As with the rebels, a number of peace bands also devolved into bandit groups that preyed on the population.
This Event illustrates the flexibility of many local armed groups during the insurgency who could collaborate with the British (unshaded effect) or defect back to armed opposition against British rule (shaded effect).
A4. Special Night Squads
Unshaded: British-Jewish units: Place 1 Irregular each into up to 3 Districts with Troops.
Shaded: Controversial units: Reduce Political Will by 1 for every 3 Irregulars in play.
Tips: None.
Background: The most prominent form of collaboration between Jewish communities and British forces involved the organization of Special Night Squads. These auxiliary forces, formed by Orde Wingate, gave the British an irregular force capable of launching special operations against the insurgency. These auxiliary units benefited from the local knowledge of Jewish citizens (unshaded effect).
The Special Night Squads quickly became controversial for their brutal treatment of Palestinian civilians and prisoners. British commanders eventually found the units to be more trouble than they were worth, restricting their activities and banning Wingate from Palestine. During WW2, Wingate went on to form guerrilla groups behind Japanese lines in Burma.
A5. Village Occupations
Unshaded: Lock down countryside: British may place Curfews in up to 3 Districts with Troops.
Shaded: Push rebels elsewhere: Rebels may March from all Districts with Curfews.
Tips: None.
Background: British forces considered curfews to be one of the best methods for combatting the rebellion. As historian Matthew Hughes notes, a curfew "contained and pacified, it detained and punished. Curfews had the advantage that they imprisoned the population at no official expense for half of every day, and during the dark hours that were harder to police." Curfews occurred primarily in urban areas during the 1945-1947 Jewish insurgency, but during the Arab rebellion village occupations brought curfews and close surveillance to rural areas.
The unshaded effect allows the British to quickly extend curfews over rural districts, using the strategy of garrisoning troops into villages. The shaded effect illustrates a common rebel response to village occupations by simply moving elsewhere.
A6. House Demolition
Unshaded: Intimidates population: British may draw 2 Punishment chits and use any Demolish chits drawn (each in 2 spaces with Troops). Return any unused chits to the pool.
Shaded: Radicalizes population: Rebels may Mobilize, placing Guerrillas in spaces with Curfews rather than Opposition.
Tips: None.
Background: House demolitions became a common form of British collective punishment against communities suspected of helping the rebels. Generally, the British troops destroyed the household and all property inside. Yet, the demolitions could expand to destroying entire villages or town quarters. One prominent example of mass house demolition is the destruction of large sections of Jaffa city, destroying at least fifteen percent of old Jaffa and making thousands homeless.
The unshaded effect allows the British to conduct mass demolitions throughout Palestine to coerce the population into compliance, while the shaded effect highlights the potential blowback of indiscriminately destroying homes and displacing thousands of civilians. Many displaced civilians, desperate or seeking revenge, likely found their way into the rebellion.
A7. Memory of al-Qassam
Unshaded: Labeled as a bandit: Roll a die twice—each result less than or equal to Irregulars on map shifts Unity Track 1 step toward Decentralized.
Shaded: Galvanizes resistance: Roll a die—if result less than or equal to number of Rebel Bases on map, Rebels may conduct a Limited Operation in each space with Opposition.
Tips: Limited Operations granted by the bottom effect may be of different types, are carried out one after the other, and may potentially use the same pieces multiple times (if they are moved with March).
Background: The preacher Izz ad-Din al-Qassam launched rebellions against French Syria in the 1920s (A31) and British Mandatory Palestine in the early 1930s. al-Qassam advocated against British rule and Zionist ambitions in Palestine, becoming a symbol of resistance after his death in 1935. After the killing of a Jewish policeman by Qassamite rebels, the police hunted al-Qassam down and killed him on November 20, 1935. Remnants of al-Qassam's bands launched retaliatory attacks, triggering a cycle of acts that directly led to the start of the Arab revolt in 1936.
This Event illustrates the different legacies of al-Qassam. The British mandatory government tried to frame al-Qassam and his supporters as bandits to discredit his popular image among Palestinian Arabs (A21). The shaded effect reflects how his early resistance galvanized popular support for the rebels during the revolt (launching Limited Operations in all Opposition spaces).
A8. Fawzi al-Qawuqji
REBEL CAPABILITY
Unshaded: Leaves the country: Raid may select max 1 space.
Shaded: Leads sophisticated attacks: In each District selected for Ambush, Rebels may also relocate 1 Troop back to a City.
Tips: If the top effect is in play, the space selected for Raid would still need to be adjacent to a Rebel Base.
Background: In 1936, the military leader and former Ottoman Army officer Fawzi al-Qawuqji joined the Palestinian fight with a contingent of foreign volunteers. While operating in Palestine, al-Qawuqji gained the title of "Supreme Commander" and achieved several impressive military feats, particularly in the Nablus-Tulkarm-Jenin triangle (A26), such as shooting down several RAF warplanes. However, he only briefly operated during the revolt before returning to Iraq.
This Capability effect demonstrates either al-Qawuqji's military skill, by allowing the Rebel player to affect British Troop cubes with Ambush, or the lack of military leaders after al-Qawuqji left Palestine, by restricting the Rebel player's Raid Special Activity.
A9. Hajj Amin al-Husayni
Unshaded: External leadership ignored: Remove all Rebel Bases in Syria or Lebanon (not both). Shift Unity Track 1 step toward Decentralized.
Shaded: Grand Mufti: If there is a Rebel Base in a Foreign Country, shift Unity Track 1 step toward Centralized. Rebels may also conduct an Operation with their Operations chit.
Tips: None.
Background: An important nationalist leader, Hajj Amin al-Husayni became the major political leader of the Palestinian Arab movement during the 1930s. From 1921-1937, he served as Grand Mufti and remained an ally of the British mandatory government. In 1936, he helped organize the Arab Higher Committee (A20), serving as its leader. However, in 1937, with rising tensions between the British and Palestinian Arab community, al-Husayni fled Palestine to avoid arrest. Operating out of Lebanon and then Iraq, al-Husayni lobbied for external support for the revolt while also eliminating political rivals. Controversially, he sought out support from the rising enemies of Britain, Germany and Italy (A11).
The unshaded effect reflects how the political leadership abroad had limited ability to guide the activities of subordinate military leaders in Palestine (decrease Unity by 1), lowering their relevancy to the outcome of the conflict (remove Rebel Base from Syria or Lebanon). The shaded effect represents a counterfactual where al-Husayni's role as Grand Mufti and leader of the Arab Higher Committee serves as a unifying symbol, aiding efforts to centralize the rebellion (increase Unity by 1) and coordinate their activities (additional Operations).
A10. Ex-Black and Tans
Unshaded: Harsh methods from Ireland: British may remove Opposition from one space with Police.
Shaded: Unsanctioned reprisals: Rebels may draw a Punishment chit and resolve only its Mobilization effect in 2 spaces with Police. Return drawn chit to the pool.
Tips: The bottom effect would do nothing if a Fine chit were drawn.
Background: In the 1920s, many of the British police serving in Palestine were former Black and Tans from the Irish War of Independence (1919-1921). During that war, "Black and Tan" auxiliary units, named for their mismatched uniforms, gained an infamous reputation for their brutality against the civilian population, particularly their use of collective reprisals. Serving as police in Palestine, the ex-Black and Tans operated with "a certain ruthlessness" during the 1936-1939 Arab Revolt.
To reflect their legacy for using brutal reprisals, the unshaded effect allows the British player to reduce support for the rebellion (Opposition) from a space with former members of the Black and Tans (Police). Yet, as in Ireland, indiscriminate Black and Tan reprisals risked alienating the population by punishing communities who lacked ties to the rebellion. The shaded effect models collective punishments against unaligned communities, mobilizing them against the British while inflicting no harm on the rebellion.
A11. Italian Aid
MANDATORY EVENT
Axis provide arms and funds: Rebels may conduct Limited Operations up to the number of Foreign Country spaces with Rebel pieces. If Tegart Forts (A28) Capability in play, ignore this Mandatory Event effect.
Tips: Resolve this Mandatory Event immediately when drawn. The Limited Operations may be of different types, are carried out one after the other, and may potentially use the same pieces multiple times.
Background: Fascist Germany and Italy, enemies of Britain in the late 1930s, served as potential sources of foreign aid for the Palestinian Arab rebels. Historically, Germany and Italy only provided a small amount of funds to the insurgency. However, this Mandatory Event offers the possibility of greater foreign attempts to arm the rebels. The construction of the Tegart forts (A28) along the borders of Palestine to hinder infiltration would also have interrupted efforts to smuggle supplies into Palestine.
A12. General Dill
Unshaded: Advocate for martial law: British may Punish, then may Punish again using a held chit.
Shaded: Suspicious of "gangster methods": Remove half Irregulars from the map (round down).
Tips: The top effect would only allow British to Punish twice if they were already holding a Punishment chit.
Background: General John Dill served as the overall commander of British forces during the first years of the Arab Revolt. Dill frequently pushed civilian leaders to implement martial law, giving the military a freer hand to repress communities suspected of helping the rebels (unshaded effect). However, Dill also remained skeptical of "gangster methods" that involved organizing British-Jewish irregular units (A4) for special operations against the insurgency and its supporters (shaded effect). Operating with little oversight, deploying such units risked abuses against the civilian population.
A13. Arab Investigation Centres
Unshaded: Intel guides operations: British may conduct Limited Operations up to the number of Rebel pieces in Prison (max 3).
Shaded: Torture techniques exposed: Reduce Political Will by 1 for each Rebel piece in Prison (max 3).
Tips: The Limited Operations granted by the top effect may be of different types, are carried out one after the other, and may potentially use the same pieces multiple times.
Background: Arab Investigation Centres became infamous for the widespread use of torture by British interrogators to force the prisoners to "spill the beans". The use of torture centres would be replicated across many subsequent post-war British counterinsurgency campaigns, including Kenya, Cyprus, Aden, and Northern Ireland. As with those later campaigns, revelations about the extent of torture quickly became a major political embarrassment for the British (shaded effect).
A14. Arab Ladies of Jerusalem
Unshaded: Popular movements crushed: Remove Opposition from each space with a Curfew.
Shaded: Resist restrictions: Remove all Curfews from the map. British must discard 1 held Punishment chit.
Tips: None.
Background: In the late 1920s, Palestinian Arab women formed nationalist associations to promote political issues. The associations later played a major role in protesting British methods used to suppress the revolt, including investigations into the British use of torture (A13) and the destruction of homes (A6).
A15. Human Shields
BRITISH CAPABILITY
Unshaded: Hostages "protect" army: Raid may not select Railways adjacent to spaces with Curfews.
Shaded: Fails to intimidate rebels: Fine chit replaces each Sabotage marker with a Guerrilla.
Tips: Guerrillas placed by the bottom effect must come from Available as usual, so would not place any Guerrillas if none were Available.
Background: One of the most common forms of rebel activity was ambushing, mining, and sabotaging lines of communication. To deter rebel attacks and compel local civilians to report the location of mines, the British took prominent individuals from nearby communities hostage while passing through an area. The abducted civilians rode in the lead vehicles of convoys as a shield against any mines along the way. Either the unfortunate civilians would directly warn the British of mines by triggering them, or their presence would sufficiently coerce nearby civilians to report the mines' location.
The unshaded capability effect replicates the British strategy by deterring rebels from sabotaging lines of communication where the British have imposed population controls on the local population (Curfews). However, rebels would not be particularly deterred by minor punishments (such as fines) against communities unaligned with their specific group.
A16. Censorship
Unshaded: Repression hidden: Cancel all shaded British Capabilities.
Shaded: Foreign newspapers: Reduce Political Will by 1 for each British Capability in play.
Tips: The top effect permanently cancels all shaded British Capabilities currently in play, i.e., only those that are negative for British.
Background: The British mandatory government maintained control over information and the press, censoring negative coverage of their activities in Palestine. For instance, British general Bernard Montgomery banned journalists from his area of operations in Haifa (A25). Some journalists complained that British press censorship in Palestine made reporting harder than covering the concurrent conflicts in Spain, China, or Czechoslovakia. Journalists, particularly from British international rivals such as Germany and Italy, faced harassment after writing critical articles focusing on British forces' harsh repressive measures. The shaded effect reflects international criticism following articles by foreign journalists for each form of British repression in play (A1, A15, A18, and A28).
A17. Revisionist Terror
Unshaded: Targets Palestinian Arabs: British may remove a Guerrilla from each space with an Underground Irregular.
Shaded: Targets British rule: Rebels may Sabotage with up to 3 Underground Irregulars as if Guerrillas.
Tips: The bottom effect Activates each Irregular used to Sabotage.
Background: Although Jewish groups began the conflict observing havlagah (non-retaliation), some started cooperating with the British against the Arab rebels (A4) or directly attacking them. Led by Ze'ev Jabotinsky (pictured on this card), the Revisionist Zionists advocated against restraint. The Revisionist Zionists' main paramilitary group, Irgun, launched attacks against Arabs, including the killing of 32 on a single day. The Revisionists also deeply distrusted the British. After WW2 Irgun launched a terror campaign against British rule, as depicted in The British Way: Palestine.
This Event reflects how Irgun could target either side during the Arab Revolt. The unshaded effect represents Irgun rejecting restraint and targeting Arab rebels, furthering the British goal of suppressing the revolt. In contrast, the shaded effect models Irgun attacks against British targets, furthering the chaos created by the rebellion. Although not seeking to help the rebels, such Irgun attacks would put additional pressure on Britain to seek a political solution and diverted British forces from operations against the rebels.
A18. Punitive Searches
BRITISH CAPABILITY
Unshaded: Troops punish population: British may choose rather than draw Punishment chits when performing Punish.
Shaded: Searches fuel recruitment: After resolving each space selected for Sweep, Rebels draw a Punishment chit and resolve only its Mobilization effect in that space, then return it to the pool.
Tips: The bottom effect would do nothing if a Fine chit were drawn.
Background: In areas near rebel activity, British forces roughly searched local civilians, their homes, and belongings. Harsh searches could result in property damage and "shake the villagers". Such searches served as a form of collective punishment for communities failing to stop the rebels or report their location to the British. Punitive searches also allowed British forces to circumvent civilian restrictions on collective punishments by transforming standard counterinsurgency practices into a strategy of civilian harm (unshaded effect). However, early in the conflict, harsh indiscriminate searches appear to have pushed many civilians to join the insurgency (shaded effect).
A19. League of Nations
Sanctions or criticizes? Roll a die—if result greater than the number of spaces with Opposition, increase Political Will by 1, otherwise reduce it by 2.
Tips: None.
Background: In the 1920s, the League of Nations granted the British a mandate over Palestine. By the 1930s, the League of Nations struggled to stop international aggression, becoming a mostly ineffectual international organization that failed to prevent the Japanese invasion of China and the Italian invasion of Ethiopia. During the Arab Revolt, Palestinian Arabs petitioned the League of Nations to criticize and sanction British conduct during the revolt.
The outcome of this Event depends on the existence of widespread opposition to British policies in Palestine. The greater the opposition, the more likely an embarrassing political result from massive backlash against British governance of Palestine drawing increased international attention.
A20. Arab Higher Committee
Unshaded: Framed as corrupt by British: Roll a die—if result greater than the number of Rebel Bases on the map, shift Unity Track 1 step toward Decentralized.
Shaded: Leadership in exile: Shift Unity Track 2 steps toward Centralized and Rebels may draw 1 Operations chit to hold.
Tips: None.
Background: The Arab Higher Committee (AHC) nominally represented the leadership of the revolt. In September 1937, the British outlawed the AHC, forcing its flight to neighboring countries. With a decentralized insurgency in Palestine and the AHC mostly operating out of Damascus, the elite leadership struggled to exert control over subordinate commanders. From the security of foreign countries, the AHC made connections with sympathetic governments, particularly Germany and Italy (A11), and raised funds for the revolt (shaded effect). The British devoted considerable propaganda efforts to discrediting the AHC as disconnected from the conflict and riddled with corruption (unshaded effect).
A21. "Criminals and Thugs"
Unshaded: Rebels prey on the people: Remove Opposition from 2 spaces with Active Guerrillas. Shift Unity Track 1 step toward Decentralized.
Shaded: Rebels eliminate traitors: Rebels may Ambush in 1 District. If an Irregular is removed, add Opposition to the space.
Tips: None.
Background: Across their 20th century counterinsurgency campaigns the British frequently framed rebellions as dominated by "criminals and thugs" who lacked genuine political grievances and preyed on civilians. Such a framing posed a major threat to the decentralized insurgency in Palestine, where rebel groups struggled to stand out from criminals. To distinguish themselves as politically motivated, some rebel groups cracked down on criminal activity in their area (shaded effect), using rebel courts to administer justice and gain legitimacy (A27)
As military pressure mounted, many rebel groups found themselves making greater demands on the civilian population. Furthermore, command and control over rebel bands lessened, weakening rebel commanders' ability to restrain their subordinates. These two factors led many rebel groups to become functionally equivalent to criminal bands preying on communities (unshaded effect).
A22. Demonstrations
Unshaded: Crackdown on protests: Place a Curfew in all Cities with both British and Rebel pieces. Then, British must Punish in two Cities with Curfews if possible (even if no Troops).
Shaded: Protests spread: Rebels may add Opposition to 1 District adjacent to each City with Opposition.
Tips: The top effect requires British to select two Cities with Curfews for the selected Punishment chit if possible, even if this would only have a negative impact for them.
Background: Although most of the insurgent activity during the Arab Revolt occurred in the countryside, the revolt began with major urban protests and strikes in 1936. After the Arab Higher Committee (A20) fled the country, the revolt shifted to the countryside, yet some demonstrations continued in urban areas. The shaded effect reflects opposition spreading from an urban protest to surrounding rural areas. The unshaded effect models British crackdowns against cities, using curfews reminiscent of the operations against the later Jewish insurgency shown in The British Way: Palestine.
A23. al-Hajj Muhammad
Unshaded: Hunted down by peace bands: British may Sweep then Assault in 1 space with a Rebel Base and any Irregulars.
Shaded: Commander-in-chief: Roll a die—if result less than or equal to the number of Rebel Bases on the map, Rebels may Mobilize then Raid.
Tips: None.
Background: With much of the Palestinian Arab political leadership in exile abroad (A9 and A20), the most skillful and committed military leader within Palestine was 'Abd al-Rahim al-Hajj Muhammad (shaded effect). al-Hajj Muhammad aided the establishment of rebel courts, which offered an alternative form of governance to British rule (A27).
On March 23, 1939, British troops hunted down and killed al-Hajj Muhammad (unshaded effect), with the help of intelligence collected from local 'peace bands' (A3). al-Hajj Muhammad's death accelerated the collapse of discipline among insurgents, furthering the devolution of many rebel bands into criminal groups (A21).
A24. Tensions in Europe
MANDATORY EVENT
Hitler annexes neighbor: British may Punish (twice if after Munich Conference) then must move 3 Troops (or 5 if after Munich Conference) from the map to Out of Play.
Tips: Resolve this Mandatory Event immediately when drawn. It has a variable effect depending on whether Propaganda Event A34 has been played or not.
Background: Rising tensions in Europe due to Hitler's expansion motivated the British government to increase troops and repression in Palestine to quickly bring an end to the revolt. The Munich Conference bought the British time to redeploy their forces to Palestine (A34), where extensive repression suppressed much of the remaining revolt in a matter of months (double Punish Special Activity if after Munich). With the revolt severely repressed, British forces quickly deployed back to Europe to face the rising threat posed by Hitler (remove more Troops after Munich).
Although historically this event happened after the post-Munich troop surge, its role as a Mandatory Event also opens the possibility of an early troop withdrawal from Palestine to respond to another severe political crisis in Europe. Such a crisis would have left British forces stretched thin in Palestine (remove 3 Troops to Out of Play) until a political settlement freed up more forces for suppressing the revolt (Propaganda Event A34 restores all Troops from Out of Play).
A25. Montgomery
Unshaded: Commander in the north: British may conduct a Limited Operation in or adjacent to Haifa District, then Punish in or adjacent to Haifa District.
Shaded: Harsh tactics fail: Rebels may conduct up to 2 Limited Operations in or adjacent to Haifa District.
Tips: The two Limited Operations granted by the bottom effect may be of different types, are carried out one after the other, and may potentially use the same pieces multiple times, but may only take place in or adjacent to Haifa District.
Background: Before becoming famous during World War II, Bernard Montgomery commanded the 8th Division in the northern part of Palestine as a major-general. His adoption of tough measures against the rebels informed his views of the British military's counterinsurgency campaign against the post-WW2 Jewish insurgency (see Event P6 in The British Way: Palestine). The unshaded effect reflects Montgomery's northern command in the area around Haifa, while the shaded effect represents how the harsh tactics he advocated initially did not suppress the rebellion. Only after the Munich Conference (A34) did the British accumulate enough overwhelming force to crush the rebellion.
A26. "Triangle of Terror"
Jenin-Nablus-Tulkarm hot spot: Conduct up to 3 Limited Operations in or adjacent to Samaria. Then the other player may conduct 1 Limited Operation in Samaria.
Tips: The three Limited Operations granted to the player executing this Event may be of different types, are carried out one after the other, and may potentially use the same pieces multiple times, but may only take place in or adjacent to Samaria.
Background: The British named the territory between the subdistricts of Jenin, Nablus, and Tulkarm the "triangle of terror" because of its heavy amount of rebel activity (Samaria District on the board). As one of the most densely populated Palestinian Arab areas in the mid-1930s and a resistance stronghold, the insurgency could launch major operations from the area (Rebels execute the Event). Likewise, the area became the target of many large counterinsurgency campaigns to contain the rebellion (British execute the Event). The Event grants a Limited Operation to the other player to reflect the protracted fighting in the area, making it difficult for either side to decisively gain the upper hand.
A27. Rebel Courts
REBEL CAPABILITY
Unshaded: Dispersed by repression: In 1 space selected for Detain, British may remove a Base instead of a Guerrilla to Prison.
Shaded: Counter-state formation: Each Political Will Phase, reduce Political Will by 1 for every 2 spaces with Opposition.
Tips: Bases removed to Prison are returned to Available during the next Reset Phase.
Background: Despite its decentralized structure and British attempts to frame the rebellion as criminal (A21), many rebel leaders provided governance in areas dominated by their forces. One of the most prominent governance services was the organization of rebel courts, replacing the need for the British state to adjudicate local disputes. The formation of rebel courts offered a powerful way to undermine the legitimacy of British rule.
To reflect the courts' political effect, the shaded Capability effect gives the Rebels player another way of reducing Political Will during each Propaganda Round. The British countered the rebel courts through brutal repression, engaging in mass detention of all those associated with the rebellion (A1). The unshaded Capability effect allows the British to remove Rebel Bases (leadership involved in institution-building) to Prison, hindering the Rebel player's ability to create an effective counter-state and centralize the rebellion.
A28. Tegart Forts
BRITISH CAPABILITY
Borders and lines fortified: British must permanently place 3 Police on this card, taken from map first then Available. All Guerrillas moving from Foreign Country spaces flip Active.
Tips: This Capability has a mixed effect that either player may wish to execute, but still counts as a British Capability for the purposes of the shaded effect of Event A16.
Background: Based on his experiences fighting insurgencies in India, Sir Charles Tegart implemented a strategy of constructing police forts throughout Palestine, particularly along its northern border with French Syria (A31). The forts near the border with Syria and Lebanon aimed to hinder the infiltration of rebels into the northern districts of Palestine. Several of the forts can still be seen in modern day Israel (as pictured on the card).
This Capability Event removes British Police from play, to perform the static duty of guarding the forts, but also makes marching from Foreign Country spaces harder for the Rebel player. If the Rebel player takes the bottom effect of Event A30, expanding the Foreign Country spaces to include Egypt and Transjordan, this Event assumes the British extended the forts to those borders as well, assisted by the fact they possessed military forces in those two countries.
A29. Haganah
Promotes disunity among rebels: Shift Unity Track 2 steps toward Decentralized, then Divide to Activate Irregulars.
Focuses on community protection: Remove 1 Irregular each from up to 2 spaces with or adjacent to Sabotage markers.
Tips: None.
Background: Alongside the formation of joint British-Jewish paramilitary groups (A4), British forces also cooperated with Haganah, a Jewish armed group who plays a major role in The British Way: Palestine. British forces looked the other way at, or even assisted, Haganah operations against the Palestinian Arab rebels in exchange for information. Haganah also strove to infiltrate the insurgency to exacerbate disunity among rebel commanders (unshaded effect). Another major focus of Haganah was the protection of Jewish communities, which could divert irregulars from more offensive operations against the insurgency (shaded effect).
A30. Arab Kings
Restrict aid to rebels: Remove 1 Guerrilla from each District adjacent to Transjordan.
Funding from Arab world: Transjordan and Egypt are now in play as Foreign Country spaces.
Tips: If the bottom effect is selected, remove the Out of Play markers from Transjordan and Egypt.
Background: The Arab kings (or emirs) ruling over the surrounding countries under British rule, such as Abdullah I of Jordan (pictured on the card), could help the British by encouraging the Palestinian Arab rebels to restrain their activities, such as when they advised the Arab Higher Committee to call off the general strike. Alternatively, Arab kings could escalate the conflict by providing military assistance to the rebels.
The unshaded effect represents the Arab kings aiding the British in containing the rebellion and denying their territory as a sanctuary (remove 1 Guerrilla from Districts adjacent to Transjordan). The shaded effect models the possibility of greater foreign assistance from Transjordan and Egypt, letting the rebels operate in border areas. By looking the other way to rebel activities, those countries enter the game as Foreign Country spaces equivalent to those in French Syria (A31).
A31. French Syria
Unshaded: French police crack down: Remove all Rebel pieces from either Syria or Lebanon (not both) to Prison.
Shaded: Foreign fighters: Place 1 Guerrilla from Prison then Available in each Foreign Country space.
Tips: Bases removed to Prison are returned to Available during the next Reset Phase.
Background: After WW1 the French government possessed a mandate over Syria and Lebanon. During the 1936-1939 Arab Revolt, French officials were divided on whether to assist the British with stopping infiltration from their mandate. On the one hand, they reveled in the unrest in British Mandatory Palestine. Yet, France also experienced rebellions in their own areas, including a major revolt in Syria in the 1920s. Rebel activities in their area could encourage a resumption of insurgent activity against their mandate. The unshaded effect represents a major French crackdown on Palestinian Arabs operating out of French Syria.
A small number of foreign fighters from Syria, Lebanon, Iraq, and Transjordan joined the revolt. To reflect these foreign fighters, the shaded effect allows the Rebels player to circumvent attrition (Guerrillas in Prison) by drawing from external sources of manpower. Many of the foreign fighters proved to be fickle, leaving the conflict after only a brief period of service in Palestine.
A32. Aerial Policing
Unshaded: Air reconnaissance: British may Air Recon, Activating 2 rather than 1 Guerrilla in each selected space.
Shaded: Anti-aircraft fire: Move 1 Troop from each space with a Rebel Base to any Cities.
Tips: None.
Background: During the interwar period, the Royal Air Force (RAF) justified its role in the British army as a cheap way of colonial policing. The RAF maintained order through the use of "air control", where their planes bombarded uncooperative villages until they submitted. Furthermore, RAF planes lowered the costs of monitoring peripheral areas through aerial reconnaissance. Once rebel bands were located, police operating from armored cars could rush to the location (unshaded effect).
During the 1936-1939 Arab Revolt, the rebels managed to shoot down RAF planes with anti-aircraft fire (shaded effect) but generally could not prevent RAF activities (only relocate rather than remove 1 Troop cube).
A33, A35. Propaganda!
Background: In 1939, with a surge of troops from Britain following the 1938 Munich Conference (A34), British forces rapidly overwhelmed the increasingly fragmented Arab resistance. To resolve the lingering conflict, the Chamberlain government organized an Arab-Zionist conference in London. When this conference produced no resolution, the British Government issued the 1939 White Paper. Despite not meeting all the Arab political leaders' demands, the 1939 White Paper satisfied moderates by restricting Jewish immigration and Jewish purchase of Arab land. These restrictions greatly angered Zionist groups, leading directly to the post-WW2 1940s conflict depicted in The British Way: Palestine.
A34. Propaganda!
Munich conference: During Reset Phase, British place all Out of Play Troops in any Cities.
Tips: This Propaganda card has an additional effect during the Reset Phase, and its having been played adjusts the effect of Mandatory Event A24.
Background: After the Munich Agreement brought an illusion of stability to the growing tensions in Europe (see GMT's The Bell of Treason), British forces released additional units for use in crushing the revolt in Palestine. In late 1938, a massive surge of troops swept into the colony (placing all Out of Play British Troops). This surge allowed the British to increase their military operations and repression against the population, quickly bringing an end to the already struggling insurgency. The unpredictable timing of this Propaganda Event reflects the impact that international affairs had on the 1936-1939 Arab Revolt, outwith the control of either player.
Key Terms Index
- Accompanying: Operation required for a Special Activity. (4.1.1)
- Activate: Flip Guerrillas or Irregulars Active. (1.4.3)
- Active Pieces: Troops, Police, Active Guerrillas and Irregulars (symbol end up), and Bases. (1.4.3)
- Adjacent: Spaces next to each other for actions or Events. (1.3.5)
- Air Recon: British Special Activity to Activate Guerrillas. (4.2.3)
- Ambush: Rebel Operation to remove Police and Irregulars. (3.3.4)
- Assault: British Operation to remove Active Rebel pieces. (3.2.4)
- Available: Pieces in Available Forces boxes, waiting to be placed. (1.4.1)
- Base: Static Rebels forces that improve Rally and whose presence in Palestine affects Political Will during the Propaganda Round. (1.4, 3.3.1, 7.0)
- British: A Faction committed to suppressing the Arab rebellion in Mandatory Palestine. (1.5)
- British Political Will: Marker on edge track indicating British stability and willingness to make concessions, position determines victory. (1.10, 7.0)
- Campaign: Event card series leading up to a Propaganda Round. (2.4)
Setup Instructions (2.1)
Available:
- Rebels—3 Bases, 6 Guerrillas
- British—3 Curfew Markers, 6 Irregulars
Prison: Empty
Lebanon: Rebels—1 Guerrilla
Syria: Rebels—1 Base, 2 Guerrillas
Galilee: Rebels—1 Guerrilla; British—1 Police
Haifa City: British—2 Troops, 1 Police
Haifa District: Rebels—1 Guerrilla; British—2 Troops, 1 Police
Samaria: Opposition marker; Rebels—1 Base, 2 Guerrillas; British—1 Police
Tel Aviv-Jaffa: British—2 Troops, 1 Police
Lydda: Rebels—1 Guerrilla; British—1 Police
Jerusalem City: British—2 Troops, 1 Police
Jerusalem District: Rebels—1 Guerrilla; British—2 Troops, 1 Police
Gaza: British—1 Police
Transjordan: Out of Play marker
Egypt: Out of Play marker
All Railways: Empty
Deck Preparation. Gather the Arab Revolt Event cards, remove and shuffle the three Propaganda cards, and then shuffle the remaining cards. Form three piles of 6 regular Event cards and set aside the remaining 14 regular Event cards (they will not be used). In each pile, shuffle a random Propaganda card with 2 of the Event cards and place these 3 cards under the remaining 4 Event Cards. Stack the three 7-card piles to form the complete Event Deck of 21 cards.
Place the Unity Track and Rebel Available Forces overlay tiles on the map, and place the 9 Operations chits and 6 Punishment chits in separate cups or containers for random drawing.
NOTE: The British only use nine blue Police cubes and three of the four Curfew markers. All other wooden forces pieces are used in Arab Revolt.
Set up the map as follows (see back page of this booklet for a full setup diagram):
- Unity Track: 1 (centermost space)
- British Political Will: 18
- Initiative: Rebels 1st Eligible, British 2nd Eligible
- Out of Play: 5 British Troops (set aside near the board)
The printed setup diagram on the back page is a map illustration and is not reproduced as text.
Japanese Occupation
The British Way: Japanese Occupation — Rules of Play.
1.0 Introduction
The British Way: Japanese Occupation is a game in the Enemy of My Enemy expansion for The British Way COIN multipack. Alongside its accompanying game, Arab Revolt, the historical simulations included in the expansion allow players to explore how earlier conflicts shaped the insurgencies in post-war Malaya and Palestine. More specifically, the games illustrate how the British in each conflict made alliances of convenience with future insurgent opponents to combat an immediate common threat.
The British Way: Japanese Occupation covers Japanese counterinsurgency efforts against British attempts to organize wartime resistance in cooperation with the Malayan Peoples' Anti-Japanese Army (MPAJA). The game particularly focuses on the period from the start of the Japanese occupation in 1942, when resistance consisted largely of British stay-behind forces and quickly organized MPAJA guerrilla units, until the end of the occupation due to Japanese surrender in 1945. It centers around the two major sides: the Japanese occupation forces assisted by local collaborators, fighting against a coalition of British Force 136 operatives and various local guerrillas. The British player has partial control over the MPAJA forces led by their future opponent, the Malayan Communist Party (MCP).
The Japanese approach to counterinsurgency in Malaya, as in other occupied territories during WWII, was dominated by extreme brutality, even beyond the usual brutality associated with counterinsurgency. Although forgoing the vast destruction of the scorched earth "Three Alls" (kill all, burn all, loot all) approach used against Communist guerrillas in China, Japanese forces began the occupation of Malaya with a massive killing of "suspected" Chinese throughout the peninsula and in Singapore known as the "sook ching" (Chinese for "eradication" or "purge"). Estimates of the deaths during this initial phase are around 50,000. Violence in response to the insurgent resistance generally consisted of reprisals against civilian communities near insurgent activity and the use of widespread selective repression by the Kempeitai secret police. On top of the direct physical violence, the occupation also involved intense economic exploitation, extracting critical materials, food, and services from the population to further the broader Japanese war effort. As elsewhere in the "Greater Co-Prosperity Sphere", extraction led to food shortages that threatened the population with starvation. Forced service included the brutal conscription of laborers to construct railways and the press-ganging of women to serve as "comfort women" for Japanese forces. As with other multipack games, Japanese Occupation does not shy away from such core aspects of the conflict and its stakes. Instead, the game deliberately focuses on these aspects to provide an educational overview of how each side approached the conflict, within the limits of what is possible with the COIN series.
1.1 General Course of Play
In The British Way: Japanese Occupation, one Event card at a time is revealed from the shared draw deck, and both players will have an opportunity to either execute that Event or perform an Operation from a unique menu, possibly adding a Special Activity. Icons on Event cards will also trigger a simple non-player MPAJA action each round, before players take their actions. Propaganda cards mixed in with the Event cards provide periodic interruptions where the general board state is assessed and Resistance is adjusted, after which both players receive an opportunity to collect additional assets and redeploy their forces.
1.2 Components
The following components from The British Way multipack and the Enemy of My Enemy expansion are required to play The British Way: Japanese Occupation:
- A 17"x22" mounted Malaya game board (1.3).
- A Japanese Available Forces (1.4) overlay tile that goes over the MCP Available Forces box printed on the board.
- An Operation Zipper Track (6.7) overlay tile that goes over the Commander Track printed on the board.
- A deck of 35 Japanese Occupation cards (5.0).
- 6 light blue cubes ('Police'), 15 tan cubes ('Troops'), 4 blue embossed octagonal cylinders ('non-MPAJA Guerrillas'), 10 red embossed octagonal cylinders ('MPAJA Guerrillas'), 5 flat red discs ('Supply Caches'), 3 embossed cylinders (1 blue and 2 red)—note that this is fewer than the total number of wooden pieces included in The British Way multipack, any excess should be set aside while playing Japanese Occupation.
- Six black and three white pawns (3.1.1).
- Specific markers from The British Way countersheet: 4x New Villages, 9x Intel, 9x Support/Oppose, 15x Sabotage/Terror, 6x Capability—all other markers should be set aside while playing Japanese Occupation.
- Specific markers from the Enemy of My Enemy countersheet: 1x Resistance, 1x Zipper, 4x Jungle Camps, 4x Railways, 4x Starred Railways, 3x Kempeitai, 3x Force 136, 1x Out of Play.
- Two player aid sheets.
- One Propaganda Round aid sheet.
- Two six-sided dice (one red, one blue).
- This rules booklet.
Although it is part of an expansion to The British Way that uses many components from the original Malaya game, the Japanese Occupation game is an entirely standalone game. Players should carefully read the rules that follow and not assume any mechanical similarities with previous multipack games.
1.3 The Map
The map shows British Malaya and some adjacent territories, divided into several different kinds of spaces. Two overlay tiles, Japanese Available Forces and Operation Zipper Track, are placed over MCP Available Forces and Commander Track respectively, and Railway markers are placed along the borders between some Provinces (1.3.6).
1.3.1 Map Spaces
Map spaces include Provinces (Mountain or Jungle), Kuala Lumpur, and two Economic Centers (ECs). The territories of Thailand, Indonesia, and Singapore are marked for flavor purposes and are not playable map spaces.
DESIGN NOTE: Singapore played a major role in the resistance and was the center of the Japanese occupation government. However, those aspects of the struggle are modeled by Events to focus the core gameplay on rural resistance to the Japanese occupation.
1.3.2 Provinces
The eight large irregular spaces (excepting Thailand) are Provinces, each corresponding to a historical part of British Malaya (the very small states of Penang, Perlis, and Malacca are incorporated into Perak, Kedah, and Negri Sembilan for gameplay purposes). Each Province is marked with a numerical Population value (either '1', '2', or '3') that affects Resistance (1.13) via Opposition (1.6) during the Propaganda Round (6.2). Each Province also has a larger space for Intel chits (1.11), placed in the "Uncontrolled" box, and a smaller space for an Opposition marker (1.6). Provinces are further distinguished as Mountains (dark green, Perak and Selangor only), or Jungle (light green, all other Provinces), affecting Japanese Sweep (3.3.3) and Assault (3.3.4) Operations, as well as certain Events (5.0). New Village markers (1.15) may be placed in Provinces by the Japanese Construct (3.3.2) Operation.
1.3.3 Thailand
Thailand is not a playable space and should be marked "Out of Play" during setup (2.1). Some Events (5.0) may refer to spaces adjacent to Thailand even though the space itself is omitted from the game.
1.3.4 Kuala Lumpur
The large circular space is Kuala Lumpur, the capital city of British Malaya. Like Provinces, Kuala Lumpur has a marked Population value ('2') and two spaces for holding an Intel chit and an Opposition marker.
1.3.5 Economic Centers
The two smaller circular spaces are Economic Centers (commonly abbreviated 'ECs'), representing Malaya's important tin and rubber industries respectively. Each EC affects Japanese Resource earnings from their Extract (4.3.1) Special Activity.
NOTE: ECs are spaces that can hold forces, as well as Kempeitai and Force 136 markers, but they cannot hold Intel chits or be shifted to Opposition. Players may want to use two rectangular "1" markers from The British Way to cover the "6" value of each Economic Center, since that value is not relevant in Japanese Occupation.
1.3.6 Railway Markers
During setup (2.1), eight Railway markers are added to the borders of several map spaces, four of which are marked with stars and should be placed on the borders with Thailand and Johore. Railway markers are a feature of the map and cannot be moved or removed. Railway markers should be considered to run along the entirety of the border that they sit on, and for the purposes of the Extract Special Activity (4.3.1) they are also connected through Economic Centers and Kuala Lumpur. Railway markers are adjacent to all spaces that touch the borders they sit on. The British may place Sabotage markers on adjacent Railways through the Sabotage Operation (3.2.3). Sabotaged Railways reduce the Resource (1.7) earnings of the Japanese Extract Special Activity (4.3.1) and allow the British to place Opposition in adjacent Provinces during the Propaganda Round. The Construct Operation (3.3.2) removes Sabotage markers from Railways.
NOTE: Unlike the Railways printed on the Palestine map, Railway markers are not spaces that can hold forces. Only Sabotage markers may be placed on Railway markers.
1.3.7 Adjacency
Adjacency affects the movement of forces and implementation of certain Events (5.0). Any two spaces that border one another are adjacent. Railway markers (1.3.6) are adjacent to all spaces touching the borders they sit on, including Provinces (1.3.2), Kuala Lumpur (1.3.4) and Economic Centers (1.3.5).
EXAMPLES: A MPAJA Guerrilla in the southern Economic Center is adjacent to Pahang, Johore, and Negri Sembilan Provinces. It is also adjacent to the three connecting Railway markers for the purposes of the Sabotage Operation.
1.4 Forces
The wooden pieces represent the Factions' various forces: Japanese Troops (tan cubes) and Police (light blue cubes), non-MPAJA Guerrillas (blue cylinders), MPAJA Guerrillas (red cylinders), and Supply Caches (red discs).
NOTE: MPAJA Guerrillas, non-MPAJA Guerrillas, and Supply Caches are all considered to be British forces for game purposes, despite the British player only having limited control over some of them.
1.4.1 Availability and Removal
Keep forces Available for placement in the Faction's Available Forces box. Forces removed from the map go to Available.
- Unless otherwise instructed (by Event, 5.1.1), forces may only be placed from or replaced with those in the Available boxes. A piece to be replaced by a piece that is unavailable is simply removed.
IMPORTANT: Factions, while executing an Operation, Special Activity, or Event to place their own forces, may take them from elsewhere on the map if the desired force type is not Available.
EXAMPLE: British without Available Guerrillas could remove Guerrillas from the map during a Train (3.2.1) to place them Underground, either in the same space or a different space.
NOTE: Although somewhat bizarre when considering the color of each side's wooden pieces, the British use the blue British Available Forces box while the Japanese use the red Japanese Available Forces box. This is to ensure consistency between the British and their "red" opponent, particularly when using the "Return of British Rule" sequence to transition from Japanese Occupation to Malaya.
1.4.2 Stacking
No more than one Supply Cache (1.4) may occupy a single space. Supply Caches may never occupy Economic Centers (1.3.5).
- Placing (such as a Supply Cache via Supply 4.2.1 or Event 5.0) may never violate stacking.
- Only one Sabotage or Terror marker may be placed in a space or on a Railway marker (1.3.6). If one is already present, ignore any further placement through Operations (3.0) or Special Activities (4.0). However, more than one Sabotage or Terror marker may be placed by Events (5.0).
- Only one Jungle Camp (1.10) and one New Village (1.15) marker may ever be in a Province, and never in any other kind of space.
NOTE: Although offering no additional benefit, more than one Kempeitai (1.8) or Force 136 marker (1.9) may occupy a space.
1.4.3 Underground/Active
Guerrillas are either Underground—symbol end down—or Active—symbol end up. Operations and Events flip them from one to the other state. Supply Caches, Troops, and Police are always Active. Always set up and place new Guerrillas Underground (including if replacing a piece).
NOTE: Unless instructions specify "Underground" Guerrilla, it is sufficient to "Activate" already Active ones (they stay Active). Also, "moving" or "relocating" Guerrillas does not affect Underground status unless specified.
IMPORTANT: The Japanese in Japanese Occupation use only 6 light blue cubes. The remaining 9 light blue cubes should be set aside and not used while playing the game. The British use only 10 red cylinders and 4 blue cylinders, the remaining cylinders should be set aside.
DESIGN NOTE: MPAJA Guerrillas represent those led by the Malayan Communist Party (MCP), while non-MPAJA Guerrillas represent various other resistance factions, including Malay, KMT, and other Chinese groups that were far smaller than the widespread MPAJA movement. Police represent local forces collaborating with the Japanese, overwhelmingly from the Malay community but also including elements of the Indian National Army.
1.5 Players & Factions
The game requires 2 players, each playing as one Faction: the British (blue), and the Japanese (red).
1.6 Opposition
Opposition markers may be placed in Provinces and Kuala Lumpur, affecting some Operations and Special Activities and the Resistance Phase during the Propaganda Round (6.2). Kuala Lumpur (1.3.4) and Provinces (1.3.2) always show one of two levels of attitude toward the Japanese Occupation that can shift during play. Each space may be either Opposition or Neutral (indicated by the absence of any marker). Actions and Events (5.0) that add or remove Opposition simply add or remove the marker.
DESIGN NOTE: This game does not allow the Japanese player to build up Support for their occupation. Although some within the Malay community actively collaborated with the Japanese to improve their local position, there was little political support for the occupation itself. Opposition markers represent areas where the resistance has successfully mobilized the population away from passive neutrality. The narrow active collaboration with Japanese occupation forces is modeled by the collaborationist Police cubes and the lowering of Resistance by having more Police on the map during the Propaganda Round.
1.7 Japanese Resources
At any moment, the Japanese Faction has between 0 and 20 Resources that it accumulates through Extract (4.3.1) and Events (5.0) to improve its position during the Resistance Phase of the Propaganda Round (6.2). Mark Japanese Resources on the edge track with a red cylinder. The British do not have Resources and any reference to "Resources" is shorthand for Japanese Resources.
NOTE: Unlike other COIN games where Resources represent operational resources that limit the number of selectable spaces, here Resources depict successful extraction from the occupied territory to further Japan's broader war effort.
1.8 Kempeitai
Kempeitai markers represent Japanese secret police units. They are moved through the Deploy Operation (3.3.1) and during the Propaganda Round (6.5), modify Japanese Sweep (3.3.3) and Assault (3.3.4), and are used to conduct Eliminate (4.3.3). The British may Ambush (3.2.4) to remove Kempeitai markers to Kuala Lumpur and increase Resistance by 1. Kempeitai markers are not forces (1.4).
1.9 Force 136
Force 136 markers represent British and Chinese operatives of the Special Operations Executive (SOE) who infiltrated into occupied Malaya to organize resistance. They are placed and moved with the Contact Operation (3.2.2) and during the Propaganda Round (6.5). The presence of Force 136 enables the British player to select spaces for their Train (3.2.1), Sabotage (3.2.3), and Ambush (3.2.4) Operations, even during a Limited Operation (2.4.4). Force 136 markers are also required for the Supply (4.2.1) and Gather (4.2.2) Special Activities. Force 136 are removed through the Japanese Eliminate Special Activity (4.3.3) and by Events (5.0). Force 136 markers are not forces (1.4).
NOTE: If none are in the Available box, the British may not relocate on-map Force 136 markers following the rule for wooden forces (1.4.1). This is not relevant to Kempeitai as they are never placed from Available.
1.10 Jungle Camps
Jungle Camp markers represent remote MPAJA camps in the deep jungles of Malaya. Jungle Camps are placed by Contact (3.2.2), the 'Seize Supplies' MPAJA card icon (5.5), and Events (5.0). If a Jungle Camp is needed to be placed and none are Available, the placing Faction must remove an on-map Jungle Camp to carry out the placement (representing the relocation of existing MPAJA infrastructure). Jungle Camps allow the British to place MPAJA Guerrillas with Train (3.2.1). Jungle Camps are removed through the British Supply (4.2.1) and Japanese Eliminate (4.3.3) Special Activities. The number of on-map Jungle Camps may enable the non-player MPAJA to win the game, resulting in both players losing (7.0).
1.11 Intel Chits
Intel chits depict intelligence on vulnerabilities in the Japanese defenses or other factors that improve the preparation for a future Allied invasion of Malaya. Intel chits have a value of '0', '1', or '2'. During setup (2.1) and in the Reset Phase of the Propaganda Round (6.6), Intel chits are randomly placed facedown, concealing their values, in the "Uncontrolled" box of every Province (1.3.2) and Kuala Lumpur (1.3.4). Neither player may look at concealed (facedown) Intel chits. The British Gather Special Activity (4.2.2) flips Intel chits to their revealed side, showing the chit's value. The Japanese Eliminate Special Activity (4.3.3) flips revealed Intel chits back to their concealed side. The value of all revealed Intel chits increases Resistance (1.13) during the Propaganda Round (6.2).
1.12 Sabotage and Terror
Sabotage markers are placed by the British Sabotage Operation (3.2.3) and some Events (5.0), reducing the Resource (1.7) earnings of the Japanese Extract Special Activity (4.3.1) and allowing the British to place Opposition in adjacent Provinces during the Propaganda Round. Sabotage markers are only removed by the Japanese Construct Operation (3.3.2) or Events (5.0).
Terror markers are placed by the Japanese Reprisal Special Activity (4.3.2) and Events (5.0). They block the placement of Opposition with the 'Mobilize Population' MPAJA card icon (5.5) and during the Propaganda Round (6.3). Terror markers are removed during the Reset Phase of the Propaganda Round (6.6).
1.13 Resistance Marker
Resistance is tracked with a marker on the edge track. The position of this counter will determine Victory (7.0) for either side. The marker is moved during the Campaign and during the Resistance Phase of the Propaganda Round (6.2). It may never be lower than 0 or greater than 20.
DESIGN NOTE: Unlike other COIN multipack games that focus on lowering a ruling power's Political Will to trigger favorable negotiations or state collapse, the fate of occupied Malaya will be decided by the broader conflict in the region. The British and their local allies seek to increase Resistance against the occupation forces to contribute to that broader conflict. Higher Resistance represents a more costly occupation for the Japanese, less resource extraction, and laying the groundwork for an Allied invasion. The Japanese seek to get the most out of their occupied territory while keeping unrest in check.
NOTE: The Resistance marker is double-sided, featuring an MPAJA flag on one side to indicate the possibility of them winning and to acknowledge their contribution to resistance against the Japanese occupation. Players are welcome to use either side as they wish, with no game effect.
1.14 Operation Zipper Preparation
The level of preparation for the Allied invasion to retake the Malayan peninsula is reflected by a marker on the Operation Zipper Track (6.7), affecting British Special Activities (4.2) and the number of Available Supply Caches (1.4). Its position also indicates the required Resistance for an MPAJA or British victory.
1.15 New Villages
The four New Village markers form a pool available to the Japanese Faction. New Villages are placed in Provinces by Construct (3.3.2) and some Events (5.0). They augment the Japanese Resources gained by Extract (4.3.1). There may only be one New Village in each Province space, and never in any other spaces. New Villages are removed if one is ever in a space with British forces and no Japanese forces.
DESIGN NOTE: New Villages represent the forced resettlement of urban dwellers to rural areas to form "food colonies" to increase food production for the occupation forces and general population. Only a few of these sites were driven by the military rationale of depriving the insurgency of resources. See Event J15 for a discussion of the militarized version that more closely resembled the British New Villages established during the Malayan Emergency.
2.0 Sequence of Play
2.1 Set Up
Follow the instructions on the second to last page of this booklet to prepare the draw deck and set up markers and forces. A full setup diagram can be found on the back page of this booklet.
2.2 Start
Begin play by revealing the top card of the draw deck and placing it onto a played cards pile. All played cards and the number of cards in the draw deck are open to inspection.
NOTE: Unlike in most previous COIN series volumes, only one Event card is revealed at a time.
RECORD STEPS: As the steps of each Event card play are completed, place a cylinder of the Faction's color (1.5) into the Initiative Track's appropriate box.
2.3 MPAJA Action
As each Event card is revealed, the British or Japanese player will first execute the MPAJA card icon (5.5) on the card, before either player acts. The effects, executing Faction, and distribution of the four types of MPAJA icons are described in section 5.5 and summarized on the Japanese side of the player aid sheet.
2.4 Initiative Track
One player takes the British Faction and the blue Eligibility cylinder, the other the Japanese Faction and the red Eligibility cylinder.
NOTE: Remember to resolve the MPAJA action on each Event card before either player acts on it (2.3, 5.5).
When playing an Event card, the British or Japanese player will execute Operations or the Event described on the card. At all times one player will be First Eligible, and the other will be Second Eligible. In each Event card round, the First Eligible player is first to choose what they will do, followed by the Second Eligible—whose choices are limited by what the First Eligible player did.
2.4.1 Eligibility
Each player puts one cylinder (blue and red respectively) on the First or Second Eligible spaces of the Initiative Track.
NOTE: British always start the game in the 1st Eligible Box and return there during the Reset Phase (6.6) of each Propaganda Round.
2.4.2 Options for Eligible Factions
First Eligible: The First Eligible player may perform a Limited Operation (2.4.4), execute the Event (5.0), or perform an Operation (3.0) with Special Activity (4.0), or Pass (2.4.3). The player selects their desired box and places their Eligibility cylinder in the appropriate box on the Initiative Track, then immediately executes the chosen action (Limited Operation, Event, Operation with Special Activity, or Pass).
Second Eligible: The Second Eligible player may then choose one of the boxes not containing the First Eligible player's cylinder and conduct the action in the box selected (or Pass).
2.4.3 Passing
After selecting a box, players may forgo the action in the box to Pass. If British pass they may conduct a Contact Operation (3.2.2). If Japanese pass, they may conduct a Limited Deploy Operation (3.3.1). Both players may pass and the order of cylinders in the Initiative Track will still decide eligibility (2.4.5).
NOTE: Ignore the Pass options written on the Initiative Track and instead consult the bottom corners of the player aid sheets for reference.
2.4.4 Limited Operation
For the Japanese, a Limited Operation is an Operation in just one space with no Special Activity. If the Japanese Limited Operation is a Sweep (3.3.3), it can involve pieces from multiple spaces but only one destination space. The British may conduct Limited Train (3.2.1), Sabotage (3.2.3), and Ambush (3.2.4) Operations in any spaces with Force 136 markers (1.9). A Limited Contact Operation (3.2.2) may either place one Force 136 marker or move any Force 136 markers. British Limited Operations may also not be combined with a Special Activity.
2.4.5 Adjust Eligibility
After both players have selected and executed their actions, replace the Eligibility cylinders on the Initiative Track, with the cylinder in the furthest left box becoming First Eligible, and the other cylinder becoming Second Eligible.
DESIGN NOTE: Selecting the Limited Operation box guarantees the player first eligibility. Likewise, selecting the Operation & Special Activity box guarantees second eligibility on the next card. Eligibility after selecting the Event space will depend on what the other player has chosen. The only way to block Events in The British Way is to take the Event space and then either play the Event or Pass.
2.4.6 Next Card
After eligibility has been reset, reveal the draw deck's next card and continue play.
2.5 Propaganda Card
When a Propaganda card is revealed, conduct a Propaganda Round (6.0).
NOTE: Each series of Event Cards up to a Propaganda Round is called a "Campaign".
3.0 Operations
3.1 Operations in General
A Faction executing an Operation (Op) chooses one of the four Operations listed on its Faction sheet and selects the map spaces (typically several) to be involved. Select a given space only once for a given Operation.
British Operations are generally allowed in any spaces with Force 136 markers (1.9), even if a Limited Operation. Japanese Operations are generally allowed in up to three spaces unless a Limited Operation, in which case they are allowed in only one space.
The executing Faction chooses the order of the spaces in which the Operation is resolved, the enemy pieces to be affected (targeted), and the friendly pieces to be placed, replaced, or moved. Once targeted, a Faction's pieces are affected to the maximum extent possible. Actions affecting another Faction's pieces do not require that Faction's permission.
3.1.1 Pawns
If desired, mark spaces selected for Operations (3.0), Special Activities (4.0), or other actions with white and black pawns. The pawns are for convenience, not a limit on play.
3.2 British Operations
The British choose from Train, Contact, Sabotage, and Ambush Operations.
3.2.1 Train
Train places Guerrillas. Select any non-EC spaces with Force 136 markers.
PROCEDURE: In each selected space, British may place one non-MPAJA Guerrilla or, if Jungle Camp marker, may place an MPAJA Guerrilla. If a Supply Cache in the selected space, may instead place up to two Guerrillas of any type.
3.2.2 Contact
Contact allows the British to place or move Force 136 markers.
PROCEDURE: Either place one Force 136 marker in any Province OR move any Force 136 markers to adjacent spaces. Up to one non-MPAJA Guerrilla may be moved with each moving Force 136 marker. Then, place a Jungle Camp, if none, in any Provinces where Force 136 placed or moved.
3.2.3 Sabotage
Sabotage allows the British to Sabotage adjacent Railways. Select any spaces with Force 136 markers and Underground Guerrillas.
PROCEDURE: In each selected space, Activate an Underground Guerrilla and place a Sabotage marker on an adjacent Railway marker without one.
3.2.4 Ambush
Ambush removes or displaces Japanese forces or Kempeitai markers. Select any spaces with Force 136 markers, Underground Guerrillas, and Japanese forces or Kempeitai markers.
PROCEDURE: In each selected space, Activate an Underground Guerrilla to either remove one Police OR roll a die—if greater than cubes in the space, British may move one Troop cube or Kempeitai marker to Kuala Lumpur to increase Resistance by 1. Add 1 to the roll for each Supply Cache in or adjacent to the space.
3.3 Japanese Operations
The Japanese choose from Deploy, Construct, Sweep, or Assault Operations.
3.3.1 Deploy
Deploy places Police and moves Kempeitai markers. Select up to three spaces, either Neutral Provinces with Troops or Kuala Lumpur.
PROCEDURE: In each selected space, place one Police. Then, even if a Limited Operation, the Japanese player may move any Kempeitai markers to any spaces with Japanese forces (Troops or Police).
3.3.2 Construct
Construct repairs Railways and places New Villages. Select up to three Provinces with more cubes than Guerrillas.
PROCEDURE: In each selected Province, remove a Sabotage marker from an adjacent Railway OR if a Province with no New Village and adjacent to an Economic Center, may place a New Village and set the space to Opposition.
3.3.3 Sweep
Sweep moves Troops and Activates Guerrillas. Select up to three destination spaces.
PROCEDURE: First, simultaneously move any adjacent Troops desired into selected spaces. Then, in each selected space, Activate (1.4.3) one Guerrilla for every cube. If Jungle Province and no Kempeitai in the space, instead Activate a Guerrilla for every two cubes.
3.3.4 Assault
Assault eliminates enemy Forces. Select up to three spaces with Japanese Troops and Active British forces.
PROCEDURE: In each selected space, remove one Active British forces piece for every Troop cube, or if Mountain and no Kempeitai, one for every two Troops. First remove Active Guerrillas, then remove Supply Caches only once no Guerrillas remain (even Underground).
NOTE: Assault may only remove British forces (i.e., wooden pieces). Force 136 and Jungle Camps are harder to locate and can instead be removed by the Japanese Eliminate Special Activity (4.3.3). Unlike other COIN multipack games, Police in Kuala Lumpur and Economic Centers do not join Assaults. In this conflict, collaborationist police largely provided information benefits, as modeled with Sweep and Eliminate.
4.0 Special Activities
4.1 Special Activities in General
When a Faction per the Initiative Track (2.4) executes an Operation (3.0), it may also execute one Special Activity (EXCEPTION: Limited Operation, 2.4.4). As with Operations, the executing Faction selects spaces, pieces affected, and the order of actions. Select a given space only once as a location for a given Special Activity. Events may grant free Special Activities (not further affecting Eligibility, 2.4.1).
IMPORTANT: A Faction may execute its Special Activity at any one time immediately before, during, or after its Operation.
EXAMPLE: British Train, then pause to Supply and place Supply Caches, then Train in another space.
4.1.1 Accompanying Operations
Some Special Activities specify that they may only accompany certain types of Operations (3.0). If not otherwise specified, Special Activities may accompany any Operations and take place in any otherwise valid spaces.
4.2 British Special Activities
The British choose from Supply, Gather, or Raid Special Activities.
4.2.1 Supply
Supply places Supply Caches. It may accompany Train (3.2.1) or Contact (3.2.2) and takes place in up to two Provinces with Force 136 and Jungle Camps (or up to three such Provinces if Operation Zipper is at 12 or higher, see 6.7.3).
PROCEDURE: In each selected space, replace a Jungle Camp with a Supply Cache.
4.2.2 Gather
Gather reveals Intel chits. Gather may accompany the Contact (3.2.2), Sabotage (3.2.3), or Ambush (3.2.4) Operations and takes place in up to two spaces with Force 136 markers.
PROCEDURE: In each selected space and each space adjacent to it, may Activate one Underground Guerrilla to reveal a concealed Intel chit.
4.2.3 Raid
Raid moves Guerrillas and then acts with them. It may accompany any British Operation (3.2) and takes place in up to two spaces adjacent to a Supply Cache (or up to three such spaces if Operation Zipper is at 20, see 6.7.3).
PROCEDURE: In each selected space, move in one or two Guerrillas from an adjacent space with a Supply Cache and if desired perform a Limited Sabotage or Ambush there (even if no Force 136 present).
4.3 Japanese Special Activities
The Japanese choose from Extract, Reprisal, or Eliminate Special Activities.
4.3.1 Extract
Extract allows the Japanese to gain Resources. It may only accompany Deploy (3.3.1) and may select up to two Economic Centers.
PROCEDURE: For each selected Economic Center, gain one Resource for each starred Railway without Sabotage connected to it by a chain of Railways without Sabotage. A Railway marker is connected to any other Railway marker on a border that touches its border, and Railway markers adjacent to Economic Centers and Kuala Lumpur are also adjacent to each other. Then, gain one additional Resource for each New Village on the map.
EXAMPLE: The starred Railway on the Kedah-Thailand border is connected directly to the Railway on the Perak-Thailand border, and through it to the Railway on the Perak-Kelantan border and thence the top Economic Center. Continuing down it connects through the Perak-Pahang-Selangor Railway, Kuala Lumpur, and the Negri Sembilan-Pahang Railway, to the bottom Economic Center. A Sabotage marker on the Perak-Kelantan Railway would interrupt the connection to both Economic Centers.
4.3.2 Reprisal
Reprisal removes Opposition and displaces Guerrillas. It may accompany the Construct (3.3.2), Sweep (3.3.3), or Assault (3.3.4) Operations and takes place in up to two spaces with Japanese Troops.
PROCEDURE: In each selected space, add a Terror marker, if none already there, and set the space to Neutral. Then, move one Guerrilla from there to an adjacent space.
4.3.3 Eliminate
Eliminate removes enemy markers and conceals Intel. It may accompany the Construct (3.3.2), Sweep (3.3.3), or Assault (3.3.4) Operations and takes place in up to two spaces with Kempeitai markers.
PROCEDURE: In each selected space, either conceal a revealed Intel chit or roll a die—if greater than Guerrillas in the space, Japanese may remove an enemy marker (Jungle Camps before Force 136). Add 1 to the die roll for each Police cube in the space. If Force 136 removed, reduce Resistance by 1.
5.0 Events
Each Event bears a title, italicized flavor text, and Event text. Flavor text provides historical interest and has no effect on play.
5.1 Executing Events
When a Faction executes an Event, it carries out the Event text literally and in order (sometimes involving actions or decisions by the other Faction). Unless otherwise specified, the executing Faction makes all selections involved in implementing the text, such as which pieces are affected. If another Faction is specified or selected to take an action, that Faction decides the details of the action. Some Events with lasting effects have markers as aids to play.
5.1.1 Event Text Precedence
Where Event text contradicts rules, the Event takes precedence. However:
- Events may not violate stacking (e.g., an Event could not place a second Supply Cache in a space).
- Events place only Available pieces (1.4.1) and markers; they remove rather than replace if the replacement is not Available or if stacking (1.4.2) would be violated.
- Events may not raise Resistance beyond 20 or reduce it below 0 (1.13).
5.1.2 Contradicting Events
If two Events contradict, the currently played Event takes precedence.
5.1.3 Partial Implementation
An executed Event's text that can be implemented must be. If not all of its text can be carried out, implement that which can.
5.2 Dual Use
Many Events have both unshaded and shaded Event text. The executing Faction may select either the unshaded or shaded text to carry out (not both). While the unshaded text often favors the British, a player may select either text option regardless of Faction.
DESIGN NOTE: Dual-use events represent opposed effects of the same cause, forks in the historical road, or instances subject to alternative historical interpretation.
5.3 Capabilities
Dual-use Events marked "BRITISH CAPABILITY" or "JAPANESE CAPABILITY" have lasting effects mainly relating to that Faction, either positive or negative. These labels are for flavor only, and both Factions may execute Capability Events with either label. The Event's effects last for the rest of the game.
NOTE: Set out executed Capability Event cards near the board as added reminders, using a Capability marker to indicate which option was selected.
5.4 Mandatory Events
Two Event cards are designated as "Mandatory Events" (J6 Jungle is Neutral and J9 Atomic Bombings). A Mandatory Event's effect occurs immediately when drawn, before the 1st Eligible player acts. Neither player may then select the Event box of the Initiative Track (2.4) during this round. A Mandatory Event's effect occurs immediately after the MPAJA card icon (5.5) is resolved.
5.5 MPAJA Card Icons
At the top right of each Event card is one of four MPAJA card icons. When an Event card is drawn, immediately resolve the MPAJA card icon before the First Eligible player decides which box of the Initiative Track (2.4) to select. The effects, executing Faction, and distribution of the four types of MPAJA icons are listed below and summarized on the Japanese side of the player aid sheet:
- Mobilize Population (14 Cards): British add Opposition to a space with a Jungle Camp and no Terror.
- Kill Traitors (6 Cards): British remove a Police from a space with an MPAJA Guerrilla.
- Seize Supplies (6 Cards): Japanese replace a Supply Cache with a Jungle Camp in a space without a Jungle Camp.
- Food Shortage (6 Cards): Japanese remove an MPAJA Guerrilla from a space without a Supply Cache.
DESIGN NOTE: The MPAJA card icons, alongside the MPAJA phase of the Propaganda Round, represent the independent agency of the insurgent organization beyond their alliance with Force 136. Although sharing a common immediate goal, the MPAJA had their own approach to the conflict and post-war goals. The card icon mechanic offers a simple but effective way of including the MPAJA's independent actions without resorting to a cumbersome non-player flowchart or an additional player faction that might exaggerate their agency.
6.0 Propaganda Round
Conduct a Propaganda Round in the sequence of phases below as each Propaganda card is played. The Propaganda Round aid sheet also lists this sequence.
6.1 MPAJA Phase
The British player resolves independent actions carried out by the MPAJA non-player Faction:
6.1.1 Clashes?
Remove one MPAJA Guerrilla and one non-MPAJA Guerrilla from each space where both are present.
6.1.2 Mobilize?
Place one MPAJA Guerrilla in each space with Opposition.
6.2 Resistance Phase
Calculate the net effect to Resistance of the following adjustments before shifting the marker:
6.2.1 Intel?
Increase Resistance by the value of each revealed Intel chit (1.11).
6.2.2 Defenses Undermined?
Increase Resistance by 1 for every Supply Cache on the map and by 1 for each space with more Guerrillas than cubes.
6.2.3 Resources Extracted?
Reduce Resistance by 1 for every 4 Japanese Resources (1.7), then set Japanese Resources to 0.
DESIGN NOTE: Resource extraction reducing Resistance does not directly represent a weakening of the resistance movement, but instead reflects a failure to deny Malaya's resources to the Japanese. Such a failure could convince Allied high command to devote resources to other, more promising, theaters, rather than to an invasion of the peninsula.
6.2.4 Population Subdued?
Reduce Resistance by 1 for every five Population at Neutral and by 1 for every three spaces with Police.
NOTE: It's important to calculate the net shift in Resistance during these steps before moving the marker and checking victory, rather than adjusting the marker one step at a time.
6.2.5 Invasion Preparation
After calculating the net shifts in Resistance, place the Zipper marker in the highest space of the Operation Zipper Track (6.7) of equal or lower value than Resistance.
EXAMPLE: If Resistance is now 14, the Zipper marker would be placed in the 12 space of the Operation Zipper Track.
6.2.6 Game End?
If final Propaganda card, the game immediately ends with an evaluation of Victory (7.0). Otherwise, continue to the next phase.
6.3 Resources Phase
6.3.1 British
For each Railway with a Sabotage marker, British may set one adjacent space without a Terror marker to Opposition.
6.3.2 Japanese
Japanese may perform a Construct Operation (3.3.2).
6.4 Support Phase
6.4.1 Supply
British may perform a Supply Special Activity.
6.4.2 Reprisal
Japanese may perform a Reprisal Special Activity.
6.5 Redeploy Phase
6.5.1 British Redeploy
British may move any Force 136 markers to any spaces with Jungle Camps.
6.5.2 Japanese Redeploy
Japanese may move any Kempeitai markers and Police on the map to any spaces with more Japanese Troops than Guerrillas.
6.6 Reset Phase
Then prepare for the next card as follows:
- Remove all Terror markers from the map.
- Return all Intel chits (1.11) to the pool and then randomly draw and place one chit facedown in the "Uncontrolled" box of each Province and Kuala Lumpur.
- Flip all Guerrillas Underground (1.4.3).
- Set British to First Eligible, then reveal the next card from the draw deck and continue play (2.4.6).
NOTE: Unlike other COIN multipack games, Sabotage markers are not automatically removed at Reset. The Japanese player must use Construct to repair the Railways.
6.7 Operation Zipper Track
The Operation Zipper Track represents preparation for the Allied military operation that aims to retake the Malayan peninsula from the Japanese. As the British and their MPAJA allies escalate the level of resistance to the occupation, they receive greater supplies from South East Asia Command (SEAC). The final position of Operation Zipper, determined by Resistance, also decides who wins the game: Japanese, MPAJA, or British (7.0).
6.7.1 Moving the Track
The Operation Zipper Track is primarily moved during the Resistance Phase of the Propaganda Round (6.2). The Track can also be moved by Events (5.0), but will still be reset according to the Resistance level during the Propaganda Round.
6.7.2 Supply Caches
When the Operation Zipper Track reaches a box with a Supply Cache, the British immediately place that Supply Cache into their Available Forces Box (1.4.1). Similarly, if the marker decreases past a box with a Supply Cache, British must immediately remove a Supply Cache to it, first from Available Forces and then from the map.
6.7.3 Modifying British Special Activities
At the '12' level of the track, British can conduct their Supply Special Activity (4.2.1) in one additional space. At the '20' level of the track, British can conduct their Raid Special Activity (4.2.3) in one additional space.
DESIGN NOTE: Operation Zipper was the planned Allied invasion to retake Malaya that did not take place, due to the Atomic Bombings and Soviet offensives in Manchuria forcing Japanese surrender before the invasion occurred. An early surrender of this kind is possible due to the Atomic Bombings Mandatory Event (J9). However, just like the real-world decision-makers, players cannot assume the Japanese will surrender before Operation Zipper takes place.
7.0 Victory
Victory is determined by the level of Resistance (1.13) at the end of the game, and possibly a comparison of Jungle Camps and Force 136 markers in play. Resistance is measured on the edge track and can range from 0-20.
7.0.1 Victory
At the final Propaganda Round, after conducting the MPAJA and Resistance Phases, check the final Resistance level to determine the winner of the game:
- If Resistance is less than 18, the Japanese player wins the game.
- If Resistance is at 20, the British player wins the game.
- If Resistance is at 18-19 and there are fewer Jungle Camps than Force 136 markers on the map, the British player wins. Otherwise, the MPAJA wins and both players lose.
NOTE: Unlike other multipack COIN games, Japanese Occupation does not have the possibility of early victory before the final Propaganda Round. Victory is always determined during the third Propaganda Round.
7.1 Raising Resistance
Resistance is raised in the following ways:
- Each Troop or Kempeitai moved by Ambush (+1 R per piece moved)
- Events (+1 to +3 R)
- At Propaganda Round, each revealed Intel chit (+ R equal to chit value)
- At Propaganda Round, every Supply Cache on the map (+1 R per Supply Cache)
- At Propaganda Round, each space with more Guerrillas than cubes (+1 R per space)
7.2 Lowering Resistance
Resistance is lowered in the following ways:
- Each Force 136 removed by Eliminate (–1 R per marker removed)
- Events (–1 to –3 R)
- At Propaganda Round, every 4 Resources (–1 R per 4 Resources)
- At Propaganda Round, every 5 Population at Neutral (–1 R per 5 Neutral Population).
- At Propaganda Round, every 3 spaces with Police (–1 R per 3 spaces)
8.0 Example of Play
Set up the game as indicated in section 2.1 (consult the setup diagram on the back of this booklet), but construct only the first part of the deck with these cards in the following order, facedown from top to bottom: Secret Army (J14), Jungle Conference (J27), Greater East Asia Co-Prosperity Sphere (J2), Burma Theatre (J17), Air Drops (J8), Malay Collaboration (J21), and Propaganda! (J33). The Intel chits would usually be placed randomly, but for the purposes of this example of play place them facedown as follows: Kedah (2), Perak (1), Kelantan (1), Trengganu (2), Pahang (0), Selangor (0), Kuala Lumpur (1), Negri Sembilan (2), Johore (0). We are now ready to begin.
Reveal the first card, "Secret Army", from the top of the deck. In Japanese Occupation, before either player acts, we check the MPAJA icon at the top right corner of the card to see what action MPAJA take. This card features "Mobilize Population", the most common icon, which allows the British to add Opposition to a space with a Jungle Camp and no Terror. There is currently only one space with a Jungle Camp that doesn't already have Opposition, Negri Sembilan, so the British add Opposition there.
The British are 1st Eligible and decide to perform a Contact Operation with the Raid Special Activity, which will allow them to get their third Force 136 marker onto the map while also damaging the Japanese infrastructure. Contact allows the British to either move all their Force 136 markers to adjacent spaces (possibly also moving a blue non-MPAJA Guerrilla with each), or to place one Available Force 136 marker into any Province. They decide to do the latter, and place a Force 136 marker in Trengganu along with a Jungle Camp, which is placed whenever a Force 136 marker is moved or placed with Contact.
Next the British will Raid, which allows them to select up to two spaces adjacent to Supply Caches, then move one or two Guerrillas from a space with a Supply Cache into each selected space and either Ambush or Sabotage there. There is currently only one space with a Supply Cache, Perak, and the British don't want to leave it unprotected, so they just select Selangor and move one (red) MPAJA Guerrilla from Perak to there. They then use this Guerrilla to Sabotage, Activating it to place a Sabotage marker on the adjacent Railway. The British turn is now complete.
British Contact and Raid
The Japanese can now choose from the other two boxes on the Initiative Track, Limited Operation or Event. The current Event is attractive, but they have a good opportunity to set up an effective action on the next turn, so decide to perform a Limited Construct Operation instead. Construct can usually select up to three Provinces with more cubes (Troops and Police) than Guerrillas, but Japanese Limited Operations are restricted to one space, so the Japanese just select Perak. They can then either place a New Village or remove a Sabotage marker from an adjacent Railway, and they decide to remove the Sabotage marker that the British just placed on the Railway between Perak, Selangor, and Pahang.
The Japanese turn is now complete and as both players have completed their turns, we reset Eligibility. The Faction whose cylinder is furthest to the left, in this case Japanese, becomes 1st Eligible, and the other Faction becomes 2nd Eligible.
Eligibility is reset at the end of each round
Reveal the next card: Jungle Conference. The MPAJA icon on this card is "Food Shortage", which allows the Japanese to remove an MPAJA Guerrilla from a space without a Supply Cache, and they decide to remove the Guerrilla in Pahang.
The Japanese are 1st Eligible and decide to perform a Deploy Operation with the Extract Special Activity. They will Extract first, which allows them to gain 1 Resource for each starred Railway connected to each Economic Center (blocked by Sabotage on any intervening Railways). In this case there is no Sabotage on any Railways, so they gain the full 8 Resources—4 for each Economic Center each being connected to four starred Railways. These Resources are marked with the red cylinder on the edge track, and will help them reduce Resistance during the Propaganda Round (they aren't spent during the Campaign).
Next they Deploy, which allows them to place a Police cube in up to three Neutral Provinces with Troops and/or Kuala Lumpur. In this case only Kuala Lumpur is an option, as both Perak and Johore have Opposition, so they just place one Police into Kuala Lumpur. Deploy also allows them to move their Kempeitai markers to any spaces with Japanese forces, even if not selected for the Operation, but they choose not to move any. The Japanese turn is now complete.
The British decide to perform a Limited Train Operation. British Limited Operations can usually be performed in any spaces with Force 136 markers, no different to their regular Operations. Train is further restricted to Provinces and/or Kuala Lumpur and allows them to place a (blue) non-MPAJA Guerrilla, or a (red) MPAJA Guerrilla if there is a Jungle Camp present, or up to two Guerrillas of any type if there is a Supply Cache present. They decide to place two MPAJA Guerrillas in Perak, one non-MPAJA Guerrilla in Trengganu, and one MPAJA Guerrilla in Negri Sembilan. The British turn is now complete, so we reset British to 1st Eligible and Japanese to 2nd Eligible.
British Limited Train
Reveal the next card: Greater East Asia Co-Prosperity Sphere. The MPAJA icon on this card is another "Mobilize Population", so the British add Opposition to Trengganu (where there is now a Jungle Camp). British are 1st Eligible and decide to perform the unshaded effect of the Event, which will allow them to place Sabotage markers on three Railways adjacent to Opposition, crippling the Japanese occupation economy. They place Sabotage markers on the Perak-Kelantan border Railway, the Perak-Selangor-Pahang border Railway, and the starred Railway adjacent to Negri Sembilan. The British turn is now complete.
The Japanese decide to perform a Sweep Operation with the Reprisal Special Activity. They Reprisal first, which allows them to select up to two spaces with Troops, adding a Terror marker to each and setting it to Neutral, then moving one Guerrilla to an adjacent space. They select Perak and Johore, placing Terror and removing Opposition from both, then moving one MPAJA Guerrilla from Perak to Kedah and one from Johore to Negri Sembilan.
Next the Japanese will Sweep, which allows them to move Troops into up to three destinations from any adjacent spaces, then Activate Guerrillas in the destinations. They select Perak, Kelantan, and Negri Sembilan, moving Troops and Activating Guerrillas as follows:
- Perak: No Troops moved in, both Guerrillas Activated by the cubes already there.
- Kelantan: Two Troops moved in from the adjacent Economic Center, Activating the Guerrilla (requiring two cubes due to Jungle).
- Negri Sembilan: Two Troops moved in from Kuala Lumpur, two Troops moved in from the adjacent Economic Center, two Troops moved in from Johore, Activating all three Guerrillas (requiring two cubes per Guerrilla due to Jungle).
Japanese Reprisal and Sweep
The Japanese turn is now complete, so we reset British to 1st Eligible and Japanese to 2nd Eligible.
Reveal the next card: Burma Theater. The MPAJA icon on this card is "Seize Supplies", which allows the Japanese to replace a Supply Cache with a Jungle Camp in a space without a Jungle Camp, but there are not currently any eligible spaces, so it has no effect.
British are 1st Eligible and decide to perform a Train Operation with the Supply Special Activity. They Supply first, which allows them to replace up to two Jungle Camps with Supply Caches in Provinces with Force 136 markers, which they do in Trengganu and Negri Sembilan.
Next they Train as follows, removing some Guerrillas from the map to place elsewhere, which can be done once there are none left in the Available Forces box:
- Perak: Place two MPAJA Guerrillas.
- Trengganu: Place one non-MPAJA Guerrilla from Available and one from Kedah.
- Negri Sembilan: Place two MPAJA Guerrillas from Negri Sembilan, just removing them temporarily and then placing them back Underground.
The British turn is then complete.
The Japanese decide to perform a Limited Sweep Operation in Negri Sembilan, just Activating both freshly placed Guerrillas without moving any Troops. The Japanese turn is now complete, so we reset Japanese to 1st Eligible and British to 2nd Eligible.
Reveal the next card: Air Drops. The MPAJA icon on this card is another "Seize Supplies", which this time will be effective as there are two Supply Caches in spaces without Jungle Camps. The Japanese decide to replace the Supply Cache in Trengganu with a Jungle Camp.
The Japanese are 1st Eligible and decide to perform an Assault Operation with the Eliminate Special Activity. Assault allows them to select up to three spaces with Troops and at least one Active British forces piece, and remove one per Troop (or one per two Troops in Mountains without Kempeitai markers). They remove the one Active non-MPAJA Guerrilla in Kelantan, the two Active MPAJA Guerrillas in Perak (but cannot remove the Supply Cache as it is protected by the Underground Guerrillas), and all three Active Guerrillas plus the Supply Cache in Negri Sembilan.
Next they Eliminate in Perak and Johore, in both cases using their Kempeitai markers to roll to try and remove the Jungle Camps. The roll needs to exceed the number of Guerrillas in the space to succeed, but gains a bonus equal to the number of Police in the space (+1 to both rolls in this case). In Perak they roll a 4 (modified to 5) and in Johore they roll a 1 (modified to 2), so both rolls succeed and both Jungle Camps are removed, leaving the Force 136 marker in Perak vulnerable to future Eliminates. The Japanese turn is now complete.
Japanese Assault and Eliminate
The British decide to perform a Limited Contact Operation, which they can use to move all three of their Force 136 markers to adjacent spaces. They move one marker from Trengganu to Kelantan, bringing a non-MPAJA Guerrilla with it, and one from Negri Sembilan to Pahang, but decide not to move the Force 136 marker in Perak. They also place a Jungle Camp in each space that a Force 136 marker moved into, Kelantan and Pahang. The British turn is now complete, so we reset British to 1st Eligible and Japanese to 2nd Eligible.
Reveal the next card: Malay Collaboration. The MPAJA icon on this card is "Kill Traitors", which allows the British to remove a Police cube from a space with an MPAJA Guerrilla. They decide to remove the Police in Johore.
British are 1st Eligible and decide to perform an Ambush Operation with the Gather Special Activity. They will Gather first, which selects up to two spaces with Force 136 markers, then allows them to Activate Guerrillas in and adjacent to those spaces to reveal Intel chits. They select Perak and Pahang, and Activate one Guerrilla each in Kedah, Perak, Trengganu, and Johore, flipping over the Intel chit in each of those spaces. This reveals a 2-value chit in each of Kedah and Trengganu, a 1-value chit in Perak, and a 0-value chit in Johore. A good haul for the British!
Next they will Ambush, which they can do in any spaces with a Force 136 marker, Underground Guerrillas, and Japanese pieces (even Kempeitai markers). There are only two of these, Perak and Kelantan, so they will Ambush in both. In Perak they Activate a Guerrilla to remove the Police cube, while in Kelantan they Activate a Guerrilla to target a Troops cube, which requires a roll greater than the number of cubes there, but gains +1 for the adjacent Supply Cache in Perak. They roll a 2, increased to a 3, and relocate one Troops cube to Kuala Lumpur, increasing Resistance by 1, to 3. The British turn is now complete.
The Japanese decide to execute the shaded Event effect, which first allows them to place Police into three Provinces of their choice, and they choose Perak, Negri Sembilan, and Johore. It also allows them to then Eliminate in one space with Police and Kempeitai, which they do in Perak, choosing to use Eliminate to conceal (flip back facedown) the 1-value Intel chit there. The Japanese turn is now complete, so we reset Japanese to 1st Eligible and British to 2nd Eligible.
The next card revealed is a Propaganda! card, triggering a Propaganda Round. We will work through each phase in turn, starting with the MPAJA phase.
- MPAJA: There are no spaces with both MPAJA and non-MPAJA Guerrillas, so none are removed. One MPAJA Guerrilla is then placed into each space with Opposition—in this case Trengganu and Negri Sembilan.
- Resistance: Resistance is increased by a net total of 3 (+4 for revealed Intel chits, +1 for Supply Caches, +3 for spaces with more Guerrillas than cubes, –2 for 8 Resources, –2 for 13 Neutral Population, –1 for four spaces with Police), up to 6. This sets the Operation Zipper Track to the '6' space, releasing an additional Supply Cache to the British Available Forces box. Japanese Resources are then set to 0.
- Resources: British set Kelantan and Selangor to Opposition. Japanese Construct in Perak and Negri Sembilan to remove Sabotage on adjacent Railways, and in Johore to place a New Village (also setting it to Opposition).
- Support: British Supply in Kelantan and Pahang to replace the Jungle Camps with Supply Caches. Japanese Reprisal in Kelantan and Negri Sembilan, placing Terror, removing Opposition, and moving both Guerrillas into Pahang.
- Redeploy: British do not move any Force 136 markers. Japanese move their Kempeitai marker in Kuala Lumpur to Kelantan.
- Reset: Remove all Terror markers from the map (but do not remove Sabotage). Remove all Intel chits and place one randomly, facedown, in each Province and Kuala Lumpur. Flip all Guerrillas Underground, set British to 1st Eligible and Japanese to 2nd Eligible, then reveal the next card and continue play.
This example of play is now complete. You can continue the current game by constructing the rest of the deck (two stacks of six random Event cards, each with a Propaganda card shuffled in with the bottom two Event cards) and revealing the next Event card.
The British have managed to establish several Supply Caches and begin increasing Resistance, but have a long way to go until they can liberate Malaya. To win conclusively they will need to bring Resistance to 20 during the final Propaganda Round, triggering Operation Zipper, but they can also win with Resistance at 18 or 19 if there are more Force 136 markers than Jungle Camps on the map, otherwise this means that the MPAJA win. If Resistance remains below 18 then the Japanese will win, and to do this they will need to use their Troops and Kempeitai to aggressively suppress all resistance, British and MPAJA alike.
9.0 Event Tips and Background
The card backgrounds below provide brief summaries of the historical events and the rationale behind the effects on the cards. For those looking to read more, there are excellent accessible sources from each of the three main actors' perspectives. For the MPAJA, I would recommend Red Star Over Malaya by Cheah Boon Kheng. It's also a good choice if you're looking for the best one-volume overview of the conflict. Although Freddie Spencer Chapman's The Jungle is Neutral is the classic British memoir, Margaret Shennan's Our Man in Malaya also provides a good account of the Force 136 perspective. Finally, Paul Kratoska's The Japanese Occupation of Malaya and Singapore, 1941-1945 offers a nice discussion of the different aspects of Japanese occupation policy, including repression, extraction, and collaboration.
J1. Sook Ching
Unshaded: Massacres alienate population: Increase Resistance by 1 for each Terror marker on the map (max 3).
Shaded: Suspected resistance crushed: Japanese may Reprisal in each space with Troops and Opposition.
Tips: None.
Background: Shortly after the Japanese conquest of the Malayan peninsula, Japanese forces began a violent purge of "anti-Japanese" Chinese in Singapore and the surrounding countryside known as the "sook ching" (Chinese for "eradication" or "purge"). The Kempeitai (J29) conducted the indiscriminate purges which killed tens of thousands in Singapore alone. The brutality convinced many Chinese elites to collaborate and provide a "donation" to the Japanese occupation government of $50 million (J3). In 1947, the British put the perpetrators of the sook ching on trial for war crimes, with the convicted masterminds executed.
The unshaded effect reflects how the shock from this pre-emptive and indiscriminate repression increased popular sympathy for acts of resistance. The shaded effect illustrates the Japanese expanding sook ching-style violence into the rural countryside with reprisals against communities suspected of helping the growing insurgency.
J2. Greater East Asia Co-Prosperity Sphere
Unshaded: People refuse to cooperate: Place Sabotage markers on up to 3 Railways adjacent to Opposition.
Shaded: Seen as a route to independence: Remove Sabotage markers from up to 2 Railways adjacent to Neutral spaces.
Tips: The unshaded effect can place Sabotage markers on Railways that already have them.
Background: During its conquest of Southeast Asia and the Pacific, Japanese occupation forces conquered the colonies of other great powers, many of which possessed growing nationalist movements seeking independence. The Greater East Asia Co-Prosperity Sphere promised an alternative regional economic order under Japanese leadership. This framing served to mask their hegemonic expansion, similar to how western colonial powers had framed their conquests as bringing enlightened modernization or "benevolent assimilation". Many nationalist leaders initially jumped at the opportunity to support Japan in displacing western colonial powers (J26). Yet, as Japanese economic demands and brutality became apparent, enthusiasm for the Greater East Asia Co-Prosperity Sphere sharply declined.
This card reflects the diverging trajectories of Japan's pitch to the region. The shaded effect illustrates the promises placating many within occupied Malaya, discouraging the population from sabotaging the occupation government's hold over the economy. In contrast, the unshaded effect represents a rejection of the Greater East Asia Co-Prosperity Sphere and greater efforts to avoid collaboration, thereby undermining Japan's goal of extracting resources for its war effort.
J3. Overseas Chinese Association
Unshaded: Chinese community resists: British may place up to 2 MPAJA Guerrillas and 1 non-MPAJA Guerrilla in any spaces with Force 136.
Shaded: Gives "donation" to Japanese: Increase Japanese Resources by 1 for every 2 Neutral Population.
Tips: None.
Background: The Overseas Chinese Association (OCA), led by prominent Chinese business leaders, sought to serve as an intermediary between the Chinese population in Singapore and the Japanese occupation government. The OCA collected the "donation" of $50 million that Japan extorted from the population following the sook ching (J1). The OCA conducted many other similar activities, viewing reluctant collaboration with Japan as the best means of lessening the effects of occupation on the population. The card features a portrait of Lim Boon Keng, a Peranakan physician and social reformer who was compelled by the Japanese to serve as president of the OCA during the war.
The unshaded effect of the card illustrates how many rural Chinese communities chose instead to support the MPAJA insurgency and other resistance groups. In contrast, the shaded effect models the "donation" and other benefits to the occupation government's economic policies (increased Resources) from the OCA's approach of collaborating to survive (Neutral Population).
J4. Chin Peng
Unshaded: Works with British agents: Increase Resistance by 1 for each space with Force 136 and a Jungle Camp.
Shaded: Mutual distrust about post-war struggle: Remove a Jungle Camp from each space with Force 136.
Tips: None.
Background: Chin Peng, the future leader of the Malayan Communist Party's post-war insurgency against British rule and the Malaysian state, served as an MPAJA leader in Perak during the resistance against Japan. As the Japanese captured the other leaders of the MPAJA, Peng suddenly found himself in charge and served as the liaison officer between the insurgency and British Force 136 operatives (J27). For his cooperation with Force 136, the British government granted Chin Peng the Order of the British Empire (OBE), later withdrawn for his resistance against British rule. During the war Chin Peng developed a friendship with Force 136 officer John Davis (J25), who went on to serve as an intermediary between the MCP and the Malaysian state during the 1955 Baling talks toward the end of the Malayan Emergency (1948-1960, covered by The British Way: Malaya).
The unshaded effect covers Chin Peng's coordination of MPAJA and Force 136, enhancing the resistance to Japanese rule. The shaded effect represents the increasing friction and doubts between the two "allies" as Japanese surrender approached and the MPAJA began stashing their weapons for a future conflict against the returning British (J14).
J5. "Hill Rats"
Unshaded: Rebels mistaken for bandits: Flip all Guerrillas Underground.
Shaded: Bandits disguised as rebels: Remove Opposition from a space with an Active Guerrilla.
Tips: None.
Background: The Japanese used "hill rats" as a derogatory term for the guerrillas and the many other armed groups that formed in the vacuum caused by the collapse of British rule. Although many of these became associated with either the MPAJA or other organized resistance groups, others were essentially just bandits attempting to survive the occupation by preying on the less fortunate.
The unshaded effect reflects how appearing like bandits could obscure the activities of the resistance groups or lead Japanese forces to pursue less immediately threatening criminal groups. In contrast, the shaded effect illustrates the problem of criminals posing as resistance members to exploit the population. Such behavior could quickly undermine civilian support for the real insurgents.
J6. Jungle is Neutral
MANDATORY EVENT
Attrition from rough conditions: Roll a die for each Jungle Province—if result is 1-2, each Faction must remove one of their forces from the space (Troops to Kuala Lumpur).
Tips: Roll separately for each Jungle Province (either player may roll). Force 136, Jungle Camps, and Kempeitai markers are not forces and cannot be removed by this Event. Supply Caches are forces and can be removed, but British may choose to remove a Guerrilla first if one is present.
Background: The phrase "jungle is neutral" comes from the title of Freddie Spencer Chapman's (J16) famous 1949 memoir of the war. The book chronicles his experiences surviving in the jungle and evading Japanese forces after the fall of Singapore in 1942. Chapman represented one of the few "stay-behind" British operatives not captured by the Japanese, largely thanks to assistance from the MPAJA insurgency's leader Chin Peng (J4). In 1943, Chapman managed to join up with other members of Force 136.
This mandatory event models how the jungle was neutral to all the major combatants, whether local guerrillas, Force 136 operatives, or Japanese forces. The tough conditions of the jungle wore down all sides. Deep jungle camps may have provided sanctuary from Japanese raids, but they also made survival a real challenge for those hiding out there. Supplies from British air drops helped alleviate the poor conditions for the guerrillas (J8).
J7. South East Asia Command
Mountbatten aids Force 136: Shift Operation Zipper 1 step towards Ready, then British may Gather.
Focuses on other fronts: Shift Operation Zipper 2 steps toward Delay.
Tips: The shaded effect may cause British to have to remove Supply Caches to the track, possibly from the map if none are Available.
Background: Led by the British commander Admiral Lord Louis Mountbatten, South East Asia Command (SEAC) coordinated Allied efforts in Southeast Asia, including Force 136 covert operations. The unshaded effect represents Lord Mountbatten's steadfast support for supplying the MPAJA resistance and infiltrating operatives into Malaya using submarines (J28) and air drops (J8). However, SEAC faced the difficult task of balancing resources across many fronts, including the Burma campaign (J17) and guerrilla forces in other occupied territories. The shaded effect delays preparation for Operation Zipper (J33) as military forces are deployed elsewhere.
J8. Air Drops
BRITISH CAPABILITY
Liberators devoted to drops: Supply may select 1 space without Force 136.
Supplies lost: Roll a die for each space selected for Supply—if result is 1-2, do not replace Jungle Camp with Supply Cache.
Tips: If the unshaded Capability is in play, British may still only select max two spaces for Supply (or three at Zipper 12), but one of these does not require the presence of a Force 136 marker.
Background: In the face of Japanese brutality and economic demands, the MPAJA insurgency quickly gained a large pool of supporters and recruits. Yet, the insurgency lacked weapons and supplies, particularly in their remote jungle camps (J6). Allied South East Asia Command (J7) organized air drops to provide much-needed resources and communication equipment (J19) for the guerrillas. In exchange for supplies, the insurgency agreed to shelter Force 136 agents who remained behind after the Japanese conquest (J16) or who infiltrated into the peninsula (J28).
The unshaded effect eases restrictions on the British player's Supply Special Activity to reflect the use of Mark VI Liberator aircraft to air drop supplies directly to the MPAJA. However, air dropping risked the security of the supplies, which could be damaged, blown away, or captured by Japanese forces (shaded effect).
J9. Atomic Bombings
MANDATORY EVENT
Early end to the war? If this is the third Campaign, immediately proceed to the final Propaganda Round—conduct MPAJA and Resistance Phases then check for Victory.
Tips: This Mandatory Event has no effect if it is drawn in the first or second Campaigns, but will immediately end the game if it is drawn in the third Campaign.
Background: Allied commanders anticipated a military reconquest of the Malayan peninsula in late 1945, known as Operation Zipper. However, in August 1945, the atomic bombings at Hiroshima and Nagasaki rapidly brought about Japanese surrender and precluded the need for a costly attack. The MPAJA rushed to fill the vacuum of authority during the period between the sudden end of the Japanese occupation and the return of the British. As happened historically, this Mandatory Event may suddenly end the war before the British are ready to launch their invasion.
J10. Rationing System
Occupation economy collapses: Reduce Japanese Resources by half (round down).
Resources extracted for war effort: Increase Japanese Resources by 2 for each New Village on the map.
Tips: None.
Background: Despite lofty promises of a Greater East Asia Co-Prosperity Sphere (J2), the Japanese occupation government balanced the need to maximize resource extraction from occupied colonies and the resulting social disruption that fueled armed resistance against occupation. As one Japanese account argued, maintaining food stability was the most important factor for gaining the support of the local population. Additionally, when Japan ceded the four northern states to Thailand, much of the rice growing areas were lost, removing another source of food (J18).
The Japanese implemented a rationing system and various resettlement schemes (J15) to mitigate food shortages. To gain greater control over occupied areas, the Japanese also issued new currency, including the famous "banana money" pictured on this card. However, rapid inflation and a growing black market quickly made the new currency worthless. The unshaded effect models the collapse of the Japanese occupation economy, undermining Malaya's contribution to the broader war effort. In contrast, the shaded effect represents the earlier years of the occupation when heavy resource extractions could still provide resources for other fronts.
J11. KMT Guerrillas
Establish proto-state in north: British may Ambush or Sabotage with an Underground Guerrilla in each space adjacent to Thailand.
Fight the communists: Remove an MPAJA Guerrilla and Opposition from each space with both non-MPAJA and MPAJA Guerrillas.
Tips: The unshaded effect can use both non-MPAJA and MPAJA Guerrillas, as the latter are assumed to be working with the new KMT proto-state.
Background: The communist-aligned MPAJA represented the largest of the resistance groups against the Japanese occupation, but nationalist Chinese guerrillas also formed groups, including those associated with the Kuomintang (KMT). The most prominent KMT group, numbering around 400 guerrillas, was known as the Overseas Chinese Anti-Japanese Army (OCAJA). The OCAJA largely concentrated in the northern states of Malaya (unshaded effect). The struggle between communist and nationalist forces in China during the war also occurred among the resistance groups that recruited from Chinese communities in Malaya. The shaded effect shows how military clashes between the MPAJA and KMT guerrillas could divert resources from the war against the Japanese (removing MPAJA Guerrillas and Opposition). Given the Allied forces' alliance with the KMT government in China, Force 136 frequently used Nationalist Chinese operatives (J20), although the British still primarily depended on the MPAJA for organizing activity against the Japanese.
J12. Labor Service Corps
JAPANESE CAPABILITY
Deeply unpopular: British may place Opposition in 1 space adjacent to each Railway where Sabotage is removed by Construct.
Forced labor: Extract may remove 1 Sabotage from a Railway adjacent to Troops before adding Resources.
Tips: None.
Background: Beyond extracting material resources, the Japanese occupation government also needed civilian manpower to maintain their war effort, particularly operations in the difficult Burma Campaign (J17). In December 1943, the Japanese formed the Labor Service Corps to organize forced labor for the construction of the Burma Railway connecting Thailand and Burma. For every 250 inhabitants, 20 working age men were impressed into labor tasks. Several hundred thousand Southeast Asian civilians (including many from Malaya) worked on the railway as forced laborers, with more than 90,000 dying.
The shaded effect models how the Japanese use of forced labor undermined the resistance's ability to achieve lasting sabotage of railways. Any damage could be quickly repaired by units of the Labor Service Corps. However, as with other extractive policies, the policy of working laborers to death was unsurprisingly unpopular and drove many to support resistance activity (unshaded effect).
J13. Lai Teck Betrayal
Former British agent: British may conduct 2 Limited Ambush and/or Sabotage Operations using any MPAJA Guerrillas.
Provides information to Kempeitai: Japanese may Eliminate in each space with Kempeitai.
Tips: None.
Background: Lai Teck, born in Vietnam and originally known as either Pham Van Dac or Hoang A Nhac, was the leader of the Malayan Communist Party (MCP) from 1939 until being succeeded by Chin Peng (J4) in 1947. Lai Teck is infamous for his numerous treacheries, probably working as a spy for the French in Indochina before infiltrating the MCP on behalf of the British, and later working for the Japanese during the occupation. In December 1941, shortly after the Japanese conquest of Malaya, Lai Teck met with the British stay-behind operatives to begin the alliance between Force 136 and the MPAJA. After being arrested by the Japanese in early 1942, Lai Teck flipped to serving as a Japanese agent and eventually helped the Kempeitai capture much of the MPAJA leadership at the Batu Caves a few months later. In 1947 Lai Teck fled from Malaya, eventually being hunted down and killed by communist agents in Thailand.
The unshaded effect illustrates the initial coordination between Force 136 and MPAJA organized through Lai Teck's connections with the British. The shaded effect shows how Lai Teck helped the Kempeitai track down his former allies.
J14. "Secret Army"
Hidden guerrilla force: Place an MPAJA Guerrilla in each space with a Supply Cache.
Arms hidden for post-war struggle: Remove a Supply Cache on the map from the game.
Tips: A Supply Cache removed from the game by the shaded effect may never be returned and permanently reduces the British to four total Supply Caches.
Background: During the war against Japan, the British suspected that the MPAJA was forming a "secret army" by hiding weapons for a future conflict against British rule. In 1946, Lai Teck (J13) denied the existence of the "secret army" to British interrogators. However, Chin Peng claimed in his memoir that "our secret army were able to stash away some 5,000 individual weapon pieces in jungle caches of which no more than 10 per cent were acquired through Force 136 air supplies".
The unshaded effect aids the British, with the rumors of a "secret army" proving to be false when British agents discover a much larger insurgent force operating against the Japanese (place MPAJA Guerrillas). The shaded effect is the historical result, with the MPAJA stowing away arms for its post-war insurgency (remove a Supply Cache).
J15. Resettlement Schemes
JAPANESE CAPABILITY
People flee resettlement camps: British may place a Guerrilla in each space with a New Village when Japanese Extract.
Militarized New Villages: Spaces with New Villages are treated as Neutral during the Propaganda Round.
Tips: The shaded Capability has an effect on the Mobilize and Population Subdued steps of the Propaganda Round.
Background: With the Japanese occupation government brutally extracting resources from captured territories, food shortages broke out. Severe famine plagued many areas of Indochina, furthering operations by the resistance organization known as the Viet Minh. In Malaya the food shortages were less severe, and the Japanese mitigated the problem by forcibly resettling urban population to rural areas to increase food production and lessen demand in cities.
In contrast to the later British New Village counterinsurgency strategy used during the Malayan Emergency (1948-1960), during the Japanese occupation resettlement occurred primarily to increase food production. Only a few of the resettlement sites were formed to undermine rural support for the MPAJA insurgency, with the shaded effect broadening the military use of resettlement to target rural opposition. Regardless of its rationale, forced resettlement remained deeply unpopular for those relocated, leading some to escape and join the insurgency (unshaded effect). The image on the card does in fact depict a later British New Village in Malaya, as we were unable to find any images of wartime Japanese New Villages.
J16. Freddie Spencer Chapman
Operatives hidden by MPAJA: British may place or move 2 Force 136 markers to any spaces with Jungle Camps.
Guerrillas refuse to cooperate: Remove a Jungle Camp from a space with Force 136, then conceal 1 Intel chit.
Tips: The unshaded effect could place one Force 136 marker and move another if desired, or place two or move two.
Background: Freddie Spencer Chapman was a British Special Operative Executive (SOE) officer who helped set up the Special Training School 101 in Singapore before the war with Japan. During the Japanese invasion of Malaya he ended up behind enemy lines, eventually joining up with MPAJA guerrillas led by Chin Peng (J4). He spent eighteen months with them before finally reestablishing contact with the British in 1943, after which he continued to work in Malaya as a Force 136 operative until the end of the war.
To organize subversive activities in Axis-occupied territories, the British formed the Special Operations Executive (SOE) in 1940. SOE operatives conducted espionage, sabotage, intelligence gathering, and helped to organize local resistance to occupation forces. In 1940-1941, British forces quickly organized SOE activity in Southeast Asia following the Allies' disastrous defeats and major territorial losses. In Malaya and Burma, SOE agents such as Freddie Spencer Chapman, John Davis (J25), and Lim Bo Seng (J20) infiltrated behind enemy lines to link up with local resistance fighters.
The unshaded effect represents locals helping SOE agents like Freddie Spencer Chapman avoid Japanese patrols and link up with members of the MPAJA (moving Force 136 to Jungle Camps). In contrast, the shaded effect illustrates the possibility of locals refusing to help foreign agents who attracted brutal Japanese reprisals. The lack of local cooperation would quickly lead to operatives being captured and hinder intelligence gathering.
J17. Burma Theater
Major victories divert resources: Shift Operation Zipper 1 step toward Delay, then place 3 Troops on this card. Return the Troops to Kuala Lumpur during next Reset Phase.
Tips: Either player may wish to execute this Event.
Background: The China Burma India (CBI) theater remained one of the key fronts in the Allied war against Japan, particularly for Commonwealth forces. Japanese advances in the theater threatened the security of India and the flow of Allied supplies to the Nationalist forces in China. Each side achieved major victories in the CBI theater over the course of the war, which could force the redeployment of troops from military operations in Malaya, such as Allied forces being reserved for Operation Zipper or Japanese forces devoted to pacifying the peninsula.
J18. Thai Administration
Unpopular with Malays: British may place up to 3 non-MPAJA Guerrillas in Provinces adjacent to Thailand.
Takes over northern states: Japanese may remove 1 Guerrilla from each space adjacent to Thailand, then must relocate any Troops in those spaces to Kuala Lumpur.
Tips: The shaded effect may even remove Underground Guerrillas.
Background: In 1943, Japan ceded the four northern states of Malaya (Kedah, Perlis, Kelantan, and Trengganu) to its ally Thailand, represented on this card with a portrait of wartime Thai leader Plaek Phibunsongkhram. However, Japanese forces and Kempeitai officers could still operate there and the Japanese retained control of the strategic infrastructure in the Thai-administered states (hence why the game does not remove those spaces from play).
The shaded effect reflects Japanese forces launching operations (removing one Guerrilla from each space) and then redeploying out of the northern states (returning to Kuala Lumpur). However, the ceding of states to Thai authority was unpopular with Malay elites, driving them to support the insurgency (placing non-MPAJA Guerrillas) rather than collaborating with Japan (J21).
J19. Radios
BRITISH CAPABILITY
Regular intelligence updates: Gather may select up to 3 spaces with Force 136.
Communications down: Gather may only use Guerrillas adjacent to 1 selected space.
Tips: If the shaded Capability is in effect, Gather may still use Guerrillas in each selected space, but only use Guerrillas adjacent to one of the selected spaces.
Background: Radios were a critical piece of equipment for Force 136 as they offered one of the only means of regularly communicating with South East Asia Command (J7) to request additional supplies, coordinate activities, and pass along intelligence. The loss of radios meant long periods of no communication with Force 136, leading Allied command to wonder about the fate of their operatives. The unshaded effect enhances the British player's ability to pass on intelligence (Gather Special Activity) while the shaded effect illustrates the severe hindrances to intelligence gathering caused by the loss of radio equipment.
J20. Lim Bo Seng
Contacts in Singapore: Remove a Force 136 marker to reveal any 2 Intel chits.
Tortured by Kempeitai: Remove a Force 136 marker and a concealed Intel chit, then reduce Resistance by its value.
Tips: An Intel chit removed by the shaded effect should be revealed and then set to one side – it will be placed back on the map during the next Reset Phase.
Background: Lim Bo Seng, a Nationalist Chinese agent serving with British Force 136, was one of the operatives infiltrated into Malaya to conduct subversive activities against the Japanese. Despite the incredible risks, Lim Bo Seng conducted many missions, including in Singapore. In 1944 he was captured by the Japanese. He refused to break under torture, eventually dying in captivity in June 1944. Lim Bo Seng is commemorated as a hero in Malaya and Singapore, with a memorial located in Singapore's Esplanade Park.
The unshaded effect allows the British player to gain intelligence (reveal Intel chits) from Lim Bo Seng's contacts in Singapore, at the cost of temporarily devoting a Force 136 marker to this mission. The shaded effect shows how brutal Kempeitai torture (J29) of Force 136 operatives could block their espionage activities by revealing the location of their informants and the types of information the Allies sought to collect.
J21. Malay Collaboration
Malays form guerrilla groups: British may place all non-MPAJA Guerrillas in any spaces.
Collaborate with Japanese: Place 1 Police each in any 3 Provinces, then Eliminate in 1 Province with Police and Kempeitai.
Tips: None.
Background: Many among the Malay majority collaborated with the Japanese occupation government after the embarrassing British military defeat in December 1941. In the early 1940s, the victorious Japanese seemed to offer a better route for nationalists than joining resistance movements that would simply restore western colonial rule. The Japanese, stretched across many fronts and occupied territories, needed the collaboration of local elites to have any means of extending administration and security into rural areas.
The shaded effect reflects the Malay collaboration with the formation of local auxiliary forces (J30) and the provision of information from collaborating locals to the Kempeitai secret police (J29). The unshaded effect illustrates the small Malay resistance groups who formed to fight the Japanese.
J22. Jikeidan System
JAPANESE CAPABILITY
Locals provide British with intelligence: Guerrillas used for Gather are not Activated.
"Vigilantes" identify British agents: Eliminate may remove Force 136 markers before Jungle Camps.
Tips: None.
Background: Jikeidan, Japanese for "vigilante group", was a system organized in occupied areas to help the Japanese occupation forces maintain control over local communities. The jikeidan system expected civilians to report on resistance groups and prevent their activities. Any communities failing to live up to their duties could face severe collective punishments. By 1944, the system extended throughout the Malayan peninsula, with major organizations in Perak, Penang, Malacca, Selangor, and Singapore. Despite the threat, many communities decided to at least passively support the resistance, refusing to give up guerrillas or Force 136 operatives.
The two effects of this Capability Event represent the varying effectiveness of the jikeidan system. The unshaded effect, favoring the British player, allows Guerrillas to collect intelligence more covertly through tips from the local population. The shaded effect eases the Kempeitai's efforts in removing Force 136 markers as local civilians follow the jikeidan system and report on Allied infiltration attempts.
J23. Allied Bombing
Devastates railway network: British may place Sabotage markers on any 2 Railways.
Anger at collateral damage: Remove Opposition from 2 Provinces adjacent to Railways with Sabotage markers.
Tips: The unshaded effect can place Sabotage markers on Railways that already have them.
Background: To deny the Japanese resources and the use of captured transportation networks, Allied bombers struck targets within occupied territories. The unshaded effect aids the British player by damaging the railway network through aerial bombing, undermining the extraction and transportation of supplies. However, allied bombing could also cause significant collateral damage to the occupied population, particularly since laborers were kept in camps near railways (J12). Collateral damage could undermine the population's sympathy for resistance groups associated with the Allies (shaded effect).
J24. Victory in Europe
Resources to the Pacific: Shift Operation Zipper 1 step toward Ready, then British may Supply.
Cold War tensions loom: Reduce Resistance by 1 for each space with Force 136 and a Jungle Camp.
Tips: None.
Background: Events in Europe could impact the resources available for the war in the Pacific. Allied forces aimed to first achieve victory in the European theater before pivoting their focus to the Pacific. The unshaded effect represents how a quicker Allied battlefield victory in Europe could expedite the shift of resources to winning the fight against the Japanese.
However, as victory in Europe approached, tensions between the Western Allies and the Soviet Union over the post-war order could undermine cooperation between ideologically opposed allies in Axis-occupied territories (see GMT's Churchill for an overview). The shaded effect models a possible collapse in cooperation between the MPAJA and Force 136 as each side prepares for a post-war clash (J14).
J25. John Davis
Meets with Chin Peng: British may Contact then conduct any Special Activity.
Loses contact with command: Remove a Force 136 marker to this card. Return it to any Province with a Jungle Camp during next Reset Phase, or to Available if none.
Tips: None.
Background: During the period of Japanese occupation, British officer John Davis served as the key Force 136 operative (pictured on the card with Lim Bo Seng, J20). Davis infiltrated into Malaya by submarine as part of Operation Gustavus (J28) and played a critical role in negotiating an agreement with the MPAJA (J27). Davis became friends with the MPAJA's leader Chin Peng (J4), who led the post-war insurgency against British rule. The unshaded effect illustrates Davis' interactions with Chin Peng allowing the British to contact the MPAJA and then secure equipment from higher command (Supply), collecting intelligence on Japanese forces (Gather), or organizing daring attacks (Raid).
The shaded effect illustrates the difficulty of issuing commands when Force 136 lost its transmission equipment (J19), forcing the British to rely on the MPAJA's much slower courier system. Additionally, without radios, Davis could only get information to high command by meeting up with submarine infiltration groups (J28).
J26. Subhas Chandra Bose
Assassination attempt: British may Ambush in 1 space with Troops, rolling to move Troops. If successful, increase Resistance by 2 instead of moving any Troops.
Indian National Army: Japanese may Sweep in 2 spaces, treating Police as Troops.
Tips: The shaded effect may move in Police from adjacent spaces.
Background: In October 1943 Subhas Chandra Bose formed the Provisional Government of Free India. Bose, an Indian nationalist, saw aligning with the Japanese as the best means of ensuring Indian independence. In occupied Malaya Indians became exempt from labor recruitment (J12). However, many were instead expected to serve in the Indian National Army (INA) as an auxiliary force for the Japanese in Malaya and the Burma Campaign (J17). The shaded effect represents the better trained INA units being deployed to combat resistance groups, allowing the Japanese to use locally recruited forces (Police) as more conventional forces (Troops).
There is evidence that agents of the Special Operations Executive were tasked by London with assassinating Bose, possibly on one of his visits to Malaya. Despite many earlier assassination attempts, Bose did not die until a plane crash in August 1945. The unshaded effect reflects an SOE assassination attempt on Bose in a daring act of resistance.
J27. Jungle Conference
BRITISH CAPABILITY
Agreement with MCP: Ambush and Sabotage Operations may each select 1 additional space without Force 136.
Discourages opposition: Each Supply removes Opposition from 1 selected space (if possible).
Tips: The unshaded Capability would allow British to select up to four spaces for Ambush and Sabotage if all three Force 136 markers are on the map. If the shaded Capability is in effect, British may choose which Opposition marker to remove, but must remove one if possible.
Background: In December 1943 a contingent of Force 136 operatives led by John Davis (J25) met with representatives from the MPAJA to reach an agreement for coordinating activity against the Japanese. Putting post-war issues aside, the two sides successfully negotiated the "Blantan Agreement". The agreement had the MPAJA provide manpower and ensure the local population's cooperation with the eventual British reconquest of Malaya in exchange for the British providing equipment and training for the guerrillas.
This Capability Event determines whether the British manage to successfully hash out an agreement with their possible future enemies, the Malayan Communist Party (MCP). The unshaded effect allows the British player to select spaces for Ambush or Sabotage without the need for British operatives (Force 136) there. The shaded effect reflects how the agreement ignored post-war issues, including the independence of Malaya, possibly undermining popular support for the insurgency (removing Opposition).
J28. Operation Gustavus
Submarine landings: Place a Force 136 marker and a Supply Cache in any Province with a Jungle Camp.
Japanese naval patrols: Remove a Force 136 marker or Supply Cache from a Province with or adjacent to Troops.
Tips: None.
Background: Operation Gustavus infiltrated Force 136 operatives into Malaya using submarines. Operatives such as John Davis (J25) and Lim Bo Seng (J20) arrived through Gustavus I. Additional Gustavus operations ferried operatives in and out while bringing essential supplies, including radios (J19). The unshaded effect allows the British player to place operatives (Force 136) and equipment (Supply Cache) in any Province on the map to reflect a submarine landing.
The Japanese aimed to counter submarine landings either through naval patrols or by the Kempeitai (J29) collecting intelligence on the planned landing sites. The shaded effect represents a failed landing with a recently landed operative and equipment being captured by Japanese patrols.
J29. Kempeitai
Diverted to other theaters: Remove a Kempeitai marker from the game.
Brutal interrogations: Japanese may move all Kempeitai markers to any spaces, then conceal up to 2 Intel chits.
Tips: A Kempeitai marker removed from the game by the unshaded effect may never be returned and permanently reduces the Japanese to two total Kempeitai.
Background: During World War II the Kempeitai operated as the Japanese secret police, with tens of thousands of officers spread throughout occupied areas. The Kempeitai conducted counter-espionage operations against subversive resistance activities, and was infamous for its use of torture and reprisals against suspected civilian communities. The shaded effect illustrates the Kempeitai's use of torture to crack down on Allied espionage (concealing Intel chits). However, with demands for Kempeitai personnel in Burma, China, Manchuria, and the Philippines, developments elsewhere could force the relocation of units serving in Malaya (unshaded effect).
J30. Malayan Volunteer Corps
Intimidated by guerrillas: Remove 1 Police each from up to 3 spaces with Guerrillas and Opposition.
Local defense forces: Place 1 Police in each space with Troops.
Tips: None.
Background: The Japanese encouraged the formation of the Malayan Volunteer Corps, a police force made of local Malay nationalists who viewed the occupation as a means of ending British rule (J21). This auxiliary Malay force allowed the Japanese to establish a lasting presence in rural areas (shaded effect). The Malayan Volunteer Corps largely restricted their activities to static defense and serving as guides. In late 1944, the mass participation of Malay communities led to the creation of a Malay Women's Auxiliary Corps, providing the Japanese occupation government with even greater local presence.
The MPAJA targeted Malay collaborators, referring to them as "running dogs" to discourage others from working with the Japanese (unshaded effect). The MPAJA's assault on Malay collaborators continued into the immediate post-war period as the resistance took revenge against collaborators. The role of the Malay majority in the occupation police force worsened relations with Chinese rural communities, who became the key support group for the post-war MCP insurgency depicted in The British Way: Malaya. In that conflict, Malays also served extensively as police on the side of the British counterinsurgents.
J31. Comfort Women
Demands resisted: Reduce Japanese Resources by 1 for each space with Troops and Opposition.
Forced compliance: Increase Japanese Resources by 1 for each space with Troops.
Tips: None.
Background: One of the most horrendous Japanese acts in occupied areas was the impressment of women and girls into sexual slavery for the Japanese army, euphemistically referred to as "comfort women". The Japanese military forced several hundred thousand into service, particularly from Korea. Such practices also occurred in Malaya and Singapore.
Although card "effects" for such a brutal practice in a game focused on military strategies are difficult to represent in any meaningful sense, this Event reflects the multifaceted nature of the Japanese "Extract" Special Activity that exploits the occupied population to further their war effort (shaded effect). As with other extraction policies, widespread enslavement of women could drive individuals to join the insurgency (unshaded effect).
J32. MPAJU
Supply jungle camps: British may place an MPAJA Guerrilla in each space with a Jungle Camp and Opposition.
Exposed to reprisals: Japanese may Limited Sweep then Reprisal in 1 Province adjacent to a Railway with a Sabotage marker.
Tips: None.
Background: As with many insurgencies, the MPAJA possessed a dedicated civilian support network, known as the Malayan People's Anti-Japanese Union (MPAJU). The civilian network provided supplies, raised funds, and gathered intelligence. The MPAJU also sent out feelers to Indian (J26), Chinese (J3), and Malay (J21) officials collaborating with the Japanese to establish avenues for infiltrating the occupation government. The two card effects reflect how the MPAJU could expand the insurgency's ability to operate (unshaded effect) but at the risk of attracting Japanese reprisals against communities near insurgent activity (shaded effect).
J33, J34, J35. Propaganda!
Background: Operation Zipper, the British plan for the reconquest of Malaya and Singapore, never occurred historically because of the Japanese surrender following the atomic bombings of Hiroshima and Nagasaki (J9). In September 1945 British forces landed and took over control of Kuala Lumpur. However, their arrival was both delayed and disorganised, and much of the countryside fell to the MPAJA. Descending from the hills, the MPAJA seized Japanese armories and pursued revenge against those who had collaborated with the occupation forces. Following the war, rising labor unrest and British crackdowns eventually led to a resumption of insurgent activity, now against British rule, as depicted in The British Way: Malaya.
Key Terms Index
- Accompanying: Operation required for a Special Activity. (4.1.1)
- Activate: Flip Guerrillas Active. (1.4.3)
- Active Pieces: Troops, Police, Active Guerrillas and Supply Caches. (1.4.3)
- Adjacent: Spaces next to each other for actions or Events. (1.3.7)
- Ambush: British Operation to remove Police and displace Troops and Kempeitai. (3.2.4)
- Assault: Japanese Operation to remove Active British pieces. (3.3.4)
- Available: Pieces in Available Forces boxes, waiting to be placed. (1.4.1)
- British: A Faction committed to resisting the Japanese occupation of Malaya. (1.5)
- Campaign: Event card series leading up to a Propaganda Round. (2.5)
- Capability Events: Events with a lasting effect on the game. (5.3)
- Construct: Japanese Operation to remove Sabotage and place New Villages. (3.3.2)
- Contact: British Operation to place and move Force 136 markers and non-MPAJA Guerrillas. (3.2.2)
- Cube: Japanese Troops or Police piece. (1.4)
Setup Instructions (2.1)
Deck Preparation. Gather the Japanese Occupation Event cards, remove the three Propaganda cards, and shuffle the remaining cards. Form three piles of 6 regular Event cards and set aside the remaining 14 regular Event cards (they will not be used). In each pile, shuffle a Propaganda card with 2 of the Event cards and place these 3 cards under the remaining 4 Event cards. Stack the three 7-card piles to form the complete Event Deck of 21 cards.
Place the Operation Zipper Track and Japanese Available Forces overlay tiles on the map. Place the 9 Intel chits into a cup or container for random drawing.
NOTE: The Japanese only use 6 blue Police cubes. The British only use 10 red octagonal cylinders (MPAJA Guerrillas), 4 blue octagonal cylinders (non-MPAJA Guerrillas), and 5 red discs (Supply Caches).
Set up the map as follows (see back page of this booklet for a full setup diagram):
- Operation Zipper: Delay (with 2 Supply Caches on the track)
- Resistance: 2
- Japanese Resources: 0
- Initiative: British 1st Eligible, Japanese 2nd Eligible
- Starred Railways:
- Thailand-Kedah Border
- Thailand-Kelantan Border
- Negri Sembilan-Johore Border
- Pahang-Johore Border
- Non-Starred Railways:
- Thailand-Perak Border
- Perak-Kelantan Border
- Perak-Pahang-Selangor Border
- Negri Sembilan-Pahang Border
- Intel Chits: Draw and place a random Intel chit facedown in the "Uncontrolled" space of each Province and Kuala Lumpur.
Available: Japanese—3 Police, 4 New Villages; British—2 Supply Caches, 4 MPAJA Guerrillas, 2 non-MPAJA Guerrillas, 1 Jungle Camp, 1 Force 136
Thailand: Out of Play marker
Kedah: Neutral; British—1 non-MPAJA Guerrilla
Perak: Opposition; Japanese—3 Troops, 1 Police, 1 Kempeitai; British—1 Supply Cache, 2 MPAJA Guerrillas, 1 Jungle Camp, 1 Force 136
Kelantan: Neutral; British—1 non-MPAJA Guerrilla
Trengganu: Neutral
Pahang: Neutral; British—1 MPAJA Guerrilla
Selangor: Neutral
Kuala Lumpur: Neutral; Japanese—3 Troops, 1 Police, 1 Kempeitai
Negri Sembilan: Neutral; British—1 MPAJA Guerrilla, 1 Jungle Camp, 1 Force 136
Johore: Opposition; Japanese—3 Troops, 1 Police, 1 Kempeitai; British—2 MPAJA Guerrillas, 1 Jungle Camp
Each Economic Center: Japanese—3 Troops
The printed setup diagram on the back page is a map illustration and is not reproduced as text.