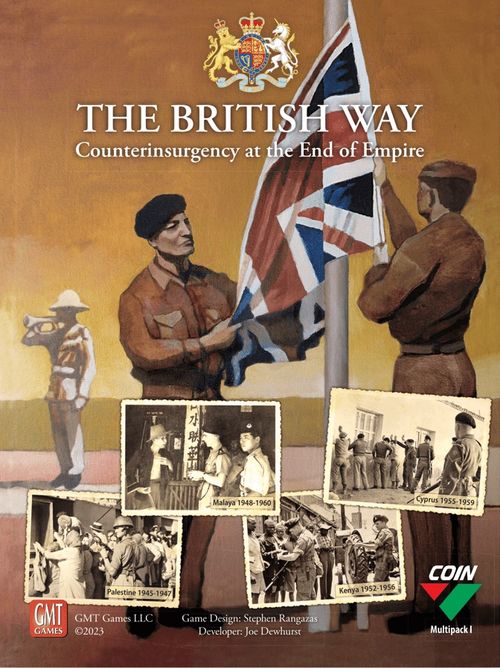
The British Way: Counterinsurgency at the End of Empire
The British Way: Counterinsurgency at the End of Empire Rulebook
Table of Contents
Table of Contents
- Palestine
- Malaya
- Kenya
- Cyprus
Palestine
The British Way: Palestine 1945-1947 — Rules of Play, 2nd Edition. Designed by Stephen Rangazas.
1.0 Introduction
The British Way: Palestine is a game in The British Way COIN multipack. Alongside its accompanying games Malaya, Kenya, and Cyprus, this historical simulation strives to depict Britain's attempts to "manage" the emergencies, as the British referred to them, in their colonies during the period of decolonization that swept the world after WWII.
The British Way: Palestine focuses on the British counterinsurgency effort against the Jewish insurgency from the end of WWII in August 1945 to the British decision to leave Palestine in September 1947. The game focuses on the counterinsurgency and counter-terrorism aspects of the conflict, particularly against the Irgun and Lehi organizations, and does not directly model the wider political struggles between the British, Jewish Agency, and Arab political groups, or the civil war that began in November 1947.
The historical simulations that comprise The British Way multipack are designed to depict the full range of strategies used by the British during these conflicts, ranging from the more benevolent but still coercive provision of material benefits through pacification programs to the horrific measures used to gain control over the local population. Although many myths have arisen about an enlightened British approach to counterinsurgency that avoids large-scale violence and focuses on winning the population's 'hearts and minds', new scholarship on these conflicts have confirmed the brutality of the methods commonly used. This volume is intended to help synthesize and present this crucial scholarship, even if the simulations depicted are at times more unpleasant than fun. The main goal is that players find these thought-provoking and the gameplay encourages them to seek out the discussion of sources and historical background material in the Event notes and Campaign booklet.
1.1 General Course of Play
In The British Way: Palestine, one Event card at a time is revealed from the shared draw deck, and both players will have an opportunity to either execute that Event or perform an Operation from a unique menu, possibly adding a Special Activity. Propaganda cards mixed in with the Event cards provide periodic interruptions where the general board state is assessed and British Political Will is adjusted, possibly triggering an instant Irgun victory, after which both players receive an opportunity to collect additional assets and redeploy their forces.
1.2 Components
The following components from the multipack are required to play The British Way: Palestine:
- A 17"x22" mounted Palestine game board (1.3).
- A deck of 35 Palestine cards (5.0).
- 6 blue cubes ('Police'), 12 tan cubes ('Troops'), 15 red embossed octagonal cylinders ('Cells'), 5 flat red discs ('Arms Caches'), 2 embossed cylinders (one blue and one red)—note that this is fewer than the total number of wooden pieces included in The British Way multipack; any excess should be set aside while playing Palestine.
- Three black and five white pawns (3.1.1).
- Specific markers from the countersheet: 1x Political Will, 1x Haganah, 3x Curfew, 9x Intel, 15x Sabotage/Terror, 8x Capability—all other markers should be set aside while playing Palestine.
- Two player aid sheets.
- One Propaganda Round aid sheet.
- Two six-sided dice (one red, one blue).
- This rules booklet.
1.3 The Map
The map shows British Mandatory Palestine with some of the southern portion of Beersheba subdistrict removed for gameplay purposes.
1.3.1 Map Spaces. Map spaces include Districts, Cities, and Railways. All map spaces can hold forces (1.4). The foreign territories of Egypt, Transjordan, Syria, and Lebanon are marked for flavor purposes and are not playable map spaces.
1.3.2 Districts. The six large irregular spaces are the Districts of Mandatory Palestine. They are each marked with a number '1' to indicate the value of Sabotage in these spaces during the Political Will phase of the Propaganda Round (6.1). Several Districts surround a City space or have Railway spaces cutting through them. All Districts aside from Jerusalem are considered Coastal for the effects of some Events (5.0).
1.3.3 Cities. The three large circles are the major Cities of Haifa, Tel Aviv-Jaffa, and Jerusalem. They are each marked with a number '2' to indicate the value of Sabotage in these spaces during the Political Will phase of the Propaganda Round (6.1). Curfew markers may be placed in Cities by the British Search Operation (3.2.3) and by some Events (5.0).
1.3.4 Railways. Four major Railways are marked on the map by black 'track' symbols, running from Egypt (southern edge of the map) to Tel Aviv-Jaffa, Tel Aviv-Jaffa to Jerusalem, Tel Aviv-Jaffa to Haifa, and Haifa to Syria (eastern edge of the map). Sabotage markers on Railways do not affect movement but do count towards Victory (7.0) during the Political Will phase of the Propaganda Round (6.1). Railways may never hold Arms Caches (1.6.2).
1.3.5 Adjacency. Adjacency affects the movement of forces and implementation of certain Events (5.0). Any two spaces that border one another are adjacent. Railways are separate spaces adjacent to all spaces they touch.
EXAMPLE: British Troops on the Tel Aviv to Haifa Railway are adjacent to Tel Aviv-Jaffa, Haifa City, Haifa District, Samaria District, and Lydda District.
1.3.6 Prison. The Prison box is where Irgun Cells are placed when removed through Patrol (3.2.2), Assault (3.2.4), Mass Detention (4.2.3), or some Events (5.0). Half the Cells in Prison, rounded down, are returned during the Reset Phase of the Propaganda Round (6.4).
DESIGN NOTE: The Prison box and several other mechanics such as the rolls for Rob and Sabotage are inspired by Fred Serval's brilliant game, A Gest of Robin Hood.
1.4 Forces
The wooden pieces represent the two Factions' various forces: British Troops (tan cubes) and Police (blue cubes), Irgun Cells (red octagonal cylinders) and Arms Caches (red discs).
DESIGN NOTE: The British Way: Palestine and Cyprus both use Cells rather than Guerrillas because the insurgencies they depict were on the line between operating as a standard insurgency and an urban terrorist organization. Their individual operational groups were far smaller than the usual guerrilla groups depicted by Guerrilla pieces in other COIN series games (including Malaya and Kenya). Likewise, their Bases are called Arms Caches to reflect that the main limitation on both groups' operations were arms and explosives.
Important! The British in Palestine use only 6 blue Police cubes and 12 tan Troops cubes. The remaining 9 blue cubes and 3 tan cubes should be set aside and not used while playing Palestine.
1.4.1 Availability and Removal. Keep forces Available for placement in the Faction's Available Forces box. Forces removed from the map go to Available. EXCEPTION: Irgun Cells are sometimes removed to Prison (1.3.6).
- Unless otherwise instructed (by Event, 5.1.1), forces may only be placed from or replaced with those in the Available boxes. A piece to be replaced by a piece that is unavailable is simply removed.
Important! Factions while executing an Operation, Special Activity, or Event to place their own forces may not take them from elsewhere on the map if the desired force type is not Available.
DESIGN NOTE: Unlike other games in the COIN series (including Malaya and Kenya), pieces that are no longer Available in a Faction's Available box may not be taken from those on the map to place elsewhere.
1.4.2 Stacking. No more than two Arms Caches (1.6.2) may occupy a single space. Arms Caches may never occupy Railways.
- Arms Caches placed (such as via the Rob Operation [3.3.4], Propaganda Round Expropriations [6.2.1], or Event [5.0]) may never violate stacking.
- More than one Sabotage or Terror marker may be placed in a space whether by Sabotage (3.3.3), Terror (4.3.3), or Events (5.0).
- Only one Curfew marker may be placed in a City space (1.3.3), and never in any other kind of space.
1.4.3 Underground/Active. Cells are either Underground—symbol end down—or Active—symbol end up. Actions and Events flip them from one to the other state. Arms Caches, Troops, and Police are always Active. Always set up and place new Cells Underground (including if replacing a piece).
NOTE: Unless instructions specify "Underground" Cell, it is sufficient to "Activate" already Active Cells (they stay Active). Also, "moving" or "relocating" Cells does not affect Underground status unless specified.
1.5 Players & Factions
The game requires two players, each playing as one Faction: the British (blue), and the Irgun (red).
DESIGN NOTE: There were three main Jewish insurgent groups combating British rule of Palestine, the Haganah, Irgun, and Lehi. Haganah, the largest group, oscillated between cooperation and conflict with Britain and the two smaller terrorist groups. They are represented by the Haganah Track and Events. The player is playing a combination of Irgun and the far smaller Lehi. For simplicity, they are collectively referred to as Irgun.
1.6 Intel Chits and Arms Caches
Neither faction uses Resources as in standard COIN volumes. Instead each faction collects and spends a special form of resource: Intel Chits for British and Arms Caches for Irgun.
DESIGN NOTE: The general management of resources, such as finances and supplies, was less of an important constraint for the two sides than other more specific resources, such as intel and weaponry. British operations in Palestine struggled due to a lack of intelligence on Irgun despite massively outnumbering them. Likewise, the major restriction on Irgun was arms and explosives. They gained these through expropriations, robberies, and external funding that was generally devoted towards gaining arms.
1.6.1 Intel Chits. There are 9 Intel Chits with values ranging from 0 to 2 (3 of each), which should be placed in an opaque draw bag or container. British gain Intel Chits through removing an Arms Cache with Assault (3.2.4), Negotiate (4.2.2), and Events (5.0), and should always draw Intel Chits randomly when gaining them, then reveal them to both players. The number and value of Intel Chits that the British currently have is open information. British may spend the value of an Intel Chit to remove Underground Cells with Patrol (3.2.2) and Assault (3.2.4), and then the Chit is returned to the draw bag. Each Chit's full value must be spent in a single space. The British player may also discard Chits, regardless of value, back to the draw bag when conducting Search (3.2.3) or an Intelligence Lead (2.3.7).
1.6.2 Arms Caches. Irgun spend their unique resource, Arms Caches, to boost various actions. Arms Caches are gained through Rob (3.3.4), Propaganda Round (6.0), and Events (5.0), but may never be placed on Railways. They are used for selecting spaces for Recruit (3.3.1). They are spent to increase the success of Sabotage Operations (3.3.3) or as part of an Offensive (2.3.7). British may remove Arms Caches through Assault (3.2.4) and Events (5.0). Arms Caches cannot occupy Railways (1.3.4).
1.7 Sabotage and Terror
Sabotage and Terror markers are placed by the Irgun Sabotage Operation (3.3.3), Terror Special Activity (4.3.3), and some Events (5.0), and affect Political Will during the Political Will Phase of the Propaganda Round (6.1). There is no limit to the number of Sabotage or Terror markers that may be placed in one space.
1.8 British Political Will
British Political Will is tracked with a marker on the edge track. The position of this counter will determine Victory (7.0) for either side. The marker is moved during the Campaign and during the Political Will Phase of the Propaganda Round (6.1). It may never be lower than 0 or greater than 20.
1.9 Haganah
The relationship between Irgun and Haganah, the paramilitary armed wing of the Jewish Agency, is tracked with a marker on the Haganah Track (6.5), affecting the number of Irgun pieces available and some other actions.
1.10 Curfews
The three Curfew markers form a pool available to the British Faction. Curfews are placed in Cities by Search (3.2.3) and some Events (5.0). They block Irgun Recruit (3.3.1) and assist in activating Cells during Travel (3.3.2). However, Curfews are also vulnerable to the Irgun Propagandize Special Activity (4.3.2). There may only be one Curfew in each City space. Curfews are removed in one of three ways:
- If a Curfew space is ever empty of British pieces.
- Curfews are removed with the British Restore Special Activity (4.2.1).
- All Curfews are removed during the Reset Phase of Propaganda Rounds (6.4).
2.0 Sequence of Play
2.1 Setup
Follow the instructions on the second to last page of this booklet to prepare the draw deck and set up markers and forces. A full setup diagram can be found on the back page of this booklet.
2.2 Start
Begin play by revealing the top card of the draw deck and placing it onto a played cards pile. All played cards and the number of cards in the draw deck are open to inspection.
NOTE: Unlike in most previous COIN series volumes, only one Event card is revealed at a time.
RECORD STEPS: As the steps of each Event card play are completed, place the Eligibility cylinder of the acting Faction's color (1.5) into the Initiative Track's appropriate box.
2.3 Initiative Track
One player takes the British Faction and the blue Eligibility cylinder, the other the Irgun Faction and the red Eligibility cylinder.
NOTE: This sequence of play is a new simpler take on the 2-player sequence of play developed by Brian Train in COIN volume VII - Colonial Twilight.
When playing an Event card, the British or Irgun player will execute Operations or the Event described on the card. At all times one player will be First Eligible, and the other will be Second Eligible. In each Event card round, the First Eligible player is first to choose what they will do, followed by the Second Eligible—whose choices are limited by what the First Eligible player did.
2.3.1 Eligibility. Each player puts one cylinder (blue and red respectively) on the First or Second Eligible spaces of the Initiative Track.
NOTE: Irgun always starts the game in the 1st Eligible box and returns there during the Reset phase (6.4) of each Propaganda Round.
2.3.2 Options for Eligible Factions.
First Eligible: The First Eligible player may perform a Limited Operation (2.3.4), execute the Event (5.0), perform an Operation (3.0) with Special Activity (4.0), or Pass (2.3.3).
The player selects their desired action and places their Eligibility cylinder in the appropriate box on the Initiative Track, then immediately executes the chosen action (Limited Operation, Event, Operation with Special Activity, or Pass).
Second Eligible: The Second Eligible player may then choose one of the boxes not containing the First Eligible player's cylinder and conduct the action in the box selected (or Pass).
2.3.3 Passing. After selecting a box, players may forgo the action in the box to Pass. If British pass they draw one Intel Chit (1.6.1). If Irgun pass they may Rob (3.3.4) in one space. Both players may pass and the order of cylinders in the Initiative Track will still decide eligibility (2.3.5).
2.3.4 Limited Operation. A Limited Operation is an Operation in just one space, with no Special Activity. If the Limited Operation is a Deploy (3.2.1), Patrol (3.2.2), or Search (3.2.3), it can involve pieces from multiple spaces but only one destination space.
2.3.5 Adjust Eligibility. After both players have selected and executed their actions, replace the Eligibility cylinders on the Initiative Track with the cylinder in the furthest left box becoming First Eligible, and the other cylinder becoming Second Eligible.
DESIGN NOTE: Selecting the Limited Operation box guarantees the player first eligibility on the next card. Likewise, selecting the Operation & Special Activity box guarantees second eligibility on the next card. Eligibility after selecting the Event space will depend on what the other player has chosen. The only way to block Events in The British Way is to select the Event box and then either play the Event or Pass.
2.3.6 Next Card. After eligibility has been reset, reveal the draw deck's next card and continue play.
2.3.7 Intelligence Lead and Offensive. Both players may discard or remove one of their special resources, Intel Chits or Arms Caches respectively (1.6), when conducting an Operation or Limited Operation to select an additional space. The British may discard any Intel Chit to the draw bag to add one additional space to Patrol (3.2.2), Search (3.2.3), or Assault (3.2.4). Irgun may remove an Arms Cache to Available from a space with no British to add one additional space to Recruit (3.3.1), Sabotage (3.3.3), or Rob (3.3.4). An additional space may be added in this way even if the Operation is Limited (2.3.4).
2.4 Propaganda Card
When a Propaganda card is revealed, conduct a Propaganda round (6.0).
NOTE: Each series of Event cards leading up to a Propaganda Round is called a "Campaign."
3.0 Operations
3.1 Operations in General
A Faction executing an Operation (Op) chooses one of the four Operations listed on its Faction sheet and selects the map spaces (typically several) to be involved. Select a given space only once for a given Operation.
Operations are generally allowed in up to three spaces unless the Operation is Limited (2.3.4), in which case they are allowed in only one space. EXCEPTION: Each side may add an additional space through Intelligence Lead or Offensive (2.3.7), and Irgun may add an additional space if the Haganah Track is at '4' (6.5).
The executing Faction chooses the order of the spaces in which the Operation is resolved, the enemy pieces to be affected (targeted), and the friendly pieces to be placed, replaced, or moved. Once targeted, a Faction's pieces are affected to the maximum extent possible. Actions affecting another Faction's pieces do not require that Faction's permission.
3.1.1 Pawns. If desired, mark spaces selected for Operations (3.0), Special Activities (4.0), or other actions with white and black pawns. The pawns are for convenience, not a limit on play.
3.2 British Operations
The British choose from Deploy, Patrol, Search, or Assault Operations.
3.2.1 Deploy. Deploy adds Police and then can rapidly deploy Troops to any one space. Select up to three District and/or City spaces with more Troops than Irgun pieces.
PROCEDURE: Place one Police in each selected space. Then, even if a Limited Operation (2.3.4), may move any Troops from anywhere on the map to one space (even a Railway space).
3.2.2 Patrol. Patrol moves Police and then may remove Cells to Prison in one space with Police. Select up to three destination spaces with Cells.
PROCEDURE: May move any Police from anywhere on the map to any destination spaces. Then in one destination space, remove one Active Cell to Prison for each Police in the space. Patrol may remove Underground Cells if the British player spends Intel Chits (1.6.1) equal to or greater in value than the number of Underground Cells removed. Spent Intel Chits are returned to the draw bag.
3.2.3 Search. Search moves Troops, activates Cells, and places Curfews (1.10). Select up to three destination spaces.
PROCEDURE: First, simultaneously move any adjacent British Troops desired into destination spaces. Then, in each District or Railway space selected, Activate (1.4.3) one Cell for every two cubes (moved or already there). In Cities, instead place a Curfew marker (if none there) and Activate only one Cell for every three cubes OR may discard one Intel Chit (1.6.1) of any value to the draw bag to activate one Cell for every cube and place no Curfew.
3.2.4 Assault. Assault uses Troops to remove enemy pieces. Select up to three spaces with Troops and Irgun pieces.
PROCEDURE: In each selected space, remove one Active enemy piece for every two Troops present. First remove Active Cells, then remove Arms Caches only once no Cells remain (even Underground). For each Arms Cache (1.6.2) removed, add 1 Political Will (1.8) and draw one Intel Chit (1.6.1). Cells are removed alternately to Available and Prison, Available first. British may remove Underground Cells if the British player spends Intel Chits (1.6.1) equal to or greater in value than the number of Underground Cells removed. Spent Intel Chits are returned to the draw bag.
NOTE: The value of an individual Intel Chit may not be split across spaces. Underground Cells removed by spending Intel Chits still count towards the total number of pieces that may be removed by Patrol or Assault. Underground Cells in a space prevent removal of Arms Caches with Assault until all Cells are Activated and removed, unless the British possess sufficient Intel Chits and Troops to also remove the Underground Cells.
3.3 Irgun Operations
Irgun chooses from Recruit, Travel, Sabotage, or Rob Operations.
3.3.1 Recruit. Recruit augments friendly forces. Select up to three spaces without Curfew markers.
PROCEDURE: In selected spaces with or adjacent to an Arms Cache (1.6.2), place up to two Cells. Otherwise, in selected Cities without (or not adjacent to) Arms Caches, place only one Cell. No Cells may be placed in non-City spaces without (or not adjacent to) Arms Caches, or in Cities with Curfews.
NOTE: Recruit may place Cells directly onto Railways if there is an adjacent Arms Cache.
3.3.2 Travel. Travel moves Cells and flips them back Underground. Select up to three origin spaces with Cells. A Limited Operation (2.3.4) Travel may select only a single origin space, but may move Cells to multiple destination spaces.
PROCEDURE: Move any Cells in each selected origin space to any spaces on the map, including their original space. Set Cells moving from one origin space to one destination space Active (1.4.3) if:
- The destination is a Railway or Curfew space and
- The number of moving Cells plus the number of cubes in that destination exceeds three.
Otherwise, flip moving Cells Underground, even if they return to their original space.
NOTE: Unlike March in Malaya or Kenya, Travel may move Cells to any spaces, not just those that are adjacent, and selects origin spaces rather than destination spaces. Therefore, a Limited Travel can only select one origin space but may select multiple destinations from that origin space.
3.3.3 Sabotage. Sabotage places Sabotage markers. Select up to three spaces with at least one Underground Cell.
PROCEDURE: In each selected space, Activate one Underground Cell. Before rolling, Irgun may expend an Arms Cache (1.6.2) that is either in or adjacent to the selected space, returning it to Available to increase the result by 2. Then, roll a die, subtracting 1 from the roll for each Police cube in the selected space. If the modified roll result is greater than 2, place a Sabotage marker in the space.
NOTE: Unlike in Malaya, Kenya, or other COIN volumes, Sabotage markers may be added to spaces that already have them, and spaces may hold more than one Sabotage marker.
DESIGN NOTE: Irgun usually place Sabotage rather than Terror markers because most of the group's attacks, especially when cooperating with Haganah, focused on sabotaging railways or destroying British facilities, rather than seeking to terrify the populace or inflict mass casualties on non-combatants.
3.3.4 Rob. Rob places Arms Caches. Select up to three Districts or Cities with more Cells than Police.
PROCEDURE: In each selected space, roll a die. If the roll result is greater than 2, add one Arms Cache (1.6.2). If there are any Police in the selected space, activate one Underground Cell there if possible.
4.0 Special Activities
4.1 Special Activities in General
When a Faction per the Initiative Track (2.3) executes an Operation (3.0), it may also execute one Special Activity (EXCEPTION: Limited Operations, 2.3.4). As with Operations, the executing Faction selects spaces and pieces affected, and the order of actions. Select a given space only once as a location for a given Special Activity. Events may grant free Special Activities (not further affecting Eligibility, 2.3.1).
Important! A Faction may execute its Special Activity at any one time immediately before, during, or after its Operation.
EXAMPLE: Irgun Sabotage in one space, then pause to Silence to remove Police in a different space, then Sabotages in that space.
4.1.1 Accompanying Operations. Some Special Activities specify that they may only accompany certain types of Operations (3.0). Certain Special Activities must occur where their Accompanying Operation occurred. If not otherwise specified, Special Activities may accompany any Operations and take place in any otherwise valid spaces.
4.2 British Special Activities
The British choose from Restore, Negotiate, or Mass Detention Special Activities.
4.2.1 Restore. Restore removes any Sabotage and Curfew markers and flips Terror markers to their Sabotage side. It may only accompany Deploy (3.2.1) and takes place in one space with Troops, Police, and no Irgun.
PROCEDURE: In the selected space, remove any Curfew and Sabotage markers, then flip any Terror markers to their Sabotage side.
4.2.2 Negotiate. Negotiate attempts to shift the Haganah Track (6.5) in Britain's favor. It may only accompany Deploy (3.2.1), Patrol (3.2.2), or Search (3.2.3).
PROCEDURE: Roll a die, adding 1 to the roll for each Terror marker on the map. If the die roll result is greater than the Haganah Track value, shift the track once to the left. If the Track is already at 0, British instead draw one Intel Chit (1.6.1).
4.2.3 Mass Detention. Mass Detention allows British to arrest a large number of Cells to Prison at the risk of losing Political Will (1.8). It may select any one City with a Curfew marker and at least three British Troops. It may accompany Search (3.2.3) or Assault (3.2.4).
PROCEDURE: Remove a die roll of Irgun Cells from the selected City and its adjacent District to Prison. If the die roll is greater than the number of removed Cells, subtract the remainder from Political Will.
EXAMPLE: British Mass Detention in a City with two Cells and with one Cell in its adjacent District. They roll a 5, removing all three Cells to Prison and then lowering Political Will by 2 (the remaining dice value once three Cells have been removed).
4.3 Irgun Special Activities
Irgun chooses from Silence, Propagandize, or Terror Special Activities.
4.3.1 Silence. Silence allows Irgun to remove Police. It may occur in one space with an equal or greater number of Underground Cells than Police. Silence may accompany any Irgun Operation (3.3).
PROCEDURE: Remove one Police to Available.
4.3.2 Propagandize. Propagandize lowers Political Will. It may occur in up to two Cities with at least one Cell and a Curfew marker. Propagandize may accompany any Irgun Operation (3.3).
PROCEDURE: If all Cells Underground, Activate one Cell. Then lower Political Will by one.
NOTE: Propagandize does not need to Activate a Cell if there is already an Active Cell in the selected space.
4.3.3 Terror. Terror places Terror markers. It may occur in any one City selected for Sabotage (3.3.3) and modifies the Sabotage Operation in that space. Terror may only accompany Sabotage (3.3.3) and must be declared before rolling.
PROCEDURE: Roll for Sabotage as usual, but instead place a Terror marker if successful. If the modified roll (adding Arms Cache if used and subtracting Police in the space) is 6 or greater, place two Terror markers and shift the Haganah Track once to the left.
DESIGN NOTE: Although many Irgun operations focused on sabotage, they also engaged in terrorist attacks, unlike Haganah. They carried out several horrific attacks, with the deadliest being the King David Hotel bombing. These attacks contributed to Haganah condemning the group's actions and ending their cooperation with Irgun.
5.0 Events
Each Event bears a title, italicized flavor text, and Event text. Flavor text provides historical interest and has no effect on play.
5.1 Executing Events
When a Faction executes an Event, it carries out the Event text literally and in order (sometimes involving actions or decisions by the other Faction). Unless otherwise specified, the executing Faction makes all selections involved in implementing the text, such as which pieces are affected. If another Faction is specified or selected to take an action, that Faction decides the details of the action. Some Events with lasting effects have markers as aids to play.
5.1.1 Where Event text contradicts rules, the Event takes precedence. However:
- Events may not violate stacking (and so never place Arms Caches where there are already two, or a Curfew marker where there is already one).
- Events place only Available pieces (1.4.1) and markers; they remove rather than replace if the replacement is not Available or if stacking (1.4.2) would be violated.
- Events may not raise British Political Will beyond 20 or reduce it below 0 (1.8).
5.1.2 If two Events contradict, the currently played Event takes precedence.
5.1.3 An executed Event's text that can be implemented must be. If not all of its text can be carried out, implement that which can.
5.2 Dual Use
Many Events have both unshaded and shaded Event text. The executing Faction may select either the unshaded or shaded text to carry out (not both). While the unshaded text often favors the British, a player may select either text option regardless of Faction.
DESIGN NOTE: Dual-use events represent opposed effects of the same cause, forks in the historical road, or instances subject to alternative historical interpretation.
5.3 Capabilities
Dual-use Events labeled "BRITISH CAPABILITY" or "IRGUN CAPABILITY" have lasting effects mainly relating to that Faction, either positive or negative. These labels are for flavor only, and both Factions may execute Capability Events with either label. The Event's effects last for the rest of the game.
NOTE: Set out executed Capability Event cards near the board as added reminders, using a Capability marker to indicate which option was selected.
5.4 Starred Events
Several Events are marked with a star (*). These are played normally but interact with the unshaded effect of the ERNEST BEVIN (P9) Capability card.
6.0 Propaganda Round
Conduct a Propaganda Round in the sequence of phases below when each Propaganda card is revealed. The Propaganda Round aid sheet also lists this sequence.
6.1 Political Will Phase
Calculate the net effect to Political Will of the following adjustments before shifting the marker:
6.1.1 Disorder? Lower British Political Will by 1 for each Sabotage marker in Districts. Lower British Political Will by 2 for every Railway with a Sabotage marker (once total per Railway). Lower British Political Will by 2 for each Sabotage marker in Cities, and by 3 for each Terror marker in Cities.
6.1.2 Order? Increase British Political Will by 2 if no Railways are Sabotaged. Increase British Political Will by 1 for each City without any Sabotage or Terror markers.
NOTE: It's important to calculate the net shift in Political Will during these steps before moving the marker and checking victory, rather than adjusting the marker one step at a time.
6.1.3 Victory? If British Political Will is now at 0, the game immediately ends with an Irgun victory.
6.1.4 Game End? If this is the final Propaganda card and Irgun have not won, the game immediately ends with a British victory.
6.2 Resource Phase
6.2.1 Expropriations. Irgun may Rob in one District or City with more Cells than Police.
6.2.2 British Intel. If British have no Intel Chits, draw one Intel Chit from the draw pool. Otherwise, British must discard half their Intel Chits (rounded down).
6.2.3 Haganah Cooperation. If Haganah Track is at 0, British draw one Intel Chit. If it is at 4, Irgun may place one Arms Cache in any District or City with a Cell.
6.3 Redeploy Phase
6.3.1 British Redeploy. British may move Police on the map to Railways and any spaces with British pieces, then may move Troops to any Cities or Railways.
6.3.2 Irgun Redeploy. Irgun may move one Cell to each City without a Curfew marker then may move one Arms Cache to any District or City with a Cell.
6.4 Reset Phase
Then prepare for the next card as follows:
- Remove all Curfew, Sabotage, and Terror markers from the map.
- Return half the Cells in Prison (1.3.6) to Available (rounded down).
- Flip all Cells Underground (1.4.3).
- Set Irgun to 1st Eligible and British to 2nd Eligible.
- Reveal the next card from the draw deck and continue play (2.3.2).
6.5 Haganah Track
The Haganah, the Jewish Agency's armed wing, was the largest of the Jewish insurgent groups. They were also the most moderate, and focused mainly on sabotage and resisting Britain's immigration policy. At the beginning of the game, they are cooperating with Irgun as part of the United Resistance Movement; however, Haganah ultimately rejected cooperation and condemned many of Irgun's actions over the course of the conflict, even providing intelligence to the British and restraining some of Irgun's attacks. The Haganah Track reflects the group's level of cooperation with the Irgun or British player.
6.5.1 Moving the Track. The Haganah Track can only be increased (shifted right) by Events (5.0). The Track is lowered (shifted left) by British Negotiate (4.2.2), Irgun Terror (4.3.3), and Events (5.0).
6.5.2 Adding and Removing Irgun Pieces. At spaces 4 and 3, the Track provides additional Cells and an additional Arms Cache to the Irgun player. When the track enters spaces 3 or 4 from a lower value, immediately add any forces under those spaces to Irgun Available. If the track ever shifts away from spaces 3 or 4 to a lower value, immediately add forces back to the Track to fill any empty spaces. First remove pieces from Available, then from the map (with Irgun choosing which pieces to remove), then finally Prison (1.3.6).
6.5.3 Additional Space for Irgun Operations. When the Haganah Track is at 4, Irgun may add an additional space to any Operation or Limited Operation.
NOTE: This is in addition to the additional space potentially gained through Offensive (2.3.7) by spending an Arms Cache, allowing up to three spaces for a Limited Operation and up to five for a full Operation.
6.5.4 Intelligence. At space 0, the British gain an Intel Chit with every Negotiate (4.2.2) and at the Propaganda Round (6.0).
7.0 Victory
Victory is determined by the level of British Political Will (1.8). British Political Will is measured on the edge track and can range from 0-20.
7.0.1 Early Victory. At the victory check during the Political Will Phase of a Propaganda round, Irgun wins if British Political Will is at 0.
7.0.2 Final Victory. If Irgun has not won at the end of the Political Will Phase of the final Propaganda Round, the game ends in a British victory.
7.1 Raising Political Will
British Political Will is raised in the following ways:
- Removing an Arms Cache by Assault or Event (+1 PW)
- Events (+1 to +3 PW)
- At Propaganda Round, no Sabotaged Railways (+2 PW)
- At Propaganda Round, for each City without any Sabotage or Terror markers (+1 PW)
7.2 Lowering Political Will
British Political Will is lowered in the following ways:
- Propagandize at Curfew marker (–1 to –2 PW)
- Mass Detention (–1 to –6 PW)
- Events (–1 to –3 PW)
- At Propaganda Round, each Sabotage marker in District spaces (–1 PW)
- At Propaganda Round, each Railway with a Sabotage marker (–2 PW)
- At Propaganda Round, each Sabotage marker in a City (–2 PW)
- At Propaganda Round, each Terror marker in a City (–3 PW)
8.0 Example of Play
Setup the game as indicated in section 2.1 (consult the setup diagram on the back of this booklet), but construct only the first part of the deck with these cards in the following order, facedown from top to bottom: DOV GRUNER (P31), PALESTINE POLICE FORCE (P10), AMERICAN LOANS* (P27), MENACHEM BEGIN (P25), LEHI (P7), HARRY TRUMAN* (P8), and PROPAGANDA! (P35).
Reveal the first card (DOV GRUNER) from the top of the deck. Irgun is 1st Eligible and decides to perform a Sabotage Operation combined with the Terror Special Activity. Place their round Eligibility cylinder into the 'Op & Special Activity' box on the Initiative Track. They can usually select up to three spaces for Operations, but are currently able to select an additional fourth space because the Haganah Track is at '4' (they could even select a second additional space, up to five total, by removing an Arms Cache for an Offensive, but decide not to). They select Jerusalem City, Haifa City, Galilee, and Gaza for Sabotage. The Terror Special Activity modifies the Sabotage Operation in one space, and they select Jerusalem City.
The Sabotage Operation requires an Underground Cell to be Activated in each space—flip over all four Cells in these spaces so that their embossed star end is visible. Then the Irgun player must roll a die in each space, succeeding and placing a Sabotage marker on a roll of 3 or greater. In Galilee they roll a 4 and succeed—place a Sabotage marker. In Gaza they roll a 2 and fail. In Haifa their roll is reduced by 1 due to the blue Police cube there, but they roll a 4 and still succeed—place a Sabotage marker. In Jerusalem their roll is also reduced by 1 due to the Police cube, but they will place a more valuable Terror marker if they succeed (or two on a modified roll of 6). They decide to improve their chances by spending the Arms Cache from the adjacent Jerusalem District (return it to the Irgun Available Forces box), increasing their roll by 2. The roll itself is a 5, reduced to 4 by the Police but then increased to 6 by the Arms Cache! Place two Terror markers in Jerusalem, then shift the Haganah Track marker one step to the left. Two Cells and one Arms Cache must now be placed in the indicated spots underneath '4' on the Track, as Haganah withdraws support from Irgun in disgust at the Terror attack—take these pieces from the Irgun Available Forces box and place them on the Track. The Irgun player is also no longer able to select an additional space for Operations without Haganah Coordination.
Irgun launch a devastating Terror attack in Jerusalem.
The Irgun turn is now complete, and the British player may choose from either of the remaining two boxes on the Initiative Track—Limited Operation or Event. They decide to perform a Limited Patrol Operation (place their blue Eligibility cylinder in the 'Limited Op' box on the Initiative Track), selecting Jerusalem City as their destination and moving one Police cube from Haifa City there. They can then remove Activated Cells up to the number of Police there to Prison, and do so with the one Activated Cell present. The British turn is complete, and as both players have completed their turns we reset Eligibility. The Faction whose cylinder is furthest to the left, in this case British, becomes 1st Eligible, and the other Faction becomes 2nd Eligible.
Eligibility is reset at the end of each turn.
Reveal the next card: PALESTINE POLICE FORCE. British are now 1st Eligible and decide to perform the Deploy Operation with the Restore Special Activity—place their cylinder in the 'Op & Special Activity' box. British Operations may usually select up to three spaces (unless they spend an Intel Chit for an additional space), and Deploy is restricted to spaces with more Troops than Irgun pieces. They select Samaria, Tel Aviv-Jaffa, and Haifa City, and place a new Police cube from the British Available Forces box in each space. After placing Police they may also move any Troops cubes on the map to any one space, and decide to move the two Troops from Samaria to the Tel Aviv-Jerusalem Railway.
Next, they select a space with Troops, Police, and no Irgun pieces for Restore, and choose Jerusalem City. Restore would first remove all Sabotage and Curfew markers in the selected space, but there are none here. Then it flips any Terror markers to their Sabotage side—do this with both markers now. A future Restore Special Activity would then be able to remove the newly flipped Sabotage markers.
Having apprehended the culprits, the British begin to Restore order in Jerusalem.
The British turn is now complete, and Irgun have the same choice that British did previously—Limited Operation or Event. They choose to perform a Limited Rob Operation (place their cylinder in the 'Limited Op' box). Rob may select any space with more Cells than Police, and places a new Arms Cache on a roll of 3 or greater, then Activates a Cell if any Police are in the space. They select Haifa District, roll a 4, and place an Arms Cache there (from Available) without Activating the Cell. We then reset Eligibility, Irgun to 1st Eligible and British to 2nd Eligible.
Irgun Rob to place a new Arms Cache in Haifa District.
Reveal the next card: AMERICAN LOANS*. Irgun now decide to perform the Recruit Operation with the Silence Special Activity. Recruit places up to two new Cells in spaces with or adjacent to Arms Caches, or one new Cell in any City space otherwise (and may never place Cells in Cities with Curfews). Irgun choose to place one Cell in Jerusalem City, one Cell on the Haifa-Tel Aviv Railway, and one Cell on the Tel Aviv-Egypt Railway. They then remove the Arms Cache in Haifa City to perform an 'Offensive', allowing them to select a fourth space, and place one Cell in Tel Aviv-Jaffa (they could have placed two Cells if another was Available, but the Cell in Prison cannot be placed back on the map). Finally, they Silence in Tel Aviv-Jaffa, where they now have as many Underground Cells as there are Police, and remove one Police cube to Available.
Irgun launch a Recruitment Offensive and Silence a Police cube in Tel Aviv-Jaffa.
British decide to Pass, placing their Eligibility cylinder in either of the remaining boxes on the Initiative Track (in this case it doesn't matter which), and drawing a random Intel Chit. They draw one with value '1' and place it near their Available Forces box, face-up. Intel Chits can be spent to remove Underground Cells with Patrol or Assault, to enhance Search, or to select an additional space for Operations with an 'Intelligence Lead'. We then reset British to 1st Eligible and Irgun to 2nd Eligible.
Reveal the next card: MENACHEM BEGIN. British decide to perform the Search Operation with the Mass Detention Special Activity. Search moves Troops into adjacent spaces, Activates Cells there, and may place Curfew markers in Cities. The British move one Troop from the Tel Aviv-Jerusalem Railway into Tel Aviv-Jaffa, the other Troop from Tel Aviv-Jerusalem Railway into Jerusalem City, and the two Troops from Gaza into Lydda. Then, in Lydda they Activate one Cell for every two Troops now present (in this case, one), and in both Cities they Activate one Cell for every three Troops now present (again, one in each City), then place a Curfew marker in both Cities. They could alternatively spend an Intel Chit of any value to Activate one Cell per Troop in a City, without placing a Curfew marker, but decide not to do so.
Next, their Mass Detention Special Activity targets one City with a Curfew marker and at least three Troops—this could be either Tel Aviv-Jaffa or Jerusalem, but they select the former. Mass Detention rolls one die and removes that many Cells (even Underground) to Prison from the selected City and its adjacent District, with any excess result from the die being subtracted from Political Will. They roll a 4 and remove the two Cells in Tel Aviv-Jaffa and one in Lydda to Prison, then reduce the Political Will marker from '18' to '17' on the numbered edge track.
The British Search, Curfew, and Mass Detention in Tel Aviv-Jaffa removes three Cells to Prison.
Irgun now decide to execute the Event (place their cylinder in the 'Event' box). MENACHEM BEGIN is a Capability Event that will have a lasting effect, so we place it by the side of the board with a red Capability marker on it to indicate that the shaded bottom effect (favoring Irgun) was selected. We then reset Irgun to 1st Eligible and British to 2nd Eligible.
Reveal the next card: LEHI. Irgun decide to take advantage of their new Capability and perform the Travel Operation with the Propagandize Special Activity. They first Travel from Gaza, moving the one Cell there to Tel Aviv-Jaffa—it remains Active because there is a Curfew in the destination space, and the moving Cells plus cubes there exceed three. Then, they interrupt the Travel Operation to perform Propagandize, which selects up to two spaces with Cells and Curfew markers—here they can select Tel Aviv-Jaffa and Jerusalem City. Propagandize Activates a Cell in each space if there is not already one Active (but in this case there is), then usually subtracts one Political Will for each selected space—however the shaded Menachem Begin capability increases this to two per space, lowering Political Will by 4 from '17' to '13'! With Propagandize complete they can continue the Travel Operation, and just decide to move the Cell in Samaria to the Tel Aviv-Jerusalem Railway, and the Cell in Galilee to the Haifa-Syria Railway. Both moving Cells flip Underground if they are not already, and if they had selected an origin space with more than one Cell then they could have moved each Cell to different spaces.
British decide to perform a Limited Assault Operation in Lydda. Assault allows them to remove one Active Irgun piece for every two Troops present, only removing Arms Caches once no Cells (even Underground) remain in the space. Any Cells removed by Assault are sent alternatively to Available and Prison, starting with Available. In this case they remove the only piece in the space, an Arms Cache, which returns to Available and gains them one Political Will (up to '14') and another Intel Chit (this time a 0 value chit). They decide to immediately spend the 0 value chit for an Intelligence Lead, allowing them to select a second Assault space, Jerusalem City, where they remove the one Cell to Available. We then reset British to 1st Eligible and Irgun to 2nd Eligible.
Reveal the next card: HARRY TRUMAN*. British decide to first perform the Negotiate Special Activity, which allows them to roll a die and shift the Haganah Track one step to the left if they roll greater than the current Track value. They roll a 5, greater than the current value of '3', and shift the Track down to '2'. This further restricts the pieces Available to Irgun, and they must return three Cells to the Track as indicated under the '3' box. One of these can come from Available, but the other two must come from the board, and they choose to remove the two Cells in Haifa District and Jerusalem District.
With Haganah at Neutral (2) the Available Irgun forces are severely depleted.
Next, British perform the Patrol Operation again, moving one Police to each of the three Railways adjacent to Tel Aviv-Jaffa, one from Samaria and two from Jerusalem City. They can remove a Cell from one of these spaces to Prison, but only if the Cell is Active—unless they spend an Intel Chit with a value of at least 1, which they do, and remove the Cell from the Tel Aviv-Jerusalem Railway to Prison.
Irgun decide to execute the Event, selecting the shaded effect to lower Political Will by 2 to '12' (as there are two Curfews on the map). We then reset Irgun to 1st Eligible and British to 2nd Eligible.
The next card revealed is the PROPAGANDA! card, triggering a Propaganda Round. We work through each phase in turn, starting with the Political Will phase:
- Political Will: Political Will is lowered by a net total of 4 (–2 for each Sabotage marker in Cities, –1 for each Sabotage marker in Districts, +1 each City without Sabotage or Terror, and +2 because no Railways have Sabotage markers), down to '8'. If Political Will was now at '0' then Irgun would win.
- Resources: Irgun may perform a Rob Operation in one District or City with more Cells than Police, but there are no eligible spaces. British gain one Intel Chit, drawing a 0 value chit. If Haganah was at '0', British would draw another Intel Chit, or if it was at '4' Irgun would place an Arms Cache, but it is currently at '2'.
- Redeploy: British may move Police on the map to any spaces with British pieces or any Railways, and Troops to any Cities or Railways. They choose just to move one Police from the Tel Aviv-Jerusalem Railway to the Haifa-Syria Railway, and two Troops each from Lydda and Galilee to the Tel Aviv-Egypt Railway and the Haifa-Syria Railway. Irgun may then move one Cell to each City without a Curfew, but decide not to move any Cells, and may move one Arms Cache to a City or District with a Cell, but do not currently have any Arms Caches on the map.
- Reset: Remove all Sabotage, Terror, and Curfew markers from the map. Return half the Cells in Prison, rounded down, to Available (in this case two). Flip all Cells Underground. Set Irgun to 1st Eligible (they already are), then reveal the next card and continue play.
This example of play is now complete. You can continue the current game by constructing the rest of the deck (two stacks of six random Event cards, each with a Propaganda card shuffled in with the bottom two Event cards) and revealing the next Event card. Irgun are in a strong position with Political Will already very low, but they have lost a lot of Cells to Prison and the Haganah Track, so the British might be able to resist defeat by keeping the pressure on them. Good luck!
9.0 Event Tips and Background
At the bottom of each Event Background is a chapter number from Bruce Hoffman's Anonymous Soldiers: The Struggle for Israel, 1917-1947 to provide more context for the event. Hoffman's book is a recent account of the British struggle with Irgun and should be easy to find. For other accounts, though harder to find, see David Charters' The British Army and Jewish Insurgency in Palestine, 1945-1947 or J. Bowyer Bell's Terror Out of Zion.
P1. Operation Agatha
Black Saturday: British Search in 1 City then Mass Detention there. Shift Haganah Track 1 step to the left.
Arrest moderate leaders: Shift Haganah Track 1 step to the right. If it is now at 4, Irgun may perform Sabotage in 1 space.
Tips: To perform Sabotage with the shaded text, Irgun would as usual require an Underground Cell in the selected space.
Background: Operation Agatha, also known as 'Black Sabbath,' was one of the largest British search operations of the conflict. The operation targeted anyone associated with the 'Jewish resistance movement.' Curfews were placed in the three main cities with around 10,000 troops and 7,000 police participating. The majority of the arrests and searches fell on the larger Jewish Agency (Card P22) and Haganah, not the smaller, more clandestine, Irgun and Lehi organizations (Card P7). Although the operation uncovered a significant amount of arms and supplies, it did little to curb the less moderate Jewish resistance organizations and also angered many of the arrested moderates. The limited damage to Irgun was made clear when the bombing of the King David Hotel (Card P3) occurred shortly after the operation (Hoffman, Chapter 13).
P2. Exodus Affair*
Crackdown on immigration: Remove all Cells from Coastal Districts with Troops to Prison.
Britain disgraced: Lower Political Will by 3.
Tips: The star (*) indicates that any Political Will loss from this Event is lowered by 1 if the unshaded ERNEST BEVIN (P9) Capability is in play.
Background: One of the major goals of Haganah was facilitating illegal immigration of Jewish refugees into Palestine (Card P4). In July 1947, a major illegal immigration operation led to the Exodus affair. The Exodus, carrying several thousand refugee passengers, was stormed by the Royal Navy at sea. Rather than the usual method of interning the refugees in camps on Cyprus, Bevin (P9) ordered them returned to Germany. The incident became a propaganda disaster for Britain. Some scholars cite the Exodus Affair and the Sergeants Affair (Card P24) as major incidents that pushed the British to declare a withdrawal from Palestine (Hoffman, Chapter 19).
P3. King David Hotel
Widespread condemnation: Remove 1 Terror marker from the map to shift Haganah Track 1 step to the left.
Horrific terror attack: Place 2 Terror markers in 1 City with an Underground Cell.
Tips: The unshaded text requires a Terror marker to be removed to have any effect, so cannot be used if there is no Terror on the map.
Background: The King David Hotel bombing is one of the most infamous events of the conflict. The Irgun bombing killed 91 people and injured many more. The attack was widely condemned by both the British and Haganah. There are several controversies surrounding the bombing such as whether there was a warning to limit casualties and the extent that the plan was approved by the United Resistance Movement (Card P21). The British launched Operation Shark (Card P11) against Irgun in response to the attack (Hoffman, Chapter 14).
P4. Illegal Immigration*
British block entry: If no Sabotage markers in Coastal Districts, Political Will +2. Otherwise, lower Political Will by 1 for every 2 Sabotage markers or Irgun pieces in Coastal Districts (max of –3 Political Will).
Tips: The star (*) indicates that any Political Will loss from this Event is lowered by 1 if the unshaded ERNEST BEVIN (P9) Capability is in play. Count the combined total of Sabotage markers and Irgun pieces to determine Political Will loss.
Background: Following the 1939 White Paper that restricted Jewish immigration, Haganah focused on organizing illegal immigration. The issue became pressing after WWII with the large number of Jewish refugees in Europe and the Labour government's refusal to alter the immigration policy. The Jewish Agency's (Card P22) main focus during the conflict was organizing illegal immigration and negotiating with British officials on the issue. Unlike Irgun, they did not see a direct confrontation with Britain as essential. After the collapse of the United Resistance Movement (Card P21), Haganah shifted most of its activities to fostering illegal immigration rather than direct attacks against British forces. The clash over illegal immigration would lead to a worldwide scandal when Bevin ordered the Jewish refugees on the Exodus (Card P2) to return to Germany (Hoffman, Chapters 11, 14).
P5. Acre Prison Break
Prisoners sent to Eritrea: Remove up to 2 Cells in Prison from the game.
Mass escape: Move all Cells in Prison to Available.
Tips: Any Cells removed from the game by the unshaded text may no longer be used by Irgun under any circumstances.
Background: The fortress at Acre served as the main maximum security prison in Palestine. Many of the Jewish Resistance members arrested during major search operations were imprisoned at Acre. In response to the execution of Dov Gruner (Card P31), Irgun organized a daring operation to free prisoners from Acre. Forty-one members of Irgun and Lehi were freed, although several were killed or captured after escaping. The British set up an additional prison for Jewish terrorists in Eritrea, making a similar escape more difficult (Hoffman, Chapter 17).
P6. Montgomery
Pushes harsh measures: British may Search in up to 3 spaces but may not use Intel Chits.
Ignores cities: Place 1 Cell in each City without Troops.
Tips: The unshaded text would allow British to Search in 3 spaces even if the shaded ERNEST BEVIN (P9) Capability is in play.
Background: Field Marshal Bernard Montgomery, Chief of the Imperial General Staff, had prior experience from serving in Palestine during the Arab Revolt (1936-1939). Experienced in the repressive tactics used against the rural-focused Arab rebels, Montgomery advocated for similar measures against the Jewish insurgency. This strategy clashed with General Cunningham's (Card P16) strategy of targeting the terrorist organizations directly while working to win the assistance of Haganah in combating Irgun (Hoffman, Chapter 15). Image source: Archives New Zealand.
P7. Lehi
Poor coordination: Remove up to 1 Cell to Available in each space with more than 1 Cell.
Assassinations: Remove up to 1 Police from each space with an Underground Cell.
Tips: None.
Background: Lehi, also known as the Stern Gang, was the smallest of the three major Jewish resistance organizations. The group focused on assassinations and bombings against British forces. One of their most prominent attacks, the assassination of Lord Moyne, occurred prior to the start of the game. On its own, Lehi never rose to become a serious threat to British rule, but did join the United Resistance Movement (Card P21) and coordinated with Irgun during several operations (Hoffman, Chapters 6 and 11).
P8. Harry Truman*
Offers support: Increase Political Will by 2. British may Deploy in up to 3 spaces.
Pressures British: Lower Political Will by 1 for each Curfew on the map.
Tips: The star (*) indicates that any Political Will loss from this Event is lowered by 1 if the unshaded ERNEST BEVIN (P9) Capability is in play. The unshaded text would also allow British to move any Troops to one additional space as usual with a Deploy Operation.
Background: President Truman put pressure on Britain to open up Palestine to greater immigration of Jewish refugees (Card P4) by issuing an additional 100,000 immigration certificates and condemning their repressive tactics (Card P14). Truman could pressure Britain due to their reliance on American post-war loans (Card P27), particularly after he abruptly ended the lend-lease agreements. In the United States, there was significant popular sympathy for Irgun (Card P12), and this likely influenced Truman's decision to pressure Britain (Hoffman, Chapter 11).
P9. Ernest Bevin — BRITISH CAPABILITY
Foreign Secretary: Lower the Political Will loss from all starred (*) Events by 1.
Declining great power: British Operations limited to up to 2 rather than 3 spaces.
Tips: The unshaded Capability affects five Events: P2, P4, P8, P20, and P27. If the shaded Capability is in effect, British could still spend an Intel Chit to perform an Operation in an additional space.
Background: Ernest Bevin was the Foreign Secretary of the Attlee Labour government in the immediate postwar period. Instability in Palestine was one of the Labour government's immediate issues at the end of WWII, and Bevin had significant authority over British policy in Palestine. Bevin took a hard stance against widening Jewish immigration which helped push Haganah to join the United Resistance Movement (Card P21). Bevin also sought to maintain Britain's importance as a great power shaping the new world order, but the difficult economic situation of the postwar period limited his efforts (Hoffman, Chapter 11).
P10. Palestine Police Force
Guard railways: Place up to all Available Police in any Railway spaces.
Poorly funded: Remove half Police on the map to Available (round down).
Tips: None.
Background: The Palestine Police Force was hampered by several issues that prevented it from effectively countering Irgun. First, the force faced personnel shortages, and attempts to expand the pool of recruits often lowered their quality. Unlike in its other counterinsurgency campaigns, the British did not extensively recruit from other local groups to expand the police force. The police force also became militarized by focusing more on fighting than intelligence gathering, a particular problem with the mobile force who operated from armored cars. The armored cars may have protected the police from mines (Card P23), but also hampered their ability to collect intelligence from the local population (Hoffman, Chapter 16).
P11. Operation Shark
Crackdown on Irgun: Search then Assault in 1 City. Remove an Arms Cache within 1 space of the City (+1 PW if an Arms Cache removed).
Leaders slip through net: Travel from up to 2 spaces with Cells and Curfew.
Tips: British would gain +1 Political Will if the unshaded text removes an Arms Cache.
Background: Operation Shark was a major British cordon and search operation launched in Tel Aviv in response to the King David Hotel bombing (Card P3). Over 20,000 troops were committed to the operation, and nearly 100,000 inhabitants were screened. Although the operation uncovered several arms caches and arrested key members of Lehi (Card P7), it failed to deliver a crushing blow due to a lack of intelligence on Irgun. Irgun leader Menachem Begin (Card P25) avoided capture despite the massive searches and screenings (Hoffman, Chapter 14).
P12. Peter Bergson
British complaints: Remove 2 Arms Caches from map to Available (gain no Political Will).
American fundraising: Place up to 2 Arms Caches total in any spaces with Cells.
Tips: British would not gain any Political Will for removing Arms Caches with the unshaded text.
Background: Irgun's main source of external support came from the United States. Fundraising events were often used to raise money, and many of these efforts were organized by Peter Bergson, a pseudonym used by Hillel Kook. American support groups also put pressure on Britain to reveal information on Jewish terrorists imprisoned in Eritrea (Card P5). Britain formally sent a protest to the US State Department about the fundraising efforts, but to little effect (Hoffman, Chapter 15, Epilogue).
P13. Palmach — IRGUN CAPABILITY
Preparing for next fight: Haganah Track 4 (Coordinate) no longer adds an additional space to Irgun Operations.
Haganah's elite: Haganah Track 3 (Support) also adds an additional space to Irgun Operations.
Tips: None.
Background: Palmach was the elite force of Haganah, numbering around 5,000 strong. During periods of Haganah's cooperation with the British, Irgun's more aggressive strategy against Britain lured Palmach forces to their organization. As part of the United Resistance Movement (Card P21), Palmach forces carried out sabotage operations in coordination with Irgun. Several hundred Palmach fighters were even lent to Irgun to strengthen collaboration between the two groups. After the collapse of the United Resistance Movement, the Jewish Agency (Card P22) focused on conserving Palmach and Haganah for the conflict with the Arab community after Britain withdrew from Palestine (Hoffman, Chapter 12).
P14. Martial Law
Extensive searches: British may Search in up to 2 Cities then Mass Detention.
Angers populace: Place up to 1 Cell in each City with a Curfew.
Tips: British would still need to meet the usual requirements to conduct Mass Detention with the unshaded text.
Background: British officials repeatedly threatened to implement martial law in response to outrageous terror attacks. In March 1947, the declaration finally came, with areas under curfew (Card P29) also being placed under martial law. Martial law severely disrupted everyday life. Commerce and transportation ceased, as well as most government services. In addition, curfews and searches were carried out in cordoned off areas. Martial law was intended to hamper Irgun operations, but also to coerce the population into providing greater assistance in identifying Irgun members. Rather than achieving either of those goals, martial law largely angered the affected population and made them more sympathetic to Irgun's struggle (Hoffman, Chapter 17).
P15. Chaim Weizmann
Meets with British: Shift Haganah Track 1 step to the left and remove up to 1 Sabotage marker from the map.
Moderates ignored: Shift Haganah Track 1 step to the right. Irgun may perform Sabotage in 1 space.
Tips: Irgun would need an Underground Cell as usual to perform Sabotage with the shaded text.
Background: Chaim Weizmann was a key Zionist activist who advocated for negotiating with rather than fighting the British. At the end of Operation Agatha (Card P1), General Cunningham (Card P16) met with Chaim Weizmann to discuss limiting Haganah and Palmach (Card P13) operations against British forces. Weizmann succeeded in convincing Haganah to break off coordination with Irgun. However, less moderate members of the organizations criticized his decision and continued cooperation with Irgun's strategy of direct confrontation with Britain (Hoffman, Chapter 13).
P16. Alan Cunningham
Restrained approach: British may conduct 2 Limited Operations then Restore.
Cells released: British must place 2 Cells from Prison into any Cities.
Tips: The two Limited Operations granted by the unshaded text may be of different types, are carried out one after the other, and may potentially use the same pieces twice. The shaded text may be used to release 1 Cell if there is only 1 in Prison.
Background: General Sir Alan Cunningham commanded British forces in the counterinsurgency campaign against Irgun. Cunningham advocated for negotiations with the Jewish Agency (Card P22) and other Jewish leaders to gain their cooperation in combating Irgun, as had occurred during World War II. Cunningham's restrained approach was criticized by his superior Field Marshal Montgomery (Card P6), who pushed for more heavy-handed measures and the replacement of Cunningham. Cunningham argued against punitive measures and was vindicated when martial law (Card P14) produced few results (Hoffman, Chapter 12).
P17. Bevingrads — BRITISH CAPABILITY
Fortified bases: Terror places max 1 Terror marker.
Isolated from population: If Intel Chit not used, Search in Cities requires 4 Cubes to Activate a Cell.
Tips: None.
Background: Following the repeated kidnappings of British officials and bombings by Irgun and Lehi (Card P7), British forces created special security zones in major cities, nicknamed 'Bevingrads' by the local population. The retreat into Bevingrads reduced the threat to British forces, but also limited their ability to collect intelligence on Irgun. Following the kidnapping of the two sergeants by Irgun (Card P24), all nonessential personnel were evacuated to Bevingrads and then removed from Palestine as part of Operation Polly (Hoffman, Chapters 14, 16).
P18. 6th Airborne — BRITISH CAPABILITY
Seasoned veterans: Assault removes 1 Irgun piece per Troop.
Cells evade capture: Assault and Mass Detention remove all Cells to Available (not Prison).
Tips: The unshaded Capability still only allows Assault to remove Active Cells unless an Intel Chit is spent.
Background: There were over 100,000 British troops in Palestine during the conflict. However, the 6th Airborne division carried out many of the major operations against Irgun. The division were seasoned veterans of several major Allied operations during World War II (Card P26). The division was the main formation conducting Operation Shark (Card P11), a major cordon and search operation against Irgun in Tel Aviv. Despite the division's previous combat experience, rapidly adjusting from conventional warfare to counterinsurgency proved to be a difficult transition (Hoffman, Chapter 11).
P19. Rome Embassy Bombing
Plot foiled: Remove up to 2 Cells and 1 Arms Cache to Available (+1 Political Will if an Arms Cache is removed).
International attacks: Roll a die and lower Political Will by 2 if the result is greater than 2.
Tips: The unshaded text may remove the specified pieces from any combination of map spaces, and British would gain +1 Political Will if an Arms Cache is removed.
Background: Irgun attempted to organize operations outside of Palestine by relying on volunteers in Europe. The most spectacular terror attack conducted outside of Palestine was the bombing of the British embassy in Rome. The British embassy in Rome was targeted for symbolic reasons, and also due to the embassy's role in limiting immigration (Card P4). The bombs were timed to explode in the early hours of the morning to avoid casualties. The explosion extensively damaged the building, but there were no fatalities and only one injured bystander. The bombing increased British fears that a wider Irgun terror campaign would be conducted outside of Palestine, but the threat never seriously materialized (Hoffman, Chapter 15). Image source: British Government under the Open Government Licence v3.0.
P20. Indian Independence*
Strategic value of Palestine: Increase Political Will by 2 if no Railways Sabotaged.
Growing pressure: Lower Political Will by 2.
Tips: The star (*) indicates that any Political Will loss from this Event is lowered by 1 if the unshaded ERNEST BEVIN (P9) Capability is in play.
Background: A major British argument for preserving a presence in Palestine was its use as a strategic base in the Middle East. Britain also feared that consenting to demands of the Jewish resistance movements would damage British relations with other states in the Middle East. However, the granting of independence to India put greater pressure on Britain to grant independence to other colonies and also lowered the need for Palestine as a strategic base (Hoffman, Chapter 11).
P21. United Resistance Movement
Cooperation falls apart: Shift Haganah Track 1 step to the left. Remove up to 2 Cells to Available.
Offensive against railways: Shift Haganah Track 1 step to the right. May perform Sabotage at each Railway.
Tips: The Cells removed by the unshaded text are in addition to any that might need to be placed back on the Haganah Track. Irgun would require Underground Cells as usual to perform Sabotage with the shaded text.
Background: In an effort to coordinate their efforts, the three main Jewish resistance groups, Haganah, Irgun, and Lehi (Card P7) formed a loose alliance known as the United Resistance Movement (URM). On October 31, 1945, the alliance launched widespread sabotage attacks on major railways throughout Palestine. Haganah, by far the largest of the three organizations, primarily carried out sabotage attacks against Britain while participating in the URM. Once the URM collapsed following Operation Agatha (Card P1) and the King David Hotel bombing (Card P3), Haganah's attacks became limited to facilitating illegal immigration (Card P4). During the URM period, Irgun received financial support and Palmach fighters (Card P13) from Haganah, bolstering their ability to conduct attacks. Once the URM fell apart, Irgun relied more on robbing banks for funds (Hoffman, Chapter 11).
P22. Jewish Agency
Cooperate or condemn terror?: Shift Haganah Track 1 step in either direction. Then, Irgun may conduct a Limited Operation or British may draw an Intel Chit.
Tips: None.
Background: The Jewish Agency and its armed wing Haganah shifted between cooperation and confrontation with Irgun. During World War II, Haganah had cooperated with Britain in targeting Irgun in a campaign known as the 'Saison'. After the war, due to British refusals to open Palestine to Jewish immigration (Card P4), Haganah coordinated with Irgun as part of the United Resistance Movement (Card P21) until August 1946. For the rest of the conflict, the Jewish Agency either condemned or limited Irgun actions as part of a 'little Saison.' Jewish Agency leaders such as Ben Gurion wanted to conserve Haganah's strength for any struggle following Britain's exit and did not want to risk damaging the organization by provoking British repression, such as during Operation Agatha (Card P1). The Jewish Agency also condemned Irgun's most violent attacks, such as the King David Hotel bombing (Card P3), and cooperated with British forces during the Sergeants Affair (Card P24) (Hoffman, Chapters 11 and 17).
P23. Road Mines — IRGUN CAPABILITY
Armored cars: Patrol may remove Cells in up to 2 selected spaces.
Early IEDs: When Patrol moves Police to any space with a Sabotage marker, remove 1 Police to Available on a roll of 1-3.
Tips: The unshaded text still only allows Cells to be removed from selected spaces, so Limited Patrol may not remove Cells from two spaces unless an Intel Chit is spent to select an additional space.
Background: Irgun used improvised road mines to attrition British forces traveling by convoy. The indirect form of attack also conserved Irgun's strength by avoiding direct clashes with British troops. The Police Mobile Force who patrolled the major railways and lines of communication commonly operated from armored cars that were more resistant to the road mines (Hoffman, Chapter 16).
P24. Sergeants Affair
Backlash in Britain: Increase Political Will by 1 for each Terror marker on map (max of +3 Political Will).
Calls for withdrawal: Lower Political Will by 1 for each Terror marker on map (max of –3 Political Will).
Tips: None.
Background: In response to the British hanging of captured Irgun fighters, Irgun threatened retaliation and kidnapped a number of British soldiers and citizens. The most controversial act occurred when they kidnapped two sergeants, Clifford Martin and Mervyn Paice. A massive search was conducted to find the two men, including the Jewish Agency (Card P22) committing over one thousand Haganah members to the search. The two men were tried and publicly hanged by an Irgun court. A mine was placed under their bodies, injuring the British officer who attempted to remove them. Begin (Card P25) argued the British had forced them "to answer gallows with gallows." The attack, alongside the Exodus affair (Card P2), increased calls in Britain to withdraw from Palestine (Hoffman, Chapter 19).
P25. Menachem Begin — IRGUN CAPABILITY
Documents captured: Each Arms Cache removed with Assault adds 2 Political Will and draws 2 Intel Chits.
Irgun leader: Propaganda lowers Political Will by 2 per selected space.
Tips: The unshaded Capability replaces the usual bonus for removing an Arms Cache with Assault, rather than being in addition to it.
Background: Menachem Begin joined Irgun in 1942 and assumed leadership in 1944. Begin's main strategy for defeating Britain was targeting its prestige. He stated that Irgun "hit at the British government's prestige, deliberately, tirelessly, unceasingly." One of Begin's main innovations was the use of propaganda against Britain, both in Palestine and abroad. Irgun had its own propaganda branch that particularly focused on British coercive measures or reprisals to serve as 'atrocity propaganda' to create sympathy for the group and increase pressure on Britain to withdraw (Hoffman, Chapters 15 and Epilogue).
P26. Veterans of WWII
Experienced in resistance and combat: Irgun may Sabotage in up to 3 spaces or British may Assault in up to 3 spaces. The Executing Faction may also conduct a valid Special Activity for that Operation.
Tips: Irgun would require an Underground Cell as usual in any space selected for Sabotage, and could conduct any Special Activity, while British could only conduct Mass Detention with their Assault.
Background: There were veterans of the Second World War on both sides of the conflict. The Sixth Airborne Division (Card P18) had participated in Operation Overlord and Operation Market Garden. On Irgun's side, Jewish refugees from Europe experienced in partisan warfare joined the group, including fighters who had participated in the Warsaw ghetto uprising (Hoffman, Chapter 13).
P27. American Loans*
Passed through Congress: Britain may conduct an Operation in up to 4 spaces.
"Financial Dunkirk": Political Will –1. Britain must Pass on the next card with no draw of an Intel Chit.
Tips: The star (*) indicates that any Political Will loss from this Event is lowered by 1 if the unshaded ERNEST BEVIN (P9) Capability is in play. The shaded text effectively means that British will not perform any action on the next card, but they should still place their eligibility cylinder to determine who becomes 1st Eligible on the following card.
Background: Britain faced a desperate economic situation at the end of World War II, particularly due to the cancellation of lend-lease agreements by the US. The economist John Maynard Keynes described the situation as a "financial Dunkirk." Despite these economic difficulties, Britain still had large overseas commitments, the value of which became seriously questioned. To manage the economic situation, Britain requested loans from the United States, which increased their ability to pressure Britain on issues such as Palestine (Hoffman, Chapters 11, 16).
P28. CID
Intelligence gathering: Gain 1 Intel Chit for each space with both Police and Cells.
Headquarters targeted: Irgun may perform Sabotage in 1 space with Police, and removes any Police there if successful.
Tips: Intel Chits gained from the unshaded text should be drawn at random as usual. The shaded text requires that an Underground Cell be Activated to perform the Sabotage as usual, and only removes Police if the Sabotage roll is successful.
Background: As with the Palestine Police Force (Card P10), the Criminal Investigation Department (CID) had significant personnel shortages during the conflict. The lack of officers with Hebrew language skills hampered the organization's main role as an intelligence gathering unit. Irgun targeted the CID to limit their intelligence capabilities. One of Irgun's most daring attacks was the bombing of the CID headquarters in Jerusalem (Hoffman, Chapter 16).
P29. Curfews — BRITISH CAPABILITY
Punitive response: At start of Reset, remove 1 Cell to Available from each space with a Curfew.
Harsh measures backfire: At start of Reset, Irgun may place up to 1 Cell from Available in each space with a Curfew.
Tips: Cells removed or placed by either text can come from, or be placed in, any spaces with Curfews.
Background: Curfews were a frequently used measure during large cordon and search operations such as Operation Agatha (Card P1) and Operation Shark (Card P11). Curfews were also issued in areas under martial law (Card P14). Curfews were highly disruptive to everyday life and many British officials saw them as measures to coerce the Jewish population into supplying information on Irgun. Other officials thought they did little to hinder Irgun and only angered the population, driving more recruits into the terrorist groups (Examples in Hoffman, Chapters 12 to 14).
P30. Roy Farran
Undercover police: Remove 1 Cell to Available from each of up to 3 spaces with Police.
Controversial killing: Remove 2 Police to Available. Lower Political Will by 1.
Tips: None.
Background: Roy Farran had extensively served with the SAS during the Second World War. In Palestine, Farran was tasked with organizing covert operations against Irgun using undercover squads. These undercover squads had little oversight from higher command. Farran's unit killed a teenager, Alexander Rubowitz, associated with Lehi (Card P7). When the killing was investigated, the evidence led back to Farran from a hat with his name on it that he had dropped nearby. Farran fled Palestine for Syria as the investigation continued, but was eventually acquitted and his undercover squad disbanded (Hoffman, Chapter 17).
P31. Dov Gruner
Captured and sentenced: Remove a Cell from 1 space with Troops to Prison.
Galvanizes resistance: Place up to 3 Cells total in any Cities or Districts.
Tips: None.
Background: The trial and execution of Dov Gruner was intended to illustrate British resolve by implementing the death penalty against captured terrorists. However, Gruner became a symbol of Jewish resistance and Irgun threatened retaliation for the execution. A British official and businessman were kidnapped by Irgun, but both were released. Both sides threatened hanging of the other side's captured personnel, and Irgun's trial and execution of two British sergeants (Card P24) was a controversial response to Britain's use of hangings (Hoffman, Chapter 16).
P32. Weapon Factories — IRGUN CAPABILITY
Accidental detonations: If Irgun Sabotage rolls a 1, remove the Activated Cell to Available.
Homemade innovation: Rob always places an Arms Cache (no roll).
Tips: None.
Background: Irgun faced weapons and explosives shortages throughout the conflict. The organization began its revolt with around 50 firearms and a small amount of explosives. To help augment their arsenal, Irgun developed weapons factories for producing homemade substitutes. Improvised road mines (Card P23) used to harass British convoys were one of their most prevalent manufactured explosives (Hoffman, Chapter 7 and 17).
P33, P34, P35. Propaganda
Background: In September 1947, Britain declared their decision to withdraw from Palestine by August 1948. Throughout the fall of 1947, violence between Arab and Jewish forces increased. In the spring of 1948, civil war and ethnic violence would characterize the last months of British rule in Palestine. Britain largely focused on safely withdrawing its own forces as the violence escalated. The final withdrawal was moved forward to May 1948. The image on these cards depicts the lowering of the British flag in Haifa (Hoffman, Chapter 19).
Palestine — Strategy Guide
By Joe Dewhurst
This strategy guide consists of some general advice for both players and then some specific tips for playing each Faction, and is intended to help get you started rather than explaining everything about the game. Much of the enjoyment of playing will come from exploring and developing these strategies yourself, and of course I need to keep some tricks up my sleeve in case we ever end up on opposite sides of the table.
General Advice
Have a plan – Each campaign (the sequence of Event cards leading up to a Propaganda Round) only lasts an average of six Event cards, meaning that you only should expect to get approximately three full Operation + Special Activity turns per campaign. This doesn't give you much time to get things done, so you should begin each campaign with a plan for what you want to achieve, and only divert from it if there is something more important you need to respond to, or if a better opportunity arises from the Event cards (although beware the allure of these, often they are not your best option).
Keep your eyes on the prize – The game is ultimately a struggle for Political Will, and you should carefully study the various ways in which this can be raised and lowered (these are summarised on both Faction player aids, and on the Propaganda Round aid sheet). Some of these have immediate effects and can often be very attractive, but in the long-term the Propaganda Round effects are likely to have a greater impact, and you should make sure that you are always working towards achieving these.
Master the one-two punch – The structure of the Initiative Track means that if you perform a Limited Operation on one turn you are guaranteed to be able to perform a full Operation + Special Activity on the next turn (unless the Propaganda card is drawn). This means that you can use a Limited Operation on one turn to set yourself up for a powerful action on the next – and remember that you can burn an Intel Chit or Arms Cache to target two spaces with a Limited Operation.
Irgun Tips
Haganah or bust – At the start of the game you need to make the most of your alliance with Haganah, flooding the map with Cells and performing your Operation in an additional space each turn. Be cautious while you have this alliance, but once the track falls below 3 don't be afraid to use Terror, as you no longer have so much to lose if it falls further.
Prioritize your targets – A single Sabotage marker on one Railway results in a net swing of 4 Political Will (by also preventing the British from regaining 2), so make sure to achieve this every campaign. After that, target other Railways and then Cities, using Districts as more of a safe haven for Arms Caches and only Sabotaging there when you have nothing better to be doing.
Victory in defeat – The British can quickly lock you out of one, two, or even all three Cities by placing Curfews, but this is in fact an opportunity in disguise. While they are busy protecting the Cities you will be able to target the valuable Railways, and you can also use Travel to move Cells back into the Cities to use Propagandize even if they end up Active as a result (although beware of sacrificing too many to Prison in this way).
British Tips
Target Arms Caches – Removing an Arms Cache with Assault can deal a severe blow to Irgun, limiting their ability to Recruit, and preventing them from adding spaces to Operations or improving their chances of Sabotage. At the same time, you will regain a Political Will and draw a very rare and valuable Intel Chit. A Limited Search can be the perfect way to prepare for an Assault!
Damage mitigation – Many of your options for fighting Irgun, such as Curfews and Mass Detention, come with a risk of reducing your Political Will. This can make these options seem unattractive, but it's important to weigh these risks against the cost of doing nothing: a Curfew in a City might lose you 1 or 2 Political Will to Propagandize, but you will get 1 Political Will back if there is no Sabotage or Terror in the City during the Propaganda Round, compared to losing at least an additional 2 Political Will to a Sabotage marker there (or 3 to a Terror marker). So in reality the Curfew might only lose you 1 Political Will in total, compared with a loss of 2 or more if you hadn't used it.
Race to the bottom – Irgun can only win if they reduce your Political Will all the way to 0, and they will often become weaker as the game goes on, especially if they lose their Haganah support or end up with a lot of Cells in Prison. Rather than aiming to 'win' you are simply aiming to 'not lose', so persevere even if your situation seems bad and just focus on making life as difficult as possible for the Irgun player.
Palestine — Key Terms Index
Accompanying: Operation required for a Special Activity. (4.1.1)
Activate: Flip Cells Active. (1.4.3)
Active Pieces: Troops, Police, Active Cells (symbol end up), and Arms Caches. (1.4.3)
Adjacent: Spaces next to each other for actions or Events. (1.3.5)
Arms Cache: Irgun forces that enable Recruit and may be spent for additional Operations or to modify Sabotage rolls. (1.4, 1.6.2)
Assault: British Operation to remove Active Irgun pieces, possibly to Prison. (3.2.4)
Available: Pieces in Available boxes, waiting to be placed. (1.4.1)
British: A Faction committed to maintaining British influence in Mandatory Palestine. (1.5)
British Political Will: Marker on edge track indicating British commitment to Mandatory Palestine, position determines victory. (1.8, 7.0)
Campaign: Event card series leading up to a Propaganda Round. (2.4)
Cell: Mobile Irgun forces that are required for several Operations and Special Activities, and may be Underground or Active. (1.4)
City: Urban space. (1.3.3)
Cube: British Troops or Police piece. (1.4)
Curfew: Marker placed by British Search or Events that inhibits Irgun Recruit and Travel, but enables Propagandize. (1.10)
Cylinder: Token to mark a Faction's Eligibility on the Initiative Track. (2.3)
Dual Use: Event with two alternative effects. (5.2)
Deploy: British Operation to place Police and rapidly move Troops to one space. (3.2.1)
District: Rural space. (1.3.2)
Event: Card with text a Faction may execute. (5.0)
Execute: Implement Event or conduct Operation or Special Activity. (2.3)
Faction: Player role: British or Irgun. (1.5)
Flip: Switch Cells between Underground and Active. (1.4.3)
Forces: Troops, Police, Cells, and Arms Caches. (1.4)
Friendly: Forces belonging to the executing Faction. (1.4)
Haganah Track: Track indicating the current posture of Haganah, possibly locking or unlocking Irgun forces, enhancing Irgun Operations, or adding British Intel Chits. (6.5)
Initiative Track: Track indicating which Faction is 1st and 2nd Eligible, and to mark actions performed on an Event card. (2.3)
Intel Chit: Marker acquired by British and spent to remove Underground Cells, modify Search, or enhance British Operations. (1.6.1)
Irgun: A Faction committed to ending British rule of Mandatory Palestine. (1.5)
Limited Operation: Operation in one space with no Special Activity. (2.3.4)
Mass Detention: British Special Activity to remove large numbers of Irgun Cells to Prison. (4.2.3)
Negotiate: British Special Activity to attempt to shift the Haganah Track. (4.2.2)
Operation (Op): Core action a Faction takes with its pieces. (3.0)
Pass: Forego the action in the selected Initiative Track box to either draw an Intel Chit or perform a Limited Rob Operation. (2.3.3)
Patrol: British Operation to rapidly move Police and remove Active Irgun Cells to Prison. (3.2.2)
Pawn: A token to designate spaces selected for Operation or Special Activity. (3.1.1)
Phase: Part of a Propaganda Round. (6.0)
Place: Move a piece from Available to the map. (1.4.1)
Police: British forces that inhibit Sabotage and may Patrol. (1.4)
Political Will Phase: Propaganda Round phase in which British Political Will is adjusted and victory is checked. (6.1)
Prison: Box where Irgun Cells are placed and kept unavailable until Reset. (1.3.6)
Propaganda Round: Interruption to usual play, during which Political Will is adjusted, victory is checked, and other status phases are carried out. (6.0)
Propagandize: Irgun Special Activity in Cities with Curfews to lower Political Will. (4.3.2)
Railway: Map space connecting Cities and Districts. (1.3.4)
Recruit: Irgun Operation to place new Cells. (3.3.1)
Redeploy Phase: Propaganda Round phase in which both Factions move pieces. (6.3)
Remove: Take from the map and return to Available or Prison. (1.4.1)
Replace: Remove pieces to place others in their stead. (1.4.1)
Reset Phase: Propaganda Round phase to ready for the next card. (6.4)
Resources Phase: Propaganda Round phase in which both Factions may gain (or lose) Intel or Arms Caches. (6.2)
Restore: British Special Activity to remove Sabotage and Curfews, then flip Terror to Sabotage. (4.2.1)
Rob: Irgun Operation to place Arms Caches. (3.3.4)
Sabotage: Irgun Operation to place Sabotage markers. (3.3.3)
Sabotage marker: Indicates successful Irgun Sabotage and affects British Political Will. (1.7)
Search: British Operation to move Troops to adjacent spaces, place Curfews in Cities, and flip Cells Active. (3.2.3)
Shaded: 2nd choice of Dual-Use Event, typically favors Irgun. (5.2)
Silence: Irgun Special Activity to remove Police. (4.3.1)
Space: A map area holding pieces in play: Cities, Districts, or Railways. (1.3.1)
Special Activities: Actions accompanying Operations; unique to each Faction. (4.0)
Stacking: A limit of two total on Arms Caches that can occupy a space. (1.4.2)
Target: Faction or piece that is the object of an action. (3.1, 4.1)
Terror: Irgun Special Activity that modifies Sabotage to place Terror markers. (4.3.3)
Terror marker: Indicates successful Irgun Terror and affects British Political Will. (1.7)
Travel: Irgun Operation to rapidly move Cells and possibly flip them Underground. (3.3.2)
Troops: British forces that may Search and Assault. (1.4)
Underground: Cell, symbol end down: not usually subject to removal from Patrol or Assault and capable of Sabotage and Silence. (1.4.3)
Unshaded: 1st choice of Dual-Use Event, typically favors British. (5.2)
Palestine — Setup Instructions (2.1)
Palestine Emergency: 1945-1947
Deck Preparation. Gather the Palestine Event cards, remove the three Propaganda cards, and shuffle the remaining cards. Form three piles of 6 regular Event cards and set aside the remaining 14 regular Event cards (they will not be used). In each pile, shuffle a Propaganda card with 2 of the Event cards and place these 3 cards under the remaining 4 Event cards. Stack the resulting three 7 card piles to form the complete Event Deck of 21 cards. Place the 9 Intel Chits in a cup or container for random drawing.
NOTE: The British only use 12 tan Troop Cubes and 6 blue Police Cubes. Irgun uses 15 red octagonal cylinders (Cells) and 5 flat red discs (Arms Caches). The British only use 3 of the 4 Curfew markers, set 1 aside.
Set up the map as follows (see back page of this booklet for a full setup diagram):
- Haganah Track: Coordinate (4, with no Irgun pieces on the track)
- British Political Will: 18
- Initiative: Irgun 1st Eligible, British 2nd Eligible
Available:
- Irgun—3 Arms Caches, 6 Cells
- British—3 Police
Prison: Empty
Galilee: Irgun—1 Cell; British—2 Troops
Haifa District: Irgun—1 Cell
Haifa City: Irgun—1 Cell; British—2 Troops, 1 Police
Samaria: Irgun—1 Cell; British—2 Troops
Tel Aviv-Jaffa: Irgun—1 Cell; British—2 Troops, 1 Police
Lydda: Irgun—1 Arms Cache, 1 Cell
Jerusalem District: Irgun—1 Arms Cache, 1 Cell
Jerusalem City: Irgun—1 Cell; British—2 Troops, 1 Police
Gaza: Irgun—1 Cell; British—2 Troops
All Railways: Empty
Malaya
The British Way: Malaya 1948-1960 — Rules of Play, 2nd Edition. Designed by Stephen Rangazas.
1.0 Introduction
The British Way: Malaya is a game in The British Way COIN multipack. Alongside its accompanying games Palestine, Kenya, and Cyprus, this historical simulation strives to depict Britain's attempts to "manage" the emergencies, as the British referred to them, in their colonies during the period of decolonization that swept the world after WWII.
The British Way: Malaya focuses on the British counterinsurgency effort against the Malayan Communist Party (MCP) from June 1948 through to the official end of the Malayan Emergency in July 1960—although by the middle of the 1950s it was already becoming clear that the MCP had little chance of winning, and so the game can be considered to focus primarily on the earlier stages of this conflict. The game focuses on the counterinsurgency aspects of the conflict in rural areas of the Malayan Peninsula, and does not directly model the suppression and struggle of militant trade union movements that took place at the same time in Kuala Lumpur and Singapore.
The historical simulations that comprise The British Way multipack are designed to depict the full range of strategies used by the British during these conflicts, ranging from the more benevolent but still coercive provision of material benefits through pacification programs to the horrific measures used to gain control over the local population. Although many myths have arisen about an enlightened British approach to counterinsurgency that avoids large-scale violence and focuses on winning the population's 'hearts and minds', new scholarship on these conflicts have confirmed the brutality of the methods commonly used. This volume is intended to help synthesize and present this crucial scholarship, even if the simulations depicted are at times more unpleasant than fun. The main goal is that players find these thought-provoking and the gameplay encourages them to seek out the discussion of sources and historical background material in the Event notes and Campaign booklet.
1.1 General Course of Play
In The British Way: Malaya, one Event card at a time is revealed from the shared draw deck, and both players will have an opportunity to either execute that Event or perform an Operation from a unique menu, possibly adding a Special Activity. Propaganda cards mixed in with the Event cards provide periodic interruptions where the general board state is assessed and British Political Will is adjusted, possibly triggering an instant victory for either side, after which both players receive an opportunity to collect additional assets and redeploy their forces.
1.2 Components
The following components from the multipack are required to play The British Way: Malaya:
- A 17"x22" mounted Malaya game board (1.3).
- A deck of 35 Malaya cards (5.0).
- 15 blue cubes ('Police'), 15 tan cubes ('Troops'), 15 red embossed octagonal cylinders ('Guerrillas'), 4 flat red discs ('Bases'), 4 embossed cylinders (two blue and two red)—note that this is fewer than the total number of wooden pieces included in The British Way multipack; any excess should be set aside while playing Malaya.
- Three black and five white pawns (3.1.1).
- Specific markers from the countersheet: 1x Political Will, 1x Commander, 4x New Villages, 10x British/MCP Control, 9x Support/Oppose, 15x Sabotage/Terror, 8x Capability—all other markers should be set aside while playing Malaya.
- Two player aid sheets.
- One Propaganda Round aid sheet.
- Two six-sided dice (one red, one blue).
- This rules booklet.
1.3 The Map
The map shows the Federation of Malaya and some adjacent territories, divided into several different kinds of spaces.
1.3.1 Map Spaces. Map spaces include Provinces (Mountain or Jungle), Thailand, Kuala Lumpur, and two Economic Centers (ECs). All map spaces can hold forces (1.4), although Thailand may only hold MCP forces. The foreign territories of Indonesia and Singapore (which was under a separate British administration) are marked for flavor purposes and are not playable map spaces.
1.3.2 Provinces. The eight large irregular spaces (excepting Thailand) are Provinces, each corresponding to a historical member state of the Federation of Malaya (the very small states of Penang, Perlis, and Malacca are incorporated into Perak, Kedah, and Negri Sembilan for gameplay purposes). Each Province is marked with a numerical Population value (either '1', '2', or '3') that affects Political Will (1.10) via changes of Control (1.7) and Support or Opposition (1.6) during the Propaganda Round (6.1), and can also modify the MCP Rally Operation (3.3.1). Each Province also has a larger space for a Control marker (1.7) and a smaller space for a Support or Opposition marker (1.6). Provinces are further distinguished as Mountain (dark green, Perak and Selangor only), or Jungle (light green, all other Provinces), affecting British Sweep (3.2.3) and Assault (3.2.4) Operations, as well as certain Events (5.0). New Village markers may be placed in Provinces by the British Resettle (4.2.1) Special Activity and some Events (5.0).
1.3.3 Thailand. The irregular Thailand space provides a refuge for MCP forces, where they may Rally (3.3.1), March (3.3.2) to or from, and Extort (4.3.1) in. British forces may never enter Thailand, and it has 0 Population value and is not considered a Province. It may be Controlled by the MCP or Uncontrolled, but can never be shifted to Support or Opposition.
1.3.4 Kuala Lumpur. The large circular space is Kuala Lumpur, the capital city of the Federation of Malaya. Like Provinces, Kuala Lumpur has a marked Population value ('2') and two spaces for Control and Support or Opposition markers. A Terror marker in Kuala Lumpur has an additional effect on Political Will during the Propaganda Round (6.1).
1.3.5 Economic Centers. The two small circular spaces are Economic Centers (commonly abbreviated 'ECs'), representing Malaya's important tin and rubber industries respectively. Each EC has an Economic value of 6, affecting British Resource earnings during the Propaganda Round (6.2.1). A Sabotage marker in an EC blocks these earnings and has an additional effect on Political Will during the Propaganda Round (6.1).
NOTE: ECs are spaces that can hold forces, but they cannot be Controlled or shifted to Support or Opposition.
1.3.6 Adjacency. Adjacency affects the movement of forces and implementation of certain Events (5.0). Any two spaces that border one another are adjacent.
EXAMPLE: MCP Guerrillas in Perak are adjacent to Thailand, Kedah, Kelantan, Pahang, Selangor, and the top Economic Center.
1.4 Forces
The wooden pieces represent the two Factions' various forces: British Troops (tan cubes) and Police (blue cubes), MCP Guerrillas (red octagonal cylinders) and Bases (red discs).
NOTE: New Villages are markers and not considered forces.
DESIGN NOTE: British Police represent both urban police (British and Malayan) and rural militias. Bases represent command, training, and supply facilities as well as political administrations.
Important! The MCP in Malaya use only 4 red Base discs. The remaining red disc should be set aside and not used while playing Malaya.
1.4.1 Availability and Removal. Keep forces Available for placement in the Faction's Available Forces box. Forces removed from the map go to Available.
- Unless otherwise instructed (by Event, 5.1.1), forces may only be placed from or replaced with those in the Available boxes. A piece to be replaced by a piece that is unavailable is simply removed.
Important! Factions while executing an Operation, Special Activity, or Event to place their own forces may take them from elsewhere on the map if the desired force type is not Available.
EXAMPLE: MCP without Available Guerrillas could remove Guerrillas from the map during a Rally (3.3.1) to place them Underground, either in the same space or a different space.
1.4.2 Stacking. No more than two Bases (1.4) may occupy a single space, and no Bases may ever be placed in Economic Centers. Only MCP forces may be placed in, or move into, Thailand (1.3.3).
- Bases placed (such as via the Rally Operation [3.3.1] or Event [5.0]) may never violate stacking.
- More than one Terror marker may be placed in a space by Events (5.0), but never by the Terror Operation (3.3.4) or Reprisal Special Activity (4.2.2), which only place up to a maximum of one Terror marker in selected spaces.
- Only one New Village marker may be placed in a Province (1.3.2), and never in any other kind of space.
1.4.3 Underground/Active. Guerrillas are either Underground—symbol end down—or Active—symbol end up. Actions and Events flip them from one to the other state. Bases, Troops, and Police are always Active. Always set up and place new Guerrillas Underground (including if replacing a piece).
NOTE: Unless instructions specify "Underground" Guerrillas, it is sufficient to "Activate" already Active Guerrillas (they stay Active). Also, "moving" or "relocating" Guerrillas does not affect Underground status unless specified.
1.5 Players & Factions
The game requires two players, each playing as one Faction: the British (blue), and the Malayan Communist Party or MCP (red).
1.6 Support and Opposition
Support and Opposition markers may be placed in Provinces and Kuala Lumpur, affecting some Operations and Special Activities and Political Will during the Propaganda Round (6.1). Kuala Lumpur (1.3.4) and all Provinces (1.3.2) always show one of three levels of Support for, or Opposition to, British rule in Malaya, that can shift during play. Each space may be either at Support or Opposition (indicated with the appropriate marker) or Neutral (indicated by the absence of any marker). A shift towards Support or Opposition either removes a marker of the opposite type, or places the specified marker if a space is already at Neutral. Some Events (5.0) may instruct you to set a space to Support or Opposition, in which case you should remove any other marker and simply place the specified marker.
NOTE: Thailand (1.3.3) and Economic Centers (1.3.5) are never at Support or Opposition and should always be treated as though they are Neutral.
1.7 Control
Provinces, Thailand, and Kuala Lumpur are always either Uncontrolled (indicated by the absence of any marker) or Controlled by either the British or the MCP (indicated by a Control marker of either Faction). The British and MCP each Control a space if their wooden forces pieces (1.4) in the space outnumber those of their opponent. Adjust Control markers immediately when Control changes due to placement, removal, or movement of pieces. Gaining or removing MCP Control immediately shifts Political Will (1.10) down or up by an amount equal to the Population value of the space (see 7.0 Victory). Control also affects certain Operations and Special Activities.
DESIGN NOTE: The MCP sought to establish liberated areas and presence across Malaya. MCP Control does not necessarily imply the MCP have completely overrun the British state in these areas, but instead represents areas of heavy presence where the British are restricted to urban centers and the countryside is dominated by the MCP.
1.8 Resources
At any moment, each Faction has between 0 and 20 Resources that it uses to pay for Operations (3.0). Mark Resources on the edge track with a cylinder of that Faction's color (1.5).
1.9 Sabotage and Terror
Sabotage and Terror markers are placed by the MCP Terror Operation (3.3.4), the British Reprisal Special Activity (4.2.2), and some Events (5.0), and can affect Political Will during the Political Will phase of the Propaganda Round (6.1) and British earnings during the Resources phase (6.2). Terror markers also inhibit MCP Agitation and British Pacify (6.3).
1.10 British Political Will
British Political Will is tracked with a marker on the edge track. The position of this counter will determine Victory (7.0) for either side. The marker is moved during the Campaign and during the Political Will Phase of the Propaganda Round (6.1). It may never be lower than 0 or greater than 20.
1.11 Commander
The current British Commander in Malaya is tracked with a marker on the Commander Track (6.6), affecting the number of spaces that may be selected by the British for Reprisal, Resettle, and Pacify with Train. The marker may be flipped to its reverse side ('Gurney Killed') to indicate that the shaded text of Event M10 is in effect.
1.12 New Villages
The four New Village markers form a pool available to the British Faction. New Villages are placed in Provinces by Resettle (4.2.1) and some Events (5.0). They block MCP Rally (3.3.1) and Extort (4.3.1) in a space, and also prevent Opposition being counted in that space during the Political Will phase of the Propaganda Round (6.1). There may only be one New Village in each Province space. New Villages are removed in one of four ways:
- If a New Village is ever in a British Controlled space with Support and no MCP forces.
- If a New Village is ever in a space with MCP forces and no British forces.
- The MCP can remove New Villages using Intimidate (4.3.2).
- Some Events (5.0) may remove or replace New Villages.
2.0 Sequence of Play
2.1 Setup
Follow the instructions on the second to last page of this booklet to prepare the draw deck (either standard or extended) and set up markers and forces. A full setup diagram can be found on the back page of this booklet.
2.2 Start
Begin play by revealing the top card of the draw deck and placing it onto a played cards pile. All played cards and the number of cards in the draw deck are open to inspection.
NOTE: Unlike in most previous COIN series volumes, only one Event card is revealed at a time.
RECORD STEPS: As the steps of each Event card play are completed, place the Eligibility cylinder of the acting Faction's color (1.5) into the Initiative Track's appropriate box.
2.3 Initiative Track
One player takes the British Faction and the blue Eligibility cylinder, the other the MCP Faction and the red Eligibility cylinder.
This sequence of play is a new simpler take on the 2-player sequence of play developed by Brian Train in COIN volume VII - Colonial Twilight.
When playing an Event card, the British or MCP player will execute Operations or the Event described on the card. At all times one player will be First Eligible, and the other will be Second Eligible. In each Event card round, the First Eligible player is first to choose what they will do, followed by the Second Eligible—whose choices are limited by what the First Eligible player did.
2.3.1 Eligibility. Each player puts one cylinder (blue and red respectively) on the First or Second Eligible spaces of the Initiative Track.
NOTE: The British always start the game in the 1st Eligible box. Eligibility order should remain untouched during each Propaganda Round (6.0).
2.3.2 Options for Eligible Factions.
First Eligible: The First Eligible player may perform a Limited Operation (2.3.4), execute the Event (5.0), perform an Operation (3.0) with Special Activity (4.0), or Pass (2.3.3).
The player selects their desired action and places their Eligibility cylinder in the appropriate box on the Initiative Track, then immediately executes the chosen action (Limited Operation, Event, Operation with Special Activity, or Pass).
Second Eligible: The Second Eligible player may then choose one of the boxes not containing the First Eligible player's cylinder and conduct the action in the box selected (or Pass).
2.3.3 Passing. After selecting a box, players may forgo the action in the box to Pass. If British pass they gain 2 Resources, and if MCP pass they gain 1 Resource (1.8). Both players may pass and the order of cylinders in the Initiative Track will still decide eligibility (2.3.5).
2.3.4 Limited Operation. A Limited Operation is an Operation in just one space, with no Special Activity. If the Limited Operation is a Garrison (3.2.2), Sweep (3.2.3), or March (3.3.2), it can involve pieces from multiple origin spaces but only one destination space.
2.3.5 Adjust Eligibility. After both players have selected and executed their actions, replace the Eligibility cylinders on the Initiative Track with the cylinder in the furthest left box becoming First Eligible, and the other cylinder becoming Second Eligible.
DESIGN NOTE: Selecting the Limited Operation box guarantees the player first eligibility on the next card. Likewise, selecting the Operation & Special Activity box guarantees second eligibility on the next card. Eligibility after selecting the Event space will depend on what the other player has chosen. The only way to block Events in The British Way is to select the Event box and then either play the Event or Pass.
2.3.6 Next Card. After eligibility has been reset, reveal the draw deck's next card and continue play.
2.4 Propaganda Card
When a Propaganda card is revealed, conduct a Propaganda round (6.0).
NOTE: Each series of Event cards leading up to a Propaganda Round is called a "Campaign."
3.0 Operations
3.1 Operations in General
A Faction executing an Operation (Op) chooses one of the four Operations listed on its Faction sheet and selects the map spaces (typically several) to be involved. Select a given space only once for a given Operation.
Operations usually cost Resources, often paid per space selected; the paying Faction must have enough Resources to pay for the Operation in each selected space. Operations are generally allowed in any number of spaces (Resources permitting) unless the Operation is Limited (2.3.4), in which case they are allowed in only one space.
The executing Faction chooses the order of the spaces in which the Operation is resolved, the enemy pieces to be affected (targeted), and the friendly pieces to be placed, replaced, or moved. Once targeted, a Faction's pieces are affected to the maximum extent possible. Actions affecting another Faction's pieces do not require that Faction's permission.
3.1.1 Pawns. If desired, mark spaces selected for Operations (3.0), Special Activities (4.0), or other actions with white and black pawns. The pawns are for convenience, not a limit on play.
3.1.2 Free Operations. Certain Events grant free Operations or Special Activities, costing no Resources (5.4). Any Pacify or Agitate performed as part of a free Train (3.2.1) or Rally (3.3.1) Operation still costs Resources. All other requirements or procedures apply as normal, unless specifically modified by Event text (5.1.1, 5.4).
3.2 British Operations
The British choose from Train, Garrison, Sweep, or Assault Operations.
British pieces may never be placed in, or move into, Thailand (1.3.3).
3.2.1 Train. Train adds British forces and can build Support via Pacify. Select Kuala Lumpur and/or any number of non-MCP Controlled Provinces, and pay 2 Resources for each space where cubes are placed.
PROCEDURE: Place up to 4 cubes in Kuala Lumpur and up 2 Police in each selected Province. Then, in one selected space (even if Limited Operation) with British Control, Troops, and Police, may Pacify to remove any Terror markers and shift up to once towards Support. Pacify costs 2 Resources per Terror marker removed and to shift towards Support, even if the Train Operation was free (3.1.2, 5.4).
NOTE: Train may Pacify in up to two spaces if Templer is the British Commander (6.6).
3.2.2 Garrison. Garrison protects Economic Centers by moving Troops and/or Police to them, and potentially revealing and removing Guerrillas there. It also allows the British to relocate their forces to Kuala Lumpur and one Province. Pay 2 Resources total (not per space selected).
PROCEDURE: Move any number of British cubes (Troops or Police) from any spaces to any Economic Centers, Kuala Lumpur, and one Province (if Limited Operation, all moving cubes must be placed in a single space). Then, in each Economic Center, Activate one Guerrilla for every cube there, and may Assault in one Economic Center at no added cost (if Limited Operation, may only reveal and Assault in an EC if it was selected as the single destination space).
3.2.3 Sweep. Sweep may move Troops and can reveal Guerrillas. Select any Provinces and/or Kuala Lumpur as destinations. Pay 2 Resources per selected destination space.
PROCEDURE: First, simultaneously move any adjacent British Troops desired into selected spaces. Then, in each selected space, Activate (1.4.3) one Guerrilla for every cube (moved or already there, even if no cubes moved). In Jungle Provinces, instead Activate only one Guerrilla for every two cubes there.
3.2.4 Assault. Assault removes enemy pieces. Select any spaces with cubes and MCP pieces. Pay 2 Resources per selected space.
PROCEDURE: In each selected space, remove one Active enemy piece for every Troop present, or one for every two Troops in Mountain Provinces, or one for every cube in Kuala Lumpur and Economic Centers. First remove Active Guerrillas, then remove Bases only once no Guerrillas remain (even Underground). For each Base removed, add 1 Political Will (1.10).
NOTE: Underground Guerrillas in a space prevent removal of Bases until all Guerillas are Activated and removed.
DESIGN NOTE: Guerrillas are less hard hitting than Troops but enjoy an information advantage in that counterinsurgents must Activate (locate) them before Assaulting them.
3.3 MCP Operations
MCP chooses from Rally, March, Attack, or Terror Operations.
3.3.1 Rally. Rally adds MCP forces and can increase Opposition via Agitate. Select any Provinces, Thailand, and/or Kuala Lumpur without Support (1.6) or New Villages (1.12). Pay 1 Resource per selected space.
PROCEDURE: In each selected space, place one Guerrilla or replace two Guerrillas with a Base (respecting stacking, 1.4.2). If the space already has at least one Base, may instead place Guerrillas up to the space's Population plus number of Bases there, or flip all Guerrillas there Underground (1.4.3). Then, in one selected space (even if Limited Operation) with MCP Control and a Base, may Agitate to remove any Terror markers and shift up to once towards Opposition. Agitate costs 1 Resource per Terror marker removed and to shift towards Opposition, even if the Rally Operation was free (3.1.2, 5.4).
3.3.2 March. March moves Guerrillas. Select any spaces as destinations. Pay 1 Resource per non-EC destination space (ECs may be selected as destination spaces for free).
PROCEDURE: Simultaneously move any Guerrillas desired into adjacent destination spaces. Set Guerrillas moving from one origin space to one destination space Active (1.4.3) if:
- The destination is an Economic Center or is at Support and
- The number of moving Guerrillas plus the number of cubes in that destination exceeds three.
Otherwise, moving Guerrillas retain their current orientation (Active or Underground).
3.3.3 Attack. Attack seeks to eliminate British forces. Select any spaces with MCP Guerrillas and British cubes. Pay 1 Resource per selected space.
PROCEDURE: In each selected space, Activate (1.4.3) all Guerrillas and roll one die: if the result is equal or less than the number of Guerrillas there, remove up to two British cubes (Police first, then Troops only once no Police remain). If any Troops are removed, lower Political Will (1.10) by 1.
DESIGN NOTE: The MCP generally avoided direct confrontations with British Troops, but an effective attack inflicting high casualties or the temporary seizure of a town, as the MCP did early in the war, was politically embarrassing for the British.
3.3.4 Terror. Terror shifts Kuala Lumpur and Provinces towards Opposition and places Terror markers that hinder further attempts to influence it. In Economic Centers, Terror instead places Sabotage markers that block British Resource earnings (6.2.1). Terror markers in Kuala Lumpur and Sabotage markers in ECs also affect Political Will during the Propaganda Round (6.1). Select any spaces with at least one Underground Guerrilla. Pay 1 Resource per non-EC space selected (ECs may be selected for free).
PROCEDURE: In each selected space, Activate an Underground Guerrilla and place a Terror or Sabotage marker if there is not already one there (place Terror in Kuala Lumpur and Provinces, place Sabotage in ECs). Then, shift each space once towards Opposition (no effect in ECs).
NOTE: Terror Operations will not add Terror or Sabotage markers to spaces that already have them, but may still shift Kuala Lumpur and Provinces towards Opposition.
4.0 Special Activities
4.1 Special Activities in General
When a Faction per the Initiative Track (2.3) executes an Operation (3.0), it may also execute one Special Activity (EXCEPTION: Limited Operations, 2.3.4). As with Operations, the executing Faction selects spaces and pieces affected, and the order of actions. Select a given space only once as a location for a given Special Activity. Events may grant free Special Activities (not further affecting Eligibility, 2.3.1).
Important! A Faction may execute its Special Activity at any one time immediately before, during, or after its Operation.
EXAMPLE: MCP Rally in one space, then pause to Extort to gain Resources before continuing to Rally in other spaces.
4.1.1 Accompanying Operations. Some Special Activities specify that they may only accompany certain types of Operations (3.0). Certain Special Activities must occur where their Accompanying Operation occurred. If not otherwise specified, Special Activities may accompany any Operations and take place in any otherwise valid spaces.
4.2 British Special Activities
The British choose from Resettle, Reprisal, or Air Strike Special Activities.
4.2.1 Resettle. Resettle places New Villages. It may select one British Controlled Province without a New Village marker. It may only accompany Train (3.2.1).
PROCEDURE: In the selected Province, place a New Village marker (1.12) and shift once towards Opposition.
NOTE: Resettle may select up to two Provinces if Briggs is the British Commander (6.6). A New Village marker must be available to be placed and cannot be taken from elsewhere on the map.
4.2.2 Reprisal. Reprisal removes Opposition (or Support) and relocates one Guerrilla to an adjacent space. It may select one Province with British Troops. It may only accompany Garrison (3.2.2), Sweep (3.2.3), or Assault (3.2.4).
PROCEDURE: Set the selected Province to Neutral, place a Terror marker if there was not already one there, and move one Guerrilla to an adjacent space.
NOTE: Reprisal may select up to two Provinces if Gurney is the British Commander (6.6).
4.2.3 Air Strike. Air Strike removes Active Guerrillas. It may select up to two Provinces with British forces. It may accompany any Operation.
PROCEDURE: Remove one Active Guerrilla from each selected space.
DESIGN NOTE: Air support in Malaya was most effective when paired with ground forces and intelligence. Blind bombing of the jungle produced few results but air operations that provided close air support, reconnaissance, and supply for ground forces operating in the field were effective.
4.3 MCP Special Activities
MCP chooses from Extort, Intimidate, or Ambush Special Activities.
4.3.1 Extort. Extort enables the MCP to gain Resources. It may select up to two spaces with an Underground Guerrilla and no New Villages. Extort may only accompany Rally (3.3.1), March (3.3.2), or Terror (3.3.4).
PROCEDURE: In each space, Activate an Underground Guerrilla and gain 1 Resource.
4.3.2 Intimidate. Intimidate removes Police or New Villages and Support. It may select up to two spaces with an Underground Guerrilla. Intimidate may only accompany Rally (3.3.1) or Terror (3.3.4).
PROCEDURE: In each space, remove one Police cube, or, if more Guerrillas than British forces, MCP may instead remove a New Village and any Support in the space.
4.3.3 Ambush. Ambush allows the MCP to Attack in one space with guaranteed success and avoid exposing all their Guerrillas there. It may occur in one space already selected for Attack where there is an Underground Guerrilla. Ambush may only accompany Attack (3.3.3), and the selected Attack space must be paid for as usual.
PROCEDURE: Instead of the usual Attack procedure, Activate only one Underground Guerrilla in the space and remove one enemy piece without rolling a die (Police first, Troops only once no Police remain). If any Troops are removed, lower Political Will (1.10) by 1.
NOTE: A free Ambush granted by an Event (5.4) occurs as if a free Attack were taking place in the selected space.
5.0 Events
Each Event bears a title, italicized flavor text, and Event text. Flavor text provides historical interest and has no effect on play.
5.1 Executing Events
When a Faction executes an Event, it carries out the Event text literally and in order (sometimes involving actions or decisions by the other Faction). Unless otherwise specified, the executing Faction makes all selections involved in implementing the text, such as which pieces are affected. If another Faction is specified or selected to take an action, that Faction decides the details of the action. Some Events with lasting effects have markers as aids to play.
5.1.1 Where Event text contradicts rules, the Event takes precedence. However:
- Events may not violate stacking (and so never place Bases where there are already two, or a New Village marker where there is already one).
- Events place only Available pieces (1.4.1) and markers; they remove rather than replace if the replacement is not Available or if stacking (1.4.2) would be violated.
- Events may not raise Resources or British Political Will beyond 20 or reduce them below 0 (1.8, 1.10).
5.1.2 If two Events contradict, the currently played Event takes precedence.
5.1.3 An executed Event's text that can be implemented must be. If not all of its text can be carried out, implement that which can.
5.2 Dual Use
Many Events have both unshaded and shaded Event text. The executing Faction may select either the unshaded or shaded text to carry out (not both). While the unshaded text often favors the British, a player may select either text option regardless of Faction.
DESIGN NOTE: Dual-use events represent opposed effects of the same cause, forks in the historical road, or instances subject to alternative historical interpretation.
5.3 Capabilities
Dual-use Events labeled "BRITISH CAPABILITY" or "MCP CAPABILITY" have lasting effects mainly relating to that Faction, either positive or negative. These labels are for flavor only, and both Factions may execute Capability Events with either label. The Event's effects last for the rest of the game.
NOTE: Set out executed Capability Event cards near the board as added reminders, using a Capability marker to indicate which option was selected.
5.4 Free Operations
Some Events allow a Faction to perform an immediate Operation or Special Activity that interrupts the usual sequence of play and is typically free: it bears no Resource cost and does not affect Eligibility (2.3.1, 3.1.2), though other procedures and restrictions remain unless modified by Event text (5.1.1).
NOTE: Pacify and Agitate cost Resources even if part of free Operations (3.2.1, 3.3.1). A free Ambush Special Activity occurs as if a free Attack is occurring in the space (4.3.3).
6.0 Propaganda Round
Conduct a Propaganda Round in the sequence of phases below when each Propaganda card is revealed. The Propaganda Round aid sheet also lists this sequence.
6.1 Political Will Phase
Calculate the net effect to Political Will of the following adjustments before shifting the marker:
6.1.1 Hearts and Minds. Subtract the total Population of spaces at Opposition and without New Village markers from the total Population of spaces at Support. Adjust Political Will by the difference, increasing it if positive and decreasing it if negative.
NOTE: Remember that Opposition Provinces with New Villages do not count their Population during this step.
6.1.2 Settlers Intimidated? First, place a Sabotage marker on each Economic Center without one where Guerrillas outnumber British cubes. Then, lower Political Will by 1 for each Economic Center with a Sabotage marker and for Kuala Lumpur if it has a Terror marker.
NOTE: It's important to calculate the net shift in Political Will during these steps before moving the marker and checking victory, rather than adjusting the marker one step at a time.
6.1.3 Victory? If British Political Will is now 0, 1, or 2, the game immediately ends with an MCP victory. If British Political Will is now 18, 19, or 20, the game immediately ends with a British victory. Otherwise, continue play.
6.1.4 Game End? If this is the final Propaganda card, end the game and check scores per Victory (7.0) to determine the winner.
6.2 Resource Phase
Follow these steps to add to Factions' Resources to a maximum of 20 (1.8).
6.2.1 British Earnings. British gain Resources equal to the Population value under British Control plus the Economic value of Economic Centers without Sabotage.
6.2.2 MCP Earnings. MCP gain Resources equal to twice the number of Bases on the map.
6.3 Support Phase
British and MCP may spend Resources to affect Support and Opposition (1.6).
6.3.1 Pacify. The British may spend Resources to build Support in up to two spaces. Each space must have British Control (1.7), Police, and Troops. Every 2 British Resources spent removes a Terror marker or—once no Terror remains in a space—shifts the space once toward Support, up to one shift per space.
DESIGN NOTE: Troops and Police or local militias together provide the security needed to gain popular support.
6.3.2 Agitate. MCP may spend Resources to encourage Opposition in up to two spaces with MCP pieces and no British Control (1.7). Every 1 MCP Resource they spend removes a Terror marker or—once no Terror remains in a space—shifts the space once toward Opposition, up to one shift per space.
6.4 Redeploy Phase
6.4.1 British Redeploy. British must move Troops in Economic Centers or in Provinces with MCP Control to Kuala Lumpur or British Controlled Provinces. British may then move Police to any Economic Centers, Kuala Lumpur, and British Controlled Provinces.
6.4.2 Control. Now adjust British Control (1.7) to reflect the above moves.
6.5 Reset Phase
Then prepare for the next card as follows:
- Remove all Terror and Sabotage markers from the map.
- Flip all Guerrillas Underground (1.4.3).
- Shift the Commander Track (6.6) one space to the right if possible.
- Reveal the next card from the draw deck and continue play (2.3.2).
6.6 Commander Track
The British overall strategy in Malaya evolved over the course of the conflict. The Commander Track reflects these changes by altering the number of spaces that may be selected for some British actions.
6.6.1 Moving the Track. The Commander Track is moved at the end of each Propaganda Round (6.5) and by some Events (5.0).
6.6.2 Effects of the Track. The Commander Track allows the British to perform Reprisal in two spaces if at Gurney, Resettle in two spaces if at Briggs, and then may Pacify in two selected spaces with Train if at Templer.
NOTE: Templer allows the player to Pacify in two spaces selected for Train. The British may still only Pacify in one Train space with a Limited Operation.
6.6.3 Gurney Killed. The shaded option on GURNEY KILLED (M10) cancels the Commander Track effect until it shifts during the next Reset phase (6.5). Flip the marker over as a reminder.
DESIGN NOTE: Sir Harold Briggs was never High Commissioner but his highly influential "Briggs Plan" that occurred between the earlier "Counter-Terror" period under Gurney and the more "Hearts and Minds" approach taken by Templer helps illustrate the three major phases of British strategy.
7.0 Victory
Victory is determined by the level of British Political Will (1.10). British Political Will is measured on the edge track and can range from 0-20.
7.0.1 Early Victory. At the victory check during the Political Will phase of a Propaganda Round, the MCP win if Political Will is 0-2 and the British win if Political Will is 18-20.
7.0.2 Final Victory. If neither player has won at the end of the Political Will phase of the final Propaganda Round, the MCP win if Political Will is less than 10 and the British win if Political Will is greater than 10. If Political Will is exactly 10 the game is tied.
7.1 Raising Political Will
British Political Will is raised in the following ways:
- Removing an MCP Base by Assault or Event (+1 PW)
- Removing MCP Control (+ Population of space to PW)
- Events (+1 PW)
- At Propaganda Round, more Support Population than Opposition Population without New Village (+ difference to PW)
7.2 Lowering Political Will
British Political Will is lowered in the following ways:
- Each MCP Attack or Ambush that removes Troops (–1 PW)
- Adding MCP Control (– Population of space from PW)
- Events (–1 to –2 PW)
- At Propaganda Round, more Opposition Population without New Village than Support Population (– difference from PW)
- At Propaganda Round, each Terror marker in Kuala Lumpur and each Sabotage marker in Economic Centers (–1 PW each)
8.0 Example of Play
Setup the game as indicated in section 2.1 (consult the setup diagram on the back of this booklet), but construct only the first part of the deck with these cards in the following order, facedown from top to bottom: NEW DIRECTIVES (M23), PLANTERS AND MINERS (M25), GURNEY KILLED (M10), MNLA (M8), TRADE UNIONS (M7), WEAPON BOUNTIES (M29), and PROPAGANDA! (M35).
Reveal the first card (NEW DIRECTIVES) from the top of the deck. British are 1st Eligible and decide to perform a Sweep Operation combined with the Reprisal Special Activity. Place their round Eligibility cylinder into the 'Op & Special Activity' box on the Initiative Track. Sweep allows the British to move Troops into adjacent destination spaces and reveal Guerrillas, and they must pay 2 Resources for each space selected (this is true of all British Operations aside from Garrison, which just costs 2 Resources total). The British decide to Sweep in Perak, Pahang, and Johore. They move three tan Troops cube from Kuala Lumpur to Pahang and one Troops cube from Johore to Pahang. This replaces MCP Control with British Control in Pahang (flip the Control marker over), which also increases Political Will by 1 (the Population value of the Province) due to removing MCP Control (shift the Political Will marker from '12' to '13'). The British may then Activate one Guerrilla for every cube in each destination space, or for every two cubes in light green Jungle spaces, even if no new cubes entered the space during the Sweep. So, both Guerrillas in Pahang are flipped Active (symbol end up) as there are now four Troops cubes there, and the single Guerrillas in Perak and Johore are also flipped Active. Finally, the British must pay 6 Resources for using Sweep in three spaces—shift their blue Resources cylinder on the edge track from '20' to '14'.
The British Sweep in Perak, Pahang, and Johore.
Next, they can perform the Reprisal Special Activity in up to two Provinces with at least one Troops cube—Reprisal may usually only select one Province, but the current British Commander (indicated on the Commander Track) is Gurney, who increases this to two Provinces. They select Pahang and Perak for Reprisal, set both Provinces to Neutral (remove the 'Oppose' marker in Pahang, Perak is already Neutral), place a Terror marker in both, and then move one Guerrilla in each Province to an adjacent space—move one Guerrilla from Pahang to Trengganu and one Guerrilla from Perak to Pahang (each Guerrilla remains Activated).
The British turn is now complete, and the MCP player may choose from either of the remaining two boxes on the Initiative Track—Limited Operation or Event. They decide to perform a Limited Rally Operation (place their red Eligibility cylinder in the 'Limited Op' box on the Initiative Track), which will cost them 1 Resource and may only select one space. They can select any non-Economic Center space without a New Village marker or Support for Rally, and select Trengganu, where they choose to replace the two Guerrillas there with a Base (remove the Guerrillas to Available then place a red Base disc in Trengganu). Rally also allows the MCP to Agitate in one MCP Controlled space with a Base, paying 1 additional Resource each to remove any Terror markers or shift once towards Opposition. They pay 1 additional Resource to shift Trengganu to Opposition (place an 'Oppose' marker there now). This costs the MCP 2 Resources total—shift their red Resource cylinder on the edge track from '10' to '8'. The MCP turn is now complete, and as both players have completed their turns we reset Eligibility. The Faction whose cylinder is furthest to the left, in this case MCP, becomes 1st Eligible, and the other Faction becomes 2nd Eligible.
Eligibility is reset at the end of each turn.
Reveal the next card: PLANTERS AND MINERS. MCP are now 1st Eligible and decide to perform another Rally Operation with the Extort Special Activity. This time they can select any number of spaces for Rally, paying 1 Resource for each space, and they choose a total of seven spaces: Kedah, Perak, Kelantan, Trengganu, Pahang, Selangor, and Negri Sembilan. They place one Guerrilla each in Kedah, Perak, Selangor, and Negri Sembilan (do this now), then place three Guerrillas in Kelantan and two each in Trengganu and Pahang, as the presence of an MCP Base allows them to place Guerrillas up to the number of Bases plus the Population value of each space. Finally, they pay 1 more Resource to Agitate in Kelantan (with a Base and MCP Control), shifting it to Opposition. This costs them a total of 8 Resources, shifting their Resource cylinder down from '8' to '0'. The new Guerrilla also adds MCP Control in Kedah, Selangor, and Negri Sembilan, and replaces British Control with MCP Control in Pahang, reducing Political Will by a total of 6 for the new Population with MCP Control (shift the Political Will marker from '13' to '7' now).
Next, the Extort Special Activity will allow them to gain Resources by Activating one Underground Guerrilla in up to two spaces with no New Village marker. They Activate one Guerrilla in Kelantan and one Guerrilla in Trengganu, gaining 1 Resource each for 2 total—increase their Resource Cylinder from '0' to '2'.
The MCP Rally to place Guerrillas and then Extort to gain Resources.
The MCP turn is now complete, and the British have the same choice that MCP did previously—Limited Operation or Event. They choose to perform another Sweep Operation, this time limited to one space. They Sweep again in Pahang, moving in no new Troops but Activating both Underground Guerrillas there. This costs them 2 Resources—shift their Resource cylinder from '14' to '12'. We then reset British to 1st Eligible and MCP to 2nd Eligible.
Reveal the next card: GURNEY KILLED. The British decide to perform the Assault Operation with the Air Strike Special Activity. They use Air Strike first, which allows them to remove one Active Guerrilla each from up to two Provinces with British pieces, and they choose to remove one from Johore and one from Pahang—this also removes MCP Control from Pahang, increasing Political Will by 1 from '7' to '8'. Next, they Assault in Pahang only, and can remove one Active MCP piece for every Troop there (removing Bases last, and only if no Underground Guerrillas remain). They have four Troops in Pahang so remove all three Active Guerrillas and then the Base, also increasing Political Will by 1 (from '8' to '9') for removing the Base, and then adding British Control. (In Mountain Provinces, Assault only removes one MCP piece for every two Troops, and in Cities and Economic Centers it removes one for every cube, including Police.) The British pay 2 Resources for selecting a single Assault space, reducing their Resources from '12' to '10', then their turn is complete.
The British Air Strike and Assault in Pahang to remove all MCP pieces there.
MCP decide to perform a Limited March Operation. March allows them to move Guerrillas into adjacent spaces (maximum one space if the Operation is Limited), paying 1 Resource per destination space, or 0 Resources for Economic Center destinations. Underground Guerrillas moving with March will also flip Active if the destination is an Economic Center or a space with Support, and if the total number of moving Guerrillas plus cubes in the destination space is greater than three. In this case, the MCP simply decide to move one Underground Guerrilla from Kelantan to the adjacent Economic Center, paying 0 Resources to do so. We then reset MCP to 1st Eligible and British to 2nd Eligible.
An MCP Guerrilla Marches into the undefended Economic Center.
Reveal the next card: MNLA. MCP decide to perform a Terror Operation with the Intimidate Special Activity. They Intimidate first, which can remove one Police cube from up to two spaces with Underground Guerrillas, or may instead remove a New Village and any Support if Guerrillas outnumber British pieces. There is only one space that is eligible for Intimidate, Perak, so they just remove one Police cube there.
Then, they can use Terror to Activate one Underground Guerrilla and place a Terror marker (or a Sabotage markers in Economic Centers) and shift once towards Opposition. Terror costs 1 Resource per space in Provinces and Kuala Lumpur, or 0 Resources in Economic Centers. The MCP only have 2 Resources remaining, so they Terror in Kedah, Negri Sembilan, and the top Economic Center. Activate the Guerilla in each space, place a Terror marker in Kedah and Negri Sembilan and shift each to Opposition, and place a Sabotage marker in the Economic Center. Finally, reduce MCP Resources by 2 from '2' to '0', then the MCP turn is complete.
MCP place Terror and Sabotage.
The British perform a Limited Garrison Operation. Garrison always costs 2 Resources total, and allows the British to move cubes to any Economic Centers, Kuala Lumpur, and one Province of their choice, then Activate one Guerrilla for each cube in Economic Centers and Assault in one Economic Center. However, because this Operation is Limited, they may only move cubes to one space, and may only Activate and Assault in an Economic Center if they move any cubes there. They decide to move two Troops from Pahang to Negri Sembilan (they could have come from any space, not just adjacent), replacing MCP Control with British Control and increasing Political Will by 2, from '9' to '11'. Then reduce British Resources by 2, from '10' to '8', and reset British to 1st Eligible and MCP to 2nd Eligible.
Reveal the next card: TRADE UNIONS. British decide to perform a Train Operation with the Resettle Special Activity. Train allows them to place 4 cubes in Kuala Lumpur, and up to 2 Police in any non-MCP Controlled Provinces, paying 2 Resources per space selected. They choose to place 4 Troops in Kuala Lumpur and 2 Police each in Pahang and Johore, for a total of 6 Resources (shift their Resources cylinder from '8' to '2'). Then, British may also Pacify in one space selected for Train that has British Control, Troops, and Police, allowing to pay 2 Resources for each Terror marker removed or for one shift towards Support. They spend their final 2 Resources to shift Johore to Support (place a Support marker there and shift the British Resource cylinder down to '0').
Next, they can Resettle in one British Controlled space, to shift it once towards Opposition and place a New Village marker (which prevents Rally and Extort, and also blocks any Opposition in the space from being counted during the Propaganda Round). They place a New Village in Negri Sembilan, which is already at Opposition.
The MCP have 0 Resources, so decide to execute the Event. The shaded text allows them to gain 5 Resources (shift their Resource cylinder to '5'), then set Kuala Lumpur to Neutral (remove the Support marker there). We then reset MCP to 1st Eligible and British to 2nd Eligible.
Reveal the next card: WEAPON BOUNTIES. MCP decide to perform an Attack Operation with the Ambush Special Activity. Ambush modifies one space selected for Attack where there is an Underground Guerrilla, so they do this first, selecting Perak where they Activate just one Guerrilla (but there is only one) and remove one cube, Police before Troops (remove the one Police cube there now). Then they also select Negri Sembilan for a regular Attack: if there were any Underground Guerrillas here they would need to Activate them all, then they roll one die, aiming to score equal or lower than the number of Guerrillas in the space. They roll a '4', which has no effect as there is only one Guerrilla in the space (if they had succeeded they would have removed two cubes, again Police first). If either Attack or Ambush ever removes a Troops cube, Political Will is reduced by 1. MCP must also pay 1 Resource for each space, reducing them to 3 Resources.
The British have no Resources remaining and the Event would require them to spend Resources, so they pass instead, placing their Eligibility cylinder in either the 'Limited Op' or 'Event' box to gain 2 Resources (shift their Resource cylinder to '2' now). We then reset British to 1st Eligible and MCP to 2nd Eligible.
The next card revealed is the PROPAGANDA! card, triggering a Propaganda Round. We work through each phase in turn, starting with the Political Will phase:
- Political Will: Political Will is lowered by a net total of –4 (–3 because there is 5 Population with Opposition and no New Villages, compared with 2 Population with Support; and –1 because there is a Sabotage marker in one Economic Center), down to '7'. If Political Will was now at 0-2 or 18-20 then MCP or British would win respectively.
- Resources: British gain 6 Resources for each Economic Center without Sabotage (6), plus Resources equal to British Controlled Population (10)—so they gain 16 total, moving their Resource cylinder from '2' to '18'. MCP gain 2 Resources for each Base on the map, in this case 4 Resources total, increasing their Resource cylinder to '7'.
- Support: British may now Pacify in up to two spaces with Control, Troops, and Police, and do so in Kuala Lumpur and Pahang. In Kuala Lumpur they pay 2 Resources to add Support, and in Pahang they pay 4 Resources to remove the Terror marker and shift the space to Support—move their Resource cylinder down to '12'. MCP may Agitate in up to two MCP Controlled spaces, and do so only in Selangor, paying 1 Resource to add Opposition—shift their Resource cylinder down '6'.
- Redeploy: British must move all Troops from Economic Centers or MCP Controlled spaces to Kuala Lumpur or British Controlled Provinces, but there are no Troops in this situation. Then, they may move any Police to Economic Centers, Kuala Lumpur, or British Controlled Provinces, and decide to move two from Johore to Perak.
- Reset: Remove all Terror markers from the map. Flip all Guerrillas Underground. Shift the Commander Track one step to the right if possible—in this case, from Gurney to Briggs. Then reveal the next card and continue play.
This example of play is now complete. You can continue the current game by constructing the rest of the deck (two stacks of six random Event cards, each with a Propaganda card shuffled in with the bottom two Event cards) and revealing the next Event card. British Political Will is quite low, but they have managed to begin building a secure area in the south of the peninsula, and if they can consolidate this they may be able to systematically drive the MCP northwards until they are destroyed. Good luck!
9.0 Event Tips and Background
At the bottom of each Event Background is a chapter number from Karl Hack's The Malayan Emergency: Revolution and Counterinsurgency at the End of Empire to provide even more context for the event. Hack's book is the most up to date and comprehensive history of the Malayan Emergency. I highly recommend anyone interested in exploring the conflict further to seek out his work. For an older, more popular account of the Malayan Emergency see Noel Barber's War of the Running Dogs: Malaya, 1948-1960.
M1. New Villages — BRITISH CAPABILITY
Strict control: Resettle shifts Opposition spaces to Neutral.
Relocation resented: MCP may Rally in spaces with New Villages if Opposition there.
Tips: With the unshaded capability in place, Resettle would still shift Neutral spaces to Opposition.
Background: New Villages were the British name for the resettlement areas for Chinese squatters relocated as part of the Briggs Plan and other population concentration efforts. At the height of the conflict, New Villages placed strict restrictions on the movement of people and food to deny supplies to the MCP. Although these restrictions could also coerce uncooperative areas to provide information, the forcible relocation and tight restrictions were unpopular with those moved (Hack, Chapter 5).
M2. Min Yuen — MCP CAPABILITY
Identified and captured: Assault may remove Bases first in 1 selected space.
Support base: Extort in MCP Controlled spaces adds the Population value in Resources.
Tips: The unshaded capability allows British Assault to remove Bases before Guerrillas (even if Underground) in one space per Operation. The shaded capability is still subject to the usual restrictions, so Extort would still not be possible in spaces with New Villages.
Background: The Min Yuen were the civilian support base of the MCP that provided food and other supplies to nearby MNLA (Card M8) units. By the end of the conflict the British had developed a system of large-scale operations, Special Branch (Card M17) intelligence gathering, and food denial (Card M19) to eliminate all branches of the Min Yuen in an area and prevent the MCP from regenerating its forces after the British directed attention to other areas (Hack, Chapter 8).
M3. Leaflets
Induce surrender: Remove 1 Guerrilla each from 2 Jungle spaces, or 2 Guerrillas from 1 Mountain space.
Few results: In 1 space with MCP pieces, place either 2 Guerrillas or 1 MCP Base.
Tip: Kuala Lumpur and the two Economic Centers are neither Jungle nor Mountain spaces, and so could not be targeted by the unshaded text. The shaded text could place Guerrillas but not a Base in Economic Centers.
Background: British psychological warfare operations dropped millions of leaflets each year, attempting to convince MCP members to surrender. These methods helped generate many of the SEPs (Card M32) who helped British forces identify other MCP groups and arms caches. The messaging of British leaflets changed over the Emergency from those depicting killed insurgents to the more effective depiction of the benefits of surrendering compared to the hardships of remaining in the jungle (Hack, Chapter 7).
M4. Chinese Squatters
Targeted for relocation: Place a New Village in any 1 Province without one.
Targeted for recruitment: MCP may place 1 Guerrilla each in any 2 Provinces.
Tips: None.
Background: Chinese squatters, rural communities on the jungle edge with only limited government contact following WWII, were the main population contested by the two sides during the conflict. The MCP would draw many of its supplies and recruits from among these communities. Chinese squatter communities were also the main targets of British directed reprisals (Cards M9, M26), deportation (Card M16), and resettlement in New Villages (Card M1). Eighty percent would be ultimately resettled (Hack, Chapters 3 and 5).
M5. MPAJA Legacy
Population exhausted by war: Set 1 Opposition space to Neutral.
Anti-Japanese force: Shift 2 spaces with MCP each 1 level toward Opposition.
Tips: None.
Background: Following their conquest of the peninsula in late 1941, the Japanese subjected Malaya to a brutal occupation. The MCP led a united front resistance movement, the Malayan People's Anti-Japanese Army (MPAJA), with assistance and cooperation from Force 136 of the British Special Operations Executive (SOE). The MCP would use their experience and legacy as a wartime resistance movement to strengthen their campaign against the British after WWII (Hack, Chapter 2).
M6. Chin Peng
$250,000 British bounty: Activate all Guerrillas in 1 Province with a Base and move 2 Troops to the space.
Leader of the MCP: MCP may conduct 2 free Limited Operations.
Tips: Troops moved by the unshaded text may come from any map spaces, but not from Available. The two free Limited Operations granted by the shaded text may be of different types, are carried out one after the other, and may potentially use the same pieces twice.
Background: Chin Peng was the leader of the MCP, drafting many of the insurgency's resolutions and directives (Card M23) and negotiating directly with Tunku Abdul Rahman, head of the Alliance party (Card M22), at the Baling Talks. Unlike other insurgent leaders who leave no record of their perspective of a conflict, Chin Peng's memoir, My Side of History, offers insight into the MCP side of the Emergency (Hack, Chapters 3, 6, and 9).
M7. Trade Unions
Suppressed: MCP Resources –3. Set Kuala Lumpur to Support.
Support MCP: MCP Resources +5. Set Kuala Lumpur to Neutral.
Tips: None.
Background: The period between the end of WWII and the beginning of the Emergency in June 1948 was characterized by a significant amount of labor unrest and low level violence. The MCP dominated many of the trade unions. However, in the lead up to and shortly after the declaration of the Emergency, the British colonial government attempted to suppress union activity (Hack, Chapter 2).
M8. MNLA — MCP CAPABILITY
High casualties: MCP must remove 1 Attacking or Ambushing Guerrilla for each Troop removed.
Armed wing: MCP Attack and Ambush remove any 2 British cubes in each selected space.
Tips: The shaded capability allows MCP Attack and Ambush to remove Troops before Police, and allows Ambush to remove two cubes rather than one cube.
Background: The Malayan National Liberation Army (MNLA) was the armed wing of the MCP. The MNLA was capable of pulling off deadly ambushes against British forces and company-sized operations against isolated police outposts. Although attempts were made to form larger units and seize towns, large-scale British operations and the difficulty of feeding larger units prevented the MCP from replicating Mao's three stage strategy of guerrilla warfare (Hack, Chapters 4 and 6).
M9. Batang Kali
British terrorize the people: British Reprisal in 1 space with Troops and then free Assault there.
Brutal massacre: Set 1 Province to Opposition, then lower Political Will by 2.
Tips: None.
Background: In December 1948, 24 laborers were killed by British forces at Batang Kali in Selangor. This was one of the most infamous moments of the Malayan Emergency, sometimes compared to the Mỹ Lai massacre during the Vietnam War. The Batang Kali massacre illustrated how an early emphasis on the collective punishment of communities, such as house burnings and punitive sweeps, combined with a relaxed attitude by superiors towards violence against civilians, such as shooting at those running from sweeps, could create larger scale killings. Over the course of 1949, British commanders would "bureaucratize" counter-terror, in the language of historian Karl Hack, to avoid similar incidents while maintaining pressure on communities supporting the MCP (Hack, Chapter 3).
M10. Gurney Killed
Galvanizes settlers: Place 1 Police each into any 3 spaces with British pieces.
MCP kill leader: Cancel British Commander effect until Reset. Place 1 Guerrilla anywhere.
Tips: If the shaded text is executed, flip the British Commander counter to its "Gurney Killed" reverse side as a reminder until the end of the next Reset phase.
Background: The MCP ambush that killed High Commissioner Sir Henry Gurney was initially seeking to ambush police to gain arms. Gurney's death, alongside rising MCP incidents, created a sense of crisis for the British government, leading them to eventually appoint General Sir Gerald Templer with combined civilian and military authority (Card M28) to replace Gurney (Hack, Chapter 5).
M11. Chemical Defoliants
Denies terrorists crops: Subtract 1 MCP Resource for each Base in a Jungle Province.
Controversial program: Shift a space with an MCP Base 1 level toward Opposition. Political Will –1.
Tips: Thailand is not a Province and so would not be affected by the unshaded text.
Background: The British experimented with chemical defoliants to destroy crop areas farmed by MCP units in the deep jungle. The chemicals were primarily applied on the ground or sprayed from helicopters. Although the overall use of chemical defoliants was limited during the Emergency, it is seen by many as a precursor to the far larger US herbicide program during the Vietnam War (Hack, Chapter 7).
M12. Orang Asli
Protected by jungle forts: Place up to 2 Police each in 2 Jungle Provinces without MCP Control.
Provide supplies to MCP: Place a Base into a Jungle Province.
Tips: Thailand is not a Province and so could not be selected for either effect.
Background: The Orang Asli are an indigenous people with several major groups dispersed over the less populated jungle areas of Malaya. As the MCP became increasingly isolated from the population on the jungle fringes, their forces made connections with the Orang Asli as a new source of supplies and base areas. The British initially dealt with the increased MCP activity through forced resettlement and bombing of Orang Asli communities, but eventually shifted to a more effective strategy of establishing a series of jungle forts. The jungle forts eventually forced the MCP further into the deep jungles near the border with Thailand (Hack, Chapter 7).
M13. Malay Police
Malay side with British: Place up to 4 Police total in any British Controlled spaces.
Alienate Chinese: Shift a space with Police 1 level toward Opposition.
Tips: The 4 Police placed by the unshaded text could be spread across up to 4 different British Controlled spaces as desired.
Background: The size of the police forces in Malaya increased dramatically over the course of the conflict, with nearly 70,000 police and several hundred thousand Home Guard mobilized to defend New Villages (Card M1). The British struggled throughout the conflict, particularly during the early years, to recruit enough police from Chinese communities (Hack, Chapters 5 and 7).
M14. Korean War
Rubber and tin prices soar: British Resources +10. Increase Political Will by 1.
Distracts from Emergency: British Resources –4.
Tips: None.
Background: The Korean War raised the prices of two of the main commodities of Malaya: tin and rubber. The increased revenue helped fund the Briggs Plan of resettlement and the eventual provision of benefits beyond basic necessities to the inhabitants of New Villages (Card M1), before declining again by 1953 (Hack, Chapter 5).
M15. Urban Calm
Colonial center: British free Train in Kuala Lumpur then conduct a free Limited Operation in or adjacent to Kuala Lumpur.
Guerrillas slip in: Place a Guerrilla in Kuala Lumpur.
Tips: The free Limited Operation granted by the unshaded text could make use of any cubes just placed by the Train, and could also move cubes from any spaces, provided they end up in or adjacent to Kuala Lumpur.
Background: Unlike other colonial struggles, such as the contemporaneous conflicts in Algeria and Indochina, the capital city of Malaya did not see significant insurgent activity. At the beginning of the conflict the MCP focused on establishing bases in rural areas, and only directed significant attention back to urban areas with the October 1951 Resolution in response to increased British pressure on their rural support base. The shaded Event represents a counterfactual of the MCP attempting to establish terrorist cells in Kuala Lumpur, similar to the FLN in Algiers or Viet Minh in Saigon (Hack, Chapter 6).
M16. Deportations
Deported to China: British may remove a total of 3 MCP pieces from any British Controlled spaces (+1 Political Will per Base Removed).
Families separated: Shift 1 Province 1 level toward Opposition then place a Guerrilla there.
Tips: The unshaded text may remove Bases before Guerrillas (even if Underground). 3 pieces in total may be removed, not 3 per space, and Political Will is increased by 1 for each Base removed.
Background: One of the forms of collective punishments (Card M26) the British used against Chinese squatter communities (Card M4) was deportation. Individuals, and eventually entire communities, perceived to be strong supporters of the MCP were deported to China. The number of deportations would decline following the CCP's victory in the Chinese Civil War (Card M30) and the shift towards resettling Chinese squatters into New Villages (Card M1). Ultimately, over 30,000 people would be deported (Hack, Chapter 3).
M17. Special Branch
Collects intelligence: Flip all Guerrillas Active in 2 spaces. British may free Assault in 1 space.
False leads: Flip all Guerrillas Underground.
Tips: The free Assault granted by the unshaded text may remove Guerrillas that have just been revealed, but could also take place in a different space if desired.
Background: Special Branch was crucial for establishing sufficient intelligence to destroy the Min Yuen (Card M2) in an area and identifying MNLA units (Card M8). Special Branch initially struggled with only limited capabilities to translate captured MCP documents and conduct interrogations due to a lack of Chinese-speaking personnel. Increasing numbers of SEPs (Card M32) over the course of the Emergency became a valuable source of intelligence for identifying underground MCP (Hack, Chapters 7 and 8).
M18. Jungle Warfare School — BRITISH CAPABILITY
Improved tactics: British Sweeps Activate 1 Guerrilla per cube in Jungle spaces.
Delays deployment: Each Train space that places Troops costs 4 Resources.
Tips: With the shaded capability in play, British Train may still only place Troops in Kuala Lumpur, but would have to pay 4 Resources to do so. They could instead pay 2 Resources to place up to 4 Police (and no Troops) in Kuala Lumpur.
Background: The geography of Malaya consisted mostly of jungles. As the MCP retreated into the deep jungles, the British needed to develop more effective ways of tracking and engaging them through the dense vegetation. Early in the war, a Jungle Warfare School was established to improve units' jungle training, using veterans of the SOE Force 136 that had resisted the Japanese occupation of Malaya, and other veterans from operations in Burma. The British also formed a special counter-insurgency 'Ferret Force' for six months in 1948 and subsequently deployed the Special Air Service (SAS) to pressure the MCP in the deep jungles (Hack, Chapters 3 and 7).
M19. Food Denial
Starve the MCP: MCP must remove 1 Guerrilla or lose 1 Resource for each New Village on the map.
Sympathetic civilians: MCP gains Resources equal to spaces with MCP pieces and New Villages.
Tips: MCP may choose any combination of Guerrillas and Resources to lose from the unshaded text, chooses which Guerrillas to remove (if any), and may remove them from any spaces, not just those with New Villages. The shaded effect counts only spaces with both a New Village and at least one MCP piece.
Background: As part of the British strategy of controlling the Chinese squatter communities (Card M4) through forced resettlement into New Villages (Card M1), a significant number of restrictions on food were implemented to prevent supplies from leaking out of New Villages back to the MCP. Food denial would eventually play a major role in reducing the MCP's strength by undercutting their sources of supplies and causing units to focus on self-production in jungle areas rather than launching attacks. The British also lured MCP guerrillas seeking food into ambushes and encouraged guerrillas to surrender due to food shortages (Hack, Chapter 8).
M20. Regroupment
Work sites fortified: Place up to 2 Police in each EC. British may then place 1 New Village into a space adjacent to an EC.
Poor conditions: Set 1 space with a New Village to Opposition. Place 1 Guerrilla in an EC.
Tips: None.
Background: From the beginning of the Emergency the MCP targeted economic sites for sabotage operations. They also sought to gain support from the laborers working in rubber plantations and tin mines. The British strategy of regroupment concentrated laborers and their families into nearby fortified sites in an attempt to cut off MCP influence. As with resettlement to New Villages (Card M1), the initial conditions in regroupment areas were often poor, eventually improving with time. Over the course of the Emergency, 650,000 laborers would be regrouped in this way, in addition to the population resettled into New Villages (Hack, Chapter 5).
M21. White Areas
Restrictions lifted: Set a space with a New Village to Support and then remove the New Village.
Lifted too early: Replace 1 New Village with a Guerrilla.
Tips: None.
Background: Areas under the tight movement and food restrictions of New Villages (Card M1) had these restrictions gradually reduced as MCP activity in the area declined, until they were eventually designated as safe 'white' areas. Areas perceived by the British to be 'black' areas of strong MCP support often received additional restrictions and punishments. The British used the examples of 'white' areas and 'black' areas to encourage others to cooperate in reducing MCP activity by providing information (Hack, Chapter 8).
M22. Nationalist Parties
Alternative path: Shift 2 spaces 1 level each toward Support. Political Will +1.
Exclude Chinese: MCP may free Rally in 3 spaces.
Tips: None.
Background: The MCP's claim of fighting for independence was undercut by the advancement of the independence process by nationalist parties operating within the political system. The major Malay party was the United Malays National Organization (UMNO), who alongside the major Chinese party, the Malaysian Chinese Association (MCA), formed a political coalition known as the Alliance party. The Alliance played a major role in the transition to independence and the unsuccessful negotiations with the MCP at the Baling Talks (Hack, Chapter 9).
M23. New Directives
Away from terror: Remove all Sabotage and Terror markers from ECs and Kuala Lumpur.
Focus on attacking British: MCP may perform a free Limited March followed by a free Limited Attack.
Tips: The free Attack granted by the shaded text may use Guerrillas that have just Marched, but could instead target a different space if desired.
Background: The MCP issued new directives at several points during the Emergency. Early in the conflict, the MCP issued orders to concentrate the MNLA (Card M8) into three base areas. In October 1951, a new resolution was issued ordering a greater focus on protecting and expanding the Min Yuen network (Card M2) and moderating the terror strategy to avoid alienating the population (Hack, Chapter 6).
M24. British Government
Demands new strategy: British Resources +6 or Political Will –1. Move the British Commander Track 1 space in either direction.
Tips: The British Commander Track may not be moved off the leftmost or rightmost space, and it must be moved if the event is executed. It should still be moved even if the shaded text from M10 is in effect.
Background: Although the Emergency began under Clement Attlee's Labour government, the Conservative Party led by Winston Churchill won the 1951 election. The Conservative government would be faced with the choice of who to replace Sir Henry Gurney with after his death (Card M10) in an MCP ambush (Hack, Chapter 5).
M25. Planters and Miners
Resources for the Empire: British Resources +6. Place up to 1 Police in each EC.
Demand protection: Move all Troops in 1 Province to an EC or Kuala Lumpur.
Tips: None.
Background: Many of the settlers in Malaya were involved in the production of the two major exports of the colony: tin and rubber. At the beginning of the Emergency, British security forces struggled with balancing their manpower between static defense to prevent economic sabotage by the MCP, and offensive operations against concentrations of the MNLA (Card M8) and MCP base areas (Hack, Chapter 3).
M26. Emergency Regulations
Collective punishments: Place 1 Terror marker each in 2 Provinces with British Control and MCP pieces. Set each Province to Neutral and then lower Political Will by 1.
Tips: Only set Provinces to Neutral where a Terror marker was just placed. This event might place a second Terror marker in either Province if there is already a Terror marker there. These would then cost additional Resources to remove during Pacify or Agitate.
Background: The declaration of the Emergency in June 1948 granted the British colonial government authority to impose collective punishments on communities deemed sympathetic to the MCP. These punishments included fines, house burnings, curfews, detention, and deportation (Card M16). The culmination of the collective punishments is commonly referred to as the 'counter-terror' phase of the conflict that contributed to unsanctioned killings and abuses such as Batang Kali (Card M9) (Hack, Chapter 2).
M27. Running Dogs — MCP CAPABILITY
Local collaboration: Intimidate may select max 1 space and Guerrilla used must flip Active.
Target traitors: Terror may also remove 1 Police from each selected space.
Tips: None.
Background: 'Running dogs' was the MCP's derogatory term for individuals working with the British, particularly those supplying information or working in the police. A significant proportion of MCP activity was engaged in terrorist attacks against 'running dogs' to directly eliminate specific opponents and discourage others from cooperating with the British (Hack, Chapter 4).
M28. Unity of Command — BRITISH CAPABILITY
Civilian and military powers: Pacify with either Train or at Propaganda may shift spaces up to 2 levels toward Support.
Overwhelming duties: Pacify costs 3 Resources per Terror removed or shift toward Support.
Tips: The unshaded capability allows British during Pacify to first pay to remove any Terror, and then shift up to two levels toward Support, paying 2 Resources per Terror removed or level shifted.
Background: Many counterinsurgency manuals stress the need for strong coordination between civilian and military organizations to address both the military and political challenges of combating an insurgency. The appointment of Sir Gerald Templer combined the powers of 'Governor-General' and 'Commander-in-Chief' to create a 'supremo' capable of addressing both military and political issues. The Templer era focused on tailoring political and military assets to address the challenges of specific areas, facilitating the gradual spread of secure 'white' areas (Card M21) across the peninsula (Hack, Chapter 7).
M29. Weapon Bounties
Encourage defection: British may pay up to 3 Resources to remove 1 Guerrilla per Resource spent.
Turn in the worst ones: Transfer 2 Resources from British to MCP.
Tips: The unshaded text may remove Guerrillas from any spaces.
Background: Alongside rewards for information on MCP leaders such as Chin Peng (Card M6), the British also offered monetary rewards for weapons collected from the MCP. As with other counterinsurgency campaigns with similar policies, often poorer quality weapons were turned in for the reward (Hack, Chapter 7).
M30. CCP Victory
Provide no support: MCP Resources –3. Remove 2 Guerrillas.
Emboldens MCP: MCP free Rally in 2 spaces then may free Agitate in 1 Rally space with a Base.
Tips: The unshaded text may remove Guerrillas from any spaces.
Background: The CCP's 1949 victory in the Chinese Civil War greatly emboldened the MCP's insurgency. The MCP hoped to follow Mao's strategy of establishing base areas and MNLA main force units (Card M8); however, pressure from the British and limited opportunities for base areas prevented the MCP from repeating the CCP's success. The CCP did train some of the MCP's cadres during the Emergency, but did not send any significant material assistance. In contrast to many post-WWII insurgencies, besides the use of Thailand as a border sanctuary, the MCP received little to no external assistance (Hack, Chapter 8).
M31. Ex-Palestine Recruits
Special constables: Place up to 4 Police in British Controlled spaces.
Tactics backfire: MCP free Rally in 2 spaces and then shift one selected space 1 level toward Opposition.
Tips: None.
Background: At the beginning of the Emergency there was a shortage of police in Malaya. To help fill the shortage and build off of the experience of previous campaigns, police who served in Mandatory Palestine, particularly during the recently ended Jewish insurgency (1945-1947, featured in The British Way: Palestine), were deployed to Malaya. Some of those recruited would repeat some of the rough methods adopted in Palestine (Hack, Chapter 3).
M32. SEP
Surrendered enemy personnel: British may replace up to 2 Guerrillas with Police in or adjacent to British Control.
Accelerates infiltration: MCP Intimidate in 2 spaces.
Tips: If the shaded text is selected the MCP would still require an Underground Guerrilla in each space selected for Intimidate.
Background: Surrendered Enemy Personnel (SEP) were MCP members that turned themselves over to the British. Many were encouraged to surrender due to supply shortages from food denial (Card M19) and leaflets highlighting the benefits of surrendering (Card M3). However, the number of surrenders only began to pick up when a more generous amnesty was granted and once the possibility of a negotiated settlement for the MCP was firmly rejected by the leading nationalist parties (Card M22) that took control of the newly independent Malaysia in the late 1950s. SEPs participated in many counterinsurgency activities after surrendering, such as psychological operations, providing intelligence on the MCP, or guiding security forces to MCP units or arms caches (Hack, Chapter 8).
M33, M34, M35. Propaganda
Background: In August 1957, Malaya gained independence from Britain. The picture is the ceremony where the first prime minister, Tunku Abdul Rahman, took over power. The push for independence was led by a coalition of Chinese and Malay nationalist parties (Card M22). By granting independence, the British undercut MCP claims of fighting to end colonial rule. In the late 1950s, surviving MCP retreated to the Thai border and were only capable of sustaining a low level of violence in remote areas (Hack, Chapter 9).
Malaya — Strategy Guide
By Joe Dewhurst
This strategy guide consists of some general advice for both players and then some specific tips for playing each Faction, and is intended to help get you started rather than explaining everything about the game. Much of the enjoyment of playing will come from exploring and developing these strategies yourself, and of course I need to keep some tricks up my sleeve in case we ever end up on opposite sides of the table.
General Advice
Have a plan – Each campaign (the sequence of Event cards leading up to a Propaganda Round) only lasts an average of six Event cards, meaning that you only should expect to get approximately three full Operation + Special Activity turns per campaign. This doesn't give you much time to get things done, so you should begin each campaign with a plan for what you want to achieve, and only divert from it if there is something more important you need to respond to, or if a better opportunity arises from the Event cards (although beware the allure of these, often they are not your best option).
Keep your eyes on the prize – The game is ultimately a struggle for Political Will, and you should carefully study the various ways in which this can be raised and lowered (these are summarised on both Faction player aids, and on the Propaganda Round aid sheet). Some of these have immediate effects and can often be very attractive, but in the long-term the Propaganda Round effects are likely to have a greater impact, and you should make sure that you are always working towards achieving these.
Master the one-two punch – The structure of the Initiative Track means that if you perform a Limited Operation on one turn you are guaranteed to be able to perform a full Operation + Special Activity on the next turn (unless the Propaganda card is drawn). This means that you can use a Limited Operation on one turn to set yourself up for a powerful action on the next—and remember that both Factions can also use a Limited Train or Rally to increase Support or Opposition respectively.
MCP Tips
Maintain presence – The British player will be aiming to use Support and New Villages to exclude you from areas of the map, so it is important to expand early and often into areas that they are seeking to control. Rally is ideal for this, but don't be afraid to use March to re-enter otherwise inaccessible areas if necessary, especially if they are only protected by a New Village.
Economic attrition – It costs you 0 Resources to March into Economic Centers and place Sabotage there, which will cost the British a lot of Resources and also reduce their Political Will, so make sure to do this at every opportunity you get. Also make sure to secure your own income, with a Base in Thailand being virtually untouchable and worth 4 Resources over the whole game if placed down early.
Pick your battles – Once Active your Guerrillas are easily removed by the British, especially outside of Mountains, but casualties can also be costly for the British to replace. Don't be afraid to take the fight to them when you see an opportunity, perhaps with a Limited March or Rally followed by an Attack and Ambush.
British Tips
The British Commander Track offers a very natural template for your strategy, enhancing a sequence of actions that should be your progressive focus across the three campaigns.
Clear – Sweep into a Province and then Assault there on your next turn to remove any enemy pieces, using Reprisal to eliminate Opposition and help uncover Bases. The one-two punch of a Limited Sweep followed by an Assault (combined with either Air Strike or Reprisal) can be particularly effective here.
Secure – Place New Villages and Police to prevent the MCP from Rallying in areas that you have cleared, potentially using Reprisal again in future turns to remove any lingering Opposition. Don't forget that you can Train Police even in Uncontrolled Provinces, so make sure to do so early, before the MCP can seize Control.
Pacify – Once a Province is cleared and secured, Pacify to bring it to Support, then move on to the next target and continue the cycle. In this way you can slowly creep across the peninsula, establishing safe 'white areas' and forcing the MCP to operate in an increasingly small zone. Garrison can be useful not only to protect Economic Centers, but also to rapidly redeploy Troops and enable Pacify.
Malaya — Key Terms Index
Accompanying: Operation required for a Special Activity. (4.1.1)
Activate: Flip Guerrillas Active. (1.4.3)
Active Pieces: Troops, Police, Active Guerrillas (symbol end up), and Bases. (1.4.3)
Adjacent: Spaces next to each other for actions or Events. (1.3.6)
Agitate: MCP action to increase Opposition. (3.3.1, 6.3.2)
Air Strike: British Special Activity to remove Active MCP pieces. (4.2.3)
Ambush: MCP Special Activity that modifies one Attack to Activate only one Guerrilla but remove only one cube. (4.3.3)
Assault: British Operation to remove Active MCP pieces. (3.2.4)
Attack: MCP Operation to remove British cubes and potentially reduce Political Will. (3.3.3)
Available: Pieces in Available boxes, waiting to be placed. (1.4.1)
British: A Faction committed to maintaining British influence in Malaya. (1.5)
British Political Will: Marker on edge track indicating British commitment to Malaya, position determines victory. (1.10, 7.0)
Campaign: Event card series leading up to a Propaganda Round. (2.4)
Commander Track: Track indicating the current British Commander in Malaya, allowing either Reprisal, Resettle, or Pacify with Train to target an additional space. (6.6)
Control: More friendly pieces than enemy pieces in a space. (1.7)
Cube: British Troops or Police piece. (1.4)
Cylinder: Token to mark a Faction's current Resources (1.8) or Eligibility on the Initiative Track. (2.3)
Dual Use: Event with two alternative effects. (5.2)
Economic Center: Special areas that generate British Resources during the Propaganda Round, unless Sabotaged. (1.3.5)
Event: Card with text a Faction may execute. (5.0)
Execute: Implement Event or conduct Operation or Special Activity. (2.3)
Extort: MCP Special Activity to gain Resources. (4.3.1)
Faction: Player role: British or MCP. (1.5)
Flip: Switch Guerrillas between Underground and Active. (1.4.3)
Forces: Troops, Police, Guerrillas, and Bases. (1.4)
Friendly: Forces belonging to the executing Faction. (1.4)
Garrison: British Operation to rapidly redeploy forces and protect Economic Centers. (3.2.2)
Guerrilla: Mobile MCP forces that are required for several Operations and Special Activities, and may be Underground or Active. (1.4)
Initiative Track: Track indicating which Faction is 1st and 2nd Eligible, and to mark actions performed on an Event card. (2.3)
Intimidate: MCP Special Activity to remove Police, or possible New Villages and Support. (4.3.2)
Kuala Lumpur: Urban space. (1.3.4)
Limited Operation: Operation in one space with no Special Activity. (2.3.4)
March: MCP Operation to move Guerrillas to adjacent spaces. (3.3.2)
MCP: A Faction committed to ending British rule of Malaya and installing a communist government. (1.5)
New Village: Marker placed by British Resettle or some Events that inhibits MCP Rally and Extort, and prevents Opposition from being counted during the Propaganda Round. (1.12)
Operation (Op): Core action a Faction takes with its pieces. (3.0)
Opposition: A space's Population favoring the MCP. (1.6)
Pacify: British action to increase Support. (3.2.1, 6.3.1)
Pass: Forego the action in the selected Initiative Track box to gain Resources. (2.3.3)
Pawn: A token to designate spaces selected for Operation or Special Activity. (3.1.1)
Phase: Part of a Propaganda Round. (6.0)
Place: Move a piece from Available to the map. (1.4.1)
Police: British forces that provide static defenses and may be moved with Garrison. (1.4)
Political Will Phase: Propaganda Round phase in which British Political Will is adjusted and victory is checked. (6.1)
Propaganda Round: Interruption to usual play, during which Political Will is adjusted, victory is checked, and other status phases are carried out. (6.0)
Province: Rural space, either Jungle or Mountain. (1.3.2)
Rally: MCP Operation to place new Guerrillas and Bases, flip Guerrillas Underground, and Agitate in up to one space. (3.3.1)
Redeploy Phase: Propaganda Round phase in which the British move pieces. (6.4)
Remove: Take from the map and return to Available. (1.4.1)
Replace: Remove pieces to place others in their stead. (1.4.1)
Reprisal: British Special Activity to place Terror, set Provinces to Neutral, and relocate one Guerrilla to an adjacent space. (4.2.2)
Reset Phase: Propaganda Round phase to ready for the next card. (6.5)
Resettle: British Special Activity to place New Villages. (4.2.1)
Resources: Factions' wherewithal for Operations and other actions. (1.8)
Resources Phase: Propaganda Round phase in which both Factions may gain Resources. (6.2)
Sabotage marker: Placed on Economic Centers using Terror, blocks British Resource earnings and lowers Political Will during the Propaganda Round. (1.9)
Shaded: 2nd choice of Dual-Use Event, typically favors MCP. (5.2)
Space: A map area holding pieces in play: Provinces, Thailand, Kuala Lumpur, and Economic Centers. (1.3.1)
Special Activities: Actions accompanying Operations; unique to each Faction. (4.0)
Stacking: A limit of two total on Bases that can occupy a space. (1.4.2)
Support: A space's Population favoring the British. (1.6)
Support Phase: Propaganda Round phase in which British may perform Pacify and MCP may Agitate. (6.3)
Sweep: British Operation to move Troops to adjacent spaces and Activate Guerrillas. (3.2.3)
Target: Faction or piece that is the object of an action. (3.1, 4.1)
Terror: MCP Operation that places Terror or Sabotage markers and shifts spaces towards Opposition. (3.3.4)
Terror marker: Placed by Terror Operations, Reprisal Special Activity, and some Events. Must be removed by Pacify and Agitate before shifting a space towards Support or Opposition. (1.9)
Thailand: Foreign space that only MCP may enter or act in. (1.3.3)
Train: British Operation to place cubes and Pacify in up to one space. (3.2.1)
Troops: Mobile British forces that may Sweep and Assault. (1.4)
Underground: Guerrilla, symbol end down: not usually subject to removal from Assault and capable of Terror, Extort, Intimidate, and Ambush. (1.4.3)
Unshaded: 1st choice of Dual-Use Event, typically favors British. (5.2)
Malaya — Setup Instructions (2.1)
Malayan Emergency: 1948-1960
Deck Preparation. Gather the Malaya Event cards, remove the three Propaganda cards, and shuffle the remaining cards. Form three piles of 6 regular Event cards and set aside the remaining 14 regular Event cards (they will not be used). In each pile, shuffle a Propaganda card with 2 of the Event cards and place these 3 cards under the remaining 4 Event cards. Stack the resulting three 7 card piles to form the complete Event Deck of 21 cards.
NOTE: MCP use only four red discs for Bases, the fifth red disc can be set aside. All other wooden pieces are used in Malaya.
Set up the map as follows (see back page of this booklet for a full setup diagram):
- Resources: MCP 10, British 20
- Commander Track: Gurney
- British Political Will: 12
- Initiative: British 1st Eligible, MCP 2nd Eligible
Available:
- MCP—2 Bases, 9 Guerrillas
- British—7 Troops, 9 Police
Kuala Lumpur: British Control, Support; British—4 Troops, 2 Police
Perak and Johore: British Control, Neutral; MCP—1 Guerrilla; British—2 Troops, 2 Police
Pahang: MCP Control, Oppose; MCP—1 Base, 2 Guerrillas
Kelantan: MCP Control, Neutral; MCP—1 Base, 1 Guerrilla
Trengganu: MCP Control, Neutral; MCP—1 Guerrilla
Kedah, Thailand, Selangor, Negri Sembilan: Uncontrolled, Neutral, no pieces
Extended Malayan Emergency
Deck Preparation. Gather the Malaya Event cards, remove the three Propaganda cards, and shuffle the remaining cards. Form three piles of 8 regular Event cards and set aside the remaining 8 regular Event cards (they will not be used). In each pile, shuffle a Propaganda card with 4 of the Event cards and place these 5 cards under the remaining 4 Event cards. Stack the resulting three 9 card piles to form the complete Event Deck of 27 cards. Setup the map and pieces following the instructions above.
DESIGN NOTE: This additional Malaya scenario extends the game by adding two additional cards to each Campaign. Although all The British Way conflicts are relatively low intensity compared to conflicts in other COIN Volumes like Fire in the Lake or Colonial Twilight, Malaya is the closest of the group to fitting a higher operational intensity. Therefore, this scenario is an optional scenario for those wanting a slightly longer game than The British Way normally provides.
Kenya
The British Way: Kenya 1952-1956 — Rules of Play, 2nd Edition. Designed by Stephen Rangazas.
1.0 Introduction
The British Way: Kenya is a game in The British Way COIN multipack. Alongside its accompanying games Palestine, Malaya, and Cyprus, this historical simulation strives to depict Britain's attempts to "manage" the emergencies, as the British referred to them, in their colonies during the period of decolonization that swept the world after WWII.
The British Way: Kenya focuses on the British counterinsurgency effort against the Mau Mau in the Central Province of Kenya from October 1952 through to their effective defeat in 1956 (although the Kenyan Emergency officially continued until 1960, with a small number of Mau Mau still fighting). The game focuses on the counterinsurgency aspects of the conflict in rural areas and the mass population resettlement and detention conducted by the British during the Emergency, known colloquially as the 'Pipeline'. It does not focus in so much detail on urban unrest and protests during this period, although Nairobi is featured on the map.
The historical simulations that comprise The British Way multipack are designed to depict the full range of strategies used by the British during these conflicts, ranging from the more benevolent but still coercive provision of material benefits through pacification programs to the horrific measures used to gain control over the local population. Although many myths have arisen about an enlightened British approach to counterinsurgency that avoids large-scale violence and focuses on winning the population's 'hearts and minds', new scholarship on these conflicts have confirmed the brutality of the methods commonly used. This volume is intended to help synthesize and present this crucial scholarship, even if the simulations depicted are at times more unpleasant than fun. The main goal is that players find these thought-provoking and the gameplay encourages them to seek out the discussion of sources and historical background material in the Event notes and Campaign booklet.
1.1 General Course of Play
In The British Way: Kenya, one Event card at a time is revealed from the shared draw deck, and both players will have an opportunity to either execute that Event or perform an Operation from a unique menu, possibly adding a Special Activity. Propaganda cards mixed in with the Event cards provide periodic interruptions where the general board state is assessed and British Political Will is adjusted, possibly triggering an instant victory for either side, after which both players receive an opportunity to collect additional assets and redeploy their forces.
1.2 Components
The following components from the multipack are required to play The British Way: Kenya:
- A 17"x22" mounted Kenya game board (1.3).
- A deck of 35 Kenya cards (5.0).
- 15 blue cubes ('Police'), 10 tan cubes ('Troops'), 15 red embossed octagonal cylinders ('Guerrillas'), 4 flat red discs ('Bases'), 3 embossed cylinders (one blue and two red)—note that this is fewer than the total number of wooden pieces included in The British Way multipack; any excess should be set aside while playing Kenya.
- Three black and five white pawns (3.1.1).
- Specific markers from the countersheet: 1x Political Will, 1x Pipeline, 5x Population (numbered '0' or '1'), 12x British/Mau Mau Control, 10x Loyal/Resist, 15x Terror, 8x Capability—all other markers should be set aside while playing Kenya.
- Two player aid sheets.
- One Propaganda Round aid sheet.
- Two six-sided dice (one red, one blue).
- This rules booklet.
1.3 The Map
The map shows the Central Province of Kenya, divided into several different kinds of spaces.
1.3.1 Map Spaces. Map spaces include Provinces (Reserve or Non-Reserve), Mountain Jungles, and Nairobi. All map spaces can hold forces (1.4). The Southern Provinces is marked for flavor purposes and is not a playable map space.
1.3.2 Provinces. The nine lighter-colored large irregular spaces are Provinces. Each Province is marked with a numerical Population value (either '1' or '2') that affects Political Will (1.10) via changes of Control (1.7) and Loyalty or Resistance (1.6) during the Propaganda Round (6.1), and can also modify the Mau Mau Rally Operation (3.3.1). Each Province also has a larger space for a Control marker (1.7) and a smaller space for a Loyalty or Resistance marker (1.6). Provinces are further distinguished as Reserves (titled in black and with a small '(R)', Meru, Nyeri, Embu, Fort Hall, and Kiambu), or Non-Reserves (titled in white, Thompson's Falls, Rift Valley, Nanyuki, and Thika), affecting the Mau Mau Rally Operation (3.3.1) and Oath Special Activity (4.3.2), as well as certain Events (5.0). The Population of Reserve Provinces may also be reduced by the British Relocate Operation (3.2.2) and some Events (5.0)—use the small numbered '0' and '1' markers to indicate the current population of such Provinces. A Province with Population 1 or 2 is considered 'Populated', and a Province with 0 Population is 'Unpopulated'.
DESIGN NOTE: Reserve Provinces represent the Kikuyu, Embu, and Meru Reserves established by the colonial government. Populated Non-Reserve Provinces represent the White Highlands where Kikuyu worked as laborers but were dominated by a small population of white settlers. Mount Kenya and Aberdares are jungle-covered mountain ranges that played a critical role in protecting the Mau Mau insurgency.
1.3.3 Mountain Jungles. The two darker-colored large irregular spaces are Mountain Jungles. Mountain Jungles have 0 Population value, and are therefore 'Unpopulated'. They may be Controlled by either Faction, but can never be shifted to Loyalty or Resistance.
1.3.4 Nairobi. The large circular space is Nairobi, the capital city of Kenya. Like Provinces, Nairobi has a marked Population value ('2') and two spaces for Control and Loyalty or Resistance markers. Nairobi is considered a Populated Non-Reserve space, and a Terror marker there has an additional effect on Political Will during the Propaganda Round (6.1).
1.3.5 Out of Play. The Out of Play box begins the game with some Police cubes in it. These cubes may not be used until they are released into play by the Relocate Operation (3.2.2) or an Event effect (5.0).
1.3.6 Adjacency. Adjacency affects the movement of forces and implementation of certain Events (5.0). Any two spaces that border one another are adjacent.
EXAMPLE: Mau Mau Guerrillas in Kiambu are adjacent to Rift Valley, Aberdares, Fort Hall, Thika, and Nairobi.
1.4 Forces
The wooden pieces represent the two Factions' various forces: British Troops (tan cubes) and Police (blue cubes), Mau Mau Guerrillas (red octagonal cylinders) and Bases (red discs).
DESIGN NOTE: British Police represent both urban settler police and Kikuyu Home Guard. Bases represent command, training, and supply facilities as well as political administration.
Important! The Mau Mau in Kenya use only 4 red Base discs, and the British use only 10 tan Troops cubes. The remaining red disc and 5 tan cubes should be set aside and not used while playing Kenya.
1.4.1 Availability and Removal. Keep forces Available for placement in the Faction's Available Forces box. Forces removed from the map go to Available.
- Unless otherwise instructed (by Event, 5.1.1), forces may only be placed from or replaced with those in the Available boxes. A piece to be replaced by a piece that is unavailable is simply removed.
Important! Factions while executing an Operation, Special Activity, or Event to place their own forces may take them from elsewhere on the map if the desired force type is not Available.
DESIGN NOTE: Mau Mau without Available Guerrillas could remove Guerrillas from the map during a Rally (3.3.1) to place them Underground, either in the same space or a different space.
1.4.2 Stacking. No more than two Bases (1.4) may occupy a single space.
- Bases placed (such as via the Rally Operation [3.3.1] or Event [5.0]) may never violate stacking.
- More than one Terror marker may be placed in a space by Events (5.0), but never by the Terror Operation (3.3.3) or Reprisal Special Activity (4.2.2), which only place up to a maximum of one Terror marker in selected spaces.
1.4.3 Underground/Active. Guerrillas are either Underground—symbol end down—or Active—symbol end up. Actions and Events flip them from one to the other state. Bases, Troops, and Police are always Active. Always set up and place new Guerrillas Underground (including if replacing a piece).
NOTE: Unless instructions specify "Underground" Guerrillas, it is sufficient to "Activate" already Active Guerrillas (they stay Active). Also, "moving" or "relocating" Guerrillas does not affect Underground status unless specified.
1.5 Players & Factions
The game requires two players, each playing as one Faction: the British (blue), and the Mau Mau (red).
1.6 Loyalty and Resistance
Loyalty and Resistance markers may be placed in Provinces and Nairobi, affecting some Operations and Special Activities and Political Will during the Propaganda Round (6.1). Nairobi (1.3.4) and all Populated Provinces (1.3.2) always show one of three levels of Loyalty or Resistance to British rule in Kenya, that can shift during play. Each space may be either at Loyalty or Resistance (indicated with the appropriate marker) or Neutral (indicated by the absence of any marker). A shift towards Loyalty or Resistance either removes a marker of the opposite type, or places the specified marker if a space is already at Neutral. Some Events (5.0) may instruct you to set a space to Loyalty or Resistance, in which case you should remove any other marker and simply place the specified marker.
NOTE: Mountain Jungles (1.3.3) and Unpopulated Provinces (1.3.2) are never at Loyalty or Resistance and should always be treated as though they are Neutral. If a Populated Province becomes Unpopulated, immediately remove any Loyalty or Resistance marker there.
DESIGN NOTE: The British estimated that 90 percent of the Kikuyu supported the Mau Mau and opposed British colonial rule, but enormous numbers still chose to behave loyally due to British repression and benefits offered. The distinction between Loyalty and Resistance reflects the core decision presented to the population torn between British and Mau Mau demands for support.
1.7 Control
All spaces are always either Uncontrolled (indicated by the absence of any marker) or Controlled by either the British or the Mau Mau (indicated by a Control marker of either Faction). The British and Mau Mau each Control a space if their wooden forces pieces (1.4) in the space outnumber those of their opponent. Adjust Control markers immediately when Control changes due to placement, removal, or movement of pieces. Gaining or removing Mau Mau Control immediately shifts Political Will (1.10) down or up by an amount equal to the Population value of the space (see 7.0 Victory). Control also affects certain Operations and Special Activities.
DESIGN NOTE: Control represents the British goal to dominate the population of the rebellion's heart in the Reserves while protecting the White Highlands and Nairobi from Mau Mau influence. Mau Mau control represents the contesting of the Reserves and the goal to push the rebellion to broader areas of Kenya outside of the Reserves.
1.8 Resources
At any moment, the Mau Mau have between 0 and 20 Resources that they use to pay for Operations (3.0). Mark Resources on the edge track with a red cylinder.
1.9 Terror
Terror markers are placed by the Mau Mau Terror Operation (3.3.3), the British Reprisal Special Activity (4.2.2), and some Events (5.0), and can affect Political Will during the Political Will phase of the Propaganda Round (6.1).
1.10 British Political Will
British Political Will is tracked with a marker on the edge track. The position of this counter will determine Victory (7.0) for either side. The marker is moved during the Campaign and during the Political Will Phase of the Propaganda Round (6.1). It may never be lower than 0 or greater than 20.
1.11 Pipeline
The current severity of British population control and detention policy is tracked with a marker on the Pipeline Track (6.6), determining the number of spaces that may be selected for Relocate (3.2.2) and Reprisal (4.2.2), and the potential consequences these actions might have for British Political Will (1.10).
2.0 Sequence of Play
2.1 Setup
Follow the instructions on the second to last page of this booklet to prepare the draw deck and set up markers and forces. A full setup diagram can be found on the back page of this booklet.
2.2 Start
Begin play by revealing the top card of the draw deck and placing it onto a played cards pile. All played cards and the number of cards in the draw deck are open to inspection.
NOTE: Unlike in most previous COIN series volumes, only one Event card is revealed at a time.
RECORD STEPS: As the steps of each Event card play are completed, place the Eligibility cylinder of the acting Faction's color (1.5) into the Initiative Track's appropriate box.
2.3 Initiative Track
One player takes the British Faction and the blue Eligibility cylinder, the other the Mau Mau Faction and the red Eligibility cylinder.
NOTE: This sequence of play is a new simpler take on the 2-player sequence of play developed by Brian Train in COIN volume VII - Colonial Twilight.
When playing an Event card, the British or Mau Mau player will execute Operations or the Event described on the card. At all times one player will be First Eligible, and the other will be Second Eligible. In each Event card round, the First Eligible player is first to choose what they will do, followed by the Second Eligible—whose choices are limited by what the First Eligible player did.
2.3.1 Eligibility. Each player puts one cylinder (blue and red respectively) on the First or Second Eligible spaces of the Initiative Track.
NOTE: The Mau Mau always start the game in the 1st Eligible box. Eligibility order should remain untouched during each Propaganda Round (6.0).
2.3.2 Options for Eligible Factions.
First Eligible: The First Eligible player may perform a Limited Operation (2.3.4), execute the Event (5.0), perform an Operation (3.0) with Special Activity (4.0), or Pass (2.3.3).
The player selects their desired action and places their Eligibility cylinder in the appropriate box on the Initiative Track, then immediately executes the chosen action (Limited Operation, Event, Operation with Special Activity, or Pass).
Second Eligible: The Second Eligible player may then choose one of the boxes not containing the First Eligible player's cylinder and conduct the action in the box selected (or Pass).
2.3.3 Passing. After selecting a box, players may forgo the action in the box to Pass. If British pass they may shift the Pipeline Track (6.6) one step in either direction, and if Mau Mau pass they gain 1 Resource (1.8). Both players may pass and the order of cylinders in the Initiative Track will still decide eligibility (2.3.5).
2.3.4 Limited Operation. A Limited Operation is an Operation in just one space, with no Special Activity. If the Limited Operation is a Deploy (3.2.1), Sweep (3.2.3), or March (3.3.2), it can involve pieces from multiple origin spaces but only one destination space.
2.3.5 Adjust Eligibility. After both players have selected and executed their actions, replace the Eligibility cylinders on the Initiative Track with the cylinder in the furthest left box becoming First Eligible, and the other cylinder becoming Second Eligible.
DESIGN NOTE: Selecting the Limited Operation box guarantees the player first eligibility on the next card. Likewise, selecting the Operation & Special Activity box guarantees second eligibility on the next card. Eligibility after selecting the Event space will depend on what the other player has chosen. The only way to block Events in The British Way is to select the Event box and then either play the Event or Pass.
2.3.6 Next Card. After eligibility has been reset, reveal the draw deck's next card and continue play.
2.4 Propaganda Card
When a Propaganda card is revealed, conduct a Propaganda round (6.0).
NOTE: Each series of Event cards leading up to a Propaganda Round is called a "Campaign."
3.0 Operations
3.1 Operations in General
A Faction executing an Operation (Op) chooses one of the three or four Operations listed on its Faction sheet and selects the map spaces (typically several) to be involved. Select a given space only once for a given Operation.
Mau Mau Operations cost Resources paid per space selected; they must have enough Resources to pay for the Operation in each selected space. British Operations do not cost any Resources. Operations are generally allowed in any number of spaces (Resources permitting for Mau Mau) unless the Operation is Limited (2.3.4), in which case they are allowed in only one space.
The executing Faction chooses the order of the spaces in which the Operation is resolved, the enemy pieces to be affected (targeted), and the friendly pieces to be placed, replaced, or moved. Once targeted, a Faction's pieces are affected to the maximum extent possible. Actions affecting another Faction's pieces do not require that Faction's permission.
3.1.1 Pawns. If desired, mark spaces selected for Operations (3.0), Special Activities (4.0), or other actions with white and black pawns. The pawns are for convenience, not a limit on play.
3.1.2 Free Operations. Raid (4.3.3) and certain Events grant free Operations or Special Activities, costing no Resources (5.4). All other requirements or procedures apply as normal, unless specifically modified by Event text (5.1.1, 5.4).
3.2 British Operations
The British choose from Deploy, Relocate, Sweep, or Assault Operations.
3.2.1 Deploy. Deploy adds British forces and can rapidly deploy Troops to any one non-Mountain Jungle space. Select Nairobi and/or any number of British Controlled Provinces.
PROCEDURE: Place up to 4 cubes in Nairobi and up to 2 Police in each selected Province. Then, even if Limited Operation (2.3.4), if desired may move any Troops to one non-Mountain Jungle space.
NOTE: A Limited Deploy Operation may place cubes in one space and move Troops to a different space, potentially including any Troops just placed.
3.2.2 Relocate. Relocate removes Population from Reserve Provinces and adds Police to Available from Out of Play (1.3.5). Select British Controlled Populated Reserve Provinces up to the number indicated on the Pipeline Track (6.6).
PROCEDURE: In each selected space, reduce the Population of the space by one and move one Police from Out of Play to Available (if possible). Then roll for Outrage against the current Pipeline value (6.6.3).
DESIGN NOTE: Relocate models the British strategy of villagization, where over one million Kikuyu were relocated into protected villages. This process of establishing firm control over the population also helped the British organize Kikuyu Home Guard police from loyalists and those wanting to avoid the worst conditions of the protected villages.
3.2.3 Sweep. Sweep may move Troops and can reveal Guerrillas. Select any spaces as destinations.
PROCEDURE: First, simultaneously move any adjacent British Troops desired into selected spaces. Then, in each selected space, Activate (1.4.3) one Guerrilla for every cube (moved or already there, even if no cubes moved). In Mountain Jungles, instead Activate only one Guerrilla for every two cubes there.
3.2.4 Assault. Assault removes enemy pieces. Select any spaces with cubes and Mau Mau pieces.
PROCEDURE: In each selected space, remove one Active enemy piece for every Troop present, or one for every two Troops in Mountain Jungles, or one for every cube in Nairobi. First remove Active Guerrillas, then remove Bases only once no Guerrillas remain (even Underground). For each Base removed, add 1 Political Will (1.10).
NOTE: Underground Guerrillas in a space prevent removal of Bases until all Guerrillas are Activated and removed.
DESIGN NOTE: Guerrillas are less hard hitting than Troops but enjoy an information advantage in that counterinsurgents must Activate (locate) them before Assaulting them.
3.3 Mau Mau Operations
Mau Mau chooses from Rally, March, or Terror Operations.
3.3.1 Rally. Rally adds Mau Mau forces. Select any Reserve Provinces, and any other spaces without Loyalty (1.6). Pay 1 Resource per selected space.
PROCEDURE: In each selected space, place one Guerrilla or replace two Guerrillas with a Base (respecting stacking, 1.4.2). If the space already has at least one Base, may instead place Guerrillas up to the space's Population plus number of Bases there, or flip all Guerrillas there Underground (1.4.3).
3.3.2 March. March moves Guerrillas. Select any spaces as destinations. Pay 1 Resource per destination space.
PROCEDURE: Simultaneously move any Guerrillas desired into adjacent destination spaces. Set Guerrillas moving from one origin space to one destination space Active (1.4.3) if:
- The destination is a Populated Non-Reserve space or Loyal Reserve Province and
- The number of moving Guerrillas plus the number of cubes in that destination exceeds three.
Otherwise, moving Guerrillas retain their current orientation (Active or Underground).
3.3.3 Terror. Terror shifts Nairobi and Populated Provinces towards Resistance and places Terror markers, or can alternatively remove Police. Terror markers in Populated Non-Reserve spaces also affect Political Will during the Propaganda Round (6.1). Select any spaces with at least one Underground Guerrilla. Pay 1 Resource per space selected.
PROCEDURE: In each selected space, Activate an Underground Guerrilla and either place a Terror marker if there is not already one there and shift once towards Resistance or remove up to 2 Police.
NOTE: Terror Ops will not add Terror markers to spaces that already have them.
DESIGN NOTE: The Mau Mau had an extreme arms shortage and could not mount significant attacks against British troops, but they did manage to intimidate and eliminate a significant number of police. To reflect the Mau Mau's relative capabilities, they do not have the standard Attack Operation as seen in other COIN volumes, but can instead remove Police with Terror.
4.0 Special Activities
4.1 Special Activities in General
When a Faction per the Initiative Track (2.3) executes an Operation (3.0), it may also execute one Special Activity (EXCEPTION: Limited Operations, 2.3.4). As with Operations, the executing Faction selects spaces and pieces affected, and the order of actions. Select a given space only once as a location for a given Special Activity. Events may grant free Special Activities (not further affecting Eligibility, 2.3.1).
Important! A Faction may execute its Special Activity at any one time immediately before, during, or after its Operation.
EXAMPLE: Mau Mau Rally in one space, then pause to Supply to gain Resources before continuing to Rally in other spaces.
4.1.1 Accompanying Operations. Some Special Activities specify that they may only accompany certain types of Operations (3.0). If not otherwise specified, Special Activities may accompany any Operations and take place in any otherwise valid spaces.
4.2 British Special Activities
The British choose from Reward, Reprisal, or Air Strike Special Activities.
4.2.1 Reward. Reward shifts spaces towards Loyalty and removes Terror. It may select one British Controlled Populated space. It may only accompany Deploy (3.2.1) or Relocate (3.2.2).
PROCEDURE: In the selected space, remove one Terror marker (if possible) and shift once towards Loyalty.
4.2.2 Reprisal. Reprisal removes Resistance (or Loyalty) and relocates one Guerrilla to an adjacent space. It may select Populated spaces with British Troops up to the number indicated on the Pipeline Track (6.6). It may only accompany Sweep (3.2.3) or Assault (3.2.4).
PROCEDURE: Set each selected space to Neutral, place a Terror marker if there was not already one there, and move one Guerrilla to an adjacent space. Then roll for Outrage against the current Pipeline value (6.6.3).
NOTE: Reprisal will not add Terror markers to spaces that already have them.
4.2.3 Air Strike. Air Strike removes Active Guerrillas. It may select one Province or Mountain Jungle. It may accompany any Operation.
PROCEDURE: Remove one Active Guerrilla in the selected space, or up to two Active Guerrillas if a Mountain Jungle is selected.
4.3 Mau Mau Special Activities
Mau Mau chooses from Supply, Oath, or Raid Special Activities.
4.3.1 Supply. Supply enables the Mau Mau to gain Resources. Supply may accompany any Operation.
PROCEDURE: Mau Mau gain 1 Resource for each Base in Nairobi, plus 1 Resource for each other Base connected to Nairobi by a path of spaces with either a Guerrilla or Resistance.
NOTE: To trace a path of spaces, the Mau Mau do not need to have Guerrillas or Resistance in Nairobi or the destination space, just the spaces in between.
4.3.2 Oath. Oath shifts spaces towards Resistance and places Guerrillas. It may select one Populated Reserve Province with at least one Underground Guerrilla. Oath may accompany any Operation.
PROCEDURE: Place up to one Guerrilla in the selected space and shift it once towards Resistance.
4.3.3 Raid. Raid allows the Mau Mau to strike from Mountain Jungles or retreat into them. It may select one Province adjacent to a Mountain Jungle. Raid may accompany any Operation.
PROCEDURE: Either move one or two Guerrillas from an adjacent Mountain Jungle into the space and perform a free Limited Operation there, or move any Guerrillas from the space to an adjacent Mountain Jungle and flip them Underground (1.4.3).
NOTE: Raid must be able to move at least one Guerrilla into the selected space in order to perform a Limited Operation there.
5.0 Events
Each Event bears a title, italicized flavor text, and Event text. Flavor text provides historical interest and has no effect on play.
5.1 Executing Events
When a Faction executes an Event, it carries out the Event text literally and in order (sometimes involving actions or decisions by the other Faction). Unless otherwise specified, the executing Faction makes all selections involved in implementing the text, such as which pieces are affected. If another Faction is specified or selected to take an action, that Faction decides the details of the action. Some Events with lasting effects have markers as aids to play.
5.1.1 Where Event text contradicts rules, the Event takes precedence. However:
- Events may not violate stacking (and so never place Bases where there are already two).
- Events place only Available pieces (1.4.1) and markers; they remove rather than replace if the replacement is not Available or if stacking (1.4.2) would be violated.
- Events may not raise Mau Mau Resources or British Political Will beyond 20 or reduce them below 0 (1.8, 1.10).
5.1.2 If two Events contradict, the currently played Event takes precedence.
5.1.3 An executed Event's text that can be implemented must be. If not all of its text can be carried out, implement that which can.
5.2 Dual Use
Many Events have both unshaded and shaded Event text. The executing Faction may select either the unshaded or shaded text to carry out (not both). While the unshaded text often favors the British, a player may select either text option regardless of Faction.
DESIGN NOTE: Dual-use events represent opposed effects of the same cause, forks in the historical road, or instances subject to alternative historical interpretation.
5.3 Capabilities
Dual-use Events labeled "BRITISH CAPABILITY" or "MAU MAU CAPABILITY" have lasting effects mainly relating to that Faction, either positive or negative. These labels are for flavor only, and both Factions may execute Capability Events with either label. The Event's effects last for the rest of the game.
NOTE: Set out executed Capability Event cards near the board as added reminders, using a Capability marker to indicate which option was selected.
5.4 Free Operations
Some Events allow a Faction to perform an immediate Operation or Special Activity that interrupts the usual sequence of play and is typically free: it bears no Resource cost and does not affect Eligibility (2.3.1, 3.1.2), though other procedures and restrictions remain unless modified by Event text (5.1.1).
6.0 Propaganda Round
Conduct a Propaganda Round in the sequence of phases below when each Propaganda card is revealed. The Propaganda Round aid sheet also lists this sequence.
6.1 Political Will Phase
Calculate the net effect to Political Will of the following adjustments before shifting the marker:
6.1.1 Kikuyu Resistance. Subtract the total Population of spaces at Resistance from the total Population of spaces at Loyalty. Reduce Political Will by the total if negative, but do not increase it if positive.
NOTE: British cannot gain Political Will from this step, even if Loyal Population outnumbers Resistant Population.
6.1.2 Settlers Intimidated? Lower Political Will by 1 for each Populated Non-Reserve space with a Terror marker.
6.1.3 Mau Mau Contained? Increase Political Will by 2 if there are no Mau Mau pieces in Nairobi. Increase Political Will by 2 if there are no Bases outside of Mountain Jungles.
6.1.4 Victory? If British Political Will is now 0, 1, or 2, the game immediately ends with a Mau Mau victory. If British Political Will is now 18, 19, or 20, the game immediately ends with a British victory. Otherwise, continue play.
6.1.5 Game End? If this is the final Propaganda card, end the game and check scores per Victory (7.0) to determine the winner.
6.2 Resource Phase
Mau Mau gain Resources equal to the number of Bases on the map, to a maximum of 20 (1.8).
6.3 Support Phase
British and Mau Mau may Reward and Oath to affect Loyalty and Resistance (1.6).
6.3.1 Reward. British may perform a Reward Special Activity.
6.3.2 Oath. Mau Mau may perform an Oath Special Activity.
6.4 Redeploy Phase
6.4.1 British Redeploy. British must move Troops in Mountain Jungles to British Controlled Spaces or Nairobi. British may then move Police to any British Controlled Provinces or Nairobi.
6.4.2 Forest Camps. Mau Mau may free Rally in each Mountain Jungle.
6.4.3 Control. Now adjust Control (1.7) to reflect the above moves.
6.5 Reset Phase
Then prepare for the next card as follows:
- Remove all Terror markers from the map.
- Flip all Guerrillas Underground (1.4.3).
- British may shift the Pipeline Track (6.6) one space in either direction.
- Reveal the next card from the draw deck and continue play (2.3.2).
6.6 Pipeline Track
The British used increasingly repressive policies to try to overwhelm the Mau Mau in Kenya. These policies were controversial back in Britain due to their harsh nature and for abuses committed during their execution. The Pipeline Track represents the current severity of British policy in Kenya and the potential for moral outrage should these atrocities become public.
6.6.1 Moving the Track. The Pipeline Track can be moved by the British by passing (2.3.3), at the end of each Propaganda Round (6.5), and by either player with some Events (5.0).
6.6.2 Effects of the Track. The Pipeline Track determines the number of spaces that may be selected for Relocate (3.2.2) and Reprisal (4.2.2). The British must also check for 'Outrage' when using these actions, as described below.
6.6.3 Roll for Outrage. When the British use Relocate (3.2.2) or Reprisal (4.2.2), they must roll one die—if the result is lower than the current Pipeline Track value, reduce Political Will by 1. Some Events (5.0) may also call for an Outrage roll, which is performed in the same way. If the Pipeline Track is at 0 or 1 no Outrage is possible, so there is no need to make the roll.
NOTE: Only roll once for Outrage each time Reprisal or Relocate is used, regardless of the number of spaces selected. For example, at Pipeline 3, the British may use Reprisal in two spaces but still only roll once against the Pipeline Track value.
7.0 Victory
Victory is determined by the level of British Political Will (1.10). British Political Will is measured on the edge track and can range from 0-20.
7.0.1 Early Victory. At the victory check during the Political Will phase of a Propaganda Round, the Mau Mau win if Political Will is 0-2 and the British win if Political Will is 18-20.
7.0.2 Final Victory. If neither player has won at the end of the Political Will phase of the final Propaganda Round, the Mau Mau win if Political Will is less than 10 and the British win if Political Will is greater than 10. If Political Will is exactly 10 the game is tied.
7.1 Raising Political Will
British Political Will is raised in the following ways:
- Removing a Mau Mau Base by Assault or Event (+1 PW)
- Removing Mau Mau Control (+ Population of space to PW)
- Events (+1 to +2 PW)
- At Propaganda Round, no Mau Mau pieces in Nairobi (+2 PW)
- At Propaganda Round, no Mau Mau Bases outside of Mountain Jungles (+2 PW)
7.2 Lowering Political Will
British Political Will is lowered in the following ways:
- Adding Mau Mau Control (– Population of space from PW)
- Outrage rolls (–1 PW)
- Events (–1 to –4 PW)
- At Propaganda Round, more Resistance Population than Loyal Population (– difference from PW)
- At Propaganda Round, each Terror marker in Populated Non-Reserve spaces (–1 PW each)
8.0 Example of Play
Setup the game as indicated in section 2.1 (consult the setup diagram on the back of this booklet), but construct only the first part of the deck with these cards in the following order, facedown from top to bottom: 'ONE-MILE STRIP' (K19), KENYA LAND AND FREEDOM ARMY (K31), KENYA POLICE RESERVE (K17), McLEAN INQUIRY (K25), SURRENDER SCHEMES (K20), PSEUDO-GANGS (K7), and PROPAGANDA! (K35).
Reveal the first card ('ONE-MILE STRIP') from the top of the deck. Mau Mau is 1st Eligible and decides to perform a Terror Operation combined with the Oath Special Activity. Place their round Eligibility cylinder into the 'Op & Special Activity' box on the Initiative Track. They can select any number of spaces with Underground Guerrillas for the Terror Operation, but will need to spend 1 Resource per space selected. They select Meru, Embu, Fort Hall, and Kiambu, and pay 4 Resources in total (shift the red Mau Mau Resource cylinder on the edge track down from '8' to '4'). Then, in each selected space they must Activate an Underground Guerrilla—flip over all four Guerrillas in these spaces so that their embossed star end is visible—and choose to either place a Terror marker and shift the space towards Resistance, or remove up to two Police cubes. As there are no Police in any of these spaces they select the first option, placing a Terror marker and shifting each space from Neutral to Resistance (place a Resistance marker in the 'Neutral' box in each space to indicate this).
Next, they may also select one Populated Reserve Province with an Underground Guerrilla for the Oath Special Activity—in this case, Nyeri is the only possible option. Oath shifts the selected space once towards Resistance and may place up to one Guerrilla there—do both things now.
The Mau Mau begin the game with a wave of Terror attacks and an Oathing ceremony in Nyeri.
The Mau Mau turn is now complete, and the British player may choose from either of the remaining two boxes on the Initiative Track—Limited Operation or Event. They decide to perform a Limited Deploy Operation (place their blue Eligibility cylinder in the 'Limited Op' box on the Initiative Track). They first place the 4 Troops cubes from Available into Nairobi, then move all 6 Troops now in Nairobi into Nyeri—these Troops could have come from any spaces, and could have moved to any one non-Mountain Jungle destination space. This replaces Mau Mau Control in Nyeri with British Control, increasing Political Will by 2 (the Population value of the space)—move the Political Will marker from '12' up to '14'. The British turn is complete, and as both players have completed their turns we reset Eligibility. The Faction whose cylinder is furthest to the left, in this case British, becomes 1st Eligible, and the other Faction becomes 2nd Eligible.
Eligibility is reset at the end of each turn.
Reveal the next card: KENYA LAND AND FREEDOM ARMY. British are now 1st Eligible and decide to perform the Sweep Operation with the Air Strike Special Activity—place their cylinder in the 'Op & Special Activity' box. British Operations (other than Relocate) may select any number of spaces, with no need to pay Resources per space. They select Aberdares, Nyeri, Mount Kenya, and Nairobi as Sweep destinations, and move 4 Troops each into Aberdares and Mount Kenya (2 each from Rift Valley and Nyeri into Aberdares, and 2 each from Nanyuki and Nyeri into Mount Kenya). This removes British Control in Nyeri (set it to Uncontrolled), but Political Will is only reduced when Mau Mau gain Control. British also gain Control in Aberdares and Mount Kenya, but Political Will does not change as these spaces are Unpopulated. Then, British may Activate one Underground Guerrilla for each cube in destination spaces, or one for every two cubes in Mountain Jungles, even if no new cubes were moved into the space. This Activates all the Guerrillas in Aberdares, Nyeri, Mount Kenya, and Nairobi.
Next, they can select any one Province or Mountain Jungle for Air Strike, removing one Active Guerrilla there (or up to two in a Mountain Jungle). They select Nyeri and remove one Guerrilla, setting it to British Control.
British Troops Sweep into Aberdares and Mount Kenya, and reveal Guerrillas in Nyeri, rendering them vulnerable to an Air Strike.
The British turn is now complete, and Mau Mau have the same choice that British did previously—Limited Operation or Event. They choose to execute the Event (place their cylinder in the 'Event' box). KENYA LAND AND FREEDOM ARMY is a Capability Event that will have a lasting effect, so we place it by the side of the board with a red Capability marker on it to indicate that the shaded bottom effect (favoring Mau Mau) was selected. We then reset Mau Mau to 1st Eligible and British to 2nd Eligible.
Reveal the next card: KENYA POLICE RESERVE. Mau Mau now decide to perform the Rally Operation with the Supply Special Activity. Rally may select any Reserve Provinces, and any Non-Reserve spaces without Loyalty, paying 1 Resource per space. As they have only 4 Resources remaining, Mau Mau first select Aberdares, Mount Kenya, Nairobi, and Thompson's Falls—reduce their Resource cylinder from '4' to '0'. In Thompson's Falls they just place one Guerrilla, removing British Control. Aberdares, Mount Kenya, and Nairobi all have Bases, so they can place Guerrillas up to the number of Bases plus the Population in each space. In Aberdares and Mount Kenya this is still just one each, but in Nairobi this allows them to place three Guerrillas, enough to gain Control! Place these Guerrillas now, set Nairobi to Mau Mau Control, and reduce Political Will by 2, from '14' to '12'.
Mau Mau Rally in Nairobi and gain Control of it.
Mau Mau now pause their Rally Operation to perform Supply and gain more Resources. Supply gains them 1 Resource for each Base in Nairobi, plus one for every other Base that is connected to Nairobi by a path of spaces with either Resistance or a Guerrilla—this includes both Bases in Aberdares and Mount Kenya, for a total of 3 Resources (increase Mau Mau Resources to '3' now). They can then continue spending Resources to Rally, and do so to place one more Guerrilla in Nyeri, removing British Control (reduce Mau Mau Resources to '2' to pay for this).
British decide to Pass, placing their Eligibility cylinder in either of the remaining boxes on the Initiative Track (in this case it doesn't matter which), and shifting the Pipeline Track one step to the right (they could have chosen to move it left instead). We then reset British to 1st Eligible and Mau Mau to 2nd Eligible.
The British pass and increase the severity of their detention system from Emergency Powers (1) to Villagization (2).
Reveal the next card: McLEAN INQUIRY. British decide to perform the Assault Operation with the Reprisal Special Activity. They perform Reprisal first, which can select one Populated space with British Troops (at Pipeline 3 it would be able to select two spaces). They select Nyeri, place a Terror marker there, set it to Neutral (remove the Resistance marker), and move the Active Guerrilla from Nyeri to Mount Kenya (adding British Control to Nyeri). Then they must make an Outrage roll, hoping not to roll lower than the current Pipeline Track value—they roll a 5, so they have gotten away with their abusive behavior…for now.
Next they can Assault in any number of spaces, removing one Active Mau Mau piece per Troop in Provinces, one per two Troops in Mountain Jungles, and one per cube in Nairobi (Bases may only be removed from any space once all Guerrillas there are removed). They remove one Active Guerrilla from Aberdares, two from Mount Kenya, and one from Nairobi.
Mau Mau now decide to perform a Limited March Operation (place their cylinder in the 'Limited Op' box on the Initiative Track). They select Nanyuki as the destination for their March, pay 1 Resource (reduce their Resource cylinder from '2' to '1'), and move two Guerrillas into Nanyuki, one from Thompson's Falls (add British Control there) and one from Nyeri. This replaces British Control with Mau Mau Control in Nanyuki, reducing Political Will by 1 from '12' to '11'. Because Nanyuki is a Populated Non-Reserve space, any Guerrillas moving in would have become Active if the group they were moving with plus the number of cubes in the space exceeded three—however, in this case neither moving Guerrilla meets this threshold so both remain Underground. We then reset Mau Mau to 1st Eligible and British to 2nd Eligible.
Mau Mau Guerrillas March into Nanyuki from both directions.
Reveal the next card: SURRENDER SCHEMES. Mau Mau decide to take advantage of their new Capability and perform the Raid Special Activity with the Terror Operation. They Raid first, which due to the KENYA LAND AND FREEDOM ARMY shaded Capability can select two, rather than one, spaces adjacent to Mountain Jungles. They select Nanyuki and Rift Valley, and move one Guerrilla from each Mountain Jungle to each space (one from Mount Kenya to Nanyuki, one from Aberdares to Rift Valley). Then they can perform a free Limited Operation in each space, Rallying in Nanyuki to remove two Guerrillas and place a Base, and perform Terror in Rift Valley to Activate the Guerrilla and remove the Police cube—setting the space to Mau Mau Control and reducing Political Will from '11' to '10'. They could alternatively have used Raid to move any number of Guerrillas from each space to the Mountain Jungles and flip them Underground, but chose not to.
Next they pay Resources (lower their Resource cylinder from '1' to '0') to also perform Terror in Nairobi, Activating one Guerrilla there to place a Terror marker and shift it to Resistance. They are now out of Resources and cannot perform Terror in any further spaces.
British decide to perform a Limited Relocate Operation in Nyeri. Relocate may select one Populated Reserve Province with British Control (or two at Pipeline 4, none at Pipeline 0 or 1). Nyeri is the only such Province, so they Relocate there, reducing the Population to 1 by placing a '1' value Population marker over the printed value of '2', and then moving a Police cube from Out of Play to Available. Then they must again roll for Outrage, and this time roll a 1, which is lower than the current Pipeline Track of value of 2, meaning that their abuses have been detected and Political Will is reduced by 1 to '9'. We then reset British to 1st Eligible and Mau Mau to 2nd Eligible.
British Relocate in Nyeri to reduce the Population to 1.
Reveal the next card: PSEUDO-GANGS. British decide to perform the Deploy Special Activity with the Reward Operation. They first Deploy in Nairobi, which they can always Deploy to even without British Control, placing two Police there and restoring British Control—increase Political Will by 2, to '11'. They then Deploy in Nyeri, which has British Control—they have no more Available cubes to place, but they can choose to remove cubes from elsewhere on the map to place them here, and they remove the one Police cube in Nanyuki in order to place it in Nyeri. Then they move the two Troops in Nyeri to Fort Hall, replacing Mau Mau Control there with British Control, which increases Political Will by another 2, to '13'.
Finally, they Reward, which can select any one Populated space with British Control. They select Nairobi, remove the Terror there, and shift it one step towards Loyal—back to Neutral (remove the Resistance marker).
Mau Mau have no Resources remaining and they are not interested in taking the Event, so they Pass to gain 1 Resource (increase their Resource cylinder to '1'), and place their Eligibility cylinder in the 'Limited Op' space. We then reset Mau Mau to 1st Eligible and British to 2nd Eligible.
The next card revealed is the PROPAGANDA! card, triggering a Propaganda Round. We work through each phase in turn, starting with the Political Will phase:
- Political Will: Political Will is lowered by a net total of 6 (–6 because there is 6 Population with Resistance and 0 Population with Loyalty), down to '7'. It could also have been lowered by 1 each for any Terror in Nairobi or Non-Reserve Provinces (but there is none), or raised by 2 each if there no Mau Mau pieces in Nairobi or no Bases outside of Mountain Jungles (but neither condition was met). If Political Will was now at 0-2 or 18-20 then Mau Mau or British would win respectively.
- Resources: Mau Mau gain 1 Resource for each Base on the map, in this case 4, increasing their Resource cylinder to '5'.
- Support: British may now Reward, and choose to do so in Nairobi, shifting the space to Loyal (place a Loyal marker). Mau Mau may then Oath, but they are not able to do so as they do not have any Underground Guerrillas in Reserve Provinces.
- Redeploy: British must move all Troops from Mountain Jungles to British Controlled Provinces or Nairobi. They have eight Troops in Mountain Jungles, and they move two to Fort Hall, two to Thompson's Falls, two to Thika, and two to Nyeri. They can then move any Police to British Controlled Provinces or Nairobi, but do not choose to move any. Mau Mau may then free Rally in each Mountain Jungle, and place a Guerrilla in each.
- Reset: Remove all Terror markers from the map. Flip all Guerrillas Underground. British may shift the Pipeline Track one step in either direction, and shift it right to Prison System (3). Then reveal the next card and continue play.
This example of play is now complete. You can continue the current game by constructing the rest of the deck (two stacks of six random Event cards, each with a Propaganda card shuffled in with the bottom two Event cards) and revealing the next Event card. Mau Mau are in a relatively strong position with all of their Bases and most of their Guerrillas on the map, and Resistance in almost every Reserve Province, but the British Pipeline system is kicking into action and they have reestablished Control and Loyalty in Nairobi. As Mau Mau begin to run low on Resources and the Population of the Reserve Provinces is reduced, they may need to begin relying more on the enhanced Raid Special Activity granted by the KENYA LAND AND FREEDOM ARMY Capability. Good luck!
9.0 Event Tips and Background
At the bottom of each Event Background is a chapter number from David Anderson's Histories of the Hanged: The Dirty War in Kenya and the End of Empire to provide even more context for the event. Anderson's book can be easily acquired and does an excellent job covering all major aspects of the conflict such as unrest in Nairobi, fighting in the mountain jungles, and British repression. There are several other books on Kenya that can be relatively easily acquired: Branch's Defeating the Mau Mau on Kikuyu loyalism, Elkin's Imperial Reckoning on British repression, and Bennett's Fighting the Mau Mau on the British army.
K1. Operation Anvil
Nairobi cleared: Remove all Mau Mau pieces from Nairobi and set it to Loyal. Shift the Pipeline 1 step to the right (+1 Political Will per Base removed).
Indiscriminate sweep: Place 2 Mau Mau pieces in Nairobi and shift it 1 level towards Resistance.
Tips: "Mau Mau pieces" includes both Guerrillas and Bases, and Political Will should be increased by 1 for each Base removed with the unshaded text.
Background: Operation Anvil was a massive urban sweep of Nairobi that ultimately screened over 50,000 inhabitants of the city and detained over 24,100 Kikuyu men without trial. Despite the indiscriminate targeting creating resentment among the wrongfully detained, Operation Anvil crushed the Mau Mau in Nairobi and cut off those operating in the forests from a source of arms and supplies (Anderson, Chapter 5).
K2. Jomo Kenyatta
Arrested during Jock Scott: Remove all Guerrillas from Nairobi and shift it 1 level towards Loyal.
Controversial trial: Place 1 Guerrilla in Nairobi and shift it 1 level towards Resistance.
Tips: None.
Background: Jomo Kenyatta was a prominent nationalist striving for independence, associated with the "moderate" nationalists who opposed the militant tactics of the Mau Mau. Kenyatta was arrested at the beginning of the Emergency, during Operation Jock Scott that arrested many of the moderates while the militants escaped to the mountain jungles. Kenyatta remained in prison or exile until the end of the Emergency, and would go on to become the first president of independent Kenya in 1963 (Anderson, Chapters 1 and 2).
K3. Passive Wing — MAU MAU CAPABILITY
Fragile supply lines: Supply requires Mau Mau Control or Resistance in each space between Nairobi and Bases.
Support network: Gain 2 Resources for each Base with Supply.
Tips: The unshaded text means that a Guerrilla without Control or Resistance is not sufficient to establish a path for Supply. The shaded text increases the amount of Resources gained when using Supply, rather than immediately adding any Resources.
Background: The Mau Mau gained widespread support among the Kikuyu. The passive wing was the movement's support base that ran the supply network, particularly between Nairobi and the Mau Mau forces in the mountain jungles of Mount Kenya and Aberdares. They supplied guerrillas with arms, ammunition, recruits, food, money, and intelligence. The British successfully disrupted the supply network in Nairobi with Operation Anvil (Card K1) and in the Kikuyu Reserve with massive relocation of the population into protected villages (Card K27). The severing of supply lines placed the fighters in the mountain jungles in a desperate situation (Anderson, Chapters 5 and 6). Image source: AJ Tattersall, CC-BY.
K4. Lari Massacre
Cycle of killings: Place a Terror marker in 1 Province and set it to Neutral, then the other player may place either a Guerrilla or Police there.
Tips: Either player might choose to use this event, as its effects are potentially useful for both of them.
Background: The settlement of Lari possessed a Home Guard (Card K6) unit, who were out patrolling one night when a large group of Mau Mau carried out a massacre among loyalist families in the village, killing or wounding over a hundred of the residents. Reprisals against those suspected of supporting the Mau Mau followed the massacre, resulting in an estimated total of four hundred killed. The cycle of massacre and retribution at Lari illustrates the evolution of the conflict into an increasingly violent civil war among Kikuyu, occurring alongside the Mau Mau's struggle for independence (Anderson, Chapter 4).
K5. Legal Zones — BRITISH CAPABILITY
Prohibited areas expand: Air Strike may select up to 2 spaces.
Prohibited areas restricted: Air Strike may only select Mountain Jungle spaces.
Tips: Air Strike may still only select Provinces or Mountain Jungle spaces if the unshaded capability is in effect.
Background: The British designated areas as 'Prohibited Areas' where anyone could be shot on sight by security forces and subjected to less restricted area bombing. Prohibited areas were expanded to both Aberdares and Mount Kenya mountain jungles, and some populated areas within the Kikuyu, Embu and Meru Reserves even received these designations. However, many areas in the Reserves were designated 'Special Areas' where there were more restrictions on the use of force (Anderson, Chapter 6).
K6. Home Guard
Protect reserves: Place 3 Police from anywhere (even Out of Play) into British Controlled Reserve Provinces.
Abuses create recruits: Replace each Terror marker in Reserve spaces with a Guerrilla.
Tips: None.
Background: The British encouraged the formation of Home Guard units among Kikuyu loyalist communities (Card K29). The Home Guard also contributed most of the static defenders for the protected villages (Card K27) created by villagization. Although the Home Guard greatly expanded the manpower available to the British, they also fueled the civil war among the Kikuyu population, and abuses by members of the Home Guard drove many to join the Mau Mau (Anderson, Chapter 6).
K7. Pseudo-Gangs — BRITISH CAPABILITY
Former guerrilla trackers: In Mountain Jungles, Sweep activates 1 Guerrilla per cube and removes 1 Guerrilla.
Additional training: British Deploy places Cubes or moves Troops, not both.
Tips: The Guerrilla removed by the unshaded Capability effect may be Underground.
Background: The British used pseudo-gangs in many of their counterinsurgency campaigns. Pseudo-gangs utilized former insurgents who helped security forces track down their former comrades in remote areas. Frank Kitson was instrumental in organizing pseudo-gangs in Kenya and wrote a memoir of his experiences, Gangs and Counter-gangs. The pseudo-gangs quickly produced results in lowering Mau Mau activity, including the elimination of many Mau Mau leaders. In 1956, they were used to eventually capture Dedan Kimathi (Card K22), one of the final KLFA leaders evading the British (Anderson, Chapter 6).
K8. Evelyn Baring
Declares emergency: Shift the Pipeline 1 step to the right. Deploy or Sweep in 2 spaces.
Revolt spreads: Mau Mau may place 1 Guerrilla each in any 2 Provinces.
Tips: The unshaded effect allows British to select two spaces and decide separately whether to Deploy or Sweep in each.
Background: Evelyn Baring was the Governor of Kenya who declared the Emergency in October 1952 and launched Operation Jock Scott. Jock Scott resulted in the arrest of many moderate nationalists, such as Jomo Kenyatta (Card K2), but failed to arrest militant nationalists, such as Dedan Kimathi (Card K22), who fled to the mountain jungles to further organize armed units. Baring was confident that the Emergency would be over 'in a few weeks', but the Mau Mau simply continued to expand (Anderson, Chapter 2).
K9. George Erskine
New operational plan: British may conduct 2 Limited Operations, then may shift Pipeline 1 step the left.
Fails to halt abuses: Lower Political Will by 1 if there is any space with Troops and Terror.
Tips: The two Limited Operations granted by the unshaded text may be of different types, are carried out one after the other, and may potentially use the same pieces twice.
Background: General George Erskine took over as Commander-in-Chief of East Africa Command in 1953. Erskine hoped to gain the combined civilian and military powers that Sir Gerald Templer had possessed during the Malayan Emergency (see The British Way: Malaya), but the Colonial Office refused, thinking the situation did not require such drastic measures. Erskine would revitalize the military effort in Kenya, push for policies that encouraged Kikuyu loyalism (Card K29), and attempted to curb abuses committed by the settlers (Card K17) and security forces (Card K25) against Kikuyu communities (Anderson, Chapter 4 and 6).
K10. Weapon Shortage
Mau Mau barely armed: Remove 1 Guerrilla from each space with more than 2.
Police station raid: Mau Mau may place up to 2 Guerrillas in 1 space with Police.
Tips: None.
Background: Weapon shortages plagued the Mau Mau and their armed wing, the KLFA (Card K31). Leaders of the movement believed the Emergency began at least one year too soon, before enough arms could be collected. Although the Mau Mau managed to collect arms through attacks on police outposts, raids on settler homes in the white highlands, and their supply network in Nairobi, they still remained one of least well-armed post-WWII independence movements (Anderson, Chapter 2).
K11. Swynnerton Plan — BRITISH CAPABILITY
Land to loyalists: Reward may select 2 spaces.
Limited reforms: Each Reward, Mau Mau may place 1 Guerrilla in a Mountain Jungle.
Tips: None.
Background: The British offered many rewards to Kikuyu loyalists who cooperated with them against the Mau Mau. Loyalists received land, cattle, and positions of power, frequently taken from families accused of being sympathetic to the Mau Mau. The British also tolerated abuses by loyalist units and officials, such as those in the Home Guard (Card K6), who utilized their position for personal gain. The Swynnerton Plan was a systematic method of rewarding Kikuyu loyalism through a major agricultural development program. Convicted Mau Mau rebels and suspected sympathizers were generally excluded from the benefits of the plan, while loyalists often gained the most (Anderson, Chapter 7).
K12. Hooded Men
Identify Mau Mau: Activate all Guerrillas in 2 Provinces.
Informers eliminated: In 1 space with Mau Mau and Police, remove 1 Police and set the space to Resistance.
Tips: A space "with Mau Mau" is any space containing at least one Guerrilla or Base.
Background: The practice of hooded informants or gikunia was developed to allow loyalists or informants to identify Mau Mau activists while theoretically not revealing their identity as the one supplying information to the British. If the identity of the informant was revealed, they would be brutally targeted by the Mau Mau to discourage others from collaborating with the British (Anderson, Chapter 5).
K13. Ruck Family Killed
Galvanize settlers: Set 1 Non-Reserve Province to Loyal then place up to 2 Police there from Available.
Settlers demand troops: Mau Mau may move British Troops from 1 space to any Non-Reserve Province.
Tips: The shaded effect may move any number of British Troops from 1 space.
Background: The killing of the Ruck family exemplified the brutality of Mau Mau terror attacks on settlers in the white highlands. The entire family, including the family's young son Michael, were killed while their house was ransacked for weapons and supplies. The slaying of the family emboldened the settler community to demand harsher methods against the Mau Mau and their support base among the Kikuyu population (Anderson, Chapter 3).
K14. Waruhiu Itote
Convinces others to surrender: Remove 1 Guerrilla from each Mountain Jungle.
General China: Place a Base and a Guerrilla in 1 Mountain Jungle.
Tips: None.
Background: Waruhiu Itote, also known as 'General China', led Mau Mau forces in Mount Kenya. Itote had prior military experience serving in the British army during WWII in Burma against the Japanese. 'General China' was eventually captured by British forces and worked with them to convince other Mau Mau groups to surrender (Card K20). As with other insurgent leaders in The British Way, Itote's memoir 'Mau Mau' General gives an insider account of the Mau Mau's perspective (Anderson, Chapter 6).
K15. Nairobi
Urban screening: British place up to 4 cubes in Nairobi then Sweep there.
General strike: Mau Mau place 1 Guerrilla in Nairobi then free Terror there.
Tips: None.
Background: Nairobi faced major strikes that paralyzed the city in the years leading up to the Emergency. Unrest and oathing (Card K28) would spread to the Eastlands, a Kikuyu dominated area of Nairobi, in the early years of the conflict. The police launched frequent sweep operations that disrupted daily life and angered many residents due to their indiscriminate nature. The Mau Mau networks in Nairobi would only be decisively crushed with the massive Operation Anvil (Card K1) in April 1954 (Anderson, Chapter 5).
K16. King's African Rifles
Experienced troops: British place 4 Troops in 1 space then conduct a Limited Operation there.
Abuse local population: Set 1 Province with Troops to Resistance and place a Terror marker there.
Tips: None.
Background: The King's African Rifles (KAR) consisted of African troops from Britain's colonies in East Africa. The regiment had experience serving in WWI and WWII, but had also served in punitive operations in East Africa during the early 20th century, quelling uprisings in Kenya and Uganda that involved significant violence against civilians. During the Emergency, investigations were conducted into several instances of excesses by KAR units, eventually leading to the McLean Inquiry (Card K25), a broader investigation of the army's conduct during the Emergency (Anderson, Chapter 6).
K17. Kenya Police Reserve
Settler police: Place 1 Police from anywhere (even Out of Play) into each Non-Reserve Province.
Vigilante counter-terror: Remove 1 Guerrilla in each Non-Reserve Province to set it to Resistance.
Tips: Neither effect may select Mountain Jungle or Reserve Provinces. If the shaded effect is selected, 1 Guerrilla must be removed from each Non-Reserve Province if possible, then each Province where a Guerrilla was removed is set to Resistance.
Background: Large numbers of the white settlers served as police in the Kenya Police Reserve (KPR). Although the expansion of the KPR addressed police manpower issues, the settlers were often difficult to control. Many KPR units carried out reprisals against communities or individuals suspected of supporting the Mau Mau. The abuses of the KPR contributed to General Erskine's (Card K9) distrust of the settler community (Anderson, Chapter 3).
K18. Operation Blitz
Prohibited area sweep: British Sweep into 1 Mountain Jungle and then Air Strike there.
Guerrillas slip away: Flip all Guerrillas in Mountain Jungles Underground.
Tips: None.
Background: The British launched many large scale sweep operations, such as Operation Blitz, against the Mau Mau in the mountain jungles. These sweeps were often accompanied by extensive bombardments by RAF aircraft. Although these operations would wear down Mau Mau forces and push them deeper into the jungle away from their connections with the population, they often failed to make contact with the guerrillas. Much of the bombing also failed to hit the guerrillas, but would drive them toward security forces (Anderson, Chapter 6).
K19. 'One-Mile Strip'
Contain guerrillas to forest: Remove 1 Base (+1 Political Will) from a Mountain Jungle with British pieces in every adjacent space.
Population removal resented: Set a Reserve Province to Resistance.
Tips: British would gain +1 Political Will if they remove a Base with the unshaded text.
Background: Complementing the British strategy of villagization that forcibly relocated the Kikuyu population into protected villages (Card K27), the British cleared an area, by digging enormous ditches fortified by Home Guard posts, between the mountain jungles and populated communities, effectively cutting off the KLFA (Card K31) from supplies and recruits in the Kikuyu Reserve. The advantages of the sparsely populated vast mountain jungles turned into a disadvantage once the insurgents became isolated from their support base (Anderson, Chapter 6).
K20. Surrender Schemes
'Green Branch' program: Remove 1 Guerrilla each from up to 2 spaces with Guerrillas and Troops.
Distrust and reject: Mau Mau free Rally in 2 spaces.
Tips: The spaces selected for free Rally with the shaded effect must still obey the usual restrictions (no Non-Reserve Support spaces).
Background: The British attempted several surrender schemes to induce mass surrenders from the Mau Mau forces in the mountain jungles. Some schemes used former Mau Mau, such as Waruhiu Itote (Card K14), to convince their comrades to surrender. However, at Gatamuki, a group of guerrillas waiting to surrender were outside the designated cease-fire area and were attacked by British forces. The mistake at Gatamuki convinced many Mau Mau that the surrender schemes were simply traps to draw them out (Anderson, Chapter 6).
K21. 'Shot While Escaping'
Captured rebels provide info: British Assault in 1 space then reveal all Guerrillas there.
Dead men cannot talk: Remove 1 Mau Mau Guerrilla with Troops to flip all Guerrillas Underground.
Tips: None.
Background: 'Shot while escaping' was a common excuse used by soldiers in many counterinsurgency campaigns to avoid the consequences for executing prisoners. These excesses were common in the settler dominated KPR units (Card K17), but also in regular army units. Although few faced punishment for their actions, pressure from command did attempt to quell the practice, given the potential intelligence that could be gained from living prisoners (Anderson, Chapter 6).
K22. Dedan Kimathi
Tried and hanged: Remove 1 Base from a British Controlled space (+1 Political Will).
KLFA Field Marshall: Mau Mau may conduct 2 free Limited Operations.
Tips: British would gain +1 Political Will if they remove a Base with the unshaded text. The two free Limited Operations granted by the shaded text may be of different types, are carried out one after the other, and may potentially use the same pieces twice.
Background: Kimathi was one of the key Mau Mau leaders of the KLFA (Card K31) operating in the Aberdares mountain jungle, and made several attempts at centralizing KLFA leadership into a more organized command structure. He is seen by many as the heroic figure of the Mau Mau movement. In 1956, Kimathi was wounded and captured by a pseudo-gang (Card K7) operation led by Ian Henderson. In 1957, he was tried and hanged, one of the nearly 1,100 Kikuyu men hanged for Mau Mau offenses during the conflict. The transcript of Kimathi's trial has been preserved and even converted into a play, The Trial of Dedan Kimathi (Anderson, Chapters 6 and 7).
K23. Mass Evictions
Removed from Highlands: Set 2 Non-Reserve spaces to Loyal. Shift the Pipeline 1 step to the right.
Forced into the Reserve: Replace 1 Population removed by Relocate, then place a Guerrilla in the space selected.
Tips: The shaded effect increases by 1 the Population value of a Reserve space where the Population was previously reduced with Relocate (either to 1 or 0), and then places a Guerrilla there.
Background: An estimated 70,000 to 100,000 Kikuyu left the white highland areas, where they were previously laborers, to return to the Kikuyu Reserve areas of Kiambu, Nyeri and Murang'a. Many were forced to return through mass evictions. Although the removal of Kikuyu from the white highlands made it harder for the Mau Mau to operate there, the displacement of large numbers of young men led many to join the Mau Mau forces in the mountain jungles (Anderson, Chapter 2).
K24. Labour Party
Pushes for reforms: British Deploy then Reward.
Exposes repression: Lower Political Will by the current Pipeline value then shift the Pipeline 1 step to the left.
Tips: None.
Background: Several Labour Party Members of Parliament (MPs) investigated and published accounts of British atrocities in Kenya, with many focusing on abuses in the 'pipeline' detention system (Card K26). MP Barbara Castle, depicted on this card, was particularly outspoken against excesses in Kenya. These investigations overcame attempts by the colonial government to deemphasize the amount of violence and coercion being used (Anderson, Chapter 7).
K25. McLean Inquiry
Officers held accountable: Increase Political Will by 2 and shift the Pipeline 1 step to the left.
Atrocities continue: Roll for Outrage but lower Political Will by 2 if the result is less than the Pipeline value.
Tips: None.
Background: The McLean inquiry was a broad investigation of army excesses during the tenure of General Erskine (Card K9), who attempted to improve the discipline and restraint of the army. The inquiry was also intended to appease demands by groups in Britain such as the Movement for Colonial Freedom and Labour Party MPs (Card K24), who were critical of British conduct in Kenya. Although several incidents were identified, the inquiry generally concluded favorably on the army's conduct in Kenya. However, there were also several restrictions on its ability to investigate, limiting the inquiry's overall effectiveness (Anderson, Chapters 6 and 7).
K26. Hola Detention Camp
Brutal detention center: Remove 1 Base from a space with Troops (+1 Political Will). Then Roll for Outrage but lower Political Will by 2 if the result is less than the Pipeline value. Shift the Pipeline 1 step to the right.
Tips: Either player may choose to use this event, but must implement it to the maximum extent possible. British would gain +1 Political Will if a Base is removed. Only shift the Pipeline to the right after making the Outrage roll.
Background: Many of the British detention camps in Kenya had harsh conditions, with prisoners facing beatings and torture. This was even more true of the camps imprisoning the perceived 'hardcore' members of the movement. In 1959, Hola Detention Camp received significant attention back in Britain from the news that eleven detainees had been beaten to death by camp guards. After multiple investigations, there were widespread condemnations of the violent methods being used in Kenya, not only by the usually critical Labour Party MPs (Card K24), but also by defenders of the empire such as Enoch Powell (Anderson, Chapter 7).
K27. Protected Villages
Rapid relocation: Shift the Pipeline 1 step to the right, then British may Relocate in up to 2 spaces.
Infiltrated by Mau Mau: Replace 1 Population removed by Relocate, then place a Guerrilla in the space selected.
Tips: The shaded effect increases by 1 the Population value of a Reserve space where the Population was previously reduced with Relocate (either to 1 or 0), and then places a Guerrilla there.
Background: As with the New Villages in Malaya and concentration camps during the Boer War, the British forcibly relocated Kikuyu, Embu, and Meru communities into 'protected villages' in an effort to control the population and deny the Mau Mau in the mountain jungles support from the passive wing (Card K3). Over a period of only fifteen months, over one million people were resettled. Conditions in the villages were often poor, particularly for communities suspected of being sympathetic to the Mau Mau. Home Guard (Card K6) units were formed to guard the villages, but they often abused those they were instructed to protect. Some accounts argue that the forced resettlement of the population was the 'master stroke' in defeating the Mau Mau (Anderson, Chapter 6).
K28. Oathing Ceremonies — MAU MAU CAPABILITY
'Vomiting the Oath': Oath may not select British Controlled spaces.
Widespread oathing: Oath may select up to two Populated spaces.
Tips: If the shaded capability is in effect Oath may select Nairobi and Non-Reserve Provinces, in addition to Populated Reserve Provinces.
Background: The Mau Mau's use of oathing ceremonies to secure their support base and recruit new members was one of the most prominent aspects of the conflict. Oathing ceremonies often involved coercion and violence, with many taking oaths under duress. Oathing spread rapidly across the Kikuyu communities throughout the Central Province and Nairobi. The British attempted to develop counteroaths, where the participants would "vomit" their original oath to signal their loyalty. Organizing counteroathing ceremonies generally also involved significant coercion, since many feared subsequent Mau Mau reprisals if they participated (Anderson, Chapters 1, 5, and 6).
K29. Kikuyu Loyalism
Join British: Place 3 Police from anywhere (even Out of Play) into British Controlled Reserve Provinces.
Targeted by Mau Mau: Mau Mau may free Terror in up to 2 spaces.
Background: Many Kikuyu cooperated with the British against the Mau Mau as loyalists. Kikuyu loyalists consisted of diverse groups with different reasons for choosing to oppose the Mau Mau: those who had already benefited from British rule, those seeking revenge for violence committed by the Mau Mau, and those who saw loyalism as a way to gain benefits while avoiding British coercion. Another source of loyalists were those who opposed British rule, but disliked the violent strategy taken by the Mau Mau. It has been claimed that the term 'Mau Mau' originated with a Kikuyu loyalist complaining about the militant nationalists desire to do everything 'very quickly' (with the term deriving from a Kikuyu phrase). Regardless of their motives, loyalists served in large numbers in the Home Guard (Card K6) and assisted the British with local administration. They were violently targeted by the Mau Mau, whether as individuals (Card K30) or entire communities (Card K4), to deter others from supporting the British (Anderson, Chapters 4 and 6).
K30. Chiefs Murdered
Popular chiefs killed: Set a Resistance space to Loyal and place a Police there from Available.
Waruhiu wa Kung'u killed: Remove 1 Police from a space with Mau Mau to set the space to Resistance.
Tips: If the shaded effect is selected, 1 Police must be removed in order to set the space to Resistance.
Background: The Mau Mau targeted chiefs loyal to the British to discourage Kikuyu loyalism (Card K29). The killing of Senior Chief Waruhiu wa Kung'u in October 1952 was the spark that ultimately led to the Emergency declaration a few days later. Mau Mau attacks against popular chiefs could also backfire and drive communities to support the British instead (Anderson, Chapter 2).
K31. Kenya Land and Freedom Army — MAU MAU CAPABILITY
Hungry and desperate: Mau Mau no longer free Rally during the Redeploy phase.
Evade British: Raid may select up to 2 spaces.
Tips: None.
Background: The Kenya Land and Freedom Army (KLFA) was the official name of the armed groups operating in the mountain jungles. However, the KLFA was never a unified army, due to communication and coordination difficulties, but instead several smaller groups commanded by largely independent leaders such as Waruhiu Itote (Card K14) and Dedan Kimathi (Card K22). The KLFA avoided British forces and generally launched raids from the mountain jungles against Home Guard (Card K6) outposts and other isolated targets (Anderson, Chapter 6).
K32. Racist Propaganda
Dehumanize enemy: Increase Political Will by 1. Relocate or Reprisal in 1 space with no Roll for Outrage.
British atrocities revealed: Lower Political Will by the Pipeline value.
Tips: None.
Background: British propaganda against the Mau Mau exploited many of their brutal attacks against settlers such as the Ruck family (Card K13), or against Kikuyu loyalist as at Lari (Card K4), to depict the Mau Mau in racist frames as bloodthirsty savages. The racist framing was intended to deny that the Mau Mau possessed serious political grievances, and to deflect criticisms of the brutal methods used to crush the movement. Although the British succeeded in altering many external viewers' perception of the Mau Mau, they failed to distract journalists and members of the British Labour Party (Card K24) from their own atrocities (Anderson, Chapter 6).
K33, K34, K35. Propaganda
Background: Although the British forces had crushed the Mau Mau insurgency by 1956 and captured the last major Mau Mau leader in the mountain jungles (Card K22), repression of the Kikuyu population in the detention camps continued for several more years (Card K26). After negotiating with moderate nationalist leaders, the British granted independence in 1963. The newly independent Kenya was led by Jomo Kenyatta (Card K2), depicted on the Propaganda cards. After taking power, Kenyatta encouraged a collective silence on the Mau Mau movement, although many decades later they would become celebrated in Kenya as national heroes (Anderson, Chapter 8).
Kenya — Strategy Guide
By Joe Dewhurst
This strategy guide consists of some general advice for both players and then some specific tips for playing each Faction, and is intended to help get you started rather than explaining everything about the game. Much of the enjoyment of playing will come from exploring and developing these strategies yourself, and of course I need to keep some tricks up my sleeve in case we ever end up on opposite sides of the table.
General Advice
Have a plan – Each campaign (the sequence of Event cards leading up to a Propaganda Round) only lasts an average of six Event cards, meaning that you only should expect to get approximately three full Operation + Special Activity turns per campaign. This doesn't give you much time to get things done, so you should begin each campaign with a plan for what you want to achieve, and only divert from it if there is something more important you need to respond to, or if a better opportunity arises from the Event cards (although beware the allure of these, often they are not your best option).
Keep your eyes on the prize – The game is ultimately a struggle for Political Will, and you should carefully study the various ways in which this can be raised and lowered (these are summarised on both Faction player aids, and on the Propaganda Round aid sheet). Some of these have immediate effects and can often be very attractive, but in the long-term the Propaganda Round effects are likely to have a greater impact, and you should make sure that you are always working towards achieving these.
Master the one-two punch – The structure of the Initiative Track means that if you perform a Limited Operation on one turn you are guaranteed to be able to perform a full Operation + Special Activity on the next turn (unless the Propaganda card is drawn). This means that you can use a Limited Operation on one turn to set yourself up for a powerful action on the next—and remember that the British can also use a Limited Deploy to move Troops to an additional non-Mountain Jungle space.
Mau Mau Tips
Take the initiative – The British may seem overwhelmingly powerful, but they can't handle everything at once, and an early burst of activity can be hard for them to deal with. Consider opening the game with a widespread recruitment drive (Rally + Oath) or a sudden surprise attack (Terror + Raid), and then maintain pressure while the British scramble to clean this up.
Operate within your means – Resources will be very scarce for you throughout the game, and you need to make every Operation count. Take advantage of Oath, and especially Raid, later on in the game, to add Resistance or Terror without spending any Resources. Look out for the Capabilities that enhance these Special Activities, and double down on the corresponding Special Activity if you can get one of these Capabilities into play.
Keep the British down – Aside from removing your Control (which is only a temporary measure), it is relatively hard for the British to regain Political Will, so make sure to block any opportunity for them to recover Political Will by maintaining presence in Nairobi and a Base outside of the Mountain Jungles. However, also make sure you know when to cut your losses!
British Tips
Protect the settlers – Terror markers in Nairobi and Non-Reserve Provinces will inflict additional hits to Political Will, so protect these spaces if you can, forcing the Mau Mau to focus instead on Reserve Provinces where their actions will be less effective.
Maintain pressure – Your opponent is heavily constrained by their limited Resources, while you do not have to worry about Resources at all. If you can get them on the back foot, keep them there. Sweep early and often to force them to spend their Resources Rallying, and remove their Bases so they will struggle to gain more Resources.
Secure the Reserves – The Relocate Operation allows you to remove Population from Reserve Provinces, rendering Mau Mau activity there ineffectual, while also unlocking additional Police for you to use elsewhere. If you can drive them out of the Reserve Provinces and into the Mountain Jungles, then you are already close to winning.
Kenya — Key Terms Index
Accompanying: Operation required for a Special Activity. (4.1.1)
Activate: Flip Guerrillas Active. (1.4.3)
Active Pieces: Troops, Police, Active Guerrillas (symbol end up), and Bases. (1.4.3)
Adjacent: Spaces next to each other for actions or Events. (1.3.6)
Air Strike: British Special Activity to remove Active Mau Mau pieces. (4.2.3)
Assault: British Operation to remove Active Mau Mau pieces. (3.2.4)
Available: Pieces in Available boxes, waiting to be placed. (1.4.1)
British: A Faction committed to maintaining British influence in Kenya. (1.5)
British Political Will: Marker on edge track indicating British commitment to Kenya, position determines victory. (1.10, 7.0)
Campaign: Event card series leading up to an Propaganda Round. (2.4)
Control: More friendly pieces than enemy pieces in a space. (1.7)
Cube: British Troops or Police piece. (1.4)
Cylinder: Token to mark a Faction's current Resources (1.8, Mau Mau only) or Eligibility on the Initiative Track. (2.3)
Deploy: British Operation to place cubes and rapidly move Troops. (3.2.1)
Dual Use: Event with two alternative effects. (5.2)
Event: Card with text a Faction may execute. (5.0)
Execute: Implement Event or conduct Operation or Special Activity. (2.3)
Faction: Player role: British or Mau Mau. (1.5)
Flip: Switch Guerrillas between Underground and Active. (1.4.3)
Forces: Troops, Police, Guerrillas, and Bases. (1.4)
Friendly: Forces belonging to the executing Faction. (1.4)
Guerrilla: Mobile Mau Mau forces that are required for several Operations and Special Activities, and may be Underground or Active. (1.4)
Initiative Track: Track indicating which Faction is 1st and 2nd Eligible, and to mark actions performed on an Event card. (2.3)
Limited Operation: Operation in one space with no Special Activity. (2.3.4)
Loyalty: A space's Population favoring the British. (1.6)
March: Mau Mau Operation to move Guerrillas to adjacent spaces. (3.3.2)
Mau Mau: A Faction committed to ending British rule of Kenya and redistributing land. (1.5)
Mountain Jungle: Unpopulated rural space that provides a safe haven for Mau Mau Guerrillas. (1.3.3)
Nairobi: Urban space. (1.3.4)
Oath: Mau Mau Special Activity to place Guerrillas and shift Reserve Provinces towards Resistance. (4.3.2)
Operation (Op): Core action a Faction takes with its pieces. (3.0)
Out of Play: Holding box for Police that are unavailable to the British at the start of the game but may be released by Relocate and some Events. (1.3.5)
Outrage: Roll made against Pipeline Track, with Political Will reduced by one if result is lower than Track value. (6.6.3)
Pass: Forego the action in the selected Initiative Track box to gain Resources (Mau Mau) or shift the Pipeline Track (British). (2.3.3)
Pawn: A token to designate spaces selected for Operation or Special Activity. (3.1.1)
Phase: Part of a Propaganda Round. (6.0)
Place: Move a piece from Available to the map. (1.4.1)
Pipeline Track: Track indicating the severity of British policy in Kenya, determining the number of spaces that may be selected for Relocate and Reprisal, and increasing the chance of Outrage. (6.6)
Police: British forces that provide static defenses. (1.4)
Political Will Phase: Propaganda Round phase in which British Political Will is adjusted and victory is checked. (6.1)
Populated: Any map space with a Population value greater than 0; a space with 0 Population is Unpopulated. (1.3.2, 1.3.3, 1.3.4)
Propaganda Round: Interruption to usual play, during which Political Will is adjusted, victory is checked, and other status phases are carried out. (6.0)
Province: Rural space, either Reserve or Non-Reserve. Reserve Provinces may also become Unpopulated. (1.3.2)
Raid: Mau Mau Special Activity to strike from Mountain Jungles or retreat into them. (4.3.3)
Rally: Mau Mau Operation to place new Guerrillas and Bases, or flip Guerrillas Underground. (3.3.1)
Redeploy Phase: Propaganda Round phase in which the British move pieces and Mau Mau free Rally in Mountain Jungles. (6.4)
Relocate: British Operation to reduce Population of Reserve Provinces and release Police from Out of Play. (3.2.2)
Remove: Take from the map and return to Available. (1.4.1)
Replace: Remove pieces to place others in their stead. (1.4.1)
Reprisal: British Special Activity to place Terror, set Populated spaces to Neutral, and relocate one Guerrilla to an adjacent space. (4.2.2)
Reset Phase: Propaganda Round phase to ready for the next card. (6.5)
Resistance: A space's Population favoring the Mau Mau. (1.6)
Resources: Mau Mau Faction's wherewithal for Operations and other actions. (1.8)
Resources Phase: Propaganda Round phase in which the Mau Mau may gain Resources. (6.2)
Reward: British Special Activity to remove Terror and shift Populated spaces towards Loyalty. (4.2.1)
Shaded: 2nd choice of Dual-Use Event, typically favors Mau Mau. (5.2)
Space: A map area holding pieces in play: Provinces, Mountain Jungles, and Nairobi. (1.3.1)
Special Activities: Actions accompanying Operations; unique to each Faction. (4.0)
Stacking: A limit of two total on Bases that can occupy a space. (1.4.2)
Supply: Mau Mau Special Activity to gain Resources. (4.3.1)
Support Phase: Propaganda Round phase in which British may Restore and Mau Mau may Oath. (6.3)
Sweep: British Operation to move Troops to adjacent spaces and Activate Guerrillas. (3.2.3)
Target: Faction or piece that is the object of an action. (3.1, 4.1)
Terror: Mau Mau Operation that places Terror markers and shifts spaces towards Resistance, or removes Police. (3.3.3)
Terror marker: Placed by Terror Operations, Reprisal Special Activity, and some Events. (1.9)
Troops: Mobile British forces that may Sweep and Assault. (1.4)
Underground: Guerrilla, symbol end down: not usually subject to removal from Assault and capable of Terror and Oath. (1.4.3)
Unshaded: 1st choice of Dual-Use Event, typically favors British. (5.2)
Kenya — Setup Instructions (2.1)
Kenyan Emergency: 1952-1956
Deck Preparation. Gather the Kenya Event cards, remove the three Propaganda cards, and shuffle the remaining cards. Form three piles of 6 regular Event cards and set aside the remaining 14 regular Event cards (they will not be used). In each pile, shuffle a Propaganda card with 2 of the Event cards and place these 3 cards under the remaining 4 Event cards. Stack the resulting three 7 card piles to form the complete Event Deck of 21 cards.
NOTE: Mau Mau use only four red discs for Bases, and British only use 10 tan Troops cube. The fifth red disc and 5 additional tan cubes can be set aside. All other wooden pieces are used in Kenya.
Set up the map as follows (see back page of this booklet for a full setup diagram):
- Resources: Mau Mau 8
- Pipeline: Emergency Powers (1)
- British Political Will: 12
- Initiative: Mau Mau 1st Eligible, British 2nd Eligible
Available:
- Mau Mau—1 Base, 7 Guerrillas
- British—4 Troops
Out of Play: British—8 Police
Nairobi: British Control, Neutral; Mau Mau—1 Base, 1 Guerrilla; British—2 Troops, 3 Police
Kiambu, Fort Hall, Nyeri, Embu, and Meru: Mau Mau Control, Neutral; Mau Mau—1 Guerrilla
Aberdares and Mount Kenya: Mau Mau Control; Mau Mau—1 Base, 1 Guerrilla
Rift Valley and Nanyuki: British Control, Neutral; British—2 Troops, 1 Police
Thompson's Falls and Thika: British Control, Neutral; British—1 Police
Cyprus
The British Way: Cyprus 1955-1959 — Rules of Play, 2nd Edition. Designed by Stephen Rangazas.
1.0 Introduction
The British Way: Cyprus is a game in The British Way COIN multipack. Alongside its accompanying games Palestine, Malaya, and Kenya, this historical simulation strives to depict Britain's attempts to "manage" the emergencies, as the British referred to them, in their colonies during the period of decolonization that swept the world after WWII.
The British Way: Cyprus focuses on the British counterinsurgency effort against the Greek Cypriot EOKA insurgency from November 1955 to the signing of the London-Zürich Agreements in 1959 that established the Republic of Cyprus as an independent state. EOKA (Ethniki Organosis Kyprion Agoniston, or the National Organization of Cypriot Fighters) sought to force Britain into granting enosis, or union with Greece, and was not satisfied by the offer of an independent Cyprus. The game focuses on the counterinsurgency and counter-terrorism aspects of British operations against EOKA in Cyprus.
The historical simulations that comprise The British Way multipack are designed to depict the full range of strategies used by the British during these conflicts, ranging from the more benevolent but still coercive provision of material benefits through pacification programs to the horrific measures used to gain control over the local population. Although many myths have arisen about an enlightened British approach to counterinsurgency that avoids large-scale violence and focuses on winning the population's 'hearts and minds', new scholarship on these conflicts have confirmed the brutality of the methods commonly used. This volume is intended to help synthesize and present this crucial scholarship, even if the simulations depicted are at times more unpleasant than fun. The main goal is that players find these thought-provoking and the gameplay encourages them to seek out the discussion of sources and historical background material in the Event notes and Campaign booklet.
1.1 General Course of Play
In The British Way: Cyprus, one Event card at a time is revealed from the shared draw deck, and both players will have an opportunity to either execute that Event or perform an Operation from a unique menu, possibly adding a Special Activity. Propaganda cards mixed in with the Event cards provide periodic interruptions where the general board state is assessed and British Political Will is adjusted, possibly triggering an instant EOKA victory, after which both players receive an opportunity to collect additional assets and redeploy their forces.
1.2 Components
The following components from the multipack are required to play The British Way: Cyprus:
- A 17"x22" mounted Cyprus game board (1.3).
- A deck of 35 Cyprus cards (5.0).
- 6 blue cubes ('Police'), 12 tan cubes ('Troops'), 12 red embossed octagonal cylinders ('Cells'), 4 flat red discs ('Arms Caches'), 2 embossed cylinders (one blue and one red)—note that this is fewer than the total number of wooden pieces included in The British Way multipack; any excess should be set aside while playing Cyprus.
- Three black and five white pawns (3.1.1).
- Specific markers from the countersheet: 1x Political Will, 1x International Opinion, 4x Curfew, 9x Intel, 15x Sabotage/Terror, 8x Capability—all other markers should be set aside while playing Cyprus.
- Two player aid sheets.
- One Propaganda Round aid sheet.
- Two six-sided dice (one red, one blue).
- This rules booklet.
1.3 The Map
The map shows the island of Cyprus, divided into several kinds of map spaces.
1.3.1 Map Spaces. Map spaces include Towns, Mountains, and British Bases (sometimes just called 'Bases'). All map spaces can hold forces (1.4).
1.3.2 Towns. The six lightly-shaded large irregular spaces represent inhabited urban or semi-urban areas of Cyprus. They are each marked with a number (either '1' or '2') to indicate the value of Sabotage in these spaces during the Political Will phase of the Propaganda Round (6.1).
DESIGN NOTE: Nicosia is the capital of Cyprus and also possessed some British military facilities. Karpas was part of Famagusta district at the time but is separated given the geographic size of the district.
1.3.3 Mountains. The two dark-shaded large irregular spaces (Troodos and Kyrenia) represent largely uninhabited mountainous areas of Cyprus. They are each marked with a number '0' to indicate that Sabotage in these spaces has no effect during the Political Will phase of the Propaganda Round (6.1).
DESIGN NOTE: The EOKA insurgent movement split itself into Mountain and Town cells. The Mountain based cells focused on launching a standard insurgency to relieve pressure from the towns. Town cells emphasized conducting urban sabotage operations and public demonstrations to humiliate Britain.
1.3.4 British Bases. The two large circular areas (Dhekelia and Akrotiri) represent British military bases that were a major target of EOKA operations. They are each marked with a number '2' to indicate the value of Sabotage in these spaces during the Political Will phase of the Propaganda Round (6.1). Arms Caches (1.6.2) may never occupy British Bases.
1.3.5 Adjacency. Adjacency affects the movement of forces and implementation of certain Events (5.0). Any two spaces that border one another are adjacent.
EXAMPLE: British Troops in Famagusta are adjacent to the Karpas, Nicosia, and Larnaca Town spaces, both Mountain spaces (Kyrenia and Troodos), and the Dhekelia Base space.
1.3.6 Prison. The Prison box is where EOKA Cells are placed when removed through Patrol (3.2.2), Assault (3.2.4), or some Events (5.0). Half the Cells in Prison, rounded down, are returned during the Reset Phase of the Propaganda Round (6.4).
DESIGN NOTE: The Prison box and several other mechanics such as the rolls for Sabotage are inspired by Fred Serval's brilliant game, A Gest of Robin Hood.
1.4 Forces
The wooden pieces represent the two Factions' various forces: British Troops (tan cubes) and Police (blue cubes), EOKA Cells (red octagonal cylinders) and Arms Caches (red discs).
DESIGN NOTE: The British Way: Cyprus and Palestine both use Cells rather than Guerrillas because the insurgencies they depict were on the line between operating as a standard insurgency and an urban terrorist organization. Their individual operational groups were far smaller than the usual guerrilla groups depicted by Guerrilla pieces in other COIN series games (including Malaya and Kenya). Likewise, their Bases are called Arms Caches to reflect that the main limitation on both groups' operations were arms and explosives.
Important! The British in Cyprus use only 6 blue Police cubes and 12 tan Troops cubes, and EOKA use only 12 red octagonal cylinders and 4 flat red discs. The remaining 9 blue cubes, 3 tan cubes, 3 red octagonal cylinders, and 1 flat red disc should be set aside and not used while playing Cyprus.
1.4.1 Availability and Removal. Keep forces Available for placement in the Faction's Available Forces box. Forces removed from the map go to Available. EXCEPTION: EOKA Cells are sometimes removed to Prison (1.3.6).
- Unless otherwise instructed (by Event, 5.1.1), forces may only be placed from or replaced with those in the Available boxes. A piece to be replaced by a piece that is unavailable is simply removed.
Important! Factions while executing an Operation, Special Activity, or Event to place their own forces may not take them from elsewhere on the map if the desired force type is not Available.
DESIGN NOTE: Unlike other games in the COIN series (including Malaya and Kenya), pieces that are no longer Available in a Faction's Available box may not be taken from those on the map to place elsewhere.
1.4.2 Stacking. No more than two Arms Caches (1.6.2) may occupy a single space, and no Arms Caches may ever be placed in British Bases.
- Arms Caches placed (such as via the Ambush Operation [3.3.4], Propaganda Round [6.2.1], or Event [5.0]) may never violate stacking.
- More than one Sabotage marker may be placed in a space whether by Sabotage (3.3.3) or Events (5.0).
- Only one Curfew marker may be placed in a Town space (1.3.2), and never in any other kind of space.
1.4.3 Underground/Active. Cells are either Underground—symbol end down—or Active—symbol end up. Actions and Events flip them from one to the other state. Arms Caches, Troops, and Police are always Active. Always set up and place new Cells Underground (including if replacing a piece).
NOTE: Unless instructions specify "Underground" Cell, it is sufficient to "Activate" already Active Cells (they stay Active). Also, "moving" or "relocating" Cells does not affect Underground status unless specified.
1.5 Players & Factions
The game requires two players, each playing as one Faction: the British (blue), and the EOKA (red).
1.6 Intel Chits and Arms Caches
Neither faction uses Resources as in standard COIN volumes. Instead each faction collects and spends a special form of resource: Intel Chits for British and Arms Caches for EOKA.
DESIGN NOTE: The general management of resources, such as finances and supplies, was less of an important constraint for the two sides than other more specific resources, such as intel and weaponry. British operations in Cyprus struggled due to a lack of intelligence on EOKA despite massively outnumbering them. Likewise, the cost of operating the insurgency for EOKA was incredibly small, the whole insurgency only cost around £71,000, but the group always struggled to possess enough arms for operations.
1.6.1 Intel Chits. There are 9 Intel Chits with values ranging from 0 to 2 (3 of each), which should be placed in an opaque draw bag or container. British gain Intel Chits through removing an Arms Cache with Assault (3.2.4), Interrogate (4.2.3), and Events (5.0), and should always draw Intel Chits randomly when gaining them, then reveal them to both players. The number and value of Intel Chits that the British currently have is open information. British may spend the value of an Intel Chit to remove Underground Cells with Patrol (3.2.2) and Assault (3.2.4), and then the Chit is returned to the draw bag. Each Chit's full value must be spent in a single space. The British player may also discard Chits, regardless of value, back to the draw bag when conducting Search (3.2.3) or an Intelligence Lead (2.3.7).
1.6.2 Arms Caches. EOKA spend their unique resource, Arms Caches, to boost various actions. Arms Caches are gained through Ambush (3.3.4), Smuggle (4.3.1), Propaganda Round (6.0), and Events (5.0), but may never be placed in British Bases. They are used for selecting spaces for Recruit (3.3.1). They are spent to increase the success of Sabotage Operations (3.3.3) or as part of an Offensive (2.3.7). British may remove Arms Caches through Assault (3.2.4) and Events (5.0). Arms Caches in Mountains also affect Political Will during the Propaganda Round (6.1).
1.7 Sabotage
Sabotage markers are placed by the EOKA Sabotage Operation (3.3.3) and some Events (5.0), and affect Political Will during the Political Will Phase of the Propaganda Round (6.1). There is no limit to the number of Sabotage markers that may be placed in one space.
NOTE: Sabotage markers are never flipped to their 'Terror' side in Cyprus.
1.8 British Political Will
British Political Will is tracked with a marker on the edge track. The position of this counter will determine Victory (7.0) for either side. The marker is moved during the Campaign and during the Political Will Phase of the Propaganda Round (6.1). It may never be lower than 0 or greater than 15.
1.9 International Opinion
The attitude of the international community, and especially the United Nations, towards the situation in Cyprus is tracked with a marker on the International Opinion Track (6.5), which affects the Smuggle Special Activity (4.3.1) and may lower Political Will during the Propaganda Round (6.1).
1.10 Curfews
The four Curfew markers form a pool available to the British Faction. Curfews are placed in Towns by Search (3.2.3) and some Events (5.0)—if no Curfews are available to be placed then the British player must move one from elsewhere on the map. They block EOKA Recruit (3.3.1) and assist in activating Cells during Travel (3.3.2). However, Curfews are also vulnerable to the EOKA Propagandize Special Activity (4.3.3). There may only be one Curfew in each Town space. Curfews are removed in one of three ways:
- If a Curfew space is ever empty of British pieces.
- Curfews are removed with the British Restore Special Activity (4.2.1).
- All Curfews are removed during the Reset Phase of Propaganda Rounds (6.4).
2.0 Sequence of Play
2.1 Setup
Follow the instructions on the second to last page of this booklet to prepare the draw deck and set up markers and forces. A full setup diagram can be found on the back page of this booklet.
2.2 Start
Begin play by revealing the top card of the draw deck and placing it onto a played cards pile. All played cards and the number of cards in the draw deck are open to inspection.
NOTE: Unlike in most previous COIN series volumes, only one Event card is revealed at a time.
RECORD STEPS: As the steps of each Event card play are completed, place the Eligibility cylinder of the acting Faction's color (1.5) into the Initiative Track's appropriate box.
2.3 Initiative Track
One player takes the British Faction and the blue Eligibility cylinder, the other the EOKA Faction and the red Eligibility cylinder.
NOTE: This sequence of play is a new simpler take on the 2-player sequence of play developed by Brian Train in COIN volume VII - Colonial Twilight.
When playing an Event card, the British or EOKA player will execute Operations or the Event described on the card. At all times one player will be First Eligible, and the other will be Second Eligible. In each Event card round, the First Eligible player is first to choose what they will do, followed by the Second Eligible—whose choices are limited by what the First Eligible player did.
2.3.1 Eligibility. Each player puts one cylinder (blue and red respectively) on the First or Second Eligible spaces of the Initiative Track.
NOTE: EOKA always starts the game in the 1st Eligible box and returns there during the Reset phase (6.4) of each Propaganda Round.
2.3.2 Options for Eligible Factions.
First Eligible: The First Eligible player may perform a Limited Operation (2.3.4), execute the Event (5.0), perform an Operation (3.0) with Special Activity (4.0), or Pass (2.3.3).
The player selects their desired action and places their Eligibility cylinder in the appropriate box on the Initiative Track, then immediately executes the chosen action (Limited Operation, Event, Operation with Special Activity, or Pass).
Second Eligible: The Second Eligible player may then choose one of the boxes not containing the First Eligible player's cylinder and conduct the action in the box selected (or Pass).
2.3.3 Passing. After selecting a box, players may forgo the action in the box to Pass. If British pass they draw one Intel Chit (1.6.1). If EOKA pass they may Ambush (3.3.4) in one space. Both players may pass and the order of cylinders in the Initiative Track will still decide eligibility (2.3.5).
2.3.4 Limited Operation. A Limited Operation is an Operation in just one space, with no Special Activity. If the Limited Operation is a Deploy (3.2.1), Patrol (3.2.2), or Search (3.2.3), it can involve pieces from multiple spaces but only one destination space.
2.3.5 Adjust Eligibility. After both players have selected and executed their actions, replace the Eligibility cylinders on the Initiative Track with the cylinder in the furthest left box becoming First Eligible, and the other cylinder becoming Second Eligible.
DESIGN NOTE: Selecting the Limited Operation box guarantees the player first eligibility on the next card. Likewise, selecting the Operation & Special Activity box guarantees second eligibility on the next card. Eligibility after selecting the Event space will depend on what the other player has chosen. The only way to block Events in The British Way is to select the Event box and then either play the Event or Pass.
2.3.6 Next Card. After eligibility has been reset, reveal the draw deck's next card and continue play.
2.3.7 Intelligence Lead and Offensive. Both players may discard or remove one of their special resources, Intel Chits or Arms Caches respectively (1.6), when conducting an Operation or Limited Operation to select an additional space. The British may discard any Intel Chit to the draw bag to add one additional space to Patrol (3.2.2), Search (3.2.3), or Assault (3.2.4). EOKA may remove an Arms Cache to Available from a space with no British cubes to add one additional space to Recruit (3.3.1), Sabotage (3.3.3), or Ambush (3.3.4). An additional space may be added in this way even if the Operation is Limited (2.3.4).
2.4 Propaganda Card
When a Propaganda card is revealed, conduct a Propaganda round (6.0).
NOTE: Each series of Event cards leading up to a Propaganda Round is called a "Campaign."
3.0 Operations
3.1 Operations in General
A Faction executing an Operation (Op) chooses one of the four Operations listed on its Faction sheet and selects the map spaces (typically several) to be involved. Select a given space only once for a given Operation.
Operations are generally allowed in up to three spaces unless the Operation is Limited (2.3.4), in which case they are allowed in only one space. EXCEPTION: Each side may add an additional space through Intelligence Lead or Offensive (2.3.7).
The executing Faction chooses the order of the spaces in which the Operation is resolved, the enemy pieces to be affected (targeted), and the friendly pieces to be placed, replaced, or moved. Once targeted, a Faction's pieces are affected to the maximum extent possible. Actions affecting another Faction's pieces do not require that Faction's permission.
3.1.1 Pawns. If desired, mark spaces selected for Operations (3.0), Special Activities (4.0), or other actions with white and black pawns. The pawns are for convenience, not a limit on play.
3.2 British Operations
The British choose from Deploy, Patrol, Search, or Assault Operations.
3.2.1 Deploy. Deploy adds Police and then can rapidly deploy Troops to any one space. Select up to three Town or Base spaces with more Troops than EOKA pieces.
PROCEDURE: Place one Police in each selected space. Then, even if a Limited Operation (2.3.4), may move any Troops from anywhere on the map to one space (even a Mountain space).
3.2.2 Patrol. Patrol moves Police and then may remove Cells to Prison in one space with Police. Select up to three non-Mountain destination spaces with Cells.
PROCEDURE: May move any Police from anywhere on the map to any destination spaces. Then in one destination space, remove one Active Cell to Prison for each Police in the space. Patrol may remove Underground Cells if the British player spends Intel Chits (1.6.1) equal to or greater in value than the number of Underground Cells removed. Spent Intel Chits are returned to the draw bag.
3.2.3 Search. Search moves Troops, activates Cells, and places Curfews (1.10). Select up to three destination spaces.
PROCEDURE: First, simultaneously move any adjacent British Troops desired into destination spaces. Then, in each Mountain or Base space selected, Activate (1.4.3) one Cell for every cube (moved or already there). In Towns, instead place a Curfew marker (if none there) and Activate only one Cell for every three cubes or may discard one Intel Chit (1.6.1) of any value to the draw bag to activate one Cell for every cube and place no Curfew.
3.2.4 Assault. Assault uses Troops to remove enemy pieces. Select up to three spaces with Troops and EOKA pieces.
PROCEDURE: In each selected space, remove one Active enemy piece for every Troop present, or for every two Troops in Mountains. First remove Active Cells, then remove Arms Caches only once no Cells remain (even Underground). For each Arms Cache (1.6.2) removed, add 1 Political Will (1.8) and draw one Intel Chit (1.6.1). Cells are removed alternately to Available and Prison, Available first. British may remove Underground Cells if the British player spends Intel Chits (1.6.1) equal to or greater in value than the number of Underground Cells removed. Spent Intel Chits are returned to the draw bag.
NOTE: The value of an individual Intel Chit may not be split across spaces. Underground Cells removed by spending Intel Chits still count towards the total number of pieces that may be removed by Patrol or Assault. Underground Cells in a space prevent removal of Arms Caches with Assault until all Cells are Activated and removed, unless the British possess sufficient Intel Chits and Troops to also remove the Underground Cells.
3.3 EOKA Operations
EOKA chooses from Recruit, Travel, Sabotage, or Ambush Operations.
3.3.1 Recruit. Recruit augments friendly forces. Select up to three Mountain or Town spaces without Curfew markers.
PROCEDURE: Place up to 2 Cells in each selected Mountain with an Arms Cache (1.6.2), 1 Cell in Mountains without Arms Caches, and 1 Cell in Towns with or adjacent to Arms Caches. No Cells may be placed in any Towns without (or not adjacent to) Arms Caches, or in any Towns with Curfews.
NOTE: Recruit may not place Cells directly into Bases, even if there is an adjacent Arms Cache.
3.3.2 Travel. Travel moves Cells and flips them back Underground. Select up to three origin spaces with Cells and without Curfew markers. A Limited Operation (2.3.4) Travel may select only a single origin space, but may move Cells to multiple destination spaces.
PROCEDURE: Move any Cells in each selected origin space to any spaces on the map, including their original space. Set Cells moving from one origin space to one destination space Active (1.4.3) if:
- The destination is a Base or Curfew space and
- The number of moving Cells plus the number of cubes in that destination exceeds three.
Otherwise, flip moving Cells Underground, even if they return to their original space.
NOTE: Unlike March in Malaya or Kenya, Travel may move Cells to any spaces, not just those that are adjacent, and selects origin spaces rather than destination spaces. Therefore, a Limited Travel can only select one origin space but may select multiple destinations from that origin space.
3.3.3 Sabotage. Sabotage places Sabotage markers. Select up to three Towns or British Bases with at least one Underground Cell.
PROCEDURE: In each selected space, Activate one Underground Cell. Before rolling, EOKA may expend an Arms Cache (1.6.2) that is either in or adjacent to the selected space, returning it to Available to increase the result by 2. Then, roll a die, subtracting 1 from the roll for each Police cube in the selected space. If the modified roll result is greater than 2, place a Sabotage marker in the space.
NOTE: Unlike in Malaya, Kenya, or other COIN volumes, Sabotage markers may be added to spaces that already have them, and spaces may hold more than one Sabotage marker.
DESIGN NOTE: Unlike insurgent factions in other COIN volumes, EOKA doesn't place Terror markers, because the group was heavily focused on sabotage operations to cause economic damage and disgrace Britain, rather than killing or terrifying non-combatants.
3.3.4 Ambush. Ambush removes Police and may place Arms Caches. Select up to three Towns with Underground Cells.
PROCEDURE: In each selected space, Activate one Cell and remove one Police cube if possible. Then, roll a die—if the roll result is greater than the number of cubes remaining in the space, place one Arms Cache in that space or an adjacent Town or Mountain.
4.0 Special Activities
4.1 Special Activities in General
When a Faction per the Initiative Track (2.3) executes an Operation (3.0), it may also execute one Special Activity (EXCEPTION: Limited Operations, 2.3.4). As with Operations, the executing Faction selects spaces and pieces affected, and the order of actions. Select a given space only once as a location for a given Special Activity. Events may grant free Special Activities (not further affecting Eligibility, 2.3.1).
Important! A Faction may execute its Special Activity at any one time immediately before, during, or after its Operation.
EXAMPLE: EOKA Recruit, then pause to Smuggle and gain an Arms Cache, then continue to Recruit in additional spaces.
4.1.1 Accompanying Operations. Some Special Activities specify that they may only accompany certain types of Operations (3.0). If not otherwise specified, Special Activities may accompany any Operations and take place in any otherwise valid spaces.
4.2 British Special Activities
The British choose from Restore, Diplomacy, or Interrogate Special Activities.
4.2.1 Restore. Restore removes Sabotage and Curfew markers. It may only accompany Deploy (3.2.1) and takes place in one space with Troops, Police, and no EOKA.
PROCEDURE: In the selected space, remove any Curfew and Sabotage markers.
4.2.2 Diplomacy. Diplomacy shifts International Opinion (6.5) in British favor. It may only accompany Deploy (3.2.1), Patrol (3.2.2), or Search (3.2.3).
PROCEDURE: If there are three or fewer Towns with Sabotage or Curfew markers, shift International Opinion one step to the left. Otherwise, roll a die and only shift International Opinion one step to the left if the die result is greater than the current International Opinion Track value.
4.2.3 Interrogate. Interrogate allows the British to gain Intel Chits (1.6.1). It may accompany Search (3.2.3) or Assault (3.2.4).
PROCEDURE: Draw one Intel Chit for every two Cells in Prison (1.3.6), rounding odd numbers down.
4.3 EOKA Special Activities
EOKA chooses from Smuggle, Infiltrate, or Propagandize Special Activities.
4.3.1 Smuggle. Smuggle allows EOKA to place or move Arms Caches. Smuggle may accompany Recruit (3.3.1) or Travel (3.3.2). It may not be performed if International Opinion (6.5) is at Ignored, and may select two spaces if International Opinion is at Condemned.
PROCEDURE: Place one Arms Cache in a Mountain or Town space with a Cell and no cubes or move an Arms Cache from any space with a Cell to an adjacent Mountain or Town space with a Cell. May select a second space to place or move an Arms Cache if International Opinion is at Condemned.
4.3.2 Infiltrate. Infiltrate replaces Police with Cells and discards Intel Chits (1.6.1). It may occur in one space with at least one Police cube, and an equal or greater number of Underground Cells than Police. Infiltrate may accompany any EOKA Operation (3.3).
PROCEDURE: Replace one Police in the selected space with a Cell, then discard the highest value Intel Chit currently in play to the draw pool.
4.3.3 Propagandize. Propagandize lowers Political Will (1.8) or shifts International Opinion (6.5) in EOKA's favor. It may occur in one space with at least one Cell and a Sabotage or Curfew marker. Propagandize may accompany any EOKA Operation (3.3).
PROCEDURE: If all Cells Underground, Activate one Cell. Then, either lower Political Will by 1 if there is a Sabotage marker in the space, or shift International Opinion one step to the right if there is a Curfew marker and no Sabotage marker in the space.
NOTE: Propagandize does not need to Activate a Cell if there is already an Active Cell in the selected space.
5.0 Events
Each Event bears a title, italicized flavor text, and Event text. Flavor text provides historical interest and has no effect on play.
5.1 Executing Events
When a Faction executes an Event, it carries out the Event text literally and in order (sometimes involving actions or decisions by the other Faction). Unless otherwise specified, the executing Faction makes all selections involved in implementing the text, such as which pieces are affected. If another Faction is specified or selected to take an action, that Faction decides the details of the action. Some Events with lasting effects have markers as aids to play.
5.1.1 Where Event text contradicts rules, the Event takes precedence. However:
- Events may not violate stacking (and so never place Arms Caches where there are already two or in a British Base, or place a Curfew marker where there is already one).
- Events place only Available pieces (1.4.1) and markers; they remove rather than replace if the replacement is not Available or if stacking (1.4.2) would be violated.
- Events may not raise British Political Will beyond 15 or reduce it below 0 (1.8).
5.1.2 If two Events contradict, the currently played Event takes precedence.
5.1.3 An executed Event's text that can be implemented must be. If not all of its text can be carried out, implement that which can.
5.2 Dual Use
Many Events have both unshaded and shaded Event text. The executing Faction may select either the unshaded or shaded text to carry out (not both). While the unshaded text often favors the British, a player may select either text option regardless of Faction.
DESIGN NOTE: Dual-use events represent opposed effects of the same cause, forks in the historical road, or instances subject to alternative historical interpretation.
5.3 Capabilities
Dual-use Events labeled "BRITISH CAPABILITY" or "EOKA CAPABILITY" have lasting effects mainly relating to that Faction, either positive or negative. These labels are for flavor only, and both Factions may execute Capability Events with either label. One Event (C31 TURKISH POLICE) is a "DUAL CAPABILITY" that simultaneously has a positive and negative effect for both Factions, so either Faction may choose to select it. Selected Capability Event's effects last for the rest of the game.
NOTE: Set out executed Capability Event cards near the board as added reminders, using a Capability marker to indicate which option was selected.
6.0 Propaganda Round
Conduct a Propaganda Round in the sequence of phases below when each Propaganda card is revealed. The Propaganda Round aid sheet also lists this sequence.
6.1 Political Will Phase
Calculate the net effect to Political Will of the following adjustments before shifting the marker:
6.1.1 International Pressure. Shift International Opinion one step to the right for every 3 Cells in Prison (round down), then lower British Political Will by the current value of the International Opinion Track (6.5).
6.1.2 Disorder? For each Sabotage marker in a Town or Base space, lower British Political Will by the numerical value of that space (1 for most Towns, 2 for Nicosia and Bases).
6.1.3 Order? Increase British Political Will by 2 if there are no Arms Caches in Mountains. Increase British Political Will by 1 for every 2 Towns without any Sabotage markers (round down).
NOTE: It's important to calculate the net shift in Political Will during these steps before moving the marker and checking victory, rather than adjusting the marker one step at a time.
6.1.4 Victory? If British Political Will is now at 0, the game immediately ends with an EOKA victory.
6.1.5 Game End? If this is the final Propaganda card and EOKA have not won, the game immediately ends with a British victory.
6.2 Resource Phase
6.2.1 EOKA Arms. EOKA may place one Arms Cache in any one Town or Mountain space with a Cell.
6.2.2 British Intel. If British have no Intel Chits, draw one Intel Chit from the draw pool. Otherwise, British must discard half their Intel Chits (rounded down).
6.3 Redeploy Phase
6.3.1 British Redeploy. British may move Police on the map among any spaces with British pieces, then must move all Troops in Mountains to either Base.
6.3.2 EOKA Redeploy. EOKA must move all Cells in Bases to Towns with EOKA pieces or Mountains. EOKA may then move one Arms Cache on the map to any space with a Cell.
6.4 Reset Phase
Then prepare for the next card as follows:
- If three or fewer Towns have either Sabotage or Curfew markers, shift International Opinion one step towards Ignored.
- Remove all Curfew and Sabotage markers from the map.
- Return half the Cells in Prison (1.3.6) to Available (rounded down).
- Flip all Cells Underground (1.4.3).
- Set EOKA to 1st Eligible and British to 2nd Eligible.
- Reveal the next card from the draw deck and continue play (2.3.2).
6.5 International Opinion Track
The British counterinsurgency in Cyprus was conducted under the scrutiny of the international community, and the Greek and Turkish governments were particularly involved in getting their desired outcome by pressuring Britain. The issue of Cyprus was also frequently brought to the UN during the conflict. The International Opinion Track represents these external pressures on British rule in Cyprus.
6.5.1 Moving the Track. The International Opinion Track can be raised by EOKA Propagandize (4.3.3), lowered by British Diplomacy (4.2.2) and during the Reset phase (6.4), and shifted either direction by some Events (5.0).
6.5.2 Effects of the Track. The International Opinion Track affects Political Will during the Political Will Phase of the Propaganda Round (6.1), and may also affect the EOKA Smuggle Special Activity (4.3.1). The current position of the Track is also referenced by some Events (5.0).
7.0 Victory
Victory is determined by the level of British Political Will (1.8). British Political Will is measured on the edge track and can range from 0-15.
7.0.1 Early Victory. At the victory check during the Political Will Phase of a Propaganda round, EOKA wins if British Political Will is at 0.
7.0.2 Final Victory. If EOKA has not won at the end of the Political Will Phase of the final Propaganda Round, the game ends in a British victory.
7.1 Raising Political Will
British Political Will is raised in the following ways:
- Removing an Arms Cache by Assault or Event (+1 PW)
- Events (+1 to +2 PW)
- At Propaganda Round, no Arms Caches in Mountains (+2 PW)
- At Propaganda Round, for every two Towns without Sabotage (+1 PW)
7.2 Lowering Political Will
British Political Will is lowered in the following ways:
- Propagandize at Sabotage marker (–1 PW)
- Events (–1 to –2 PW)
- At Propaganda Round, each Sabotage marker in Town spaces (–1 to –2 PW)
- At Propaganda Round, each Sabotage marker in Bases spaces (–2 PW)
- At Propaganda Round, value of International Opinion Track (–0 to –4 PW)
8.0 Example of Play
Setup the game as indicated in section 2.1 (consult the setup diagram on the back of this booklet), but construct only the first part of the deck with these cards in the following order, facedown from top to bottom: AKEL (C3), DEVELOPMENT PROGRAM (C21), APPEALS TO UN (C11), OPERATION PEPPERPOT (C6), MOUNTAIN GANGS (C19), HUMAN RIGHTS COMMITTEES (C13), and PROPAGANDA! (C35).
Reveal the first card (AKEL) from the top of the deck. EOKA is 1st Eligible and decides to perform a Recruit Operation combined with the Smuggle Special Activity. Place their round Eligibility cylinder into the 'Op & Special Activity' box on the Initiative Track. EOKA Operations can usually be performed in up to three spaces (unless they spend an Arms Cache for an additional space), and Recruit allows EOKA to place Cells in any Mountains, and in any Towns without Curfews and with or adjacent to an Arms Cache—two Cells in a Mountain space with an Arms Cache, or one Cell in any other space. They place two Cells in the Troodos Mountains (where there is an Arms Cache), one in Nicosia, and one in Paphos.
Then they perform the Smuggle Special Activity, which allows them to place an Arms Cache in any Town or Mountain with a Cell and no British cubes, and decide to place one in Paphos. They could alternatively have moved an Arms Cache from one space with a Cell to any adjacent space with a Cell. If the International Opinion Track is at '0' then the Smuggle Special Activity is not possible at all, and if it is at '4' then Smuggle may place or move up to two Arms Caches in two different spaces.
EOKA Recruit four new Cells and Smuggle in a new Arms Cache.
The EOKA turn is now complete, and the British player may choose from either of the remaining two boxes on the Initiative Track—Limited Operation or Event. The Event is not attractive to them, and they don't fancy performing a Limited Operation either, so instead they decide to Pass. This option is always open to either player, and allows them to place their Eligibility cylinder in any of the remaining spaces to take one Intel Chit (if British) or to perform a Limited Ambush Operation (if EOKA)—the latter option being useful primarily to stop the British from executing an Event, by placing the EOKA cylinder in that space on the Initiative Track. The British place their cylinder in the 'Limited Op' space and draw an Intel Chit at random from the bag, revealing a valuable '2' chit. They keep this near their Available box, for use in a future turn. The British turn is complete, and as both players have completed their turns we reset Eligibility. The Faction whose cylinder is furthest to the left, in this case British, becomes 1st Eligible, and the other Faction becomes 2nd Eligible.
Eligibility is reset at the end of each turn.
Reveal the next card: DEVELOPMENT PROGRAM. British are now 1st Eligible and decide to perform the Search Operation with the Diplomacy Special Activity—place their cylinder in the 'Op & Special Activity' box. British Operations can usually be performed in up to three spaces (unless they spend an Intel Chit for an additional space), and Search allows them to move Troops to adjacent spaces, reveal Cells, and place Curfews in Towns. They move all six Troops from Nicosia, Limassol, and Larnaca into the Troodos Mountains, and three Troops each from Akrotiri into Limassol and Dhekelia into Famagusta. Then, in the Troodos Mountains they Activate one Cell for every cube now present, flipping all three Cells there Active (so that their embossed star end is visible). In Limassol and Famagusta they may only Activate one Cell for every three cubes now present, but this is still enough to Activate both Cells. They must also place a Curfew marker in both Towns, which will inhibit future Recruit and Travel but leaves them vulnerable to Propagandize. They could alternatively have spent their Intel Chit in one Town to Activate one Cell per cube and place no Curfew, but decided not to.
British Troops Search in Troodos, Limassol, and Famagusta, Activating five Cells and establishing two Curfews.
Next, they conduct the Diplomacy Special Activity, which allows them to shift International Opinion Track one step to the left if there are three or fewer Towns with Curfews or Sabotage markers; if there are four or more, they would instead need to roll higher than the current Track value to shift it. As there are only two Towns with Curfews, and none with Sabotage, they simply shift the Track from '2' to '1'.
British Diplomacy shifts International Opinion.
The British turn is now complete, and EOKA have the same choice that British did previously—Limited Operation or Event. They decide to execute the Event, selecting the shaded effect to place a total of two Cells in any Towns, and choosing to place one in Limassol and one in Karpas (new Cells are always placed Underground, even if there is a Curfew in the selected space). We then reset Eligibility, EOKA to 1st Eligible and British to 2nd Eligible.
Reveal the next card: APPEALS TO UN. EOKA now decide to perform the Sabotage Operation with the Propagandize Special Activity. They also launch an Offensive, removing their Arms Cache in Paphos to allow them to select an additional space for Sabotage—four instead of three (they could not remove the Arms Cache in Troodos for an Offensive, as there are British cubes there). They select Paphos, Limassol, Nicosia, and Karpas for Sabotage. The Sabotage Operation requires an Underground Cell to be Activated in each space—flip one Cell Active in each space now. Then the EOKA player must roll a die in each space, succeeding and placing a Sabotage marker on a roll of 3 or greater. In Paphos they roll a 2 and fail, in Limassol they roll a 4 and succeed, and in Karpas they roll a 6 and succeed—place one Sabotage marker each in Limassol and Karpas. In Nicosia their roll is reduced by 1 due to the blue Police cube there, but they decide to remove the adjacent Arms Cache in Troodos to increase their roll by 2. They roll a 3, which is reduced to 2 by the Police cube but then increased to 4 by the expended Arms Cache—a success, placing a Sabotage marker.
The EOKA Sabotage attempt in Nicosia is successful despite the presence of a Police cube.
Next, EOKA may select a space with a Cell and either a Sabotage marker or Curfew for the Propagandize Special Activity. In both cases they must then Activate a Cell if one is not already Active, and then either reduce British Political Will by 1 (if a Sabotage marker was selected) or shift International Opinion one step to the right (if a Curfew with no Sabotage was selected). They decide to do the latter, selecting Famagusta where a Cell is already Active, and shifting International Opinion one step to the right, from '1' to '2'.
EOKA Propagandize shifts International Opinion from 'Discussed' to 'Criticized'.
The EOKA turn is now complete, and the British decide to perform a Limited Assault Operation, selecting just one space (or two if they choose to expend their Intel Chit for an Intelligence Lead). They select just Troodos Mountains, where Assault will let them remove one Active EOKA for every two Troops present (in a Town or Base they could remove one Active piece for every Troop present). Arms Caches may only be removed after all Cells are removed (even Underground Cells), and Underground Cells may be removed if Intel Chits of equal value are spent. In this case there are only three Active Cells in the Troodos Mountains, and sufficient Troops (six) to remove all of them with Assault. Cells removed with Assault go alternately to the EOKA Available Forces box and the Prison box, starting with Available Forces, so two Cells are removed to Available and one is sent to Prison. If the Assault had removed an Arms Cache then the British would also increase Political Will by 1 and draw an Intel Chit. We then reset Eligibility, British to 1st Eligible and EOKA to 2nd Eligible.
The British Troops Assault in the Troodos Mountains, removing two Cells to Available and one to Prison.
Reveal the next card: OPERATION PEPPERPOT. British now decide to perform the Patrol Operation with the Diplomacy Special Activity. The Patrol Operation moves Police on the map to any non-Mountain spaces with Cells, then may remove Active Cells to Prison from one space, up to the number of Police now present. The British may select up to three destination spaces as usual for an Operation, but decide to select only Nicosia and Karpas. They move one Police cube from Larnaca to Nicosia, and one from Famagusta to Karpas (note that Police do not need to be adjacent to move with Patrol). Then, they decide to remove Cells in Nicosia using the two Police cubes that are now there, and spend their 2-value Intel Chit to allow them to also remove the Underground Cell—place both Cells in Prison, and place the Intel Chit back in the pool.
The British Patrol in Nicosia removes two Cells to Prison.
Then, the Diplomacy Special Activity must this time roll greater than the International Opinion track value to succeed, as there are more than three Town spaces with Sabotage or Curfew markers. This roll fails, so the Special Activity is ineffective.
The British turn is now complete, and EOKA decide to perform a Limited Ambush Operation to replenish their Arms Caches. Ambush requires an Underground Cell to be Activated, removes a Police cube in that space to British Available Forces if possible, and then rolls a die—if the result is greater than the number of cubes remaining in the space, EOKA may add an Arms Cache either to that space or an adjacent space. They select Larnaca for Ambush, Activating the Cell there, not removing any Police as none are present, and then automatically succeeding on the roll to add an Arms Cache—place one in Larnaca now. We then reset Eligibility, EOKA to 1st Eligible and British to 2nd Eligible.
The EOKA Ambush adds an Arms Cache in Larnaca.
Reveal the next card: MOUNTAIN GANGS. EOKA decide to perform the Travel Operation with the Infiltrate Special Activity. Travel allows them to move Cells from up to three origin spaces without Curfews to any number of destination spaces (including the origin spaces themselves if desired), and then flip any moved Cells Underground, unless the space they were moving to is a Town with a Curfew or a British Base, and the Cells moving there plus cubes present exceeds three. They decide to move Cells from Paphos, Larnaca, and Karpas, and move one Active Cell from Paphos to Nicosia, another Cell from Larnaca to Kyrenia Mountains, and finally the Cell from Karpas to Akrotiri. All three moved Cells flip Underground. Then they perform the Infiltrate Special Activity, which allows them to select one space with at least as many Underground Cells as Police (and at least one Police), replace one Police there with a Cell, and remove an Intel Chit back to the pool (if possible). They select Nicosia and replace one Police there with a Cell, but the British do not have any Intel Chits to remove.
EOKA Travel two Cells to Nicosia, then Infiltrate to replace one Police with a Cell there.
British decide to perform a Limited Patrol Operation in Limassol. They move in two Police, one from Nicosia and one from Karpas, using them to remove both Active Cells there to Prison. We then reset British to 1st Eligible and EOKA to 2nd Eligible.
Reveal the next card: HUMAN RIGHTS COMMITTEES. British decide to perform the Deploy Operation with the Restore Special Activity. Deploy allows the British to place one Police each in selected spaces with more Troops than EOKA pieces, then move any Troops desired to one additional space. They place one Police in Limassol and one in Famagusta, then move the six Troops in Troodos Mountains to Nicosia. Then they can use the Restore Special Activity in one space with Troops, Police, and no EOKA pieces, to remove all Curfew and Sabotage markers there—they do so in Limassol, removing both markers there.
The British Deploy one Police cube into Limassol and then Restore there.
EOKA now decide to execute the Event. HUMAN RIGHTS COMMITTEES is a Capability Event that will have a lasting effect, so we place it by the side of the board with a red Capability marker on it to indicate that the shaded bottom effect (favoring EOKA) was selected. We then reset EOKA to 1st Eligible and British to 2nd Eligible.
The next card revealed is the PROPAGANDA! card, triggering a Propaganda Round. We work through each phase in turn, starting with the Political Will phase:
- Political Will: International Opinion is shifted one step the right due to the number of Cells in Prison, then Political Will is lowered by a net total of 2 (–3 for the International Opinion Track, –2 for the Sabotage marker in Nicosia, –1 for the Sabotage marker in Karpas, +2 because there are no Arms Caches in Mountains, and +2 because there are four Towns without Sabotage), down to '12'. If Political Will was now at '0' then EOKA would win.
- Resources: EOKA may add one Arms Cache to a Town or Mountain with a Cell, and place one into Kyrenia Mountains. British gain one Intel Chit because they had none, drawing a 1-value chit.
- Redeploy: British may move Police on the map to any spaces with British pieces, and move all four Police to Nicosia (if there were any Troops in Mountains, British would also need to move them back to Bases). EOKA must then move any Cells in Bases to Towns with EOKA pieces or any Mountains, and move their one Cell in Akrotiri to Nicosia (they could also move one Arms Cache to a space with a Cell, but choose not to move any).
- Reset: International Opinion shifts one space to the left (from '3' to '2'), because there are three or fewer Towns with Curfew or Sabotage markers. Remove all Curfew and Sabotage markers from the map. Return half the Cells in Prison, rounded down, to Available (in this case two). Flip all Cells Underground. Set EOKA to 1st Eligible (they already are), then reveal the next card and continue play.
This example of play is now complete. You can continue the current game by constructing the rest of the deck (two stacks of six random Event cards, each with a Propaganda card shuffled in with the bottom two Event cards) and revealing the next Event card. British are in a strong position with Political Will still quite high, but EOKA are fairly well positioned for future Sabotage Operations, and can also make use of the HUMAN RIGHTS COMMITTEES Capability, which will be especially powerful if the British have to place down any Curfew markers. Good luck!
9.0 Event Tips and Background
At the bottom of each Event Background is a chapter number from David French's Fighting EOKA: The British Counter-Insurgency Campaign on Cyprus, 1955-1959 to provide more context for the event. French's book is the best on British counterinsurgency against EOKA, though it is quite difficult to acquire. Unfortunately, many of the other excellent books on the Cyprus Emergency, such as Robert Holland's Britain and the Revolt in Cyprus, are also quite rare or expensive. The Cyprus chapter from John Newsinger's British Counterinsurgency might be the easiest to consult for greater context.
C1. Makarios III
Troublemaker deported: British may Restore in any 2 spaces with cubes and no EOKA.
Political leader of Enosis: Shift International Opinion 2 steps to the right.
Tips: None.
Background: Makarios III was the Archbishop of Cyprus and the political leader of the enosis movement. When diplomacy failed, Makarios worked with Grivas (Card C2) to establish a subversive movement, EOKA, to pressure Britain to grant enosis (union with Greece). During the conflict, Makarios negotiated with General Harding (Card C15). Harding, frustrated with Makarios' role in encouraging EOKA, eventually deported him to the Seychelles. As part of a later cease-fire, Makarios was released but forbidden to return to Cyprus. In 1958, with pressure from the Greek government (Card C22) for a settlement, Makarios conceded on the point of enosis and accepted the formation of an independent Cyprus, thus ending the conflict with Britain (French, Chapters 2 and 8).
C2. Georgios Grivas
Escapes leaving documents: In a space with British Troops, Assault removing any Arms Caches first.
EOKA leader: EOKA conducts 3 Limited Operations.
Tips: The three Limited Operations granted by the shaded text may be of different types, are carried out one after the other, and may potentially use the same pieces three times.
Background: Georgios Grivas was the military leader of the EOKA insurgency. In the conflicts of the early 20th century, Grivas had gained prior experience serving in the Greek army. During the German occupation and the Greek Civil War, he formed an underground militia focused on targeting communists. Grivas' overall strategy for EOKA was to "continuously harry" the British until they settled the Cyprus problem in favor of enosis. The British came close to capturing Grivas several times, and he only narrowly escaped Operation Pepperpot (Card C6) by a night march. As the leader of EOKA, Grivas and his memoir became a model for future urban guerrillas such as the Tupamaros in Uruguay (French, Chapters 2 and 4).
C3. AKEL
Operation Lobster Pot: British may Limited Patrol then increase Political Will by 1.
Cypriot Communist Party: EOKA may Propagandize in 1 space with Cell and Curfew.
Tips: None.
Background: The Anorthodiko Komma Ergazomenou Laou (Progressive Party for the Working People), or AKEL, was the communist party in Cyprus. AKEL strongly criticized EOKA's sabotage campaign and insisted that the organization did not represent all Cypriots. Despite their critical stance against EOKA, AKEL were targeted by the British, who banned the party, due to their suspicion of well organized communists. In late 1955, over one hundred prominent Communists were detained in Operation 'Lobster Pot,' though many were subsequently released when no evidence of ties with Moscow were found (French, Chapters 1 and 4).
C4. Suez Crisis
Troops withdrawn: Remove 3 Troops cubes from the map to this card until the Reset phase of the next Propaganda Round, then return them to any British Bases.
Tips: Place this card aside with the removed Troops cubes until the next Reset phase.
Background: The Suez crisis began when Nasser, the leader of Egypt, nationalized the Suez Canal. A combined military operation of British, French, and Israeli forces invaded Egypt to topple Nasser. However, pressure from the United States, Soviet Union, and United Nations forced the combined force to withdraw in defeat. The crisis had a major impact on the conflict in Cyprus by pulling two brigades conducting counterinsurgency from the island for operations against Egypt. The withdrawal of forces reduced pressure on EOKA for several months (French, Chapter 4).
C5. Turkish Government
Defends minority interests: Shift International Opinion 2 steps to the left.
Encourages TMT: Place a Sabotage marker in any 1 Town with both Police and EOKA.
Tips: None.
Background: The Turkish government had a significant stake in the conflict in Cyprus due to its geographic proximity and the sizable Turkish Cypriot minority. Turkey was staunchly against EOKA's goal of enosis and strove for an independent Cyprus. The Turkish government also encouraged the formation of Turkish Cypriot armed groups to protect the Turkish communities on the island and to combat EOKA, such as the Türk Mukavemet Teşkilatı (TMT) and Volkan (Card C26). Although these groups targeted EOKA, they also contributed to rising intercommunal violence that placed additional pressure on Britain to make concessions to end the conflict (French, Chapter 7).
C6. Operation Pepperpot
British sweep mountains: British may move any number of cubes to Mountain spaces then Search in each.
EOKA tipped off: EOKA may Travel from each Mountain space.
Tips: None.
Background: To counter Grivas' mountain gangs (Card C19), the British launched large-scale sweep operations of the mountains in Cyprus. Operation Pepperpot managed to destroy several gangs and uncover arms caches, but failed to capture Grivas (Card C2). There is evidence that Grivas was warned about the operation, giving him time to escape. However, he only narrowly evaded the follow-up operation, 'Lucky Alphonse.' Grivas eventually chose to leave the mountains for Limassol due to the frequent sweeps (French, Chapter 4).
C7. Mass Detention
Roundup: Remove all Cells in Curfew spaces to Prison.
Creates new recruits: In each Curfew space, place up to 1 Cell from Prison.
Tips: None.
Background: Mass Detention was a common strategy in many of Britain's counterinsurgency campaigns, such as Palestine and Kenya. Lacking good intelligence, rounding up a large number of suspects and then screening them allowed rapid action against suspected cells. However, most of those detained would likely have nothing to do with EOKA prior to detention, and the experience of indiscriminate detention could easily drive individuals into joining the insurgency. One of the largest roundups in Cyprus was actually against AKEL (Card C3), a group opposed to EOKA (French, Chapter 4).
C8. School Children Revolt
Education system reform: Remove 2 Cells to Available from any spaces.
Demonstrations: EOKA may Propagandize in 1 Curfew space (no Cell needed).
Tips: The shaded effect allows EOKA to conduct Propagandize in a Curfew space even if there is no Cell there.
Background: School children led many of the riots and demonstrations ordered by Grivas. By using school children, Grivas hoped to confuse security forces and prevent them from using repressive measures to put down the unrest. The unrest would also hopefully draw security forces away from operations against the mountain gangs (Card C19). Around 700 school children participated in the first major riot in Nicosia. The initial British response was to shut down several schools, but this only made the matter worse. Harding (Card C15) eventually implemented school reforms that more effectively lessened EOKA's ability to use school children (French, Chapters 3 and 5).
C9. Royal Navy Blockade — BRITISH CAPABILITY
Interdicts arms smuggling: EOKA must roll greater than 3 to place any Arms Cache with Smuggle.
Navy evaded: EOKA may select any Mountain or Town for Smuggle.
Tips: If the unshaded text is in effect, EOKA must declare if they are attempting to place an Arms Cache, and that Special Activity is wasted if they do not roll greater than 3.
Background: EOKA smuggled many arms and explosives from Greece into Cyprus by sea, particularly in the lead up to the conflict. The Greek government (Card C22) generally allowed EOKA's arms smuggling, unless foreign policy forced them to shut off the supply. Major smuggling rings worked out of Limassol and Paphos. To counter EOKA smuggling, the British attempted to seal off the island through naval patrols, minesweepers, and RAF reconnaissance aircraft. Although the Royal Navy intercepted many weapon shipments, the blockade never completely sealed off EOKA's external supply (French, Chapters 2 and 4).
C10. Rough Handling — BRITISH CAPABILITY
Gets information: Interrogate adds 1 Intel Chit for every Cell in Prison.
Accusations of torture: Interrogate also lowers Political Will by 1.
Tips: None.
Background: EOKA accused the British security forces of torturing prisoners during interrogations to collect intelligence (Card C17). There is concrete evidence of cases of abuse against prisoners who received a 'rough handling' by members of the Special Branch, particularly by Turkish Cypriot police, but less evidence for a program of systematic torture. As the historian David French notes, providing a definitive answer to the extent of torture is difficult because EOKA had strong incentive to exaggerate British atrocities (Card C13) and British officials only half-heartedly investigated accusations of abuse (French, Chapter 6).
C11. Appeals to UN
Ignored: Set International Opinion to Ignored.
Debated: Set International Opinion to Debated.
Tips: None.
Background: EOKA hoped to draw international attention to their struggle and generate external pressure on Britain to accept enosis. Greece (Card C22) provided diplomatic support for EOKA's struggle by taking the issue of Cyprus to the United Nations General Assembly. Both Britain and Greece sought United States support for their position, but the US rejected taking a side to avoid alienating either ally. Although the issue was debated several times, the Greek government's insistence on enosis was repeatedly rejected. Instead, the United Nations General Assembly called for a return to peaceful negotiations (French, Chapter 4).
C12. Hugh Foot
New approach: British conduct 2 Limited Operations then any Special Activity.
Welcomed with terror: EOKA may perform Sabotage in up to 3 spaces.
Tips: The two Limited Operations granted by the unshaded text may be of different types, are carried out one after the other, and may potentially use the same pieces twice. The Sabotage Operations granted by the shaded text would require Underground Cells as usual, unless modified by the shaded Street Riots (C23) capability.
Background: In 1957, Sir Hugh Foot succeeded Sir John Harding (Card C15) as Governor of Cyprus. Foot possessed prior experience combating insurgents during the Arab Revolt (1936-1939) in Palestine. Foot pushed a plan of self-government for Cyprus and conducted diplomacy with the Greek (Card C22) and Turkish (Card C5) Governments to help resolve the Emergency. However, intercommunal violence between the Greek and Turkish Cypriot communities (Card C24) intensified during his tenure, derailing his plan for a quick resolution of the conflict (French, Chapter 7).
C13. Human Rights Committees — EOKA CAPABILITY
International audiences skeptical: Propagandize may not shift International Opinion.
Highlights abuses: Propagandize may select 2 spaces.
Tips: None.
Background: EOKA organized an extensive propaganda campaign to discredit the conduct of British security forces and generate sympathy for EOKA. The formation of Human Rights Committees in Nicosia and other major towns to investigate and reveal abuses by the British assisted EOKA's efforts. The Greek government (Card C22) took EOKA's campaign one step further by taking cases of British abuses before the European Convention on Human Rights (ECHR) and United Nations (Card C11). Although they were able to identify concrete evidence of abuses by British security forces, EOKA may have discredited their overall effort by some of their wilder accusations, such as claiming the British were committing 'genocide' and comparisons with 'Nazi methods' (French, Chapter 6).
C14. Radio Athens
Disrupted by Greece: If International Opinion is at Discussed or Ignored, remove any 3 Cells from the map to Available.
Attracts recruits: Place 3 Cells total in any Towns or Mountains.
Tips: None.
Background: Besides clandestine arms smuggling (Card C9) and bringing world attention to the conflict through the United Nations (Card C11), the Greek government (Card C22) also permitted EOKA to operate a friendly radio station that spread their propaganda among the Greek Cypriot population. British efforts to pressure Greece to restrain Radio Athens failed, and the British eventually resorted to jamming to hinder the broadcasts (French, Chapter 5).
C15. John Harding
Military approach: Place a Curfew marker in a Town with Troops, then Search and Assault there.
Talks with Makarios fail: Shift International Opinion 2 steps to the right.
Tips: None.
Background: At the beginning of the conflict, Field Marshal Sir John Harding was appointed Governor of Cyprus. Harding quickly declared a state of emergency, enabling a more aggressive military response and the ability to levy collective punishments on uncooperative communities. The emergency regulations also granted security forces the ability to place curfews, conduct intensive searches (Card C18), and enabled the easier arrest of suspects (Card C7). Due to these measures, Harding's approach to defeating EOKA is criticized by some as overly militaristic and heavy handed. Harding did attempt to negotiate with Makarios (Card C1), but resumed tough tactics when talks failed. In 1957, Sir Hugh Foot (Card C12) took over as Harding's successor (French, Chapter 3).
C16. Q-Patrols
Root out EOKA: Remove 1 EOKA piece each (max 1 Arms Cache total) from up to 3 spaces with Troops (+1 PW if Arms Cache removed).
Terrorize civilians: Place a Sabotage marker in up to 2 Town spaces with Troops.
Tips: British would gain +1 Political Will if the unshaded text removes an Arms Cache.
Background: Q-patrols were small units of British troops and police that operated in civilian clothes and often included former terrorists in their squads, a tactic used in many other British counterinsurgency campaigns. These units' surprise capture of insurgents would often result in intelligence breakthroughs leading to further arrests. Nicos Sampson, one of EOKA's most experienced assassins (Card C25), was captured by a Q-patrol. Although effective, surprise night raids could easily terrify the local population (French, Chapter 4).
C17. Special Branch — BRITISH CAPABILITY
Intelligence gathering: Interrogate may instead add Intel Chits equal to spaces with Police and Cells.
Police stretched thin: Patrol removes only 1 Cell per 2 Police.
Tips: If the unshaded capability is in effect British may choose which option to use each time they Interrogate.
Background: As in other British counterinsurgency campaigns, the police Special Branch was the main organization for generating intelligence on the insurgency. During the Cyprus conflict, most of the Special Branch intelligence came from prisoners and captured documents. Personnel shortages limited the Special Branch's ability to collect intelligence, particularly their lack of Greek interrogators and translators. In addition, the Special Branch was the main initial target of EOKA's assassination groups (Card C25). There were also accusations of the use of torture (Card C10) by members of Special Branch when interrogating prisoners (French, Chapters 4 and 6).
C18. Cordon and Search — BRITISH CAPABILITY
Searches and arrests: Cells Traveling to Curfew spaces must always flip Active. At the start of the Reset phase send all Cells in Curfew spaces to Prison.
Cells slip through: A single Cell may always Travel to a Curfew space without Activating.
Tips: The shaded capability means that a single Cell may Travel to a Curfew space without Activating, no matter the number of the cubes there.
Background: Cordon and search operations were a frequent British measure against EOKA, particularly when more precise intelligence on cells was not available. The operations generally consisted of cordoning off a community using barbed wire enclosures, then screening the inhabitants. The process was highly disruptive to the local community and often entailed indiscriminate screening and arrests. Without good intelligence, the operations often uncovered few weapons and failed to capture EOKA members (French, Chapter 4).
C19. Mountain Gangs
Isolated and surrounded: British may Search in 1 Mountain space and then Assault there.
Lure British from towns: Move up to 6 British Troops from any Towns to 1 Mountain space.
Tips: The shaded effect may move Troops even to a non-adjacent Mountain space.
Background: Although most of the sabotage attacks were carried out by EOKA cells located in Cyprus' towns, Grivas also organized guerrilla groups in the mountains of Troodos and Kyrenia. The main goal of the mountain gangs was to draw security forces from the towns into large scale sweeps of the mountains, such as Operation Pepperpot (Card C6). The mountains also provided a sanctuary for cells in the towns to avoid capture (French, Chapters 2).
C20. Youth Movements
British impose curfews: Place up to 2 Curfew markers in any Town spaces with Troops.
Used for recruitment: Place 3 Cells in any Towns.
Tips: None.
Background: Many of EOKA's early recruits came from preexisting youth organizations. Grivas went as far as to claim that he sought "to turn the youth of Cyprus into the seedbed of EOKA." The colonial government was concerned with the "corruption of youth" by EOKA and even deported the leader of one of the youth movements, alongside Archbishop Makarios III (Card C1), because of the suspicion he was encouraging unrest among the school children (Card C8) (French, Chapter 2).
C21. Development Program
Win hearts and minds: Increase Political Will by 1 for each Town with both Troops and Police, and no EOKA pieces, Sabotage marker, or Curfew.
Loyalty cannot be bought: Place 2 Cells total in any Towns.
Tips: To be counted for the unshaded effect a space must have at least 1 Police, at least 1 Troop, and no EOKA pieces or Sabotage markers or Curfew markers.
Background: One of Sir John Harding's (Card C15) main strategies for winning the 'hearts and minds' of the Greek Cypriot population was through a development program with an announced budget of 38 million pounds. The British hoped that the Greek community would choose prosperity over enosis. Although the amount was large compared to previous efforts, the development projects were slowly carried out, fell short of the initial goal, and a sizable portion of the funds were collected from taxes on the Cypriot population (French, Chapter 5).
C22. Greek Government
Critical opinion on Enosis: Shift the International Opinion Track up to 2 spaces in either direction. Then either place 2 Cells in Town spaces or remove 2 Cells from any spaces to Available.
Tips: Either player may wish to use this event. Cells may be removed from any Towns, Mountains, or Bases, but not from the Prison box.
Background: Greece was EOKA's main external backer and internationally promoted the position of enosis. Although the Greek government permitted clandestine activities in support of EOKA such as arms smuggling (Card C9) and Radio Athens (Card C14), it refused to openly support the insurgency due to fears of publicly upsetting Britain (a fellow NATO ally), and to avoid tarnishing EOKA's international reputation by making them seem like Greek puppets (Card C11). Greece's support of EOKA was more beholden to their own foreign policy objectives than EOKA's needs. Greek officials hoped to use their clandestine support of EOKA as a way of controlling Grivas, and were willing to threaten reduced assistance to pressure EOKA to limit their activity at key points in the conflict (French, Chapters 2 and 8).
C23. Street Riots — EOKA CAPABILITY
Crowds dispersed: Each space selected for EOKA Sabotage Operation with British pieces and more than 1 Cell must first remove 1 Cell to Available.
Demonstrations: One space selected for EOKA Sabotage Operation may use an already Active Cell.
Tips: If the shaded capability is in effect then EOKA may conduct Sabotage with an Active Cell in one space per turn.
Background: During the Cyprus Emergency, British forces spent much of their time searching for elusive underground cells. However, they often also found themselves having to disperse public demonstrations and riots. Many of the riots and demonstrations were organized by EOKA or encouraged by EOKA actions, such as their attacks on Turkish Cypriots (Card C24) that sparked intercommunal riots. Several of the large-scale street riots involved hundreds of school children (Card C8), intended by EOKA to mitigate Britain's use of harsh measures (French, Chapter 3).
C24. Turkish Cypriots
Bolster police force: Place all Available Police in any spaces with British pieces, then Patrol in up to 2 spaces.
Intercommunal violence: Place a Sabotage marker in up to 2 Towns with Cells and Police.
Tips: None.
Background: Turkish Cypriots were the largest minority group in colonial Cyprus, seventeen percent of the population in the mid-1950s. Turkish Cypriot leaders were also the biggest opponents of EOKA's goal of enosis. The sizable Turkish minority and strategic value of Cyprus also led to Turkey's involvement in the conflict (Card C5). Although EOKA generally avoided targeting the Turkish Cypriot community during the initial years of the conflict, their attacks increased as Turkish Cypriots became increasingly involved in the police (Card C31) and paramilitary organizations (Card C26). The killings of Turkish Cypriot policemen by EOKA led to intercommunal riots on several occasions (French, Chapters 1 and 7). Image source: Brian Harrington Spier, CC-BY-SA.
C25. Assassinations — EOKA CAPABILITY
Limits counterintelligence: Infiltrate may either replace Police or discard Intel Chit, but not both.
Nicos Sampson: Infiltrate may instead select a space with an Underground Cell to remove 1 Police there.
Tips: If the shaded capability is in effect then EOKA may Infiltrate even if there are more Police than Underground Cells, but does not discard an Intel Chit or place a Cell in this case (they may still choose to Infiltrate in the usual way if they have sufficient Underground Cells). If either capability is in effect then EOKA may choose which option to use each time they Infiltrate.
Background: Assassinations were one of EOKA's main tactics other than sabotage attacks. Assassinations carefully targeted members of the security forces, usually police, or civilians deemed 'traitors' for providing information to the British. Besides eliminating EOKA's opponents, assassinations were intended to intimidate other Cypriots from joining the police or collaborating with the British. One of EOKA's most experienced assassins, Nicos Sampson, allegedly carried out over twenty-five assassinations or attempted assassinations. Due to EOKA's recruitment of youths (Card C20), many assassins were only teenagers, some as young as fourteen (French, Chapter 2).
C26. Volkan/TMT
Turkish resistance groups: In up to 2 spaces with Cells and Police, remove 1 Cell to Available to place a Sabotage marker.
Tips: Either player may want to use this event. Sabotage markers are only placed in spaces where a Cell is removed.
Background: Volkan was an early Turkish Cypriot armed group that formed to combat EOKA and protect the Turkish community in Cyprus (Card C24). Volkan and other Turkish paramilitary groups were later absorbed into TMT (Türk Mukavemet Teşkilatı or Turkish Resistance Organization). Although initially formed by local initiatives, there is evidence of TMT receiving assistance and training from the Turkish government (Card C5). TMT clashes with EOKA may have helped weaken the latter, but the fighting also escalated intercommunal violence in the last years of the conflict (French, Chapter 7).
C27. Kyrenia Castle Prison
Attack thwarted: Remove 1 Cell from any space to Prison, then Interrogate.
Prison escape: Move all Cells in Prison to Available.
Tips: None.
Background: As with the Jewish insurgency in Palestine, depicted in The British Way: Palestine, the British detained a large number of EOKA members, but failed to prevent daring prison escapes. Though not as large as the Acre prison break in Palestine, EOKA members escaped Kyrenia Castle Prison using sheets tied into a rope. Many were quickly captured, but others managed to join mountain gangs (Card C19). After the escape from Kyrenia Castle Prison in 1955, many EOKA prisoners would instead be held at Kokkinotrimithia Camp, commonly referred to as 'Camp K.' In 1958, an attempted escape from Camp K was thwarted (French, Chapters 3 and 7).
C28. British Bases
Unsinkable aircraft carrier: For each British Base with no Sabotage marker or EOKA pieces, add 1 Political Will.
Sabotage attempts: Place a Cell in each British Base, then EOKA may Sabotage in each.
Tips: None.
Background: Cyprus' main strategic value for Britain in the post-war period were the military bases on the island. These 'unsinkable aircraft carriers' gave Britain a base with access to the Middle East. The island's perceived strategic value only increased with the British withdrawal from Palestine and the Suez Canal. The bases were targeted by EOKA many times during the Emergency, often using the many Cypriot laborers working on the base to smuggle in bombs. As of 2022, Britain still maintains sovereignty over two major base areas on the island, Akrotiri and Dhekelia (French, Chapters 3 and 4).
C29. Macmillan Plan
Compromise offer: Lower Political Will by 1 to either remove 2 Sabotage markers or shift International Opinion 2 steps to the left.
Plan rejected: Increase Political Will by 1 to conduct Sabotage in up to 3 spaces.
Tips: The Sabotage Operations granted by the shaded text would require Underground Cells as usual, unless modified by the shaded Street Riots (C23) capability.
Background: Harold Macmillan replaced Anthony Eden as prime minister after the latter resigned following the disastrous Suez Crisis (Card C4). In 1958, Macmillan unveiled his plan for Cyprus, a compromise that kept Cyprus under British rule for at least another seven years but with representatives from the Turkish and Greek governments to help govern the island. The plan was rejected by Greece and Greek Cypriots out of fear it would lead to partition, and Grivas signaled EOKA's rejection of the plan by launching another offensive. Although the Macmillan plan failed, negotiations between the Greek and Turkish governments contributed to the Zürich Agreement in 1959 that led to the end of the conflict with the formation of an independent Cyprus (French, Chapter 8).
C30. Operation Forward to Victory
British pre-empt offensive: British may Search in 1 space and then Assault there.
Grivas' terror campaign: EOKA may Sabotage in each Town with Underground Cells.
Tips: None.
Background: Operation Forward to Victory was a campaign devised by Grivas (Card C2) to place the security forces under continuous pressure all across Cyprus, with the goal of dispersing and wearing down the enemy. The campaign resulted in an average of nearly twenty security incidents a week over a six month period including sabotage attacks, ambushes, demonstrations, and strikes. Although British casualties increased, the campaign failed to deliver a decisive blow and force Britain to grant enosis as Grivas had hoped (French, Chapter 3).
C31. Turkish Police — DUAL CAPABILITY
Force multiplier and EOKA target: Infiltrate only removes rather than replaces Police and no longer discards Intel Chits. Police no longer subtract from Sabotage rolls.
Tips: This capability has positive and negative effects for both factions and so might be attractive to either player depending on the board situation.
Background: Through EOKA intimidation and assassinations, the proportion of Greek Cypriot police diminished over the course of the conflict, from close to two-thirds of the force in 1954 to only about one fifth in 1957. The police force increasingly recruited from Turkish Cypriot communities (Card C24). By 1957, slightly over two-thirds of the police force were Turkish Cypriots. Although this made EOKA infiltration of the police harder, the shift also made the police less effective at collecting intelligence on EOKA operations and operating among the Greek Cypriot community. The use of Turkish Cypriot police in Greek communities also risked escalating intercommunal violence (French, Chapter 4). The card image shows Abdullah Alparslan, the first Turkish Cypriot police officer killed by EOKA in 1956.
C32. Road Ambushes — EOKA CAPABILITY
Adapt to attacks: Ambush in spaces with British Troops must also remove the Activated Cell to Available.
Troop lorries attacked: In 1 Ambush space with Troops EOKA may lower Political Will by 1 if successful but remove no Police.
Tips: If the shaded capability is in effect then EOKA may choose which option to use each time they Ambush. If they choose the new option, no Police cube is removed in that space but Political Will is lowered by 1 if the roll is successful.
Background: Although EOKA would generally launch attacks against easier targets such as isolated police stations to capture arms, they conducted a large number of ambushes against British troops, usually traveling along roads. Guerrillas would toss grenades at passing lorries or place mines in their path. These attacks often produced little to no casualties, but on occasion could cause significant losses (French, Chapter 4).
C33, C34, C35. Propaganda
Background: Although Britain hoped to control the resolution of the Cyprus conflict, the Zürich Agreement arose from negotiations between the Greek (Card C22) and Turkish (Card C5) governments. The image depicts Greek and Turkish ministers at the negotiations in February 1959. The agreement and the following London agreement led to an independent Cyprus and sovereign base rights for the British. The agreement did not resolve the demands for enosis. Tensions between Greek and Turkish communities continued throughout the 1960s leading to a Greek-led coup d'état and Turkish invasion in 1974. Since the invasion, Cyprus has been de facto partitioned (French, Chapter 8). Image source: Swiss National Archive, CC BY.
Cyprus — Strategy Guide
By Joe Dewhurst
This strategy guide consists of some general advice for both players and then some specific tips for playing each Faction, and is intended to help get you started rather than explaining everything about the game. Much of the enjoyment of playing will come from exploring and developing these strategies yourself, and of course I need to keep some tricks up my sleeve in case we ever end up on opposite sides of the table.
General Advice
Have a plan – Each campaign (the sequence of Event cards leading up to a Propaganda Round) only lasts an average of six Event cards, meaning that you only should expect to get approximately three full Operation + Special Activity turns per campaign. This doesn't give you much time to get things done, so you should begin each campaign with a plan for what you want to achieve, and only divert from it if there is something more important you need to respond to, or if a better opportunity arises from the Event cards (although beware the allure of these, often they are not your best option).
Keep your eyes on the prize – The game is ultimately a struggle for Political Will, and you should carefully study the various ways in which this can be raised and lowered (these are summarised on both Faction player aids, and on the Propaganda Round aid sheet). Some of these have immediate effects and can often be very attractive, but in the long-term the Propaganda Round effects are likely to have a greater impact, and you should make sure that you are always working towards achieving these.
Master the one-two punch – The structure of the Initiative Track means that if you perform a Limited Operation on one turn you are guaranteed to be able to perform a full Operation + Special Activity on the next turn (unless the Propaganda card is drawn). This means that you can use a Limited Operation on one turn to set yourself up for a powerful action on the next—and remember that you can burn an Intel Chit or Arms Cache to target two spaces with a Limited Operation.
EOKA Tips
Prepare and then strike – It can be quite slow and costly for the British to uncover and remove your Cells, so you can afford to take your time to prepare by Smuggling in Arms Caches, Recruiting additional Cells, and Infiltrating to remove Police, before unleashing a wave of Sabotage.
Sway international opinion – Once the British begin establishing Curfews, make sure to use Propagandize to keep International Opinion as high as possible. By itself this can potentially cost the British 12 Political Will over the whole game, almost enough to secure you a victory. Propagandize can also be used for an immediate hit to Political Will in spaces with a Sabotage marker, but this is typically less effective. Don't forget that an already Active Cell can be used for Propagandize!
Conserve your forces – Be careful not to let the British remove too many Cells to Prison, or else by the end of the game you may be reduced to only a token force. Travel can allow you to flip Cells back Underground, and even a Limited Travel can be used to move Cells from one space to several other spaces, potentially setting you up for a big action on your next turn.
British Tips
Follow the intel – Your Intel Chits have a variety of uses, but the most valuable is probably the ability to remove Underground Cells directly to Prison with Patrol. Once you have Cells in Prison you can Interrogate to gain more Intel, and the cycle continues. Solitary Police are especially vulnerable to Infiltrate, which will also lose you Intel, so consider establishing a 'buddy system'.
Maintain the peace – Placing down Curfews will make you vulnerable to Propagandize, but it can also allow you to secure up to four Towns, which could be worth an additional 2 Political Will during the Propaganda Round. This will mitigate the damage from International Opinion, in addition to preventing Sabotage in those spaces.
Eliminate Mountain Bases – Removing Bases with Assault gains you Intel and Political Will, and if you can clear both Mountain spaces of Arms Caches you will gain an additional 2 Political Will during the Propaganda Round. However, this is easier said than done, and be wary of getting too distracted from the more valuable Towns while you do this. A Limited Search followed by an Assault and Interrogate can be a good way to clear out a Mountain space.
Cyprus — Key Terms Index
Accompanying: Operation required for a Special Activity. (4.1.1)
Activate: Flip Cells Active. (1.4.3)
Active Pieces: Troops, Police, Active Cells (symbol end up), and Arms Caches. (1.4.3)
Adjacent: Spaces next to each other for actions or Events. (1.3.5)
Ambush: EOKA Operation to remove Police and possibly place Arms Caches. (3.3.4)
Arms Cache: EOKA forces that enable Recruit and may be spent for additional Operations or to modify Sabotage rolls. (1.4, 1.6.2)
Assault: British Operation to remove Active EOKA pieces, possibly to Prison. (3.2.4)
Available: Pieces in Available boxes, waiting to be placed. (1.4.1)
Base: British-controlled military base space. (1.3.4)
British: A Faction committed to maintaining British influence in Cyprus. (1.5)
British Political Will: Marker on edge track indicating British commitment to Cyprus, position determines victory. (1.8, 7.0)
Campaign: Event card series leading up to a Propaganda Round. (2.4)
Cell: Mobile EOKA forces that are required for several Operations and Special Activities, and may be Underground or Active. (1.4)
Cube: British Troops or Police piece. (1.4)
Curfew: Marker placed by British Search or Events that inhibits EOKA Recruit and Travel, but enables Propagandize. (1.10)
Cylinder: Token to mark a Faction's Eligibility on the Initiative Track. (2.3)
Dual Use: Event with two alternative effects. (5.2)
Deploy: British Operation to place Police and rapidly move Troops to one space. (3.2.1)
Diplomacy: British Special Activity to shift the International Opinion Track. (4.2.2)
EOKA: A Faction committed to enosis (union) between Cyprus and Greece. (1.5)
Event: Card with text a Faction may execute. (5.0)
Execute: Implement Event or conduct Operation or Special Activity. (2.3)
Faction: Player role: British or EOKA. (1.5)
Flip: Switch Cells between Underground and Active. (1.4.3)
Forces: Troops, Police, Cells, and Arms Caches. (1.4)
Friendly: Forces belonging to the executing Faction. (1.4)
Initiative Track: Track indicating which Faction is 1st and 2nd Eligible, and to mark actions performed on an Event card. (2.3)
Infiltrate: EOKA Special Activity to replace Police and remove Intel Chits. (4.3.2)
Intel Chit: Marker acquired by British and spent to remove Underground Cells, modify Search, or enhance British Operations. (1.6.1)
International Opinion Track: Track indicating the attitude of external actors such as the US and UN towards the conflict in Cyprus, affecting British Political Will and EOKA Infiltrate. (6.5)
Interrogate: British Special Activity to gain Intel Chits. (4.2.3)
Limited Operation: Operation in one space with no Special Activity. (2.3.4)
Mountain: Mountainous rural space. (1.3.3)
Operation (Op): Core action a Faction takes with its pieces. (3.0)
Pass: Forego the action in the selected Initiative Track box to either draw an Intel Chit or perform a Limited Ambush Operation. (2.3.3)
Patrol: British Operation to rapidly move Police and remove Active EOKA Cells to Prison. (3.2.2)
Pawn: A token to designate spaces selected for Operation or Special Activity. (3.1.1)
Phase: Part of a Propaganda Round. (6.0)
Place: Move a piece from Available to the map. (1.4.1)
Police: British forces that inhibit Sabotage and may Patrol. (1.4)
Political Will Phase: Propaganda Round phase in which British Political Will is adjusted and victory is checked. (6.1)
Prison: Box where EOKA Cells are placed and kept unavailable until Reset. (1.3.6)
Propaganda Round: Interruption to usual play, during which Political Will is adjusted, victory is checked, and other status phases are carried out. (6.0)
Propagandize: EOKA Special Activity in Towns with Sabotage or Curfews to lower Political Will on shift the International Opinion Track. (4.3.3)
Recruit: EOKA Operation to place new Cells. (3.3.1)
Redeploy Phase: Propaganda Round phase in which both Factions move pieces. (6.3)
Remove: Take from the map and return to Available or Prison. (1.4.1)
Replace: Remove pieces to place others in their stead. (1.4.1)
Reset Phase: Propaganda Round phase to ready for the next card. (6.4)
Resources Phase: Propaganda Round phase in which both Factions may gain (or lose) Intel or Arms Caches. (6.2)
Restore: British Special Activity to remove Sabotage and Curfews. (4.2.1)
Sabotage: EOKA Operation to place Sabotage markers. (3.3.3)
Sabotage marker: Indicates successful EOKA Sabotage and affects British Political Will. (1.7)
Search: British Operation to move Troops to adjacent spaces, place Curfews in Towns, and flip Cells Active. (3.2.3)
Shaded: 2nd choice of Dual-Use Event, typically favors EOKA. (5.2)
Smuggle: EOKA Special Activity to place or move Arms Caches. (4.3.1)
Space: A map area holding pieces in play: Towns, Mountains, or Bases. (1.3.1)
Special Activities: Actions accompanying Operations; unique to each Faction. (4.0)
Stacking: A limit of two total on Arms Caches that can occupy a space. (1.4.2)
Target: Faction or piece that is the object of an action. (3.1, 4.1)
Town: Semi-urban space. (1.3.2)
Travel: EOKA Operation to rapidly move Cells and possibly flip them Underground. (3.3.2)
Troops: British forces that may Search and Assault. (1.4)
Underground: Cell, symbol end down: not usually subject to removal from Patrol or Assault and capable of Sabotage and Silence. (1.4.3)
Unshaded: 1st choice of Dual-Use Event, typically favors British. (5.2)
Cyprus — Setup Instructions (2.1)
Cyprus Emergency: 1955-1959
Deck Preparation. Gather the Cyprus Event cards, remove the three Propaganda cards, and shuffle the remaining cards. Form three piles of 6 regular Event cards and set aside the remaining 14 regular Event cards (they will not be used). In each pile, shuffle a Propaganda card with 2 of the Event cards and place these 3 cards under the remaining 4 Event cards. Stack the resulting three 7 card piles to form the complete Event Deck of 21 cards. Place the 9 Intel Chits in a cup or container for random drawing.
NOTE: The British only use 12 tan Troop cubes and 6 blue Police cubes. EOKA only uses 12 red octagonal cylinders (Cells) and 4 flat red discs (Arms Caches).
Set up the map as follows (see back page of this booklet for a full setup diagram):
- International Opinion Track: Debated (2)
- British Political Will: 14
- Initiative: EOKA 1st Eligible, British 2nd Eligible
Available:
- EOKA—3 Arms Caches, 6 Cells
- British—3 Police
Prison: Empty
Paphos: EOKA—1 Cell
Limassol: EOKA—1 Cell; British—2 Troops
Nicosia: EOKA—1 Cell; British—2 Troops, 1 Police
Larnaca: EOKA—1 Cell; British—2 Troops, 1 Police
Famagusta: EOKA—1 Cell; British—1 Police
Troodos Mountains: EOKA—1 Arms Cache, 1 Cell
Akrotiri: British—3 Troops
Dhekelia: British—3 Troops
Karpas: Empty
Kyrenia Mountains: Empty