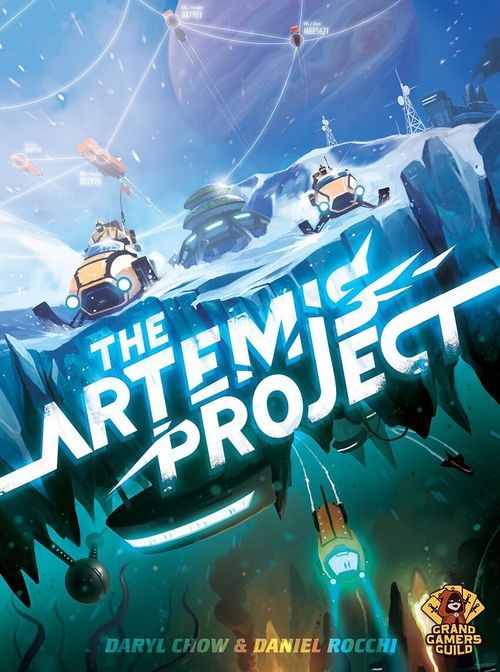
The Artemis Project
The Artemis Project Rulebook
Table of Contents
Table of Contents
Objective
You are the head of a team of Stabilizers attempting to build the most successful colony before the game ends. Harvest resources (Energy and Minerals), construct buildings (in the ocean to improve your abilities and above the ice for scoring), gain and train colonists to staff your colony and help with expeditions. You will score Victory Points (VP) for various accomplishments during the game, and then for a variety of criteria when the game ends (saved Energy and Minerals, VP-earning buildings, number of buildings, sets of all 4 colonist types plus leftovers, and collections of Expedition badges and Toolkits; see Final Scoring for details). The player with the most VP wins!
Components
1 Game Board
5 Player Mats
52 Building Tiles. See the Building Appendix for details on all of the buildings. Ocean buildings are constructed in the first three rounds of the game. If fully staffed at the end of each round, their unique ability activates for you. Surface buildings are constructed in the final three rounds of the game. If fully staffed at the end of the game, they'll provide you with unique scoring criteria.
14 Event Cards. Each Event describes how it is resolved, and displays a letter value that shows when it triggers during the Resolution phase.
22 Expedition Cards. Each Expedition card displays its difficulty and two different rewards. Each card also displays resource values which are not relevant to the Expedition; they help determine how many resources are added to the board for the round.
84 Colonist Markers. Colonists are essential for staffing buildings that require their specific talents, and each of them can bring a different benefit when sent on expeditions. The colonist types are Pioneers, Engineers, Marines, and Stewards, represented throughout the game by their distinct symbols.
1 Draw Bag. The draw bag helps you randomize your colonists. There is also an alternative to the draw bag called the Shakeship — see The Shakeship section for details.
25 Dice (5 per player).
10 Player Markers
1 Event Marker
1 Phase Marker
60 Minerals Markers
60 Energy Markers
35 Toolkit Markers
35 Expedition Badges
20 "5x" Tokens
General Setup
Place the game board centrally. Make supply piles of Minerals, Energy, Toolkits, Expedition badges, and 5x tokens by the board as shown. Place 4 each of Engineers, Marines, and Stewards on the board near the Academy.
Set aside 1 Pioneer per player, then put the rest of the colonists into the draw bag and mix well; keep it near the Doorstep. Shuffle the Building tiles into separate face-down stacks of Surface and Ocean tiles, and place the stacks near the Gantry.
For a 2-player game, you must remove all duplicate buildings from both stacks. They are marked with a symbol.
Shuffle the Event cards, and draw six to form a face-down Event deck near the board. Return the rest to the box. Put the Event marker near the deck.
Since there are six rounds in the game, this Event deck will act as a game timer to remind you of how many rounds remain.
Shuffle the Expedition deck and place it face-down near Basecamp.
Player Setup
Each player takes a player mat, both player markers, and all 5 dice in their color. Each player takes 3 Minerals, 3 Energy, and 1 Toolkit from the supply and puts them in the storage areas of their player mat. Each player takes 1 Pioneer colonist (the ones left out of the bag during General Setup) and puts it in their Shelters.
Each player places their two player markers on the starting spaces of the Score track and the Relief track on the game board. Select a starting player randomly, and give them the Phase marker.
Board Setup
This process happens at game start and then to prepare for each new round. Obviously, at game start there will have been no "previous round".
Basecamp: Clear all Expedition cards from the previous round into a discard pile, then lay out Expedition cards from the deck face up; 1 fewer than the number of players. If the deck runs out, shuffle the discard pile to form a new deck.
If there are any colonists as rewards on these cards, draw them from the bag and place them on those Expeditions now. If there are any buildings as rewards on these cards, draw them from the stack matching the round you are entering and place them by those Expeditions now.
Vents: Discard any Energy remaining from the previous round. Add Energy from the supply to the Vents. The amount you should add is displayed on the top left corner of all of this round's Expedition cards combined, plus 2 Energy.
Quarry: Discard any Minerals remaining from the previous round. Add Minerals from the supply to the Quarry. The amount you should add is displayed on the top left corner of all of this round's Expedition cards combined, plus 2 Minerals.
Gantry: Reveal Building tiles from the indicated stack (Ocean if you are about to play round 1, 2, or 3; Surface if you are about to play round 4, 5, or 6); equal to the number of players. Display them by the side of the board, adding to any that remain from the previous round.
Maximum 8 buildings in the Gantry. If you reach 8, stop revealing new ones.
Doorstep: Place random colonists (two more than the number of players) drawn from the bag into the Doorstep, adding to any that remain from the previous round.
Maximum 12 colonists in the Doorstep. If you reach 12, stop drawing new ones.
Academy: No extra setup necessary.
Outfitters: No extra setup necessary.
Event: Reveal the top card of the Event deck. There is a letter on the Event card; place the Event marker on that letter along the edge of the game board. This indicates when that Event will trigger during the round. (If the letter is first, it triggers immediately when revealed.) Read the Event card aloud so that all players are aware of what it will do and when it occurs during the round.
When all of this is complete, you are ready to begin the round!
Harsh Mode
It's supposed to be difficult to colonize Europa... if you find it too forgiving, try a play where you don't add the +2 Energy, Minerals, and Colonists to the Vents, Quarry, and Doorstep in Setup or each round.
Gameplay
Each round has a Placement phase where players assign their dice to any of the 7 different regions on the board, then a Resolution phase where the regions (and this round's Event) are resolved in a specific order. Finally, there is an Upkeep phase to finish the round and prepare for the next one. The game plays for 6 rounds, and then final scoring is calculated and added to VP that players earned during the game.
Some General Rules
- Whenever you gain/lose VP for any reason, move your marker on the Score track to reflect the gained/lost points.
- Whenever you "pay" or "spend" anything in the game, it is discarded back into its supply pile.
- "Resources" refers to Minerals and Energy in any combination.
- If the supply runs out of Energy, Minerals, Toolkits, or Expedition badges, players should use the 5x tokens to make change and return resources to the supply. A 5x token kept in one of the storage areas on your player mat counts as 5 of that area's item.
- Colonists may only ever go into your buildings if there is room. A building has room for a colonist if there's an empty spot indicating that type of colonist, or an empty blank spot (which can hold any type of colonist).
- Whenever you gain a colonist for any reason, it may immediately be placed in any building that has room, otherwise it must go into your Shelters.
- Whenever you gain a building for any reason, you may immediately move colonists from your Shelters (but not from other buildings) into the new building. Colonists may not otherwise be moved around until the move/swap step of the Upkeep phase.
- If the draw bag ever runs out of colonists, collect the ones that have been discarded from the game and replenish the bag with those. If ever the bag is empty and there are no discarded colonists, no new colonists may enter the game by any means.
- If you are ever instructed to lose something you don't have, comply as much as you can and ignore the remainder. For example, if an event would cause you to lose 2 Minerals and you only have 1, lose the 1.
The Placement Phase
All players roll their dice to form their own dice pool, then placement begins. Begin with the start player and proceed clockwise. On your turn, select one die from your pool and play it to one of the seven regions: Basecamp, Vents, Quarry, Gantry, Doorstep, Academy, or Outfitter.
If you have any Toolkits, you may spend them to alter your dice (before you place them, never after).
- Each Toolkit you spend allows you to add or subtract 1 from one die.
- You may spend multiple Toolkits to alter a die multiple times.
- You may not reduce a die below 1 or raise it above 6.
There are specific rules to placing in the different regions, described below.
Basecamp
Compete to earn Expedition badges and the rewards shown on the Expedition cards.
Place your die next to the Expedition card you wish, starting at the card bottom. Subsequent dice will be placed above existing dice, regardless of their value. You are trying to have the combined dice total on an Expedition meet or exceed its difficulty, in order to earn a badge and a reward.
For example, if you wanted to join an Expedition, you would place your die above the die that an earlier player placed at the bottom of the card.
Sending Colonists on Expeditions
You may send along a colonist (or multiple Pioneers) from the Shelters on your player mat (by spending 1 resource) which will help affect the outcome of the Expedition in the manner described below. When sending colonists on Expeditions, place them alongside your die so that it remains clear who owns them.
Pioneers: You may send multiple Pioneers with your die. (It only costs 1 resource to send any number of Pioneers from your Shelters.) Each Pioneer raises the value of your die by 1 (even beyond 6 is allowed). Do not change the die itself, just consider each Pioneer to be an added "pip" on your die.
Engineers: You may send 1 Engineer with your die. If the Expedition is successful, gain any 2 resources in addition to any other rewards the Expedition might earn you (even if you don't qualify for a reward).
Marines: You may send 1 Marine with your die. Immediately reduce 1 opponent's die on the same Expedition by 1 or 2 (actually change the die). You may not reduce a die below 1.
Stewards: You may send 1 Steward with your die, and your die must be value 1 or 2 only. If the Expedition is a success and you are the first to choose a reward, gain 1VP in addition to the reward.
Note: This is hard to pull off; you would almost always need to send another die on the Expedition in order to achieve first place and qualify for the Steward's reward.
For example, you could send 2 Pioneers from your Shelters along with your die, by spending 1 Energy or 1 Mineral. You place the Pioneers beside your die, and now that die is considered to be a "7".
Vents
Harvest Energy, which is useful for gaining, sheltering, and deploying colonists.
This region uses the Exposure mechanism, which is a key element of the game; place your die to the right of all existing dice that are equal to or lower than your die. Your die's value indicates how much Energy you will be able to harvest during Resolution.
For example, if you wanted to place a "3" die and the existing dice were a "1" and a "3", you would slip it in to the right of the existing "3", bumping any higher dice to the right.
Quarry
Harvest Minerals, which are used to construct buildings.
The Quarry uses the Exposure mechanism, which works the same as in the Vents.
Gantry
Bid upon the buildings you wish to construct.
Place your die on the building tile you wish to construct. The value of the die you place here is the amount of Minerals you are bidding to construct the building.
- You may place a die onto a building that already has other dice on it, but your die's value must be higher than each other die already there.
- You may outbid yourself, or outbid another player who has outbid you.
- You do not need to possess the bid amount of Minerals when you place your die; but if you don't own them by the time the Gantry is resolved in the Resolution phase, you won't be able to buy the building. Plan ahead!
For example, if you wanted to place a "4" on a building, you could place it on a building with no dice on it, or one with a "3" on it. You could not place it on a building where your die wouldn't be the highest one there.
Doorstep
Recruit incoming colonists to staff your colony's buildings and assist with expeditions.
The Doorstep uses the Exposure mechanism, which works the same as in the Vents and the Quarry. Your die's value indicates how many colonists (at most) you will be permitted to recruit from the Doorstep during Resolution, at a cost of 2 Energy apiece.
- You do not need to possess the needed Energy when you place your die; but if you don't own it by the time the Doorstep is resolved in the Resolution phase, you won't be able to recruit your desired colonists.
Academy
Train colonists for other roles.
There are only two spaces here (only 1 space in a 2-player game). Place your die along with any type of colonist from your Shelters or from one of your buildings. Your die value determines what your colonist will become, as displayed on the board.
- If the Academy has run out of the colonist type you'd train into, placing that die here will result in a wasted action during Resolution.
For example, if you place a "3" in an Academy spot with a colonist, it will become a Marine during Resolution.
Outfitter
Gain Toolkits, which are used to change your dice.
The Outfitter is unique among the regions because it triggers immediately instead of waiting for the Resolution phase! Place your die in the section here according to the value shown. Immediately gain the amount of Toolkits displayed from the supply and store them in the Toolkit storage area of your player mat.
- There is no limit to the number of dice that may be sent to the Outfitter.
For example, if you place a "5" in the Outfitter, you immediately gain 2 Toolkits from the supply.
When all players have run out of dice, the Placement phase ends.
The Resolution Phase
Beginning with the Phase marker at Event Spot A and proceeding clockwise around the board, the 6 numbered regions (and the round's single Event, wherever it may fall) are resolved. The start player moves the Phase marker around the board to indicate the currently resolving region. All players gain their dice back from regions as they are resolved.
The Event
When the Event marker is reached by the Phase marker, resolve the Event text of the current Event card; read the card aloud and follow its instructions.
Basecamp
Resolve each Expedition card separately, beginning with the one closest to the deck and proceeding away from it. If the combined total of all the player dice by the card is lower than the Expedition difficulty, the Expedition has failed; every player with dice there receives nothing and gains 1 on the Relief Track (see The Relief Track below). If the combined total of all the dice by the card equals or exceeds the Expedition difficulty, the Expedition is successful! The player with the highest combined value of their own dice (plus any Pioneers) gains 1 Expedition badge and picks a reward from the two shown on the card. The player with the second-highest value of dice there gains 1 Expedition badge and receives the remaining reward. Any other player with dice there receives nothing and gains 1 on the Relief Track.
See the Expedition Reward Index for details on the different Expedition Rewards.
- Ties are broken by the player who played to the Expedition earlier, which is the die placed lower beside the card.
- If only one player has dice present on a successful Expedition, that player gains both rewards (but only one Expedition badge).
- Remember to account for colonist abilities as you resolve! After each Expedition is resolved and rewards claimed, your colonists return to your Shelters (or to your Expedition Hub building, if you have one), not to any other building.
Example: For an Expedition, Green has 6, Yellow has 7 (5 plus 2 Pioneers), and Purple has 3. The total is 16, which easily beats the difficulty of 8; the Expedition is a success! Yellow gets a badge and picks a reward first, choosing to take a Pioneer and Engineer. Green gets a badge and the remaining reward: a single VP. Purple earns neither a badge nor any reward, and gains 1 on the Relief Track.
Vents
Beginning with the leftmost die and proceeding right, the owning player takes Energy from the Vents equal to the die's value. (It is possible that a die will result in a player receiving only some of the Energy their die should have earned them; in that case the player should take as much as possible, and the leftover value of the die is wasted.)
- For any die that earns zero Energy because the Energy ran out, that die is exposed and earns nothing; the player gains 1 on the Relief Track.
Example: There are 8 Energy and 5 dice in the Vents. The Yellow 1 takes 1 Energy. The Green 3 takes 3 Energy. The Yellow 3 takes 3 Energy. The Green 4 takes 1 Energy because that's all that remains. The Purple 4 is exposed, so Purple gains 1 on the Relief Track.
Quarry
Resolve identically to the Vents except with Minerals.
Gantry
Resolve each building tile (that has any dice on it) separately. The player with the highest-value single die has the option to pay that much in Minerals in order to claim that building tile. That player may opt to not spend the Minerals to buy the building (or may not have enough Minerals to spend); that player does not gain anything on the Relief Track. In this case the option goes to the player with the next-highest value die, and so on.
- If you were outbid by another player (not yourself) and that player does pay for and claim the building, you gain 1 on the Relief Track.
- When you claim a building, line it up beside your player mat according to whether it is an Ocean or Surface building. Remember: when you gain a building, you may immediately move any colonists you wish from your Shelters to that building if there is room.
Example: Nobody bid on one building. Yellow won the bid for another building, so pays 4 Minerals and claims it. Purple was outbid, so goes to the Relief track. Green wins the bid for a third building without a fight, so pays 4 Minerals and takes it.
Doorstep
Beginning with the leftmost die and proceeding right, the owner may pay 2 Energy per colonist to claim colonists of their choice from the Doorstep, as limited by the die value (shown on the board). If the colonists run out before all dice have been resolved, any unresolved die gains its owner 1 on the Relief Track. (You may opt out of taking any colonists even if some remain, but you do not gain on the Relief Track unless there are no colonists in the Doorstep when it is your die's turn to resolve.)
- When you gain a colonist, you may immediately place it into any of your own buildings where you have room, otherwise it goes into your Shelters.
Example: These are the dice and colonists in the Doorstep. Players pay 2 Energy per colonist in this order: Purple claims 1 colonist, the Marine. Yellow claims 1 colonist, the Engineer. Green claims 2 of the Pioneers. Purple claims the last Pioneer. The Doorstep is empty, so Yellow's 5 earns Yellow a trip to the Relief Track.
Academy
Each player with a die in the Academy discards their placed colonist from the game, and gains the appropriate (according to their die value) colonist from the Academy supply. (If there are none remaining of the type you should gain, your action here is wasted and you retrieve your placed colonist but you do not gain 1 on the Relief Track.)
- The Academy space on the left is resolved first when both are filled.
- As always, you may immediately place your new colonist into any of your own buildings where you have room, otherwise it goes into your Shelters.
Example: Since Yellow played a "3" into the Academy, Yellow's Pioneer trains up into a Marine! Yellow discards the Pioneer from the game and takes the Marine from the Academy supply.
Outfitter
These dice were already resolved during the Placement phase. Players simply take them back now.
The Relief Track
Whenever you gain on the Relief Track (usually because you had an exposed die, went on a failed Expedition, or were outbid on a building), move your Relief Track marker 1 space to the right. Then gain the reward shown above the space your marker is in, or any one reward your marker has already passed.
Once your marker reaches the end of the Relief Track, you no longer move it or gain Relief Track benefits for the remainder of the game, even if you would normally be entitled to do so.
Example: You are on the second space of the Relief Track, and you gain 1; you move to the third space and could choose to gain either 2 Minerals, 2 Energy, or 2 Toolkits.
Once the Resolution phase is over, proceed to the Upkeep phase.
The Upkeep Phase
During the Upkeep phase, players perform the following tasks in order.
One Move/Swap
Each player may perform 1 colonist move/swap. This means that you may either move a colonist from its current location to an empty space in a building with room (or to your Shelters), or swap the current position of any two colonists in your buildings or Shelters, as long as there is room for both in their destinations.
Activate Fully-Staffed Buildings
Each player may activate their fully staffed Ocean buildings. Most Ocean buildings provide some sort of benefit that can be gained at this time, as long as the building is fully staffed (meaning, there are no empty spots). Players may activate their buildings now (up to once per building) in any order they choose, and gain the benefits described. (See the Building Appendix for details on each building.)
Pay Energy for Colonists in Your Shelters
For each colonist (of any type) in your Shelters, you must pay 1 Energy to keep them warm. If you don't have enough Energy to pay to warm all of the colonists in your Shelters, pay for as many as you can (your choice which ones get paid for) and discard (from the game) any colonists that are not paid for.
Example: You have 3 colonists in your Shelters but only 2 Energy left; you pay the 2 Energy to warm 2 of your colonists and choose one Pioneer to discard.
Refresh the Game Board
Each region gets refreshed for the next round (not necessary if the round you just finished was the final round; you can tell that the final round just finished if there are no Event cards left to reveal). The process for refreshing the board is the same as the original Board Setup, and is summarized in The Artemis Project at a Glance.
Choose a New Start Player
The player with the fewest resources chooses the starting player for the next round. (If this is a tie, the tied player furthest in clockwise order from the previous starting player chooses.) Then a new round begins with a new Placement phase.
Game End and Final Scoring
After the sixth round is complete (including the Upkeep phase), tally final scores to see who has won. Players may have earned VP during the game, and now they will add to those scores according to the criteria displayed below. Score them in the specific order below:
- Saved Energy and Saved Minerals. Earn 1VP for every 5 Energy you have left (up to a maximum of 3VP), and 1VP for every 5 Minerals you have left (up to a maximum of 3VP).
- Fully Staffed Surface Buildings. Each fully-staffed Surface building in your colony scores VP as described on that building tile. Surface buildings that are not fully staffed do not score.
- Number of Buildings. Earn VP based on the number of buildings you've constructed, as displayed on the chart. All of your buildings count towards this score whether they are fully staffed or not.
- Colonist Sets. Earn 3VP for each full set of all 4 colonist types in your colony. You can move all colonists to your Shelters to form sets, they aren't needed in your buildings any more.
- Leftover Colonists. For every group of 3 colonists in your colony (regardless of type) that were not part of a set above, score 1VP. Ignore remainders.
- Expedition Badges. Earn (or lose) VP based on the number of Expedition badges you've collected, as displayed on the chart.
- Most Toolkits. Earn 2VP if you have (or are tied for) the most Toolkits.
The player with the most VP wins! In the event of a tie, the tied player who went earlier in the turn order in the final round wins!
The Shakeship
The Shakeship is a unique alternative to the draw bag for dispensing random colonists, especially if you are worried that players drawing from the bag might be able to feel the shape of the colonists as they are drawn.
Before playing, assemble the Shakeship: make sure the art is on the outside and the blank gray on the inside. Connect the two ship faces to the thruster piece. Slide the two side panels up. Make sure the access hatch is on the side with yellow dots. Slide the two angled panels down. You're done!
The Shakeship can be stored fully assembled in the box.
During Setup, load the colonists by sliding open the access hatch. Remember to leave out one Pioneer per player and the 12 colonists for the Academy. Give it a good shake (with your hand over the opening) to mix the occupants. Stand it upright by the Doorstep.
During play, treat it like you would the draw bag, except instead of reaching into the draw bag you gently tilt and shake out the number of colonists that you need. If any extra colonists ever tumble out accidentally, just pick them up and pop them back in.
Expedition Reward Index
- Gain 3 Minerals.
- Gain 5 Energy.
- Gain 3 Energy or 3 Minerals.
- Gain the building from the card, which was drawn from the appropriate stack and placed on the card when the Expedition was revealed. Colonists from your Shelters may immediately move into the new building if there is room.
- Gain the colonist from the card, which was randomly drawn and placed on the card when the Expedition was revealed.
- Gain 4 Toolkits.
- Gain 2 VP.
- Gain 1 VP for each Marine in your entire colony.
- Gain 1 VP for each Steward in your entire colony.
- Train 1 colonist: discard any colonist from anywhere in your colony and gain 1 of the colonists remaining in the Academy. The new colonist may go into your Shelters or a building where there is room.
- Gain 1 on the Relief Track.
- Gain 1 Expedition badge. This is in addition to the usual badge gained for success.
Building Appendix
Ocean Buildings (Rounds 1-3)
Assault Pod. Special timing: activates before all other buildings, in the "activate fully staffed buildings" step of Upkeep. Choose one opponent. That opponent must lose 3 Minerals (to the supply), and you gain 2 Energy from the supply. (If more than one player owns an Assault Pod, they activate in turn order from the current start player clockwise.)
Crystal Foundry. Gain 1 Mineral from the supply, plus 1 Mineral for each Engineer staffing your Crystal Foundry.
Drone Docks. Gain 1 Energy and 1 Mineral from the supply.
Expedition Hub. Special timing. Colonists here may be sent on Expeditions as if they were in the Shelters, with no resource fee to do so. The Expedition Hub does not need to be fully staffed to be used. After an Expedition's resolution, you may return your Colonists from there to the Expedition Hub if there is room, even if they did not come from it; otherwise they must go to your Shelters.
Geotherm Deck. Gain 2 Energy or 2 Minerals from the supply.
Manufactory. Gain 2 Toolkits from the supply.
Pocket Operations. Spend 2 Minerals to gain 1 VP.
Scoutpost. Special timing. If your Scoutpost is fully staffed when you are placing a die in the Vents or Quarry, immediately gain 1 Energy or 1 Mineral from that location, respectively.
Sensor Station. Spend 2 Energy to gain 1 VP.
Shuttle Bay. Special timing, at the start of Upkeep. If your Shuttle Bay is fully staffed, you are entitled to add up to 2 move/swaps to your move/swap step this round, even if you move the Engineer out of the Shuttle Bay in the process.
Surface Conduit. Gain 1 random colonist from the Shakeship (or draw bag). It may be placed directly into a building that has room, otherwise it must go into your Shelters. If placement in a building results in the building becoming fully staffed, that building is eligible to activate this round.
Synthetics Complex. Discard 1-3 Energy and gain the same amount of Minerals from the supply, or vice versa.
Volcanic Extractor. Gain 1 Energy from the supply, plus 1 Energy for each Engineer staffing your Volcanic Extractor.
Surface Buildings (Rounds 4-6)
Armorist. Gain 1 VP, plus 1 more VP (up to a maximum of 3 more VP) for every 2 Toolkits you hold.
Battery Banks. Gain 1 VP, plus 1 more VP for every 5 Energy you hold, up to a maximum of 3 more VP. This is in addition to the normal VP gained for saved Energy at game end.
Bio-Drome. Gain 4 VP.
Colonial Embassy. Gain 4 VP.
Command Citadel. Gain 1 VP, plus 1 more VP for each Marine/Steward pair in your entire colony, regardless of whether they are in buildings or Shelters.
Explorer's League. Gain 1 VP, plus 1 VP for every 2 Pioneers in your entire colony, regardless of whether they are in buildings or Shelters.
Mineral Jumpdock. Gain 1 VP, plus 1 more VP for every 5 Minerals you hold, up to a maximum of 3 more VP. This is in addition to the normal VP gained for saved Minerals at game end.
Scion Tower. Gain 1 VP, plus 1 VP if your Scion Tower is staffed by a Steward.
Sentry Pylon. Gain 1 VP, plus 1 VP if your Sentry Pylon is staffed by a Marine.
Snowcat Garage. Gain 2 VP. Also: special timing, before you score anything else — if your Snowcat Garage is fully staffed at the beginning of Final Scoring, you may spend Toolkits to make extra move/swaps at a rate of one per Toolkit spent. Moving any staff out of the Snowcat Garage means that you can no longer do this. (If more than one player owns a Snowcat Garage, they activate in turn order from the current start player clockwise.)
Strongpoint. Gain 4 VP.
Threshold Footprint. Gain 1 VP, plus 1 VP for every 2 Engineers in your entire colony, regardless of whether they are in buildings or Shelters.
Warmitory. If all three colonists in your Warmitory are identical, gain 3VP.
Drone's Agenda: Rules for Solo Play
Your consortium has sent you on your mission to colonize Europa with two automated administration drones. You must outperform their rigid and unforgiving agenda to establish a productive colony in the harsh environs of Europa, or suffer a career-ending demotion and reassignment!
Setup
Set up as if for a 2-player game, taking five dice for yourself as usual (for example 5 yellow dice). To represent the Drones, take two sets of four dice in two different colors (for example 4 blue dice for the first Drone and 4 green dice for the second Drone). Take one die of an unused color to act as the Agenda die (for example 1 purple die).
Gameplay
To start each round, roll the Agenda die and the first Drone's four dice. The Agenda die will show a number from 1 to 6; this indicates one of the six regions of the board. Place the first Drone's dice in ascending value from lowest to highest, one per region as if it were a player, starting in the area indicated by the Agenda die and going clockwise.
- If either Drone goes in the Academy, it doesn't place a colonist with it.
For example, the Agenda die shows a 4. Start in the Gantry and place the lowest blue die on a building. The next-lowest goes in the Doorstep, the next in the one space in the Academy, and the last one on the expedition in Basecamp.
Then, roll and place all your dice, using the placement rules as normal as if the Drone dice were other players. After you've placed your five dice, roll the Agenda die with the second Drone's four dice. The Agenda die will give you a region to start in again, but this time place the dice in ascending value from lowest to highest going counterclockwise (ignoring the Outfitter).
- The second Drone skips over the Academy if it is already filled. (Remember, only 1 Academy space is available.)
- Place the second Drone's dice among the existing dice, following normal placement rules as if it were a player.
For example the Agenda die shows a 3. You begin by placing the lowest die in the Quarry, then the next-lowest in the Vents, then the next on the Expedition in Basecamp. Since the single location in the Academy is full, it is skipped and the last one goes into the Doorstep.
Special Drone placement rules for the Gantry; when Drones go here they follow these rules:
A. If the first Drone places in the Gantry, it goes on the building closest to the stack. B. If the second Drone places in the Gantry, it will place on the empty building closest to the stack. i. If there is no empty building, it outbids an existing lower-valued die, preferring to outbid your dice over a Drone die if it is able to. ii. If the Drone could outbid more than one of your bids, you choose which one gets outbid. iii. If the Drone can't outbid the highest bid on any building, set that die aside; it does nothing this round.
Resolve the dice using the normal rules (including applying Relief Track effects for yourself; never for Drones), with the following changes:
- Basecamp: Determine Expedition success as normal, treating the Drones as two distinct players. Drones do not claim Badges or rewards. If you are entitled to a single reward, you may claim either one (regardless of whether you technically achieved first or second place).
- Vents: Energy taken by Drones returns to the supply.
- Quarry: Minerals taken by Drones return to the supply.
- Gantry: When a Drone claims a building, pretend that it can afford the Mineral cost; the building is discarded from the game.
- Doorstep: When a Drone hires colonists, it takes the maximum number that its die value permits; pretend that it can afford the Energy cost. Drones always hire colonists in this order: Steward > Marine > Engineer > Pioneer. Colonists hired by Drones are removed from the game.
- Academy: A Drone in this spot does nothing.
Play the full 6 rounds as usual, following this same process of Drone 1 / You / Drone 2 for placement each round. Remember when you are refreshing the game board each round to treat it as a 2-player game.
Drones are unaffected by Events that would cause them to gain or lose something if they were a player. Drone dice are taken into account when calculating whether an Event's effect might affect you or not. For example an Event causing a penalty to the player with the most dice in a region would count your dice and the Drone dice to see who qualifies; if a Drone qualifies it ignores the penalty but if you qualify you'd suffer the penalty.
Scoring
At the end of the game, score points as normal. (The only difference to scoring is for Toolkits; instead of awards for most or penalties for fewest, you simply earn 2 points if you have at least 7 Toolkits, and lose 1 point if you have fewer than 2.) Your total score earns you the rank as follows:
| Score | Rank |
|---|---|
| 20 or less | Tentacle Cleanup Crew |
| 21 - 24 | Mediocronaut |
| 25 - 28 | Macro Manager |
| 29 - 32 | Colonial Commandant |
| 33 or more | Artemis Prime! |
The Artemis Project at a Glance
Placement Phase (Place 1 die at a time clockwise from Start player.)
- Basecamp: Place beside an Expedition above existing dice; pay to send colonist(s) along.
- Vents: Place to the right of lower or equal dice.
- Quarry: Place to the right of lower or equal dice.
- Gantry: Place on empty building or overbid lower dice.
- Doorstep: Place to the right of lower or equal dice.
- Academy: Place along with colonist you wish to train.
- Outfitter: Place and gain Toolkit(s) immediately.
Resolution Phase (Resolve regions in order, plus the Event when reached.)
- Basecamp: For each successful Expedition, 1st & 2nd get badges and rewards.
- Vents: From left to right, claim Energy based on dice values.
- Quarry: From left to right, claim Minerals based on dice values.
- Gantry: Highest bid per building pays bid in Minerals and claims building.
- Doorstep: From left to right, pay 2 Energy to claim colonists.
- Academy: Train placed colonist into new one from supply based on die value.
- Outfitter: Do nothing.
Upkeep Phase
- You may perform one Colonist move/swap.
- Activate your fully staffed Ocean buildings.
- Pay 1 Energy per colonist in your Shelters.
- Refresh the game board:
- Basecamp: Clear Expeditions, add 1 Expedition per player minus 1.
- Vents: Clear Energy, add Energy shown on Expeditions plus 2.
- Quarry: Clear Minerals, add Minerals shown on Expeditions plus 2.
- Gantry: Add 1 building per player from correct stack (max 8).
- Doorstep: Add random colonists; 1 per player plus 2 (max 12).
- Reveal a new Event and place the Event marker.
- Player with fewest resources chooses starting player.
Final Scoring: Saved Energy and Minerals; Fully Staffed Surface Buildings; Number of Buildings; Colonist Sets; Leftover Colonists; Expedition Badges; Most Toolkits — see Game End and Final Scoring for the full details of each.