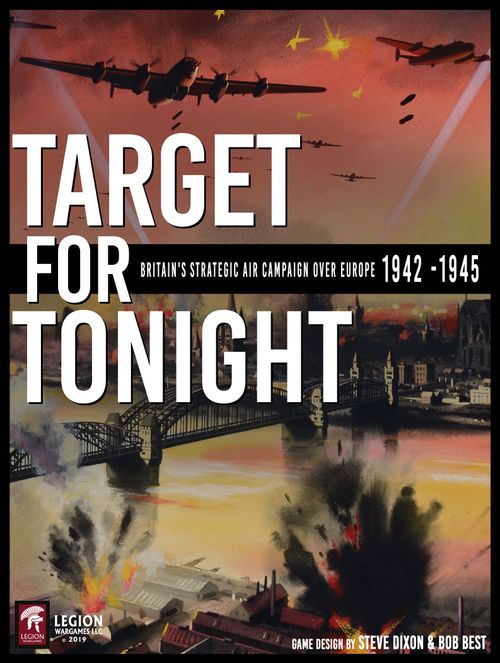
Target for Tonight: Britain's Strategic Air Campaign Over Europe, 1942-1945
Target for Tonight: Britain's Strategic Air Campaign Over Europe, 1942-1945 Rulebook
Table of Contents
Table of Contents
- 1.0 Introduction
- 2.0 Pre-Mission Steps
- 2.1 Set-Up
- 2.2 How to Win
- 2.3 The Twelve Campaigns Offered in Target for Tonight
- 2.4 Target Selection
- 2.5 Selecting Your Bomber Type
- 2.6 The Bomber Command Flight Log Gazetteer
- 2.7 The Electronics War
- 2.8 The Bomber's Crew Members
- 2.9 Crew Placement Board and Battle Board
- 2.10 Determine the Phase of the Moon
- 3.0 Starting the Mission Game
- 4.0 The Zones
- 4.1 Movement Defined
- 4.2 Weather in the Zone
- 4.3 Checking for Mission Recall
- 4.4 Check for Mechanical Failure
- 4.5 Aborting the Mission
- 4.6 Contrails
- 4.7 Detection of Your Bomber by the Luftwaffe's "Kammhuber" Air Defense System
- 4.7.1 The Luftwaffe's "Kammhuber" Air Defense System will attempt to detect your bomber in the bomber's current zone.
- 4.7.2 If the bomber is NOT spotted then there is NO COMBAT in this zone. Return to the Zone sequence of play and continue with the navigation step. (Rule 4.9)
- 4.7.3 If your bomber is detected on Table 4-5 go to Rules Section 5.0 to resolve both spotting and attack(s) for AAA and Night Fighter combat(s).
- 4.8 Decoy Mission or "Spoof Raid"
- 4.8.1 If your bomber is recalled per the procedure outlined in Rule 4.2, roll on Table 4-2A to see if the reason for the recall was a "Spoof Raid" cancellation. If the result is "Spoof Raid Recall" then your bomber receives credit for the mission. If it was just a weather recall then no credit is given.
- 4.8.2 (Optional Rule) Flying a "Spoof" Raid as Your Mission
- 4.9 Navigation
- 5.0 German Night Fighter and AAA Gun Combat Procedures
-
- 5.0.1 Preparing Your Bomber
- 5.0.2 Any of the Electronic Warfare devices that transmit a signal such as Monica, Mandrel, and H2S can be detected by Night Fighters with the correct ECM equipment. The player needs to decide which, if any of these devices he wants to have transmitting in the zone. This will affect which die roll modifiers are available on various tables as play progresses in the zone. Note all of these devices that are active on the mission log sheet.
- 5.0.3 The player should also decide if he is dropping "Window". The "Window Chute" for game purposes is located in the rear centre section of each bomber type. There are various tables that have a Die Roll Modifier when "Window" is dropped. To get the modifier a crewmember must be assigned to drop "window" while crossing the entire zone.
- 5.0.4 After positioning your crew go to Rule 5.1 for Searchlight and AAA Gun Spotting and Combat phase.
- 5.1 Searchlight/AAA Gun Spotting Procedure
- 5.1.1 To see if your bomber has been detected in this combat phase by AAA Guns and Searchlights roll on 2D6 on Table 4-7 "Searchlight/AAA gun Detection in the Zone".
- 5.1.2 To use Table 4-7, select the correct Phase of the Moon column and cross-index it with the die roll to determine the result. At the top of each "Phase of the Moon" column is the Spotting number that must be rolled for the Germans to spot the bomber. Die roll modifiers affect the die roll result.
-
- 6.0 In the Target Zone
- 6.1 Bombing the Target
- 6.2 Low Altitude Bombing
- 6.3 (Optional Rule) Thermal Turbulence - Fire Bombing and Firestorms
- 6.4 Pathfinders and the "Master Bomber"
- 6.4.1 To reflect Bomber Command's poor bombing record before Pathfinders were used to mark the target, if your bomber is flying its mission prior to September 1942, apply a -5 die roll modifier on Table 6-6. This is in addition to any other "off course" Modifiers from navigation errors in the zone (Table 5-15) and any other applicable table modifiers.
- 6.4.2 There is no modifier used on Table 6-6 between Sept 1942 and May 1943.
- 6.4.3 After June 1943, a "Master Bomber" was used by the Pathfinder Force to ensure the target was properly marked and the flares and incendiary bombs refreshed as needed to illuminate the aiming point for the bomb aimers coming in to bomb the target. The "Master Bomber" also directed each bomber as it arrived at the initial point on the bomb run to the drop point. Bombing accuracy was greatly improved.
- 6.5 The Turn Around - Heading Home
- 7.0 Ending the Mission
- 8.0 Post Mission Debriefing
- 9.0 (Optional Rule) Additional British Bombers and German Night Fighter Aircraft
- 9.1 (Optional Rule) The Vickers Wellington Bomber
- 9.2 (Optional Rule) German Me 262 Jet Night Fighter
- 9.2.1 The Me-262 B-1a/U1 night fighter can be substituted in Table 5-7 GERMAN NIGHT FIGHTER APPEARANCE. If the player wishes to use this night fighter follow note c) for Table 5-7. The Me-262 also has Bomber "To Hit" firing data in Table 5-12B.
- 9.2.2 The Me-262 B-1a/U1 night fighter is considered to come equipped with both Flensburg and Naxos EW devices as standard.
- 9.2.3 The Me-262 B-1a/U1 can operate in the Very High-Altitude Level against the B-29 Superfortress bombers if that optional rule is being used.
- 9.2.4 (Optional Rule) Early Introduction of the German Jet Me-262 B-1a/U1 Night Fighter
- 9.3 (Optional Rule) Ta 154 A-0 Night Fighter
- 9.3.1 The Ta 154 A-0 night fighter can be substituted in Table 5-7 GERMAN NIGHT FIGHTER APPEARANCE. If the player wishes to use this night fighter follow note d) for Table 5-7. The Ta 154 A-0 also has bomber "To Hit" firing data in Table 5-12B.
- 9.3.2 The Ta 154 A-0 night fighter is considered to come equipped with both Flensburg and Naxos EW devices as standard.
- 9.3.3 (Optional Rule) Early Introduction of the Ta 154 A-0 Night Fighter
- 9.4 (Optional Rule) Italian Do 217 J-1 Night Fighter
- 10.0 The Optional Rules
- 10.1 (Optional Rule) Alternate Landing Options
- 10.2 (Optional Rules) Mobile Barges and "Heavy Flak Ships"
- 10.2.1 To determine if the water zone contains a mobile barge or "Heavy Flak Ship", roll 1D6. 1-3 - the zone contains a Mobile Barge or "Heavy Flak Ship". 4-6 - there is no mobile barge or "Heavy Flak Ship" in the zone.
- 10.2.2 After March 1944 No mobile barges or "Heavy Flak Ships" are found in any sea zone where the players bomber is crossing the coastline into France (F) or Belgium (B). After December 1944, no mobile barges or "Heavy Flak Ships" are found in any sea zone where the players bomber is crossing the coastline into France (F), Belgium (B) or the Netherlands (N).
- 10.2.3 If the water zone the player's bomber is passing thru contains a mobile barge or "Heavy Flak Ship", resolve spotting and the AAA Gun attack and Searchlight phases just as you would in any other non-water zone containing AAA Guns and searchlights. (See Rules sections 5.0 thru 5.2)
- 10.2.4 Some of the additional mission scenarios presented in the Optional Rules Section may call for placement of "Heavy Flak Ships". When playing those scenarios, place the "Heavy Flak Ships" as directed in the individual scenarios and do not roll for additional mobile barges or "Heavy Flak Ships".
- 10.3 (Optional Rule) Additional Crew Positions
- 10.4 (Optional Rule) The Bomber Squadron Game
- 11.0 Making Bombers Compatible in the Target for Tonight, Target for Today, and B-29 Superfortress Games
-
- 11.0.1 When selecting a bomber to fly in any of the three games the player will use the tables and rules specific to that bomber from its parent game.
- 11.0.2 The specific game actions where each bomber needs its own tables and rules from its own game are listed below:
- 11.0.3 If the player is using a bomber that came from another game, then the player will use the bomber's Defensive Fire Resolution Table (Table 5-12A in the case of the Target for Tonight game) from the game being played, NOT from the game the bomber came from. This is because the Bomber Defensive Fire Resolution Table was designed to work with the game being played.
- 11.0.4 Players can check the dice roll modifiers listed below the bomber's parent game Bomber Defensive Fire Resolution Table for modifiers that are specific to the bomber he is flying and then use those modifiers on the Bomber Defensive Fire Resolution Table in the game they are playing.
- 11.0.5 The player should use all the other rules and tables as called for by the sequence of play for the game being played. EXCEPTION: Use the specific rules and tables (listed above) that came with the bomber no matter what game system you are playing.
- 11.1 Some Considerations - Target for Tonight
-
- 12.0 Sources
1.0 Introduction
1.1 Game Rules
The Target for Tonight game design closely follows that of Legion Wargames' Target for Today game, which covers the American Strategic Daylight Bombing Campaign over Europe. Players who are familiar with the Target for Today game system should have no problems adapting to the Target for Tonight game rules and should move quickly into game play.
Designer's Note: For those of you who already own Target for Today here are the major differences between the two games.
Unlike Target for Today, enemy fighters do not attack in large numbers. You may face up to two fighters each time you are attacked. Each fighter attacks one at a time. Enemy fighters do not give up - they continue to press the attack when they miss. They will continue to attack until they lose contact with you, or damage forces them to break off.
Keep track of any off course results you receive, as well as "Corkscrew Maneuvers" you perform. These affect certain procedures in the game. Have fun and enjoy!
For players who own Legion Wargame's Target for Today Game, the three RAF bombers used in this game are compatible with the bombers used in Target for Today. You can also use the Lancaster, Halifax and Stirling bombers featured in this game with the Target for Today game. Optional rules are included to allow the player to experiment with the American B-17 and B-24 bombers from Target for Today in night bombing missions using the Target for Tonight game rules.
Target for Tonight is designed so that each individual mission is fast and easy to play. The campaign game that comprises your Operational Tour of Duty offers the player a game that is rich in detail, making the game as realistic as possible while remaining playable.
It is suggested that the player read the rules then fly a few practice missions to random targets to learn the game systems. After getting comfortable with the basic mission rules, the player can add optional rules that will raise the realism level in the game system.
Note that certain rules are marked Optional. This means that beginners (or anyone interested in a quicker game) should feel free to skip that section if desired and ignore its provisions during play.
1.2 Game Equipment
The following items are contained in your game box:
- This Rules of Play Manual
- Game Tables Manual
- Gazetteer Manual
- Battle Board
- Squadron Game Mission Sheet
- Composite Mission Record
- Zone Worksheet
- Two Counter Sheets
- 5 Bomber cards
- 4 dice (2 Six-Sided, and 2 Ten-Sided)
- Four Pilot's Manuals *
- Four Mission Log Sheets *
- Four Crew Placement Boards *
*One each for Avro Lancaster, Handley Page Halifax, Short Stirling Bomber and Wellington models.
1.3 Dice
Target for Tonight requires two different colored six-sided dice and two different colored ten-sided dice that are included. Throughout the rules and tables:
- The notation "1D6" means roll one six-sided die that gives a result between 1 and 6.
- The notation "2D6" means rolling two six-sided dice and adding the results together to get a result between 2 and 12.
- The notation "1D10" means rolling one ten-sided die. The result is a number between 1 and 10. Note "0" is ten (10) not Zero (0).
- The notation "1D10 + 1D10" means that the player should select a colored 10-sided die to be the 10's digit and the second die will become the 1's digit of a two-digit number.
Some tables will require you to roll "1D10 + 1D10" dice to get a result from 1-100. Before you roll specify one colored die to be the "tens" number and the second die to be the "ones" number. (Example: the first 1D10 die roll is a 6 while the second 1D10 die roll is a 4. The result would be read as "64" on that table.) Note: "00" results is read as one hundred (100), NOT zero (0). Exception, when determining targets using the campaign cards, "00" is zero.
1.4 Counter Identification
The playing pieces include:
- Bomber Crew Counters - hat and rank for officers, portrait for enlisted men. Each position (in most cases) has its own crew counter.
- German Fighter Pilot Skill Levels - Experte, Veteran, Flieger, Novice.
- Phases of the Moon counters.
- Fire & Fire Extinguisher Counters.
- Heat Out & Oxygen Out Counters.
- KIA, Serious and Light Wound Counters.
- Primary Target Marker - used to mark the target zone location on the Strategic Movement Track located on the Battle Board.
- Enhanced "Night Vision" Counter for some bomber crewmen.
- Night Fighter Radar (Lichtenstein, Naxos & Flensburg) Counters.
- Sample German Fighter Counters (including "Wild Boar").
- Schräge Musik Counter.
- Player Position Counter.
- Searchlight Counter.
- Target Marked with Flares Counter.
- Lancaster Bomber Marker to record movement on the Strategic Movement Track. There is one counter for each bomber type in the game.
- Marker used to identify the Night Fighter being targeted by a specific bomber's turret or gun position.
- German Fighter Damage Markers (-# is the die roll modifier).
- H2S, Gee and Gee-H Radar Counters.
- Mandrel, Monica, and Window Counters.
- Low and High Altitude Counters.
- "On-The-Deck" Counter.
- Lancaster Bomber Card placed in the center of the Battle Board. There is one card for each bomber type in the game (the B-29 and Wellington bombers are optional rules).
Optional Rule Counters:
- Optional Bomber Squadron Game Counter - 12 Lancasters, 12 Stirlings, 12 Halifaxes, 12 Wellington and 18 B-29.
- Optional Seafire Escort for B-29 Superfortress Game.
- Optional Italian Do 217 J-1 Night Fighter Counter.
- Optional Me 262 B-1a/U1 Night Fighter Counter.
- Optional Ta 154 A-0 Night Fighter Counter.
- Optional Ventral Turret, retractable (red arrows) and non-retractable. Double arrow below abbreviations (left counter) indicates a retractable turret. Abbreviations indicate which bombers can use the optional gun counters - L indicates can be used with Lancaster, S with Stirling, H with Halifax and W with Wellington.
- Optional Mid Upper turret - BP (MK VIII). "Mid Upper" indicates the bomber's mid upper turret position. "4" indicates number of guns. White color indicates a power turret.
- Optional Ventral handheld .50 Browning MG. "Ventral" indicates the bomber's Ventral position. The "1" indicates number of guns. Black color represents hand-held.
- Optional Nose Gun and Mid-upper Gun Counters.
- Optional Twin Lewis Gun Counter.
1.5 Game Forms and Boards
Target for Tonight uses several different forms during play. NOTE: The forms that require the player to write information on them to keep track of the game processes should be photocopied before use by the player. Only ONE master copy of each form is provided in the game. Permission to copy them is granted to the player. The player should make photocopies of the Mission Log Sheet, the Zone Worksheet, the Composite Mission Record and the Bomber Squadron Game Assignment Sheet before starting play.
How each of the forms are used:
Mission Log Sheet - Each individual bomber type has its own Mission Log Sheet. The player should select the Mission Log Sheet that corresponds with the Bomber type that they wish to fly. There are three different bomber types to pick from; the Avro Lancaster, the Handley Page Halifax or the Short Stirling bomber.
The Player enters the campaign number, mission number, and the number of missions this bomber has flown along with the bomber's name, your airbase name, target city, target type, Bomber Command Group and Squadron numbers and your bomber's Flight Letter in the header area.
The on or off target and bombing percentage are entered after making the bomb run on the target.
Next enter the crew identification information in the appropriate boxes. During play the player tracks his ammunition usage in the Turret/Gun Ammunition Section and records damage and any other pertinent information in the Notes box.
Zone Worksheet - The player uses the Zone Work Sheet for recording the actions in each individual zone as the mission progresses. Record the zone number in the upper left-hand corner of the box. Use the boxes to the right to record your dice roll modifiers and table results for various actions that happen in each zone the bomber is currently in. Note the phase of the Moon in the box provided on the Zone Worksheet.
Note that the Zone Weather (Wx) box can be used for Weather over the Base if this is zone 1 or for the Target's visibility if this is the target zone.
Use the Combat Calculations/Notes box as needed to help you keep track of the action in the zone. Any bomber damage results should be noted on the bomber's Mission Log Sheet.
Crew status (injuries, aircraft shot down, etc.) should be recorded in the status box next to each crewmember's name on the Mission Log Sheet.
The Zone Worksheet contains boxes for two zones. Use as many pages as necessary to record one zone's activity per box to complete the mission.
Crew Placement Board - The player places his crew counters in the correct crew station boxes on the bomber diagram.
Decide what your bomber's turret/gun configuration is going to be and select the correct turret/gun counters. Then place them in the boxes on the bomber silhouette. Do the same for any ECM devices your bomber will carry.
How to make the gun/turret and ECM selections will be explained later in the rules. Also place the bomber's fire extinguishers in the Fire Extinguisher box.
The Bomber Stream Diagram represents a three-dimensional view of the 12 bomber's flying in your bomber squadron and is used with the optional Bomber Squadron game. The bomber numbers correspond with the bomber numbers on the Bomber Squadron Game Assignment Sheet.
Composite Mission Record - The player completes the Composite Mission Record if they are playing an Operational Tour of Duty Campaign rather than just a single mission. After the mission is complete the player records results of the mission, the names and status of the crew and the name of the bomber flying the mission in the Composite Mission Record Sheet. This will give you a record of each mission flown in your Operational Tour of Duty.
Bomber Squadron Game Assignment Sheet - If the player is playing the Optional Rules Bomber Squadron Game then they should complete the Bomber Squadron Game Assignment Sheet to track the status of each bomber in the Bomber Squadron. (See Optional Rule 10.4.)
The player can use historical RAF bomber group designations, or they can make up their own unit information to fit in with any ongoing role-playing story line or other type of game they might be playing.
The Strategic Movement Track - The track is located on the Battle Board. The box with the RAF Bomber Command Emblem is considered your Air Base in Southern England. Place the bomber movement counter in the Air Base zone at the start of the game. Place the Target counter in the correct zone on the Strategic Movement Track. The target's location zone can be found in the Target Listing in the Gazetteer Manual as explained later in the rules.
The player moves his bomber one zone at a time toward the target without skipping any zones. The bomber may spend more than one movement phase in a zone as explained later in the rules. Upon reaching his target zone and bombing the target, the bomber will be turned around in the target zone. (The bomber movement counter is faced back towards its airbase in zone 1 for the return trip home). The bomber will then move one zone at a time back to its air base in Zone 1 as called for by the rules. The procedure is explained later in the rules.
1.6 The Operational Tour of Duty
RAF Bomber Command airmen were required to fly several operations to make up their "operational tour". This usually comprised 30 operations (missions in USAAF terminology).
Bomber Command's Night bombing operations were inherently dangerous. Between March 1943 and the early summer of 1944 over 2,000 bombers were declared "Missing in Action" by the RAF. The life expectancy for bomber crews was very short, with new crews often being lost during their first few operations. A crew might expect to fly 30 "Ops" (missions) in a period of 3 – 5 months depending on the weather conditions and operational requirements.
Only Operational missions completed with the bombs dropped on the target could count towards the crew's operational tour. (See Rule 4.5 for list of Exceptions to this)
The Campaign Game Calendar - After selecting the campaign you wish to fly in you need to pick a beginning date that your bomber will begin flying missions. That date should fall within the campaign game time frame. You can start your operational tour of duty on any date within the campaign you wish. Once you have decided on the start date record it on your Composite Mission Record.
The Battle Board - The Battle Board is where the combat actions take place for each zone. The player places his large sized bomber counter in the center of the board. As German night fighters are generated from the tables, the German night fighter counters are placed in the appropriate attack sector and elevation boxes. Each box shows its clock sector and High, Level or Low attack elevation. Vertical Climb and Dive boxes are also shown along with the "Schräge Musik" box.
1.7 Designer's Note: The Anatomy of a Bombing Mission
Here is the background within which the player will be flying their night bombing operations in Target for Tonight.
Aircrew would usually be notified early in the day that "Ops are on tonight" or "We're stood down" (in their own terminology). A "Battle Order" or list of all aircraft and crews assigned to the mission would be posted on notice boards at the airfield.
Briefings usually commenced during the afternoons. The primary briefing was provided by the Group "C.O." (Commanding officer) accompanied by his flight commanders, Met Officer (meteorologist), "Spy" (intelligence officer) and attended by Pilots and Navigators. At each briefing a huge map of Europe had a line of colored tape running from the bomber base in England out across the English Channel to their target. Usually the bomber stream made a turn or two (called a "dog leg") in their flight path. They would feint toward another city to try to confuse the German Night Fighter controllers as to their true mission target.
Whenever possible RAF Bomber Command would arrange a diversionary attack which was known as a "spoof raid", using a small secondary force often composed of aircraft from Operational Training Units. The hope was that the "Spoof Raid" would draw the night fighters far enough away from the main force bombers that they could not recover in time to effectively intercept the real bombing raid mission force.
The "Kammhuber Line" was the Allied name given to the Luftwaffe's night integrated air defense system. The system was established in July 1940 by Colonel Josef Kammhuber. The system used radar, listening posts, ground observers and searchlights to coordinate night fighter interceptions and Anti-Aircraft Artillery (AAA) gun attacks against the invading bombers. The Kammhuber Line was organized into a series of zones with each zone having a control center that coordinated the incoming information and passed it to the Night Fighters and AAA gun positions. The zones had overlapping coverage and were layered three deep from Denmark to the middle of France.
Each control center (called Himmelbett (canopy bed) by the Germans) consisted of Freya and a Wurzburg radars with a range of about 60 miles, Each Himmelbett control center was also assigned one primary and one backup night fighter.
Here is how the system worked: Once a bomber was located, a night fighter was vectored to the bomber's location by the control center. The control center directed the night fighter close to the bomber's location and then turned the search over to the night fighter. This was called Ground Control Intercept (GCI). When the night fighter was close to the bomber, it took over the search using its own on-board Lichtenstein radar or other detection devices to find the bomber. After handing off the night fighter at the bomber's location, the control center began searching for another bomber to intercept.
The control centers also sent bomber stream location data to AAA gun and searchlight positions so that they could engage the bombers as they passed. AAA guns and searchlights ringed cities and town and were positioned to cover the most likely avenues of approach by the bombers.
An often-successful tactic to evade a determined night fighter pilot or after being caught by a searchlight(s) was to perform an evasive action "Corkscrew Maneuver". This was a high-speed spiral carried out while diving several thousand feet before pulling out of the dive. This maneuver caused high G-forces on the bomber and if not properly executed could tear the wings off.
Early in the war the bombers arrived over the target and dropped their bombs based on each individual navigator's position data. Bombing was very inaccurate. In late 1942 a Pathfinder force was organized to locate and mark the targets. When the bomber arrives in the Target Area a "Master Bomber" or "Master of Ceremonies" as he was known to British Bomber crews would be on scene to direct the bomber attack.
The bomber stream could be 100 miles long and the attack might last an hour or more. It was necessary to keep the target aiming points freshly illuminated and to avoid German decoy fires set to lure bombers away from the real target.
Bomber crews were expected to "stooge around", (fly circuits) around the target and await radio instructions from the "Master Bomber" to bomb the target.
Different colored marker flares or target indicators were dropped onto/over the target at low level by the Pathfinder Force. Once the "Master Bomber" was satisfied with the accuracy of one or more of the "markers" he would give the order to start the attack based on a particular marker. As the attack took place, he would instruct individual bombers approaching the target to adjust their aiming point if the bombs were not landing as he required.
Getting the signal to bomb the target, the bomber would then fly a straight and level bomb run to aid the bomb aimer in lining up on the target. As the bombs fell away a huge photoflash from the bomber would light up the ground below so the bombing target photo could be taken by the bomber. The photo showed the bombing accuracy on the marker and the falling bombs.
After making their attack the crew would turn away and head for home while attempting to avoid known AAA gun concentrations and fighter hotspots if possible.
Night fighters continued to hunt along the returning bomber stream's route claiming victims back towards the North Sea and out into the English Channel and sometimes even over the RAF landing fields in England.
On several occasions the Luftwaffe mounted night intruder raids and followed the bombers home over England shooting them down while they were attempting a landing.
Depending on the course to the target the bombers might overfly several belts of anti-aircraft artillery and search lights, radar sites and listening positions (The Kammhuber Line). The bombers would be illuminated by searchlights and fired upon from the ground, and all the while be pursued, harried and attacked by night-fighters.
The Ruhr Valley was about 35 minutes flying time from the Dutch coast and here the first bombers in the stream would be met with intense anti-aircraft fire and extremely efficient searchlights working closely together.
On arrival back at base the bombers were granted permission to land based on their fuel reserves, wounded crewmen and battle damage. Crippled bombers flying on two or three engines or with wounded crewmen aboard sometimes could not make it back to base and would land at any available airfield they found, RAF Woodbridge was a recognized emergency landing place.
Arriving back at base crews were promptly ferried to debriefing where mugs of tea were distributed while each crew was interviewed and a detailed operational report, compiled before a generous bacon and egg breakfast could be claimed.
2.0 Pre-Mission Steps
2.1 Set-Up
Note: Whether using the standard rules or optional rules, as you select your equipment while setting up your mission note your selections on the Mission Log Sheet of your bomber.
Lay out the game components.
Once you have this done, go to Rules Section 2.3 to decide which campaign you wish to fly your single bombing mission, or start your operational tour of duty in.
Select from one of the twelve available campaigns on the card. Then go to the campaign card you have selected (See Rule 2.3).
The campaign card includes the name of the campaign, the historical time period of the campaign (Starting and ending dates) and the type of bomber(s) available to the player. Select the campaign you wish to play.
Select the start date for your bomber's first mission from the campaign that you have chosen. This can be either a single mission or the beginning mission for your campaign game.
See Rule 2.3 to determine which bombers are available by date and campaign. The player should feel free to choose any bomber type for his game even if it is not historically available. Decide which type of bomber you wish to fly and then select the appropriate Crew Placement Board and Mission Log Sheet for that bomber.
All three (3) RAF bombers have additional choices on Turret/Gun Types (See Rule 2.5.1 & 2.5.2) and electronic counter measures devices (See Rule 2.7) to be made that will be explained later in the rules. Make those choices and place the gun/turret counters on the Crew Placement Board.
Next pick a set of crew counters and place them on the Crew Placement Board of the bomber of your choice. The crew consisted of the following members, a Pilot, a Flight Engineer, a Navigator, a Bomb Aimer, a Wireless Operator/Air Gunner, a Mid Upper gunner and a Tail Gunner. (See Rule 2.8)
Different Electronic Counter Measures (ECM) may also be available depending up which campaign you are playing. The various types of ECM and when they become available will be explained later in the rules. Your bomber may or may not get additional ECM. This will also be explained later in the rules. If your bomber does have added ECM units, place the selected ECM counters on the Crew Placement Board.
There are also optional rules that will allow the player to add more "realism" to the game. This "realism" may increase the complexity of the game. The player can add them or not at their own discretion. There are Optional Rules that will allow the player to fly earlier bomber types and fly some specialized missions that were performed by Bomber Command.
If the player owns Target for Today or B-29 Superfortress, there are Optional Rules that will allow the player to fly the American B-17, B-24 and B-29 bombers in Target for Tonight. Other Optional Rules will allow the player to fly the RAF Lancaster, Halifax and Stirling bombers from this game in Target for Today.
(NOTE: These options will increase the realism level and the complexity of the game and are strictly OPTIONAL. They are all explained later in the rules. Note any choices on the Mission Log Sheet.)
If you are playing a campaign game (multiple single missions) then complete a Composite Mission Sheet as well.
Next, lay out the Zone Worksheet. You will record your bomber's mission progress here.
Lay out the Battle Board. The Battle Board is where combat is resolved and mission progress is recorded on the Strategic Movement Track.
2.2 How to Win
In the Single Mission game your objective is to complete the mission and return your crew and bomber safely to base. Getting your bombs on target is a bonus.
In the campaign game of "TARGET FOR TONIGHT" your goal is to complete the 30 Operations (missions) that comprise your operational tour of duty and bring you and your crew safely back to your base after each mission.
2.3 The Twelve Campaigns Offered in Target for Tonight
- Campaign 1 - Harris Takes Over (8/9 March 1942 - 29/30 May 1942) - Bomber Types: Stirling, Halifax, Lancaster, Wellington
- Campaign 2 - The 1,000 Plane Raids (30/31 May 1942 - 17 August 1942) - Bomber Types: Stirling, Halifax, Lancaster, Wellington
- Campaign 3 - Pathfinders Introduced (17/18 August 42 - 20 December 1942) - Bomber Types: Stirling, Halifax, Lancaster, Wellington
- Campaign 4 - Gathering Strength (20/21 Dec. 1942 - 5 March 1943) - Bomber Types: Stirling, Halifax, Lancaster, Wellington
- Campaign 5 - The Ruhr (5/6 March 1943 - 24 July 1943) - Bomber Types: Stirling, Halifax, Lancaster, Wellington
- Campaign 6 - Hamburg (24/25 July 1943 - 3 August 1943) - Bomber Types: Stirling, Halifax, Lancaster, Wellington
- Campaign 7 - Prepping for Berlin (3/4 August 1943 - 18 November 1943) - Bomber Types: Stirling, Halifax, Lancaster (Stirling begins phase out late 1943) (Wellington phased out Oct. 43)
- Campaign 8 - Target Berlin (18/19 November - 31 March 1944) - Bomber Types: Stirling, Halifax, Lancaster
- Campaign 9 - Prepping for the Invasion (31 March/1 April 1944 - 5 June 1944) - Bomber Types: Stirling, Halifax, Lancaster
- Campaign 10 - Normandy (5/6 June 1944 - 16 August 1944) - Bomber Types: Stirling, Halifax, Lancaster
- Campaign 11 - Target Germany (16/17 August 1944 - 31 Dec 1944/1 Jan 1945) - Bomber Types: Stirling (phased out Sept 44), Halifax, Lancaster
- Campaign 12 - End Game (1/2 Jan 1945 - 25/26 April 1945) - Bomber Types: Halifax, Lancaster
2.4 Target Selection
"...The first stage of Britain's bomber offensive over Germany, from May 1940 to February 1942, had been conducted in such an amateurish and incoherent manner that it had failed to inflict significant economic or psychological damage upon the Third Reich. Although Bomber Command had caused some damage to the Ruhr industrial cities, the pre-war twin-engine bombers lacked the range and payload to reach Berlin or other targets deep in Germany. Furthermore, Bomber Command's efforts to conduct precision night bombing had been revealed by the Butt Report in August 1941 to be a failure, with at best only 10-20 per cent of bombers striking within five miles of their intended target. ... Put on the defensive by this excoriating statistical analysis, Bomber Command sought a new rationale, based on what its forces could actually achieve. ... On 14 February 1942, the Air Ministry issued General Directive No. 5, known as the Area Bombing Directive, which directed Bomber Command to concentrate its operations against Germany's major cities in order to degrade civilian morale within the Third Reich. In practical terms, this now meant that the achievements of Bomber Command's growing fleet of four-engine heavy bombers would be measured primarily by the gross bomb tonnage delivered to Germany, as if it were some great assembly line, rather than by inflicting crippling damage on specific targets that were vital to the Third Reich's war machine" —Quote from Bf 110 vs. Lancaster by Robert Forczyk.
Designer's Note: Target selections for Main Force RAF bomber raids against Europe were made from within RAF's Bomber Command. Target selection was made after considering Intelligence on targets provided by the Joint US - British Combined Strategic Targets Committee or "Jockey Committee" as it was sometimes referred too. Following directives from the highest level of the British government, the missions were selected to compliment the American Daylight Strategic Bombing Campaign with the objective of bringing a combined bomber offensive against Hitler's Third Reich. Follow the directions on the campaign card for the campaign that you have picked to select your targets.
Roll 1D10 + 1D10 and find the result in the left hand (Roll) column of the Campaign card you have selected. Cross-index the dice result to the middle Column (Target) and find your Target City for the Mission. The right-hand column tells you what type of target you are bombing for the city result. Most early campaign targets are Area type, but specific target types will appear in later campaigns and will be explained later in the bombing section of the rules.
Example: Assume you have decided to play Campaign #1- Harris Takes Over. If you are playing a single mission, roll 1D10 + 1D10 to generate a number between 00 and 99. (See Rule 1.3 Dice that explains how to do this). Assume you rolled an 8 and a 3. This will give a result of "83". Cross-index "83" in the roll column with the Target Column. "83" shows that Rostock, Germany is the target and its Target Type is "Area".
The "Notes" section on each campaign card shows the first mission date and target flown by the RAF in that Campaign. The player may start with this mission and then generate additional missions as described in the Notes section as an optional method of determining targets.
After determining the Target City on the Campaign Card you have selected, record the target city and target type on the both the Mission Log Sheet and the Composite Mission Record.
Next, find the Target City in the Target Listing Gazetteer (Table 2-8) and record the information for each zone listed to the right of the target city on the Zone Worksheet. The zone information will be recorded on the zone worksheet as the player's bomber enters each new zone.
2.5 Selecting Your Bomber Type
While there were several different variations within each of the three main bomber types. Target for Tonight uses the following variations of the RAF's four engine bombers for game play.
The Short Stirling Mk III - The Stirling Mk III's maximum speed was 270 mph and the service ceiling with maximum bomb load of 17,000 lbs. was 16,500 feet. A number of different turret and gun types were tried in the Stirling bombers over the course of the war to provide greater protection for the bomber and crew. The standard arrangement was nine (9) .303 caliber Browning machine guns with two guns in a nose turret, two guns in a dorsal (Top) turret mounted in mid-upper fuselage, and four guns mounted in a tail turret. All three of the turrets were powered. A single gun was mounted in the under fuselage pointing aft and was fired by hand. (Optional rules will cover different gun/turret layouts.) The Stirling began to be phased out in late 1943. It flew its last RAF Bomber Command mission in early Sept. 1944.
The Handley Page Halifax Mk II - In October 1941 the Halifax Mk II bombers with 1280 hp Merlin XX engines were assigned to operational units. Maximum service ceiling for the Mk II was 21,000 feet with Maximum bomb load of 13,000 pounds.
The Handley Page Halifax Mk III bomber was introduced in November 1943 and used the Bristol Hercules radial engines.
The player should decide which engine type (Mk II or Mk III) he will be using in the current mission.
(Note: Britain fitted radial engines to some bomber Models to diversify engine production during the war)
Both Mark II and Mark III bombers used several different turret and gun types over the course of the war to provide greater protection for the bomber and crew. The standard arrangement was eight (8) .303 caliber Browning Machine guns with two guns in a nose turret, two guns in a dorsal (Top) turret mounted in mid-upper fuselage, and four guns mounted in a tail turret. Early versions had a ninth .303 caliber single handheld machine gun in a ventral gun position.
Both the Mk II and the Mk III bombers were produced with or without the nose turret. Bombers without the nose turret had a plexiglass nose with a single handheld gun mount decreasing the number of guns carried in the Halifax to seven (7). (Optional rules will cover different gun/turret layouts.)
The player needs to decide if his Halifax has a nose turret or a plexiglass nose with the single handheld machinegun if he chooses to fly the Halifax.
The Avro Lancaster Bomber Mk I - In March 1942, the Lancaster Mk I entered operational service. The bomber had a maximum speed of 275 mph fully loaded at 15,000 feet. The maximum service ceiling with reduced bomb load was 24,500 feet. Several different turret and gun types were tried over the course of the war to provide greater protection for the bomber and crew. The standard arrangement was nine (9) .303 caliber Browning Machine guns with two guns in a nose turret, two guns in a dorsal (Top) turret mounted in mid-upper fuselage, and four guns mounted in a tail turret. All three of the turrets were powered. A single gun was mounted in the under fuselage pointing aft and was fired by hand. (Optional rules will cover different gun/turret layouts.)
2.5.1 Selecting Gun/Turrets On Your Bomber
Select a turret or gun counter for each Turret/gun location on your bomber and place them on the Crew Placement Board. If the player elects to use the standard gun/turret layout use the turret/gun configurations listed in the bomber descriptions in Rule 2.5.
2.5.2 (Optional Rule) Non-Standard Turret/Gun Options
The RAF experimented with different turret arrangements manufactured by Frazer Nash and Boulton Paul during the war. This optional rule allows the player to make changes in the standard turret/gun types used in his bomber. Counters are provided for the various turret/gun options.
Nose Guns - All three bomber types have the twin gun .303 caliber MG turret mounting in the nose as standard.
The Handley Page Halifax - A later option for the Halifax included removing the Nose turret and substituting either a single handheld .303 caliber MG or the heavier single handheld Browning .50 caliber MG in a clear plexiglass nose cone.
Dorsal Mid-Upper (Top) Turret - All three bomber types had a twin gun .303 caliber MG turret installed as standard. A Later option was the Boulton Paul Mk VIII four-gun .303 caliber MG turret. It could be fitted to all three bomber types. A second option used later in the war was a twin gun turret mounting two .50 caliber heavy machine guns.
The Handley Page Halifax Mk II - When first introduced in 1941 the early Halifax bombers had left and right waist gun positions rather than the dorsal mid-upper (Top) turret. The gun positions were twin mounted .303 caliber Lewis guns with each gun having a 97 round drum magazine mounted. Each position had several spare magazines. The player should use the twin Lewis gun counters (one on each side at the waist instead of the upper (Top) turret if you want to use this optional rule.
Tail Turret - All three bomber types had a four-gun .303 caliber MG turret installed as standard. A later option was the FN 82 turret. It was a Twin Gun .50 caliber heavy MG turret that could be fitted to any of the bombers.
The Ventral (Belly) Turret position - This ventral position could either hold a single handheld gun or a twin mounted Preston Green or Frazer Nash FN 64 turret. Or, in lieu of a gun this position was used as a mounting location for the H2S Radar antenna.
The Handley Page Halifax - Early versions of the Halifax had a single handheld ventral gun position only. Several Marks did carry the H2S Radar antenna in this location.
The Avro Lancaster - Early versions of the Lancaster carried either a handheld single .303 caliber MG pointing aft or a Twin .303 caliber FN 64 retractable belly turret. A later option was the single handheld 50 caliber MG pointing aft, or a .50 caliber twin mounted non-retractable turret. If the H2S Radar was installed this gun position was not used.
The Short Stirling - Early versions of the Stirling carried a ventral handheld single .303 caliber MG pointing aft. A later option was the single handheld ventral 50 caliber MG pointing aft. If the H2S Radar was installed the gun position was not used.
2.5.2.1 The substitution of .50 caliber guns into some RAF bombers began in late 1942 to combat the more heavily armed and armored night fighters. It's strictly the players option if he wants to substitute the heavier .50 caliber guns for the lighter caliber .303 guns normally carried. The heavier fire power is reflected on the combat and damage tables as dice roll modifiers.
2.5.2.2 After the player decides upon the turret/gun and caliber arrangement for his bomber he should record it on the bomber's mission sheet next to each gun position.
2.6 The Bomber Command Flight Log Gazetteer
The Bomber Command Flight Log Gazetteer contains an alphabetical listing of all target cities used in Target for Tonight.
The Gazetteer gives the player the distance in Zones to his target, along with the zone types (land/water/country) that must be crossed. On a roll of "1-3" the first letter applies (i.e., water), on a roll of "4-6" the second letter applies (i.e., land).
If your bomber is forced down, or your crew must bail out over water, Crewmen rescued from the sea in Zones 1-5 are returned to England; those rescued from the sea in Zones 6 and beyond are captured. Any other zone marked with "W" for Water or determined to be water from the roll above are considered to be under Axis control.
After September 1944 any water "W" zone bordering France (F) comes under Allied Control.
After January 1945 any water "W" zone bordering France "F", Belgium "B", Netherlands "N", and Norway "No" are considered under Allied control.
The Gazetteer gives the player the distance in Zones to his designated target zone and it also gives the country codes and shows if the zone is water or land for bailout or crash landings for each zone the bomber must travel thru to reach the target city.
NOTE: The zones in the Gazetteer run from Zone 2 thru Zone 15 as zone 1 is your airbase and is not listed in the table.
The last zone block in the row containing data is the "Designated Target Zone" for your target city. Place the Primary Target Marker on the Strategic Movement Track on that zone's space on the Zone Map. Zones beyond the designated target zone will not be entered on this mission.
Next enter the information for each zone in the boxes on the Zone Worksheet. You can enter them all at once or get them from the Gazetteer as you move to each new zone box on the Zone Worksheet as you choose.
Determining Zone Control - The letter(s) in each zone is a code identifying whether the zone is over water or land and its country affiliation.
W = Water, B = Belgium, Cz = Czechoslovakia, E = England, F = France; G = Germany, I = Italy, L = Luxembourg, N = Netherlands, No = Norway, P = Poland, S = Switzerland.
This information comes into play when your bomber is forced down in a zone or the crew must bail out.
Where a zone shows two code letters, the player has a choice of where to come down IF the bomber is under control. If forced to land or bail out involuntarily in such a zone, roll 1D6: on a roll of "1-3" the first letter applies (i.e., water), on a roll of "4-6" the second letter applies (i.e., land).
The Axis controls all the land areas in zones with country codes except England and Switzerland, which is a Neutral country.
After September 1944 France "F" changes from Axis control to Allied control.
After January 1945 France "F", Belgium "B", Netherlands "N" and Luxembourg "L" all change from Axis control to Allied control.
The Alps - Zones highlighted in gray on the Flight Log Gazetteer are "Alps" mountain zones. Roll for weather conditions using Table 4-1A Weather over the Alps and apply the results in the zone.
Your bomber's base - Zone 1 shown on the Strategic Movement Track (but NOT in the Gazetteer) is considered to be the bomber's air base.
Designer Note: The gazetteer assumes Norwich UK as the origin point (which was also used in "Target for Today"). Norwich is in East Anglia which was home of most of the US 8th AF bomber bases in World War II. RAF Bomber Command bases were somewhat more scattered, although the majority were in the East Midlands and Yorkshire regions north of East Anglia. However, some were in East Anglia, which makes a conveniently acceptable base for "Target for Tonight" to ensure consistency and compatibility with "Target for Today". Players are of course free to assume a take-off from bases farther north without impact, the assumption being that the ability of RAF bombers to take off and proceed directly to target on night missions offsets the formation assembly time needed by US bombers on daylight missions.
2.7 The Electronics War
2.7.1 The RAF
The RAF's night bombing campaign was defined by the Electronics War. "Tactical and strategic advantage" seesawed back and forth as each side developed new electronics equipment to counter an advantage held by the other side. Each new development by one side led to a counter development by the other side. These advantages seldom lasted long and in many cases, they were obsolete before any type of full scale EW equipment production program could be implemented. This led to situations when new Electronic Warfare equipment was only installed on some aircraft while other aircraft, many times in the same unit, did without.
Electronic Warfare (EW) equipment in the game is represented by counters that the player selects from and adds to his bomber. These choices of EW equipment have die roll modifiers associated with them. The modifiers are found below the applicable tables found in the Game Tables Booklet, along with the date of appearance of that EW device.
Here is a listing of the EW devices that can be carried by the player's bomber. Select the devices you want your bomber to carry and place the associated EW counter on the Crew Placement Board. Consult your Crew Placement Board for date of availability.
Gee - Gee was designed to assist navigation and to permit 'blind' bombing when the target was not visible to the bomb aimer. It relied on reception of signals from a series of ground stations, along a 200-mile baseline. Gee calculated signal reception time differences and displayed the results. The navigator could calculate a ground position by referencing the display to a special 'Gee Chart', which gave a result accurate to within five and a half miles. Only a limited number of aircraft were fitted with Gee and typically led bomber streams to targets within the operating range of Gee, (about 200 to 220 miles) The bombers would drop their bomb load, which mainly consisted of incendiaries, to mark the target. The first operational mission using Gee took place on the night of 8/9 March 1942 when a force of about 200 aircraft attacked Essen.
Gee-H - Gee-H was one of the more accurate radio navigation systems used during World War II. An advanced design of Gee, its accuracy allowed a longer range than Gee. Gee-H also allowed the Ground Stations to work with multiple aircraft at one time. Mobile ground stations transmitted multiple bearings to the bomber to allow the calculation of a fix. Accuracy depended heavily on the ability of the aircrew. The system was used first on the night of 3 November 1943 during a raid on Dusseldorf by 344 Lancaster bombers. Only 38 were G-H-equipped. By example, October 1944, found that only one third of No. 3 Group's bombers had been fitted with G-H.
H2S Radar - H2S was the first airborne, ground scanning radar to be able to identify targets on the ground for night and all-weather bombing. H2S allowed attacks outside the range of the various radio navigation aids like Gee and Oboe, which were limited to about 220 miles. H2S was also widely used as a general navigation system that allowed the Navigator to identify landmarks at long range. H2S was able to show an electronic radar map of the ground area below the aircraft. The first systems went into service in early 1943. On its second operational mission on 2/3 February 1943, an H2S was captured almost intact by the Germans, and a second unit a week later. This led to the introduction of the FuG 350 Naxos radar detector in late 1943, which enabled Luftwaffe night fighters to home on the transmissions of H2S.
Monica - Monica was a tail warning Radar system fitted to main force bombers that detected night fighters approaching from the rear of the bomber. In September 1944, RAF began removing Monica when it was discovered that the German night fighter force had been equipped with Flensburg sets, which homed in on the Monica set's Radar emissions.
Window - Window consisted of aluminum foil strips cut to precise lengths that would interfere with German ground radar by presenting multiple false targets. Window was initially developed in 1942 by both the Allies and the Germans separately. For over a year the curious situation arose where both sides in the conflict knew how to use Window to jam the other side's radar but had refrained from doing so for fear of their opponent replying in kind. Bomber Command was finally given permission to use Window in July 1943. Window rendered the ground-controlled Himmelbett fighters of the Kammhuber Line unable to track their targets and it also blinding radar-guided anti-aircraft guns and searchlights.
Mandrel - Mandrel was another EW device fitted to main force bombers, which produced a signal that jammed the German early-warning Freya radar sets.
2.7.2 The Luftwaffe
Lichtenstein Aerial Intercept Radar - Beginning in June 1942 the Lichtenstein Aerial Intercept radar sets began being installed in night fighters. Before June of 1942 the pilots relied upon their eyes to spot the bombers after being directed to the bomber's location by Ground Control Intercept operators in the Kammhuber Line Air Defense System.
Naxos - Beginning in September 1943 the night fighter began carrying Naxos, a passive EW device that homes in on H2S radar emissions.
Luftwaffe ground-based signals units attempted to jam Gee and Gee-H transmissions with varying degrees of success during the war.
The Germans countered Mandrel and Window by using Zahme Sau (Tame Boar) tactics. Tame Boar was a night fighter intercept tactic introduced by the German Luftwaffe in 1943. When a raid was detected, the night fighters were scrambled and collected together to orbit one of several radio beacons throughout Germany. Ground operators would radio-direct the massed night fighters to areas where concentrations of Window were the greatest (this would indicate the source of the Window) for the fighter pilots to see targets, often against illumination from fires and searchlights from below. Once fed into the stream, night fighters contacted a succession of individual bombers and maintained contact (and combat) as far as their ammunition and fuel held out.
The Germans also used Wilde Sau (Wild Boar) tactics. Ground operators would radio-direct single-seat day fighters flying at night into the target area. The fighter pilots would attempt to locate the bombers visually relying on searchlights and illumination from fires on the ground to find the bombers. A few of the single-seat fighters had the FuG 350 Naxos device to detect H2S radar emissions from the bombers.
2.8 The Bomber's Crew Members
There are many role-playing aspects to Target for Tonight. Crew members can be named, and personal histories generated to suit the player's taste. Crew counters are provided and are placed in the designated boxes on the Crew Placement Board during setup. There are also optional crew member counters that can be used with some of the optional rules modules.
Crew Position Boxes with a place for the crew member's name are shown on the Mission Log Sheet and the Composite Mission Record. Record any wounds, frostbite, heroic deeds, etc., received by crew members in their status box next to the crew member's name on both forms.
Select the correct crewmen to man the bomber type you selected to use and place them on the Crew Placement Board. Wound status counters are placed on the crew member's counter on the Crew Placement Board as directed.
2.8.1 Bomber Crew Skills and Positions
By Late 1941 with the high casualty rates and the difficulty the RAF had in keeping pace in training crews, a decision was made to standardize all three of the heavy four engine bomber crews at seven men. Typically, the crew consisted of the following members, a Pilot, a Flight Engineer, a Navigator, a Bomb Aimer, a Wireless Operator/Air Gunner, a Mid Upper gunner and a Tail Gunner.
Several of the bombers had more gun positions than air gunners to man them, thus forcing gunners to move from one-gun position to another if the situation required it.
2.8.1.1 Some gunners developed superior night vision and spotting skills as they became more experienced.
2.8.1.2 Roll on Table 2-2 for the two gunners, the WT Operator/Gunner and the bomb aimer to see if they have superior night vision spotting skills. The skill only applies when they are searching the clock sectors that are applicable to the machinegun or turret they are using when a search is conducted. Various modifiers apply to Table 2-2 and are listed below the table.
(Note: ONLY the two gunners, WT Operator/Gunner and the bomb aimer can have the enhanced Night Vision die roll modifier.)
2.8.1.3 If your two gunners, WT Operator/Gunner or bomb aimer has enhanced Night Vision skills place the "Night Vision" counter next to him on the Crew Placement Board and note it next to the crew member's name on the Composite Mission Record sheet.
2.8.1.4 Enhanced "Night Vision" is a skill that may only apply as a dice roll modifier on some combat and spotting tables.
2.8.2 Bomber Command Rank Structure
The RAF introduced a minimum rank of Sergeant for all aircrew. Pilots, navigators and bomb aimers were considerably more likely to be commissioned officers before the end of their operational tours, keeping pace with the enormous rate of losses men could be promoted three times in a year. Wireless operators, flight engineers and air gunners were more likely to be sergeants or flight sergeants at the end of their tours. Exceptional aircrew men were occasionally promoted to Warrant Officer or Commissioned Officer rank. From the mid-war period pilots of crews posted from Operational Training Units to squadrons to commence their tours of operations had often already been commissioned, in some crews the navigator might also have been commissioned and occasionally the bomb aimer.
Rank Comparison - USAAF vs. RAF Bomber Command
| US Army Air Force | RAF Bomber Command |
|---|---|
| Colonel | Group Captain |
| Lt. Colonel | Wing Commander |
| Major | Squadron Leader |
| Captain | Flight Lieutenant |
| 1st Lieutenant | Flying Officer |
| 2nd Lieutenant | Pilot Officer |
| Chief Master Sergeant | Warrant officer |
| Master Sergeant | Flight Sergeant |
| T/Sergeant | Sergeant |
| Senior Airman | Corporal |
A "Main Force" heavy bomber squadron was usually commanded by an officer holding the rank of Wing Commander (Lt Colonel - USAAF Rank). Until mid-summer of 1943 most bomber squadrons were comprised of three flights, "A", "B" and "C". Each flight was commanded by a Squadron Leader (Major) who was usually a pilot but later in the war could be a navigator. During the expansion of RAF Bomber Command from the summer of 1943 many squadrons downsized to having just two flights instead of three. A heavy bomber squadron's aircraft strength varied during the war but 16 to 20 aircraft was considered normal.
Squadrons would normally dispatch about 60 to 70% of the squadron's aircraft on a night operation and at least one of their crews would be expected to be lost every two-night operations. Squadron's losing multiple crews on a single night was quite normal and on several nights during World War II some squadrons lost five or six of their crews in a single night.
Bomber Squadrons usually had a two-digit letter or letter/number code to the left of the National Insignia on the sides of the bomber's fuselage at the waist that identified the Bomber Squadron. A single digit letter to the right of the National Insignia identified the individual bomber within the Squadron.
Crews who had survived several "ops" would often have a particular aircraft assigned to them. They would generally be quite unhappy if "their" aircraft was unserviceable after the day's air test, meaning that they had to take a spare aircraft. It was considered "Unlucky".
2.8.3 (Optional Rule) Role-Playing Aircrew Considerations
For those players who enjoy the role-playing aspects of the game and who like to write after action reports on their bomber's missions for posting on social media here is some additional background for your bomber crew members.
Heavy Aircrew Losses - By July 1943, German night fighters had a success rate of 5%. While impressive in the sense that this was a very new way of fighting, it also meant that very many RAF bombers got through. However, the element of 'never knowing' was a major worry for Bomber Command crews – would we be next?
Aircrews often adopted a fatalistic attitude and in the parlance of the RAF Bomber Crews it was "not the done thing" to discuss losses of friends or roommates, although they would half-jokingly ask each other "can I have your bicycle if you get the chop" or "can I have your eggs and bacon at breakfast if you don't get back tomorrow?" Aircrews had to become accustomed very quickly to the casualty rate suffered by RAF Bomber Command squadrons. Fellow crews were lost or in aircrew language, "bought the farm", "got the chop" or "Failed to Return" (FTR), frequently.
Airmen shared accommodation blocks and it was normal to have spare beds or even a half-empty hut after a night operation.
Superstition - Many aircrew biographies recorded that facing a very limited life expectancy, many of them adopted mascots and superstitions, holding to the belief that if they adhered to a particular custom or carried a specific talisman with them, then they would "get home in time for breakfast". Amongst those frequently mentioned is having a family photograph attached to their crew position inside the bomber, carrying a rabbits foot or teddy bear, wearing a particular scarf around the neck, urinating on the tail wheel of the aircraft before takeoff, or always donning their flying kit in the same sequence. Such rituals were taken extremely seriously. Having to fly in an unfamiliar bomber was highly unpopular. If a crew had a particular aircraft regularly assigned to them many considered it unlucky to have to fly in another if their own was unserviceable.
Either flying as a "spare body" to cover for sickness in another crew or having a "spare body" fly in their own crew was also not popular. Many crews were extremely tightly knit and would not consider being unable to fly as a complete crew. If a crew member was not fully healthy quite often, he would still fly in order to keep the crew together, believing that his absence might cause the loss of the crew on that night. The fear was not groundless as a newly arrived airman from a training unit might be used as a temporary replacement and a momentary hesitation in calling for evasive action in a pending night-fighter attack did often result in bombers being lost.
Trade Leaders - "Trade group" (USAAF Military Occupational Specialty) leadership within a squadron headquarters section included a Navigation Leader who was responsible for the training, efficiency and any special pre-operation briefing requirements of the Navigators, a Bombing Leader heading the bomb aimers, an Engineer Leader for the flight engineers, a Signals Leader for the wireless operators and a Gunnery Leader for the air gunners. The trade leaders were often Flight Lieutenants in rank but could be Flying Officers and were highly experienced and were usually on their second or third tours of operations. The Trade Leaders still flew operationally but not as frequently as the normal aircrew. If a crew had a member unable to fly due to illness or injury sometimes his place might be taken by a "Leader" if the crew was on the "Battle Order" for that night.
2.9 Crew Placement Board and Battle Board
Select the Crew Placement Board for the bomber type you have picked. Place the gun/turrets you have chosen for your bomber on the Crew Placement Board. Then place the aircrew counters you have chosen on the Crew Placement Board. Add any Electronic Warfare packages to the bomber that you want to use. Next place the fire extinguishers in their box next to the bomber on the Crew Placement Board.
Lay the appropriate combat turret gunnery markers nearby.
Place the large bomber counter for the bomber type you have chosen in the middle of the Battle Board combat area.
Now, place the small bomber marker representing the bomber you have decided to use in Zone 1 on Strategic Movement Track, facing toward the Designated Target Zone number.
2.10 Determine the Phase of the Moon
A critical factor in night bombing operations was the amount of light available for the bombers to find their way to the target and successfully bomb it.
In Target for Tonight there are three phases of the moon. Each moon phase has its own dice roll modifiers that will affect visibility rolls on various tables used in Target for Tonight.
Players have the option of rolling on Table 2-1 to determine the phase of the moon for their mission or if the player wants to use the Historical moon phases for that time period, they are listed near the end of the gazetteer. Once the phase of the moon has been determined, place the correct Moon Phase counter in the box on the Battle Board.
3.0 Starting the Mission Game
Sequence of Play:
Determine the Phase of the Moon on Table 2-1. (Rule 2.10)
Determine the weather over the base on Table 3-1. (Rule 3.1.1)
Determine the bomber's takeoff position in the bomber stream on Table 3-1A. (Rule 3.1.2)
Determine takeoff results on Tables 3-2 and 3-3. (Rule 3.1.3)
Determine if you have suffered a collision after takeoff in Zone 1. Roll on Table 5-16. (Rule 3.1.4)
3.1 Take-Off Procedure
3.1.1 Determine the Weather
English weather can be hideous. Tables 3-1 Weather over The Base (Take-Off) and Table 3-2 Take-Off will determine whether your bomber and crew enjoy a safe start to their mission…or an emergency right away.
Consult Table 3-1 - Weather over the Base (Take-Off), to determine the weather for takeoff. Note the weather in the zone box you labeled "Zone 1" on the Zone Worksheet. Modifiers on Table 3-1 can cause the die roll result to be "Mission Scrubbed".
If you are playing the 30 mission Operational Tour of Duty and tracking the days of your tour, mark off another day and roll again for better weather tomorrow, or disregard the result and consider the weather to be "POOR" and continue with the mission. The choice is yours.
Crescent Moon - The Crescent Moon counter represents the moon when it gives the least amount of reflected light. This is sometimes referred to as "The Dark of the Moon" or New Moon period. Dice Roll Modifier is -1.
Half Moon - The Half Moon counter represents those two periods each month when the moon is moving from the Crescent Moon Phase to the Full Moon phase and then moving from the Full Moon phase back to the Crescent Moon phase. There are no dice roll modifiers for the Half Moon Phase.
Full Moon - The Full Moon counter represents the moon when it is in its brightest period. Sometimes referred to as "The Bomber's Moon!" There is a +1 Die Roll Modifier for the Full Moon.
3.1.2 Bomber Stream Takeoff Position
Consult Table 3-1A Bomber Stream Takeoff Position to determine where in the bomber stream your bomber takes off. The Main Force bomber streams early in the war covered hundreds of miles in length and could take several hours between the first bombers taking off and the last bombers taking off. Bombers flying at the back of the Main Force bomber stream had a greater chance of being targeted as the defense was alerted to the raid. Mark your position in the bomber stream on your Mission Log Sheet.
3.1.3 The Takeoff
Next, consult Table 3-2 Takeoff and roll 1D10 to determine your success. If you "crash" go to table 3-3 and determine the results of the crash.
If the result is a mid-air collision your squadron has taken two losses. If you are playing the optional "Squadron Game" game mark off the losses on your "Bomber Group Assignment Sheet" (The consequences of this will be further explained in the "Squadron Game" section - Rule 10.4)
If you take off successfully your bomber counter is now airborne in the Low Altitude Level over Zone 1.
Place a Low Altitude Level counter in the Altitude Level box on the Crew Placement Board.
3.1.4 Possible Collision
Flying at night with several hundred other bombers all flying toward an assembly point which was usually a searchlight pointing vertically into the night sky could be hazardous and collisions were not uncommon.
Roll on Table 5-16 - COLLISION TABLE, to see if your bomber suffers a collision while forming up at the assembly point. (See Rules Section 5.9 Mid-Air Collisions.)
If you avoided a collision, you have successfully reached your assembly point and you are now ready to move into Zone 2 heading toward your target.
4.0 The Zones
Sequence of Play in the Zones:
Determine your bomber's altitude level in the zone when you enter (Rule 4.1.1)
Determine the weather in the zone. Roll on Table 4-1. (Rule 4.2)
Check for Mission Recall on Table 4-2. (Rule 4.3 & Rule 4.8)
Check for Mechanical Failure on Table 4-3A. (Rule 4.4)
Check for Contrails on Table 4-4. (Rule 4.6)
Check for Bomber detection by Freya and Wurzburg Radar on Table 4-5. (Rule 4.7)
If the bomber is spotted go to Rules section 5.0 and complete the combat sequence of play.
If the bomber is NOT spotted, then continue the sequence of play in the zone with the Navigation section. (Rule 4.9)
Check for collisions (Rule 4.10 and Rule 5.9) (Table 5-16)
4.1 Movement Defined
During normal movement your bomber will move one (1) Zone per game turn. Each game turn move your bomber counter one Zone closer to the Zone containing your target—or one Zone closer to your base when returning after bombing the target or aborting the mission prior to bombing.
Some situations such as damage to your bomber, trying to find a route over the Alps or when bombing in the Target Zone will require the bomber to spend more than one game turn in a single zone. These situations are explained in the rules that pertain to them.
4.1.1 Altitude Levels
There are two altitude levels in each zone, including over your base in zone 1. "Below 10,000 feet" is considered low level and "above 10,000 feet" is considered high level. Your Bomber may freely change altitude levels in each zone. If you are at low level when you exit the previous zone you can change to high level and vice-versa. Or, you can enter the next zone at the same altitude level you were at in the previous zone if you wish.
Some rules may require your bomber to change altitude levels within a zone. The bomber can change altitude levels within a zone only as directed by the rules.
As directed by the rules, there are several occasions when your bomber may be moving at two (or more) turns per zone. Reasons include but are not limited to; Battle damage, climbing to get over the Alps, actions in the target zone, evasive maneuvers, or any other situation required by the rules. If the bomber remains in the zone for a second or subsequent movement turn, the bomber can change altitude levels in the zone during that movement phase at the player's discretion.
4.1.2 Place either the Low or High-Altitude Level counter in the Altitude Level box on the Crew Placement Board to show your bomber's altitude level each time you change altitude levels in the zone.
4.1.3 "On-The-Deck" is a special case of flying in the Low Altitude Level. (This is flying the bomber very close to the ground and may be used in some optional rules)
To move to "On-The-Deck" the bomber must start from the Low Altitude Level. In the next zone it can go to "On-The-Deck".
If the bomber is "On-The-Deck" in the current zone, it must return to Low Altitude Level before it can climb to High Altitude Level. The bomber cannot return to the Low Altitude level until the NEXT zone is entered.
4.1.4 The Game Scale
Each zone is approximately 50 miles wide. Your bomber may travel more than 50 miles per zone as "doglegs" were made in the flight paths followed by the bombers to their targets to avoid know AAA gun concentrations and avoid enemy airbases, etc.
Definition: The outbound leg of the mission is flying from your airbase zone toward the target zone.
The inbound leg of the mission is the reverse flight direction. The bomber is flying away from the target zone and toward airbase zone.
4.2 Weather in the Zone
Determine the weather for the zone your bomber is entering and note it on the Zone Worksheet.
For normal zones, roll on Table 4-1 to determine the weather. Roll for weather each time the bomber enters a new zone, NOT each game turn the bomber spends in a zone. The bomber can have more than one movement turn in a zone. The modifiers under Table 4-1 are cumulative. Table 4-1 provides a number of Die roll modifiers for other tables.
If this is an Alps Mountain Zone (Shaded on Table 2-8 of the Gazetteer), AND, 100% Cloud Cover was rolled on Table 4-1 then roll for additional weather results on Table 4-1A Weather over the Alps and follow the table notes.
4.2.1 Entering Alps Mountain Zones
Your bomber must be in the High-Altitude Level to cross over the Alps. If your bomber is in the Low Altitude Level, it must climb to the High Altitude Level before entering the Alps zone.
If your bomber cannot climb to the High-Altitude Level due to damage (Example Turbo Superchargers out) then your bomber can attempt to find a pass that is below 10,000 feet through the Alps. To do this your bomber must spend one additional movement turn (In addition to any other added movement turns for damage, etc.) in the Alps zone looking for a way through the mountains.
See note e) to Table 4-1A - The player rolls 1D10: A result of 1-7 means a pass is located. 8-10 means No Pass was found.
If a pass is found, roll 1D6. 1-5, bomber survives passage unharmed; 6, the bomber crashes into a mountainside bomber is destroyed and all aboard KIA).
If No pass is located the bomber must abort the mission and return to base.
If you are south of the Alps, flying over Italy and cannot cross the Alps, your bomber can divert to Malta in the Mediterranean Sea. Malta is six (6) zones away. Zones 1-4 and 6 are considered over water (W) with zone 5 being a Land Zone (Sicilia) for AAA Gunfire and for ditching and bailout purposes.
4.2.2 If you rolled 100% cloud cover on Table 4-1 "Weather in The Zone" and this is an Alps Zone you are about to enter, you are seeing a storm front building in the Alps zone ahead of you. You are then referred to Table 4-1A "Weather Over the Alps". If you roll "severe icing conditions", ice is beginning to build up on your bomber's wings as you are entering the zone. Note b) to table 4-1A requires the mission to be aborted at this point. Since you are just beginning your entry into the Alps Zone you simply turn your bomber around and reenter the zone you just came from when you tried to enter the Alps zone.
If you are heading toward the target, you simply turn your bomber around in the non-Alps zone you were attempting to leave. You perform all the "in Zone" sequence of play for this non-Alps zone just like any other non-target zone your bomber would enter and then return to base in the turns that follow.
4.2.3 If you are bombing a target in the Alps zone you just abort the mission without bombing the target and return to base.
4.2.4 If you are returning to base and must cross the Alps to return to your base and you roll "100% Cloud Cover" and "severe Icing Conditions" for the Alps zone you are about to enter, you follow the same procedure as above. You roll the zone sequence of play when you reenter the non-Alps zone you were attempting to leave. After completing the sequence of events for the non-Alps zone you can again attempt to reenter the Alps zone on your next turn. Continue this turn around process until you roll conditions that permit you to make it thru the Alps. This simulates the bomber being forced to hunt for a way thru the Alps if the weather closes in on you.
4.2.5 Night Fighters can only appear in the Alps in Good Weather.
4.3 Checking for Mission Recall
Check for mission recall on Table 4-2 Mission Recall. Many missions were recalled due to poor weather. You will ONLY roll on Table 4-2 if the weather result for the zone is "100% Cloud Cover" from Table 4-1. Roll 2D10 on Table 4-2 Mission Recall Table to see if your mission is recalled. Roll on Table 4-2 when entering any and all zones beginning with Zone 2 and prior to the Designated Target Zone (non-inclusive).
Do NOT roll on this Table if the bomber's radio is not functioning or if the bomber is returning to base.
Recalled Missions do not count toward the 30 missions of your tour of duty.
(Exception: If this is a Decoy Mission or Spoof Raid then the mission IS credited as a completed mission for your tour of duty. (See Rule 4.8)
4.4 Check for Mechanical Failure
While the Avro Lancaster, the Short Stirling and the Handley Page Halifax bombers were all reliable aircraft, mass-produced engines, turbochargers, and other systems of the aircraft were subject to malfunction—often at very ill-timed moments. Upon reaching Zone 2, and each zone thereafter, roll 2D10 dice on Table 4-3A.
The die rolls for potential mechanical problems differ with each bomber type.
If the player rolls "01-04" a possible random mechanical failure has occurred in the Halifax and Lancaster bombers. Roll on Table 4-3B for the Lancaster or Table 4-3C for the Halifax bombers. Rolling "05-100" with either the Lancaster or the Halifax is no malfunction.
If the player rolls "01-07" a possible random mechanical failure has occurred in the Stirling bomber. Roll on Table 4-3D for the Stirling bomber. Rolling "08-100" with the Stirling is no malfunction.
4.5 Aborting the Mission
"Aborting a mission" means the bomber turns around and heads for home without bombing the target.
Historically, the decision to abort was the pilot's. "Mission Recall" (Table 4-2) can require an abort. Note that certain events on Table 4-3A, B or C can also require the player to abort the mission or give that option to the player. For game purposes, unless specifically required to abort, players having the option to abort may choose instead to continue the mission. However, in all cases, players may only abort (voluntarily or otherwise) after any and all combat in the zone has taken place (If applicable).
If aborting, begin the return flight to base by turning the bomber counter around in its current zone on the Strategic Movement Track. Face back toward zone 1 and the Bomber's Base. If turning around (aborting), the bomber will spend another turn in the same Zone, (bombs may be jettisoned beforehand unless in Zone 1), and (if applicable) resolving combat again per the spotting procedures (Rule 4.7) and the combat procedures (Rule 5.0).
Aborted missions only count toward the required 30 mission Operational tour if any of the following circumstances occur due to German fighter attacks or German AAA Gun combat:
- a. Bomb bay doors, intercom, or bombsight inoperable.
- b. Compartment heat or suit heater inoperable for one or more crewmen.
- c. Pilot, Bomb Aimer, or Navigator seriously wounded or KIA.
- d. One or more engines out (if two or more engines are out, the bomber must abort)
- e. Oxygen out for one or more crewmen (and no alternative oxygen station exists. See Section 5.14 Loss of Oxygen and its effects)
- f. Electrical system failure.
- g. If the bomber is forced "out of formation" for any other reason.
- h. This is a "Spoof Raid" and your bomber has been ordered to return to base (See Role 4.8)
If the target has not been bombed when the bomber is forced to abort, the bombs may be jettisoned for safety (exception: You cannot jettison bombs in Zone 1).
Note: Only Operational missions completed with the bombs dropped on the target were allowed to count towards the crew's operational tour.
4.6 Contrails
Exhaust contrails usually form in cold, moist air at high altitudes when the air temperature is below -34 degrees Fahrenheit. Conditions that form contrails can be found in the cold night air over Europe at the High-Altitude Level. (Above 10,000 feet.)
When the weather conditions are right, the exhaust of a bomber's engines became visible to the naked eye. "Contrails" (as these came to be called) tended to attract enemy night fighters and helped flak crew determine the bombers' altitude. Accordingly, upon reaching Zone 2, if the bomber is flying in the High-Altitude Level, roll 1D10 on Table 4-4 to see if Contrails form. Record the formation of "contrails" in the appropriate box on the Zone Worksheet as each zone is entered. Roll for contrails in each zone.
No die roll on Table 4-4 is made if the bomber is flying in the "Low Altitude Level" or "On-The-Deck".
4.7 Detection of Your Bomber by the Luftwaffe's "Kammhuber" Air Defense System
The "Kammhuber" Air Defense System can attempt to detect your bomber in any zone except Zone 1 when your bomber is taking off. The Kammhuber radars CAN attempt to spot your bomber when it is returning to base in Zone 1 and night fighters CAN attack your bomber as it attempts to land. This simulates the possibility of German night fighter intruders attacking your bomber. Night fighters did follow the bombers back to their bases and shoot some of them down.
4.7.1 The Luftwaffe's "Kammhuber" Air Defense System will attempt to detect your bomber in the bomber's current zone.
(Note: No detection attempt roll is made in the Target Zone. Your bomber is already spotted. They know where you are going!)
To see if your bomber has been detected in the current zone roll 2D6 on Table 4-5 "Bomber Detection Table". The player must roll 5 or less after adding any table modifiers to the die roll to avoid detection by the radar sites in this zone.
Only roll once for each non-target zone entered. The bomber remains "spotted" or "unspotted" for any additional movement turns it moves in the current zone. Die roll modifiers affect the die roll result. All modifiers are cumulative.
4.7.2 If the bomber is NOT spotted then there is NO COMBAT in this zone. Return to the Zone sequence of play and continue with the navigation step. (Rule 4.9)
4.7.3 If your bomber is detected on Table 4-5 go to Rules Section 5.0 to resolve both spotting and attack(s) for AAA and Night Fighter combat(s).
4.8 Decoy Mission or "Spoof Raid"
In order to provide support for the Main Force Bomber raid, Bomber Command would plan and execute "Spoof Raids" to confuse the Kammhuber Line Air Defense System operators. The "Spoof Raids" were planned to attempt to draw the Luftwaffe's attention away from the real target of the Main Force Bomber mission and get them to send night fighters to attack these decoy raids.
"Spoof Raids" were hazardous as they were a small force of bombers trying to make as much "electronic noise" to get the attention of the Air Defense GCI operators as possible and they were regularly attacked by the night fighters.
Spoof Raids were generally made up of bombers from Heavy Bomber Operational Training Units.
If the player keeps the stations manned and the electronic warfare devices working, then the Bomber Player receives a point for the zone.
Points are accrued in zones 2, 3 and 4. Upon completing both night fighter and AAA Gun Combat in zone 4 turn the bomber around using the same steps as when bombing a target in the target zone and fly back to your base.
After landing the bomber tally the points earned for the mission. If the Luftwaffe has 2 or more points you failed to lure the night fighters away from the Main Force Bombing raid. Casualties were 10% greater than they would have been had you succeeded in your mission of distracting the night fighters.
If your bomber has 2 or more points, you succeeded in your mission and several more bomber crews made it back to base that would have been lost otherwise. And a hardy "Well Done!" for your crew.
4.8.1 If your bomber is recalled per the procedure outlined in Rule 4.2, roll on Table 4-2A to see if the reason for the recall was a "Spoof Raid" cancellation. If the result is "Spoof Raid Recall" then your bomber receives credit for the mission. If it was just a weather recall then no credit is given.
4.8.2 (Optional Rule) Flying a "Spoof" Raid as Your Mission
The player can elect to fly a Decoy or "Spoof" Raid as your mission. These missions were mainly flown between early 1943 and late 1944. If you want to fly a "Spoof" Raid determine the mission just as you would for a regular bombing mission. (See Rule 2.4)
If the target is four zones or less away, reroll until you get a target that is at least five zones or further away. This is because the spoof raid only travels 4 zones before the Luftwaffe GCI controllers in the Kammhuber Line have committed their night fighters or figured out that you are flying a "Spoof Raid".
The object of the "Spoof Raid" is to get the GCI operators to commit the night fighters to attack your group so the main force bomber raid has more of a chance of success. In other words, you are bait!
To attract the attention of the GCI controllers your bomber must make as much electronic "noise" as possible. Your bomber must have an operating Mandrel Set installed and be equipped to dispense Window. If your bomber has H2S radar, then you have to have it turned on as well as any Monica tail warning radar set.
A dedicated crew member must be assigned to man the Window dispensing chute and dropping window beginning in zone 2 and continuing through zone 4. The station must be continually manned. If the crew member is killed or incapacitated, he must be replaced immediately before the bomber leaves the zone.
A crewman must be continually working the Mandrel jamming radar in zones 2 thru four. The station must be continually manned. If the crewman is killed or incapacitated, he must be replaced immediately before the bomber exits the zone.
A crewman must be continually working the H2S radar navigation and bombing radar in zones 2 thru four. The station must be continually manned. If the crewman is killed or incapacitated, he must be replaced immediately before the bomber exits the zone.
If any of the three radar sets are disabled by the night fighter or AAA gun fire or any station cannot continue to be manned due to lack of personnel, then the Germans receive a point for that zone.
4.9 Navigation
Finding the target while navigating at night was a difficult task for Bomber Command. Studies and reports made during the bombing campaign show that bombers often could not locate the target with any degree of accuracy. It was found that most bombers were lucky if they dropped their bombs within 5 MILES of the designated target!
Advances in electronic warfare including navigation aids and blind bombing techniques helped solve the accuracy problem, but night navigation was still a critical factor. The skill of the navigator was a large factor as was the night visibility and weather conditions in arriving at the correct target location. Various die roll modifiers are used with the Navigation Table to determine if your bomber is on course in the zone.
Bomber Command later developed a Path Finder Force to locate and mark targets, but your bomber still has to accurately arrive in the target area. If you are too far off course, you will have to maneuver in the target zone to get lined up for your bomb run. This exposed your bomber to the chance of more attacks by night fighters and AAA Guns. This extra time spent in finding the target is simulated by the "Going Around" option to negate the effects of negative Die Roll Modifiers accrued by being off-course in the zones as the bomber moves toward the target zone.
Before the bomber exits the zone, a check must be made to verify the bomber is still on course as it heads into the next zone. After all combats and any evasive actions taken by your bomber are complete, check to see if your bomber is On Course in the zone.
Roll 1D10 on Table 5-15 and record the results on the Mission Log Sheet.
There is no need to check for "off course" results when returning to base. It is assumed your navigation will be close enough to your base in the airbase zone that "going around" will not be necessary if you were off course.
4.9.1 Electronic Navigation Aids
If your bomber is using Gee in zones 2-5 and is at the High Altitude Level (Zones 2-3 when the bomber is in the Low Altitude Level) and the radar is operational; and the navigator is not KIA, Seriously Wounded or Frostbitten, then the bomber is automatically on course. Gee has an effective range of 5 zones when the bomber is in the High-Altitude Level.
If your bomber is NOT using Gee or your bomber is in zone 6 or beyond, then use the Die Roll Modifiers listed below Table 5-15 to determine if you are on course.
If your bomber is using Gee-H in zones 2-7 and is at the High Altitude Level (Zones 2-5 when the bomber is in the Low Altitude Level) and the radar is operational; and the navigator is not KIA, Seriously Wounded or Frostbitten, then the bomber is automatically on course. Gee-H has an effective range of 7 zones when the bomber is in the High-Altitude Level.
If your bomber is NOT using G-H, or your bomber is in zone 8 or beyond, then use the Die Roll Modifiers listed below Table 5-15 to determine if you are on course.
4.9.2 Effects of Being "Off Course"
The number of zones your bomber is "off course" in is a die roll modifier that negatively affects bombing accuracy on Table 6-6. (Note: This Modifier is shown below Table 6-6 in the format "-??". You must calculate the die roll modifier and substitute it for the "-??")
When your bomber enters the designated target zone, apply a negative modifier on Table 6-6 equal to the number of zones your bomber was off course on the outbound leg to the target. (Example - if the bomber was off course in zones 3 and 4 while traveling to the target in zone 5, the modifier would be -2).
This modifier can be negated by "Going Around".
"Going Around" is an extra attack roll sequence by German night fighters before you enter the bomb run.
Repeat the German Night Fighter Attack sequence as outlined in Section 5.3 for this extra attack as the bombers are "going around". The German fighters get a second chance to attack your bomber again. This additional attack is in addition to any other attacks as outlined in the rules that your bomber faces in the target zone.
If you "go around", do NOT subtract the off-course die roll modifier calculated above on the bomb run.
Die Roll Modifiers for on-course checks:
- +1 if your navigator has between 6 and 10 Missions.
- +1 if the navigator is KIA, Seriously Wounded or Frostbitten or another crewman is navigating
- +1 if your bomber is in the front 1/3 of the bomber stream
- +2 if "100% Cloud Cover" from Table 4-1
- +2 if your navigator has between 1 and 5 Missions
- +3 for missions between 1939 and 1941
4.9.3 German Decoy Fires (Optional Rule)
Because night navigation was a difficult task for the bombers and because the bomber stream was tens of miles long, later arriving bombers tended to navigate toward ground fires ignited by bombers ahead of them in the bomber stream. The Germans would set Decoy Fires to confuse the bombers as to the exact location of the target, hoping to lure bombers away from the real target to bomb a Decoy Fire target. After June of 1943, a "Master Bomber" (Rule 6.4) was used by the pathfinder force to mark the correct target for the main force bombers.
Not all targets could support decoy fire attempts by the Germans. To use this optional rule, the player rolls 1D6 to see if the Germans set a decoy fire.
If the player rolls a modified die roll of <3 the Germans have set a decoy fire. On a modified die roll of ≥4, no fire is set.
DRMs for the roll:
- -1 for mission dates prior to 1942
- +1 for mission dates during 1944 and 1945.
Exceptions:
- If a Master Bomber is directing operations your bomber automatically bombs the real target. (Rule 6.4).
- If the player's bomber is equipped with an operating H2S Radar unit (Rule 2.71) (NOT Gee or Gee-H radar) then your bomber automatically bombs the real target.
If a decoy fire is successfully set, place the Decoy Fire counter in the target zone as a reminder that a die roll is required on the bomb run. In the target zone after the player's bomber has made any final go around to improve its "off-course navigation" (Rule 4.92) roll 2D6 to see if the Navigator successfully brings the bomber onto the correct target. If the dice roll is ≥ 9 on 2D6, then the Navigator has targeted the Decoy Fires and all bombs are automatically off target (Table 6-6)
DRMs:
- -1 if your navigator has more than 11 missions
- -1 if "Clear Conditions" from Table 4-1
- -1 if your bomber is equipped with an operating "Gee-H" radar.
- -1 if the Moon Phase is "Full"
- +1 if the Moon Phase is "Crescent"
- +1 if "Ground Fog or Haze" from Table 4-1
- +1 if "50% Cloud Cover" from Table 4-1
4.10 Possible Collision
Make a check for possible collisions as your last action prior to leaving the zone. Roll on Table 5-16 "COLLISION TABLE" to see if your bomber suffers a collision while traversing the zone. (See Rule Section 5.9 "Mid-Air Collisions".)
5.0 German Night Fighter and AAA Gun Combat Procedures
Combat sequence of play:
- The player determines crew positions on the bomber. (Rule 5.0.1)
- The player determines if a crewman is dropping "Window" (Rule 5.0.3)
- The player determines which of the bomber's EW devices are operating in the zone (Rule 5.0.2)
5.0.1 Preparing Your Bomber
German Freya and Wurzburg radars have detected your bomber. The Ground Control Intercept Officer (GCI) in the "Himmelbett" control center has passed the contact information on your bomber to waiting night fighters and radar directed searchlights and AAA guns spread through the zone. Complete the AAA Gun combat procedure and the night fighter attack procedure for each movement turn your bomber spends in the zone.
The player now makes any position changes for his crew.
Example: The Radio operator can be moved to man the ventral gun if your bomber is so equipped or he may be positioned at the "window chute" if your bomber is equipped with Window ECM. Each bomber dropped 'Window' at one-minute intervals thus saturating radar on the ground radar with blips.
There may not be enough crew members to cover all of the positions in the bomber and this may cause the player to lose or gain different die roll modifiers depending upon his choices in crew placement. The player can change crew positions before starting a new movement turn if the bomber is moving 2 or more movement turns per zone or after the Navigation phase before entering the next zone. (See rule 4.1)
5.0.2 Any of the Electronic Warfare devices that transmit a signal such as Monica, Mandrel, and H2S can be detected by Night Fighters with the correct ECM equipment. The player needs to decide which, if any of these devices he wants to have transmitting in the zone. This will affect which die roll modifiers are available on various tables as play progresses in the zone. Note all of these devices that are active on the mission log sheet.
5.0.3 The player should also decide if he is dropping "Window". The "Window Chute" for game purposes is located in the rear centre section of each bomber type. There are various tables that have a Die Roll Modifier when "Window" is dropped. To get the modifier a crewmember must be assigned to drop "window" while crossing the entire zone.
5.0.4 After positioning your crew go to Rule 5.1 for Searchlight and AAA Gun Spotting and Combat phase.
5.1 Searchlight/AAA Gun Spotting Procedure
AAA Gun Combat Sequence of Play:
- Determine if your bomber has been detected by the Searchlights.
- (NOTE: If the zone has a German occupied country symbol then check to see if your bomber will be attacked by AAA Guns.)
5.1.1 To see if your bomber has been detected in this combat phase by AAA Guns and Searchlights roll on 2D6 on Table 4-7 "Searchlight/AAA gun Detection in the Zone".
5.1.2 To use Table 4-7, select the correct Phase of the Moon column and cross-index it with the die roll to determine the result. At the top of each "Phase of the Moon" column is the Spotting number that must be rolled for the Germans to spot the bomber. Die roll modifiers affect the die roll result.
5.1.3 If the bomber is NOT spotted then there is NO AAA GUN COMBAT in this movement turn in the zone. Proceed to the Night Fighter Spotting/Combat procedure.
5.1.4 If your bomber IS spotted then go to Rule 5.2 AAA Gun Combat and resolve the AAA Gun combat.
5.1.5 The Searchlights
AAA Gun Combat Sequence of Play (continued):
- Determine if your bomber has been detected by the searchlights and AAA guns roll 2D6 on Table 4-7. (Rule 5.1.1 and Table 4-7)
- If the bomber is NOT detected go to the Night Fighter combat phase. (Rule 5.3)
- If the bomber is detected go to Rule 5.2 and complete the AAA Gun combat Phase.
- After completing the AAA Gun Combat go to the Night Fighter combat phase. (Rule 5.3)
The Luftwaffe's "Kammhuber" Air Defense System in the zone has detected your bomber and has provided an approximate location where to look for it to the AAA Gun locations in the zone. But other factors could affect the ground-based searchlights and AAA Guns ability to actually find, illuminate and place accurate fire on your bomber from the ground. The phase of the Moon (Table 2-1), your bomber's takeoff position in the bomber stream (Table 3-1A), the weather in the zone (Table 4-1), whether or not Contrails have formed (Table 4-4), and if the Freya and Wurzburg radars are being jammed all affect how easily your bomber can be detected. All of these items are represented by dice roll modifiers on Table 4-7.
There is NO AAA Gun combat (or searchlights) in Zone 1 or ANY Zone that has been determined to be "Water" (Marked by a "W' in the Gazetteer.)
(Exception: Water marked zones may contain a "Heavy Flak Ship". See Optional Rule 10.2)
If your bomber is detected on Table 4-7 place a searchlight counter in the space provided on the Crew Placement Board to show that it has been illuminated in this movement turn in the zone, then complete the AAA Gun combat sequence below.
(Exception: There are NO searchlights in Zone 1 or ANY Zone that has been determined to be "Water" (Marked by a "W' in the Gazetteer.)
Your bomber remains illuminated by the Searchlight until a successful "Corkscrew Maneuver" is made. (See Rule 5.6 Evasive Action - The Corkscrew Maneuver)
If the bomber is NOT flying "On-The-Deck", the Player can attempt a Single "Corkscrew Maneuver" when the bomber is first acquired by the searchlight.
At the completion of each "Corkscrew Maneuver", roll on table 4-7A to see if the bomber successfully evaded the searchlight.
If your bomber is successful evading the searchlight then remove the searchlight counter. Lose any die roll modifiers for searchlight illumination on any other tables during this movement and combat (both AAA Gun and night fighter) phases in this turn.
Remove the searchlight counter at the end of the night fighter combat phase for this movement turn if it is still active.
5.2 AAA Gun Combat
5.2.1 The bomber does NOT have to be illuminated by searchlights for AAA guns to fire on the bomber.
To determine the level of anti-aircraft fire the bomber receives roll 1D6 on Table 5-1. Record the result on the Zone Worksheet.
5.2.2 After determining level of AAA Fire, cross-index the result with a roll of 2D6 on Table 5-2 to determine any hit made on the bomber.
5.2.3 High Altitude Level vs. Low Altitude Level.
Roll three times on Table 5-2 to see if the Bomber is hit if your bomber is in the High-Altitude Level.
Roll four times on Table 5-2 to see if the Bomber is hit if your bomber is in the Low Altitude Level.
Exception: NO roll on Table 5-2 is made if the result from Table 5-1 was "No AAA Fire."
5.2.4 For each hit recorded from Table 5-2; roll on Table 5-3 to determine the number of shell hits on the Bomber.
For each shell hit, roll once on Table 5-4 to determine the section of the Bomber hit. Record sections hit on the Mission Log Sheet.
After finding the bomber section hit by each AAA Gun shell on Table 5-4, go to the Pilot's Manual for your specific bomber and find the Specific Damage Tables to resolve the actual hit damage. The Specific Damage Tables are divided into various bomber sections and the table designation begins with the first letter of the bomber type and its specific section table number. (See Rule 5.8.3 for the procedure to record bomber damage.)
5.2.5 AAA Shell Bursts Inside Plane (BIP)
Occasionally, AAA shells would explode inside the plane, generally with catastrophic consequences.
BIP Effects - When a BIP result is rolled on AAA Shell Hits table (Table 5-3), it has the following effects:
All crewmen in this compartment are KIA.
If the area hit is a Wing, the Tail, or the Pilot Compartment, the Bomber dives out of control to the ground and the remaining crewmen immediately bailout according to Table 7-4, Uncontrolled Bailout table.
If the Bomb Bay is hit with the bombs still aboard, the Bomber Explodes and the entire crew is KIA.
If the area hit is the Nose, empty Bomb Bay, Radio Room, or Waist, the following occurs:
The Bomber immediately loses altitude and moves into the Low Altitude Level.
No Evasive Action is possible for the Bomber.
The Bomber must spend two turns in each upcoming zone, rolling twice for German night fighter attacks. (If the zone currently occupied is the target zone and flak over the target inflicted the BIP, the Bomber must spend two turns in the target zone after turning around.)
The Bomber is assumed to have received every damage result possible on the damage table for that compartment. (Examine the correct damage table and assume each number from 2 to 12 has been rolled.)
Record this damage on the Mission Log Sheet.
If the Bomber makes it back to base it is considered a total write-off. Get a new bomber for the next mission.
5.2.6 After completion of the AAA Gun combat sequence proceed to the Night Fighter Spotting/Combat procedure. (Rule 5.3)
5.3 Night Fighter Spotting and Combat Procedure
Night Fighter Combat Sequence of Play:
- Determine the number of night fighters that will attack your bomber. (Rule 5.3.1) (Table 5-5)
- Determine the type of night fighter attacking your bomber (Rule 5.3.3) (Table 5-7)
- Determine the type of EW and Weapons Packages carried by the night fighter. (Rule 5.3.4) (Tables 5-7A thru D)
- Determine the skill level of the night fighter pilot. (Rule 5.3.5) (Table 5-8)
- Determine if the first night fighter rolled for on Table 5-5 spots the bomber. (Rule 5.3.2) (Table 5-6)
- Determine the night fighter's attack clock position and level of attack. (Rule 5.3.6) (Tables 5-9 and 5-9A)
- Determine if the bomber spots the night fighter. (Rule 5.3.7) (Table 5-10)
- Complete the "Schräge Musik" Combat procedure if the night fighter is not spotted. (Rule 5.4 and Table 5-13)
- Decide if Evasive Action is desired (Rule 5.6)
- Complete the Bomber's defensive fire phase. (Rule 5.5)
- Complete the night fighter combat round (Rule 5.8 and Tables 5-13, 5-13A, 5-13B)
- Check for collision after night fighter (Rule 5.9 and Tables 5-9, 5-9A)
- Determine if night fighter maintains contact with the bomber. (Rule 5.8 and Table 5-14)
- Complete any additional rounds of combat for this night fighter. (Rule 5.8)
- Complete any additional night fighter combats called for by the rules, then after all combat is concluded return to the Navigation section in the Zone sequence of play.
After the Freya and Wurzburg radars have spotted your bomber in the zone, the GCI controller directs the night fighter(s) close to your bomber's approximate position where the night fighter takes over the search.
5.3.1 Determine the Number of German Night Fighters Attacking the Bomber
5.3.1.1 Roll on Table 5-5 to determine how many night fighters will attack your bomber this turn. There can be anywhere from 0 to 2 night fighters that will attack the bomber. Record the number of attacking night fighters in the appropriate box for that zone on the Zone Worksheet.
5.3.1.2 Random Events
If a Random Event is rolled on Table 5.5, go to Table 5-11 "Random Event" and resolve the random event. The random event takes the place of the night fighter attack in this combat round.
All Random Events listed in the table take effect in the next zone after rolling for them in the current zone. Some events apply only for the next zone, some for the duration of the mission, while others can be carried over into future missions.
5.3.1.3 Night fighters always attack individually. All combat is resolved completely for the first night fighter before the player starts a second night fighter attack sequence if two attacks were called for on Table 5-5.
5.3.2 Determine if the Night Fighter Spots Your Bomber
To see if the night fighter detects your bomber in the current zone roll 2D6 on Table 5-6 "Bomber Detection by the Night Fighter in the Zone".
Only roll once on Table 5-6 for spotting. The bomber is spotted by the night fighter for any additional combat rounds.
5.3.2.4 If the bomber IS spotted by the night fighter proceed to section 5.3.3 and continue the night fighter attack procedure.
5.3.3 Determine the Type of Night Fighter Attacking The Bomber
Hitler did not believe that a large night fighter force was necessary to defend against the RAFs poor night bombing performance. The German thinking was that searchlights and AAA guns could defend the Reich until Germany finished off the Soviet Union and could then bring her full might against the western allies. Germany allocated little of its production to its night fighter forces and did not mass produce Electronic Warfare devices. As a result, after 1940 the Me-110 day fighters equipped with early model Aerial Intercept (AI) radar became the standard night fighter along with modified and upgraded Ju-88. EW devices were limited and not available for all night fighters in a unit so different aircraft within the same unit often had different levels of EW on board. Night fighter squadrons usually assigned their best pilots to the night fighters with the best EW equipment on board. This state of affairs continued into early 1943 when dedicated night fighters that were faster, had better EW equipment and armaments began to appear in service.
5.3.3.1 Roll on Table 5-7 to determine the type of night fighter that will attack your bomber. Place the appropriate night fighter counter on the Battle board.
5.3.3.2 The night fighter types are:
Me 110 F-4 - Operational 12/41 to 3/44; Armed with 2 - 20mm forward firing cannon and 2 - 7.92mm Mg 17 machine guns in the nose.
5.3.2.1 To use Table 5-6, select the correct Phase of the Moon column and cross-index it with the die roll to determine the result. At the top of each "Phase of the Moon" column is the Spotting number that must be rolled for the Germans to spot the bomber. Die roll modifiers affect the die roll result.
5.3.2.2 If the bomber is NOT spotted by the first night fighter, its combat round is over.
5.3.2.3 If a second night fighter was called for by the roll on Table 5-5, follow the same procedure and roll on Table 5-6 to see if the second night fighter spots the bomber. If it does NOT spot the bomber then the second night fighter combat round is over, and the player returns to the Navigation section (Rule 4.9) and continues with the sequence of play in the zone.
Me 110 G-4 - Operational 2/43 to 4/45; Armed with 2 - 30mm forward firing cannon and 4 - 7.92mm Mg 17 machine guns in the nose.
Designer's Note: A designation change was made during the war for Messerschmitt. Their code letters went from "Bf" to "Me" (e.g. Early in the war Bf-109 was used and later, Me-109. Both designations refer to basically the same aircraft. Any reference to any "Bf" fighter means the same as a reference to a "Me" fighter.
Ju 88 C-6 - Operational from 12/41 to 4/45; Armed with 1 - 20 mm cannon and 3 - 7.92 mm Mg 17 machine guns in a solid nose. It also carries 2 - 20mm cannon in the under-fuselage gondola.
Ju 88 G-7 - Operational from 6/44 to 4/45; Armed with 3 - 20mm forward firing cannon and 3 - 7.92mm Mg 17 machine guns in the nose and 2 -20mm upward firing "Schräge Musik" cannon fitted aft of the rear canopy as standard equipment.
Do 217 J-1 - Operational 3/42 to 4/45; Armed with 4 - 7.92mm Mg17 forward firing machine guns and 4 - 20mm forward firing cannon in the ventral gondola.
Do 217 N-2 - Operational 3/43 to 4/45; Armed with 4 - 7.92mm Mg17 forward firing machine guns and fitted with 2 - 30mm or 4 - 20mm cannon in an upward firing "Schräge Musik" installation as standard equipment.
He 219 A-0 - Operational 10/43 to 4/45; armed with 2 - 30mm MK 108 cannons in a ventral tray, 2 - 20-mm MG 151/20 cannons in the wing roots and fitted with 2 - 30mm MK 108 upward firing "Schräge Musik" cannons just behind the cockpit as standard equipment.
Fw 190 A-5UZ Single Seat Day Fighter - Operational 8/41 to 4/45. Armament varied but the A4 version carried 4 - 20mm forward firing cannon and 2 - 7.92mm machine guns.
Me 109 G6/U4N Single Seat Day Fighter - Operational 5/42 to 4/45. Armament varied but the G-2 version carried 1 - 20mm forward firing cannon and 2 - 7.92mm machine guns.
5.3.3.3 The Wild Boar Night Fighter Types
In early 1943 the Luftwaffe decided to increase the night fighter force to counter the RAFs use of Window and Mandrel to blind the Kammhuber Line's radar. Single seat day fighters flying at night were sent over target cities to help combat the bombers. These single seat day fighters were called Wilde Sau (Wild Boar). The Wild Boar fighters were not equipped with radar. Pilots tried to intercept enemy bombers illuminated by searchlights. Initial tests suggested the ideal conditions for the Wilde Sau night fighters were when a certain (not too thick) lower level cloud cover prevailed, since then the bomber would be silhouetted against the back-lit clouds and the high-flying German day fighters could easily spot their targets.
5.3.3.4 "Wild Boar" night fighters also could have a Naxos passive EW device installed. Roll for the "Wild Boar" night fighter on Table 5-7B just as you would for a regular night fighter. That is the only EW device a "Wild Boar" fighter can carry.
5.3.3.5 "Wild Boar" night fighters only appear in the Target Zone between March 1943 and April 1944 in campaigns 5 thru 9. There is a chance they will appear when rolling on Table 5 - 7 German Night Fighter Appearance Table.
5.3.3.6 (Optional Rule) Additional German and Italian Night Fighters. The Me 262 B-1a/U1, Ta 154 A-0 and the Italian Do 217 J-1 are all optional rule night fighters. (See Optional Rules Sections 9.2, 9.3, and 9.4)
5.3.4 Determine the Type of EW and Weapons Packages Carried by the Night Fighter
5.3.4.1 Beginning in June 1942 the Lichtenstein Aerial Intercept radar sets began being installed in night fighters. Before June of 1942 the pilots relied upon their eyes to spot the bombers after being directed to the bomber's location by the Freya and Wurzburg radars.
Table 5-7A shows the availability of Aerial Intercept radar by year for the night fighter. Select the year of your mission and roll 1D6 to see if your night fighter has AI radar. If the result is YES, place a Lichtenstein Radar counter next to your night fighter on the battle board.
5.3.4.2 Beginning in September 1943 the night fighter (and the Wild Boar Day Fighters) can carry Naxos, a passive EW device that homes in on H2S radar emissions.
Table 5-7B shows the availability of Naxos by year for the night fighter. Select the year of your mission and roll 1D6 to see if your night fighter has Naxos installed. If the result is YES, place a Naxos EW counter next to your night fighter on the battle board.
5.3.4.3 Beginning in January 1944 the FuG 227 Flensburg radar set that will home in on the RAF's Monica Tail Warning radar becomes available.
Table 5-7C shows the availability of Flensburg by year for the night fighter. Select the year of your mission and roll 1D6 to see if your night fighter has Flensburg installed. If the result is YES, place a Flensburg EW counter next to your night fighter on the battle board.
5.3.4.4 In June 1943 the "Schräge Musik" cannon packages were available to be mounted on in-service night fighters. "Schräge Musik" comes from the German colloquialism for shaky, off-tune music; literally, it translates to "slanted or oblique music".
Night fighters used this device to approach and attack Allied bombers from below, outside the bomber crew's usual field of view or fire. The attack was typically a surprise to the bomber crew, who only realized a fighter was close by when they came under fire. Particularly in the initial stage of operational use, until early 1944, Allied crews often attributed sudden fire from below to ground fire rather than a fighter. A Schräge Musik-equipped fighter had either, 4- 20mm or 2 x 30mm cannons firing upward at a slant mounted behind the rear canopy. The "Schräge Musik" equipped night fighter would slip under the bomber if they were not spotted and fire upward at very close range, many times inflicting catastrophic damage on the bomber.
Table 5-7D shows the availability of "Schräge Musik" by year for the night fighter. Select the year of your mission and then roll 1D6 to see if your night fighter has "Schräge Musik" installed. If the result is YES, place a "Schräge Musik" counter next to your night fighter on the battle board.
5.3.5 Determine Night Fighter Pilot Quality
There are four possible skill levels for night fighter pilots. These skill levels not only reflect the experience of the pilot but also the level of cutting-edge EW equipment carried by the night fighter and their experience in using it to intercept your bomber.
Roll on Table 5-8 to determine the pilot quality. Select the year of the campaign you are flying in and roll 1D10 on that table. The result is the skill level of the night fighter's pilot and crew. Place the appropriate skill level counter next to the night fighter on the battle board.
The four skill levels are; Experte (Expert, an Ace), Veteran, Flieger, and Novice. Each skill level has die roll modifiers that affect combat, spotting and other maneuvering skills in the combat rounds. EW devices have been factored into the tables used for spotting and combat and appear as dice roll modifiers for those tables.
5.3.5.1 If the pilot is Novice level, (or, Green) it means he has few flight hours and is new to squadron service. Novice Pilot's skill levels are reflected by dice roll modifiers on various tables. The specific die roll modifier to use in each case is listed below the tables that are affected.
5.3.5.2 If the pilot is an Experte, (or Ace) it means he has extensive night fighter experience and is most likely an ace with multiple victories. Experte Pilot's skill levels are reflected by dice roll modifiers on various tables. The specific die roll modifier to use in each case is listed below the tables that are affected.
5.3.5.3 If the pilot is a Veteran it means that he has night fighter experience and several hundred hours of flying experience both in day and night fighters. Veteran Pilot's skill levels are reflected by dice roll modifiers on various tables. The specific die roll modifier to use in each case is listed below the tables that are affected.
5.3.5.4 If the pilot is a Flieger (Flyer) it means he is an average pilot most likely with day fighter experience recently recruited into night fighter service. Flieger Pilot's skill levels are reflected by dice roll modifiers on various tables. The specific die roll modifier to use in each case is listed below the tables that are affected.
5.3.6 Determine the Night Fighter's Attack Clock Position and Attack Level Against Your Bomber
If you have at least one night fighter attacking your bomber roll on Tables 5-9 and 5-9A to determine the night fighter's beginning clock sector and the High (H), Level (Lv) or Low (Lo) position of the attacking night fighter. Place the fighter counter in the correct clock section and the correct High, Level or Low box on the Battle Board.
5.3.6.1 There is no roll on Table 5-9A for Vertical Dive (VD) attacks or Vertical Climb (VC) attacks as the night fighter is approaching from above or below the bomber and the attack level is predetermined.
If the bomber is flying "On-The-Deck" and Vertical Climb is rolled then reroll until a different clock angle is obtained.
5.3.7 Determine if the Bomber Spots the Night Fighter
The night fighter has spotted the bomber and has maneuvered into a clock sector at a High, Level or Low attitude. At this point the player checks to see if the bomber's crew spots the night fighter. The player rolls on Table 5-10 "The Bomber spotting the Night Fighter" to see if the bomber crew spots the night fighter.
5.3.7.1 If the night fighter IS spotted continue with The Bomber's Defensive Fire play sequence. (Rule 5.5)
5.3.7.2 If the night fighter is NOT spotted by the bomber AND has a "Schräge Musik" gun package installed AND the night fighter is attacking from either the 6 o'clock Low or Level position AND the bomber is not flying "On-The-Deck", then the night fighter counter is moved to the Vertical Climb/"Schräge Musik" box on the Battle Board. Go to Rule 5.4 "Schräge Musik" Combat Procedure.
5.3.7.3 If the night fighter is NOT spotted by the bomber but has NO "Schräge Musik" gun package installed, then it has still caught the bomber by surprise and fires FIRST at the bomber in this combat round. The night fighter remains in its current clock sector and High, Level or Low position for the combat.
The bomber may not perform an evasive action "Corkscrew Maneuver" as this is a surprise attack. Assess all damage inflicted by the night fighter BEFORE any return fire by the bomber. (This is an exception to the rule that the bomber fires first (See Rule 5.5)
5.3.7.4 Continue with The Bomber's Defensive Fire play sequence. (Rule 5.5)
5.4 "Schräge Musik" Combat Procedure
5.4.1 The night fighter will attack the bomber using his "Schräge Musik" gun package. The night fighter fires FIRST. (This is an exception to the rule that the bomber fires first (See Rule 5.5)
5.4.2 Resolve these hits just as you would any other hits on the bomber. To see if hits are made on the bomber, roll on Table 5-13 "German Offensive fire. Use the "Schräge Musik" column on the table. Then follow the regular night fighter combat procedure to apply the hits. (See Rule 5.5 Bomber Defensive Fire combat procedure)
5.4.3 This is a surprise attack. The bomber can return fire on the night fighter if the bomber has a gun or turret that can fire into the VC/"Schräge Musik" sector and that gun or turret is manned. Or, the bomber can take immediate evasive action after applying any hits from the night fighter's attack. There is no evasive action die roll modifier allowed for this initial "Schräge Musik" attack. (See Rule 5.6, Evasive Action).
5.4.4 The bomber may only take one action. Either return fire or take evasive action. If the bomber cannot take evasive action, or has no gun or turret installed in the ventral position, the night fighter is moved back to its 6 o'clock level or Low position after the first attack.
5.4.5 The bomber then rolls again on Table 5-10 to spot the night fighter. (Add the second spotting attempt die roll modifier on Table 5-10 before making the roll).
5.4.6 If the bomber fails to spot the night fighter on the second attempt, move the night fighter back into the Vertical Climb/"Schräge Musik" box and repeat the "Schräge Musik" attack again. (Rules 5.4.1 to 5.4.6) Keep repeating the "Schräge Musik" attacks on the bomber until the night fighter is spotted, or the bomber is shot down, or the bomber takes evasive action.
5.4.7 Night fighters cannot perform a "Schräge Musik" attack on bombers flying "On-The-Deck".
5.4.8 When the night fighter IS spotted the "Schräge Musik" attacks stop. Continue from this point with The Bomber's Defensive Fire play sequence. (Rule 5.5)
5.4.9 Once the night fighter has been spotted by the bomber, it remains spotted for this round of combat.
5.5 The Bomber's Defensive Fire
The bomber fires first in all combat rounds. All results against the night fighter are assessed before any German night fighter combat against the bomber takes place. (Exception: "Schräge Musik" attacks - Rule 5.4.1 and unspotted night fighter first combat attacks - Rule 5.3.7.3)
The player must decide if the bomber will take evasive action. If evasive action is taken by the bomber dice roll modifiers will affect the defensive fire from the bomber. The DR modifiers are shown under the Die Roll Modifiers section in tables that are affected by evasive actions (Also see rule 5.6 Evasive Action - The "Corkscrew Maneuver".)
Table 5-12 Defensive Fire Allocation shows the fields of fire of all guns and turrets on the Lancaster, Stirling and Halifax Mk II and Mk III bombers. The player decides what guns and turrets on the bomber will fire against the attacking night fighter. Guns and turrets on the bomber may not fire outside of their field of fire sectors shown on Table 5-12.
More than one gun or turret can be targeted at the same night fighter in the same combat round. The night fighter must be in the gun or turret's sector of fire to be targeted.
The gun or turret must be operational and manned to fire on the night fighter. It must have a crew member assigned to fire it.
The player does not have to fire all or any guns at the night fighter. The player can fire as many or as few guns or turrets as he wishes as long as the night fighter is in the sector of fire of the gun or turret.
Guns and turrets can only fire once during each round of combat that occurs with this individual night fighter.
Place a marker for each of the bomber's guns and turrets that are firing in the current combat round next to the night fighter. Once allocated the fire marker must fire in that round even if the night fighter is shot down prior to the gun/turret firing.
Assign any hit damage to the night fighter before moving on to the next gun/turret combat.
If multiple guns fire at the night fighter and a Kill result is obtained during that combat, then the credit for the kill is shared between all the guns firing on the fighter.
Example: If the Dorsal mid upper turret and the Tail turret are firing at an attacking fighter from the 6 o'clock high position and the fighter is destroyed after both guns have fired on the target then each gun would receive credit for 1/2 of a Kill.
There are notes for Table 5-12A that explain gun jams and an extensive list of die roll modifiers for the table that are cumulative.
If a hit was obtained on Table 5-12A, roll for damage to the attacking fighter on Table 5-12B Hit Damage against German Fighters. The possible results on Table 5-12B are:
Superficial Damage - As the war progressed the Germans armor plate and bullet resistant glass to their night fighters. The light .303 caliber guns of the bombers had difficulty penetrating these armored areas of the individual night fighters. The .50 caliber heavy machinegun rounds had no such problems penetrating the armor-plated areas.
FCAB - Fighter continues this attack and then breaks off after this attack is complete. It will only attack once. The night fighter has been driven off. There is no die roll modifier on Table 5-13 German Offensive Fire for this attack.
FCA - Night Fighter damaged but continues attack, –1 die roll modifier on Table 5-13 "German Offensive Fire" during the German night fighter attack phase. FCA results can accumulate on the night fighter: 2 FCA results have a -2 modifier on Table 5-13; 3 FCA results and the night fighter is Destroyed. The night fighter counter is immediately removed and does not fire on the bomber.
(Note: If the night fighter already has one or more FCA results and receives an FBOA result, the night fighter is destroyed and removed at the conclusion of its attack against the bomber during the round of combat in which it sustained the result.)
FBOA - Night Fighter is damaged and breaks off after this current attack. A –2 die roll modifier is used on Table 5-13 for the current attack. The night fighter may not attack again. If the fighter already has one or more FCA results, the fighter is destroyed at the conclusion of the attack. Treat any additional FBOA results received in that same round as Superficial Damage.
Destroyed - The night fighter is destroyed. Immediately remove the night fighter counter. The night fighter may not fire at the bomber.
5.5.1 Bomber Defensive Fire Procedure
After each firing gun's target marker has been placed on the attacking night fighter, mark off one ammunition box on the Mission Log Sheet. The ammunition available for each machine gun or turret position is shown on the Mission Log Sheet by a box next to the gun position. Each box represents a single "burst" of fire. When all the boxes are checked off the gun or turret is out of ammunition.
Ammunition may be shifted from one gun firing position to another. As the bomber enters a zone, any crewman my leave his station, move to any gun position/turret with ammunition available and move some or all of that gun/turret's remaining ammunition to a gun position/turret that is out of ammunition. The crewman may NOT fire a gun or perform any other duties like firefighting while so engaged in the current zone. After the player designates the crewman to perform the transfer, he simply crosses off however many boxes of ammunition that the crewman is moving from the gun position/turret with ammunition and erases an equal number of boxes on the gun position/turret that is out of ammunition.
After placing the turret or gun target counters on the night fighter the player rolls on Table 5-12A Bomber Defensive Fire Resolution for each turret or gun counter to determine if a hit is obtained on the night fighter.
5.5.1.1 (Optional Rule) Detailed German Fighter Damage
For those players desiring a more detailed game experience refer to Tables 5-12C and 5-12D for detailed damage to attacking German fighters after rolling on Table 5-12B.
5.6 Bomber Evasive Action - The "Corkscrew Maneuver"
Bomber Command developed an evasive action maneuver called "The Corkscrew" to help the bomber evade an attacking night fighter. The standard "Corkscrew Maneuver" as laid down in Bomber Command tactical notes consisted of a series of steep dives and climbs while the bomber was turning from left to right.
Flying like this necessarily threw off the aim of the bomber's gunners. So, throughout the maneuver the pilot called out the next part of the maneuver so that the gunners could adjust their aim.... "Going down to port...Going up starboard...rolling... etc." were calls the pilot made as he performed "The Corkscrew".
5.6.1 After the bomber spots the night fighter in the night fighter combat round the player can immediately conduct an evasive action "Corkscrew Maneuver". (Exception: Any other rule that specifically prohibits evasive action "Corkscrew Maneuvers" supersedes this rule)
The "Corkscrew Maneuver" may not be performed by the bomber if:
- Two or more of the bomber's engines are out.
- The bomber's Electrical system is out.
- Anyone other than the Pilot is flying the bomber. (See Tables 7-1 and 7-2)
- The bomber has received any damage that specifically prohibits "Evasive Action" or the "Corkscrew Maneuver".
- The bomber cannot be flying "On-The-Deck".
- The bomber cannot perform "Corkscrew Maneuvers" in an Alps zone.
5.6.2 If the player decides to perform the "Corkscrew Maneuver", note that on the Mission Log sheet. Various die roll modifiers will apply on different tables. These DM's are noted below each table. Some are favorable to the bomber while others are not.
5.6.3 Because of the hazard of performing violent and erratic maneuvers in the densely packed bomber stream the possibility of collision is increased. After performing the "Corkscrew Maneuver" immediately roll on Table 5-16 to determine if the bomber avoided a collision with the night fighter or any other bomber flying in the bomber stream. (See Collision Rule 5.9)
IF your bomber avoids any collision during the evasive action, continue with rule 5.6.4.
5.6.4 The bomber may fire on the night fighter while the bomber is performing the evasive action but incurs a negative die roll modifier because of the difficulty of aiming accurately during the evasive action. (See Modifiers for Table 5-12A)
5.6.5 Per Rule 5.1.5 if the bomber is illuminated by a searchlight it can perform a "Corkscrew Maneuver" to attempt to evade the searchlight as soon as it is illuminated.
At the completion of the "Corkscrew Maneuver", roll on table 4-7A to see if the bomber successfully evaded the searchlight. If your bomber was lost by the searchlight then remove the searchlight counter. Lose any searchlight illumination die roll modifiers until the bomber is reacquired by the searchlights in any round where a bomber spotted roll is made on Table 4-7.
5.7 Bomber Guns/Turrets
Some gun turrets on the bomber are powered and some have multiple barrels. There are several modifiers for these functions. Specific gun positions are covered under the applicable table die roll modifiers when executing bomber defensive fire.
5.7.1 Bomber Guns/Turrets Special Considerations
Bomber Command used primarily the .303 caliber service rifle round in their machine guns on the heavy bombers. This lightweight round suffered from lack of penetration against normal day fighters and especially against the heavily armored night fighter variants. Bomber command felt (incorrectly) that increasing the number of guns in the turret would supply enough firepower to knock down the German fighters.
When the .303 caliber guns were found lacking, Bomber Command experimented with the American .50 caliber Browning heavy machinegun. The .50 caliber rounds packed a heavy punch and could easily bring down an armored night fighter when they got close to the bombers. Combat and damage tables have modifiers that reflect the massive increase in hitting power of the .50 Browning Machinegun over the much lighter weight .303 service rifle round. (Also See Rule 2.5.1)
5.7.2 Some bomber guns and turrets have special considerations.
Tail Guns Passing Shot - German night fighters attacking from the 10:30, 12, or 1:30 positions, whether High, Level, or Low, can be fired upon by the Tail Turret.
The Tail Turret may be allocated to any night fighter attacking from the 10:30, 12, or 1:30 positions, whether High, Level, or Low. However, this defensive fire is not resolved until after all other defensive fire and all German offensive fire for the combat round is resolved. Thus, the target night fighter could be shot down, or the Tail Guns themselves be knocked out, before the Tail Guns get a chance to fire.
Procedure - After the fighter has fired at the bomber but BEFORE going to the next combat round move the fighter counter to the 6 o'clock fire sector facing away from the bomber. The fighter will exit either 6 o'clock High or 6 o'clock Low. (Player determines randomly)
5.8 Night Fighter Successive Rounds of Combat
A combat round is defined as beginning when the night fighter determines his attacking clock sector and the High, Level, or Low attack angle and then begins its attack against the bomber as explained in Rule Section 5.3.6.
Tail Guns fire Passing Shots using Table 5-12A and Table 5-12B just as in normal combat.
Tail Guns may not fire Passing Shots if the intercom is out and/or the Tail Guns are jammed or damaged.
Tail Guns may only fire once per round of combat. If tail guns fired in their regular combat phase, they may NOT fire Passing Shots.
Tail guns may not use spray fire on passing shots.
No ammunition is marked off unless the Tail Guns shoot.
Ace Gunners - Once a gunner has shot down 5 or more fighters in his career, he is an Ace Gunner and may add +1 to his defensive fire rolls. Ace Gunners lose this bonus when frostbitten and when wounded. The bonus is retained if the intercom is knocked out. A gunner becomes an Ace at the instant of his 5th kill, and the bonus takes effect with his next defensive fire.
However, if after the post mission debriefing the gunner in question has less than 5 credited kills, he loses his Ace status for the next mission. See Optional Rule 7.6.2 Credited Kills.
Area Spray Fire (Optional Rule) - Area Spray Fire represents the "hosing" of an area with a long burst of an unaimed spray of bullets. Although usually ineffective as far as hits were concerned, it could drive off an attacking night fighter because of the numerous tracer rounds filling the sky in front of the fighter. Area Spray fire was not a favored tactic because it quickly burned up ammunition.
To use spray fire mark off three bursts of ammunition rather than the normal one burst each time a gun position or turret uses Spray Fire.
Area Spray Fire could also jam a gun because of the long burst of fire that could overheat the gun. Roll on Table 5-12E rather than Table 5-12A to determine results of Spray fire.
Area Spray Fire is an optional rule which players may include for additional interest. Flip the gun marker to its unprinted side that will use spray fire during the Defensive Fire Phase. Ace Gunners employing Area Spray Fire do not add 1 to their die roll for ace status.
The combat round continues with the night fighter making any "Schräge Musik" attacks if eligible against the bomber until spotted. Then the bomber and night fighter exchanging regular combat fire and assess any damage as defined by the rules. The bomber may take evasive action as defined by the rules. Then the bomber may take any "passing shot" combat after the fighter attacks.
After completion of that exchange of fire, the night fighter rolls on Table 5-16 to determine if the night fighter avoided a collision with the bomber during the combat. (See Collision Rule 5.9)
IF the night fighter avoids a collision, roll on Table 5-14 (Continuing night fighter attacks) to see if it will get another round of combat or if the bomber successfully escapes from the night fighter.
Table 5-14 has a number of table modifiers listed below the table that apply to the dice roll. The modifiers are cumulative.
IF the night fighter fails to make the roll to reengage the bomber then the combat round is over and play reverts to the next game action phase.
5.8.1 Fighters Eligible for a Successive Round of Combat
The night fighter will continue attacks on the bomber until it either; fails a "continue night fighter attacks" roll on Table 5-14, shoots the bomber down, is itself shot down by the bomber or is driven away by the bomber's defensive fire.
If the night fighter is successful on its roll on Table 5-14, go to rules section 5.3.6 and repeat the combat procedure.
Any attacking fighter making a Vertical Climb or Vertical Dive attack may NOT make ANY additional rounds of combat attacks. Combat ends at the completion of the first round of combat and NO roll is made on Table 5-14.
(Note: "Schräge Musik" attacks are NOT considered to be Vertical Climb attacks. The night fighter making a "Schräge Musik" attack IS eligible for successive rounds of combat.)
All of the bomber's guns/turrets are eligible to be targeted and fired in each successive round of combat just as in the first round of combat. Any jammed guns have to be cleared before they can fire in that new round of combat.
The night fighter's Pilot status remains the same as it was in the first round of combat.
(Note: Night fighters that receive a "MISS" result on Table 5-13 are NOT removed from the board but will continue to attack until a condition to end combat occurs.)
The night fighter must comply with the table notes for any damage received after each round of attacks. Any FCA hits received by the fighter are carried forward into the next successive combat round.
Three FCA results means the fighter is destroyed. (See Table 5-12B Table Notes)
Example; if the night fighter receives a FCAB result on Table 5-12B in the second round of combat then it will complete the second round of combat and then break off its attack - no third-round combat attack is allowed.
If the night fighter receives an FCA result in the first combat round it would use -1 die roll modifier when rolling on Table 5-13. In the second combat round the night fighter receives another FCA result it would use -2 die roll modifier on Table 5-13 for this attack. It would use -2 die roll modifier on Table 5-13 if it received two FCA results in a single combat round as well.
The night fighter would be eliminated and removed from the Battle Board at the point it received its third FCA result.
For the same fighter, if it receives an FCAB or a FBOA result in any combat round then that will end its attacks after completing the current attack.
FCAB and FBOA results have different die roll modifiers for German Offensive fire on Table 5-13.
(NOTE: After completing all combats for the first night fighter, the player then repeats the same combat procedure if there was a second night fighter rolled for on Table 5-5.)
If the bomber is moving two (or more) times per zone then you will complete the entire combat procedure in each movement turn in the zone.
5.8.2 German Offensive Fire Procedure - Resolving Hits On The Bomber
(Note: A MISS result on Table 5-13 does NOT end the night fighter's attack. Continue with the attack sequence of play until the night fighter either; fails a "continue night fighter combat" roll on Table 5-14, shoots the bomber down, is itself shot down by the bomber or is driven away by the bomber's defensive fire.)
During offensive fire, each night fighter that scores a hit on Table 5-13 against the bomber rolls 2D6 on Table 5-13A. Cross index the die roll against the attacking fighter's clock section to determine the number of shell hits on the bomber.
Check table 5-13B for the Hit Effect Multiplier. Cross index the attacking fighter type in the date range of your mission at the top of the column that you are playing with a 1D6 roll to determine any hit multiplier.
Multiply the number of hits rolled on Table 5-13A by the resulting hit multiplier from Table 5-13B. This result is the number of shell hits on the bomber.
(Note: Some night fighters appear more than once in Table 13B because they received an upgraded armament package.)
5.8.3 Determining Bomber Damage
Use this procedure to resolve all night fighter, all AAA Gun hits, or any other time the rules require the player to assess damage against the bomber.
Go to the Pilot's Manual for your specific bomber.
The manual contains the Area Damage Tables which show what sections of your bomber receive damage when hit.
Start with the Area Damage Tables. Select the appropriate clock sector and elevation (High, Level or Low) that the attacking night fighter is firing from for your bomber. Then roll 2D6 and cross index the result with the appropriate column to determine the area hit by the attacking night fighter. Roll once for each shell hit.
(Note: A "Walking Hits" result negates any further hits rolled by this attack. Example: You determined that the night fighter scored 4 hits on the bomber. You will resolve each hit individually. Let's say a "Walking Hits" result is obtained while resolving the third hit made by the night fighter. Resolve the "Walking Hits" for the third hit, but then disregard rolling for the fourth hit originally scored on the bomber.)
(Note: ALL "Schräge Musik" attacks are resolved on the Vertical Climb Column.)
After rolling on the appropriate Area Damage Table to determine the section of the bomber for that hit, go to the Specific Damage Tables to resolve the actual hit damage.
The Specific Damage Tables are divided into various bomber sections and the table designation begins with the first letter of the bomber type and its specific number. The sections shown below are the Specific Damage Table titles for the Lancaster Mark I bomber. "H" is used for the Halifax bomber and "S" is used for the Stirling bomber. The Lancaster's Specific Damaged Table titles are listed below as an example.
- NOSE (L-1)
- FRONT CENTRE SECTION (L-2)
- BOMB BAY (L-3)
- REAR CENTRE SECTION (L-4)
- TAIL (L-5)
- WINGS (L-6)
- INSTRUMENTS (L-7)
(Note: Instruments do not show up as a section in the area damage tables for the bombers. Instrument damage comes from hits to other compartments of the bomber. You are referred to the Instrument Tables from die roll results in other compartments.)
(Note: Some bomber models have more than one table for a specific section of the bomber. The different tables reflect different options that were selected by the player for his bomber. Example: Various turret or non-turret options like having a nose turret or a plexiglass nose.)
Roll on the correct Specific Damage Table for that shell hit to determine the effects of the damage.
Record the damage/effects of the shell hit in the "Damage Notes" section on the Mission Log Sheet and follow any instructions given.
Roll once for each shell hit scored by the attacking night fighter.
Continue this process until all hits made by the night fighter in each attack round have been resolved.
5.9 Mid-Air Collisions
(Note: Use Table 5-16 to resolve possible collisions between the night fighter and the bomber during combat and between the player's bomber and other aircraft whenever called for by the rules.)
If the results on Table 5-16 are <2-10, there is no threat of collision and the night fighter can re-attack if eligible to do so.
If the results are 11-12+, then a there is a possible collision.
To determine if a collision occurs, roll 1D6: 1-5, your bomber avoided a collision with another aircraft. (If it was the night fighter, then the night fighter cannot make any additional attacks as the night fighter is considered to have lost contact with the bomber in avoiding the collision);
If a 6 was rolled, then the other aircraft or the night fighter collides with your bomber.
Roll once on the Area Damage Tables found in your bomber's Pilot's Manual under the appropriate clock position of the attacking fighter or the other aircraft involved in the collision to determine the section of your bomber the aircraft or night fighter hit. If the result is "Superficial Damage", the other aircraft or the night fighter narrowly avoids your bomber, there is no collision. Roll again for any other result that is not a compartment. Otherwise, the result of collision is the same as "AAA Burst Inside Plane" (BIP); (See Rule 5.2.5) for the applicable compartment/section hit.
5.9.1 Because of the hazards of flying close to the ground at night, if your bomber is flying "On-The-Deck" and a possible mid-air collision is called for, the first roll on Table 5-16 is automatically considered to be 11-12 Possible Collision. Go directly to the second 1D6 die roll to determine the results of a possible collision per note c) on Table 5-16 and as explained in Rule 5.9.
5.10 Engines Out
All three British bomber designs had four engines. Crews found that the plane could continue to fly, even with only one engine still functioning. However, each successive loss of another engine meant new problems and more danger.
(Note: Use Table 5-16 to resolve possible collisions between the night fighter and the bomber during combat and between the player's bomber and other aircraft whenever called for in the rules.)
If the rules call for a possible collision roll between the player's bomber and another aircraft that does not have a clock sector or High, Level or Low altitude level already assigned then roll for these on Tables 5-9 and 5-9A.
For combat situations, after resolving the effects of the fighter's offensive fire, roll 2D6 on Table 5-16 to determine whether the attacking night fighter pilot presses his attack close enough to possibly (either intentionally or inadvertently) cause a collision with the bomber. Various die roll modifiers can affect the collision roll and are listed below the table. Die roll modifiers are cumulative.
One Engine Out - With one engine out, all three bomber types can only stay at the high-level altitude band if they jettison their bomb load immediately. If any of the bombers is already in the Target Zone when the engine is knocked out, it may bomb the target and remain at high level. Otherwise, if the bomber decides to keep its bomb load aboard and continues to the target with one engine out, it must drop to the low-level band.
The bomber must spend 2 turns in each zone (while it still has its bombs) due to slowness caused by the weight of the bombs. The bomber must therefore roll for AAA gun attacks and German night fighter attacks twice per zone. Complete the full combat procedure for the first turn in the zone and then complete the full combat procedure for the second turn in that same zone.
Do not check for weather, contrails, mission recall, mechanical failure or discovery by Radar sites (Rule 4.7.1) again for this second turn in the same zone.
Once the bomber has dropped its bombs, it may continue its mission at the normal rate of speed of 1 turn per zone.
Two or Three Engines Out - The Bomber must immediately jettison its bombs and spend 2 turns in each zone due to slowing down. The bomber cannot bomb the target even if the second engine is lost in the Target Zone.
The bomber must therefore roll for AAA gun attacks and German night fighter attacks twice per zone. Complete the full combat procedure for the first turn in the zone and then complete the full combat procedure for the second turn in that same zone.
Do not check for weather, contrails, mission recall, mechanical failure or discovery by the Kammhuber Line Defense System sites (Rule 4.7.1) again for this second turn in the same zone.
The Bomber must also drop to the low altitude level for the remainder of the mission.
When a Bomber has two or more engines out, attacking fighters add (+1) to their German Offensive Fire die rolls on Table 5-13,
The bomber may not take Evasive Action.
One Engine Operating - If the bomber has only one engine operating, it may go one zone further, then it must either crash land, or the crew must bail out. (See Tables 7-1, 7-2 and 7-3). However, the crew may throw overboard all bombs, guns, ammo, and fire extinguishers, and fly 2 zones past the zone in which the third engine was lost. When landing with only one engine, subtract -3 from the landing roll on Tables 7-1 and 7-2.
No Engines Operating - The Bomber must either crash land in its present zone on either Tables 7-1 and 7-2 (find this zone in the Flight Log Gazetteer to determine if the Bomber is over land or water, or if you have a choice), or the crew must bail out on Table 7-3 or 7-4. Once the last engine is out, the player must immediately choose either to attempt the crash landing or bail out. If crash landing with all engines out, landing die roll is -7 on Tables 7-1 and 7-2.
5.11 Wounded Crewmen
Roll for Crew Wounds on Table 5-17 to determine the status of a wounded crewman. Place the correct wound counter with the crewman on the Crew Placement Board and note the crewman's wounds in the status box next to his name on the Mission Log Sheet. Record wounds on the Composite Mission Record Sheet if you are playing a Tour of Duty campaign Table. Table 5-17's Table Notes show the effect of multiple wounds.
Roll on Table 5-17 under note b) to determine if wounded crewmen may fly the next mission. Note the results on the Composite Mission Record at the end of the mission.
Whenever a crew member is Wounded or Killed In Action (KIA), place the correct counter type in his Crew Box on the Crew Placement Board.
If the crewmember receives:
- Two light wounds he is still Lightly Wounded.
- Three light wounds result in a Serious Wound.
- Four light wounds become a KIA.
- A light wound plus a serious wound becomes a KIA.
- Two serious wounds become a KIA
When a crew member is seriously wounded or KIA, he can no longer fire any guns or perform any other functions. However, another crew member may take over his position. Simply take the counter of the crew member taking over and place it in the position vacated by the wounded man. Remove KIA crewmen from the Crew Placement Board. (They are assumed to have been placed in an out of the way section of the plane.) Wounded men must be placed where they have a source of heat and oxygen.
5.11.1 (Optional Rule) Detailed Wounds
For the player who wants a more detailed experience for his crewmembers, detailed wound tables are provided.
For each wound rolled for on Table 5-17, find the result on the appropriate Detailed Wound Table (Tables 5-17A, B and C). Continue rolling on the appropriate table for additional details on the specific wound.
5.11.2 Crew Movement
Upon entering a zone and before determining AAA or radar detection, the player may move his crewmen within the bomber as he sees fit with no penalty to the crewman's actions.
At the beginning of any night fighter combat sequence, before the night fighter attacks, the player can move crew members per rule 5.0.1 "Preparing your bomber". The player can make any position changes for his crew with no penalty other than those specifically noted in the rules.
Crew movements can be made within the same compartment with no penalty. For example, the engineer can take over for the pilot if he is incapacitated, or a gunner can change gun positions within a compartment with no penalty.
There is no penalty for moving a wounded crewman.
A penalty is accessed if crew movements are made between night fighter attacks. After the night fighter completes an attack and successfully rolls to reengage the bomber, should the player decide to move a crewman to another station in a different section in the bomber, the moving crew members may not fire any guns from either their old or new position, until the night fighter has completed the current combat round and rolled for reengagement for another combat round. (Example: The wireless (W/T) operator moving from his station in the Front Centre Section is penalized by not being able to fire if he moves to a gun station in the Rear Centre Section of the bomber. If the W/T station is left unmanned no radio messages like a recall are received.)
There is no penalty to move between guns or turrets in the same section. The gunner can fire at his new station in the next attack round by the night fighter.
5.11.3 Crew Replacement Effects
A crew member now occupying another wounded man's position on the Crew Placement Board assumes any wounds/damage taken by the position while he occupies it.
For example, if the Navigator moves up to the Bomb Aimer's position to replace a seriously wounded Bomb Aimer, any damage from shell hits that would normally affect or wound the Bomb Aimer now affect the Navigator. Conversely, the Bomb Aimer who was moved to the navigator's position will now take any wounds/damage called for against the navigator from the damage tables.
5.11.4 Wounded or Killed Pilot
Any crew member may fly the Bomber if the Pilot is seriously wounded or KIA, but the first one to take over flying must be the Engineer. If the Engineer is subsequently or already seriously wounded or KIA, then anyone else may take over, with appropriate modifiers to the landing (See Table 7-1 and 7-2).
5.12 Heat Out and Frostbite
The bombers normally flew above 10,000 feet (The top of the Low Altitude Level) where air temperatures dropped well below freezing. Crew members wore electrically heated suits that plugged into the bombers electrical system to ward off the cold. Damage to the bomber or a system malfunction could cause a crew member's suit heater to fail. To keep the crew member from being injured from frostbite the bomber can descend into Low Altitude Level (below 10,000 feet) where the air is warmer. The bomber can travel one more zone at the High-Altitude Level (between 10,000 and 20,000 feet) before frostbite sets in.
Each zone thereafter that the bomber stays in the High-Altitude Level the player will roll on Table 5-18 "Frostbite" to check for the extent of injury to that crew member. Check the dice roll modifiers below Table 5-18. All die roll modifiers are cumulative.
Roll for each affected crew member. Record any frostbite result in the status box next to the crewman's name on the Mission Log Sheet and also on the Composite Mission Record. Place a frostbite counter with the crewman on the Crew Placement Board.
When the bomber descends to the Low Altitude Level (below 10,000 feet) no longer roll on Table 5-18.
After landing, roll 1D6 for each frostbitten crewman. On a roll of 1-3 the crewman recovers and can fly the next mission. On a roll of 4-6 the frostbite is severe, and the crewman is invalided home. (Apply appropriate die roll modifiers below Table 5-18 to the die roll) Record the results on the Composite Mission Record. Then, select a new crewman for the next mission. (See Table 5-18 Notes)
A (-1) die roll modifier on the Table 5-12A on the Bomber Defensive Fire table apply if the frostbitten crewman is firing a gun/turret.
Crewmen who have severe frostbite may not operate a gun.
For the player who wants a more detailed experience for his crewmembers. Detailed frostbite tables are provided. (See Table 5-18A)
5.13 Oxygen Fires
Oxygen fires in the crew sections can result from shell hit damage to the bomber. When a fire occurs place a fire marker in the designated compartment. Record the fire location on the Mission Log Sheet.
When an oxygen fire occurs the closest crew member immediately stops what he is doing, moves to the compartment with the fire and attempts to put it out. There is no movement penalty to do this and he moves as soon as the fire starts no matter where the player is in the combat phase. The crewman is assumed to pick up a fire extinguisher on his way to the fire.
Each extinguisher is represented by an individual counter placed on the Crew Placement Chart. Each extinguisher may be sprayed once and then it's empty. A crewman may immediately attempt 3 times (depending on the availability of unused fire extinguishers) to put out a fire. Roll once on Table 5-19 for each attempt to extinguish the fire.
Used extinguishers are removed from play.
If the fire is not out after the 3rd try (or when all available extinguishers are exhausted), the crew must immediately bailout using Table 7-3.
A crewman may not operate a gun during an attack in which he is fighting a fire.
The number of fire extinguishers each bomber carries is:
- The Lancaster bomber has 6 handheld extinguishers.
- The Stirling bomber has 4 handheld extinguishers
- The Halifax Mk II and Mk III bombers have 7 handheld extinguishers.
5.14 Loss of Oxygen and Its Effects
Bomber crews went on oxygen above 10,000 feet because of the thin atmosphere. Each crew station had an oxygen supply connection that the crewman plugged his oxygen mask into. Crew members used small portable oxygen bottles to move between stations when the bomber was at high altitude. Crew members quickly lost consciousness if their oxygen was interrupted. The oxygen system was also a potential fire hazard.
To keep the crew member who lost his oxygen alive the bomber must descend into the Low Altitude Level (below 10,000 feet.)
If the oxygen is knocked out in a particular section that crew member can move to a vacant oxygen supply connection in another section if one is available.
Example: A gunner is killed in the Rear Centre Section ventral turret position. His oxygen connection point is vacant. The wireless operator's compartment takes a shell hit knocking out the radio room oxygen. The radio operator can move to the turret gunner's position and suffer no ill effects from lack of oxygen. The bomber would not have to descend to the Low Altitude Level.
After descending to the Low Altitude Level, if the bomber has additional crew members killed and enough oxygen connection points become available for the surviving crew members the bomber may again climb to mission altitude in the High-Altitude Level.
When the bomber is flying at the Low Altitude Level it can be targeted by random flak gun positions that it may pass over. When the bomber enters a zone while flying at the Low Altitude Level, roll four times on Table 6-3's Light Flak column. If a hit is obtained complete the flak cycle and record the hits on the Mission Log Sheet.
After completing all combat in the zone and recording damage to your bomber and crew return to the Navigation section (4.9). Complete your navigation Phase and then check for any possible collisions per Rule Section 4.10 before moving on to the next zone.
6.0 In the Target Zone
Bomber Command used the Mark XIV Computing Bomb Sight in their heavy bombers. The bombsight was also known as the Blackett sight after its primary inventor, P. M. S. Blackett. Production of a slightly modified version was also undertaken in the United States as the Sperry T-1, which was interchangeable with UK-built version. It was the RAF's standard bombsight for the second half of the War. The Mk. XIV required only 10 seconds of straight flight before the drop and automatically accounted for shallow climbs and dives. The Mk. XIV was less accurate than the contemporary Norden bombsight.
Bomber Command's mission bombing altitudes normally fell between 10,000 and 15,000 feet AGL (Above Ground Level). This is in the High-Altitude Level in the game.
The sequence of play in the Target Zone:
6.0.1 Determine your bomber's altitude level in the zone when you enter (Rule 4.1.1)
6.0.2 Determine the weather in the zone. Roll on Table 4-1. (Rule 4.2)
6.0.3 No check is made for Mission Recall on Table 4-2. (Rule 4.3)
6.0.4 Check for Mechanical Failure on Table 4-3A. (Rule 4.4)
6.0.5 Check for Contrails on Table 4-4. (Rule 4.6)
6.0.6 No check is made for Bomber detection by Freya and Wurzburg Radar on Table 4-5. (Rule 4.7) The Germans already know where you are. The bomber is considered to already be spotted by the Kammhuber Line radar in the target zone.
6.0.7 Go to the night fighter and AAA gun combat rules section 5.0 and complete the combat sequence of play for both AAA guns and night fighters for the initial movement turn in the target zone. If the bomber is moving more than one movement turn per zone, then perform the combat sequences for each movement turn the bomber is required to make in the zone.
6.0.8 If the bomber has "Off Course" negative die roll modifiers and you decide to "Go Around" to avoid the "Off Course" bomb run penalty, the German night fighter attack sequence is rolled for to reflect the time needed for the bombers to "Go Around" to get lined up for the bomb run.
"Going Around" is an extra attack roll sequence by German night fighters before you enter the bomb run.
Repeat the German Night Fighter Attack sequence as outlined in Section 5.3 for this "extra attack roll sequence". Only the German fighters get this second chance to attack your bomber again. There is no additional AAA Gun attack. This additional attack is in addition to any other attacks as outlined in the rules that your bomber faces in the target zone.
If you do NOT go around there is NO "extra attack roll sequence" for the German night fighters, but your bomber WILL have the "Off Course" penalty applied on the Table 6-6 die roll.
6.0.9 Next determine the Target Visibility. Regardless of the weather at altitude, bomber crews often found their targets obscured from visual observation by fog, cloud cover and/or smoky haze when viewed from above.
After resolving all AAA Gun and night fighter combats in the Designated Target Zone, roll one die on Table 6-1. The table's target visibility result will be a die roll modifier on Table 6-6 Bomb Run. Use the Zone Worksheet to record the results.
6.1 Bombing the Target
The bomber is considered to have turned onto the bomb run after completing all pre-target night fighter and AAA Gun combats and any "going around" combats.
Determine if the bombs are "on target" or "off target" on the bombing run by rolling on Table 6-6. Various die roll modifiers will affect the bombing run result and are listed below the table. Record the "on target" or "off target" accuracy result on the Mission Log Sheet.
(Note: An "Off Target" result on an Area Target mission does not mean that your bombs "missed" the city altogether. Rather, it means that your bombs or incendiaries have been released into a district outside the designated target area (in which case any fires started by your incendiaries alone could be much more easily contained) or into neighborhoods already on fire from the bombs of other bombers.)
Bombing Accuracy - Next, determine the Bombing Accuracy on Table 6-7. Use the on-target or off target result from Table 6-6 as the column header on Table 6-7. Cross index the die roll on Table 6-7 with the correct column to determine the percentage of bombs hitting within the limits of the Area Target's aiming point. Record the percentage results on the Mission Log Sheet and the Composite Mission Record Sheet.
6.2 Low Altitude Bombing
If your bomber is flying in the Low Altitude Level add a +1 modifier to Table 6-6.
6.3 (Optional Rule) Thermal Turbulence - Fire Bombing and Firestorms
The bombers often carried bomb loads composed of both incendiary and high explosive bombs to maximize damage in the target area. Many German cities were fire-bombed to maximize destruction. Massive fires were started that burned for days, creating huge smoke columns and areas of turbulent air towering thousands of feet into the air. This severe turbulence can cause damage to bombers flying through it.
If this is an Area Target roll ID6 on Table 6-8 (and, if necessary, Table 6-9) to determine if your bomber encounters thermal turbulence from incendiary-caused fires burning in the target area. Record any damage caused by Thermal Turbulence to your bomber on the damage sheet.
6.4 Pathfinders and the "Master Bomber"
An examination of the results of eight bomber raids against the city of Essen from March 8th to April 12th 1942 by Group Captain S O Bufton, DSO, DFC, who in early 1942 was Deputy Director of Bomber Operations at the Air Ministry showed that almost 90 percent of the aircraft dispatched had released their bomb loads from 5 to 100 miles away from the actual designated target!
As a result of this finding, the Pathfinder Force came into being on August 15th, 1942.
6.4.1 To reflect Bomber Command's poor bombing record before Pathfinders were used to mark the target, if your bomber is flying its mission prior to September 1942, apply a -5 die roll modifier on Table 6-6. This is in addition to any other "off course" Modifiers from navigation errors in the zone (Table 5-15) and any other applicable table modifiers.
6.4.2 There is no modifier used on Table 6-6 between Sept 1942 and May 1943.
6.4.3 After June 1943, a "Master Bomber" was used by the Pathfinder Force to ensure the target was properly marked and the flares and incendiary bombs refreshed as needed to illuminate the aiming point for the bomb aimers coming in to bomb the target. The "Master Bomber" also directed each bomber as it arrived at the initial point on the bomb run to the drop point. Bombing accuracy was greatly improved.
If the date of your bomber's mission is in June 1943 or later, use a +1 die roll modifier on Table 6-6 to show the effect of having a "Master Bomber" directing operations.
Place the +1 Flares marker on the battle board to remind you that the target is being marked by the Pathfinders.
6.5 The Turn Around - Heading Home
After the bomb run is resolved, begin the return flight to base by turning the Bomber counter around on the Strategic Movement Track and facing it toward your airbase in Zone 1. The Bomber will spend a second turn in the Designated Target Zone.
(Note: It's possible to spend four or more turns in the target zone if your bomber has several engines out and the "Go Around" option was used.)
After turning your bomber around to head home, complete another AAA Gun and night fighter combat sequence. This simulates the bombers flight out of the target zone. Go to the night fighter and AAA gun combat rules section 5.0 and complete the combat sequence of play for both AAA guns and night fighters.
Record any damage received on the Mission Log Sheet.
7.0 Ending the Mission
There are several ways the mission can end. You can return to your base in England and land successfully. You can crash at your base as a result of damage to the bomber or pilot error. You might not make it all the way home and be forced to "crash" land in enemy territory or ditch (land in the water) in any of several bodies of water that missions were flown over.
You can also be shot down over enemy territory where you can possibly bail out. If you safely bailout you may be able to escape and evade to friendly territory or you may be captured and become a prisoner of war. If your bomber has received a lot of damage you might be able to divert to a neutral country (Switzerland). If you divert to Switzerland, you will be interned for the rest of the war thus ending your bomber crew's career.
The location of the Bomber counter on the Strategic Movement Track determines where the plane will land. Refer to the Flight Log Gazetteer,
7.1 Landing at Your Base
Landing at your base in England happens when the bomber reaches the base zone on the Strategic Movement Track.
When the bomber enters the airbase zone, roll for weather over your base on Table 3-1. Apply the table modifiers and roll for the weather. (Disregard the reference to the mission being scrubbed if you roll BAD weather.)
Then, roll 2D6 on Table 7-1. Damage received in combat plus circumstances described in the notes and dice roll modifiers for this table may affect the success of the landing by increasing or decreasing the landing dice roll. An unsuccessful landing can mean the destruction of the Bomber and death or injury for the crew.
7.2 Ditching (Landing) in Water
Crews of bombers downed in the sea face the additional hazards of drowning and exposure. Landing a bomber in the sea is an act of desperation and should only occur if the plane is forced out of the sky in a zone totally over water. Ditching in the sea is preferable only to bailing out into the sea. A bomber landing in the sea is lost. Crewmen rescued from the sea in Zones 2-5 are returned to England; those rescued from the sea in Zones 6 or 7 are captured.
Roll for landings in water on Table 7-2. Refer to the table notes and die roll modifiers to determine the disposition of the crew. The modifiers below Table 7-2 are cumulative.
7.3 Landing in Europe
A bomber landing in Europe is automatically assumed to be "crash" landing in some open area, not an airfield. Roll for landings in Europe on Table 7-1, refer to the table notes and die roll modifiers to determine the disposition of the crew. Bombers which land in Europe are considered lost. To determine the disposition of surviving crewmembers, crash landing in German controlled territory, refer to notes c) and e) in Table 7-3 Controlled Bailout.
Crewmen rescued from the sea in Zones 2-5 are returned to England; those rescued from the sea in Zones 6 or 7 are captured.
See optional rules for diverting your bomber to a neutral country.
7.4 Bailing Out
Crewmembers may bail out of a damaged bomber that is still under control on Table 7-3 or from an uncontrolled bomber (as may be directed from the Damage Tables) on Table 7-4.
Roll for each crewman separately. Seriously wounded crewmen may not bail out. Crewmen with two light wounds may bail out with a (-1) die roll modifier in a controlled bailout (Table 7-3). Crewmen with two light wounds may make an uncontrolled bailout with NO die roll modifier on Table 7-4.
See Table Notes for tables 7-3 and 7-4 for details of bailing out.
7.4.1 (Optional Rule) Crew Capture
In real life crew members that escaped capture and were returned by Partisans or the Underground were taken off of flying status. There were notable exceptions and the player can determine if his crew member is pulled from flying status or is returned to flying duty.
7.5 (Optional Rule) Awards
Air Crewmen may be eligible for medals for heroic acts. Medals were awarded to individuals for extraordinary achievement, either against the enemy or in saving a fellow soldier, or even bringing a plane home despite its excessive damage. If the player feels he has a crewman who deserves a medal, roll 2d6 on Table 7-5 Awards to determine if the award was issued.
British Military Medals in order of precedence:
Victoria Cross - The Victoria Cross is the premier Operational Gallantry award given for 'most conspicuous bravery, or some daring or pre-eminent act of valor or self-sacrifice, or extreme devotion to duty in the presence of the enemy.
Distinguished Service Order - The Distinguished Service Order is an operational gallantry award given for highly successful command and leadership during active operations.
Conspicuous Gallantry Award - The Conspicuous Gallantry Cross is an operational gallantry award given to all ranks of the services in recognition of an act (or acts) of conspicuous gallantry during active operations against the enemy.
Distinguished Service Cross - The Distinguished Service Cross is an operational gallantry award given to all ranks of the services in recognition of exemplary gallantry during active operations against the enemy at sea.
Military Cross - The Military Cross is an operational gallantry award given to all ranks of the services in recognition of exemplary gallantry during active operations against the enemy on land.
Distinguished Flying Cross - The Distinguished Flying Cross is an operational gallantry award given to all ranks of the services in recognition of exemplary gallantry during active operations against the enemy in the air.
For all of the above medals, personnel who perform a further act of such gallantry which would have merited a second award would be issued with an ornamented silver bar. Most awarded could be awarded posthumously.
Mentioned in Dispatches - A soldier mentioned in dispatches (or dispatches) (MID) is one whose name appears in an official report written by a superior officer and sent to the high command, in which is described the soldier's gallant or meritorious action in the face of the enemy.
7.6 (Optional Rule) Confirmation of German Fighters Claimed Shot Down by Your Gunners
The Royal Air Force's leading bomber gunner, Wallace McIntosh, was credited with eight kills, including three on one mission. Flight Sergeant F. J. Barker scored 13 victories while flying as a gunner in a Boulton Paul Defiant turret fighter, piloted by Flight Sergeant E. R. Thorne.
For player's who wants a more detailed experience for his crewmembers, this rule allows the player to determine what aerial victories claimed by his bomber's gunners are approved for official credit by the Aerial Victory Credit board. To simulate the Aerial Victory Credit Board's award of Credit for a claimed aerial victory by one of your gunners, use the optional rules below.
7.6.1 Receiving Credit for Aerial Victories Claimed by Your Bomber's Gunners
Treat each enemy fighter shot down by a gunner on your bomber as a "Claim". Keep track of the claimed victories by each gunner during each mission. At the end of the mission during the Post Mission Debriefing roll on Table 7-6 to determine if the Victory Awards Board approved your credit.
It is now possible to receive partial credit if the board determined other gunners also made a claim on the fighter you claimed as shot down.
Roll 2D6 on Table 7.6 for each Enemy Aircraft claimed by your gunners. Record the results next to the crewmen's name on the Composite Mission Record.
8.0 Post Mission Debriefing
Before beginning the next mission, players must resolve the fate of any returning seriously wounded and/or frostbitten crew members (see Tables 5-17, 5-18 and sections 5.11 Crew Wounds 5.12 Heat Out/Frostbite), then record the results of the just completed mission on the Composite Mission Record. Note the percentage of bombs dropped on the target in the appropriate column. A destroyed bomber and crew members who will not be flying again, for one reason or another, are crossed out. Notes can be added to lost crewmen to describe their fate, such as: KIA (killed in action); DOW (died of wounds); LAS (lost at sea); IH (invalided home); and BO-C (bailed out-captured). Decorations for Heroic acts can also be recorded if you are using that optional rule.
Also note enemy fighters destroyed during the mission in order to keep a running tally of a gunner's progress towards ace status.
When a bomber or crew member is lost, select a new bomber or crewmen and give them a new name in preparation for the next mission.
9.0 (Optional Rule) Additional British Bombers and German Night Fighter Aircraft
9.1 (Optional Rule) The Vickers Wellington Bomber
The Vickers Wellington Bomber is being added to Target for Tonight as a Special Thank You to Joe Osentoski our Technical Advisor. The Wellington is a favorite of Joe's and we are adding it to the roster to thank him for all his time and effort assisting with Target for Tonight and our sister game Target for Today. So, THANK YOU, JOE! Steve and I appreciate all your hard work!
(DESIGN NOTE: The Wellington Bomber is a twin-engine bomber design while Target for Tonight and Target for Today were designed with the four engine heavy bombers in mind.)
The player is cautioned that there may be some compatibility issues in the regular game rules when using twin-engine bombers. If you want to fly the twin-engine Wellington, you may find references that seem incompatible. We have tried to cover all the situations with these optional rules where the twin engine vs. the four engine bomber rules are different, or that may lead to confusion. The player may discover some others we have missed. If you do discover a conflict, try to resolve it in the truest to life manner that will enhance your game play.
We think we have covered the major areas of conflict between twin engine bombers and four engine bombers in this optional rule, but please let us know if you discover any others. We hope you enjoy this "Extra Bomber".
The rules in this section supersede those in the regular four engine bomber rules sections, otherwise use the regular game rules to fly your Wellington Bomber Missions.
The Wellington Bomber was used by Bomber Command from 1939 to 1943 when it was removed from the Main Force Bomber Operations and relegated to secondary operations due to heavy losses. The player can fly any of the missions found in the various campaigns in Target for Tonight with the Wellington bomber. The Wellington can also carry any of the Electronic Warfare devices of its bigger brothers and can also use the Optional .50 caliber guns/turrets at the player's option.
The Wellington Mk III bomber variant will be used here in the game. The Wellington Mark III was powered by a pair of 1,425 hp air cooled Hercules III radial engines driving Rotol propellers. The Wellington Mark III was fitted with the FN5 nose turret mounting twin .303 caliber machine guns. The rear centre section held left and right single .303 caliber Lewis or Vickers handheld gun positions and the four-gun .303 caliber FN20 tail turret was mounted in the tail. There were no Ventral or dorsal turrets mounted on the Mark III. Entering service with No 9 Squadron on 22 June 1941 the Wellington Mk III was destined to be the backbone of Bomber Command and shouldered most of the night offensive load until such time as the four engine Stirling's, Halifax's and Lancaster's appeared in sufficient numbers to take over. A total of 1,519 Mark IIIs were built and became the mainstays of Bomber Command through 1941. It was pulled out of front line service in Oct. 1943.
When the Pathfinder Force was first authorized, it was a small number of Gee equipped Wellingtons that were pressed into a basic Pathfinder force. The Wellingtons would arrive over the target ahead of the main force, marking it with colored flares or incendiaries for the following bombers to aim at. One of the founding members of the Pathfinder Force in August 1942 was No 156 Squadron which was flying Wellingtons.
9.1.1 Rules Applying to the Wellington Mark III Bomber
9.1.1.1 Checking for Mechanical Failure with the Wellington Bomber (Standard Rule Section 4.4)
The Wellington Bomber, while being a reliable aircraft, also suffered mechanical failures. Upon reaching Zone 2 and each zone thereafter, roll 2D10 (1D10+1D10) dice on Optional Rule Table 9-1 to check for Mechanical Failure.
A die roll result or 01-04 means the Wellington Bomber suffered a mechanical failure. Rolling "05-100" means there is no malfunction.
As with other conditions affecting the bomber, mark the results on your Zone Work Sheet.
9.1.1.2 Turbo-Supercharger Failure - Table 9-1 Note (C)
Turbo-supercharger failure results in a loss of power to the affected engine. If the bomber is flying at the high altitude level (Above 10,000 feet) while still carrying its bomb load and suffers a turbo-supercharger failure in an engine, it must enter the low altitude level in its next movement Turn and move at the rate of two movement turns per zone. If the bomber is moving normally it must enter the next zone at the low altitude level unless it jettisons its bomb load in the current zone or bombs the target if this is the target zone. It may climb back to the High-Altitude Level after jettisoning its bombs or bombing the target with one super charger working. If the bomber suffers a second turbo-supercharger failure, then it must stay in the low altitude level. If neither supercharger is working the Wellington must stay in the low altitude level.
There are two types of turbo-supercharger failure, mechanical or regulatory. Roll: 1D10 to determine type of turbo-supercharger failure: 1-2 = mechanical failure; 3-10 = regulator failure. The Pilot, 2nd Pilot or Observer may repair the regulator failure by spending one turn taking no other action at the Front Centre Section Pilot's Compartment. If an Unsuccessful is rolled for on the Regulatory roll it cannot be repaired in flight. Mechanical failure cannot be repaired in flight. This failure result may occur again on any remaining operating engine; there is no effect if a previously failed engine receives another failure result.
Flying thru the Alps - If the Wellington bomber has one turbo-supercharger working and has dropped or jettisoned its bomb load it can fly over the Alps in the High-Altitude Level. If the Wellington is in the Low Altitude Level for any reason and wants to pass thru the Alps, it must follow the procedure outlined in rule 4.2.1 and spend one additional movement turn in the Alps zone to simulate the search the bomber must make to find a low passage thru the mountains. Roll per rule 4.2.1 and Table 4-1A Table Note e) to determine the results of the attempt.
9.1.1.3 Engines Out (Rule Section 5.10)
One Engine Out - With one engine out, the Wellington bomber may only fly in the Low Altitude Level if it jettisons its bomb load. (It can either bomb from the Low Altitude Level if this is the target zone or it can jettison its bomb load in the current zone).
The Bomber must spend 2 turns in each zone due to slowing down.
The bomber must therefore roll for AAA gun attacks and German night fighter attacks twice per zone. Complete the full combat procedure for the first turn in the zone and then complete the full combat procedure for the second turn in that same zone.
Do not check for weather, contrails, mission recall, mechanical failure or discovery by the Kammhuber Line Defense System sites (Rule 4.7.1) again for this second turn in the same zone.
The Bomber must also drop to the low altitude level for the remainder of the mission.
When a Bomber has one engine out, attacking night fighters add (+1) to their German Offensive Fire die rolls on Table 5-13.
The Wellington Bomber may not take Evasive Action with one engine out.
The bomber may abort the mission.
No Engines Operating - The Bomber must either crash land in its present zone on either Tables 7-1 and 7-2 (find this zone in the Flight Log Gazetteer to determine if the Bomber is over land or water, or if you have a choice), or the crew must bail out on Table 7-3 or 7-4. Once the second engine is out, the player must immediately choose either to attempt the crash landing or bail out. If crash landing with both engines out, landing die roll is -7 on Tables 7-1 and 7-2.
9.1.1.4 Wellington Bomber's Defensive Fire Allocation Table
Use Table 9-2 to determine the fields of fire for the Wellington bomber's guns and turrets.
9.1.1.5 The Wellington's Crew
The Wellington Mark III had a crew of six: a Pilot, Wireless Radio Operator, a Navigator/Bomb Aimer, An Observer/Nose Gunner, a Tail Gunner and a Waist Gunner. Crew members performed multiple duties in the bomber.
9.1.1.6 Enhanced Night Vision
The Navigator/Bomb Aimer, the Observer/Nose Gunner, the Tail Gunner and the Waist Gunner are the only crew members eligible for the enhanced Night Vision die roll modifier.
9.1.1.7 Fire Extinguishers
The Wellington bomber carries 4 fire extinguishers.
9.2 (Optional Rule) German Me 262 Jet Night Fighter
The Me 262 B-1a/U1 - German jets first appeared in day combat over Germany in July 1944. The Me 262 was the best jet fighter designed by the Germans. It was a single seat day fighter used against the American bombers in the daylight bomber raids over Germany. It is armed with four 30mm Mk-108 cannons and has a good range (550 Miles) and high speed (495 mph) that allowed it to climb quickly to its service ceiling of 36,000 feet.
A number of the single seat Me 262 fighters were converted to a dual seat trainer version for pilot training. Late in the war a night fighter variant was developed from this two seat Me-262 jet trainer.
The night fighter variant became the Me 262 B-la/Ul and was considered a Behelfsnachtjager (interim night fighter). The most notable change on the Me 262 B-la/Ul was the introduction of the Siemens FuG 218 Neptun V airborne interception radar. It was the Luftwaffe's most sophisticated radar system. The rear control columns were deleted on the Me 262 B-la/Ul, and the rear cockpit was modified for a radar operator. This modification included a console with a radar display unit. All the Behelfsnachtjager were based on late Me 262 B-la trainer aircraft. All Me 262 B-la/Ul night fighters were armed with 4 30mm MK 108 cannons.
About half a dozen Me 262 B-la/Uls were built in the closing stage of World War II. At least four of these aircraft were allocated to the 10. Staffel (10th Squadron) of Nachtjagdgeschwader 11 (Night Fighter Wing 11), which was based at Burg airfield near Magdeburg until 11 April 1945. The 10. Staffel was under the command of night fighter ace Oberleutnant (First Lieutenant) Kurt Welter. The unit moved to Lübeck-Blankensee in mid-April 1945 and to Schleswig-Jagel airbase in early May 1945. At Schleswig-Jagel, four Me 262 B-la/Ul Behelfsnachtjager were handed over to the British occupation forces. A fifth example was captured by the Soviet air force.
9.2.1 The Me-262 B-1a/U1 night fighter can be substituted in Table 5-7 GERMAN NIGHT FIGHTER APPEARANCE. If the player wishes to use this night fighter follow note c) for Table 5-7. The Me-262 also has Bomber "To Hit" firing data in Table 5-12B.
9.2.2 The Me-262 B-1a/U1 night fighter is considered to come equipped with both Flensburg and Naxos EW devices as standard.
9.2.3 The Me-262 B-1a/U1 can operate in the Very High-Altitude Level against the B-29 Superfortress bombers if that optional rule is being used.
9.2.4 (Optional Rule) Early Introduction of the German Jet Me-262 B-1a/U1 Night Fighter
The player can add to the game action by using the "What-If" rule below if they so choose.
Optional "What-if" Scenario - Hitler set the Jet program back by at least 8 months by requiring that the Me 262 jet fighter be able to drop bombs. It was possible that Jets could have been deployed in the fall of 1943 if Hitler had not interfered in the program. If you would like to fly a "what if" mission, allow the Me 262 B-1a/U1 night fighter to be introduced during September 1943.
9.3 (Optional Rule) Ta 154 A-0 Night Fighter
Ta 154 A-0 - The Ta 154 A-0 night fighter was a high-wing twin-engine design, built primarily of plywood. The only large-scale use of metal was in the pressurized cockpit. The Ta 154 made its maiden flight on July 1, 1943. The Ta 154 was also allocated the name "Moskito" as a form of recognition of the RAF's de Havilland Mosquito. It was at about this time that the light and very fast de Havilland Mosquito, also made of plywood, arrived over Germany. The de Havilland quickly racked up an impressive record; in its first 600 bombing missions, only one was shot down, compared to an average of 5% for the RAF's medium and heavy bombers. Erhard Milch, director of aircraft production personally requested a purpose-built German answer to the de Havilland and selected the Ta 154. Production delays caused the project to lag and only a handful of the Ta 154 A-0 night fighter versions were available in the last month of the war.
The Ta 154 A-0 carried a crew of two, had a maximum speed of 418 mph and a ceiling of 31,000 feet. It could climb 2,800 feet per minute. It carried the FuG 212 C-1 Lichtenstein radar and was armed with 2 × 20 mm MG 151 cannons, 2 × 30 mm nose-mounted MK 108 cannons and 2 × fuselage-mounted 30 mm Schräge Musik MK 108 cannons.
9.3.1 The Ta 154 A-0 night fighter can be substituted in Table 5-7 GERMAN NIGHT FIGHTER APPEARANCE. If the player wishes to use this night fighter follow note d) for Table 5-7. The Ta 154 A-0 also has bomber "To Hit" firing data in Table 5-12B.
9.3.2 The Ta 154 A-0 night fighter is considered to come equipped with both Flensburg and Naxos EW devices as standard.
9.3.3 (Optional Rule) Early Introduction of the Ta 154 A-0 Night Fighter
The player can add to the game action by using the "What-If" rule below if they so choose.
Optional "What-if" Scenario - Erhard Milch, director of aircraft production personally requested a purpose-built German answer to the de Havilland and selected the Ta 154. Production delays and political wrangling between government agencies over control of the project caused the project to lag. If this political in-fighting had not occurred the Ta 154 A-0 could have flown as early as the fall of 1943. If you would like to fly a "what if" mission, allow the Ta 154 A-0 night fighter to be introduced during September 1943.
9.4 (Optional Rule) Italian Do 217 J-1 Night Fighter
Do 217 J-1 - Germany provided Italian Air Force with the German Do 217 J-1 night fighter for defense against night attacks.
When bombing targets in Italy the player may elect to use the Italian Do 217 J-1 if rolled for per note d) in Table 5-7 German Night Fighter Appearance.
9.4.1 The Do 217 J-1 night fighter can be substituted in Table 5-7 GERMAN NIGHT FIGHTER APPEARANCE. If the player wishes to use this night fighter follow note c) for Table 5-7. Do 217 J-1 also has Bomber "To Hit" firing data in Table 5-12B.
9.4.2 The Do 217 J-1 night fighter is considered to come equipped with both Flensburg and Naxos EW devices as standard.
10.0 The Optional Rules
PLAYERS TAKE NOTE! - The optional rules contained in this section are designed to give the gamer the ultimate gaming experience from playing Target for Tonight. The player should be aware that using some of the optional rules modules presented in this section could conflict with rules presented in other optional rules modules or with rules presented in the Standard Game rules. In cases of conflict the player should resolve them it what appears to be the most logical manner.
Some optional rules appear in the regular rules sections pertaining to their subject matter. Others appear here. Below is a list of the optional rules appearing in the regular rules section for Target for Tonight:
Optional Rules appearing in regular rules sections:
- 2.5.2 Non-Standard Turret/Gun Options
- 2.8.3 Role-Playing Aircrew Considerations
- 4.8.2 Flying a "Spoof" Raid as Your Mission.
- 5.3.3.6 Additional German and Italian Night Fighters. (See Rules 9.2, 9.3 and 9.4)
- 5.5.1.1 Detailed German Fighter Damage
- 5.7.1 - Bomber Guns/Turrets Special Considerations - Area Spray Fire
- 5.11.1 Detailed Wounds
- 6.3 Thermal Turbulence - Fire Bombing and Firestorms
- 7.4.1 Crew Capture
- 7.5 Awards
- 7.6 Confirmation of German Fighters Claimed Shotdown by Your Gunners.
- 9.0 Additional British Bombers and German Night Fighter Aircraft
- 9.1 The Vickers Wellington Bomber
- 9.2 German Me-262 Jet Night Fighter
- 9.3 Ta-154 A-0 Night Fighter
- 9.4 Italian Do-217J1 Night Fighter
10.1 (Optional Rule) Alternate Landing Options
Switzerland:
During the mission if your bomber receives damage that will not allow you to return to your base (e.g. multiple engines out) you may wish to divert to Switzerland rather than try to crash land or bail out over enemy territory. Switzerland is in zones 10 and 11 for England based bombers.
Sweden:
Sweden declared herself as a Non-Belligerent as opposed to a Neutral Country. A non-belligerent state differs from a neutral one in that it may support certain belligerents in a war but is not directly involved in military operations. Sweden supported Germany and her allies.
For bombers flying from England against targets in Northeastern Germany or Poland, you may divert to Sweden rather than try to crash land or bail out over enemy territory. Sweden is in zones 11 and 12 for England based bombers.
If you decide to divert to Switzerland or Sweden, you must be able to fly there from the zone you are currently in. Roll for landing upon arrival on Table 7-1 to see if your crew and bomber survive. If you divert to Switzerland or Sweden, you and your crew are interned for the rest of the war. Game over!
Island of Malta divert base:
The Island of Malta in the Mediterranean Sea was held by the Allies. If your bomber is damaged, you can divert to Malta if need be. Bombing missions in Italy will allow you to divert to Malta.
If you are south of the Alps, flying over Italy and cannot cross the Alps, your bomber can divert to Malta in the Mediterranean Sea. Malta is six (6) zones away. Zone 1 is a combination zone. Water (W)/Italy (I), 2-4 and 6 are considered over water (W) with zone 5 being a Land Zone (Sicilia) for AAA Gunfire and for ditching and bailout purposes.
After repairs your bomber is ready for the next mission. Fly it from Malta but return to your base in England.
Island of Vis divert base:
After November 1943 The Island of Vis in the Adriatic Sea was held by the Allies and had a runway. If your bomber is damaged, you can divert to Vis if need be.
Consider Vis to be four zones from targets in Northern Italy for diverting purposes.
- Zone 1 is Italy (I)
- Zone 2 is Water (W)/Italy (I)
- Zone 3 is Water (W)
- Zone 4 is Water (W)/Vis
After repairs your bomber is ready for the next mission. Fly it from Vis but return to your base in England.
Bari Italy:
On November 1st, 1943, the Allies moved the USAAF 15th Air Force to Bari Italy. Consider Bari to be 7 zones away from the targets in Northern Italy for divert purposes. If your bomber is damaged, you can divert to Bari Italy if need be.
Consider Bari to be four zones from targets in Northern Italy for diverting purposes.
- Zones 1-3 are considered Axis controlled Italy (I)
- Zone 4 is considered Allied controlled (Friendly) Italy (I) for bailout and crash-landing purposes.
After repairs your bomber is ready for the next mission. Fly it from Bari Italy but return to your base in England.
10.2 (Optional Rules) Mobile Barges and "Heavy Flak Ships"
The German's anchored mobile barges containing light and heavy AAA Guns and Searchlights in various locations along the coastline of Europe. The Barges would be moved regularly to keep Bomber Command guessing as to where AAA gun concentrations were located. In addition to the barges the Germans deployed the Sperrbrecher ships in the shipping lanes.
The Sperrbrecher (as named by the German Navy) was a combination minesweeper and AAA Gun-bearing ship used to protect the coastal shipping lanes. These ships had 20 mm and 37 mm cannons positioned on high platforms at bow and stern for unrestricted fields of fire. Other armament included 105 mm cannons and 88 mm AAA cannons, and searchlights. The RAF referred to these ships as "Heavy Flak Ships".
These mobile barges and "Heavy Flak Ships" can appear in coastal zones that are marked with "W" for water and are adjacent to a land zone or where a zone shows two code letters in the zone and a die roll has determined the zone is water ("W"). There are no "Heavy Flak Ships" or mobile barges found in any water zones adjacent to England.
If the player has not determined if the zone in question is land or water, then roll 1D6. On a roll of "1-3" the first letter applies (i.e., water), on a roll of "4-6" the second letter applies (i.e., land).
The effect of a mobile barge or "Heavy Flak Ship" is to extend AAA gun fire into that zone, if that zone is marked as or determined to be water "W".
NOTE: This supersedes Rule 5.1 which states that there are no AAA Gun attacks or Searchlights in any zone marked as water "W".
At the player's discretion, they can use this optional rule in any regular mission game.
10.2.1 To determine if the water zone contains a mobile barge or "Heavy Flak Ship", roll 1D6. 1-3 - the zone contains a Mobile Barge or "Heavy Flak Ship". 4-6 - there is no mobile barge or "Heavy Flak Ship" in the zone.
10.2.2 After March 1944 No mobile barges or "Heavy Flak Ships" are found in any sea zone where the players bomber is crossing the coastline into France (F) or Belgium (B). After December 1944, no mobile barges or "Heavy Flak Ships" are found in any sea zone where the players bomber is crossing the coastline into France (F), Belgium (B) or the Netherlands (N).
10.2.3 If the water zone the player's bomber is passing thru contains a mobile barge or "Heavy Flak Ship", resolve spotting and the AAA Gun attack and Searchlight phases just as you would in any other non-water zone containing AAA Guns and searchlights. (See Rules sections 5.0 thru 5.2)
10.2.4 Some of the additional mission scenarios presented in the Optional Rules Section may call for placement of "Heavy Flak Ships". When playing those scenarios, place the "Heavy Flak Ships" as directed in the individual scenarios and do not roll for additional mobile barges or "Heavy Flak Ships".
10.3 (Optional Rule) Additional Crew Positions
Bomber Command would sometimes assign senior Squadron or Group officers or other personnel to fly along with the bomber crews. These extra crewmen or "Super-Cargo" as they were sometimes called, (because they just rode along) might take the place of a gunner or other bomber crewman or they might just occupy an empty position. In real life both flying and non-flying personnel had legitimate reasons to be flying with the bomber crews.
Some ideas for personnel to be accompanying the bomber crew on its mission might be:
Headquarters personnel needing a few hours to maintain their flight pay and flight status.
A Group or Wing Commander accompanying your Bomber to see how you are performing.
A Movie Camera Crews sometimes accompanied the bombers to get that fantastic combat footage that we all like to watch on TV.
An electronic warfare specialist operating a Mandrel set or one of the other EW devices.
There are a couple of ways you can simulate this.
Substitute the super cargo crewman for one of your personnel. (Such as a Gunner)
Add the crewman to the crew in a compartment (usually Rear Centre Section). Any hits on that compartment that calls for casualties should be divided between whoever is occupying it at the player's discretion.
If a senior officer such as the Wing or Group Commander accompanies your bomber on a mission that person may fly the plane in which case you as the pilot would be "bumped". You would then complete the flight riding in a jump seat or in another area of the bomber. Or the Senior Officer may just ride along in any of the compartments elsewhere in the plane. Place them at your discretion.
This can really add to the role-playing nature of Target for Tonight and is a fun addition that portrays a slice of real-life action during the Strategic Night Bombing Campaign.
10.4 (Optional Rule) The Bomber Squadron Game
The Bomber Squadron Game optional rules allow the player to fly his bomber as part of an RAF Bomber Command Main Force Bomber Squadron on an operational bombing mission. If the player is playing the Bomber Squadron Game in conjunction with his own bomber mission, then for any rule conflicts between the Bomber Squadron Game Rules and the individual bomber game rules, the Bomber Squadron Rules take precedence.
The Bomber Squadron Game results are determined after the player has completed his turn in the current zone but before he moves to the next zone.
Heavy Bomber Squadrons within the RAF's Bomber Command varied in size during the war. On the average they contained 16-20 bombers. Normally between 65 and 70% of the bombers would be available to be assigned to a night bombing mission.
For the Bomber Squadron Game, the operational mission will be composed of 12 bombers flying in the Bomber Stream. One of the 12 bombers will be the Player's bomber.
10.4.1 Bomber Squadron Game Rules
Only your plane will use all the rules in Target for Tonight. The remaining 11 bombers of the Bomber Squadron use the following rules to determine their destiny on the assigned bombing mission.
(NOTE: Anytime the player is asked by the game rules to determine a bomber to apply any kind of game result, the player will use the procedure outlined in Rule 10.4.1.1 below.)
10.4.1.1 Determining your bomber's position in the bomber stream
To use the Bomber Squadron Game the player must first determine their own bomber's position in their Squadron's Bomber Stream.
First, roll 1D6. If the result is 1-3, then use the left column in Table 10-4.1 labeled "Bombers 1 to 6". If the roll result is 4-6, then use the right-hand column labeled "Bombers 7 - 12".
After selecting the correct column to use on Table 10-4.1, roll again and cross index the roll result with the correct column to determine your bomber's number in the bomber stream diagram on the Crew Placement Board. Then place the player position counter on the resulting numbered box on the bomber stream diagram on the Crew Placement Board.
After determining your own bomber's position (box) number in the bomber stream, record your bomber's name in the "Bomber Name" Column next to the appropriate bomber position number (Bombers 1 to 12) on the Bomber Squadron Game Assignment Sheet.
Next position squadron's "other 11" bomber counters in the remaining 11 positions on the Bomber Stream Diagram on the Crew Placement Board. Then fill in the names of the remaining 11 bombers in your Squadron on the Bomber Squadron Game Assignment Sheet.
At the top of the Bomber Squadron Game Assignment Sheet fill in the Bomber Command Group number, Squadron number and Flight letter your bomber is assigned to. This can be done historically, or you can use any designation that fits in with the role playing or other type of game you may be playing or hosting.
Historical note - Most units of the Royal Air Force are identified by a two-character alphabetical or alpha-numeric combination squadron code. Usually, that code is painted on the aircraft belonging to that unit. The squadron code is usually presented along with an individual letter or character to form a call sign for the particular aircraft. Location of the call sign combination has usually been on the rear fuselage next to the RAF roundel.
[Ed. Note: - The Bomber Squadron Game Assignment Sheet can also be used by a game master to host a multi-player event, either live or via email/internet, by recording other player's names in Bomber Position Column and track bomber damage in the other columns.]
Table 10-4.1 Determining Your Bomber's Position in the Bomber Stream
| 1D6 | Bombers 1 - 6 | Bombers 7 - 12 |
|---|---|---|
| 1 | Box 1 (a) | Box 7 |
| 2 | Box 2 (a) | Box 8 |
| 3 | Box 3 (a) | Box 9 |
| 4 | Box 4 | Box 10 |
| 5 | Box 5 | Box 11 |
| 6 | Box 6 | Box 12 |
Table Notes: Note a) above ONLY applies when selecting your bomber's position in the bomber stream if your bomber is not equipped with Gee (or, a later version of a navigation device) then reroll until your bomber is NOT in boxes 1, 2 or 3.
Otherwise roll on table 10-4.2 to determine if any of the "other 11" bombers are lost on takeoff.
Table 10-4.2 - Take Off for the "Other 11" Bombers
| 1D10 | Results |
|---|---|
| 1 | Accident - 1 bomber crashes on takeoff. (a) |
| 2 - 10 | Take-off OK. (b) |
Table Notes:
- a) Roll 1D6: 1-2 Landing gear collapses on the bomber determined in using Table 10-4.1. Crew Safe, Bomber destroyed; 3- Bomber crashes, bombs detonate bomber destroyed, crew killed; 4-6 - Engine malfunction, bomber aborts mission, crew and bomber safe.
- b) The squadron's bombers are now airborne over its base in the low altitude level in Zone 1 on Strategic Movement Track. Continue the mission.
10.4.2 Running the "Other 11" Bombers in Your Squadron
The player completes the actions for his own bomber in each zone of the mission entered using the full Target for Today game rules. For the "other 11" bombers in the squadron use the abbreviated rules in the Bomber Squadron Game to complete their move in each zone.
10.4.2.1 As the player plays out the bombing mission for his own bomber, the tables and results may call for actions/results that apply to other bombers in his squadron.
(Example - The player rolls to determine the outcome of his bomber's takeoff on Table 3-2. Note C for Table 3-2 states "There has been a "Mid-air Accident". You are not involved but two of the bombers in your Squadron have collided and gone down." Use this section to determine the bomber(s) involved in those events.)
10.4.2.2 The "other 11" bombers will fly in the same altitude zone as the player's bomber. If the player's bomber is lost, then the player will determine the altitude level the "other 11" bombers fly at just as he would for his bomber.
10.4.2.3 Should the player's bomber be required to spend extra movement "turns" in any zone due to bomber damage, poor navigation or a delay called by the "Master Bomber" then each additional movement "turn" subjects the "other 11" bombers in your bomber squadron to another set of attacks. (Each set consists of one AAA attack and one Night Fighter attack). So, there could be multiple rounds of combat in a zone.
10.4.3 Takeoff
After the player's bomber takes off from his base in zone 1, the player will determine if the "other 11" bombers take off safely.
Start by checking to see if the player's bomber rolled a Takeoff Event affecting any of the "other 11" bombers in the squadron. If an event was rolled then determine which two bombers crashed using the procedure outlined in 10.4.1.1.
Record this or any other "Event" loses or damage to your "other 11" bomber's as they occur on the Bomber Squadron Game Assignment Sheet.
Should the player decide to roll individually for each of his "other 11" bomber for takeoff, disregard any "takeoff event" affecting the "other 11" bombers that his bomber might roll and roll individually for the "other 11" bombers in his squadron on Table 3-2.
10.4.4 Determining Attacks on the "Other 11" Bombers
If your bomber is not attacked in its current zone, the "other 11" bombers in your Squadron can still be attacked.
Should your bomber be shot down during the mission and you want to continue playing The Bomber Squadron Game without your bomber, simply move the bomber Squadron on the Strategic Movement Track as if your bomber was still present in the bomber stream. You can complete the mission without your bomber being present.
Resolve these attacks using the procedures outlined below.
Use the following tables to determine which bombers in your Bomber Squadron becomes the subject of an attack in each zone entered. This is determined after all attacks against your own bomber are resolved using the Standard Target for Tonight rules.
10.4.4.1 The Attack Procedure Each of the bombers in the Bomber Squadron, other than your own, takes six (6) hits before it is shot down.
Use Tables 10-4.3, 10-4.4, and 10-4.5 to determine which of the "other 11" bombers in your squadron is attacked in each zone and the damage done to them.
Roll for both an Anti-Aircraft Artillery (AAA) attack and a Night Fighter attack in each applicable Zone. Roll for the AAA attack first then the night fighter attack.
If the AAA attack result on Table 10-4.3 is "No Attack" play continues with the player determining the results of the night fighter attack.
Table 10-4.3 Determining Which of the "Other 11" Bombers are to be Attacked
| 1D10 | Bombers 1 - 6 | Bombers 7 - 12 |
|---|---|---|
| 1 | Bomber 1 | Bomber 7 |
| 2 | No Attack | No Attack |
| 3 | Bomber 2 | Bomber 8 |
| 4 | No Attack | No Attack |
| 5 | Bomber 3 | Bomber 9 |
| 6 | Bomber 4 | No Attack |
| 7 | No Attack | Bomber 10 |
| 8 | Bomber 5 | No Attack |
| 9 | No Attack | Bomber 11 |
| 10 | Bomber 6 | Bomber 12 |
- Roll twice, 1st roll for AAA Attack and 2nd Roll for Night Fighter Attack.
- The bomber numbers in the tables correspond to the bomber numbering on the Bomber Squadron Game Assignment sheets.
- If the player's bomber is rolled then the result is "No Attack". If a bomber number is rolled that has already shot down, then the result is "No Attack".
- If a "No Attack" result is obtained then that attack ends.
- If an active "Bomber #" result is obtained, continue to Table 10-4.4 for AAA attack Results or Table 10-4.5 for Fighter Attack Results.
10.4.4.2 Anti-Aircraft Artillery (Flak) Attack For each Axis Controlled land ZONE with a country code letter that your bomber passes thru on the mission, the "other 11" bombers in your squadron are subject to an Anti-Aircraft Artillery attack. For Zones with both a Water (W) and a Land Code determine which code is applicable as you would in the single bomber game.
To determine the results of the AAA attack roll 2D6 on Table 10-4.4
Record the results of the AAA attack on the Bomber Squadron Game Assignment sheets for that squadron bomber.
Table 10-4.4 AAA Gun Attack Results
| 1D10 | Results |
|---|---|
| <2 | Miss |
| 3-4 | Bomber - 1 Hit |
| 5-6 | Bomber - 2 Hits |
| 7-8 | Bomber - 3 Hits |
| 9 | Bomber - 4 Hits |
| >10 | Bomber Shot Down |
Die Roll Modifiers:
- +1 - If Mission date falls between 1941 & June 1943 (Freya/Wurzburg radar directed AAA and searchlights operational).
- -1 - If Mission date falls between July 1943 & April 1945. (Window and Monica deployed by RAF)
10.4.4.3 Night Fighter Attack For each ZONE entered on the mission by the player's bomber, the "other 11" bombers in your squadron are subject to a Night Fighter attack. The Night Fighters can attack beginning in Zone 2 on the "outbound leg" to the target zone and can then attack the bombers on the "inbound leg" into Zone 1 over your airbase.
To determine damage to the bomber from Night Fighter Attack, roll 2D6 on Table 10-4.5 Fighter Attack Results to determine the result of the night fighter attack.
Record the results of the night attack on the Bomber Squadron Game Assignment sheets for the squadron bomber.
After the night fighter attack phase is resolved play proceeds per standard game rules if this is NOT the target zone.
Note: that there are no repeat attacks by enemy fighters.
Table 10-4.5 Night Fighter Attack Results
| 1D10 | Results |
|---|---|
| <1 | Miss - Night Fighter "Shot Down" |
| 2 | Miss - Night Fighter "Damaged" |
| 3-4 | Bomber - 1 Hit |
| 5-6 | Bomber - 2 Hits |
| 7-8 | Bomber - 3 Hits |
| 9 | Bomber - 4 Hits |
| >10 | Bomber Shot Down |
Table Notes: Night Fighter "Shot Down" or "Damaged" results are for the role-players. Consider those results as a "Miss" if you are not tracking German Night Fighter Losses.
Die Roll Modifiers:
- +1 - If Mission date falls between 1941 & June 1943 (Luftwaffe advantage - Freya/Wurzburg radar directed night fighter attacks).
- -1 - If Mission date falls between July 1943 & December 1943. (RAF Advantage - Window and Monica deployed by Bomber Command)
10.4.4 Determining Attacks in the Target Zone
10.4.4.1 The Bomber Squadron is subject to AAA Gun attacks and Two Night Fighter attacks in the Target Zone. The first set of attacks are on the bomb run into the target and the second set of attacks are after the bomber squadron is turned around in the target zone and heading home.
10.4.4.2 Should the player's bomber be required to spend extra movement "turns" in the target zone due to poor navigation or damage then each additional movement "turn" subjects the "other 11" bombers in your bomber squadron to another set of attacks. (One AAA attack and one Night Fighter attack) So, there could be multiple rounds of combat in the target zone before the squadron's bombers turn for home.
10.4.5 Shooting Down the Bombers
Each of the non-player bombers in the Bomber Squadron require any combination of flak or fighter hits totaling 6 hits to be shot down. Hits are cumulative during the mission. Record all fighter and AAA Gun hits for each bomber on the status line after the bomber's number on the Bomber Group Game Assignment Sheet.
10.4.5.1 Bombing the Target When bombing the target in The Bomber Group Game you can either use the bombing rules as outlined in Rules Section 6.1 BOMBING THE TARGET for each bomber reaching the target or you can use the following simplified bombing table to determine the squadron's results.
10.4.5.2 Simplified Bombing Table The results of the Group's bomb run can be determined by rolling once on Table 10-4.8 and following the instructions.
Table 10-4.8 Bomb Run Table - Bomber Group Play
| 1D10 | Group Bomb Run |
|---|---|
| <4 | OFF TARGET - Roll on Table 6-7 under the OFF TARGET Column |
| >5 | ON TARGET - Roll on Table 6-7 under the ON TARGET Column |
Die Roll Modifiers:
- -1 if "Target Visibility" is "Target completely obscured" on Table 6-1
- +1 if "Target Visibility" is "Clear conditions apply" on Table 6-1
10.4.6 Making It Home
After you land at your base, roll on Table 10-4.8 for each bomber in your Bomber Group to determine if the bomber returned home safely. Roll for the weather over the base on Table 3-1. A POOR result gets a -1 die roll modifier on Table 10-4.8 and a BAD result gets a -2 die roll modifier on Table 10-4.8.
Roll 1d10 for each bomber. Find the die roll in the table on the appropriate number of hits row for the die roll number and determine if the bomber returns safely or was lost on the mission. Damaged bombers are considered repaired for the next mission.
Table 10-4.8 Safe Return and Landing
| Number of Bomber Hits | 1D10 Bomber Lost | 1D10 Bomber Safe |
|---|---|---|
| 0 | <0 | 1 - 10 |
| 1-2 | <1 | 2 - 10 |
| 3-4 | <2 | 3 - 10 |
| 5 | <3 | 4 - 10 |
Die Roll Modifiers:
- -1 if weather over base is POOR.
- -2 if weather over base is BAD.
10.5 (Optional Rule) Aerial Minelaying Missions
The Royal Navy levied Bomber Command to lay anti-shipping mines in German shipping lanes throughout the war to help stop the flow of supplies and war material entering and leaving "Fortress Europa" ports and traveling along coastal shipping lanes.
"Gardening" became the term used to describe these mine-laying missions flown by Bomber Command's Halifax, Lancaster, Stirling and Wellington bombers. Bomber Command codenamed all the Sea Lanes, using popular vegetable or plant names, therefore you have the "Gardening" code name for the sowing or planting of mines.
Each mine-laying area was given the delegated code name of a vegetable or "Veggies", such as; Pumpkin, Artichokes, Iris, Nectarines, etc. The Admiralty moved on to Trees names and then, Flower names and finally sea creature names as the war progressed and more areas opened for mining.
The Admiralty decided the exact locations for each Gardening mission. The minefields were often located in enemy channels, harbors, ports, and inland waterways, all along the European Atlantic coast, the North Sea, and Baltic Sea. The fields were often narrow, ranging from 1000 ft to a mile across. They were often laid in areas that forced the merchant ships into narrow channels or "chock points" to increase the odds of sinking a ship. This forced the Germans to deploy Sperrbrechers or mine sweeping craft to keep the channels open, thus tying up valuable shipping resources.
Mine-Laying:
Aircrews had guidelines to follow when assigned to a "Gardening" operation. Each Gardening Operation required the squadron to provide 5 aircraft – never more, never less – each carrying 6 airborne magnetic/acoustic mines; Take-off was usually around dusk and missions could last 6 to 10 hours depending upon where the bomber was doing the "gardening".
Aircraft from the Pathfinder Squadron would assist the five bombers assigned to laying mines by dropping colored marker flares at a desirable visual pinpoint of land so the mine laying bomber's navigator could get an accurate fix to lay out the bomb run. Once the navigator informed the pilot the intended target was nearing the pilot would make alterations to his altitude and speed, ideally, the aircraft speed should be 180 mph, and altitude at 1500 ft. The aircraft would now have to make a straight 12-mile timed run at this altitude, and speed. The mines are dropped by parachute with each mine being released at 3 to 5-second intervals with each aircraft dropping their six mines.
The aircraft would continue in a straight line for another few minutes to confuse the enemy as to where the mines were actually dropped. After completing the drop the bomber crew would head for home.
The aircraft mine is cylindrical shaped, approximately 17 inches in diameter and 9ft long including the wood or metal fairing. The weight averaged 1,500 lbs. (680 kg) of which 750 lbs. (340 kg) of explosive (Amatol or Minol). An anti-detonation device prevented explosions of other mines in close proximity to the exploding mine. A small parachute attached at the end would facilitate vertical entry into the water, and the nose fairing would prevent deflection during its flight through the air and would disintegrate upon impact with the water.
10.5.1 Players should use Optional Rule 10.2 Mobile Barges and "Heavy Flak Ships" when flying a "Gardening" mission.
Each Gardening Mission listed in rule section 10.5.7 has a dice roll modifier that is added to or subtracted from the 1D6 die roll to determine if a "Heavy Flak Ship" is present in a water zone per Rule 10.2.1. Apply that DM to the roll when determining if a "Heavy Flak Ship" is present.
10.5.2 The Bomber Squadron Game can be used with Gardening Missions with the following rules changes. (See Rule 10.4 Bomber Squadron Game)
Select your bomber and four other bombers for your squadron's gardening mission assignment by randomly placing the five bombers in the first five positions on the bomber stream diagram. (You can place the bomber counters in a cup and draw them out at random or use some other method to make the random selection). Then run the Squadron Game mission per the rules in section 10.4.
The "other 4" bombers in your squadron can use the individual bomber bombing rules to determine their bombing results just as your bomber does. (See Rules 6.1 thru 6.4) Or, the "Other 4" bombers can bomb using the Bomber Squadron Game rules. It is the player's choice.
10.5.3 Players wanting to fly a gardening mission will take off from their airbase and stay in the Low Altitude Level until reaching the Target Zone. The bomber will move to the "On-The-Deck" Altitude Level when entering the Target Zone to conduct the bomb run. The bomber should stay "On-The-Deck" until exiting the target zone.
10.5.4 All target zones are water (W) zones including any zone that is marked with both a land and a water (W) code.
The player should roll per Rule 10.2 to determine if there is a Mobile barge or "Heavy Flak Ship" in the zone. If one is present, then conduct AAA gun attacks as outlined in Rules 5.0 to 5.2. This die roll is modified with the die roll modifier shown in the "Gardening Mission zone information" in Rule 10.5.7.
10.5.5 Night fighters can attack the bomber in any zone including the target zone. No "Schräge Musik" attacks are permitted when the bomber is flying "On-The-Deck".
10.5.6 No "Corkscrew Maneuvers" are permitted by the bomber when flying "On-The-Deck".
10.5.7 Picking Your Gardening Mission
Mission 1 - Ijsselmeer Bay (Amsterdam) Netherlands. (Zone 4) Code Name - Trefoil.
Target is the Ijsselmeer Bay (Amsterdam) in zone 4. "Heavy Flak Ship" Die Roll modifier is -2.
- Zones 2-3 - are all water (W)
- Zone 4 (Target Zone) is Water (W)/ Netherlands (N)
Mission 2 - The Frisian Islands off the Netherlands coast. (zone 5) Code Name - Nectarines.
"Heavy Flak Ship" Die Roll modifier is 0.
- Zones 2-3 are all Water
- Zones 4 is Water (W)/ Netherlands (N)
- Zones 5 (Target Zone) is Water (W)/ Netherlands (N)
Mission 3 - Helgolander Bucht (Bremerhaven, Germany) (Zone 8) - Code Name - Nectarines
Target is Kiel Canal exit to the Elbe River. "Heavy Flak Ship" Die Roll modifier is -1.
- Zones 2-7 are all Water
- Zones 8 (Target Zone) is Water (W)/ Germany (G)
Mission 4 - Skagerrak Strait (Denmark/Norway) (Zone 10) - Code Name - Hawthorne
Target is Skagerrak Bay. "Heavy Flak Ship" Die Roll modifier is -1.
- Zones 2-9 are all Water
- Zones 10 (Target Zone) is Water (W)/ Norway (N)
Mission 5 - Kattegat Bay - (Denmark/Sweden) (Zone 10) Code Name - Pumpkin.
"Heavy Flak Ship" Die Roll modifier is -2.
- Zones 2 - 6 are Water (W)
- Zones 7 - 9 are Denmark (D)
- Zones 10 (Target Zone) is Water (W)/ Denmark (D)
Mission 6 - Lorient Shipping Channel (France) (Zone 9) Code Name - Artichokes
"Heavy Flak Ship" Die Roll modifier is -1.
- Zones 2-4 England
- Zones 5-7 Water (w)
- Zone 8 France (F)
- Zone 9 (Target Zone) is Water (W)/France (F)
Mission 7 - Westerschelde Estuary - (Antwerp) (Zone 3) Code Name - Iris.
"Heavy Flak Ship" Die Roll modifier is -1.
- Zone 2 - Water
- Zone 3 (Target Zone) is Water (w)/ Belgium (B)
Mission 8 - La Gironde Shipping Channel (Royan, France) (Zone 10) Code Name - Artichokes
"Heavy Flak Ship" Die Roll modifier is -1.
- Zone 2 - England
- Zone 3 - Water (w)/England (E)
- Zone 4 - Water (W)
- Zones 5-9 - France (F)
- Zone 10 (Target Zone) is Water (W)/France (F)
10.6 (Optional Rule) Operation Chastise and the Dambuster's Raid - May 1943
During the 19th and early 20th century, the Ruhr Basin became one of Germany's major industrial centers. Many iron mines and a plentiful supply of water for drinking, manufacturing and transportation along with an abundance of wood for fuel were close at hand for steel production. A number of dams and reservoirs were built on the two major rivers, the Lenne and the Ruhr and their tributaries that flowed thru the basin. These dams provided hydroelectric power for the industries.
The British Air Ministry developed a plan to attack the dams and reservoirs along the Lenne and Ruhr rivers that flowed thru the Ruhr Basin. If the dams could be breached it was thought that the resulting floods would disrupt production for many months if not years in this critically important industrial area. To this end Operation Chastise was implemented.
Calculations were made and it was found that the current types and sizes of both bombs and naval torpedoes in service would not be able to penetrate the dams built in the Ruhr Basin. After studying the problem, Sir Barnes Wallis, Assistant Chief Designer at Vickers Aircraft Ltd. devised a bomb that skipped over the surface of the water like skipping a stone, struck the face of the dam and then sank to the proper depth before exploding. The water concentrated the force of the explosion against the dam face and caused a breach. The bomb, code named Project Upkeep was a steel cylinder about 60 inches in diameter and weighed 11,960 pounds.
The Lancaster bomber was selected to carry the Project Upkeep bomb. The bomber had to have extensive modifications to the bomb bay to carry the bomb. 23 Lancaster bombers were so modified. 3 bombers were used for trials and the remaining 20 bombers were assigned to a single Special duty Squadron (617 Squadron) to do the bombing.
For the mission to succeed, the dams needed to be close to full capacity and the raid had to have a "Bomber's Moon". The night of 16-17 May 1943 was chosen as the attack date for the mission. The 3 target dams chosen were the Mohne dam, the Eder dam and the Sorpe dam.
The plan called for the 20 bombers to make a succession of individual attacks on the dams. 617 Squadron was divided into 3 waves. The Main Force, consisting of 9 bombers would attack the Mohne and Eder dams. (5 assigned to the Mohne and 4 to the Eder.) A Diversionary Force of 5 bombers would attack the Scorpe dam. 6 bombers made up the reserve force and would attack any dams still standing after the Main Force and Diversionary attacks.
617 Squadron commanded by Acting Wing Commander Guy Gibson was assembled and began training on low level bombing and navigation at RAF Scampton.
To deliver the Project Upkeep bomb accurately, a spotlight was mounted to each wing of the Lancaster bombers. The spotlights pointed down toward the water and were aligned in such a way that when the two spotlight beams overlapped on the surface of the water the bomber was at the correct drop altitude.
The bomb had to be released at a specific distance from the dam so that it bounced 3 times and then struck the dam face allowing it to settle in the water against the concrete dam face.
The distance between the target dam's sluice towers was determined from aerial photographs for the Mohne and Eder dams and Wing Commander Charles Dann developed a hand-held bombsight that triangulated the distances and the angles to accurately determine the release point for the bomb aimer.
Because of the terrain at the Sorpe dam the bombers flew parallel to the face of the dam and the bomb aimer dropped the bomb when he "estimated" the bomber was in the center of the dam face.
10.6.1 The Mission
The player can fly in any of the three waves as they choose. If the player wants to lead the mission, they may but the mission leader will be subject to some additional rounds of combat in the Target Zone. (See Rule 10.6.2.9)
The Zone information for these missions is found in the Gazetteer under their dam names.
10.6.2 Modifications and Rules Additions
10.6.2.1 Use the "Bomber's Moon" Full Moon phase column when rolling on any of the spotting tables.
10.6.2.2 Disregard the -2 die roll modifier for flying "on-the-deck" on Table 5-15 (Navigation Table).
10.6.2.3 The Bomber Squadron Game can be used with the "Dambusters Mission" with the following rules changes. (See Rule 10.4 Bomber Squadron Game)
Select the number of bombers minus 1 for your bomber as called for by the wave you are flying in. (Example: If you are flying in the Main Force wave (9 bombers) select your bomber and the "other 8" bombers for your squadron.)
Randomly place the number of bombers called for in the wave starting with the first position on the bomber stream diagram. (You can place the bomber counters in a cup and draw them out at random or use some other method to make the random selection). Then run the Squadron Game mission per the rules in section 10.4.
Disregard the Bomber Squadron Bombing Rules (Rule 10.4.5). The "other" bombers in your squadron should individually bomb the dam using the bombing rules listed in Rule 10.6.3 to determine their results.
When using the Squadron Game, if a dam is breached the player can direct the bombers who have yet to bomb to attack the other dams.
10.6.2.4 Select the bombing wave you want to fly in and the Dam you wish to bomb from the Gazetteer.
10.6.2.5 The bomber will move to the "On-The-Deck" Altitude Level when entering the Target Zone to conduct the bomb run. The bomber should stay "On-The-Deck" until exiting the target zone.
10.6.2.6 Night fighters can attack the bomber in any zone including the target zone. No "Schräge Musik" attacks are permitted when the bomber is flying "On-The-Deck".
10.6.2.7 No "Corkscrew Maneuvers" are permitted by the bomber when flying "On-The-Deck".
10.6.2.8 To bomb the target dam, your bomber must be flying "On-The-Deck".
10.6.2.9 If the player assumes the role of Wing Commander Guy Gibson you must remain in the target zone orbiting the two dams while you direct your "other 8" bombers making their bomb run. Roll for AAA Gun combat and night fighters for your bomber just as you would if you were spending another turn in the target zone. You must "go around" once for each bomber that bombs the dams or until the dam collapses. Each "going around" is subject to AAA gun combat and night fighter attack.
10.6.2.10 In real life, the modified Lancaster bombers had their Ventral Turrets removed because of stability issues with the weight of the Project Upkeep bomb. It is the player's choice if they wish to fly with or without the dorsal turret.
10.6.2.11 Use the following Bomb Bay section L-3 from the Pilot's Manual for the modified Lancaster bomber.
Lancaster Mark I Bomber - Specific Damage Tables
L-3 Bomb Bay/Lancaster
| 2D6 | Area Hit | Effect |
|---|---|---|
| 2-3 | The Bomb | If bomb already dropped—no effect. Otherwise roll 1D6: 1-4 = No effect; 5-6 = Bomb detonates—Lancaster destroyed and entire crew KIA. |
| 4 | Motor that spins the bomb | Roll 1D6: 1-2 = Inoperable—no bombs drop 3-6 = Superficial damage—no effect. |
| 5 | Bomb holding A-Frame | Roll 1D6, 1-3 Superficial Damage. 4-5, Bomb drops away. 6, Bomb explodes - Damaged - unable to drop the bomb. |
| 6-8 | Superficial Damage | No Effect |
| 9 | Bomb holding A-Frame | Roll 1D6, 1-3 Superficial Damage. 4-5, Bomb drops away. 6, Bomb explodes - Damaged - unable to drop the bomb. |
| 10 | Motor that spins the bomb | Roll 1D6: 1-2 = Inoperable—no bombs drop 3-6 = Superficial damage—no effect. |
| 11-12 | The Bomb | If bomb already dropped—no effect. Otherwise roll 1D6: 1-4 = No effect; 5-6 = Bomb detonates—Lancaster destroyed and entire crew KIA. |
10.6.3 In the Target Zone - Mohne, Eder and Sorpe Dams
Resolve all AAA Gun and night fighter combat normally per the rules of Target for Tonight.
Resolve the bombing sequence per Rule 6.0 and 6.1. Disregard Rules Sections 6.2, 6.3 and 6.4.
Use the following rule additions and Die Roll Modifiers and roll on 2D6 on Table 10.6-1 to determine if you are on or off target when bombing. Then if you are "On Target", roll on Table 10.6-2 to determine your bombing result.
Table 10.6-1 The Bomb Run
| 2D6 | Results |
|---|---|
| <2 | Off Target |
| >3 | On Target |
Table Notes:
- a) "Off Target" - Your bomb was released too early or too late and missed the dam face.
- b) "On Target" - Your bomb hit the dam's face and sank to 30 feet where it exploded. Roll on Table 10.6-2 to determine if the dam face is breached.
- c) Fog could be an issue in the river valleys in the Ruhr. Targets that are "completely obscured" on Table 6-1 are considered to be "fog-bound" and have a -5 DM.
Die Roll Modifiers (Cumulative):
- Apply the number of zones your bomber was "off course" on the outbound leg to the target as a negative die roll modifier. (Example - if the bomber was off course in zones 3 and 4 while traveling to the target in zone 5, the modifier would be -2). (Disregard this modifier if your bomber "goes around" in the target zone.)
- -5 if "Target Visibility" is "Target completely obscured" on Table 6-1
- -1 if Bomb Aimer has less than 5 missions.
- -1 if Bomb Aimer is KIA, Lightly Wounded, Seriously Wounded or Frostbitten and another crewman is bombing.
- -1 if the bomber took any hits (including Superficial Damage) while in the target zone or on the bomb run.
- -1 if "Target Visibility" is "Target mostly obscured" on Table 6-1
- +0 if "Target Visibility" is "Target slightly obscured" on Table 6-1
- +1 if "Target Visibility" is "Clear conditions apply" on Table 6-1
- +1 if Bomb Aimer has between 11-30 missions. (Disregard if KIA, Lightly Wounded, Seriously Wounded or Frostbitten)
Table 10.6-2 Dam Breached Table
| 1D10 | Result |
|---|---|
| 1-3 | Bomb Explodes but dam remains intact |
| 4-5 | Bomb Explodes but dam remains intact (a) |
| 6-7 | Bomb Explodes but dam remains intact (b) |
| 8-10 | Dam Breached |
Table Notes:
- a) if this is the 3rd "Dam remains intact" result, then the Dam Collapses.
- b) if this is the 2nd "Dam remains intact" result, then the Dam Collapses.
10.6.4 AAA Guns at the Mohne Dam (Add This Rule If You Want a Little More "Realism" Added to the Game)
The Mohne dam was the only dam directly defended by AAA Guns. If you wish to fly against the German defenses at the Mohne dam, then add these rules to the mission against this dam.
The Mohne dam was defended by the 3. Batterie/Leichte Flak-Abteilung 840. This battery, consisting of six - 20mm AAA guns were deployed on and around the Mohne dam face and put up a heavy barrage of fire as the bombers attacked.
To simulate this, in the target zone after you bomber has completed the regular AAA gun and night fighter combat phases, your bomber will turn onto the bomb run. Your bomber will begin its bombing run flying toward the dam face and 3. Batterie/Leichte Flak Abteilung 840 will open fire.
10.6.4.1 Before the bomb run begins, position your bomber crew members. You may move a crew member into the nose turret position where he can fire at the Flak Guns. This objective of this firing is to suppress the flak guns as your bomber approaches the bomb release point. This scenario plays best when you are using the Squadron Game rules and are maneuvering the other bombers assigned to bomb this dam.
Like in the real-life event, the Squadron Commander (Gibson) attacked first and alone. (Remember Leaders lead from the front!). When the flak guns began firing at the bomber the nose gunner returned fire attempting to suppress the guns or put them out of action so the pilot could fly straight and level and the bomb aimer could concentrate on lining up the bombsite on the Sluice Towers for the drop.
(Example: Let's say you are bombing third in the attack order. The Squadron Leader will be on your left and the number 2 bomber that already dropped his bomb will be flying on your right as you make your bomb run. Each bomber's nose gun will get 1 die roll (a total of 3 dice rolls) on Table 10.6-3 to see how many guns can be put out of action or suppressed. The player rolls a "1", a "6" and an "8". The results from Table 10.6-3 are: "No Effect", "2 Guns Suppressed" and "1 Gun Put Out of Action (Destroyed)." Assume for our example that the battery still has 6 flak guns available to fire on the bombers on this bomb run. The player subtracts the 2 guns put out of action and the 1 gun suppressed from the total guns (6) available to fire on this bomb run. That result leaves 3 guns available to return fire on the bombers.)
10.6.4.4 The battery starts with 6 flak guns available to fire on the bombers on the first bomb run. Each time a bomber in your group makes a bomb run on the dam the number of flak guns available to fire is recalculated.
Start with the first bomber attacking and roll on Table 10.6-3 to see if it can reduce the number of flak guns firing.
A "Suppressed" result on Table 10.6-3 suppresses the number of guns indicated for that bomb run. Suppressed guns cannot fire in this bomb run but are available to fire again with the next bomb run.
A "Put out of Action" result on Table 10.6-3 puts the number of guns indicated out of action permanently. "Put out of action" guns are subtracted from the number of guns available to fire in this bomb run and any future bomb runs.
(Example: Using the dice roll results from the example above, "2 guns were suppressed" and "1 gun was permanently put out of action". There will be 3 guns available to fire on the attacking bomber on this bomb run. Since 1 gun was "permanently destroyed", the flak battery will only have 5 guns available at the start of the next bomber's bomb run. Flak guns that are "Put out of action" are permanently removed from the battery.)
10.6.4.5 Continue reducing the number of Flak Guns on each bomb run as called for by die roll results on Table 10.6-3 until all bombers have bombed and the final round of Flak Fire is taken.
10.6.4.6 Consider all of the bomber's attacking the Mohne dam to be "Spotted" for this combat. (No search attempts are made by the German flak guns.)
10.6.4.7 Roll one time for each flak gun able to fire on Table 5-1 "AAA fire in the Zone" to determine whether the AAA fire is Light, Medium or Heavy. (Do not use the "contrails" or "if the bomber is illuminated by Searchlights" die roll modifiers when calculating any additions or subtractions from the die roll.)
A "No AAA Fire" result means the battery was slow to react and that gun does not fire in this round.
10.6.4.8 Use the results of the roll on Table 5-1 to find the correct column on Table 5-2. Then roll 3 times as called for on Table 5-2. The results are applied to the three bomber positions as follows:
The first result is applied to the bomber on the left, the second result is applied to the bomber in the middle and the third result is applied to the bomber on the right. Do this for each gun firing.
If one of the positions has is no bomber in it then that "Hit" becomes a "Miss".
10.6.4.9 If a "Hit" result is obtained against one of the "Other" bombers from the bomber squadron game simply record it as a hit made against the bomber. (Do not use Rule 10.4.4 to resolve the combat.)
10.6.4.10 If a "hit" is made against your bomber, then resolve that "Hit" using the procedure outlined in Rule Section 5.2.4.
10.6.4.11 There is a -1 die roll modifier on Table 10.6-1 "The Bomb Run" if your number receives any hits (including Superficial Damage). Mark any damage taken on your bomber's mission log sheet.
10.6.4.12 If you are the Squadron Leader you will bomb first and alone against the dam. After you have bombed you alone will escort the number 2 bomber while he is bombing. You will fly in the left position (Number 1) while the number 2 bomber flies in the middle (Number 2) position. You and second bomber to bomb will fly in the left (Number 1) and right (Number 3) wing positions for all of the remaining bombers on their bomb runs.
(Designer's Note: Wing Commander Guy Gibson was awarded a Victory Cross for Valor in the face of enemy fire for his actions. It should be noted that because of the good results obtained in bombing when Wing Commander Gibson directed the bomb runs, the "Master Bomber" Pathfinder Operations program came into being.)
Each bomber drops their bomb after resolving the AAA gun fire from the Flak guns. Use the bombing rules as laid out for the other dams.
Table 10.6-3 Flak Guns Suppressed or Put Out of Action
| 1D10 | Flak Guns Suppressed or Put Out of Action |
|---|---|
| 1-2 | No Effect |
| 3-4 | 1 Gun Suppressed |
| 5-6 | 2 Guns Suppressed |
| 7-8 | 1 Gun Put Out of Action (Destroyed) |
| 9-10 | 2 Guns Put Out of Action (Destroyed) |
10.7 (Optional Rule) "What-If" the American USAAF Joined the Night Bombing Campaign
Air Marshall Harris and the British Air Ministry tried to convince the USAAF to change from daylight bombing to nighttime bombing. After suffering severe casualties in daylight raids the Americans tried a few night missions.
On the night of 8/9 September 1943, 5 B-17s of the 422nd Bomb Squadron, 305th Bombardment Group, participated in a RAF bombing mission near Boulogne. It participated in a further 7 raids - 5 over German cities. It lost two bombers. No further participation by US bomber units after the eight raids. The squadron did continue to fly night leaflet operations until the end of the war.
The player can fly the American B-17 and B-24 bombers contained in Target for Tonight's sister game, Target for Today and experiment with American night time bombing missions. Use the rules for Target for Tonight and Rule Section 11.0 "Making Bombers Compatible In The Target for Tonight, Target for Today and B-29 Superfortress Games." to run this "What-If" scenario.
10.8 (Optional Rule) "What-If" the Americans Had Deployed the B-29 Bomber to Europe Instead of the Pacific
In December 1939, the US Army Air Corps issued a formal specification for a so-called "super bomber", capable of delivering 20,000 lbs. of bombs to a target 2,667 mi away and capable of flying at a speed of 400 mph in response to Germany's aggression in Europe. Boeing submitted its design for the B-29 in May 1940. Boeing received an initial production order for 14 service test aircraft and 250 production bombers in May 1941. This order was increased to 500 aircraft in January 1942. The B-29 was a difficult aircraft to build. It was a pressurized design that could fly above 30,000 feet. The first prototype flew on 21 September 1942. By the end of 1943 almost 100 aircraft had been delivered.
In this "What-If" scenario we are assuming production ran smoothly and initial bomber production was available for the USAAF to deploy several squadrons of B-29 bombers to England by mid-1943.
If the player would like to fly the B-29 Superfortress Bomber in Target for Tonight use the rules for Target for Tonight and Rule Section 11.0 to run this "What-If" scenario. Be sure to read "the considerations" rules in Section 11.0 for using the B-29 bomber.
(Note: be sure to see rule 11.1.2 that explains adding the Very High-Altitude Level for the B-29 to Target for Tonight)
A B-29 Bomber counter has been provided with the Target for Tonight game so that the player can use it with the "What-If" scenarios here and also in the Target for Today game system.
A British "Seafire" Escort Counter has also been provided in this game exclusively for use in the B-29 Superfortress game should the player want to fly any of the four bombers in this game against Japanese targets in the B-29 Superfortress game.
11.0 Making Bombers Compatible in the Target for Tonight, Target for Today, and B-29 Superfortress Games
PLAYERS TAKE NOTE! - The player should be aware that using rules presented in this section could conflict with standard and optional game rules that are presented in the three different game systems. In cases of conflict the player should resolve them it what appears to be the most logical manner.
These optional rules are designed to give the gamer who owns one or both of Target for Tonight's sister games the ability to be able to fly any of the bombers found in the three games with any of the three game systems. While the games are similar in their play patterns there are some differences in the naming and numbering of the game tables and rules that essentially performs the same function in all three games. Table 11.1 will give the player the names or the various tables and rules that relate to each specific bomber so that the player will know what tables to reference for the particular game system they are playing when using a bomber from a different parent game system.
11.0.1 When selecting a bomber to fly in any of the three games the player will use the tables and rules specific to that bomber from its parent game.
(Note: We will use the table names from Target for Tonight to show the tables needed for your bomber in this rules section unless otherwise noted. See Table 11.1 for the names and numbers of tables performing the same functions for other bombers contained in the other two games.)
11.0.2 The specific game actions where each bomber needs its own tables and rules from its own game are listed below:
- When checking for mechanical failure.
- When determining fields of fire for the bomber's turrets and guns.
- When determining night fighter's and AAA gun hits against the bomber on its Area Damage Tables. (Found in the Pilot's Flight Operating Instruction Manual)
- When determining night fighter's and AAA gun hits against the bomber on its Specific Damage Tables. (Found in the Pilot's Flight Operating Instruction Manual)
- When landing your bomber on land.
- When landing your bomber in water. (Ditching)
- When making a controlled Bail Out.
- When making an Uncontrolled Bail Out.
11.0.3 If the player is using a bomber that came from another game, then the player will use the bomber's Defensive Fire Resolution Table (Table 5-12A in the case of the Target for Tonight game) from the game being played, NOT from the game the bomber came from. This is because the Bomber Defensive Fire Resolution Table was designed to work with the game being played.
11.0.4 Players can check the dice roll modifiers listed below the bomber's parent game Bomber Defensive Fire Resolution Table for modifiers that are specific to the bomber he is flying and then use those modifiers on the Bomber Defensive Fire Resolution Table in the game they are playing.
(Example: You are Playing Target for Tonight and you want to fly the B-24J bomber from Target for Today. You can check for specific bomber dice roll modifiers under Table 5-6 Bomber Defensive Fire Resolution Table in Target for Today and use them when rolling on the Target for Tonight Bomber Defensive Fire Resolution Table 5-6.
Looking at the dice roll modifiers, the player can use the "-1 die roll modifier for defensive fire when the B-24J's Nose Turret Hydraulics are out" (found in the die roll modifiers under Table 5-6 in Target for Today) The player simply adds that die roll modifier when using Table 5-12A in Target for Tonight.
The Player can add bomber specific die roll modifiers found in the bomber's parent game to any table where they seem applicable in the game that is being played.
11.0.5 The player should use all the other rules and tables as called for by the sequence of play for the game being played. EXCEPTION: Use the specific rules and tables (listed above) that came with the bomber no matter what game system you are playing.
(Example - You are playing Target for Tonight and you want to fly the B-24 Liberator Bomber from the Target for Today game system. The player will use the Specific Bomber rules and tables outlined above from the Target for Today game when flying the Night Bombing mission in Target for Tonight.)
See Table 11-1 for a listing of bomber specific tables for each bomber from their parent games needed to fly each bomber in any of the three games.
Design Note: Most of the actions that bombers can be involved in for the three games are listed above but specific games may have additional actions that may require additional tables from the bomber's parent game. If this situation occurs, the player should resolve it in the manner that seems most realistic in the situation and use the rules that seem appropriate.
11.1 Some Considerations - Target for Tonight
11.1.1 Electronic Warfare Devices in the Target for Tonight Game
The B-29 Bomber is equipped with radar (Equivalent to the British H2S) and Loran (equivalent to the British Gee-H) systems.
B-24 and B-17 bombers also can be equipped with Radar and Loran. (See Rules Section 10.9 (Optional Rule) Pathfinder Force (PFF) Bombers in the Target for Today Game System for more information. The player can follow those rules to equip his bombers or just equip the B-17 or B-24 bomber with their British EW equivalent.)
Tail warning radar (Monica) can be fitted to any of the bombers in all three games.
Note: - You have to use the Crew Placement Board from the parent game for the bomber you are flying. Crew Placement Boards from Target for Today and B-29 Superfortress may not have all of the boxes to hold EW and other counters from Target for Tonight. If the player is using one of these other bombers simply place any counters called for by the Target for Tonight rules on the Crew Placement Board for your bomber.
11.1.2 Altitude Levels in Target for Tonight
The Low Altitude Level and the High-Altitude Level in Target for Tonight correspond to the Low and Medium Altitude levels in the B-29 Superfortress game. The B-29 bomber was pressurized capable of climbing above 30,000 feet. To simulate this increased altitude capability, add the Very High-Altitude Level to the Target for Tonight game rules.
The Very High-Altitude Level for Target for Tonight corresponds to the "High Altitude Level in the B-29 Superfortress game rules as covered in Rule 4.1B. "Movement" and Rule 4.2 "Pressurization". Use these rules when changing altitude levels with the B-29 Bomber in Target for Tonight.
The B-24 and B-17 bombers only use the Target for Tonight game's Low Altitude Level and High-Altitude Level.
11.1.3 Navigation in Target for Tonight
Use Target for Tonight's Navigation rules when Flying B-29, B-24 or B-17 bombers in Target for Tonight.
11.1.4 Hypothetically the B-29 could have been deployed to England in June 1943. If the B-29 is being used in Target for Tonight then the player should also use the optional early deployment rules for the Me-262 and the Ta-154 A-0 Night Fighters. (See Rules sections 9.2 and 9.3)
11.1.5 The German two optional rule night fighters can reach the B-29 bomber in the Very High-Altitude Level. They should be substituted for night fighters rolled for on Table 5-7 German Night Fighter Appearance Table.
11.1.6 There are no fuel consumption rules in Target for Tonight.
11.1.7 If the player is flying for the USAAF rather than for Bomber Command, the optional rule Awards and Decorations and Aircraft Victory Credits should be used in lieu of the British Awards and Victory credits used in Target for Tonight. The American equivalent awards can be found in the Target for Today game.
11.1.8 "Schräge Musik" attacks do not occur in the Target for Today and B-29 Superfortress games. When flying the B-29, B-17F & G Models, YB-40, or the B-24 D or J models in Target for Tonight use your bomber's Vertical Climb column in your bomber's Area Damage tables to resolve "Schräge Musik" attack damage called for by the rules.
11.2 Some Considerations - Target for Today
11.2.1 Formations in Target for Today
If you are flying any of the four British bombers from Target for Tonight or the B-29 from the B-29 Superfortress game on daylight missions in Target for Today, then these bombers will use the same formation rules as their USAAF B-17 and B-24 equivalents. You can use the early formation optional rule of the regular game Combat Box rules.
There are no Altitude levels in Target for Today. The B-29 will conform to the Target for Today formation altitudes and loss of oxygen rules.
Formation altitude used by Bomber Command for their four engine bombers was between 15,000 and 20,000 feet depending upon bomb load and the precision of their bombsights.
The B-29 bomber will follow the same considerations as the Bomber Command bombers, but their formation altitude can extend above 25,000 feet.
11.2.2 Altitude Levels are not used in Target for Today.
If a Bomber Command bomber falls out of formation it drops to 10,000 feet for those oxygen and other damage related considerations.
The B-29 bomber drops to 10,000 feet just like the B-17 and B-24 bombers if pressurization is lost or it faces the consequences of Lack of Oxygen.
11.2.3 Navigation in Target for Today
There are no Navigation Rules except the Optional Rules Section 10.7 "Lead Bomber Crews and Navigators" and "The Going-Around" Option in the target zone. These rules can be used by the B-29 bomber or the four British bombers when flying in Target for Today.
11.2.4 There are no fuel consumption rules in Target for Today.
11.2.5 When playing the Target for Today game, use the appropriate awards and decorations and victory credit determination rules for the service your bomber flies for.
11.3 Some Considerations - B-29 Superfortress Game
If you are flying any of the four British bombers from Target for Tonight or the B-17 or B-24 from Target for Today you can also fly them in the B-29 Superfortress game.
11.3.1 Fuel Consumption in the B-29 Superfortress Game is a consideration.
The four British bombers have the range to fly to targets in Japan and return as do the B-17 and B-24 bombers. It was possible to mount additional fuel tanks to the B-17 and B-24 bombers to give them a fuel reserve cushion. The Americans called these "extra fuel tanks "Tokyo Tanks". The bomb loads were also reduced.
To use the British bombers and the American B-17 and B-24 bombers in the B-29 Superfortress game, give each bomber 38 fuel boxes. You can keep a record of the fuel boxes used on the zone worksheet.
11.3.2 Altitude Levels in the B-29 Superfortress Game
The four British and two US bombers can only fly in the Low and Medium Altitude Levels as defined in the B-29 Superfortress game.
11.3.3 Navigation Radar in the B-29 Superfortress Game
The four British bombers carry H2S and Gee-H while the B-24 and B-17 Bombers carry radar equivalent to the H2S and Loran (equivalent to Gee-H). All radar sets function as called for by the rules in the B-29 Superfortress game.
11.3.4 Fighter Escort Counters
The player may want to explore the "What-If" scenario of the British Empire having a greater presence in the Pacific War against Japan. This "What-If" scenario postulates Bomber Command taking part in the bombing of Japan from Saipan. To support this Hypothetical situation a Royal Navy Seafire Escort Fighter counter has been provided for those players desiring to have their Bomber Command bombers escorted by British escorts. Use the RN Seafire Escort counter just as you would use the regular escort fighter counters in the game.
The Seafire Escort counter has a -1 die roll modifier on Table 5-1 "Japanese Fighter Resistance".
11.3.5 Hit Damage Against Japanese Fighters
Table 5-8 does not contain any FCAB or FBOA results. Your bomber is using the hit damage against enemy fighters contained in the game system they are playing so this should not present an issue.
If the player wishes to have a more detailed description of what damage is done to the Japanese fighter, they can roll on Tables 5-12C and 5-12D from the Target for Tonight game.
11.3.6 Wounded Crewmen
If the player would like to have the more detailed wound results for crewmen wounded and killed in combat, they can roll for additional wound details on Tables 5-17A, 5-17B and 5-17C.
11.3.7 The Random Events table in the B-29 Superfortress game refers to Mechanical Failure in the B-29 bomber. (See Rule 4.6 and Table 4-9 in B-29 Superfortress game rules)
11.3.8 In Target for Today use the appropriate awards and decorations and victory credit determination for the service your bomber flies for.
11.3.9 The B-29 Bomber Counter
Target for Tonight contains a B-29 Bomber counter for use in any of the games. (An Additional Escort Counter with a Royal Navy Seafire fighter image is also provided to add "flavor" to the B-29 Superfortress game when using RAF bombers to bomb Japan.)
Final Note:
By using these rules you should be able to fly the British bombers in Target for Today's daylight bombing campaign or you could use the B-29 Superfortress bomber from that game in either Target for Today or Target for Tonight. You will also be able to fly British Bombers or the American B-17s and B-24s in the B-29 Superfortress game.
Remember, this is a solo game. If a player wants to include extra details, feel free to do so. It may not make it as official errata to the published rules, but the player can certainly take the game design and add his own "pet" rules to the game system.
12.0 Sources
Extensive research was done for this game, including review of personal memoirs from participants and official government documents on Bomber Command's Strategic Night Bombing Campaign in Europe. Many books and monographs written by former bomber crewmen were reviewed and we have listed some of the more easily obtained material below if the player wishes to do further research on the Daylight Strategic Bombing Campaign in Europe.
Sources for Target for Tonight:
Books
- Combat Aircraft of World War II, Macmillan Publishing Co., Inc. 1977
- The Bomber Command War Diaries, Pen and Sword Aviation, 2014
- RAF Bomber Command Operations Manual, Haynes Publishing, 2018
- Luftwaffe War Diaries, Da Capo Press, 1994
- History of the German Night Fighter Force 1917-1945, Crécy Books, 1992
- Bomber Command, The Dial Press, 1979
- Luftwaffe Night Fighter Units 1939-1945, Osprey Publishing, 1978
- German Night Fighter Aces of World War 2, Osprey Publishing, 2008
- The Bomber Command Handbook 1939-1945, Sutton Publishing, 1998
- Ground Radar Systems of the Luftwaffe 1939-1945, Schiffer Publishing, 1998
- Lancaster Bomber, Ballantine Books, 1972
- The Defense of the Reich - Hitler's Night Fighter Planes and Pilots, Arco Publishing, 1982
- Pathfinders at War, Ian Allan Ltd. 1977
- Bf 110 vs. Lancaster - 1942 - 1945, Osprey Books, 2013
- Lancaster in Action, Squadron Signal, 1982
- Short Stirling in Action, Squadron Signal, 1989
- Wellington in Action, Squadron Signal, 1986
- Halifax in Action, Squadron Signal, 1984
- Raid - Dambusters Operation Chastise 1943, Osprey 2010
Studies and Papers
- Electronic Combat over the Third Reich, DECLASSIFIED, Air Command and Staff College, 1988
- The Bombing of Germany 1940-1945 Exhibition, University of Exeter
- The Strategic Air War Against Germany 1939-1945, DECLASSIFIED, 1956
- A New Look At 'The Wizard War', Royal Air Force Historical Society Journal 28 and Conference, 2003
- Bomber Command's Electronic Warfare Policy and Suppression of Enemy Air Defense Posture During The Second World War, A thesis submitted to the University of Birmingham for the degree of Doctor Of Philosophy, 2017
Wartime Publications (1939-1945)
- Wellington Pilot Notes
- Stirling Pilot Notes
- Halifax Pilot Notes
- Lancaster Pilot Notes
Websites – Many were consulted. A few are listed here.
- RAF Medals - gov.uk/guidance/medals-campaigns-descriptions-and-eligibility
- RAF Medals - historylearningsite.co.uk/world-war-two/world-war-two-in-western-europe/battle-of-britain/raf-medals/
- RAF Bomber Command - iwm.org.uk/history/raf-bomber-command-during-the-second-world-war
- Halifax bomber - bombercommandmuseum.ca/halifax.html; militaryfactory.com/aircraft/detail.asp?aircraft_id=233
- Stirling Bomber - militaryfactory.com/aircraft/detail.asp?aircraft_id=308; bombercommandmuseum.ca/shortstirling.html
- Lancaster Bomber - bombercommandmuseum.ca/lancbomber.html; warplane.com/aircraft/collection/details.aspx?aircraftId=4
- Wellington Bomber - militaryfactory.com/aircraft/detail.asp?aircraft_id=295; bombercommandmuseum.ca/wellington.html