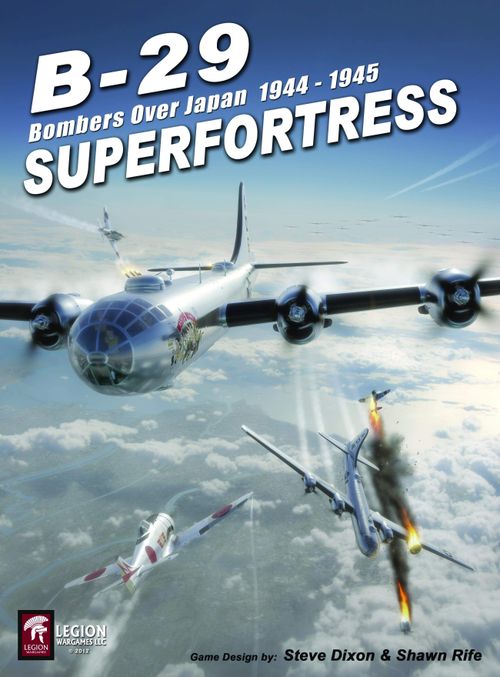
B-29 Superfortress
B-29 Superfortress Rulebook
Table of Contents
Table of Contents
Introduction
"B-29 SUPERFORTRESS" game play is similar to, although to some extent more complex than, Avalon Hill's B-17, QUEEN OF THE SKIES. Some familiarity with that game is assumed. However, it is a new game from the ground up—you do not need to own B-17, QUEEN OF THE SKIES to play SUPERFORTRESS. The rules are organized according to the sequence of play in any typical mission. All new tables are included and are arranged in the order in which they are most likely needed during play. Detailed design notes are also included. SUPERFORTRESS is designed to be as realistic as possible while still remaining playable.
It is suggested that the player read the rules then attempt to fly a practice mission (see the "note" after Section 2.2 below).
Note that certain rules are marked with a Ω symbol. This means that beginners (or anyone interested in a quicker game) should feel free to skip that section if desired and ignore its provisions during play.
Note that in this game, your bomber is a block "MO" B-29 Superfortress—built by the fine folks at the Martin plant in Omaha, Nebraska in 1944.
Game Equipment
Each copy of B-29 SUPERFORTRESS comes with the follow components:
- 51 large counters (1.2" x 1.2")
- 108 small counters (.6" x .6")
- Rule Book – 28 pages
- Chart Book – 48 pages
- Fighter Placement Map (17" x 22")
- Crew Placement Chart
- Mission Log Sheet
- Campaign Log Sheet
- Urban Target Damage Sheet
- 2 each six-sided dice
Dice
Two six-sided dice are needed to play. Throughout the rules, the notation "1D" means roll one die, and the notation "2D" means rolling two dice. Tables 2-2D, 2-2E, 2-3 are special cases. When rolling "2" on these tables, treat the first die as the 10's digit and the second die as the 1's digit of a two-digit number (using different colored die is helpful). Rolling two dice on these tables will generate 35 possible numbers from "11" to "66."
Counter Identification
Japanese fighters: Eight fighter types are represented. Red band denotes Ace; Blue band – average pilot; Green band – green pilot. A moon in the upper right corner denotes a night fighter.
Escort markers: The P-51, P-38 and Hellcat represent US escorts when called for. Place in escort box on fighter placement map when used.
Crew counters. There are 11 crew counters representing each position in a B-29.
Special Weapons: There are 3 special weapon counters: Rockets – Bombs – and Baka (Ohka).
Casualty Marker: There are 3 casualty markers: KIA, WIA and Frostbite. These are placed on crew counters when needed.
Ram Marker: Place on Japanese fighter when needed. When placed, Japanese fighter is to attempt to ram a B-29.
Target Marker: Place in zone of target on Strategic Movement Track.
Damage markers: There are several types covering different areas of the B-29. They are placed on the B-29 on the fighter placement map when needed. Not all systems are represented. Players should also note damage on the mission sheet.
Gunnery markers: Placed on Japanese fighters when firing at them. Each gun position is represented.
Fire Extinguishers: These are placed on the crew placement chart and used when needed.
Information markers: Altitude, Navigation, Cabin Pressure and Weather are placed on the appropriate track on the fighter placement map.
Flak and Searchlight markers: Placed on fighter placement map when situation is called for. Used as reminders of situation.
Fighter damage marker: Placed on Japanese fighter when damaged by B-29 guns.
B-29: Placed on Strategic movement track and moved from zone to zone to track movement.
Pre-Mission Steps
"No part of the Japanese Empire is now out of range. Japan has sowed the wind; now let it reap the whirlwind." — Gen. Henry H. "Hap" Arnold
2.1 SET-UP. To set up the game, find a place where you will have enough room to place the various sheets and counters. The dinner table is a good place or an unoccupied room on the floor. Be sure your B-29 has a nickname and full crew recorded on the Campaign Log Sheet. Note that in the spring of 1945, the Twentieth Air Force set the B-29 combat tour at 35 missions (much to the disappointment of the crews who had hoped for 30!) Therefore, the goal of "SUPERFORTRESS" is to safely complete 35 missions and thereby earn a ticket home in time to celebrate V-J Day.
2.2 TARGET SELECTION. Roll for the mission target per the instructions below and record it on the Campaign Log Sheet and the Mission Log Sheet. Place the Target Marker on the Strategic Movement Track in the appropriate Zone space for the target (see Table 2-9).
Design Note: Minelaying missions are not included in this game. Minelaying missions were flown almost exclusively by the 313th Bombardment Wing, one of five B-29 Bombardment Wings flying out of the Marianas (the other Wings being the 58th, 73rd, 314th, and 315th). The 313th began combat operations in early 1945, after specialized training for the crews and minor modifications were made to the aircraft to provide anchorage for parachute static lines (each mine had to be dropped with a small parachute designed to protect the sensitive equipment inside the mine from being damaged on contact with the water). Adding this option to "SUPERFORTRESS" would have increased complexity without enhancing the realism. Although attacks were also made on the Japanese oil industry, most were run as part of a specialized campaign flown almost exclusively by the 315th Bombardment Wing (VH), whose units were not fully ready for combat until June 1945. The 315th flew specially equipped B-29s, including the more accurate AN/APQ-7 (Eagle) radar instead of the conventional AN/APQ-13. Approximately 6% of all combat bombing sorties flown by Twentieth Air Force were directed at oil and fuel targets. Adding this option to "SUPERFORTRESS" would have increased complexity without enhancing the realism.
A. If this is one of Missions #1-10, then roll for the mission and target on the Mission Targets, Table 2-1. Otherwise, go to Step B (exception: it is recommended beginners stick with Missions #1-10).
B. Ω Skip this step if flying a mission from Table 2-1. Otherwise, roll two dice to determine if this is to be a "Day" or "Night" Mission: "2-6" = "Night" Mission, "7-12" = "Day" Mission. Then roll for the Target Type on Table 2-2A. Note this information on the Mission Log Sheet.
Player Note: Missions #1-10 simulate the missions flown by Twentieth Air Force from the Marianas from November 1944 through February 1945. Missions #11-35 represent the missions flown by Twentieth Air Force from March - August 1945, assuming an average of approximately 5-6 missions per month.
C. Ω Skip this step if flying a mission from Table 2-1. Roll for "Day" Mission Altitude on Table 2-2B (for game purposes, "HI" [high] altitude is approximately 26,000 feet and above, "LO" [Low] altitude is approximately 12,000 feet and below, and "MED" [medium] altitude is everything in between). Do NOT confuse "altitude" with "squadron formation position" (see Table 2-5) (e.g., your B-29 can be in the "Low" formation and "HI" altitude and vice versa). "Night" Missions are automatically "LO" altitude.
D. Ω Skip this step if flying a mission from Table 2-1. Depending on which target type was rolled for on 2-2A, roll for target city on Table 2-2C, D, or E (or Table 2-3) as applicable.
Player Note: Several targets on Table 2-3 historically received little or no conventional bombing. For example, Hiroshima, Nagasaki, Niigata, and Kokura were reserved as potential atomic bomb targets. Kyoto was not bombed for historic religious and cultural reasons. The chart allows the possibility that, under different circumstances, the powers-that-be might have approved the attack of otherwise prohibited targets. If you prefer to keep your campaign strictly historical, then roll again if any underlined target is rolled for.
2.3 OTHER MISSION PARAMETERS.
A. Roll for the B-29's position in its squadron (Lead bomber, tail bomber, or in the middle) on Table 2-4 and check the corresponding box on the Mission Log Sheet. Note that this roll is made for "Night" Missions (although not in formation at night, the B-29 is never considered to be "out of formation" per Section 4.8).
Player Note: For night missions, Table 2-4 is used to determine the B-29's position in the "bomber stream." A lead bomber is at or near the front of the "bomber stream" and is considered to be a pathfinder, marking the target with incendiaries or flares. A tail bomber is at or near the end of the "bomber stream" and is likely to have more trouble with smoke (see Table 6-1) and/or "thermal turbulence" (see Table 6-8).
Player Note: With one exception, all primary targets attacked by Twentieth Air Force during this timeframe are included on Tables 2-1, 2-2, and 2-3. Your crew has approximately the same statistical probability of being assigned to any listed target as their real-life counterparts. The exception: B-29 units also flew missions against Japanese installations on Truk Island. However, these missions were generally used as "shake-down" training for new crews, did not count towards a crew's combat mission tour, and are therefore not included on the Mission Targets Tables. (However, if desired, a player can fly a "free" mission against Truk for both historical realism and game familiarization. In this case, the target is "Airfield", the mission is "Day" and "HI" Altitude. Target is in zone 5. Escorts may be available as if this is an Iwo Jima mission and enemy fighters may appear in Zone 5 only; Table 5-1 modifier is –2.)
B. Roll for the B-29's squadron formation positions (High, Middle, or Low squadron) on Table 2-5 and check the corresponding box on the Mission Log Sheet.
Design Note: Although bombers did not fly in formation at night, different squadrons and groups were assigned different altitudes on night bombing runs. On large raids, multiple units were often scheduled to arrive over the target nearly simultaneously—any deviation from planned altitude could be deadly with the high concentration of planes in one area. In game terms, squadron position on night missions may affect gunner placement (see Section 2.3 (d) below) and, potentially, results of "thermal turbulence" (Table 6-8).
C. Roll for pre-briefed expected Japanese fighter resistance (as assessed by Twentieth Air Force intelligence officers) on Table 2-6. This will impact both gunner allocation (below) and actual Japanese fighter appearance during the mission.
D. Check for gunner and armament allocation: On "Day" Missions, all gunners (Central Fire Controller, Left Gunner, Right Gunner, and Tail Gunner) will fly on the mission and all gun turrets are considered armed and ready.
Exception: The 20-mm rear cannon is available only on Missions #1-10. Cross out the cannon on the Mission Log Sheet on any mission after Mission #10.
Design Note: The 20-mm cannon proved of limited value as its rate of fire was slower than the .50s, there were often problems with the feed mechanism, and the cannon shell had a trajectory different than the machine guns (making it more difficult to aim both simultaneously). The gun was also heavy and was provided fewer rounds of ammunition. By mid-February 1945, it was ordered removed from all aircraft to save weight—some crews mounted a broomstick in the cannon's place, hoping the enemy wouldn't realize the difference!
Ω On "Night" missions, roll on Table 2-7 for gunner allocation.
Design Note: There was no consistent policy for the number of gunners and guns carried onboard B-29 night missions to Japan. On the first low-altitude urban area attack to Japan, the 9/10 March 1945 mission to Tokyo, LeMay ordered most of the guns, gunners, and ammunition off the bombers to enable the aircraft to carry a greater weight of bombs. On a subsequent mission to Osaka, bottom turrets in the bomber units that flew at the lowest altitude were armed so that the gunners could fire at Japanese searchlights. During later missions, gunners were typically carried on board as "observers" or "scanners," relaying information to the pilot as to the position of landing gear, flaps, oil leaks, or other problems, and to help maintain crew morale. At other times, seeing that the Japanese seemed to improve their night fighter defenses, bombers carried a full load of guns and ammo.
"Airmen boarding trucks for the ride to their B-29s. Loaded down with parachutes, Mae Wests (life vests), oxygen masks, survival vests and other paraphernalia, they take their places. Some of the men are joking, others are silent as they think of the mission ahead." — Andy Doty, B-29 tail gunner
E. Place the assigned crew counters in the appropriate place on the Crew Placement Sheet and record names/positions of all crewmembers flying this mission on the Mission Log Sheet. Also place the fire extinguishers in their appropriate boxes (one in the Nav/Radio area, one in the rear turret area, one in the tail area compartment). Also, place the appropriate turret gunnery markers nearby.
F. Examine the Flight Log Gazetteer, Table 2-9, to find the modifications in zones 10 through 14 (or zone 6 for missions against Iwo Jima) to the rolls for enemy fighters on Table 5-1. Note that all target cities are listed in alphabetical order. Add these modifications with any for the B-29's squadron position and note them on the Mission Log Sheet.
G. Ω The B-29 could carry two auxiliary fuel tanks in both the forward bomb bay and also in the aft bomb bay. This extra fuel was essential on the long-range missions to Japan, although it did limit bombload capacity. See Section 4.3. On any "Day" Mission at "HI" or "MED" altitude, assume your bomber has fuel tanks in both the bomb bays (Exception: extra tanks are not required for missions to Iwo Jima). On any "LO" altitude mission, extra fuel tanks are NOT included unless:
- All gunners and all guns are aboard, add auxiliary fuel tanks in the aft bomb bay
- Flying to a designated target in Zones 13 or 14, add auxiliary fuel tanks in the aft bomb bay
If both of the above conditions apply, then auxiliary fuel tanks are considered to be in both bomb bays. On the Mission Log Sheet, cross off the corresponding auxiliary fuel boxes if the relevant bomb bay (forward or aft) is not onboard.
Design Note: The first mission against Japan from the Marianas was to be a coordinated attack with Navy carrier fighters scheduled for early November 1944. Conflicting naval requirements scrubbed all joint strike plans—but the game allows that an attempt could conceivably have been made. Fighter escorts for bomber missions to Japan were not assigned until P-51 units settled into the captured airfields on Iwo Jima (a P-47 fighter group also arrived on the island in late July). Prior to that, escorts were available only for missions against that island when it was Japanese held. Unlike in Europe where fighter escorts proved crucial to Allied victory, escort was of limited value in the Pacific given the poor state of Japanese fighter defenses (especially at night). Accordingly, fighter sweeps independent of the bombers became more prevalent—such missions required less preparation and were far more productive.
Player Note: It is possible during flight to jettison auxiliary fuel tanks (assuming bomb bay doors and bomb release mechanism function properly) that still have fuel in them but are otherwise useless to you (for example, in the event of fuel pump failures). This may save the plane and crew from catastrophic damage on Tables 7-3 & 7-4. Jettisoning tanks may also improve the odds of a good landing if the aircraft is otherwise facing difficulty—see note d. to Table 8-1. Once empty, auxiliary fuel tanks have no game effect. In reality, there would indeed be some weight savings even from dropping empty tanks but dropping empty tanks was NOT done routinely (they could be reused). You can assume that if your crew sees some necessary advantage to dropping empty tanks, they've gone ahead and done it if possible.
H. If this is a "Day" Mission, roll on Table 2-8 to determine if fighter escorts are available.
I. Place the B-29 counter on the Strategic Movement Track inside the track square labeled "20th Air Force Base" facing toward the Designated Target Zone. The mission is ready to begin.
Starting the Mission
"I feel that the destruction of Japan's ability to wage war lies within the capability of this command, provided its maximum capacity is exerted unstintingly during the next six months." — Curtis E. LeMay
3.1 Ω TAKE-OFF TIME. Roll on Table 3-1 to determine mission take-off and landing times. See the notes for explanation. (Beginners, your plane always takes off and lands in daylight…)
Design Note: Take-offs and landing are inherently more dangerous at night. Yet because of the length of missions to Japan, it was impossible to set a daylight time-on-target in Japan where both a daytime take-off and landing were practical in the Marianas. Night missions presented a solution to the dilemma. However, after the capture of Iwo Jima, night take-offs on night missions were at times established in order to enable returning bombers to cross Iwo Jima sometime after dawn and therefore better utilize the emergency air strip there, if required. (FYI, the first emergency B-29 landing was made on the island on 4 March 1945, twelve days before the island was declared officially "secure".)
3.2 Ω TAKE-OFF PROCEDURE. Reference Table 3-2 to determine whether your bomber and crew enjoy a safe start to their mission…or an emergency right away.
Player Note: Regardless of the time of day, getting a very heavy bomber, fully loaded with bombs and fuel, off the ground could be a hazardous business. The R-3350 engine provided little safety margin—if all four of these engines were not working at optimum performance at take-off, the results could be disastrous. As far as the game goes, yes, losing your bomber and/or your crew at the start of a mission is anticlimactic and disappointing. However, any game that attempts to simulate the tension of a B-29 bomb mission but always assumes a safe take-off would be intrinsically unrealistic.
"Bombers easing out of their revetments to form a long line before take-off. They edge forward, engines idling, brakes screeching, tails bobbing in the moonlight like some prehistoric monsters. Sagging with bombs and gas, they lumber down the runway, engines roaring, vapor trailing from opened cowlings. They slowly gain speed, lift into the air…then disappear into the distance." — Andy Doty, B-29 tail gunner
The Zones
"I came to the conclusion early on that…we would be confronting a multitude of 'enemies' during the B-29 final assault on Japan. Mentally, I listed them in this order: 1. Weather, 2. Japanese fighters and flak over Japan, 3. Weather, 4. Fuel enough to complete the round trip?, 5. Weather, 6. 3,000 miles of water" — Chester Marshall, B-29 pilot
Design Note: Given the very long flying distance over open water, and the dense concentration of targets in the relatively small boundaries of Japan, a Strategic Movement Map as is used in B-17, QUEEN OF THE SKIES was deemed impractical. The Strategic Movement Track on the Game Map allows a player to trace his or her bomber's position as well as convey other important information more conveniently.
For sequence of play purposes, the charts in Section 4.0 "The Zones" in the "Charts and Tables" book should be used/referenced in the order given, as applicable (e.g., determine if there is a Random Event after Course Determination but before Formation Assembly). Pressurization, depressurization, any crew movement (see rule 7.6), and any required crew frostbite or oxygen out checks (see rules 4.2D, 7.3, 7.4) are made after aircraft Zone movement (including altitude changes) but before weather determination, navigation, etc.
4.1 MOVEMENT
A. Each turn, move the B-29 counter one zone closer along the Strategic Movement Track to the zone containing the target—or one zone closer to the base when returning after bombing the target (or aborting).
B. Current altitude is tracked using a marker on the Game Map's Altitude Track. Your B-29 may increase one level of altitude each turn. For example, when moving from Zone 1 into Zone 2, you can move the altitude counter from "LO" to "MED" altitude on the Altitude Track; when moving into Zone 3, you can move the counter to the "HI" altitude box. The B-29 can descend one or two levels of altitude in one turn (i.e., "HI" to "LO"). Any voluntary altitude changes must be made immediately at the start of each turn. Also, see Section 4.2 for the rules for pressurization.
Player Note: The rules require that your plane must be at the required mission altitude established by Table 2-2B for formation assembly and formation flying ("Day" Missions; see Section 4.8) and for bombing the target. When not in formation, however, you are free to fly the mission at any altitude (there are advantages and disadvantages to each).
4.2 PRESSURIZATION
Design Note: A significant B-29 innovation was cabin pressurization. The B-29 had three pressurized cabins: the cockpit (which included the bombardier, navigator, flight engineer, and radio operator in addition to the pilot and copilot), the gunner's compartment, and the tail gunner's compartment. The first two compartments were connected by a tunnel running 40 feet across the top of the bomb bays. The entire system was designed to maintain 8,000-foot cabin pressure at an altitude of 30,000 feet. The job of pressurizing or depressurizing belonged to the flight engineer (although in emergencies there were cabin pressure release handles on the airplane commander's control stand and in the gunner compartment). Under normal conditions, the crew was to begin pressurizing at 8,000 feet. B-29 crews were instructed to always depressurize (and go on oxygen) when expecting enemy action, if the bomber was on fire, or when preparing to abandon ship. Wearing oxygen masks was required when flying unpressurized above 12,000 feet.
A. When moving from "LO" to "MED" altitude, the B-29 is automatically pressurized. The B-29 remains pressurized at "MED" or "HI" altitude until and unless the conditions outlined in paragraphs b. and c. below apply. When moving from "MED" to "LO" altitude, the B-29 is automatically depressurized. Track the pressurization status of the B-29 on the Pressurization Track on the game map using the "Pressurization" markers.
B. If the flight engineer position is occupied by a functioning crewmember (i.e., not KIA or seriously wounded) the B-29 may be voluntarily depressurized or re-pressurized at "MED" or "HI" altitude for any of the reasons below. Voluntary depressurization (but not repressurization) is also possible if there is any functioning crewmember in the pilot position or in the Waist compartment.
- Crew movement (see Section 7.6) from a pressurized compartment (Nose, Nav/Radio, Waist, Tail) into an unpressurized compartment (Forward Bomb Bay, Aft Bomb Bay, or Utility compartment). Exception: crewmembers may move from Nav/Radio section directly to the Waist compartment (and vice versa) without depressurization (unless the "tunnel" is damaged on Tables 7-3 or 7-4).
- Any fire in a pressurized compartment (depressurizing results in a modifier on Table 7-12 for extinguishing a fire at "MED" or "HI" altitude)
- Expected combat (see Section 5.2)
- Any requirement to bail out. Crews that depressurize for bail out roll on Table 7-11 for any pressurized compartment containing one or more exiting crewmembers (in this case, crewmembers do not go on oxygen but they may be wounded/injured).
Unless damage prevents it, the B-29 may be depressurized and/or re-pressurized any number of times during a mission. Note, however, that re-pressurization may only take place at the beginning of a turn, immediately after plane movement (if applicable).
Design Note: It's important to note that a shell hole in a pressurized compartment did not necessarily render pressurization in that compartment impossible—it just added another leak to an already leaky fuselage. It was not unusual for a B-29 to return to base with assorted, multiple shell holes in the pressure vessel but still capable of being successfully pressurized. Also, see the Design Note to Table 7-11 regarding the oft-misunderstood question of "Explosive Decompression."
C. Pressurization capability is lost in one or more compartments (meaning that the compartment is involuntarily depressurized—if pressurized—and may not be pressurized again) for the following reasons:
- Damage Table results (see Section 7.0) or Random Event (see Table 4-9)—in this case, pressurization is "compromised" in the affected compartment(s)
- Both inboard engines (engines #2 and #3) are not operating—in this case, pressurization is lost throughout the airplane.
D. If the B-29 is depressurized for any reason (except bail out) at "MED" or "HI" altitude, see Section 7.3 for potential crewmember frostbite effects. In addition, all crewmembers must immediately go on oxygen (see Section 7.4 if oxygen is out anywhere on the aircraft). Roll 2D each turn that a B-29 is depressurized at "MED" or "HI" altitude, beginning with the turn of depressurization (add two [+2] to the dice roll if the intercom/communications is out): "2-11" = no problem, all crewmembers on oxygen, "12" = oxygen malfunction for individual crewman, or crewman fails to don mask in timely manner. Roll 1D to determine the affected crew position (if the rolled for position is unoccupied, then disregard):
"1" = Nose Section. Roll 1D again: "1-3" bombardier affected, "4" pilot affected, "5-6" copilot affected.
"2" = Nav/Radio Section. Roll 1D again: "1" flight engineer affected, "2-3" navigator affected, "4-6" radio operator affected.
"3" = Gunner Section. Roll 1D again: "1-2" CFC affected, "3-4" left gunner affected, "5-6" right gunner affected.
"4" = Radar operator position is affected.
"5" = Tail gunner position is affected.
"6" = Roll again.
After determining the affected crewmember, roll 1D again: "1-5" = condition is discovered in time to successfully revive and/or move crewman to another oxygen line; "6" = crewman's condition/failure to revive is discovered too late, he has died as a result of anoxia (KIA).
4.3 Ω FUEL CONSUMPTION
Design Note: B-29s flying from the Marianas were operating at the very end of their range bombing targets in Japan. Many were lost because of insufficient fuel for safe return. The rules for fuel consumption are intentionally an oversimplification of a very complicated question. Fuel consumption was determined by a number of complex, varying factors including wind direction and speed, aircraft weight, altitude, rates of climb and descent, engine power and efficiency, etc. The purpose of these rules is to give players a feel for the very real tension felt by B-29 aircrews as they watched their fuel reserves slowly dwindle over the vast Pacific Ocean.
Player Note: The crossing off of additional fuel boxes for guns and crewmembers is a one-time requirement only for entry in to Zone 1 from the "20th Air Force Base." Crew/gun weight for fuel is not checked for remaining Zones, outbound and inbound.
A. B-29 fuel consumption for the mission is tracked by crossing off fuel boxes on the Mission Log Sheet. There are 38 fuel boxes representing self-sealing internal wing fuel tanks plus four boxes each (total of 8) for forward and aft bomb bay auxiliary fuel tanks (see Section 2.3(g) for use of auxiliary tanks). Fuel boxes are marked off according to the following schedule:
- With entry into Zone One from the "20th Air Force" base square (i.e., just after take-off), roll one die: if the result is less than the number of gun turrets/guns armed and ready for this mission (see Section 2.3.d and/or Table 2-7)—Fwd Upper, Fwd Lower, Aft Upper, Aft Lower, Tail, Tail Cannon—cross off one box.
- With entry into Zone One from the "20th Air Force" base square (i.e., just after take-off), roll one die: if the result is less than or equal to the number of gunners on board for this mission (see Section 2.3.d and/or Table 2-7)—Central Fire Controller, Left Gunner, Right Gunner, and Tail Gunner (regardless of gun status)—cross off one box.
- Cross off two boxes per zone entered if bombs are aboard.
- Cross off one box per zone entered if no bombs are aboard.
- Cross off one box in the Designated Target Zone after bomb run for turn-around to inbound (return to base) leg of the mission.
- Cross off two boxes for each level climbed in altitude ("LO" to "MED" or "MED" to "HI"). For example, if your bomber moved from Zone 2 to Zone 3 and climbed from "MED" to "HI" altitude as it entered Zone 3 (see Section 4.1(a) above), a total of four (4) fuel boxes would be crossed off in Zone 3. There is no additional fuel box cost (or benefit) for descending in altitude.
- Cross off one box if rejoining formation after being forced out of formation (see Section 4.8).
- One or more additional fuel boxes may be crossed off or restored (the use of a pencil with an eraser is encouraged when marking fuel boxes) as result of weather (see Section 4.4).
- One or more fuel boxes may be crossed off or restored as the result of Random Event (see Section 4.6).
- One or more fuel boxes may be crossed off as the result of battle damage (see Section 7.0).
Note that boxes are crossed off for moving per zone as opposed to per turn, unless the rules indicate otherwise (e.g., see Sections 4.7 and 6.5).
Player Note: As an example, for the first turn of movement from the "20th Air Force" base square to Zone One, the minimum fuel consumption (not counting the possibility of a random event) would be 2 fuel boxes crossed off (for zone entered with bombs aboard) and the maximum fuel consumption (again, not counting possibility of random event) would be 4 boxes (the first 2 for zone entered as with the minimum, plus up to 2 more—1 each for weight of guns and gunners, depending on die rolls). There is no addition for going to LO altitude after take-off—since "LO" altitude is everything below ~12,000 feet, the B-29 is for game purposes at LO altitude the moment it leaves the ground.
B. In zones where more than one fuel box must be marked off, no more than one auxiliary (bomb bay) fuel tank box (if present) may be crossed off; all other additional cross off requirements in that zone must be satisfied by those boxes representing the bomber's own internal wing tanks. The ability to use the auxiliary tanks may be impacted by Random Event (see Section 4.6) or battle damage (see Section 7.0).
C. If all fuel boxes are crossed off prior to entering a zone (or the "20th Air Force Base" square from Zone 1), roll on Table 4-1 to see if the B-29 has sufficient fuel to, in fact, enter the zone (or base square).
D. You may choose to abort any mission (see Section 4.7) if at any time you calculate that you do not have sufficient fuel boxes to bomb your target and return safely to base (including Iwo Jima, if available, see Section 8.4).
4.4 WEATHER. Upon reaching Zone 1, and every zone (not "turn") thereafter (a roll is not made for the "20th Air Force Base" square), roll two dice and consult Table 4-2 for weather in the Zone. Denote weather in the Zone using the Weather marker on Weather Track on the Game Map.
Design Note: B-29 crews flying to Japan at higher altitudes sometimes found the headwinds so strong—occasionally in excess of 200 miles per hour—that they couldn't reach their targets and return safely to the Marianas. At first, weather personnel refused to believe the navigator reports but it soon became clear that they were accurate. The previously unknown "jet stream" had been discovered.
4.5 Ω NAVIGATION (Beginners, your plane is always "on course"…)
A. Navigation is resolved once per Zone up to and including the form-up zone (if applicable), see 4.8. Note that NO navigation check is required while in formation unless your B-29 is the "Lead" bomber of the Middle Formation (see Tables 2-4 and 2-5). Navigation checks must be resumed upon dropping out of formation, or upon re-entry into Zone 3 or 9 (again, depending on mission) on the inbound leg (flying towards base, when formations are disbanded). After determining weather in Zone, roll on Tables 4-4 through 4-7 (successively). These tables may yield cumulative modifiers for Table 4-8 (used to determine whether the B-29 is currently "On Course" or "Off Course.") Track modifiers as they are obtained using the "Navigation" marker on the Game Map.
B. After rolling on Tables 4-4 through -7, roll on Table 4-8 and, based on the result, check the applicable "On Course/Off Course" box for the Zone on the Mission Log Sheet.
C. If the B-29 is "On Course," then the mission continues normally. An "Off Course" result can have the following effects:
-
If "Off Course" in Formation Assembly Zone (see Section 4.8, "Day" Missions only), roll 1D: "1-2" = B-29 at Rally Point on time, "3-6" = Rally Point Missed or B-29 arrives late. No die roll is made on Table 4-10, B-29 remains "Out of Formation." B-29 may abort (Section 4.7).
-
If "Off Course" in Designated Target Zone, the B-29 has missed the IP ("Initial Point") and may either abort (see Section 4.7) or remain in the Designated Target Zone for an additional turn in an attempt to obtain an "On Course" result. If remaining for an additional turn, mark off two additional fuel boxes (see Section 4.3) (i.e., as if entering a new Zone). Other than fuel, there is no limit per se to the number of turns a B-29 may remain in the Zone in an attempt to obtain an "On Course" result. Once an "On Course" result is obtained, the target may be bombed normally (see Section 6.0). If at any time the B-29 aborts for being "Off Course" while over the target; bombs are automatically Off Target, 0%—in this case, see paragraph C.4 below. In this case, B-29 has dropped bombs on a secondary target (see Tables 6-6 and 6-7).
-
If "Off Course" in Zone 1 on the inbound leg of the mission, (i.e., returning to Base)—or in Zone 6 on the inbound leg of the mission and planning a landing at Iwo Jima (if available, see Section 8.4)—then the B-29 must remain in the Zone for additional turns in an attempt to obtain an "On Course" result. Mark off an additional fuel box (see Section 4.3) for each extra turn the B-29 must spend in the Zone (keep playing turns until you get on-course or your plane runs out of fuel whichever comes first; per rule 4.4, additional weather checks are not required). If no fuel boxes remain, the B-29 may only remain in the air with a successful roll on Table 4-1. Once an "On Course" result is obtained, the B-29 may move into the "20th Air Force Base" square from Zone 1 (fuel permitting) (if applicable) and roll for landing (see Table 8-1), or (if in Zone 6) roll for landing at Iwo Jima (again, see Table 8-1).
-
If "Off Course" in any Zone, then upon receipt of the next "On Course" result, roll 1D: "1-4" = minor course correction necessary, "5-6" = significant course correction necessary, cross off one fuel box. Add one (+1) to the die roll if the B-29 was "Off Course" in two consecutive Zones (including the current Zone, see the Mission Log Sheet), add two (+2) to the die roll if the B-29 was "Off Course" in three consecutive Zones, etc.
Exceptions:
- Do not make a die roll per paragraph C.4 above (or mark off an extra fuel box) if the B-29 does not abort for being "Off Course" in the Designated Target Zone and a subsequent "On Course" result is obtained in the same Zone (see paragraph C.2 above).
- Similarly, do not make a die roll per paragraph C.4 above (or mark off an extra fuel box) if the B-29 is "Off Course" in Zone 1 on the inbound leg of the mission, (i.e., returning to Base)—or is in Zone 6 on the inbound leg of the mission and planning a landing at Iwo Jima (see paragraph C.3 above). In this case, extra fuel boxes will be marked off as necessary anyway in order to obtain the necessary "On Course" result for landing.
Design Note: A B-29 pilot could never take his navigator for granted. Flying over hundreds of miles of open water, often alone, without the benefit of today's satellite navigation systems or other advanced course-plotting aids, the navigator's job was arguably the most important on the crew. The significance of the navigator is attested by the fact that a whopping 21 percent of Twentieth Air Force B-29s forced to ditch at sea did so because of navigation error. B-29 navigators used four principal methods of navigation:
"Pilotage" consisted of following the plane's course on a detailed map and determining the plane's position by identifying landmarks on the ground. Visual pilotage was impossible when above cloud cover, and of very limited value at night or over the ocean. Radar, however, could be used over clouds and at night to produce an approximate representation of the surface area below the plane and could highlight islands while over water.
"Dead Reckoning" was the bread and butter of navigation, and was used to estimate a bomber's position by measuring time, direction and speed flown from a known geographical starting point. This method was very dependent on knowing the proper direction and velocity of the wind—a huge variable on missions to and over Japan.
"Celestial" navigation was essential for night navigation. A bubble sextant was used to take an observation of either the sun or certain pre-identified stars, from which could be identified a "Line of Position" (LOP) (i.e., a connection to a map line without pinpointing its exact position on the line). Triangulation using multiple LOPs could establish exact position.
"Radio" navigation was used to determine a LOP in relation to a known radio transmitter station (in some cases it was even possible to get a good radio bearing using on-air Japanese stations!) The B-29 was equipped with a radio compass for direction finding (normally good only at short-range) and an AN/APN-4 (or –9) LORAN (LOng RANge) constant-beam navigation set (installed in most aircraft in early 1945). This was the navigation aid on which B-29 navigators leaned on the heaviest. LORAN transmitting stations were set up initially in the Marianas, and on Ulithi (in the Caroline Islands), with the network rated operational by 1 Mar 1945. Additional stations went on the air from both Iwo Jima and Okinawa in May 1945. These latter two stations were crucial to extending a reliable LORAN signal over Japan. LORAN also had a much greater range at night.
4.6 Ω RANDOM EVENT. Curtis LeMay once described the B-29 as "the buggiest damn airplane that ever came down the pike." The B-29 was plagued with mechanical problems that resulted in a much higher abort rate in the Twentieth Air Force than in the Eighth. Upon reaching Zone 1, and every turn thereafter, roll two dice. On a roll of "12" a random event has occurred reflecting a possible mechanical failure in your plane. Roll two dice and consult Table 4-9.
"During our training, we were told if we were able to get to the target, that not being able to make it back to the base was no reason to abort. Our only job was to hit the target—planes and crews, it seemed, were expendable." — Clarence Miller, B-29 navigator
4.7 ABORTING THE MISSION
A. "Aborting a mission" means the B-29 turns around and heads for home (either "20th Air Force Base" square or Iwo Jima in Zone 6 if available as a friendly base, see Section 8.4) without bombing the target. Historically, the decision to abort was the pilot's; note that certain events on Table 4-9 or on the Damage Tables require the player to abort the mission or give that option to the player. For game purposes, unless specifically required to abort, players having the option to abort may choose instead to continue the mission. However, in all cases, players may only abort (voluntarily or otherwise) after any and all combat in any zone (if applicable).
B. Begin the return flight to base by turning the B-29 counter around on the Strategic Movement Track facing toward the track square labeled "20th Air Force Base" (exception: the B-29 may instead proceed to Iwo Jima, if available as a friendly base, see Section 8.4). If turning around, the B-29 will spend another turn in the zone, crossing off fuel box(es) for the turn normally (bombs may be jettisoned beforehand), and (if applicable) resolving combat again per the procedure in Section 5.0. Use the previously rolled for weather effects in the Zone (do not roll again on Table 4-2 on this turn). If not turning around (i.e., proceeding forward to Iwo Jima), an additional turn in the zone is not required simply for aborting (although it may be required for other reasons).
C. Only missions that count toward the required 35 also count towards crew experience for determining a crewmember's "novice" (seven or fewer missions) or "veteran" (fourteen or more missions). This may provide a modifier on a number of Tables.
D. Aborted missions only count toward the required 35 if any of the following circumstances occur due to Japanese fighter attacks or Japanese flak:
a. "Off Course" result is obtained on Table 4-8 in the Designated Target Zone b. Bomb bay doors, intercom, bombsight, or radar inoperable c. Loss of pressurization in any compartment ("HI" or "MED" altitude missions only) d. Pilot, Co-Pilot, Bombardier, or Navigator seriously wounded or KIA e. One or more engines out f. Any fuel tank hit which does not leave enough fuel to bomb the target and return g. Electrical system failure
If the target has not been bombed when the B-29 is forced to abort, the bombs may be jettisoned for safety.
4.8 FORMATIONS
Design Note: Early in the 20th Air Force's campaign, formations were assembled near the Marianas. After the invasion of Iwo Jima, the bombers met at a designated point near Japan, sparing the pilots the rigor of formation flying for the many hours of flight over empty ocean. The first planes to reach the designated rendezvous point began to fly in circles until the stragglers arrived. After hours of flying, however, it was not unusual for some planes to be slow in reaching the area (or miss it altogether), forcing the waiting planes to use up valuable fuel.
A. On Missions #1-10, formation assembly will occur in Zone 3 of the Strategic Movement Track. On "Day" Missions #11-35, formation assembly will occur in Zone 9 of the Strategic Movement Track. Your bomber must be at the altitude specified for the mission (e.g., see Table 2-2B) prior to rolling for assembly. (Also see Section 4.5 for possible navigation effect on formation assembly.) A formation will always fly at the specified mission altitude. Roll two dice and consult Table 4-10. Note that time of day (see Table 3-1) has no effect on formation assembly.
B. On Missions #1-10, the requirement to fly in formation ends with entry into Zone 3 of the Strategic Movement Track on the inbound leg of the mission (flying away from the Designated Target Zone). On "Day" Missions #11-35, the requirement to fly in formation ends with entry into Zone 9 of the Strategic Movement Track on the inbound leg of the mission (flying away from the Designated Target Zone).
C. The term "out of formation" applies on "Day" Missions (only) and refers to any situation when formation flying is not required during the mission or if your bomber has left formation involuntarily (or because the pilot has chosen to abort). Note that your bomber cannot voluntarily leave formation unless aborting (for reasons that specifically permit it). Apply a "+2" modifier on rolls for Japanese fighters on Table 5-1 when out of formation.
A B-29 which is out of formation prior to entering the Designated Target Zone may immediately abort the mission, turn around, and head for home. However, mission credit is only awarded if aborting per the criteria in Section 4.7. An out of formation B-29 may choose to complete its mission and bomb the target.
D. If your bomber is forced "out of formation" (e.g., in a possible collision off Tables 4-3, 4-9, or 4-10) it is possible to later regain formation if all engines are fully functional and any required fuel costs for regaining altitude (if applicable) are paid. However, in any situation where your bomber rejoins an existing formation, one extra fuel box (see Section 4.3) must be crossed off (simulating the effect of having to run the engines at higher power settings to catch up) and your B-29 is automatically assumed to henceforth be in the tail position.
E. After formation assembly, roll for fighter rendezvous on Table 4-11 under the appropriate column if this is a "Day" Mission and fighter escort is available for the mission (per previous roll on Table 2-8). On any mission with a target in Japan, fighter rendezvous will always be rolled for no earlier than Zone 9 of the Strategic Movement Track, unless the target is Iwo Jima in which case it will be rolled for no earlier than Zone 3. If the rendezvous is missed, rendezvous attempt may be made again (after checking for weather) in any ensuing Zone with a -2 die roll modifier. Fighter rendezvous is never rolled for if "Out of Formation" or if "Off Course" (this latter only applies if the B-29 is "Lead" bomber of the Middle Formation). The table lists the type of American fighter flying the escort—note that different fighter types yield different modifiers on the Japanese Fighter Resistance Table (Table 5-1). Place the appropriate escort fighter marker in the proper box of the Japanese Fighter Placement Chart.
Combat
"We had nothing that we could use against such a weapon." — Prince Higashikuni
5.1 DETERMINE FIGHTER RESISTANCE
A. Each turn (both to and from the target) that the B-29 is in Zones 10 through 14 (see Table 2-9), or in Zone 6 when Iwo Jima is Japanese-controlled (Missions #1-10), roll on Table 5-1 (but see paragraph b. below first) to determine the Japanese fighter resistance level for that turn. (EXCEPTION: on Day missions [#1-10] where Base Take-off time is "Day" and Base Landing time is "Night," do not roll for Japanese fighters in Zone 6 on the inbound (return to base) mission leg.)
IMPORTANT NOTE: A result of "None" always means no Japanese fighters encountered this turn.
B. If pressurized at "HI" or "MED" altitude, the pilot must decide whether to depressurize the bomber. This must be done before rolling on Table 5-1. (EXCEPTION: if the aircraft was just re-pressurized this turn from a previous voluntary depressurization, then the pilot may not voluntarily depressurize again this turn.) See Section 4.2.
Design Note: Yes, on paper, Japanese fighter ranges extended into zones other than just those listed on Table 2-9, but Japanese fighters rarely strayed very far from the Home Islands. Primarily because of fuel shortages (but also because of the poor state of pilot training), Japanese fighter commanders were reluctant to send up planes until the target of a B-29 raid could be exactly identified. However, Japanese geography—with its long, thin string of islands and targets bunched on the east coast—made it simple for the US bombers to approach with little warning over open sea, hit their targets, and be gone at high speed—long before the Japanese (who were deficient in radar and communications) could assemble a defense of any strength. Also, as the war progressed, the Japanese began to withhold more fighters to create a Kamikaze reserve in preparation for the anticipated U.S. invasion.
5.2 DETERMINE ATTACKERS – "DAY" MISSIONS (For "Night" Missions, go to Section 5.8.)
A. Roll 1D to determine whether an enemy fighter (or fighters) attack your plane in the Zone using the result for the fighter resistance level of the Zone from Table 5-1.
- Light Fighter Resistance: "1-2" = fighter attacks, "3-6" = no fighter combat this turn
- Moderate Fighter Resistance: "1-3" = fighter attacks, "4-6" = no fighter combat this turn
- Heavy Fighter Resistance: "1-4" = fighter attacks, "5-6" = no fighter combat this turn
B. If the die roll result on Table 5-1 is within the range for "fighter attacks," roll on Table 5-2 to determine the specific fighter type encountered. Otherwise, no combat occurs this turn.
Design Note: Note that "Heavy" Japanese fighter resistance means heavy by Pacific War standards—not European air war standards. Although some missions were hotly contested, overall Japanese air defenses were inferior. From the start of Twentieth Air Force raids until the end of the war, the total number of B-29s confirmed lost directly to Japanese fighters amounted to only 73 out of 31,387 sorties, or just under one-quarter of one percent. Nearly five times as many B-29s were lost to accidents and mechanical failures.
C. Once fighter type is determined, roll on Table 5-3 to determine the area (direction) of the fighter's attack. Note that normally, the B-29 will be attacked by only one fighter in any given zone. A roll of #5 on Table 5-3 provides for a possible attack by multiple fighters. Also, notes (a) and (h) to Table 5-3 specify additional conditions in which an additional (second) fighter may be encountered in the same combat. Notes (a) and (h) only apply on a dice roll on Table 5-3 of "2" or "12" respectively.
D. Once the area of attack is determined, roll on Table 5-4 (if applicable) to determine angle of attack for the attacking fighter. Place each fighter on the Japanese Fighter Placement Chart in the proper attack clock position(s).
Design Note: Japanese fighter pilots were instructed to attack B-29s from above and head-on on the bomber's right side, if possible. Twentieth Air Force estimated that over 40% of Japanese fighter attacks came from the nose, only 16-17% from the rear. Most frontal attacks came from above while more rear attacks came from below. By one analysis, only 11% of attacks were coordinated (multi-plane attacks on the same bomber)—a sharp contrast to the European experience. This difference was attributed to the B-29's speed and altitude, the restricted performance of the interceptors, and poor Japanese pilot quality.
E. If there are not enough fighter types to place in a clock position, use unused fighter counters and note the type it is being used for.
Player Note: B-29 defensive fire—see 5.3—should be allocated before determining attacking fighter pilot status ("Green," "Average," "Ace") on Table 5-5. After all, your gunners are not clairvoyant!
F. Once angle of attack is determined, roll on Table 5-5 to determine pilot status for the attacking fighter, "Green", "Average, or "Ace."
5.3 B-29 DEFENSIVE FIRE
A. Each armed and operating gun position may be allocated to fire at any one fighter within its field of fire as shown on Table 5-6. Table 5-6 also indicates which crew position is eligible to fire in each case. Designate the targets for each gun turret with the appropriate gunnery and crew position marker. A single crew position may fire more than one gun turret at the same target.
B. However, no single crew position may fire at more than one target per turn even with different gun turrets. Within the restrictions set in Table 5-6, you may designate any gunner to fire at any target (exception: see paragraph b. below).
Design Note: Gunners sighted through movable gunsights that transmitted signals to the central fire-control computer, which operated the gun turrets. The bombardier and waist gunners used a pedestal-type sighting station, while the CFC used a ring-type sighting station to control both the two upper and the two lower turrets. All except the bombardier had secondary control over the tail turret. The tail gunner could operate no other guns besides his own.
C. The exception to paragraph a. above is if the B-29's intercom is out: in this case, roll 1D on Table 5-6 for each gun turret eligible to fire and refer to the parenthetical ranges (if applicable) in the "Crew Position Eligible to Fire" column, cross-referenced to the applicable gun turret and fighter attack clock position. (Note that if any position is occupied by a KIA or seriously wounded crewmember, then that crew position is considered unavailable and not applicable.) If the die roll is within a particular crew position's number range, that crewmember fires the gun turret. If the choice is between two gunners in the same (Waist) compartment then die roll discrimination is not necessary—either gunner may fire the guns at the player's option (they don't need an intercom to talk to each other). In the event the B-29 is attacked by more than one fighter in one turn, any crewmember allocated to firing guns at one fighter may still be rolled for on Table 5-6 to fire at another fighter using another available gun turret, even though the prohibition against one crewmember actually firing at more than one target per turn still applies. In this case, if a crewmember already allocated to one target is rolled for against a second target using another available gun turret, then that (second) gun turret is now unavailable to fire at any target. (This reflects the difficulty in coordinating fire with no intercom.) Once allocated to a particular target, neither guns nor gunner may be later "unallocated" to fire at a different target on the same turn. A player is always free, however, to resolve allocation for each attacking fighter in any order he wishes.
D. The ammunition available for each gun position per mission is shown on the Mission Log Sheet. Each box next to the gun position's name represents one burst of ammunition. Mark off one burst (box) of ammunition when a gun position is allocated to firing. When a gun position runs out of ammunition, it may not fire for the remainder of the mission. Ammunition may not be transferred from gun to gun.
Player Note: B-17, QUEEN OF THE SKIES players take note: there is no "Ace" bonus available to bomber gunners in SUPERFORTRESS. The B-29's central fire computer automatically corrected for airspeed and range, and calculated the necessary lead so that the gunner could keep his sight fixed on the target at all times. Thus, individual marksmanship counted for much less than with the more conventional armament on other heavy bombers. There is also no "spray fire" in this game. This was a fairly common tactic with inexperienced gunners early in the war but was discouraged during training as the war progressed. Moreover, the sophisticated gun sights on the Superfortress discouraged gunners from such a tactic.
E. Ω If not already allocated to fire at an attacker in the 6 o'clock position, the tail gun turret may be allocated to any fighter attacking from the 10:30, 12, or 1:30 positions, whether High, Level, or Low. However this defensive fire is not resolved until all other combat involving the attacking fighter is resolved. Thus, the target fighter could be shot down, or collide, or the tail turret could be knocked out before having a chance to fire. No ammunition is marked off unless the tail turret actually shoots. The tail turret may not fire in this manner if the intercom is out unless the CFC position is occupied by a functioning (not KIA or seriously wounded) crewmember and any defensive fire resolved by the CFC prior was against the same target. The tail cannon (if present) may never fire in this manner.
F. Resolve B-29 defensive fire on Table 5-7 (roll once for each firing gun turret) to determine if the target fighter is hit.
G. For each hit a fighter receives, roll one on Table 5-8, using the column appropriate to the target, to determine the damage to the fighter from that hit. Remove destroyed fighters, and place FCA (Fighter damaged but continues attack) counters on damaged fighters.
Player Note: B-17, QUEEN OF THE SKIES players take note: there are no FBOA ("fighter damaged and breaks off after this attack) counters, because (1) "successive attacks" are more rare in SUPERFORTRESS, and (2) despite their other shortcomings, Japanese pilots tended to be very aggressive (some might say "reckless"), pressing attacks very close and firing often.
Note also that all B-29 guns are dual with a lethality "advantage" built in. The upper forward turret has a bonus because it's considered a quad in this design. Kill probability in SUPERFORTRESS is based on actual historical results—they are lower than in the B-17 game because the latter is arguably overly generous.
5.4 JAPANESE OFFENSIVE FIRE
A. Roll once on Table 5-9 for each surviving fighter to determine if that fighter hits the B-29, taking into account any modifiers due to damage or fighter pilot status. If the result is a hit, go to Table 5-10 to determine the number of shells hitting the B-29 from this fighter.
B. For each shell hit, roll once on Table 5-11 under the appropriate clock position of the attacking fighter to determine the compartment/section of the B-29 this shell hit. Record sections hit on the Mission Log Sheet.
C. After determining sections hit, roll once on Table 5-12 for each hit to determine the multiplicative effect of the hit. The result is the number of rolls on the applicable Damage Table (see Tables 7-1 through 7-8) required for that hit, based on the attacking fighter type that inflicted it.
Design Note: Table 5-12 accounts for the various caliber of armament carried by each different fighter type, ranging from 7.7-mm machine guns up to 37-mm cannon (i.e., a shell from the latter is obviously going to cause more damage than a shell from the former).
D. Roll on the specific Damage Table(s) (see Tables 7-1 through 7-14), as required and resolve damage done. Record all damage and effects of damage on the Mission Log Sheet and place a damage marker/s on the affected area. Note: Not all areas have damage markers.
E. When a compartment is hit and crew casualties must be rolled for, any wounded crew that was moved into the affected compartment must roll for wounds.
5.5 Ω MID-AIR COLLISIONS. After resolving the effects of an attacker's offensive fire, roll 2D to determine whether the attacking fighter pilot presses his attack close enough to possibly (either intentionally or inadvertently) cause a collision (add +1 to the die roll if the attacking fighter is a Tojo or Nick, subtract -1 if the attacking fighter did not score any hits on the B-29 or if the B-29 took "Evasive Action" during combat, see Section 5.7): "2-10" = no threat of collision, "11-12" = possible collision, roll 1D: "1-5" = fighter misses, no collision, no successive attack (see Section 5.6 below), "6" fighter collides with B-29. Roll once on Table 5-11 under the appropriate clock position of the attacking fighter to determine the section of the B-29 the fighter hit. If the result is "Superficial Damage", the fighter misses, there is no collision. Otherwise, the result of collision is the same as "Flak Burst Inside Plane" (BIP), see Section 6.2.f, for the applicable compartment/section hit. Fighters which fail to score a hit on Table 5-9 or do not collide with the B-29 are removed from the board.
Design Note: Reports of B-29 midair collisions with Japanese fighters were unnerving to bomber crews, but Twentieth Air Force opinion was divided as to how many collision incidents were deliberate. It's true that the ramming tactic was officially endorsed by the Japanese high command—given the lack of veteran Japanese fighter pilots/pilot for an 11-man heavy bomber was seen as justified. Although forcing a collision sounds simple, in actual practice it proved surprisingly difficult. An approach from the rear subjected the attacker to the maximum firepower of the B-29's many guns, while a head-on attack, at a closure rate of over 500 mph, demanded a degree of skill that usually only experienced Japanese pilots possessed—which contradicted a major reason for the tactic.
5.6 SUCCESSIVE ATTACKS
A. For any Frank, Tojo or Jack fighter which scores a hit in its initial attack on the B-29 (even if the hit has no effect) and was not damaged ("FCA") during the attack, roll 1D: "1-3" = no effect, remove the fighter from the board, "4-6" = fighter is able and willing to attack the B-29 again (assuming, of course, it did not collide with the B-29). Note that undamaged Nick, Tony, Zeke, Oscar, and George fighters may only make a die roll for successive attacks if the B-29 is "out of formation", and one or more of the B-29's engines are out. Fighters not scoring hits never roll for successive attacks (Irving fighters do not appear on "Day" Missions and are unaffected by this rule).
Design Note: Generally, unless a B-29 was damaged, most Japanese fighters were only capable of making one straight pass at the fast-flying bomber, especially at high altitude. The majority of Japanese fighters had an effective (versus rated) ceiling far below the normal altitude of B-29 daylight formations. For these fighters, even just a simple turn at the higher levels could result in an altitude loss requiring ten minutes—or more—to regain…by which time the B-29s were long gone.
B. For each fighter eligible to make a successive attack, roll once on Table 5-13, under one of two columns (depending on whether or not all B-29 engines are operating), to determine the fighter's new attack position. After any and all fighters conducting a successive attack are positioned, resolve combat normally using Tables 5-6 through 5-12. Also check for collision normally on successive attacks (see Section 5.5 above). Fighters not scoring a hit during this attack are removed from play.
C. A fighter normally does not conduct a second successive attack unless it scored a hit during the first successive attack, and the B-29 is "out of formation", and one or more of the B-29's engines are out, and the fighter has not suffered a "FCA" result—if all four conditions apply, roll 1D again per the provision of paragraph a. above and, if eligible for another successful attack, roll 2D on the second column of Table 5-13. After any second attack, a fighter is removed from play even if it scores a hit every time. The most attacks any one fighter can make against the B-29 on any given turn is three—one initial and two successive attacks.
5.7 Ω EVASIVE ACTION
A. "Evasive Action" represent the dips, dives, banks, and weaves that a pilot could put his plane through in an attempt to dodge enemy fighter attacks. Flying like this necessarily threw off the aim of the plane's gunners, and wasn't possible if the bomber was heavily damaged. Due to the proximity of friendly planes and the danger of collision, B-29s in formation may not use "Evasive Action."
B. "Evasive Action" is only allowed for B-29s flying "Out of Formation" or "Night" Missions. "Evasive Action" provides a negative modifier to B-29 defensive fire (Table 5-7) and Japanese offensive fire (Table 5-9) and Japanese searchlights (Table 5-14), may reduce the chance of mid-air collision (see Section 5.5) and may reduce bombing accuracy (see Table 6-6). No "Evasive Action" is allowed if:
- B-29 is in formation
- Two or more engines are out
- Electrical system is out (see Table 7-10)
- Anyone other than the Pilot or Copilot is flying the plane (see Section 7.6)
- Any damage previously received that specifically prohibits "Evasive Action."
5.8 Ω COMBAT PROCEDURE – "NIGHT" MISSIONS. For "Day" Missions, go to Section 5.2. For "Night" missions, continue the procedure below (REFERENCE SECTION 5.1 FIRST).
A. If within the Designated Target Zone (only), roll on Table 5-14 to determine if your bomber has been spotted by searchlight (EXCEPTION: do NOT make this roll if the target city is asterisked on Table 2-9). If the B-29 is spotted and fixed, then it remains so for the remainder of the turn (exception: see note (b) to Table 5-14). If the bomber is still within the Designated Target Zone next turn, roll normally on Table 5-14—there are no special modifiers for having been successfully spotted the previous turn.
Design Note: The Japanese concentrated searchlights at several locations: for example, Tokyo and Nagoya (large urban and industrial centers), as well as Shimonoseki (which controlled the vital water chokepoint between the Sea of Japan and the Inland Sea)—each of these targets was nicknamed "Searchlight Alley" by B-29 crews. Searchlights were often an annoyance to B-29 crews but only rarely contributed to shooting a bomber down. The Japanese simply did not possess enough lights—or crews properly trained in their use—to compensate for deficiencies in radar and other defenses.
B. Roll on Table 5-15 to determine whether an enemy night fighter attacks your plane in the Zone.
Design Note: At the beginning of Twentieth Air Force's night bombing campaign, American intelligence credited the Japanese with having only two night fighter units in all of the home islands, and those units were poorly equipped for the battle. The airborne radar carried by the Navy's primary night fighter—the Nakajima J1N Gekko—was primitive and unreliable, while the Japanese Army pressed the Ki-45 into night fighter service even though it had no radar at all. For the most part, Japanese night fighter pilots were forced to rely entirely on their night vision to spot American B-29s. To compensate for inadequate technology, the Japanese trained their fighter pilots to maintain a precise flight pattern designed to sweep an assigned sector of the night sky. Contact with a B-29 was usually little more than a chance encounter.
C. Night fighters always attack from the 6 o'clock position. If a night fighter is encountered, roll on Table 5-4 to determine angle of attack (note that in the event of a coordinated attack, no more than one Japanese fighter may occupy the same angle of attack; if necessary, roll again on Table 5-4). Place the fighter(s) on the Fighter Placement sheet. Do not roll for fighter pilot status (Table 5-5).
D. Roll 1D for each night fighter to see if the fighter is spotted (subtract -1 if any gunners besides just the tail gunner are aboard, even as "observers"): "1-2" = attacking fighter spotted; "3-6" = attacking fighter approaches unseen. If a fighter is spotted and the intercom is working, then the bomber may take "Evasive Action" after defensive fire, but before Japanese offensive fire. This means that the fighter(s) will be affected by the "Evasive Action" modifier, but the gunner(s) will not (at least for the Initial attack). (EXCEPTION: if within the Designated Target Zone and the B-29 performed "Evasive Action" in an attempt to avoid being fixed by Japanese searchlight, then the bomber gunner(s) are affected by the "Evasive Action" modifier.) Defensive fire may never be resolved against a fighter not spotted.
E. If no Japanese fighter is spotted, the fighter(s) may fire first, with B-29 defensive fire resolved after the effects of Japanese offensive fire are applied (at that time, any fighter is automatically spotted).
F. Within the restrictions of these rules, resolve defensive fire normally per the rules of Section 5.3, using Table 5-6 for any and all armed guns and Table 5-7. (EXCEPTION: if the intercom is out and the tail gunner is rolled as "Crew Position Eligible To Fire" on Table 5-6 per Section 5.3(b), then only the tail gunner is allowed to fire in the first round of combat; no other guns or gunners may fire, even if present.) ALL applicable modifiers are in effect. Resolve any hit damage to the fighter on Table 5-8. ALL applicable modifiers are in effect.
G. Within the restrictions of these rules, resolve Japanese offensive fire normally per the rules of Section 5.4 and using Tables 5-9, 5-10, 5-11, 5-12. ALL applicable modifiers are in effect.
H. Check for mid-air collision normally per the rules in Section 5.5.
I. A Japanese Nick night fighter will always make one (and only one) successive attack unless it was destroyed or received a "FCA" damage result on Table 5-8. An undamaged Irving night fighter will not make a successive attack unless one or more of the B-29's engines are out (in the event of a coordinated attack, only one fighter may make a successive attack if eligible—any others may not; select only an undamaged fighter for the attack). In either case, use the Vertical Climb position for the successive attack (the fighter is automatically considered spotted for this round of combat).
Over the Target
"Apparently the brass felt better when AA guns could be heard firing during an air raid. The sound conveyed the feeling that something effective was being done." — Japanese air defense officer
6.1 DETERMINE TARGET VISIBILITY. Regardless of weather at altitude, bomber crews often found their targets obscured from visual observation by cloud cover and/or smoke below. (Of course, visibility worked both ways—if the B-29 had trouble seeing the ground then so did antiaircraft gunners seeing the B-29!) After resolving all fighter combat in the Designated Target Zone, roll one die on Table 6-1.
6.2 ANTI-AIRCRAFT FIRE (FLAK)
A. After determining target visibility, resolve anti-aircraft fire by rolling one die on Table 6-2.
B. After determining amount of flak, roll two dice on Table 6-3 three times to see if the B-29 is hit. Exception: a roll on Table 6-3 is not made if the result from Table 6-2 was "No Flak."
C. For each hit recorded from Table 6-3, roll on Table 6-4 to determine the number of shell hits on the B-29.
Design Note: As with their other air defenses, Japanese antiaircraft artillery was inadequate. Many of the guns in the Japanese inventory were obsolete 75-mm guns which were effective to no higher than 20,000 feet, well below the B-29's operating ceiling. Even their lighter guns—40-mm and 25-mm in caliber—were limited to no higher than 4500 and 8000 feet respectively. An 88-mm gun (similar to the renowned German piece) was in production in 1945 but was just another case of too little, too late—as was a fearsome 150-mm gun with a 30-foot long barrel, being produced in the last months of the war. In any event, radar sighting mechanisms were woefully few in number, and those that were available were notoriously inaccurate. Moreover, the heavier guns could not traverse fast enough to track the fast moving B-29s at low altitude. To add to the Japanese problems, anti-aircraft shells of all calibers were in short supply and many were defective. Overall, Twentieth Air Force credited the loss of only 55 bombers to enemy anti-aircraft fire.
D. For each shell hit, roll once on Table 6-5 to determine the section of the B-29 hit. Record sections hit on the Mission Log Sheet.
E. After determining the area affected by each flak shell hit, roll on the specific Damage Table(s) (see Tables 7-1 through 7-14) as required and resolve damage done. Record all damage and effects of damage on the Mission Log Sheet.
F. Most flak damage consisted of near misses which could do some internal damage or throw the bomber's aim off. Occasionally, a shell would actually explode inside the plane with generally catastrophic consequences. When a BIP result occurs on Table 6-4, it has the following effects:
- All crewmen in the applicable compartment are KIA.
- If the area hit is a Wing, the Tail, or the Nose, the B-29 dives out of control and the remaining crewmen immediately bail out according to Table 8-5.
- If one of the Bomb Bays is hit with bombs still aboard, the B-29 is destroyed and entire crew is KIA.
- If the area hit is the Nav/Radio compartment, roll for wound for the Pilot, Copilot, and Bombardier on Table 7-13, and also roll for Explosive Decompression (Table 7-11) in the Nose if the B-29 is pressurized at "HI" or "MED" altitude.
- If the area hit is the Nav/Radio or Waist compartment, pressurization capability for the B-29 is permanently lost (see Section 4.2).
- If the area hit is Nav/Radio, empty Bomb Bay, Waist, or Utility compartment, the following occurs:
- The B-29 immediately falls "out of formation" (see Section 4.8) if this is a "Day" Mission.
- The B-29 must spend two turns in each following zone (including two more turns in the Designated Target Zone after turning around), expending one fuel box each turn.
- The B-29 is assumed to have received every damage result roll possible for that compartment—examine the correct Damage Table and assume each number from 2 to 12 has been rolled (however, never roll for Explosive Decompression in any except the hit compartment except as noted above). Record this damage on the Mission Log Sheet.
- The landing roll on Tables 8-1 or 8-2 is -2 cumulative with any other modifiers.
- No "Evasive Action" (see Section 5.7) is possible for this aircraft.
- If the B-29 returns successfully to base, it is considered to be irreparably damaged and may not fly further missions.
Player Note: Players familiar with B-17 QUEEN OF THE SKIES should note that there is no additional Flak over Japanese held land zones simply for being at LO altitude. Japanese topography is drastically different than western Europe and Japanese ground force deployed in the Home Islands were more confined/less mobile, and more easily avoided if not directly over urban areas. Also, Japanese ground forces (compared to their German counterparts) were more poorly equipped and less well-trained for engaging aircraft.
"Stricken, burning B-29s had been seen to plunge to earth all along that fearful run from the initial point to the city. Cruelest and most sickening of all sights that night—the B-29 with one engine on fire which had been turned into flaming wreckage by the guns of hysterical gunners on another B-29." — James O'Keefe, B-29 Bombardier
6.3 BOMB RUN
A. Resolve the bomb run on the target by rolling on Table 6-6. Then roll on Table 6-7 to determine the percentage of bombs hitting within 1000 feet of the aiming point (or within a predetermined number of square miles on U/A missions).
Design Note: The strong, unpredictable winds over Japan made high altitude bombing very problematic, even on the (exceptional) clear days. Drift, airspeed, and bomb ballistics were difficult to reconcile. Moreover, high winds made a second pass impossible if the first run failed; and if a navigation error brought a bomber in downwind from the target, the bomb run might be impossible altogether. The move to lower altitude bombing at night helped solve this problem but, despite considerable RAF experience in night operations over Germany, the U.S. Army Air Forces lacked good target indicator markers and a high-quality night bombsight. Radar bombing typically achieved a more uniform pattern than visual bombing.
B. Ω If this is an Urban Area mission against a target listed on Table 2-2C (not Table 2-3 targets) at "LO" altitude (only!), roll 1D on Table 6-8 (and, if necessary, Table 6-9) to determine if B-29 encounters thermal turbulence from incendiary-caused fires.
Player Note: An "Off Target" result on a U/A mission does not mean that your bombs "missed" the city altogether (which was obviously difficult to do without a substantial navigation error). Rather, it means that your incendiaries have been released into a district outside the designated target area (in which case any fires started by your incendiaries alone could be much more easily contained), or into neighborhoods already on fire from the bombs of other B-29s.
6.4 Ω ADDITIONAL FLAK. Bombers could continue to be targeted by antiaircraft gunners on the run out from the target, i.e., after bombs away. Accordingly, immediately after completion of the bomb run, roll again on Table 6-2, except apply a "-1" modifier (bombers had more flexibility to maneuver at this point). This modifier is cumulative with any other modifiers used on the first Table 6-2 roll (going to the target).
6.5 TURN AROUND. After the bomb run is resolved, begin the return flight to base by turning the B-29 counter around on the Strategic Movement Track facing toward the track square labeled "20th Air Force Base." The B-29 will spend another turn in the Designated Target Zone, crossing off a fuel box for the turn normally, and resolving combat again per the procedure in Section 5.0. Use the previously rolled for weather effects in the Zone (do not roll again on Table 4-2 on this turn).
"We had entered a smoke cloud from the burning city, and I had never experienced such turbulence, not even in the most vicious thunderstorm. I yelled for the copilot to get on the controls with me, and we had no thought of trying to maintain altitude or direction. We were just struggling to keep the plane from turning on its back. The wild gyrations continued for what seemed an eternity until we emerged from the other side, and although it had been only a few minutes, both of us were exhausted and shaken from the fight to keep our 29 in the air." — Carter McGregor, B-29 pilot, The Kagu-Tsuchi Bomb Group, 1981
Bomber Damage
"We feel it has been worthwhile; we have to believe that. But the cost has been high. We've lost a lot of good men, especially key men like group and squadron commanders." — B-29 pilot
7.1. DAMAGE TABLES. Players may be directed to the following Damage Tables as a result of Bad Weather (Table 4-3), Random Event (Table 4-9) Japanese fighter attacks (Tables 5-3, 5-11, 5-12, and 5-15), Japanese Flak (Table 6-5), and Thermal Turbulence (Table 6-9). If any result on a particular table is rolled for more than once, the subsequent rolls have no effect unless the table instructions specifically indicate otherwise (exceptions to this are crew wounds and any note that requires checking to see if pressurization capability is compromised if not already compromised):
- 7-1 NOSE
- 7-2 NAV/RADIO
- 7-3 FWD BOMB BAY
- 7-4 AFT BOMB BAY
- 7-5 WINGS
- 7-6 WAIST
- 7-7 UTILITY
- 7-8 TAIL
- 7-9 COCKPIT INSTRUMENTS
- 7-10 ENGINEER INSTRUMENTS
- 7-11 EXPLOSIVE DECOMPRESSION
- 7-12 HAND HELD EXTINGUISHERS
- 7-13 WOUNDS
- 7-14 FROSTBITE
7.2 ENGINES OUT
ONE ENGINE OUT. With one engine out, the B-29 can stay in formation (if applicable, see Section 4.8) if it jettisons its bombs immediately. If the B-29 is already in the Designated Target Zone when the engine is knocked out, it may bomb the target and still remain in formation. Otherwise, if the B-29 keeps its bombs aboard and continues to the target with one engine out, it may not join formation or, if already in formation, drops "Out of Formation" (if applicable). A B-29 with one engine out and bombs aboard may not climb in altitude (see Section 4.1) and must spend two turns in each Zone due to slowness caused by the weight of the bombs. There is no additional fuel cost. Once the B-29 drops its bombs, it may continue its mission at the normal rate of speed of one Zone per turn and regains the ability to climb in altitude. When landing with one engine out, subtract -1 from the landing roll on Tables 8-1 and 8-2.
TWO OR THREE ENGINES OUT. The B-29 must jettison its bombs and auxiliary fuel tanks, drop "Out of Formation" (if applicable), and spend two turns in each Zone due to slowing (note that a B-29 is never required to spend more than two turns in one Zone, except when accounting for turn around, see Section 6.5). There is no additional fuel cost. A B-29 with two or more engines out and at "HI" altitude must drop to "MED" altitude, while a B-29 at "MED" altitude must drop to "LO" altitude (a B-29 at "HI" is not required to drop to "LO" on the same turn; this descent can be done in two turns). Note that if both inboard engines (#2 and #3) are out, pressurization capability is lost (see Section 4.2). When a B-29 has two or more engines out, attacking fighters add one (+1) to their Japanese Offensive Fire dice rolls. A B-29 with two or more engines out may not take "Evasive Action" (see Section 5.7). When landing with two engines out, subtract -2 from the landing roll on Tables 8-1 and 8-2.
ONE ENGINE OPERATING. If at "LO" altitude, the B-29 must either land immediately or the crew must bail out on Table 8-4. If at "MED" altitude, the B-29 may enter the next Zone (spending two turns in the current Zone), then it must either immediately land or the crew must bail out on Table 8-4. If at "HI" altitude, the B-29 may enter the next Zone (spending two turns there) and then one more Zone beyond it, then it must either immediately land or the crew must bail out on Table 8-4. When landing with only one engine, subtract -3 from the landing roll on Tables 8-1 and 8-2. Also, see above for additional effects.
NO ENGINES OPERATING. The B-29 must either crash land in its present Zone on either Table 8-1 or 8-2 (find this zone on Table 2-9 or the Strategic Movement Track to determine if the B-29 is over land or water, or see Note (c) if both land and water exist in the Zone), or the crew must bail out on Table 8-4. Once the last engine is out, the player must immediately choose either to attempt the crash landing or bail out. If crash landing with all engines out, apply the full modifier on Tables 8-1 and 8-3 for all engines out as well as the modifiers for elevators, rudder, ailerons, and wing flaps being inoperable. In addition, the landing gear may not be lowered (if not already lowered). Also, see above for additional effects.
Note that the "20th Air Force Base" square counts as a Zone for purpose of this rule.
7.3 FROSTBITE. Frostbite can occur in two situations:
- If pressurization capability (see Section 4.2) is compromised in any individual compartment—i.e., due to result from Damage Tables 7-1, 7-2, 7-6, 7-7, 7-8, or "Gunner Blister Blow-out" on Table 4-9—the B-29 may travel one more turn (beyond the current one) at "MED" or "HI" altitude (if applicable) and in formation (if applicable). Thereafter, the B-29 must immediately descend to "LO" altitude (and "Out of Formation", if applicable) for warmth, or risk frostbite to crewmembers in the affected compartment(s). Of course, if the affected compartment is not occupied by living crewmembers, there is no frostbite risk. If living crewmembers remain in a compartment where pressurization capability is compromised and the B-29 remains at "MED" or "HI" altitude beyond one turn, check for frostbite by rolling at the beginning of each turn (after movement) on Table 7-14 for each crewman in the affected compartment. Crewmembers in a non-affected compartment do not suffer frostbite.
- If pressurization capability is lost throughout the B-29—i.e., due to result from Damage Tables 7-3, 7-4, 7-5, or 7-10 (including any reference to Table 7-10 from Table 4-9)—or if the B-29 has been voluntarily depressurized and not re-pressurized for any reason, the B-29 may travel one more turn (beyond the current one) at "MED" or "HI" altitude (if applicable) and in formation (if applicable). Thereafter, to avoid risk of frostbite to crewmembers in all compartment(s), the B-29 must be re-pressurized (if able) or immediately descend to "LO" altitude (and "Out of Formation", if applicable) for warmth. (EXCEPTION: a descent to "LO" altitude is not required if it is possible to re-pressurize all occupied compartments.) If the B-29 remains unpressurized at "MED" or "HI" altitude beyond one turn, check for the possibility of frostbite by rolling one die at the beginning of each turn (after movement). On a result of "1" at "MED" altitude, or "1-2" at "HI" altitude, roll on Table 7-14 for each and every crewman in the aircraft. (On any other result, there is no possibility of frostbite this turn.) The B-29 may not rejoin formation in this case, if applicable.
Once a crewmember is frostbitten, he remains so for the remainder of the mission. Frostbitten crewmembers may perform no duties.
7.3 OXYGEN OUT
Design Note: The B-29 was equipped with 14 oxygen stations, each including a demand mask, a regulator, a pressure gauge, a flow indicator, and low-pressure supply cylinders. The system was supplied by 18 low-pressure, shatterproof oxygen cylinders located in the Utility compartment. Portable emergency oxygen bottles were available for short movements around the plane. The length of time that the oxygen supply could last varied depending on circumstances, but in general, there was more than 10 hours supply for a crew of eleven flying at 15,000 feet.
A. Two shell hits to a particular crewmember's oxygen system (cumulative over the course of a mission) will knock out the oxygen for that crewman. Two shell hits to the oxygen tanks in the Utility compartment will knock out oxygen to all crewmembers in the aircraft. In either case, the first shell hit has no effect. Keep a record of all oxygen system hits on the Mission Log Sheet. When the plane's or a crew member's oxygen is knocked out, the B-29 must descend to "LO" altitude (and "Out of Formation", if applicable) on the next turn. (Section 4.2 describes the procedure(s) for going on oxygen when depressurized.) In the event of oxygen loss to just a single crewmember, if a "vacancy" exists somewhere else in the aircraft due to the death of another crewman, the crew member with no oxygen can occupy that position and the B-29 can remain at "MED" or "HI" altitude (and in formation, if applicable). Similarly, if a B-29 is forced down to "LO" altitude by a crewmember oxygen outage, and later, due to the death of a crewmember or members, there is enough vacant functioning oxygen supply to accommodate all surviving crewmembers, then the B-29 may re-ascend to "MED" and "HI" altitude (but may not rejoin formation in this case, if applicable).
B. Oxygen fires can result from shell hit damage in the various compartments. When an oxygen fire occurs, place one of the Oxygen Fire markers on the appropriate section on the Crew Placement Sheet (see section 7.5 for extinguishing an oxygen fire).
7.5 AIRCRAFT FIRES. There are three portable fire extinguishers on the B-29, each represented by a counter placed on the Crew Placement Sheet at the start of play: one in the Nav/Radio section, one in the Waist compartment, one in the aft Utility compartment. Each may be sprayed once, and then it's empty. When a fire breaks out on board the B-29, one crew member in that compartment (or an adjacent one, if the fire breaks out in an empty compartment) must immediately be designated to fight the fire, using the closest available extinguisher. Used extinguishers are removed from play.
A crewmember may not perform any additional duties during the turn he is fighting a fire. Resolve any attempt to extinguish fires on Table 7-12. (The B-29 may be immediately depressurized per the procedures in Section 4.2 prior to resolving the extinguisher attempt.) If the first attempt fails, a second attempt may be made in the Waist or Utility compartments if a second extinguisher in either of those two compartments is available. Only one attempt may be made in any other compartment. If a fire in the Nose or Nav/Radio sections is not out after one attempt, the crew must immediately bail out on Table 8-4. If a fire is not out after one attempt in any other compartment (or after two attempts in the Waist or Utility compartments), the B-29 may enter the next Zone and then the crew must bail out on Table 8-4.
7.6 CREW MOVEMENT
A. Each member of the crew is represented on the Crew Placement Sheet by his individual counter. Whenever a crewmember is wounded or KIA, mark his counter with the appropriate Wound marker or a KIA marker as applicable. Crewmembers may be moved into different compartments, either to perform a specific action (e.g., fighting fires, see Section 7.5) or to replace a wounded or KIA crewmember. All crew movements are made at the beginning of a turn. Section 4.2 details pressurization/depressurization requirements for crew movement. The maximum number of crew members that may be in any compartment at any one time is as follows:
- Nose – three (3) crewmembers
- Nav/Radio – seven (7) crewmembers
- Waist – five (5) crewmembers
- Utility – three (3) crewmembers (remember that the Utility compartment is never pressurized)
- Tail – one (1) crewmember
KIA crewmembers do count against these totals. A KIA crewmember may be moved into any adjacent compartment by any one crewmember performing no other duties on one turn (in this case, two crewmembers, including the KIA, may temporarily occupy the Tail section; tail guns in this case must be fired from the Waist). A KIA crewmember may not be moved between the Waist and Nav/Radio sections; a KIA crewmember may never be thrown out of the aircraft.
B. Crew movements can be made within the same compartment with no penalty (e.g., gunners in the Waist compartment can switch positions at any time). If crew movements are made into or between different compartments during a turn on which the B-29 is attacked, then the moving crewmember(s) may not fire any guns during that turn.
C. Lightly wounded crewmembers may move under their own power. Seriously wounded crewmembers may only be moved (into any adjacent compartment—exception: a seriously wounded crewman may not be moved between the Waist compartment and Nav/Radio section) with the assistance of another crewman performing no other duties on one turn. Wounded men may not be placed (or remain) in an unpressurized compartment if the bomber is pressurized.
D. A crewmember occupying another crew position on the Crew Placement Sheet assumes any future damage taken by that new position (ignore damage to his previous position unless that one has also been replaced).
E. If both Pilot and Copilot are still functioning with no worse than a light wound, the Copilot may temporarily vacate his post to fight a fire. Otherwise, the Pilot and Copilot must stay in their normal positions.
F. Any crewmember may fly the B-29 if the Pilot and Copilot are both seriously wounded or KIA, but the first one to take over flying must be the Flight Engineer. If the Engineer is subsequently or already seriously wounded or KIA, then anyone else may take over with appropriate modifier to the landing (see Tables 8-1 and 8-2).
Ending the Mission
"My greatest worry was thinking of the possibility of ditching in that dreary ocean." — B-29 crewmember
8.1. LANDINGS. There are four types of landings which can occur at the end of a mission. The first is a landing in the Marianas ("20th Air Force Base"), the second is landing at Iwo Jima (if US-controlled), the third is a landing in enemy Japan, and the fourth is a crash landing (or ditching) into the sea. (Note that a plane with inoperable Pilot and Copilot controls—see Table 7-9—may never be landed, the crew must bail out instead.) Landings are accomplished by rolling 2D on either Table 8-1 or 8-3. Damage received in combat plus circumstances described in the modifiers to these tables may affect the chance of landing success. An unsuccessful landing can mean destruction of the B-29 and death or injury for the crew.
"Dozens of returning bombers swinging wide over the water and jungle at Guam in the evening, landing lights on, wheels and flaps down, safely home to roost." — Andy Doty, B-29 tail gunner
8.2 BAILING OUT. Crewmembers may bail out over the Marianas ("20th Air Force Base"), over Iwo Jima, over Japan, and into the sea. Crewmembers bail out from a plane under control on Table 8-4 or from an uncontrolled plane (as may be directed from results on Table 4-9 or the Damage Tables, see Section 7.0) on Table 8-5. If pressurized (see Section 4.2), the B-29 must be depressurized prior to a controlled bail out (see Table 8-4). Failure to depressurize for bail out results in a roll on Table 7-11 required for any pressurized compartment containing one or more exiting crewmembers (in this case, crewmembers do not go on oxygen but they may be wounded/injured). If the bomber is pressurized when bail out from an uncontrolled plane is required (see Table 8-5), no option to depressurize is available. A roll on Table 7-11 is required in this case for any pressurized compartment containing one or more exiting crewmembers.
8.3 THE MARIANAS. A B-29 at "LO" altitude in Zone 1 may attempt to land at "20th Air Force Base," assuming it has sufficient fuel to exit the Zone (see Section 4.3), receives an "On Course" result on Table 4-8 in Zone 1 (see Section 4.5), and is not otherwise restricted from proceeding as a result of two or three engines being out (see Section 7.2). Roll for landings in the Marianas on Table 8-1. Do not resolve weather (Section 4.4), navigation (Section 4.5), and random event (Section 4.6) in the "20th Air Force Base" base square prior to landing. Apply any weather modifier based on the weather result (Table 4-2) previously rolled for Zone 1. Crewmembers may voluntarily bail out (Table 8-4) over "20th Air Force Base" prior to attempting a dangerous landing (or if landing is impossible). Crewmembers who safely bail out in these situations are automatically returned to duty.
8.4 IWO JIMA. A B-29 in Zone 6 may attempt to land at Iwo Jima if available as a friendly base (Missions #11-35). Resolve weather (Section 4.4), navigation (Section 4.5), and random event (Section 4.6) in Zone 6 before attempting to land. Iwo Jima was often subject to fog, making landings there more difficult. Accordingly, if "Weather in Zone" for Zone 6 (Table 4-2) was "Good", roll 1D and apply the following: "1-4" = "Good" weather for landing, "5-6" = "Poor" weather for landing. If "Weather in Zone" for Zone 6 (Table 4-2) was "Poor", roll 1D and apply the following: "1-4" = "Poor" weather for landing, "5-6" = "Bad" weather for landing. Roll for landings at Iwo Jima on Table 8-1. Crewmembers may voluntarily bail out (Table 8-4) over Iwo Jima (Zone 6, Missions #11-35 only) prior to attempting a dangerous landing (or if landing is impossible). Crewmembers who safely bail out in these situations are automatically returned to duty.
8.5 JAPAN. A B-29 may be forced to land in Japan in Zones 10-14, or the crew may have to bail out in these Zones. Consult the Flight Log Gazetteer (Table 2-9) and cross reference the Zone the B-29 now occupies with the Mission Target. The letter notation to the right of the slash mark will detail whether the B-29 is over water, land, or some of both (W = Water; J = Japan; O = Okinawa). Where a zone shows two code letters, the player has a choice of where to land if the B-29 is under control or if bailing out voluntarily. If forced to land or bail out in such a zone, roll one die: on a roll of "1-3" the first letter applies (i.e., water), on a roll of "4-6" the second letter applies (i.e., land). A B-29 which must make a mandatory crash landing (or ditch) in Zones 10-14 must resolve any combat normally before landing/ditching (the plane is considered to be "Out of Formation," if applicable). If landing in—or bailing out over—water, see Section 8.6. If landing on land, the B-29 is automatically assumed to be landing in some open area of Japan. Roll for the landing on Table 8-1, subtracting -4 from the dice roll. Crewmembers who survive landing on land, or bailing out over land, are considered captured; roll to determine the fate of each on Table 8-7.
8.6 THE SEA. Ditching at sea is necessary if the B-29 is forced to land in Zones 1 through 9 (exception: a landing may be attempted at Iwo Jima in Zone 6 on Missions #11-35, see Section 8.4), or if the B-29 is landing in water in Zones 10-14. Ditching in the sea is preferable only to bailing out into the sea. Roll for landings in water on Table 8-3 after checking the sea state on Table 8-2 (which may provide a dice roll modifier). A roll on Table 8-2 is required if bailing out over water. (After checking sea state, a player may choose to have his crewmembers bailout rather than attempt ditching at sea.) For each crewmember who survives landing in the sea—or survives bailing out over water—roll on Table 8-6 to determine if the crewmember survives at sea and is rescued, or is lost. Rescued crewmembers are normally returned to duty in the Marianas (note, however, that crewmembers rescued in Zones 10-14 may be captured, requiring a roll on Table 8-7 for POW survival). A B-29 landing at sea is considered permanently lost.
Design Note: Statistically, over the course of the Twentieth Air Force's entire campaign against Japan, just under 50% of those crewmen known downed at sea were successfully rescued. US Navy destroyers and submarines were assigned to rescue duty at regular intervals along the route between the Marianas and Japan, while long range aircraft—specially modified to carry lifeboats and other droppable survival gear—patrolled the areas in between. (In some cases, crewmen were successfully rescued just a few miles from the Japanese coast.) The chances of being spotted and rescued were better for those crews who survived a ditching attempt (especially if much or all of the plane stayed afloat for any length of time) versus those who had to parachute individually—although ditching, notoriously difficult even in the best of circumstances—was a perilous endeavor in the characteristically rough seas and unpredictable weather of the Pacific Ocean.
Victory Conditions
"Unfortunately, the B-29 is a splendid plane. As I sit at my desk writing and look up at the sky, countless numbers are passing over." — Empress Nagako, 1945
9.1 POST-MISSION DEBRIEFING. Before beginning the next mission, players must resolve the fate of any returning seriously wounded and frostbitten crewmembers (see Tables 7-13 and/or 7-14), then log the results of the just completed mission on the Campaign Log Sheet. Note the percentage of bombs dropped on target in the appropriate column. Destroyed B-29s, and crew members who will not be flying again, are crossed out. Notes can be added to lost crewmen to describe their fate: KIA (killed in action), DOW (died of wounds), LAS (lost at sea), IH (invalided home), BO-C (bailed out, captured), CAS (captured at sea), DIC (died in captivity). When a bomber or crew member is lost, pencil in a new name in preparation for the next mission.
9.2 Ω URBAN AREA DAMAGE ASSESSMENT. Regardless of whether or not your B-29 successfully bombed its target, for each U/A mission (Table 2-2C or 2-3), roll on Table 9-1 to determine damage to the target. The table may direct that one box be crossed off on the Target Damage Sheet for the target city. Once all boxes are crossed off for a particular city, that city is considered "bombed out" and no more U/A missions will be flown against it (non-U/A missions may continue). (If a "bombed out" city is rolled for on Table 2-2C, then roll instead for a target on Table 2-3.)
9.3 MISSION VICTORY CONDITIONS. A B-29's bombing results and survival determine whether a mission is a Twentieth Air Force Victory, a Japanese Air Defense Victory, or a Draw.
A. A mission is considered a Twentieth Air Force Victory if the B-29's bomb run was "On Target" and the B-29 returned to the Marianas (or Iwo Jima on Missions #11-35) not irreparably damaged (a B-29 can only be irreparably damaged by a Flak BIP or crash landing).
B. A mission is considered a Japanese Air Defense Victory if either the B-29 was destroyed in combat, ditched at sea, crash landed in Japan, or was irreparably damaged in combat (i.e., Flak BIP) or while landing.
C. A mission is considered a Draw if the B-29 was unable to bomb the target or if the bomb drop was "Off Target", but returned to the Marianas (or Iwo Jima on Missions #11-35) not irreparably damaged (a B-29 can only be irreparably damaged by a Flak BIP or crash landing).
9.4 CAMPAIGN VICTORY CONDITIONS. The cumulative results over 35 missions determine victory in a campaign. At the end of a 35 mission campaign, total the number of Twentieth Air Force Victories and Japanese Air Defense Victories, and ignore the number of Draws. The side with the most victories is the "winner" in the campaign game. In addition, the survival of an individual bomber or crewmember over several missions can be measured as a relative performance rating. See Tables 9-2 and 9-3.
Japanese Fighter Types Featured in B-29 Superfortress
- Kawasaki Ki-45 Toryu ("Dragon Slayer") Allied codenamed "Nick." Two-seat, twin-engine Army fighter, similar to the Messerschmitt Bf-110, with heavy armament capable of knocking down B-29s, but unsatisfactory performance at high altitude. Used as the Army's primary night fighter and also for ramming tactics late in the war.
- Nakajima Ki-61 Hien ("Flying Swallow") Allied codenamed "Tony" (based on a mistaken assumption that the plane was a derivative of an Italian design). Single-seat Army fighter with liquid-cooled engine. Near the end of the war, Tony airframes were fitted with the new Ha-112 radial engine—the derivative (designated Ki-100) proved amazingly effective in combat.
- Mitsubishi A6M5 Type "Zero", Model 52 The most famous Japanese fighter of the war, officially nicknamed "Zeke" by the Allies but widely referred to by its Japanese designation. Obsolete by 1945 despite efforts to modernize it; the Zeke's chief flaw was its inability to withstand punishment in combat.
- Nakajima Ki-84 Hayate ("Hurricane") Allied codenamed "Frank." Army single-seat fighter, solidly designed, and well-suited for high-altitude combat. Its excellent potential was limited by poor production quality, fuel problems, and inexperienced pilots.
- Nakajima Ki-44 Shoki ("Demon"—also sometimes translated as "Devil Queller") Allied codenamed "Tojo." Army single-seat fighter designed for speed and climbing ability, used to intercept high-flying B-29s. Disliked by pilots for poor visibility and weak armament. At least one Tojo-equipped unit was organized for collision tactics.
- Nakajima Ki-43 Hayabusa ("Peregrine Falcon") Allied codenamed "Oscar." Most widely used Japanese Army fighter of the war. Single-seat, similar in performance and ability to the Zero, but even more lightweight and less rugged.
- Kawanishi N1K2-J Shiden ("Violet Lightning") Allied codenamed "George." Single-seat Navy plane, arguably the finest Japanese fighter design of the war. Well-armed and endowed with exceptional performance characteristics—but a classic case of "too little, too late."