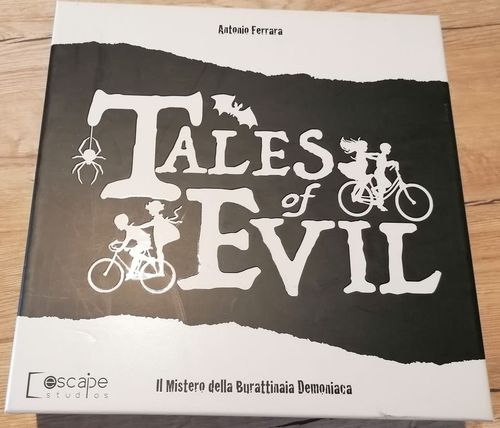
Tales of Evil
Tales of Evil Rulebook
Table of Contents
Table of Contents
Content
- 1 Rulebook
- 1 Story Book
- 1 Event Book
- 5 Dice
- 6 Game boards
- 7 Investigator boards
- 7 Investigator standees
- 1 Board of events
- 1 Hourglass
- 7 Investigator Bases
- 7 Investigator Miniatures
- 1 Aberration Miniature
- 216 Cards
- 1 Walkie-Talkie Token
- 1 Terror Token
- 1 Panic Token
- 1 Group Token
- 2 Aberration Tokens
- 4 Key Tokens
- 4 Mystery Tokens
- 4 Secret Passage Tokens
- 4 Dark Tokens
- 4 Passage Token
- 6 Match Tokens
- 4 Clue Tokens
- 10 Track Tokens
- 10 Barred Tokens
- 10 Find Tokens
- 18 Battery Tokens
- 24 Body Tokens
Setup
-
Take the Investigators' cards and read the back, so as to start getting to know the members of the group and discover part of their history and their characteristics.
-
Choose one of the Pizza & Investigation members. A Brave (player), if they wish so, can play more Investigators at the same time.
-
At the beginning of each game, each Brave (player) must equip themselves with:
- A card of the investigator they have chosen.
- A stand / miniature that represents it.
- The Status cards (based on the difficulty level) that represent your investigator (to be placed in the center of the card and sort progressively with the number 1 at the top and visible, then the numbers 2, 3 and 4).
- The Body tokens, Mind tokens and Scary tokens marked on the Status card #1.
- The 3 Battery tokens.
- The 3 Action cards related to your Investigator.
Note: The Brave who chose Daphne must also equip themselves with Ritual cards.
-
The Brave at the table whose birthday is next takes the Walkie-Talkie token.
-
Equipment and special cards are set aside.
-
Covered on the table, the decks of the Find, Event and Trauma cards are mixed separately.
-
Take the "Chapter" card you intend to play and follow the instructions.
Note: One of the players in addition to interpreting one of the investigators has the task of narrating the story to themselves and their companions (it is preferable to entrust this role to the one who is a better reader and who has strong interpretative skills).
Note: During the adventure other investigators can be added, but if on another occasion, you are more or fewer at the table do not worry, the newcomer will only have to choose one of the available characters and equip themselves normally. You can also sell some items in your possession to buy the newcomer some equipment from the "Recovery Shop" represented by the Equipment deck.
WARNING: Never look at the cards if you are not told to, not to ruin the game experience. Consequently, the contents of the card should not be disclosed before the cards are picked.
Difficulty Level
In Tales of Evil you can choose the difficulty level to play the missions based on your skill and according to the scheme below:
- Easy: Start the mission with all four Status cards.
- Normal: Before starting the mission each investigator will have to discard the Status No. 1 card. Then you will start playing with only 3 Status cards (2, 3 and 4).
- Hard: Before starting the mission each investigator will have to discard the Status No. 1 and No. 2 card. Then you will start playing with only 2 Status cards (3 and 4).
Note: We advise you to start playing with the Normal Level and then (if you wish) adjust the difficulty level of the subsequent missions based on the results obtained.
ATTENTION: If this is the first time that you "play" open the book "The Mystery of the Demonic Puppeteer" and start reading from the beginning. The book will introduce you to the atmospheres of this extraordinary experience through a tutorial mission and will introduce you to the adventure.
Investigator Card and Status Cards
Before starting your experience, I suggest you read these few lines to understand how the Investigator card and Status cards work.
If you fail a test or if you are hit by a creature or event, you will generally be forced to discard some Body or Mind tokens. When there are no more Body or Mind tokens available, you begin to lose the Scary tokens. When you have lost all the Scary tokens, you must discard the Status card you have at the top of the deck and refer to the second available Status card. In this case, reinstate all the Body, Mind and Scary tokens marked on the new Status card.
Note: When changing the Status card the Battery tokens are never implemented again, but they remain the ones you had previously.
When you are forced to discard the last Scary token the last status (4), your Investigator must consider themselves out of action and therefore will not be able to continue their adventure, but do not worry because, at that point in all probability, the game will be lost.
Investigators Action
Choose - Move - Attack - Perform a characteristic shot - Use an object - Perform a Ritual - Search - Organize - Sell and Buy
Choose: Often the Story book and the cards ask you to make choices.
-
Individual choices: the choice is made by who is acting at that moment (the one holding the Walkie-Talkie).
-
Group choices: all of you are voting in unison, using an ancient method: Your hand! Example: The Story book asks you if you intend to proceed towards port 1-A, 2-B or 3-C. All together at the same time you must indicate your preference by your fingers. The number that has been most successful will be the way to go. In the event of a tie, the one who owns the Walkie-Talkie at that time will decide.
Note: In order not to be influenced by the choices of others, the Braves must show their preference in unison with their fingers. This way of deciding the fate of Pizza & Investigation anticipates the Fusion System that we will see later. To make sure you all vote together, the gang kids use a nice trick that you can use too. It will be sufficient for the holder of the Walkie-Talkie to shout out loud "Pizza & Investigation!" And at the end of the sentence everyone will have to indicate a number with the fingers.
-
Match tokens (this will be signaled by the story or the cards): You take as many Match tokens as there are Braves playing. The one who carries the Walkie-Talkie at that time will hold them in the fist of the hand and everyone else will draw a Match. Whoever has drawn the shorter one, will have to make the choice or in any case act or suffer something indicated in the Story book or in the cards.
Moving: The general rule is that the investigators move in groups, as if they were a single entity, unless otherwise specified. When a new area is revealed through the opening of a passage/door (generally the result of a choice) all the investigators move their miniature in the new area. To open a door or a passage in the area where you are, there must be no creatures or active events to solve. So, in a situation of "calm" you can explore new areas and follow the directions given in the Story book.
Attacking: To attack, the investigator will roll as many dice as are marked on their status card. Ex. Peter meets a Creature from an Event card and, after being attacked, tries to attack it in turn. In this case he will roll as many dice as are marked on the value of his Status card + any bonuses given by his equipment and subtract so many Body tokens as there are Hits obtained.
Defend: To defend against an Aberration the investigator will roll as many dice as are marked on their Status card plus any bonuses given by any equipment cards. It must be said that the investigator will lose as many Body tokens based on how many hits he will not be able to repel. Example: Peter is attacked by a mummy that has these characteristics: Attack 3, Body 2 and this means that Peter will have to get 3 Hits to get out of it unscathed, while he will lose 1 Body token for each unspent shot. Explanation of the creature's characteristics: Attack 3, Body 2 where Attack 3 indicates how many hits the creature scores with each attack and Body 2 represent the creature's life points.
Making a Characteristic Shot: During your experience, you may be asked to take some tests, related to your characteristics. Example: Peter draws an Event card that requires him to face a Perception 2+ (Body) check to save himself from the rubble. Peter must roll as many dice as his Perception value and try to pass the test to avoid losing Body tokens. For each Hit, he will cancel a hit he should suffer. So in this specific case Peter will have to get at least 2 Hits to come out unscathed. The value represented in brackets in this case indicates the tokens that will be lost if the attack cannot be repelled. If for example a Perception 2+ (Mind) test had been requested, Peter would have to get a 2 Hits or more so as not to lose Mind tokens.
Using an item: Items are represented by cards drawn from the Finders deck or Equipment cards and can be used at the discretion of an investigator during their turn or traded to the Recovery Shop for new equipment.
Perform a Ritual: Some types of equipment allow the use of Rituals. The investigator can use only one Ritual in their turn, but combine it with other actions such as attacking, using an object, and so on. Some Rituals can also be used during another investigator's or Event/Creature's turn if it is indicated on the card. The cost of ritual cards is always paid by those who use them and not by those who are targeted. Example: Daphne uses a Fortification of Level 2 ritual to help Peter who was attacked by a creature, but this to Daphne will cost the loss of a Mind token. Depending on how described on the Equipment card, some Rituals can be generated rather than others. For example, to use the "Ritual of Light" the investigator will have to be equipped with a weapon of Liv. 2 or higher.
Search: When you encounter a find token, or are given the opportunity to search, the Walkie-Talkie holder can do a search. The investigator who currently holds the Walkie-Talkie can draw a Find card, face the test on the card and apply its effects according to the result obtained. The card always requires a Feature test (marked on the Find card), unless otherwise specified. If there are more search tokens in the area, proceed in an orderly manner in a clockwise direction, starting with who at that moment has the Walkie-Talkie. So for example, Peter collects the first search marker, then it's up to the brave to his left to pick up the second and so on.
Get organized: Investigators can organize themselves during their shift provided that there are no impediments in the room (Creatures, Events, hostile presences, etc.). Organizing consists in exchanging or using objects and equipment of various kinds among the investigators who are in the same area.
Selling and Buying: Investigators who are in the whereabouts of "The Recovery Shop" and have access to the Equipment deck can trade collected items (Find cards) for equipment cards. A value is indicated on each Find card. When accessing the equipment deck (the Story Book indicates when), you must add up the value of the cards and spend the accumulated points to purchase the Equipment cards. The excess points are lost at the end of the sale. All the Research cards traded during the sale are placed on the bottom of the relevant deck.
Note: All cards, regardless of their type, when discarded or traded must be placed on the bottom of their decks.
Investigator Sheet and Status Cards: Each investigator is equipped with an investigator card that shows the traits of their character on one side and a dashboard where the status cards and equipment are placed (never more than one per type). At the beginning of each Chapter the status cards must be placed on their Investigator card in sequence from the number 1 on the top up to the number 4 on the bottom.
When an investigator is hit, they loses a number of Body, Mind tokens indicated by the current event. Then they start to lose Scary tokens.
Example: Peter starts with 4 Body tokens, but during the adventure he loses 3, remaining with a single Body token. Unfortunately later in his journey, he is fatefully attacked by a creature that gives him 3 more wounds. Peter at this point only has one Body token and then starts losing Scary tokens. In this specific case, Peter loses 1 Body token (his last remaining) and 2 Scary tokens.
Note: An investigator can never have more tokens than indicated on their status card. The tokens earned in excess are not implemented.
When an investigator runs out of all Scary tokens, they must be considered Stunned and must:
- Discard their status card from the top of the deck.
- Reinstate all the tokens (Body, Mind and Scary) according to the indications of the new status card.
- Advance the Terror token on the board of events by one position.
Stunned: When an investigator is stunned, unless otherwise specified by the Story book, they remain out of the game until the end of the current event, but they can return to play again as soon as the event is over.
When an investigator is stunned they cannot act, attack or defend. Therefore, events and creatures ignore them as if they were not there. An investigator that loses all their Scary tokens is considered to be out of combat.
Be careful because as you may have noticed, the status cards are progressive and this means that, for each status card discarded, the investigator state worsens. The status card #4 is the limit and an investigator in this state can become a burden to themselves and their friends.
It's necessary to collaborate, helping them with rituals, objects and action cards to prevent them from suffering further damage. If the investigator further exhausts the Scary tokens he or she will be considered out of action and will remain inactive until the end of the current Chapter, but do not worry because as already said at that point probably the mission will have failed.
Battery tokens are never replenished, but can only be earned through the events described in the Story Book and from the cards or be donated by other investigators. Battery tokens are re-integrated at the beginning of a new Chapter, like all other tokens.
The Dice
In Tales of Evil there is only one type of dice that performs all the functions of the game.
Each door, passage, and area is identified by letters and numbers. These letters identify the doors, these numbers identify the tile, and these numbers identify the areas.
Bull's Eye/Hit: the face of the dice with this symbol is a valid result in all situations and can be used to your advantage, because it is a positive result. Equivalent to a "Bull's Eye/Hit".
Spider: the Spider is a negative result, since it eats another die at the discretion of the one who obtained the result. The Spider is canceled by a Turtle result.
Turtle: the Turtle cancels the Spider result, but depending on the situations described by the story book or by the cards it can also take other values/meanings.
Flashlight: the Flashlight result, regardless of the outcome of the other dice, allows you to activate the investigators' special abilities (they are often marked on some equipment cards). To take advantage of a special ability investigators must spend one or more Battery tokens in their possession. A Flashlight result temporarily suspends all interactions between the dice. (Ex. Mike in a roll of three dice gets these results: Hit - Spider - Flashlight. In this specific case the Spider should eat/cancel the Hit or Flashlight result at the investigator's discretion, but since Mike is equipped with "Mike's slingshot" (Special card 5) which as a special ability allows him to withdraw a die at the cost of a Battery token, Mike decides to withdraw the Spider result.)
Direction Arrows Symbols and Numbers: On each side of the dice there are arrows, some symbols and numbers that will be taken into consideration based on the indications of the Story book or of the cards.
The Story Book
The Mystery of the Demon Puppet-mistress is the heart of Tales of Evil and tells you about the adventures of Pizza & Investigation in the haunted house. The book is divided into chapters that represent the missions to be completed in order to access the next adventure. The stories told by the book are non-linear and, based on your choices and a series of events, the story can change and evolve differently.
Event Book: This is a book to refer to each time it is explicitly requested by the Story book or by the cards. The book also contains the texts of the so-called "Fusion System". For example, if the game asks you to make a phone call, view an audiovisual or otherwise perform some action that requires the use of technology, but you are unable to do so, you will have no problem because you can go to the relevant page of the "Event Book" and discover the transcript of the message. This makes the game completely analog and technology-independent.
The Boards: The game boards depict the various environments that make up the haunted house (rooms, corridors, gardens, etc.). You will place them on the table as instructed by the Storybook. Each door, passage, and area is identified by letters and numbers. Generally, an "area" is a place surrounded by walls, other obstacles, and doors.
A typical page of the Story book: The pages of the Story book are generally divided into three sections. At the top you'll find the numbers that indicate the paragraphs contained in the page, followed in the lower center by the paragraph number, while on the left you find the name of the paragraph and immediately after that, the description of what is happening. The last part is about "The Choice" which tells you what you can do.
Déjà-vu: Visiting the same area several times, you can run into some choice options you already made and it is up to the Brave to discard it a-priori in order not to end up in a déjà-vu. Example. You are in a room where there are two clues "1" and "2". Let us assume that you decide to collect the clue 1 and that, for various vicissitudes, you want to leave the room without revealing clue "2". Later, however, you decide to return to the room; it is probable that, at this point, the story tells you that there are two clues, but you can collect only the clue "2" since the other you have already collected previously.
Lost: I recommend using a bookmark before starting your adventure, so as not to get lost along the Story. However, it could happen that the narrator, for obscure reasons (Evil works continuously so that you won't complete the experience) loses the mark, the page or the reference on the Story Book. At that point you will be lost and end up in an endless limbo where ancient demons will devour you ... No, no, joke. If you ever get lost, just remember the chapter you were playing. You will have to consider the "Failed Mission" and start over.
Designer Kit: Tales of Evil was designed to bring an experience to life. Everyone can create adventures for Tales of Evil and in this perspective I thought of structuring the Story Book so that everyone can easily create their own adventures and put them online so that other Braves around the world can venture into the nightmares you create. At www.talesofevil.com/toecreator/ you can download a program that will allow you to create your adventures.
Saving System: This is the game rescue system, which works very simply. It will be sufficient that at the end of each game the Status, Equipment, Find and Special cards of each of the investigators are saved in a separate slot, so that, at the next game, you take the Chapter card you intend to play and then take the decks of cards previously stored in the slot. With just a few moves you will be ready for a new adventure.
The Fusion System
When you encounter a challenge bearing the word Fusion, start the hourglass. You must complete the challenge before the time expires.
Tales of Evil is a unique experience. Going on in the narration, you will be catapulted into the adventures of the Pizza & Investigation not only by using the components contained in the box, but also through real life action. It will be an experience like never before: you will enter the game and at the same time the game will enter you.
I don't want to spoil the surprise, but to better understand what we're talking about I can give you an example of what awaits you once you start playing. For example, you may be asked to be in the presence of a burning fireplace in order to start a fire, but we are not talking about an imaginary fireplace inside the game, but a real fire, present in the place where you are playing the game. Tales of Evil is an experience that links real life with that of the game. Living this adventure is not like participating in any other game, but it means being directly involved. When you meet the "Fusion" keep your eyes open because even the ringing of a phone or the barking of a dog could get you caught, while you are furtively crossing a room full of creatures. You may need a couple of AA batteries to take out of a watch you have at home to couple them with a Flashlight that you will find in the game to light up your path inside the house and so on ... There is a lot of more than you can expect, but it's up to you to find out.
The Fusion System could include various activities that require the use of technology, so you may be asked to visit a web page, view audiovisuals, make a phone call, etc., but you will not be forced to do so and you will be able do without this thanks to the "Book of Events" which also includes all the transcriptions of the Fusion texts.
Ending a Chapter
The other cards, on the other hand, especially the Find and Event cards should never be mixed with the events and findings that you have already revealed during the other adventures of the campaign. We advise you to keep these cards aside or place them on the bottom of the related deck in reverse, so you will never get confused.
Each chapter can end in three different ways.
- Mission Accomplished: You have succeeded in completing the main objectives of the Chapter you were playing and you can continue to play the next Chapter.
- Mission (almost) complete: You have succeeded in completing the Chapter, but not in completing some of the main objectives. In this case you can decide to start playing the next chapter or consider the mission failed and try again. To you the choice.
- Failed Mission: This happens when the Terror or Panic token reaches the Group token. In this case the mission failed and you will have to try again by learning from the experience you have gained.
Events Board
The set-up of the events dashboard is established by the Story Book and manages the parameters of Terror and Panic. On it are placed the Group, Terror and Panic tokens. The general rule is that when the Terror or Panic token overlaps with that of the Group, the current Chapter will be considered as failed.
Group token: It is the token that is placed on the scale to indicate the limit of the Chapter that is being played. In fact, if the Terror or Panic token overlap it, the investigators fail the ongoing incursion (Mission Failed) and are forced to follow the instructions on the Chapter card that are playing at that time.
Terror token: It is the token that represents the level of Terror and always starts from the position indicated on the Events Board unless otherwise indicated.
Panic token: It is the token that indicates the progression of a possible Aberration described in the Story book (water, fire, etc.) and always starts from the position indicated on the Events Board unless otherwise indicated.
Cards
Chapter cards: these cards contain instructions for playing a new chapter, as well as guidelines on what to do if the raid fails.
Find cards: these cards represent the objects that investigators find during their research and generally require a test to determine the effects of the card. These are useful items that can be used while playing or bartered at the Recovery Shop (Equipment deck) to purchase new equipment. All the finding cards are preserved even in case of failure of the test, unless otherwise specified on the card or in the Story Book.
Aberration card: on this card you must place the Body and Mind tokens of the creature you are facing. This will make it easier for you to check them out during a fight, making Body or Mind points visible to all, and that you will need to reduce to zero to eliminate the creature.
Note: Generally all cards (regardless of type) when used will be discarded and placed at the bottom of the relevant deck unless otherwise specified. This is the case for example of Action cards that will always be discarded when used and can only be reinstated at the beginning of a new mission.
Special Cards: These are cards with numbered backs, which must be drawn according to the indications contained in the Story Book or in other cards.
Trauma Cards: These are debilitating cards that are drawn according to the indications contained in the Story Book or in other cards.
Ritual Cards: The rituals can only be used with some types of equipment, only available to Daphne. At the start of each game, the latter will be equipped with all the Ritual cards, but will be able to use only a few based on what is described on the cards of her equipment. A magic weapon of Lev. 1 can generate Rituals of Lev. 1 while a weapon of Lev. 2 can generate Rituals of Lev. 1 and 2 and so on. Some types of Rituals include a cost that must be paid by Daphne herself in order to be executed, even if the effects are targeted at another investigator.
Equipment Cards: These are the cards that are on sale in the "Recovery Shop" of old Jack and can be purchased by investigators between an adventure and another by bartering Finding cards or old equipment.
Event Cards: They represent the events or creatures that populate the universe of Tales of Evil and are drawn when it is specifically required by the Story book or other cards. Usually, this symbol appears in the middle of the narration and indicates to immediately draw an Event card and continue the narration on the card.
Action Cards: These are the cards with which the investigator is equipped at the beginning of each Chapter and which will allow them to act even outside his own turn. All Action cards also allow you to retry a dice roll, but in this case you must be directly involved. That is, it is not possible to have another investigator roll a dice through your own action card.
Status Cards: These are the cards that represent the state of physical and mental health, as well as the characteristics of each Investigator and must be positioned on the Investigator tab in sequence from the number 1 on top down to the number 4 at the bottom.
Tokens
Clue: It should be positioned as indicated in the Story Book and may represent something interesting within an area.
Darkness: Darkness is a disabling condition: it does not allow you to do research when entering a zone and might bring other consequences from time to time, as described in the Story Book.
Barred: It must be placed on passages and on inaccessible doors and indicates that this road cannot be traveled.
Mystery: Indicates a particular point of interest, a mystery, a change or a situation that would deserve your attention, such as a suspicious noise or other events that occur in a particular area described by the book.
Search: When exploring a new zone, the Story book may require you to place one or more such tokens to indicate that there is something to collect. The P&I kids are always looking for junk. After the search has been carried out (draw a Find card), the token can be removed.
Passage: It acts as a bridge between two distant areas that are not adjacent and therefore apparently inaccessible.
Secret Passage: Allows access to adjacent areas that were previously inaccessible.
Trace: It could be fingerprints, or debris or even a liquid, a tentacle or anything described in the Story Book. These are real traces that spread from one area to others.
Body: They are used by investigators to indicate how many body points they have at their disposal and when you need to keep track of the body points of a creature.
Mind: They are used by investigators to indicate how many mind points they have at their disposal and when you need to keep track of the mind points of a creature.
Scary: They are used by investigators to indicate how many Scary points they have at their disposal.
Battery: These represent the resources the investigators can spend to activate special abilities marked on equipment cards. Also, you get "batteries" when the die returns a "Flashlight" result. Batteries can also serve other purposes, for example, they can power electrical instruments or be useful in various situations described in the Story book.
Matches: They should be used when there is a need to randomly decide which investigator should act or for other decisions described in the Story book or in the cards.
Walkie-Talkie: Indicates the first player in order of initiative in all situations that arise in the game. Whenever a new zone is explored, the token passes into the hands of the next Brave to the left of the current holder. This token can also be passed according to the indications in the Story Book or the cards.
Aberration Token/Aberration Miniature: Can be a hazard or anything that is a Aberration and is positioned according to the indications of the Story book.
Special tokens: They represent four symbols (Hearts, Clubs, Diamonds and Spades) and must be used when required.
A Bit of History...
There comes a time in life when you stop being a child and become an adult. In general, this event coincides with the end of a summer. No one knows why this happens and it is even more difficult to predict when it will happen with precision, but there is an instant in everyone's life when the beginning and the end coincide.
The transition between these two conditions occurs unconsciously and sometimes traumatically. It is our case, that of Pizza & Investigation, a group of friends who, at the end of the summer of 1982, found themselves having to face the forces of evil. In all likelihood, if they had not entered the old house of Neibolt Street, today I would not be here to tell you their deeds, but they did and I too with them and this inevitably changed our lives.
This may seem a bizarre and surreal story to you, but I can assure you that everything I will tell you has actually happened and thanks to this diary and the material contained in the box, you can relive it in the first person.
It all started when the umpteenth Crystal Country child mysteriously disappeared, but the story is much older and therefore, it is necessary to start from the beginning and from why we found ourselves entangled in something bigger than us.
My brother Ray and I used to spend our summer holidays in our grandparents' big house on the east coast of the United States, in a small town in Maine called Crystal Country, located between Castle Rock and Bangor. It was a quiet place surrounded by nature, even though at the time rumors circulated about a madman in a hockey mask. It was rumored that a maniac had committed a massacre among those responsible for a summer camp near the lake. The story was remembered in the village as "Last Friday" and I believe that hardly anyone will ever dare reopen the old Camp Apache, but this is another story.
Coming back to us, the summer of 1982 lasted an eternity for us kids. Our parents accompanied me, my brother Ray and little Flo (our troublemaker little sister) to our maternal grandparents, at the end of the school, with the promise that they would join us later, because of their work commitments.
Grandpa Jeremiah and Grandma Adelaide were happy to host us in the big house and every summer they waited anxiously for our arrival. My brother Ray and I lived our summer adventures with great trepidation. Our life in Crystal Country was a concentration of emotions, adventures, discoveries. We had even founded a club with a name and headquarters for the coordination of the operations we planned.
"Pizza & Investigation" was the name we gave to our gang. Because, after all, this is what we did, eating pizza (the fundamental food to power-up and face any adversity in my humble opinion) and investigations. What kind of investigations it was difficult to explain. More than anything else we were concerned with solving small mysteries in the neighborhood and helping find some old lady's kitten, this until that fateful day when our lives changed forever.
We only operated during summer and the club was dissolved with an end-of-summer ritual and a promise by all members to return the next year.
Besides myself and my brother Ray, Mike, Daphne, Leila and obviously the small Flo were also part of the club, even if the latter was not really operational, but more than anything else it served as a mascot.
The first thing we dealt with was to find a place where we could settle, to keep at a safe distance from prying eyes and store the junk we usually picked up. A place where we could also hide the evidence collected during the investigations and where eat pizza at will. Finding the right place had not been easy, but after much wandering we realized that what we were looking for was right under our nose. It was an old abandoned camper van, in the garden corner of our grandparents' house. It had been snoozing there for who knows how long, so much so that it was almost completely covered with creepers.
Together with my brother Ray and with the help of trusted Mike, his best friend, we cleaned it up, or at least we managed to make the place livable, allowing the creepers to continue to wrap the external structure so as to make it almost invisible on first look. Our grandparents had no complaints, they were happy that we kids had found a place of our own where we could be together during rainy afternoons. It was perfect and there were plenty of shelves, a worn-out sofa where one could read comics and even a folding table where we could play our board games.
Solo Mode
You may decide to undertake the experience in a solitary mode. In this case, when your investigator has to carry out operations that also involve other investigators, he or she will be the one to face the proposed challenges.
Example: "The skeleton attacks and scores 3 Hits (Body) and the investigator will have to defend himself and will lose 1 Body token for each non-canceled hit. The other investigators will have to hit the skeleton getting a 2 Hits in attack to destroy it. If they fail, the investigator will have to defend themselves again and so on until the skeleton is hit or the investigator is not Stunned."
In this specific case, since there are no other investigating players, your investigator defends and attacks trying to destroy the skeleton. It may also happen that you have to be attacked by another investigator or that situations arise in which a counterpart is required. Don't worry, you can still roll the dice of the investigator that attacked you, thus making up for the lack of other investigators.
Turn Order
A game of Tales of Evil takes place by turns and in each round the investigators can perform or be forced to perform various actions. Plays first who is holding the Walkie-Talkie at that time, and then all the others clockwise. Some actions are called for directly by the Story Book or by the cards, while the investigators can carry out other actions on their own initiative or based on the events that occur (the appearance of a creature or other occurrence).
Tales of Evil FAQ
Question: What can I do if I get a Flashlight result with the die? Answer: You can activate a special ability on your equipped weapon or recover a Battery token (You can never have more than 3 Battery tokens). If you get multiple Flashlight results, you get to do one of the actions described above for each result.
Q: If I get a Flashlight result and a Spider result, can I use the Flashlight to reroll the Spider die? A: Yes, you can.
Q: If I get a Flashlight result, can I decide to reroll the same die that got the Flashlight result? A: No, you can't.
Q: A Turtle result cancels a Spider result, but can it also be considered a Bull's Eye? A Hit? In short, a positive result? A: No, the Turtle result only cancels a Spider result.
Q: Can a Spider result cancel out another Spider? A: No.
Q: When you switch to a weapon of a higher level, what happens to your other weapon of a lower level? A: You can keep it to use or sell it. You can only use the weapon equipped on your Investigator sheet, and you cannot exchange equipment on your Investigator sheet while you are playing, only between Chapters. You cannot have multiple weapons equipped in the same slot: only one of each type.
Q: When can Daphne use her Rite cards? A: Daphne can use Rite cards anytime she wants without limits. She can use them on herself and other group members. Any Rite cards used (as with investigator Action cards) must be discarded after use. Daphne will only be able to take back all of her discarded Rite cards at the beginning of the next Chapter.
Q: Can Equipment cards that give character enhancements be exchanged in the shop between Chapters or even between players? A: Yes, when there are no Challenges or Events in progress, Equipment cards can also be exchanged between players.
Q: What if the Storybook tells me to move the Group token on the board, where do I move it? A: To an adjacent location of your choice.
Q: Do Search cards and Equipment cards only affect the player who owns them or can they also be used on other players? A: Search cards can be used on yourself or on another player in the same area. Obviously, they can only be played during the turn of the player who holds the card.
Q: How do characters' Action cards work? A: Action cards must be used and then discarded. You can only recover them at the start of the next Chapter. These cards can even be used during another player's turn.
Q: How do Daphne's Rite cards work? A: Rite cards are discarded after use, but are recovered for the next Chapter.
Q: If Daphne has a Level 3 weapon, can she also use Level 1 and 2 Rites? A: Yes, a higher-level weapon allows you to generate lower level Rites as well.
Q: When should I draw a Trauma card? A: Trauma cards are drawn only when specifically requested by the Story Book or other cards.
Q: Some Tests will require you to recognize a certain character on a card without any way of verifying whether the name you gave is correct or not. How do you know if you are right? A: In this case, these are Fusion cards which imply that if you know the name of the character, you know the answer, so there is no need for verification. You know if you know ;-)
Q: Can items purchased at the shop and then discarded at the end of the Chapter be repurchased later? A: Yes, but only in a later Chapter. You cannot sell an item and immediately repurchase it while in the shop. You can only buy it again another time that you enter the shop.
Q: If you draw a Search card and pass the Test, you get the positive ability that the card offers. But can it be used only in the current Chapter, or also in the following ones? A: Only in the current Chapter, after which it must be sold or discarded.
Q: Cards that require a roll of the dice or Events that require a roll of the dice... are the dice always resolved before applying the effects? A: Yes, you always resolve the results on the dice first. For example, a Spider eats another die, and only then can you count the useful results that remain.
Legal
Not suitable for children under 36 months, it contains small parts that could cause suffocation if swallowed. Keep this information for future reference.
Published by Escape Studios by Antonio Ferrara - Via Poli 72 Portici (NA) 80055. All rights reserved. Any reproduction or translation, even partial, is prohibited unless specifically authorized.
www.escapestudios.net - [email protected] - www.talesofevil.com