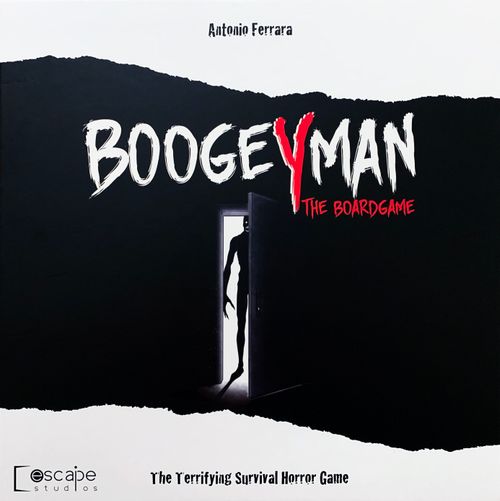
Boogeyman: The Board Game
Boogeyman: The Board Game Rulebook
Table of Contents
Table of Contents
- The Object of the Game
- The Game Modes
- Game Components
- Setting Up the Game
- The Play of the Game
- The Characters
- The Children's State of Mind
- The Children's Actions
- Free Actions
- Entering a Room with a Character
- The Babysitter
- The Boogeyman
- Semi-Cooperative Mode
- The Stress Scale
- The Mission
- The Grand Finale
- The Cards
- The Tokens
- The House
- Boogeyman Meets Tales of Evil
The Object of the Game
In order to survive, the Children will have to work together to locate certain key Items hidden around the house so they can trigger the Finale, and then live through it!
The Boogeyman and the psycho Babysitter will do everything in their power to stop them.
Keep your eyes peeled, because when things get tough, not everyone is likely to survive… Muahahahaha…
The Game Modes
You can play Boogeyman in different ways depending on the experience you are looking for. Depending on your preferences, you can choose any of four different game modes to play before the game begins:
- Solo Mode (1 player): You play alone, controlling one or more children against the Boogeyman and the Babysitter, who are controlled by the game itself.
- Cooperative Mode (from 1 to 6 players): Each player acts as one of the children, while the Boogeyman and the Babysitter are controlled by the game.
- Semi-Cooperative Mode (2 or more players): At first, this is the same as Cooperative Mode. But, the first time a child Passes Out, they are removed from the game and that player takes on the role of the Boogeyman, competing against the other players!
- Competitive Mode (2 or more players): One player is chosen to act as the Boogeyman against all the other players from the start of the game.
Depending on which Game Mode you have chosen to play, there may be some special rules for setting up and playing the game, as indicated below.
Game Components
- 1 Game board
- 1 Finale token
- 55 Search cards
- 1 Rulebook
- 10 Lock tokens
- 32 Boogeyman cards
- 1 The Book of Endings
- 18 Candy tokens
- 32 Babysitter cards
- 1 Poster
- 25 Room tokens
- 32 Light cards
- 1 Die
- 25 Light/Dark tokens
- 32 Dark cards
- 8 Miniatures
- 50 Search tokens
- 19 Cards for Tales of Evil
- 8 Character standees
- 10 Nightmare cards
- A New Chapter for Tales of Evil
- 8 Plastic stands
- 10 Trouble cards
- 1 Poster
- 10 Event cards
- 1 Boogeyman token
- 10 Objective cards
- 1 Babysitter token
- 10 Mission cards
- 1 Flashlight token
Setting Up the Game
- Place the game board on the table.
- Separate the Search, Light, Dark, Nightmare, Event, Trouble, Boogeyman, Babysitter, Mission and Objective cards into their own decks. Shuffle each deck separately and place them near the board.
- Competitive Mode: The Boogeyman takes the Nightmare, Trouble, and Event cards. There is no reason to shuffle those cards.
- Each player who is playing one of the Children chooses which Child they want to play and takes the matching miniature, 3 Candy tokens and Status cards. Stack your Status cards, taking care to place Calm (1) on top and visible, followed by Scared (2), and finally Terrified (3).
- Each Child player draws 1 Objective card. You must keep your Objective secret from the other players until the Finale (see page 12). You may look at your own Objective at any time.
- 1 Mission card is drawn and the rest are returned to the pack. The selected card is read aloud to inform everyone of the mission they must complete before they can begin the Finale. Place the card next to the board so that everyone can consult it at any time during the game.
- Shuffle the 25 Room tokens face down and place them near the board (without looking at them). Competitive Mode: The Boogeyman takes the Room tokens, keeping them covered so the other players cannot see them.
- Select a Trap Door Token and Skeleton Key Token (a type of Search token—see page 15) and set them aside.
- The remaining Search tokens are drawn randomly and 2 are placed face down in Room 6 and 2 in Room 20. Then shuffle the rest face down, including the Trap Door, Skeleton Key and, without looking at them, place them on the board so you have 2 tokens in each Room.
- Competitive Mode: The Boogeyman personally selects the Objectives, Trap Door Token and Skeleton Key Token without revealing them to the others (based on the number of Children in the game as listed above) and places them in numbered Rooms of its choice, filling the rest of the Rooms with random Search tokens. In this way, only the Boogeyman will know where the Objectives are.
You are now ready to begin the nightmare… ehmmm… the game!
Good Advice! Among the Objective cards, there is one called "Possessed." This card introduces the role of a "traitor," hidden within the game. We recommend that you use this card only in games with 4 or more players. So, if there are 3 or fewer players, you should remove this card from the deck of Objectives before shuffling. This is just a tip, and of course you are free to keep the card in the deck when you distribute the goals even if you play with less than 4 players in the game!
Advice: If you want to make your games of Boogeyman more exciting, you can try playing Hard Mode or even venture into Nightmare Mode!
Hard Mode: After completing the game setup, randomly reveal 13 Room tokens and flip the Light tokens in those rooms so that they show the Dark side (then shuffle them back into the pile).
Nightmare Mode (only for the bravest!): After finishing the game setup, flip all the Light tokens in the Rooms so that they show the Dark side. Also, in this mode, during the Boogeyman's turn you will draw 2 Room tokens instead of 1. This way, the Boogeyman will be in 2 rooms at the same time!
The Play of the Game
The game is divided into a series of rounds. In each round, every Child will take their own turn, then the Boogeyman goes.
Phases of a Round:
- The first player (the holder of the Flashlight token) goes first.
- Starting with the first player and proceeding clockwise, each player carries out their actions.
- After every child has taken their turn, the Boogeyman plays.
Finale Phase: Once all 3 Objective tokens are in the Finale room and the Leader starts the Finale, they will move on to play in the Book of Endings, but not before completing the task dictated by the Mission card!
The Characters
The story of Boogeyman includes different characters with different motivations, which has an effect on how they are played within the game.
The Children: The gang of children who will, a few years later, reunite to form the Pizza & Investigation Gang is made up of Peter, Ray, Daphne, Mike, Leila, and Tommy. Each of them has a unique view on their situation.
- Peter: He fully believes in the Boogeyman's existence.
- Daphne: She's actually looking forward to meeting the Boogeyman.
- Ray: Even though he says he doesn't believe in the Boogeyman, he does believe it a little.
- Leila: She thinks the Boogeyman story was made up by adults to scare children.
- Tommy: He doesn't even know what the Boogeyman is, but he's pretty sure it's not good to eat.
- Mike: He says he'll only believe in the Boogeyman when he sees it with his own eyes.
The Babysitter: Jennifer. We don't know if Jennifer really is a psychopath, if she's under the influence of the Boogeyman, or if she just looks evil because of the children's imaginations. Whatever the truth is, you'd better stay away from her…
The Boogeyman: It represents all of the real and unreal nightmares that a kid can imagine during the period of their childhood. Nobody knows what it looks like, and it is said that it can take any shape it wants. They say that it kidnaps children and nobody knows where it takes them or what it does with them. Better not to find out, don't you think?
The Children's State of Mind
Each Child starts the game with 3 Status cards, which represent their current "state of mind." These cards are stacked with the number 1 card on top, the number 2 card in the middle, and the number 3 card on the bottom. As each card is lost during the game, that Child's mood worsens:
- 1 - Calm: The Child is in full possession of their sanity. They can perform up to 3 Actions during their turn and use the special ability described on the card. They may have up to 3 Candy tokens in their possession at a time.
- 2 - Scared: The Child is still at their full mental capacity, but they are a bit shaken. They can perform up to 3 Actions during their turn and use their ability, but now they can only hold up to 2 Candy tokens at a time.
- 3 - Terrified: The Child is about to lose their wits! They still get 3 Actions per turn, but they cannot use their ability and they are limited to only 1 Candy token at a time.
If a Child loses their last Status card (Terrified), they immediately Pass Out: You must lay their miniature down in a horizontal position.
Be careful! A Passed Out child generates Nightmares, which can be a problem for the other Children! It is important to revive them as soon as possible (see page 14).
Nightmares: The next time the Passed Out Child's turn comes up, they must draw 1 Nightmare card and follow the instructions on it. If the Boogeyman is controlled by one of the players (Competitive or Semi-Cooperative Mode), they decide which Nightmare card to inflict upon the group. Otherwise, the Nightmare is drawn randomly. Nightmare cards affect all the Children, and can be very difficult to handle. The Nightmare card remains in play until the Passed Out Child is revived.
The Children's Actions
During their turn, each Child can spend up to 3 Actions. Actions can be spent to do any of the following, in any order and as many times as you wish as long as you have Actions to spend.
Good Advice! Remember that you can repeat the same Action several times in a row. For example, Peter may want to get out of a Room really fast by spending all 3 Actions on his turn to move 3 Rooms away.
-
Moving: You can move from the Room you are in to any adjacent Room by moving through a Passage. Each Passage you move through costs 1 Action.
-
Remove a Lock: If there is a Lock token on top of the Room's stack, you cannot access the tokens beneath it unless you remove the Lock first. There are two ways to remove a Lock: you can play a card that allows you to remove it or you can try to break the Lock. If you decide to break the Lock, you must roll 1 die and move the Babysitter toward you a number of Rooms equal to number rolled (see page 15). The Lock is only removed if the Babysitter does not reach your Room. Attempting to remove a Lock costs 1 Action.
-
Go Through the Trap Door: If the Trap Door has been revealed, and you are in the Room with it, you may use the Trap Door as a Passage to enter the Secret Room (Room 20) by spending 1 Action. Similarly, if you are in the Secret Room, you can spend 1 Action to move back to the Room with the Trap Door. Otherwise, the Secret Room is completely inaccessible.
-
Flip a Light/Dark Switch: If you are in a Room with a Light/Dark token (usually, each Room has one on top of its stack of Search tokens), you may remove it by paying 1 Action. After you remove the token, you must immediately draw a Light or Dark card based on which side of the Light/Dark token was visible when you removed it (see page 14).
Good Advice! If you want to search a Room (see below), you must first remove any Light/Dark token in that Room!
-
Search a Room: Searching costs 1 Action. When you search, you take the top Search token from the Room you are in. You can only search a Room if there are no other tokens on top of the Search tokens in that Room (such as a Light/Dark token or Lock token).
Free Actions
In addition to your 3 Actions, you may perform any number of these Free Actions at any time during your turn:
- Play Search Cards: Without these cards, you surely won't survive the Boogeyman! You can use these cards to get yourself out of trouble or to counter the advance of the shadows. There is no limit to the number of Search cards you can accumulate and play on your turn, but remember that each card must always be discarded after use.
- Skeleton Key: Use the Skeleton Key token to access the attic.
- Use Candy Tokens: These tokens can be used to modify the result of a die roll. On your turn, you may play as many Candy tokens as you wish, and this does not cost any Actions.
How to change the die result: Generally, you will have to roll the die only for the most desperate situations, and it could happen that the result obtained is not to your liking. By using a Candy token, you can add or subtract 1 to the value of the roll. There is no limit to the number of Candy tokens you can use each time you roll the dice. The important thing to remember is that each token you spend equals a +1 or -1 for any die and you can spend them after you see the result of your roll.
Example: Daphne is trying to remove a Lock token in her Room, so she has to roll a die. Unfortunately, she rolls a 6! That means that the Babysitter, attracted by the noise, is going to catch her. She spends 2 of her Candy tokens to reduce the result to a 4, leaving the Babysitter outside her Room. Whew!
Note: Each Child can repeat the same action several times. E.g., Peter may want to get away from a Room and spend all 3 Actions of his turn to move 3 Rooms.
Entering a Room with a Character
Transcriber's note: the source prints the following bullets without a heading; this heading is added for navigation only.
- If you move into a Room that no one is in, or one occupied only by other Children, nothing special happens. You can keep spending your Actions and taking Free Actions.
- If you move into a Room occupied by the Babysitter or the Boogeyman, your turn ends immediately (you lose any unspent Actions) and you must draw the matching type of card, based on who you met, and follow its instructions. You must also move the matching token up one space on the Stress Scale.
- If you move into a Room occupied by the Babysitter and the Boogeyman together in the same Room, you must face only the Babysitter by drawing a Babysitter card and moving her token up on the Stress Scale. The Boogeyman never reveals itself when both adults and children are together.
- If you begin your turn in the same Room as the Babysitter and/or the Boogeyman, you cannot take any Actions in that Room. You can play cards (Free Action) and you may use an Action to leave that Room and go elsewhere.
Remember: Any time you encounter the Babysitter or the Boogeyman, your turn ends immediately!
The Babysitter
The Babysitter never takes a turn of her own. Instead, she will only react to certain actions taken by other characters.
Activating the Babysitter: There are four ways that the Babysitter could be activated:
- When a Search token is revealed that produces noise, indicated by a number or die symbol on the token.
- Based on the effects of some cards.
- When a child tries to break a Lock (remove a Lock token).
- When under the influence of the Boogeyman.
How the Babysitter behaves depends on how she was activated:
When collecting a Search token: On the back of most of the Search tokens there is a value that indicates the intensity of the noise caused by the Child intent on carrying out the search or the symbol of a die. Either one will immediately activate the Babysitter. If there is a die symbol, the Child will have to roll the die and move the Babysitter as many areas as the number rolled. In either case, the Babysitter will move, following the shortest path, as many areas as indicated by the noise in the direction of the marker just revealed, after which she will remain in the Room she reached until her next activation. If during this move, the Babysitter reaches a Child's miniature, her move ends and the Child will be forced to draw a Babysitter card. If, on the other hand, there is no number or die symbol on the counter, the Babysitter is not activated.
Example: Mike is searching a Room and he reveals a Search token with a noise value of 3. He must immediately move the Babysitter 3 Rooms towards him, which is seriously bad news because she is only 3 Rooms away! Mike must draw a Babysitter card and do what it says and move her token up a space on the Stress Scale. Plus, his turn is over.
Interactions with the Babysitter:
- If she ends her movement in the same Room as the Boogeyman but there are no Children there, the Babysitter is Possessed. Roll 1 die and move the Babysitter that many Rooms toward the nearest Child. If there are two or more Children an equal distance away, they must each roll 1 die and the Babysitter will move toward the one who rolled the lowest number. If the Boogeyman is controlled by a player, that player decides where to move the Babysitter (not necessarily toward the nearest Child).
- If the Babysitter ends her movement in a Room with no one else, nothing happens and her activation ends.
- If she enters a Room occupied by a Child, her movement ends and that Child must immediately draw a Babysitter card and follow its instructions. Regardless of the result, you must also advance the Babysitter token on the Stress Scale.
- If she encounters two or more Children at the same time, they each have to roll a die and whoever gets the lowest number will be forced to face her by drawing a Babysitter card (and moving her token on the Stress Scale).
- If the Babysitter enters the Room where you made a noise, your turn ends immediately and you must draw a Babysitter card (see above).
- If there is no noise value on the Search token (such as an Objective token), the Babysitter is not activated and she does not move.
- If the Boogeyman is in the same Room as one or more Children when the Babysitter enters the Room, her actions will take place as if the Boogeyman was not there. (Remember, it does not reveal itself in the presence of adults and children when they are together.)
Important: To be Possessed, the Babysitter must be stationary (i.e., not moving) and in the same place as the Boogeyman. If she only moves through the area without stopping, nothing will happen.
Good Advice! Be careful when you search, because the Babysitter could be on you in no time!
When affected by a card: Some cards will cause the Babysitter to move or even make her come directly to you. Be careful!
When removing a Lock: If a Lock token is preventing you from searching a Room, and you don't have any cards you can play to remove it, you can try to break the lock, but this will make noise. You must roll 1 die: the number rolled determines the amount of noise created, which will immediately activate the Babysitter. She will move in your direction a number of Rooms equal to the number rolled on the die, following the shortest path.
When under influence of the Boogeyman: As we will see later on, the Boogeyman can temporarily take control of the Babysitter and throw her at you. Eyes open!
Important: After the Babysitter moves, she will remain in her new location until the next time she is activated. No Child can take any Actions in a Room that the Babysitter is in. If you move into her Room, you must immediately draw a Babysitter card. (Are you crazy?)
The Boogeyman
Because of the nature of that creature, the Boogeyman can only return to a Room it occupied previously after some time has passed. To reflect this, any Room token placed on the Ladder cannot be used again until the entire Ladder is completely full (10 Room tokens have been played). At this point, all of the Room tokens are taken back and mixed together to form a new reserve for the Boogeyman to use.
Good Advice! In practice, the Boogeyman can never appear in the same room during each stretch of 10 turns, except for the effects of some cards. The Children will be wise to take advantage of this opportunity!
The Apparitions Ladder: The Apparitions Ladder is used to control the movement of the Boogeyman around the house. This is particularly important when a player is controlling the Boogeyman's actions, because in this case the movement is effectively "hidden" until a Child or the Babysitter crosses the Boogeyman's path.
The Ladder shows a series of spaces where Room tokens will be placed. At the beginning of the game, a Room token is placed face down on the first space of the Ladder. During the Boogeyman's turn, another Room token is added to the Ladder to show which Room the Boogeyman has moved to.
Moving the Boogeyman: Then, a new, random Room token is drawn without revealing it, and placed face down on the next space of the Ladder. The new token will determine where the Boogeyman will make its next appearance, after the Children have all taken another turn.
Unlike other characters, the Boogeyman is not limited to moving into an adjacent Room. Each time it moves, it can move to any part of the house!
Drawing Event Cards: In addition to managing the flow of the Boogeyman's appearances, the Apparitions Ladder also manages the Event cards. Each time a Room token is placed in a space on the Ladder with the Event symbol, an Event card must be drawn immediately and carried out. As we will see, it is the Boogeyman who chooses the card if it is under the control of a player.
The Boogeyman's Turn: Normally, the Boogeyman takes its "turn" at the end of each round, after all of the Children have finished taking their actions. In addition, some cards can activate the Boogeyman. During its turn, the Boogeyman will be able to:
- Move with the help of a Room token and the Apparitions Ladder
- Possess the Babysitter (only if the conditions are met)
- Play an Event card (only if the conditions are met)
- Play a Trouble card (only if the conditions are met)
- Play a Nightmare card (only if the conditions are met)
There are two ways that the Boogeyman can be managed during the game. It can be controlled by one of the players in Competitive or Semi-Cooperative Mode, or controlled by the game itself. Either way, the Boogeyman will do everything in its power to thwart the Children's efforts to escape its clutches!
When the Boogeyman is Controlled by the Game
Revealing the Boogeyman: At the end of each round, once the Children have all finished their turns, the last Room token on the Ladder is flipped over and the Boogeyman is placed in the Room shown.
Interacting with the Boogeyman:
- Each time the Boogeyman reveals its location and places its miniature on the board (regardless of whether there are any Children, the Babysitter, or both in that Room), if there is a Light/Dark token there, you must flip that token so that it shows the Dark side.
- If there is one Child in that Room, they must face the Boogeyman by drawing a Boogeyman card and following its instructions. Regardless of the result, also advance the Boogeyman token one space on the Stress Scale.
- If there are two or more Children in the Room, they must each roll 1 die: whoever rolls the lowest number will be forced to face the Boogeyman.
- If only the Babysitter is in that Room, she is Possessed by the Boogeyman: roll 1 die and move the Babysitter that many Rooms toward the nearest Child. If there are two or more Children an equal distance away, they each must roll 1 die and the Babysitter will go toward the Child who rolled the lowest number. If the Babysitter moves into a Room with a Child, she will immediately stop moving and that Child will have to draw a Babysitter card (and move her token up on the Stress Scale).
- If both the Babysitter and any Children are in the Room, nothing happens since the Boogeyman stays in the shadows when both adults and children are together in the same place.
If a Child or the Babysitter moves into the Room that the Boogeyman is in at that moment (matching the last token played), in addition to flipping the Light/Dark token to the Dark side, they must place the Boogeyman in that Room and encounter it as described above.
The Boogeyman miniature will remain in that Room until it appears in another Room during a later turn or it is moved by the effects of a card. So be careful!
Important: The Boogeyman will stay in its current room until its next turn. So, a Child who is already in a Room with the Boogeyman will not be able to perform any Actions in that Room as long as the Boogeyman is present, but they will be able to get out by moving away on their turn. If a Child decides to enter that Room in the meantime, they must immediately draw a Boogeyman card (we advise against this…).
The Boogeyman can be in two places at once: the room where its miniature is located and the new Room hidden under the last token placed on the Apparitions Ladder. The Boogeyman is the shadow, and it could be anywhere and even everywhere at the same time… Muahahaha… Muhahahaha… Muahahaha… Ok, okay, enough.
- Unlike the Babysitter, an interaction with the Boogeyman occurs only if a Child or the Babysitter stops in the Room the Boogeyman is in at that moment. There is no interaction if a Child or the Babysitter only passes through the Room without stopping there.
On the other hand, if the Boogeyman decides to move to a Room that is already occupied by any Children or the Babysitter (or both), nothing happens at that moment: the Boogeyman never attacks directly, but instead lurks in the shadows and waits to attack only when one of the other characters moves into the Room where it is hiding. With this in mind, if, at the end of the next round, when the Boogeyman takes its next turn, if any Children or the Babysitter are still in that Room, the Boogeyman is revealed and the interaction takes place.
Example: The Boogeyman has placed 3 Room tokens on the Apparitions Ladder: 14, 23, and 8. The Babysitter moves into Room 23, but since that was not the last Room token played, nothing happens. Later on, Tommy moves into Room 14, so that Room token is immediately flipped over, revealing that the Boogeyman was there two rounds ago, then the Light/Dark token in that Room is flipped to the Dark side.
If the Room token revealed is from a previous turn, the only effect of revealing that token is to flip any Light/Dark token in that Room to the Dark side.
Example: Peter is in Room 12. The Boogeyman, on its turn, decides to play the Room 12 token, placing it on the Apparitions Ladder. If Peter decides to leave on his turn, nothing would happen. But, if he decides to stay in the Room, when it is the Boogeyman's next turn it would be able to make an appearance and Peter would be forced to draw a Boogeyman card…
When the Boogeyman is Controlled by a Player
If a player is controlling the Boogeyman, there are a few changes to the process described above. In this case, that player always controls the Boogeyman and decides how the Boogeyman moves and acts.
Revealing the Boogeyman: The location of the Boogeyman (and the last Room token placed on the Ladder) is not automatically revealed every round. Instead, the Room tokens on the Ladder are only revealed when a Child or the Babysitter enters the Room shown on the last Room token played or when a Child (but not the Babysitter) enters a Room shown on any of the Room tokens on the Ladder.
Moving the Boogeyman: Instead of drawing a random Room token every round, the player controlling the Boogeyman chooses which Room token to use and places it face down on the Apparitions Ladder.
Interacting with the Boogeyman: If the Boogeyman Possesses the Babysitter, the player controlling the Boogeyman chooses where she moves, instead of automatically moving toward the nearest Child.
Playing Event Cards: At the beginning of its turn, when the Boogeyman plays a Room token, if there is an Event symbol on the space of the Apparitions Ladder that the token is played on, the Boogeyman gets to play an Event card. The Boogeyman player chooses 1 Event card from those available and places it next to the game board where it is visible to all players. This card will affect the entire next game round. When it is the Boogeyman's turn again, they must discard this card, ending the effect.
Fusion System: The Event cards take advantage of the exclusive Fusion System. That is, these cards will request actions directly from the players and not from the Children! For example, you may be asked to stop talking for an entire round, or you will be forced to take off your shoes and finish the game barefoot, or other bizarre requests that you will discover along the way.
Playing Trouble Cards: When either token on the Stress Scale reaches a space with the Trouble symbol, the Boogeyman chooses 1 Trouble card from those available and applies its effects after reading it and showing it to the other players.
Playing Nightmare Cards: If a Child Passes Out, they will generate a Nightmare if they are not revived by another player before their next turn. The player controlling the Boogeyman chooses which Nightmare card to play on the Passed Out Child, which will remain in play and repeat its effects every time it is that Child's turn until the unconscious child is awakened.
Chart — Boogeyman Run by the Game vs. Run by a Player:
| Topic | Boogeyman Run by the Game | Boogeyman Run by a Player |
|---|---|---|
| Room tokens | Room tokens are drawn randomly. | The Boogeyman player chooses the Room tokens. |
| Revealing | Reveal the Room it is in at the end of each round before drawing a new Room token. | Reveal a Room it was in only if one of the Children or the Babysitter enters that room. |
| Possessed Babysitter | When it gets hold of the Babysitter, she goes towards the nearest child. | When it gets hold of the Babysitter, the Boogeyman player decides where to move her. |
| Trouble cards | When a token reaches a Trouble symbol on the Stress Scale, the players draw a Trouble card from the deck. | The Boogeyman player chooses which Trouble card to use. |
| Nightmare cards | If necessary, the players draw a Nightmare card from the deck. | The Boogeyman player chooses which Nightmare card to use. |
| Event cards | If necessary, the players draw an Event card from the deck. | The Boogeyman player chooses which Event card to reveal. |
Semi-Cooperative Mode
If you are playing the Semi-Cooperative Mode, there are a few special rules you will need to follow:
Becoming the Boogeyman: The first Child to Pass Out will be taken over by the spirit of the Boogeyman and will turn against their fellow children. If this is your Child, you must follow these steps immediately after they Pass Out:
- Remove your Child's miniature from the game board and discard your Status cards, Candy tokens, and any Search cards you have. You will not draw a Nightmare card.
- If you have any Objectives or Item tokens, place them at the bottom of the stack in the Room your Child was in when they Passed Out.
- Take the Room tokens and the Nightmare, Trouble, and Event cards and place them in front of you.
The player to your left takes the Flashlight token. Regardless of whose turn it was, they become the new first player and take the next turn. Play will pass to the left as usual, so as the new Boogeyman you will always be the last to play. From now on, you will play as the Boogeyman, as described above.
The Stress Scale
The Stress Scale depicts the growing power of the Boogeyman, and the rising frustration the Babysitter feels towards her young charges. It shows two independent tracks: one for the Boogeyman and one for the Babysitter. At the start of the game, the matching tokens are placed on the "0" spaces of their tracks.
Every time a Child encounters one of them (and draws a matching card), they must also move the matching token on the Stress Scale up 1 space.
Drawing Trouble Cards: Next to some of the spaces on the Stress Scale you will find the symbol for the Trouble cards. If either the Boogeyman or the Babysitter token reaches a space with this symbol, you must immediately draw a Trouble card and play it. Like Event cards, if the Boogeyman is controlled by a player, they will choose which Trouble card takes effect.
If one of the tokens reaches the top of the Stress Scale, it will stay there for the rest of the game. There is no additional effect. But, if both tokens (Boogeyman and Babysitter) reach the top (i.e., the two tokens overlap), the game ends immediately and all the Children lose! The Boogeyman will take complete possession of Jennifer and the Children will no longer have any chance of escape… Muahahah! Muahahah! Muahahah!
Note: The Boogeyman will stay in the Room he is in until his next activation. The Boogeyman's token will remain in the Room until another appearance occurs or it is moved by the effect of a card. So be careful! Because at the beginning of their turn, it is as if the Boogeyman were in two places at the same time—that is, in the Room where the pawn is present and in the new Room hidden under the last marker placed on the Apparitions Ladder. He is the shadow and could be anywhere and, as in this case, in several places at the same time... Muahahah… Muhahahah… Muahahahaha…
The Mission
Before facing the Grand Finale, the Children will have to complete the task given by the Mission card they drew at the start of the game. Without completing the Mission, even if they have the 3 Objective tokens that would allow them to start a Finale, they still won't be able to.
The Grand Finale
When the Children are in possession of all 3 Objective tokens, a Room token is drawn from those available. The Finale token is placed in the indicated Room, and then the Children must bring the Objective tokens there. Once all 3 tokens are stacked in that Room, a Finale begins—but remember that you cannot start the Finale unless you have already completed the Mission card's task.
After completing the Mission, the first Child who reaches the Room with the Finale token carrying an Objective token becomes the Leader of the group, and when all 3 Objective tokens are in the Room, during their turn the Leader can decide to start the Finale, regardless of how many other Children are present in the Room. Only the Children who are in the Finale Room will participate in the Finale while the others will be excluded—but they do not necessarily lose the game: This will only be revealed later by the Finale itself.
When the Leader, during their turn, starts the Finale, every Child must reveal their Objective card and, if possible, apply the effects. Then, shuffle ALL the Room tokens available in the supply face down and without looking at them draw one. The number on the marker will indicate which Finale you must face. Take the Book of Endings and place it in the center of the table so that everyone can follow the illustrated adventure and start reading. The Book of Endings is structured like a comic, and in order to proceed to the next cartoon it will often be required to pass a "test."
Note: After you have played a few games, by mutual agreement, the players may decide to play a Finale they have never played before rather than facing a random Finale they have already seen.
Children who Pass Out during a Finale will no longer be able to continue, but if even just one Child manages to pass all the tests, you will be able to read the last cartoon of the comic and find out how the long night at Villa Spencer ended. If all of the Children Pass Out during the Finale, the game is lost and the Boogeyman wins! Otherwise, the Boogeyman loses and the final cartoon reveals the winners.
How does it work? Once you are on the Finale page, you will start reading the comic and carry out the required tests and, based on what happens, you will move on to the next scene. The Leader of the group always starts playing and then all the other participants take turns going clockwise, but only those who were in the Room when the Leader started the Finale. Each scene must be faced by a different player and this continues until the epilogue or until all the Children have Passed Out.
Children who Pass Out during a Finale will not be able to continue, but if even just one Child manages to reach the epilogue, you can read the last scene and find out who won the game. If all the kids Pass Out during the Finale, the Boogeyman wins the game.
Any doubts? You may be wondering why the Leader has the power to begin the Finale before all of the Children reach the Finale Room. The answer is simple: You may be forced to make this drastic decision in order to save most of the group. In fact, while trying to reach the Finale Room, it is possible that one (or more!) of the Children might Pass Out, which could cause Nightmare cards to appear. Or, it could happen that a Child simply does not have enough Status cards left to have a good chance of making it to the room, so the Leader may decide to start the Finale and leave them behind to avoid the risk that the Boogeyman or the Babysitter will swoop down on them and create a panic.
Of course, it is also possible that the Leader has the traitor Objective… They may purposely start the Finale while leaving the other Children behind in an effort to make the group fail!
Our advice is that the Leader act according to the progress of the game and their own Objective card. A wrong decision could jeopardize the entire game, while a tough but timely decision could be the right choice. The role of the Leader is a huge responsibility, so you should be strict but fair. And don't forget it, because otherwise you might not survive the night!
The Cards
- Babysitter Cards: If you meet Jennifer, you must draw one of these cards, and you know that it will not be easy to escape from her clutches.
- Status Cards: Each Child has 3 Status cards to them, which represent the current mood of that Child. The game always starts with Status card #1 on top, then #2, and finally #3. Each Status card shows the special ability that Child can use and the maximum number of Candy tokens they can hold. Be careful, because losing a Status not only risks losing your special ability, but you could also lose Candy tokens!
- Light Cards: Each time you take a Light token, you must draw one of these cards and carry out its instructions. These are situations that the Children will have to face, but fortunately they take place in the light so they are less frightening and difficult.
- Dark Cards: These are drawn each time a Dark token is collected. They are situations in the dark, when the shadows reach out and reality is distorted. They are truly frightening and more difficult to deal with. Be careful, because in the dark the shadows have sharp teeth and long nails.
- Search Cards: These cards are the skills, equipment, and other useful items that you can use to face the real and unreal nightmares that you might encounter during your night in the Spencer house. But, they can also hide some nasty surprises… You draw a Search card when you collect a Search token with a number on it. Do not draw one if you reveal a Search token with an item, the Trap Door, or the Skeleton Key. You can play your Search card whenever the text on the card allows. All Search cards must be discarded after one use.
- Boogeyman Cards: You must draw one of these cards each time you encounter the Boogeyman. They are never positive. Quite the contrary…
Any time you draw a Boogeyman or Babysitter card, your turn ends immediately after you resolve that card and you must advance the matching token one space on the Stress Scale.
But, if you play a card that cancels an encounter with the Boogeyman or Babysitter, you do not draw a card and you do not have to advance their token on the Stress Scale because, in fact, the encounter never happened.
- Nightmare Cards: These are horrible cards that are drawn by a Child who has Passed Out on their turn. They can put the whole group in serious trouble. Try to avoid them if you want to survive. A Nightmare card on a Passed Out Child generates the same effect each time that Child's turn comes up, and stays in play until they are revived by another player. If the Boogeyman is controlled by a player, they decide which Nightmare cards to dispense.
- Trouble Cards: These cards represent negative incidents that can occur in the house, and are drawn when the Boogeyman or Babysitter tokens on the Stress Scale reach certain positions. If the Boogeyman is controlled by a player, they decide which Trouble cards to play.
- Event Cards: From time to time, the dark influence of the Boogeyman will warp reality, represented by these cards. One is drawn each time a Room token is placed on a space of the Apparitions Ladder with the Event symbol. These cards have long-term effects that apply for the entire next game round. If the Boogeyman is controlled by a player, they decide which Event cards to use.
- Objective Cards: Aside from evading the Boogeyman and surviving until morning, each Child has their own personal goals. At the beginning of the game, each player controlling a Child is dealt one of these cards, which must be kept secret until the Finale.
- Mission Cards: At the beginning of each game, a Mission card is drawn, which must be completed before the start of the Finale.
The Tokens
-
Room Tokens: There are 25 tokens with the Room numbers on them. They are used by the Boogeyman to move around the house. A Room token is drawn on the Boogeyman's turn, without looking at them, if it is controlled by the game. If a player controls the Boogeyman, they will choose which Room token to use.
-
Search Tokens: These tokens represent things that the Children might find around the house. There are four different types of Search tokens. They have different effects when a Child reveals them:
- Noise Tokens: When you take one of these tokens, you have made enough noise to attract the attention of the Babysitter! The good news is that the risk is not without its rewards: Each time you take one of these tokens, you get to draw a Search card. Then, the Babysitter moves a number of Rooms toward you equal to the value on the Noise token. So be careful, because you might be surprised at any moment!
- Candy Tokens: Each Child starts the game with 3 of these invaluable tokens. You can gain and lose them in different ways. You may find them to be very useful for achieving your goal. In fact, by playing one of these tokens, you can modify the result of a die roll: Each Candy spent is worth +1 or -1 to the result.
- Final Token: Used to indicate the room where the Children will have to go to start the Finale. It must be placed when three Object tokens of the same color have been found, which allows you to start the Finale. At that point, you will draw a Room token and place this token in the indicated Room. The number also indicates the number of the Finale in The Book of Endings.
- Objective Tokens: You will need to find these 3 tokens in order to start the Finale.
- Trap Door Token: The Secret Room (number 20) has been carefully hidden from the Children. Even the door that leads to it is a secret! When the Trap Door token is revealed, place it face up in the Room where it was found. From now on, any Child can move from that Room to the Secret Room (and vice versa) by spending 1 Action.
The House
The game board has 25 numbered zones which we call "Rooms" and 5 unnumbered corridors. Corridors count as Rooms for most purposes, and therefore if a player wants to enter a corridor they will have to spend 1 Action. The general rule is that you spend 1 Action for each door / passage you pass through and which bears a letter.
The Secret Room (Room 20)
There is no direct way to access this hidden area. It can only be reached if you first find and reveal the Trap Door, a type of Search token. Once the Trap Door is revealed, any Child can move from the Room with the Trap Door to the Secret Room (or vice versa) by spending 1 Action. Once found, the Trap Door remains in that Room until the end of the game.
The Attic (Room 5)
As you will notice, access to the attic (Room number 5) is blocked by a padlock. In order to access this area, you must first find the Skeleton Key, which is hidden on the back of one of the Search tokens. At that point, the player who has the key may go to the attic and place the key on the lock, after which all players will be able to access that Room.
Boogeyman Meets Tales of Evil
Boogeyman is a Tales of Evil crossover: It is a completely independent game, but it is set in the same universe as Tales of Evil and Pizza & Investigation. As you may have noticed, the doors and passages of the board feature letters that you will not need to play Boogeyman, but they will be essential to be able to play Tales of Evil adventures using the Boogeyman board.
In the box, you will surely have found some cards for the Tales of Evil board game. These cards will either have to be set aside or placed in your Tales of Evil box. These include Event, Equipment, Action, and Status cards that you can use to expand the gaming experience of Tales of Evil. They will also allow you to play as Jennifer and above all to play the exclusive adventure at the end of this manual. Obviously, you will need a copy of the Tales of Evil game (not included in the Boogeyman box). If you don't have a copy of Tales of Evil, don't worry and ignore this part of the rules. If you do have a copy of Tales of Evil, or are willing to buy it in the future, when you are ready you can try your hand at this new adventure!
The Tales of Evil cards included with Boogeyman are: 10 Event cards, 3 Action cards, 4 Status cards, 1 Equipment card, and 1 Special card (The Mysterious Shield), together with a new playable character, Jennifer, from Pizza & Investigation.
Since Tales of Evil is a game in which you will also be able to create your own adventures and play those created by the community, do not hesitate to take advantage of the materials contained in Boogeyman to play Tales of Evil as well! In fact, in addition to the new cards we warned you about, you can use the board and miniatures to create new adventures.
Transcriber's note: the source says the exclusive Tales of Evil adventure by Antonio Ferrara is "at the end of this manual", but the printed pages that follow this section are the credits and backer list, and the adventure text itself is not printed in the rulebook. The adventure is therefore not transcribed here; it requires the Tales of Evil board game.