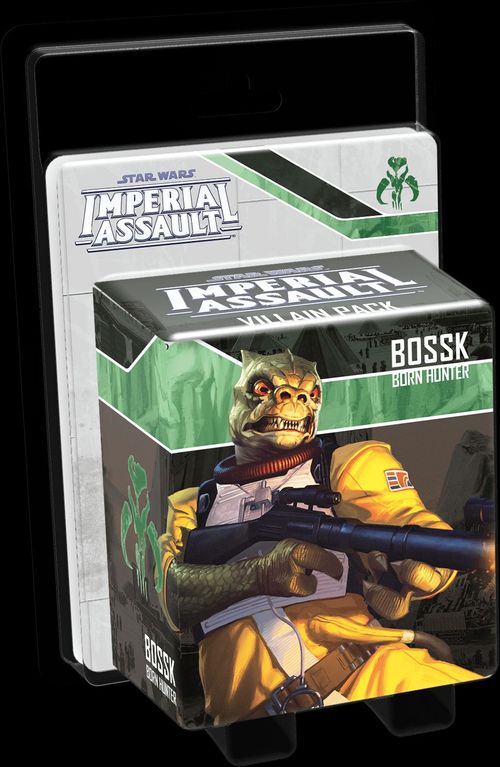
Star Wars: Imperial Assault – Bossk Villain Pack
Star Wars: Imperial Assault – Bossk Villain Pack Rulebook
Table of Contents
Table of Contents
Component Breakdown
- 1 Plastic Figure (Bossk)
- 2 Deployment Cards (Bossk, Headhunter)
- 4 Command Cards (Disorient, Grisly Contest, Trandoshan Terror, Wild Attack)
- 3 Agenda Cards (Base Instincts)
- 2 Skirmish Mission Cards (Wasskah Hunting Ground)
Setup Changes
- Add the Deployment cards to their supply.
- If you own the The Bespin Gambit expansion, the Imperial player can choose the "Base Instincts" Agenda set when building his Agenda deck at the start of a campaign.
- Shuffle the Skirmish Mission cards into the Skirmish Mission deck. These cards use the "Wasskah Hunting Ground" skirmish map.
- Add the Command cards to the pool of cards that a player can use to build his Command deck.
Skirmish Attachments
Some skirmish upgrade Deployment cards list the word "Attachment" above their abilities. These cards can be attached to other Deployment cards as follows:
- When deploying units during skirmish setup, if a player has one or more "Attachment" cards included in his army, he places each of these cards on one of his non-upgrade Deployment cards.
- Each Deployment card can have only one "Attachment."
- Abilities on "Attachment" cards apply to all figures in the corresponding group.
- Many attachments require the group to have a specific trait, such as "Trooper." Attachments with these restrictions cannot be played on a group that does not have the trait.
When a group with an "Attachment" card is defeated, the opposing player scores VPs equal to the deployment cost of the "Attachment" card in addition to the VPs he scores from the defeated group's Deployment card.
Side Mission: Gunrunner
A Rebel operative tracked the stolen guns to a swamp behind an Imperial facility. It seems Bossk has arranged a deal for protection. Knowing you won't be able to smuggle these weapons back out, you've packed light–except for the explosives.
Staying low-profile, you make it into the lower level of the facility. The swamp is guarded from the outside, but nobody would be crazy enough to try what you're about to do. You set the charges and blast your way into the service tunnels.
Map: Gunrunner. The map diagram shows the Tunnels location, marked D02A. Walls between spaces containing difficult terrain are marked by blue lines on the map diagram. This map requires The Bespin Gambit expansion.
Deployment and Setup
- Initial Groups: Imperial Officer, Probe Droid, Stormtrooper.
- Reserved Groups: Bossk (Born Hunter), Trandoshan Hunter.
- Open Groups: 3.
- Special Setup: Increase [threat icon] by twice the threat level and resolve an optional deployment to the Tunnels.
Event Summary
- Round 3: The Butcher
- Round 6: End of Mission
- Rebel figure enters Tunnels: Trespass
- Stockpile destroyed: Rage
- All stockpiles destroyed or all heroes wounded: End of Mission
Mission Briefing
- Neutral mission tokens represent stockpiles.
- A Rebel figure can attack a stockpile (Health: the threat level, Defense: 1 [triangle icon]). A hero can interact with a stockpile to destroy it.
- Walls between spaces containing difficult terrain (indicated by blue lines on the map diagram) do not block adjacency, counting spaces, line of sight, or movement.
- When a figure enters one or more spaces containing difficult terrain, that figure suffers 1 damage.
- Imperial figures cannot be optionally deployed within 2 spaces of a hero.
- The mission ends when all stockpiles are destroyed ([objective icon]), at the end of Round 6, or when all heroes are wounded.
Trespass
When a Rebel figure enters the Tunnels:
- Deploy the reserved Trandoshan Hunter group to the yellow point.
The Butcher
At the end of Round 3:
"I paid them well. Useless Imperialsss."
Bossk charges in from a guard post in the swamp. He moves effortlessly through the murky waters, intent on protecting his stock. For a moment, you wonder if you've made a mistake by challenging the Trandoshan in his element.
- Increase [threat icon] by the threat level.
- Deploy the reserved Bossk to the red point.
- Bossk gains "Mobile."
- While Bossk is defending, while on a space containing difficult terrain, apply +1 [block icon] to the defense results.
Rage
When a stockpile is destroyed:
- If there is at least 1 other stockpile on the map, 1 Imperial figure may interrupt to perform an action.
End of Mission
When all stockpiles are destroyed:
You look up from the wreckage of the last weapons to see stormtroopers moving in from their guard positions in the swamp. Recognizing you won't win a fight outside an Imperial facility, you sprint for your extraction point. Rebels can rest a little easier knowing the black market lost some of its supply.
- Heroes receive 100 credits per hero.
At the end of Round 6 or when all heroes are wounded:
With Imperials closing in from the swamp and the facility above, you decide to leave before being captured. Sloshing through the swamp you hear the hiss of pursuit, yet you arrive at your ship unharmed. You're alive, but Bossk is well armed and on the hunt.
- The Imperial player receives Bossk (Born Hunter) as a villain.
Additional Rewards
- Each player receives 1 XP. Heroes receive 100 credits per hero. The Imperial player receives 1 influence.
Transcription Notes
- The Deployment cards (Bossk, Headhunter), the Command cards (Disorient, Grisly Contest, Trandoshan Terror, Wild Attack), and the Agenda cards (Base Instincts) are named on the sheet's component breakdown, but their printed text is not on this sheet. Nothing has been added for them. Their rules are on the cards themselves.
- The skirmish map and mission for Wasskah Hunting Ground are named on the sheet, but the mission's own text is not printed on this sheet. Only the Gunrunner side mission is transcribed from page 2.
- The Gunrunner mission is labelled "Side Mission" in its footer.
- Icons are written as words where the printed text names them. Glyphs that are not named on the sheet are shown in brackets: the defense triangle after "Defense: 1", the objective icon in the mission end condition, the threat icon in the Special Setup and The Butcher steps, and the block icon after "+1". The damage glyph after "suffers 1" is written as "damage".
- The footers carry reference codes that are not rules text and are not transcribed: page 1 lists "02A, 05A, 07A, 09A, 18A(4), 19B, 20B, 23B, 27B, 28B, 29B, 32B(2), 38B(3)"; page 2 lists "D02A, 07A" and "05A, 07A, 09A, 10A, 11A, 13A, 14A(2), 15A, 16A, 17A(3), 18A(2), 20A, 31A, 32A(2), 36A(2), 39A(2)".