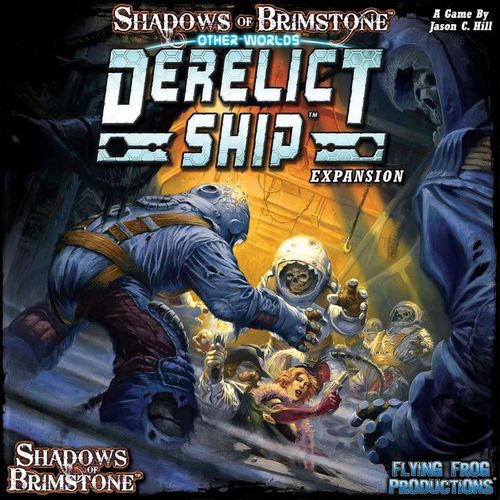
Shadows of Brimstone: Other Worlds – Derelict Ship
Shadows of Brimstone: Other Worlds – Derelict Ship Rulebook
Table of Contents
Table of Contents
- Overview
- Game Contents
- The Derelict Ship
- Global Rules
- Barriers
- The Dark Stone Shaft
- Dark Stranglers and Space Terrors
- Broken Grates
- Void Vortex
- New Missions
- Mission 1: Time's Echo
- Mission 2: Collapse the Vortex
- Mission 3: Lost in Space
- Mission 4: The Captain's Log
- Mission 5: Voyage of the Dead
- Mission 6: Reactor Breach
- Enemy Records: Stranglers and Night Terrors
- FAQ & Clarifications
- Derelict Ship Depth Events
Overview
The Derelict Ship Expansion offers a lot of new material, not only for exploring and fighting your way across the new OtherWorld of this futuristic star ship, but also for all of your adventures within the Mines!
New OtherWorld
With this set, gateways have opened up into the flickering lights and metal halls of the ill-fated Vostros, a Derelict Ship hurtling through the cold dark of interstellar space! Lost on its final voyage into the unknown, the ship is overrun with death and madness. To survive adventures in this new world, your Heroes will need to steel their nerve while outsmarting and outmaneuvering the shambling hordes of undead... all that remains of the ship's fallen crew!
New Map Tiles
The Derelict Ship Expansion includes an entire set of 18 brand new, double-sided Map Tiles. This gives you a full set of Map Tiles for the new Derelict Ship OtherWorld, but also a new set of Map Tiles for the Mines, including 8 new Unique Rooms, 4 new Standard Rooms, and an additional set of 6 Passages!
New Cards
Also included are all of the OtherWorld card decks for use while in the Derelict Ship - Encounters, Artifacts, Map Cards, OtherWorld Threats, and the World Card, as well as a host of new cards for adventuring in the Mines!
New Enemies
There are 3 new Enemy Types in this set, unique to the Derelict Ship - 6 Necronauts, 3 Large B.E.A.C.O.N. Drones, and 3 Auto-Turrets.
New Missions
There are 6 new Missions in the Derelict Ship Expansion, each themed around different aspects of the new Map Tiles, Cards, Enemies, and OtherWorld.
Game Contents
- 1 Full-Color 16 page Adventure Book
- 6 Plastic Necronaut Enemies with 30mm Bases
- 3 Plastic BEACON Drone Enemies with 40mm Bases
- 3 Plastic Auto-Turret Enemies
- 1 Entrance Map Tile
- 8 Unique Room Map Tiles
- 4 Standard Room Map Tiles
- 6 Passage Map Tiles
- 18 End Cap Map Tiles
- 6 Bulkhead Door End Cap Map Tiles
- 6 Gate End Cap Map Tiles
- 3 Double-Sided Enemy Record Sheets
- 11 Mine Map Cards
- 3 Mine Artifact Cards
- 9 Mine Encounter Cards
- 4 Darkness Cards
- 15 Card Derelict Ship Encounter Deck
- 12 Card Derelict Ship Artifact Deck
- 18 Card Derelict Ship Map Deck
- 12 Card Derelict Ship Otherworld Threat Deck
- 1 World Card
- 3 Reference Cards
- A large assortment of Die-cut Counters
Bleeding Markers
These markers represent the ongoing effect of being badly injured and bleeding. They are placed on a model, reducing its total Health by 3, until removed by spending a Grit.
A Bleeding marker is placed on a model to show that they have sustained a nasty wound that cannot be easily healed. A model is -3 to its Health for each Bleeding marker it currently has. Note that as this actually reduces the model's Health stat, it is not Wound markers that can be Healed. If this reduces the model's Health to 0, they are immediately KO'd (or killed if an Enemy). A Hero may use 1 Grit at any time to remove a Bleeding marker from themselves. All Bleeding markers are removed when KO'd, or at the end of the Adventure. Models that are Keyword Undead are immune to Bleeding markers.
Stunned Markers
Stunned markers are used to show that a model is shaken and has reduced Defense.
Sometimes a model will be stunned by an attack, putting them off-balance. A Stunned marker is placed on a model to show that they have been shaken. A model that has one or more Stunned markers on them is -1 Defense (regardless of how many Stunned markers they have). At the start of each of that model's Activations, they may roll a D6. On the roll of 4+, remove 1 Stunned marker. A Hero removes all Stunned markers when KO'd, or at the end of the Adventure.
Consoles
These markers represent Mission Objectives for when the Heroes need to find particular computer consoles on the Ship to interact with.
Teleportation Nodes
Teleportation Nodes are sometimes placed on the board to allow models to move instantly from one part of the Ship to another.
Money Tokens
A set of generalized Money tokens has been included in two sizes and several denominations. These can be helpful for tracking Gold earned during an Adventure, or any other thing that may be of use during the game.
Additional Counters
Several additional counters have been provided. These are not needed for the main game but can be used for house rules and Missions, as well as future official content.
The Derelict Ship
Like all OtherWorlds, the Derelict Ship has a set of unique Encounters, Artifacts, Map Cards, and OtherWorld Threat cards, as well as a couple of Global Rules that make adventuring there more distinct. The Global Rules are listed on the World Card included in this expansion.
While exploring the Derelict Ship, Heroes will encounter all manner of hazards, including auto-defense turrets springing to life to defend the ship from intruders, Hull Breaches that threaten to suck the Heroes out into the vacuum of space, faulty grav-plating that makes it difficult for Heroes to keep their feet on the deck, and hideous demons and creatures that have taken up residence in the cold dark of the long dead ship.
Card: The Derelict Ship
Interstellar Horror - Whenever a Hold Back the Darkness roll is failed, the Hero (or Heroes) farthest from the Lantern immediately hear "Voices in the Dark".
While on the Derelict Ship, whenever a Hero Explores (Looks through a Door or successfully Scavenges), they may draw a Loot card on the D6 roll of 5+.
Global Rules
A dark and nightmarish place, the Derelict Ship is filled with the madness of Interstellar Horror! Whenever the Hold Back the Darkness roll is failed at the start of a turn, the Hero that is farthest from the Lantern immediately hears Voices in the Dark (D6 Horror Hits) as the madness begins to take hold! If there are more than one Hero tied for being farthest from the Lantern, all Heroes that are tied for farthest are affected.
Though the Ship is filled with death and madness, many areas remain untouched and unexplored. To represent this, anytime a Hero Explores, by looking through a Doorway or successfully Scavenging, they may also roll a D6. On the roll of 5 or 6, that Hero may immediately draw a Loot card.
Barriers
Some spaces on the board have one or more edges with a thick, white line. These are called Barriers and usually represent elevation changes or obstacles that prevent movement but can be seen through, such as railings or low walls.
Only models that have an ability allowing them to 'Move through other models' may cross these Barrier space edges during their move. This usually includes models that can fly, such as HellBats, models that have the ability to leap or climb over obstacles, such as Dark Stranglers, or XL-sized Enemies that can smash through them.
When a Barrier extends slightly beyond the cross point of multiple spaces (as shown here), it prevents normal diagonal movement that would cross this extended end of the Barrier as well.
Barriers have NO EFFECT on Line of Sight for Ranged Attacks, adjacency for Escape tests, or Melee Attacks; they ONLY affect movement. Dynamite may be thrown over a Barrier, just like any Ranged Attack, and may Bounce through Barriers as well.
The Dark Stone Shaft
One of the new Mine Map Tiles is the Dark Stone Shaft. This Map Tile has an area on it with no grid spaces that is considered a Pit.
Pits
Pit areas on the map are bottomless chasms that cannot be moved over by conventional methods, but do not block Line of Sight. All spaces touching a Pit area are considered adjacent to that Pit area.
Movement
Models may not move onto a Pit area unless they are XL size or larger, or have the Flight ability (usually only certain Enemies have this ability, such as HellBats). These Models are allowed to enter a Pit area from any adjacent space to it at the cost of 2 spaces of Movement. The model is assumed to be in the entire Pit area. Models may exit the Pit area onto any space adjacent to the Pit. There is no limit to the number of Models that can be on a Pit area at once, and anything that targets the Pit area will effect all of the models there.
Ranged Attacks
Ranged Attacks may trace their Line of Sight onto and across a Pit area without being blocked by it. When counting out the Range to a target, count the entire Pit area as 2 spaces.
Dynamite and Explosives
A Dynamite or Explosive that goes off in a space adjacent to a Pit area will effect any models on that Pit area. A Dynamite or Explosive that goes off ON a Pit area will ONLY hit the models currently on that Pit area (not any adjacent), as the blast happens in mid air above, or down in, the chasm.
Models Knocked Into a Pit
Any model that could not normally move onto a Pit area, but is moved there by some other means, is considered to be knocked into the Pit. If it is an Enemy, it is immediately killed. If it is a Hero, they are KO'd, and considered to be hanging onto the ledge until they can Recover and roll for Injury.
Dark Stranglers and Space Terrors
Two of the new OtherWorld Enemies that can be encountered in the Derelict Ship are Dark Stranglers and Space Terrors. Both of these Enemies are alternate OtherWorld versions of Enemies found in the City of the Ancients Core Set. You do not, however, need to have that Core Set to use this Expansion.
For players that do not yet have the City of the Ancients Core Set, we have included simple tokens that can be used to represent these Enemies on the board (in place of miniatures), as well as the basic Enemy Record Sheets for both Stranglers and Night Terrors, which can be found on page 14 of this rulebook.
Broken Grates
Broken Grates are holes ripped into the floor or ceiling that enemies crawl through to get to the Heroes. In game, Broken Grates act as generalized Enemy Spawners.
Broken Grates are holes torn into the floor or ceiling of the Ship, allowing Enemies to crawl through! They act as an Enemy Spawner, with the potential to bring more Enemies onto the board at the end of each turn.
Placement and Associated Enemy Type
Broken Grates are placed like an Enemy with Initiative 0 (even in Ambush). They never move or attack, and do not have Defense or Health (the Heroes must use their Skills or Explosives to seal them).
A Fight is not complete until all Broken Grates are sealed (in addition to all Enemies being defeated).
Broken Grates are always associated with a single Enemy Type, as listed on the Threat card that placed it. This associated Enemy Type are the only Enemies that can be spawned from this particular Broken Grate.
Broken Grate Barriers
Broken Grates have a thick white line Barrier on each edge of the marker, making each Broken Grate space completely enclosed in Barriers (see rules for Barriers above).
Spawning Enemies
At Initiative 0 each turn, roll a D6 for each Broken Grate on the board. On the roll of 5+ (or 4+ if there are currently no associated Enemies for that Broken Grate on the board right now), place 1 new Enemy model, from the associated Enemy Type, in any empty space adjacent to the Broken Grate (if you cannot place an Enemy (for any reason), move the Darkness 1 space forward on the Depth Track instead).
Sealing a Broken Grate
Any Hero in the same or adjacent space with a Broken Grate may give up an Attack to make a Skill 6+ test (choosing any Skill to use). For every 6+ rolled, place a marker on the Grate (gain 10 XP each). When there are 3 markers, the Grate is sealed (removed).
If an Explosive (like Dynamite) goes off in the same space with a Broken Grate (not adjacent), the Broken Grate is automatically sealed on the D6 roll of 3+ (the Hero that threw the Explosive gains 25 XP).
Void Vortex
The Void Vortex is a powerful and chaotic environment element that pulls everything nearby toward its center. It is used for some Missions as well as for the Void Grenade item that can be found by the Heroes.
A swirling maelstrom of pure Void energy, the Void Vortex is like a miniature black hole, sucking everything nearby directly into the Void between worlds!
The Void Vortex Marker
The Void Vortex marker is a large, irregularly-shaped, swirly, purple marker that covers an area of 3 x 3 spaces on the board (the same size as most XXL Enemies).
When the Void Vortex is placed as part of a Mission or Event, it should be described how it is placed on the board within that Mission/Event. When it is placed as the result of a Void Grenade being thrown, the center space of the 3 x 3 area should be the final space that the grenade landed in, after any Bounces.
The Void Vortex does NOT block Line of Sight or movement (though moving onto it can be deadly).
Pull of the Void
At the start of each turn, every model on the same and adjacent Map Tiles as the Void Vortex is pulled D3 spaces along the shortest path to the center space of the Vortex. Always start with the closest models to the Vortex first.
XXL Size, Immobile, and Keyword Void Enemies are immune to being moved by the Void Vortex.
Affected Heroes may make a Strength 5+ test each turn to avoid being moved by the Void Vortex. If successful, the Hero remains in their space, unmoved. If failed, the Hero is moved by the Vortex as normal.
Escape
Heroes touching or near the Void Vortex marker must pass an Escape test to move away, exactly as though they were next to an Enemy. This test is harder the closer you are to the Vortex:
- Touching the Vortex Marker - Escape 5+
- Adjacent to the Vortex Marker - Escape 4+
- On the same Map Tile as the Vortex Marker - Escape 3+
Touching the Vortex
Any Enemy whose entire base is moved onto the Void Vortex is instantly pulled into the Void and destroyed (removed).
Enemies will never choose to move onto the Void Vortex.
Any time a Hero enters a space (by moving there or being pulled), or ends their Move on a space of the Void Vortex, they immediately take 2D6 Wounds, ignoring Defense. This also applies to Extra Large or bigger Enemies that only have part of their base on the Void Vortex.
Enemies killed by the Void Vortex do not grant XP to the Heroes, unless a Hero created the Vortex under an Enemy (by throwing a Void Grenade) or specifically did something to move that Enemy onto the Vortex (Spinning Kick, etc). In either of these cases, the Hero gains half the XP for the Enemy (rounding up to the nearest 5).
Void Vortex Collapse
At the end of each turn, place a wound marker on the Void Vortex and then roll a D6. If the roll is less than the number of wound markers on the Void Vortex, it collapses and is immediately removed from the board.
Note that in some instances (such as the Collapse the Vortex Mission), there will be a stable Void Vortex that does not add markers to it or roll for Collapse like this.
New Missions
The Derelict Ship Expansion has 6 new Missions to challenge your Heroes. These can be played in order as a narrative, or simply mixed in to your new or current campaign.
| D6 Roll | Derelict Ship Missions |
|---|---|
| 1 | Time's Echo |
| 2 | Collapse the Vortex |
| 3 | Lost in Space |
| 4 | The Captain's Log |
| 5 | Voyage of the Dead |
| 6 | Reactor Breach |
Mission 1: Time's Echo
All of the Towns in this region are smoking ruins and the Earth trembles and cracks with evil from deep below the surface. Something terrible has happened here... and it's starting to spread!
One of the local survivors comes to you with desperation in her eyes. "Something happened down in the mine! I don't know what, but two weeks ago, they unleashed something, and it's tearing our world apart! They say it's shattered time itself. You have to go into the mine, find out what they did and stop it before it's too late!"
Set Up
For this Mission, set up the starting board for 'The Past' and 'The Present', as shown in the diagram below. Heroes start on the Boarded Up Mine Entrance Map Tile in 'The Present'. Also place 5 Body markers on the board, in 'The Present', as shown. These are bodies of miners that died during the incident here and the map exits in 'The Present' have all collapsed (shown by the End Caps). There is a flickering Time Portal here (both sides of the marked Gate A) that leads back and forth from 'The Present' board to 'The Past' board, and may be moved through like a normal Gate.
The 3 Rooms shown in the Set Up Diagram below may each be Scavenged a total of 5 times across both 'The Past' and 'The Present' versions of the same Room.
The Hero Posse marker starts on the number 12 space of the Depth Track.
Mission Goal
The Heroes must venture into the collapsed mine and pass through the unstable Time Portal. They must find 2 Clues in 'The Past' to discover what caused this cascade of destruction... and stop it before it happens!
Special Rules
Gates are Time Distortions
For this Mission, Heroes may NOT pass through Gates (other than the Time Portal). Instead, any Gate found adds a Clue icon to the Exploration Token in that Room, if it doesn't already have one. Also, for each new Gate placed (not including the Time Portal), the Heroes need to roll 1 higher to Hold Back the Darkness.
Rescue the Miners
Every time the Heroes complete an 'Encounter' Exploration Token, they also find and warn one of the miners about the danger. Remove one Body marker from 'The Present' as they flee to safety.
Objectives
Discover the Cause
Whenever the Heroes find a Clue, in addition to the normal effects of the Token, they learn something about the cause of the destruction based on the type of Exploration Token/Gate found, and whether it is the First Clue found or the Second Clue found, as follows (note that in this Mission, Exploration Tokens that have a Clue icon may not be canceled or re-drawn):
First Clue
- Encounter - Add a Growing Dread card to the stack and draw a Darkness card.
- Attack or Ambush Attack - Place a Wound on D3 of the Body markers in 'The Present'. Those miners are killed and may not be warned.
- Growing Dread Token - Add an extra Growing Dread card to the stack for each Hero in the Posse.
Second Clue (Resolve all Growing Dread cards and then...)
- Encounter - Draw a World card and 2 OtherWorld Threats from that World to Attack.
- Attack or Ambush Attack - Draw an Epic Threat that gains 1 free Elite ability to Attack.
- Growing Dread Token - The mass of tentacles and terror spilling into the mine here cannot be stopped! You must run! Each Hero takes D3 Horror Hits, and any Sanity lost is permanent. Immediately move the Hero Posse marker to the Darkness Starts space of the Depth Track. There is no Attack here, but the Heroes win if at least 1 Hero ends a turn back in 'The Present' area of the board before the Darkness escapes the mine.
Preventing the Disaster
Once the Heroes have found the second Clue and defeated all Enemies on the board, as listed above, the Heroes have successfully completed the Mission!
Reward
Every Hero gains D6x$100 for saving the nearby Towns and an extra 25 XP for each Miner that was saved. (Body markers removed during the Mission).
Failure
If the Heroes fail the Mission, all of the nearby Towns are destroyed and they must flee the area. Each Hero must discard D3 Side Bag Tokens or one Item, lost in the past. Also, the Heroes may not visit Town, but instead proceed directly to the next Mission.
Mission 2: Collapse the Vortex
A stable Void Vortex has opened up in one of the nearby mines, sucking everything into its inescapable maw! If it is not collapsed, it could do untold damage to this entire region before it is through. A local blacksmith has created some Dark Stone charges that he believes should seal it up, if you can get them close enough without getting pulled in.
Set Up
This Mission uses the standard set up and all Heroes start on the Mine Entrance Map Tile as normal.
Mission Goal
The Heroes must find the Void Vortex and place enough Dark Stone charges nearby to collapse it in on itself.
Special Rules
Leading Darkness
Due to the extra Void energies surrounding the area, the Darkness moves D3+1 steps on the Depth Track at the start of the game (after set up but before the first turn). This may lead to an immediate Attack on the Heroes as they approach the entrance.
Placing Dark Stone Charges (Objective)
Any Hero that ends their move on the Objective Room Map Tile with the Void Vortex may give up their Attack (even when not in a Fight) to attempt to place a Dark Stone Charge. Make a 'Skill' 6+ test (using any Skill of your choice - Lore, Agility, Strength, etc). If successful, gain 10 XP and place a Sanity marker in the same or adjacent space to your Hero to represent the Dark Stone Charge that has been set. There is a limit of 1 Dark Stone Charge per space.
Objectives
The First Clue
The First Clue the Heroes find is the unsettling pull of the Void Vortex as they get ever closer to its location. To represent the Heroes being pulled ever closer to the Darkness, immediately move the Hero Posse marker D6 spaces forward on the Depth Track. Then move the Darkness marker D6 spaces forward on the Depth Track as well.
The Second Clue
The Second Clue the Heroes find is the location of the Void Vortex itself! Ignore any Attacks or Encounters listed on this Exploration Token. Also, ignore any Door/Gate Icons on the token, as the Room has only one exit leading to the Objective Room with the Void Vortex in it. Draw an additional Map card (re-drawing any Passage) and place that Map Tile as the Objective Room connected to a Random exit of this Room. The Objective Room has no exits.
Place the Void Vortex marker in the Objective Room with the corner of the marker in the back, left-most space of the Objective Room (just like Enemy placement).
The Void Vortex here is stable and does NOT roll for Collapse on its own.
Once the Void Vortex is placed, reveal all Growing Dread cards in the stack as normal and then the Heroes must face an Epic Threat that is guarding the Vortex. Enemies from this Epic Threat are placed in the Room that had the final Exploration Token (not the Objective Room itself). Note that these Enemies are not affected by the pull of the Void Vortex unless actually on the Objective Room Map Tile, as they are used to dealing with the pull of the Void.
To Collapse the Void Vortex, the Heroes must place a number of Dark Stone Charges in spaces of the Objective Room equal to 2 x the number of Heroes in the Posse (or one on every space of the Objective Room Map Tile not covered by the Void Vortex marker - whichever is fewer).
Once enough Dark Stone Charges have been placed and there are no Enemies on the board, the Void Vortex is collapsed and the Heroes have successfully completed the Mission.
Reward
Each Hero may draw a Mine Artifact, dislodged from the Vortex when it collapsed.
Failure
If the Heroes fail the Mission, they each take D6 Corruption Hits from the relentless Void energies of the Vortex. Also, D3 Random Buildings in Town are Destroyed
Mission 3: Lost in Space
Rumors have been swirling that a mine has been found with a stable gateway leading to a massive ship traveling the stars! It is said to be a dark and shadowy vessel made of cold steel and overrun with terrifying creatures from beyond our reality. Though most who have ventured there in search of futuristic treasures and weapons have never returned, those few who have babble incoherently about the dark entities that probed their minds and the walking death that resides within the ship's cursed halls. If you can keep your wits about you, avoid the robotic navigators that have been corrupted by touching the darkness beyond, and fend off the clawing hunger of the undead crew that still dwell there, you may find a wealth of fantastic technology beyond your wildest dreams... if you are not driven mad in the process.
Set Up
This Mission uses the standard set up and all Heroes start on the Mine Entrance Map Tile as normal.
Mission Goal
Find a Gate that leads to the Derelict Ship hurtling through uncharted, interstellar space and explore its cold, steel corridors. Once in the Derelict Ship, the Heroes must find 2 Clue Icons to have explored the area and successfully completed the Mission.
Special Rules
All Gates Lead to the Derelict Ship
All Gates in this Adventure lead to the Derelict Ship, even Gates found in the Derelict Ship (they lead to a different part of the world).
Mine Clues add a Gate
Any Clue Icon the Heroes find in the Mines automatically has a Gate in that Room, in addition to any other doors (place this Gate before other Doors).
Objectives
The Second Clue in the Derelict Ship
When the Heroes find the second Clue Icon in the Derelict Ship, they have reached the Objective for exploring this Other World. Ignore any Attacks or Encounters listed on the final Exploration Token. Also, ignore any Door/Gate Icons on the token, as the Objective Room has no exits.
Reveal all Growing Dread cards in the stack as normal and then the Heroes must face an Epic Threat. Remember, that any time a normal Threat card (Low, Med, or High) would be drawn in an OtherWorld, an OtherWorld Threat card is drawn instead. Once all Enemies have been defeated, the Heroes have successfully completed the Mission!
Reward
Each Hero gains 25 XP and may roll a D6. On the roll of 1, 2, 3, or 4, you recover enough gold and trinkets to sell for D6x$50. On the roll of 5 or 6, you find a special item in one of the Ship's laboratories, recovered from an alien world and tagged for examination. Draw a Mine Artifact, however, the item is of Alien design. Any time you want to use the item, you must roll a Cunning 5+ test. If failed, you may not use the Item this turn. If it is a Clothing Item, you only need make the test whenever you Equip the Item. If sold, the Item is worth +$100.
Failure
Lost in the twisting corridors and flickering passages of the Derelict Ship, the Heroes are assaulted by the darkness all around them. Each Hero must roll a number of dice equal to their Sanity. For every roll of 1, take 1 Corruption Point, ignoring Willpower.
Mission 4: The Captain's Log
Searching the abandoned corridors and smashed rooms of the Derelict Ship, one thing has become clear... something very, very bad happened here. If you can find the Captain's Log, it may give some insight into what cosmic horrors befell this cursed ship and its crew.
Set Up
This Mission has a Fixed Map Layout, as shown in the diagram to the right. The entire board should be constructed during Set Up. Each Room has a random Exploration Token placed on it, face down (as shown in the diagram - Note that the Stasis Chambers Room has 2 Exploration Tokens on it, both of which are resolved when exploring that Room).
You will also need the Number Counters marked 1-6. Mix these Number Counters up and place one face down, without looking, near each of the 6 possible Objective Rooms (marked on the diagram with a red X).
Roll a D6 to determine the Number Counter that represents the actual location of the Captain's Log. The other Number Counters are fakes.
The Heroes start on the Derelict Ship Entrance Map Tile as shown.
Mission Goal
The Heroes must search the Ship to find the location of the Captain's Log (the correct Number Counter), and defeat any Enemies that are guarding it.
Special Rules
Fixed Map
This Mission uses a Fixed Map as shown in the Map diagram to the right. A list of all of the Map Tiles used is provided for easier identification. Map Cards can be used as reference to determine the names of each Map Tile.
The Fixed Map layout uses the following Map Tiles:
- Derelict Ship: Entrance; A Habitat Ring x2; A Hydroponic Garden x2; Stasis Chambers; Astro Navigation; Loading Dock; Medical Bay; Drive Room; The Bridge; Short Passage; Mid Passage; Long Passage; Cross Passage; T-Junction Passage; End Cap x6
Hero Posse Marker Variable Move
In this Mission, the Hero Posse marker starts the game on the Mine Entrance space of the Depth Track as normal. However, whenever the Heroes flip over a Number Counter during the Mission, the Hero Posse marker is moved forward a number of spaces on the track equal to the number on that counter.
Objectives
Searching a Red X Room
There are six Rooms on the board with a red X on them. These are the possible Objective Rooms that could be the location of the Captain's Log. After fully completing any Encounters/Attacks on the Exploration Token in a Room with a red X, reveal the face down Number Counter by that Room.
If the number matches the Number Counter the Heroes are looking for, they have found the Objective Room and the Captain's Log!
If it is any other number, the Room is empty and the Heroes must continue their search.
Remember, any time one of the Number Counters is revealed, the Hero Posse marker is moved on the Depth Track as noted in the Hero Posse Marker Variable Move Special Rule above, making it harder for the Heroes to Hold Back the Darkness.
The Objective Room
When the Heroes find the Room with the Captain's Log in it, they also find themselves surrounded! Reveal all Growing Dread cards in the stack as normal and then the Heroes must face an Epic Threat that Ambushes them. Once all Enemies have been defeated, the Heroes have successfully recovered the Captain's Log and completed the Mission!
Reward
Each Hero may choose to either draw 1 Loot card for each Number Counter revealed during the Adventure or gain 1 to their Sanity (or D3 if 4 or more Number Counters were revealed).
Failure
If the Heroes fail the Mission, the Captain's Log remains lost and each Hero loses 1 Sanity permanently from the traumatic experience.
Mission 5: Voyage of the Dead
Punching a green lit button on the wall, a massive bulkhead door slams closed, sealing the horde of brain-hungry Necronauts that were chasing you on the other side! But that won't hold them for long... The path back the way you came is overrun, and the undead are closing in all around; pouring in from broken grates and jammed doors throughout this section of the ship. Your only chance is to find and seal the entry points up ahead to create a clear escape route before the bulk of the horde smashes through the bulkhead!
Set Up
This Mission starts on the Derelict Ship side of the Mine Entrance Map Tile. Other than beginning the game on the Derelict Ship, all Heroes start on the Entrance Map Tile as normal.
Mission Goal
Cut off and surrounded by hordes of Undead Necronauts, the Heroes must find and seal at least 6 Broken Grates on the ship (or 8 Broken Grates if 5 or 6 Heroes in the Posse) to slow down the shambling dead long enough to escape!
Special Rules
Darkness Closing In
For this Mission, every space on the Depth Track that is not already a Blood Spatter or a Growing Dread space counts as a Growing Dread space when the Darkness marker reaches it.
Cold Dread
Whenever a Clue icon is revealed, all Growing Dread cards currently in the stack are immediately revealed and played. Also, for the duration of any Fight caused by that Clue icon (see below), all Growing Dread cards are played immediately when drawn, rather than being placed on the stack.
No Gates
There are no Gates to escape through in this Mission. Any time a Gate would be placed, it is simply a normal Doorway instead.
Objectives
Finding the Entry Points
Any time a Clue icon is found on an Exploration Token, the Heroes have also found a grouping of Broken Grates that the Necronauts are pouring out of!
In addition to the normal Encounters or Attacks listed on the Exploration Token, the room also has an Attack! with D3+1 Broken Grates and a number of Necronauts as follows:
- 1-2 Heroes - 3 Necronauts
- 3-4 Heroes - [orange "P" icon in a hexagon, as printed] Necronauts
- 5-6 Heroes - 6 Necronauts
Transcriber's note: the count for 3-4 Heroes is printed as an orange "P" hexagon icon, not a number. The icon could not be read as a numeral from the scan; check the printed booklet for the value.
Sealing Enough Broken Grates
Once the Heroes have found and sealed a total of at least 6 Broken Grates (or 8 Broken Grates if 5 or 6 Heroes in the Posse), and there are no Enemies or Broken Grates left on the board, the Mission is successfully completed.
Note that any Broken Grates sealed during the Mission count toward this total, regardless of whether they were found through Clue icons, Encounters, or as part of a normal OtherWorld Threat card.
Reward
Every Hero gains either 1 Health or 1 Sanity (your choice) for surviving this nightmare on the Derelict Ship!
Failure
Trapped in the cold dark of space, the Heroes are haunted by their memories of the dead closing in around them! Every Hero must roll once on the Madness Table (this is in addition to any normal Injury/Madness rolled for being KO'd).
Mission 6: Reactor Breach
One of the Ship's reactors has malfunctioned and is going critical, threatening to destroy a large section of the Ship...a section that you happen to be in! The entire Ship begins to shake as the reactor heats up, tearing itself apart as the ship moves faster and faster through the galactic abyss. If you can't find a way to get the reactor under control, it's going to breach and explode, taking you and half the Ship with it!
Set Up
This Mission starts on the Derelict Ship side of the Mine Entrance Map Tile, leading directly to a Cross Passage Map Tile. All Heroes start on this Mine Entrance Map Tile, as normal.
Remove a Cross Passage Map Card from the Derelict Ship Map Deck. Note that the Hero Posse marker is not moved forward a step on the Depth Track for this Cross Passage.
Mission Goal
The Heroes must search for 3 Clues to find the 3 Consoles that control the Power Level, Coolant Regulation, and Drive Flow, and adjust their settings to get the reactor under control before it overloads and breaches!
Special Rules
No Gates
There are no Gates to escape through in this Mission. Any time a Gate would be placed, it is simply a normal Doorway instead.
Hard to Hold Back the Darkness
The Hold Back the Darkness roll needs to be one higher than normal to succeed each turn.
Immediate Dread
For this Mission, Growing Dread cards are revealed immediately when drawn rather than being placed on the stack.
Critical Reactor
This section of the Ship is breaking itself apart as the reactor begins to go critical! Any time the Hold Back the Darkness roll is failed, every Hero immediately takes 2 Hits from falling debris and broken steam pipes. Also, any time the Darkness marker crosses into a new Stage of the Depth Track, it immediately triggers the Depth Event 4) Hull Breach.
Objectives
Finding a Console
Each time the Heroes find a Clue Icon, they have discovered one of the Consoles that controls the reactor. Roll a D6 to determine which Console has been found (Re-rolling if that Console has already been found):
- 1-2 Power Level
- 3-4 Coolant Regulation
- 5-6 Drive Flow
Ignore any Doors listed on the Exploration Token and place a Console marker covering the two back, left-most spaces of the Map Tile (similar to Enemy placement). Consoles block movement, but not Line of Sight.
Encounters and Attacks on the Exploration Token are resolved as normal.
Each Type of Console has a different special effect once placed on the board, as well as when it is Stabilized:
- Power Level Console - While on the board, the Critical Reactor Special Rule does D6+2 Hits to each Hero instead, when the Hold Back the Darkness roll is failed. Once Stabilized, each Hero may Heal 2D6 Health/Sanity (any mix).
- Coolant Regulation Console - While on the board, all Enemies are driven into a rage by the rising temperatures, gaining +1 Combat/Shot. Once Stabilized, each Hero may Recover D3 Grit.
- Drive Flow Console - While on the board, all Blood Spatter spaces on the Depth Track instead count as Growing Dread spaces. Once Stabilized, cancel any further Growing Dread cards on the D6 roll of 5+.
Getting a Console Under Control
Any Hero adjacent to a Console may give up their Attack for the turn (even when not in a Fight) to choose any one of their Skills (Lore, Cunning, etc.) and make a 'Skill' 6+ test to work on getting the Console under control (it can be fun to announce how your Hero is using their chosen skill to work on the Console). For each 6+ rolled, place a marker by the Console and gain 10XP.
To get a Console under control, the Heroes must collectively place a number of these markers on it equal to:
The Hero Posse Level +1 per Hero
Once a Console has enough markers on it, it will be Stabilized and removed from the board. When the Heroes have found and Stabilized all 3 Consoles, the Mission is successfully completed.
Reward
Each Hero may draw 3 Loot cards and choose 2 of them to keep (discard the other). Shuffle the Loot Deck before each Hero's draw.
Failure
If the Mission is failed, every Hero must roll once on the Injury Table (in addition to any roll for being KO'd). Also, because a large section of the Derelict Ship has been destroyed, the next time the Derelict Ship World card is randomly drawn for any reason, shuffle it back and Re-draw.
Enemy Records: Stranglers and Night Terrors
The Derelict Ship background fiction, the Enemy Overview and the Painting Guide on pages 12, 13 and 15 of the booklet are not reproduced here; the rules content is below.
Stranglers
- Demon - Initiative 4 - Size Medium
- Move 6 - Escape 6+
- To Hit: Range -, Melee 3+
- Combat 4 - Damage 1 - Defense 2 - Health 3 - XP 25
Abilities
- Ensnare - Strangler To Hit rolls of 6 count as 3 Hits each.
Elite Chart (roll a D6 for Elite Ability)
- Dark Stone Hunger - +2 Combat while attacking any Hero with 1 or more Dark Stone on them.
- Snapping Jaws - Any Hero that starts their Activation adjacent to one or more Stranglers must pass an Agility 5+ test or take D6 Hits.
- Scramble - +1 Initiative.
- Lashing Arms - +2 Combat.
- Regeneration (2) - Heals 2 Wounds at the start of each turn.
- Writhing Form - +3 Health.
Night Terrors
- Demon - Initiative 3 - Size Large
- Move 5 - Escape 3+
- To Hit: Range -, Melee 5+
- Combat 4 - Damage 4 - Defense 3 - Health 12 - XP 10 +5 each
Abilities
- Terror (2) - A Hero starting their Activation on the same Map Tile automatically takes 2 Horror Hits.
Elite Chart (roll a D6 for Elite Ability)
- Transfixing Stare - Escape 6+.
- Gibbering Nightmare - Terror (2) is replaced with: Unspeakable Terror (2) - Any Hero starting on the same or adjacent Map Tile automatically takes 2 Horror Hits.
- Brutes - +6 Health.
- Soul Drain - All Night Terror Hits and Horror Hits are now Damage +2.
- Regeneration (2) - Heals 2 Wounds at the start of each turn.
- Hunters - Night Terror Melee To Hit is now 4+.
Transcriber's note: the booklet's Space Terrors section (page 4) and the FAQ call these enemies Space Terrors and Dark Stranglers, while this record sheet is headed Night Terrors and Stranglers. Both are reproduced as printed.
FAQ & Clarifications
Q) Dark Stranglers and Space Terrors always attack from Ambush. How does this work when they are placed by a Broken Grate?
A) The Ambush only occurs when the Enemy Group is first placed on the board, and has no effect when individual Enemy models are Spawned by a Broken Grate.
Q) How does the possibility to find extra Loot cards in the Derelict Ship work with a Fixed Map Mission?
A) Roll as normal when Scavenging. Since there are no Open Doorways to look through, instead, the first Hero to end their move on a Map Tile with one or more unrevealed Exploration Tokens may also roll as though they had looked through a Doorway.
Q) What happens in a Derelict Ship Fixed Map Mission (like The Captain's Log) if I find a Teleporter that would take me away from the Map?
A) Instead of leading away from the Fixed Map, any Teleportation found will lead to a different Random Room on the same Fixed Map (shuffle and draw one of the Map cards for the other Rooms that are part of the board to find where it leads).
Derelict Ship Depth Events
Doubles Rolled - Other World - Derelict Ship Depth Events
| Roll | Event | Effect |
|---|---|---|
| 1 | Ambush Attack! | "There are fiendish creatures and demons in the dark places of the world!" Draw a Threat to immediately Ambush the Heroes. |
| 2 | Dark Dread | "Things are looking more and more bleak by the moment!" Draw a Growing Dread card to add to the stack. |
| 3 | Creeping Darkness | "The Darkness is always searching for a way out." Move the Darkness 2 steps forward on the Depth Track. |
| 4 | Hull Breach - Space | "Explosions rock the ship as a Hull Breach tears open nearby!" Select a Random Hero's Map Tile, and a Random Exit on that Map Tile (either an open Door or an End Cap) to find the location of the Hull Breach (Re-roll a new Hero if no valid exits on the Map Tile). Roll a D6 to determine the Size of the Breach. Every Hero is immediately pulled a number of spaces equal to the Size of the Breach along the shortest path toward it (starting with the Hero closest to the Breach). Every Hero also takes a number of Hits equal to the Size of the Breach. Any Hero that is moved into one of the two spaces of the open Door/End Cap, is pulled through, taking 2D6 Wounds, ignoring Defense, before clawing their way back inside the ship. The Breach is then sealed by a forcefield. |
| 5 | Echoes of Death | "A wave of pure terror washes over you, flickering flashes of nightmares in your mind!" Each Hero takes D6 Horror Hits. If the total Sanity Damage taken is equal to or greater than the number of Heroes in the Posse, also add a Growing Dread card to the stack. |